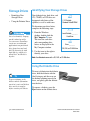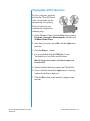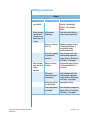
1
Notice ©2000 Compaq Computer Corporation COMPAQ and the Compaq logo Registered in U.S. Patent and Trademark Office. Microsoft and Windows are trademarks of Microsoft Corporation. Intel, SpeedStep and Pentium are trademarks of Intel Corporation. All other product names mentioned herein may be trademarks or registered trademarks of their respective companies. Compaq shall not be liable for technical or editorial errors or omissions contained herein. The information in this document is subject to change without notice. THE INFORMATION THIS PUBLICATION IS SUBJECT TO CHANGE WITHOUT NOTICE AND IS PROVIDED “AS IS” WITHOUT WARRANTY OF ANY KIND. THE ENTIRE RISK ARISING OUT OF THE USE OF THIS INFORMATION REMAINS WITH RECIPIENT. IN NO EVENT SHALL COMPAQ BE LIABLE FOR ANY DIRECT, CONSEQUENTIAL, INCIDENTAL, SPECIAL, PUNITIVE OR OTHER DAMAGES WHATSOEVER (INCLUDING WITHOUT LIMITATION, DAMAGES FOR LOSS OF BUSINESS PROFITS, BUSINESS INTERRUPTION OR LOSS OF BUSINESS INFORMATION), EVEN IF COMPAQ HAS BEEN ADVISED OF THE POSSIBILITY OF SUCH DAMAGES. THE FOREGOING SHALL APPLY REGARDLESS OF THE NEGLIGENCE OR OTHER FAULT OF EITHER PARTY AND REGARDLESS OF WHETHER SUCH LIABILITY SOUNDS IN CONTRACT, NEGLIGENCE, TORT, OR ANY OTHER THEORY OF LEGAL LIABILITY, AND NOTWITHSTANDING ANY FAILURE OF ESSENTIAL PURPOSE OF ANY LIMITED REMEDY. The limited warranties for Compaq products are exclusively set forth in the documentation accompanying such products. Nothing herein should be construed as constituting a further or additional warranty. Compaq Presario Mobile Internet PC Series 1800 Second Edition (September 2000) Part Number 181115-032 CONTENTS Chapter 1 Introduction . . . . . . . . . . . . . . . . . . . . . . . . . . . . . . . 1-1 Where Can I Find Information?. . . . . . . . . . . . . . . . . . . . 1-2 Printed Documents . . . . . . . . . . . . . . . . . . . . . . . . . 1-2 Symbols and Graphics . . . . . . . . . . . . . . . . . . . . . . . . . . 1-4 Symbols . . . . . . . . . . . . . . . . . . . . . . . . . . . . . . . . . . 1-4 Graphics . . . . . . . . . . . . . . . . . . . . . . . . . . . . . . . . . . 1-4 Safety . . . . . . . . . . . . . . . . . . . . . . . . . . . . . . . . . . . . . . . 1-5 Disconnecting Your Notebook from the Power Source . . . . . . . . . . . . . . . . . . . . . . 1-5 Chapter 2 Your Notebook at a Glance . . . . . . . . . . . . . . . . . . 2-1 Front of Your Presario Notebook . . . . . . . . . . . . . . . . . . . . . . . . . 2-2 Common Features . . . . . . . . . . . . . . . . . . . . . . . . . . 2-2 Internet Zone Buttons and Lights . . . . . . . . . . . . . . . 2-3 Function Keys . . . . . . . . . . . . . . . . . . . . . . . . . . . . . 2-5 Status Display and CD/DVD Controls . . . . . . . . . . . 2-6 Left and Right Panels . . . . . . . . . . . . . . . . . . . . . . . . . . . 2-7 Components on Left Side . . . . . . . . . . . . . . . . . . . . 2-7 Components on Right Side . . . . . . . . . . . . . . . . . . . 2-7 PRESARIO NOTEBOOK BEYOND SETUP GUIDE 1800 SERIES CONTENTS-III Back Panel . . . . . . . . . . . . . . . . . . . . . . . . . . . . . . . . . . . 2-8 Components on Back . . . . . . . . . . . . . . . . . . . . . . . 2-8 Underside . . . . . . . . . . . . . . . . . . . . . . . . . . . . . . . . . . . . 2-9 Components on Underside . . . . . . . . . . . . . . . . . . . 2-9 QuikDock . . . . . . . . . . . . . . . . . . . . . . . . . . . . . . . . . . . 2-10 QuikDock Features . . . . . . . . . . . . . . . . . . . . . . . . 2-10 Chapter 3 Using Your Notebook . . . . . . . . . . . . . . . . . . . . . . 3-1 Power On! . . . . . . . . . . . . . . . . . . . . . . . . . . . . . . . . . . . 3-2 Plugging and Unplugging AC Power . . . . . . . . . . . . 3-2 Turning Your Notebook On and Off . . . . . . . . . . . . . 3-3 Using Battery Power . . . . . . . . . . . . . . . . . . . . . . . . 3-4 Optimizing Processor Speed . . . . . . . . . . . . . . . . . . 3-5 TouchPad . . . . . . . . . . . . . . . . . . . . . . . . . . . . . . . . . . . . 3-6 Using the TouchPad Instead of a Mouse . . . . . . . . 3-6 Tapping and Double-Tapping . . . . . . . . . . . . . . . . . 3-7 Edge Motion . . . . . . . . . . . . . . . . . . . . . . . . . . . . . . 3-8 Display Options . . . . . . . . . . . . . . . . . . . . . . . . . . . . . . . 3-9 Changing Resolution . . . . . . . . . . . . . . . . . . . . . . . . 3-9 Adjusting Brightness . . . . . . . . . . . . . . . . . . . . . . . 3-10 Internet Zone Buttons . . . . . . . . . . . . . . . . . . . . . . . . . . 3-11 Reprogramming the Internet Zone Buttons . . . . . . 3-11 Disabling the Internet Zone Buttons . . . . . . . . . . . 3-11 Storage Drives . . . . . . . . . . . . . . . . . . . . . . . . . . . . . . . 3-12 Identifying Your Storage Drives . . . . . . . . . . . . . . . 3-12 Using the Diskette Drive . . . . . . . . . . . . . . . . . . . . 3-12 Security . . . . . . . . . . . . . . . . . . . . . . . . . . . . . . . . . . . . 3-13 Using the Security Slot . . . . . . . . . . . . . . . . . . . . . 3-13 Power-On Password . . . . . . . . . . . . . . . . . . . . . . . 3-13 CONTENTS-IV PRESARIO NOTEBOOK BEYOND SETUP GUIDE 1800 SERIES Chapter 4 Common Tasks . . . . . . . . . . . . . . . . . . . . . . . . . . . . 4-1 TV-Out Connection. . . . . . . . . . . . . . . . . . . . . . . . . . . . . 4-2 Connecting and Enabling TV-Out . . . . . . . . . . . . . . 4-2 Setting Your Television Format . . . . . . . . . . . . . . . . 4-3 Adjusting the Television Screen . . . . . . . . . . . . . . . 4-4 Switching Between Displays . . . . . . . . . . . . . . . . . . 4-4 Anti-Virus Software. . . . . . . . . . . . . . . . . . . . . . . . . . . . . 4-5 Using Anti-Virus Software . . . . . . . . . . . . . . . . . . . . 4-5 Recognizing a Computer Virus . . . . . . . . . . . . . . . . 4-6 Removing a Virus . . . . . . . . . . . . . . . . . . . . . . . . . . 4-6 Software and Hardware . . . . . . . . . . . . . . . . . . . . . . . . . 4-7 Adding and Removing Software . . . . . . . . . . . . . . . 4-7 Attaching Hardware Devices . . . . . . . . . . . . . . . . . . 4-9 Chapter 5 Using the CD or DVD Drive . . . . . . . . . . . . . . . . . . 5-1 Insert and Remove Discs . . . . . . . . . . . . . . . . . . . . . . . . 5-2 Inserting a Disc . . . . . . . . . . . . . . . . . . . . . . . . . . . . 5-2 Removing a Disc . . . . . . . . . . . . . . . . . . . . . . . . . . . 5-3 Manually Ejecting a Disc . . . . . . . . . . . . . . . . . . . . . 5-3 Audio CDs and Video Discs . . . . . . . . . . . . . . . . . . . . . . 5-4 Playing Audio CDs . . . . . . . . . . . . . . . . . . . . . . . . . . 5-4 Playing Audio CDs Using Disqplay2 . . . . . . . . . . . . 5-5 Playing Non-DVD Video Discs . . . . . . . . . . . . . . . . 5-7 PRESARIO NOTEBOOK BEYOND SETUP GUIDE 1800 SERIES CONTENTS-V DVDs . . . . . . . . . . . . . . . . . . . . . . . . . . . . . . . . . . . . . . . 5-8 Using the DVD Player . . . . . . . . . . . . . . . . . . . . . . . 5-8 Playing a DVD Film on a TV . . . . . . . . . . . . . . . . . 5-12 Using “Regionalized” DVDs . . . . . . . . . . . . . . . . . . 5-13 Video Display Options . . . . . . . . . . . . . . . . . . . . . . . . . 5-15 Showing and Hiding the DVD Panel . . . . . . . . . . . 5-15 Zooming the View . . . . . . . . . . . . . . . . . . . . . . . . . 5-15 CD-RW Basics . . . . . . . . . . . . . . . . . . . . . . . . . . . . . . . 5-16 Installing Adaptec Easy CD Creator™ 4 . . . . . . . . 5-16 Using Adaptec Easy CD Creator 4 . . . . . . . . . . . . 5-18 Preventing Buffer Underrun Errors . . . . . . . . . . . . 5-21 Accessing Easy CD Creator 4 Users Information . . . . . . . . . . . . . . . . . . . . . . . . . . 5-22 Chapter 6 Let’s Go Surfing . . . . . . . . . . . . . . . . . . . . . . . . . . . 6-1 Basic Concepts . . . . . . . . . . . . . . . . . . . . . . . . . . . . . . . 6-2 What is the Internet? . . . . . . . . . . . . . . . . . . . . . . . . 6-2 What is the World Wide Web? . . . . . . . . . . . . . . . . . 6-4 Browsers . . . . . . . . . . . . . . . . . . . . . . . . . . . . . . . . . . . . 6-8 What is a Browser? . . . . . . . . . . . . . . . . . . . . . . . . . 6-8 Using Microsoft Internet Explorer . . . . . . . . . . . . . . 6-8 Search Engines . . . . . . . . . . . . . . . . . . . . . . . . . . . . . . 6-10 Choosing a Search Engine . . . . . . . . . . . . . . . . . . 6-10 Using a Search Engine . . . . . . . . . . . . . . . . . . . . . 6-11 Searching on the Web . . . . . . . . . . . . . . . . . . . . . . 6-12 Accessing Files from the Internet . . . . . . . . . . . . . 6-13 In Conclusion . . . . . . . . . . . . . . . . . . . . . . . . . . . . . 6-13 CONTENTS-VI PRESARIO NOTEBOOK BEYOND SETUP GUIDE 1800 SERIES Chapter 7 Caring for Your Battery . . . . . . . . . . . . . . . . . . . . . 7-1 Battery Care . . . . . . . . . . . . . . . . . . . . . . . . . . . . . . . . . . 7-2 Using the Battery . . . . . . . . . . . . . . . . . . . . . . . . . . . 7-2 Storing the Battery . . . . . . . . . . . . . . . . . . . . . . . . . . 7-2 Recycling the Battery . . . . . . . . . . . . . . . . . . . . . . . . 7-3 Battery Calibration . . . . . . . . . . . . . . . . . . . . . . . . . . . . . 7-4 Calibrating the Battery . . . . . . . . . . . . . . . . . . . . . . . 7-4 Maximizing Battery Operating Time . . . . . . . . . . . . . 7-6 Fixing a Low-Battery Condition . . . . . . . . . . . . . . . . 7-7 Power Management . . . . . . . . . . . . . . . . . . . . . . . . . . . . 7-9 Saving Energy . . . . . . . . . . . . . . . . . . . . . . . . . . . . . 7-9 What is Power Management? . . . . . . . . . . . . . . . . . 7-9 Chapter 8 Service and Support . . . . . . . . . . . . . . . . . . . . . . . . 8-1 Preventive Maintenance . . . . . . . . . . . . . . . . . . . . . . . . . 8-2 Cleaning Your Notebook’s Exterior . . . . . . . . . . . . . 8-2 Cleaning the Keyboard . . . . . . . . . . . . . . . . . . . . . . 8-2 Cleaning the Display Screen . . . . . . . . . . . . . . . . . . 8-3 Cleaning the TouchPad . . . . . . . . . . . . . . . . . . . . . . 8-3 Caring for Your Presario Notebook . . . . . . . . . . . . . 8-4 Backup Utilities . . . . . . . . . . . . . . . . . . . . . . . . . . . . . . . . 8-5 Using Backup Devices . . . . . . . . . . . . . . . . . . . . . . . 8-5 Hard Disk Errors . . . . . . . . . . . . . . . . . . . . . . . . . . . . . . . 8-6 Using ScanDisk . . . . . . . . . . . . . . . . . . . . . . . . . . . . 8-6 Using Disk Cleanup . . . . . . . . . . . . . . . . . . . . . . . . . 8-6 Deleting Stored Files . . . . . . . . . . . . . . . . . . . . . . . . 8-7 Defragmenting Your Hard Disk . . . . . . . . . . . . . . . . 8-7 PRESARIO NOTEBOOK BEYOND SETUP GUIDE 1800 SERIES CONTENTS-VII Hard Disk Space Management . . . . . . . . . . . . . . . . . . . 8-8 Checking the Hard Disk Space . . . . . . . . . . . . . . . . 8-8 Deleting Unnecessary Files . . . . . . . . . . . . . . . . . . . 8-8 Using the Recycle Bin . . . . . . . . . . . . . . . . . . . . . . . 8-9 System Support . . . . . . . . . . . . . . . . . . . . . . . . . . . . . . 8-10 Compaq Diagnostics . . . . . . . . . . . . . . . . . . . . . . . 8-10 System Record . . . . . . . . . . . . . . . . . . . . . . . . . . . 8-12 Compaq Service Connection . . . . . . . . . . . . . . . . . 8-13 Internet Support . . . . . . . . . . . . . . . . . . . . . . . . . . . 8-15 Chapter 9 Solutions . . . . . . . . . . . . . . . . . . . . . . . . . . . . . . . . . 9-1 Basic Solutions . . . . . . . . . . . . . . . . . . . . . . . . . . . . . . . . 9-2 Helpful Hints . . . . . . . . . . . . . . . . . . . . . . . . . . . . . . 9-2 Finding Solutions Quickly . . . . . . . . . . . . . . . . . . . . 9-2 Frequently Asked Questions . . . . . . . . . . . . . . . . . . . . . 9-3 General Questions . . . . . . . . . . . . . . . . . . . . . . . . . . 9-3 Display Questions . . . . . . . . . . . . . . . . . . . . . . . . . . 9-4 Questions about Sound . . . . . . . . . . . . . . . . . . . . . . 9-5 Questions about Films . . . . . . . . . . . . . . . . . . . . . . . 9-6 Questions about Peripherals . . . . . . . . . . . . . . . . . . 9-6 Questions about Upgrades . . . . . . . . . . . . . . . . . . . 9-7 Error Messages . . . . . . . . . . . . . . . . . . . . . . . . . . . . 9-7 Solutions Tables . . . . . . . . . . . . . . . . . . . . . . . . . . . . . . . 9-9 Audio and Video . . . . . . . . . . . . . . . . . . . . . . . . . . . 9-9 Battery and Power . . . . . . . . . . . . . . . . . . . . . . . . . 9-11 Mass Storage . . . . . . . . . . . . . . . . . . . . . . . . . . . . 9-15 Games and Internet . . . . . . . . . . . . . . . . . . . . . . . . 9-19 Keyboard and TouchPad . . . . . . . . . . . . . . . . . . . . 9-21 Memory and PC Card . . . . . . . . . . . . . . . . . . . . . . 9-24 CONTENTS-VIII PRESARIO NOTEBOOK BEYOND SETUP GUIDE 1800 SERIES Introduction Where Can I Find Information?, 1-2 Symbols and Graphics, 1-4 Safety, 1-5 PRESARIO NOTEBOOK BEYOND SETUP GUIDE 1800 SERIES Congratulations! As the owner of a new Presario Notebook computer, you have joined the world-wide community of mobile computer users. Once your Notebook is set up and connected to the Internet, you can explore vast regions of information, entertainment, and services online. The Beyond Setup Guide is designed for both experienced computer users and beginners. This easy-to-scan guide helps you find the information you want as quickly as possible. It’s also designed to familiarise you with the following: • Features you’ll want to try during the first few days or weeks • Keeping your Notebook running smoothly • Solving common problems as they occur INTRODUCTION 1-1 Where Can I Find Information? This section describes the documentation that came in the box with your new Notebook. Printed Documents Your new Presario Notebook computer came with printed documents containing helpful reference information. If you have access to the Internet, you can also view these and other documents on the Compaq Web site at www.compaq.com/mypresario. Note: Additional documents to those described here may vary per region. Easy Setup Poster The Compaq Web site is available worldwide. As you explore the Internet, stop at the following address for information about products, services, and special offers: www.compaq.com The Beyond Setup Guide is also available on the Compaq Web site: This poster shows you how to set up your Notebook. When you finish, fold the poster and store it with your documents for future use. For more information about the hardware that came with your new Notebook, refer to “Your Notebook at a Glance” later in this guide. Beyond Setup Guide This easy-to-scan guide explains how to set up your Notebook and get acquainted with its features. It also introduces: • Common computer tasks • The Internet • Notebook maintenance • Solutions for computer problems • Compaq service and support tools www.compaq.com/mypresario 1-2 INTRODUCTION PRESARIO NOTEBOOK BEYOND SETUP GUIDE 1800 SERIES Safety and Comfort Guide This document explains how to protect your equipment from damage, protect yourself from injury, and ensure your comfort while using your Notebook. Warranty Certificate The warranty details the Compaq commitment to service during the warranty period. Keep the warranty certificate in a safe place for future reference. Presario Operating System Manual The Presario Operating System Manual explains how to communicate with your Notebook using the Microsoft Windows® operating system. It also introduces: • File Management, which covers creating, saving, deleting, renaming, and moving files • Customizing the Windows desktop • Using the Windows online Help Note: The illustrations shown and the features described in this document may differ slightly from your Presario Notebook computer. PRESARIO NOTEBOOK BEYOND SETUP GUIDE 1800 SERIES INTRODUCTION 1-3 Symbols and Graphics Symbols The following words and symbols have special meaning in this guide and in the electronic documentation: Important information that may help you solve a problem. Helpful hints that make using your Notebook easier and faster. Another document or another page in this document that has related information. Failure to follow directions may result in bodily harm or loss of life. < Caution: Failure to follow directions may result in equipment damage or data loss. Graphics The illustrations shown and the features described in this document may differ slightly from your Presario Notebook computer. 1-4 INTRODUCTION PRESARIO NOTEBOOK BEYOND SETUP GUIDE 1800 SERIES Safety Disconnecting Your Notebook from the Power Source To shut down your Notebook properly, complete the following steps: To reduce the risk of electric shock and damage to the equipment, read the Safety and Comfort document. 1. Close all open programs. 2. On the Windows taskbar, click Start, then click Shut Down… The Shut down Windows dialogue box is displayed. 3. Select the Shut down option. To protect your equipment from power surges, plug all power cords into a high-quality surge protector. If you have a dedicated telephone line for the modem, buy a surge protector with a telephone jack. After your Notebook is safely disconnected from AC power and the phone line, you can run your Notebook on battery power. PRESARIO NOTEBOOK BEYOND SETUP GUIDE 1800 SERIES Note: If the Notebook does not turn off automatically, then press and hold the Power button until it shuts down. 4. Unplug the power cord from the wall outlet and unplug the modem line from the wall jack. Protecting Your Notebook During an Electrical Storm During an electrical storm, you should take the following precautions to protect your Notebook from damage. You should immediately disconnect your Notebook from the power source. • If you are not using a surge protector, unplug all power cords from the wall sockets. • Disconnect your Notebook from the wall sockets. • Turn off the power button on all surge protectors. • If a telephone line from your Notebook is plugged directly into the wall jack (without going through a surge protector), unplug the line from the wall jack. INTRODUCTION 1-5 1-6 INTRODUCTION PRESARIO NOTEBOOK BEYOND SETUP GUIDE 1800 SERIES Your Notebook at a Glance Before you begin using your new Presario Notebook computer, you’ll want to look at some of the basic components. Front of Your Presario Notebook, 2-2 Left and Right Panels, 2-7 Back Panel, 2-8 Underside, 2-9 QuikDock, 2-10 To open your Notebook, slide the 1 Display Release Latches forward and gently lift the lid. PRESARIO NOTEBOOK BEYOND SETUP GUIDE 1800 SERIES YOUR NOTEBOOK AT A GLANCE 2-1 Front of Your Presario Notebook Common Features Open your Notebook and take a look at these components: • Common Features • Internet Zone Buttons and Lights • Function Keys • Status Display and CD/DVD Controls “Turning Your Notebook On and Off” later in this guide to learn more about how to start and shut down your Notebook. 1 Display Release Latch 6 TouchPad 2 Display 7 Speakers 3 Power Button 8 Left TouchPad Button 4 Model Number 9 Scroll Up/Down Button 5 Keyboard - Right TouchPad Button “TouchPad” later in this guide for more information on using the TouchPad. 2-2 YOUR NOTEBOOK AT A GLANCE PRESARIO NOTEBOOK BEYOND SETUP GUIDE 1800 SERIES Internet Zone Buttons and Lights “Reprogramming Your Internet Zone Buttons” in Chapter 3 of this guide to learn how to program the Internet zone buttons to suit your needs. 1 AC Adapter Light 7 Digital Audio Button 2 Caps Lock Light 8 Entertainment Button 3 Instant Internet Access Button 9 Retail Central Button 4 Instant E-Mail Button - Num Lock Light 5 My Presario Instant Access Button q Scroll Lock Light 6 Power Button PRESARIO NOTEBOOK BEYOND SETUP GUIDE 1800 SERIES YOUR NOTEBOOK AT A GLANCE 2-3 Note: Before using these buttons, you must have access to the Internet. Button M C B Button Description Default Button Action Instant Internet Access Provides your daily start point to the Internet. It connects you to a personalised Web page filled with local weather, news, sports, and financial information. Instant E-mail Provides you with one-touch access for sending and reading your e-mail. My Presario Connects instantly to Compaq for product information, helpful hints, performance updates, service, and more. Digital Audio Launches Rioport Audio Manager to play MP3 music. Entertainment Launches the Icast Web site which provides up-to-date entertainment information. Retail Central Provides instant connection to your computer store and a variety of leading consumer companies. Favourite Program Launch Launches the My Presario Web site. Can be reprogrammed to launch any application or Web site. Favourite Program Launch Launches the Icast Web site. Can be reprogrammed to launch any application or Web site. (Fn+F1) (Fn+F2) 2-4 YOUR NOTEBOOK AT A GLANCE PRESARIO NOTEBOOK BEYOND SETUP GUIDE 1800 SERIES Function Keys The following keys are assigned: To access these features, press and hold down the Fn key, press the numbered function key, and then release both keys simultaneously. PRESARIO NOTEBOOK BEYOND SETUP GUIDE 1800 SERIES Button Description F1 User-programmable favourite program launch key F2 User-programmable favourite program launch key F3 Switches between the display and external monitor in the following order: • Display • External Monitor • Display and External Monitor • TV Out F4 Sleep F5 None F6 None F7 Brightness control down F8 Brightness control up F9 CD or DVD play/pause F10 CD or DVD stop F11 CD or DVD previous track F12 CD or DVD next track YOUR NOTEBOOK AT A GLANCE 2-5 Status Display and CD/DVD Controls 1 Sleep Status Icon 7 Disqplay2 On/Off Button 2 Power Status Icon 8 Next Track Button 3 Battery Charging Status Icon 9 Volume Down Button 4 Disqplay Status Icon - Volume Up Button 5 Battery Gauge q Play/Pause Button 6 Previous Track Button w Stop Button 2 2-6 YOUR NOTEBOOK AT A GLANCE PRESARIO NOTEBOOK BEYOND SETUP GUIDE 1800 SERIES Left and Right Panels Components on Left Side Take a look at the left and right sides of your Notebook. This is where the CD or DVD drive, diskette drive, battery and PC Card slot are located. 1 Security Slot 4 CD or DVD Manual Eject Hole 2 CD or DVD Drive 5 Diskette Drive 3 CD or DVD Eject Button 6 Diskette Eject Button Components on Right Side “Inserting the Battery” in Chapter 3 of this guide for more information about the battery. PC Cards are credit card-sized removable options that expand the capability of your Notebook. 1 Battery Compartment 5 Microphone Jack 2 PC Card Eject Button 6 Modem Port 3 PC Card Slot (Type I, II, or III) 7 Ethernet Port 4 Headphone Jack PRESARIO NOTEBOOK BEYOND SETUP GUIDE 1800 SERIES YOUR NOTEBOOK AT A GLANCE 2-7 Back Panel Components on Back Take a look at the back of your Notebook. This is where you connect external hardware such as a printer, mouse, or external monitor. “Attaching Hardware Devices” later in this guide for more information on attaching external devices. 1 Mouse/Keyboard Connector 6 TV-Out Connector 2 AC Adapter Connector 7 External Monitor (VGA) Port 3 Printer/Parallel Port 8 Serial Port 4 QuikDock Connector 9 USB Port 5 Fan Vent 2-8 YOUR NOTEBOOK AT A GLANCE PRESARIO NOTEBOOK BEYOND SETUP GUIDE 1800 SERIES Underside Components on Underside Here’s what’s on the underside of your Notebook. This is where the memory compartment and the pop-up feet are located. Before calling Compaq Customer Support you will need the serial number from the underside of your Notebook. PRESARIO NOTEBOOK BEYOND SETUP GUIDE 1800 SERIES 1 Pop-Up Feet 3 Memory Compartment 2 Model and Serial Number 4 Speaker Ports YOUR NOTEBOOK AT A GLANCE 2-9 QuikDock QuikDock Features With the QuikDock you can create a permanent work space, or “dock” for your Notebook, complete with external monitor, keyboard, mouse, and printer. The QuikDock provides external ports for various connectors, allowing you to dock and remove your Notebook while your hardware devices remain connected to the QuikDock. The illustration and table below show where to connect external devices to the QuikDock. QuikDock is an option that can be purchased separately for your Notebook. QuikDock is an option that can be purchased separately for your Notebook. See the Options Catalogue icon on the desktop for more information. The catalogue is only available in selected areas. See your Compaq authorised retailer for details. 2-10 YOUR NOTEBOOK AT A GLANCE 1 USB 7 Game/Midi 2 USB 8 Serial 3 AC Adapter 9 Monitor 4 Mouse - S-Video 5 Keyboard q Composite TV-Out 6 Printer w Audio Line Out PRESARIO NOTEBOOK BEYOND SETUP GUIDE 1800 SERIES Using Your Notebook Your Presario Notebook computer is designed for easy setup, use, and upgrading. In this chapter, you’ll become familiar with using your Notebook‘s features. Power On!, 3-2 TouchPad, 3-6 Display Options, 3-9 Storage Drives, 3-12 Security, 3-13 PRESARIO NOTEBOOK BEYOND SETUP GUIDE 1800 SERIES USING YOUR NOTEBOOK 3-1 Power On! This section helps you get your Notebook set up and running. • Plugging and Unplugging AC Power • Turning Your Notebook On and Off • Using Battery Power • Optimizing Processor Speed The Easy Setup Poster and the “Government Approvals” section in the Safety and Comfort Guide for worldwide power cord information. To reduce the risk of electrical shock, fire, or damage to the equipment, do not use converter kits sold for appliances to power your Notebook. Use only the Compaq adapter that came with your Notebook or a Compaq replacement part. 3-2 USING YOUR NOTEBOOK Plugging and Unplugging AC Power Do’s • Ensure that you can reach the electrical socket easily. • Unplug the AC adapter from the electrical socket when you want to disconnect AC power from your Notebook. • To unplug from the electrical socket, grasp the cord by the plug. Don’ts • Do not leave the AC adapter plugged into the electrical socket when it is not connected to your Notebook. • Do not place anything on power cords or cables. Arrange them so that no one accidentally steps on or trips over them. Surge Protectors Using surge protectors and line conditioners can substantially reduce the risk of electrical shock and aid in protecting your Notebook from power-source problems. During a power surge, the voltage level of electricity coming into your Notebook can increase and cause data loss or system damage. Protect your Notebook and peripherals by connecting them to a surge suppresser, which absorbs voltage surges and prevents them from reaching your Notebook. < Caution: High voltages can enter your Notebook through the phone line connected to the modem. To protect your Notebook during electrical storms, use a telephone line surge protector. PRESARIO NOTEBOOK BEYOND SETUP GUIDE 1800 SERIES Why Use AC Power When I’ve Got a Battery? When you’re not on the go, you’ll want to use your Notebook’s AC adapter to supply power. This ensures that the battery is always charged. When your Notebook does not have a charged battery, you should save your work and turn off your Notebook before unplugging it from the AC power supply. Turning Your Notebook On and Off When a charged battery is in your Notebook, you can simply unplug it from AC power. Your Notebook automatically switches to battery power. To turn on your Notebook, press the Power button, which is located at the top of the keyboard. To turn off your Notebook properly, complete the following steps: 1. Save your work and exit all open programs. 2. Click the Start button, then click Shut Down, and select the Shut down option. Hibernation is a state of no-power consumption. When your Notebook enters this mode, the contents of the memory are saved to the hard disk and your Notebook is powered off. 3. Click the OK button. After a few seconds, your Notebook will turn off. Note: If your Notebook is not responding, press and hold down the Power button until your Notebook shuts down. Power Button Functionality When your Notebook is on, pressing the Power button places your Notebook in Hibernation mode. The settings for the Power button are as follows: • Press and release once to enter Hibernation mode • Press and hold down to shut down your Notebook Note: You should only press and hold down the Power button to shut down your Notebook if it is locked up or not responding. Compaq does not recommend that you turn off your Notebook using this method under normal circumstances. To turn off your Notebook properly, refer to the procedure above. PRESARIO NOTEBOOK BEYOND SETUP GUIDE 1800 SERIES USING YOUR NOTEBOOK 3-3 Using Battery Power Inserting the Battery Your Notebook contains a lithium ion battery pack. Improper handling of the battery pack can result in fire and chemical burns. Do not disassemble, crush, puncture, short external contacts, dispose of in water or fire, or expose it to temperatures higher than 60° C (140° F). Replace only with the Compaq battery pack specified for your Notebook. To insert your battery into the battery compartment, complete the following steps: 1. Push down 1 on the battery compartment door to remove the door. 2. Insert 2 the new battery into the battery compartment with the label side turned up. 3. Close the battery compartment door by gently pushing up on the door until it snaps into place. Charging the Battery “Caring For Your Battery” later in this guide. The battery charges whether your Notebook is on or off. It continues charging until the battery is fully charged or the AC power is disconnected. To charge the battery, insert the battery in the battery compartment and connect your Notebook to AC power. Leave your Notebook plugged into the electrical socket until the Battery Charging icon is no longer displayed. This ensures that the battery is fully charged. If you will not be using your Notebook for an extended period of time, Compaq recommends that you unplug the electrical cord from the socket and remove the battery while your Notebook is not in use. 3-4 USING YOUR NOTEBOOK PRESARIO NOTEBOOK BEYOND SETUP GUIDE 1800 SERIES Optimizing Processor Speed (available on select models) Some Presario Notebook models use the Pentium III Processor featuring Intel® SpeedStep™ Technology. This technology gives you the capability to optimise your Notebook’s processor speeds based on the power source in use. The default SpeedStep icons for each power source are listed below: When maximum performance is selected, the processor operates at full (100 %) speed. When battery optimised mode is selected, the processor operates at approximately 80 % of the maximum performance mode. PRESARIO NOTEBOOK BEYOND SETUP GUIDE 1800 SERIES The chequered flag icon in the system tray on the Windows taskbar indicates External AC Power and Maximum Performance. The non-chequered flag icon in the system tray on the Windows taskbar indicates Battery Optimised Performance. To change the setting for either power source, AC or battery, right-click the SpeedStep icon in the System Tray and select either Battery Optimised Performance or Maximum Performance. USING YOUR NOTEBOOK 3-5 TouchPad Using the TouchPad Instead of a Mouse In this section you’ll learn how to select, click and double-click with the TouchPad: Just like the mouse, the TouchPad lets you draw lines or point to items on the Windows desktop. Try dragging the pointer across the screen by gently dragging your finger across the TouchPad. • Using the TouchPad Instead of a Mouse • Tapping and Double-Tapping • Edge Motion “Caring for Your Presario Notebook” later in this guide for tips on keeping your TouchPad clean. Left-Click To left-click, press the Left TouchPad button. It is located directly below the TouchPad. The left TouchPad button works as the select or drag button. To double-click an item, move the pointer over the item and press the left TouchPad button twice in rapid succession. Right-Click The right TouchPad button works as the context menu or special drag button. Press the Right TouchPad button to get context-sensitive options. Scroll Button “Attaching Hardware Devices” later in this guide to learn how to attach an external mouse. The Scroll button is the equivalent of the up and down buttons of the scroll bar on the side of your screen. To view other areas of a document or browser window, press the Scroll button in the desired direction. Note: The Scroll button is only functional with some software applications. 3-6 USING YOUR NOTEBOOK PRESARIO NOTEBOOK BEYOND SETUP GUIDE 1800 SERIES Tapping and Double-Tapping To get additional help for setting advanced TouchPad features, click the button or select Help from the Mouse Properties dialogue box. Your TouchPad has a Tapping feature that works like the left mouse button. If enabled, you can tap once on the TouchPad to select an object and tap twice to double-click. To turn on the tapping feature, complete the following steps: To help prevent accidental pointing while typing, drag the PalmCheck slider towards maximum. 1. From the Windows desktop, click Start, point to Settings, and then click Control Panel. Z 2. Double-click the Mouse icon to open the Mouse Properties dialogue box. 3. Select the Touch tab and click the Tap to Click check box to turn on the tapping feature. 4. Click OK to accept the changes and close the dialogue box. PRESARIO NOTEBOOK BEYOND SETUP GUIDE 1800 SERIES USING YOUR NOTEBOOK 3-7 Edge Motion Edge Motion allows you to continue to scroll once your finger reaches the edge of the TouchPad. When this feature is turned on, the window continues to scroll until you lift your finger. To turn on Edge Motion, complete the following steps: 1. From the Windows desktop, click Start, point to Settings, and then click Control Panel. 2. Double-click the Mouse icon. 3. Click the Edge Motion tab. 4. Select When Dragging, Always, and When Scrolling to turn on Edge Motion. 5. Click OK to accept the changes and close the dialogue box. 3-8 USING YOUR NOTEBOOK PRESARIO NOTEBOOK BEYOND SETUP GUIDE 1800 SERIES Display Options Changing Resolution • Changing Resolution If the display only fills part of the screen or the default resolution does not suit your needs, you may want to adjust the display resolution. • Adjusting Brightness To change the display resolution, complete these steps: In this section: 1. On the Taskbar, click the Start button, point to Settings, and then click Control Panel. Your Notebook’s display is already set to its optimal resolution. Compaq recommends changing the resolution setting only if you encounter problems. 2. Double-click Display to open the Display Options dialogue box, and then click the Settings tab. 3. Under Screen area, click the resolution slider and drag it to the desired resolution. 4. Click OK to accept the new settings, then close the Control Panel window. PRESARIO NOTEBOOK BEYOND SETUP GUIDE 1800 SERIES USING YOUR NOTEBOOK 3-9 Adjusting Brightness If your display is too faint or too bright, the brightness controls may not be set properly. To correct this condition, complete the following steps: 1. On the taskbar, click Start, point to Settings, and then click Control Panel. You can also adjust the display brightness by pressing Fn+F7 to decrease the brightness or Fn+F8 to increase the brightness. 2. Double-click Display and click the Settings tab. 3. Click the Advanced button to open the RAGE MOBILITY AGP Properties dialogue box. Key combinations such as the example, Fn+F7, used above mean that you should press and hold down the Fn key, press the F7 key, and then release both keys simultaneously. 4. Click the Color tab. Under Brightness, click and drag the Desktop slider to the desired brightness. 5. Click OK to close the dialogue box and click OK again to close the Display Properties dialogue box, then close the Control Panel window. 3-10 USING YOUR NOTEBOOK PRESARIO NOTEBOOK BEYOND SETUP GUIDE 1800 SERIES Internet Zone Buttons The Internet Zone buttons, located above your Notebook’s keyboard, automatically connect you to the Internet. These buttons give you one-touch access to your most frequently used Internet activities. Reprogramming the Internet Zone Buttons You can reprogram the Internet Zone buttons to reflect your personal preferences. To reprogram your Internet Zone buttons, complete the following steps: 1. From the Windows taskbar, right-click the Easy Access Internet Zone icon and choose Reprogram Easy Access Buttons. 2. Follow the instructions provided. This section covers: • • Reprogramming the Internet Zone Buttons Disabling the Internet Zone Buttons “Front of your Presario Notebook” in Chapter 2 of this guide for descriptions of each button and its default action. Disabling the Internet Zone Buttons You may turn off all Internet Zone buttons from the Easy Access icon. When turned off, the Internet Zone buttons are inactive. The Easy Access Internet Zone icon located on the taskbar appears with a red X on top. You can still access the button functions if you click the Easy Access Internet Zone icon. To disable the Internet Zone buttons, complete the following steps: 1. From the Windows taskbar, right-click the Easy Access Internet Zone icon. 2. Click Disable Easy Access Buttons. You can also access the Internet Zone options from the taskbar by clicking Start, selecting Programs, and then clicking Reprogram Easy Access Buttons. To enable the Internet Zone buttons, complete the following steps: 1. From the Windows taskbar, right-click the Easy Access Internet Zone icon. 2. Click Enable Easy Access Buttons. PRESARIO NOTEBOOK BEYOND SETUP GUIDE 1800 SERIES USING YOUR NOTEBOOK 3-11 Storage Drives Identifying Your Storage Drives • Identifying Your Storage Drives • Using the Diskette Drive Your diskette drive, hard drive, and CD, CD-RW, or DVD drive are designated with letters of the alphabet, as well as with icons. To determine your drive letters, complete the following steps: On selected models, Compaq provides a back-up utility (or system save) that allows you to save your data and applications to a partitioned drive located on your hard disk. To determine the total hard disk size, add the size of both the C and D drives together. 0 3 1/2 Diskette _______ Standard Diskette Drive 1. From the Windows desktop, double-click the My Computer / icon. The icons for each drive and corresponding drive letters are displayed in the My Computer window. Local Diskette _______ Hard Drive Drive _______ CD, DVD, or CD-RW Drive 2. Use the icons to the right to identify your drive. Note: Your Notebook comes with a CD, DVD, or CD-RW drive. Using the Diskette Drive To prevent damage to the diskette and the information stored on it, wait until diskette drive activity is complete before removing the diskette. 3-12 USING YOUR NOTEBOOK To insert a diskette into the diskette drive, hold the diskette with the label facing up and the arrow on the diskette pointing towards the drive, and gently push the diskette into the drive. To remove a diskette, press the Eject button on the diskette drive. PRESARIO NOTEBOOK BEYOND SETUP GUIDE 1800 SERIES Security Using the Security Slot In this section: To use the security slot found on the rear corner of your Notebook, complete the following steps: • Using the Security Slot • Power-On Password 1. Insert a locking device (such as a Kensington lock) into the security slot. 2. Turn the locking device clockwise 90 degrees. To remove the locking device, turn the locking device counterclockwise 90 degrees and remove the device from the slot. Power-On Password You can set a power-on password that will secure the information you store on the hard disk. When turning on your Notebook, this password must be entered before you can access your files. Setting the Password To set the power-on password, complete the following steps: 1. Press the Power button to turn on your Notebook. Pressing the F9 key at any point within the setup returns your Notebook to the default settings. 2. After the Compaq logo is displayed, a cursor is shown in the upper right corner of the screen for a few seconds. While the cursor is visible, press the F10 key. < Caution: F10 Setup is for experienced users only. Changing settings may affect the functionality of your Notebook. 3. Using your arrow keys, select the Security option from the menu bar. 4. Move to Set Supervisor Password. Press the Enter key. PRESARIO NOTEBOOK BEYOND SETUP GUIDE 1800 SERIES USING YOUR NOTEBOOK 3-13 5. Set your personal password, and press the Enter key. You must confirm the password and press the Enter key again. < Caution: Write your password down in a secure location. If you forget or lose your password, a Compaq service technician must reset your Notebook for you to be able to access your files. 6. Move to Password on boot using the + or – keys to select Enable. 7. Using the arrow keys, select Exit from the menu bar. 8. Make sure that Exit Saving Changes is selected. Press the Enter key. 9. Select Yes to save your changes and exit. Your power-on password is now set. Every time you turn on your Notebook, resume working from Hibernation mode, or access F10 Setup, you must enter this password. Removing the Password To remove a power-on password, complete the following steps: 1. Access F10 Setup as above, enter your current password, and press the Enter key. In the spaces to enter your new password and confirm new password, press the Enter key. Press the Enter key again to exit the screen. 2. Move to Password on boot using the + or – key to select Disable. 3. Using your arrow keys, select Exit from the menu bar. 4. Make sure that Exit Saving Changes is selected. Press the Enter key. 5. Select Yes to save your changes and exit. 3-14 USING YOUR NOTEBOOK PRESARIO NOTEBOOK BEYOND SETUP GUIDE 1800 SERIES Common Tasks Now that your Presario Notebook computer is set up and running, you may want to explore and learn about some of the common tasks performed by your Notebook. TV-Out Connection, 4-2 Anti-Virus Software, 4-5 Software and Hardware, 4-7 PRESARIO NOTEBOOK BEYOND SETUP GUIDE 1800 SERIES COMMON TASKS 4-1 TV-Out Connection With TV-Out connection, you can play games on a bigger screen or watch DVD films on a TV rather than your Notebook display. This section helps you to complete the following tasks: • Connect and Enable TV-Out Connection • Set Your Television Format • Adjust the Television Screen • Switch Between Displays Connecting and Enabling TV-Out To connect your Notebook and your television, you need a composite video cable (RCA cable) to plug into your TV, VCR, or other device. These cables can be purchased in a retail TV store or a computer store. To connect and enable TV-Out, complete the following steps: 1. Connect your Notebook and your television with a composite video cable. 2. From the Windows taskbar, click Start, point to Settings, click Control Panel. 3. Double-click the Display icon to open the Display Properties dialogue box and then click the Settings tab. 4. Click the Advanced button to open the RAGE MOBILITY AGP Properties dialogue box and then click the Displays tab. 5. Click the top left corner of the TV button to enable TV-Out. TV-Out is enabled if the button next to Primary is blue. 4-2 COMMON TASKS PRESARIO NOTEBOOK BEYOND SETUP GUIDE 1800 SERIES 6. Click Apply to accept the changes and then click OK to exit both dialogue boxes. 7. If your Notebook asks you to restart Windows, click OK for the new settings to take effect. At this time, the display may be rolling. To correct this problem, you must set your TV format. Setting Your Television Format To properly view images, you must set your Notebook to your country’s standard for television transmission. To do this, complete the following steps: 1. From the Windows taskbar, click Start, point to Settings, click Control Panel. 2. Double-click the Display icon to open the Display Properties dialogue box and then click the Settings tab. 3. Click the Advanced button, then click the Displays tab. 4. Click the right corner of the TV button. 5. Click the Format tab. 6. Make sure Select by country is selected. 7. Scroll to find your country, then select it. 8. Click OK to exit both dialogue boxes. 9. If your Notebook asks you to restart Windows, click OK for the new settings to take effect. Your television format is now set and the television image should be stable. PRESARIO NOTEBOOK BEYOND SETUP GUIDE 1800 SERIES COMMON TASKS 4-3 Adjusting the Television Screen After you have enabled your television, you may need to adjust the size or location of the image on your screen. To make adjustments to your display, complete the following: The resolution of your Notebook display is much greater than the resolution of your TV. Image quality on the TV varies from application to application. Text viewed on a TV may have reduced quality. 1. From the Windows taskbar, click Start, point to Settings, click Control Panel. 2. Double-click the Display icon to open the Display Properties dialogue box and then click the Settings tab. 3. Click the Advanced button to open the RAGE MOBILITY AGP Properties dialogue box, and then click the Displays tab. 4. Click the right corner of the TV button. a. To change the brightness, contrast, or colour saturation, click the Attributes tab and then click and drag the sliders to the desired settings. b. To change the position and screen size, click the Adjustments tab and click the appropriate buttons to adjust as necessary. 5. Click OK to exit both dialogue boxes. Switching Between Displays “Playing a DVD Film on a TV“ later on in this guide. 4-4 COMMON TASKS You can switch between your television and your display or external monitor by pressing Fn+F3. The order in which they change is: • Display • External Monitor • Display and External Monitor • TV-Out PRESARIO NOTEBOOK BEYOND SETUP GUIDE 1800 SERIES Anti-Virus Software Compaq provides anti-virus scanning and free software updates for one year through the Internet. PRESARIO NOTEBOOK BEYOND SETUP GUIDE 1800 SERIES Using Anti-Virus Software A virus is a program that attaches itself to a file on your Notebook and then spreads from one file to another. Viruses can damage data, cause computers to malfunction, and display annoying or offensive messages. Some viruses may go unnoticed for long periods of time because they are activated on a certain date or time. Protect your Notebook from a virus by: • Using an anti-virus scanning program to scan for viruses on your drives or diskettes. This scanning program is located in the Start menu. If you need help using the program, select Help in the menu bar. • Backing up your files periodically to diskettes, a separate hard drive, or a high-capacity storage drive. • Write-protecting diskettes. A virus cannot infect a write-protected diskette. • Obtaining all software from reputable sources and checking the software for viruses before installing it. • Using your anti-virus program to check files and programs that are on diskettes, attached to e-mail messages, or downloaded from the Internet. • Disabling macros on suspicious Microsoft Word and Excel files. These programs warn you if a document that you are opening contains a macro that might have a virus. • Updating your anti-virus program periodically to keep up with new viruses. COMMON TASKS 4-5 Recognizing a Computer Virus A computer virus is a program that damages or erases files or programs. Your Notebook can become “infected” with a virus when you open a contaminated program or file. Some signs indicating that your Notebook may be infected include: • Strange characters or crude statements suddenly appearing on your screen • Hard drive, memory, or software error messages • Damage to files or directories for no apparent reason • Strange responses to commands • Sharp decrease in performance or program speed Removing a Virus If you suspect your Notebook has been infected with a virus, find and remove the virus immediately using an Anti-Virus program. After you have followed the instructions provided by the Anti-Virus program, complete the following steps: 1. Turn off your Notebook and leave it off for at least 30 seconds. 2. Turn on your Notebook and rescan for the virus. 4-6 COMMON TASKS PRESARIO NOTEBOOK BEYOND SETUP GUIDE 1800 SERIES Software and Hardware Discover how easy it is to add and remove software or attach new hardware devices. With easy-tofollow instructions, you can completely and safely install or remove software programs and hardware devices with no worries. This section covers: • • Adding and Removing Software Software can be installed from a CD, a diskette, or downloaded from a Web site. Many software CDs automatically begin the installation process when placed in the CD drive. If you have software that does not automatically begin the installation process, you can install the software by using the Microsoft Windows Add/Remove Programs utility. Installing Software from a CD or Diskette To install software from a diskette or from a CD that does not automatically install, complete the following steps: Adding and Removing Software 1. Close all programs. Attaching Hardware Devices 2. From the Windows taskbar, click the Start button, point to Settings, and then click Control Panel. 3. Double-click the Add/Remove Programs icon. The Add/Remove Program Properties window is displayed. 4. Click Install. 5. Insert the CD or diskette into the proper drive and click Next. Microsoft Windows finds the CD or diskette and begins the installation process. PRESARIO NOTEBOOK BEYOND SETUP GUIDE 1800 SERIES COMMON TASKS 4-7 Installing a Downloaded Program File Check the downloaded program file for viruses before installation. To install a program file that you have downloaded from the Internet to your hard disk, complete the following steps: 1. Terminate your Internet connection. 2. Close all programs. 3. From the Windows taskbar, click the Start button, point to Settings, and then click Control Panel. 4. Double-click the Add/Remove Programs icon to open the Add/Remove Program Properties dialogue box. 5. Click Install to open the Install Program from Floppy Disk or CD-ROM window. 6. Click Next to open the Run Installation Program window. 7. Click Browse to locate and select the setup.exe or install.exe file for the downloaded software. 8. Click Open to begin the installation process. 4-8 COMMON TASKS PRESARIO NOTEBOOK BEYOND SETUP GUIDE 1800 SERIES Attaching Hardware Devices To install a new hardware device such as a printer or USB device to your Notebook, complete the following steps: 1. Turn off your Notebook. 2. Connect the device to your Notebook according to the instructions that come with it. 3. Turn on your Notebook and follow the instruction that came with your device for installing any needed drivers. You may be prompted to insert the Windows Installation CD or diskettes. If this occurs, complete the following steps: 1. At the Add New Hardware Wizard, click Next to begin installing the drivers and files necessary to make the new hardware work. 2. Select Search for the best driver for your device (Recommended) and click Next. PRESARIO NOTEBOOK BEYOND SETUP GUIDE 1800 SERIES COMMON TASKS 4-9 3. Select Specify a location. If C:\WINDOWS\OPTIONS\CABS is not displayed in the drop-down box, select it from the drop-down list or type it in the box and click Next. The Wizard begins installing the necessary files and drivers for the new hardware. 4. When the Wizard completes installing the files and drivers, click the Finish button. You may need to restart your Notebook for the new hardware to be recognised by your Notebook. 4-10 COMMON TASKS PRESARIO NOTEBOOK BEYOND SETUP GUIDE 1800 SERIES Using the CD or DVD Drive Insert and Remove Discs, 5-2 Audio CDs and Video Discs, 5-4 DVDs, 5-8 Video Display Options, 5-15 CD-RW Basics, 5-16 PRESARIO NOTEBOOK BEYOND SETUP GUIDE 1800 SERIES Who would ever have thought that your home entertainment centre could fit in your lap or on a desktop? Your Presario Notebook computer allows you to listen to your favourite music and (on select models) watch your favourite films almost anywhere you go. To help you understand what options lie at your fingertips and how to use these options, this chapter includes information for: • Inserting and removing CD or DVD discs • Playing audio CDs • Playing both DVD and non-DVD videos • Adjusting the display options with the DVD Control Panel • Creating audio, data, and backup CDs 5-1 Insert and Remove Discs This section covers: Inserting a Disc To load a disc into the disc drive, complete the following steps: < Caution: Improper handling of a CD or DVD can damage the disc and could potentially damage the drive. • Inserting a Disc • Removing a Disc • Manually Ejecting a Disc 1. Press the Eject button located on the front of the drive. 2. Remove a disc from its protective case, holding the disc by its centre hole and outer edge to avoid touching the surface. 3. Place the disc, label side up (unless it is a double-sided DVD), into the round area of the tray. Gently press the disc down onto the centre spindle of the tray until the disc snaps into place. < Caution: Before closing the disc tray, ensure that the disc snaps onto the spindle in the centre of the tray. You can damage the disc and your Notebook if the disc is not seated properly. 4. Push the tray back into the drive until the drive locks into place. 5-2 USING THE CD OR DVD DRIVE PRESARIO NOTEBOOK BEYOND SETUP GUIDE 1800 SERIES Removing a Disc To remove a disc from the drive, complete the following steps: 1. Press the Eject button on the drive. 2. Remove a disc from the tray, gently pushing down on the centre spindle while pulling up on the outer edges. Avoid touching the surface of the disc. 3. Push the tray back into the drive until it locks into place. Manually Ejecting a Disc If your Notebook power is off, you will not be able to eject a disc from the CD or DVD drive. To remove a disc without powering up your Notebook, you must manually eject the disc from the drive. If you need to eject a disc when the power is off, complete the following steps to eject the disc manually: 1. Make sure the power is off and any external power sources are disconnected. 2. Insert a small rod or pin, such as a paper clip (approximately 1/16 inch in diameter and at least 3/8 inch in length) into the Manual Eject Hole and push firmly as shown in the figure above. 3. Remove the disc from the tray. 4. Gently push the tray back into the drive until it locks into place. PRESARIO NOTEBOOK BEYOND SETUP GUIDE 1800 SERIES USING THE CD OR DVD DRIVE 5-3 Audio CDs and Video Discs In this section you’ll learn how to play audio and video discs with your Notebook. This section covers: • Playing Audio CDs • Playing Audio CDs Using Disqplay2 • Playing Non-DVD Video Discs Playing Audio CDs To play an audio CD, insert the disc into the CD or DVD drive. After a few seconds the Compaq CD Player opens and the disc automatically starts playing. If disc play does not start automatically, complete the following steps: 1. On the Windows taskbar, click Start, point to Programs, Accessories, Entertainment, and then click CD Player. 2. Once the CD Player opens, click the Play button to begin playing the CD. 3. Click the Stop button to stop playing the CD. You can also use the function keys to play an audio CD. These keys are shown in “Function Keys” earlier in this guide. To remove the disc from the drive, click the Eject button on the CD Player. Disabling the Self-Starting Feature (available on select models) The Compact disc (CD) is the most common way to store information to use on your Notebook. Compact discs hold more than 450 times the information that can be stored on a floppy disk. To disable the self-starting feature, complete the following steps: 1. On the Windows taskbar, click Start, point to Settings, and then click Control Panel. 2. Double-click the System icon to open the System Properties dialogue box. 3. Click the Device Manager tab, and then double-click CDROM from the list of devices. 4. Select your CD/DVD drive from this list. Click Properties to open the CD/DVD System Properties dialogue box. 5. Click the Settings tab, and ensure that the check box next to Auto Insert Notification is clear. 6. Click OK to close the dialogue box. 5-4 USING THE CD OR DVD DRIVE PRESARIO NOTEBOOK BEYOND SETUP GUIDE 1800 SERIES Playing Audio CDs Using Disqplay2 The Disqplay2 allows you to play audio CDs without starting your Notebook. While your Notebook is powered off, press and hold the Disqplay R button to turn on the Disqplay2. If the CD or DVD drive cannot read a disc or takes too long to start, check to ensure the disc is clean and inserted properly. The status display shows a digital readout that indicates the play status of your audio CD. You can forward, replay, pause or stop playing a CD at the push of a button. The Disqplay2 has the following button functions: Icon Function Disqplay2 Power On/Off Skip the CD to the previous track Skip the CD to the next track Pause the CD from play mode or resume play mode Stop playing the CD Volume Down Volume Up The buttons on the outer front of your Notebook control the speaker volume and the Disqplay2 on/off power. Press the Volume Down ´button to lower the speaker volume and the Volume Up µ button to raise the speaker volume. PRESARIO NOTEBOOK BEYOND SETUP GUIDE 1800 SERIES USING THE CD OR DVD DRIVE 5-5 Using Repeat Track To continuously repeat a single track, complete the following steps: 1. While the track is playing, press the Play/Pause button. 2. Press the Previous Track button. The Repeat icon is shown on the status display and the track starts playing. 3. To stop the track from repeating, press any button. Using Repeat All To continuously repeat a CD, complete the following steps: 1. While the track is playing, press the Play/Pause button. 2. Press the Next Track button. The Repeat All icon is shown on the status display and the current track starts playing. 3. To stop the CD from repeating, press any button. 5-6 USING THE CD OR DVD DRIVE PRESARIO NOTEBOOK BEYOND SETUP GUIDE 1800 SERIES Playing Non-DVD Video Discs To play a video disc, insert the disc into the CD or DVD drive. After a few seconds, the disc automatically starts playing. If disc play does not start automatically, complete the following steps: 1. On the Windows taskbar, click the Start button, point to Programs, Accessories, Entertainment, and then click Windows Media Player. 2. Once the player opens, select File, and then Open from the menu. 3. Click the Browse… button. 4. Locate and double-click the CD Drive icon. You should see a list of files and file folders. Note: CD films are usually stored in a file folder that begins with the letters MPEG. 5. Double-click the folder that contains the CD film files. 6. Select a film file and click the Open button. A viewing window for the film is displayed. 7. Click the Play button on the window to begin playing the film. PRESARIO NOTEBOOK BEYOND SETUP GUIDE 1800 SERIES USING THE CD OR DVD DRIVE 5-7 DVDs Using the DVD Player (available on select models) In this section you’ll learn how to play DVD discs with your Notebook. This section covers: • Using the DVD Player • Playing a DVD Film on a TV • Using “Regionalized” DVDs Your Notebook’s DVD Drive reserves the best seat in the house for you, so you can watch all of your favourite films anytime, anywhere. The DVD Player is simple and fun to use. You have two options for starting the DVD Player: Digital Versatile Discs (DVDs) look like CDs, but they store films. DVDs store about 28 times more information than video CDs. • Insert a DVD disc into the DVD drive. After a few seconds, the Compaq DVD Player control panel opens and playback begins. • If a DVD disc is already inserted in the drive, start the DVD player by pressing the Play button on the status panel on the front of your Notebook. The Compaq DVD Player control panel opens and playback begins. The DVD drive will take a few seconds to start playback because it must first determine the type of media being played. For the best playback quality, close all other applications in the background while playing a DVD. 5-8 USING THE CD OR DVD DRIVE PRESARIO NOTEBOOK BEYOND SETUP GUIDE 1800 SERIES On-Screen Controls The on-screen controls allow you to quickly and easily access the features of the DVD Player. The table below provides you with button identifications and descriptions to help you operate the player. Button Title Open Displays a list of files for playback. Eject Opens the DVD drive to load or remove discs. DVD Options Displays the DVD Options menu for selecting Video Display and Parental Controls. Rewind Rewinds the content. Press Play to resume playback. Previous Moves to the previous track and resumes playback. Stop Stops the content playback and returns to the start of the content file. Play Begins playback of selected content. Pause Pauses playback. Press Pause or Play to resume playback. Next Skips to the beginning of the next track. Fast Forward PRESARIO NOTEBOOK BEYOND SETUP GUIDE 1800 SERIES Description Advances to a selected location. Press Play to resume playback. USING THE CD OR DVD DRIVE 5-9 Button Title Root Menu/ Shows what is available on the DVD for playback. Resume Change Subtitle Displays or changes subtitles viewed on the window. This feature is allowed only for DVD content with subtitles. This feature is available only when the content allows changes to the audio track. Change Audio Changes the playing audio track to audio of another track located on the DVD. Most commonly used with multi-language content to change the spoken/heard language. This feature is available only when the content allows changes to the audio track. Menu/ Title Resume Displays the main title menu so you can select content. Change Camera Angle Changes the camera angle of content being played. This feature is allowed only for DVD content created using multiple cameras and camera angles. D 3D Audio Activates the 3D Audio feature for virtual surround sound. Volume Increases the volume level when the bar is moved up and decreases the volume level when the bar is moved down. Mute Turns the audio off. Press the Mute or Volume button to resume audio. Close Player Closes the program. Minimize Minimizes the size of the Display window of the program. Help Shows the Help file. ! 5-10 USING THE CD OR DVD DRIVE Description PRESARIO NOTEBOOK BEYOND SETUP GUIDE 1800 SERIES Setting the Play Features The DVD Player has two modes or play settings: the DVD mode and the File mode. Use the DVD mode to play a standard DVD. Use the File mode to play film or MPEG files. To play content from the File mode, complete the following steps: 1. Click the Open icon on the DVD Player control panel. The list of files is displayed. 2. Select the file you want to view. 3. Click Open. The content begins playing. Not all of the following features are available on all DVDs: • If the DVD Player is in the File mode, the Subtitle D button is disabled. • If the DVD Player is in the DVD mode and your disc does not have Subtitle language options, the Subtitle D button is disabled. • If the DVD Player is in the DVD mode and your DVD has Subtitle language options, the Subtitle D button is enabled. When a DVD is inserted into the CD or DVD drive, the features available on the DVD player are displayed. When a particular feature is not available, the respective button does not respond when clicked. PRESARIO NOTEBOOK BEYOND SETUP GUIDE 1800 SERIES USING THE CD OR DVD DRIVE 5-11 Playing a DVD Film on a TV DVD films can only be viewed on one display at a time. If two or more displays are active (Notebook display plus TV, for example), the film will show as a black box or blank screen on one of the displays. This is normal. Set up your TV-Out connection following the procedures in the “Common Tasks” chapter of this guide. 1. Once your TV-Out connection is properly set up, start the DVD player by one of these methods: • Insert a DVD disc into the drive. After a few seconds, the Compaq DVD Player control panel opens and playback begins. • If the disc is already inserted in the DVD drive, press the Play button on the status panel on the front of your Notebook. The Compaq DVD Player control panel opens and playback begins. 2. Press the Fn+F3 keys to switch the display from your Notebook to the attached TV. Press and hold the Fn key while pressing the F3 key to switch the display from your Notebook to the TV. Note: You may need to press Fn+F3 more than once to transfer the image to the TV. Refer to “Switching Between Displays” in the “Common Tasks” chapter of this guide for more information. 3. You can switch the display from the TV back to your Notebook at any time by pressing Fn+F3 again. 5-12 USING THE CD OR DVD DRIVE PRESARIO NOTEBOOK BEYOND SETUP GUIDE 1800 SERIES Using “Regionalized” DVDs When attempting to play a DVD that does not match the drive’s region setting, you will see the message, “The disc region is different from the region of the drive… Do you wish to change the drive region?” To close the player without changing the drive’s region setting, click No. To change the region setting and play the DVD disc, click Yes and follow the on-screen instructions. Some models have a “regionalized” feature that limits the playback of discs to specific geographical regions. If your Notebook has this feature, the region code on the DVD drive must match the region code on the disc. Although the DVD drive region code is set at the factory, some DVD drives (depending on the make and model) allow you to change the region code. If your Notebook has this feature, you can change the code a maximum of five times. Identifying Your Region Setting If your Notebook offers the option to change region settings, complete the following steps: 1. Insert a DVD disc into the DVD drive. The Compaq DVD Player control panel opens automatically. 2. Click the DVD Options 6 icon on the lower left corner of the player. The DVD Options dialogue box opens. 3. Select the DVD Region tab. The selected option indicates the drive’s current region setting. 4. If the drive’s region setting matches the disc’s region setting, click OK. Note: If the drive’s region setting does not match the disc, you will need to select a new region to play the disc. PRESARIO NOTEBOOK BEYOND SETUP GUIDE 1800 SERIES USING THE CD OR DVD DRIVE 5-13 Selecting Your Region Setting To change the DVD drive region setting, complete these steps: You can only change the region code for the DVD drive five times. The fifth setting change you make becomes the permanent region on the player. Each time you make a change to the drive’s region setting, the remaining number of changes allowed on the DVD drive is displayed. 1. With a DVD disc in the drive, open the Compaq DVD Player. 2. Click the DVD Options icon on the lower left corner of the player to open the DVD Options dialogue box. 3. Click the DVD Region tab. 4. Select the desired region from the displayed map or from the options buttons. Note: You will only be allowed to select the region that matches the disc inserted in the drive. All other options will appear dimmed. 5. Click OK to close the dialogue box. 5-14 USING THE CD OR DVD DRIVE PRESARIO NOTEBOOK BEYOND SETUP GUIDE 1800 SERIES Video Display Options You already know how to play DVDs and video CDs. This section shows you how to adjust the display options while watching videos on your Notebook. Showing and Hiding the DVD Panel To hide the DVD Player panel, click anywhere outside the DVD control panel. To view the DVD Player control panel when the DVD Content Picture window is set to full-size, move the cursor to the edge of the screen. Zooming the View To enlarge the DVD Player picture window to full-window size, double-click anywhere on the picture. To return to a smaller window, double-click anywhere on the picture. PRESARIO NOTEBOOK BEYOND SETUP GUIDE 1800 SERIES USING THE CD OR DVD DRIVE 5-15 CD-RW Basics Installing Adaptec Easy CD Creator™ 4 (available on select models) Insert the Adaptec Easy CD Creator 4 disc into the CD-RW drive and complete the following steps to install the Adaptec Easy CD Creator software. If your Notebook has a CD-RW drive, you can create your own audio and data CDs. This section covers: • • Installing Adaptec Easy CD Creator™ 4 Using Adaptec Easy CD Creator 4 • Preventing Buffer Underrun Errors • Accessing Easy CD Creator 4 Users Information Easy CD Creator and Direct CD To install the Easy CD Creator, complete the following steps: 1. Once the CD is inserted, the Adaptec Installation dialogue box opens. Click Easy CD Creator. 2. Follow the on-screen installation instructions. 3. When prompted, select a location on the hard disk to store the Easy CD Creator program, or accept the recommended location, and then click Next. 4. When prompted, select a folder where the program icons will be placed. Click Next to continue installation. 5. When prompted, insert the Adaptec Update Diskette if one was provided with the Adaptec Easy CD Creator software. Follow the on-screen instructions to continue the installation. CD-RW refers to Compact Discs (or Drives) that are Readable and Writable. Note: If an Adaptec Update Diskette did not come with the software, click Skip and follow the on-screen instructions to continue installation. 6. When the installation is complete, click Finish. To install the Direct CD program, complete the following steps: You must close all other Windows programs before installing Adaptec Easy CD Creator 4. 1. On the Adaptec Installation Window, click Direct CD. 2. Follow the on-screen installation instructions. 3. When prompted, select a location on the hard disk to store the Direct CD program, or accept the recommended location, and then click Next. 4. When prompted, select a folder where the program icons will be placed. Click Next to continue the installation. 5-16 USING THE CD OR DVD DRIVE PRESARIO NOTEBOOK BEYOND SETUP GUIDE 1800 SERIES 5. When prompted, insert the Adaptec Update Diskette if one was provided with the Adaptec Easy CD Creator software. Follow the on-screen instructions to continue the installation. Note: If an Adaptec Update Diskette did not come with the software, click Skip and follow the on-screen instructions to continue installation. 6. When the installation is complete, click Finish. Take Two Take Two is used to back up the contents of your hard disk to a single or multiple CDs. After your data is backed up to CD, you can easily restore all selected files. To install Take Two, complete the following steps: 1. From the Adaptec Installation dialogue box, click Take Two and follow the on-screen installation instructions. 2. When prompted, select a location on the hard disk to store the Take Two program, or accept the recommended location, and then click Next. 3. When prompted, select a folder where the program icons will be placed. Click Next to continue installation. 4. When prompted, insert the Adaptec Update Diskette if one was provided with the Adaptec Easy CD Creator software. Follow the on-screen instructions to continue the installation. Note: If an Adaptec Update Diskette did not come with the software, click Skip and follow the on-screen instructions to continue installation. 5. When setup is complete, click OK. PRESARIO NOTEBOOK BEYOND SETUP GUIDE 1800 SERIES USING THE CD OR DVD DRIVE 5-17 Using Adaptec Easy CD Creator 4 After installation of Adaptec Easy CD Creator 4, you will be prompted to restart your Notebook. You must restart your Notebook before you can begin using Adaptec Easy CD Creator 4. When you start or restart your Notebook, Adaptec Easy CD Creator 4 prompts you with a Web-CheckUP option. Web-CheckUP connects to the Adaptec Web site on the Internet and searches for Adaptec software programs that can be updated on your Notebook. To access the main menu of the Adaptec Easy CD Creator 4, from the Windows taskbar click Start, point to Programs, then to Adaptec Easy CD Creator 4, and then click Create CD. The Adaptec main menu is displayed. Creating Audio CDs An Audio CD is used only for playing music, not for data storage. The Adaptec Easy CD Creator 4 allows you to record CDs and audio files. You can even create your own “greatest hits” Audio CD that contains tracks from multiple artists. To create an Audio CD, complete the following steps: If you are using the Easy CD Creator Standard Edition and would like to upgrade to the Deluxe Edition, contact your nearest software retailer or run Web-CheckUP. 1. On the Windows taskbar, click Start, point to Programs, Adaptec Easy CD Creator 4, and then click Create CD. 2. On the Welcome screen, click Audio. After the Audio screen is displayed, click Audio CD. The Easy CD Creator window opens. 3. To open an Audio CD layout click the small arrow next to the New button on the toolbar. Click Audio CD from the drop-down list and an Audio CD Layout opens. 5-18 USING THE CD OR DVD DRIVE PRESARIO NOTEBOOK BEYOND SETUP GUIDE 1800 SERIES You can record any combination of tracks, WAV, or MP3 files to an Audio CD. If information about the music CD is located on your hard disk, the CD title, artist name, and the name of each track are displayed. If this information does not appear and you have access to the Internet, click the CDDB™ Internet button on the toolbar to download the information from the online CDDB Music Service. To test the drive performance, Compaq recommends using the Emulate Only option (located in the Options window) when recording a new CD-R or using your Notebook for the first time. This allows you to perform a test run before actually recording. 4. If you are recording tracks from an existing music CD, insert the music CD into your CD drive and continue with the next step. To begin recording WAV or MP3 files, continue with the next step. 5. In the left pane of the Explorer section, select the CD-ROM drive containing the music CD; a list of the tracks on the CD appears to the right. If you are recording WAV or MP3 files, select the folder where your files are located. 6. Select the track, WAV, or MP3 file you want to record in the right pane of the Explorer section, and then click Add on the toolbar. Repeat until the Audio CD Layout contains all of the tracks and files that you want to record. 7. Click Create CD. The CD Creation Process dialogue box opens. 8. When prompted, remove your Audio CD and insert a blank CD into your CD-Recorder and click OK to start recording. 9. When the CD Creation Process is complete, click OK. Note: If you have tracks on other music CDs that you want to record, repeat steps 3–5 for each music CD from which you want to record. During the actual recording process, Easy CD Creator prompts you to reinsert the appropriate music CD for the track being recorded. Creating Data CDs A Data CD is ideal for backing up important files such as personal documents and files on your hard disk. The Data CD is designed for data storage only, and cannot be played on your home stereo like an Audio CD. To create a Data CD, complete the following steps: 1. On the Windows taskbar, click Start, point to Programs, Adaptec Easy Creator 4, and then click Create CD. When you have finalised a CD-R disc, no additional tracks can be added to the disc. PRESARIO NOTEBOOK BEYOND SETUP GUIDE 1800 SERIES 2. On the Welcome screen, click Data. The Data screen opens. 3. On the Data screen, click Data CD. The Easy CD Creator window opens. USING THE CD OR DVD DRIVE 5-19 4. To open a Data CD Layout, click the small arrow next to the New button on the toolbar. Select Data CD from the dropdown list and a Data CD Layout opens. 5. Insert a blank CD into your CD-Recorder. 6. In the Explorer section, select the data file or folder you want to record, and then click Add on the toolbar. Repeat until the Data CD Layout contains all the files and folders you want to record. 7. Click Create CD. The CD Creation Setup dialogue box opens. 8. Click OK to start recording. DirectCD DirectCD allows you to write files directly onto CD-Recordable or CD-ReWritable CDs. To begin using DirectCD, complete the following steps: 1. On the Windows taskbar, click Start, point to Programs, Adaptec Easy CD Creator 4, and then click Create CD. 2. On the Welcome screen, click Data. The Data screen opens. 3. On the Data screen, click DirectCD. The Adaptec DirectCD Wizard! dialogue box opens. 4. Follow the on-screen instructions to begin writing the CD. Jewel Case Creator The Jewel Case Creator allows you to create custom jewel case covers, inserts, and CD labels. To start the Jewel Case Creator, double-click the Jewel Case Creator button on the Adaptec CD Creator Menu. For detailed information on how to create customised products, refer to the Online Help Manual. 5-20 USING THE CD OR DVD DRIVE PRESARIO NOTEBOOK BEYOND SETUP GUIDE 1800 SERIES CD Copier The CD Copier is used to back up almost any kind of CD. Easy CD Creator is designed to assist you in reproducing material for which you own the copyright or have obtained permission to copy from the copyright owner. Unless you own the copyright or have permission to copy from the copyright owner, you may be violating copyright law and be subject to payment of damages and other remedies. If you are uncertain about your rights, contact your legal advisor. To make a backup copy of a CD, complete the following steps: 1. On the Windows taskbar click Start, point to Programs. 2. Point to Adaptec Easy CD Creator 4 on the Programs menu, point to Features. 3. Click CD Copier. The CD Copier window opens. 4. Click the Source and Destination tab. 5. Under Copy from, select the drive containing the original CD. 6. Under Record to, select the drive containing the blank CD. This is the CD-recordable drive. 7. Click Copy to begin recording a copy of your CD. Preventing Buffer Underrun Errors In extreme cases, some errors may render your disc unusable. If this occurs, it may be necessary to start again with a new disc and then properly dispose of the old disc. A Buffer Underrun is an error that occurs when the flow of data to the CD-Recorder is interrupted. Once a buffer underrun occurs, the CD creation process is halted. The following are suggestions for preventing buffer underruns: • Close other programs and disable tasks or applications running in the background such as screen savers and virus software. • Ensure that the temporary files created during CD recording are created on the local hard disk, not in a directory on a network drive. Note: To change the location where the temporary files are stored, click Tools, select Options from the menu, and then follow the on-screen instructions. PRESARIO NOTEBOOK BEYOND SETUP GUIDE 1800 SERIES USING THE CD OR DVD DRIVE 5-21 • Open the Systems Properties dialogue box by clicking System from the Control Panel. Click the Device Manager tab and ensure that Allow Disconnect is set for both the CD-Recorder and the hard disk. • Do not attempt to record CDs from files on a network. If the desired files are on a network, copy them to your local hard disk before recording the CD. Note: A buffer underrun error can occur on single or dual optical drive systems (CD-ROM, CD-RW, or DVD-ROM drive). Accessing Easy CD Creator 4 Users Information The Easy CD Creator 4 software included with your Notebook comes with step-by-step instructions, the Quick Reference Guide provided by Adobe Acrobat 4.0, and a complete user’s manual called Online Help to answer any questions you might have about the functionality of the software with your CD-RW Drive. To access Online Help while using the Audio or Data CD Creator, click Help from the toolbar, then select Contents and Index from the drop-down list. To use the Adobe Acrobat Quick Reference Guide and glossary of terms, click Start, then Programs, then Adaptec Easy CD Creator, then click Quick Reference Guide. 5-22 USING THE CD OR DVD DRIVE PRESARIO NOTEBOOK BEYOND SETUP GUIDE 1800 SERIES Let’s Go Surfing Basic Concepts, 6-2 Browsers, 6-8 Search Engines, 6-10 PRESARIO NOTEBOOK BEYOND SETUP GUIDE 1800 SERIES “Surfing the Web” can be a wonderful way to use and enjoy your Notebook. Surfing offers new opportunities daily for shopping, education, news, entertainment, research, and education. Possibilities abound on the Web. This chapter helps you discover them. When you do, you will not be alone. It is estimated that thousands of new users connect to the Web every day for the first time. LET’S GO SURFING 6-1 Basic Concepts This section helps you answer these questions: • What is the Internet? • What is the World Wide Web? The World Wide Web is part of the Internet. Several decades ago, the U.S. military began developing the Internet. It wasn’t long before academic and industrial researchers began using it to share data. Vast numbers of new computer users stimulated Internet growth over the last ten years. Millions of homes and businesses now use their computers to communicate through this system. Welcome to the World Wide Web. Whatever other uses you have for your computer, this one can be the most interesting. What is the Internet? The Internet is changing communication and commerce around the world. The Internet is a vast communications system for computers. Cables, phone lines, and radios connect huge numbers of computers around the world. These connections allow many simultaneous public and private communications. The Internet does not have an owner or manager. It is a cooperative effort between individuals, private organisations, universities, businesses, and governments. 6-2 LET’S GO SURFING PRESARIO NOTEBOOK BEYOND SETUP GUIDE 1800 SERIES Let’s take a brief look at how the Internet is put together. A network is the basic building block of the Internet. Two computers create a small network when they are linked to each other. Computers in a network can share information as well as devices such as printers and scanners. A network can link multiple computers. For example, a large company could link all its computers within a single network. On a higher level, networks can link to other networks. In fact, huge numbers of networks are linked worldwide to form the Internet. Together they provide seemingly endless amounts of information for topics such as: PRESARIO NOTEBOOK BEYOND SETUP GUIDE 1800 SERIES • Entertainment • Commerce • Research • Education LET’S GO SURFING 6-3 What is the World Wide Web? Inside the Internet is the World Wide Web (www). Although the World Wide Web is the part of the Internet that you are most likely to be interested in, it is only one small part of the whole system. The complete Internet offers a number of tools, including e-mail, the World Wide Web, and other communication services. Here is some basic information about aspects of the Web that will help you understand this new world. World Wide Web The World Wide Web is a popular system that is set up within the Internet specifically for publishing and accessing information. It is also known as the Web. The letters www stand for World Wide Web. Web Sites and Web Pages World Wide Web information is grouped in Web sites that are home to one or more Web pages. Web pages can provide text, graphics, animation, audio, and video to your computer. Hyperlinks Hyperlinks make it easy to jump from place to place on the World Wide Web. 6-4 LET’S GO SURFING Many Web pages include hyperlinks, also known as links, that transport your search at the click of a button. A link can be to another place on the same Web page or to another computer halfway around the world. PRESARIO NOTEBOOK BEYOND SETUP GUIDE 1800 SERIES Hyperlinks often appear in Web pages as coloured, underlined text. You will also find hyperlinks hidden in buttons, pictures, and drawings on a Web page. When you pass your cursor over a hidden hyperlink, the normal cursor arrow turns into a hand with the thumb and first finger extended. Click on a hyperlink and discover where it sends you. These links can move you from page to page, site to site, Web server to Web server – all over the world! Web Servers Information on the World Wide Web is stored on computers called Web servers. Web servers are like electronic libraries. Web servers are scattered throughout the world. Surfing the Web Using your computer to tour the World Wide Web is called surfing the Web. Sometimes you’ll just be looking to see what’s there. At other times, you’ll be looking for something specific. Internet Address (URL) A Web site has an Internet address that tells your computer how to find it. An Internet address is known as a Uniform Resource Locator, or URL. It identifies the location of a Web site just as your home address identifies where you live. PRESARIO NOTEBOOK BEYOND SETUP GUIDE 1800 SERIES LET’S GO SURFING 6-5 Internet Service Provider (ISP) Your Presario Notebook provides you with a selection of Internet Service Providers (ISPs). A company that provides access to the Internet is an Internet Service Provider (ISP). Your computer’s connection to an ISP’s computer is your entry point to the Web. You must establish an account with the ISP of your choice. Modem High-speed Internet access may be available in your area. Check with your ISP or local telephone company for more information. A computer’s physical connection to the Internet is typically through a telephone line. Your computer contains hardware called a modem that sends and receives information over a standard telephone line. There are on-screen instructions you must follow when you set up your modem. Search Engine Your Presario Notebook has a built-in Ethernet connection which is the most common way to connect to high-speed Internet access. A search engine is a program used on Web sites that allows you to search the Internet for keywords you enter. The search engine generates a list of Web pages that contain your keywords. Once you access the Internet, you can use a search engine to begin searching for information. You can choose from many search engines on the Internet. To access one of these search engines, type in a URL, such as www.compaq.com. URLs take you to the requested site. The “Search Engines” section later in this chapter for detailed information about searching on the Internet. 6-6 LET’S GO SURFING PRESARIO NOTEBOOK BEYOND SETUP GUIDE 1800 SERIES E-mail Check with your Internet Service Provider for details about the e-mail service they provide. PRESARIO NOTEBOOK BEYOND SETUP GUIDE 1800 SERIES A form of mail delivered over the Internet is e-mail. It is like a paperless letter that goes directly from one computer to another. To get e-mail, both the sender and recipient must have e-mail accounts. Your ISP is one possible provider of an e-mail account. LET’S GO SURFING 6-7 Browsers What is a Browser? This section covers the following: A Web browser is a program that allows you to see Web sites on the Internet. • What is a Browser? Your computer’s browser performs four basic tasks. When you provide a Web site’s URL, your browser will: • Using Microsoft Internet Explorer • Contact the Web site. • Gather information from the Web site. • Display information from the Web site on your computer screen. • File, print, or dispose of information from the Web site as you choose. Learn to use the features in your browser. It makes your Internet experience much more enjoyable. Using Microsoft Internet Explorer Your Internet PC comes with a browser called Microsoft Internet Explorer. It is the most widely used browser in the world. Your Notebook comes with Microsoft Internet Explorer™ pre-installed. When you use your browser, the first page it displays is the default home page. You can customise or change this page. You can also customise other browser features. Look in the browser Help files for instructions on customising your browser. Note: To use Microsoft Internet Explorer, you must have an active account with an ISP. You must also have a physical connection, such as a phone line, to your ISP’s computer. America Online (AOL) users must start AOL and log on before starting Internet Explorer. 6-8 LET’S GO SURFING PRESARIO NOTEBOOK BEYOND SETUP GUIDE 1800 SERIES To begin surfing the Internet with Microsoft Internet Explorer, complete either of the following: Microsoft Internet Explorer has an extensive Help section that includes a tour of its major features. • From the Windows desktop, double-click the Internet Explorer icon. • From the Windows taskbar, click the Start button, point to Programs, and then click the Internet Explorer icon. An alternative method uses the Internet Zone buttons on your keyboard. To connect to the Web with this procedure, simply press one of the Internet Zone buttons. Note: The Internet Zone buttons on your computer may differ from those shown here. “Internet Zone Buttons” in Chapters 2 and 3 for information about identifying, reprogramming, and disabling the Internet Zone buttons. PRESARIO NOTEBOOK BEYOND SETUP GUIDE 1800 SERIES These buttons give you quick access to the most frequently used Internet activities. They can be programmed to reflect your personal preferences. LET’S GO SURFING 6-9 Search Engines Choosing a Search Engine This section will help you perform the following tasks: Many different search engines exist on their own Web sites. Each one keeps a list, or database, of registered Web sites. The search engine’s master list includes a description and Internet address for each of its registered Web sites. • Choosing a Search Engine • Using a Search Engine • Searching on the Web • Accessing Files from the Internet Some search engines keep general-purpose lists while others limit their lists to a single topic. • An example of a general-purpose search engine is AltaVista™ at www.altavista.com. Some ISPs, such as America Online™, provide their own general-purpose search engine. • An example of a specialised search engine would be one that only lists Web sites about one specific topic. You can locate search engines in several ways: Each search engine has a different look and feel. Try various search engines to see which one you like. 6-10 LET’S GO SURFING • Click your browser’s Search button. • Press the Internet Zone Instant Search button on your keyboard. • Ask a search engine to list other search engines. PRESARIO NOTEBOOK BEYOND SETUP GUIDE 1800 SERIES Using a Search Engine Choose your keywords carefully. Your choice determines the success of your search. Most search engines ask for a keyword. A keyword is a single word or simple phrase that describes your topic. • When entering keywords, you can enter an entire sentence to limit the search to a more specific topic. For example, for information about searching the Internet, enter searching the Internet, instead of Internet. • After you enter a keyword search, the search engine generates a list of hyperlinks to all Web sites that contain your keywords. Click a link to go to a specific Web site. For practice, search for the Compaq Web site: URL means Uniform Resource Locator. A URL is an address for a resource or Web site on the Internet. 1. Connect to the Internet and open your browser. 2. Enter the following URL into the Address box of your Web browser: www.altavista.com. 3. Enter Compaq in the box next to Find this. 4. Click Search. Your browser should display numerous links to different Compaq Web sites. To use a search engine, complete these steps: 1. Choose a keyword that describes your topic. 2. Type that keyword into the search engine. 3. Click the go button (or other button provided) to send your request. Once you have entered a keyword, the search engine will: • Review the descriptions of the Web sites in its records • Create a list of the Web sites that contain your keyword • Display the list on your screen The list the search engine returns to you includes a brief description of each Web site as well as its URL. PRESARIO NOTEBOOK BEYOND SETUP GUIDE 1800 SERIES LET’S GO SURFING 6-11 Searching on the Web You can now begin searching on the Web. Briefly examine the list provided by the search engine. Then, Try various keywords and compare the results. You can also use the same keyword in different search engines. • If you don’t like the list, change the keyword and ask the search engine to generate a new list. • If you see a Web site that looks interesting, click its URL or enter its URL in your browser. After you have chosen and visited a Web site, you can easily return to the search engine. • Use the Back arrow in your browser to return to the list. • Choose another Web site from the list or generate a new list. Your browser keeps a chronological list of the Web sites you visit. The forward arrow and back arrow let you move through that list to revisit Web sites. Check your browser’s Help files for specific information on using your Favourites folder. If you know the URL of the Web site you want to visit, type it directly into the Address box of your Web browser. For example, you can visit the Compaq Web site by typing the following URL into the Address box of your Web browser: www.compaq.com/athome/exploration The URL of a Web site that you want to remember can be placed in your browser’s Favourites folder. Some suggested Web sites are already in that folder. You can open your Favourites folder and easily visit a Web site by clicking on its name. 6-12 LET’S GO SURFING PRESARIO NOTEBOOK BEYOND SETUP GUIDE 1800 SERIES Accessing Files from the Internet Accessing files from the Internet can be as simple as the push of a button. You may want to access files such as software upgrades and patches, videos, music, the latest news, or up-to-date virusdetection files. The “Anti-Virus Software” section of chapter 4 for more information about how to protect your Notebook and your files from viruses. To access a file on the Internet, complete the following: 1. Open your Web browser and enter a Web address or search for the information you need. 2. Once you have located a source for the information, follow the Web site’s directions to view or download the file. In Conclusion The Internet has its own terms and ways of doing things. You learned about many of them in this chapter. Come back to this chapter as often as you need. PRESARIO NOTEBOOK BEYOND SETUP GUIDE 1800 SERIES LET’S GO SURFING 6-13 6-14 LET’S GO SURFING PRESARIO NOTEBOOK BEYOND SETUP GUIDE 1800 SERIES Caring for Your Battery Battery Calibration, 7-4 When you’re on the go, AC wall outlets are not always available and sometimes you’ll want to use battery power. This chapter shows you how to maintain and recharge your battery properly so that your Presario Notebook computer has the power necessary to continue running. After you have read this chapter, you will be able to complete the following tasks: Power Management, 7-9 • Increase the length of battery operating time. • Correct a low-battery condition. • Store your battery • Recycle your battery Battery Care, 7-2 PRESARIO NOTEBOOK BEYOND SETUP GUIDE 1800 SERIES CARING FOR YOUR BATTERY 7-1 Battery Care When AC wall sockets are not available or convenient, the battery becomes the “life-line” of your Notebook. In this section you will become familiar with the following: • Using the Battery • Storing the Battery • Recycling the Battery Using the Battery Your Notebook allows you to use either AC power or battery power. If an AC wall socket is not available, you will want to use battery power. This section of “Caring for Your Battery” will help you: • Determine the amount of remaining battery power • Determine what affects the length of battery operating time Checking Battery Power To determine the amount of remaining battery power, follow these steps: 1. Double-click the Battery Charge icon or the AC power icon located on the right side of the Windows taskbar. If your Notebook contains a lithium-ion battery pack, improper handling of the battery pack may result in fire and chemical burns. Do not disassemble, crush, puncture, short external contacts, dispose of in water or fire, or expose it to temperatures higher than 60° C (140° F). Replace only with the Compaq battery pack specified for your Notebook. 2. Check the lights on your battery or status panel gauge, depending on what type of Notebook you have. Storing the Battery If you will not be using your Notebook for an extended period of time, you must take precautions to ensure that your battery is stored correctly. For safety reasons when operating under AC Power, Compaq recommends that you keep a battery installed. This ensures that you have a charged battery when you need it. 7-2 CARING FOR YOUR BATTERY PRESARIO NOTEBOOK BEYOND SETUP GUIDE 1800 SERIES Refer to the following storage requirements. Temperature plays an important role in recharging your battery. To gain maximum capacity, allow both the battery and your Notebook to cool to 20° C (68°F), which is room temperature, before recharging the battery. You may store your battery within the following temperature range: 0° C to 45° C (32° F to 113° F). To extend its operating life, store the battery in a cool dry place. “Government Approvals” section of the Safety and Comfort Guide for more information on recycling. NiMH Battery – If your Notebook uses a NiMH (nickel-metalhydride) battery and you will not be using your Notebook for a long period of time (more than two weeks): • Use your Notebook until the battery is drained completely. • Remove the battery from your Notebook and store it separately. Li-Ion Battery – If your Notebook uses a Li-Ion (lithium-ion) battery and you will not be using your Notebook for a long period of time (more than two weeks): • Use your Notebook until the battery is drained to 50 percent. • Remove the battery and store it separately. Recycling the Battery In North America, dispose of nickel-metal-hydride or lithium-ion batteries by taking advantage of the Compaq battery recycling program. You will be provided with a postage-paid battery pack envelope pre-addressed to a reclamation facility where the metals are recycled. Do not dispose of batteries with general household waste. Dispose of or recycle them by using a public collection system or returning them to Compaq, your authorised Compaq partners, or their agents. PRESARIO NOTEBOOK BEYOND SETUP GUIDE 1800 SERIES CARING FOR YOUR BATTERY 7-3 Battery Calibration All batteries lose their charge if they have not been used for a long period of time. In this section of “Caring for Your Battery” you will become familiar with the following: • Calibrating the Battery • Maximizing Battery Operating Time • Fixing a Low-Battery Condition Calibrating the Battery You may notice that the battery gauge does not correctly display the battery charge level when you first receive your Notebook, or if you have not used your Notebook for a long period of time. If the battery gauge becomes inaccurate, you must recalibrate your battery. Recalibrating the battery simply means recharging the battery to its maximum capacity and resetting the battery gauge to display the level of charge accurately. To recalibrate the battery, complete the following steps: 1. Plug in the AC adapter: a. Allow the battery to charge until the Battery Charge icon turns off, showing that the battery is fully charged. b. After the battery charge light or the icon turns off, unplug the AC adapter. 2. Turn on or restart your Notebook. Steps 3 to 6 prevent your Notebook from entering Sleep mode. These steps also allow the battery to drain faster. 3. On the Windows taskbar, click Start, point to Settings, and then click Control Panel. 4. Double-click the Power Management icon on the Control Panel. The Power Management Properties dialogue box opens. 7-4 CARING FOR YOUR BATTERY PRESARIO NOTEBOOK BEYOND SETUP GUIDE 1800 SERIES 5. Click the Power Schemes tab. Do not plug in the AC adapter while the battery is draining or you will have to start again with step 1. You can use your Notebook while the battery is draining or charging. 6. From Running on Batteries column: a. In the Turn off Monitor drop-down list, select Never. b. In the Turn off Hard Disk drop-down list, select Never. c. In the System Standby drop-down list, select Never. 7. Click OK to close the Power Management Properties box. 8. Let the battery drain until your Notebook reaches Hibernation and turns off. 9. Plug in the AC adapter. Restart your Notebook. 10. Return to the Power Management Properties dialogue box under Control Panel and re-enter your Power Savings settings to the desired level. The battery is now calibrated. PRESARIO NOTEBOOK BEYOND SETUP GUIDE 1800 SERIES CARING FOR YOUR BATTERY 7-5 Battery Charging Time If you will not be using your Notebook for an extended period of time, Compaq recommends that you unplug the electrical cord from the socket and remove the battery while your Notebook is not in use. Battery charging time will vary based on the initial battery charge, the type of battery, and the activity of your Notebook while charging. Purchasing Spare or Extra Batteries Over time, all batteries lose the ability to operate at full capacity and the battery will have to be replaced. To purchase a new battery, contact your Compaq-authorized dealer or access the Compaq Web site at: www.compaq.com/athome. Maximizing Battery Operating Time The battery operating time depends on your power management settings. Your Notebook components, the options, and the applications that you use also affect the operating time. This section of “Caring for Your Battery” shows you how to increase the length of time you are able to operate under battery power. The display, processor, CD/DVD drive, and hard drive use the most battery power. To maximise the battery operating time, perform one or more of the following actions: The battery will charge whether your Notebook is on or off, and will continue to charge until the battery is fully charged or AC power is disconnected. 7-6 CARING FOR YOUR BATTERY • Reduce display brightness and select a short wait for your screen saver. • Select a screen saver that does not generate a lot of graphics or motion. • Reduce audio volume or use headphones. • Exit modem programs when you are not using them. • Remove PC Cards when you are not using them. • Remove CDs or DVDs when you are not using them. • Use Sleep or Hibernation mode to turn off your Notebook when you are not using it. PRESARIO NOTEBOOK BEYOND SETUP GUIDE 1800 SERIES Fixing a Low-Battery Condition Once your Notebook has entered Hibernation mode, it will not turn on until it is plugged into an AC adapter or the drained battery is replaced with a charged one. A low-battery condition exists when the battery has less than 10 percent of its power remaining. This section of “Caring for Your Battery” will show you how to correct a low-battery condition and what to do if your Notebook loses all battery power. When your Notebook loses all battery power, it begins Hibernation, a process that cannot be interrupted. If Hibernation has begun, you must allow your Notebook to finish saving your information and shut off automatically before trying to correct the low-battery condition. The availability of an AC wall socket will determine which solution you should use to correct a low-battery condition. Use one of the following options: Connect the AC Adapter This solution allows you to continue working without being interrupted and simultaneously charges the drained battery. You don’t have to turn off your Notebook before connecting the AC adapter. Your Notebook automatically switches to AC power once you connect the AC adapter. PRESARIO NOTEBOOK BEYOND SETUP GUIDE 1800 SERIES CARING FOR YOUR BATTERY 7-7 Replace the Drained Battery with a Charged One If you cannot connect the AC adapter but you have a charged battery, you can change to battery power and continue working. To replace the drained battery with a charged one, complete the following steps: 1. Save your work. 2. Turn off your Notebook (or initiate Hibernation). 3. Replace the drained battery with the charged one. 4. Press the Power button to turn on your Notebook. 5. Resume your work. When AC power becomes available, repeat these same steps but insert the drained battery and charge it by plugging in the AC adapter. Suspend Your Work If you cannot plug in the AC adapter and you do not have a charged replacement battery, start Hibernation by pressing the Power button. When a power source (AC or battery) becomes available, press the Power button to turn your Notebook on and resume your work. 7-8 CARING FOR YOUR BATTERY PRESARIO NOTEBOOK BEYOND SETUP GUIDE 1800 SERIES Power Management Saving Energy Congratulations! You are no longer a “new user”. Now you know how to use some of the fun, basic functions of your new Presario Notebook computer, like surfing the Web. Now, it’s time to learn about some advanced features, such as power management, Hibernation and Sleep modes. What is Power Management? This section explains the following: Presario Notebooks have power-saving features that protect your data and conserve battery and monitor life. • Understanding Power Management • Starting and Ending Power Modes • Power Management Settings • Changing Power Management Settings Understanding Power Management Power management lets you reduce your Notebook power consumption. Your Notebook has two power management modes: • Hibernation saves information to the hard drive and then turns off your Notebook. Your Notebook hibernates when the Power button is pressed, when the battery has little power left, or when your Notebook (operating on battery power) is in Sleep mode for more than one hour. • Sleep, also called Standby, puts your Notebook in low-power mode. It is still on, but the display appears blank. < Caution: Although Sleep mode maintains system information and open files, you will lose any unsaved information if you turn off your Notebook before you end the Sleep mode. PRESARIO NOTEBOOK BEYOND SETUP GUIDE 1800 SERIES CARING FOR YOUR BATTERY 7-9 Starting and Ending Power Modes Your Notebook automatically goes into Hibernation if your battery is low or after one hour of Sleep. When it is on AC power, it does not go into Hibernation. Presario Operating System Manual for more information on changing Power Management settings. 7-10 CARING FOR YOUR BATTERY If you want to… Then… Result/Indicators Put your Notebook to sleep manually Press the Fn+F4 keys. Or click the Start button on the Windows Taskbar, Shutdown, then Standby. Moon icon appears on status display. Wake your Notebook from Sleep manually Press any key. Moon icon disappears on status display. Put your Notebook into Hibernation manually Press the Power button once. Or click the Start button, Shutdown, then Hibernate. Power icon does not appear on status display. Wake your Notebook from Hibernation manually Press the Power button once. Power icon appears on status display. PRESARIO NOTEBOOK BEYOND SETUP GUIDE 1800 SERIES Service and Support Preventive Maintenance, 8-2 Maintaining your Notebook by keeping it clean and keeping the vents free from dust promotes greater longevity and higher performance. If Notebook components are not cleaned periodically, the probability of system failure increases. Backup Utilities, 8-5 Hard Disk Errors, 8-6 Hard Disk Space Management, 8-8 System Support, 8-10 The information in this chapter provides helpful instructions for the maintenance and care of your Notebook. PRESARIO NOTEBOOK BEYOND SETUP GUIDE 1800 SERIES SERVICE AND SUPPORT 8-1 Preventive Maintenance This section covers: • Cleaning Your Notebook’s Exterior • Cleaning the Keyboard • Cleaning the Display Screen • Cleaning the TouchPad • Caring for Your Presario Notebook Cleaning Your Notebook’s Exterior < Caution: When you shut down your Notebook, the power turns off. However, some electrical currents may still be flowing through the Notebook. To completely disconnect power from the Notebook, unplug the power and modem cables from the wall sockets and remove the battery. Using a damp, lint-free cloth, clean the keyboard, the Notebook’s exterior, and other external parts on your Notebook. < Caution: Do not use household cleaning solvents because they will damage the finish on your Notebook. Cleaning the Keyboard You should clean the keyboard periodically to rid it of dust, lint, and any other foreign particles that may become trapped beneath the keys. Use a compressed can of air with a straw extension attached to blow air in and around the keys. Cleaning the keyboard prevents keys from sticking and jamming. It also makes typing a more pleasant experience. < Caution: Do not use liquids of any kind on the keyboard, as they may permanently damage your keyboard. < Caution: Do not use a regular vacuum cleaner for cleaning the keyboard because you may deposit normal household debris on the surfaces rather than remove it. 8-2 SERVICE AND SUPPORT PRESARIO NOTEBOOK BEYOND SETUP GUIDE 1800 SERIES Cleaning the Display Screen Foam swabs or cosmetic applicators are preferred to cotton swabs because cotton can add rather than remove lint. The surface of your display screen may look fuzzy or smudged. You can use a soft, damp, lint-free cloth to wipe the screen clean. If the display screen requires any additional cleaning, use an antistatic screen cleaner or pre-moistened antistatic wipes. < Caution: Never spray water or any other cleaning fluids or chemicals directly on the screen. You may permanently damage your Notebook. Give your Presario Notebook a safe home. If your Notebook is consistently exposed to direct sunlight, consider moving it. The heat from the sun shining on the display screen can reduce its performance and cause glare. Always disconnect the power from your Notebook and disconnect any other peripherals before attempting to clean your Notebook or any of its components. PRESARIO NOTEBOOK BEYOND SETUP GUIDE 1800 SERIES Cleaning the TouchPad Grease and dirt on the TouchPad can cause your cursor to jump around on the display screen. To avoid this, periodically clean the TouchPad with a damp cloth. Remember, before using your Notebook, always wash your hands. SERVICE AND SUPPORT 8-3 Caring for Your Presario Notebook Your Notebook is cooled by air that is drawn in through the vents and blown out through the exhaust fan. It is important to keep the vents on the chassis free of dust and debris. Brush any dust away from the vents with a damp cloth but do not attempt to dismantle the Notebook to clean dust from the inside of the Notebook. If you dismantle your Notebook, you may permanently damage the components on your Notebook. Your Presario Internet Notebook is designed as a durable product. However, when you transport it, we recommend that you put it in a portable notebook carrying case. To enhance the life of your system, follow these Do’s and Don’ts. Do’s • Carry and store your Notebook in a portable notebook carrying case. • Keep diskettes and modular disk drives away from magnetic fields. Magnetic fields can erase data on your diskettes and your hard drives. • Keep your Notebook away from extreme temperatures (for example, in parked cars, near heaters, or near open windows). Extreme temperatures can damage your Notebook or cause it to perform poorly. Don’ts 8-4 SERVICE AND SUPPORT • Bump or drop your Notebook. • Put objects on top of it. Even if your Notebook is stored in a durable carrying case, it is not made to support extra weight. • Leave the CD/DVD ROM door open when it is not in use. It can get damaged. • Handle liquids around your Notebook. Exposure to almost any liquid can result in expensive repairs that are not covered under your warranty. • Expose your Notebook to dusty or dirty environments. Dust and dirt can clog internal components and mechanisms. PRESARIO NOTEBOOK BEYOND SETUP GUIDE 1800 SERIES Backup Utilities Using Backup Devices To retrieve files that may have been lost or damaged, you should back up your files regularly to diskettes or other backup media. You can back up all the files on your Notebook or you can select specific files and folders. Use diskettes to do a partial backup of selected files or folders. Use backup devices such as tape drives or other high-capacity backup devices to do a complete hard-drive backup. PRESARIO NOTEBOOK BEYOND SETUP GUIDE 1800 SERIES SERVICE AND SUPPORT 8-5 Hard Disk Errors This section covers: Using ScanDisk The ScanDisk utility examines the hard drive for surface errors and file and folder problems. ScanDisk corrects these problems so that Windows and other programs run efficiently. • Using ScanDisk • Using Disk Cleanup Use ScanDisk from once a week to once a month, depending on how often you use your Notebook. Also use ScanDisk if you encounter hard drive problems. • Deleting Stored Files To run ScanDisk, complete the following steps: • Defragmenting Your Hard Disk 1. Click Start, Programs, and then Accessories. 2. Click System Tools, and then ScanDisk. 3. Select the drive(s) you want to check for errors. In the ScanDisk dialogue box, you can select the option “Automatically fix errors”. You can also optimise your disk space with other options. For detailed information, see the Presario Notebook Operating System Manual included with your new Notebook. Compaq recommends using ScanDisk, using Disk Cleanup, and Defragmenting your hard drive at least once a week to optimise the performance of your Notebook. 8-6 SERVICE AND SUPPORT 4. Select the type of test you want to run. 5. Click Start to begin scanning your hard drive for errors. 6. Click Close when finished. Using Disk Cleanup Optimize your system by using the Disk Cleanup maintenance feature offered in Microsoft Windows. When you use the Disk Cleanup tool, you can free hard disk space on your Notebook by: • Deleting temporary Internet files • Deleting downloaded program files • Emptying the Recycle Bin • Deleting files from your temporary folder • Deleting files created by other Windows tools • Removing optional Windows components not in use • Removing installed programs that you do not use • Converting your hard disk to the FAT32 file system PRESARIO NOTEBOOK BEYOND SETUP GUIDE 1800 SERIES Deleting Stored Files To free hard disk space, remove unused files stored on your hard disk by completing these steps. 1. Double-click the My Computer icon on your Windows desktop. 2. Right-click the disk that you want to free space on. 3. Click Properties, then click Disk Cleanup on the General tab. 4. Select the files you want to remove by clicking the adjacent check boxes. 5. Click OK to confirm your request, and then click OK to start the deletion process. Defragmenting Your Hard Disk The Disk Defragmenter utility rearranges files and unused space on your hard disk so that programs can run faster. Defragmenting your Notebook on a regular basis optimises the speed of your Notebook. < Caution: Plug your Notebook into AC Power before defragmenting the hard drive. < Caution: Do not turn off the Notebook during the defragmentation process. To defragment your hard drive, complete the following steps: 1. Click Start, Programs, and then Accessories. 2. Click System Tools, then Disk Defragmenter. A dialogue box prompting you to select the drive you want to defragment is displayed. 3. Select the drive you wish to defragment. 4. Click OK to begin defragmenting your selected hard drive. PRESARIO NOTEBOOK BEYOND SETUP GUIDE 1800 SERIES SERVICE AND SUPPORT 8-7 Hard Disk Space Management Checking the Hard Disk Space In Windows, you can see a chart of the available hard drive space. To check your hard drive space, complete the following steps: This section covers: • Checking the Hard Disk Space • Deleting Unnecessary Files • Using the Recycle Bin • Double-click the My Computer icon. The My Computer window is displayed. • Right-click the hard drive where you want to check available file space, then select Properties. The System Properties dialogue box displays and shows the free and used space on the drive. Deleting Unnecessary Files By deleting unnecessary files from the hard drive, you free drive space and help improve your Notebook’s performance. Use the Windows Disk Cleanup utility to delete temporary Windows files, temporary Internet files, empty the Recycle Bin, and delete unneeded electronic mail files. < Caution: If you do not intend to delete files that are selected for deletion, cancel the request by clicking No when prompted. To use Windows Disk Cleanup, complete the following steps: 1. Click Start, then select Programs, Accessories, System Tools, then Disk Cleanup. The Select Drive dialogue box is displayed. 2. Select the drive you want to clean up and click OK. The Disk Cleanup dialogue box is displayed. 3. Click the check box beside each file type you want to delete. For more information about each file type you can delete, read the descriptions in the Disk Cleanup dialogue box. 4. Click OK, then click Yes to confirm. The selected files are deleted. 8-8 SERVICE AND SUPPORT PRESARIO NOTEBOOK BEYOND SETUP GUIDE 1800 SERIES Using the Recycle Bin You can also double-click on the Recycle Bin K icon and open the folder to select items that you wish to keep. When you delete files from your Notebook, they are not completely eliminated from your hard drive. They are temporarily stored in a system folder referred to as the Recycle Bin. You can recover these files if necessary. To delete these files, follow this process: 1. On your desktop, right-click the Recycle Bin K icon. 2. Click the Empty Recycle Bin option and the Confirm File Delete dialogue box is displayed. 3. Click Yes to confirm the deletion. If program files are stored in the Recycle Bin folder, the your Notebook identifies them and prompts you to verify your intention to delete these files. PRESARIO NOTEBOOK BEYOND SETUP GUIDE 1800 SERIES SERVICE AND SUPPORT 8-9 System Support Compaq Diagnostics (available on select models) This section covers: • Compaq Diagnostics • System Record • Compaq Service Connection • Internet Support Compaq Diagnostics provides an easy way to perform system checks and diagnose problems. When you double-click the Compaq Diagnostics icon located in the Compaq Support folder on the Windows desktop, a progress bar is displayed while the application analyses your Presario Notebook for information about its components. After approximately one minute, a Summary window with the component information is displayed. A row of icons is located at the top of the window. Clicking these icons provides information about the components being tested. Refer to the following table for descriptions of the tabs. You can select Quick or Complete as a starting point for a Custom test. If you select Interactive mode, stay with your Notebook for the interactive test portions. Tab Description Overview Contains information about your Notebook Test Selects the devices you want tested Status Shows progress of tests and faults detected Log Shows a record of all device tests and detailed results Error Reports details of errors detected Types of Tests You may conduct a Quick, Complete, or Custom test. If you choose the Quick test, it can be run in either the interactive or unattended mode. Complete or Custom tests are completed only in the Interactive mode, since they test the audio and video components of your Presario Notebook. You must be present to confirm the test results. Complete testing takes approximately 10 minutes. 8-10 SERVICE AND SUPPORT PRESARIO NOTEBOOK BEYOND SETUP GUIDE 1800 SERIES The Test tab has the following main regions: Types of Test, Test mode, an Information Window, and a Component List (under the Type of Test box). The Component List resembles Windows Explorer: Click the + to open a component folder, then the component for information about it. The information window may show further tests that can be performed on certain components. You can request any or all of the subtests. Testing Equipment To run a test, complete the following steps: 1. Click the Test tab. 2. Choose the type of test: Quick, Complete, or Custom. In Custom, you will need to check the boxes in the Component List for each test you want. 3. Select Interactive mode or Unattended mode. 4. Click the Begin Test button at the bottom of the window. The Status tab automatically replaces the Test tab on your window. You can follow the progress of individual tests on this window. When the tests are complete, the progress bar in the Status window is green if the test is successful and red if the test fails. The lower part of the Status tab provides details of the tests that are completed. The Long tab lists all the tests and also provides information about the number of times each test was run, the time taken for the test, and the number of errors detected. You can save this information by clicking the Save button at the bottom of the window. The Error tab provides details about the errors detected, including error codes. These error codes reveal useful information that a Compaq technician uses to advise you on how to correct problems with your Notebook. PRESARIO NOTEBOOK BEYOND SETUP GUIDE 1800 SERIES SERVICE AND SUPPORT 8-11 System Record (available on select models) System Record reports all of the devices that came with your Notebook, as well as all the devices you have added or changed since you purchased your Notebook. System Record highlights these changes in red. This allows you to isolate and diagnose possible problems with your Notebook. To access System Record, complete the following steps: 1. From the Windows desktop, double-click the Compaq Support icon. 2. Double-click the System Record ¢ icon. The System Record tab displays the Base.log, which displays all the devices that came with your Notebook, and the Now.log, which displays all the devices you have added or changed. The changes you have made to your Notebook are highlighted in red. For example, if your Notebook came with 64 megabytes (MB) of memory and you upgrade to 96 MB of memory, your Base.log displays 64 MB of memory and the Now.log displays 96 MB. The memory lines in the Now.log are noted in red lettering, which indicates a change made to your Notebook’s original amount of memory. 8-12 SERVICE AND SUPPORT PRESARIO NOTEBOOK BEYOND SETUP GUIDE 1800 SERIES Compaq Service Connection (available on select models) If the Service Connection icon is visible in the Windows taskbar, the service is already active. Turning Compaq Service Connection On and Off If you wish to turn on the Compaq Service Connection manually, complete the following steps: 1. Double-click the Compaq Support icon in the Windows desktop. 2. Double-click the Service Connection icon. Note: If the Service Connection icon is visible on the Windows taskbar, the service is already active. The Compaq Service Connection remains active and is ready to perform updates when you log on to the Internet. To turn off the Compaq Service Connection, complete the following steps: 1. Right-click the Service Connection icon on the Windows taskbar. 2. Select Shutdown Compaq Service Connection. How Does It Work? The Compaq Service Connection software operates in the background while you are performing other tasks on your Notebook. You will only be aware that it is working when a Notice is displayed. If you are using your modem when the Compaq Service Connection software initiates an update, it waits until the modem is idle before downloading any information. You are not interrupted while using your Web browser or e-mail programs. PRESARIO NOTEBOOK BEYOND SETUP GUIDE 1800 SERIES SERVICE AND SUPPORT 8-13 When a Notice is displayed, usually as a rotating , complete the following steps to obtain the update: 1. Double-click the Notice to reveal the update identification. 2. Install, postpone, or delete the download by clicking the appropriate button. • If you ignore the Notice, it disappears after a minute or two. However, the update is still available for you to download at any time during the next 10 days. • If you have not downloaded the update within 10 days, it will be automatically cancelled. To view the updates you have downloaded and the updates that are still available, double-click the Compaq Support icon on the Windows desktop, then double-click the Service Connection icon. A list of updates is displayed in the window. The updates that have not yet been accepted are highlighted and bolded. Privacy and Data Security Compaq Service Connection is committed to providing you with beneficial software updates and information. To provide you with these updates and information, non-personal information limited to your Notebook model number, serial number, and software ID files is communicated to the Compaq server. Files sent to your Presario Notebook are protected by a personalised security number, similar to a Personal Identification Number (PIN), to ensure that you receive the correct information. Compaq Service Connection does not access, share, or send any personal information, files, or data on your Notebook over the Internet. If you no longer wish to receive updates from the Compaq Service Connection, you can turn it off at any time. 8-14 SERVICE AND SUPPORT PRESARIO NOTEBOOK BEYOND SETUP GUIDE 1800 SERIES Internet Support You can also access Internet Support through the Instant Answer button (available on select models) on your keyboard. The Internet Support icon allows you to access the Compaq Service and Support Web page for your country. The Compaq Service and Support Web page provides you with tools and information to help make using your Compaq Presario easier than ever. To access the Compaq Service and Support Web page, complete the following steps: 1. Make sure your Notebook is connected to the Internet. 2. From the Windows desktop, double-click the Compaq Support icon. 3. Double-click the Internet Support icon. Icons representing flags of various countries are displayed in a window. 4. Click the icon that represents your country’s flag. You will be connected to your country’s specific Service and Support Web page. PRESARIO NOTEBOOK BEYOND SETUP GUIDE 1800 SERIES SERVICE AND SUPPORT 8-15 8-16 SERVICE AND SUPPORT PRESARIO NOTEBOOK BEYOND SETUP GUIDE 1800 SERIES Solutions Basic Solutions, 9-2 Frequently Asked Questions, 9-3 Solutions Tables, 9-9 You turn on your Notebook and it won't start. You try to print and nothing happens. You get an error message that prevents you from getting your work done – and there's no one around who knows what to do. Help! In this chapter you’ll learn easy ways to increase computer performance and solve some basic computer problems: • In “Frequently Asked Questions” (FAQs), you’ll find answers to questions such as: Where can I find the specifications for my Compaq Presario Notebook computer? How do I change my Notebook display resolution? What types of upgrades are available for my Notebook? • In “Solutions Tables”, you’ll find common problems described in detail and several solutions to try and fix the problems. If you can’t solve a problem yourself, we’ll show you how to contact Compaq Support for all the help you’ll need. PRESARIO NOTEBOOK BEYOND SETUP GUIDE 1800 SERIES SOLUTIONS 9-1 Basic Solutions Helpful Hints Before you consult our extensive list of common solutions, try these helpful hints. If you still need help, this section tells you how to quickly find the solution. If you encounter minor problems with your Notebook, display, or software, refer to the following list of general suggestions before taking further action: In this section: • Helpful Hints • Finding Solutions Quickly • Ensure that your Notebook is plugged into the AC adapter and that the adapter is plugged into a working electrical socket. • Ensure that your Notebook is turned on and the Power light or icon is lit. • Adjust the brightness and contrast controls of the display. • Remove any diskettes from the diskette drive before turning on your Notebook. Finding Solutions Quickly To help you find a solution quickly, most of the information in this chapter is divided into three columns: 1. Symptom – describes the symptom or warning that indicates a problem. 2. Problem – identifies one or more reasons why the symptom occurred. 3. Solution – describes how you should try to fix the problem. If the listed solution does not fix your problem, try another solution for the symptom or try the solution a second time. If a problem persists and you can’t resolve it, contact a Compaq Authorised Service Provider. Refer to your Warranty Statement for details. 9-2 SOLUTIONS PRESARIO NOTEBOOK BEYOND SETUP GUIDE 1800 SERIES Frequently Asked Questions General Questions Q. Where can I find more information about my Notebook? A. In the printed documentation that came with your Notebook. Also visit the Compaq support Web site at: • General Questions • Display Questions http://www.compaq.com/athome/support/serv_note.html • Questions about Sound Q. What is Microsoft Windows™? • Questions about Films A. Microsoft Windows is an operating system. • Questions about Peripherals Q. What is an operating system? • Questions about Upgrades • Error Messages A. An operating system is software that tells your Notebook what to do. It translates keyboard strokes and mouse movements into a language your Notebook can understand. Your Notebook comes with a Microsoft operating system already installed. Q. What is a computer virus and how can I remove it? For more information, please refer to your Microsoft Windows Operating System Manual. A. A computer virus is a program that can cause damage to your Notebook. Your Notebook usually comes with preinstalled third-party virus scan software to remove computer viruses. However, since new viruses constantly emerge, you should check with your software vendor about software upgrades. These upgrades are usually available on the Internet. Q. I can’t connect to the Internet. What’s the problem? You can refer to other documentation that comes with your Notebook or peripheral devices. Examples include Microsoft Windows manuals, third-party software manuals, and hardware documentation such as printer manuals. A. First, you must have an account with an Internet Service Provider (ISP). Your modem must also be configured correctly, and you must have a cable connecting the modem port to the phone jack. Also ensure that you have an Internet browser installed, such as Microsoft™ Internet Explorer or Netscape Navigator™. Q. The keyboard does not respond when I press any button. What should I do? “Common Tasks” chapter in this guide for more information about anti-virus software. PRESARIO NOTEBOOK BEYOND SETUP GUIDE 1800 SERIES A. Press and hold the Power button to power off your Notebook then restart, or call Compaq customer support for assistance. SOLUTIONS 9-3 Q. Why is my Notebook slow when coming out of Hibernation mode or when not on the network? Presario Notebook Operating System Manual for information on how to create additional hardware profiles. A. If the internal Ethernet hardware (network card) is set up to connect to a network, Windows tries to access the network through the Ethernet hardware. If a connection does not exist, then start-up delays or loss of functionality can occur. One way to overcome these problems is to use the Hardware Profile feature of Windows. This feature allows you to create two different Hardware Profiles that are selectable upon start-up: one with the internal Ethernet hardware enabled, and one with internal Ethernet hardware disabled. Display Questions Q. How can I change the display settings on my Notebook? A. Right-click on the Windows desktop and select Properties. The following dialogue box is displayed: Select the Settings tab and make changes as necessary. Click OK when you finish to apply the settings. 9-4 SOLUTIONS PRESARIO NOTEBOOK BEYOND SETUP GUIDE 1800 SERIES Q. My display (monitor) is blank. What should I do? A. Your Notebook might be in either Sleep (Standby) or Hibernation mode. Try pressing any key to wake your Notebook from Sleep (Standby) mode. If this does not correct the problem, press the Power button once to resume from Hibernation mode. Questions about Sound Q. There is no sound coming from my Notebook. What’s wrong? A. You can control the sound coming from your Notebook speakers by double-clicking the Volume ¶ icon in the taskbar. The Volume Control dialogue box is displayed: Make sure the Mute all box is not checked in the Volume Control Balance panel. PRESARIO NOTEBOOK BEYOND SETUP GUIDE 1800 SERIES SOLUTIONS 9-5 Questions about Films Q. When I play a DVD film on TV-Out, the film shows only on the display panel. What should I do? A. You may need to press the Fn+F3 keys more than once to transfer the image to the TV. “Adjusting Brightness” section in this guide. Q. The DVD film is too dim or too bright. What should I do? A. Adjust the brightness setting and the Advanced Display properties. Questions about Peripherals Q. My Notebook is connected to a printer, but I am unable to print. What’s wrong? A. If the printer is attached directly to your Notebook, make sure that the power cable is plugged into the wall and the printer is turned on. Check to make sure that the connector cable between your Notebook and the printer is properly attached. Also, ensure that you have the correct driver for your printer installed on your Notebook. If you are still have trouble printing, refer to the instructions that came with your specific printer model. “Using Your Notebook” in this guide for more information on charging the battery. 9-6 SOLUTIONS Q. How do I know how much battery power I have? A. See the Battery Status icon on the System tray on the Windows taskbar. PRESARIO NOTEBOOK BEYOND SETUP GUIDE 1800 SERIES Questions about Upgrades Q. Can I download upgrades from the Compaq Internet site? A. Yes. You can download Compaq upgrades, called Softpaqs, such as video drivers, diagnostics, and flash ROM at: http://web14.compaq.com/falco/sp_list.asp Note: You must know your Presario Notebook Model and Serial Numbers (located underneath your Notebook). Q. Where do I get information about memory upgrades? A. See the following site: http://athome.compaq.com Error Messages Error messages are displayed on the screen to alert you when problems occur and when your input is required to resolve a problem. Q. I receive an Out of Memory message while a program is running. What’s wrong? A. Your Notebook operating system resources are low. Close one or more programs to recover resources. Note: You may have to restart your Notebook to completely recover Windows memory. PRESARIO NOTEBOOK BEYOND SETUP GUIDE 1800 SERIES SOLUTIONS 9-7 Q. I receive hard disk error messages. What is wrong? A. A hard disk error message is displayed when part of the hard disk has failed. The hard drive can be restored by using the ScanDisk utility. “Solving Hard Disk Problems” in this chapter for information about the hard disk. To repair the hard disk using the ScanDisk Utility, complete the following steps: 1. Click the Start button, point to Programs, Accessories, System Tools, then click ScanDisk to open the ScanDisk dialogue box. 2. Select the hard disk and any other desired options. 3. Click the Start button to begin the repair process. Q. I receive a non-system disk or disk error message. What is wrong? A. If you have a non-system or disk error message, check the following: • Check the diskette drive to see if you have a diskette in the drive. When drive activity stops, remove the diskette and press the Spacebar to continue the startup process. • If a diskette is not in the drive, the system files have been damaged. To repair the system files, complete the following steps: a. Insert the startup diskette that you have created for your operating system in the diskette drive. b. Press and hold down the Power button until your Notebook shuts down. c. Press the Power button to restart your Notebook. d. At the A:\ prompt, type SYS C: and press the Enter key. The following message is displayed: ‘SYSTEM TRANSFERRED’. This operation restores the system files to your hard disk. e. When the operation is complete, restart your Notebook. 9-8 SOLUTIONS PRESARIO NOTEBOOK BEYOND SETUP GUIDE 1800 SERIES Solutions Tables In this section: • Audio and Video • Battery and Power • Mass Storage • Games and Internet • Keyboard and TouchPad • Memory and PC Card PRESARIO NOTEBOOK BEYOND SETUP GUIDE 1800 SERIES Audio and Video Audio Symptom Problem Solution No sound. Volume has been muted. On the taskbar, click the Volume icon and clear the Mute check box. Your Notebook is in Sleep mode. This is identified when the Sleep icon is displayed. Press any key. Sound is too low. Volume is set too low. Click the Volume icon on the taskbar, and click the Volume slider and drag it up, or press the Volume Up button. Sound is distorted. Volume is set too high. Audio CD or DVD does not play. See CD or DVD in “Fixing Mass Storage Problems” later in this chapter. Volume icon is missing from the Windows taskbar. The Show Volume Control on taskbar option has not been selected. Click the Volume icon on the taskbar, and click the Volume slider and drag it down, or press the Volume Down button. 1. On the taskbar, click the Start button, and point to Settings. 2. Click Control Panel. 3. Double-click Sound and Multimedia. 4. Select Show volume control on taskbar, and click OK. SOLUTIONS 9-9 Video or Display Video is also referred to as the display. Key combinations, such as the example Fn+F8 used in these solutions, mean that you should press and hold down the Fn key, press the F8 key, and then release both keys simultaneously. 9-10 SOLUTIONS Symptom Problem Solution Screen is blank. Screen saver is enabled. Press the Spacebar or click with the TouchPad. Your Notebook is in Sleep mode. This is identified when the Sleep icon is displayed. Press any key. The external monitor display is selected. Press the Fn+F3 keys to switch between the LCD display, external monitor, TV-Out (available on select models), and simultaneous display. Display is too faint. Brightness and contrast controls are not set properly. Display only fills part of the screen. Your resolution settings are not set properly. Press the Fn+F8 keys to turn up the brightness. (On select models, you can adjust the contrast.) 1. On the taskbar, click the Start button and point to Settings. 2. Click Control Panel. 3. Double-click Display. 4. Click the Settings tab. 5. In the Screen area, click the slider and drag it to the desired resolution. 6. Click OK to accept the new settings, then close the Control Panel window. Characters are garbled or the display flashes when your Notebook is connected to an external monitor. The external monitor’s resolution is set too high for your Notebook. Restart your Notebook and reset the Display settings for a lower resolution. Refer to the solution for “Display only fills part of the screen” for more details. PRESARIO NOTEBOOK BEYOND SETUP GUIDE 1800 SERIES Battery and Power Battery Symptom Problem Battery gauge is not accurate. Battery charging indicator does not appear and battery does not charge. Battery charge does not last as long as expected. PRESARIO NOTEBOOK BEYOND SETUP GUIDE 1800 SERIES Solution Calibrate the battery. Refer to “Calibrating the Battery” in this guide for details. Battery needs calibrating. Allow time for the battery to return to room temperature. Battery is at the end of its life. Replace the battery. Refer to “Recycling the Battery” in this guide for battery recycling information. Battery was exposed to temperature extremes. Keep the battery within the recommended temperature ranges. Refer to “Maintaining the Battery” in this guide. Battery is not fully draining. Calibrate the battery. Refer to “Calibrating the Battery” in this guide. Battery was exposed to extreme temperatures. Keep the battery within the recommended temperature ranges. Refer to “Maintaining the Battery” in this guide. Battery has partially self-discharged. Recharge the battery. Power Management is disabled. Reset the power management options. Refer to “Calibrating the Battery” in this guide. SOLUTIONS 9-11 Battery 9-12 SOLUTIONS Symptom Problem Solution (cont’d) Battery charge does not last as long as expected. Battery is at the end of its life. Replace the battery. Refer to “Recycling the Battery” in this guide for battery recycling information. Your Notebook has entered the Low Battery state, but it did not beep. Volume is set too low to hear the warning beep, or a CD is playing and the alarm does not interrupt play to issue a warning beep. Adjust volume if necessary. Your Notebook is beeping and the Low Battery warning appears or the battery gauge is below 10 %. Your Notebook has entered a Low Battery stage. If possible, immediately connect your Notebook to AC power. If connecting to AC power is not possible, you have the following choices: • Save your files and perform a normal Windows shut down. • Initiate Hibernation by pressing the Power button. • Let your Notebook go into Hibernation automatically (if enabled). PRESARIO NOTEBOOK BEYOND SETUP GUIDE 1800 SERIES Power “Error Messages” in this chapter. PRESARIO NOTEBOOK BEYOND SETUP GUIDE 1800 SERIES Symptom Problem Solution You forgot your power-on password. Your Notebook will not start without entering the power-on password. Take your Notebook to your local Compaq Authorised Service Provider. See the Warranty Statement for details. Your Notebook will not turn on. Power button on your Notebook has not been pressed. Press the Power button on your Notebook. Power plug is not properly connected to AC adapter or wall socket. Reconnect the power plug to AC adapter and wall socket. AC adapter is not properly connected to back of your Notebook. Reconnect the AC adapter to the back of your Notebook. Battery is fully discharged or not installed. Connect AC adapter to the back of your Notebook and a wall socket or insert a charged battery. Keyboard controller needs to be reset. 1. Unplug AC adapter from back of your Notebook. 2. Remove the battery and wait 30 seconds. 3. Reinstall AC adapter and battery. Wall socket is bad. Test the socket by connecting a different electrical device to socket. Wrong memory modules were used in upgrade, or memory modules were installed in the wrong location. Contact your Compaq Authorised Service Provider to verify the type of memory modules to use and where to install them. See the Warranty Statement for details. SOLUTIONS 9-13 Power “Error Messages” in this chapter. Symptom Problem Solution Your Notebook is not responding to keyboard or TouchPad. Your Notebook has locked up. Restart your Notebook by pressing CTRL+ALT+DEL keys simultaneously or hold down the Power button until your Notebook turns off. A program you are using is not certified for Windows by Microsoft. Verify program is certified by Microsoft (see program packaging for this information). If program is Microsoft certified then see the next problem. A diskette that does not contain system files needed to start your Notebook is in the diskette drive. When drive activity stops, remove the diskette, and press the Spacebar to continue the startup process. System files may have been damaged. Insert a boot diskette or Windows Startup diskette to restart your Notebook. Insert an emergency diskette that has been created for your operating system in the diskette drive. 1. Restart your Notebook. This task rebuilds the system files on your hard drive. 2. Restart your Notebook. Configuration file may be corrupted. If possible, save all data, close all programs, and restart your Notebook. One of the following messages is displayed: “Operating System Not Found,” or “Nonsystem disk or disk error.” “Illegal Operation has Occurred” error message is displayed. 9-14 SOLUTIONS PRESARIO NOTEBOOK BEYOND SETUP GUIDE 1800 SERIES Mass Storage Mass Storage media include CDs, DVDs, diskettes, and the hard disk. PRESARIO NOTEBOOK BEYOND SETUP GUIDE 1800 SERIES CD or DVD Drive Symptom Problem Solution CD/DVD drive cannot read a disc or takes too long to start. The disc is inserted improperly. Reinsert the CD with the label facing up and verify the disc is securely snapped down on the spindle. The DVD drive takes longer to start because it must determine the type of media being played before it can start. Wait at least 30 seconds to let the DVD drive determine the type of media being played. If disc still does not start, refer to the solution for related problems. The disc is dirty. Clean the disc with a CD cleaning kit available in most computer stores. DVD Player performance is poor when running other programs simultaneously. DVD playback requires large amounts of processing power; therefore, the system cannot process other tasks simultaneously at maximum performance. To provide maximum performance, close all other programs while playing DVD media. It may also be necessary to restart Windows to free all resources. Cannot eject CD or DVD. Power is not on. Manually eject the disc (see “Using Your CD or DVD Drive” in this guide) or turn on your Notebook. Display is corrupted when playing some DVD films. Copyright material at beginning of film causes momentary corruption. Wait a few seconds for video corruption to clear up. If it does not clear up, then stop and restart the DVD film. SOLUTIONS 9-15 Diskette Drive Symptom Problem Solution Not reading drive: “Abort, Retry, Fail?” message appears. A non-formatted diskette is inserted. Format the diskette using the following steps: 1. Double-click the My Computer icon on the desktop. 2. Select the 3 1/2 Floppy (A:) drive. 3. Click File and point to Format. 4. Select the desired options, and click Start to begin formatting the diskette. Diskette is damaged. Replace the diskette with a new one. The diskette is improperly inserted. Remove the diskette and reinsert it as follows: 1. Insert the edge with the sliding cover into the drive facing up. 2. Push the diskette all the way into the drive until the it stops. Diskette is damaged. Replace the diskette with a new one. Diskette is not formatted. Format the diskette by following these steps: 1. From the desktop, double-click the My Computer icon. 2. Select the 3 1/2 Floppy (A:) drive. 3. Click File, and point to Format. 4. Select the desired options, and click Start to begin formatting the diskette. Diskette drive is continually active. Diskette drive cannot read a diskette. 9-16 SOLUTIONS PRESARIO NOTEBOOK BEYOND SETUP GUIDE 1800 SERIES Diskette Drive PRESARIO NOTEBOOK BEYOND SETUP GUIDE 1800 SERIES Symptom Problem Solution (cont’d) Diskette drive cannot read a diskette. The wrong type of diskette is being used. Check the type of drive you have and use the correct diskette type. Diskette drive cannot save information to diskette. Diskette is not formatted. Format the diskette by following these steps: 1. From the desktop, double-click the My Computer icon. 2. Select the 3 1/2 Floppy (A:) drive. 3. Click File and point to Format. 4. Select the desired options, and click Start to begin formatting the diskette. Once the format is complete, you should be able to save your information. Diskette is write-protected. Slide the write-protection tab to the unlocked position on the diskette. Diskette is full or file is too big. Use another diskette or compress the file to reduce the file size. File save command was not properly executed. When saving information to the diskette drive, verify you are using the correct drive. Diskette is damaged. Replace the damaged diskette. SOLUTIONS 9-17 Hard Drive 9-18 SOLUTIONS Symptom Problem Solution Hard drive error message is displayed. Part of the hard drive failed. Insert an emergency diskette that has been created for your operating system in the diskette drive. 1. Restart your Notebook. This operation rebuilds the system files on your hard disk. 2. When the operation is complete, restart your Notebook. For further assistance call the Compaq Customer Support number for your region. “Non-system disk or disk error” message is displayed. A diskette that does not contain system files needed to start your Notebook is in the diskette drive. When drive activity stops, remove the diskette and press the Spacebar to continue the startup process. System files are damaged. Insert a startup diskette that has been created for your operating system in the diskette drive. 1. Restart your Notebook. 2. At the A:\ prompt, type SYS C: and press Enter. The following message is displayed: ‘SYSTEM TRANSFERRED’. This operation restores the system files to your hard disk. 3. Restart your Notebook. PRESARIO NOTEBOOK BEYOND SETUP GUIDE 1800 SERIES Games and Internet Games Symptom Problem Solution Game frequently stops responding or locks up. Minimum hardware or software requirements set by manufacturer are not met. Review the game packaging or call the game’s manufacturer to verify the minimum hardware and software requirements. Game was not set up properly when installed. Reinstall the program, noting any settings and default selections that pertain to your Notebook, and restart the game. Internet PRESARIO NOTEBOOK BEYOND SETUP GUIDE 1800 SERIES Symptom Problem Solution Cannot connect to the Internet. Internet service provider (ISP) account is not set up properly. Verify Internet settings, or contact your Internet service provider (ISP) for assistance. Modem is not set up properly. Reconnect the modem, verifying the telephone line to wall jack connection. Refer to the Compaq Easy Setup poster. Web browser is not set up properly. Verify your web browser is installed and set up to work with your ISP. SOLUTIONS 9-19 Internet Symptom Instant Internet Zone buttons do not respond. 9-20 SOLUTIONS Problem Solution If no dial tone is found, another telephone handset on the same line is not on the receiver. Verify all telephone handsets on the same line are on the receiver. Messages are not cleared from answering service. If you use an answering service that modifies your telephone’s dial tone to inform you of messages, clear all messages and try your call again. ISP connection is not established. Connect to your ISP and retry the Instant Internet Zone buttons. PRESARIO NOTEBOOK BEYOND SETUP GUIDE 1800 SERIES Keyboard and TouchPad The TouchPad is your Notebook’s mouse. Use your finger on the touchpad to direct the cursor across the screen. PRESARIO NOTEBOOK BEYOND SETUP GUIDE 1800 SERIES Keyboard and TouchPad Symptom Problem Solution Keyboard commands or keystrokes are not recognised by your Notebook. Program in use has stopped responding to commands. Turn off your Notebook using the TouchPad. 1. On the taskbar, click the Start button. 2. Click Shut Down… 3. Select the Shut down option, and click OK. 4. After the shutdown is complete, restart your Notebook. If your Notebook does not shut down, press and hold down the Power button until your Notebook turns off. Fn+Num Lk or Shift+Num Lk does not turn the internal NumLock on. The internal keyboard NumLock is disabled when an external PS/2 keyboard or keypad is present. Use keypad on the external keyboard, or unplug the external keyboard to use internal keypad feature. When typing, some of the letter keys return numbers to the screen. The NumLock feature is turned on. Press the Fn or Shift key while pressing the Num Lk key to turn Num Lock off. Cursor jumps to a different location while typing. TouchPad needs to be cleaned. Wipe the TouchPad with a damp cloth and wipe it dry. Cursor does not respond. TouchPad needs to be cleaned. Wipe the TouchPad with a damp cloth and wipe it dry. SOLUTIONS 9-21 Keyboard and TouchPad 9-22 SOLUTIONS Symptom Problem Solution (cont’d) Cursor does not respond. Program in use has stopped responding to commands. Turn off your Notebook using your keyboard. 1. Press the Ctrl and Esc keys simultaneously. 2. From the Windows Start menu, use the arrow keys to select Shut Down… and press the Enter key. 3. Select the Shut down option (you may need to use the arrow keys to select it), and press the Enter key. 4. After the shutdown is complete, restart your Notebook. If your Notebook does not shut down, press and hold down the Power button until your Notebook turns off. TouchPad needs to be cleaned. Wipe the TouchPad with a damp cloth and wipe it dry. PRESARIO NOTEBOOK BEYOND SETUP GUIDE 1800 SERIES Keyboard and TouchPad PRESARIO NOTEBOOK BEYOND SETUP GUIDE 1800 SERIES Symptom Problem Solution (cont’d) Cursor does not respond. The TouchPad sensitivity settings may need adjustment. Restore default TouchPad settings. 1. On the taskbar, click the Start button and point to Settings. 2. Click Control Panel and double-click Mouse. 3. Click the Touch tab and then the Defaults button. 4. Click OK, and close the Control Panel window. TouchPad has been set up to interpret TouchPad taps as clicks, and this setting may need adjustment. Adjust the TouchPad settings. 1. On the taskbar, click the Start button and point to Settings. 2. Click Control Panel, and double-click Mouse. 3. Click the Touch tab, and clear the Tap to click option. 4. To adjust the PalmCheck Settings, click the slider and drag it to the right until the Maximum setting is reached. 5. Click OK, and close the Control Panel window. The PageUp, PageDown, Home, or End keys were accidentally pressed while typing. Avoid pressing these keys when pressing the Backspace or Enter keys. SOLUTIONS 9-23 Memory and PC Card Memory Symptom Problem Solution Insufficient memory message is displayed. All available memory is used by open programs and memory is needed for the desired task. Close one or more programs and retry. If this does not solve the problem, restart Windows to recover additional memory. PC Cards 9-24 SOLUTIONS Symptom Problem Solution Your Notebook does not recognise the PC Card. PC Card is not fully inserted in the slot or is upside down. Remove the card and gently reinsert it. Refer to the manufacturer’s documentation for details. The PC Card device driver is not installed. Install the device driver. Refer to the documentation that came with your PC Card or contact the PC Card manufacturer. PC Card may not be supported by Windows. Review the PC Card packaging to verify the PC Card is compatible or contact the manufacturer directly. PRESARIO NOTEBOOK BEYOND SETUP GUIDE 1800 SERIES GLOSSARY This Glossary defines commonly used terms to help new users understand computer concepts. Some of these terms are used in this guide. 1394 port A new type of connector for plugging in peripherals, such as video cameras, with extremely fast data-transfer rates. The 1394 standard synchronises audio and video files by delivering data at a guaranteed rate – in real time. See peripheral. Acrobat® Reader™ Software created by Adobe Systems that allows you to view an electronic document with the exact layout intended by the author. The Acrobat Reader can be downloaded free of charge from the Adobe Web site. See software. See also PDF. anti-virus software A program that detects and, in many cases, repairs the damage caused by a computer virus. backup Copy of a file that is kept in case the original is lost or damaged. Backups can be kept on the hard disk, a diskette, an LS Compaq drive, or even a CD. bit The smallest possible piece of computer information – a single digit. See digital. boot To start or restart the computer. During the start-up process, information necessary for the computer to operate is loaded into memory. See main memory. browser Software that searches for, displays, and downloads text, graphics, sound, and video from the Internet. Microsoft Internet Explorer and Netscape Navigator are two popular browsers. application Software installed on a computer. See program. audio/video streaming See streaming. PRESARIO NOTEBOOK BEYOND SETUP GUIDE 1800 SERIES GLOSSARY-1 bug A mistake in the design of computer software or hardware. Because of their complexity, many have minor bugs. As soon as the manufacturer becomes aware of the problem, modifications are made to correct it. cable modem A modem that allows you to access the Internet via your cable television provider. Continuously connected to the Internet, it allows high-speed, high-capacity data transfer. CD (compact disc) Media used in a CD-ROM drive. The disc is a circular piece of plastic that stores digital data on one side, using laser technology. bulletin board An electronic notice board on the Internet where people can post notices for others with similar interests. Professional organisations and clubs often have bulletin boards for members to share information and opinions. byte Eight bits of data (eight individual electronic on/off signals, strung together to make a message that the computer can interpret). Most information is organised into bytes. One byte of data is usually required to represent a single character that you can see on the screen (a letter, number, punctuation mark, or other symbol). For example, the byte 01001000 represents the capital letter H. See bit. GLOSSARY-2 CD-ROM A compact disc with read-only data. You cannot erase or record over the data. CD-RW A compact disc with rewritable data. You can write to the disc using a rewritable or recordable CD drive. chat An Internet feature that allows you to exchange typed messages with another person (or a group of people) in real time. A message you type instantly displays on the other person’s computer. click To push down and quickly release either the left or right mouse button. PRESARIO NOTEBOOK BEYOND SETUP GUIDE 1800 SERIES Ctrl+Alt+Delete Pressing and holding down the Ctrl key, then the Alt key, and then the Delete key, simultaneously, to close a program that is locked (not responding). Use Ctrl+Alt+Delete a second time to shut down a computer that is locked. Unsaved data is erased from memory. When the computer restarts, it displays an error message that Windows was not properly shut down, and it scans the hard disk for errors. copies to print (the default is 1). You can change the settings, and you can designate the new settings as the default. defragmenting The rearrangement of files and unused space on your hard disk so programs can run faster. desktop See Windows desktop. dialogue box A small window that requests information from the user before a command can be carried out. cursor The blinking vertical line on the screen that indicates where the next character appears when you type. data Information that can be processed by a computer. See digital. database A collection of similar data that is designed for easy retrieval of information. dedicated line A telephone line that is always connected to the modem (inside the computer) to provide constant access to the Internet. A separate telephone line is used for phone calls. See modem. default The option that the software automatically chooses for you when you don’t indicate a choice yourself. For example, when you print a document, the Print dialogue box asks which pages to print (the default is All) and how many PRESARIO NOTEBOOK BEYOND SETUP GUIDE 1800 SERIES digital A system that uses electronic signals to transfer data in the form of bits. A bit is represented by a single digit. Computers use only two digits – either a 0 or a 1 – in various combinations. See bit and byte. discussion group A group discussion on a topic of mutual interest held on the Internet. Instead of meeting in a classroom, students may meet for group discussions on the Internet. directory See folder. GLOSSARY-3 disk High-capacity storage media, such as the hard disk inside the computer and the removable media used in a Zip drive or Jaz drive. diskette Low-capacity, removable storage media made of flexible plastic film encased in a hard plastic shell. Since the plastic film is flexible, the 3.5-inch diskette is sometimes referred to as a floppy disk. diskette drive The drive that reads and writes to a diskette. double-click To push down and quickly release the left mouse button two times in rapid succession to open an item. download To receive files from another computer on the Internet. drive A device that reads and sometimes writes to storage media. Examples are the CD drive, DVD drive, LS Compaq drive, diskette drive, and hard drive. driver Software that enables the operating system to recognise and operate devices installed in or attached to the computer, such as a printer. All drives that use removable media and all peripheral devices have drivers. You can download updated drivers from the manufacturer’s Web site. See peripheral device. DSL (digital subscriber line) A telephone line that carries both voice and data signals; it allows you to talk on the phone and surf the Internet at the same time. The data part of the line, which is continuously connected to the Internet, allows high-speed, high-capacity data transfer. Your local telephone company provides the necessary equipment – a DSL modem, a network interface card, and a splitter. DSL modem A modem that connects to the Internet using digital subscriber line service through an existing copper telephone line. DVD (digital versatile disc) A CDsized disc that stores full-length films, music videos, and multimedia computer games with three-dimensional graphics. Both single-sided and double-sided discs are available. encrypt To translate data into a secret code. You must have access to a secret key or password to read an encrypted file. See secure Web site. drop-down menu A list of options that drops down when you click a menu on the menu bar or the down arrow on a dialogue box. GLOSSARY-4 PRESARIO NOTEBOOK BEYOND SETUP GUIDE 1800 SERIES Ethernet The most widely-installed local area network technology. An Ethernet LAN typically uses coaxial cable or special upgrades of twisted pair wires. The most commonly installed Ethernet systems provide transmission speed up to 10Mbps are called 10BASE-T. Devices are connected to the cable and compete for access using a Carrier Sense Multiple Access with Collision Detection protocol. Explorer See Microsoft Internet Explorer and Microsoft Windows Explorer. fax modem A modem that allows your computer to transmit and receive faxes. The fax modem can transmit documents to fax machines and other computers with fax modems. It can broadcast a fax to several sites at once. A dual-purpose modem functions as both a regular modem that transmits files as attachments, and a fax modem that transmits printed documents. file extension A dot and two or three letters after a file name that indicate the program in which the file was created. For example, .doc indicates that the file was created in Microsoft Word. floppy disk See diskette. folder Represented by an icon that looks like a yellow manila folder, a folder contains other folders (subfolders) and PRESARIO NOTEBOOK BEYOND SETUP GUIDE 1800 SERIES files. Both MS-DOS and early versions of Microsoft Windows used the term directory (and subdirectories) for folder (and subfolders). game port A connector on the back of the computer for plugging in a joystick. See joystick. GIF (pronounced giff). A file format for graphics displayed on the Internet. They are easily identified by the file extension .gif. See JPEG. graphical interface Communication between a person and a computer by means of images. With a pointing device, such as a mouse, you click an icon to tell the computer what you want. See icon. graphics Pictures or illustrations, including drawings, pie charts, bar graphs, street maps, architectural and engineering designs, fashion designs, musical scores, cartoons, animated images, and photographs. A graphics card enables the monitor to display these items on the screen. See SVGA. GLOSSARY-5 hard disk Internal storage media for permanent storage of system files, software, and data files. The hard disk consists of flat, round platters. Each side of each platter has a head that floats on a thin cushion of air over the surface of the rapidly spinning disk and picks up (reads) magnetically stored data or records (writes) data onto the disk. hard drive The drive that reads and writes to the hard disk. If you have a large hard drive, it may be divided into several partitions. Each partition is designated by a different icon and a drive letter, beginning, with the letter C. Partition C: contains the files the computer uses to start up. The other partitions contain no preinstalled files. hardware The physical components of a computer – the parts you can physically touch. See software. HTML (hypertext markup language) The standard language for documents designed for viewing on the Internet with a browser. Tags, embedded in the documents, mark the location of other electronic files – including text, graphics, audio, and video files. Click on the links to jump from one document to another. Documents formatted for a browser can be identified by the file extension .htm or .html. See hyperlink. GLOSSARY-6 http:// (hypertext transfer protocol) This protocol commands the Web server to locate the Web site you requested and transmit the Web site to your computer. hyperlink The embedded link to another document. When you pass the cursor over a link (usually highlighted text or an image), a small hand with a pointed index finger is displayed. When you click the link, the document to which it points is automatically transferred to your computer – no matter where on the Internet the file is stored. See HTML. icon A small picture that represents a menu command, file, program, tool, or peripheral. interactive A computer program that responds to you as if you were having a conversation. You give instructions; the computer performs an action or requests additional information. Computer games, multimedia, and tutorials are interactive programs. interface A means of communication between two entities. A person and a computer interface through a monitor, keyboard, and mouse. Two computers interface through a network or Internet connection. PRESARIO NOTEBOOK BEYOND SETUP GUIDE 1800 SERIES Internet A worldwide collection of computer networks that are interconnected so that users can share electronic information. files, which store more information per pixel than GIF files, are used for complex, high-resolution images. See GIF. See also pixel. Internet Explorer See Microsoft Internet Explorer. Internet keyboard A keyboard that resembles a typewriter keyboard, but is equipped with special buttons programmed to connect to the Internet. Internet phone A video telephone that allows you to make long-distance calls over the Internet. ISP (Internet service provider) A company that provides access to the Internet. To use the service, you need the service provider’s software, a user-name, a password, and access phone number(s). Through a modem, you can log on to the ISP, surf the World Wide Web, and send and receive e-mail. joystick A lever that moves in all directions to control the movement of a pointer or objects on the screen. It is used for computer games in which you drive, fly, or shoot objects displayed by the monitor. JPEG (pronounced J-peg). A file format for graphics, especially photographs, displayed on the Internet. It is easily identified by the file extension .jpg. JPEG PRESARIO NOTEBOOK BEYOND SETUP GUIDE 1800 SERIES link See hyperlink. left click To push down and quickly release the left mouse button to select an item. log on To gain access to a computer network, or the Internet by entering a user-name and password. See network. main memory Physical memory chips (RAM) inside the computer. Every program you launch and every file you open must be copied from a storage disk, disc, or diskette into main memory. The amount of main memory in your computer determines how many programs you can run and how much data you can process at one time. Memory is measured in megabytes (1 million bytes or characters) of information. Most personal computers come with a minimum of 32 megabytes of main memory – the minimum recommendation for Windows programs. You can insert extra memory (visit the following website for more information www.compaq.com/my presario). See RAM. See also byte. GLOSSARY-7 microprocessor A silicon chip inside your computer that processes the instructions and data from input devices (such as the keyboard and mouse) and communicates them to output devices (such as the monitor, speakers, and printer). Microsoft Internet Explorer A Web browser developed by the Microsoft Corporation. See browser. Microsoft Windows The most popular computer operating system in the world. It is characterised by the use of windows and icons. Each running program and open file has its own window. Instead of memorising commands, you click icons to communicate with the computer. Clicking the minimise button shrinks a program to an icon on the taskbar. Clicking the icon redisplays the program as a window. You can have several windows open at the same time and toggle from one to another by using Alt+Tab. (Press and hold down the Alt key, press the Tab key, and then release both keys. A palette with an icon for each program is displayed. Click the icon for the program you want.) MIDI (musical instrument digital interface) (pronounced middy). An interface that allows the computer to record sounds created by a synthesiser and then manipulate the data to produce new sounds, such as changing the key of a composition. See interface. See also digital. GLOSSARY-8 MIDI connector A connector on the back of the computer for plugging in a synthesiser keyboard. MIDI format A file format used to store electronic music sounds. It can be identified by the file extension .mid. A sound card that supports MIDI files allows the computer to generate the synthesised musical sounds found in games, CD-ROMs, and presentation packages. minimize To shrink a running program window into an icon on the Windows taskbar. Click the icon to restore the program window. See Microsoft Windows. modem A device in the computer that converts data from digital format to analogue format so that it can be transferred through a standard telephone line to another computer. The modem in the receiving computer converts the data back to digital format. See digital. mouse A device that you move across the top of your desk (or a mousepad) to move the pointer or cursor on the screen. Click to select an item, double-click to launch a program, and right-click to see a shortcut menu.mouse pointer The arrow on the screen that moves with the mouse. PRESARIO NOTEBOOK BEYOND SETUP GUIDE 1800 SERIES MP3 The file extension for MPEG, audio layer 3, sound files. This format compresses sound data from a stereo music CD to one-half of its original size without sacrificing sound quality. Because of their small size, MP3 files can easily be transferred over the Internet. You can download individual songs or entire CDs in MP3 format to your computer. The format is easily identified by the file extension .mp3. navigate To move through a Web site or online document by clicking the hyperlinks embedded in the text or images. See hyperlink. Netscape Navigator A Web browser developed by the Netscape Communications Corporation. See browser. network Two or more computers linked together to share resources, such as programs, files, and printers. network interface card (NIC) An expansion card or other device used to connect a computer to a local area network. multimedia Two or more media formats used together, such as text, graphics, animation, audio, or video. music software Programs for composing and editing music. When you play a tune on a synthesiser keyboard connected to a computer, the music program translates what you play into a written score. PRESARIO NOTEBOOK BEYOND SETUP GUIDE 1800 SERIES newsgroup A discussion group on the Internet where people can post or read messages on thousands of topics, such as professional basketball, environmental protection, and Himalayan cats, newsreader A program that lets you read and post messages to newsgroups. news server A server that receives the Usenet news feed (all the individual messages collected from 100,000 news servers around the world). You access the news server through your Internet Service Provider. See Usenet. See also newsgroup. GLOSSARY-9 online To be communicating with another computer through a modem or network. You are online when you log on and establish a connection. You are offline when you lose or terminate a connection. See modem. See also network. parallel port A connector on the back of the computer for plugging in a parallel cable attached to a parallel device, such as a printer. Data is transferred, one byte at a time, through eight data wires (one for each bit in the byte). All eight bits travel side by side and arrive at the same time. A parallel port is faster than a serial port, which lets data through one bit at a time. See digital. See also serial port. online Help A manual that displays on the screen while you are actually working in a program and need help. It can be accessed through the Help menu at the top of the screen. Help for Windows can be accessed from the Start button on the taskbar. online shopping Ordering products on the Internet. You can purchase books, flowers, music CDs, toys, groceries, stocks, airline tickets, and used cars. OS (operating system) The interface that permits a person and a computer to “talk” to one another. Microsoft Windows, the most popular operating system, displays icons, menus, and dialogue boxes to find out what you want. You use a mouse and keyboard to reply. See Microsoft Windows. See also interface. path A sequence of information that directs the operating system to a file. For example, C:\Windows\Clouds.bmp is the path to a bitmap file named Clouds. It is located in a folder named Windows, which is located on the C drive. PC card A removable device that is designed to plug into a PCMCIA slot to accommodate devices such as a modem, fax, and rotating storage media. peripheral An external device connected to a computer. Examples are a monitor, keyboard, mouse, printer, scanner, joystick, and digital camera. pixel One of the individual dots, or picture elements, that compose a graphical image. See graphics. playlist Tracks chosen to play from a CD or DVD. GLOSSARY-10 PRESARIO NOTEBOOK BEYOND SETUP GUIDE 1800 SERIES plug-and-play A feature, introduced with Windows 95, to simplify the use of some peripheral devices. Once the device has been installed (in accordance with the manufacturer’s instructions), you can plug it into the computer while the computer is running. The operating system automatically recognises the new device. (In order to connect a non-plug-and-play device, you must first shut down the computer.) See peripheral. pop-up menu A list of options that pops up when you right-click an icon on the desktop or taskbar, the vacant part of the desktop, a selection in a document, or a file in Windows Explorer. See right-click. processor (short for microprocessor). The brains of the computer. See microprocessor. product key A unique series of letters and numbers that are assigned to each software package you buy. You are asked to enter the product key when you install the software. When you register the software, you transmit the product key to the manufacturer to enter in a customer database. Later, when you call for technical support, you are asked for the product key. The technician matches it against the database to determine whether you qualify for support. You should keep a record of all product keys to protect your investment. They are comparable to the serial numbers on hardware. See software. PRESARIO NOTEBOOK BEYOND SETUP GUIDE 1800 SERIES program Software that you install on a computer for word processing, drawing, manipulating photos, reconciling your bank statement, calculating your taxes, composing music, or playing games. It is occasionally referred to as an application. See software. QuickDock A device that provides ports for external devices, allowing you to “dock” and remove your Notebook while your hardware remains connected to the QuickDock. RAM (random access memory) The main memory of the computer. It holds a copy of the operating system, any programs that are running on the computer, and any data that is being processed. RAM is temporary memory; turning off the computer clears RAM. The more RAM your computer has, the faster the programs respond. See main memory. See also ROM. GLOSSARY-11 right-click To push down and quickly release the right mouse button to display a shortcut menu of the most commonly used commands for the item you clicked. See pop-up menu. ROM (read-only memory) Memory that contains the basic instructions for the microprocessor. ROM is permanent memory; turning off the computer does not erase it. Since you cannot change or write to ROM, it is referred to as read only. See microprocessor. scanner A device that creates digital images of printed documents and photographs. Software allows you to save and edit the images on the computer. See digital. See also software. screen saver A moving picture or pattern that appears on the screen when you stop using your computer for a specified period of time. Originally designed to protect the monitor, screen savers are now used for amusement. scroll To gradually move information across the screen when a document or Web page is too long or too wide to view all at once. Scroll bars are located along the right side and across the bottom of a window. When scroll arrows are present at the ends of the bars, you know that some information is off the screen. Click on one GLOSSARY-12 of the arrows to scroll the information into view. scroll mouse A mouse with a scroll wheel (between the two mouse buttons) for automatic scrolling through long documents or Web pages. search engine A program, accessed on the Internet, that allows you to search large databases for information, using keywords or phrases. See database. secure Web site A Web site that encrypts data to protect it from unauthorised use. When you purchase items over the Internet, you are asked to type your name, mailing address, e-mail address, and credit card information on an electronic form. Sending information to a secure Web site is comparable to giving it over the telephone when you order from a catalogue. (But never send your national insurance number over the Internet. Criminals can steal your identity with your national insurance number.) See encrypt. serial port A small connector on the back of the computer (or keyboard) for plugging in a thin cable attached to a serial device, such as a mouse. Serial devices transfer data, one bit at a time, through a data wire. The serial cable has two wires for bidirectional communication (sending and receiving information simultaneously). See digital. See also parallel port. PRESARIO NOTEBOOK BEYOND SETUP GUIDE 1800 SERIES shareware Software you can try before you buy. After a trial period, usually 30 days, the program uninstalls unless you pay for it You can download shareware from the Internet. See software. shortcut An icon on the Windows desktop that you double-click to launch a program. shortcut menu A menu that pops up when you right-click an icon on the Windows desktop or taskbar, the vacant part of the desktop, a selection in a document, or a file in Windows Explorer. The options on the pop-up menu are the most commonly used commands that relate to the item you right-clicked. See right-click. sleep mode A low-power state that saves electricity when the computer is not in use. surf To jump from place to place on the Internet, searching for topics of interest, by clicking hyperlinks. Instead of searching for specific information, surfing is an undirected type of Web browsing. You amuse yourself by clicking whatever catches your fancy. surge protector A device that protects a computer from fluctuations in power. A surge protector regulates the flow of electricity to the computer and prevents high-voltage surges from damaging the equipment. SVGA (super video graphics array) A video display standard that offers greater resolution and colour depth than VGA. The resolution (clarity and sharpness) of an image is determined by the number of pixels that can be displayed per square inch. Colour depth is determined by the number of colours (from 256 to 16 million) that can be displayed simultaneously. The number of both pixels and colours is limited by the amount of video memory on the SVGA system. See pixel. software The invisible code stored in digital bits and bytes. It consists of a set of instructions that tell the hardware what tasks to perform. See digital. See also program. PRESARIO NOTEBOOK BEYOND SETUP GUIDE 1800 SERIES taskbar See Windows taskbar. GLOSSARY-13 upload To send information to another computer on the Internet. UPS (uninterruptible power supply) A device that provides a short-term backup power supply, as well as surge protection. URL (uniform resource locator) address of a Web site, such as www.compaq.com. The USB port (universal serial bus port) A connector for plugging in multiple, ultra-high-speed peripherals. USB ports are gradually replacing serial ports and parallel ports and eliminating the need for so many connectors and so many cables. (Multiple USB peripherals can be linked together in a chain to share the same port.) Windows 98 included a built-in driver for USB peripherals. Windows Millennium supports a new USB standard that is 40 times faster than the previous standard. See serial port and parallel port. See also peripheral. Usenet (users’ network) A world-wide network of computers set up to transmit messages to newsgroups. See newsgroups. does not conform to the V.90 standard, you can visit the manufacturer’s Web site and download a software upgrade.) video phone See Internet phone. virus A set of software instructions written to harm computers. A virus can cause unusual messages to display on the screen, destroy information on the hard disk, or cause your hard disk to crash. Some viruses affect your computer immediately; others are set to activate on a certain date. See anti-virus software. WAV A file format used to store sounds. WAV sound files can be identified by the file extension .wav. Microsoft and IBM developed the format for Windows programs that support sound. Web See World Wide Web. Web browser See browser. window A framed area that displays on the Windows desktop after you select an item or open a program. V.90 standard A standard adopted in 1998 to resolve two competing technologies for 56Kbps modems. (If your modem GLOSSARY-14 PRESARIO NOTEBOOK BEYOND SETUP GUIDE 1800 SERIES Windows desktop The main screen you see when your computer completes startup. The desktop displays icons (small pictures) that represent items in the operating system (such as My Computer and Recycle Bin), shortcuts to programs installed on your computer, and shortcuts to folders or files. See shortcut. Windows Explorer A file management program that lets you see the hierarchy of folders on your computer and all the files and subfolders in each folder. Visualising the hierarchy is useful for copying and moving files. You can open the folder that contains the file you want to move or copy, click and drag the file to a new folder, and then drop it in. To find Windows Explorer, click the Start button, and point to Programs. You can create a shortcut to Windows Explorer. World Wide Web A system of Internet servers that support documents formatted in HTML. See HTML. zipped file A file that has been squeezed to a smaller size by compression software, such as WinZip. An archive (group of related files that are zipped together) can be transmitted as an e-mail attachment much faster than individual files. An archive takes up less storage space on your disk. It can be identified by the file extension .zip. An archive contains a selfextracting program with the file extension .exe (for executable). Double-click the executable file, and a wizard guides you through the process of unzipping the files. See wizard. Windows taskbar The grey bar running along the bottom of the screen when your computer completes startup. The Start button is on the left side of the taskbar, and the systray (a tray with icons and the computer clock) is on the right. Programs that are running, but minimised into icons, are displayed in the middle of the taskbar. wizard Part of a program that guides you through a complex process, such as signing up with an Internet service provider or posting a Web site to a server. Most programs on CD-ROMs have wizards to guide you through the installation process. PRESARIO NOTEBOOK BEYOND SETUP GUIDE 1800 SERIES GLOSSARY-15 GLOSSARY-16 PRESARIO NOTEBOOK BEYOND SETUP GUIDE 1800 SERIES INDEX A AC adapter connecting 7-7 connector 2-8 troubleshooting 9-13 AC power 3-2 plugging 3-2 unplugging 3-2 using 3-3 Accessing files from the Internet 6-13 search engines 6-6 Adaptec Easy CD Creator user information 5-22 Add New Hardware Wizard 4-9 Audio troubleshooting 9-15, 9-19 B Backing up CDs 5-21 using data CDs 5-19 PRESARIO NOTEBOOK BEYOND SETUP GUIDE 1800 SERIES Backup 8-5 devices 8-5 utilities 8-5 Battery calibrating 7-4 care 7-2 charging 3-4 charging time 7-6 checking 7-2 compartment 2-7 disposal 7-3 gauge 2-6 inserting 3-4 life 3-3 low condition 7-7 maximizing operating time 7-6 optimized performance 3-5 power 3-4, 7-2, 9-6 purchase 7-6 recycling 7-3 replacing 7-8 storage 7-2 types 7-3 INDEX-1 Beyond Setup guide defined 1-2 Brightness 3-10 adjusting 3-10 controls 2-5 Browser 6-8 Microsoft Internet Explorer 6-8 Buffer underrun 5-21 Burning CDs 5-19 Buttons CD control 2-6 CD/DVD eject 2-7 Digital Audio 2-3 diskette eject 2-7 Entertainment 2-3 Instant E-Mail 2-3 Instant Internet Access 2-3 Internet Zone 2-3 left TouchPad 2-2 My Presario Instant Access 2-3 PC Card eject 2-7 power 2-2, 2-3, 3-3 Retail Central 2-3 right TouchPad 2-2 scroll 2-2 volume down 2-6 volume up 2-6 C Calibration battery 7-4 CD eject button 2-7 manual eject hole 2-7 Quick Restore 8-9 INDEX-2 CD cases making 5-20 CD Copier 5-21 CD player 5-4 repeat track 5-6 CD/DVD ejecting 5-3 inserting 5-2 manual eject hole 5-3 manually ejecting 5-3 CD/DVD controls 2-6 CD/DVD drive troubleshooting 9-15 CD-R/CD-RW writing to 5-20 CDs playing audio 5-4 Charged battery 7-8 Cleaning display screen 8-3 exterior 8-2 keyboard 8-2 TouchPad 8-3 Clicking left 3-6 right 3-6 Compaq Diagnostics 8-10 testing equipment 8-10, 8-11 tests 8-11 Compaq Service Connection 8-13 Data Security Statement 8-14 privacy 8-14 turning off 8-13 turning on 8-13 PRESARIO NOTEBOOK BEYOND SETUP GUIDE 1800 SERIES Computer turning off 3-3 turning on 3-3 virus 9-3 Connecting to the Web 6-9 Connectors AC adapter 2-8 mouse/keyboard 2-8 printer 2-8 QuikDock 2-8 TV Out 2-8 Controls Disqplay2 2-6 Copying CDs 5-21 Creating data CDs 5-19 D Data CD creating 5-19 Definitions Internet 6-2 World Wide Web 6-2 Defragmentation hard drive 8-7 Deleted files recovery 8-9 Disabling self-starting feature 5-4 Disc inserting 5-2 removing 5-3 removing manually 5-3 PRESARIO NOTEBOOK BEYOND SETUP GUIDE 1800 SERIES Disk drive 3-12 ejecting 3-12 Disk Cleanup using 8-6 Display 2-2 blank 9-5 brightness 3-10 cleaning screen 8-3 hibernation 9-5 questions 9-4 release latch 2-1, 2-2 resolution 3-9 settings 9-4 standby 9-5 switching from TV to Notebook 5-12 troubleshooting 9-10 Disqplay2 buttons 5-5 controls 2-6 using 5-5 Downloaded program file installing 4-8 Drained battery 7-8 Drives 3-12 CD/DVD 2-7 diskette 2-7 DVD drive 5-8 eject button 2-7 manual eject hole 2-7 playing films 5-12 DVD player 5-8 buttons 5-9 on-screen controls 5-9 setting play features 5-11 INDEX-3 E G Easy Setup poster defined 1-2 Edge Motion 3-8 Ejecting CD/DVD 5-3 CD/DVD manually 5-3 Electrical storms 1-5 E-mail 6-7 provider 6-7 Error messages hard disk 9-7 non-system disk 9-8 out of memory 9-7 Errors scanning for 8-6 Ethernet connection 6-6 Ethernet port 2-7 External monitor port 2-8 External mouse port 2-8 General questions 9-3 Graphics 1-4 F F10 Setup 3-13, 3-14 Fan vent 2-8 Favorites folder 6-12 Files backup 8-5 deleting 8-8 from the Internet 6-13 Films playing 5-11 Films questions 9-6 Fn key 2-5 Function keys 2-5 INDEX-4 H Hard disk defragmenting 8-7 errors 8-6 space 8-8 Hard drive errors 8-6 managing of 8-8 Hardware devices attaching 4-9 Headphone jack 2-7 Hibernation 3-3, 7-9 Hyperlinks defined 6-4 using 6-5 I Inserting CD/DVD 5-2 Installation downloaded program file 4-8 software from a CD or diskette 4-7 Internet accessing files 6-13 connection 9-3 defined 6-2 files access 6-13 searching 6-6 support 8-15 Internet address 6-5 Internet mail 6-7 PRESARIO NOTEBOOK BEYOND SETUP GUIDE 1800 SERIES Internet Service Provider (ISP) 6-6 and e-mail 6-7 Internet Zone buttons 2-3 and the Web 6-9 J Jewel Case Creator 5-20 K Keyboard 2-2 cleaning 8-2 connector 2-8 Keys Fn 2-5 function 2-5 L Left click 3-6 Lights AC adapter 2-3 caps Lock 2-3 num lock 2-3 scroll lock 2-3 Links defined 6-4 Low-battery condition fixing 7-7 Low-power mode 7-9 M Making CD jewel cases 5-20 Manual eject hole 5-3 PRESARIO NOTEBOOK BEYOND SETUP GUIDE 1800 SERIES Mass storage CD or DVD drive 9-15 diskette drive 9-15 Mass-storage hard drive 9-18 Memory 9-7 troubleshooting 9-13 Memory compartment 2-9 Microphone jack 2-7 Microsoft Internet Explorer using 6-8 Microsoft Windows managing files 1-3 using online Help 1-3 Model number 2-2, 2-9 Modem 6-6 Modem port 2-7 Modes Hibernation 7-9 sleep 7-9 Mouse connector 2-8 MPEG files playing 5-11 N network defined 6-3 Non-DVD Video CD 5-12 Notebook back side 2-8 caring for 8-4 cleaning 8-2 common features 2-2 common tasks 4-1 disconnecting 1-5 INDEX-5 left side 2-7 maintenance 8-1 protecting from electrical storm 1-5 right side 2-7 safety 1-5 set up 3-2 testing 8-11 turning off 3-3 turning on 3-3 underside 2-9 Numbers model 2-9 serial 2-9 O Operating system 1-3, 9-3 manual 1-3 P Password 3-13 removal 3-14 setting 3-13 troubleshooting 9-13 PC Card Slot 2-7 Pentium III 3-5 Peripherals questions 9-6 Playing audio CDs 5-4 DVD films 5-12 DVDs 5-4 video discs 5-7 Pop-up feet Feet notebook 2-9 INDEX-6 Ports Ethernet 2-7 external monitor 2-8 modem 2-7 mouse/keyboard 2-8 parallel 2-8 serial 2-8 USB 2-8 Power AC 3-2 battery 3-4 button 2-2, 3-3 plugging 3-2 status 2-6 supply 3-3 unplugging 3-2 using AC 3-3 Power management defined 7-9 understanding 7-9 Power Modes ending 7-10 starting 7-10 Power source disconnecting from 1-5 Power surge 1-5 Preventing buffer underruns 5-21 Printer connector 2-8 Printing 9-6 Processor speed 3-5 PRESARIO NOTEBOOK BEYOND SETUP GUIDE 1800 SERIES Q Questions battery power 9-6 display 9-4 download upgrades 9-7 DVD films 9-6 general 9-3 memory upgrades 9-7 peripherals 9-6 printer 9-6 sound 9-5 QuikDock connector 2-8 features 2-10 R Recording CDs 5-18 Recycle Bin using 8-9 Release latch display 2-1, 2-2 Removing CD/DVD disc 5-3 CD/DVD manually 5-3 Repeating tracks 5-6 Resolution changing 3-9 Right click 3-6 S Safety 1-5 Safety and Comfort guide 1-3 ScanDisk using 8-6 PRESARIO NOTEBOOK BEYOND SETUP GUIDE 1800 SERIES Scroll button 3-6 Search engine 6-6 choosing 6-10 using 6-11 Searching the Internet 6-6 the Web 6-12 Security Slot 3-13 Security slot 2-7 Self-starting feature disabling 5-4 Serial number 2-9 Set-up poster defined 1-2 Shutdown 7-10 Sleep 7-9 status 2-6 sleep indicators 7-10 Software adding 4-7 installation 4-7 removing 4-7 Solutions 9-2 audio and video 9-9 battery 9-11 games 9-19 Internet 9-19 keyboard and TouchPad 9-21 mass storage 9-15 memory and PC card 9-24 power 9-13 Sound questions 9-5 Speaker volume 5-5 Speakers 2-2, 2-9 Standby 7-9 INDEX-7 Status power 2-6 sleep 2-6 Status Display 2-6 Storage drives 3-12 diskette 3-12 Stored files deleting 8-7 Surfing the Web 6-1, 6-5 Surge protector 1-5, 3-2 Symbols 1-4 System Record 8-12 System recovery 8-9 T Testing Notebook equipment 8-10 TouchPad 2-2 cleaning 8-3 double-tapping 3-7 Edge Motion 3-8 left button 2-2 left click 3-6 right button 2-2 right click 3-6 scroll button 2-2 tapping 3-7 using 3-6 Tracks continuously repeating 5-6 recording 5-19 Troubleshooting AC adapter 9-13 audio 9-15, 9-19 CD 9-15 DVD 9-15 INDEX-8 memory modules 9-13 password 9-13 screen 9-10 volume 9-9 TV adjusting the screen 4-4 for displaying DVD films 5-12 setting view formats 4-3 TV-Out adjusting television screen 4-4 format 4-3 switching between displays 4-4 U Uniform Resource Locator (URL) defined 6-11 Upgrades Compaq 9-7 memory 9-7 Upgrades questions 9-7 URL Uniform Resource Locator 6-5 URL address 6-12 USB Port 2-8 Using DVD player 5-8 hyperlinks 6-5 V Video discs playing 5-7 Virus defined 4-5 protection from 4-5 recognizing 4-6 removing 4-6 PRESARIO NOTEBOOK BEYOND SETUP GUIDE 1800 SERIES Volume raising and lowering 5-5 troubleshooting 9-9 W Warranty certificate defined 1-3 Web basic information 6-4 favourite addresses 6-12 Web browser defined 6-8 Web servers 6-5 Windows customizing 1-3 Disk Cleanup 8-8 World Wide Web defined 6-2 Writing files to CD-R/CD-RW 5-20 PRESARIO NOTEBOOK BEYOND SETUP GUIDE 1800 SERIES INDEX-9 INDEX-10 PRESARIO NOTEBOOK BEYOND SETUP GUIDE 1800 SERIES