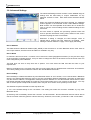
1
Print Date: 21.09.2004
Product Manual
RS232 Bluetooth Converter
Version: 5.3
Brainboxes Limited, Unit 3C, Wavertree Boulevard South, Wavertree Technology Park, Liverpool, L7 9PF, UK
Tel: +44 (0)151 220 2500 Fax: +44 (0)151 252 0446 Web: www.brainboxes.com Email: [email protected]
Table of Contents
1. Introduction ......................................................................................................4
1.1. Preamble............................................................................................................................................................. 4
1.2. Products and Firmware....................................................................................................................................... 4
1.3. Changes from earlier versions............................................................................................................................ 4
2. Physical Product Features...............................................................................5
2.1. BL-521 ................................................................................................................................................................ 5
2.2. BL-730 ................................................................................................................................................................ 5
3. Product Configuration .....................................................................................6
3.1. Configuration features at a glance...................................................................................................................... 6
3.2. Installing the Configuration Application .............................................................................................................. 6
3.3. Opening the Configuration Application ............................................................................................................... 7
3.4. Using the Configuration Application ................................................................................................................... 8
3.4.1. Device Info ................................................................................................................................................... 8
3.4.2. Port Settings................................................................................................................................................. 8
3.4.3. Support/Links ............................................................................................................................................... 8
3.5. Current Settings .................................................................................................................................................. 9
3.6. Advanced Settings ............................................................................................................................................ 12
3.7. Default settings ................................................................................................................................................. 16
3.8. Upgrade Device ................................................................................................................................................ 16
4. Alternative Product Configuration ................................................................17
4.1. Accessing the configuration menus and commands. ....................................................................................... 17
4.2. Configuration Menu. ......................................................................................................................................... 18
4.2.1. Navigation .................................................................................................................................................. 18
4.2.2. Main Menu ................................................................................................................................................. 19
4.2.3. Communications Parameters..................................................................................................................... 19
4.2.4. Handshaking .............................................................................................................................................. 20
4.2.5. Bluetooth Parameters ................................................................................................................................ 20
4.2.6. Display, Restore and Update Current and Factory Settings...................................................................... 21
4.2.7. Disabling Interactive Menu......................................................................................................................... 22
4.2.8. Upgrading Firmware 3.0 ............................................................................................................................... 23
4.3. Command Interface .......................................................................................................................................... 24
5. Resetting the Product ....................................................................................25
6. Upgrading your device...................................................................................26
7. Physically connecting to your RS232 device ...............................................29
7.1. Configuring the communications parameters. .................................................................................................. 29
7.2. Physically connecting your device to BL-521 via the RS232 cable.................................................................. 29
8. Connecting converters over Bluetooth.........................................................30
8.1. Client/Server Pair: “Cable Replacement”. ........................................................................................................ 30
8.1.1. Configuration by Windows Application ...................................................................................................... 30
8.1.2. Configuration by Menu............................................................................................................................... 31
8.1.3. Configuration by Commands ..................................................................................................................... 32
8.2. Client: BL-521 is the Bluetooth device which initiates the connection ............................................................. 32
8.3. Server: Connecting to BL-521 from a remote Bluetooth device. ...................................................................... 32
8.3.1. Configure and connect the converter......................................................................................................... 32
8.3.2. Bluetooth Enable your PC.......................................................................................................................... 32
8.3.3. Discover the device.................................................................................................................................... 32
Manual for BL-521 5_3.doc
© Copyright Brainboxes Limited 2004
Page 2 of 41
8.3.4. Secure the relationship .............................................................................................................................. 33
8.3.5. Connect to the Serial Port profile ............................................................................................................... 33
8.3.6. Connect your application to the new COM port ......................................................................................... 33
9. Worked Examples ..........................................................................................34
9.1. Scientific equipment data logging: .................................................................................................................... 34
10. Custom Factory Configuration ....................................................................34
11. Troubleshooting ...........................................................................................35
12. Technical Specifications..............................................................................36
12.1. Storage and Operating Environment .............................................................................................................. 36
12.1.1. Storage..................................................................................................................................................... 36
12.1.2. Operational............................................................................................................................................... 36
12.2. Power requirements........................................................................................................................................ 36
12.2.1. Input Voltage Requirements .................................................................................................................... 36
12.2.2. Measured current consumption ............................................................................................................... 36
12.3. Transmitter Characteristics............................................................................................................................. 37
12.4. Receiver Characteristics................................................................................................................................. 37
12.5. Antenna Characteristics.................................................................................................................................. 38
12.5.1. Gain.......................................................................................................................................................... 38
12.5.2. Radiation Patterns ................................................................................................................................... 38
13. Regulatory Information ................................................................................39
13.1. Europe – EU Declaration of Conformity ......................................................................................................... 39
13.2. Important Notice for use in France and Italy................................................................................................... 39
13.3. Rest of World .................................................................................................................................................. 39
14. Index..............................................................................................................40
Manual for BL-521 5_3.doc
© Copyright Brainboxes Limited 2004
Page 3 of 41
1. Introduction
1.1. Preamble
Brainboxes’ RS232 Bluetooth converters are fully embedded, stand-alone Bluetooth solutions, which will Bluetooth
enable any device with an RS232 port. Unlike many of Brainboxes wide range of Bluetooth products, the converters
do not require any additional Bluetooth software.
For many applications, a Bluetooth converter used in combination with another Bluetooth product (e.g. Brainboxes’
USB adapter connected to a PC with Brainboxes’ Bluetooth Software Suite, or a second converter) essentially
replaces the serial cable, freeing the device from the limits imposed by the cable specification and in many
applications removes the need for expensive cable installation and maintenance. The devices are designed to
appear transparent to a user’s applications that would otherwise be communicating via a COM port and over a
cable, therefore no specific Bluetooth programming is required. The connection uses Bluetooth security to ensure
that sensitive data is not “sniffed” by any unauthorised source, although this feature can be turned off.
The products described by this document are designed as cable replacement products. Their primary function is to
offer “point to point” Bluetooth capabilities to devices which otherwise do not have the capacity for such behaviour.
This capability is configured by a “set and forget” interface, which is not designed to cater for multiple device
connection scenarios. At the time of publication, the converters are only capable of connecting to one other
Bluetooth device at a time.
The converter is user configurable to baud rates between 244 and 1.3Mbaud in steps of 244, with none, odd, or
even parity, and with 1 or 2 stop bits. Its default factory settings are 115,200 baud, no parity, 8 data bits and 1 stop
bit.
A convenient reset button can be used to restore various functions of the device including a restore of factory
settings.
We trust that if you adhere to the following procedures you will enjoy many years of useful service from your
Brainboxes Bluetooth Converter.
1.2. Products and Firmware
This document covers Brainboxes part numbers BL-521 and BL-730. Any features that apply to a specific part code
will be clearly identified.
This document covers firmware versions from 4.0 Onwards. For documentation of features in versions of firmware
prior to 4.0 please see previous revision manual. A superscripted version number, e.g. “Upgrade Device Firmware
3.0
”, identifies additions to the original firmware and specifies from which firmware revision the addition applies.
1.3. Changes from earlier versions
This manual begins a major transformation to the configuration utility application as well as the addition of four new
features and significant bug fixes. Based on customer feedback, the Windows configuration application has been
simplified and designed to reflect the new style incorporated into Windows XP Service Pack 2. It also has the ability
to upgrade the device directly.
There is also a new Configuration Wizard, which provides a wizard-style interface for the changing of BL-521
settings.
Additional features to the firmware include:
•
•
•
Handshaking – DTR/DSR over-the-air handshaking is now available
Remote Configuration
Low Power Modes
Manual for BL-521 5_3.doc
© Copyright Brainboxes Limited 2004
Page 4 of 41
2. Physical Product Features
2.1. BL-521
Reset button
See section 6 for more details on how to use the reset button.
LED’s
a) LED1: The leftmost LED is Green. This is used to indicate the
“Power” status of the converter. When power is applied at the
specified voltage and current the LED turns ON.
b) LED2: The middle LED is Orange. It indicates transmitted data
activity.
c) LED3: The rightmost LED is also Orange. It indicates received
data activity.
Serial Cable:
BL-521 is supplied with a short (approx 20cm) length of cable
terminating in a standard 9-pin (DTE) male D type connector.
It is supplied as DTE as the main anticipated use of BL-521 is to be connected to a (DCE) device that would
normally plug into the back of a PC. If you wish to use BL-521 as a DCE device (e.g. to plug into the back of a PC
or similar) you should use the included “gender changer”. For larger volumes BL-521 can be supplied with a DCE
cable, thus removing the need for the gender changer.
2.2. BL-730
a)
b)
c)
d)
Antenna - The antenna is integral to the printed circuit board
Reset button - See “5 Resetting for details of the operation of this feature
LED’s - The LED behaviour is identical to the BL-521 above.
JST Cable connector - The BL-730 uses a 10-way JST connector. As BL-730 is designed to be an
embedded device, it is not supplied with a cable. The mating connector is JST part no. SHR-10V-S-B
e) External Antenna - Should your application require it, an external antenna can be connected to the rear of
the BL-730
f) Mounting Points - The BL-730 has 3 mounting points to allow for a secure physical connection to your
system
Manual for BL-521 5_3.doc
© Copyright Brainboxes Limited 2004
Page 5 of 41
3. Product Configuration
This device contains a comprehensive set of Bluetooth and COM port features which can be changed from an easy
to use Windows Configuration Application. This section gives full details about the changes that can be made, how
to make them, and the implications the changes will have on the manner in which your converter behaves.
3.1. Configuration features at a glance
Below is a quick list of the configuration options that are available from the configuration application. They will be
covered in more detail later in this section.
•
•
•
•
•
•
•
•
•
View/Set local COM port settings (baud rate, parity, stop bits)
View/Set Discoverability, Security mode and PIN number
View/Set Pairing options (including pairing to another converter)
View/Set Client/Server configuration (Client connects to Server – important if “pairing” 2 converters)
View/Set Local Device Name and Device Class
View all “factory” and modified settings plus local Bluetooth Address
Disable command interface and configuration menu
Permanently update “factory” settings
Upgrade Device Firmware
3.2. Installing the Configuration Application
Insert the CD supplied with the product, open Windows Explorer and navigate to your CD drive. In the “BL-521
Configuration Utility” folder, double click the “Setup.exe” file and follow the onscreen instructions as shown below:
Manual for BL-521 5_3.doc
© Copyright Brainboxes Limited 2004
Page 6 of 41
3.3. Opening the Configuration Application
After attaching your converter to an available COM port on your Computer, either start the application by double
clicking the new application icon located on your desktop or go to “Start/All Programs/Brain Boxes Software/BL-521
Configuration Utility/BL-521 Configuration” as shown below:
The Configuration Utility will display allowing selection of the appropriate COM port settings for the converter device
you have attached to the port:
COM Port: Select the port number of the COM port to which you have attached
your converter. Select “Auto” if you don’t know the number and the utility will
attempt to find the device for you.
Other Settings: Select the other parameters to match those that have been set
on the converter. If you don’t know them, select “auto” and the utility will
attempt to find the device for you. The default parameters for the converters
are 115200 baud, No Parity and 1 Stop bit.
At the bottom of the application there are four ‘action’ icons. These card be used to restore the local BL-521 to it’s
default settings, save the current settings as default settings, reload the current settings and apply the current
settings:
The feature that allows a user to change the default configuration settings on their converter would be useful in
cases where the converter was in use in an application where the physical security of the converter couldn’t be
guaranteed. If the application required that the settings were very different from the original factory settings then if a
long reset were performed (restoring default settings) the application would no longer work until the converter was
reconfigured. Updating the default settings to the required ones means that should a long reset be performed the
device will power up with the settings required by the application.
Care should be taken to make a note of the updated settings when using this feature, particularly in the case of
future use or reconfiguration of the product. Use the table below to note any settings you have changed:
Baud Rate
Parity
Stop Bits
Local Device Name
Security Mode
Encryption
Pin Code
Client/Server
Class of Device
Partner Device
Other Notes:
Manual for BL-521 5_3.doc
© Copyright Brainboxes Limited 2004
Page 7 of 41
3.4. Using the Configuration Application
The application will now load. There may be a short delay whilst
the device is detected and its current configuration is queried and
the appropriate fields are populated.
As a rule, sections on the left-hand side of the application display
information about your device. Settings cannot be changed here.
Sections on the right-hand side are where settings can be
changed as well as viewed.
Useful “tips” are displayed if the cursor is “hovered” over various
fields to help explain those options.
Each section can be expanded to see or change the relevant
settings for your BL-521 device
All the settings are described in full detail below.
3.4.1. Device Info
The Device Info section displays the Bluetooth address, name and firmware
of the product currently attached.
The local device name field displays the “friendly” name of the device that is
connected. This can be changed to any name as required as detailed further
below.
Each Bluetooth device in the world must have a unique address Some Bluetooth devices need to know the address
of the device they are connecting to. This address is also identified on the label attached to your product.
The firmware loaded onto your connected device is also displayed here. This is provided mainly for technical
support purposes, but also allows you to check for available or suitable updates.
3.4.2. Port Settings
The Port Settings section displays the current used port settings for the
connected BL-521 i.e. the port settings that were used to open and access
the device. This includes the current COM port, Baud Rate, Parity and Stop
Bits.
In this section the port that accesses the BL-521 can be opened and closed.
See section 3.3 for more details on the options in this section
3.4.3. Support/Links
The Support/Links section can be used to get more help from Brainboxes
should you be experiencing any difficulties.
The Brainboxes Bluetooth Support website and support email address are
available in this section.
Manual for BL-521 5_3.doc
© Copyright Brainboxes Limited 2004
Page 8 of 41
3.5. Current Settings
The Current Settings section is broken down into two sections;
Local Device Settings and Partner Device Settings. Each field
will be discussed further below.
When the Current Settings has been selected, an additional
section appears in the left-hand section called Default Settings.
Both sections can be expanded at the same time to enable the
user to view the current settings and the default settings at the
same time.
As each section is opened, the previously opened section will
close to prevent information moving off the bottom of the screen
and thus requiring the user to scroll down.
Whenever a setting is changed, the field changes colour to
indicate that a change has been made but not applied.
Baud Rate
Click the drop down arrow at the far right of this field to display a list of popular baud rates. Due to some technical
limitations, it is not possible for the product to achieve all of these baud rates exactly, although most of them are
available to within 1%. Normal RS232 operation is not affected by such small differences in data rates unless very
long streams of continuous data are being used. The Actual baud rate achieved is displayed next to your selection.
This option is only applied when the “Apply” icon is clicked. Along with updating the device, the application will
immediately change its own communications parameters to match those new settings so it can continue to interact
with the device. Multiple changes to communications settings are ALL applied when the “apply” icon is selected.
NOTE: It is possible for the converters to be configured to baud rates that are not supported by a PC’s COM port. If
your application requires such a “non-standard” baud rate, you may no longer be able to communicate to the
converter from your PC. If you “apply” the setting inadvertently, you can restore the original settings of the converter
by performing a reset as documented below.
The converter’s normal factory set baud rate is 115200 baud.
Parity
Click the drop down arrow at the far right of this field to display the available options for Parity.
This option is only applied when the “Apply” icon is clicked. Along with updating the device, the application will
immediately change its own communications parameters to match those new settings so it can continue to interact
with the device. Multiple changes to communications settings are ALL applied when the “apply” icon is selected.
Stop Bits
Click the drop down arrow at the far right of this field to display the available options for Stop Bits.
This option is only applied when the “Apply” icon is clicked. Along with updating the device the application will
immediately change its own communications parameters to match those new settings so it can continue to interact
with the device. Multiple changes to communications settings are ALL applied when the “apply” icon is selected.
Data bits
Unfortunately this setting cannot be changed. BL-521 only supports the 8 data bit format. Thus there is not a
configuration menu option for this setting.
Manual for BL-521 5_3.doc
© Copyright Brainboxes Limited 2004
Page 9 of 41
PIN Code
The PIN (Personal Identification Number) is used to create a secure and trusted connection between 2 Bluetooth
devices during a process called pairing or bonding. The PIN can be any combination of printable characters. The
PIN is only used when BL-521 is configured to be in security mode 2 or 3 (High or Medium security).
The factory set PIN is “1234”. This can be changed and you may enter your own combination up to a maximum of
16 characters. If you try to create a PIN code that is larger than this, an error message is generated and you will be
given another opportunity to enter your own PIN.
To change your device’s PIN number, click in this field and simply type the new code you want applied. This can be
any printable alphanumeric character or symbol, but you should take care to choose a PIN appropriately
remembering that some Bluetooth devices (e.g. cell phones) only have limited input mechanisms and may not have
a full range of characters available. Press the “Apply” icon to apply the new PIN code.
If your BL-521 is to be configured into Client mode, this is the PIN that will be used by BL-521 to initiate pairing with
the remote device before any connection is made. If your remote device is another BL-521 in Server mode, you will
need to ensure that “both” devices are configured to use the same PIN number.
Client/Server
The option Client/Server changes the default behaviour of your product. This is important if you want a remote
device to connect to the product or whether you want the product to connect to a remote device. Click on the drop
down arrow on the far right of this field to see the 2 selectable options. The default configuration of your product is
set to “Server” operation. This means that the product will wait for devices to connect to it (just like a network or web
server). Changing this setting to “Client” will put the product into a state where it will attempt to connect to remote
devices contained in its internal database.
The “remote” or “partner” device feature is explained below. It is this option that requires attention if you wish to
configure 2x BL-521’s to communicate to each other to create a “true” cable replacement scenario.
Due to the nature of this feature (it connects to a remote device and therefore renders the configuration utility
unavailable) we recommend that this setting is changed after all other configuration changes have been made and
applied.
Partner Device
This feature serves 2 purposes:
•
•
In Server mode it shows the address of the last device to successfully bond and connect.
In Client mode, it shows the device to which the product will attempt to pair/connect.
A remote device address must first be entered into the “partner device” field before the product, configured in Client
mode, will be able to initiate any connections to that remote device. Adding a partner device using this feature will
stop remote devices bonding with BL-521 in Server Mode if one of those remote devices is not the partner device.
Click on the field to enter the Bluetooth Address (BD_ADDR) of the remote device you wish to connect to. This
should be in the same format as indicated on the products label (NAP-UAP-LAP, for those of you who know). The
option to remove this newly entered device exists at this point should you have made a mistake. You should be
sure to check that the PIN number entered above exactly matches the PIN code requirement of the remote device
to which you are trying to connect.
Once BL-521 has successfully added a partner device the menu will update to give the user the option to remove
the partner. All settings must be applied using the “Apply” icon before they are set.
Connect Using
Clicking the arrow on the far right of this field shows a drop down list of the available service options. It should be
noted that this feature does not actually query the remote device for its supported services, so you must be sure
that your remote device actually supports your selection.
Manual for BL-521 5_3.doc
© Copyright Brainboxes Limited 2004
Page 10 of 41
This feature can be used to connect to remote devices that support DUN, LAN or FAX services i.e. some Bluetooth
phones will only let devices that are Dial Up Networking clients to connect to them. Although the BL-521 does not
actually include all the software necessary for it to support DUN, LAN and FAX fully, these are all based on SPP,
which the BL-521 does support. The additional software can come from the operating system such as XP.
For example, a Bluetooth phone can be used by a BL-521 to dial out to the internet on a PC if the Connect Using
feature is set to DUN, partner address is the phone’s Bluetooth address and the BL-521 is in Client mode. When
the phone confirms that a Bluetooth connection is present, a modem can be installed on the PC, which would use
the COM port that the BL-521 is connected to. Some Bluetooth phone’s such as Nokia and Sony Ericsson have a
special Bluetooth modem driver that you can download from their website. Once installed you can then use the
Create a New Connection wizard from Control Panel/Network Connections to dial out using the new modem. You
will require an ISP with username and password for this.
Manual for BL-521 5_3.doc
© Copyright Brainboxes Limited 2004
Page 11 of 41
3.6. Advanced Settings
The Advanced Settings section contains a more detailed range of
settings that are least likely to require modification for any
particular scenario to work. Each field will be discussed further
below.
When the Advanced Settings has been selected, an additional
section appears in the left-hand section called Default Settings.
Both sections can be expanded at the same time to enable the
user to view the current settings and the default settings at the
same time.
As each section is opened, the previously opened section will
close to prevent information moving off the bottom of the screen
and thus requiring the user to scroll down.
Whenever a setting is changed, the field changes colour to
indicate that a change has been made but not applied. After
making a selection select the “Apply” icon to apply the setting.
Device Address
This field shows the Bluetooth Address (BD_ADDR) of the local device. As each Bluetooth device must have its
own unique address, this field cannot be edited or modified in any way.
Device Name
In scenario’s where more than 1 converter is to be used in the same geographical location (i.e. they are all in range
of each other/the controlling device), it may be wise to change the name of each device so that human users can
more easily identify each individual.
This field does not have a drop down list of options. You must select the field and edit the name to your
requirements.
Memory constraints on the converter mean that you must ensure that your desired name is less than 30 characters.
The Factory setting for the local device name is “BL-521 BB RS232 Converter”.
Discoverability
Discoverability is a feature that allows any other Bluetooth device to “see” another, or not. Just because a Bluetooth
device is non-discoverable it doesn’t mean it’s not also connectable. Because a Bluetooth connection is made using
only the device’s address, if an application already knows the address of a non-discoverable remote device, and it
has already bonded (if appropriate) or knows the correct PIN number, then it can connect to that device. You may
wish to set this option to help avoid confusion when many BL-521’s exist in close proximity to each other.
This field has 2 options selected from the drop down list.
1) “On” is the default setting for the converters. This setting will make the converter “viewable” by any other
Bluetooth device.
2) Selecting “Off” immediately renders the converter “non-discoverable”. No other Bluetooth devices will be able to
see the converter when they perform a device discovery. However, in this mode, your BL-521 is still “connectable”.
Manual for BL-521 5_3.doc
© Copyright Brainboxes Limited 2004
Page 12 of 41
Security Mode
The factory set security mode is 3 (Highest). This field has 3 available settings from the drop down list:
1) Selecting option “1” will immediately place your converter into security mode 1. This is the lowest security mode
that the converter can be configured to. Connections, including service discovery, can take place without the need
for “pairing” or “bonding”. In mode 1, the converter automatically accepts all access requests without initiating
authentication, encryption, or authorization procedures. Any attempt by a remote application to perform
authentication or encryption procedures will be rejected.
2) Selecting option “2” will immediately place your converter into security mode 2. This mode allows remote
Bluetooth devices to search for and retrieve the services on your converter without pairing, but will not allow them to
connect unless the 2 devices are paired.
3) Selecting option “3” will immediately place your converter into security mode 3 (default). This is the highest
security mode available. Connections of any kind (other than a device discovery) from a remote Bluetooth device
are only allowed after a successful “pairing” has been performed. No services will be shown to other Bluetooth
devices unless the 2 devices are successfully paired.
The tables below show some more information with regards to the application of the security settings…
Security modes for converter as Client (initiates Connections):
Security:
High
(Mode 3)
Medium
(Mode 2)
Low
(Mode 1)
Who can Pair?
BL-521 will only pair with
device entered in the ‘Set
Partner’ menu.
Other
device must have identical
PIN number
BL-521 will only pair with
device entered in the ‘Set
Partner’
menu.
Other
device must have correct
link key
Who can it connect to?
Only device entered in
the ‘Set Partner’ Menu,
after pairing.
Possible use:
Secure connection between the BL-521
and a preset device (Link level enforced
security – can see device but not services
unless paired)
Only device entered in
the ‘Set Partner’ Menu,
after pairing.
Secure connection between the BL-521
and a preset device (Service level security
– can see services but not connect unless
paired)
N/A
Only device entered in
the ‘Set Partner’ Menu.
When users who do not want to spend time
pairing and do not require a secure
connection
Security mode for converter as Server (receives connections):
Security:
High
(Mode 3)
Who can Pair?
Any Device with
correct PIN.
Who can Connect?
Any device
Medium
(Mode 2)
Any Device
correct PIN.
Any device
Low
(Mode 1)
N/A
with
Any device
Possible Use:
Secure connection between the BL-521 and a preset
device (Link level enforced security – can see device
but not services unless paired)
Secure connection between the BL-521 and a preset
device (Service level security – can see services but
not connect unless paired)
When users who do not want to spend time pairing and
do not require a secure connection
Encryption
Encryption is a method of ensuring that the communications between 2 devices cannot be “bugged” or “listened” to
by any unauthorised source. This encryption is performed in lower layers of the protocol stack as defined by the
Bluetooth Specification.
The factory set Encryption mode is “Disabled”. This field has a drop down list from which the configuration can be
changed to enable “Point to Point” or “Point to Point & Broadcast”.
Manual for BL-521 5_3.doc
© Copyright Brainboxes Limited 2004
Page 13 of 41
Class of Device
Some remote device applications will only communicate to devices of a certain type. This option allows you to
reconfigure your BL-521 to appear as a number of different device types. The Factory setting for the Class of
device is “Peripheral”. The available options are: Peripheral, Desktop, Laptop, Imaging, Phone/Modem and LAN.
IMPORTANT NOTE: Changing this Class of Device setting does not alter the published functionality of the product.
It will continue to offer ONLY One Serial port profile connection.
Handshaking
This setting allows the user to select the handshaking scheme used for the BL-521/730. By default the setting is no
handshaking. Handshaking options are RTS/CTS, DTR/DSR, RTS/CTS & DTR/DSR or none. When changing
between handshaking options, a power cycle is required before the configuration utility can be re-accessed.
RTS/CTS handshaking is used between the BL-521 and the port to which it is connected (hardware handshaking).
DTR/DSR handshaking is used over the Bluetooth connection between the BL-521 and the device to which it is
connected via Bluetooth (over-the-air handshaking).
As shipped from the factory, this product is configured NOT to require the use of RTS/CTS handshaking. Its
implementation is such that these control signals are NOT transferred over the Bluetooth link, but instead are used
to control the passage of data between the product (BL-521 or BL-730) and the physically connected RS232 device.
It is therefore not possible to use this product in an application that uses the RTS and/or CTS handshake lines for
purposes other than simply to control the flow of data.
Whilst the converter is configured NOT to require RTS/CTS handshaking, some devices to which it may be
connected will require this flow control. If this is the case, unless the following procedures are undertaken the
converter will not send any data and the communications between the 2 devices will appear corrupt or broken.
Whilst the product ships without handshaking to make initial configuration easier, Brainboxes do not recommend
that you leave RTS/CTS handshaking disabled unless you are connecting the converter to a device that specifically
does not use any itself. This handshaking exists to ensure that no data is lost between the 2 devices. In applications
where there is a significant amount of data flowing between devices, there is an increased risk of data being lost.
Disabling handshaking unnecessarily may cause your application to fail intermittently due to this lost data.
No provision has been made in the current design for the implementation of the DCD and RI lines.
Connect Scheme
This allows the selection of a connection scheme called Proximity. This connection scheme tells the BL-521/730 to
go out, find the first Bluetooth device in range and connect to that device. If there are any problems connecting or
pairing, then the BL-521/730 will give up and go out to search again.
There are two different proximity schemes, 1 and 2. Scheme 1 finds a device to connect to and then saves that
device’s address as it’s partner device, so that the next time the BL-521/730 is powered up, it will always connect to
that partner device. Scheme 2 finds a device to connect to and doesn’t save that device’s address, so that next
time the BL-521/730 is powered up, it will go out and find a new device to connect to again. It may be the same
device as last time (if it is still in range) or it may be a new device.
The closest device to the BL-521/730 is not necessarily going to be the device that responds to the inquiry first.
The BL-521/730 needs to be in Client mode for Proximity to work and as soon as a partner address is populated in
the partner address field, the BL-521 behaves just as though it is in Client mode with a partner device to connect to.
Low Power Mode
This setting allows the selection of either Park or Sniff low power modes. These can be used to reduce the power
consumption of the BL-521 when an active Bluetooth connection exists. These settings only reduce power
consumption when a Bluetooth connection is present. They do not affect the power consumption of the BL-521
while it is inquiring, waiting for a connection or trying to make a connection. The setting requires the connecting
device to also support the selected low power mode.
Manual for BL-521 5_3.doc
© Copyright Brainboxes Limited 2004
Page 14 of 41
A server device in park or sniff mode periodically wakes up to listen to transmissions from the master. The client
device only transmits at these same times periodically. Also, in Park mode, a server device can have as many as
255-parked clients, as oppose to the usual limit of 7 clients. However, only 7 of the parked clients can be brought
from park mode to be active at the same time. For further information on low power modes and their operation
please see the Bluetooth website www.bluetooth.org
The settings used for the low power modes can be changed to suit whatever
the application is that the devices are being used for. Increasing interval
times will reduce the power usage, but will also increase the response time of
the BL-521’s as they are “out of action” for much longer.
Max Interval: This is used to specify in milliseconds the maximum possible
time that should exist between server/client communication ‘slots’
Min Interval: This is used to specify in milliseconds the minimum possible time
that should exist between server/client communication ‘slots’
Attempt & Timeout: These are used to specify the number of attempts that the
client device will listen at the specified interval, if there is no data there the
first time it starts to listen.
Interactive Menu
Some RS232 devices (GPS devices for example) emit a continuous stream of data regardless of whether a cable is
connected. When there is no Bluetooth connection, this data (from the RS232 device) will be interpreted by the
converter as commands to (or interaction with) the menu and ultimately change settings (such as baud rate) that
render the converter inoperable. Selecting “off” for this setting will stop the converter being unwontedly reconfigured in this manner. Unfortunately, this will also disable all the functionality required for this configuration
application to interact with this product.
If you inadvertently select “off” for this setting, the menu/command interface (and thus the operation of the
configuration application on this device) will only be re-enabled by a long reset as documented below.
WARNING: Use with care: Selecting the “off” option of this feature will render further configuration impossible.
Manual for BL-521 5_3.doc
© Copyright Brainboxes Limited 2004
Page 15 of 41
3.7. Default settings
The “Default Settings” section is simply a display page showing all
the configuration options either as they were set in the factory
(default or custom) or as the user has chosen to update them
from this application or menu.
These are the settings that will be restored if the “Restore Default”
icon is selected at the bottom of the page.
When the Default Settings section is opened (on the right-hand
side of the application), a new section appears in the left-hand
side called Current Settings, which can also be expanded so that
the current and default settings can be viewed at the same time.
3.8. Upgrade Device
The “Upgrade” section is a new feature that allows the user to
upgrade the BL-521/730 firmware using a simple upgrade wizard.
Updated firmware will be available from the Brainboxes support
website so please check the site regularly:
http://www.brainboxes.com/downloads/manuals/bluetooth/bl-521.asp
Manual for BL-521 5_3.doc
© Copyright Brainboxes Limited 2004
Page 16 of 41
4. Alternative Product Configuration
4.1. Accessing the configuration menus and commands.
The converter’s configuration menu is available at any time that there is no Bluetooth radio connection established
with another device (unless of course you have selected the option to disable the menu). As soon as a Bluetooth
connection is made, the data sent to the converter will be sent over the radio link to the remote device. A short time
after the Bluetooth connection is broken, the configuration menu’s become available again.
Sending a single “Carriage Return” character to the converter whilst no Bluetooth connection exists will activate the
initial main menu, or typing the command required will initiate the appropriate response. Both the menu and
command list are documented further below.
The version of firmware documented in this manual has a significantly reduced functionality menu compared to
earlier revisions of the product. This has been implemented so that more flexible functionality can be provided by
the Windows Configuration application as documented earlier.
The example given below to connect to the configuration menus is performed in Windows XP using HyperTerminal,
a terminal application that ships with Windows. If you are using a different operating system, you will need a similar
“terminal” or “tty” type application (e.g. minicom), which talks directly to a serial port in that operating system. If you
are using a different version of Windows the specific steps to invoke and use the HyperTerminal application may be
slightly different – please refer to your operating system documentation if you need further help in this respect.
First, connect the converter, along with the supplied gender changer, to an available serial port on your computer. In
this example, the COM1 port on the PC has been used.
Ensure the power adapter is connected and switched on (the leftmost green LED on the converter should light.
Start HyperTerminal by clicking “Start\All Programs\Accessories\Communications\HyperTerminal”.
If you are running HyperTerminal for the first time you will be prompted for
information about your location. This section must be filled in, but is not
used for our purposes, so you are free to add anything here.
The next screen (left) is just to name this instance of the connection. You
are free to name this as anything except an existing device name (e.g.
COM1).
Click OK
Manual for BL-521 5_3.doc
© Copyright Brainboxes Limited 2004
Page 17 of 41
Select the Port that you have connected the BL-521 to. All other fields will
then be “greyed out” then Click OK.
Select the communications parameters that your device is configured to.
In this example we have used the factory defaults normally applied. If you
have previously reconfigured these values, then you will need to make
sure the settings here match those you have configured to device to be.
Click OK
HyperTerminal should now be running.
Now hit the “Enter” key once. This should activate the main configuration
menu as shown in Main Menu below. You should be able to now interact
with the menus as described in the following sections.
4.2. Configuration Menu.
4.2.1. Navigation
As a general principle, from any menu screen hitting the “Enter” key refreshes the current menu and hitting the
“Esc” or “Escape” key returns the user to the previous menu or skips a particular option.
Menu selection is performed by pressing the number on your keyboard that corresponds to the number listed on the
menu item you wish to view/configure.
Reminder: The configuration menu is not available whilst a radio (Bluetooth) connection is established.
Manual for BL-521 5_3.doc
© Copyright Brainboxes Limited 2004
Page 18 of 41
4.2.2. Main Menu
Sending the “Enter” character to the BL-521
accesses its main menu. This is also sometimes
referred to as “Carriage Return”.
All basic configuration options for BL-521 are
accessed via this menu. Advanced features are not
available from the menu interface.
Users wishing to alter “advanced” settings can do so
by either using the Windows Configuration
application documented above, or by using the
commands documented below.
4.2.3. Communications Parameters
Selecting option 1 from the “Main Menu” menu
displays the Communications settings menu.
It is from this menu that all available serial port
settings can be changed. The available options are
detailed below.
The factory set communications parameters for your
BL-521 are as follows…
Baud Rate:
115,200
Data Bits:
8 (non-configurable)
Parity:
None
Stop Bits:
1
You can alter these settings by using
configuration menu options shown below.
the
The user is first prompted to change the Baud Rate.
The current setting is shown. To change the baud
rate, just type the rate you want to use and press
<enter>. The converter will accept any number you
type, but will set the baud rate to the one that’s
closest to what it can actually achieve.
Press “Esc” to skip this setting – the current setting
will remain unchanged
Manual for BL-521 5_3.doc
© Copyright Brainboxes Limited 2004
Page 19 of 41
Next the user is prompted to set the converter’s
Parity. Options here are None, Odd or Even.
“Esc” skips this selection leaving the current setting
unchanged.
Then the user is prompted to change Stop bits.
Options here are 1 or 2.
Pressing “Esc” skips this selection leaving the
current setting unchanged.
The user is then asked if they wish to Apply the new
settings immediately. If settings are not immediately
applied, the changes will only take effect after the
converter has had it’s power cycled.
This is to minimise the disruption to the device
configuration by having to reconfigure the terminal
application after changing each setting.
If you have changed any communications
parameters, and wish to continue to access the
configuration menu, you will need to update your
terminal applications settings. The easiest method
of performing this in HyperTerminal is to close and
re-start the application, setting the new parameters
during the initial application configuration.
4.2.4. Handshaking
Handshaking is discussed in more detail in the section below, as it is not an option directly available from the menu.
4.2.5. Bluetooth Parameters
Selecting option 2 from the “Main Menu” menu
displays the Bluetooth settings menu shown below
left.
The factory set Bluetooth Parameters are:
Partner device: None
Role (Client/Server): Server
PIN: 1234
Local device name: BL-521 BB RS232 Converter
It is from this menu that all available Bluetooth
settings can be changed. The available options are
detailed below.
Manual for BL-521 5_3.doc
© Copyright Brainboxes Limited 2004
Page 20 of 41
The Currently configured partner device is shown (if
any). The user is then prompted to enter a new
partner device address.
To keep the same partner, or skip this option, press
the “Esc” key
The user is then prompted for a new PIN to be
entered. You can enter any characters you wish
here up to a maximum of 16 characters. You should
bear in mind that some devices have limited input
mechanisms and may not be able to use a full
character set.
Next the user is prompted to choose a role for the
device (the current one is identified). “s” chooses
Server, “c” chooses Client or “Esc” skips this section
leaving the current setting unchanged.
Lastly, the user is offered to change the converters
friendly name. Typing your chosen name followed
by “enter” will immediately alter the published name,
hitting the “Esc” key will skip this setting leaving the
current name unchanged.
4.2.6. Display, Restore and Update Current and Factory Settings
Selecting option 3 from the “Main Menu” menu
displays the Current Settings menu and allows the
user to display, change or restore the default
settings.
Manual for BL-521 5_3.doc
© Copyright Brainboxes Limited 2004
Page 21 of 41
The first screen that displays shows the current
state of the converters settings.
If any settings have been modified by the user
following the instructions above, then this list will
differ from the default (factory) settings
Selecting option 2 from this menu shows the original
factory settings for the product (if viewing for the first
time). The one item that will be different for each
individual product will be the local device setting.
This setting is unique for each individual Bluetooth
device in existence and cannot be changed.
Selecting option 3 from this “Settings” menu allows
the current user settings to be used to update the
“factory” settings, providing some level of protection
from losing application configuration settings during
a device reset when the reset button is activated.
A warning message will appear to ask the user to be
sure that the default settings should be changed.
This is not something you really want to do unless
you’re sure you have the settings as you want them
and are sure you can remember them, as there is no
way back from here…
Selecting option 4 from the “Settings” menu above allows the user to restore the device to its default settings. Be
sure to take a note of, or print these settings, as you will need to ensure that the next time you attempt to
communicate with your converter you use these new settings. Remember that the original factory settings may
have been updated using the previous menu.
4.2.7. Disabling Interactive Menu
Some RS232 devices (GPS devices for example)
emit a continuous stream of data regardless of
whether a cable is connected. When no Bluetooth
connection exists, this data can actually appear
as commands to the menu and change settings
that render the converter inoperable. Disabling the
menu, stops the converter being unwontedly reconfigured in this manner.
Selecting option 5 from the main menu displays
the following Disable Interactive menu.
Selecting ‘y’ or ‘Y’ from this menu means that no
further interaction with the menu will be possible
until the device has been completely reset to it’s
factory defaults by performing a “long” reset from
the reset button.
Manual for BL-521 5_3.doc
© Copyright Brainboxes Limited 2004
Page 22 of 41
4.2.8. Upgrading Firmware 3.0
This feature is only available from firmware version 3.0 onwards.
Upgrade DFU (Device Firmware Upgrade) is an
option to be taken seriously as it has the potential
to leave your product in an unusable state.
The upgrade is a 2 stage process, the menu
option must be used in conjunction with the
upgrade software supplied on the accompanying
CD ROM which requires a Microsoft Windows 95
or later operating system
Selecting option 5 from the main menu displays
the following Firmware Upgrade menu.
To activate this feature, you must type the word
“PROCEED” exactly. This command is case
sensitive.
Typing “PROCEED” correctly will cause the
product to enter its firmware upgrade mode with
immediate affect.
Failure to enter “PROCEED” correctly will cause
the menu option to abort and you will be able to
continue navigating the menu in the normal
fashion.
In some (but not all) instances you will see some
“odd” characters displayed as shown above. This
is normal behaviour and indicates the product is
ready to receive its firmware upgrade commands
from the supporting software.
At this point, you will no longer be able to interact with the menu, nor will you be able to use the product as
advertised. ONLY the supporting software can restore this setting. Neither a power reset nor any combination of
presses of the reset button will restore normal operation to the product. It is now permanently in a state to upgrade
the firmware.
IMPORTANT, in order for the upgrade application to connect to your product and perform the
upgrade, you must ensure you disconnect your terminal application from the COM port. In
Hyperterminal, this is done either by closing the application down, or Clicking the “disconnect”
toolbar Icon
Now run the “upgrade” application documented in the section below for upgrading.
Manual for BL-521 5_3.doc
© Copyright Brainboxes Limited 2004
Page 23 of 41
4.3. Command Interface
The command interface is a new addition to version 4 of the converter’s firmware. This interface has been
developed primarily to support programming access to the configuration settings by an application such as our own
configuration application, but can also offer a powerful human operated (e.g. via HyperTerminal) command driven
interface in it’s own right. Additionally, the commands can be placed in a Text/script file and sent (e.g. by
HyperTerminal) in one go to the converter. The <scr> command is strongly recommended for use in this scenario.
The command interface protocol is quite straightforward. Each command (see table and descriptions below) must
be sent over the COM port, followed by a Carriage return. This can be done in HyperTerminal just by typing each
command and hitting the Enter key.
There are up to 3 ways each command can be used.
1. On its own. This acts as a “query” command.
e.g. cod<CR>
Returns the current device class
2. With an “=” and parameter(s). This acts as a “set” command
e.g. cset=9600,n,1<CR>
Sets the current settings to 9600 baud, No Parity and 1 Stop Bit
Not all commands support this function as they are query commands only
3. With a “?” which acts as a “help” command
e.g. svc?<CR>
Returns a description of the command syntax and allowable parameters
The command list summary is given below.
Command
Name
aset
btset
cnx
cod
cset
delpair
delpart
dflt
disc
enc
find
help or ?
hsk
ladd
list
lowpwr
lnam
Description
Get all settings
Get current Bluetooth settings
Manually connect to a found device
Class Of Device
Communication Settings
Delete the current pair
Delete the current Partner
Default settings
Discoverability
Encryption
Manually perform an inquiry
Help
Handshaking
Local device address
List the manually-found devices
Low Power Mode
Local device name
Command
Name
menu
padd
pair
parkset
part
pin
pnam
prox
remcfg
scr
sec
sniffset
svc
svr
upg
ver
verb
Description
Display Menu
Partner Address
Pair
Park Settings
Partner
PIN code
Partner Name
Set the proximity mode
Remote Configuration
Script Mode
Security
Sniff Settings
Connect Using profile other than SPP
Server or Client
Prepare for upgrading
F/W app version
Verbose
The full command list syntax and programming examples will be given in a future edition of this manual. In the
meantime, this information can be found using the help or ? command in HyperTerminal when your converter is
attached to an available COM port.
Manual for BL-521 5_3.doc
© Copyright Brainboxes Limited 2004
Page 24 of 41
5. Remote Configuration
A new feature in this release of BL-521 firmware is the ability to remotely configure its settings from a second
Bluetooth device, over a Bluetooth connection. For example, a Bluetooth connection can be created from a second
device and that second device can change the baud rate, local name or any of the settings of the BL-521 over the
Bluetooth link.
This is achieved by the BL-521 presenting two services to connect to; one is the standard serial port service and the
other is a remote configuration service. The latter is connected to, to enable the second device to access the BL521’s configuration menu using Hyperterminal and thus make any changes. Changes to port settings such as baud
rate, parity or stop bits do not affect the port settings of the second devices’ Hyperterminal settings, so the BL-521
can be set to 115200, n, 1 and the Hyperterminal settings for the second device that is accessing the BL-521’s
menu remotely can be set to any settings i.e. 9600, e, 2.
Currently the remote configuration feature is not accessible from the main configuration utility application and
Hyperterminal or some other suitable terminal application should be used.
Also, upgrading of the BL-521 cannot be achieved using remote configuration because as soon as the BL-521
starts to upgrade, the Bluetooth connection is lost and there is no longer a way of communicating to the BL-521
remotely.
To use remote configuration from BL-521 to BL-521 use the command line “remcfg=xxxx-xx-xxxxxx” where the x’s
stand for the remote device’s Bluetooth address.
6. Resetting the Product
The BL-521 has a “reset button” located on the side of the case as shown in section 2.1 above. This button
performs 2 different functions.
a) Resets Paired Devices.
A short press (less than 3 seconds) of the reset button causes any paired device information to be deleted.
When the device is in low security mode, this will not have any effect on the devices operation, but whilst in
high security mode, this will mean that another device can pair with BL-521, or that the original device must
expire its bond in order to reconnect.
b) Resets BL-521 to factory defaults.
A long press (more than 3 seconds) of the reset button causes all factory defaults to be restored. Care
should be taken here to remember that these “factory” settings can actually be updated via the interactive
menu and thus may not be the same as the device was shipped with. The user should also remember that
BL-521 is likely to need it’s parameters re-configuring to ensure communications can be re-established with
either the local serial device, or remote Bluetooth device.
Manual for BL-521 5_3.doc
© Copyright Brainboxes Limited 2004
Page 25 of 41
7. Upgrading your device
If you have installed the Configuration Utility already, the Upgrade application will also have installed and a shortcut
will be placed onto your desktop. Otherwise browse the CD, navigate to the “BL-521 Configuration Utility” directory,
and run the “Setup.exe” application. Follow the onscreen instructions to install the application. This will create an
entry in your start menu as well as a desktop shortcut.
Run the application by selecting it from the “Start” menu.
The first screen is displayed. The version of the
application is displayed in the lower right corner of
the screen.
Click “Next”
Three options are presented to the user with the
choice or either just upgrading the firmware,
upgrading the firmware and changing the RTS/CTS
handshaking setting or just changing the RTS/CTS
handshaking setting.
To simply upgrade the firmware, select the first
option.
Manual for BL-521 5_3.doc
© Copyright Brainboxes Limited 2004
Page 26 of 41
Select the COM port to which you have connected
your product. (Remember to close the Configuration
Utility or Hyperterminal application if you still have
either open)
Then Click “Next”.
Point the upgrade wizard to the upgrade file you
wish to use.
These upgrade files all have the extension .dfu and
the latest version is available from the Brainboxes
website.
Confirm you have made the correct selections by
clicking “Next” to start the upgrade procedure.
Manual for BL-521 5_3.doc
© Copyright Brainboxes Limited 2004
Page 27 of 41
Assuming you have selected the correct options, the
wizard will detect the product connected to the
selected port and begin the upgrade.
This may take a few minutes, as the wizard will
automatically make a copy of the firmware currently
on the device before uploading the new version.
A progress bar indicates how the procedure is
going.
If everything went well the final screen should show
indicating any further action that may be required.
Typically a power cycle of the device will be
necessary before the upgrade completes.
Manual for BL-521 5_3.doc
© Copyright Brainboxes Limited 2004
Page 28 of 41
8. Physically connecting to your RS232 device
8.1. Configuring the communications parameters.
The converters do not have the ability to auto-detect the communications parameters (e.g. baud rate) so they must
be configured to match the data rate used in the application to which they are connected.
Please refer to section 4.2.3 above, for details on how to do this.
It is possible, if a little confusing, to “pair” two converters and have them physically connected to RS232 devices
which use totally different communications parameters.
8.2. Physically connecting your device to BL-521 via the RS232 cable
BL-521 is supplied with an integral cable terminating in a 9-pin male D type connector. This DTE (Data Terminal
Equipment) configuration has been chosen to allow for easy connection to DCE (Data Communication Equipment)
RS232 devices that would normally connect directly to the RS232 port on a computer. Included is a convenient and
appropriately wired gender changer that allows the converter to behave as a DCE device (e.g. if you wish to
connect it to your computer for configuration or to Bluetooth enable the same).
Connector Pin-Outs for the integral DTE cable (Male 9 Pin D Type) are…
Pin
Signal
Pin
Signal
Pin
Signal
1
2
3
N/C
RxD
TxD
4
5
6
DTR – N/C
Ground
DSR – N/C
7
8
9
RTS
CTS
N/C
As the RS232 standard allows for many different cable configurations,
your device may need an additional cable to work with the converter,
such as a “cross-over” or “null-modem” cable. Please refer to your
device’s documentation for specific details.
When the enclosed DCE “gender changer” is connected, the (Female 9 pin D Type) Pin-Outs are…
Pin
Signal
Pin
Signal
Pin
Signal
1
2
3
N/C
TxD
RxD
4
5
6
DSR – N/C
Ground
DTR – N/C
7
8
9
CTS
RTS
N/C
The female connector is designed so that it can be plugged directly into
a PC’s motherboard COM port. If you are connecting it directly to a
different device you may need an additional cable, such as a “crossover” or “null-modem” cable. Please refer to your device’s
documentation for further details.
Manual for BL-521 5_3.doc
© Copyright Brainboxes Limited 2004
Page 29 of 41
9. Connecting converters over Bluetooth.
There are 3 scenarios in which BL-521 can be connected via Bluetooth. This section details all 3 methods.
a) Client/Server Pair: 2 converters, configured to perform a “true” cable replacement.
b) Client: BL-521 is the Bluetooth device which initiates the connection
c) Server: Connecting TO BL-521 from a remote Bluetooth device (Factory Default)
Each of these 3 different scenarios can be configured in each of the 3 configuration methods previously described
and are also documented herein.
9.1. Client/Server Pair: “Cable Replacement”.
One of the strongest features of BL-521 is that 2 of them can be configured to connect to each other and thus
behave almost exactly as a cable. This configuration is very straightforward, does not require any Bluetooth
software and is detailed below.
For BL-521’s to connect as a pair, one of the devices needs to be configured as a client device, and one as a
server. As the factory settings for BL-521 are “Server” it follows then that only 1 of the BL-521 pair needs any
alternate configuration from that supplied.
It is advisable that you first configure the communications settings (baud rate etc) for each BL-521 so that they are
suitable for the devices into which you are plugging them. When configuring a pair of BL-521’s the Communications
parameters of each converter do not have to match each other’s, only that of the devices into which they are
connected.
Each BL-521 has a unique Bluetooth Address (BD_ADDR). This is printed on a label on the base of every product,
but is also accessible from the “View Current Settings” menu detailed above. For our example here, we will use a
BL-521 with a BD_ADDR of 000A-4F-00082D, which we’ll call the Server, and a second, with a BD_ADDR of 000A4F-0013BB, which we’ll call the Client. We’ll leave all other settings for this example as factory defaults. As
explained above we only need to change the settings of the Client device…
9.1.1. Configuration by Windows Application
Add the address of your remote device into the “Partner
Device Settings” Section in the “Address” field.
Next Click the drop down arrow at the right of the
“Client/Server” field in the “Local Device Settings” section and
select the “Client” Option
Click “Apply”
Manual for BL-521 5_3.doc
© Copyright Brainboxes Limited 2004
Page 30 of 41
9.1.2. Configuration by Menu
Select option 2 from the “Main Menu” menu to
display the Bluetooth settings menu shown below
left.
You should enter here the Bluetooth Address
(BD_ADDR) of the remote (server) device you wish
to pair (in our case this is 000A-4F-00082D)
followed by ENTER.
This should be in the same format as indicated on
the products label (NAP-UAP-LAP, for those of you
who know)
Press “Esc” to skip this section
Press C to select the client option. This setting is
stored immediately and is not discarded upon a
reboot. In fact it requires a re-boot in order to
activate it.
Press “Esc” to skip this option
Re-boot (power cycle) your converter. When the Client BL-521 is switched on, it will connect to the Server device
you have entered in the menu above, assuming of course that the server device is also powered up. Remember of
course that the factory shipped configuration of the converters is “server” so only 1 device needs any modification in
this respect
Manual for BL-521 5_3.doc
© Copyright Brainboxes Limited 2004
Page 31 of 41
9.1.3. Configuration by Commands
Access the converter you wish to change to “Client” for command mode as documented above and send the
following commands:
padd = 000A-4F-00082D<CR>
svr = 0<CR>
Now power cycle your converter and it will attempt to connect to the server device.
9.2. Client: BL-521 is the Bluetooth device which initiates the connection
The instructions in the above section for creating a “cable replacement” connection should be followed to place the
BL-521 into Client Mode in order to initiate a connection to a remote device substituting the address for that of the
other device which you are trying to connect to.
Some remote devices do not allow connection to a Serial Port Profile, but may allow connection to DUN, LAN or
FAX profiles. If this is the case, only the Windows Configuration UI or command mode can be used to change the
behaviour of your converter in this respect. This option is documented above in the converter configuration section.
9.3. Server: Connecting to BL-521 from a remote Bluetooth device.
Connecting to your BL-521 will vary depending on your application, but will usually consist of 3 Steps.
1 – Configuring the BL-521’s communications parameters.
2 – Physically connecting BL-521 to your device.
3 – Connecting to BL-521 from a remote device via Bluetooth and transferring data.
There are many different scenarios whereby a connection can be made to a BL-521 and consequently its attached
device. The application scenarios will also depend on what sort of device you have attached to the BL-521.
9.3.1. Configure and connect the converter
Configure the communications and Bluetooth parameters of the converter as described in the above sections and
physically connect it to your RS232 device.
9.3.2. Bluetooth Enable your PC
Any PC based Bluetooth device could be used, but for this example we have used a Brainboxes USB adapter and
Bluetooth software for Windows XP.
9.3.3. Discover the device
Open the “My Bluetooth Devices” window and click the
discovery button to discovering the converter using the
Brainboxes Bluetooth Windows software. This sets the
software to display all the Bluetooth devices it can find “in
range”.
This software will not operate the converter products if
attached to the PC although it can be used to connect by
Bluetooth to a converter attached to the same PC.
Assuming that your converter is switched on, in radio range
and set to “discoverable) you should see it displayed
(perhaps alongside other Bluetooth devices in range) in the
main screen.
Manual for BL-521 5_3.doc
© Copyright Brainboxes Limited 2004
Page 32 of 41
9.3.4. Secure the relationship
This is where you must “Bond” or “Pair” with the device. This
is a feature of Bluetooth, which allows secure
communications to take place. It is also used to stop other
devices from performing unauthorised connections.
You can start the bonding process by selecting and right
clicking on your BL-521 from the main screen. This brings up
a context menu from which you should select the “Bond”
option.
If you have configured your BL-521 from the menu to use a
low security mode (and thus not require bonding) then this
step can be skipped and you can jump straight to section
“9.3.5 Connect to the Serial Port profile”.
You will then be prompted to enter a PIN number. Enter the
Pin number (which is 1234 by default, unless you have used
the configuration menu to change it). Click OK
The Icon of your BL-521 in the main window should now
change to indicate a “bonded” status as shown here.
9.3.5. Connect to the Serial Port profile
In order to actually connect to the appropriate function on the
BL-521 you will need to discover it’s services.
Double-Click the device selected.
This will display a serial port service called “Serial 01”
Double clicking this service (or right clicking and selecting the
“connect” option), will create a COM port style connection to
the BL-521.
This screen shot shows that the port in our example here is
listed as COM25, although yours will most likely be a much
lower number than this.
This “COM” port is now available for any application to use to
communicate with your device, or in our case, the
oscilloscope.
9.3.6. Connect your application to the new COM port
In our initial testing at our labs, we use the HyperTerminal application included in Windows to open the new COM
port. See documentation above for details of using the HyperTerminal application
Manual for BL-521 5_3.doc
© Copyright Brainboxes Limited 2004
Page 33 of 41
10. Worked Examples
10.1. Scientific equipment data logging:
In this example we have connected a Tektronix TDS220 Oscilloscope to
a BL-521 and plugged in the power adapter included. No additional
cables or gender changers were used in this application scenario.
In order to communicate to the oscilloscope/BL-521 we have connected
a Brainboxes USB adapter (Order code BL-554) to a laptop with
Brainboxes Bluetooth software suite installed. If you are connecting to
BL-521 with a different manufacturers Bluetooth product, please refer to
the manufacturers instructions for that product. If you are Bluetooth
enabling your laptop with another Brainboxes converter you should
follow the previous sections instructions.
In this scenario, BL-521 was configured as a Server (default) and it’s baud rate was changed to match that of the
oscilloscope (19200 baud). Connection from the USB adapter to the BL-521 was performed exactly as described in
the section above.
Setting HyperTerminal to save data to a file called screen.bmp, and activating the hardcopy feature of the
oscilloscope, caused all data to be sent from the scope to the file as listed. This file could then be viewed using any
picture editing software and displays an exact screen copy of the oscilloscope. Instructions for using HyperTerminal
can be found above. Of course it is also possible for you to write (as we did) your own application to read this data
from the COM port and display it very easily.
11. Custom Factory Configuration
To help ease larger application rollouts by removing the need for customer re-configuration of each individual unit
supplied, all the settings documented in this manual can be pre-configured to your specification at the factory.
Please speak to your account manager/distributor for more details about this service.
Manual for BL-521 5_3.doc
© Copyright Brainboxes Limited 2004
Page 34 of 41
12. Troubleshooting
In the rare occasion that you experience difficulties using this product, please read the following suggestions from
the table below before contacting our support team.
Symptom
Description
Solution
Data doesn’t seem to be
received by the product, but
seems to be sent by it (e.g. data
only travelling in one direction)
This is normally the result of the
product being configured as requiring
RTS/CTS handshaking, but being
plugged into a device which does not
support it.
Interaction with the menu
appears slow and unresponsive,
but data does show eventually.
This is normal operation when the
product is in Client mode. The product
is using most of its processor cycles
to try and find and connect to a
remote device.
There are a number of scenarios
where this might happen…
1. A Bluetooth connection is made
2. The Product has failed to initialise
correctly (perhaps if the power
adapter has been attached whilst
switched on).
3. Incorrect
communication
parameters selection.
4. Incorrect Wiring configuration
Firmware prior to 3.0 requires that pins
7 and 8 (RTS and CTS) of the 9 pin
connector are connected to each other
(looped back). Firmware from 3.0
onwards
can
switch
off
this
requirement – refer to Error!
Reference source not found. Error!
Reference source not found. for
details on how to do this.
Reconfigure the product to Server
mode whilst attempting to configure
other options
Cannot interact with the menu
Firmware upgrade (DFU Wizard)
fails
Manual for BL-521 5_3.doc
1. Product not connected
2. Product not configured for upgrade
© Copyright Brainboxes Limited 2004
1. No interaction with the menu is
possible when a Bluetooth connection
is present. Break the connection to
restore access to the menu.
2. Switch the power off then on again.
3. Change the communication settings
in your terminal application to match
those of the devices settings. If you
have forgotten or lost these settings,
then the device can be restored to its
factory settings by performing a long
reset. Check your devices wiring and
handshake configuration requirements
1. Connect your converter to a suitable
port on your PC and connect the
power.
2. Follow instructions in above sections
for preparing for upgrade
Page 35 of 41
13. Technical Specifications
Qualified Output Power:
average
peak
o
= 14.43 dBm @2441 MHz, 25 C
o
= 18.21 dBm @2402 MHz, 0 C
13.1. Storage and Operating Environment
13.1.1. Storage
Temperature
Humidity
o
o
: -40 C to +85 C
: 8% to 95% non-condensing
13.1.2. Operational
Temperature
Humidity
o
o
: 0 C to +40 C
: 20% to 75% non-condensing
13.2. Power requirements
13.2.1. Input Voltage Requirements
The product was qualified using a fully rectified AC/DC power supply supplying 800mA @ 5V. To ensure your
product performs within the regulatory requirements, you should only use the AC/DC adapter supplied, or approved
by Brainboxes.
For your information only, the Voltage tolerances are given below.
Minimum 4.3V – Maximum 6V
Correct operation of the product has not actually been tested at these voltage extremes. This additional Voltage
information does not in any manner constitute advice or recommendation on alternative power supplies.
13.2.2. Measured current consumption
Measurement scenario
Server application, no rf connection
Slave application, rf connection
Slave application, file receive mode
Slave application, file transmit mode
Master application, no rf connection
Master application, rf connection
Master application, file receive mode
Master application, file transmit mode
Measured Current (mA)
68.5
41.7
44.1
48.7
88.4
16.7
30.3
24.9
Note:
Air separation of 2 metres for all measurements.
Tested using Stack version 16.4.4 and firmware version 2.10, other versions may differ.
Maximum measured power (peak) = 120mA. Recommend use minimum of 200mA power adaptor.
Manual for BL-521 5_3.doc
© Copyright Brainboxes Limited 2004
Page 36 of 41
13.3. Transmitter Characteristics
Test Type
Output Power
Power Density
Power Control
Frequency Range
20 dB bandwidth
o
Adjacent Channel Power (0 C)
Modulation Index
Initial Carrier Frequency Tolerance
Drift Rate
European Conducted Emissions
FCC Conducted Emissions
Results
+18.21 dBm (peak)
+17.02 dBm
Min step: 4.37dBm ; Max step: 5.67dBm
2400.05 MHz ~ 2481.60 MHz
Worse case: 940 kHz
2 fails
TX = 2405 MHz
TX = 2441 MHz
1 fail
TX = 2477 MHz
0 fails
0.94~1.03 (channel dependent)
Worse case: 21.9 kHz
Worse case: 18.3 kHz / 50 us
Worse case: -31.72 dBm
Worse case: none of note
Required Limits
< +20 dBm
< 20dBm per 100 kHz EIRP
2 dBm < step < 8 dBm
2400.00 MHz ~ 2483.5 MHz
1 MHz
3 fails
3 fails
3 fails
0.8
75 kHz
20 kHz / 50 us
-30 dBm
20 dBm
Results
0.00 %
0.00 %
0.00 %
Required Limits
0.1 %
0.1 %
0.1 %
13.4. Receiver Characteristics
Test Type
Single Slot Sensitivity
Multi Slot Sensitivity
Maximum Input Level
Manual for BL-521 5_3.doc
© Copyright Brainboxes Limited 2004
Page 37 of 41
13.5. Antenna Characteristics
13.5.1. Gain
The antenna is integral to the printed circuit board. It is a quarter-wave Planar Inverted-F Antenna (PIFA) with a gain
of -0.3 dBm.
13.5.2. Radiation Patterns
0o
0o
0 dBd
0 dBd
-10 dBd
315o
-20 dBd
-10 dBd
315o
o
45
-20 dBd
-30 dBd
45o
-30 dBd
270o
90o
270o
135o
225o
180o
90o
135o
225o
180o
horizontal polarisation
vertical polarisation
horizontal polarisation
vertical polarisation
0o
0 dBd
-10 dBd
315o
-20 dBd
45o
-30 dBd
270o
90o
135o
225o
180o
horizontal polarisation
vertical polarisation
Manual for BL-521 5_3.doc
© Copyright Brainboxes Limited 2004
Page 38 of 41
14. Regulatory Information
Bluetooth product operating in 2.4GHz band for Home and Office use.
14.1. Europe – EU Declaration of Conformity
This device complies with the R&TTE Directive 1999/5/EC, and the following standards:
EN 60950: 1992; EN60335-1: 1994
ETS 300 826 ; EN 301 489-1/-17 : 2000 ;
EN50081 – 1 : 1992 ; EN 50082 – 1 : 1997
ETS 300 328-2:
Safety information Technology Equipment,
including Electrical Business Equipment
Electromagnetic compatibility
2000 Radio Equipment and Systems (RES);
Wideband transmission systems; Technical
characteristics and test conditions for data
transmission equipment operating in the 2.4
GHz ISM band and using spread spectrum
modulation techniques.
14.2. Important Notice for use in France and Italy
Italy:
License required for use. Your reseller will tell you the procedure to follow.
E’necessaria la concessione ministeriale anche per l’uso. Verification con Irivenditori la procedura
da seguire.
France:
Low power device (1mW), there is no limitation for indoor or outdoor use.
Dispositif à faible uissance (1mW), pas de limitation pour son usage à l’intérieur ou a l’extérieur.
14.3. Rest of World
Country restrictions apply for home and office use.
Manual for BL-521 5_3.doc
© Copyright Brainboxes Limited 2004
Page 39 of 41
15. Index
Address, 6, 10, 31, 32
gender changer, 17, 30
apply, 40
HyperTerminal, 17, 18, 20, 34
baud, 4, 6
LED’s, 17
BD_ADDR, 10, 31, 32
Local Device Name, 6, 12
BL-521, 6, 9, 10, 12, 13, 14, 17, 18, 19, 20, 26, 30,
31, 32, 33, 34, 35
menu, 6, 9, 10, 17, 18, 19, 20, 21, 22, 23, 26, 31, 32,
34, 42
Bluetooth, 1, 4, 6, 10, 12, 13, 17, 18, 20, 26, 31, 32,
33, 34, 35, 40
Menu, 18, 19, 20, 21, 22, 32
bond, 26
Pairing, 6
Bond, 34
parameters, 18, 19, 20, 26, 30, 31, 33
bonded, 34
parity, 4, 6
Brainboxes, 4, 35
partner, 10
cable, 4, 10, 30, 31, 33
PIN, 6, 10, 34
changes, 6, 42
Port, 18
Client, 6, 10, 31, 32, 33
re-boot, 32
COM, 6, 30, 34
Regulatory, 40
communications, 18, 19, 20, 26, 30, 31, 33, 34
configuration, 6, 9, 10, 17, 18, 19, 20, 22, 31, 34, 42
connect, 10, 13, 17, 31, 32, 34
connectable, 12
data, 4, 9, 17, 33, 35, 40
Device Class, 6, 14
Disable, 6, 22
Discover, 33
Discoverability, 6, 12
Encryption, 13
error, 10
factory settings, 4, 22, 31
Factory Settings, 21
Manual for BL-521 5_3.doc
Pair, 31, 34
reset, 4, 22, 23, 26
reset button, 22, 23
Resets, 26
restore, 4
RS232, 1, 4, 9, 12, 20, 30
secure, 10, 34
security, 4, 10, 13, 26, 34
serial, 17, 19, 26, 34
Server, 6, 10, 31, 32, 33
service, 4, 13, 34
services, 13, 34
settings, 6, 18, 19, 20, 21, 22, 26, 31, 32
stop bits, 4, 6
© Copyright Brainboxes Limited 2004
Page 40 of 41
Version History
Version
Date
Author
1.0
2.0
06/01/2003
10/01/2003
Gav
Gav
2.1
3.0
14/01/2003
03/04/2003
Gav
Gav
3.1
11/04/2003
Gav
3.2
11/04/2003
Gav
4.0
26/08/2003
Gav
4.1
5.0
5.1
04/09/2003
26/09/2003
10/12/2003
Gav
Gav
Gav
5.2
22/03/2004
Michelle Best
5.3
20/09/2004
Michelle Best
Manual for BL-521 5_3.doc
Checked By
ETW ;SE ;DR
;MW ;OS ;NP
J ;PG
ETW ;SE ;DR
;MW ;OS ;NP
J ;PG
ETW ;SE ;DR
;MW ;OS ;NP
J ;PG
SG;NP-J;DR;
MR; MW
Comments
Initial version
Added info for configuration menu options, changes in pinouts,
and other features along with minor formatting changes.
Minor formatting changes
Updated to reflect changes on Rev7 Product PCB and updates
to product firmware (V2.10)
Minor mods and clarifications following review. Creation of index.
Minor changes to device menu display updated.
Section re-order, update tables.
Re-write for firmware 3.0 additions.
Addition of Technical data
Various additional explanation/clarification in many areas
Addition of troubleshooting information
Additional worked examples
Major Formatting alterations
Major Update for new firmware version 4.0 features
Formatting and minor content clarification changes following
review
Formatting and minor content changes following updated
firmware release
Minor content changes and additions following updated firmware
release
© Copyright Brainboxes Limited 2004
Page 41 of 41