1
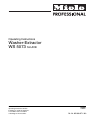
Operating Instructions
Washer-Extractor
WS 5073 SLUICE
It is essential to read these
operating instructions before
installing or using the machine,
to avoid the risk of accident
or damage to the machine.
Q
M.-Nr. 05 068 971 /03
M.-Nr. 05068971/03
2
Contents
Page
Warning and Safety instructions . . . . .
Caring for the environment . . . . . . .
Guide to the machine . . . . . . . . . .
Before using for the first time . . . . . .
Preparing the wash load . . . . . . . . .
Programme selection . . . . . . . . . .
Dispensing detergent . . . . . . . . . .
Changing programme sequence . . . .
Fabric conditioner/starch . . . . . . . . .
Coin unit . . . . . . . . . . . . . . . . .
Programme changes . . . . . . . . . . .
Cleaning and care . . . . . . . . . . . .
Problem solving guide . . . . . . . . . .
After sales service . . . . . . . . . . . .
Explanation of symbols on the data plate
Notes for the installer . . . . . . . . . .
.
.
.
.
.
.
.
.
.
.
.
.
.
.
.
.
.
.
.
.
.
.
.
.
.
.
.
.
.
.
.
.
.
.
.
.
.
.
.
.
.
.
.
.
.
.
.
.
.
.
.
.
.
.
.
.
.
.
.
.
.
.
.
.
.
.
.
.
.
.
.
.
.
.
.
.
.
.
.
.
.
.
.
.
.
.
.
.
.
.
.
.
.
.
.
.
.
.
.
.
.
.
.
.
.
.
.
.
.
.
.
.
.
.
.
.
.
.
.
.
.
.
.
.
.
.
.
.
.
.
.
.
.
.
.
.
.
.
.
.
.
.
.
.
.
.
.
.
.
.
.
.
.
.
.
.
.
.
.
.
.
.
.
.
.
.
.
.
.
.
.
.
.
.
.
.
.
.
.
.
.
.
.
.
.
.
.
.
.
.
.
.
.
.
.
.
.
.
.
.
.
.
.
.
.
.
.
.
.
.
.
.
.
.
.
.
.
.
.
.
.
.
.
.
.
.
.
.
.
.
.
.
.
.
.
.
.
.
.
.
.
.
.
.
.
.
.
.
.
.
.
.
.
.
.
.
.
.
.
.
.
.
.
.
.
.
.
.
.
.
.
.
.4
.6
.7
10
11
12
12
14
15
16
17
20
21
24
25
26
The washer-extractor must be installed by an
approved service technician or an authorized
Service Dealer.
3
M.-Nr. 05068971/03
Warning and Safety Instructions
The machine is only completely isolated
from the electricity supply either when
switched off at the wall isolator, or the mains
fuse is withdrawn from the socket.
Please read the operating instructions before using this machine for the first time.
They contain important information about
the safety, use and maintenance of the machine. This will avoid the risk of accidents
and damage to the machine.
Repairs to machines operating with electricity, gas or steam should only be undertaken by a suitably qualified service engineer
to ensure safety. Unauthorized repairs could
be dangerous.
Appropriate use of the machine
This washer extractor is only intended for
items of laundry which have not been impregnated with dangerous or inflammable substances.
Faulty components should only be exchanged for Miele original spare parts.
Only when these parts are fitted can the
safety standards of the machine be guaranteed.
Only machine wash articles which
possess a care label stating they are suitable for machine washing.
The very best materials are used in the
manufacture of this machine, and every
care is taken in its manufacture. However,
with time, deterioration of parts can occur, especially with rubber components such as
hoses. This should be borne in mind if operating the machine without supervision. Check
the inlet hoses regularly for signs of deterioration and replace in good time, to avoid leaks
and subsequent damage.
On no account must solvents of the kind
used for dry cleaning be used in this machine. There may be the danger of fire or explosion.
Never use or store petrol or petroleum
based substances or any easily inflammable substances near the machine. Do not
use the machine lid as a resting place.
Danger of fire or explosion
Local regulations regarding regular inspection and maintenance of this machine
must be observed. (In Germany this machine
is subject to laundry regulations UVV
(VBG7y), Sections 36 and 37, which stipulate
that washer extractors with a kinetic energy of
more than 1500 Nm must be checked once a
year by a competent person for their operational safety and the results entered in a test
log (book) supplied with the machine for the
German market, and which must be kept at
the place of operation and be available for inspection.)
Technical and electrical safety
The electrical safety of this appliance can
only be guaranteed when continuity is
complete between the appliance and an effective earthing system which complies with local
and national regulations.
It is most important that this basic safety requirement is regularly tested by a qualified
electrician. The manufacturer cannot be held
responsible for the consequences of an inadequate earthing system.
Do not damage, remove or bypass the
safety features and controls on the machine.
Where there is any damage to the machine or to the cable insulation the machine must not be used until it has been
repaired.
Any removable outer panels must be in
place, and all moving or electrical parts
shielded before the machine is operated.
M.-Nr. 05068971/03
4
Warning and Safety instructions
Use of the machine
chine. There may be the danger of fire or explosion.
Never allow children to play in, on or near
the washer extractor, or to operate it themselves. Please supervise its use by the elderly or infirm.
Always follow the instructions of the
chemical manufacturer when using cleaning agents and special application chemicals.
Only use such chemicals for the purpose and
in the situation specified by the manufacturer
in order to avoid the danger of adverse
chemical reactions and material damage.
If in doubt check the suitability of the product
for use in this machine with the manufacturer
before using it.
Remember that the door porthole glass
can become hot during the operation of
the machine. Do not let children touch it.
When washing with high temperatures
steam can be emitted from the venting
slot behind the machine.
Where a chemical cleaning agent is recommended on technical application
grounds, this does not imply that the manufacturer of the machine takes responsibility for
the effect of the chemical on the material of
the items being cleaned or on the machine.
Please be aware that changes in formulation,
storage conditions etc., which may not be publicised by the chemical producer, can have a
negative effect on the cleaning result.
Do not grip between the suspended drum
unit and the seal of the front panel cut-out
during spin.
Always make sure the drum is stationary
before reaching in to remove washing.
Reaching into a moving drum is extremely
dangerous.
Water used for washing and rinsing must
not be used as drinking water. It must be
discharged into a proper sewerage system.
On no account use high pressure
cleaners or hose down the machine.
The machine should only be operated unsupervised when there is a floor drain
(gully) in the direct vicinity of the machine.
Use of accessories
Accessory parts may only be fitted when
expressly approved by Miele. If other
parts are used, guarantee, performance and
product liability claims may be invalidated.
Chlorine or agents containing chlorine are
corrosive, and can under certain conditions lead to irreperable damage to components.
Disinfecting and cleaning agents often
have compounds containing chlorides in
them. If these agents dry on to stainless steel
surfaces, the residual chlorides will attack the
steel and can cause rusting.
To protect your machine from rust damage,
we recommend only using chloride free disinfecting and cleaning agents for washing and
disinfecting programmes and for cleaning
stainless steel surfaces of the machine itself.
If you are not sure about a particular agent,
contact the manufacturer of that agent for advice.
If you accidentally spill an agent containing
chlorides on the machine it should be rinsed
off with water and dried using a soft cloth.
Disposal of old machines or appliances
When disposing of an old washer extractor first make it unusable. Disconnect
from all services, cut off the cable and the
plug from the cable.
Make the door lock inoperative, so that children cannot accidentally shut themselves in.
Make appropriate arrangements for the safe
disposal of the appliance.
All personnel working with this machine must
be fully trained in all aspects of its use and
safety.
Keep these instructions in a safe place
Proprietary dyes, dye removers and descaling agents may only be used in this
machine if the manufacturer expressly states
that they are suitable for use in a washing ma5
M.-Nr. 05068971/03
Caring for the environment
Disposal of the packing material
The transport and protective packing has
been selected from materials which are environmentally friendly for disposal and can normally be recycled.
Rather than just throwing these materials
away, please ensure they are offered for recycling.
Disposal of your old machine or appliance
Old machines contain materials which can be
reclaimed or recycled. Please contact your
dealer, your local waste collection centre or
scrap merchant about potential recycling
schemes.
Ensure that the machine presents no danger
to children while being stored for disposal.
See the appropriate section in the Warning
and Safety instructions.
M.-Nr. 05068971/03
6
Guide to the machine
WS 5073 washer extractor, sluice machine
11
1
2
7
8
9
10
12
13
16
3
4
14
5
6
15
1
2
3
4
5
-Detergent dispenser box
-Control panel
-Drum door
-Front wall panel
-Flap for drainage system
and emergency door release
6 -Four adjustable screw feet
7
8
9
10
11
12
13
14
15
16
-Cable entry for extra equipment
-Cable entry for Dispenser pumps
-Cable entry for power supply
-Venting socket
-Cold water connection
-Hot water connection
-Opening for dispenser hoses
-Back wall
-Drainage
-Air gap
Control panel
1
2
3
1 -Temperature and time left display
2 -Push button switches
4
3 -Programme sequence indicator lights
4 -Programme and Temperature selector
7
M.-Nr. 05068971/03
Guide to the machine
Additional display
Push button switches
h
a Door
min / °C
Time display h(rs)/min(s)
(does not apply to programme F)
Opens the drum door, releases the
“With pre-wash” or “Starch” or “No final
spin” buttons, if any of these had been
pushed in.
This display shows how long the wash programme still has to run.
Indicator light ¾min lights up.
+i with Pre-wash
or
Temperature oC
Can be selected with programmes
A, B, C, E
m Starch
From 20 oC the temperature is shown rising
in 5 oC-Steps.
Indicator light p°C lights up.
Can be selected with programmes
A, B, E
¾ min Time left
w
No final spin
p°C
Can be selected with programmes
A, B, C, D, E
h
Start
Starts the programme
M.-Nr. 05068971/03
8
Temperature
Guide to the machine
F Sluice programme
Programme sequence indicator lights
Sluice programme for heavily soiled cotton
and linen items.
Smaller loads, e.g. 5 kg Cottons are washed
more efficiently.
Add detergent to Pre-wash i and Main
wash j compartments.
Add fabric conditioner to p compartment.
On/Start
Pre-wash
Main wash
Rinses
Rinses
Rinse/Starch
Drain
Final spin
End
Water inlet/drain
The "Sluice" programme begins, consisting of:
– Cold water sluice cycles (high water
level, then drained)
– Pre-wash 65°C
– Main wash 75°C, held for 12 minutes
– Rinses
Programme and Temperature selector
– Drain
– Spin
Once the programme commences the door
cannot be opened until completion of the
whole programme, in full compliance with
DHSS requirements.
For the same reason the options for change
available with other programmes during a
cycle are excluded and the programme cannot be cancelled.
Maximum spin speed per programme
Programmes
A Cottons
D Wool
E Short programme
G Separate spin
B Minimum iron
F Sluice
C Delicates/Synthetics
A Cottons
B Minimum iron
C Delicates/Synthetics
D Woollens
E Short programme
F Sluice
G Separate Spin
H Separate Drain
9
1200 rpm.
900 rpm.
1200 rpm.
600 rpm.
M.-Nr. 05068971/03
Guide to the machine
Before using for the first time
The first commissioning of the machine
should be carried out only by a Miele service technician or an authorized Miele Service Dealer.
It is essential that the machine is installed
and connected to power, water and drainage correctly.
Washing out the machine
Any residual lubricants and water from testing
still in the machine should be flushed out as
follows:
Detergent dispenser compartments
Do not load any laundry in the machine.
Compartment i
- Pre-wash
Compartment j
- Main wash
Compartment y
- Liquid bleach
Turn the programme selector switch to the
“A Cottons 60°C” programme.
Compartment p
- Fabric conditioner
Press the“h Start” button.
Add a little detergent to compartment j .
At the end of the programme turn the programme and temperature selector to the “r
End ” position.
M.-Nr. 05068971/03
10
Preparing the wash load
Maximum load (weight of dry washing):
A Cottons
BMinimum iron
CDelicates/Synthetics
D Woollens
E Short programme
F Sluice
7.5 kg
3.0 kg
1.5 kg
1.5 kg
7.5 kg
7.5 kg
Empty all pockets
Foreign objects, (eg nails, coins, paper
clips etc) can cause damage to textiles
and components in the machine.
Sort the laundry
Most garments have a textile care label in the
collar or side seam. Sort the laundry by care
label symbols.
Only wash items in this machine which are
stated by the manufacturer to be machine
washable on the textile care label.
Dark textiles often contain excess dye, and
should be washed separately several times
before being included in a mixed load.
Delicate textiles should be washed separately
in a delicates programme.
Woollens and textiles containing wool must
only be washed in this machine if the care
label states that they are machine washable.
Shut the drum door
Grasp the door in the open position and
slam it shut, (mind your fingers).
At first the door may shut with difficulty.
This eases in due course.
Make sure no items of washing are caught
when the door is closed, or they could be
damaged.
Loading the drum
Unfold laundry and load loosely in the drum.
For best results make up mixed loads of large
and small items. This improves the washing
effect and distributes the load better for spinning.
Overloading reduces the wash result and
causes more creasing.
11
M.-Nr. 05068971/03
Programme selection
Dispensing detergent
Open the on-site stopcock.
Switch on the on-site main switch.
Select programme and temperature
(e.g. programme
Cottons 95 oC).
A
Add detergent for the main wash to compartment j - and if required detergent for
the pre-wash to compartment i, fabric
conditioner to compartment p and liquid
bleach to compartment y.
Dispensing detergent
t
Add the right amount of detergent as recommended on the packaging. It is important to
avoid overdosing as it can lead to excessive
foam. Use a low foaming detergent.
Additionally select pre-wash if required but
only with programmes
, , ,
.
Press the “+i with pre-wash” button.
ABC E
The amount dispensed will depend on the following:
- the quantity of laundry
- the water hardness level
- the level of soiling.
too little detergent results in the following:
Water hardness levels
Hardness
range
Water
quality
Hardness
level in
mmol/l
German
hardness
level °d
I
soft
0 – 1.3
0-7
II
medium
1.3 – 2.5
7 - 14
III
hard
2.5 – 3.8
14 - 21
IV
very hard
over 3.8
over 21
- The laundry will not be properly
clean and will in time become grey
and hard to touch.
- Greasy particles cling to the laundry.
- Lime deposits on the heater elements.
too much detergent results in the following:
- Excessive foam.
- Low level of agitation.
- Poor washing, rinsing and spin results
If you do not know the hardness level of the water in
your area you should contact your local water authority
for information.
M.-Nr. 05068971/03
12
Programme selection
Press the “aOpen door” button
- the drum door opens.
Take out the washing.
t
Only remove laundry from the machine once
the drum has stopped turning, otherwise you
may seriously injure yourself.
Make sure the drum is empty, otherwise,
when the machine is next used items may
become damaged (e.g. shrink) or cause other
laundry to discolour.
Press the “h Start” button.
- The indicator light “¾ min” goes out and
the indicator light “p°C” lights up. - The wash programme starts.
If no more washing is to be done:
Temperature display
leave the drum door open.
After the programme start the current suds
temperature for the main wash is shown in
5°C-steps until the set temperature has been
reached.
In programme F the current suds temperature is shown in 5 °C steps for the whole duration of the programme.
switch the machine off at the on-site main
switch.
turn off the on-site stopcock(s).
The indicator light “p°C Temperature” lights
up.
Time display (Time left)
Additional functions
Once the temperature set for the main wash
has been reached the time left for the programme to run shows in the display in hours
and minutes (does not apply to programme F).
By pressing one or more buttons programmes
can be adapted to offer additional functions.
The indicator “¾ min time” lights up.
For heavily soiled or stained textiles
in programmes A,B,C,E.
+i “with pre-wash”
The time left counts down in 1 minute intervals.
m “Starching”
Opening the drum door at the end of the programme.
For freshly washed textiles such as table
cloths, napkins, work wear etc., in programmes A,B,E.
w “without final spin”
Washing which is not to be spun but taken
dripping from the machine in programmes
A,B,C,D,E.
After the “r End ” indicator lights up:
At the end of the programme turn the programme and temperature selector to the
“r End ” position.
13
M.-Nr. 05068971/03
Changing programme sequence
To repeat a programme stage
(does not apply to programme F)
The programme can be changed at any time
where it makes sense (does not apply to programme F).
A programme stage must have been finished
before it can be repeated:
Turn the programme selector to the required programme. The new programme
will carry on at the relevant stage.
turn the programme selector switch to “r
End”.
Exceptions:
When“r End” illuminates in the sequence
display:
If the programme selector has been turned
through “r End”.
Select the new programme required.
Opting into or out of the following programmes:
Press the “h Start” button.
– G Separate spin or
After approx. 5 seconds, turn the programme selector switch to “r End” again.
– H Separate drain
As soon as the indicator light of the programme stage to be repeated starts flashing:
breaks off the programme. The “h Start” button must be pressed in again to start the required programme.
turn the programme selector switch to the
appropriate programme within a period of
3 seconds.
When working through a coin unit or coin counter the programme is locked after 3 minutes
and no changes are possible.
Programmable functions
Cancelling a programme
It is possible to programme additional functions or change programme sequences. See
Programme changes.
Turn the programme selector to “r End”.
The indicator lights flash through the other
programme stages until the “r End" light is
reached.
To cancel programme F the machine must
be switshed off at the mains.
Any changes to the standard machine version
must be noted on a card left with the machine
as a record for any subsequent servicing
work. This is of particular importance for the
service technician, when electronic units may
need to be exchanged.
To omit a programme stage
(does not apply to programme F)
Turn the programme selector to “r End”.
As soon as the programme sequence light for
the stage at which the programme should continue starts flashing:
Turn the selector switch to the appropriate
programme within 3 seconds.
M.-Nr. 05068971/03
14
Fabric conditioner / Starch
Powder and liquid starch
Prepare and dispense the starch solution
as stated on the packaging.
Automatic dispensing of liquid starch
Pour the liquid starch into compartment p
(do not exceed the marker level).
Close the compartment lid.
Adding liquid or powder starch by hand
Select the programme required and also
push in the “Starch m” button.
The programme, and the ”time left" indicator will pause before the last rinse.
The starch m indicator light comes on.
Bleaching agents
Only use bleaching agents on textiles with the
symbol y on the wash care label.
Bleaching agents must only be added to the
compartment marked y . The agent will then
be dispensed automatically during the 2nd
rinse (cold bleaching).
Liquid bleaching agents should only be used
with coloureds if the textile manufacturer’s
wash care label states that the textile is colour fast and suitable for bleaching.
Add starch formulation to
compartment i.
Press the “m Starch” button to release it
for the programme to continue.
“w No final spin” can be selected to keep
creasing to a minimum. The water is drained
away, and the load can be taken dripping wet
from the drum.
For cold bleaching the 4th rinse must be programmed, (see Programme changes).
Fabric conditioner
Dispense according to the manufacturer’s recommendations:
Open the lid of the compartment p.
Add fabric conditioner, but do not exceed
the max. level mark.
Close the compartment lid.
The conditioner is automatically dispensed in
the last rinse. At the end of the programme a
small amount of water remains in the fabric
conditioner compartment.
15
M.-Nr. 05068971/03
Coin operating mechanism/coin unit
Selecting a programme with a coin unit in
use
Open the on-site stopcock(s). Switch on
the on-site mains switch,
Select a programme and temperature.
m “Starching” and w “without final spin” are
not available with coin operation.
Add detergent and any fabric conditioner .
Insert coins/tokens.
Press the “h Start” button.
Coin unit C 5002, C 5003
Coins or tokens are “lost” if any of the following are done after the coins have been inserted but before the “h Start” button has
been pressed:
– the machine door is opened,
– the programme selector has been
turned past “r End” to another programme.
– a programme is interrupted for more
than 20 seconds with the coin time counter.
Note for the user:
Coins and tokens should be emptied on a
regular basis to ensure the coin box does not
get jammed full.
M.-Nr. 05068971/03
16
Programme changes
To change individual programmes by reprogramming
To access programming mode
t
Programmes can be changed individually to
accommodate different wash processes and
methods.
20 Programmable functions can be changed
with up to 4 Options.
Before starting:
After the drum door is shut the “+i with
pre-wash” button must be pressed in and
released twice within 4 seconds.
The on-site mains switch must be switched
on.
A previous programme must be completed.
The drum door must be open.
- A “P ” (for Programming) appears in the display.
- The programme sequence indicators “Prewash" and “Main wash” flash.
- Re-programming can be carried out (see
example).
All the other buttons must be inoperative, i.e.
not pushed in.
The programme selector must be at the “r
End” position.
17
M.-Nr. 05068971/03
Programme changes
Example:
Changing the temperature holding time in the
main wash
from 10 minutes to 5 or 15 or 20 minutes.
15 minutes is required.
P 3 (15 minutes).
t
Option 3 corresponds to 15 mins.; see Programme Change Chart No.8 / B
Temperature holding time in minutes.
Press the “a open door" button.
- Pressing the “a open door" button saves
the change in memory and completes the programming process.
Please enter this programming change in
the table on the following page.
Turn the programme selector to 8
B. “ P8 ” flashes in the additional display.
Turn the programme selector to the “r
End” position.
t
See the next page for further possible programming changes.
Press the “h Start” button 3 times.
The following appear one after another in the
additional display
P 1 (10 minutes),
M.-Nr. 05068971/03
P 2 (5 minutes),
18
Programme changes
Programme selector setting
Options
No.
Programme function
1
Standard
2
3
no pre-w.
5
9
low
high
4
Enter
programm
ed
options
Additional pre-wash
1 A 95
Wash time A,B (mins)
2 A
Water level A,B
Pre-wash
3 A 60
Select pre-wash A,B,C,E
4 A
Wash times A,B (mins)
8
11
16
6
5 A 40
Temperature A,B,C,E (°C)
35
45
60
24
6 A
Water level A,B,E,F
low
high
15
202
via button gen/lly yes
Main wash
7 B 95
Thermostop &. Heating active
yes
no
8 B
Temp. holding time A,B,C (mins)
10
5
9 B 60
Water level A,B
low
high
10 B
Suds cooling A,F (secs)
25
20
11 B 40
Temp. in Wool prog. D (°C)
30
25
30
Rinses
12 B
Increase water level A,B,D
no1
slightly1 average1
13 C 60
No. of rinse cycles A,B,C,F
3
43
14 C
Rinse hold
no
yes
no
yes*
53
high
2
Final spin
15 C 30
Pre-spin
Special functions
16 C
17
D
May only be changed by service technician.
Switching over
Water inlet
Sep.rinse
Hygiene
KW+WW
KW
18 D 30
Max. Temperature in HW A,B,D(°C)
90
85
19 D
Separate spin free
yes
no
20 E 40
3 external disp. pumps
comb. 1
1)
2)
3)
Load dependent if no. 2,6,9 has a standard setting
chemothermal Disinfection Temp.= 60°C
with bleach select 4 or 5 rinses.
* standard setting
Sluice*
KW-hard KW+HotterKW-soft
water
80
comb. 2 comb. 3
comb. 4
KW = Cold-Water
WW = Hot water
HW = Main wash
19
M.-Nr. 05068971/03
Cleaning and Care
Cleaning the washing machine
Remove the rubber seal from the recess.
Clean the casing with a mild non-abrasive
detergent or soap and water. Wipe dry with a
soft cloth.
Clean the facia panel with a damp cloth and
dry with a soft cloth.
The drum and any other stainless steel parts
can be cleaned using a proprietary stainless
steel cleaner according to the manufacturer’s
instructions.
Using pointed pliers, take hold of the plastic filter bar, remove the filter and clean.
Put the filter and seal back in the reverse
order.
The filters in the inlet hose should be checked
and cleaned approx. every 6 months.
Inspect the inlet hose which is subjected to
high pressure while the machine is in operation. The hose should be replaced if there
are small cracks in the surface, or if it has
been otherwise damaged.
Do not use any scouring agent or solvent
cleaner.
To ensure the correct functioning of the air
gap, any significant detergent residues must
be removed from the canal.
If replacing the inlet hose only use a hose
able to withstand pressure up to 70 bar.
Miele’s own hoses meet this requirement.
Cleaning the filters in the water inlet
The washing machine has the following filters
to protect the inlet valves:
After use the detergent box should be
cleaned with warm water to remove any
detergent residues.
– in the free end of any water inlet hose,
– in the water inlet valve(s) for connection hose to machine.
The siphon tubes in compartments § and
y should also be cleaned.
To clean the filter in the inlet hose:
Close the stopcock.
Unscrew the screws next to the siphon
tubes. Pull the siphon tubes upwards to
remove for cleaning in warm water. Replace in the reverse order (the siphon
tubes must be hooked in correctly).
Carefully unscrew the knurled coupling
connecting the inlet hose to the stopcock.
M.-Nr. 05068971/03
20
Cleaning and Care
Problem solving guide
To clean the filter in the water inlet valve:
Any work on the electrical components of
this machine should only be carried out by
a suitably qualified and competent person.
Unauthorized repairs could be dangerous.
Using pliers, carefully loosen the ribbed
plastic nut on the inlet valve, and unscrew.
There are, however, minor faults which can
be corrected without contacting the Service
Department.
Opening the drum door in the event of a
power failure
Turn the programme selector to “r End”.
Use water pump pliers to withdraw the
plastic filter by the bar (see illustration).
Clean and put back in the reverse order.
The machine must not be used without the
two dirt filters being put back in place
Open the drain valve access flap.
Press the emergency release lever downwards, (see illustration) and hold down
until no more water drains out.
21
M.-Nr. 05068971/03
Problem solving guide
A selected programme does not begin.
The “I On/ Start” indicator light does not
light up.
Check that the door is properly closed, the
mains plug is plugged in and that the fuse or
circuit breaker has not tripped.
The check light “ p ” flashes, although
the programme has finished as usual.
The water inlet system is partially blocked:
Stopcocks not fully opened.
Inlet hose kinked or trapped.
The water pressure is too low.
The filters in the inlet hoses are clogged
(see “Cleaning and Care”).
Press against the drum door and pull on
the emergency door opening mechanism
(see illustration).
The indicator light goes out when the programme selector switch is turned to the “r
End” position.
Always make sure the drum is stationary
before reaching in to remove washing.
Reaching into a moving drum is extremely
dangerous.
The check light “ p ” flashes, the “r
End”, indicator light is on, but the laundry
in the machine has not been washed.
The water inlet system is turned off.
Turn the programme selector switch to
“r End”.
Turn on the water supply at the stopcocks.
Select a programme.
Press the “h Start” button.
If little or no water is taken in during the next
programme, the water pressure may be too
low.
If it is adequate there may be a technical
fault. In this case, call your local service
dealer or the Miele Service Department.
M.-Nr. 05068971/03
22
Problem solving guide
The indicator light “q” is flashing.
Possible reasons for increased levels of
foaming:
Check whether the drainage system is
clogged.
– detergent type
The Pre-wash indicator light “i" is flashing in the sequence display.
Only use detergent formulated for use in
commercial washer extractors. Domestic
laundry detergent is not suitable.
Start the programme again. If the indicator
still flashes call the Service Department.
– overdosing of detergent
The Main wash indicator light “j”
flashes during, or after the end of a programme.
Dispense detergent following the detergent manufacturer’s instructions on the
packaging and in accordance with local
water hardness levels.
If it also flashes on the next programme there
is a technical fault.
Call the Service Department.
– detergent creates too much foam
Despite adequate water supply pressure,
the machine takes a long time to fill.
Use a lower foaming detergent or contact
your detergent application specialist.
The filters in the water inlet might be blocked.
Clean as described under the section “Cleaning and Care”.
– very soft water
In areas with hardness level 1 dispense
less detergent in accordance with the
detergent manufacturer’s instructions.
Large amounts of unused detergent remain in the dispenser.
– soiling level of the laundry
Water supply pressure is too low.
For lightly soiled laundry dispense less
detergent in accordance with the detergent manufacturer’s instructions.
Clean filters (as described in the section
“Cleaning and Care”).
Check if the water flow through the stopcock is 5 litres in 15 seconds.
– residues, e.g. detergent are left on
laundry
Washing powder becomes viscous when
used together with a water softener.
Run an additional pre-wash without detergent and without selecting a temperature.
Laundry which has been soaked before
washing must be thoroughly
rinsed before running a wash programme.
In future pour washing powder into the detergent dispenser before adding water softener.
Fabric conditioner or bleaching agent is
not completely dispensed or water remains in the dispensing compartment.
– small loads
Reduce the amount of detergent dispensed according to the size of the load.
The siphon tube is either incorrectly positioned or clogged.
Lift the lid and remove the siphon.
Rinse out the dispenser compartment and
the siphon with warm water.
23
M.-Nr. 05068971/03
Problem solving guide
After sales service
Laundry is either not spun at all or not
spun satisfactorily.
After sales service
Should a fault occur please contact your nearest authorized Service Dept.
The “w No final spin” button was pushed
in.
When contacting the Service Department,
please quote the model type, (Typ), the machine number, (Fabr.-Nr.) und Part-no. (M.Nr.). These can be found on the data plate:
The machine was not able to distribute the
laundry load evenly. To protect the machine, laundry was either only spun at a reduced speed or not at all.
Large items which tangle or roll up in the
drum (e.g. bath mats) can cause an imbalance during the spin cycle.
For safety reasons, the machine does not
spin if this is the case. Attempts to build up
spin speed are repeated, however, until the
time allocated to spinning has expired.
With the door open at the top of the door ring,
or:
It is therefore important to make up mixed
loads consisting of large and small items.
The drain system may be clogged.
The “ n ” indicator light flashes.
The machine has switched off because of
serious imbalance.
at the rear of the machine towards the top.
Only use genuine spare parts. When ordering spare parts the Spare Parts Dept will also
need to know the model type (Typ), machine
number (Fabr.-Nr.) und Part-no. (M.-Nr.).
Switch the on-site mains switch off and
then on again or
open the drum door with the emergency
release as described in “Opening the door
in a power cut”.
The machine shakes during the spin cycle.
The most likely cause is that the four machine
feet are not resting securely on the floor.
Level the machine as described in “Notes
for the installer”.
M.-Nr. 05068971/03
24
Explanation of symbols on the data plate
1
2
3
4
5
6
7
8
9
10
11
12
13
14
15
16
17
18
19
20
21
22
Machine type
Machine number/year of manufacture*
Voltage/Frequency
Control fusing
Drive motor
Plate diameter*/Plate quantity*
Drum data
Drum diameter/drum depth
Spin speed
Drum volume/Laundry dry weight
Kinetic energy
Ex. time to top speed
Braking time
Heating
Electric heating
Fusing (on site)
Steam heating indirect*
Steam heating direct*
Gas heating*
Commissioning date
Water registration DVGW-test cert (Water)*
Field for CE test symbol....(Product-ID-No./
Gas)*
Noise emission
During wash
58.5 dB
During spin
74.3 dB
(measured in Germany in accordance with
DIN (IEC) 45 635, machine noise regulations
3. GSGV p1. 1.a)
*)not applicable to WS 5073
25
M.-Nr. 05068971/03
Notes for the installer
Installation
Front transit fitting
A concrete floor is the most suitable installation surface.
Please note:
The machine must be level and securely
positioned.
Do not install the machine on a ’soft’ base
such as floorboards as this could result in
more vibration during the spin cycles.
If the machine is installed on a raised
plinth it should be secured using the butt
straps supplied with the machine.
If there is not already a concrete plinth onsite, the Miele Spare Parts department offer a
steel plinth. It must be ensured that the steel
plinth is secured to the floor, (see the enclosed installation plan).
“A” (1piece)
The front panel must be taken off, (2 internal
torx T20 screws at the bottom) to remove the
front transit fitting (3 SW-13 screws) .
To avoid the possibility of frost damage on no
account install the machine in a room which is
exposed to frost.
Rear transit fitting
Do not install the machine on carpeted flooring if the carpet pile blocks the ventilation gap
at the base of the machine.
Transit fittings
When the machine has been installed in its
final position, only then remove the red transit
fittings marked “A”, “B”. and “C”.
The machine must not be moved without
the transit fittings in place.
The transit fittings should be stored in a safe
place for future use. They must be re-fitted if
the machine is moved again.
“B” (1piece)
“C” (1piece)
The rear panel must be taken off, (just loosen
15 internal torx T20 screws at the bottom) to
remove the rear transit fitting (3 SW13
screws each) .
The machine must not be moved without
all the outer panels in place.
M.-Nr. 05068971/03
26
Notes for the installer
Levelling
To ensure the hot water inlet hose (marked
90°C) lasts for many years it is advised not to
use it on a hot water connection supplying
water hotter than 70°C.
If replacing an inlet hose only use a hose able
to withstand a burst pressure of at least 70
bar and a temperature of 90°C. This also applies to all connection parts.
Miele “Original” spare parts meet this requirement.
The machine must stand level to ensure
smooth operation.
The adjustable feet can compensate for an
uneven base.
A water pressure flow rate of at least 1 bar,
maximum 10 bar is essential to ensure the
smooth operation of this machine.
Water taken into the machine must not exceed a temperature of 70°C.
Connection to cold water only
-See the Installation Plan provided.
Water connection Australia
Screw the foot or feet out until the machine stands level.
To prevent back-syphonage, the water connection must be via an approved Dual-CheckValve.
Hold the foot tight using a pipe wrench.
Tighten the counternut using a screwdriver as indicated.
Drainage
The machine empties through a motor controlled drain valve. A DN 50 angle connector can
be used to make connection to an on-site
drainage system, (sink box with odour trap).
Connection to water supply
Connection must be made to the water supply
via a stopcock which conforms with local and
national regulations. This work must be carried out by a suitably qualified and competent
person.
To ensure the machine is correctly connected
please observe the installation plan and the installation instructions supplied with the machine.
See the installation diagram supplied for instructions on connection to the water supply
and for drainage.
The inlet pressure hoses supplied with the
machine must be used for connection to the
water supply.
27
M.-Nr. 05068971/03
Notes for the installer
Coin mechanism unit
WARNING
The washer-extractor can be fitted with a coin
unit.
THIS APPLIANCE MUST BE EARTHED
It can also be connected to an existing coin
unit. The correct connection cable is required
for this. For the C 4030/31 and C 4050/51
using timed operation an AD 3 adapter is required.
Connection should be made via a suitable isolator which complies with national and local
regulations, and the on/off switch should be
easily accessible for servicing work.
The machine has to be reprogrammed for this
connection. This must only be done by a
Miele authorized service engineer.
When installation and connection have
been completed all removable outer panels must be re-fitted before the machine
is operated.
The coin unit and connection cable are available at extra cost from the Miele Spare Parts
Department, or from Miele specialist dealers.
Electrical connection
All electrical work must be carried out by a
suitably competent person in compliance with
national and local regulations.
Please take note of the Installation diagram
and the Wiring diagram. They are important
for electrical connection.
The electrical safety of this machine (WS
5073, 5100, 5140, 5101, 5141) is in accordance with IEC 335.
The minimum suds level required for activating the heating is given in mm column of
water: WS 5073
45 mm column of water
The voltage and frequency are given on the
data plate. The machine must only be connected if these match the mains supply.
Variants:
3N AC 380-415 V 50 Hz
1 AC 220-240 V 50 Hz
The motor is fitted with an overload protection
switch.
For extra safety it is advisable to install a residual current device with a trip current of 100
mA.
Nominal rated load and fuse rating are given
on the data plate. Ensure that these are compatible with the electricity supply.
M.-Nr. 05068971/03
28
29
M.-Nr. 05068971/03
Miele Co. Ltd,
Fairacres, Marcham Road,
ABINGDON, Oxon OX14 1TW
tel: 01235 554455, fax: 01235 554477
Service department, tel: 01235 554466
Telephone calls may be monitored and recorded to improve our service.
Alteration rights reserved
This paper consists of cellulose which has been bleached without the use of chlorine.
09.02