1
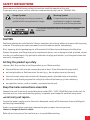
Standard Definition
Digital Set Top Box
USER MANUAL
COMPONENT
VIA SCART
OPTICAL AUDIO
www.wintal.com.au
SAFETY INSTRUCTIONS
Please observe the following safety instructions carefully operating this unit.
If you need help, please call our national troubleshooting help line on 1300 662 946.
Danger Symbol
Warning Symbol
The lightning fl ash with arrowhead
symbol within an equilateral triangle
The exclamation point within an
equilateral triangle is intended
to alert the user to the presence
This symbol indicates there is a dangerous voltage
within the
CAUTION
Swallowing batteries could be fatal. Always keep the unit and any batteries inaccessible to young
children. If a battery has been swallowed, consult a medical doctor immediately.
Also, keep any plastic packaging out of the reach of children to avoid danger of suffocation.
Protect the power cord from physical or mechanical abuse, such as being twisted, pinched, closed
in a door, or walked upon. Pay particular attention to plugs wall outlets, and the point where the
cord exits the appliance.
Setting the product up safely
Choose a fl at, firm surface to set the product up on. Make sure that:
■ the ventilation slots are not covered (ensure at least 10 cm distance from any walls)
■ no foreign bodies or fluid can enter the unit (e.g., do not place vases on the unit)
■ the unit cannot come into contact with dripping water, splashed water or humidity
■ the unit is not directly exposed to sunlight or other direct heat (e.g. from radiators)
■ no open fire sources, such as candles, are placed on the unit
Keep the mains connections accessible
Connect the unit to an easily accessible power socket (90 – 240 V, 50/60 Hz) close to the unit. In
case the unit has to be disconnected quickly, the power point needs to be within easy reach.
Do not carry out repairs
In case the power supply cord or the unit is damaged, switch off at the mains then carefully pull
out the plug immediately.
Under no circumstances should you attempt to open or repair the unit yourself.
There is a danger of electric shock!
Refer all servicing to our Service Centre or to a qualified workshop.
1
Operating ambient temperature range
The operating ambient temperature range for your unit is 5°C – 40°C (41°F – 104°F) with humidity
of 20 – 80%. When using the unit in a system rack, be sure to keep the ambient temperature
within this temperature range.
Thunderstorms
If you leave the unit unattended for a long period of time, disconnect the unit from both the
mains and the aerial. The use of surge protectors can protect the unit from power surges caused
by thunderstorms.
Battery disposal
Empty batteries do not belong with household refuse. Batteries must be disposed of at a
designated disposal/recycle point. Contact your local authorities to locate your nearest battery
disposal point. Please care for our environment.
Cleaning the unit
Always disconnect the unit from the mains before cleaning the unit.
When cleaning the unit, only use a moistened, soft cloth. Do not apply chemical solvents or
cleaning agents, as they may damage the surface and/or labelling of the unit.
The device is labelled with the CE sign and conforms to the requirements of the regulations
89/336/EEC and 71/23/EEC.
2
CONTENTS
SAFETY INSTRUCTIONS
Setting the product up safely
Keep the mains connections accessible
Do not carry out repairs
Operating ambient temperature range
Thunderstorms
Battery disposal
Cleaning the unit
1
FIRST USE
Unpacking
Easy Install Guide
Optional devices
OPERATING YOUR SET TOP BOX
BASIC SETTINGS
GENERAL OPERATION OF YOUR SET TOP BOX
CHANNEL SELECTION
CHANNEL LIST
EPG - ELECTRONIC PROGRAM GUIDE
The status panel
The EPG
OSD TELETEXT
Closed Captions (subtitles)
TIMER
Programming timers using the EPG
SELECTION OF AUDIO/ RADIO CHANNEL
CONFIGURATION OF THE RECEIVER
Basic settings
General Options
OSD/EPG
Reception
Signal Output
Extras
Factory defaults
EDITING THE CHANNEL LIST
AUTOMATIC SEARCH
Performing an automatic search
Select channels window
SIGNAL STRENGTH INDICATOR
Antenna adjustment
GAMES
Blocks
Snake
TROUBLESHOOTING
WARRANTY INFORMATION
4
1
1
1
2
2
2
2
4
4
6
7
8
9
10
11
12
12
12
13
13
14
14
15
16
16
16
16
17
17
17
17
18
19
19
19
20
20
21
21
21
22
23
First Use
Unpacking
Please ensure that the following
items have been included with delivery:
USER
MANUAL
■ Receiver unit
■ Remote control
■ User Manual
■ 2 batteries (LR03 “AAA”) for remote control
■ AV cable
SCART to S-Video/ Composite Video + Audio (Left & Right)
SCART to Component + Audio (Left & Right)
Composite AV Cable
If any of these are missing, please contact your retailer.
Easy Install Guide
1. Connect your television aerial to the RF IN socket on the set top box
2.
Make a video connection from your Set Top Box to your television by connecting one of
the following cables to SCART IN. Use the highest quality connection that is available on
your television.
Lead
Quality
Label on Television
SCART
Video (yellow)
Moderate
AV1 | AV2 | Video In | CVBS
SCART
S-Video
High
S-VIDEO | SVHS | Y/C
SCART
Component (red, green, and blue) Highest
YCbCr | RGB
Then make an audio connection using one of the following. Use the highest quality
connection available. You may connect to an audio amplifier for a more powerful sound.
Lead
Quality
Label on Television/ Amp
Good
AV1 (L/R) | AV2 (L/R)
Optical (not supplied)
Highest
Optical in | Digital in
Coaxial (not supplied)
Highest
SPDIF in | Digital coax in
SCART
Audio (red, white)
3. Switch your television to the appropriate input (AV) mode. For instance, if you connected
the video lead to AV1, select AV1 using the input button (also called TV/AV or Mode) on
your TV remote (see your television manual for more information)
4. Turn on the set top box. Please note that if there is a green dot scrolling across the LED
display, then the unit is in stand-by
4
5. After the Wintal start up screen, the option is given for you to select the menu language.
(If this option is not displayed, perform a factory reset, below) Please select your
language & press OK
6. Then select your country & press OK
7. Select your State & press OK
8. Select Search Channels & Press OK
9. Once search has completed (May take several minutes) select Save
Please Note: You can restart this process at any time by doing a factory reset;
1. Press Menu Button on remote
2. Select Main Menu, Press OK
3. Select Edit Settings, press OK
4. Select Factory Defaults, press OK
5. Press OK to reset factory defaults
If using the SCART
S-Video Cable for connection;
1. Press Menu button on remote
2. Select Main menu, Press OK
3. Select Edit Settings, press OK
4. Select Signal Output, Press OK
5. Change the Video Format TV to Y/C
6. Exit Menu to save
If using the SCART
Component Cable for connection;
1. Press Menu button on remote
2. Select Main menu, Press OK
3. Select Edit Settings, press OK
4. Select Signal Output, Press OK
5. Change the Video Format TV to YCbCr
6. Exit Menu to save
To change Aspect ratio between 16:9 Widescreen, 4:3 (Letterbox) & 4:3 (Full Screen)
1. Press Menu Button
2. Select Main Menu, Press OK
3. Select Edit Settings, Press OK
4. Select Signal Output, Press OK
5. Select TV Screen & scroll between 16:9 Widescreen, 4:3 (Letterbox) & 4:3 (Full Screen)
6. Exit Menus to save
5
Optional devices
6
Audio L/R
If you wish to hear superior sound through your Hi-fi Stereo system you can do so
by using a stereo cable.
Video
Composite video out. Connect to your TV or VCR. Your TV or VCR must support
Composite IN (check your TV / VCR user manual).
RF Out
If you wish to send the regular terrestrial aerial signal through to your TV or VCR
connect the RF cable here. RF cable not included.
RX/ TX
For authorised service use ONLY.
Operating your set top box
Operating the receiver is done using the supplied remote control. Navigation within menus is
carried out using the buttons shown below:
P+ / P– Moves the cursor in the menus up- and down.
– / + In lists: pages up and down
In input fields: changes option
OK Open sub -menu, select option or edit the
currently marked entry.
EXIT Leave the active menu
SWAP In menus with more than one window, use SWAP
to move the cursor to the next window.
MENU Press MENU once to access menu options.
Press MENU twice to open the main menu.
INFO/EPG Press once to open the EPG (electronic program
guide) for information on the current program.
Press INFO/EPG twice for information on all
programs transmitted today. Note: extent of EPG
is dependent on broadcaster.
LIST Press LIST for a list of available channels.
7
Basic Settings
After switching on the receiver for the first time or after using the Factory Reset function, you
will be asked to choose your OSD language and your geographical location. This informs the
receiver to scan using a preset channel list for your location.
Note: these channel lists are only up-to-date when the receiver is produced or a software update
has been performed. To bypass scanning using these lists, (for instance, if certain available
channels are not found), select “other” as your location, the unit will perform a full frequency
scan.
Afterwards you should perform the following steps:
1. Open the main menu
2. Select “Edit Settings”
3. Select “Signal Output”. Select the screen format for your TV
4. If you are using an amplifier, or wish to use the tv remote to adjust volume:
Reduce the volume of your TV or amplifier to it’s minimum
Select “Volume-bypass”
Turn the volume up on your TV/amp as required
5. Leave the menu by pressing EXIT, then select “Save Settings”.
6. Press OK and wait until the menu disappears.
8
General operation of your set top box
You can choose the following remote control functions in normal TV viewing mode:
P+ / P– Change to previous or next channel in the channel list
TV / RADIO Change between TV and radio mode
– / + Volume down/up
Mute on/off
OK Display the status panel or use the quick help function
SWAP Change to the last chosen TV or radio channel
MENU Enter the menu
Stand-by mode on/off
TEXT Displays Teletext / Closed captions.
9
Channel selection
The receiver keeps an internal channel list in its memory. This list contains all channels that were
found during the channel scan. There are several methods of selecting a channel:
P+ / P– Change to previous or next channel in the channel list
TV / RADIO Change to TV or radio mode
SWAP Change back and forth between current and previously viewed channel.
The operating software of the receiver only notes the last channel that was
active for at least one second. This means that you can change channels
quickly using the P+/P- button and these channels will be ignored by the SWAP
function.
0-9 Change directly to a channel by using the number buttons. The change can
be shortened using the OK button (e.g. when you wish to enter a single figure
channel number) or use EXIT to cancel.
To speed up the process of entering a channel which is less then four digits,
keep the button pressed when entering the last digit.
10
Channel list
The channel list can be used in a number of ways:
LIST Shows the whole channel list. You can navigate using the P+/P– buttons to any
channel. Press OK to select the channel.
EXIT You can also use the EXIT button to call up the channel list.
TV / RADIO Change to the TV or radio list
0-9 You can also enter a channel number using the number buttons directly. The
entry can be shortened using the OK button (e.g. when you wish to enter a
single figure channel number) or EXIT to cancel.
11
EPG - Electronic program guide
Broadcasters can offer information on their programs such as the title and description of the
current and following program (the status panel). Additionally, they also have the option to
offer a program guide of up to 64 days in advance. Not all broadcasters offer the full 64 days of
program information. Please check with the company providing the signal.
The status panel
When a channel has been selected, the title and a short description of the current program is
displayed in the status panel. For further information open the EPG.
The EPG
The following table explains the functions of the Electronic Program guide:
Detailed view Detailed information on the current program is displayed by pressing the
INFO/ EPG button
Detailed view For information on the following program, move back and forth using + /
of following event – on your remote control.
Daily overview The list of programs for the whole day is displayed by pressing the INFO/
(where available) EPG button again when detailed information for the current program is
open.
The date to which the program guide refers is shown in the heading. To
the right of this you can see how many days of information are available
and which day you have activated.
If you wish to move to the next day go to the end of the list and press + or
–.
To move back to the previous day go to the beginning of the list and press
P+ or P–.
Note:
If you have selected a TV channel for the first time the information in the list may update
as you navigate.
Daily overview To get detailed information on a program in this list press OK.
Detailed view The next or previous programs are accessed using the + / – buttons.
12
OSD Teletext
If you have selected a channel that contains teletext data (normally Channel Seven), press ‘TEXT’
on your remote control to enter teletext mode.
0 – 9 Enter page number (between 100 and 899)
P+ / P– Single step through the pages
Pages that hold no information will be skipped.
– / + In normal mode: Volume control
In sub page mode: Single-step through sub pages
MUTE Mute on / off
OK Activate/Deactivate sub page mode. While the sub page mode is active a green “>”
is displayed next to the sub page number in the second text row.
MENU Go to page 100
INFO/EPG Quiz key (uncover hidden text)
SWAP Step through zoom modes:
1. Zoom upper half
2. Zoom lower half
3. Normal mode
LIST Hide the teletext window until the selected page or a new sub page becomes
available.
The teletext remains active in the background.
EXIT Leave Teletext
TEXT Out of the running programme: Open teletext
Out of the teletext window: toggle between teletext display modes
PAUSE Teletext stop (page will not be updated) — press again to restart teletext retrieval
Closed Captions (subtitles)
Closed captions (where available) are accessed using teletext. Press text (on any channel), then
enter ‘801’ to display closed captions.
If the Channel holds CC data, the captions will be displayed on the screen. Press Exit to return to
normal viewing.
13
Timer
The built in timer can manage up to 12 timer events. Timers allow you to program the unit to alert
you and change channel, so you do not miss your favourite programs.
The timers are accessed and edited via the timer sub menu. The dates of each timer are displayed
in the overview window. Within this first window, individual entries can be selected for editing
using the OK button. To change a timer be programmed for a fixed date or a regular day of the
week is done by pressing the LIST button in the date column. If an end time which is sooner or the
same as the start time is entered, the recording will take place on the following day.
Please take note of the following important instructions for using the timer:
1. The timer is activated by putting the receiver in stand-by mode; however, the unit will still
alert the user if the unit is on when the timer is activated.
2. To interrupt an activated timer the STAND-BY button should be pressed for a few
seconds. A dialogue will appear in which you can choose between deactivating that timer
permanently or temporarily. Press the STAND-BY button again to reactivate the timer.
3.
In order for the timer to function properly the internal clock must be correct. This can be
checked by confirming the time in the status panel.
The TIMER LED will illuminate when at least one timer is programmed. If a timer has been
programmed and the receiver has not received correct time information from the TV signal the
TIMER LED blinks quickly to warn you.
Programming timers using the EPG
A timer can be created using information from the EPG, in EPG mode, select a program that you
wish to set a timer for and press LIST. The details of the program (start, finish etc) will be inserted
directly into a free timer slot, ready to be activated.
14
Selection of Audio/ Radio Channel
Where available, the receiver is able to select an alternate language or audio channel than the
default broadcast.
To select another audio channel, press the MENU button whilst the program is running. Select
“Audio Channel” and any extra audio channels available will be displayed. Select the desired
audio channel and press OK.
Press the OK key for a few seconds to store the selected audio channel permanently as the default
in the channel list.
15
Configuration of the receiver
Basic settings
The basic settings can be adjusted via the sub menu “Edit Settings”, which can be accessed from
the main menu (press the MENU button twice).
To change an individual option of the settings menu, select the item and use the – / + buttons to
cycle through the different options. Numerical values can be entered directly using the numeric
buttons.
Settings, which have been changed without saving, are marked green. When the receiver is used
for the first time and no settings have been made, all values will appear green.
Changes to settings must be saved. Select “Save settings” in the settings menu and press OK.
Explanations of the Sub menus are as follows:
General Options
Time-zone
To set the system time correctly, the correct time-zone must be entered, as a time difference from
Greenwich Mean Time. Select the difference relevant to your time-zone. You can check the time in
the status bar when changing channels.
Summertime control
Summertime, or daylight savings time, can be effected by selecting your relevant country.
Start up volume
To set a default volume for the unit, select a volume here.
Power on mode
Set the unit to go to stand-by or to switch on when power is supplied to the unit.
Scan Scrambled
This option tells the receiver to attempt to gain data from all found channels, even if they are
scrambled for security.
OSD/EPG
Status time out
Set the time the status bar will stay on screen for (in seconds).
Channel number time out
Set the time the channel number will stay on screen for whilst entering (in seconds).
OSD Transparency
Set the On Screen Display (OSD), or menu, transparency level from 1-16.
Help on OK
Decide whether you want a quick help screen or the status bar displayed when OK is pressed.
16
Reception
5V Antenna supply
Only select this option if you are running a masthead power supply of 5 V.
Mobile Reception
Select this option if you are using the receiver in a mobile application, such as in a moving
caravan, or boat.
Signal Output
TV Screen
Select: 16:9 Widescreen, 4:3 (Letterbox) & 4:3 (Full Screen), dependant on your TV screen and
personal preference.
Video Format
Select the cable type you are using to connect to your TV: CVBS (composite), Y/C (S-Video) or RGB
(Component)
Volume Bypass
Turn the receiver volume control off, so you can use the volume control on your TV or amplifier.
Digital Audio
If you are using a digital audio output (Coax / optical), select which digital format to use (if you
can hear the sound with no break-up, there is no need to adjust this setting).
Extras
System Info
Shows an information page, detailing which software version you are running.
Signal Strength
Brings up a signal strength meter, for more information, see the signal strength section, below.
Sleep timer
Select a time after which the unit will turn off.
Calendar
Displays a handy calendar for your reference.
Game: Blocks
Game: Snake
For more information on the games, see the Games section, below
Factory defaults
The function “Factory Defaults” in the “Edit Settings” menu resets all settings to the original
shipping condition. The Factory defaults will be saved immediately and the channel list will be
emptied.
17
Editing the channel list
The channel list of the receiver can be sorted according to your wishes.
Call up the channel list editor through the menu “Channel List” / “Sort Channels” from the main
menu.
After making any changes leave the channel list with the EXIT button. Confirm changes in the
“Save Changes” window by pressing OK.
To change an entry, select the required channel and press OK. A menu will appear with the
available functions.
If you wish to edit a group of channels in a row choose the option “Block”. In this case the menu
will disappear and you will be requested to mark the end of the block in the list. Go to the last
entry of the block and press OK. The menu with the available options will then reappear.
Following functions are available in the menu:
Copy Copies the channel to another position in the channel list. The target entry is over
written.
Move Moves the entry to another position.
Note:
If an entry is moved upwards, it will be positioned before the destination position, if moved
downwards it will be placed after the destination position.
Delete If a channel is deleted from the list, the position will be marked as unused, thus
making no changes to the number sequence of the channel list.
Cut Deletes a channel from the list but moves the following channels back up the list.
Note:
Using the block function, only channels move up that are located before the next entry that is marked
as “unused”. For example, if the list is unused from entry 85 to 99 deleting entry 57 will move only the
channels 58 to 84 back down the list. The channels past 100 would remain unchanged.
Insert Inserts an empty entry. The other entries are moved accordingly.
empty Note:
As with the “Cut” function the areas marked as unused TV channels will be regarded as the end of a
block.
Pack This option is only for use in block mode. The Channels will be moved to into the
first few slots. All gaps marked as “unused” within the block will be filled by the
channels being moved up. The empty entries will then be collected at the end of
the block.
18
Automatic search
The automatic search function finds any newly available TV and radio channels. These new
channels can be added to the existing List.
Performing an automatic search
1. Select the ‘Search’ option in the “Channel List” / “Channel Search” menu, available from
the main menu.
2. Wait while the unit searches. Technical details are displayed, giving a visual indication of
how the search is progressing.
3. When the search is completed the select channel window will be displayed.
Select channels window
This page contains the existing channel list on the left and the list of newly found channels on
the right. To change between TV and radio channels, use the TV and RADIO buttons. To move
between the lists use the SWAP button. To edit a channel, select it from one of the lists and press
OK, then choose an option from the menu which appears.
In operations where channel entries are to be added to the channel list, the cursor is moved to
the left hand window and you are then required to select the target position with the OK button.
Note:
If the channel list is empty before the scan is performed the results will automatically be copied into the left hand list.
The following options are available for found channels (right hand list):
Activate View channel
Copy above Copy the selected channel into the channel list. Following programs will be
pushed down to make room.
Copy over Copies the selected channel onto an existing entry in the channel list. The old
entry is then written over.
The following menu options are available for entries in the existing channel list (left hand list):
Activate View channel
Restore This option prevents updates to channels, which have been detected during the
scan and that already exist in the channel list. Channels that will be updated
are highlighted in green in the channel list.
Cut Deletes a channel from the channel list. The following channels move up to take
over the new space.
Delete Deletes a channel from the channel list. The entry will be marked as unused in
the list and numbering of other channels will remain unchanged.
After entering the new channels into the channel list according to your preferences press EXIT.
A box will appear asking if you wish to save the changes (press OK), or if you don’t wish to save
(press SWAP), or to continue editing (EXIT button).
19
Signal strength indicator
The signal strength indicator can be found in the sub menu “Extras” from the main menu.
The indicator gives an estimation of the signal strength for a particular channel, measured in dB.
Note:
The signal strength is not only dependent on your antenna but also the strength of the channel which is being
transmitted. This can be affected by obstructions such as trees, buildings and weather. Please take this into
consideration when positioning your antenna.
Antenna adjustment
To simplify antenna adjustment the signal strength is displayed. In addition the INFO button
can be used to invoke (and hide) a zoomed view of the signal level, so that is readable from a
distance.
20
Games
Two games have been included with the receiver. These games can be found under “Extras” in the
main menu.
Blocks
The object of the game “Blocks” is to strategically place falling blocks so as to leave as little
empty, unused space as possible. As a row becomes full it disappears and the rows above it move
down. Points are achieved for every block which is moved into place, and every row which is
eliminated. The game is over when there is no more space left in which to place the blocks from
the top of the screen.
To place the blocks use the following buttons:
OK / P+ Turn the blocks (counter clockwise)
– Push the block to the left
+ Push the block to the right
P– Allow the block to fall faster
Snake
The object of the game “Snake” is to control a hungry snake for as long as possible, while eating
the food that appears on the screen. Don’t let the snake hit a wall or eat through its own tail! As
you progress further, the snake will speed up making it more difficult to control.
P+ / P– / + / – Change the direction of the snake’s travel
21
TROUBLESHOOTING
Problem
Possible Reason
Possible Solution
No Power
Defective lead
Check lead for kinks / cuts
No reception, ‘no signal’
Unit has not been tuned
Follow installation
instructions
Antenna not connected
Ensure proper connection
Broadcast channels differ
from preset channel list
Restore factory defaults and
select “other” as location
Signal too weak
Check your antenna and leads.
Consider a signal amplifier or
consult an antenna installer.
Signal too weak
Check your antenna and leads.
Consider a signal amplifier or
consult an antenna installer.
Signal too strong
If you are using a signal
amplifier, the signal may be
boosted too much. Turn down
the amplifier.
Picture breaks up when lights
/ air con switched on
Antenna cable picking up
interference from internal
power cables due to bad
wiring
Ensure all antenna cable is
to RG6 Quad standard. If in
doubt, consult an antenna
installer. Re-wiring may be
necessary.
Picture black and white
Wrong video output selected
Set signal output to match
your connection, using
installation instructions.
Remote control not working
Dead batteries
Check and replace batteries
Direct sunlight
Use remote in shade
No Audio
Volume low / mute enabled
Check volume / mute on
remote
Cannot get TV channels, only
displays Radio
In Radio mode
Press TV on your STBX5C
remote
Does not display Closed
Captions
Program does not support
Closed captions
Check guides for CC supported
programs
Missing Channels
Picture breaks up (pixelation)
on some channels or displays
‘no signal’
If the receiver does not function properly after checking it, please contact our Wintal
troubleshooting help line on 1300 662 946. Do not attempt to make repairs on this unit as there
is danger of electric shock and will void your warranty.
22
TOMER
CUS
CA
R E CE NTR E
CUSTOMER
CARE CENTRE
this product is warranted for 36 months from the date of purchase.
Subject to the conditions of this warranty, the Customer Care Centre will perform
necessary service on the product without charge for parts, or labour if, in the opinion
of the manufacturer/ manufacturer’s agent, the product is found to be faulty within
the warranty period.
This warranty only applies if the product has been installed and used in accordance
with the manufacturer’s recommendations (as noted in the operating instructions)
under normal use and reasonable care. The warranty covers normal domestic use only
and does not cover damage, malfunction or failure resulting from use of incorrect
voltage, accident, misuse, neglect, build-up of dirt or dust, abuse, mis-adjustment
of customer controls, mains supply problems, thunderstorm activity, infestation
by insects or vermin, tampering or repair by unauthorised persons (including
unauthorised alterations), exposure to abnormally corrosive conditions or any foreign
object or matter having entered the product.
If warranty service is required you should:
■ Telephone the Customer Care Centre on 1300 662 946
■ Provide a copy of your purchase receipt that shows retailers identity and
date of purchase.
■ Send or bring the product to your Customer Care Centre.
Please note that freight to and/or from your Customer Care Centre
must be arranged by you.
The warranties hereby conferred do not extend to any costs associated with the
delivery, handling, freighting or transportation of the product or any part thereof
or replacement of and do not extend to any damage or loss occurring during, or
associated with transit.
THIS WARRANTY CARD AND THE PURCHASE DOCKET
(OR SIMILAR PROOF OF PURCHASE)
SHOULD BE RETAINED BY THE CUSTOMER AT ALL TIMES
TROUBLE SHOOTING HELP LINE
1300 662 946
Customer Care Centre
562 Spencer Street, West Melbourne
VICTORIA 3003
DON’T LOSE YOUR PROOF OF
PURCHASE!
STAPLE IT HERE.