1
RP4-MZ11
Radio Replacement & Steering Wheel Control Interface
for Mazda Vehicles
Testing & Verification
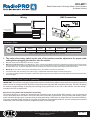
1. Turn the ignition on. The LED on the interface will turn on & the +12v accessory wire will turn on.
2. Turn on the radio & check balance & fade. Note: Premium Factory amplified Systems fader must be adjusted through the
RP interface. See vehicle Settings menu below.
3. Verify that the factory subwoofer (if present) is playing
4. Verify that all SWC are functioning properly. If not all SWC are functioning properly you need to re-calibrate the
SWC buttons because the analog SWC are falling outside of the pre-programmed values. Please see page 5 for
instructions on how to re-calibrate the SWC.
5. The LED & radio will turn off when the ignition is turned off.
Rear Seat Entertainment (RSE); If equipped
The RP4-MZ11 will allow the DVD player and rear screen to function independantly fron the new radio. A/V will be passed
from the factory DVD player to the rear screen and audio can be heard through the headphones. A/V cannot be passed from the
factory DVD player to the aftermarket head unit.
Accessing Vehicle Settings (vehicles equipped with OEM LCD)
To access the vehicle setting menu, press and hold the Mode button (Info button in 2013+ CX-9) on the SWC until “Setup Menu” is
displayed on the LCD screen. Use the Arrow Down on the SWC to scroll through the options. Once the option you wish to select is
displayed, press the Mode button on the SWC to advance to the next step. Follow the instructions listed below under each option
to make changes.
Change Text - Allows you to enter custom text for the LCD screen’s default display. Once this is selected, you can use the Volume
Up & Down buttons to select the character position and the Arrow Up & Down buttons to select the character. Once you have set
your custome text, do not press any buttons for 8 seconds and the programming function will time out and return to the default
display.
Set Clock - Allows you to set the clock on the LCD screen. Once this is selected you can use the Arrow Down button on the SWC
to choose a clock set mode. Please find your vehicle in the chart below to determine which mode you will select. Once your mode
is displayed, press the Mode button on the SWC to select. Follow the instructions on the LCD screen or in the chart below to set
the clock.
PLEASE NOTE: Choosing the wrong clock set mode may cause erratic LCD screen behavior. If you choose the wrong
mode you will need to wait for the programming function to time out and start over. It may take up to one minute for the
programming function to time out in clock set mode.
Clock Set Mode
Mode 1
Mode 2
Vehicle
2009+ Mazda 6
2010+ CX‐7
2009‐2012 CX‐9
2007‐2009 CX‐7
2004‐2009 Mazda 3
2009‐2012 CX‐9 & Mazda 6 with Mid‐
Line Radio
2013+ CX‐9
Clock Set Instructions
Choose Clock Set from the menu and follow the instructions on the LCD screen.
1. Press and hold the Mode button on the SWC to start.
2. Use the up & down arrows to select between 12 or 24 hour.
3. Press the Mode button again to advance to hours.
4. Use the up arrow to select the hour.
5. Press the Mode button again to advance to minutes.
6. Use the up arrow to select the minute.
7. Press the Mode button again to exit.
1. Press and hold the Mode button on the SWC for 8 seconds to start.
2. The vehicle info screen which switch to the next option
3. At this point you can press the Mode button to scroll the vehicle info options (press and hold mode to reset option)
or
4. Use Volume Up on the SWC to select the hour.
5. Use Arrow Up on the SWC to select the minute.
7. When you are finished do not press any buttons for 8 seconds and the programming function will time out and return to the default display.
Pacific Accessory Corporation® | Santa Ana, California 92705 | Ph. 866-931-8021 | [email protected]
©2012 Pacific Accessory Corporation
www.pac-audio.com
Pacific Accessory Corporation
Rev. 052413
Page 4