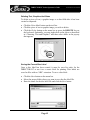
1
DIRECTOR EC Series
Publishing System
Operator’s Guide
DIRECTOR EC Series Operator’s Guide
Document Revision: 080904
Table of Contents
WELCOME TO THE DIRECTOR EC SYSTEM...................................................................................................5
COPYRIGHT NOTICE ...................................................................................................................................................5
CD-R/RW RECORDER WARRANTY POLICY ...............................................................................................................5
PIRACY .......................................................................................................................................................................5
CORPORATE HEADQUARTERS:....................................................................................................................................5
ABOUT MF DIGITAL ...............................................................................................................................................6
WHAT TO EXPECT FROM YOUR MF DIGITAL DIRECTOR EC PUBLISHING SYSTEM ................................................6
ABOUT THIS MANUAL ...........................................................................................................................................6
INSTALLING THE DIRECTOR EC........................................................................................................................7
WHAT’S IN THE BOX ..................................................................................................................................................7
PACKING MATERIALS .................................................................................................................................................7
THE BEST PLACE TO PUT THE DIRECTOR EC .........................................................................................................8
SAFETY PRECAUTIONS................................................................................................................................................8
LOCATION OF DIRECTOR EC COMPONENTS ................................................................................................9
FRONT VIEW...............................................................................................................................................................9
REAR VIEW ................................................................................................................................................................9
LOCATION OF CD-R/RW AND DVD ±R/±RW RECORDER PARTS AND CONTROLS............................10
PRODRIVE 52X .......................................................................................................................................................10
PIONEER DVD-R±/±RW..........................................................................................................................................10
REMOVING PACKING RESTRAINTS ................................................................................................................11
INPUT AND OUTPUT SPINDLES .........................................................................................................................11
INSTALLING THE PRINTER................................................................................................................................12
PREPARING THE PRISM PLUS PRINTER ......................................................................................................................12
INSTALLING THE MONITOR, KEYBOARD AND MOUSE ...........................................................................13
INSTALLING THE MONITOR, KEYBOARD AND MOUSE ...........................................................................14
CONNECTING THE MONITOR ....................................................................................................................................14
CONNECTING THE MOUSE AND KEYBOARD .............................................................................................................14
INSTALLING THE NETWORK CABLE..............................................................................................................14
CONNECTING THE NETWORK CABLE........................................................................................................................14
INSTALLING FIREWIRE CABLES......................................................................................................................15
STARTING THE DIRECTOR EC FOR THE FIRST TIME...............................................................................16
POWER CONNECTION AND SETTINGS .......................................................................................................................16
STARTING UP ...........................................................................................................................................................17
ALIGNING THE DRIVE TOWER AND PRINTER ............................................................................................................18
APPLICATION STARTUP......................................................................................................................................21
Page 1
DIRECTOR EC Series Operator’s Guide
Document Revision: 080904
STARTING THE DIRECTOR EC APPLICATION .........................................................................................................21
DIRECTOR EC APPLICATION LAYOUT ..................................................................................................................21
DIRECTOR EC APPLICATION CONFIGURATION .....................................................................................................22
PRINTER DRIVER (REQUIRED) ..................................................................................................................................23
OPERATOR’S EMAIL ADDRESS (OPTIONAL)..............................................................................................................23
RECORDING SPEED (REQUIRED) ...............................................................................................................................24
ASYNCHRONOUS MODE (REQUIRED)........................................................................................................................24
DESCRIPTION .........................................................................................................................................................25
DISABLED .................................................................................................................................................................25
JOBS=SYNCHRONOUS (FIFO), DRIVES=SYNCHRONOUS ..........................................................................................25
LEVEL 0....................................................................................................................................................................25
LEVEL 1*..................................................................................................................................................................25
LEVEL 2*..................................................................................................................................................................25
JOBS=ASYNCHRONOUS (FIFO), DRIVES=ASYNCHRONOUS .....................................................................................25
DEFAULT JOB FILE FOLDER (REQUIRED)..................................................................................................................26
DEFAULT IMAGE FILE FOLDER (REQUIRED) .............................................................................................................26
DEFAULT LABEL FILE FOLDER (REQUIRED) .............................................................................................................26
CREATING NEW PRIVILEGES PROFILE ......................................................................................................................27
EDITING EXISTING PRIVILEGES PROFILE ..................................................................................................................28
DELETING EXISTING PRIVILEGES PROFILE ...............................................................................................................29
CREATING NEW USERS.............................................................................................................................................29
EDITING EXISTING USERS.........................................................................................................................................31
DELETING EXISTING USERS ......................................................................................................................................31
DEFAULT JOB OPTIONS ............................................................................................................................................31
SYSTEM DRIVES .......................................................................................................................................................32
TRUSTED DRIVES .....................................................................................................................................................33
CONTROLLING THE DIRECTOR EC FROM CUSTOM APPLICATIONS .......................................................................34
CREATING DISC LABELS ....................................................................................................................................35
LABEL EDITOR MENU BAR .......................................................................................................................................35
CREATING TEXT .......................................................................................................................................................37
CHANGING TEXT AND TEXT ATTRIBUTES ................................................................................................................37
IMPORTING GRAPHICS ..............................................................................................................................................38
RESIZING GRAPHICS .................................................................................................................................................39
REPOSITIONING TEXT, GRAPHICS AND DATES..........................................................................................................40
CENTERING TEXT AND GRAPHICS ............................................................................................................................40
DELETING TEXT, GRAPHICS AND DATES .................................................................................................................41
SAVING THE CURRENT DISC LABEL .........................................................................................................................41
OPENING EXISTING DISC LABELS .............................................................................................................................42
CREATING DISC IMAGES....................................................................................................................................43
DATA DISC IMAGES ..................................................................................................................................................43
DATA IMAGE EDITOR TOOLBAR ...............................................................................................................................44
STATIC AND DYNAMIC CONTENT.............................................................................................................................45
ADDING FILES AND FOLDERS ...................................................................................................................................46
REMOVING FILES AND FOLDERS ..............................................................................................................................46
CREATING NEW FOLDERS.........................................................................................................................................46
NAMING A FOLDER ..................................................................................................................................................46
SAVING THE CURRENT DISC IMAGE FILE .................................................................................................................47
LOADING AN EXISTING SCRIPT FILE ........................................................................................................................51
AUDIO DISC IMAGES ................................................................................................................................................51
AUDIO IMAGE TOOLBAR...........................................................................................................................................52
ADDING TRACKS ......................................................................................................................................................53
Page 2
DIRECTOR EC Series Operator’s Guide
Document Revision: 080904
SELECTING CD CAPACITY ........................................................................................................................................53
REMOVING TRACKS..................................................................................................................................................54
EDITING A TRACK ....................................................................................................................................................54
CHANGING ISRC CODES AND COPY PROHIBIT FLAGS .............................................................................................55
INSERTING, EDITING AND REMOVING SILENCE ........................................................................................................56
INSERTING, EDITING AND REMOVING SUB-INDEXES ................................................................................................57
SAVING THE CURRENT AUDIO DISC IMAGE .............................................................................................................59
LOADING AN EXISTING AUDIO DISC IMAGE .............................................................................................................59
CREATING JOBS.....................................................................................................................................................60
CREATING NEW JOBS ...............................................................................................................................................60
JOB MENU BAR ........................................................................................................................................................60
GENERAL OPTIONS ...................................................................................................................................................61
JOB ID (REQUIRED)..................................................................................................................................................62
USER ID (REQUIRED) ...............................................................................................................................................62
PASSWORD (REQUIRED) ...........................................................................................................................................62
IMAGE (NEEDED IF “COPY” OPTION IS CHECKED) .....................................................................................................63
LABEL FILE (OPTIONAL)...........................................................................................................................................63
SMARTGUARD MEDIA ID.........................................................................................................................................65
COMMENTS (OPTIONAL)...........................................................................................................................................65
QUANTITY (REQUIRED) ............................................................................................................................................65
PRIORITY (REQUIRED) ..............................................................................................................................................65
SAVING THE CURRENT JOB ......................................................................................................................................66
LOADING AN EXISTING JOB......................................................................................................................................66
SUBMITTING JOBS ................................................................................................................................................68
SUBMITTING A JOB ..................................................................................................................................................68
THE PRODUCTION PROCESS ......................................................................................................................................69
REMOVING A JOB .....................................................................................................................................................70
CLEARING THE COMPLETED JOBS LIST ....................................................................................................................70
STARTING A NEW JOB ..............................................................................................................................................70
ABORTING A JOB .....................................................................................................................................................70
VIEWING LOGS ......................................................................................................................................................71
UPDATING JOB RECORDS..........................................................................................................................................71
NAVIGATING JOB RECORDS ......................................................................................................................................71
DELETING INDIVIDUAL JOB RECORDS ......................................................................................................................72
DELETING ALL JOB RECORDS...................................................................................................................................72
RESUBMITTING JOBS ................................................................................................................................................72
DUPLICATING EXISTING CDS ...........................................................................................................................73
CREATING AN IMAGE FILE .......................................................................................................................................73
RECORDING AN IMAGE FILE .....................................................................................................................................75
VIEWING RESOURCES .........................................................................................................................................76
UPGRADING DIRECTOR EC SOFTWARE........................................................................................................77
OVERVIEW OF THE PROCESS .....................................................................................................................................77
DOWNLOAD ZIPPED FILES.........................................................................................................................................77
EXTRACT THE ZIPPED FILES ......................................................................................................................................78
CHANGING COMPUTER NAME .........................................................................................................................79
DISCONNECTING COMPUTER IN THE INTERNET SERVICE MANAGER (ISM)...............................................................79
Page 3
DIRECTOR EC Series Operator’s Guide
Document Revision: 080904
CHANGING THE COMPUTER NAME ...........................................................................................................................81
CHANGE THE ANONYMOUS ACCOUNT ......................................................................................................................83
APPENDIX A: WORKING WITH CD-REWRITABLE (CD-RW) DISCS .......................................................85
CD-RW SUPPORTED FORMATS ................................................................................................................................85
CD-RW RECORDING SPEED .....................................................................................................................................85
APPENDIX B: SUPPORTED FORMATS FOR DUPLICATING.......................................................................86
Page 4
DIRECTOR EC Series Operator’s Guide
Document Revision: 080904
Welcome to the Director EC System
Copyright Notice
Copyright ©2003, 2004 by MF DIGITAL. All rights reserved.
This manual and the accompanying illustrations may not be copied, reproduced,
electronically transmitted, or translated into another language, in whole, or in part,
without the written consent of MF DIGITAL.
MF DIGITAL, CD/DVD-5906ec, Director EC, Scribe EC, Scribe EC
Standalone, are trademarks of MF DIGITAL.
Other trademarks referred to are the property of their respective trademark or
registered trademark holders.
CD-R/RW Recorder Warranty Policy
Individual CD-R/RW recorder manufacturers are responsible for the products they provide. As a convenience,
MF DIGITAL will honor any service issue related to a defective recorder while under its respective
manufacturer’s warranty providing that the recorder has been purchased from MF DIGITAL either directly or
indirectly. MF DIGITAL assumes no responsibility for products NOT purchased through MF DIGITAL.
Piracy
The copying of audio, video, or software without the permission of the copyright holder is illegal. MF
DIGITAL. accepts no responsibility for the copyright use or misuse of this equipment. It is the sole
responsibility of the user to ensure that the legal rights of copyright in duplicating are respected.
Corporate Headquarters:
MF Digital
121 Carolyn Blvd
E. Farmingdale, NY 11735
phone: (631)249-9393
fax: (631)249-9273
e-mail: support@MF Digital.com
website: http://www.mfdigital.com/
Page 5
DIRECTOR EC Series Operator’s Guide
Document Revision: 080904
About MF Digital
Thank you for purchasing MF Digital’s DIRECTOR EC publishing system.
MF Digital manufactures a wide variety of software and audio duplication
and production equipment, including manual and fully automatic CD and
DVD duplicators and printers. We hope you will consider us for all of your
production needs.
What To Expect From Your MF Digital DIRECTOR EC Publishing
System
Your MF Digital DIRECTOR EC publishing system is professionally
designed and manufactured to give you years of trouble free operation. To
avoid accidental damage to your new DIRECTOR EC publishing system,
please read and understand this manual thoroughly before operating the
unit.
About This Manual
This manual is written for both novice and experienced users. Please read
through this Operator’s Guide from beginning to end before using the unit.
Once having read the manual, follow along chapter by chapter. This will
provide the necessary understanding of your new DIRECTOR EC
publishing system.
Page 6
DIRECTOR EC Series Operator’s Guide
Document Revision: 080904
Installing the DIRECTOR EC
Carefully remove the DIRECTOR EC publishing system from the shipping
container. Inspect the contents and verify them against the packing slip.
Report any errors in shipping as soon as possible.
What’s In The Box
Your DIRECTOR EC is a complete publishing system containing all
necessary components. The package includes:
•
•
•
•
•
•
DIRECTOR EC publishing system
Computer including: SVGA Monitor, Mouse, and keyboard
Power cords
Operator’s Guide (on CD)
Windows 2000 Pro license pack
MF Digital Product & Warranty Registration card
Packing Materials
Please retain the original box and packaging in the event that the unit
requires future servicing. This will help to reduce the possibility of damage
occurring in transit.
Page 7
DIRECTOR EC Series Operator’s Guide
Document Revision: 080904
The Best Place To Put The DIRECTOR EC
The best operating location for the DIRECTOR EC publishing system is in
a climate controlled area, free of dirt, dust, humidity, excessive heat, and
electronic or electromagnetic interference. Room temperature should be
between 65 and 75 degrees Fahrenheit, or between 18 and 23 degrees
Celsius. Place the DIRECTOR EC on a solid, steady work surface and
allow sufficient room for all incidental work materials. Provide at least six
inches of clearance on all sides of the unit for ventilation.
Safety Precautions
The system is shipped with a three-prong power connector and must be
used with a properly grounded AC receptacle. DO NOT try to defeat the
third “ground” prong. All computer peripherals must be properly grounded
and the DIRECTOR EC is no exception. The use of a power conditioner
such as an Uninterruptible Power Supply (UPS), or a surge protector is
highly recommended. At the very least you should consider connecting the
PC portion of the DIRECTOR EC to a UPS. The minimum required size is
500VA.
Repairs or alterations should only be attempted by authorized factory
trained technicians. MF Digital reserves the right to void the warranty if
unauthorized service is performed.
Page 8
DIRECTOR EC Series Operator’s Guide
Location Of DIRECTOR EC Components
Front View
Rear View
Page 9
Document Revision: 080904
DIRECTOR EC Series Operator’s Guide
Document Revision: 080904
Location Of CD-R/RW and DVD ±R/±RW Recorder Parts And Controls
ProDRIVE 52x
Legend
1.
2.
3.
4.
5.
6.
Disc tray - Discs are loaded and removed from this tray. Pressing the eject button will open the tray when the
power is switched on to the Director EC.
Emergency eject pinhole - In the event that the disc tray will not open by pressing the eject button, insert the
tip of a large paper clip into this hole and push.
Earphone jack
Volume Control
Read and write status LEDs - These indicators light up when the recorder is reading or writing.
Eject button - This button is used to open or close the disc tray.
Pioneer DVD-R±/±RW
Legend
1) Disc Tray - Discs are loaded and removed from this tray. Pressing the eject button will open the tray when
the power to the Director EC is switched on.
2) Headphone Jack – Connect headphones here.
3) Volume Control Knob – This controls the volume level of the headphones.
4) Disc Indicator – Light indicates presence of disc in drive.
5) Ventilation Hole – Do not block.
6) Ventilation Hole – Do not block.
7) Eject Button – This button is used to manually open the disc tray.
8) Emergency Eject Pinhole – In the event that the disc tray will not open by pressing the eject button, insert
the tip of a large paper clip into this hole.
Page 10
DIRECTOR EC Series Operator’s Guide
Document Revision: 080904
Removing Packing Restraints
The DIRECTOR EC ships with a picker arm restraint to reduce the
possibility of damage in transit. This restraint must be removed before
operation or power-on. Remove the foam block above the transfer arm.
Save the foam block, as you will need to return it to its place if you need to
transport the unit in the future.
Input And Output Spindles
The input bin and the output spindle and bins serve as the containers to
store up to 200 blank and recorded discs per bin (up to 600 total depending
on printer option).
Page 11
DIRECTOR EC Series Operator’s Guide
Document Revision: 080904
Installing The Printer
Before operating the DIRECTOR EC, the printer must be properly mounted
and aligned. In addition, please familiarize yourself with the documentation
included with the Spectrum2 thermal CD printer.
Preparing the Prism Plus Printer
(fig. 0) Cabling arrangement for Prism Plus Printer
Page 12
DIRECTOR EC Series Operator’s Guide
Document Revision: 080904
1. With a Torx head
screwdriver, remove the
rubber feet from the
bottom of the printer (fig.
1).
2. Using the flat head screws
provided,
attach
the
printer plate to the bottom
of the printer as seen in
(fig. 2).
(fig. 1)
(fig. 2)
NOTE: Fig 3 – Fig 5 shows placement of
Spectrum 2 printer. Placement for Prism
Plus is similar.
3. Place the printer / plate
onto the drive bay (fig. 3)
4. Use the dotted line at the
rear of the drive bay to
guide the positioning of
the printer on the drive
tower (fig. 4)
(fig. 3)
(fig. 4)
5. After placing the printer
on the drive tower, use the
“Printer
Alignment”
function to align the
printer. Please refer to p.
30 for details.
6. Once you are satisfied
with
the
printer
alignment, tighten the
thumb-screws located on
both sides of the printer
(fig. 5).
(fig. 5)
Page 13
DIRECTOR EC Series Operator’s Guide
Document Revision: 080904
Installing The Monitor, Keyboard And Mouse
Before operating the DIRECTOR EC, the monitor, keyboard and mouse
must be attached.
Connecting The Monitor
• Place the monitor on either side of the DIRECTOR EC unit.
• Make sure the monitor power switch is set to the off position.
• Connect one end of the power cord to the VAC Out on the monitor and
the other to the wall power outlet.
• Connect the High Density DB15 male connector of the video cable to
the High Density DB15 female Video In port on the back of the host
computer.
Connecting The Mouse And Keyboard
• Connect the PS/2 male connector of the mouse cord to the PS/2 female
Mouse In port on the back of the DIRECTOR EC.
• Connect the PS/2 male connector of the keyboard cord to the PS/2
female Keyboard In port on the back of the DIRECTOR EC.
Installing The Network Cable
In addition to operating as a standalone duplicator the DIRECTOR EC can
be connected to a network to receive files for pre-mastering or even be
remotely controlled by use of the DIRECTOR EC’s advanced Application
Program Interface (SmartAPI). The unit comes equipped from the factory
with a 3COM 10/100BaseT Ethernet card for network attachment.
Note:
While networks are commonplace, their connection and interconnection
require specific expertise far beyond the scope of this manual. For our
purposes here, we will assume you either have expertise with networking
computers, or had your unit professionally installed by MF Digital.
Connecting The Network Cable
• Connect a suitable patch cord to the RJ45 network port on the back of
the DIRECTOR EC unit. A Category 3 or better cable should be used
for 10Base-T and Category 5 for 100Base-T network connection.
Page 14
DIRECTOR EC Series Operator’s Guide
Document Revision: 080904
Installing Firewire Cables
The following illustrations show firewire installation on the Director EC. Please connect
the firewire cables as illustrated below.
Director EC-2
Director EC-4
Firewire Connection on back of PC
Page 15
DIRECTOR EC Series Operator’s Guide
Document Revision: 080904
Starting the DIRECTOR EC For The First Time
Before CD creation or duplication can begin it is necessary to review a few
details.
Power Connection And Settings
• Make sure the DIRECTOR EC power switch is set to the off position.
Also, set the PC switch to off or “0”.
• Verify that the voltage selector switch on the back of the unit is set
correctly. The DIRECTOR EC supports both 115 VAC and 230 VAC at
50 ~ 60 Hz. Please confirm that the correct voltage (115 VAC for North
America) has been selected.
• Plug one end of the supplied power cord into the receptacle at the rear
of the unit and the other end into the wall or UPS power outlet.
0
Note:
CAUTION
Always use properly grounded receptacles, or severe damage
to your system may result. The use of a surge protector or
Uninterruptible Power Supply (UPS) is highly recommended.
The DIRECTOR EC use Microsoft’s Windows 2000 Professional for
their operating system. To get the most out of the DIRECTOR EC it is
recommended that users supplement this manual with a Windows 2000
Professional guide.
Page 16
DIRECTOR EC Series Operator’s Guide
Document Revision: 080904
Starting Up
•
•
•
•
Flip the DIRECTOR EC power switch to the “on” position.
Flip the host computer’s power switch to the “on” position.
Switch on the power to the printer.
Wait a minute or two while the system starts up. A series of diagnostic
information will be displayed and once complete the unit will display
the Begin Logon dialog box.
• Enter “MF Digital” in lowercase letters for the password. Please note
that the password is case sensitive.
• Press the ENTER key. The screen will now display the DIRECTOR EC
desktop screen.
Page 17
DIRECTOR EC Series Operator’s Guide
Document Revision: 080904
Aligning The Drive Tower and Printer
The printer must now be manually positioned relative to the DIRECTOR
EC’s disc picking mechanism. Once the correct position has been
determined the drive tower and printer retaining guides are screwed down
tight to hold the drive tower and printer in place.
• From the DIRECTOR EC’s desktop screen, double click the “EC
Alignment Utility” icon.
• The screen will now display:
Page 18
DIRECTOR EC Series Operator’s Guide
Document Revision: 080904
• Click the Perform Test button. The screen will now display:
•
•
•
•
Manually open drive tray
Place a blank disc on the input spindle.
Click the Yes button.
The disc will be loaded from the input spindle and over the open drive
tray, so that you may properly align the drive tower
• Click the Yes button.
• The disc will be loaded onto the drive tray. Observe the disc’s position
on the tray. The CD fits into the inset on the drive tray.
• The screen will now display:
• Click the OK button. The disc will be unloaded onto the output spindle.
If the drive tower alignment is correct, tighten the thumb screws for the
drive tower. If the alignment is not correct, adjust the position of the
drive tower as needed and repeat the procedure. When aligning the
printer is completed click the Exit button. The EC Alignment Utility
will close.
Page 19
DIRECTOR EC Series Operator’s Guide
Document Revision: 080904
• After aligning the drive tower, repeat the same procedure to align the
printer.
Page 20
DIRECTOR EC Series Operator’s Guide
Document Revision: 080904
Application Startup
The DIRECTOR EC is a state-of-the-art CD publishing system and
duplicator. It is designed to create, duplicate and verify most standard
compact disc formats. This startup section will guide you through starting
and configuring the DIRECTOR EC application.
Starting the DIRECTOR EC Application
To start the DIRECTOR EC application the steps are as follows:
• From the DIRECTOR EC desktop, double click the “DIRECTOR EC”
icon on the Windows desktop. The DIRECTOR EC application screen
will now be displayed:
• Place as many blank discs as required onto the input spindle.
DIRECTOR EC Application Layout
The DIRECTOR EC application is organized into a sequence of eight pages
accessible by tabs at the top of the screen (System Status, Create Job, Data
Image Editor, Audio Image Editor, Label Editor, Resources Info, System
Setup, System Log). By completing information on these cards you control
the actions of the DIRECTOR EC to create, duplicate and verify CDs as
well as print disc labels.
Page 21
DIRECTOR EC Series Operator’s Guide
Tabs:
System Status
Create Job
Data Image
Editor
Audio Image
Editor
Label Editor
Resources Info
System Setup
System Log
Document Revision: 080904
Displays the status of jobs after they have been
submitted for production.
Brings together the data or audio contents and label
components of a CD so it can be produced.
Specifies the contents of a data CD to be recorded.
Specifies the contents of an audio CD to be recorded.
Creates labels to be printed on the surface of CDs.
Displays the hardware elements connected to the
DIRECTOR EC.
Defines operating settings and user privileges.
Displays the database of information maintained on all
jobs.
DIRECTOR EC Application Configuration
Before creating or duplicating a CD the DIRECTOR EC application must
first be configured. The System Setup tab is used to establish a number of
important settings including basic operation parameters as well as the
authorized users and privileges they have using the DIRECTOR EC.
Note: Apply button must be clicked in order for any changes to take effect. Except
for modification of users and privileges.
To begin or modify an existing setup of the DIRECTOR EC:
• Click the System Setup tab. The screen will now display:
Page 22
DIRECTOR EC Series Operator’s Guide
Document Revision: 080904
The System Setup tab is divided into a number of information fields that
must be completed.
Printer Driver (Required)
The Printer Driver pull-down is used to indicate to the DIRECTOR EC the
type of printer that is installed.
• Click the Printer Driver pull down and select your printer Ex: “MF
Digital Spectrum”.
Operator’s Email Address (Optional)
The OPERATOR’S EMAIL ADDRESS field is a user defined email
address to which a network attached DIRECTOR EC will send a message
when the unit requires attention (such as an empty input spindle, etc.). The
email feature requires the presence of a POP3 or IMAP server on the
network and that an email client account be created for use by the
DIRECTOR EC.
Note:
DIRECTOR EC sends email via MAPI hence you must first setup a
MAPI email client on the DIRECTOR EC. Make sure you set this client
to be used from MAPI based applications.
Page 23
DIRECTOR EC Series Operator’s Guide
Document Revision: 080904
• Click the Operator’s E-mail Address field and enter an email address.
Leave the field blank if the DIRECTOR EC is not attached to a network
or if you do not want to receive unit attention messages.
Recording Speed (Required)
The Recording Speed pull-down allows you to set the recording speed as
determined by the capabilities of the recorders installed in the DIRECTOR
EC.
• Click the Recording Speed pull down and select the desired recording
speed “maximum speed”, or “4x, 8x, 12x, 16x, 20x, 24x, 32x, or 48x
speed”.
• Click on “Apply” to activate the changes.
Asynchronous Mode (Required)
The Asynchronous Mode pull-down is used to instruct the DIRECTOR EC
how to process jobs. This affects both how jobs are handled and how the
drives operate. Jobs and drives can run either synchronously or
asynchronously. In the table below you will find each mode detailed. Let’s
define the basic modes first:
Jobs=Synchronous / Asynchronous
When jobs are Synchronous, they are completed in the order in which
they were submitted. Take for example two jobs submitted for one copy
each. The first job is of a 650MB master while the second job is only
10MB. While the second job submitted will be completed prior to the
first job, it will not be outputted to the accept spindle until the second
job has been completed. When jobs are Asynchronous they will be
outputted to the accept spindle as they are completed.
Drives=Synchronous /Asynchronous
Drives can also run either synchronously or asynchronously. In
synchronous mode, all the drives in use for a given job, run in tandem
or parallel to one another. In asynchronous mode, all the drives in use
for a given job, operate independently of each other. For example if you
submit a job for three copies and the drives are operating
synchronously, the copying process will not begin until all drives
become ready. On the other hand, if the same job were submitted with
the drives operating asynchronously, each drive would begin to write as
soon as it becomes ready, independently of any other drives which may
Page 24
DIRECTOR EC Series Operator’s Guide
Document Revision: 080904
also be in use for this particular job. Asynchronous mode is more
demanding of system resources.
The modes of operation are:
Mode
Description
Disabled
Jobs=Synchronous (FIFO), Drives=Synchronous
When the setting is “disabled”, jobs are processed on a first in/first out
(FIFO) basis such that they will be kept together when placed on the
output spindle. For example, let us say two jobs of one piece each are
submitted. Job 1 is a 650 MB disc and Job 2 is a 10 MB disc. Even
though Job 2 was submitted last, it will completed before Job 1 but it will
NOT be outputted to the accept spindle until Job 1 is done.
Level 0
Jobs=Asynchronous, Drives=Synchronous (Default)
When the setting is “level 0” jobs are still started on a first in / first out
basis, but completed jobs will be outputted when they are done and
therefore discs will be mixed together on the output spindle. For example,
let us say two jobs of two pieces each are submitted. Job 1 is a 650 MB
disc and Job 2 is a 10 MB disc. Even though Job 2 was submitted last, it
will completed before Job 1 but unlike the DIASBLED mode, it will not
be held but rather immediately outputted to the accept spindle when it is
done. In processing the respective jobs, the two drives in use for each job
will function in tandem such that they will not begin to write until both
drives have become ready.
Level 1*
Jobs=Synchronous (FIFO), Drives=Asynchronous
When the setting is “Level 1”, jobs are processed on a first in/first out
(FIFO) basis such that they will be kept together when placed on the
output spindle. For example, let us say two jobs of two pieces each are
submitted. Job 1 is a 650 MB disc and Job 2 is a 10 MB disc. Even
though Job 2 was submitted last, it will completed before Job 1 but it will
NOT be outputted to the accept spindle until Job 1 is done. In processing
the respective jobs, the two drives in use for each job will function
independently of one another and begin to write as soon as they become
ready.
Level 2*
Jobs=Asynchronous (FIFO), Drives=Asynchronous
When the setting is “level 2” jobs are still started on a first in / first out
basis but completed jobs will be outputted when they are done. For
example, let us say two jobs of two pieces each are submitted. Job 1 is a
650 MB disc and Job 2 is a 10 MB disc. Even though Job 2 was
submitted last, it will completed before Job 1 but unlike the DIASBLED
mode, it will not be held but rather immediately outputted to the accept
spindle when it is done. In processing the respective jobs, the two drives
in use for each job will function independently of one another and begin
to write as soon as they become ready. In this mode, disc placement on
output spindle will be scattered.
Page 25
DIRECTOR EC Series Operator’s Guide
Document Revision: 080904
• Click the ASYNCHRONOUS MODE pull down and select the desired
“disabled” or “level O” setting (level 1 and level 2 not used).
Default Job File Folder (Required)
The DEFAULT JOB FILE FOLDER field is used to specify the default
location where job files (*.JOB) will be saved. The factory setting
(C:\CDDIRECTOR\Jobs\) should be sufficient for most uses. To change
the default setting:
• Click the Browse button below the DEFAULT JOB FILE FOLDER
field.
• Select the volume and Director EC where you wish to save job files.
• Click the OK button.
Default Image File Folder (Required)
The DEFAULT IMAGE FILE FOLDER field is used to specify the default
location where disc image script (*.ISC) will be saved. The factory setting
(C:\CDDIRECTOR\Images\) should be sufficient for most uses. To change
the default setting:
• Click the Browse button below the DEFAULT IMAGE FILE FOLDER
field.
• Select the volume and Director EC where you wish to save disc image
files.
• Click the OK button.
Default Label File Folder (Required)
The DEFAULT LABEL FILE FOLDER field is used to specify the default
location where disc label files (*.LBL) will be saved. The factory setting
(C:\CDDIRECTOR\Labels\) should be sufficient for most uses. To change
the default setting:
• Click the Browse button below the DEFAULT LABEL FILE FOLDER
field.
• Select the volume and Director EC where you wish to save disc label
files.
• Click the OK button.
Page 26
DIRECTOR EC Series Operator’s Guide
Document Revision: 080904
Creating New Privileges Profile
Control access to the DIRECTOR EC by restricting use to only authorized
users. The main intent of this is for jobs submitted remotely through the
included Java Client, or through other client side applications. New users
must first be entered into the DIRECTOR EC’s database and their
privileges or permissions assigned.
The first step in entering new users into the database is to create profiles,
which define types or classes of users and their work privileges on the
DIRECTOR EC. For example, a “Team Leader” profile might be
established for users who need to produce an unlimited number of discs and
a “Team Member” profile created for other users in order to restrict the
number of discs they can produce in a given period of time.
To create a new privilege profile:
• Click the New button below the PRIVILEGES window.
• Complete these required fields:
Page 27
DIRECTOR EC Series Operator’s Guide
Editing Privileges
Profile name
Max quantity per day
Max quantity per month
Max quantity per quarter
Max quantity per request
Max requests per day
Max requests per month
Max requests per quarter
Max priority
•
Document Revision: 080904
Required. Enter the profile name.
Required. Enter the maximum number of
discs this type of user is allowed to
record/print per day.
Required. Enter the maximum number of
discs this type of user is allowed to
record/print per month.
Required. Enter the maximum number of
discs this type of user is allowed to
record/print per quarter.
Required. Enter the maximum number of
discs this type of user is allowed to
record/print per job.
Required. Enter the maximum number of jobs
this type of user is allowed to submit per day.
Required. Enter the maximum number of jobs
this type of user is allowed to submit per
month.
Required. Enter the maximum number of jobs
this type of user is allowed to submit per
quarter.
Required. Enter the maximum priority (1
lowest - 99 highest) this type of user is
allowed to assign a job. Jobs are queued
based on order of submission and priority.
Jobs of higher priority will be queued before
jobs of lower priority. If the priority level is
the same, the job will be processed in order of
submission.
When finished entering the information, click the Save To Database
button.
Editing Existing Privileges Profile
To edit an existing privilege profile:
• Click the privilege profile you wish to edit and click the Edit button
below the PRIVILEGES window. The privileges information boxes will
be displayed.
• Make any changes as needed then click the Save To Database button.
Page 28
DIRECTOR EC Series Operator’s Guide
Document Revision: 080904
Deleting Existing Privileges Profile
To delete an existing privileges profile:
• Click the privilege profile you wish to delete and click the Delete button
below the PRIVILEGES window.
• Click the Yes button to confirm.
Note:
You may NOT delete a Profile while users are assigned to it. You must
first either delete or assign the users a new profile, then the profile may be
deleted.
Creating New Users
After creating suitable privileges profiles the next step is to enter new users
and their personal information into the DIRECTOR EC’s database.
To create a new user:
• Click the New button below the USERS window.
• Complete the user information boxes:
Creating New Users
Username
Required. Enter a name for the user.
(15 characters maximum, A to Z, 0 to 9)
First Name
Required. Enter the user’s first name.
(16 characters maximum, A to Z, 0 to 9)
Last Name
Required. Enter the user’s last name.
(31 characters maximum, A to Z, 0 to 9)
Password
Required. Enter the user’s password.
(15 characters maximum, A to Z, 0 to 9)
Confirm Password
Required. Enter the user’s password a second time.
Privileges
Required. Select a defined privileges profile.
Max Quantity
Determined by privileges profile.
Max Requests
Determined by privileges profile.
Max Priority
Determined by privileges profile.
Company
Optional. Enter the user’s company name.
(63 characters maximum, A to Z, 0 to 9)
Department
Optional. Enter the user’s department name.
Page 29
DIRECTOR EC Series Operator’s Guide
Street Address 1
Street Address 2
City
State/Province
Zip/Postal Code
Country
Phone
Fax
Email
Date Entered
Document Revision: 080904
(31 characters maximum, A to Z, 0 to 9)
Optional. Enter the user’s street address.
(63 characters maximum, A to Z, 0 to 9)
Optional. Enter the user’s street address.
(63 characters maximum, A to Z, 0 to 9)
Optional. Enter the user’s city.
(31 characters maximum, A to Z, 0 to 9)
Optional. Enter the user’s state or province.
(15 characters maximum, A to Z, 0 to 9)
Optional. Enter the user’s Zip or postal code.
(15 characters maximum, A to Z, 0 to 9)
Optional. Enter the user’s country.
(15 characters maximum, A to Z, 0 to 9)
Optional. Enter the user’s telephone number.
Optional. Enter the user’s fax number.
Optional. Enter the user’s email address.
Automatic. The DIRECTOR EC automatically
registers the date and time the user’s information is
entered.
• When finished entering the information click the Save To Database
button.
Page 30
DIRECTOR EC Series Operator’s Guide
Document Revision: 080904
Editing Existing Users
To edit an existing user:
• Click the username you wish to edit and click the Edit button below the
USERS window and the user information boxes will be displayed.
• Make any changes as needed then click the Save To Database button.
Deleting Existing Users
To delete an existing user:
• Click the username you wish to delete and click the Delete button below
the USERS window.
• Click the Yes button to confirm.
Default Job Options
The DEFAULT JOB OPTIONS window allows you to specify which
production options will be enabled on the Job tab when the DIRECTOR
EC application is started. Setting these defaults can save time if the type of
jobs you produce fall into a regular pattern.
To change the job option defaults:
• Select or de-select the check box next to the appropriate option:
Default Job Options:
Copy
When checked the Copy option on the Job tab will be
enabled by default.
Verify
When checked the Verify option on the Job tab will be
enabled by default.
Print
When checked the Print option on the Job tab will be enabled
by default.
Simulate When checked the Simulate option on the Job tab will be
enabled by default.
Archive
When checked the Archive option on the Job tab will be
enabled by default.
Page 31
DIRECTOR EC Series Operator’s Guide
Document Revision: 080904
System Drives
The SYSTEM DRIVES window allows you to specify which hard disk
drives the DIRECTOR EC uses exclusively. The factory settings should be
sufficient for most uses.
Director EC-4: Be sure that: D:, E:, F:, and G: are selected. DO NOT
SELECT C:.
Director Office Publisher (EC-2): Be sure that: D:, and E: are selected.
DO NOT SELECT C:.
Example of Director EC-4
To change the SYSTEM DRIVES:
• Select or de-select the check box next to the appropriate drive.
• Click “Apply” after making the changes.
Page 32
DIRECTOR EC Series Operator’s Guide
Document Revision: 080904
Trusted Drives
The TRUSTED DRIVES window allows you to specify which hard disk
drives are capable of sustaining the data transfer rate necessary for
recording CDs. The C: drive (which houses the DIRECTOR EC’s
operating system and application) should never be used as a recording
source. The factory settings should be sufficient for most uses.
To change the TRUSTED DRIVES:
• Select or de-select the check box next to the appropriate drive.
Note:
Unless you have added a raid solution, or other additional fast storage, you
should never change the default settings. EIDE drives should not be used
for this purpose. Please consult your MF Digital reseller if you wish to add
additional storage.
Page 33
DIRECTOR EC Series Operator’s Guide
Document Revision: 080904
Controlling the DIRECTOR EC From Custom Applications
In addition to operating the DIRECTOR EC from its console, you have the
option to remotely control the system from anywhere on the network using
your own custom applications or scripts. This is accomplished using the
DIRECTOR EC’s Application Program Interface (SmartAPI) after initial
configuration using the System Setup tab. For additional information see
the DIRECTOR EC’s SmartAPI Programmer’s Guide.
Page 34
DIRECTOR EC Series Operator’s Guide
Document Revision: 080904
Creating Disc Labels
The first step in creating a CD is to create a label that will be printed on the
surface of the disc. The DIRECTOR EC’s built-in label design software
provides a quick and easy way to create simple disc labels that contain text
and graphics. More sophisticated labels can be created by using the
provided software included with the your printer.
To use the DIRECTOR EC’s built-in label design software:
• Click the Label Editor tab. The screen will now display:
The Label Editor’s main editing window consists of two concentric circles
that graphically represent the surface appearance of a CD.
Label Editor Menu Bar
Horizontally along the top of the Label Editor window is the menu bar, as
depicted below:
The menu bar contains eight buttons: New, Open, Save, Cut, Select Font,
Point Mode, Text Mode and Import Picture.
Page 35
DIRECTOR EC Series Operator’s Guide
Document Revision: 080904
Label Menu Buttons:
New
Creates a new disc label.
Open
Opens an existing disc label file (*.LBL).
Save
Saves the current disc label.
Cut
Cuts the selected item
Select
Used to select the font, style, size and color before creating test
Font
on the disc label.
Used to select a piece of text, date field or graphic image so it
Point
can be moved, modified or deleted.
Mode
Text
Mode
Import
Picture
Used to create text on the disc label.
Used to place a graphic image file created using other software
on the disc label.
Page 36
DIRECTOR EC Series Operator’s Guide
Document Revision: 080904
Creating Text
Using the Text Mode tool, you can create horizontal text anywhere on your
disc label. In addition, once the text has been entered it can be repositioned
and its font and other attributes changed. To create text:
• Click the Text Mode button on the toolbar.
• Click where you want the type to begin.
• Enter the text you want.
Changing Text And Text Attributes
To change the attributes of a piece of text once it has been entered:
• Click the Point Mode button on the toolbar.
• Double click the piece of text you wish to change. The screen will now
display:
• To change the text that you previously typed in, edit the contents of the
text box.
Page 37
DIRECTOR EC Series Operator’s Guide
Document Revision: 080904
• To change the font, style, size or color, click the Select Font button. The
screen will now display:
• After making the changes click the OK button.
• Click the OK button.
Importing Graphics
Using the Import Picture tool, you can place graphics created using other
software anywhere on your disc label. To import a graphics file:
• Click the Import Picture button on the toolbar. The screen will now
display:
• Select the graphics file you wish to import (supported formats include
BMP, JPG, PCX, PNG, TGA, TIF and WMF).
• Click the Open button.
Page 38
DIRECTOR EC Series Operator’s Guide
Document Revision: 080904
Resizing Graphics
To proportionally resize a graphic image after it has been imported:
• Click the Point button on the toolbar.
• Click the graphic image you wish to resize. A bounding box will appear
around the image with eight solid squares (handles).
• Click and drag the appropriate handle until the image is the correct size
and release the mouse button.
Page 39
DIRECTOR EC Series Operator’s Guide
Document Revision: 080904
Repositioning Text, Graphics and Dates
To reposition a piece of text, a graphic image or a date field after it has
been created or imported:
• Click the Point button on the toolbar.
• Click and hold on the selected text or graphic image you wish to move.
• Drag the text or graphic image to the desired location and release the
mouse button.
Centering Text and Graphics
To center text or graphic images after they have been created or imported:
• Click the Point button on the toolbar.
• Right-click on the text or graphic image. A pop-up menu, as depicted
below, will appear.
• You may center text horizontally only. You may choose to center
graphics horizontally, vertically, or both. Clicking on the “Center” popup menu option centers the graphic horizontally and vertically.
Page 40
DIRECTOR EC Series Operator’s Guide
Document Revision: 080904
Deleting Text, Graphics And Dates
To delete a piece of text, a graphic image or a date field after it has been
created or imported:
• Click the Point Mode button on the tool bar.
• Click the piece of text or graphic image you wish to delete.
• Click the Delete button on the menu bar or press the DELETE key on
the keyboard. Optionally, you may right-click on the object as described
in “Centering Text and Graphics” and then select delete in the pop-up
that appears.
Saving the Current Disc Label
Once a disc label has been created, it must be saved in order for the
DIRECTOR EC to use it as a source label for printing. Disc labels are
saved as files with an “LBL” extension. To save a disc label:
• Click the Save button on the menu bar.
• Select the proper folder where you want to save the disc label file.
• Enter the name for the disc label file and click the Save button.
Page 41
DIRECTOR EC Series Operator’s Guide
Document Revision: 080904
Opening Existing Disc Labels
Once a disc label has been saved it can be modified at a later date. To open
an existing disc label file:
• Click the Open button on the menu bar.
• Select the appropriate file and click the Open button.
Page 42
DIRECTOR EC Series Operator’s Guide
Document Revision: 080904
Creating Disc Images
After creating a label, the next step in constructing a CD is to specify its
contents (disc image). The DIRECTOR EC creates industry standard data
(Mode 1 ISO 9660 level 2 with Joliet extensions) and audio (Red Book)
CDs from scratch as well as duplicates existing CDs authored in most
formats. In this section we cover how to create the CD contents from files
residing on the local system or a remote system connected via a network. If
you already have a CD and simply wish to copy it, refer to the section
entitled Duplicating Existing CDs.
Data Disc Images
To create a data disc image:
• Click the Data Image Editor tab. The screen will now display:
The Data Image Editor tab is divided into four panes. The top left pane
lists all of the names and icons of the files and folders on the currently
selected disk drive (source). The top right pane displays the contents of any
item you click on in the top left pane along with its icon. The bottom left
pane lists all the names and icons of files and folders on the CD that is
being created (disc image). The bottom right pane displays the contents of
any item you click on in the bottom left pane along with its icon.
Page 43
DIRECTOR EC Series Operator’s Guide
Document Revision: 080904
Data Image Editor Toolbar
Horizontally at the top of the panes, which contains eight buttons: New
Open, Save, Properties, Disc Capacity, CD, DVD, Wildcard.
Data Image Editor Toolbar:
New Folder
Creates a new volume.
Open
Opens an existing folder on the disc image.
Save
Saves files or folders .
Properties
Displays properties about the image: volume title,
Publisher, Data Preparer, Copyright File, Abstract File
and Bibliographic File
Disc Capacity
Allows selection of capacity of discs loaded into
Director EC i.e. 74 minute/650MB, 80 minute/700MB,
DVD 3.95GB and DVD 4.7GB.
CD
Lets Director EC know CD media is in use.
DVD
Lets Director EC know DVD media is in use.
*.* Wildcard
Allows specification of dynamic content
Page 44
DIRECTOR EC Series Operator’s Guide
Document Revision: 080904
Static And Dynamic Content
The DIRECTOR EC allows CDs to be created from both static and
dynamic content. A finished CD created from static content will contain the
exact files and folders that are specified when the disc image is created. A
finished CD created from dynamic content will contain the files and folders
that exist in specified locations at the time the job is submitted for
recording (rather than when the disc image is created).
For example, specifying dynamic content when creating a CD layout would
allow a job to be run every week that records the contents of a specific
folder onto a CD without having to create a new disc image every time. In
this case the contents of the folder (not the folder itself) can change.
To specify a file or folder on a disc image as containing dynamic content:
• Highlight the Volume which will be using dynamic source then Click
the *.* check box.
Note:
Please be sure not to exceed the capacity of the disc being used.
Page 45
DIRECTOR EC Series Operator’s Guide
Document Revision: 080904
Adding Files And Folders
• Click the desired file or folder in the top left or right pane (source) and
hold down the mouse button.
• Drag the file or folder over the CD icon in the lower right then release
the mouse button
• Files and folders can also be added to the disc image using the Open
button. A box appears choose the image and click he Open button the
image will be added.
Removing Files And Folders
• Click the desired file or folder in the bottom left or right pane (disc
image)
• Right click the file or folder and choose Delete from the toolbar which
appears.
Creating New Folders
• Click the desired root or folder area in the left or right pane (disc
image).
• Click the New Folder button on the toolbar.
Naming A Folder
• Right click the desired folder in the bottom left or right pane (disc
image).
• Choose Rename from the drop down menu, which appears.
Page 46
DIRECTOR EC Series Operator’s Guide
Document Revision: 080904
Saving The Current Disc Image File
Once a data disc image has been created, it must be saved for the
DIRECTOR EC to use it as a data source for recording. Disc images can
either be saved as script files (with an “ISC” extension) or physical image
files (with an “ISO” extension).
A script file (ISC) contains pointers to the source data files and is used as a
guide at the time of recording the CD. Since a script file does not include
the source data it is best used when producing unique projects with
dynamic content, or when the source data will always be available to the
DIRECTOR EC. Or, if producing software, a “static” image would be best
to ensure content.
A physical image file (ISO) is an exact replica of the final CD and contains
all of the source data. It is therefore best used when producing static
projects that are recorded on a regular basis, and when source data will not
always be available to the DIRECTOR EC. Please note that, depending
upon the amount of data to be recorded, a physical image file can occupy as
much as 700 MB of hard disk space.
Page 47
DIRECTOR EC Series Operator’s Guide
Document Revision: 080904
To save a data disc image script file:
• Click the Save button on the toolbar. The screen will now display:
The file will automatically be saved with the .isc extension.
Page 48
DIRECTOR EC Series Operator’s Guide
Document Revision: 080904
• Click the OK button. The screen will now display:
• Select the volume and directory where you want to save the script file.
• Enter the name for the script file and click the Save button.
To save a disc physical image file:
• Click the Save button on the toolbar. The screen will now display:
• Select the volume and directory where you want to save the image file.
• Enter the name for the image file.
• Change you the Save as type: to ISO.
This will make a standard ISO 9660 image file to the desired location.
Page 49
DIRECTOR EC Series Operator’s Guide
Document Revision: 080904
Volume Properties
Volume Label
Publisher
Data Preparer
Copyright File
Enter the name you want to call the CD.
Enter the name of the publisher.
Enter the name of the person who prepared the CD.
Enter the file name that provides copyright
information about the CD.
Abstract File
Enter the file name that describes the contents of the
CD.
Bibliographic File Enter the file name that provides bibliographic
information about the CD.
• Click the OK button. The screen will now display:
• Select the volume and directory where you want to save the physical
image file.
• Enter the name for the physical image file and click the Save button.
Page 50
DIRECTOR EC Series Operator’s Guide
Document Revision: 080904
Loading An Existing Script File
Once a data disc image script file has been saved it can be modified at a
later date.
To load an existing script file:
• Click the Load Script button on the toolbar. The screen will now
display:
• Select the appropriate file and click the Open button.
Audio Disc Images
The DIRECTOR EC creates industry standard audio (Red Book) CDs from
scratch that can be played on any home, car or portable compact disc audio
player or computer CD or DVD-ROM drive. Audio tracks are created using
any combination of 44.1 kHz, 16 bit stereo WAV or MP3 files.
To create an audio disc image:
• Click the Audio Image Editor. The screen will now display:
Page 51
DIRECTOR EC Series Operator’s Guide
Document Revision: 080904
The Audio Image Editor tab is divided into three panes. The top left pane
lists all the names and icons of the disk drives available to the DIRECTOR
EC, as well as files and folders on the currently selected disk drive (source).
The top right pane displays the contents of any item you click on in the top
left pane along with its icon. The bottom pane lists the names of audio files
on the CD, which is being created (disc image) as well as their type (WAV
or MP3), start position and end position, silence option (inserts silence into
the audio disc image) and ISRC code.
Audio Image Toolbar
Horizontally along the top above the panes is a toolbar that contains five
buttons: New, Open, Save, and Disc Capacity.
Image Toolbar:
New
Open
Save
Disc Capacity
Creates a new audio disc image.
Opens an existing audio disc image script folder to
allow selection of an existing file (*.ISC)
Saves the current disc image contents to an audio
disc image script file (*.ISC).
Selects the capacity of the CD-R or CD-RW discs
that are loaded into the DIRECTOR EC: 74
minutes/650 MB or 80 minutes/700 MB. (DVD
3.95GB and DVD 4.7 GB are not used).
Page 52
DIRECTOR EC Series Operator’s Guide
Document Revision: 080904
Adding Tracks
• As depicted below, drag one or more WAV / MP3 files onto the text.
Multiple files may be selected by pressing and holding down the SHIFT
or CTRL key while clicking on the tracks. SHIFT allows you to select a
range of contiguous tracks, while CTRL allows you to randomly pick
multiple tracks. As additional tracks are added, drag and drop them in at
the desired insertion point.
Selecting CD Capacity
On the horizontal toolbar is a button to select the capacity of the CD-R or
CD-RW discs that are loaded into the DIRECTOR EC: 74 minute/650MB
or 80 minute/700MB (DVD 3.95GB and DVD 4.7GB are not used).
The Disc Capacity will displayed in the lower right hand corner
Page 53
DIRECTOR EC Series Operator’s Guide
Document Revision: 080904
Removing Tracks
• Right click on the audio track you wish to delete.
• Choose Delete Track from the drop down menu.
Editing A Track
• Right click the track to be edited. The screen will now display:
The right hand buttons have the following options:
• Play Selection
• Set IN Point
• Set OUT Point
• Remove Subindex
These options allow custom changes to the tracks. Choosing OK sets the
changes and Cancel cancels the changes.
Page 54
DIRECTOR EC Series Operator’s Guide
Document Revision: 080904
Changing ISRC Codes And Copy Prohibit Flags
Note:
DIRECTOR EC systems equipped with Pioneer DVD-R drives do not
support MF Digital SmartDRIVE features.
The INTERNATIONAL STANDARD RECORDING CODE (ISRC) is an
optional 12-character descriptor that identifies a specific track on an audio
CD. Each track can have its own unique ISRC consisting of 2 alphanumeric
characters (country), 3 alphanumeric characters (owner), 2 digits (year of
recording) and 5 digits (serial number).
The COPY PROHIBIT flag is a setting in each track on an audio CD,
indicating whether or not that track can be copied by a digital recorder.
To change an ISRC code:
• Double click the desired audio track in the lower pane. The screen will
now display:
• Enter the code in the ISRC line and click the OK button.
To change a Copy Prohibit flag:
• Double click the desired audio track in the lower left pane. The screen
will now display:
Page 55
DIRECTOR EC Series Operator’s Guide
Document Revision: 080904
• To enable Copy Prohibit select the Copy Prohibit box so that it is
checked, or uncheck the box to disable Copy Prohibit.
Inserting, Editing And Removing Silence
When assembling an audio CD disc image the DIRECTOR EC application
does not insert silences (gaps) between tracks.
To insert silence between tracks:
• Right click the track that is to be edited. Choose “Edit” on the drop
down menu
• A pop up screen appears. The Silence option appears in the middle of
the screen with a slide control. Slide the control to the preferred length
of silence. In the example: 48 seconds.
To edit the amount of silence between tracks:
• Double click the silence indicator you wish to edit in the lower left
pane. The screen will now display:
Page 56
DIRECTOR EC Series Operator’s Guide
Document Revision: 080904
• Click the up and down indicators to increase or decrease the duration of
the silence (minutes, seconds, frames).
• Click the OK button.
To remove silence between tracks:
• Click the silence indicator you wish to remove in the lower left pane
and hold down the mouse button.
• Drag the silence indicator over the trashcan in the bottom right of the
• WaveMan tab and release the mouse button.
• Click the Yes button.
Inserting, Editing And Removing Sub-indexes
Sub-indexes are markers used by CD audio players to locate specific points
inside an audio track. Sub-index 0 indicates the start of any silence before
the beginning of a track and sub-index 1 indicates the beginning of a track’s
audio material. Other sub-indexes can also be assigned to allow some audio
players to locate specified material within a track itself.
To insert sub-indexes in a track:
• Click the audio track you wish to edit in the lower left pane and its
existing sub-indexes will be displayed in the bottom right pane.
• Click the Insert Sub-index button. The screen will now display:
• Click the up and down indicators to specify the location of the subindex (minutes, seconds, frames).
• Click the OK button.
To edit sub-indexes:
Page 57
DIRECTOR EC Series Operator’s Guide
Document Revision: 080904
• Click the audio track you wish to edit in the lower left pane, and its
existing sub-indexes will be displayed in the bottom right pane.
• Double click the sub-index you want in the bottom right pane. The
screen will now display:
• Click the Insert Sub-index button. The screen will now display:
• Click the up and down indicators to specify the new location of the subindex (minutes, seconds, frames).
• Click the OK button.
To remove sub-indexes:
• Click the audio track you wish to edit in the lower left pane and its
existing sub-indexes will be displayed in the bottom right pane.
• Click on the sub-index you want in the bottom right pane and hold
down the mouse button.
• Drag the sub-index over the trashcan in the bottom right of the Audio
Image Editor tab and release the mouse button.
• Click the Yes button.
Page 58
DIRECTOR EC Series Operator’s Guide
Document Revision: 080904
Saving The Current Audio Disc Image
Once an audio disc image has been created it must be saved so that it can be
used by the DIRECTOR EC as an audio source for recording. Disc images
are saved as script files (with an “ISC” extension).
To save an audio disc image script file:
• Click the Save button on the toolbar. The screen will now display:
• Select the volume and directory where you want to save the script file.
• Enter the name for the audio disc script file and click the Save button.
Loading An Existing Audio Disc Image
Once an audio disc image script file has been saved it can be modified at a
later date.
To load an existing audio disc image script file:
• Click the Open button on the toolbar. The screen will now display:
• Select the appropriate file and click the Open button.
Page 59
DIRECTOR EC Series Operator’s Guide
Document Revision: 080904
Creating Jobs
After creating a data or audio disc image, the next step in constructing a CD
is to create or define a job. A job brings together the various elements of the
CD (label, disc image, etc.) so they can be recorded and printed.
Creating New Jobs
To create a new job:
• Click the Create Job tab. The screen will now display:
The Create Job tab is divided into a number of check boxes and
information fields that must be completed.
Job Menu Bar
Horizontally along the top of the Job tab is a menu bar that contains five
buttons: New, Open, Save, About, Help.
Job Menu Buttons:
New
Creates a new job.
Open Loads an existing job file (*.JOB).
Save
Saves the current job file (*.JOB).
About Displays the current version information of the DIRECTOR EC
application.
Page 60
DIRECTOR EC Series Operator’s Guide
Help
Document Revision: 080904
Displays on-screen help.
General Options
Note:
DIRECTOR EC systems equipped with Pioneer DVD-R drives
do not support MF Digital SmartDRIVE features.
Vertically along the left side of the Job tab is a series of nine check boxes:
Copy, Verify, Print, Print First, Simulate, Archive, Align, SmartGuard
Media. The first step in creating a job is to set the general options so as to
define which operations the DIRECTOR EC will perform when the job is
submitted for production.
• Check or uncheck the option boxes to enable or disable the production
options needed for your job:
General Options:
Copy
Verify
Print
Print First
Simulate
Archive
Align
When checked, the CDs in the submitted job will be
recorded using the disc image file selected in the
IMAGE field.
When checked, the CDs in the submitted job will
automatically be compared against the source files
after recording is completed.
When checked, the CDs in the submitted job after
recording will be printed with the disc label selected
in the LABEL FILE field.
When checked, the CDs in the submitted job before
recording will be printed with the disc label selected
in the LABEL FILE field.
When checked, the CDs in the submitted job will
not be recorded.
When checked, an existing CD is saved to the hard
drive as a physical image file for later recording.
This option is used for duplicating existing CDs.
When checked, CDs will be placed on the optical
aligner so that the disc may be oriented relative to
the alignment mark. This is used for over-printing
silk-screened discs.
Page 61
DIRECTOR EC Series Operator’s Guide
Document Revision: 080904
SmartGuard Media *** 48x ProDRIVE only ***
This option, when the only item checked, allows
you to generate SmartGUARD Media for use with
MF Digital stand-alone duplicators. SmartGuard
Media allows you to lock-in your stand-alone
duplicator to specific media giving the owner
control over what media is used. DIRECTOR ECs
equipped with Pioneer DVD-R drives or any drive
other than the ProDRIVE 48x, DO NOT support
MF Digital SmartDRIVE features.
• After setting the general options, complete the required information in
the related information fields:
Job ID (Required)
The JOB ID field is a user-defined descriptor that assists in identifying and
tracking CDs produced on the DIRECTOR EC. Jobs can be given
meaningful names such as date codes. In addition, jobs may receive
product, invoice or work order numbers.
• Click the JOB ID field and enter a name for the job to a maximum of 20
alphanumeric characters.
User ID (Required)
The USER ID field is a descriptor that assists in identifying and tracking
users operating the DIRECTOR EC. User IDs are defined using the System
Setup tab.
• Click the USER ID field and enter your assigned User ID.
Password (Required)
The PASSWORD field assists in controlling access to the DIRECTOR EC.
Passwords are assigned to specific User IDs using the System Setup tab.
• Click the PASSWORD field and enter your assigned password.
Page 62
DIRECTOR EC Series Operator’s Guide
Document Revision: 080904
Image (needed if “Copy” option is checked)
The IMAGE field is used to specify the data or audio disc image, (ISC or
ISO file) that was previously created, to be used as the data or audio source
for recording. The DIRECTOR EC also accepts standard Mode 1 data
physical image files (such as ISO 9660, MacOS HFS, Unix UFS and Rock
Ridge, etc.) created with other pre-mastering software (such as Roxio Easy
CD Creator and Toast, GEAR Software GEAR Pro, etc.).
• Click the Browse Images button below the IMAGE field. The screen
will now display:
• Select the appropriate file and click the Open button. Leave the field
blank if no image is to be recorded.
Label File (Optional)
The LABEL FILE field is used to specify the disc label (LBL or PRN file),
that was previously created, to be used as the source label for printing.
• Click the Browse Print Files button below the LABEL FILE field the
screen will now display:
Page 63
DIRECTOR EC Series Operator’s Guide
Document Revision: 080904
• Select the appropriate file and click the Open button. Leave the field
blank if no label is to be printed.
Page 64
DIRECTOR EC Series Operator’s Guide
Document Revision: 080904
SmartGuard Media ID
Note:
DIRECTOR EC systems equipped with drives other than the 48
ProDRIVE such as Pioneer DVD-R drives or the 52x ProDRIVE do
not support this feature.
This option allows you to create SmartGUARD Media for use with MF
Digital stand-alone duplicators (CD-5000 or Scribe EC Standalone).
SmartGuard Media allows you to lock-in your stand-alone duplicator to
specific media, giving the owner control over what media is used.
• Click the SmartGUARD MediaID field and enter the desired numeric
ID (consisting of up to six digits 0 to 9 only). Leave the field blank if no
string is to be recorded.
Comments (Optional)
The COMMENTS field is a user-defined descriptor that is entered into the
database of all jobs completed by the DIRECTOR EC. The COMMENTS
field can contain meaningful information such as documenting operator
observations.
• Click the COMMENTS field and enter your remarks. Leave the field
blank if no information is to be logged into the database.
Quantity (Required)
The QUANITY field is used to specify the number of discs to be recorded
or printed as part of the current job.
• Click the QUANTITY field and enter the number of discs to be
recorded or printed.
Priority (Required)
The PRIORITY field is used to specify the production priority assigned to
the current job (1 lowest - 99 highest). The maximum allowable priority is
determined by a specific user’s privileges assigned using the Setup tab.
• Click the PRIORITY field and enter the priority number.
Page 65
DIRECTOR EC Series Operator’s Guide
Document Revision: 080904
Saving The Current Job
Once a job has been created it can be saved and used by the DIRECTOR
EC for future recording. Job files are saved as job files with a “JOB”
extension.
To save a job file:
• Click the Save button on the menu bar. The screen will now display:
• Select the volume and directory where you want to save the job file.
• Enter the name for the job file and click the Save button.
Loading An Existing Job
Once a job file has been saved it can be modified at a later date.
To load an existing job file:
• Click the Open button on the menu bar. The screen will now display:
Page 66
DIRECTOR EC Series Operator’s Guide
• Select the appropriate file and click the Open button.
Page 67
Document Revision: 080904
DIRECTOR EC Series Operator’s Guide
Document Revision: 080904
Submitting Jobs
After defining or creating a job, the final step in constructing a CD is to
submit the job for production. During the production process the
DIRECTOR EC uses the job as a guide or map for bringing together the
various elements of the CD (label, disc image, etc.) to print and record as
needed. The DIRECTOR EC processes up to eight different jobs
simultaneously and offers unlimited job queuing.
Submitting A Job
To submit a job for production:
• Complete the details on the Job tab as desired or load an existing job
file.
• Click the Submit Job button at the bottom of the Job tab. The screen
will now display:
The screen is now switched to the Status tab where the progress of jobs
submitted for production can be easily monitored. The Status tab is divided
into three panes. The top pane is the JOB QUEUE window which lists all
of the jobs waiting to be processed by displaying their assigned JobID, their
assigned priority, the total number of requested CDs as well as the names of
their associated disc image and label files.
The middle pane is the ACTIVE JOBS window that lists all the jobs
currently being recorded or printed by the DIRECTOR EC. Information
displayed for each job includes: its assigned JobID, the total number of
requested CDs, the number of successful CDs produced, the number of
failed CDs produced, the time the job was submitted for production, the
Page 68
DIRECTOR EC Series Operator’s Guide
Document Revision: 080904
immediate status of the job (copying images, loading discs, copying discs,
unloading discs, etc.), and the estimated time of completion (E.T.C).
The lower pane is the COMPLETED JOBS window that lists all the jobs
completed by the DIRECTOR EC. Information displayed for each job
includes: its assigned JobID, the total number of requested CDs, the
number of successful CDs produced, the number of failed CDs produced
and the time each of the jobs was completed.
The Production Process
During production the blank discs will be loaded one at a time from the
input spindle into the recorders and/or printer. Upon successful completion
the discs will be unloaded onto the output spindle. This process will
continue until the job is complete, and the DIRECTOR EC will then
advance to produce the next job in the queue according to its priority.
However, if the 1st input spindle empties before the job is complete the
DIRECTOR EC will then go to the 2nd input spindle. If the 2nd input spindle
is empty the DIRECTOR EC will go to the third spindle. If the third
spindle is empty the screen will now display:
To continue producing the job, place additional blank discs onto the 1st
input spindle and click the Yes button. To stop the job click the No button
and the remainder of the job will be aborted. The DIRECTOR EC will then
advance to produce the next job in the queue according to its priority.
Note:
Any discs dropped on the reject/centering spike have failed to record
properly and should not be used. Be sure to remove rejected discs
periodically during operation, if the need arises.
Page 69
DIRECTOR EC Series Operator’s Guide
Document Revision: 080904
Removing A Job
To remove a pending job from the queue so that it will not be produced:
• Click the job you wish to remove in the JOB QUEUE window.
• Click the Remove Job button.
Clearing The Completed Jobs List
To clear the list of completed jobs:
• Click the Clear List button.
Starting A New Job
To start a new job:
• Click the New button. The screen will now display:
The screen is now switched to the Create Job tab where new jobs can be
created or existing job files can be loaded and submitted for production.
Aborting A Job
To abort a job once its production has begun:
• Click the job you wish to abort in the ACTIVE JOBS window.
• Click the Abort Job button.
Page 70
DIRECTOR EC Series Operator’s Guide
Document Revision: 080904
Viewing Logs
The DIRECTOR EC maintains a comprehensive database of all jobs
completed by the unit. The collected information is useful for a variety of
reasons such as, tracking disc usage, helping to diagnose problems, or even
for billing clients. The Log tab provides an easy way to review the history
of all jobs completed by the DIRECTOR EC.
To display the DIRECTOR EC’s history log:
• Click the System Log tab. The screen will now display:
The System Log tab consists of one central JOBLOG windowpane,
containing all job related information.
Updating Job Records
To update job records in the history log:
• Click the Refresh button at the bottom of the JOBLOG window.
Navigating Job Records
To navigate among job records in the history log.
• Use the scroll bar at the bottom of the JOBLOG window to move left or
right.
• Use the Database Navigator buttons to advance from record to record
or to move to the top or bottom of the database.
Page 71
DIRECTOR EC Series Operator’s Guide
Document Revision: 080904
Deleting Individual Job Records
To delete a job record from the history log:
• Click the job name you wish to delete and click the Delete Record
button at the bottom of the JOBLOG window.
Deleting All Job Records
To delete all job records from the history log:
• Click the Purge button at the bottom of the JOBLOG window.
Resubmitting Jobs
To resubmit a job for production:
• Click the job name you wish to resubmit and click the Resubmit button
at the bottom of the JOBLOG window.
Page 72
DIRECTOR EC Series Operator’s Guide
Document Revision: 080904
Duplicating Existing CDs
In addition to creating industry standard data and audio CDs source files,
the DIRECTOR EC also duplicates existing CDs authored in most formats.
Creating An Image File
The first step in duplicating an existing CD is to create an image file of it
on the hard disk drive to be used as the master source for recording. Image
files are saved with an “IMG” extension.
To create an image file of an existing CD:
• Click the Create Job tab. The screen will now display:
• Check the ARCHIVE box in the general options window. Ensure that
no other boxes are checked.
• Click the QUANTITY field and enter 0.
• Click the JOB ID field and enter a name for the job to a maximum of 20
alphanumeric characters.
• Click the USER ID field and enter your assigned User ID.
• Click the PASSWORD field and enter your assigned password.
• Click the New Image button below the IMAGE field. The screen will
now display:
Page 73
DIRECTOR EC Series Operator’s Guide
Document Revision: 080904
• Select the volume and directory where you want to save the image file.
Please note that depending upon the amount of data to be recorded the
image file can occupy as much as 700 MB of hard disk space.
• Enter the name for the image file and click the Save button.
• Place your original CD to be duplicated (master disc) on top of the stack
of blank discs on the input spindle.
• Click the Submit Job button. The screen will now display:
The screen is now switched to the Status tab to display the progress of the
submitted job. During production the master disc will be loaded from the
input spindle into the top recorder, and saved as an image file with the
specified name on the hard disk drive. Upon successful completion, the disc
will be unloaded onto the output spindle.
Page 74
DIRECTOR EC Series Operator’s Guide
Document Revision: 080904
Recording An Image File
Once created, the image file of the master disc is used as the source for
recording.
To use the image file of the master disc as the recording source:
• Click the Create Job tab. The screen will now display:
• Adjust the general options and complete the information on the Create
Job tab as required. When completing the IMAGE field specify the
image file created from the master disc to be duplicated.
Page 75
DIRECTOR EC Series Operator’s Guide
Document Revision: 080904
Viewing Resources
The Resource tab is a simple diagnostic tool that displays the hardware
elements connected to the DIRECTOR EC. These include the disc
autoloader, CD-R/RW recorders and the printer.
To display the hardware elements connected to the DIRECTOR EC:
• Click the Resources Info tab. The screen will now display:
The Resource Info tab on a properly configured and correctly functioning
DIRECTOR EC system will display one autoloader, eight, four, or two CDR/RW or DVD-R recorders (including ID string, SCSI channel and ID, and
firmware version) as well as one printer.
Page 76
DIRECTOR EC Series Operator’s Guide
Document Revision: 080904
Upgrading DIRECTOR EC Software
Overview of the process
Do not remove the previous version of Director EC software from the
add/remove program applet.
Note:
• Download the zipped files
• Unzip the downloaded files and save it as c:\cdDIRECTOR\cdDIRECTOR
XXX
• Reboot the PC
• Run Setup.exe found in as c:\cdDIRECTOR EC\cdDIRECTOR XXX–
choose all the default options
Download Zipped files
• Click on the link provided in the email. This will take you directly to the
appropriate web site to start the download. Unknown file type message box
will popup with 4 option buttons.
• Click on [save to file]. You could save it anywhere you wish to but make a
note of the location of the folder. You require this to locate the file for
unzipping. Saving Location message box will appear with progress bar.
Once it is saved the Saving Location message box will disappear.
Note:
Above description is for Netscape browser. Internet Explorer might be
slightly different.
Page 77
DIRECTOR EC Series Operator’s Guide
Document Revision: 080904
Extract the Zipped files
• Unzip the downloaded files and save it as c:\cdDIRECTOR\cdDIRECTOR
XXX
• Browse to the location where the zipped file was saved.
• Double Click on the cddirXXX.zip folder to open WinZip window. Click
on [I agree] to open WinZip-cddirXXX window.
• Click on Extract icon. Extract Window will appear. In the Folders/drives
box select c:\cdDirector EC folder. You will see c:\cdDIRECTOR in the
Extract to pull down box. Append \cdDIRECTOR XXX to this box to
create a new folder and click the [extract].
• Close WinZip-cddirXXX.zip window.
Page 78
DIRECTOR EC Series Operator’s Guide
Document Revision: 080904
Changing Computer Name
1.
2.
3.
4.
Disconnect computer in the Internet Service Manager (ISM)
Change the Computer name
Change Anonymous user account and password
Reboot the computer
Disconnecting computer in the Internet Service Manager (ISM)
• From desktop Click start, settings, control panel at this point the screen will
appear as below.
• Double click the administrative tools – the following window will appear.
Page 79
DIRECTOR EC Series Operator’s Guide
Document Revision: 080904
• Right Click on the computer icon with the name results in the following
window
• Right Click on the computer name to reveal the following window
Although “Connect” is highlighted, select disconnect. When computer
name is changed, a reboot is required and upon reboot ISM will
automatically connect. Now you are able to change the Computer name as
follows.
Page 80
DIRECTOR EC Series Operator’s Guide
Document Revision: 080904
Changing the Computer Name
• From desktop, right click on the computer icon and click on Properties
to open System Properties window.
• Click [Properties] button to open the Identification changes window
Page 81
DIRECTOR EC Series Operator’s Guide
Document Revision: 080904
• Key in the new computer name in the computer name box, and click
[OK]. Need to reboot the system for the new name to be effective.
Page 82
DIRECTOR EC Series Operator’s Guide
Document Revision: 080904
Change the Anonymous Account
• Open ISM window as instructed previously
• Right clicking on the default website will open the following window
• Right Click on the properties, select Directory Securities tab to reveal
the following
Page 83
DIRECTOR EC Series Operator’s Guide
Document Revision: 080904
• Click the [Edit] button to edit anonymous access in the authentication
control window
• Click browse to select the user, select the user in window that you
would like to change
The “Look In” window should default to the new computer name, select the
user and click [OK], Manually key in the user password. Leave the check
box “Let IIS control the password” blank. Click [OK] to effect the change.
Page 84
DIRECTOR EC Series Operator’s Guide
Document Revision: 080904
Appendix A: Working With CD-ReWritable (CD-RW) Discs
In addition to working with CD-Recordable (CD-R) discs, the DIRECTOR
EC can also rewrite CD-ReWritable (CD-RW) discs. CD-R discs are writeonce and can be read on any CD audio player, CD-ROM and MultiRead
DVD-ROM drive. CD-RW discs can be rewritten to as many as 1,000 times
and are read using MultiRead CD-ROM (usually 24x and faster) and DVDROM drives.
CD-RW Supported Formats
The DIRECTOR EC can duplicate CD-RW discs written in most logical
formats (ISO 9660, audio, etc.) but not those created using the Universal
Disk Format (UDF). CD-RW discs using UDF are produced by packet
writing software (such as Roxio DirectCD, CeQuadrat PacketCD, Prassi
abCD etc.). Because UDF discs cannot be read by all CD-ROM drives they
are not a good choice for distributing data.
CD-RW Recording Speed
CD-RW copying speed is determined by two factors - the CD-RW writing
speed of the recorders installed in the DIRECTOR EC and the maximum
speed rating of the discs themselves. CD-RW discs are manufactured with
an internal speed code, which is checked before copying begins.
Page 85
DIRECTOR EC Series Operator’s Guide
Document Revision: 080904
Appendix B: Supported Formats For Duplicating
Originally designed for audio use the Compact Disc (CD) evolved quickly and now
employs a wide variety of formats for audio, data and multimedia applications. The
following is a list of the most popular formats currently supported for duplicating by the
DIRECTOR EC. Periodic software updates will be made available to deal with new
formats as they appear. To obtain the latest version of software contact your MF Digital
reseller or download the update from the MF Digital web site: http://www.MF
Digital.com
Many CD formats are international or industry standards but variations on them may
emerge from time to time. Should you encounter a disc (which does not employ a copy
protection scheme) that you cannot duplicate on your DIRECTOR EC, MF Digital will
do its best to promptly add support for this format. Dealing with custom formats,
however, may be subject to a development charge.
Keeping track of how the various formats relate to each other can be confusing. For
example, the DIRECTOR EC can duplicate all CD-ROM Mode 1 discs - this includes
ISO 9660, HFS, Hybrid, Rock Ridge and many other types of file systems. The
DIRECTOR EC will most likely duplicate CD formats not listed in the table below. If
you require further assistance please contact MF Digital ’s technical support department
at (631) 249-93930 or email: support@MF Digital.com
DIRECTOR EC Supported Formats For Duplicating
ISO 9660
CD-DA (Compact Disc-Digital Audio)
Hybrid (ISO 9660/HFS)
Hybrid (ISO 9660/HFS/Rock Ridge)
Mixed Mode
CD-I Form 1 & Form 2*
Native O/S’s (NT, DOS, OS/2, UFS, HFS
(Mac O/S), SUN, AS/400, AIX, etc.)
Video CD
Photo CD
Picture CD
CD-ROM Mode 1 & Mode 2
CD-ROM XA Mode 2 Form 1 & Form 2
Single session
Multisession
Disc-at-Once and Track-at-Once
Rock Ridge
CD-Extra
Romeo
Joliet
Bootable CD
* Some variations require a special reader
Page 86