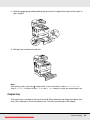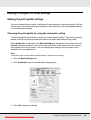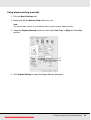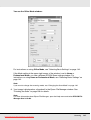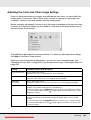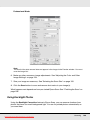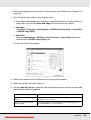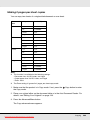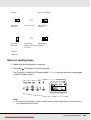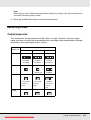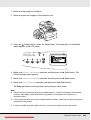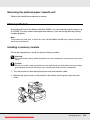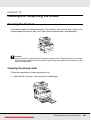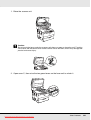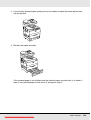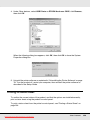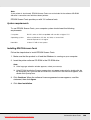
1
EPSON AcuLaser CX21 Series
User’s Guide
NPD2571-00
Downloaded from ManualsPrinter.com Manuals
Copyright and Trademarks
Copyright
No part of this publication may be reproduced, stored in a retrieval system, or transmitted
in any form or by any means, mechanical, photocopying, recording, or otherwise, without
the prior written permission of Seiko Epson Corporation. No patent liability is assumed with
respect to the use of the information contained herein. Neither is any liability assumed for
damages resulting from the use of the information contained herein.
Neither Seiko Epson Corporation nor its affiliates shall be liable to the purchaser of this
product or third parties for damages, losses, costs, or expenses incurred by purchaser or
third parties as a result of: accident, misuse, or abuse of this product or unauthorized
modifications, repairs, or alterations to this product, or (excluding the U.S.) failure to strictly
comply with Seiko Epson Corporation’s operating and maintenance instructions.
Seiko Epson Corporation and its affiliates shall not be liable against any damages or
problems arising from the use of any options or any consumable products other than those
designated as Original Epson Products or Epson Approved Products by Seiko Epson
Corporation.
Trademarks
IBM and PS/2 are registered trademarks of International Business Machines Corporation.
Microsoft® and Windows® are registered trademarks of Microsoft Corporation in the United
States of America and other countries.
Apple® and Macintosh® are registered trademarks of Apple Computer, Inc.
Adobe, the Adobe logo and PostScript3 are trademarks of Adobe Systems Incorporated,
which may be registered in certain jurisdictions.
HP and HP LaserJet are registered trademarks of the Hewlett-Packard Company.
PCL is the registered trademark of Hewlett-Packard Company.
Features Zoran Corporation Integrated Print System (IPS) for print language emulation.
EPSON and EPSON ESC/P are registered trademarks and EPSON AcuLaser and EPSON
ESC/P 2 are trademarks of Seiko Epson Corporation.
Downloaded from ManualsPrinter.com Manuals
Copyright and Trademarks
2
Coronet is a trademark of Ludlow Industries (UK) Ltd.
Marigold is a trademark of Arthur Baker and may be registered in some jurisdictions.
CG Times and CG Omega are trademarks of Agfa Monotype Corporation and may be
registered in certain jurisdictions.
Arial, Times New Roman and Albertus are trademarks of The Monotype Corporation and
may be registered in certain jurisdictions.
ITC Avant Garde Gothic, ITC Bookman, ITC Zapf Chancery and ITC Zapf Dingbats are
trademarks of International Typeface Corporation and may be registered in some
jurisdictions.
Antique Olive is a trademark of Fonderie Olive.
Helvetica, Palatino, Times, Univers, Clarendon, New Century Schoolbook, Miriam and
David are trademarks of Heidelberger Druckmaschinen AG which may be registered in
certain jurisdictions.
Wingdings is a trademark of Microsoft Corporation and may be registered in some
jurisdictions.
General Notice: Other product names used herein are for identification purposes only and
may be trademarks of their respective owners. Epson disclaims any and all rights in those
marks.
Copyright © 2007 Seiko Epson Corporation. All rights reserved.
Downloaded from ManualsPrinter.com Manuals
Copyright and Trademarks
3
Contents
Copyright and Trademarks
Copyright . . . . . . . . . . . . . . . . . . . . . . . . . . . . . . . . . . . . . . . . . . . . . . . . . . . . . . . . . . . . . . . . . 2
Trademarks . . . . . . . . . . . . . . . . . . . . . . . . . . . . . . . . . . . . . . . . . . . . . . . . . . . . . . . . . . . . . . . 2
Safety Instructions
Safety. . . . . . . . . . . . . . . . . . . . . . . . . . . . . . . . . . . . . . . . . . . . . . . . . . . . . . . . . . . . . . . . . . .
Warnings, cautions, and notes. . . . . . . . . . . . . . . . . . . . . . . . . . . . . . . . . . . . . . . . . . . .
Safety precautions . . . . . . . . . . . . . . . . . . . . . . . . . . . . . . . . . . . . . . . . . . . . . . . . . . . . .
Important Safety Instructions . . . . . . . . . . . . . . . . . . . . . . . . . . . . . . . . . . . . . . . . . . . . .
Safety Information . . . . . . . . . . . . . . . . . . . . . . . . . . . . . . . . . . . . . . . . . . . . . . . . . . . . .
Power on/off cautions . . . . . . . . . . . . . . . . . . . . . . . . . . . . . . . . . . . . . . . . . . . . . . . . . .
16
16
16
18
20
22
Chapter 1 Getting to Know Your Product
Where to Find Information . . . . . . . . . . . . . . . . . . . . . . . . . . . . . . . . . . . . . . . . . . . . . . . . . . .
Where to Find Information . . . . . . . . . . . . . . . . . . . . . . . . . . . . . . . . . . . . . . . . . . . . . . .
Product Parts . . . . . . . . . . . . . . . . . . . . . . . . . . . . . . . . . . . . . . . . . . . . . . . . . . . . . . . . . . . . .
Front view . . . . . . . . . . . . . . . . . . . . . . . . . . . . . . . . . . . . . . . . . . . . . . . . . . . . . . . . . . .
Rear view . . . . . . . . . . . . . . . . . . . . . . . . . . . . . . . . . . . . . . . . . . . . . . . . . . . . . . . . . . . .
Inside the product . . . . . . . . . . . . . . . . . . . . . . . . . . . . . . . . . . . . . . . . . . . . . . . . . . . . .
Scanner parts. . . . . . . . . . . . . . . . . . . . . . . . . . . . . . . . . . . . . . . . . . . . . . . . . . . . . . . . .
Control panel . . . . . . . . . . . . . . . . . . . . . . . . . . . . . . . . . . . . . . . . . . . . . . . . . . . . . . . . .
Options and Consumable Products . . . . . . . . . . . . . . . . . . . . . . . . . . . . . . . . . . . . . . . . . . . .
Options. . . . . . . . . . . . . . . . . . . . . . . . . . . . . . . . . . . . . . . . . . . . . . . . . . . . . . . . . . . . . .
Consumable products . . . . . . . . . . . . . . . . . . . . . . . . . . . . . . . . . . . . . . . . . . . . . . . . . .
23
23
24
24
25
26
26
27
29
29
29
Chapter 2 Product Features and Various Options
Product Features . . . . . . . . . . . . . . . . . . . . . . . . . . . . . . . . . . . . . . . . . . . . . . . . . . . . . . . . . .
About the EPSON AcuLaser CX21 series . . . . . . . . . . . . . . . . . . . . . . . . . . . . . . . . . . .
High-quality printing . . . . . . . . . . . . . . . . . . . . . . . . . . . . . . . . . . . . . . . . . . . . . . . . . . . .
Pre-defined color settings in the printer driver . . . . . . . . . . . . . . . . . . . . . . . . . . . . . . . .
Toner save mode . . . . . . . . . . . . . . . . . . . . . . . . . . . . . . . . . . . . . . . . . . . . . . . . . . . . . .
Resolution Improvement Technology . . . . . . . . . . . . . . . . . . . . . . . . . . . . . . . . . . . . . .
Wide variety of fonts . . . . . . . . . . . . . . . . . . . . . . . . . . . . . . . . . . . . . . . . . . . . . . . . . . .
Adobe PostScript 3 Mode . . . . . . . . . . . . . . . . . . . . . . . . . . . . . . . . . . . . . . . . . . . . . . .
PCL Emulation Mode . . . . . . . . . . . . . . . . . . . . . . . . . . . . . . . . . . . . . . . . . . . . . . . . . . .
Downloaded from ManualsPrinter.com Manuals
30
30
30
30
30
31
31
31
31
4
Various Options . . . . . . . . . . . . . . . . . . . . . . . . . . . . . . . . . . . . . . . . . . . . . . . . . . . . . . . . . . .
Fit to page printing . . . . . . . . . . . . . . . . . . . . . . . . . . . . . . . . . . . . . . . . . . . . . . . . . . . . .
Pages per sheet printing . . . . . . . . . . . . . . . . . . . . . . . . . . . . . . . . . . . . . . . . . . . . . . . .
Watermark printing. . . . . . . . . . . . . . . . . . . . . . . . . . . . . . . . . . . . . . . . . . . . . . . . . . . . .
Header/Footer printing . . . . . . . . . . . . . . . . . . . . . . . . . . . . . . . . . . . . . . . . . . . . . . . . . .
31
31
32
32
33
Chapter 3 Paper Handling
Paper Sources . . . . . . . . . . . . . . . . . . . . . . . . . . . . . . . . . . . . . . . . . . . . . . . . . . . . . . . . . . . .
MP tray. . . . . . . . . . . . . . . . . . . . . . . . . . . . . . . . . . . . . . . . . . . . . . . . . . . . . . . . . . . . . .
Optional 500-Sheet Paper Cassette Unit. . . . . . . . . . . . . . . . . . . . . . . . . . . . . . . . . . . .
Selecting a paper source . . . . . . . . . . . . . . . . . . . . . . . . . . . . . . . . . . . . . . . . . . . . . . . .
Loading Paper . . . . . . . . . . . . . . . . . . . . . . . . . . . . . . . . . . . . . . . . . . . . . . . . . . . . . . . . . . . .
MP tray. . . . . . . . . . . . . . . . . . . . . . . . . . . . . . . . . . . . . . . . . . . . . . . . . . . . . . . . . . . . . .
Optional Paper Cassette . . . . . . . . . . . . . . . . . . . . . . . . . . . . . . . . . . . . . . . . . . . . . . . .
Output tray . . . . . . . . . . . . . . . . . . . . . . . . . . . . . . . . . . . . . . . . . . . . . . . . . . . . . . . . . . .
Printing on Special Media . . . . . . . . . . . . . . . . . . . . . . . . . . . . . . . . . . . . . . . . . . . . . . . . . . .
EPSON Color Laser Paper . . . . . . . . . . . . . . . . . . . . . . . . . . . . . . . . . . . . . . . . . . . . . .
EPSON Color Laser Transparencies . . . . . . . . . . . . . . . . . . . . . . . . . . . . . . . . . . . . . . .
EPSON Color Laser Coated Paper . . . . . . . . . . . . . . . . . . . . . . . . . . . . . . . . . . . . . . . .
Envelopes . . . . . . . . . . . . . . . . . . . . . . . . . . . . . . . . . . . . . . . . . . . . . . . . . . . . . . . . . . .
Labels . . . . . . . . . . . . . . . . . . . . . . . . . . . . . . . . . . . . . . . . . . . . . . . . . . . . . . . . . . . . . .
Thick paper and extra thick paper . . . . . . . . . . . . . . . . . . . . . . . . . . . . . . . . . . . . . . . . .
Loading a custom paper size . . . . . . . . . . . . . . . . . . . . . . . . . . . . . . . . . . . . . . . . . . . . .
34
34
35
35
36
36
38
40
41
41
42
43
44
45
46
46
Chapter 4 Using the Printer Software with Windows
About the Printer Software. . . . . . . . . . . . . . . . . . . . . . . . . . . . . . . . . . . . . . . . . . . . . . . . . . .
Accessing the printer driver . . . . . . . . . . . . . . . . . . . . . . . . . . . . . . . . . . . . . . . . . . . . . .
Making Changes to Printer Settings . . . . . . . . . . . . . . . . . . . . . . . . . . . . . . . . . . . . . . . . . . .
Making the print quality settings. . . . . . . . . . . . . . . . . . . . . . . . . . . . . . . . . . . . . . . . . . .
Duplex printing . . . . . . . . . . . . . . . . . . . . . . . . . . . . . . . . . . . . . . . . . . . . . . . . . . . . . . . .
Displaying information about consumables with the printer driver. . . . . . . . . . . . . . . . .
Ordering Consumables . . . . . . . . . . . . . . . . . . . . . . . . . . . . . . . . . . . . . . . . . . . . . . . . .
Resizing printouts . . . . . . . . . . . . . . . . . . . . . . . . . . . . . . . . . . . . . . . . . . . . . . . . . . . . .
Modifying the print layout . . . . . . . . . . . . . . . . . . . . . . . . . . . . . . . . . . . . . . . . . . . . . . . .
Using a watermark . . . . . . . . . . . . . . . . . . . . . . . . . . . . . . . . . . . . . . . . . . . . . . . . . . . . .
Using headers and footers. . . . . . . . . . . . . . . . . . . . . . . . . . . . . . . . . . . . . . . . . . . . . . .
Making Extended Settings . . . . . . . . . . . . . . . . . . . . . . . . . . . . . . . . . . . . . . . . . . . . . . .
Making Optional Settings . . . . . . . . . . . . . . . . . . . . . . . . . . . . . . . . . . . . . . . . . . . . . . . .
Monitoring Your Printer Using EPSON Status Monitor . . . . . . . . . . . . . . . . . . . . . . . . . . . . .
Installing EPSON Status Monitor . . . . . . . . . . . . . . . . . . . . . . . . . . . . . . . . . . . . . . . . . .
Accessing EPSON Status Monitor. . . . . . . . . . . . . . . . . . . . . . . . . . . . . . . . . . . . . . . . .
Downloaded from ManualsPrinter.com Manuals
48
48
49
49
52
55
56
56
58
60
62
63
64
64
64
67
5
Information on EPSON Status Monitor . . . . . . . . . . . . . . . . . . . . . . . . . . . . . . . . . . . . .
Simple Status. . . . . . . . . . . . . . . . . . . . . . . . . . . . . . . . . . . . . . . . . . . . . . . . . . . . . . . . .
Detailed Status. . . . . . . . . . . . . . . . . . . . . . . . . . . . . . . . . . . . . . . . . . . . . . . . . . . . . . . .
Consumables Information . . . . . . . . . . . . . . . . . . . . . . . . . . . . . . . . . . . . . . . . . . . . . . .
Job Information . . . . . . . . . . . . . . . . . . . . . . . . . . . . . . . . . . . . . . . . . . . . . . . . . . . . . . .
Notice Settings. . . . . . . . . . . . . . . . . . . . . . . . . . . . . . . . . . . . . . . . . . . . . . . . . . . . . . . .
Order Online . . . . . . . . . . . . . . . . . . . . . . . . . . . . . . . . . . . . . . . . . . . . . . . . . . . . . . . . .
Tray Icon Settings . . . . . . . . . . . . . . . . . . . . . . . . . . . . . . . . . . . . . . . . . . . . . . . . . . . . .
Setting Up the USB Connection . . . . . . . . . . . . . . . . . . . . . . . . . . . . . . . . . . . . . . . . . . . . . .
Canceling Printing . . . . . . . . . . . . . . . . . . . . . . . . . . . . . . . . . . . . . . . . . . . . . . . . . . . . . . . . .
Uninstalling the Printer Software . . . . . . . . . . . . . . . . . . . . . . . . . . . . . . . . . . . . . . . . . . . . . .
Uninstalling the printer driver . . . . . . . . . . . . . . . . . . . . . . . . . . . . . . . . . . . . . . . . . . . . .
Uninstall the USB device driver . . . . . . . . . . . . . . . . . . . . . . . . . . . . . . . . . . . . . . . . . . .
Sharing the Printer on a Network. . . . . . . . . . . . . . . . . . . . . . . . . . . . . . . . . . . . . . . . . . . . . .
Sharing the printer . . . . . . . . . . . . . . . . . . . . . . . . . . . . . . . . . . . . . . . . . . . . . . . . . . . . .
Setting up your printer as a shared printer. . . . . . . . . . . . . . . . . . . . . . . . . . . . . . . . . . .
Using an additional driver . . . . . . . . . . . . . . . . . . . . . . . . . . . . . . . . . . . . . . . . . . . . . . .
Setting up clients . . . . . . . . . . . . . . . . . . . . . . . . . . . . . . . . . . . . . . . . . . . . . . . . . . . . . .
Installing the printer driver from the CD-ROM . . . . . . . . . . . . . . . . . . . . . . . . . . . . . . . .
68
68
69
70
71
73
74
75
76
77
78
78
80
81
81
82
83
87
91
Chapter 5 Using the Printer Software with Macintosh
About the Printer Software. . . . . . . . . . . . . . . . . . . . . . . . . . . . . . . . . . . . . . . . . . . . . . . . . . . 93
Accessing the printer driver . . . . . . . . . . . . . . . . . . . . . . . . . . . . . . . . . . . . . . . . . . . . . . 93
Making Changes to Printer Settings . . . . . . . . . . . . . . . . . . . . . . . . . . . . . . . . . . . . . . . . . . . 94
Making the print quality settings. . . . . . . . . . . . . . . . . . . . . . . . . . . . . . . . . . . . . . . . . . . 94
Resizing printouts . . . . . . . . . . . . . . . . . . . . . . . . . . . . . . . . . . . . . . . . . . . . . . . . . . . . . 97
Modifying the print layout . . . . . . . . . . . . . . . . . . . . . . . . . . . . . . . . . . . . . . . . . . . . . . . . 97
Using a watermark . . . . . . . . . . . . . . . . . . . . . . . . . . . . . . . . . . . . . . . . . . . . . . . . . . . . . 98
Using headers and footers. . . . . . . . . . . . . . . . . . . . . . . . . . . . . . . . . . . . . . . . . . . . . . 105
Duplex printing . . . . . . . . . . . . . . . . . . . . . . . . . . . . . . . . . . . . . . . . . . . . . . . . . . . . . . . 106
Making Extended Settings . . . . . . . . . . . . . . . . . . . . . . . . . . . . . . . . . . . . . . . . . . . . . . 107
Monitoring Your Printer using EPSON Status Monitor . . . . . . . . . . . . . . . . . . . . . . . . . . . . 107
Accessing EPSON Status Monitor. . . . . . . . . . . . . . . . . . . . . . . . . . . . . . . . . . . . . . . . 107
Simple Status. . . . . . . . . . . . . . . . . . . . . . . . . . . . . . . . . . . . . . . . . . . . . . . . . . . . . . . . 108
Detailed Status. . . . . . . . . . . . . . . . . . . . . . . . . . . . . . . . . . . . . . . . . . . . . . . . . . . . . . . 109
Consumables Information . . . . . . . . . . . . . . . . . . . . . . . . . . . . . . . . . . . . . . . . . . . . . . 109
Job Information . . . . . . . . . . . . . . . . . . . . . . . . . . . . . . . . . . . . . . . . . . . . . . . . . . . . . . 110
Notice Settings. . . . . . . . . . . . . . . . . . . . . . . . . . . . . . . . . . . . . . . . . . . . . . . . . . . . . . . 112
Setting Up the USB Connection . . . . . . . . . . . . . . . . . . . . . . . . . . . . . . . . . . . . . . . . . . . . . 112
For Mac OS X users . . . . . . . . . . . . . . . . . . . . . . . . . . . . . . . . . . . . . . . . . . . . . . . . . . 113
Canceling Printing . . . . . . . . . . . . . . . . . . . . . . . . . . . . . . . . . . . . . . . . . . . . . . . . . . . . . . . . 113
For Mac OS X users . . . . . . . . . . . . . . . . . . . . . . . . . . . . . . . . . . . . . . . . . . . . . . . . . . 113
Uninstalling the Printer Software . . . . . . . . . . . . . . . . . . . . . . . . . . . . . . . . . . . . . . . . . . . . . 113
Downloaded from ManualsPrinter.com Manuals
6
For Mac OS X users . . . . . . . . . . . . . . . . . . . . . . . . . . . . . . . . . . . . . . . . . . . . . . . . . .
Sharing the Printer on a Network. . . . . . . . . . . . . . . . . . . . . . . . . . . . . . . . . . . . . . . . . . . . .
Sharing the printer . . . . . . . . . . . . . . . . . . . . . . . . . . . . . . . . . . . . . . . . . . . . . . . . . . . .
For Mac OS X users . . . . . . . . . . . . . . . . . . . . . . . . . . . . . . . . . . . . . . . . . . . . . . . . . .
114
114
114
114
Chapter 6 Using the PostScript Printer Driver
About the PostScript 3 Mode . . . . . . . . . . . . . . . . . . . . . . . . . . . . . . . . . . . . . . . . . . . . . . . .
Hardware requirements . . . . . . . . . . . . . . . . . . . . . . . . . . . . . . . . . . . . . . . . . . . . . . . .
System requirements . . . . . . . . . . . . . . . . . . . . . . . . . . . . . . . . . . . . . . . . . . . . . . . . . .
Using the PostScript Printer Driver with Windows . . . . . . . . . . . . . . . . . . . . . . . . . . . . . . . .
Installing the PostScript printer driver for the USB interface . . . . . . . . . . . . . . . . . . . .
Installing the PostScript printer driver for the network interface. . . . . . . . . . . . . . . . . .
Accessing the PostScript printer driver . . . . . . . . . . . . . . . . . . . . . . . . . . . . . . . . . . . .
Making changes to PostScript printer settings. . . . . . . . . . . . . . . . . . . . . . . . . . . . . . .
Using AppleTalk under Windows 2000 . . . . . . . . . . . . . . . . . . . . . . . . . . . . . . . . . . . .
Using the PostScript Printer Driver with Macintosh . . . . . . . . . . . . . . . . . . . . . . . . . . . . . . .
Installing the PostScript printer driver . . . . . . . . . . . . . . . . . . . . . . . . . . . . . . . . . . . . .
Selecting the printer . . . . . . . . . . . . . . . . . . . . . . . . . . . . . . . . . . . . . . . . . . . . . . . . . . .
Accessing the PostScript printer driver . . . . . . . . . . . . . . . . . . . . . . . . . . . . . . . . . . . .
Making changes to PostScript printer settings. . . . . . . . . . . . . . . . . . . . . . . . . . . . . . .
115
115
115
116
116
118
119
120
120
121
121
122
123
124
Chapter 7 Using the PCL6/PCL5 Printer Driver
About the PCL Mode . . . . . . . . . . . . . . . . . . . . . . . . . . . . . . . . . . . . . . . . . . . . . . . . . . . . . .
Hardware requirements . . . . . . . . . . . . . . . . . . . . . . . . . . . . . . . . . . . . . . . . . . . . . . . .
System requirements . . . . . . . . . . . . . . . . . . . . . . . . . . . . . . . . . . . . . . . . . . . . . . . . . .
Using the PCL6/PCL5 Printer Driver . . . . . . . . . . . . . . . . . . . . . . . . . . . . . . . . . . . . . . . . . .
125
125
125
126
Chapter 8 Scanning
About Scanning Mode . . . . . . . . . . . . . . . . . . . . . . . . . . . . . . . . . . . . . . . . . . . . . . . . . . . . .
System Requirements . . . . . . . . . . . . . . . . . . . . . . . . . . . . . . . . . . . . . . . . . . . . . . . . .
Setting Your Originals . . . . . . . . . . . . . . . . . . . . . . . . . . . . . . . . . . . . . . . . . . . . . . . . . . . . .
Document table . . . . . . . . . . . . . . . . . . . . . . . . . . . . . . . . . . . . . . . . . . . . . . . . . . . . . .
Auto Document Feeder . . . . . . . . . . . . . . . . . . . . . . . . . . . . . . . . . . . . . . . . . . . . . . . .
Starting a Scan With Epson Scan . . . . . . . . . . . . . . . . . . . . . . . . . . . . . . . . . . . . . . . . . . . .
Starting a Scan With the Epson Creativity Suite . . . . . . . . . . . . . . . . . . . . . . . . . . . . . . . . .
Starting a Scan With Another Scanning Program . . . . . . . . . . . . . . . . . . . . . . . . . . . . . . . .
Selecting Epson Scan Settings . . . . . . . . . . . . . . . . . . . . . . . . . . . . . . . . . . . . . . . . . . . . . .
Overview of the Epson Scan Modes . . . . . . . . . . . . . . . . . . . . . . . . . . . . . . . . . . . . . .
Selecting File Save Settings . . . . . . . . . . . . . . . . . . . . . . . . . . . . . . . . . . . . . . . . . . . .
Downloaded from ManualsPrinter.com Manuals
127
127
129
129
131
133
135
138
139
139
139
7
Changing the Scan Mode . . . . . . . . . . . . . . . . . . . . . . . . . . . . . . . . . . . . . . . . . . . . . .
Selecting Basic Settings . . . . . . . . . . . . . . . . . . . . . . . . . . . . . . . . . . . . . . . . . . . . . . .
Selecting the Scan Resolution . . . . . . . . . . . . . . . . . . . . . . . . . . . . . . . . . . . . . . . . . . .
Previewing and Adjusting the Scan Area. . . . . . . . . . . . . . . . . . . . . . . . . . . . . . . . . . .
Adjusting the Color and Other Image Settings. . . . . . . . . . . . . . . . . . . . . . . . . . . . . . .
Selecting the Scan Size . . . . . . . . . . . . . . . . . . . . . . . . . . . . . . . . . . . . . . . . . . . . . . . .
Finishing the Scan . . . . . . . . . . . . . . . . . . . . . . . . . . . . . . . . . . . . . . . . . . . . . . . . . . . .
Using the Scanner Features . . . . . . . . . . . . . . . . . . . . . . . . . . . . . . . . . . . . . . . . . . . . . . . .
Restoring Color in Photos . . . . . . . . . . . . . . . . . . . . . . . . . . . . . . . . . . . . . . . . . . . . . .
Removing Dust Marks . . . . . . . . . . . . . . . . . . . . . . . . . . . . . . . . . . . . . . . . . . . . . . . . .
Fixing Backlight Photos . . . . . . . . . . . . . . . . . . . . . . . . . . . . . . . . . . . . . . . . . . . . . . . .
Using the Scanner as a Copier . . . . . . . . . . . . . . . . . . . . . . . . . . . . . . . . . . . . . . . . . .
Scanning to a PDF File . . . . . . . . . . . . . . . . . . . . . . . . . . . . . . . . . . . . . . . . . . . . . . . .
Scanning to an E-mail . . . . . . . . . . . . . . . . . . . . . . . . . . . . . . . . . . . . . . . . . . . . . . . . .
Using the Start Button on the Control Panel . . . . . . . . . . . . . . . . . . . . . . . . . . . . . . . . . . . .
Scanning to your computer . . . . . . . . . . . . . . . . . . . . . . . . . . . . . . . . . . . . . . . . . . . . .
Assigning a different application on Windows . . . . . . . . . . . . . . . . . . . . . . . . . . . . . . .
Canceling Scanning. . . . . . . . . . . . . . . . . . . . . . . . . . . . . . . . . . . . . . . . . . . . . . . . . . . . . . .
Scanning in a Network Environment . . . . . . . . . . . . . . . . . . . . . . . . . . . . . . . . . . . . . . . . . .
Starting EPSON Scan settings . . . . . . . . . . . . . . . . . . . . . . . . . . . . . . . . . . . . . . . . . .
Scanning an image . . . . . . . . . . . . . . . . . . . . . . . . . . . . . . . . . . . . . . . . . . . . . . . . . . .
Setting up a client computer . . . . . . . . . . . . . . . . . . . . . . . . . . . . . . . . . . . . . . . . . . . .
Using the Application Software . . . . . . . . . . . . . . . . . . . . . . . . . . . . . . . . . . . . . . . . . . . . . .
Software information . . . . . . . . . . . . . . . . . . . . . . . . . . . . . . . . . . . . . . . . . . . . . . . . . .
Accessing the software . . . . . . . . . . . . . . . . . . . . . . . . . . . . . . . . . . . . . . . . . . . . . . . .
Notice for Windows XP Service Pack 2 Users. . . . . . . . . . . . . . . . . . . . . . . . . . . . . . . . . . .
Unblocking EEventManager . . . . . . . . . . . . . . . . . . . . . . . . . . . . . . . . . . . . . . . . . . . .
142
142
147
148
153
155
158
159
159
164
166
169
172
177
178
178
179
182
183
183
185
185
190
190
194
196
196
Chapter 9 Copying
Setting Originals to Copy . . . . . . . . . . . . . . . . . . . . . . . . . . . . . . . . . . . . . . . . . . . . . . . . . . .
Basic Copying . . . . . . . . . . . . . . . . . . . . . . . . . . . . . . . . . . . . . . . . . . . . . . . . . . . . . . . . . . .
Canceling Copying. . . . . . . . . . . . . . . . . . . . . . . . . . . . . . . . . . . . . . . . . . . . . . . . . . . . . . . .
Making Changes to Copy Settings . . . . . . . . . . . . . . . . . . . . . . . . . . . . . . . . . . . . . . . . . . .
Changing the number of copies . . . . . . . . . . . . . . . . . . . . . . . . . . . . . . . . . . . . . . . . . .
Selecting the paper . . . . . . . . . . . . . . . . . . . . . . . . . . . . . . . . . . . . . . . . . . . . . . . . . . .
Adjusting the density . . . . . . . . . . . . . . . . . . . . . . . . . . . . . . . . . . . . . . . . . . . . . . . . . .
Adjusting the contrast . . . . . . . . . . . . . . . . . . . . . . . . . . . . . . . . . . . . . . . . . . . . . . . . .
Adjusting the RGB color. . . . . . . . . . . . . . . . . . . . . . . . . . . . . . . . . . . . . . . . . . . . . . . .
Specifying the zoom ratio. . . . . . . . . . . . . . . . . . . . . . . . . . . . . . . . . . . . . . . . . . . . . . .
Making 2 pages per sheet copies . . . . . . . . . . . . . . . . . . . . . . . . . . . . . . . . . . . . . . . .
Reset the copy settings . . . . . . . . . . . . . . . . . . . . . . . . . . . . . . . . . . . . . . . . . . . . . . . .
Restrictions on Copying. . . . . . . . . . . . . . . . . . . . . . . . . . . . . . . . . . . . . . . . . . . . . . . . . . . .
Downloaded from ManualsPrinter.com Manuals
197
197
199
199
199
199
201
201
202
202
204
205
206
8
Chapter 10 Faxing (Fax Model Only)
Setting Originals to Fax . . . . . . . . . . . . . . . . . . . . . . . . . . . . . . . . . . . . . . . . . . . . . . . . . . . .
Sending Faxes. . . . . . . . . . . . . . . . . . . . . . . . . . . . . . . . . . . . . . . . . . . . . . . . . . . . . . . . . . .
Basics of sending faxes . . . . . . . . . . . . . . . . . . . . . . . . . . . . . . . . . . . . . . . . . . . . . . . .
Sending faxes using the speed-dial function . . . . . . . . . . . . . . . . . . . . . . . . . . . . . . . .
Sending faxes using the one-touch function . . . . . . . . . . . . . . . . . . . . . . . . . . . . . . . .
Sending faxes using group-dial function . . . . . . . . . . . . . . . . . . . . . . . . . . . . . . . . . . .
Receiving Faxes . . . . . . . . . . . . . . . . . . . . . . . . . . . . . . . . . . . . . . . . . . . . . . . . . . . . . . . . .
Output paper size. . . . . . . . . . . . . . . . . . . . . . . . . . . . . . . . . . . . . . . . . . . . . . . . . . . . .
Basics of receiving faxes . . . . . . . . . . . . . . . . . . . . . . . . . . . . . . . . . . . . . . . . . . . . . . .
Receiving faxes when you hear fax tones . . . . . . . . . . . . . . . . . . . . . . . . . . . . . . . . . .
Receiving faxes using fax polling. . . . . . . . . . . . . . . . . . . . . . . . . . . . . . . . . . . . . . . . .
Making Changes to Fax Settings. . . . . . . . . . . . . . . . . . . . . . . . . . . . . . . . . . . . . . . . . . . . .
Selecting the appropriate settings . . . . . . . . . . . . . . . . . . . . . . . . . . . . . . . . . . . . . . . .
Document size . . . . . . . . . . . . . . . . . . . . . . . . . . . . . . . . . . . . . . . . . . . . . . . . . . . . . . .
Density . . . . . . . . . . . . . . . . . . . . . . . . . . . . . . . . . . . . . . . . . . . . . . . . . . . . . . . . . . . . .
Image quality . . . . . . . . . . . . . . . . . . . . . . . . . . . . . . . . . . . . . . . . . . . . . . . . . . . . . . . .
Polling Reception . . . . . . . . . . . . . . . . . . . . . . . . . . . . . . . . . . . . . . . . . . . . . . . . . . . . .
Overseas transmission mode . . . . . . . . . . . . . . . . . . . . . . . . . . . . . . . . . . . . . . . . . . .
Changing outgoing faxes settings . . . . . . . . . . . . . . . . . . . . . . . . . . . . . . . . . . . . . . . .
Changing incoming faxes settings . . . . . . . . . . . . . . . . . . . . . . . . . . . . . . . . . . . . . . . .
Managing Communication Setup Function . . . . . . . . . . . . . . . . . . . . . . . . . . . . . . . . . . . . .
Printing report . . . . . . . . . . . . . . . . . . . . . . . . . . . . . . . . . . . . . . . . . . . . . . . . . . . . . . .
Fax Job Information . . . . . . . . . . . . . . . . . . . . . . . . . . . . . . . . . . . . . . . . . . . . . . . . . . .
Canceling a fax job . . . . . . . . . . . . . . . . . . . . . . . . . . . . . . . . . . . . . . . . . . . . . . . . . . .
Registering Recipients. . . . . . . . . . . . . . . . . . . . . . . . . . . . . . . . . . . . . . . . . . . . . . . . . . . . .
Using the EPSON Speed Dial Utility (for Windows only) . . . . . . . . . . . . . . . . . . . . . . .
Using the Setup menu on the control panel. . . . . . . . . . . . . . . . . . . . . . . . . . . . . . . . .
207
207
208
210
211
212
213
213
214
215
216
216
216
216
217
217
218
218
219
220
221
221
223
223
224
224
226
Chapter 11 Using the Control Panel
Selecting a Mode . . . . . . . . . . . . . . . . . . . . . . . . . . . . . . . . . . . . . . . . . . . . . . . . . . . . . . . . .
Mode Menus . . . . . . . . . . . . . . . . . . . . . . . . . . . . . . . . . . . . . . . . . . . . . . . . . . . . . . . . . . . .
Print mode . . . . . . . . . . . . . . . . . . . . . . . . . . . . . . . . . . . . . . . . . . . . . . . . . . . . . . . . . .
Copy mode. . . . . . . . . . . . . . . . . . . . . . . . . . . . . . . . . . . . . . . . . . . . . . . . . . . . . . . . . .
Fax mode (fax model only) . . . . . . . . . . . . . . . . . . . . . . . . . . . . . . . . . . . . . . . . . . . . .
Scan mode. . . . . . . . . . . . . . . . . . . . . . . . . . . . . . . . . . . . . . . . . . . . . . . . . . . . . . . . . .
Using the Setup Menu . . . . . . . . . . . . . . . . . . . . . . . . . . . . . . . . . . . . . . . . . . . . . . . . . . . . .
When to make Setup menu settings . . . . . . . . . . . . . . . . . . . . . . . . . . . . . . . . . . . . . .
How to access the Setup menu settings . . . . . . . . . . . . . . . . . . . . . . . . . . . . . . . . . . .
Setting menus . . . . . . . . . . . . . . . . . . . . . . . . . . . . . . . . . . . . . . . . . . . . . . . . . . . . . . .
Information Menu . . . . . . . . . . . . . . . . . . . . . . . . . . . . . . . . . . . . . . . . . . . . . . . . . . . . .
Tray Menu . . . . . . . . . . . . . . . . . . . . . . . . . . . . . . . . . . . . . . . . . . . . . . . . . . . . . . . . . .
Downloaded from ManualsPrinter.com Manuals
235
235
236
236
237
237
238
238
239
240
240
242
9
Emulation Menu . . . . . . . . . . . . . . . . . . . . . . . . . . . . . . . . . . . . . . . . . . . . . . . . . . . . . .
Printing Menu. . . . . . . . . . . . . . . . . . . . . . . . . . . . . . . . . . . . . . . . . . . . . . . . . . . . . . . .
Setup Menu . . . . . . . . . . . . . . . . . . . . . . . . . . . . . . . . . . . . . . . . . . . . . . . . . . . . . . . . .
Reset Menu . . . . . . . . . . . . . . . . . . . . . . . . . . . . . . . . . . . . . . . . . . . . . . . . . . . . . . . . .
PCL Menu . . . . . . . . . . . . . . . . . . . . . . . . . . . . . . . . . . . . . . . . . . . . . . . . . . . . . . . . . .
PS3 Menu . . . . . . . . . . . . . . . . . . . . . . . . . . . . . . . . . . . . . . . . . . . . . . . . . . . . . . . . . .
USB Menu . . . . . . . . . . . . . . . . . . . . . . . . . . . . . . . . . . . . . . . . . . . . . . . . . . . . . . . . . .
Network Menu . . . . . . . . . . . . . . . . . . . . . . . . . . . . . . . . . . . . . . . . . . . . . . . . . . . . . . .
Basic Settings . . . . . . . . . . . . . . . . . . . . . . . . . . . . . . . . . . . . . . . . . . . . . . . . . . . . . . .
Transmission Settings . . . . . . . . . . . . . . . . . . . . . . . . . . . . . . . . . . . . . . . . . . . . . . . . .
Reception Settings. . . . . . . . . . . . . . . . . . . . . . . . . . . . . . . . . . . . . . . . . . . . . . . . . . . .
Speed Dial Settings . . . . . . . . . . . . . . . . . . . . . . . . . . . . . . . . . . . . . . . . . . . . . . . . . . .
Forward Settings . . . . . . . . . . . . . . . . . . . . . . . . . . . . . . . . . . . . . . . . . . . . . . . . . . . . .
Communication Setup . . . . . . . . . . . . . . . . . . . . . . . . . . . . . . . . . . . . . . . . . . . . . . . . .
Fax Factory Settings . . . . . . . . . . . . . . . . . . . . . . . . . . . . . . . . . . . . . . . . . . . . . . . . . .
Copy Settings. . . . . . . . . . . . . . . . . . . . . . . . . . . . . . . . . . . . . . . . . . . . . . . . . . . . . . . .
Scan Settings. . . . . . . . . . . . . . . . . . . . . . . . . . . . . . . . . . . . . . . . . . . . . . . . . . . . . . . .
Printing a Status Sheet . . . . . . . . . . . . . . . . . . . . . . . . . . . . . . . . . . . . . . . . . . . . . . . . . . . .
Canceling a Job . . . . . . . . . . . . . . . . . . . . . . . . . . . . . . . . . . . . . . . . . . . . . . . . . . . . . . . . . .
Canceling printing . . . . . . . . . . . . . . . . . . . . . . . . . . . . . . . . . . . . . . . . . . . . . . . . . . . .
Canceling scanning . . . . . . . . . . . . . . . . . . . . . . . . . . . . . . . . . . . . . . . . . . . . . . . . . . .
Canceling copying . . . . . . . . . . . . . . . . . . . . . . . . . . . . . . . . . . . . . . . . . . . . . . . . . . . .
Canceling faxing . . . . . . . . . . . . . . . . . . . . . . . . . . . . . . . . . . . . . . . . . . . . . . . . . . . . .
Status and Error Messages . . . . . . . . . . . . . . . . . . . . . . . . . . . . . . . . . . . . . . . . . . . . . . . . .
Printer error messages . . . . . . . . . . . . . . . . . . . . . . . . . . . . . . . . . . . . . . . . . . . . . . . .
Scanner error messages . . . . . . . . . . . . . . . . . . . . . . . . . . . . . . . . . . . . . . . . . . . . . . .
Fax error messages . . . . . . . . . . . . . . . . . . . . . . . . . . . . . . . . . . . . . . . . . . . . . . . . . . .
Copier error messages . . . . . . . . . . . . . . . . . . . . . . . . . . . . . . . . . . . . . . . . . . . . . . . .
System error messages . . . . . . . . . . . . . . . . . . . . . . . . . . . . . . . . . . . . . . . . . . . . . . . .
243
243
244
247
248
249
251
252
252
252
253
253
253
254
254
254
254
254
256
256
257
257
257
258
258
265
266
267
267
Chapter 12 Installing Options
Optional Paper Cassette Unit . . . . . . . . . . . . . . . . . . . . . . . . . . . . . . . . . . . . . . . . . . . . . . .
Handling precautions . . . . . . . . . . . . . . . . . . . . . . . . . . . . . . . . . . . . . . . . . . . . . . . . . .
Installing the optional paper cassette unit . . . . . . . . . . . . . . . . . . . . . . . . . . . . . . . . . .
Removing the optional paper cassette unit . . . . . . . . . . . . . . . . . . . . . . . . . . . . . . . . .
Memory Module . . . . . . . . . . . . . . . . . . . . . . . . . . . . . . . . . . . . . . . . . . . . . . . . . . . . . . . . . .
Installing a memory module . . . . . . . . . . . . . . . . . . . . . . . . . . . . . . . . . . . . . . . . . . . . .
Removing a memory module . . . . . . . . . . . . . . . . . . . . . . . . . . . . . . . . . . . . . . . . . . . .
269
269
269
273
273
273
275
Chapter 13 Replacing Consumable Products
Replacement Messages . . . . . . . . . . . . . . . . . . . . . . . . . . . . . . . . . . . . . . . . . . . . . . . . . . . 277
Downloaded from ManualsPrinter.com Manuals
10
Toner Cartridge . . . . . . . . . . . . . . . . . . . . . . . . . . . . . . . . . . . . . . . . . . . . . . . . . . . . . . . . . .
Handling precautions . . . . . . . . . . . . . . . . . . . . . . . . . . . . . . . . . . . . . . . . . . . . . . . . . .
Replacing a toner cartridge . . . . . . . . . . . . . . . . . . . . . . . . . . . . . . . . . . . . . . . . . . . . .
Photoconductor Unit . . . . . . . . . . . . . . . . . . . . . . . . . . . . . . . . . . . . . . . . . . . . . . . . . . . . . .
Handling precautions . . . . . . . . . . . . . . . . . . . . . . . . . . . . . . . . . . . . . . . . . . . . . . . . . .
Replacing the photoconductor unit . . . . . . . . . . . . . . . . . . . . . . . . . . . . . . . . . . . . . . .
278
278
278
281
281
282
Chapter 14 Cleaning and Transporting the Product
Cleaning the Product . . . . . . . . . . . . . . . . . . . . . . . . . . . . . . . . . . . . . . . . . . . . . . . . . . . . . .
Cleaning the pickup roller . . . . . . . . . . . . . . . . . . . . . . . . . . . . . . . . . . . . . . . . . . . . . .
Cleaning the print head . . . . . . . . . . . . . . . . . . . . . . . . . . . . . . . . . . . . . . . . . . . . . . . .
Cleaning the exposure window . . . . . . . . . . . . . . . . . . . . . . . . . . . . . . . . . . . . . . . . . .
Cleaning the document table . . . . . . . . . . . . . . . . . . . . . . . . . . . . . . . . . . . . . . . . . . . .
Cleaning the ADF pickup roller . . . . . . . . . . . . . . . . . . . . . . . . . . . . . . . . . . . . . . . . . .
Cleaning the document table and the exposure window for Auto Document Feeder .
Transporting the Product . . . . . . . . . . . . . . . . . . . . . . . . . . . . . . . . . . . . . . . . . . . . . . . . . . .
Finding a place for the product . . . . . . . . . . . . . . . . . . . . . . . . . . . . . . . . . . . . . . . . . .
For long distances . . . . . . . . . . . . . . . . . . . . . . . . . . . . . . . . . . . . . . . . . . . . . . . . . . . .
For short distances . . . . . . . . . . . . . . . . . . . . . . . . . . . . . . . . . . . . . . . . . . . . . . . . . . .
287
287
288
290
290
291
291
292
292
293
294
Chapter 15 Printing Problems
Printer Operational Problems . . . . . . . . . . . . . . . . . . . . . . . . . . . . . . . . . . . . . . . . . . . . . . . 296
The Print light does not turn on . . . . . . . . . . . . . . . . . . . . . . . . . . . . . . . . . . . . . . . . . . 296
The product does not print (Print light off) . . . . . . . . . . . . . . . . . . . . . . . . . . . . . . . . . . 296
The Print light is on but nothing prints . . . . . . . . . . . . . . . . . . . . . . . . . . . . . . . . . . . . . 296
The Order Online function does not work . . . . . . . . . . . . . . . . . . . . . . . . . . . . . . . . . . 297
The remaining service lives of the consumables are not updated (For Windows users only)297
Printout Problems . . . . . . . . . . . . . . . . . . . . . . . . . . . . . . . . . . . . . . . . . . . . . . . . . . . . . . . . 297
The font cannot be printed . . . . . . . . . . . . . . . . . . . . . . . . . . . . . . . . . . . . . . . . . . . . . . 297
Printout is garbled . . . . . . . . . . . . . . . . . . . . . . . . . . . . . . . . . . . . . . . . . . . . . . . . . . . . 297
Color Printing Problems. . . . . . . . . . . . . . . . . . . . . . . . . . . . . . . . . . . . . . . . . . . . . . . . . . . . 298
Cannot print in color. . . . . . . . . . . . . . . . . . . . . . . . . . . . . . . . . . . . . . . . . . . . . . . . . . . 298
The printout color differs when printed from different printers . . . . . . . . . . . . . . . . . . . 298
The color looks different from what you see on the computer screen . . . . . . . . . . . . . 298
Print Quality Problems . . . . . . . . . . . . . . . . . . . . . . . . . . . . . . . . . . . . . . . . . . . . . . . . . . . . . 299
The background is dark or dirty . . . . . . . . . . . . . . . . . . . . . . . . . . . . . . . . . . . . . . . . . . 299
White dots appear in the printout . . . . . . . . . . . . . . . . . . . . . . . . . . . . . . . . . . . . . . . . . 299
Print quality or tone is uneven . . . . . . . . . . . . . . . . . . . . . . . . . . . . . . . . . . . . . . . . . . . 299
Half-tone images print unevenly . . . . . . . . . . . . . . . . . . . . . . . . . . . . . . . . . . . . . . . . . 300
Toner smudges . . . . . . . . . . . . . . . . . . . . . . . . . . . . . . . . . . . . . . . . . . . . . . . . . . . . . . 300
Areas are missing in the printed image . . . . . . . . . . . . . . . . . . . . . . . . . . . . . . . . . . . . 300
Downloaded from ManualsPrinter.com Manuals
11
Completely blank pages are output . . . . . . . . . . . . . . . . . . . . . . . . . . . . . . . . . . . . . . . 301
The printed image is light or faint. . . . . . . . . . . . . . . . . . . . . . . . . . . . . . . . . . . . . . . . . 301
The non-printed side of the page is dirty . . . . . . . . . . . . . . . . . . . . . . . . . . . . . . . . . . . 302
Memory Problems . . . . . . . . . . . . . . . . . . . . . . . . . . . . . . . . . . . . . . . . . . . . . . . . . . . . . . . . 302
Print quality decreased . . . . . . . . . . . . . . . . . . . . . . . . . . . . . . . . . . . . . . . . . . . . . . . . 302
Insufficient memory for current task. . . . . . . . . . . . . . . . . . . . . . . . . . . . . . . . . . . . . . . 302
Insufficient memory to print all copies . . . . . . . . . . . . . . . . . . . . . . . . . . . . . . . . . . . . . 302
Printing in the PostScript 3 Mode Problems . . . . . . . . . . . . . . . . . . . . . . . . . . . . . . . . . . . . 303
The printer does not print correctly in the PostScript mode . . . . . . . . . . . . . . . . . . . . . 303
The printer does not print. . . . . . . . . . . . . . . . . . . . . . . . . . . . . . . . . . . . . . . . . . . . . . . 303
The printer driver or printer that you need to use does not appear in the Printer Setup Utility (Mac
OS 10.3.x and 10.4.x) or Print Center (Mac OS 10.2.x) . . . . . . . . . . . . . . . . . . . . . 304
The font on the printout is different from that on the screen . . . . . . . . . . . . . . . . . . . . 304
The edges of texts and/or images are not smooth. . . . . . . . . . . . . . . . . . . . . . . . . . . . 304
The printer does not print normally via the USB interface . . . . . . . . . . . . . . . . . . . . . . 304
The printer does not print normally via the network interface . . . . . . . . . . . . . . . . . . . 305
An undefined error occurs (Macintosh only) . . . . . . . . . . . . . . . . . . . . . . . . . . . . . . . . 305
Printing in the PCL6/5 Mode Problems . . . . . . . . . . . . . . . . . . . . . . . . . . . . . . . . . . . . . . . . 306
The printer does not print. . . . . . . . . . . . . . . . . . . . . . . . . . . . . . . . . . . . . . . . . . . . . . . 306
The printer does not print correctly in the PCL mode . . . . . . . . . . . . . . . . . . . . . . . . . 306
The font on the printout is different from that on the screen . . . . . . . . . . . . . . . . . . . . 306
The edges of texts and/or images are not smooth. . . . . . . . . . . . . . . . . . . . . . . . . . . . 306
Chapter 16 Scanning Problems
Scanner Operational Problems . . . . . . . . . . . . . . . . . . . . . . . . . . . . . . . . . . . . . . . . . . . . . .
The Print light does not come on. . . . . . . . . . . . . . . . . . . . . . . . . . . . . . . . . . . . . . . . .
The product does not scan. . . . . . . . . . . . . . . . . . . . . . . . . . . . . . . . . . . . . . . . . . . . . .
Pressing the Start button does not start scanning. . . . . . . . . . . . . . . . . . . . . . . . . . . .
Pressing the Start button in a Mac OS X environment starts the Classic mode. . . . . .
You cannot scan multiple images. . . . . . . . . . . . . . . . . . . . . . . . . . . . . . . . . . . . . . . . .
Scanning Software Problems . . . . . . . . . . . . . . . . . . . . . . . . . . . . . . . . . . . . . . . . . . . . . . .
You Cannot Start Epson Scan . . . . . . . . . . . . . . . . . . . . . . . . . . . . . . . . . . . . . . . . . . .
The Scanner Software Does Not Work Properly . . . . . . . . . . . . . . . . . . . . . . . . . . . . .
Scanning Takes a Long Time . . . . . . . . . . . . . . . . . . . . . . . . . . . . . . . . . . . . . . . . . . .
Scan Quality Problems . . . . . . . . . . . . . . . . . . . . . . . . . . . . . . . . . . . . . . . . . . . . . . . . . . . .
The Edges of Your Document Are Not Scanned . . . . . . . . . . . . . . . . . . . . . . . . . . . . .
You See Only a Few Dots in Your Scanned Image . . . . . . . . . . . . . . . . . . . . . . . . . . .
A Line Of Dots Always Appears in Your Scanned Image . . . . . . . . . . . . . . . . . . . . . .
Straight Lines in Your Image Come Out Crooked . . . . . . . . . . . . . . . . . . . . . . . . . . . .
Your Image is Distorted or Blurred. . . . . . . . . . . . . . . . . . . . . . . . . . . . . . . . . . . . . . . .
Colors Are Patchy or Distorted at the Edges of Your Image . . . . . . . . . . . . . . . . . . . .
Your Scanned Image is Too Dark . . . . . . . . . . . . . . . . . . . . . . . . . . . . . . . . . . . . . . . .
An Image on the Back of Your Original Appears in Your Scanned Image. . . . . . . . . .
Downloaded from ManualsPrinter.com Manuals
308
308
308
309
309
309
310
310
310
311
311
311
311
312
312
312
313
313
314
12
Ripple Patterns Appear in Your Scanned Image . . . . . . . . . . . . . . . . . . . . . . . . . . . . . 314
Characters Are Not Recognized Well When Converted Into Editable Text (OCR) . . . 314
Scanned Colors Differ From the Original Colors . . . . . . . . . . . . . . . . . . . . . . . . . . . . . 315
You Have Trouble Adjusting the Scan Area in the Thumbnail Preview . . . . . . . . . . . . 315
Uninstalling Your Scanning Software . . . . . . . . . . . . . . . . . . . . . . . . . . . . . . . . . . . . . . . . . 316
Uninstalling Epson Scan . . . . . . . . . . . . . . . . . . . . . . . . . . . . . . . . . . . . . . . . . . . . . . . 316
Uninstalling the Epson Creativity Suite . . . . . . . . . . . . . . . . . . . . . . . . . . . . . . . . . . . . 318
Uninstalling the On-screen User’s Guide. . . . . . . . . . . . . . . . . . . . . . . . . . . . . . . . . . . 320
Color Matching Problems . . . . . . . . . . . . . . . . . . . . . . . . . . . . . . . . . . . . . . . . . . . . . . . . . . 321
Colors on your monitor are different from those in the original image. . . . . . . . . . . . . 321
Printed colors are different from those in the original image.. . . . . . . . . . . . . . . . . . . . 322
ADF Scanning Problems . . . . . . . . . . . . . . . . . . . . . . . . . . . . . . . . . . . . . . . . . . . . . . . . . . . 322
A blank copy is output even though an original is set on the Auto Document Feeder during scanning. . . . . . . . . . . . . . . . . . . . . . . . . . . . . . . . . . . . . . . . . . . . . . . . . . . . . . . . . . . . . . 322
You cannot scan using the Auto Document Feeder. . . . . . . . . . . . . . . . . . . . . . . . . . . 322
A line of dots always appears in your scanned image. . . . . . . . . . . . . . . . . . . . . . . . . 322
Paper jams in the Auto Document Feeder. . . . . . . . . . . . . . . . . . . . . . . . . . . . . . . . . . 323
You cannot scan multiple documents. . . . . . . . . . . . . . . . . . . . . . . . . . . . . . . . . . . . . . 324
Chapter 17 Copying Problems
Copy Operational Problems. . . . . . . . . . . . . . . . . . . . . . . . . . . . . . . . . . . . . . . . . . . . . . . . . 325
The product does not copy . . . . . . . . . . . . . . . . . . . . . . . . . . . . . . . . . . . . . . . . . . . . . 325
Copy Quality Problems . . . . . . . . . . . . . . . . . . . . . . . . . . . . . . . . . . . . . . . . . . . . . . . . . . . . 325
Printout is not fine enough . . . . . . . . . . . . . . . . . . . . . . . . . . . . . . . . . . . . . . . . . . . . . . 325
The information on the back side or background color is printed on the copy. . . . . . . 326
Copies are blank, or images are missing or faded. . . . . . . . . . . . . . . . . . . . . . . . . . . . 326
Improving copy quality . . . . . . . . . . . . . . . . . . . . . . . . . . . . . . . . . . . . . . . . . . . . . . . . . 327
Completely blank pages are output . . . . . . . . . . . . . . . . . . . . . . . . . . . . . . . . . . . . . . . 327
The background is dark and dirty. . . . . . . . . . . . . . . . . . . . . . . . . . . . . . . . . . . . . . . . . 328
Black vertical lines appear on the scanned image or the image is all black. . . . . . . . 328
The scanned area is inappropriate. . . . . . . . . . . . . . . . . . . . . . . . . . . . . . . . . . . . . . . 328
A blank copy is output even though an original is set on the Auto Document Feeder during scanning. . . . . . . . . . . . . . . . . . . . . . . . . . . . . . . . . . . . . . . . . . . . . . . . . . . . . . . . . . . . . . 328
ADF Copying Problems . . . . . . . . . . . . . . . . . . . . . . . . . . . . . . . . . . . . . . . . . . . . . . . . . . . . 328
A line of dots always appears in your scanned image . . . . . . . . . . . . . . . . . . . . . . . . . 328
Paper jams in the Auto Document Feeder. . . . . . . . . . . . . . . . . . . . . . . . . . . . . . . . . . 328
You cannot scan using the Auto Document Feeder. . . . . . . . . . . . . . . . . . . . . . . . . . . 329
High quality color copy stops halfway . . . . . . . . . . . . . . . . . . . . . . . . . . . . . . . . . . . . . 330
Chapter 18 Faxing Problems
Sending and Receiving Faxes Problems. . . . . . . . . . . . . . . . . . . . . . . . . . . . . . . . . . . . . . . 331
Downloaded from ManualsPrinter.com Manuals
13
The document stops feeding during faxing . . . . . . . . . . . . . . . . . . . . . . . . . . . . . . . . . 331
The product is receiving faxes but not sending them. . . . . . . . . . . . . . . . . . . . . . . . . . 331
Outgoing fax calls keep dialing . . . . . . . . . . . . . . . . . . . . . . . . . . . . . . . . . . . . . . . . . . 332
Faxes you send are not arriving. . . . . . . . . . . . . . . . . . . . . . . . . . . . . . . . . . . . . . . . . . 332
Incoming fax calls are not being answered . . . . . . . . . . . . . . . . . . . . . . . . . . . . . . . . . 332
Faxes are transmitting or being received very slowly . . . . . . . . . . . . . . . . . . . . . . . . . 333
A blank copy is output even though an original is set on the Auto Document Feeder during scanning. . . . . . . . . . . . . . . . . . . . . . . . . . . . . . . . . . . . . . . . . . . . . . . . . . . . . . . . . . . . . . 333
Time setting is incorrect . . . . . . . . . . . . . . . . . . . . . . . . . . . . . . . . . . . . . . . . . . . . . . . . 333
Printout Problems . . . . . . . . . . . . . . . . . . . . . . . . . . . . . . . . . . . . . . . . . . . . . . . . . . . . . . . . 333
Black vertical lines appear on the scanned image or the image is all black. . . . . . . . 333
The scanned area is inappropriate. . . . . . . . . . . . . . . . . . . . . . . . . . . . . . . . . . . . . . . 334
Faxes are not printing or are printing incorrectly . . . . . . . . . . . . . . . . . . . . . . . . . . . . . 334
Received faxes are too light or are printing only on half of the page . . . . . . . . . . . . . . 334
Reports are not printing correctly. . . . . . . . . . . . . . . . . . . . . . . . . . . . . . . . . . . . . . . . . 334
Chapter 19 Other Problems
Clearing Jammed Paper . . . . . . . . . . . . . . . . . . . . . . . . . . . . . . . . . . . . . . . . . . . . . . . . . . .
Precautions for clearing jammed paper . . . . . . . . . . . . . . . . . . . . . . . . . . . . . . . . . . . .
Jam C (cover C). . . . . . . . . . . . . . . . . . . . . . . . . . . . . . . . . . . . . . . . . . . . . . . . . . . . . .
Jam E (cover E) . . . . . . . . . . . . . . . . . . . . . . . . . . . . . . . . . . . . . . . . . . . . . . . . . . . . . .
Jam F (cover F) . . . . . . . . . . . . . . . . . . . . . . . . . . . . . . . . . . . . . . . . . . . . . . . . . . . . . .
Jam MP (MP tray) . . . . . . . . . . . . . . . . . . . . . . . . . . . . . . . . . . . . . . . . . . . . . . . . . . . .
Jam LC/G (optional paper cassette and cover G) . . . . . . . . . . . . . . . . . . . . . . . . . . . .
When transparencies are jammed at the MP tray . . . . . . . . . . . . . . . . . . . . . . . . . . . .
Paper jams in the Auto Document Feeder. . . . . . . . . . . . . . . . . . . . . . . . . . . . . . . . . .
Paper Handling Problems . . . . . . . . . . . . . . . . . . . . . . . . . . . . . . . . . . . . . . . . . . . . . . . . . .
Paper does not feed properly. . . . . . . . . . . . . . . . . . . . . . . . . . . . . . . . . . . . . . . . . . . .
Problems Using Options . . . . . . . . . . . . . . . . . . . . . . . . . . . . . . . . . . . . . . . . . . . . . . . . . . .
Paper does not feed from the optional paper cassette . . . . . . . . . . . . . . . . . . . . . . . .
Feed jam when using the optional paper cassette. . . . . . . . . . . . . . . . . . . . . . . . . . . .
An installed option cannot be used . . . . . . . . . . . . . . . . . . . . . . . . . . . . . . . . . . . . . . .
Correcting USB Problems . . . . . . . . . . . . . . . . . . . . . . . . . . . . . . . . . . . . . . . . . . . . . . . . . .
USB connections . . . . . . . . . . . . . . . . . . . . . . . . . . . . . . . . . . . . . . . . . . . . . . . . . . . . .
Windows operating system . . . . . . . . . . . . . . . . . . . . . . . . . . . . . . . . . . . . . . . . . . . . .
Printer software installation . . . . . . . . . . . . . . . . . . . . . . . . . . . . . . . . . . . . . . . . . . . . .
Printing a Status Sheet . . . . . . . . . . . . . . . . . . . . . . . . . . . . . . . . . . . . . . . . . . . . . . . . . . . .
335
335
335
339
340
343
345
348
349
350
350
351
351
352
352
352
352
353
353
356
Appendix A Customer Support
Contacting Customer Support . . . . . . . . . . . . . . . . . . . . . . . . . . . . . . . . . . . . . . . . . . . . . . . 358
Before Contacting Epson . . . . . . . . . . . . . . . . . . . . . . . . . . . . . . . . . . . . . . . . . . . . . . . 358
Downloaded from ManualsPrinter.com Manuals
14
Help for Users in Europe . . . . . . . . . . . . . . . . . . . . . . . . . . . . . . . . . . . . . . . . . . . . . . . 358
Appendix B Technical Specifications
Paper . . . . . . . . . . . . . . . . . . . . . . . . . . . . . . . . . . . . . . . . . . . . . . . . . . . . . . . . . . . . . . . . . .
Available paper types. . . . . . . . . . . . . . . . . . . . . . . . . . . . . . . . . . . . . . . . . . . . . . . . . .
Paper that should not be used . . . . . . . . . . . . . . . . . . . . . . . . . . . . . . . . . . . . . . . . . . .
Printable area. . . . . . . . . . . . . . . . . . . . . . . . . . . . . . . . . . . . . . . . . . . . . . . . . . . . . . . .
Product . . . . . . . . . . . . . . . . . . . . . . . . . . . . . . . . . . . . . . . . . . . . . . . . . . . . . . . . . . . . . . . .
General . . . . . . . . . . . . . . . . . . . . . . . . . . . . . . . . . . . . . . . . . . . . . . . . . . . . . . . . . . . .
Environmental . . . . . . . . . . . . . . . . . . . . . . . . . . . . . . . . . . . . . . . . . . . . . . . . . . . . . . .
Mechanical. . . . . . . . . . . . . . . . . . . . . . . . . . . . . . . . . . . . . . . . . . . . . . . . . . . . . . . . . .
Electrical . . . . . . . . . . . . . . . . . . . . . . . . . . . . . . . . . . . . . . . . . . . . . . . . . . . . . . . . . . .
Standards and approvals . . . . . . . . . . . . . . . . . . . . . . . . . . . . . . . . . . . . . . . . . . . . . . .
Interfaces . . . . . . . . . . . . . . . . . . . . . . . . . . . . . . . . . . . . . . . . . . . . . . . . . . . . . . . . . . . . . . .
USB interface. . . . . . . . . . . . . . . . . . . . . . . . . . . . . . . . . . . . . . . . . . . . . . . . . . . . . . . .
Ethernet interface. . . . . . . . . . . . . . . . . . . . . . . . . . . . . . . . . . . . . . . . . . . . . . . . . . . . .
Options and Consumables . . . . . . . . . . . . . . . . . . . . . . . . . . . . . . . . . . . . . . . . . . . . . . . . .
Optional 500-Sheet Paper Cassette Unit. . . . . . . . . . . . . . . . . . . . . . . . . . . . . . . . . . .
Memory modules . . . . . . . . . . . . . . . . . . . . . . . . . . . . . . . . . . . . . . . . . . . . . . . . . . . . .
Toner cartridge. . . . . . . . . . . . . . . . . . . . . . . . . . . . . . . . . . . . . . . . . . . . . . . . . . . . . . .
Photoconductor unit . . . . . . . . . . . . . . . . . . . . . . . . . . . . . . . . . . . . . . . . . . . . . . . . . . .
359
359
359
360
361
361
362
363
363
364
364
364
365
365
365
365
366
366
Appendix C Information about Fonts
Working with Fonts . . . . . . . . . . . . . . . . . . . . . . . . . . . . . . . . . . . . . . . . . . . . . . . . . . . . . . .
EPSON BarCode Fonts (Windows Only). . . . . . . . . . . . . . . . . . . . . . . . . . . . . . . . . . .
Available fonts . . . . . . . . . . . . . . . . . . . . . . . . . . . . . . . . . . . . . . . . . . . . . . . . . . . . . . .
Adding more fonts . . . . . . . . . . . . . . . . . . . . . . . . . . . . . . . . . . . . . . . . . . . . . . . . . . . .
Selecting fonts . . . . . . . . . . . . . . . . . . . . . . . . . . . . . . . . . . . . . . . . . . . . . . . . . . . . . . .
Downloading fonts . . . . . . . . . . . . . . . . . . . . . . . . . . . . . . . . . . . . . . . . . . . . . . . . . . . .
EPSON Screen Fonts (Windows Only) . . . . . . . . . . . . . . . . . . . . . . . . . . . . . . . . . . . .
Symbol Sets. . . . . . . . . . . . . . . . . . . . . . . . . . . . . . . . . . . . . . . . . . . . . . . . . . . . . . . . . . . . .
Introduction to symbol sets . . . . . . . . . . . . . . . . . . . . . . . . . . . . . . . . . . . . . . . . . . . . .
In the PCL5 mode . . . . . . . . . . . . . . . . . . . . . . . . . . . . . . . . . . . . . . . . . . . . . . . . . . . .
In the PCL6 Mode . . . . . . . . . . . . . . . . . . . . . . . . . . . . . . . . . . . . . . . . . . . . . . . . . . . .
367
367
382
387
387
387
387
390
390
390
392
Index
Downloaded from ManualsPrinter.com Manuals
15
Safety Instructions
Safety
Warnings, cautions, and notes
w
c
Warnings
must be followed carefully to avoid bodily injury.
Cautions
must be observed to avoid damage to your equipment.
Notes
contain important information and useful tips on the operation of your product.
Safety precautions
Be sure to follow the precautions carefully to ensure safe, efficient operation:
❏ Because the product weighs approximately 33.1 kg (73 lb) for EPSON AcuLaser
CX21N/CX21NF, excluding consumable products, one person should not lift or carry it.
Two people should carry the product, lifting it by the correct positions as shown below.
w
Warnings
Be very careful when lifting the product as the rear side is heavier than the front.
Downloaded from ManualsPrinter.com Manuals
Safety Instructions
16
❏ Be careful not to touch the fuser, which is marked CAUTION HIGH TEMPERATURE,
or the surrounding areas. If the product has been in use, the fuser and the surrounding
areas may be very hot. If you must touch one of these areas, wait 30 minutes to allow
the heat to subside before doing so.
b
*
a
c
a
*
* CAUTION HIGH TEMPERATURE
a. fuser unit
b. cover B
c. cover C
❏ Do not insert your hand deep into the fuser unit as some components are sharp and
may cause injury.
❏ Avoid touching the components inside the product unless instructed to do so in this
guide.
Downloaded from ManualsPrinter.com Manuals
Safety Instructions
17
❏ Never force the product’s components into place. Although the product is designed to
be sturdy, rough handling can damage it.
❏ When handling a toner cartridge, always place them on a clean, smooth surface.
❏ Do not attempt to modify a toner cartridge or take them apart. They cannot be refilled.
❏ Do not touch the toner. Keep the toner away from your eyes.
❏ Do not dispose of used toner cartridge, photoconductor units, or fuser units in fire, as
they can explode and cause injury. Dispose of them according to local regulations.
❏ If toner is spilled, use a broom and dustpan or a damp cloth with soap and water to
clean it up. Because the fine particles can cause a fire or explosion if they come into
contact with a spark, do not use a vacuum cleaner.
❏ Wait at least one hour before using a toner cartridge after moving it from a cool to a
warm environment to prevent damage from condensation.
Important Safety Instructions
Read all of the following instructions before operating your product:
When choosing a place and power source for the product
❏ Place the product near an electrical outlet where you can easily plug in and unplug the
power cord.
❏ Do not place the product on an unstable surface.
❏ Do not put your product where the cord will be stepped on.
❏ Slots and openings in the cabinet and the back or bottom are provided for ventilation.
Do not block or cover them. Do not put the product on a bed, sofa, rug, or other similar
surface or in a built-in installation unless proper ventilation is provided.
❏ All interface connectors for this product are Non-LPS (non-limited power source).
❏ Connect your product to an electrical outlet that meets the power requirements of this
product. Your product’s power requirements are indicated on a label attached to the
product. If you are not sure of the power supply specifications in your area, contact your
local power company or consult your dealer.
❏ If you are unable to insert the AC plug into the electrical outlet, contact an electrician.
❏ Avoid using outlets that other appliances are plugged into.
Downloaded from ManualsPrinter.com Manuals
Safety Instructions
18
❏ Use the type of power source indicated on the label. If you are not sure of the type of
power available, consult your dealer or local power company.
❏ If you are unable to insert the plug into the outlet, contact a qualified electrician.
❏ When connecting this product to a computer or other device with a cable, ensure the
correct orientation of the connectors. Each connector has only one correct orientation.
Inserting a connector in the wrong orientation may damage both devices connected by
the cable.
❏ If you use an extension cord, make sure that the total of the ampere ratings on the
products plugged into the extension cord does not exceed the extension cord ampere
rating.
❏ Unplug this product from the wall outlet and refer servicing to a qualified service
representative under the following conditions:
A.
When the power cord or plug is damaged or frayed.
B.
If liquid has been spilled into it.
C.
If it has been exposed to rain or water.
D.
If it does not operate normally when the operating instructions are followed. Adjust only
those controls that are covered by the operating instructions since improper adjustment
of other controls may result in damage and will often require extensive work by a qualified
technician to restore the product to normal operation.
E.
If it has been dropped or the cabinet has been damaged.
F.
If it exhibits a distinct change in performance, indicating a need for service.
When using the product
❏ Follow all warnings and instructions marked on the product.
❏ Unplug this product from the wall outlet before cleaning.
❏ Use a well-wrung cloth for cleaning and do not use liquid or aerosol cleaners.
❏ Avoid touching the components inside the product unless instructed to do so in this
guide.
❏ Never force product components into place. Although the product is designed to be
sturdy, rough handling can damage it.
❏ Be sure to keep consumables out of the reach of children.
❏ Do not use product in a damp environment.
Downloaded from ManualsPrinter.com Manuals
Safety Instructions
19
❏ Do not leave jammed paper inside of the product. This can cause the product to
overheat.
❏ Never push objects of any kind through cabinet slots as they may touch dangerous
voltage points or short out parts that could result in a risk of fire or electric shock.
❏ Never spill liquid of any kind on the product.
❏ Except as specifically explained in the product’s documentation, do not attempt to
service this product yourself.
❏ Adjust only those controls that are covered by the operating instructions. Improper
adjustment of other controls may result in damage and may require repair by a qualified
service representative.
Safety Information
Power cord
c
Caution:
Be sure the AC power cord meets the relevant local safety standards.
Use only the power cord that comes with this product. Use of the another cord may result in
fire or electric shock.
This product’s power cord is for use with this product only. Use with other equipment may
result in fire or electric shock.
Laser safety labels
w
Warning:
The performance of procedures and adjustments other than those specified in the product's
documentation may result in hazardous radiation exposure.
Your product is a Class 1 laser product as defined in the IEC60825 specifications. The label
shown is attached to the back of the product in countries where required.
Internal laser radiation
Max. Average Radiation Power:
Downloaded from ManualsPrinter.com Manuals
5 mW at laser aperture
Safety Instructions
20
Wavelength:
770 to 795 nm
This is a Class III b Laser Diode Assembly that has an invisible laser beam. The printer
head unit is NOT A SERVICE ITEM, therefore, the printer head unit should not be opened
under any circumstances. An additional laser warning label is affixed to the inside of the
product.
Ozone safety
Ozone emission
Ozone gas is generated by laser printers as a by-product of the printing process. Ozone is
produced only when the printer is printing.
Ozone exposure limit
The recommended exposure limit for ozone is 0.1 parts per million (ppm) expressed as an
average time-weighted concentration over an eight (8) hour period.
The Epson laser printer generates less than 0.1 ppm for eight (8) hours of continuous
printing.
Minimize the risk
To minimize the risk of exposure to ozone, you should avoid the following conditions:
❏ Use of multiple laser printers in a confined area
❏ Operation in conditions of extremely low humidity
❏ Poor room ventilation
❏ Long, continuous printing together with any of the above
Product location
The product should be located so that the exhaust gases and heat generated are:
❏ Not blown directly into the user’s face
❏ Vented directly out of the building whenever possible
Downloaded from ManualsPrinter.com Manuals
Safety Instructions
21
Power on/off cautions
Do not turn off the product:
❏ After turning on the product, wait until Ready appears in the LCD panel.
❏ While the Print light is flashing.
❏ While the Data light is on or flashing.
❏ While printing.
Downloaded from ManualsPrinter.com Manuals
Safety Instructions
22
Chapter 1
Getting to Know Your Product
Where to Find Information
Where to Find Information
Setup Guide
Provides you with information on assembling the product and setting up the fax basic
settings.
User’s Guide (this manual)
Provides you with detailed information on the product’s functions, optional products,
maintenance, troubleshooting, and technical specifications.
Network Guide
Provides network administrators with information on both the printer driver and network
settings.You need to install this guide from the Network Utilities CD-ROM to your
computer’s hard disk before referring to it.
Basic Operation Guide
Provides you with solutions for paper jam problems about your product, and information on
the control panel, copy and fax operations you may need to refer to on a regular basis. We
recommend printing this guide and keeping it near the product.
Online Help for product software
Click Help for detailed information and instructions on the software that controls your
product. Online help is automatically installed when you have installed from the software
CD-ROM.
Note:
The illustrations in this guide are for EPSON AcuLaser CX21NF unless otherwise indicated.
Downloaded from ManualsPrinter.com Manuals
Getting to Know Your Product
23
Product Parts
Front view
a
l
b
k
j
c
d
e
f
i
h
g
a. Auto Document Feeder
b. stopper
c. output tray
d. extension tray
e. control panel
f.
cover A
g. MP tray
h. power switch
i.
option cover
j.
cover B
k. cover C
l.
ADF cover
Downloaded from ManualsPrinter.com Manuals
Getting to Know Your Product
24
Rear view
b
a
c
d
h
g
f
e
a. cover F
b. USB interface connector
c. telephone interface connectors (fax model only)
- LINE: Connects with the phone cord.
- EXT: Connects with an attached phone.
d. network interface connector
e. AC inlet
f.
cover E
g. handle
h. cleaner cover
Downloaded from ManualsPrinter.com Manuals
Getting to Know Your Product
25
Inside the product
a
b
c
d
f
e
a. fuser unit
b. photoconductor unit access lever
c. photoconductor unit
d. cleaning knob access lever
e. toner cartridge
f.
paper guides (MP tray)
Scanner parts
a
b
c
a. document cover
Downloaded from ManualsPrinter.com Manuals
Getting to Know Your Product
26
b. document table
c. transportation lock
Control panel
a. One Touch Dial button A, B, C
(fax model only)
Use these buttons to transmit a fax to a registered fax number
assigned to the corresponding button. Available from any
mode.
b. Data light
(Yellow)
Flashes when the product is processing data.
c. Error light
(Red)
On or flashes when an error has occurred.
- On when an error has occurred that requires operator
intervention. The product will automatically recover when the
cause of the error is resolved.
- Flashing 1 (blinks at 0.3 second intervals)
Indicates an error has occurred that can be recovered by
pressing either the x B&W Start or x Color Start button.
- Flashing 2 (blinks at 0.6 second intervals)
Indicates an error has occurred that requires operator
intervention and the x B&W Start or x Color Start button to be
pressed after resolving the error.
d. LCD panel
Downloaded from ManualsPrinter.com Manuals
Displays product status messages, guidance information, and
various mode settings.
Getting to Know Your Product
27
e. l Left/ r Right button
Use these buttons to sequentially display previous or next setting
values. The r Right button is also used as the OK button to set
and register a setting item. Also, the l Left button can be used
to move the cursor one character left and overwrite mistakenly
entered data.
u Up/ d Down button
Use these buttons to sequentially display previous or next menu
items. For instructions on how to use these buttons, see "Using the
Setup Menu" on page 238.
f. Advanced/Menu button
Use this button to display the advanced menu for each mode.
g. Speed dial button
(fax model only)
Use this button to display a list of registered recipients in the LCD
panel.
h. Pause/Redial button
(fax model only)
Use this button to insert a pause into fax dialing, or redial to the
same fax number called previously.
i. x B&W Start button,
x Color Start button
Use these buttons to start a black-and-white or color copy,
scan, or fax transmission.
When the error light is flashing, pressing this button clears the
error and switches the product to ready status.
j. y Cancel button
Use this button to stop scanning operation, or cancel copy, fax
transmission and print job.
Pressing it once cancels the current job.
Pressing and holding it for more than three seconds in Print
mode deletes all print jobs from the product memory.
k. Numeric keypad
Used to enter the number of copies or a zoom value in Copy
mode. Also, enters numeric values, such as the Time Setting
used in fax communications, in Setup mode.
hash and * asterisk buttons can be used in Fax mode.
l.
Use this button to reset the selected setting item or mistakenly
entered values to the default value. Press and hold it for more
than three seconds to delete all setting items to their default
values. Also, used as a delete button to delete one character
from the entered data when entering a recipient fax number in
Fax mode.
Reset button
m. Setup light
On when the product is in Setup mode.
n.
Use this button to switch to the Setup mode.
Setup button
o. Mode buttons
Use these buttons to switch to the corresponding mode.
p. Mode lights
On when the corresponding mode (Print, Copy, Fax, or Scan) is
selected. When the Print light is on, the product is in Print mode
and ready to receive and print data.
Downloaded from ManualsPrinter.com Manuals
Getting to Know Your Product
28
Options and Consumable Products
Options
You can add the following option to your product’s capabilities by installing it.
500-Sheet Paper Cassette Unit *C12C802181)
The 500-Sheet Paper Cassette Unit holds one paper cassette. It increases paper handling
capacity by 500 sheets of paper. For details, see "Optional Paper Cassette Unit" on page
269.
Consumable products
The life of the following consumable products is monitored by the product. The product lets
you know when replacements are needed.
Product name
Product code
Toner Cartridge (Yellow)
0316
Toner Cartridge (Magenta)
0317
Toner Cartridge (Cyan)
0318
Toner Cartridge (Black)
0319
Photoconductor Unit
1104
Downloaded from ManualsPrinter.com Manuals
Getting to Know Your Product
29
Chapter 2
Product Features and Various Options
Product Features
The product comes with a full set of features that contributes to ease of use and consistent,
high-quality output. The main features are described below.
About the EPSON AcuLaser CX21 series
The EPSON AcuLaser CX21 series consists of the following two products.
AcuLaser CX21N:
Network capable base model
AcuLaser CX21NF:
Network capable fax model
High-quality printing
When using the driver provided, your product does 600-dpi printing at a speed of up to 25
pages per minute when printing in the black-and-white mode on A4 paper. You’ll
appreciate the professional print quality produced by your product and its quick processing
speed.
Pre-defined color settings in the printer driver
The printer driver offers many pre-defined settings for color printing, allowing you to
optimize print quality for various types of color documents.
For Windows, see "Making the print quality settings" on page 49 for more information.
For Macintosh, see "Making the print quality settings" on page 94 for more information.
Toner save mode
To reduce the amount of toner used in printing documents, you can print rough drafts using
the Toner Save mode.
Downloaded from ManualsPrinter.com Manuals
Product Features and Various Options
30
Resolution Improvement Technology
Resolution Improvement Technology (RITech) is an original Epson printer technology that
works by smoothing out the jagged edges of diagonal and curved lines in both text and
graphics. With the driver provided, the product’s 600 dpi (dots per inch) resolution is
enhanced by RITech technology.
Wide variety of fonts
The printer comes with a selection of 84 scalable fonts, and 7 bitmap fonts in ESC/Page
mode to provide you with the fonts you need to create professional-looking documents.
Adobe PostScript 3 Mode
The printer’s Adobe PostScript 3 Mode provides you with the ability to print documents
formatted for PostScript printers. Seventeen scalable fonts are included. IES (Intelligent
Emulation Switch) and SPL (Shared Printer Language) support allow the printer to switch
between the PostScript mode and other emulations as print data is received at the printer.
The PostScript 3 Mode enables you to print PDF formatted files directly, which are
transferred via network interface.
PCL Emulation Mode
The PCL Emulation mode provides you with the ability to print documents in the PCL6/5c
printing language with this printer.
Various Options
This product provides you with a variety of different printing options. You can print in
various formats, or you can print using many different types of paper.
The following explains the procedure for each type of printing. Choose the procedure
appropriate for your print job.
Fit to page printing
"Resizing printouts" on page 56 (Windows)
Downloaded from ManualsPrinter.com Manuals
Product Features and Various Options
31
Note:
This function is not available with Mac OS X.
Lets you automatically enlarge or reduce the size of your document to fit the paper size you
selected.
Pages per sheet printing
"Modifying the print layout" on page 58 (Windows)
"Modifying the print layout" on page 97 (Macintosh)
Lets you print two or four pages on a single sheet.
Note:
In copy mode, you can print up to two pages on a single page.
Watermark printing
"Using a watermark" on page 60 (Windows)
Downloaded from ManualsPrinter.com Manuals
Product Features and Various Options
32
Note:
This function is not available with Mac OS X.
Lets you print text or an image as a watermark on your printout. For example, you can put
“Confidential” on an important document.
Header/Footer printing
"Using headers and footers" on page 62 (Windows)
"Using headers and footers" on page 105 (Macintosh)
XXXXX
XXXXX
Lets you print a header and footer on the top or bottom of the paper.
Downloaded from ManualsPrinter.com Manuals
Product Features and Various Options
33
Chapter 3
Paper Handling
Paper Sources
This section describes the combinations of paper sources and paper types that you can
use.
MP tray
Paper Type
Paper Size
Capacity
Plain paper
Weight: 64 to 80 g/m²
A4, A5, B5, Letter (LT), Government
Letter (GLT), Half Letter (HLT), Legal
(LGL), Government Legal (GLG), F4,
Executive (EXE)
Up to 180 sheets
(a stack 20 mm thick)
Custom-size paper:
90 × 110 mm minimum
220 × 355.6 mm maximum
Semi-Thick paper
Weight: 81 to 105 g/m²
A4, A5, B5, Letter (LT), Government
Letter (GLT), Half Letter (HLT), Legal
(LGL), Government Legal (GLG), F4,
Executive (EXE)
Up to 20 mm thick stack
Custom-size paper:
90 × 110 mm minimum
220 × 355.6 mm maximum
Envelopes
C5, C6, C10, DL, Monarch, IB5
Up to 20 sheets
(a stack 20 mm thick)
Labels
A4, Letter (LT)
Up to 75 sheets
Thick paper
Weight: 106 to 163
g/m²
A4, A5, B5, Letter (LT), Government
Letter (GLT), Half Letter (HLT), Legal
(LGL), Government Legal (GLG), F4,
Executive (EXE)
Up to 20 mm thick stack
Custom-size paper:
90 × 110 mm minimum
220 × 355.6 mm maximum
Extra thick paper
Weight: 164 to 210
g/m²
90 × 110 mm minimum
220 × 355.6 mm maximum
Downloaded from ManualsPrinter.com Manuals
Up to 20 mm thick stack
Paper Handling
34
Coated paper
Weight: 105 to 210
g/m²
A4, A5, B5, Letter (LT), Government
Letter (GLT), Half Letter (HLT), Legal
(LGL), Government Legal (GLG), F4,
Executive (EXE)
Up to 20 mm thick stack
Custom-size paper:
90 × 110 mm minimum
220 × 355.6 mm maximum
EPSON Color Laser
Paper
A4
Up to 180 sheets
(a stack 20 mm thick)
EPSON Color Laser
Transparencies
A4, Letter (LT)
Up to 75 sheets
EPSON Color Coated
paper
A4
Up to 20 mm thick stack
Optional 500-Sheet Paper Cassette Unit
Paper Type
Paper Size
Capacity
Plain paper
Weight: 64 to 105 g/m²
A4, Letter (LT)
Up to 500 sheets in a cassette
(a stack 56 mm thick)
EPSON Color Laser Paper
A4
Up to 56 mm thick stack
Selecting a paper source
You can specify a paper source manually, or set the product to select the paper source
automatically.
Manual selection
You can use the printer driver to select a paper source manually. To access the printer
driver, for Windows, see "Accessing the printer driver" on page 48, or for Macintosh, see
"Accessing the printer driver" on page 93.
❏ For Windows:
Access the printer driver, click the Basic Settings tab, and select the paper source that
you want to use from the Paper Source list. Then click OK.
❏ For Macintosh:
Access the printer driver, select Printer Settings from the drop-down list and click the
Basic Settings tab. Then, select the paper source that you want to use from the Paper
Source list and click OK.
Downloaded from ManualsPrinter.com Manuals
Paper Handling
35
Auto selection
❏ For Windows:
Access the printer driver, click the Basic Settings tab, and select Auto Selection as
the paper source. Then click OK.
❏ For Macintosh:
Access the printer driver, select Printer Settings from the drop-down list and click the
Basic Settings tab. Then, select Auto Selection as the paper source and click OK.
The product will search for a paper source containing the specified paper size in the
following order.
Standard configuration:
MP tray
With optional paper cassette unit installed:
MP tray
Lower Cassette
Note:
❏ Paper other than A4 or Letter size can be fed only from the MP tray.
❏ If you make paper size settings or paper source settings in your application, these settings may
override the printer driver settings.
❏ If you select an envelope for the Paper Size setting, it can be fed only from the MP tray
regardless of the Paper Source setting.
❏ You can change the priority of the MP tray by using the MP Tray setting in the Setup menu. For
details, see "Setup Menu" on page 244.
Loading Paper
This section describes how to load paper. If you use special media such as transparencies
or envelopes, see also "Printing on Special Media" on page 41.
MP tray
Follow the steps below to load paper.
Downloaded from ManualsPrinter.com Manuals
Paper Handling
36
1. Open the MP tray cover.
2. Slide the right paper guide outward while pinching the knob and the paper guide
together.
3. Load a stack of the desired paper on the center of the tray with the printable surface
facing up. Then slide the side paper guide while pinching the knob and the paper guide
together until it is against the right side of the stack to get a snug fit.
Downloaded from ManualsPrinter.com Manuals
Paper Handling
37
Note:
Do not load the paper that exceeds the maximum stack height.
4. Close the MP tray cover.
Note:
After loading paper, press the
Setup button on the control panel, select Printer Settings,
select Tray Menu, and then set the MP Tray Size and MP Type settings to match the loaded
paper size.
Optional Paper Cassette
Follow the steps below to load paper.
1. Pull out the optional paper cassette.
Downloaded from ManualsPrinter.com Manuals
Paper Handling
38
2. Slide the paper guide while pinching the knob.
3. Load a stack of paper on the center of the cassette unit with the printable surface facing
up.
Note:
❏ Load the paper after aligning the edges of the paper carefully.
❏ Do not load paper that exceeds the maximum stack height.
❏ When loading the paper, insert the short edge first.
Downloaded from ManualsPrinter.com Manuals
Paper Handling
39
4. Slide the paper guide while pinching the knob until it is against the sides of the stack to
get a snug fit.
5. Reinsert the cassette into the unit.
Note:
After loading paper, press the
Setup button on the control panel, select Printer Settings,
select Tray Menu, and then set the LC Size and LC Type settings to match the loaded paper size.
Output tray
The output tray is located on the top of cover B. Since printouts are output face-down, this
tray is also referred to as the face-down tray. This tray can hold up to 250 sheets.
Downloaded from ManualsPrinter.com Manuals
Paper Handling
40
Before using the output tray, raise and open the stopper on the extension tray to prevent
documents from slipping off the product as shown below.
Printing on Special Media
You can print on special media which include an assortment of Epson paper such as the
following.
Note:
Since the quality of any particular brand or type of media may be changed by the manufacturer at
any time, Epson cannot guarantee the quality of any type of media. Always test samples of media
stock before purchasing large quantities or printing large jobs.
EPSON Color Laser Paper
When loading EPSON Color Laser Paper, you should make paper settings as shown
below:
❏ Make settings on the Basic Settings in the printer driver.
Downloaded from ManualsPrinter.com Manuals
Paper Handling
41
Paper Size:
A4
Paper Source:
MP Tray (up to 180 sheets or up to 20 mm
thick stack)
Lower Cassette (up to 500 sheets or up to
56 mm thick stack)
Paper Type:
Semi-Thick
Note:
When printing on the back side of previously printed paper, select Semi-Thick (Back).
❏ You can also make these settings on the Setup menu’s Tray Menu on the control panel.
See "Tray Menu" on page 242.
EPSON Color Laser Transparencies
Epson recommends the use of EPSON Color Laser Transparencies.
Note:
Duplex printing is not available for transparencies.
Transparencies can be loaded into the MP tray only. When using transparencies, you
should make paper settings as shown below:
❏ Make settings on the Basic Settings in the printer driver.
Paper Size:
A4 or LT
Paper Source:
MP Tray (up to 75 sheets)
Paper Type:
Transparency
❏ You can also make these settings on the Setup menu’s Tray Menu on the control panel.
See "Tray Menu" on page 242.
Please note the following when handling this media:
❏ Hold each sheet by its edges, as oil from your fingers may transfer to the surface and
damage the printable surface of the sheet. The Epson logo appears on the printable
side.
Downloaded from ManualsPrinter.com Manuals
Paper Handling
42
❏ When loading transparencies in the MP tray, insert the short edge first as shown below.
❏ If transparencies are loaded incorrectly, the message Check Transparency appears in
the LCD panel. Remove the jammed transparencies from the product. To clear the jam,
see "When transparencies are jammed at the MP tray" on page 348.
❏ When using transparencies, load them in the MP tray and set the Paper Type setting to
Transparency in the printer driver.
❏ When the Paper Type setting in the printer driver is set to Transparency, do not load
any other type of paper except transparencies.
c
Caution:
Sheets that have just been printed on may be hot.
EPSON Color Laser Coated Paper
Printing on EPSON Color Laser Coated Paper produces glossier and higher quality
printouts. When loading EPSON Color Laser Coated Paper, you should make paper
settings as shown below:
❏ Make settings on the Basic Settings in the printer driver.
Paper Size:
A4
Paper Source:
MP Tray (up to 20 mm thick stack)
Paper Type:
Coated
Note:
When printing on the back side of previously printed paper, select Coated (Back).
❏ You can also make these settings on the Setup menu’s Tray Menu on the control panel.
See "Tray Menu" on page 242.
Downloaded from ManualsPrinter.com Manuals
Paper Handling
43
❏ Duplex printing is not available for EPSON Color Laser Coated Paper.
Envelopes
The print quality of envelopes may be irregular because different parts of an envelope have
different thicknesses. Print one or two envelopes to check the print quality.
c
Caution:
Do not use window envelopes unless they are specifically designed for laser printers. The
plastic on most window envelopes will melt when it comes into contact with the fuser.
Note:
❏ Depending on the quality of envelopes, the printing environment, or the printing procedure,
envelopes might be wrinkled. Make a trial print run before you print on a lot of envelopes.
❏ Duplex printing is not available for envelopes.
When loading envelopes, you should make paper settings as shown below:
❏ Make settings on the Basic Settings tab in the printer driver.
Paper Size:
IB5, C6, MON, C10, DL, or C5
Paper Source:
MP Tray (up to 20 sheets, or a stack up to
20 mm thick)
❏ You can also make these settings on the Setup menu’s Tray Menu on the control panel.
See "Tray Menu" on page 242.
Please note the following when handling this media.
Downloaded from ManualsPrinter.com Manuals
Paper Handling
44
❏ Load envelopes with the printable side facing up as shown below.
a
b
c
d
a. MON
b. C6, DL
c. C5, IB5
d. C10
❏ Only the standard envelopes shown above can be printed on with this product.
However, those standard envelopes that are less than 110 mm long when their flaps
are opened, such as Mon (Monarch), cannot be printed on.
❏ Do not use an envelope that has glue or tape on it.
Labels
You can load up to 75 sheets of labels into the MP tray at one time. However, you may
need to feed some labels one sheet at a time, or load them manually.
Note:
❏ Duplex printing is not available for labels.
❏ Depending on the quality of labels, the printing environment, or the printing procedure, labels
might be wrinkled. Make a trial print run before you print on a lot of labels.
When loading labels, you should make paper settings as shown below:
❏ Make settings on the Basic Settings tab in the printer driver.
Paper Size:
A4 or LT
Downloaded from ManualsPrinter.com Manuals
Paper Handling
45
Paper Source:
MP Tray (up to 75 sheets)
Paper Type:
Labels
❏ You can also make these settings on the Setup menu’s Tray Menu on the control panel.
See "Tray Menu" on page 242.
Note:
❏ You should only use labels designed for laser printers or plain-paper copiers.
❏ To prevent the label adhesive from coming into contact with product parts, always use labels
that completely cover the backing sheet, with no gaps between the individual labels.
❏ Press a sheet of paper on top of each sheet of labels. If the paper sticks, do not use those labels
in your product.
Thick paper and extra thick paper
You can load thick paper (106 to 163 g/m²) or extra thick paper (164 to 210 g/m²) into the
MP tray.
When loading thick or extra thick paper, you should make paper settings as shown below:
❏ Make settings on the Basic Settings tab in the printer driver.
Paper Size:
A4, A5, B5, LT, HLT, GLT, LGL, GLG, F4, or
EXE
Paper Source:
MP Tray (up to 20 mm thick stack)
Paper Type:
Thick or Extra Thick
❏ You can also make these settings on the Setup menu’s Tray Menu on the control panel.
See "Tray Menu" on page 242.
Note:
When printing on the back side of previously printed thick paper manually, set the Paper Type
setting on the printer driver to Thick (Back), Extra Thick (Back) or Thick, Extra Thick.
Loading a custom paper size
You can load non-standard size paper (90 × 110 mm to 220 × 355.6 mm) into the MP tray
as long as it meets the following size requirements.
When loading a custom paper size, you should make paper settings as shown below:
Downloaded from ManualsPrinter.com Manuals
Paper Handling
46
❏ Make settings on the Basic Settings tab in the printer driver.
Paper Size:
User defined size
Paper Source:
MP Tray (up to 20 mm thick stack)
Paper Type:
Plain, Semi-Thick, Thick or Extra Thick
❏ You can also make these settings on the Setup menu’s Tray Menu on the control panel.
See "Tray Menu" on page 242.
Note:
❏ For Windows, access the printer driver, then select User-Defined Size from the Paper Size list
on the Basic Settings tab. In the User Defined Paper Size dialog box, adjust the Paper Width,
Paper Length, and Unit settings to match your custom paper. Then click OK and your custom
paper size will be saved.
❏ For Mac OS X 10.2 or 10.3, follow the steps below to save your custom paper size.
1. Open the Page Setup dialog box.
2. Select Custom Page Size from the Settings drop-down list.
3. Click New.
4. Enter the setting's name and specify the paper size, and then click OK.
5. Click Save.
❏ For Mac OS X 10.4, follow the steps bellow to save your custom paper size.
1. Open the Page Setup dialog box.
2. Select Manage Custom Sizes from the Page Size drop-down list.
3. Click
.
4. Double-click Untitled and enter the setting's name.
5. Specify the paper size and click OK.
Downloaded from ManualsPrinter.com Manuals
Paper Handling
47
Chapter 4
Using the Printer Software with Windows
About the Printer Software
The printer driver lets you choose from a wide variety of settings to get the best results from
your printer. EPSON Status Monitor lets you check the status of your printer.
See "Monitoring Your Printer Using EPSON Status Monitor" on page 64 for more
information.
Accessing the printer driver
You can access the printer driver directly from any application programs, from your
Windows operating system.
The printer settings made from many Windows applications override the setting made
when the printer driver is accessed from the operating system, so you should access the
printer driver from your application to make sure that you get the result you want.
Note:
The printer driver’s online help provides details on printer driver settings.
From the application
To access the printer driver, click the Print or Page Setup from the File menu. You also
need to click Setup, Options, Properties, or a combination of these buttons.
Windows XP, XP x64, Server 2003, or Server 2003 x64 users
To access the printer driver, click Start, click Printers and Faxes, then click Printers.
Right-click your printer’s icon, then click Printing Preferences.
Windows Me or 98 users
To access the printer driver, click Start, point to Settings, then click Printers. Right-click
your printer’s icon, then click Properties.
Windows 2000 users
To access the printer driver, click Start, point to Settings, then click Printers. Right-click
your printer’s icon, then click Printing Preferences.
Downloaded from ManualsPrinter.com Manuals
Using the Printer Software with Windows
48
Making Changes to Printer Settings
Making the print quality settings
You can change the print quality of printouts through settings in the printer driver. With the
printer driver, you can make the print settings by choosing from a list of predefined settings,
or customizing the settings.
Choosing the print quality by using the Automatic setting
You can change the print quality of printouts to favor speed or detail. There are five quality
modes for the color printing mode and three for the black-and-white printing mode.
When Automatic is selected on the Basic Settings tab, the printer driver takes care of all
detailed settings according to the color setting you select. Print quality and color are the
only settings you have to make. You can change other settings such as paper size or
orientation in most applications.
Note:
The printer driver’s online help provides details on printer driver settings.
1. Click the Basic Settings tab.
2. Click Automatic, then choose desired printing quality.
3. Click OK to apply the settings.
Downloaded from ManualsPrinter.com Manuals
Using the Printer Software with Windows
49
The printer driver provides the following quality modes.
Color
Draft, Text, Text&Image, Web, Photo
Monochrome
Draft, Text&Image, Photo
Note:
If printing is unsuccessful or a memory-related error message appears, selecting a different print
quality may allow printing to proceed.
Using the predefined settings
The predefined settings are provided to help you optimize print settings for a particular kind
of printout, such as presentation documents or images taken by a video or digital camera.
Follow the steps below to use the predefined settings.
1. Click the Basic Settings tab.
2. Select Advanced. You will find the predefined settings in the list below of Automatic.
Note:
This screen may vary depending on your operating system version.
Downloaded from ManualsPrinter.com Manuals
Using the Printer Software with Windows
50
3. Select the most appropriate setting from the list according to the type of document or
image you want to print.
When you choose a predefined setting, other settings such as Print Quality, Screen, and
Color Management are set automatically. Changes are shown in the current settings list on
the Setting Information dialog box that appears by pressing the Setting Info button on the
Optional Settings tab.
Note:
The printer driver’s online help provides details on printer driver settings.
Customizing print settings
If you need to change detailed settings, make the settings manually.
Follow the steps below to customize your print settings.
1. Click the Basic Settings tab.
2. Click Advanced, then click More Settings.
3. Choose Color or Black as the Color setting, then choose desired print quality with the
Print Quality slider bar.
Note:
❏ This screen may vary depending on your operating system version.
❏ When making the other settings, see online help for details on each setting.
Downloaded from ManualsPrinter.com Manuals
Using the Printer Software with Windows
51
❏ The Web Smoothing check box is not available when PhotoEnhance is selected. Note
this setting is effective for screens that include full color, 24, or 32 bit images. It is not
effective for screens that include only illustrations, graphs, and text, and do not include any
images.
4. Click OK to apply the settings and return to the Basic Settings tab.
Saving your settings
To save your custom settings, click Advanced, then click Save Settings on the Basic
Settings tab. The Custom Settings dialog box appears.
Type a name for your custom settings in the Name box, then click Save. Your settings will
appear in the list below of Advanced on the Basic Settings tab.
Note:
❏ You cannot use a predefined setting name for your custom settings.
❏ To delete a custom setting, click Advanced, click Save Settings on the Basic Settings tab,
select the setting in the Custom Settings dialog box, then click Delete.
❏ You cannot delete predefined settings.
If you change any setting in the More Settings dialog box when one of your custom settings
is selected in the Advanced Settings list on the Basic Settings tab, the setting selected in
the list changes to Custom Settings. The custom setting that was previously selected is not
affected by this change. To return to your custom setting, simply reselect it from the current
settings list.
Duplex printing
Duplex printing prints on both sides of the paper. When printing for binding, the binding
edge can be specified as required to produce the desired page order.
New :Duplex is standard or option.
Downloaded from ManualsPrinter.com Manuals
Using the Printer Software with Windows
52
Doing duplex printing manually
1. Click the Basic Settings tab.
2. Make sure that the Manual Feed check box is off.
Note:
The manual feed function is not available when using the manual duplex function.
3. Select the Duplex (Manual) check box, then select Left, Top, or Right as the binding
position.
4. Click Duplex Settings to open the Duplex Settings dialog box.
Downloaded from ManualsPrinter.com Manuals
Using the Printer Software with Windows
53
5. Specify the Binding Margin for the front and back sides of the paper, then select
whether the front or back side of the paper is to be printed as the Start Page.
6. When printing for binding as a booklet, select the Binding Method check box and
make appropriate settings. For details about each setting, see online help.
7. Click OK.
8. Execute the print job.
Note:
The alert screen appears on the computer. Click the OK button on the screen.
9. After printing on one side, reload the paper into the MP tray with the printed surface
face-down as shown below. Then, press the x B&W Start or Color Start button.
Downloaded from ManualsPrinter.com Manuals
Using the Printer Software with Windows
54
Note:
❏ Manual duplex printing may not be completed normally when printing a document for which the
paper size, orientation, or paper source setting is set to change in the document.
❏ When doing duplex printing manually with collate set on the printer driver, the printing may not
be completed normally depending on the application you use.
❏ Straighten the paper before loading it. If curled paper is loaded, it may not feed correctly.
Displaying information about consumables with the printer driver
The remaining service lives of the toner cartridges are displayed on the Basic Settings tab
when EPSON Status Monitor is installed. The Order Online button is also available. You
can set the interval at which the information about the consumables is updated on the
Consumables Info Settings dialog box that appears by clicking the Consumables Info
Settings button on the Optional Settings tab.
Note:
❏ The driver and EPSON Status Monitor use different methods to measure the remaining service
lives of the toner cartridges. Because of this, the information that is displayed in EPSON Status
Monitor and the Basic Settings tab might be different. Use EPSON Status Monitor to get more
detailed information.
❏ The country/region and URL for a web site must be specified when installing EPSON Status
Monitor to use the function for ordering consumables online.
Downloaded from ManualsPrinter.com Manuals
Using the Printer Software with Windows
55
Ordering Consumables
To order consumables online, click the Order Online button on the Basic Settings tab.
See "Order Online" on page 74 for details.
Resizing printouts
You can have your document enlarged or reduced during printing.
To automatically resize pages to fit the output paper
1. Click the Advanced Layout tab.
Downloaded from ManualsPrinter.com Manuals
Using the Printer Software with Windows
56
2. Select the Zoom Options check box, then select the desired paper size from the
Output Paper drop-down list. The page will be printed to fit on the paper you have
selected.
3. Select Upper Left (to print reduced page image at upper left corner of the paper) or
Center (to print reduced page image with centering) for Location setting.
4. Click OK to apply the settings.
Resizing pages by a specified percentage
1. Click the Advanced Layout tab.
2. Select the Zoom Options check box.
Downloaded from ManualsPrinter.com Manuals
Using the Printer Software with Windows
57
3. Select the Zoom To check box, then specify the magnification percentage in the box.
Note:
The percentage can be set between 50% and 200% in 1% increments.
4. Click OK to apply the settings.
If necessary, select the paper size to be printed from the Output Paper drop-down list.
Modifying the print layout
Your printer can print either two or four pages onto a single page and specifies the printing
order, automatically resizing each page to fit the specified paper size. You can also choose
to print documents surrounded by a frame.
1. Click the Advanced Layout tab.
Downloaded from ManualsPrinter.com Manuals
Using the Printer Software with Windows
58
2. Select the Print Layout check box and the number of pages you want to print on one
sheet of paper. Then click More Settings. The Print Layout Settings dialog box
appears.
3. Select the Page Order in which the pages are printed on each sheet.
4. Select the Print the Frame check box when you want to print the pages surrounded by
a frame.
Note:
The Page Order choices depend on the number of pages selected above, and the paper
orientation (Portrait or Landscape) selected on the Basic Settings tab.
5. Click OK to apply the settings and return to the Advanced Layout tab.
Downloaded from ManualsPrinter.com Manuals
Using the Printer Software with Windows
59
Using a watermark
Follow the steps below to use a watermark on your document. On the Advanced Layout
tab or Watermark dialog box, you can select from a list of predefined watermarks, or you
can make an original watermark with text or a bitmap. The Watermark dialog box also
allows you to make a variety of detailed watermark settings. For example, you can select
the size, intensity, and position of your watermark.
1. Click the Advanced Layout tab.
2. Select a watermark that you want to use from the Watermark drop-down list. If you want
to make detailed settings, click Watermark Settings. The Watermark dialog box
appears.
Note:
If you select User Name or Computer Name from the Water Mark drop-down list, the login
account name or computer name is printed.
Downloaded from ManualsPrinter.com Manuals
Using the Printer Software with Windows
60
3. Select the color from the Color drop-down list, then adjust the image intensity of the
watermark with the Intensity slider bar.
4. Select Front (to print the watermark in the foreground of the document) or Back (to
print the watermark in the background of the document) for the Position setting.
5. Select the location on the page where you want to print the watermark from the
Location drop-down list.
6. Adjust the X (horizontal) or Y (vertical) Offset position.
7. Adjust the size of the watermark with the Size slider bar.
8. Click OK to apply the settings and return to the Advanced Layout tab.
Making a new watermark
You can make a new watermark as follows:
1. Click the Advanced Layout tab.
2. Click New/Delete. The User Defined Watermarks dialog box appears.
Note:
The User Defined Watermarks dialog box also appears by clicking New/Delete in the
Watermark dialog box.
Downloaded from ManualsPrinter.com Manuals
Using the Printer Software with Windows
61
3. Select Text or BMP and type a name for the new watermark in the Name box.
Note:
This screen appears when you select Text.
4. If you select Text, type the watermark text in the Text box. If you select BMP, click
Browse, select the BMP file you want to use, then click OK.
5. Click Save. Your watermark will appear in the List box.
6. Click OK to apply the new watermark settings.
Note:
You can register up to 10 watermarks.
Using headers and footers
You can print a header or footer on the top or bottom of a page. The items that can be
printed as a header or footer include user name, computer name, date, date/time, or collate
number.
1. Click the Advanced Layout tab.
Downloaded from ManualsPrinter.com Manuals
Using the Printer Software with Windows
62
2. Select the Header/Footer check box, then click Header/Footer Settings.
3. Select the items to be printed for the header and the footer from the drop-down list.
Note:
❏ If you select User Name or Computer Name from the drop-down list, the login account
name or computer name is printed.
❏ If you select Collate Number from the drop-down list, the number of copies is printed.
4. Click OK to apply the settings and return to the Advanced Layout tab.
Making Extended Settings
You can make various settings in the Extended Settings dialog box. To open the dialog
box, click Extended Settings on the Optional Settings tab.
Downloaded from ManualsPrinter.com Manuals
Using the Printer Software with Windows
63
Note:
The printer driver’s online help provides details on printer driver settings.
Making Optional Settings
You can update the installed option information manually if you have installed options to
your printer.
1. Access the printer driver.
2. Click the Optional Settings tab, then select Update the Printer Option Info
Manually.
3. Click Settings. The Optional Settings dialog box appears.
4. Make settings for each installed option, then click OK.
Monitoring Your Printer Using EPSON Status Monitor
Installing EPSON Status Monitor
Follow the steps below to install EPSON Status Monitor.
1. Make sure that the printer is off and that Windows is running on your computer.
2. Insert the printer software CD-ROM in the CD-ROM drive.
Note:
❏ If the language selection window appears, select your country.
❏ If the Epson Installation Program screen does not appear automatically, double-click the My
Computer icon, right-click the CD-ROM icon, click OPEN in the menu that appears, then
double-click Epsetup.exe.
3. Click Continue. When the software Licence agreement screen appears, read the
statement, then click Agree.
4. Click User Installation.
Downloaded from ManualsPrinter.com Manuals
Using the Printer Software with Windows
64
5. In the dialog box that appears, click Local.
Note:
❏ See the Network Guide for information on installing EPSON Status Monitor on a network.
6. Click Custom.
7. Select EPSON Status Monitor check box, then click Install.
Downloaded from ManualsPrinter.com Manuals
Using the Printer Software with Windows
65
8. In the dialog box that appears, make sure that your printer’s icon is selected, and click
OK. Then follow the on-screen instructions.
9. When the software license agreement screen appears, read the statement and then
click Accept.
10. In the dialog box that appears, select your country or region, and the URL for EPSON’s
Web site in that country or region appears. Then click OK.
Note:
❏ In the dialog box, you can set the URL for the site where you can order consumables online.
See "Order Online" on page 74 for details.
❏ Selecting your country or region allows you to change the settings of the URL.
❏ When you click the Cancel button, the Web site’s URL does not appear, but the EPSON
Status Monitor installation continues.
11. When the installation is complete, click OK.
Downloaded from ManualsPrinter.com Manuals
Using the Printer Software with Windows
66
Accessing EPSON Status Monitor
EPSON Status Monitor is a utility program that monitors your printer and gives you
information about its current status.
Follow the steps below to access EPSON Status Monitor.
1. Right-click the tray icon on the taskbar.
2. Select your printer name and then Simple Status. The Simple Status window appears.
Note:
You can also access EPSON Status Monitor by clicking the Simple Status button on the Optional
Settings tab on the printer driver.
To find detailed information on EPSON Status Monitor, see "Information on EPSON Status
Monitor" on page 68, "Simple Status" on page 68, "Detailed Status" on page 69,
"Consumables Information" on page 70, "Job Information" on page 71, "Notice Settings" on
page 73, "Order Online" on page 74, and "Tray Icon Settings" on page 75.
Note for Windows XP/XP x64 users:
EPSON Status Monitor is not available when printing from a Remote Desktop connection.
Note for Netware users:
When monitoring NetWare printers, a Novell Client that corresponds to your operating system must
be used. Operation is confirmed for the versions below:
❏ For Windows 98:
Novell Client 3.4 for Windows 95/98
❏ For Windows XP or 2000:
Novell Client 4.91 SP1 for Windows 2000/XP
❏ To monitor a NetWare printer, connect only one print server to each queue. For directions, see
the Network Guide for the printer.
❏ You cannot monitor a NetWare queue printer beyond the IPX router because the setting for IPX
hops is 0.
❏ This product supports NetWare printers configured by a queue-based printing system such as
Bindery or NDS. You cannot monitor NDPS (Novell Distributed Print Services) printers.
Downloaded from ManualsPrinter.com Manuals
Using the Printer Software with Windows
67
Information on EPSON Status Monitor
You can obtain information about EPSON Status Monitor such as product versions or
interface versions.
This window appears by right-clicking the tray icon on the taskbar and selecting your
printer name and About.
Simple Status
The Simple Status window indicates printer status, errors, and warnings.
This window appears by right-clicking the tray icon on the taskbar, then selecting your
printer name, then clicking Simple Status. This window also appears when errors occur
according to the Pop-up Notice you select in the Notice Settings dialog box.
If you wish to see more information about the status of your printer, click Details.
Downloaded from ManualsPrinter.com Manuals
Using the Printer Software with Windows
68
Detailed Status
You can monitor detailed printer status by right-clicking the tray icon on the taskbar, then
selecting your printer name, then clicking Detailed Status.
a.
Icon/Message:
The icon and message show the printer status.
b.
Printer image:
The image at the upper left shows the printer status graphically.
c.
Text box:
The text box next to the printer image displays the current status of
the printer. When a problem occurs, the most probable solution is
displayed.
d.
Close button:
Clicking this button closes the dialog box.
Note:
You can see information about jobs or consumables by clicking on the respective tab.
Downloaded from ManualsPrinter.com Manuals
Using the Printer Software with Windows
69
Consumables Information
You can obtain information on paper sources and consumable products by right-clicking
the tray icon on the taskbar, then selecting your printer name, then clicking Consumables
Information.
a.
Paper:
Displays the paper size, the paper type and the
approximate amount of paper remaining in the paper
source. Information on the optional paper cassettes are
displayed only if these options are installed.
b.
Toner:
Indicates the remaining service lives of the toner cartridges.
The toner icon flashes when the toner cartridge has some
error or has neared the end of its service life.
c.
Photoconductor Unit
Indicates the remaining service life of the photoconductor
unit. The unit icon flashes when the imaging unit has some
error or has neared the end of its service life.
d.
Order Online button:
Clicking this button enables you to order consumables
online. See "Order Online" on page 74 for details.
e.
Close button:
Clicking this button closes the dialog box.
Note:
You can see the status of the printer or information about jobs by clicking on the respective tab.
Downloaded from ManualsPrinter.com Manuals
Using the Printer Software with Windows
70
Job Information
You can check job information by right-clicking the tray icon on the taskbar, then selecting
your printer name, then clicking Job Information.
a.
Job Name:
Displays the user’s print job names. Other user’s print jobs are
displayed as --------.
b.
Status:
Waiting:
The print job which is waiting to be printed.
Spooling:
The print job which is being spooled on your
computer.
Deleting:
The print job which is being deleted.
Printing:
The print job which is printed currently.
Completed:
Displays only your jobs that have finished
printing.
Canceled:
Displays only your jobs that have been canceled
printing.
c.
User:
Displays the user name.
d.
Computer:
Displays the name of the computer that sent the print job.
e.
Cancel Job button:
Selecting a print job and clicking this button cancels the selected
print job.
f.
Close button
Clicking this button closes the dialog box.
g.
Refresh button:
Clicking this button refreshes the information on this menu.
h.
Display Settings
button
Displays the Display Settings dialog box to select items and the
order they are displayed on the Job Information screen to be
displayed.
Downloaded from ManualsPrinter.com Manuals
Using the Printer Software with Windows
71
Note:
You can see the status of the printer or information about consumables by clicking on the
respective tab.
Note for Windows XP/XP x64 users:
Shared Windows XP LPR connections and shared Windows XP Standard TCP/IP connections with
Windows clients do not support the Job Management function.
The Job Information tab is available when the following connections are used:
Server and Client Environments:
❏ When using the shared Windows 2000, Server 2003, or Server 2003 x64 LPR
connection with Windows XP, XP x64, Me, 98, or 2000 clients.
❏ When using the shared Windows 2000, Server 2003, or Server 2003 x64 Standard
TCP/IP connection with Windows XP, XP x64, Me, 98, or 2000.
❏ When using the shared Windows 2000, Server 2003, or Server 2003 x64 EpsonNet
Print TCP/IP connection with Windows XP, XP x64, Me, 98, or 2000 clients.
Client only Environments:
❏ When using the LPR connection (in Windows XP, XP x64, 2000, Server 2003, or Server
2003 x64).
❏ When using the Standard TCP/IP connection (in Windows XP, XP x64, 2000, Server
2003, or Server 2003 x64).
❏ When using the EpsonNet Print TCP/IP connection (in Windows XP, XP x64, Me, 98,
2000, Server 2003, or Server 2003 x64).
Note:
You cannot use this function in the following situations:
❏ When using an optional Ethernet interface card that does not support the Job Management
function.
❏ When the NetWare connections do not support the Job Management function.
❏ When the printing jobs from NetWare and NetBEUI are displayed as “Unknown” on the Job
Management menu.
❏ Note that if the user account used to log on to a client is different from the user account used to
connect to the server, the Job Management function is not available.
Note on deleting print jobs:
You cannot delete the print job spooling on client computers running Windows Me or 98 using
EPSON Status Monitor when the following connections are used:
Downloaded from ManualsPrinter.com Manuals
Using the Printer Software with Windows
72
❏ When using the shared Windows 2000, Server 2003, or Server 2003 x64 LPR connection.
❏ When using the shared Windows 2000, Server 2003, or Server 2003 x64 standard TCP/IP
connection.
❏ When using the shared Windows 2000, Server 2003, or Server 2003 x64 EpsonNet Print
TCP/IP connection.
Notice Settings
You can make specific monitoring settings by right-clicking the tray icon on the taskbar,
then selecting your printer name, then clicking Notice Settings. The Notice Settings dialog
box appears.
a.
Monitor the printer status
check box:
When this check box is selected, EPSON Status Monitor
monitors the printer status during a print job is processed.
b.
More Settings button:
Displays the More Settings dialog box to set how to
display the tray icon.
c.
Pop-up Notice:
Sets the notification to be displayed.
d.
Allow monitoring of the
shared printers check box:
When this check box is selected, a shared printer can be
monitored by other computers.
If you connect the printer via a server with Windows Point
& Print and the server and the client are both Windows XP
or later, it communicates with the OS communication
function. Therefore you can monitor the printer without
selecting this check box.
e
More Settings button:
Downloaded from ManualsPrinter.com Manuals
Displays the More Settings dialog box to set how to
communicate with the shared printer.
Using the Printer Software with Windows
73
f.
Display the Order Online
window automatically check
box:
When this check box is selected, the Order Online
window appears automatically when a consumable
becomes low or reaches end of service life and keeps
appearing once a day until the consumable is replaced.
g.
Display once a day when a
consumable is low check
box:
When this radio button is selected, the Order Online
window appears automatically once a day when you
start printing or display the status by accessing EPSON
Status Monitor.
h.
Display only when a
consumable first becomes
low check box:
When this radio box is selected, the Order Online window
appears automatically only when a consumable first
becomes low.
i.
More Settings button:
Displays the More Settings dialog box in which you can
set the URL for placing an order appears.
j.
Monitor Settings button:
Displays the Monitor Settings dialog box to set the
monitoring interval.
k.
Cancel button:
Click this button to exit the dialog box without saving the
settings.
l.
OK button:
Click this button to save the settings and to exit the dialog
box.
Order Online
You can order consumables online by right-clicking the tray icon on the taskbar, then
selecting your printer name, then clicking Order Online. The Order Online dialog box
appears.
Note:
❏ You can also order consumables online by clicking the Order Online button on the EPSON
Status Monitor dialog box. The Order Online dialog box appears.
Downloaded from ManualsPrinter.com Manuals
Using the Printer Software with Windows
74
❏ The Order Online dialog box also appears by clicking the Order Online button on the Basic
Settings tab in the printer driver.
a.
Text box:
Displays the consumables and codes.
b.
Order Now/Find Dealer
button:
Connects to the URL where you can place an order and
find the dealer nearest you.
When you click this button, a confirmation window asking
if you wish to connect to the Web site appears. If you do
not want this window to appear, select the Do not
display the confirmation message before connecting
check box in the More Settings dialog box. The More
Settings dialog box appears by clicking the More Settings
button in the Notice Settings dialog box.
c.
Consumables button:
Displays the consumables information.
d.
Close button:
Closes the dialog box.
e.
Do not display this window
automatically until a
consumable becomes low or
reaches end of service life
check box:
When this check box is selected, the Order Online
window appears automatically only when a consumable
first becomes low or reaches end of service life.
Tray Icon Settings
You can access EPSON Status Monitor by double-clicking the tray icon on the taskbar.
The menu that appears by double-clicking the tray icon when no printing job is being
processed depends on the settings you select. Follow the steps below to set the tray icon
settings.
1. Right-click the tray icon on the taskbar, then select Tray Icon Settings.
Downloaded from ManualsPrinter.com Manuals
Using the Printer Software with Windows
75
2. Confirm that your printer is selected. Select the menu you wish to display from the
Information to display drop-down list. Then click OK.
Note:
You can also access EPSON Status Monitor by right-clicking the tray icon and selecting your
printer’s name.
Setting Up the USB Connection
The USB interface that comes with your printer complies with Microsoft Plug and Play
(PnP) USB specifications.
Note:
❏ Only PC systems equipped with a USB connector and running Windows XP, XP x64, Me, 98,
2000, Server 2003, or Server 2003 x64 support the USB interface.
❏ Your computer must support USB 2.0 in order to use USB 2.0 as the interface to connect your
computer to the printer.
❏ Since USB 2.0 is fully compatible with USB 1.1, USB 1.1 can be used as an interface.
❏ USB 2.0 is applied for Windows XP, XP x64, 2000, Server 2003, and Server 2003 x64 operating
systems. If your operating system is Windows Me or 98, use USB 1.1 interface.
1. Access the printer driver.
2. For Windows Me or 98, click the Details tab.
For Windows XP, XP x64, 2000, Server 2003, or Server 2003 x64, click the Ports tab.
Downloaded from ManualsPrinter.com Manuals
Using the Printer Software with Windows
76
3. For Windows Me or 98, select the EPUSBX:(your printer name) USB port from the Print
to the following port drop-down list.
For Windows XP, XP x64, 2000, Server 2003, or Server 2003 x64, select the USBXXX
USB port in the list on the Ports tab.
Note:
This screen may vary depending on your operating system version.
4. Click OK to save the settings.
Canceling Printing
If the printouts are not what you expected and display incorrect or garbled characters or
images, you may need to cancel printing. When the printer’s icon is displayed on the
taskbar, follow the instructions below to cancel the printing.
Double-click your printer’s icon on the taskbar. Select the job in the list, then click Cancel
from the Document menu.
Downloaded from ManualsPrinter.com Manuals
Using the Printer Software with Windows
77
After the last page is output, the Print (green) light on the product turns on.
The current job is canceled.
Note:
You can also cancel the current print job that is sent from your computer, by pressing the y Cancel
button on the product’s control panel. When canceling the print job, be careful not to cancel print
jobs sent by other users.
Uninstalling the Printer Software
When you wish to reinstall or upgrade the printer driver, be sure to uninstall the current
printer software beforehand.
Uninstalling the printer driver
1. Quit all applications.
2. Click Start, point to Settings, then click Control Panel.
For Windows XP, XP x64, Server 2003, or Server 2003 x64, click Start, click Control
Panel, then click Add or Remove Programs.
3. Double-click the Add/Remove Programs icon.
For Windows XP, XP x64, Server 2003, or Server 2003 x64, click the Change or
Remove Programs icon.
Downloaded from ManualsPrinter.com Manuals
Using the Printer Software with Windows
78
4. Select EPSON Printer Software, then click Add/Remove.
For Windows XP, XP x64, 2000, Server 2003, or Server 2003 x64, select EPSON
Printer Software, then click Change/Remove.
5. Click the Printer Model tab, select your printer’s icon.
6. Click the Utility tab, and confirm that the check box for the printer software you want to
uninstall is selected.
Note:
If you wish to uninstall only EPSON Status Monitor, select the EPSON Status Monitor check
box.
Downloaded from ManualsPrinter.com Manuals
Using the Printer Software with Windows
79
7. To uninstall, click OK.
Note:
You can uninstall EPSON Network Utility. When the utility is uninstalled, you cannot display the
printer status from EPSON Status Monitor of other printers.
8. Follow the on-screen instructions.
Uninstall the USB device driver
When you connect the product to your computer with a USB interface cable, the USB
device driver is also installed. When you uninstalled the printer driver, you also need to
uninstall the USB device driver.
Follow the steps below to uninstall the USB device driver.
Note:
❏ Uninstall the printer driver before uninstalling the USB device driver.
❏ Once you uninstalled the USB device driver, you cannot access any other Epson printers
connected with a USB interface cable.
1. Follow steps 1 through 3 of "Uninstalling the printer driver" on page 78.
2. Select EPSON USB Printer Devices, then click Add/Remove.
Note:
❏ EPSON USB Printer Devices appears only when the product is connected to Windows Me
or 98 with a USB interface cable.
Downloaded from ManualsPrinter.com Manuals
Using the Printer Software with Windows
80
❏ If the USB device driver is not installed correctly, EPSON USB Printer Devices may not
appear. Follow the steps below to run the “Epusbun.exe” file in the CD-ROM that comes
with your printer.
1.Insert the CD-ROM in your computer’s CD-ROM drive.
2.Access the CD-ROM drive.
3.Double-click the Win9x folder.
4.Double-click the Epusbun.exe icon.
3. Follow the on-screen instructions.
Sharing the Printer on a Network
Sharing the printer
This section describes how to share the printer on a standard Windows network.
The computers on a network can share a printer that is directly connected to one of them.
The computer that is directly connected to the printer is the print server, and the other
computers are the clients which need permission to share the printer with the print server.
The clients share the printer via the print server.
According to the versions of Windows OS and your access rights on the network, perform
the appropriate settings of the print server and clients.
Setting the print server
❏ For Windows Me or 98, see "Setting up your printer as a shared printer" on page 82.
❏ For Windows XP, XP x64, 2000, Server 2003, or Server 2003 x64, see "Using an
additional driver" on page 83.
Setting the clients
❏ For Windows Me or 98, see "With Windows Me or 98" on page 87.
❏ For Windows XP, XP x64, or 2000, see "With Windows XP, XP x64, or 2000" on page
88.
Note:
❏ When sharing the printer, be sure to set EPSON Status Monitor so that the shared printer can
be monitored on the print server. See "Notice Settings" on page 73.
❏ When you are using shared printer in a Windows Me or 98 environment, on the server,
double-click the Network icon in Control panel and make sure that the “File and printer sharing
for Microsoft Networks” component is installed, then on the server and clients, make sure that
the “IPX/SPX-compatible Protocol” or the “TCP/IP Protocol” is installed.
Downloaded from ManualsPrinter.com Manuals
Using the Printer Software with Windows
81
❏ The print server and clients should be set on the same network system, and they should be
under the same network management beforehand.
Setting up your printer as a shared printer
When the print server’s OS is Windows Me or 98 follow the steps below to set the print
server.
1. Click Start, point to Settings, then click Control Panel.
2. Double-click the Network icon.
3. Click File and Print Sharing on the Configuration menu.
4. Select the I want to be able to allow others to print to my printer(s). check box, then
click OK.
5. Click OK to apply the settings.
Note:
❏ When “Insert the Disk” appears, insert the Windows Me or 98 CD-ROM in the computer.
Click OK, then follow the on-screen instructions.
❏ When the prompt to restart the computer appears, restart the computer, then continue with
the settings.
6. Double-click the Printers icon on the control panel.
7. Right-click your printer’s icon, then click Sharing in the menu that appears.
8. Select Shared As, type the name in the Share Name box, then click OK. Type a
Comment and Password if needed.
Note:
❏ Do not use spaces or hyphens for the share name, or an error may occur.
❏ When sharing the printer, be sure to set EPSON Status Monitor so that the shared printer
can be monitored on the print server. See "Notice Settings" on page 73.
Downloaded from ManualsPrinter.com Manuals
Using the Printer Software with Windows
82
You need to set the client computers so that they can use the printer on a network. See the
following pages for details:
❏ "With Windows Me or 98" on page 87
❏ "With Windows XP, XP x64, or 2000" on page 88
Using an additional driver
When the print server’s OS is Windows XP, XP x64, 2000, Server 2003, or Server 2003
x64, you can install the additional drivers on the server. The additional drivers are for client
computers that have different OS from the server.
Follow the steps below to set a Windows XP, XP x64, 2000, Server 2003, or Server 2003
x64 as a print server, then install the additional drivers.
Note:
You must access Windows XP, XP x64, 2000, Server 2003, or Server 2003 x64 as the
Administrators of the local machine.
1. For a Windows 2000 print server, click Start, point to Settings, then click Printers.
For a Windows XP, XP x64, Server 2003, or Server 2003 x64 print server, click Start,
point to Printers and Faxes.
2. Right-click your printer’s icon, then click Sharing in the menu that appears.
For Windows XP, XP x64, Server 2003, or Server 2003 x64, if the following menu
appears, click either Network Setup Wizard or If you understand the security risks
but want to share printers without running the wizard, click here.
In either case, follow the on-screen instructions.
Downloaded from ManualsPrinter.com Manuals
Using the Printer Software with Windows
83
3. For a Windows 2000 print server, select Shared as, then type the name in the Share
Name box.
For a Windows XP, XP x64, Server 2003, or Server 2003 x64 print server, select Share
this printer, then type the name in the Share name box.
Note:
Do not use spaces or hyphens for the Share name, or an error may occur.
4. Select the additional drivers.
Note:
If the computers of the server and clients use the same OS, you do not have to install the
additional drivers. Just click OK after step3.
On the Windows XP, XP x64, 2000, Server 2003, or Server 2003 x64 print server
Downloaded from ManualsPrinter.com Manuals
Using the Printer Software with Windows
84
Click Additional Drivers.
Select Windows being used for clients, then click OK.
Downloaded from ManualsPrinter.com Manuals
Using the Printer Software with Windows
85
Server Name
Client OS
Driver
Windows 2000
Windows Me or 98 clients
Intel Windows 95 or 98
Windows XP or 2000 clients
Intel Windows 2000
Windows Me or 98 clients
Intel Windows 95, 98 and Me
Windows XP or 2000 clients
Intel Windows 2000 or XP
Windows XP x64 clients
x64 Windows XP
Windows Me or 98 clients
x86 Windows 95, Windows98,
and Windows Millennium
Edition
Windows XP or 2000 clients
x86 Windows 2000, Windows
XP and Windows Server 2003
Windows XP x64 clients
x64 Windows XP and Windows
Server 2003
Windows XP*
Windows XP x64,
Server 2003, or Server
2003 x64*
*
The additional driver for Windows XP x64 and Server 2003 x64 can be used on Windows XP Service
Pack 2, Windows 2003 Service Pack 1, or later.
Note:
❏ You do not have to install the additional drivers noted below, because these drivers are
preinstalled.
Intel Windows 2000 (for Windows 2000)
Intel Windows 2000 or XP (for Windows XP)
x86 Windows 2000, Windows XP and Windows Server 2003 (for Windows Server 2003)
x64 Windows XP and Windows Server 2003 (for Windows XP x64 or Windows Sever 2003
x64 edition)
❏ Do not select additional drivers other than the drivers listed in the above table. The other
additional drivers are not available.
Downloaded from ManualsPrinter.com Manuals
Using the Printer Software with Windows
86
Setting up clients
This section describes how to install the printer driver by accessing the shared printer on a
network.
Note:
❏ To share the printer on a Windows network, you need to set the print server. For details, see
"Setting up your printer as a shared printer" on page 82 (Windows Me or 98) or "Using an
additional driver" on page 83 (Windows XP, XP x64, 2000, Server 2003, or Server 2003 x64).
❏ This section describes how to access the shared printer on a standard network system using
the server (Microsoft workgroup). If you cannot access the shared printer due to the network
system, ask the administrator of the network for assistance.
❏ This section describes how to install the printer driver by accessing the shared printer from the
Printers folder. You can also access the shared printer from Network Neighborhood or My
Network on the Windows desktop.
❏ You cannot use the additional driver on the server system OS.
❏ When you want to use EPSON Status Monitor at a client, you have to install EPSON Status
Monitor from the CD-ROM with administrator privileges in each client.
With Windows Me or 98
Follow the steps below to set Windows Me or 98 clients.
1. Click Start, point to Settings, then click Printers.
2. Double-click the Add Printer icon, then click Next.
3. Select Network printer, then click Next.
4. Click Browse, and the Browse for Printer dialog box appears.
Note:
You can also type “\\(the name of the computer that is locally connected to the shared
printer)\(the shared printer’s name)” in the network path or queue name.
Downloaded from ManualsPrinter.com Manuals
Using the Printer Software with Windows
87
5. Click the computer or server that is connected to the shared printer, and the name of
the shared printer, then click OK.
Note:
The name of the shared printer may be changed by the computer or server that is connected to
the shared printer. To make sure of the name of the shared printer, ask the administrator of the
network.
6. Click Next.
Note:
❏ If the printer driver is installed in the client beforehand, you need to select the new printer
driver or the current printer driver. When the prompt to select the printer driver appears,
select the printer driver according to the message.
❏ If the print server’s OS is Windows Me or 98 or the additional driver for Windows Me or 98
is installed in the Windows XP, XP x64, 2000, Server 2003, or Server 2003 x64 print server,
go to the next step.
❏ If the additional driver for Windows Me or 98 is not installed in the Windows XP, XP x64,
2000, Server 2003, or Server 2003 x64 print server, go to "Installing the printer driver from
the CD-ROM" on page 91.
7. Make sure of the name of the shared printer, then select whether to use the printer as
the default printer or not. Click Next, then follow the on-screen instructions.
Note:
You can change the shared printer’s name so that it appears only on the client computer.
With Windows XP, XP x64, or 2000
Follow the steps below to set Windows XP, XP x64, or 2000 clients.
You can install the printer driver for the shared printer, if you have Power Users or more
powerful access rights even if you are not the Administrator.
Downloaded from ManualsPrinter.com Manuals
Using the Printer Software with Windows
88
1. For Windows 2000 clients, click Start, point to Settings, and click Printers.
For Windows XP or XP x64 clients, click Start, point to Printers and Faxes.
2. For Window 2000, double-click the Add Printer icon, then click Next.
For Windows XP or XP x64 click Add a printer in the Printer Tasks menu.
3. For Windows 2000, select Network printer, then click Next. For Windows XP or XP
x64, select A network printer, or a printer attached to another computer, then click
Next.
4. For Windows 2000, type the name of the shared printer, then click Next.
Note:
❏ You can also type “\\(the name of the computer that is locally connected to the shared
printer)\(the shared printer’s name)” in network path or queue name.
❏ You do not necessarily need to type the name of the shared printer.
Downloaded from ManualsPrinter.com Manuals
Using the Printer Software with Windows
89
For Windows XP or XP x64, select Browse for a printer.
5. Click the icon of the computer or server that is connected to the shared printer, and the
name of the shared printer, then click Next.
Note:
❏ The name of the shared printer may be changed by the computer or server that is
connected to the shared printer. To make sure of the name of the shared printer, ask the
administrator of the network.
❏ If the printer driver is installed in the client beforehand, you need to select either the new
printer driver or the current printer driver. When the prompt to select the printer driver
appears, select the printer driver according to the message.
❏ If the additional driver for Windows XP, XP x64, or 2000 is installed in the Windows XP, XP
x64, 2000, Server 2003, or Server 2003 x64 print server, go to the next step.
❏ If the print server’s OS is Windows Me or 98, go to "Installing the printer driver from the
CD-ROM" on page 91.
6. Select whether to use the printer as the default printer or not, then click Next.
Downloaded from ManualsPrinter.com Manuals
Using the Printer Software with Windows
90
7. Make sure of the settings, then click Finish.
Installing the printer driver from the CD-ROM
This section describes how to install the printer driver in the clients when setting the
network system as follows:
❏ The additional drivers are not installed in the Windows XP, XP x64, 2000, Server 2003,
or Server 2003 x64 print server.
❏ The print server’s OS is Windows Me or 98 and the client’s OS is Windows XP, XP x64,
or 2000.
The on-screen displays on the following pages may differ depending on the version of
Windows OS.
Note:
❏ When installing in Windows XP, XP x64, or 2000 clients, you must access Windows XP, XP
x64, or 2000 as the Administrator.
❏ If the additional drivers are installed or the computers of the server and clients use the same
OS, you do not have to install the printer drivers from the CD-ROM.
1. Access the shared printer and a prompt may appear. Click OK, then follow the
on-screen instructions to install the printer driver from the CD-ROM.
Downloaded from ManualsPrinter.com Manuals
Using the Printer Software with Windows
91
2. Insert the CD-ROM, type the appropriate drive and folder names in which the printer
driver for clients is located, then click OK.
When installing drivers in Windows XP, XP x64, 2000, Server 2003, or Server 2003
x64, “Digital Signature is not found.” may appear. Click Yes (for Windows 2000) or
Continue Anyway (for Windows XP, XP x64, Server 2003, or Server 2003 x64) and
continue installing.
The folder name differs depending on the OS being used.
Client’s OS
Folder Name
Windows Me or 98
\<Language>\WIN9X
Windows 2000 or XP
\<Language>\WINXP_2K
Windows XP x64
\<Language>\WINXP64
3. Select the name of the printer, click OK, then follow the on-screen instructions.
Downloaded from ManualsPrinter.com Manuals
Using the Printer Software with Windows
92
Chapter 5
Using the Printer Software with Macintosh
About the Printer Software
The printer driver lets you choose from a wide variety of settings to get the best results from
your printer. EPSON Status Monitor lets you check the status of your printer. See
"Monitoring Your Printer using EPSON Status Monitor" on page 107 for more information.
Note:
❏ Mac OS X refers to Mac OS X 10.2.8 or later.
❏ Instructions in this section that are common to all operating systems are for Mac OS X 10.3 as
an example. They may slightly differ from what actually appears on your screen depending on
your operating system; however, the functions are the same.
❏ You have to re-install the printer driver after major operating system updates such as OSX 10.3
to 10.4, but you do not have to re-install it for minor updates such as 10.3.1 to 10.3.2.
Accessing the printer driver
To control your printer and change its settings, use the printer driver. The printer driver
allows you to easily make all the print settings, including paper source, paper size, and
orientation.
Mac OS X
To access the printer driver, register your printer in Printer Setup Utility (for Mac OS X
10.3 and 10.4) or Print Center (for Mac OS X 10.2), click Print on the File menu of any
application, then select your printer.
From an application
❏ To open the Paper Setting dialog box, select Page Setup from the File menu on any
application.
❏ To open the Basic Settings tab, select Print from the File menu on any application.
Note:
The printer driver’s online help provides details on printer driver settings.
Downloaded from ManualsPrinter.com Manuals
Using the Printer Software with Macintosh
93
Making Changes to Printer Settings
Making the print quality settings
You can change the print quality of printouts through settings in the printer driver. With the
printer driver, you can make the print settings by choosing from a list of predefined settings,
or customizing the settings.
Choosing the print quality by using the Automatic setting
You can change the print quality of printouts to favor speed or detail. There are two levels
of print out, Fast and Fine. Fine provides high quality, precise printing, but requires more
memory and slows the printing speed.
When Automatic is selected on the Basic Settings tab, the printer driver takes care of all
detailed settings according to the color setting you select. Color and resolution are the only
settings you need to make. You can change other settings such as paper size or
orientation in most applications.
For Mac OS X users
1. Open the Print dialog box.
2. Select Printer Settings from the drop-down list, and select the Basic Settings tab.
3. Click Automatic, then choose the desired printing resolution from the drop-down list.
Downloaded from ManualsPrinter.com Manuals
Using the Printer Software with Macintosh
94
Using the predefined settings
The predefined settings are provided to help you optimize print settings for a particular kind
of printout, such as presentation documents or images taken by a video or digital camera.
Follow the steps below to use the predefined settings.
For Mac OS X users
1. Open the Print dialog box.
2. Select Printer Settings from the drop-down list, and select the Basic Settings tab.
3. Select Advanced. You will find the predefined settings in the list on the right of
Automatic.
4. Select the most appropriate setting from the list according to the type of document or
image you want to print.
When you choose a predefined setting, other settings such as Printing Mode, Screen, and
Color Management are set automatically. Changes are shown in the Summary drop-down
list in the Print dialog box.
Note:
The printer driver’s online help provides details on printer driver settings.
Downloaded from ManualsPrinter.com Manuals
Using the Printer Software with Macintosh
95
Customizing print settings
Your printer provides for customized print settings if you need more control over the
printout, want to make the most detailed settings available, or just want to experiment.
Follow the steps below to customize your print settings.
For Mac OS X users
1. Open the Print dialog box.
2. Select Printer Settings from the drop-down list, and select Basic Settings tab.
3. Click Advanced, then click More Settings. The following dialog box appears.
4. Choose Color or Black as the Color setting.
5. Choose the desired print quality from the drop-down list.
Note:
When making the other settings, click the
button for details on each setting.
6. Click OK to apply the settings and return to the Basic Settings dialog box.
Note:
For details on each setting, see the online help.
Saving your settings
For Mac OS X users
Use the following procedures to save your custom settings.
Save your custom settings by Save or Save As in the Preset on the Print dialog box. Type
a name for your custom settings in the name box. Your settings will be saved with this
name in the Preset drop-down list.
Downloaded from ManualsPrinter.com Manuals
Using the Printer Software with Macintosh
96
Note:
The Custom Setting option is a standard feature of Mac OS X.
Resizing printouts
You can enlarge or reduce the size of your documents during printing according to the
specified paper size.
For Mac OS X users
Note:
This function is not available with Mac OS X 10.2 and 10.3.
1. Open the Print dialog box.
2. Select Paper Handling from the drop-down list.
3. Select Scale to fit paper size and select the desired paper size from the drop-down
list.
Note:
❏ If you select Scale down only, your documents are not enlarged even if you select the large
paper size.
❏ The Paper Handling settings are a standard feature of Mac OS X 10.4.
Modifying the print layout
You can print either two or four pages onto a single page and to specify the printing order,
automatically resizing each page to fit the specified paper size by using Layout printing.
You can also choose to print documents surrounded by a frame.
For Mac OS X users
Downloaded from ManualsPrinter.com Manuals
Using the Printer Software with Macintosh
97
1. Open the Print dialog box.
2. Select Layout from the drop-down list.
3. Select the number of pages you want to print on one sheet of paper from the drop-down
list.
4. Click Print to start printing.
Note:
The Layout settings are a standard feature of Mac OS X.
Using a watermark
Follow the steps below to use a watermark on your document. In the Layout dialog box,
you can select from a list of predefined watermarks, or you can select a image file (PDF,
PNG, or JPG) or text file as your own custom watermark. For example, you can select the
size, intensity, and position of your watermark.
For Mac OS X users
1. Open the Print dialog box.
2. Select Printer Settings from the drop-down list, and select the Basic Settings tab.
Downloaded from ManualsPrinter.com Manuals
Using the Printer Software with Macintosh
98
3. Click Stamp Function.
4. Select the Watermark check box, then click Watermark Settings.
5. Select a watermark from the Watermark drop-down list.
6. Select the location on the page where you want to print the watermark by dragging the
watermark image on the preview window. To resize the watermark, drag its handle.
Downloaded from ManualsPrinter.com Manuals
Using the Printer Software with Macintosh
99
7. Adjust the image density of the watermark with the Intensity slide bar.
8. You can rotate custom text watermarks by inputting the degrees in the Angle box. Or
select the Rotate by mouse check box, then rotate the text watermark with the pointer
on the preview window.
9. Click OK to apply the settings.
Making a new watermark
You can make a new text or bitmap watermark with the following procedures.
To make a text watermark
For Mac OS X users
1. Open the Print dialog box.
2. Select Printer Settings from the drop-down list, and select the Basic Settings tab.
3. Click Stamp Function.
Downloaded from ManualsPrinter.com Manuals
Using the Printer Software with Macintosh
100
4. Select the Watermark check box, then click Watermark Settings.
5. Click New/Delete.
6. Click Add Text on the User Stamp Setting dialog box.
Downloaded from ManualsPrinter.com Manuals
Using the Printer Software with Macintosh
101
7. Click the Text box to open the Text Input dialog box. Type the watermark text, then click
OK to close the dialog box. Select the Font and Style, then click OK on the Edit Text
dialog box.
8. Type the file name in the Watermark box, then click Save.
Note:
❏ To edit the saved text watermark, select it from the List box, then click Edit Text. After
editing, be sure to click OK to close the dialog box.
❏ To remove the saved text watermark, select it from the List box, then click Mark Delete.
After removing it, be sure to click Save to close the dialog box.
9. Select a custom watermark, that has been saved, from the Watermark drop-down list
on the Watermark Setting dialog box, and then click OK.
To make a bitmap watermark
Before making a custom watermark, you should prepare a image file (PDF, PNG, or JPG).
For Mac OS X users
1. Open the Print dialog box.
2. Select Printer Settings from the drop-down list, and select the Basic Settings tab.
Downloaded from ManualsPrinter.com Manuals
Using the Printer Software with Macintosh
102
3. Click Stamp Function.
4. Select the Watermark check box, then click Watermark Settings.
5. Click New/Delete.
Downloaded from ManualsPrinter.com Manuals
Using the Printer Software with Macintosh
103
6. Click Add Image on the User Stamp Setting dialog box.
7. Select a image file (PDF, PNG, or JPG), then click Open.
8. Type the file name in the Watermark box, then click Save.
Note:
To remove the saved text watermark, select it from the List box, then click Mark Delete. After
removing it, be sure to click Save to close the dialog box.
9. Select the saved custom watermark from the Watermark drop-down list on the
Watermark Setting dialog box, then click OK.
Downloaded from ManualsPrinter.com Manuals
Using the Printer Software with Macintosh
104
Using headers and footers
You can print a header or footer on the top or bottom of a page. The items that can be
printed as a header or footer include user name, computer name, date, date/time, or collate
number.
For Mac OS X users
1. Open the Print dialog box.
2. Select Printer Settings from the drop-down list, and select Basic Settings tab.
3. Click Stamp Function.
4. Select the Header/Footer check box, then click Header/Footer Settings.
Downloaded from ManualsPrinter.com Manuals
Using the Printer Software with Macintosh
105
5. Select the items to be printed for the header and the footer from the drop-down list.
Note:
If you select Collate Number from the drop-down list, the number of copies is printed.
6. Click OK to apply the settings.
Duplex printing
Duplex printing prints on both sides of the paper. You can also do duplex printing manually
without using the Duplex Unit. When printing for binding, the binding edge can be specified
as required to produce the desired page order.
New :Duplex is standard or option.
Doing duplex printing manually
For Mac OS X users
1. Open the Print dialog box.
2. Select Printer Settings from the drop-down list, and select the Basic settings tab.
3. Select the Duplex (Manual) check box, then click Duplex Settings.
4. Select a Binding position from Left, Top, or Right.
5. Specify the Binding Margin for the front and back sides of the paper.
Downloaded from ManualsPrinter.com Manuals
Using the Printer Software with Macintosh
106
6. Select whether the front or back side of the paper is to be printed as the Start Page.
7. Click Print to start printing.
8. After printing on one side, reload the paper into the MP tray with the printed surface
face-down as shown below. Then press the x B&W Start or Color Start button.
Note:
Straighten the paper before loading it. If curled paper is loaded, it may not feed correctly.
Making Extended Settings
You can make various settings in the Extended Settings dialog box, for example Page
Protect.
For Mac OS X users, open the Print dialog box and select Printer Settings from the
drop-down list, then select the Extended Settings tab.
Note:
The printer driver’s online help provides details on printer driver settings.
Monitoring Your Printer using EPSON Status Monitor
Accessing EPSON Status Monitor
For Mac OS X users
Downloaded from ManualsPrinter.com Manuals
Using the Printer Software with Macintosh
107
Note:
After installing the EPSON Status Monitor and before doing the procedure below, you need to open
the Print dialog box so the EPSON Status Monitor can display the current status of the printer.
1. Open the Applications folder on your hard disk drive, then open the Utilities folder.
2. Double-click the Printer Setup Utility (for Mac OS X 10.3 and 10.4) or Print Center
(for Mac OS X 10.2) icon.
3. Click the Utility (for Mac OS X 10.3 and 10.4) or Configure (for Mac OS X 10.2) icon
in the Printer List dialog box.
Note:
You can also access EPSON Status Monitor by clicking the EPSON Status Monitor icon in the
Dock.
Simple Status
The Simple Status window appears when an error or warning occurs. It indicates what type
of error has occurred and offers you a possible solution. The window closes automatically
once the problem is cleared.
This window will appear according to the Pop-up Notice you select in the Notice Settings
dialog box.
If you wish to see more information about the status of your printer, click Details.
Note:
The Simple Status window does not appear automatically while the Status tab in the Detailed
Status dialog box is displayed.
Downloaded from ManualsPrinter.com Manuals
Using the Printer Software with Macintosh
108
Detailed Status
You can monitor detailed printer status on the Status tab in the Detailed Status dialog box.
a.
Icon/Message:
The icon and message show the printer status.
b.
Printer image:
The image at the upper left shows the printer status graphically.
c.
Text box:
The text box next to the printer image displays the current status of the
printer. When a problem occurs, the most probable solution is
displayed.
d.
Close button:
Clicking this button closes the dialog box.
Note:
You can see information about jobs or consumables by clicking on the respective tab.
Consumables Information
You can obtain information on paper sources and consumable products on the
Consumables tab in the Detailed Status dialog box.
Downloaded from ManualsPrinter.com Manuals
Using the Printer Software with Macintosh
109
a.
Paper:
Displays the paper size, the paper type and the approximate
amount of paper remaining in the paper source. Information
on the optional paper cassettes are displayed only if these
options are installed.
b.
Toner:
Indicates the remaining service lives of the toner cartridges.
The toner icon flashes when the toner cartridge has some
error or has neared the end of its service life.
c.
Photoconductor Unit:
Indicates the remaining service life of the photoconductor
unit. The unit icon flashes when the imaging unit has some
error or has neared the end of its service life.
d.
Close button:
Clicking this button closes the dialog box.
Note:
You can see the status of the printer or information about jobs by clicking on the respective tab.
Job Information
You can check job information on the Job Information tab of the Detailed Status dialog
box.
a.
Job Name:
Downloaded from ManualsPrinter.com Manuals
Displays the user’s print job names. Other user’s print jobs are
displayed as --------.
Using the Printer Software with Macintosh
110
b.
Status:
Waiting:
The print job which is waiting
to be printed.
Spooling:
The print job which is being
spooled.
Deleting:
The print job which is being
deleted.
Printing:
The print job which is printed
currently.
Completed:
Displays only your jobs that
have finished printing.
Canceled:
Displays only your jobs that
have been canceled
printing.
c.
User:
Displays the user name.
d.
Computer:
Displays the name of the computer that sent the print job.
e.
Cancel Job button:
Selecting a print job and clicking this button, cancels the
selected print job.
f.
Close button:
Clicking this button closes the dialog box.
g.
Refresh button:
Clicking this button refreshes the information on this menu.
h.
Display settings button:
Displays the Display settings dialog box to select items to be
displayed.
Note:
You can see the status of the printer or information about consumables by clicking on the
respective tab.
Downloaded from ManualsPrinter.com Manuals
Using the Printer Software with Macintosh
111
Notice Settings
To make specific monitoring settings, access EPSON Status Monitor and select Notice
Settings from the file menu. The Notice Settings dialog box appears.
a.
Printer drop-down list (Mac OS X
only):
Select your printer from the drop-down list.
b.
Monitor the printer status check
box:
When this check box is selected, EPSON Status Monitor
monitors the printer status during a print job is
processed.
c
Pop-up Notice:
Sets the notification to be displayed.
d.
Monitor Settings button:
Displays the Monitor Settings dialog box to set the
monitoring interval.
e.
OK button:
Click this button to save the settings and to exit the
dialog box.
f.
Cancel button:
Click this button to exit the dialog box without saving
the settings.
g.
Save button (Mac OS X only):
Saves new changes and closes the dialog box.
Setting Up the USB Connection
Note:
If you are connecting the USB cable to your Macintosh through a USB hub, be sure to connect
using the first hub in the chain. The USB interface may be unstable depending on the hub used. If
you experience problems with this type of setup, connect the USB cable directly to your computer’s
USB connector.
Downloaded from ManualsPrinter.com Manuals
Using the Printer Software with Macintosh
112
For Mac OS X users
1. Open the Applications folder on your hard drive, then open the Utilities folder and
double-click the Printer Setup Utility (for Mac OS X 10.3 and 10.4) or Print Center (for
Mac OS X 10.2) icon.
2. Click Add Printer in the Printer List dialog box.
3. Select EPSON USB from the pop-up menu. Select your printer icon in the Product list,
then click Add.
4. Close Printer Setup Utility (for Mac OS X 10.3 and 10.4) or Print Center (for Mac OS
X 10.2).
Canceling Printing
If the printouts are not what you expected and display incorrect or garbled characters or
images, you may need to cancel printing. When a print job continues on the computer,
follow the instruction below to cancel printing.
For Mac OS X users
Open Printer Setup Utility (for Mac OS X 10.3 and 10.4) or Print Center (for Mac OS X
10.2) and double-click your printer from the print queue. Then, select Delete Job from the
jobs menu.
Uninstalling the Printer Software
When you wish to reinstall or upgrade the printer driver, be sure to uninstall the current
printer software beforehand.
Downloaded from ManualsPrinter.com Manuals
Using the Printer Software with Macintosh
113
For Mac OS X users
1. Quit all applications on the computer.
2. Insert the EPSON printer software CD-ROM in your Macintosh.
3. Double-click the Mac OS X folder.
4. Double-click the Printer Driver folder.
5. Double-click your printer’s icon.
Note:
If the Authorization dialog box appears, enter the Password or phrase, then click OK.
6. When the software license agreement screen appears, read the statement, then click
Accept.
7. Select Uninstall from the menu at the upper left, then click Uninstall.
Follow the on-screen instructions.
Sharing the Printer on a Network
Sharing the printer
This section describes how to share the printer on an AppleTalk network.
The computers on the network can share the printer that is directly connected to one of
them. The computer that is directly connected to the printer is the print server, and the
other computers are the clients which need permission to share the printer with the print
server. The clients share the printer via the print server.
For Mac OS X users
Use the Printer Sharing setting, which is a standard feature of Mac OS X 10.2 or later.
See your operating system’s documentation for details.
Downloaded from ManualsPrinter.com Manuals
Using the Printer Software with Macintosh
114
Chapter 6
Using the PostScript Printer Driver
About the PostScript 3 Mode
Hardware requirements
Your printer must meet the following hardware requirements to be able to use the
PostScript 3 printer driver.
Memory requirements for using the PostScript 3 printer driver are shown below. Install
optional memory modules into your printer if the amount of memory currently installed does
not meet your printing needs.
Minimum memory
Recommended memory
256 MB
(for duplex printing of image data in full color at 600 dpi)
384 MB
(for PDF printing)
System requirements
Your computer must meet the following system requirements to be able to use the Adobe
PostScript 3 printer driver.
New :including the information about Windows 95
For Windows
To use the Adobe PostScript 3 printer driver, your computer must be running Microsoft
Windows XP, XP x64, Me, 98, or 2000. See the following table for details.
Windows XP, XP x64, or 2000
There are no restrictions for these systems.
Windows Me or 98
Minimum
Recommended
Computer
i386, i486, or Pentium processor
i486 or Pentium processor
Hard Disk
6 MB free (for driver installation)
8 MB free (for driver installation)
Downloaded from ManualsPrinter.com Manuals
Using the PostScript Printer Driver
115
Memory
8 MB
16 MB
For Macintosh
Any Macintosh computer to which the printer is connected must be running or Mac OS X
ver. 10.2.8 or later. See the following table for details.
Note:
To use the PostScript 3 printer driver with a USB interface, your computer must be Macintosh OSX
10.3.9 or later.
Mac OS X
Minimum
Recommended
Computer
Power Mac G3, G4, G5, iMac, eMac, PowerBook G3, G4, or iBook
Hard Disk
—
Memory
128 MB
Note:
To use binary data, Epson recommends that you use AppleTalk for the printer’s network
connection. If you use a protocol other than AppleTalk for the network connection, you need to set
Binary to On in the PS3 Menu on the control panel. If you use the printer with a local connection, you
cannot use binary data.
Using the PostScript Printer Driver with Windows
To print in the PostScript mode, you will have to install the printer driver. See the
appropriate sections below for installation instructions according to the interface that you
are using to print.
Installing the PostScript printer driver for the USB interface
Follow the steps below to install the PostScript printer driver for the USB interface.
New :including the information about Windows 95
c
Caution:
Never use EPSON Status Monitor when the printer is connected via a USB port. It may
damage the system.
Downloaded from ManualsPrinter.com Manuals
Using the PostScript Printer Driver
116
Note:
❏ For Windows Me or 98, if the Windows driver and the Adobe PS driver for Epson printers with
a USB connection have already been installed on your computer, skip the step 3 to 6 in the
installation procedure below. If you have not installed an Epson USB printer driver on your
computer, follow all the steps below.
❏ Installing the printer software for Windows XP, XP x64, or 2000 may require administrator
privileges. If you have problems, ask your administrator for more information.
❏ Turn off all virus protection programs before installing the printer software.
1. Make sure that the printer is turned off. Insert the printer software CD-ROM into your
CD-ROM drive.
2. Connect your computer to the printer with a USB cable, then turn on the printer.
3. Install the USB Device Driver.
For Windows Me, select Automatic search for a better driver (Recommended), click
Next, then go to step 6.
For Windows 98, click Next in the Add New Hardware Wizard. Select Search for best
driver for your device (Recommended), then click Next.
Note:
For Windows XP, XP x64, or 2000, a USB Device Driver is installed automatically. Go to step 7.
4. Select Specify a location, then specify the following path for the CD-ROM. If your
CD-ROM drive is D:, the path will be D:\ADOBEPS\ENGLISH\WIN9X\PS_SETUP
Then click Next.
5. Click Next to continue.
6. When installation of the USB Device Driver is done, click Finish.
7. For Windows 2000, Me, or 98, click Start, point to Settings, and click Printers. Then
double-click the Add Printer icon.
For Windows XP or XP x64, click Start, point to Printer and Faxes, and click Add a
printer in the Printer Tasks menu.
8. The Add Printer Wizard appears. Then click Next.
9. For Windows Me or 98, go to step 11.
For Windows XP, XP x64, or 2000, select Local printer, then click Next.
Note:
For Windows XP, XP x64, or 2000, do not select the Automatically detect and install my
Plug and Play printer check box.
10. Select USB as the port the printer is connected to, then click Next.
Downloaded from ManualsPrinter.com Manuals
Using the PostScript Printer Driver
117
11. Click Have Disk and specify the following path for the CD-ROM. If your CD-ROM drive
is D:, the path will be D:\ADOBEPS\ENGLISH\Folder Name\PS_SETUP
Then click OK.
Note:
❏ Change the drive letter as needed for your system.
❏ The folder name differs depending on your operating system version.
Operating system version
Folder Name
Windows Me or 98
WIN9X
Windows XP, XP x64, or 2000
WIN2K_XP
12. Select the printer, then click Next.
13. For Windows Me or 98, select USB as the port the printer is connected to, then click
Next.
For Windows XP, XP x64, or 2000, go to the next step.
14. Follow the on-screen instructions for the rest of the installation.
15. When installation is done, click Finish.
Installing the PostScript printer driver for the network interface
See the appropriate sections below according to your operating system, and follow the
instructions to install the PostScript printer driver for the network interface.
New :including the information about Windows 95 / Network is standard or option
Note:
❏ Set the network settings before installing the printer driver. Refer to the Network Guide that
comes with your printer for details.
❏ Turn off all virus protection programs before installing the printer software.
For Windows XP, XP x64, or 2000 users
1. Make sure that the printer is turned on. Insert the printer software CD-ROM into your
CD-ROM drive.
2. For Windows XP, or XP x64, click Start, point to Printer and Faxes, and click Add a
printer in the Printer Tasks menu.
For Windows 2000, click Start, point to Settings, and click Printers. Then double-click
the Add Printer icon.
3. The Add Printer Wizard appears. Then click Next.
Downloaded from ManualsPrinter.com Manuals
Using the PostScript Printer Driver
118
4. Select Local printer, then click Next.
Note:
Do not select the Automatically detect and install my Plug and Play printer check box.
5. Select the Create a new port check box and select Standard TCP/IP Port from the
drop-down list. Click Next.
6. Click Next to continue.
7. Specify the IP address and port name, then click Next.
8. Click Finish.
9. Click Have Disk in the Add Printer Wizard and specify the following path for the
CD-ROM. If your CD-ROM drive is D:, the path will be
D:\ADOBEPS\ENGLISH\WIN2K_XP\PS_SETUP. Then click OK.
Note:
Change the drive letter as needed for your system.
10. Select the printer and click Next.
11. Follow the on-screen instructions for the rest of the installation.
12. When installation is done, click Finish.
For Windows Me or 98 users
1. Install the EpsonNet Print. Refer to “Installing EpsonNet Print” in the Network Guide to
find the instructions.
2. Install the printer driver. See "Installing the PostScript printer driver for the USB
interface" on page 116 for details.
3. Set the printer port to EpsonNet Print Port. Refer to “Configuring the Printer Port” in
the Network Guide to find the instructions.
Note:
High-speed Printing (RAW) is not supported.
Accessing the PostScript printer driver
You can access the PostScript printer driver directly from any application programs, from
your Windows operating system.
New :delete unnecessary information
Downloaded from ManualsPrinter.com Manuals
Using the PostScript Printer Driver
119
The printer settings made from many Windows applications override the setting made
when the printer driver is accessed from the operating system, so you should access the
printer driver from your application to make sure that you get the result you want.
From the application
To access the printer driver, click the Print or Page Setup from the File menu. You also
need to click Setup, Options, Properties, or a combination of these buttons.
For Windows XP or XP x64 users
To access the printer driver, click Start, click Printers and Faxes, then click Printers.
Right-click your printer icon, then click Printing Preferences.
For Windows Me or 98 users
To access the printer driver, click Start, point to Settings, then click Printers. Right-click
your printer icon, then click Properties.
For Windows 2000 users
To access the printer driver, click Start, point to Settings, then click Printers. Right-click
your printer icon, then click Printing Preferences.
Making changes to PostScript printer settings
You can change the PostScript printer settings in the PostScript printer driver. Online help
is available to help you with the printer driver settings.
Using online help
If you want help on a particular item, click the “?” icon on the top-right corner of the dialog
box’s title bar, then click the name of the setting that you want more information on. An
explanation of the setting and its options will be displayed.
Using AppleTalk under Windows 2000
Use the following settings if your machine is running Windows 2000, and the printer is
connected through an network interface using the AppleTalk protocol:
❏ Use SelecType to set the Emulation Mode-Network item to PS3. Using the default Auto
setting will cause an extra, unneeded page to be printed.
Downloaded from ManualsPrinter.com Manuals
Using the PostScript Printer Driver
120
❏ On the Device Settings sheet of the printer’s Properties dialog box, make sure that
SEND CTRL-D Before Each Job and SEND CTRL-D After Each Job are set to No.
❏ TBCP (Tagged binary communications protocol) cannot be used as the Output
Protocol setting.
❏ On the Job Settings sheet of the printer’s Properties dialog box, make sure to clear the
Job Management On check box.
Using the PostScript Printer Driver with Macintosh
Installing the PostScript printer driver
Follow the steps below to install the PostScript printer driver.
Note:
Make sure that no applications are running on your Macintosh before installing the printer driver.
For Mac OS X users
Note:
Make sure that Printer Setup Utility (for Mac OS X 10.3 and 10.4) or Print Center (for Mac OS X
10.2) is not open.
1. Insert the printer software CD-ROM into your CD-ROM drive.
2. Double-click the CD-ROM icon.
3. Double-click Mac OS X, then double-click PS Installer.
Note:
For Mac OS X 10.2, if the Authenticate window appears, enter the user name and password for
an administrator.
4. The Install EPSON PostScript Software screen appears, click Continue, then follow
the on-screen instructions.
5. Easy Install is displayed on the screen. Click Install.
Note:
For Mac OS X 10.3 and 10.4, if the Authenticate window appears, enter the user name and
password for an administrator.
6. When installation is done, click Close.
Downloaded from ManualsPrinter.com Manuals
Using the PostScript Printer Driver
121
Selecting the printer
After installing the PostScript 3 printer driver, you need to select the printer.
Selecting a printer in a network environment
If the printer is connected through the Ethernet interface or an optional network card.
For Mac OS X users
Follow the steps below to select the printer.
Note:
❏ You cannot use FireWire for printer connection in the PostScript 3 mode. Although EPSON
FireWire appears in the interface pop-up list, it cannot be used with the PostScript 3 printer
driver.
❏ You need to make the settings for your installed options manually when the printer is connected
using USB, IP printing, or Bonjour (Rendezvous). When the printer is connected using
AppleTalk, the printer software automatically makes the settings.
❏ Make sure to specify ASCII as the data format in the application.
1. Open the Applications folder, open the Utilities folder, then double-click Printer
Setup Utility (for Mac OS X 10.3 and 10.4) or Print Center (for Mac OS X 10.2).
The Printer List window appears.
2. Click Add in the Printer List window.
3. Select the protocol or the interface that you are using from the pop-up list.
Note for Appletalk users:
Make sure to select AppleTalk. Do not select EPSON AppleTalk, because it cannot be used
with the PostScript 3 printer driver.
Note for IP Printing users:
❏ Make sure to select IP Printing. Do not select EPSON TCP/IP, because it cannot be used
with the PostScript 3 printer driver.
❏ After selecting IP Printing, enter the IP address for the printer, then make sure to select the
Use default queue on server check box.
Note for USB users:
Make sure to select USB. Do not select EPSON USB, because it cannot be used with the
PostScript 3 printer driver.
4. Follow the instructions as appropriate below to select your printer.
Downloaded from ManualsPrinter.com Manuals
Using the PostScript Printer Driver
122
AppleTalk
Select your printer from the Name List, then select Auto Select from the Printer Model
List.
IP Printing
Select Epson from the Name List, then select your printer from the Printer Model List.
USB
Select your printer from the Name List, then select your printer from the Printer Model
List.
Note for Mac OS X 10.3 and 10.4 users:
If ESC/Page driver is not installed, your printer model is automatically selected in the Printer
Model List when you select your printer from the Name List while the printer is on.
Bonjour (Rendezvous)
Select your printer, the printer name is followed by (PostScript), from the Name List.
Your printer model is automatically selected in the Printer Model List.
Note for USB (for Mac OS X 10.2) or Bonjour (Rendezvous) users:
If your printer model is not automatically selected in the Printer Model list, you need to reinstall
the PostScript printer driver. See "Installing the PostScript printer driver" on page 121.
5. Click Add.
Note for IP Printing users, USB or Bonjour (Rendezvous) users:
Select your printer from the Printer list, then select Show Info from the Printers menu. The
Printer Info dialog box appears. Select Installable Options from the pop-up list, then make the
necessary settings.
6. Confirm that your printer’s name is added to the Printer List. Then quit Printer Setup
Utility (for Mac OS X 10.3 and 10.4) or Print Center (for Mac OS X 10.2).
Accessing the PostScript printer driver
To control your printer and change its settings, use the printer driver. The printer driver
allows you to easily make all the print settings, including paper source, paper size, and
orientation.
For Mac OS X users
To access the PostScript printer driver, register your printer in Printer Setup Utility (for
Mac OS X 10.3 and 10.4) or Print Center (for Mac OS X 10.2), click Print on the file menu
of any application, then select your printer.
Downloaded from ManualsPrinter.com Manuals
Using the PostScript Printer Driver
123
Making changes to PostScript printer settings
You can change the PostScript printer settings in the PostScript printer driver. Balloon help
is available to help you with the printer driver settings.
Using Balloon Help
Follow the steps below to use Balloon Help.
1. Click the Help menu, then select Show Balloons.
2. Place your cursor over the item that you need help with. Information on that item is
displayed inside a floating balloon.
Changing the printer setup settings
You can change or update the printer setup settings according to the options installed in
your printer.
For Mac OS X users
Follow the steps below to change the settings.
1. Access the printer driver. The Printer List window appears.
2. Select the printer from the list.
3. Select Show Info from the Printers menu. The Printer Info dialog box appears.
4. Make necessary changes to the settings, then close the dialog box.
5. Quit Printer Setup Utility (for Mac OS X 10.3 and 10.4) or Print Center (for Mac OS X
10.2).
Downloaded from ManualsPrinter.com Manuals
Using the PostScript Printer Driver
124
Chapter 7
Using the PCL6/PCL5 Printer Driver
About the PCL Mode
Hardware requirements
Your printer must meet the following hardware requirements to be able to use the
PCL6/PCL5 printer driver.
Memory requirements for using the PCL6/PCL5 printer driver are shown below. Install
optional memory modules into your printer if the amount of memory currently installed does
not meet your printing needs.
Minimum memory
Recommended memory
128 MB* (for a simple print job at 600 dpi)
256 MB* or more
* Printing may not be possible with this amount of memory, depending on the specifics of the job being
printed.
System requirements
Your computer must meet the following system requirements to be able to use the
PCL6/PCL5 printer driver.
To use the PCL6/PCL5 printer driver, your computer must be running Microsoft Windows
XP or have installed the 2000 Service Pack 3 or later.
For Windows XP or 2000
Minimum
Recommended
Computer
IBM PC series or IBM compatible with
Pentium or higher CPU
IBM PC series or IBM compatible with
Pentium II or higher CPU
Hard Disk
10-25 MB free (for driver installation)
Memory
128 MB (256 MB for Server 2003)
256 MB
Display
Super VGA supporting 640 × 480
Super VGA supporting 800 × 600 or
more
Downloaded from ManualsPrinter.com Manuals
Using the PCL6/PCL5 Printer Driver
125
For Windows XP x64 or 2003 Server x64
Minimum
Recommended
Computer
IBM PC series or IBM compatible with Intel EM64T or AMD/64 CPU
Hard Disk
10-25 MB free (for driver installation)
Memory
256 MB
512 MB
Display
Super VGA supporting 640 × 480
Super VGA supporting 800 × 600 or
more
Using the PCL6/PCL5 Printer Driver
To print in the PCL mode, you will have to install the printer driver. Consult the customer
support in your region regarding how to get the printer driver.
Note:
The PCL6/PCL5 printer driver and EPSON Status Monitor cannot be used at the same time.
Downloaded from ManualsPrinter.com Manuals
Using the PCL6/PCL5 Printer Driver
126
Chapter 8
Scanning
About Scanning Mode
System Requirements
Make sure that your system meets the requirements in these sections before using it with
your scanner.
Check your system to see which type of interface you are using. Then see the appropriate
section for your system below.
For Windows system
USB 2.0 ports
System
Microsoft Windows XP Home Edition, Professional, or Professional x64 Edition, or
2000 Professional
(Operating systems upgraded from Windows Millennium Edition, 98, and 95 are
not supported by the software.)
USB 2.0 Host Driver by Microsoft must be used.
Interface
USB port (Type A) built into the main board
Display
SVGA or higher resolution monitor
800 × 600, 16-bit (High Color) screen resolution or higher
(Color and tone reproduction are subject to the display capability of your
computer system, including the video card, display monitor, and software. See
your system documentation for details.)
Note:
❏ USB 2.0 is backward-compatible with USB 1.1.
❏ Contact your software manufacturer to find out if their software works in Windows XP
Professional x64 Edition.
Downloaded from ManualsPrinter.com Manuals
Scanning
127
USB 1.1 ports
System
Microsoft Windows XP Home Edition, Professional, or Professional x64 Edition,
Millennium Edition, 98 Second Edition, or 2000 Professional
(Operating systems upgraded from Windows 95 are not supported by the
software.)
The USB interface must be used in full speed mode.
Interface
USB port (Type A) built into the main board
Display
SVGA or higher resolution monitor
800 × 600, 16-bit (High Color) screen resolution or higher
(Color and tone reproduction are subject to the display capability of your
computer system, including the video card, display monitor, and software. See
your system documentation for details.)
Note:
Contact your software manufacturer to find out if their software works in Windows XP Professional
x64 Edition.
For Macintosh system
USB 2.0 ports
System
Macintosh computers running Mac OS X 10.2.8 or later
Fast User Switching on Mac OS X 10.3 is not supported.
Interface
Macintosh USB
Display
Color monitor with 800 × 600 screen resolution or higher, and 32,000 or more
colors
(Color and tone reproduction are subject to the display capability of your
computer system, including the video card, display monitor, and software. See
your system documentation for details.)
Note:
❏ USB 2.0 is backward-compatible with USB 1.1.
❏ Epson Scan does not support the UNIX File System (UFS) for Mac OS X. You must install
Epson Scan on a disk or in a partition that does not use UFS.
USB 1.1 ports
System
Macintosh computers running Mac OS X 10.2.8 or later
Fast User Switching on Mac OS X 10.3 is not supported.
Interface
Macintosh USB
Downloaded from ManualsPrinter.com Manuals
Scanning
128
Display
Color monitor with 800 × 600 screen resolution or higher, and 32,000 or more
colors
(Color and tone reproduction are subject to the display capability of your
computer system, including the video card, display monitor, and software. See
your system documentation for details.)
Note:
Epson Scan does not support the UNIX File System (UFS) for Mac OS X. You must install Epson
Scan on a disk or in a partition that does not use UFS.
Setting Your Originals
Before scanning a document, remember to respect the rights of copyright owners. Do not
scan published text or images without first checking their copyright status.
Document table
When using the document table, set an original one sheet at a time.
c
Caution:
❏ Do not place heavy objects on the glass surface of the document table. Also, do not press
the glass surface with too much force.
❏ To scan an original correctly, set the transportation lock on the left side of the document
table in the
unlocked position.
*
* Transportation lock
Downloaded from ManualsPrinter.com Manuals
Scanning
129
1. Make sure the product is turned on, and then open the document cover gently.
2. Place an original on the document table, with the side to be scanned facing down.
Use the document guide strip to align the horizontal edge of the document.
Note:
❏ The area with a width of maximum 1.5 mm from the horizontal edge and 1.5 mm from the
vertical edge is not scanned.
1. Maximum unreadable area of 1.5 mm
2. Maximum unreadable area of 1.5 mm
2
1
Downloaded from ManualsPrinter.com Manuals
Scanning
130
❏ If you plan to preview images using the Thumbnail method, while scanning multiple
photographs, position each photograph at least 20 mm apart from its adjacent photographs.
❏ Always keep the document table clean.
3. Close the document cover gently so that the original does not move.
Note:
❏ Do not leave photographs on the document table for an extended period of time as they may
stick to the glass.
❏ Make sure the document is flat against the glass surface, otherwise the image will appear
fuzzy and out of focus. Also be sure to close the document cover to prevent interference
from external light.
For the detailed scanning procedure, see "Selecting Epson Scan Settings" on page 139.
Auto Document Feeder
The Auto Document Feeder can automatically load up to 50 sheets. You can use the
following documents with the Auto Document Feeder.
Paper Type
Paper Size
Capacity
Plain paper,
EPSON Color
Laser Paper,
EPSON ink jet
paper,
Recycled
paper
Weight: 50 to
124 g/m²
B5*, A4, Letter,
Legal
Up to 50 sheets (a
stack 8 mm thick)
* Can not be used for fax transmission.
Downloaded from ManualsPrinter.com Manuals
Scanning
131
c
Caution:
To scan an original correctly, set the transportation lock on the left side of the document table
in the
unlocked position.
*
* Transportation lock
Note:
When scanning an original using the Auto Document Feeder, scanning quality may be lower than
when scanning an original on the document table.
Follow the steps below to load documents in the Auto Document Feeder.
1. Slide the edge guides all the way outward.
Downloaded from ManualsPrinter.com Manuals
Scanning
132
2. Insert a stack of documents face-up in the Auto Document Feeder until it meets
resistance, and then move the edge guides so they are flush with the edges of your
documents.
Note:
❏ Make sure the ADF cover is closed firmly. If the ADF cover is open, the document table is
preemptively scanned and a blank copy is output even if an original is set on the Auto
Document Feeder.
❏ If you load multiple pages in the Auto document Feeder, the pages will be fed from the top and
then ejected face-down.
Starting a Scan With Epson Scan
If you want to scan an image and save it directly to a file, you can start Epson Scan as a
“standalone” program.
1. Place your document or photo on the scanner. See "Setting Your Originals" on page
129 for instructions.
2. Do one of the following to start Epson Scan.
Windows:
Double-click the EPSON Scan icon on your desktop.
Or select Start > All Programs or Programs > EPSON Scan > EPSON Scan.
Mac OS X:
Open the Applications folder and double-click the EPSON Scan icon.
The Epson Scan window appears.
Downloaded from ManualsPrinter.com Manuals
Scanning
133
3. EPSON Scan starts in Office Mode the first time you open it. If necessary, click the
arrow in the Mode box at the top right of the EPSON Scan window and select Office
Mode.
You see the Office Mode window:
For instructions on using Office Mode, see "Selecting Basic Settings" on page 142.
If the Mode setting in the upper right corner of the window is set to Home or
Professional Mode, you see a different EPSON Scan settings window. For
instructions on using Home or Professional Mode, see "Selecting Basic Settings" on
page 142.
Note:
If you want to change the scanning mode, see "Changing the Scan Mode" on page 142.
Downloaded from ManualsPrinter.com Manuals
Scanning
134
Starting a Scan With the Epson Creativity Suite
When you scan with the Epson Creativity Suite, you first scan and save the image file using
Epson File Manager. Then you use the other project options in the Epson File Manager
window to print, attach, or import your image files.
1. Place your document or photo on the scanner. See "Setting Your Originals" on page
129.
2. Do one of the following to start Epson File Manager:
Windows:
Double-click the EPSON File Manager icon on your desktop.
Or, select Start > Programs or All Programs > EPSON Creativity Suite > EPSON
File Manager.
Mac OS X:
Double-click the EPSON File Manager for X icon on your desktop.
Or, open the Applications > EPSON > Creativity Suite > File Manager folders and
double-click the EPSON File Manager for X icon.
You see a window asking if you want to see program instructions.
3. If you want to view the program instructions, click Next and follow the on-screen
instructions.
Note:
To turn off display of the program instruction window, click the Do Not Show Next Time check
box.
Downloaded from ManualsPrinter.com Manuals
Scanning
135
You see the Epson File Manager window.
4. Click the scanner icon in Load Photos in the upper left corner. You see an Epson Scan
window.
5. EPSON Scan starts in Office Mode the first time you open it. If necessary, click the
arrow in the Mode box at the top right of the EPSON Scan window and select Office
Mode.
Downloaded from ManualsPrinter.com Manuals
Scanning
136
You see the Office Mode window:
For instructions on using Office Mode, see "Selecting Basic Settings" on page 142.
If the Mode setting in the upper right corner of the window is set to Home or
Professional Mode, you see a different EPSON Scan settings window. For
instructions on using Home or Professional Mode, see "Selecting Basic Settings" on
page 142.
Note:
If you want to change the scanning mode, see "Changing the Scan Mode" on page 142.
6. Your image is displayed as a thumbnail in the Epson File Manager window. See
"Finishing the Scan" on page 158 for details.
Note:
For more information about Epson File Manager, open the Help menu and select EPSON File
Manager User’s Guide.
Downloaded from ManualsPrinter.com Manuals
Scanning
137
Starting a Scan With Another Scanning Program
You can use any TWAIN-compliant scanning program, such as Adobe Photoshop
Elements or ArcSoft PhotoImpression, to scan with your scanner. You open the program,
select Epson Scan as your scanning program, and scan. When you are finished, the
scanned image opens in your scanning program so you can modify, print, and save it.
1. Place your document or photo on the scanner. See "Setting Your Originals" on page
129 for instructions.
2. Start your scanning program.
Double-click the program icon from your desktop, if it is available, or do one of the
following:
Windows:
Select Start > All Programs or Programs >program folder > program icon.
Mac OS X:
Open the Applications folder, select the program folder, and click the program icon.
3. Do one of the following:
Photoshop Elements and other programs:
Open the File menu and select Import or Acquire.
PhotoImpression:
Open the File menu and select Get Photo, then select Camera/Scanner.
4. Select your scanner.
In some programs, you must select the scanner as the “source” first. If you see a Select
Source option, choose it and select your scanner there first.
Note for Windows XP users:
Do not choose a WIA option for your scanner from the Import or Acquire list; your scanner will
not work correctly.
Epson Scan starts automatically. For instructions on using it, see "Selecting Epson
Scan Settings" on page 139.
Downloaded from ManualsPrinter.com Manuals
Scanning
138
Selecting Epson Scan Settings
Overview of the Epson Scan Modes
Epson Scan lets you control all aspects of scanning and includes three modes:
❏ Office Mode lets you quickly select settings for scanning text documents and check
their effects with a preview image. EPSON Scan opens in this mode the first time you
use it.
See "Changing the Scan Mode" on page 142 for instructions on switching to Office
Mode.
See "Selecting Basic Settings" on page 142 for scanning steps.
❏ Home Mode lets you customize some scanning settings and check their effects with a
preview image.
Home Mode is best when you want to preview images of photos before scanning them.
You can size the image as you scan, adjust the scan area, and adjust many image
settings, including color restoration, dust removal, and backlight correction.
See "Changing the Scan Mode" on page 142 for instructions on switching to Home
Mode.
See "Selecting Basic Settings" on page 142 for scanning steps.
❏ Professional Mode gives you total control of your scanning settings and lets you check
their effects with a preview image.
Professional Mode is best when you want to preview your image and make extensive,
detailed corrections to it before scanning. You can sharpen, color correct, and enhance
your image with a full array of tools, including color restoration, dust removal, and
backlight correction.
See "Changing the Scan Mode" on page 142 for instructions on switching to
Professional Mode.
See "Selecting Basic Settings" on page 142 for scanning steps.
Selecting File Save Settings
When you see the File Save Settings window, you need to select the location, name, and
format of the scanned image file you want to save.
Downloaded from ManualsPrinter.com Manuals
Scanning
139
1. Click the
File Save Settings button to the right of the Scan button.
2. In the File Save Settings window, specify the file folder in which you want to save your
scanned image. Click the My Documents or My Pictures radio button (Windows), or
the Documents or Pictures radio button (Mac OS X).
If you want to select another folder, click Other radio button, then click Browse
(Windows) or Choose (Mac OS X) button and select the folder. If you want to save your
image on the desktop, simply click Other.
3. Specify a file name prefix with an alphanumeric character string. A 3-digit number is
automatically added to the file name, but you can change the Start Number if you like.
If you are scanning multiple images at once, each image will receive a different 3-digit
number.
Note:
❏ With Windows, the following characters cannot be used in the prefix.
\, /, :, ., *, ?, ", <, >, |
❏ With Mac OS X, you cannot use a colon (:) in the prefix.
4. Select a file format as described in the following table. Depending on the format, the
Options button may be available for selecting detailed settings.
Format (File
Extension)
Explanation
BITMAP
(*.BMP)
(Windows
only)
A standard image file format for Windows. Most Windows programs,
including word processing programs, can read and prepare images in this
format.
Downloaded from ManualsPrinter.com Manuals
Scanning
140
JPEG (*.JPG)
A compressed file format in which the compression level can be selected.
The JPEG format lets you highly compress image data. However, the
higher the compression, the lower the image quality. Any lost image
quality data cannot be restored and the quality deteriorates each time
the data is saved. The TIFF format is recommended when modification
and retouching are required.
Multi-TIFF
(*.TIF)
A TIFF format where multiple pages are saved to the same file. You can
also edit the scanned images before saving them. See Epson Scan Help
for details. To open Multi-TIFF files, you need a program that supports it.
PDF (*.PDF)
A document format that can be read on both Windows and Macintosh
systems (platform independent). To use PDF documents, you need Adobe
Reader or Acrobat. Multi-page documents can be saved as one PDF file.
When you save color or grayscale images in PDF, you can select a
compression level. You can also edit the scanned images before saving
them. See "Scanning to a PDF File" on page 172 for details.
PICT (*.PCT)
(Macintosh
only)
A standard image file format for Macintosh. Most Macintosh programs,
including word processing programs, can read and prepare images in this
format.
PRINT Image
Matching II
JPEG (*.JPG)
or TIFF (*.TIF)
A file format that includes PRINT Image Matching II data for enhanced
quality and a wider color range. PRINT Image Matching II compatible
printers can then print using this data for brilliant, true-to-life results. (PRINT
Image Matching data does not affect the way the image displays on a
screen.) Available in JPEG or TIFF format.
TIFF (*.TIF)
A file format created for exchanging data between many programs, such
as graphic and DTP software. When scanning black & white images, you
can specify the compression type.
5. The check boxes at the bottom of the window give you these options:
❏ Overwrite any files with the same name
Select this option if you want to reuse the selected file name and location and
overwrite previous files with the same names.
❏ Show this dialog box before next scan
Select this option if you want the File Save Settings window to appear automatically
before you scan (Home or Professional Mode only). If you deselect it, you must click
the
File Save Settings button to open the window in Home or Professional
Mode.
❏ Open image folder after scanning
Select this option if you want Epson File Manager, Windows Explorer, or the
Macintosh Finder to automatically open the folder where your scanned image is
saved when Epson Scan finishes scanning.
6. Click OK.
7. Click Preview, then click Scan.
Downloaded from ManualsPrinter.com Manuals
Scanning
141
The scanned image is automatically saved in the file and location you chose.
Changing the Scan Mode
To change the scan mode, click the arrow in the Mode box at the top right of the Epson
Scan window. Then select the mode you want to use from the list that appears.
Note:
The mode you select remains in effect when you start Epson Scan the next time.
For instructions on scanning using these modes, see "Selecting Basic Settings" on page
142.
Selecting Basic Settings
When you start Epson Scan in Home or Professional Mode, you see the main Epson Scan
window.
Downloaded from ManualsPrinter.com Manuals
Scanning
142
Office Mode
Downloaded from ManualsPrinter.com Manuals
Scanning
143
Home Mode
Downloaded from ManualsPrinter.com Manuals
Scanning
144
Professional Mode
Before you scan your document or photo, you need to select these basic settings.
❏ Original settings. These tell Epson Scan the type of document or photo you are
scanning.
❏ Destination settings. These tell Epson Scan how you plan to use your scanned image
so it can select the correct default resolution (scan quality) for you.
Follow these steps to select the basic settings for a document or photo in Epson Scan.
1. Do one of the following to select your document type.
Office or Home mode:
Click the arrow to open the Document Type list and select the type of original you are
scanning. Then click the Color, Grayscale, or Black & White radio button to select the
colors in the original.
Professional mode:
Click the arrow to open the Document Type list and select Reflective. Then click the
arrow in the Auto Exposure Type list and select Document or Photo.
Downloaded from ManualsPrinter.com Manuals
Scanning
145
2. Do one of the following to select your destination setting(s).
Home mode:
Click the radio button for the way you plan to use the scanned image in the Destination
box:
❏ Screen/Web radio button for images you will view only on a computer screen or
post on the web.
❏ Printer radio button for images you will be printing or converting to editable text with
an OCR (Optical Character Recognition) program.
❏ Other radio button if you want to select a specific resolution for other purposes.
Professional mode:
Click the arrow to open the Image Type list and select the detailed image type you are
scanning.
Image Type setting
Type of image you are scanning
24-bit Color
Color photo
Color Smoothing
Color graphics, such as a chart or graph
8-bit Grayscale
Black-and-white photo with just a few shades of gray
Black & White
Document with black text and/or line art
3. In Home Mode, Epson Scan selects a default resolution setting based on the original
and destination settings you select. See "Selecting the Scan Resolution" on page 147
to continue scanning.
Downloaded from ManualsPrinter.com Manuals
Scanning
146
Selecting the Scan Resolution
In Office Mode, you can select the resolution you want at any time.
In Home Mode, you can change the resolution only if you click Other radio button as the
Destination setting.
In Professional Mode, you can select the resolution you want at any time.
Before you select the scan resolution, you should consider whether you will enlarge the
images before or after you scan. Follow these guidelines.
❏ You will not be enlarging the images.
If you will scan the images at 100% size or smaller and will not enlarge them later, you
can accept the Resolution setting selected by Epson Scan based on your original and
destination settings. (Home Mode only)
Downloaded from ManualsPrinter.com Manuals
Scanning
147
❏ You will enlarge the images as you scan them (increase the Target Size setting).
If you will enlarge the images in Epson Scan so you can use them at a larger size, you
can accept the Resolution setting selected by Epson Scan based on your original and
destination settings. (Home Mode only)
❏ You will scan the images at their original size, but then enlarge them later in an
image-editing program.
If you plan to enlarge your images later in an image-editing program, you need to
increase the Resolution setting to retain a high image quality after enlargement.
Increase the resolution by the same amount you will increase the image size. For
example, if the resolution is 300 dpi (dots per inch), but you will increase the image size
by 200% in an image-editing program, change the Resolution setting to 600 dpi in
Epson Scan.
Click the arrow next to the Resolution list and select the number of dots per inch at which
you want to scan. See the table below for some guidelines.
What you will do with the scanned image
Suggested scan resolution
Send via e-mail, upload to web, view only
on the screen
96 to 150 dpi
Print, convert to editable text (OCR)
300 dpi
Fax
200 dpi
Enlarge after scanning at 100%
Increase Resolution setting by same amount you
will increase image size after scanning
After selecting the Resolution, you can preview your image and make any necessary
adjustments. See "Previewing and Adjusting the Scan Area" on page 148 to continue
scanning.
Previewing and Adjusting the Scan Area
Once you have selected your basic settings and resolution, you can preview your image
and select or adjust the area of the image(s) you want to scan. Epson Scan displays the
preview image(s) in a separate Preview window on your screen.
❏ Full-size preview displays your previewed images in their entirety. You must select the
scan area and make any image quality adjustments manually. This is the default
preview type in Office and Professional Mode, but you can also select it in Home Mode,
if available.
Note:
❏ The thumbnail preview is not available for the model with the Auto Document Feeder installed.
Follow these steps to preview your image(s).
Downloaded from ManualsPrinter.com Manuals
Scanning
148
1. Click the Preview button toward the bottom of the Epson Scan window.
Epson Scan prescans your image(s) and displays them in one of the following Preview
windows.
Full-size preview
Downloaded from ManualsPrinter.com Manuals
Scanning
149
Thumbnail preview
Note:
If the edge of your document or photo is not scanned, move it away from the edge of the
document table slightly.
2. If you are viewing the thumbnail preview, you can do the following to adjust the
image(s).
❏ To zoom in on an image, double-click its thumbnail, or click the thumbnail and then
click the Full Size tab near the top of the Preview window.
❏ To rotate an image or flip it horizontally (like a mirror image), click its thumbnail and
click the
rotation icon or
mirroring icon.
❏ To adjust the scan area to crop your image, you can create and move a marquee
that marks the edges of your scan. See "Adjusting the Scan Area (Marquee)" on
page 151 for instructions.
❏ To adjust the image quality, click the image(s) you want to modify and make the
adjustments as described in "Adjusting the Color and Other Image Settings" on
page 153. If you want to apply the adjustments you have made to all your images,
click the All button.
3. If you are viewing the full-size preview, you can do the following to adjust the image(s).
Downloaded from ManualsPrinter.com Manuals
Scanning
150
❏ To select your scan area, click the
auto locate icon to place a marquee that
marks the edges of your image area. You can move the marquee to change the
scan area. See "Adjusting the Scan Area (Marquee)" on page 151 for instructions.
Note:
If you are going to scan at a different size than your original, you must first select your
Target Size and automatically create a marquee that is proportioned to that size. See
"Selecting the Scan Size" on page 155 for instructions. You can then copy the marquee and
place it on each image you will scan at that size.
❏ To zoom in on an image, click inside the scan area and click the Zoom button.
Epson Scan prescans again and displays a larger preview on the Zoom tab. (Your
other images are still previewed at the original size on the Preview tab.)
❏ To adjust the image quality, click the image(s) you want to modify and make the
adjustments as described in "Adjusting the Color and Other Image Settings" on
page 153.
4. When you have finished adjusting the scan area, and modifying the color and image
settings, you can select the size of your scanned image, if you have not already
selected it. See "Selecting the Scan Size" on page 155 for instructions.
Adjusting the Scan Area (Marquee)
A marquee is a moving dotted line that appears on the edges of your preview image to
indicate the scan area.
You can move the marquee, adjust its size, and create multiple marquees on one image
(full-size preview only) to scan different image areas in separate scan files. Follow these
steps.
1. To draw a marquee, move your cursor over a preview image. The pointer becomes a
set of cross-hairs.
Downloaded from ManualsPrinter.com Manuals
Scanning
151
2. Position the pointer in the area where you want to place the corner of your marquee and
click. Hold down the mouse button and drag the cross-hairs over the image to the
opposite corner of the desired scan area. Then release the mouse button. You see the
moving dotted line of the marquee.
3. Do one of the following to adjust the marquee.
❏ To move the marquee, position your cursor inside the marquee. The pointer
becomes a hand. Click and drag the marquee to the desired location.
❏ To resize the marquee, position your cursor over the edge or corner of the marquee.
The pointer becomes a straight or angled double-arrow. Click and drag the edge or
corner to the desired size.
Note:
To restrict movement of the marquee to vertical or horizontal only, hold down the Shift key as
you move the marquee. To restrict sizing of the marquee to the current proportions, hold down
the Shift key as you resize the marquee.
4. To draw multiple marquees (up to 50; the full-size preview only), you can just draw them
as described in steps 1 through 3, or click the
copy marquee icon to create
additional marquees of the same size. You can move and resize all the marquees as
described in step 3. To delete a marquee, click inside it and click the
delete
marquee icon.
Downloaded from ManualsPrinter.com Manuals
Scanning
152
Adjusting the Color and Other Image Settings
Once you have previewed your images and adjusted the scan area, you can modify the
image quality, if necessary. Epson Scan offers a variety of settings for improving color,
sharpness, contrast, and other aspects affecting image quality.
Before you make adjustments, be sure to click the image or marquee for the area you want
to adjust. In Professional Mode, you also need to scroll down to the Adjustments area of
the main Epson Scan window.
The table below describes the settings available. For details on adjusting these settings,
click Help in the Epson Scan window.
When you are finished making adjustments, you can size your scanned images (see
"Selecting the Scan Size" on page 155) or go ahead and scan (see "Finishing the Scan" on
page 158).
Setting
Available mode(s) and description
Color Restoration
Home and Professional:
Restores the colors in faded photos automatically.
Dust Removal
Home and Professional:
Removes dust marks from your originals automatically.
Backlight
Correction
Home and Professional:
Removes shadows from photos that have too much background light.
Brightness
Home and Professional:
Adjusts the overall image lightness and darkness.
In Home Mode, click the Brightness button to access the Brightness setting.
In Professional Mode, click the
Image Adjustment button to access the
Brightness setting.
Contrast
Home and Professional:
Adjusts the difference between the light and dark areas of the overall
image.
In Home Mode, click the Brightness button to access the Contrast setting.
In Professional Mode, click the
Image Adjustment button to access the
Contrast setting.
Downloaded from ManualsPrinter.com Manuals
Scanning
153
Saturation
Professional only:
Adjusts the density of colors in the overall image.
Click the
Image Adjustment button to access the Saturation setting.
Color Balance
Professional only:
Adjusts the balance of red, green, and blue colors in the overall image.
Click the
Image Adjustment button to access the Color Balance setting.
Auto Exposure
Home:
Automatically applied.
Professional:
Click the
Auto Exposure button. To turn it on continuously, click the
Configuration button, click the Color tab, and select Continuous auto
exposure. You can adjust the level of exposure adjustment using the slider.
Unsharp Mask
Filter
Office and Home:
Automatically applied.
Professional:
Turn on to make the edges of image areas clearer for an overall sharper
image. The level of sharpness is adjustable. Turn off to leave softer edges.
Descreening Filter
Office, Home and Professional:
Removes the rippled pattern that can appear in subtly-shaded image
areas, such as in skin tones. Also improves results when scanning magazine
or newspaper images which include screening in their original print
processes. The results of the Descreening Filter do not appear in the
preview image, only in your scanned image.
Text
Enhancement
Office:
Makes the texts clearer when printing documents.
Histogram
Professional only:
Provides a graphical interface for adjusting highlight, shadow, and
gamma levels individually. For advanced users only. Click the Histogram
Adjustment button to use the Histogram settings.
Tone Correction
Professional only:
Provides a graphical interface for adjusting tone levels individually. For
advanced users only. Click the
Tone Correction button to use the Tone
Correction settings.
Color Palette
Professional only:
Provides a graphical interface for adjusting mid-tone levels, such as skin
tones, without affecting the highlight and shadow areas of the image. For
advanced users only. Click the
Color Palette button to use the Color
Palette settings.
Threshold
Home and Professional:
Adjusts the level at which the black areas in text and line art are
delineated, improving text recognition in OCR programs. (Available only
when you select Black & White as the Image Type setting.)
In Home Mode, click the Brightness button to access the Threshold setting.
Note:
❏ To view the red, green, and blue levels at particular points in your preview image as you make
adjustments, click the
densitometer icon in the preview window and click an image area. See
Epson Scan help for details.
Downloaded from ManualsPrinter.com Manuals
Scanning
154
❏ Certain settings may not be available, or may be automatically selected, depending on the type
of image you are previewing and other settings you have selected.
❏ You can customize how certain Epson Scan settings behave by clicking the Configuration
button and changing settings in the window that appears. See Epson Scan Help for details.
❏ To undo any image quality adjustments you make to the preview image, click the Reset button
(if available), turn off the setting, or preview your image again.
Selecting the Scan Size
You can scan your images at their original size, or you can reduce or enlarge their size as
you scan them. You do this using the Target Size setting in Home or Professional Mode.
Home Mode
Downloaded from ManualsPrinter.com Manuals
Scanning
155
Professional Mode
If you are going to scan your image to a particular size, you should select the Target Size
setting after previewing it, but before adjusting your scan area (indicated by the marquee).
This sets the scan area to the correct proportions so your image will not be cropped
unexpectedly.
For instructions on previewing your image(s), see "Previewing and Adjusting the Scan
Area" on page 148. Then follow these steps to select the Target Size setting.
1. You can choose a predefined scan size from the Target Size list. Click the arrow in the
list and select the size you want. A marquee (dotted line) proportioned for that size
appears on your preview image.
Downloaded from ManualsPrinter.com Manuals
Scanning
156
2. If you need to create a scan size that is not in the Target Size list, you can create a
custom size. Click the arrow in the list and select Customize. You see the Target Size
window.
Type a name for your custom size, enter the size, click the Save button, then click OK.
Your new size appears in the Target Size list.
3. In Professional Mode, you can fine-tune the size using additional tools. Click the +
(Windows) or r (Mac OS X) next to Target Size to display these tools.
❏ To size your image by a certain percentage, adjust the Scale value.
❏ To change the way your image is cropped, turn Trimming on or off. (See Epson
Scan Help for details.)
❏ To unlock the proportions of your scan size, click the
marquee or enter new width/height measurements.
lock icon. Then adjust the
4. Once you have selected your scan size, you can click and drag the marquee to the area
in the image you want to scan. For details, see "Adjusting the Scan Area (Marquee)" on
page 151. The marquee proportions are retained as you adjust it.
If you need to rotate the marquee for a landscape or portrait image without changing its
aspect ratio, click the
orientation icon. (Not available if you are scanning at the
Original Target Size.)
Note:
For more information about using the Target Size tools, click Help in the Epson Scan window.
5. Now you are ready to scan your image(s). Click the Scan button and see "Finishing the
Scan" on page 158 for instructions.
Downloaded from ManualsPrinter.com Manuals
Scanning
157
Finishing the Scan
What happens after you scan depends on how you started your scan.
❏ If you started your scan by running Epson Scan as a standalone program, you see the
File Save Settings window. This lets you select the name and location of your saved
scan files. See "Selecting File Save Settings" on page 139 for details.
❏ If you started your scan from a scanning program such as Adobe Photoshop Elements,
your scanned image(s) open in the program window. Click Close to close the Epson
Scan window and view your image(s) in the program.
❏ If you started your scan from Epson File Manager, you see thumbnails of your scanned
images in the Epson File Manager window.
Note:
If you do not see your scanned images, select the folder in which you saved them on the left
side of the Epson File Manager window.
If you want to use your scanned images in one of the Epson Creativity Suite project
programs, click the check box beneath each image thumbnail. The images are
displayed in the My Selection box on the bottom of the Epson File Manager window.
Then select one of these project icons at the top of the window.
Project icon
For instructions, see these sources
Scan and Copy
See "Using the Scanner as a Copier" on page 169.
Copy to Fax
See the Epson File Manager or Copy Utility Help for instructions.
Attach to e-mail
In the Send File Via E-mail window, select the e-mail program and
the photo size. Then click OK. Your e-mail program is opened and
any scanned images you selected are attached to a new e-mail
message.
Downloaded from ManualsPrinter.com Manuals
Scanning
158
Easy Photo Print
See Epson Easy Photo Print Help for instructions.
Note:
Once you have saved a scanned image, you can start Epson File Manager by dragging the
image file or an image folder to the Epson File Manager icon on your desktop.
Using the Scanner Features
Restoring Color in Photos
Using the Color Restoration feature in Epson Scan, you can transform old, faded, or
badly exposed photos into ones with true-to-life color and sharpness. You can restore
printed photos automatically as you scan them.
Original image
Color Restoration
applied
Note:
Color Restoration is available only in Home or Professional Mode.
Follow these steps to restore colors using Epson Scan.
1. Place your original photo on the scanner. See "Setting Your Originals" on page 129 for
instructions.
2. Start Epson Scan. See one of these sections for instructions.
❏ "Starting a Scan With Epson Scan" on page 133
❏ "Starting a Scan With the Epson Creativity Suite" on page 135
❏ "Starting a Scan With Another Scanning Program" on page 138
Downloaded from ManualsPrinter.com Manuals
Scanning
159
3. When Epson Scan window appears, select the basic settings for the type of original(s)
you are scanning, then select the destination setting for the way you will use your
image(s). See "Selecting Basic Settings" on page 142.
4. Click the Preview button to preview your image(s), then select your scan area. See
"Previewing and Adjusting the Scan Area" on page 148.
5. Do one of the following to select the Color Restoration option.
❏ Home Mode: Click the Color Restoration check box.
Downloaded from ManualsPrinter.com Manuals
Scanning
160
❏ Professional Mode: Scroll down to the Adjustments area and click the Color
Restoration check box.
6. Make any other necessary image adjustments. See "Adjusting the Color and Other
Image Settings" on page 153.
7. Size your image as necessary. See "Selecting the Scan Size" on page 155.
8. Click the Scan button to scan and restore the color in your image(s).
What happens next depends on how you started Epson Scan. See "Finishing the Scan"
on page 158.
Using the Color Palette Function (Professional Mode Only)
Follow the steps in these sections to fine tune the colors in your images using the Color
Palette feature in Epson Scan.
Sampling a Color From an Image
1. If necessary, click the Preview button to preview your image. Then click the
Palette button.
Downloaded from ManualsPrinter.com Manuals
Color
Scanning
161
The Color Palette window appears.
2. Click the
Color Extractor button. Your cursor changes to an eye dropper.
3. In the Preview window, click on the color in your image that needs adjustment.
The color you selected is moved to the center cell in the Color Palette window with
variations in hue in the surrounding cells.
4. Select the cell that contains the hue you would like to use to adjust the color in your
image. This color now becomes the color of the center cell and the color change is
reflected in your image.
Note:
You can also use the cells to the right of the adjustment area to change the brightness, if
necessary.
5. If you want to continue adjusting the color, repeat step 4.
If you want to save the color for future scans, click the
appears in the save area.
Note:
To load a previously saved color, select the color and click the
Save Button. The color
Apply to Palette button.
6. When you are finished adjusting the color, click the Close button to return to the Epson
Scan window.
For further details on using the Color Palette feature, click the Help button.
Downloaded from ManualsPrinter.com Manuals
Scanning
162
Applying a Color to an Image
1. If necessary, click the Preview button to preview your image. Then click the
Palette button.
Color
The Color Palette window appears.
2. Select the cell that contains the hue you would like to use to adjust the color in your
image. This color now becomes the color of the center cell.
Note:
You can also use the cells to the right of the adjustment area to change the brightness, if
necessary.
3. Click the
Color Applicator button. Your cursor changes to a droplet.
4. In the Preview window, click on the color in your image that needs adjustment. The
color change is reflected in your image.
5. If you want to continue adjusting the color, repeat steps 2 through 4.
If you want to save the color for future scans, click the
appears in the save area.
Note:
To load a previously saved color, select the color and click the
Save Button. The color
Apply to Palette button.
6. When you are finished adjusting the color, click the Close button to return to the Epson
Scan window.
Downloaded from ManualsPrinter.com Manuals
Scanning
163
For further details on using the Color Palette feature, click the Help button.
Removing Dust Marks
Using the Dust Removal feature in Epson Scan, you can virtually “clean” the dust marks
from your originals as you scan them.
Original image
Dust Removal applied
Note:
❏ Dust Removal is available only in Home or Professional Mode.
❏ Before scanning your originals, carefully remove any dust that you can see on them.
Follow these steps to remove dust marks using Epson Scan.
1. Place your original on the scanner. See "Setting Your Originals" on page 129.
2. Start Epson Scan. See one of these sections for instructions.
❏ "Starting a Scan With Epson Scan" on page 133
❏ "Starting a Scan With the Epson Creativity Suite" on page 135
❏ "Starting a Scan With Another Scanning Program" on page 138
3. When Epson Scan window appears, select the basic settings for the type of your
original(s), then select the destination setting for the way you will use your image(s).
See "Selecting Basic Settings" on page 142.
4. Click the Preview button to preview your image(s), then select your scan area. See
"Previewing and Adjusting the Scan Area" on page 148.
5. Do one of the following to select the Dust Removal option.
❏ Home Mode: Click the Dust Removal check box.
Downloaded from ManualsPrinter.com Manuals
Scanning
164
❏ Professional Mode: Scroll down to the Adjustments area and click the Dust
Removal check box. If you want to increase or decrease the level of the dust
removal effect, click the + (Windows) or r (Mac OS X) button next to the option and
select a setting in the Level list.
Home Mode:
Downloaded from ManualsPrinter.com Manuals
Scanning
165
Professional Mode:
Note:
The result of the dust removal does not appear in the image in the Preview window. You must
scan the image first.
6. Make any other necessary image adjustments. See "Adjusting the Color and Other
Image Settings" on page 153.
7. Size your image as necessary. See "Selecting the Scan Size" on page 155.
8. Click the Scan button to scan and remove dust marks in your image(s).
What happens next depends on how you started Epson Scan. See "Finishing the Scan" on
page 158.
Fixing Backlight Photos
Using the Backlight Correction feature in Epson Scan, you can remove shadows from
photos that have too much background light. You can fix printed photos automatically as
you scan them.
Downloaded from ManualsPrinter.com Manuals
Scanning
166
Original image
Backlight Correction
applied
Note:
Backlight Correction is available only in Home or Professional Mode.
Follow these steps to fix backlit photos using Epson Scan.
1. Place your original. See "Setting Your Originals" on page 129.
2. Start Epson Scan. See one of these sections for instructions.
❏ "Starting a Scan With Epson Scan" on page 133
❏ "Starting a Scan With the Epson Creativity Suite" on page 135
❏ "Starting a Scan With Another Scanning Program" on page 138
3. When the Epson Scan window appears, select the basic settings for the type of
original(s) you are scanning, then select the destination setting for the way you will use
your image(s). See "Selecting Basic Settings" on page 142.
4. Click the Preview button to preview your image(s), then select your scan area. See
"Previewing and Adjusting the Scan Area" on page 148.
5. Do one of the following to select the Backlight Correction option.
Downloaded from ManualsPrinter.com Manuals
Scanning
167
❏ Home Mode: Click the Backlight Correction check box.
Downloaded from ManualsPrinter.com Manuals
Scanning
168
❏ Professional Mode: Scroll down to the Adjustments area and click the Backlight
Correction check box.
6. Make any other necessary image adjustments. See "Adjusting the Color and Other
Image Settings" on page 153.
7. Size your image as necessary. See "Selecting the Scan Size" on page 155.
8. Click the Scan button to scan and correct backlighting in your image(s).
What happens next depends on how you started Epson Scan. See "Finishing the Scan" on
page 158.
Using the Scanner as a Copier
You can use your scanner along with a printer connected to your computer just like you
would use a copy machine. You can even enlarge and reduce, restore faded colors,
remove dust, enhance text, and adjust image brightness and contrast as you copy.
Downloaded from ManualsPrinter.com Manuals
Scanning
169
1. Place your original document or photo on the scanner. See "Setting Your Originals" on
page 129.
2. Start the Epson Copy Utility in one of these ways.
❏ Start Epson File Manager (see "Starting a Scan With the Epson Creativity Suite" on
page 135). Then click the Scan and Copy icon at the top of the window.
❏ Windows:
Click Start > Programs or All Programs > EPSON Creativity Suite > Copy Utility
> EPSON Copy Utility.
❏ Mac OS X:
Open the Applications > EPSON > Creativity Suite > Copy Utility folders and
double-click the EPSON Copy Utility icon.
You see the Copy Utility window:
3. Select your scanner from the Scanner list at the top of the window.
4. Select your printer from the Printer list.
5. Click the Source Type box, select the type of document you are copying, and click OK.
See the table below for guidance:
Source Type setting
Type of document
Color Document (Single
Page)
One-page color document containing text or text and
graphics, such as a flyer.
Black & White Document
(Single Page)
One-page black and white document containing text or
text and graphics, such as a letter.
Downloaded from ManualsPrinter.com Manuals
Scanning
170
Color Document (Multiple
Pages)
Multiple page color document containing text or text and
graphics, such as a brochure.
Black & White Document
(Multiple Pages)
Multiple page black and white document containing text or
text and graphics, such as a manual.
Photo
Color or black-and-white photographs.
6. Click the Output Paper box, select the type and size of paper you loaded in your
product, and click OK.
Note:
If you are printing on certain Epson printers, you see the printer settings window. See your
printer documentation for instructions on selecting settings.
7. If you want to enlarge or reduce your image as you copy it, click the Copy Size box,
select the enlargement/reduction, and click OK.
Note:
If you are printing on an Epson printer that supports borderless printing, you can select options
for Margins (borders) or No Margins (borderless).
8. If you are copying a faded photo and want to restore the colors, click the Color
Restoration check box. (It is available only when the Source Type is Photo.)
9. If you need to remove dust marks as you copy, click the Dust Removal check box. (It
is available only when the Source Type is Photo.)
10. If you are copying a color or black-and-white document, you can improve the definition
of text and line art by leaving the Text Enhancement check box checked. (It is
available only when the Source Type is one of the Document options.)
11. If you need to adjust the lightness or darkness of your original or adjust the contrast
between them as you copy, click the slider beneath the Brightness and/or Contrast
settings. (Contrast is only adjustable when the Source Type is Photo.)
12. Click the arrow in the Number of Copies box to select the number of copies you want,
if necessary.
13. When you are ready to scan and print, click the Copy button.
Note:
If you want to preview your scan before printing it or make additional copy settings, click the
Custom Copy button at the bottom of the window. Click Help in the Copy Utility for instructions
on using the Custom Copy features.
Downloaded from ManualsPrinter.com Manuals
Scanning
171
Scanning to a PDF File
You can scan a document to a PDF file quickly and easily.
1. Place your original document on the document table. See "Setting Your Originals" on
page 129 for instructions.
2. Start Epson Scan. See one of these sections for instructions.
❏ "Starting a Scan With Epson Scan" on page 133
❏ "Starting a Scan With the Epson Creativity Suite" on page 135
❏ "Starting a Scan With Another Scanning Program" on page 138
You see an Epson Scan window.
Note:
The screen varies depending on the scan mode.
If you want to change the scan mode, see "Changing the Scan Mode" on page 142.
Downloaded from ManualsPrinter.com Manuals
Scanning
172
3. Click the File Save Settings button to the right of the Scan button.
4. The File Save Settings window appears.
Select PDF as the file type setting. The current Paper Size, Orientation, Margin, and
Compression setting are displayed below it.
5. If you need to change any of the current PDF settings, click the Options button. You
see the Epson PDF Plug-in Settings window.
Select the settings that match your document and click OK. You return to the File Save
Settings window.
6. When you are finished selecting file settings, click OK.
Downloaded from ManualsPrinter.com Manuals
Scanning
173
7. Click the Scan button. Epson Scan starts scanning.
8. Depending on how you started Epson Scan, the program saves the file to the location
you specified or opens the scanned image in your scanning program. See "Finishing
the Scan" on page 158 for details.
Scan Multiple Pages to a PDF File
You can scan multiple pages of a document, magazine, or newspaper and save them as
one PDF file on your computer. Epson Scan displays an editing page so you can view the
pages as you scan them and reorder, rotate, or delete them as necessary.
1. Place the first page of your original document on the document table or on the Auto
Document Feeder. See "Setting Your Originals" on page 129 for instructions.
2. Start Epson Scan. See one of these sections for instructions.
❏ "Starting a Scan With Epson Scan" on page 133
❏ "Starting a Scan With the Epson Creativity Suite" on page 135
❏ "Starting a Scan With Another Scanning Program" on page 138
You see an Epson Scan window.
3. Select the basic settings for the type of original(s) you are scanning, then select the
destination setting for the way you will use your image(s). See "Selecting Basic
Settings" on page 142.
Note:
If you want to change the scan mode, see "Changing the Scan Mode" on page 142.
4. Click the Preview button to preview your image(s), then select your scan area. See
"Previewing and Adjusting the Scan Area" on page 148".
Downloaded from ManualsPrinter.com Manuals
Scanning
174
5. Click the Scan button. The File Save Settings window appears.
Select PDF as the file type setting. The current Paper Size, Orientation, Margin, and
Compression setting are displayed below it.
6. If you need to change any of the current PDF settings, click the Options button. You
see the Epson PDF Plug-in Settings window.
Select the settings that match your document and click OK. You return to the File Save
Settings window.
Downloaded from ManualsPrinter.com Manuals
Scanning
175
7. When you are finished selecting file settings, click OK. Epson Scan scans your page
and displays this window.
8. If you are only scanning one document page, or you don’t need to edit your pages, click
Save File and go to step 9.
If you are scanning multiple pages, click Add page and replace the first page on the
document table or on the Auto Document Feeder with the second page and click Scan.
Repeat this step for each page in your document. When you are finished, click Edit
page and go to step 9.
Note:
You can scan up to 200 pages of a document at a time.
9. You see the Editing Page window displaying thumbnail images of each scanned page.
The Editing Page window displays thumbnails of each scanned page. You can use the
tools below the Editing Page window to select, rotate, reorder, and delete pages in your
document. Click the Help button for details.
If you want to include all the document pages in your PDF file as they currently look, go
to step 10.
Downloaded from ManualsPrinter.com Manuals
Scanning
176
If you do not need to include some of the pages, click the
odd pages or
even
pages icons, or click the individual pages you do not need. Then click the
delete icon
to delete them.
If you want to rotate pages, click the pages or use the
or
all pages icon to select the pages. Then click the
rotate them.
Note:
The
odd pages,
even pages,
left or
right rotate icon to
delete icon is not available when all document pages are selected.
10. When you have finished editing your document pages, click OK. All the document
pages on the Editing Page window are saved in a PDF file in the location you selected.
Scanning to an E-mail
You can automatically attach scanned image file(s) to an e-mail message by using Attach
to e-mail function in Epson File Manager.
1. Place your original document or photo on the scanner. See "Setting Your Originals" on
page 129.
2. Start Epson File Manager (see "Starting a Scan With the Epson Creativity Suite" on
page 135). Then click the Attach to e-mail icon at the top of the window. After scanning
is finished, you see the Send File Via E-mail window.
Downloaded from ManualsPrinter.com Manuals
Scanning
177
3. Select the e-mail program you use in the Select E-mail Application list.
4. If you want to resize your image, choose an option under Select Photo Size.
Note:
The box at the bottom of the window displays information about the image file(s) you are
attaching to the e-mail message.
5. Click OK. Your e-mail program is opened and any scanned images you selected are
attached to a new e-mail message. (See your e-mail program Help if you need
instructions on sending your e-mail message.)
Using the Start Button on the Control Panel
Scanning to your computer
This product allows you to use the control panel to scan an image to a computer through a
local connection. To scan an original using the control panel, the following software must
be installed on the computer.
For local computer:
To use a computer that is directly connected to the product, you need to have installed EPSON
Scan and EPSON Creativity Suite on your computer. If you are connecting this product to a
computer through a local connection, an application is automatically launched on your computer by
pressing the
Scan button on the control panel, selecting Local PC, and then pressing the
r Right button. The application that starts differs according to the user settings. By default, EPSON
Scan is launched.
Note:
❏ EPSON Scan and EPSON Creativity Suite are installed in the standard installation using the
installation software CD-ROM.
❏ When scanning an original on the document table, the product automatically recognizes the
document type. If the document is recognized as text, the original is scanned as a
black-and-white document even if it is a color document. To correctly scan a color original,
select Network PC and use Manual Scan, or specify the detail settings for the image to be
scanned using EPSON Scan on your computer. For details, see "Scanned Colors Differ From
the Original Colors" on page 315.
Before using this feature, make sure you have installed EPSON Scan and EPSON
Creativity Suite on your computer.
Follow the steps below to use this feature.
1. Connect this product to your computer with a USB cable and then start up the
computer.
Downloaded from ManualsPrinter.com Manuals
Scanning
178
2. Make sure the product is turned on, and then place your original either on the document
table or in the Auto Document Feeder. For details, see "Setting Your Originals" on page
129.
c
Caution:
To scan an original correctly, set the transportation lock on the left side of the document
table in the
unlocked position. For details, see "Scanner parts" on page 26.
3. Press the
Scan button on the control panel.
The Scan light is lit and the Scan menu appears in the LCD panel.
4. When Local PC is displayed, press the r Right button.
When a proper connection to the local computer is confirmed, a message to notify that
the device is ready appears and scanning starts.
Assigning a different application on Windows
This section explains how to make settings that control which application to open when you
select Local PC and press the r Right button on the control panel. You can specify one
application to open automatically when you select Local PC and press the r Right button,
or you can have a window open allowing you to choose from a list of applications. Follow
the steps below to make these settings.
Note:
Before using this feature, make sure you have installed EPSON Scan and EPSON Creativity Suite
on your computer.
Note for Mac OS users:
You cannot assign any application to the r Right button when Local PC is displayed on the control
panel on the product.
For Windows XP users
1. Click Start, and then point to Control Panel.
Downloaded from ManualsPrinter.com Manuals
Scanning
179
2. Click the Scanners and Cameras icon in the control panel.
3. Right-click your product’s icon, and then select Properties.
4. Select the Events tab.
5. Select Start Button from the Select an event list. Select Start this program and then
select a desired application from the list.
Note:
❏ If Prompt for which program to run is selected, when the button is pressed, a dialog box
appears to prompt you to select an application from the list.
❏ Some applications do not support linkage to scanners and digital cameras. Linkage is
available only to applications that appear on the list.
6. To save your settings, click Apply and then OK.
Note:
You need to click Apply whenever you change a setting.
If you need to disable the Scanner events, select Take no action in the product’s
Properties dialog box.
Downloaded from ManualsPrinter.com Manuals
Scanning
180
For Windows Me, 98, and 2000 users
Note for Windows 98 and 2000 users:
Screen shots for Windows Me are used in this section, so they may differ in appearance from what
actually appears on your screen. The instructions are the same.
1. Click Start, point to Settings, and then select Control Panel.
2. Double-click the Scanners and Cameras icon.
3. For Windows Me users:
Right-click your product’s icon, and then select Properties.
For Windows 98 and 2000 users:
Select your product from the installed scanners and cameras list. Click Properties.
Downloaded from ManualsPrinter.com Manuals
Scanning
181
4. Select the Events tab.
5. Select a desired button from the Scanner events list, and then select the check box of
a desired application in the Send to this application list. Clear the rest of the check
boxes.
Note:
❏ If multiple applications are selected, when you click the button, a dialog box appears to
prompt you to select just one from the list.
❏ Some applications do not support linkage to scanners and digital cameras. Linkage is
available only to applications that appear in the Send to this application list.
6. To save your settings, click Apply and then OK.
Note:
You need to click Apply whenever you change a button setting.
Note for Windows 2000 users:
Be sure to restart the computer.
If you need to disable the Scanner events, select the Disable device events check box in
the product’s Properties dialog box.
Canceling Scanning
When you press the y Cancel button on the control panel, a scanning job in Scan mode is
canceled or the TWAIN processing is stopped.
Downloaded from ManualsPrinter.com Manuals
Scanning
182
When Cancel on progress bar is clicked while scanning an original with the Professional
Mode, preview scanning or final scanning is quieted and the product returns to the
Professional Mode.
Scanning in a Network Environment
Starting EPSON Scan settings
Follow the steps below to start EPSON Scan settings and enable network scanning.
Note:
❏ For Windows 2000 and XP, you need the administrative privileges to install the software.
❏ For Windows 2000, XP, Mac OS X, you need to use the administrative privileges to log in. Any
changes made by the administrator to the settings apply to all users.
Note for Mac OS X 10.3 or later users:
Do not use the Fast User Switching function while using this product.
1. Obtain the IP address or host name from your network administrator.
2. Start EPSON Scan Settings.
For Windows users:
Click Start, point to All Programs (for Windows XP users) or Programs (for Windows
Me, 98, and 2000 users) and EPSON Scan, and then select EPSON Scan Settings.
Downloaded from ManualsPrinter.com Manuals
Scanning
183
For Mac OS X users:
Double-click the EPSON Scan Settings icon in the Utility folder.
3. Select your product from the Select Scanner drop-down list.
4. Change the Connection setting to Network. Click Add button. In the Add dialog box
that appears, click Enter address radio button. Then enter the IP address or host name
in the text box.
5. Click Test to check the connection. If everything works properly, this is indicated by a
message appearing under Scanner Status in the dialog box.
Downloaded from ManualsPrinter.com Manuals
Scanning
184
6. Click OK to save the settings, and then close the dialog box.
Scanning an image
Network scanning requires that all of the devices are turned on. Also, make sure EPSON
Scan is running.
There are several methods you can use to scan a document.
❏ Click the Scan button in the EPSON Scan main window on the client computer
Start EPSON Scan on the client computer. Make any desired settings, and then click
the Scan button to start scanning.
❏ Use the x B&W Start or x Color Start button on the product
Start EPSON Scan on the client computer, and then click the x B&W Start or x Color
Start button on the product.
Note:
In a network environment, the x B&W Start or x Color Start button on the product works in the
same way as clicking the Scan button in the EPSON Scan main window.
Setting up a client computer
To allow networking, each client computer in the network requires a Network Interface
Card and a Network Interface Card (NIC) driver. Install the Network Interface Card and
Network Interface Card (NIC) driver on each client computer. For details on the installation
procedures, refer to the corresponding manuals included with the card.
Installing the TCP/IP protocol
To install the TCP/IP protocol on a client computer on the network, follow the instructions
below.
For Windows XP and 2000 users
Note for Windows XP users:
Screen shots for Windows 2000 are used in this section, so they may differ in appearance from
what actually appears on your screen. The instructions are the same, except as noted.
Downloaded from ManualsPrinter.com Manuals
Scanning
185
1. For Windows XP users:
Click Start, right-click My Network Places, and then select Properties.
For Windows 2000 users:
Right-click the My Network Places icon, and then select Properties.
2. Double-click Local Area Connection.
Downloaded from ManualsPrinter.com Manuals
Scanning
186
3. Click Properties.
4. Check that Internet Protocol (TCP/IP) is included in the Local Area Connection
Properties list box.
If the Internet Protocol (TCP/IP) appears in the list box, proceed to "Scanning in a
Network Environment" on page 183; otherwise, proceed to step 5.
5. Click Install. The Select Network Component Type dialog box appears.
Downloaded from ManualsPrinter.com Manuals
Scanning
187
6. Select Protocol from the list and click Add.
7. Select Internet Protocol (TCP/IP) in the Network Protocol list box and click OK.
8. Check that Internet Protocol (TCP/IP) is installed and then click Close. Then, proceed
to "Scanning in a Network Environment" on page 183.
For Windows Me and 98 users
1. Click Start, point to Settings, and then select Control Panel.
Control Panel appears.
Downloaded from ManualsPrinter.com Manuals
Scanning
188
2. Double-click the Network icon in Control Panel.
The Network dialog box appears.
3. Click the Configuration tab.
4. Check that TCP/IP is included in the following installed network components list box.
5. Click Add.
The Select Network Component Type dialog box appears.
Downloaded from ManualsPrinter.com Manuals
Scanning
189
6. Select Protocol from the list, and then click Add.
7. Select Microsoft from the Manufacturers list box and TCP/IP from Network Protocols,
and then click OK.
8. Follow the instructions on the screen. Then, proceed to "Scanning in a Network
Environment" on page 183.
Using the Application Software
Software information
EPSON Web-To-Page (For Windows only)
EPSON Web-To-Page makes printing web pages easier by sizing them to fit your paper
and giving you a preview of your printed output.
Note for network connections:
EPSON Web-To-Page is available only for the following connections.
- LPR connection
- EpsonNet Print
- Windows sharing
Downloaded from ManualsPrinter.com Manuals
Scanning
190
Note:
When the product is directly connected with Windows 98 or Me as the shared printer, printing from
Windows 2000 or XP clients is not available.
Note for other than network connections:
EPSON Web-To-Page is available for Windows 98, Me, 2000, and XP. The Internet Explorer
version must be 5.5 or higher.
Creativity Suite
The EPSON Creativity Suite is a software package that let you scan, save, manage, edit,
and print your images. Using the main program, EPSON File Manager, you can scan and
save your images, and then display them in an easy-to-use window. From there you can
print them, upload them to EPSON’s photo-sharing web site, drag them to a document,
attach them to an e-mail message, or open them in an image-editing program.
When you install the Creativity Suite from the software CD-ROM that came with your
product, the following applications are automatically installed on your computer.
❏ Attach to Email
❏ Image Clip Palette
❏ Event Manager
❏ Scan Assistant
❏ File Manager
File Manager
Use EPSON File Manager to:
Downloaded from ManualsPrinter.com Manuals
Scanning
191
❏ Retrieve images from a digital camera or memory card and send the files directly to the
application you want to use
❏ View supported images as thumbnails
❏ View the various applications you can use as project icons in the launch area
❏ Assign an application to the x B&W Start or x Color Start button on your product
❏ Search for images on your hard disk
❏ View images as a slideshow
❏ Retouch images
Event Manager
Event Manager launches File Manager for EPSON automatically when you press the
x B&W Start or x Color Start button on the control panel in Scan mode.
Scan Assistant
Scan Assistant lets you select an available scanner from the list, specify the location where
scanned images are saved, and make other settings from the Scan Assistant dialog box.
Downloaded from ManualsPrinter.com Manuals
Scanning
192
Attach to Email
EPSON Attach To Email lets you send e-mail with images. It supports various e-mail
systems and allows you to resize images before attaching them.
Image Clip Palette
EPSON Image Clip Palette lets you view images as thumbnails, adjust the resolution and
size of an image, then drag it to the application you want to use without changing the
original image.
Downloaded from ManualsPrinter.com Manuals
Scanning
193
Accessing the software
EPSON Web-To-Page
After installing EPSON Web-To-Page, the menu bar is displayed on the Microsoft Internet
Explorer toolbar. If it does not appear, select Toolbars from the View menu of Internet
Explorer, and then select EPSON Web-To-Page.
Note:
When you install EPSON Web-To-Page, select custom installation on the software CD-ROM.
EPSON File Manager
There are three ways to start EPSON File Manager.
❏ Double-click the EPSON File Manager icon on the desktop.
❏ Drag and drop images or a folder to the EPSON File Manager icon on the desktop.
❏ For Windows:
Click Start, point to All Programs (Windows XP) or Programs (Windows Me, 98, or
2000), point to EPSON Creativity Suite, point to File Manager, and then click EPSON
File Manager.
For Mac OS X:
Double-click the Applications folder in Macintosh HD, then double-click the EPSON
folder. Next, double-click the Creativity Suite folder, File Manager folder, and finally
double-click the EPSON File Manager icon.
Click Next when the confirmation message for Instructions is displayed. The
Instructions appear.
If you check Do Not Show Next Time, the confirmation message will not be displayed
the next time you start the EPSON File Manager.
Scan Assistant
There are two ways to access Scan Assistant:
Downloaded from ManualsPrinter.com Manuals
Scanning
194
❏ Double-click the EPSON File Manager icon on the desktop, then select Load from
Scanner from Tool menu in the EPSON File Manager window.
❏ For Windows:
Click Start, point to All Programs (Windows XP) or Programs (Windows Me, 98, or
2000), point to EPSON Creativity Suite, and then click Scan Assistant.
For Mac OS X:
Double-click the Applications folder in Macintosh HD, then double-click the EPSON
folder. Next, double-click the Creativity Suite folder, and then double-click the Scan
Assistant icon.
Attach to Email
There are two ways to access EPSON Attach to E-mail:
❏ Double-click the EPSON File Manager icon on the desktop, then click the Attach to
e-mail icon in the upper part of the EPSON File Manager window.
❏ For Windows:
Click Start, point to All Programs (Windows XP) or Programs (Windows Me, 98, or
2000), point to EPSON Creativity Suite, then point to Attach To Email, and then click
EPSON Attach To Email.
For Mac OS X:
Double-click the Applications folder in Macintosh HD, then double-click the EPSON
folder. Next, double-click the Creativity Suite folder, and then the Attach To Email
folder. Finally double-click the EPSON Attach To Email icon.
Image Clip Palette
There are two ways to access EPSON Image Clip Palette:
❏ Double-click the EPSON File Manager icon on the desktop, then click the Use Image
icon in the upper part of the EPSON File Manager window.
❏ For Windows:
Click Start, point to All Programs (Windows XP) or Programs (Windows Me, 98, or
2000), point to EPSON Creativity Suite, then click Image Clip Palette.
For Mac OS X:
Double-click the Applications folder in Macintosh HD, then double-click the EPSON
folder. Next, double-click the Creativity Suite folder, and then double-click the Image
Clip Palette icon.
Downloaded from ManualsPrinter.com Manuals
Scanning
195
Notice for Windows XP Service Pack 2 Users
If you use a computer running Windows XP Service Pack 2 with this product, follow the
steps below to scan using the buttons on the control panel via a network connection.
Unblocking EEventManager
During or after the installation of EPSON Creativity Suite from the Software CD-ROM, the
Windows Security Alert window may appear. If it appears, click the Unblock button to
unblock EEventManager; otherwise the product cannot list your computer on the control
panel when you use scan using the buttons on the control panel.
Note:
If you have clicked the Keep Blocking button in the Windows Security Alert window, follow the
steps below to unblock EEventManager.
1. Click Start, point to Control Panel, and then select Security Center. Click Windows
Firewall.
2. Click the Exceptions tab, and then click the Add Program button.
3. Select EEventManager from the Programs list, and then click OK.
4. Confirm that the check box for EEventManager is selected in the Programs and
Services list, and then click OK.
Downloaded from ManualsPrinter.com Manuals
Scanning
196
Chapter 9
Copying
Setting Originals to Copy
You can load the original either on the document table or in the Auto Document Feeder
depending on the type of the original. For details, see "Setting Your Originals" on page 129.
Note:
❏ Before scanning a document, remember to respect the rights of copyright owners. Do not scan
published text or images without first checking their copyright status.
❏ If documents are placed both in the Auto Document Feeder and on the document table, only the
documents in the Auto Document Feeder are scanned.
Basic Copying
Available paper sources:
❏ The available paper types for copying are not the same as that for printing. Depending on the
paper source, available paper types differ. When copying originals, you can only use the
following paper types.
MP tray:
Plain paper, EPSON Color Laser Paper, Preprinted, Letterhead, Recycled paper, Colored
paper, Transparencies, Labels
Optional paper cassette:
Plain paper, EPSON Color Laser Paper, Preprinted, Letterhead, Recycled paper, Colored
paper
❏ You cannot copy onto coated paper, thick paper and special paper such as postcard or
envelopes.
Available original sizes:
❏ You can use A4, B5, Letter, and Legal size originals for copying.
❏ Legal size originals are available only with the Auto Document Feeder.
❏ The edge of the paper (5 mm from the horizontal and vertical paper ends) is not guaranteed for
printing.
Follow the steps below to make a copy.
Downloaded from ManualsPrinter.com Manuals
Copying
197
1. Make sure the product is turned on and paper is loaded in the product. For information
on how to load paper, see "Loading Paper" on page 36.
2. Press the
Copy button on the control panel.
The Copy light is lit and the LCD panel shows Copy Mode for a few seconds, and then
changes to the copy mode screen.
Note:
If no button is pressed for more than 3 minutes, any changes made are canceled and the mode
returns to the Print mode.
3. Place your original either on the document table or in the Auto Document Feeder. For
details, see "Setting Your Originals" on page 129.
4. Specify the desired copy settings as necessary. For details, see "Making Changes to
Copy Settings" on page 199.
Note:
When you press the x B&W Start or x Color Start button without making any settings here,
copying starts with the existing setting values.
5. Press the x B&W Start or x Color Start button.
To make a black-and-white copy, press the x B&W Start button. To make a color copy,
press the x Color Start button.
Copying starts.
Note:
❏ If you press the x B&W Start button twice in a row, copying starts faster than in the normal
mode. However, the print quality may be inferior to that in the normal mode.
❏ Do not turn off the power or press another mode’s button while copying is in progress, as
copying may be performed incorrectly.
Downloaded from ManualsPrinter.com Manuals
Copying
198
❏ When you place multiple documents in the Auto Document Feeder and make a continuous
high quality (600 dpi) color copy with the default memory (128 MB), the product may not
work properly because of insufficient memory. We recommend adding an memory module
so that the total memory size is 256 MB or higher.
Canceling Copying
When the y Cancel button on the control panel is pressed while a document is being
copied in copy mode, the LCD panel shows Cancel Print Job and the copy job is
canceled.
Making Changes to Copy Settings
When you plan to copy your document using other than the default settings, you can make
changes to the appropriate copy settings as follows. Use the u Up or d Down button to
move between menu items.
Changing the number of copies
You can specify the number of copies by selecting a value from 1 to 99. The default setting
is 1.
1. Make sure that the product is in Copy mode. If not, press the
the Copy mode.
Copy button to enter
2. Make sure the value next to Copies is highlighted in the LCD panel, and then enter the
number of copies to be made using the numeric keypad.
Note:
You can also use the r Right or l Left button to increase or decrease the number, one digit at
a time.
Selecting the paper
You can specify the type and size of paper to be loaded in the MP tray or the optional paper
cassette.
Available paper sources:
❏ The available paper types for copying are not the same as that for printing. Depending on the
paper source, available paper types differ. When copying originals, you can only use the
following paper types.
Downloaded from ManualsPrinter.com Manuals
Copying
199
MP tray:
Plain paper, EPSON Color Laser Paper, Preprinted, Letterhead, Recycled paper, Colored
paper, Transparencies, Labels
Optional paper cassette:
Plain paper, EPSON Color Laser Paper, Preprinted, Letterhead, Recycled paper, Colored
paper
❏ You cannot copy onto coated paper, thick paper and special paper such as postcard or
envelopes.
Paper size
You can specify the paper size.
1. Make sure that the product is in Copy mode. If not, press the
the Copy mode.
Copy button to enter
2. Press the u Up or d Down button several times until Paper Size appears.
3. Press the l Left or r Right button several times until your desired paper size appears.
Note:
❏ For the MP tray, you can select the paper size from MP A4, MP B5, MP LGL, and MP LT.
❏ For the optional paper cassette, the paper size loaded in the cassette is displayed (LC A4 or
LC LT).
Document type
You can select the following document type settings suited for various types of color or
black-and-white documents.
Document Type
Description
Txt/Ph
(Text/Photo)
Good for magazines and catalogs.
Removes moiré patterns, sharpens the
outline and removes the backgrounds.
Photo
Good for color photos or other color
images. Accurately reproduces the
gradation and subtle tonal variations.
Text
Good for documents containing black
text only. Text in copies appears sharp
and easy to read. Also effective when
you want to remove the background
(document color).
Downloaded from ManualsPrinter.com Manuals
Copying
200
Hgh QI (High
quality)
Good for documents containing fine
information.
Although copying takes longer, higher
quality (600 dpi) is obtained.
Note:
When you place multiple documents in the Auto Document Feeder and make a continuous high
quality (600 dpi) color copy with the default memory (128 MB), the product may not work properly
because of insufficient memory. We recommend adding an memory module so that the total
memory size is 256 MB or higher.
1. Make sure that the product is in Copy mode. If not, press the
the Copy mode.
Copy button to enter
2. Press the u Up or d Down button several times until Color DocType or B&W DocType
appears.
3. Press the l Left or r Right button several times until your desired document type
appears.
Adjusting the density
You can adjust the image quality in density by selecting from 7 levels (-3 to 3). The higher
the level, the darker the image. The default level is 0. For adjusting the image quality, see
also "Adjusting the contrast" on page 201 and "Adjusting the RGB color" on page 202.
1. Make sure that the product is in Copy mode. If not, press the
the Copy mode.
Copy button to enter
2. Press the u Up or d Down button several times until Density appears.
The current value next to Density is highlighted.
3. Specify the density.
Note:
To increase or decrease the density, press the r Right or l Left button, respectively. The
density increases or decreases one level at a time.
Adjusting the contrast
You can adjust the image quality in contrast by selecting from 7 levels (-3 to 3). The higher
the level, the greater the contrast becomes. When you adjust the contrast to a lower level,
the difference in brightness decreases. The default level is 0. For adjusting the image
quality, see also "Adjusting the density" on page 201 and "Adjusting the RGB color" on
page 202.
Downloaded from ManualsPrinter.com Manuals
Copying
201
1. Make sure that the product is in Copy mode. If not, press the
the Copy mode.
Copy button to enter
2. Press the u Up or d Down button several times until Contrast is selected.
The current value next to Contrast is highlighted.
3. Specify the contrast level.
Note:
To increase or decrease the contrast, press the r Right or l Left button, respectively. The
contrast increases or decreases one level at a time.
Adjusting the RGB color
You can adjust the image quality in RGB strength by selecting from 7 levels (-3 to 3) for red
(R), green (G), and blue (B). The higher the level, the richer the image. The default level is
0. For adjusting the image quality, see also "Adjusting the density" on page 201 and
"Adjusting the contrast" on page 201.
Note:
RGB adjustment is available only for color copies.
1. Make sure that the product is in Copy mode. If not, press the
the Copy mode.
Copy button to enter
2. Press the u Up or d Down button several times until your desired color (R, G, or B) is
selected.
The current value next to R, G, or B is highlighted.
3. Specify the color strength.
Note:
To increase or decrease the color strength, press the r Right or l Left button, respectively. The
color density increases or decreases one level at a time.
Specifying the zoom ratio
You can specify a zoom ratio by selecting from the fixed zoom ratios, or by specifying a
value from 25 to 400% in increments of 1%. The default zoom ratio is 100%.
1. Make sure that the product is in Copy mode. If not, press the
the Copy mode.
Downloaded from ManualsPrinter.com Manuals
Copy button to enter
Copying
202
2. Place your original either on the document table or in the Auto Document Feeder. For
details, see "Setting Your Originals" on page 129.
3. Press the d Down button to select Zoom.
4. Specify your desired zoom ratio with either of the following methods.
Selecting a zoom ratio:
Press the l Left or r Right button several times until the desired fixed zoom ratio is
displayed.
The following document fixed zoom ratios are available:
Zoom Ratio Settings
Zoom
LGL > LT
78%
A4 > B5
86%
100%
100%
B5 > A4
115%
HLT > LG
154%
Setting a zoom ratio:
You can also specify a magnification rate between 25% and 400% using the numeric
keypad.
Note:
If the l Left or r Right button is pressed after entering a magnification rate using the numeric
keypad, the closest fixed value to the entered rate is displayed.
Full-page copy
The full-page copy function is used to slightly reduce the output in order to fit the document
into the guaranteed print area of the product. Normally, the guaranteed printable area of a
photocopier is limited. Therefore, when a photocopier copies a document with text or
image printed on the whole sheet of paper, part of the text or image on the edges of paper
will not be copied. This function is enabled when On is selected.
1. Make sure that the product is in Copy mode. If not, press the
the Copy mode.
Copy button to enter
2. Place your original either on the document table or in the Auto Document Feeder. For
details, see "Setting Your Originals" on page 129.
3. Press the d Down button twice to select Full Copy.
4. Press the l Left or r Right button to select between On and Off.
Downloaded from ManualsPrinter.com Manuals
Copying
203
Making 2 pages per sheet copies
You can copy two sheets of a single-sided document on one sheet.
Document
Size
Output size
Availability
A4
A4
Available
B5
Available
Letter
N/A
Legal
N/A
A4
Available
B5
Available
Letter
N/A
Legal
N/A
A4
N/A
B5
N/A
Letter
Available
Legal
Available
A4
N/A
B5
N/A
Letter
Available
Legal
Available
B5
Letter
Legal
Note:
❏ This function is available for the following settings.
- Document size: A4, B5, Letter, and Legal
- Output paper size: A4, B5, Letter, and Legal
- Zoom: 100%
❏ The Zoom setting is ignored in 2 pages per sheet copy mode.
1. Make sure that the product is in Copy mode. If not, press the
the Copy mode.
Copy button to enter
2. Place your original either on the document table or in the Auto Document Feeder. For
details, see "Setting Your Originals" on page 129.
3. Press the Advanced/Menu button.
The Copy advanced menu appears.
Downloaded from ManualsPrinter.com Manuals
Copying
204
4. Press the d Down button to select 2 Pages per Sheet, and then press the r Right
button.
5. Specify the desired copy settings as necessary. For details, see "Making Changes to
Copy Settings" on page 199.
6. Press the x B&W Start or x Color Start button to start copying.
To make a black-and-white copy, press the x B&W Start button. To make a color copy,
press the x Color Start button.
Using the document table
Set the documents one by one. When you press the x B&W Start or x Color Start button,
messages prompting you to set the next document and to confirm whether there are more
documents or not are displayed in the LCD panel.
Using the Auto Document Feeder
When you set all documents in the Auto Document Feeder and press the x B&W Start or
x Color Start button, the documents are fed automatically, and then scanning starts. If you
set an odd number of sheets in the Auto Document Feeder, a half of the last page is output
blank.
Reset the copy settings
The currently selected setting can be reset to the default value by pressing the
Reset
button. Pressing the
Reset button for a while resets all setting values to the default and
the LCD panel returns to the initial display.
Reset the copy settings in the LCD panel
To reset all settings you made to the factory settings, follow the steps below.
1. Press the
Setup button on the control panel.
The Setup light is on and the Setup menu appears in the LCD panel.
2. Press the d Down button until Copy Settings appears, and then press the r Right
button.
3. Press the d Down button to select Copy Factory Settings, and then press the r Right
button.
4. Make sure that Copy Factory Settings is selected, and then press the r Right button.
Downloaded from ManualsPrinter.com Manuals
Copying
205
When all settings are changed to the factory settings, the product returns to the Print
mode.
Restrictions on Copying
Operators of this product must observe the following restrictions in order to ensure the
responsible and legal use of this product.
Copying of the following items is prohibited by law
❏ Bank bills, coins, government-issued marketable securities, government bond
securities, and municipal securities
❏ Unused postage stamps, pre-stamped postcards, and other official postal items
bearing valid postage
❏ Government-issued revenue stamps, and securities issued according to legal
procedure
Exercise caution when copying the following items
❏ Private marketable securities (stock certificates, negotiable notes, checks, etc.),
monthly passes, concession tickets, etc.
❏ Passports, driver’s licenses, warrants of fitness, road passes, food stamps, tickets, etc.
Responsible use of copyrighted materials
Scanners can be misused by improperly copying copyrighted materials. Unless acting on
the advice of a knowledgeable attorney, be responsible and respectful by obtaining the
permission of the copyright holder before copying published material.
Downloaded from ManualsPrinter.com Manuals
Copying
206
Chapter 10
Faxing (Fax Model Only)
Setting Originals to Fax
You can load the original either on the document table or in the Auto Document Feeder
depending on the type of the original. For details, see "Setting Your Originals" on page 129.
Note:
❏ Before scanning a document, remember to respect the rights of copyright owners. Do not scan
published text or images without first checking their copyright status.
❏ If documents are placed both in the Auto Document Feeder and on the document table, only the
documents in the Auto Document Feeder are scanned.
Sending Faxes
Available original sizes:
❏ You can use A4, Letter, and Legal size originals for fax transmission.
❏ Legal size documents are available only with the Auto Document Feeder.
❏ The transmission result may differ from the original size. For example, when you fax an original
smaller than A4 size, it is transmitted in A4 landscape.
❏ You can fax a B5 size original, but it is output on A4 size paper on the recipient’s machine as
illustrated below.
Downloaded from ManualsPrinter.com Manuals
Faxing (Fax Model Only)
207
Original
Transmission data
**
*
Scanning
direction
Sent in A4 size
Transmitting
direction
*
Scanning
direction
**
Rotated 90
Transmitting
degrees and sent direction
in A4 size
* B5 size
** A4 size
Basics of sending faxes
1. Make sure that the product is turned on.
2. Press the
Fax button on the control panel.
The Fax light is lit and the LCD panel shows Fax Mode for a few seconds, then changes
to the fax mode’s screen.
Note:
❏ Do not turn off the power or press another mode’s button while faxing, as the fax process
may be performed incorrectly.
Downloaded from ManualsPrinter.com Manuals
Faxing (Fax Model Only)
208
❏ If no button is pressed for more than 3 minutes, any changes made are canceled and the
mode returns to the Print mode.
3. Place your original either on the document table or in the Auto Document Feeder. For
details, see "Setting Your Originals" on page 129.
4. Enter the recipient’s fax number directly from the numeric keypad on the control panel.
Note:
❏ A maximum of 50 characters can be entered for a recipient.
❏ If an incorrect number is entered, press the
Reset button to delete a character left to the
cursor. Pressing the l Left or r Right button moves the cursor left or right.
❏ When entering the recipient number, numerics (0 to 9), #, and * can be inserted using the
numeric keypad.
❏ When you press the Redial button instead of entering the recipient’s fax number, the fax
number you previously transmitted is automatically entered.
❏ When pressing the Pause button while entering the recipient number, a “-” is displayed for
the pause.
❏ You can also send a fax using the One Touch Dial button or the Speed Dial button. For
details, see "Sending faxes using the one-touch function" on page 211 or "Sending faxes
using the speed-dial function" on page 210.
5. Make the appropriate settings for your scanning purpose if necessary.
You can specify the Document Size, Density, Image Quality, Polling reception, and
Overseas transmission mode settings. For details, see "Selecting the appropriate
settings" on page 216.
Note:
When you press the x B&W Start or x Color Start button without making any settings here, the
fax transmission starts with the existing setting values.
6. Press the x B&W Start or x Color Start button to start the transmission.
To send a black-and-white fax, press the x B&W Start button. To send a color fax,
press the x Color Start button.
Note:
When the recipient’s fax machine supports only black-and-white fax, a color fax is received as
a black-and-white fax even if you press the x Color Start button.
Downloaded from ManualsPrinter.com Manuals
Faxing (Fax Model Only)
209
Sending faxes using the speed-dial function
When a recipient fax number is registered on the product, you can send a fax by choosing
the desired recipient from the speed-dial list in the LCD panel. You can register up to 60
recipient fax numbers on the product.
Note:
Before using the speed dial function, you need to register recipient fax information in advance. For
details, see "For Speed dial" on page 226 or "Using the EPSON Speed Dial Utility (for Windows
only)" on page 224.
1. Make sure that the product is in Fax mode. If not, press the
Fax mode.
Fax button to enter the
2. Place your original either on the document table or in the Auto Document Feeder. For
details, see "Setting Your Originals" on page 129.
3. Press the Speed Dial button on the control panel.
The registered recipient list appears in the LCD panel.
4. Press the u Up or d Down button several times until your desired recipient is selected,
then press the r Right button.
The selected recipient appears in the second top row in the LCD panel.
Note:
❏ You can also select a recipient by entering the number directly.
❏ To display the details of the assigned recipient, press the Advanced/Menu button while the
recipient is selected. To return to the list again, press either the Advanced/Menu button or
the l Left button.
5. Make the appropriate settings for your scanning purpose if necessary.
You can specify the Document Size, Density, Image Quality, Polling receptions, and
Overseas transmission mode settings. For details, see "Selecting the appropriate
settings" on page 216.
Downloaded from ManualsPrinter.com Manuals
Faxing (Fax Model Only)
210
Note:
When you press the x B&W Start or x Color Start button without making any settings here, the
fax transmission starts with the existing setting values.
6. Press the x B&W Start or x Color Start button to start the transmission.
To send a black-and-white fax, press the x B&W Start button. To send a color fax,
press the x Color Start button.
Note:
When the recipient’s fax machine supports only black-and-white fax, a color fax is received as
a black-and-white fax even if you press the x Color Start button.
Sending faxes using the one-touch function
When a frequently used recipient fax number is assigned for the One Touch Dial button (A,
B, or C), you can send a fax to the recipient by simply pressing the corresponding One
Touch Dial button.
Note:
❏ When sending a fax using the One Touch Dial button, the original is transmitted as a
black-and-white fax.
❏ Before using the one-touch dial function, you need to register recipient fax information in
advance. For details, see "For One-touch dial" on page 230 or "Using the EPSON Speed Dial
Utility (for Windows only)" on page 224.
❏ Pressing a One Touch Dial button (A, B, or C) in any mode accesses the Fax mode.
1. Place your original either on the document table or in the Auto Document Feeder. For
details, see "Setting Your Originals" on page 129.
2. Press a One Touch Dial button (A, B, or C).
The recipient assigned for One Touch Dial button A, B, or C appears in the second top
row of the setting items, and then fax transmission starts.
Downloaded from ManualsPrinter.com Manuals
Faxing (Fax Model Only)
211
Sending faxes using group-dial function
When multiple recipient fax numbers are registered in a group, the same original is sent to
all the registered recipients by choosing the desired group number. You can enter up to 20
groups on the product.
Note:
❏ When sending a fax using the group-dial function, the original is transmitted as a
black-and-white fax.
❏ Before using the group-dial function, you need to register multiple recipient fax numbers as a
group using EPSON Speed Dial Utility. For details, see online help.
1. Make sure that the product is in Fax mode. If not, press the
Fax mode.
Fax button to enter the
2. Place your original either on the document table or Auto Document Feeder. For details,
see "Setting Your Originals" on page 129.
3. Press the Speed Dial button twice on the control panel.
The group dial list appears in the LCD panel.
4. Press the u Up or d Down button several times until your desired group is selected,
then press the r Right button.
The selected group appears in the second top row in the LCD panel.
Note:
To display the details of the registered group, press the Advanced/Menu button while a group
is selected. To return to the group list again, press either the Advanced/Menu button or the
l Left button.
5. Make the appropriate settings for your scanning purpose if necessary.
You can specify the Document Size, Density, Image Quality, Polling reception, and
Overseas transmission mode settings. For details, see "Selecting the appropriate
settings" on page 216.
Downloaded from ManualsPrinter.com Manuals
Faxing (Fax Model Only)
212
Note:
When you press the x B&W Start button without making any settings here, the fax transmission
starts with the existing setting values.
6. Press the x B&W Start button to start the transmission.
Receiving Faxes
Output paper size
The received fax can be printed in A4, B5, Letter, or Legal. However, when the output
paper size does not match the received data size, the image of the received data is divided
according to the output paper size as follows.
Cassette
paper size
Received document size
Letter
A4
Legal
*1
Divided
*1
Divided
*1
Divided
Rotated
*2
Rotated
*2
Rotated
*3
Reduced
*1
Divided
*1
Divided
B5
*2
Letter
A4
*4
Trimmed
on both
ends
*4
Trimmed
on both
ends
*4
Trimmed
on both
ends
Legal
Downloaded from ManualsPrinter.com Manuals
Faxing (Fax Model Only)
213
In the list above, a shaded area indicates the printable area and a vertical line in the
shaded area indicates the location of the header information (head of the original).
*1
Divided: Received image is output on 2 pages.
*2
Rotated: Received image is rotated.
*3
Reduced: Received image is reduced in the sub-scan direction only.
*4
Trimmed on both ends: Both ends of the received image are trimmed.
Note:
When paper is loaded in both the MP tray and the optional paper cassette, paper in the optional
paper cassette is printed.
Basics of receiving faxes
When the product has an attached phone, you can select from four reception modes for
receiving a call. The default is set to the Fax only mode.
Setting item
Description
Auto switching
The call is received by the attached
phone and the product automatically
answers after the phone rings for a
certain duration specified by the
Attached Phone Timeout setting.
Fax only
The product automatically answers
and receives the fax. The phone rings
at least one time.
Phone only
The call is received by the attached
phone. Fax reception is not
performed.
TAM
When an attached phone detects a
fax/phone signal while answering an
incoming call, the product
automatically receives the fax.
To change the reception mode, follow the steps below.
1. Press the
Setup button on the control panel.
Downloaded from ManualsPrinter.com Manuals
Faxing (Fax Model Only)
214
The Setup light is lit and the Setup menu appears in the LCD panel.
2. Press the d Down button twice to select Fax Settings, then press the r Right button.
3. Press the d Down button twice to select Reception Settings, then press the r Right
button.
4. Press the d Down button to select Incoming Mode, then press the r Right button.
The Reception Settings menu appears.
5. Press the u Up or d Down button to select your desired reception mode, then press the
r Right button.
6. To exit the settings, press the l Left button several times or another mode’s button.
Receiving faxes when you hear fax tones
This function is used to print fax data after answering the incoming call using the attached
phone.
Before receiving faxes when you hear the fax tones, make sure that the product is in the
Fax mode. If not, press the
Fax button to enter the Fax mode.
Downloaded from ManualsPrinter.com Manuals
Faxing (Fax Model Only)
215
Note:
To use this function, your product needs to have an attached phone, and Incoming Mode in
Reception Settings needs to be set to Auto switching. For details, see "Making Changes to Fax
Settings" on page 216.
1. Answer the incoming call using the attached phone.
2. Press the x B&W Start or x Color Start button after confirming the fax tone.
The received data are printed by page as they are received.
Receiving faxes using fax polling
This function is used to get the information stored in the other party’s fax machine to your
product.
1. Make sure that the product is in Fax mode. If not, press the
Fax mode.
Fax button to enter the
2. Enter the other party’s fax number using the numeric keypad.
3. Press the u Up or d Down button several times until Polling Rcptn appears, then
press the l Left or r Right button to select On.
4. Press the x B&W Start or x Color Start button to start the transmission.
Making Changes to Fax Settings
Selecting the appropriate settings
You can change the following settings for transmitting or receiving faxes with the
appropriate settings.
Document size
You can specify the document size from A4, Letter, and Legal.
Note:
Legal size documents are available only with the Auto Document Feeder.
1. Make sure that the product is in Fax mode. If not, press the
Fax mode.
Downloaded from ManualsPrinter.com Manuals
Fax button to enter the
Faxing (Fax Model Only)
216
2. Make sure Docu Size is selected. If not, press the d Down button to select the item.
3. Press the l Left or r Right button several times until your desired document size
appears.
4. Press the u Up button to exit the document size setting, or make other settings if
necessary.
Density
When sending a fax, you can specify the transmission density from 7 levels (-3 to 3) on the
control panel. The greater the number, the darker the image.
1. Make sure that the product is in Fax mode. If not, press the
Fax mode.
Fax button to enter the
2. Press the d Down button to select Density.
3. Press the l Left or r Right button several times to specify your desired density level.
Note:
You can also set the density by entering the number directly with the numeric keypad.
4. Press the u Up button twice to exit the Density setting, or make other settings if
necessary.
Image quality
In black-and-white transmission, you can specify the image quality according to the
document type.
You can select the following image qualities.
Items
Description
Stndrd
(Standard)
Fax is transmitted with standard image
quality.
Qlty (Quality)
Fax is transmitted with the moiré-removal
and background-clearance functions
active. Effective for documents such as
magazines and catalogs.
Downloaded from ManualsPrinter.com Manuals
Faxing (Fax Model Only)
217
High QI
(High Quality)
Effective when faxing a document
containing small characters, graphics or
thin lines. Although the transmission
speed is lower, a finer fax can be
transmitted.
Photo
Effective for faxing photos taken with a
camera. Accurately reproduces the
gradation and subtle tonal variations.
Moiré removal is also performed.
1. Make sure that the product is in Fax mode. If not, press the
Fax mode.
Fax button to enter the
2. Press the d Down button twice to select ImageQlty.
3. Press the l Left or r Right button several times until your desired image quality
appears.
4. Press the u Up button three times to exit the image quality setting, or make other
settings if necessary.
Polling Reception
You can specify whether to use the polling reception function. When you select On, you can
import fax data stored in the sender’s fax machine.
1. Make sure that the product is in Fax mode. If not, press the
Fax mode.
Fax button to enter the
2. Press the u Up or d Down button several times until Polling Rcptn appears.
3. Press the l Left or r Right button to select On or Off.
4. Press the u Up button several times to exit the polling reception setting, or make other
settings if necessary.
Overseas transmission mode
When you transmit faxes overseas, set this function to On.
1. Make sure that the product is in Fax mode. If not, press the
Fax mode.
Fax button to enter the
2. Press the u Up or d Down button several times until Overseas Mode appears.
Downloaded from ManualsPrinter.com Manuals
Faxing (Fax Model Only)
218
3. Press the l Left or r Right button to select On or Off.
4. Press the u Up button several times to exit the overseas mode setting, or make other
settings if necessary.
Changing outgoing faxes settings
You can change the number of auto redial attempts and whether to print the sender’s
information with a transmission data.
Auto Redial
This function is used to specify the retry interval and the total retries when unable to
connect to the recipient due to a busy line.
Note:
The number of redial attempts can be set between 0 and 99. If you do not use the auto redial
function, select 0.
1. Press the
Setup button on the control panel.
The Setup light is lit and the Setup menu appears in the LCD panel.
2. Press the d Down button twice to select Fax Settings, then press the r Right button.
The Fax Settings menu appears.
3. Press the d Down button to select Transmssn Settings, then press the r Right button.
4. Make sure Auto Redial Tries is selected, then press the r Right button.
5. Press the u Up or d Down button to specify your desired number of redial attempts.
Note:
You can also set the number of auto redial attempts by entering the number using the numeric
keypad.
6. To exit the settings, press the l Left button several times or another mode’s button.
Printing sender information
This function is used to print sender information with a transmission data. When Print
Sender Info is set to On, the date, day of week, time, sender’s name, sender’s phone
number, and page number (fraction style display) are automatically printed at the top of the
transmission image.
Downloaded from ManualsPrinter.com Manuals
Faxing (Fax Model Only)
219
Note:
❏ Page numbers will not be printed when performing a manual transmission.
❏ Part of the document may be lost since the above information overwrites the document data.
Setting
Note
On
Prints the sender information
Off
Does not print the sender information
1. Press the
Setup button on the control panel.
The Setup light is lit and the Setup menu appears in the LCD panel.
2. Press the d Down button twice to select Fax Settings, then press the r Right button.
The Fax Settings menu appears.
3. Press the d Down button to select Transmssn Settings, then press the r Right button.
4. Press the d Down button to select Print Sender Info, then press the r Right button.
5. Press the u Up or d Down button to select On, then press the r Right button.
6. To exit the settings, press the l Left button several times or another mode’s button.
Changing incoming faxes settings
You can set the following items for receiving faxes in Reception Settings.
Reception Settings menu
Setting items
Paper Cassette
Auto, MP, LC
Incoming Mode
Auto switching, Fax only,
Phone only, TAM
Attached Phone Timeout
1 to 99
Fit to page
On, Off
1. Press the
Setup button on the control panel.
The Setup light is lit and the Setup menu appears in the LCD panel.
2. Press the d Down button twice to select Fax Settings, then press the r Right button.
The Fax Settings menu appears.
Downloaded from ManualsPrinter.com Manuals
Faxing (Fax Model Only)
220
3. Press the d Down button twice to select Reception Settings, then press the r Right
button.
4. Press the u Up or d Down button to select the item you want to change, then press the
r Right button.
Note:
When you set Attached Phone Timeout, you can also specify the number of seconds with the
numeric keypad.
5. Press the u Up or d Down button to select your desired settings.
6. To exit the settings, press the l Left button several times or another mode’s button.
Managing Communication Setup Function
Printing report
You can print the following communication reports or a fax information list to check various
transmission information and transmission results.
Type of report
Description
Speed Dial List
Prints a list for one-touch dial, group
dial, and speed dial information.
Activity Report
Prints an Activity report.
Fax Settings List
Prints the Fax settings items.
Memory Job
Info
Prints the job information stored in the
memory.
1. Make sure that the product is in Fax mode. If not, press the
Fax mode.
Fax button to enter the
2. Press the Advanced/Menu button.
3. Make sure that Printing Report is selected, and then press the r Right button.
4. Press the u Up or d Down button to select the report or list you want to print, and then
press the r Right button.
Printing starts.
Downloaded from ManualsPrinter.com Manuals
Faxing (Fax Model Only)
221
Fax communication setup settings
You can specify the following settings for fax communication reports.
Type of report
Description and setting items
Activity Report
This report contains transmission and reception information. You can
specify whether to automatically print every 50 transmissions or to not
automatically print them.
Transmission Report
Multiple Trans Report
On
Prints this report automatically for every 50
transmissions.
Off
Does not print this report automatically.
This report contains transmission information such as Start Time, number
of pages, and transmission result. You can specify when printing this
report.
On
Prints this report automatically each time fax
transmission occurs.
Error Only
Prints this report automatically only when an error
occurs.
Off
Does not print this report.
This report contains transmission information for multiple transmissions.
You can specify when printing this report.
On
Prints this report automatically each time multiple
fax transmission using group dial occurs.
Error Only
Prints this report automatically only when an error
occurs.
Off
Does not print this report.
Follow the steps below to change the report settings.
1. Press the
Setup button on the control panel.
The Setup light is lit and the Setup menu appears in the LCD panel.
2. Press the d Down button twice to select Fax Settings, then press the r Right button.
The Fax Settings menu appears.
3. Press the u Up or d Down button several times until CommunicationSetup appears,
then press the r Right button.
The Communication Setup menu appears.
4. Press the u Up or d Down button to select your desired report, then press the r Right
button.
Downloaded from ManualsPrinter.com Manuals
Faxing (Fax Model Only)
222
5. Press the u Up or d Down button to select your desired setting item, then press the
r Right button.
6. To exit the settings, press the l Left button several times or press another mode’s
button.
Fax Job Information
This function is used to confirm the status for a fax transmission or reception.
Setting item
Description
Memory Info
Display
Displays the remaining memory level
in percent.
FAX Transmission
Job
Displays the list of faxes to be
transmitted.
FAX Reception
Job
Displays the list of faxes to be printed.
1. Press the
Fax button on the control panel.
The Fax light is lit and the Fax menu appears in the LCD panel.
2. Press the Advanced/Menu button.
3. Press the d Down button to select Fax Job Info, then press the r Right button.
The Fax Job Information menu appears.
4. Press the d Down button to select your desired job information, then press the r Right
button.
5. To exit the settings, press the l Left button several times or press another mode’s
button.
Canceling a fax job
If the y Cancel button is pressed in Fax mode while a fax is being transmitted, the LCD
panel shows Cancel Print Job and the fax job is canceled.
Downloaded from ManualsPrinter.com Manuals
Faxing (Fax Model Only)
223
Registering Recipients
When sending faxes using the speed dial or one-touch dial function, you need to register
the recipient information in advance. You can register recipients either from EPSON Speed
Dial Utility or the Setup menu on the control panel.
c
Caution:
While using a fax function such as sending/receiving fax or making fax settings in Setup
mode, do not use EPSON Speed Dial Utility to change a recipient.
Note:
❏ When registering multiple recipient fax numbers on the product as a group, only EPSON Speed
Dial Utility is available. For details, see online help.
❏ Registering a recipient name is only available using EPSON Speed Dial Utility. For details, see
online help.
Using the EPSON Speed Dial Utility (for Windows only)
Installing EPSON Speed Dial Utility
Note:
For Windows 2000 and XP, you need the administrative privileges to install the software.
Follow the steps below to install EPSON Speed Dial Utility.
1. Make sure that the product is off and Windows is running on your computer.
2. Insert the software CD in the CD-ROM drive.
3. Click Continue. When the software Licence agreement screen appears, read the
statement, then click Agree.
4. Click User Installation.
Downloaded from ManualsPrinter.com Manuals
Faxing (Fax Model Only)
224
5. In the dialog box that appears, click Local.
6. Click Custom.
7. Select EPSON Speed Dial Utility check box, then click Install.
8. Then follow the on-screen instructions.
9. When the installation is complete, click Exit.
Accessing EPSON Speed Dial Utility
c
Caution:
❏ When accessing EPSON Speed Dial Utility, the product must be in Print mode. If the
product is in other than Print mode, such as in Copy mode, communication with EPSON
Speed Dial Utility is not available.
❏ While uploading or downloading speed dial data between your computer and the product,
jobs cannot be printed and faxes cannot be transmitted or received.
Follow the steps below to access EPSON Speed Dial Utility.
Downloaded from ManualsPrinter.com Manuals
Faxing (Fax Model Only)
225
1. Click Start, point to All Programs (Windows XP) or Programs (Windows Me, 98, or
2000), EPSON Speed Dial Utility, and then click Speed Dial Utility.
EPSON Speed Dial Utility window appears.
For using EPSON Speed Dial Utility, see the software online help.
Using the Setup menu on the control panel
You can register, change, or delete a recipient number for one-touch dial or speed dial on
the control panel.
Note:
When registering multiple recipient fax numbers on the product as a group, only EPSON Speed
Dial Utility is available. For details, see online help.
For Speed dial
Registering recipients
You can register up to 60 recipients in the speed dial list.
1. Make sure the product is turned on, and then press the
Setup button.
The Setup light is lit and the Setup menu appears in the LCD panel.
2. Press the d Down button twice to select Fax Settings, then press the r Right button.
The Fax Settings menu appears.
3. Press the u Up or d Down button several times until SpeedDialSettings appears,
then press the r Right button.
Downloaded from ManualsPrinter.com Manuals
Faxing (Fax Model Only)
226
4. Make sure that Indvdual SpeedDial is selected, and then press the r Right button.
The Speed dial list appears.
5. Press the u Up or d Down button several times to select the number displayed as
Unregistered, and then press the r Right button.
6. Press the d Down button to select Number=, and then press the r Right button.
Note:
To register a recipient name to the speed dial, use EPSON Speed Dial Utility. For details, see
online help.
7. Enter the phone number you want to register, and then press the r Right button.
Downloaded from ManualsPrinter.com Manuals
Faxing (Fax Model Only)
227
Note:
To correct a number while entering it, use the l Left button to back one character or the
Reset button to delete.
The registered speed dial is added to the speed dial list.
To change or delete a registered recipient in the speed-dial list, see "Changing
recipients" on page 228 or "Deleting recipients" on page 229.
Changing recipients
You can change recipient registered to another one in the speed dial list.
1. Make sure the product is turned on, and then press the
Setup button.
The Setup light is lit and the Setup menu appears in the LCD panel.
2. Press the d Down button twice to select Fax Settings, then press the r Right button.
The Fax Settings menu appears.
3. Press the u Up or d Down button several times until SpeedDial Settings appears,
then press the r Right button.
4. Make sure that Indvdual SpeedDial is selected, and then press the r Right button.
The Speed dial list appears.
5. Press the u Up or d Down button several times to select the recipient you want to
change, and then press the r Right button.
6. Make sure that Change Fax Number is selected, and then press the r Right button.
Downloaded from ManualsPrinter.com Manuals
Faxing (Fax Model Only)
228
7. Press the d Down button to select Number=, and then press the r Right button.
Note:
When registering a recipient name to the speed dial, use EPSON Speed Dial Utility. For details,
see online help.
8. Enter the phone number you want to register, and then press the r Right button.
Note:
To correct a number while entering it, use the l Left button or the
Reset button.
The registered speed dial is changed to the new one on the speed dial list.
Deleting recipients
You can delete registered recipients in the speed dial list.
1. Make sure the product is turned on, and then press the
Setup button.
The Setup light is lit and the Setup menu appears in the LCD panel.
2. Press the d Down button twice to select Fax Settings, then press the r Right button.
The Fax Settings menu appears.
Downloaded from ManualsPrinter.com Manuals
Faxing (Fax Model Only)
229
3. Press the u Up or d Down button several times until SpeedDial Settings appears,
then press the r Right button.
4. Make sure that Indvdual SpeedDial is selected, and then press the r Right button.
The speed dial list appears.
Note:
To clear all recipients that are registered in the speed-dial list, select Clear Speed Dial and
press the r Right button.
5. Press the u Up or d Down button several times to select the recipient you want to
delete, and then press the r Right button.
6. Press the d Down button to select Delete, and then press the r Right button.
7. Press the d Down button to select Yes for confirmation, and then press the r Right
button.
The registered recipient in the speed-dial list is deleted.
For One-touch dial
Assigning recipients
You can assign recipients from the registered speed dial list for the One Touch Dial button
A, B, or C.
1. Make sure the product is turned on, and then press the
Setup button.
The Setup light is lit and the Setup menu appears in the LCD panel.
2. Press the d Down button twice to select Fax Settings, then press the r Right button.
The Fax Settings menu appears.
Downloaded from ManualsPrinter.com Manuals
Faxing (Fax Model Only)
230
3. Press the u Up or d Down button several times until SpeedDial Settings appears,
then press the r Right button.
4. Press the d Down button to select One-Touch Dial, and then press the r Right button.
The One-Touch Dial list appears.
5. Press the d Down button to select one-touch dial A, B, or C displayed as
Unregistered, and then press the r Right button.
6. Press the d Down button to select a recipient you want to assign for the One Touch
Dial, and then press the r Right button.
The selected recipient is assigned for the One Touch Dial A, B, or C.
To change or delete a recipient assigned for the one-touch dial, see "Reassigning
recipients" on page 231 or "Deleting recipients" on page 233.
Reassigning recipients
You can reassign recipients from the registered speed dial list for the One Touch Dial
button A, B, or C.
1. Make sure the product is turned on, and then press the
Downloaded from ManualsPrinter.com Manuals
Setup button.
Faxing (Fax Model Only)
231
The Setup light is lit and the Setup menu appears in the LCD panel.
2. Press the d Down button twice to select Fax Settings, then press the r Right button.
The Fax Settings menu appears.
3. Press the u Up or d Down button several times until SpeedDial Settings is selected,
then press the r Right button.
4. Press the d Down button to select One-Touch Dial, and then press the r Right button.
The One-Touch Dial list appears.
5. Press the d Down button to select one-touch dial A, B, or C you want to change a
recipient, and then press the r Right button.
6. Make sure that Change is selected, and then press the r Right button.
7. Press the d Down button to select the number you want to reassign for the One Touch
Dial button, and then press the r Right button.
The selected recipient is assigned to the corresponding One Touch Dial button, then it
is displayed in the one-touch dial list.
Downloaded from ManualsPrinter.com Manuals
Faxing (Fax Model Only)
232
Deleting recipients
You can delete recipients from the assigned One Touch Dial button A, B, or C.
1. Make sure the product is turned on, and then press the
Setup button.
The Setup light is lit and the Setup menu appears in the LCD panel.
2. Press the d Down button twice to select Fax Settings, then press the r Right button.
The Fax Settings menu appears.
3. Press the u Up or d Down button several times until SpeedDial Settings appears,
then press the r Right button.
4. Press the d Down button to select One-Touch Dial, and then press the r Right button.
The One-Touch Dial menu appears.
5. Press the d Down button to select the One Touch Dial button A, B, or C, and then press
the r Right button.
6. Press the d Down button to select Delete, and then press the r Right button.
7. Press the d Down button to select Yes for confirmation, and then press the r Right
button.
Downloaded from ManualsPrinter.com Manuals
Faxing (Fax Model Only)
233
The recipient assigned for the one-touch dial is deleted.
Downloaded from ManualsPrinter.com Manuals
Faxing (Fax Model Only)
234
Chapter 11
Using the Control Panel
Selecting a Mode
You can use this product as a printer, copier, fax, and scanner. When the product is turned
on, it enters the Print mode automatically. When using one of these functions, select your
desired function by pressing the corresponding mode button on the control panel. Each
mode’s main screen appears in the LCD panel as you select the mode.
There are three mode buttons on the control panel that allow you to switch between the
four modes: Print mode (default mode), Copy mode, Fax mode, and Scan mode. In
addition, you can also use the
Setup button for making various settings for this product.
For details on the Setup menu, see "Using the Setup Menu" on page 238.
Note:
❏ The fax function is available for EPSON AcuLaser CX21NF model only.
❏ If no button is pressed for more than 3 minutes, any changes made are canceled and the mode
returns to the Print mode.
❏ If you press a mode button while the product is in that mode, e.g., pressing the
in Fax mode, the mode returns to the Print mode.
Fax button
❏ You cannot switch between modes in the following cases.
- When an error has occurred on the whole system such as a service call error or a system
error.
- When a job is being processed in any of the modes.
Mode Menus
You can use your desired mode according to your job purpose. To access your desired
mode, press the corresponding mode button on the control panel.
Downloaded from ManualsPrinter.com Manuals
Using the Control Panel
235
Print mode
The default mode of this product is Print mode. While the product is in Print mode, the Print
light (green) is lit and the following screen appears.
Note:
During the printing process, you cannot access other modes.
Copy mode
To use the copy function, press the
Copy button on the control panel to enter the Copy
mode. While the product is in Copy mode, the following screen appears.
Note:
❏ Fax reception is available even while copying.
❏ If you press the
Copy button while in Copy mode, the screen returns to the Print mode.
Downloaded from ManualsPrinter.com Manuals
Using the Control Panel
236
Fax mode (fax model only)
To use the fax function, press the
Fax button on the control panel to enter the Fax
mode. While the product is in Fax mode, the following screen appears.
Note:
❏ If no button is pressed for more than 3 minutes, any changes made are canceled and the mode
returns to the Print mode.
❏ If you press the
Fax button while in Fax mode, the screen returns to the Print mode.
❏ Even in Fax mode, TWAIN scan (only when the scanner is not operating) and printing using the
host interface are available.
Scan mode
To use the scanning function, press the
Scan button on the control panel to enter the
Scan mode. While the product is in Scan mode, the following screen appears.
Note:
❏ Even in Scan mode, TWAIN scan, fax reception, and printing are available.
❏ If you press the
Scan button while in Scan mode, the screen returns to the Print mode.
Downloaded from ManualsPrinter.com Manuals
Using the Control Panel
237
Using the Setup Menu
This section describes how to use the Setup menu, and when it is appropriate to make
product settings using the Setup menu screen. You can use the Setup menu in the LCD
panel to access a variety of menus that allow you to make product settings.
When to make Setup menu settings
You can make the following settings for copying, faxing, scanning, and printing on the
Setup menu.
Setup menu
Setting items
Printer Settings
Use this menu to make the following
printer settings.
- Information Menu
- Tray Menu
- Emulation Menu
- Printing Menu
- Setup Menu
- Reset Menu
- PCL Menu
- PS3 Menu
Host I/F Settings
Use this menu to make the following
interface settings.
- USB Menu
- Network Menu
Fax Settings
Use this menu to make the following
fax settings (fax model only).
- Basic Settings
- Transmission Settings
- Reception Settings
- Speed Dial Settings
- Forward Settings
- Communication Setup
- Fax Factory Settings
Copy Settings
Use this menu to make the following
copy settings.
- Copy Function Settings
- Copy Factory Settings
Scan Settings
Use this menu to make the following
scan settings
- Carriage Lock
Downloaded from ManualsPrinter.com Manuals
Using the Control Panel
238
For Printer Settings:
In general, Printer Settings can be made from the printer driver, and do not need to be
made using the Setup menu. In fact, printer driver settings override settings made using
the Setup menu, so use the Setup menu only to make settings you cannot make in your
software or printer driver.
How to access the Setup menu settings
For a complete description of the items and settings available in the Setup menu, see
"Setting menus" on page 240.
1. Make sure the product is turned on, and then press the
Setup button.
The Setup light is lit and the LCD panel shows Setup Mode for a few seconds, and then
changes to the Setup menu screen.
Note:
An arrow mark in the LCD panel indicates the currently available button (u Up, d Down, l Left,
or r Right) on the control panel for the operation.
2. Use the u Up and d Down buttons to select your desired Setup menu, and then press
the r Right button to view the items in the menu.
Downloaded from ManualsPrinter.com Manuals
Using the Control Panel
239
3. Use the u Up and d Down buttons to scroll through the items, and then press the
r Right button to carry out the operation indicated by the selected item, or to view the
settings available for the item.
Note:
❏ To return to the previous (higher) level, press the l Left button.
❏ The * asterisk mark indicates the current setting value.
4. Exit the Setup menu.
To switch to another mode, use the following method.
❏ Press the
Copy,
❏ Press the
Setup button again in Setup mode to switch to the Print mode.
Fax, or
Scan button to switch to the corresponding mode.
Setting menus
Press the u Up and d Down buttons to scroll through the menus. The menus and menu
items appear in the order as described below.
Note:
Some menus and items appear only when a corresponding optional device is installed or an
appropriate setting has been done.
Information Menu
From this menu you can check the toner level and the remaining service life of consumable
products. You can also print status and sample sheets showing the printer’s current
settings, available fonts, and a brief summary of available features.
Press the u Up or d Down button to select an item. Press the r Right button to print a
sheet or font sample.
Downloaded from ManualsPrinter.com Manuals
Using the Control Panel
240
Item
Settings
Status Sheet
-
Network Status Sheet
-
PS3 Status Sheet
-
PS3 Font List
-
PCL Font Sample
-
USB Ext I/F StatusSht*1
-
Cyan(C) Toner*2
E______F to E******F
Magenta(M) Toner*2
E______F to E******F
Yellow(Y) Toner*2
E______F to E******F
Black(K) Toner*2
E______F to E******F
Photocon*2
E______F to E******F
Total Pages*2
0 to 99999999
Color Pages*2
0 to 99999999
B/W Pages*2
0 to 99999999
*1
Available only when the printer is connected to a USB device with D4 support and has been turned on
when the USB I/F setting is set to On.
*2
This item is for display only and cannot be modified.
Status Sheet
Prints a sheet showing the current Printer Settings and installed options. These sheets can
be useful to confirm whether options have been installed correctly.
Network Status Sheet
Prints a sheet showing the working status of the network.
PS3 Status Sheet
Prints a sheet showing information about the PS3 mode such as the PS3 version.
PS3 Font List /PCL Font Sample
Prints a sample of the fonts available for your selected printer emulation.
Cyan(C) Toner/Magenta(M) Toner/Yellow(Y) Toner/Black(K) Toner/Photocon
Displays the remaining service lives of the toner cartridges, and the remaining service life
of the photoconductor unit, from * to ******.
Downloaded from ManualsPrinter.com Manuals
Using the Control Panel
241
Total Pages
Displays the total number of pages printed by the product.
Color Pages
Displays the total number of pages printed in color by the product.
B/W Pages
Displays the total number of pages printed in black and white by the product.
Tray Menu
This menu allows you to specify the size and type of paper loaded in the MP tray and the
optional paper cassette.
The paper type settings in this menu can also be made from your printer driver. Settings
you make in your printer driver override these settings, so use your printer driver whenever
you can.
Item
Settings
MP Tray Size
A4, A5, B5, LT (Letter), HLT (Half Letter), LGL (Legal), GLT (Government
Letter), GLG (Government Legal), EXE (Executive), F4, MON (Monarch),
C10, DL, C5, C6, IB5 (ISO B5)
LC Size
A4, LT (Letter)
MP Type
Plain, SemiThk (Semi Thick), Preprinted, Letterhead, Recycled, Color,
Transparency Labels
LC Type
Plain, SemiThk (Semi Thick), Preprinted, letterhead, Recycled, Color
MP Tray Size
Select the size of your paper that is set in MP tray from this menu.
LC Size
Lets you select the paper size loaded in the optional paper cassette.
MP Type
Lets you set the paper type loaded in the MP tray.
LC Type
Lets you select the paper type loaded in the optional paper cassette.
Downloaded from ManualsPrinter.com Manuals
Using the Control Panel
242
Emulation Menu
Use this menu to select the printer emulation mode. You can specify different emulations
for each interface; in other words, for each computer you connect the printer to. The
settings you can choose from are the same for every interface.
Item
Settings
USB
Auto, PS3, PCL
Network
Auto, PS3, PCL
Printing Menu
This menu allows you to make standard print settings, such as Page Size and Orientation,
when printing from an application or operating system that does not support your printer
driver. Be sure to use the printer driver to make these settings whenever you can, since
settings made on your computer always override these settings.
*1
Item
Settings
Page Size
A4*1, A5, B5, LT*1, HLT, LGL, GLT, GLG, EXE, F4, MON, C10, DL, C5, C6, IB5,
CTM*2
Wide A4*3
Off, On
Orientation
Port, Land
Resolution
300, 600
RITech
On, Off
Toner Save
Off, On
Image Optimum*3
Auto, Off, On
Top Offset
-99.0 ... 0.0 ... 99.0 mm in 0.5 increments
LeftOffset
-99.0 ... 0.0 ... 99.0 mm in 0.5 increments
Default setting varies according to the country of purchase.
*2
Custom-size paper is 90.0 × 110.0 mm at the minimum and 220 × 355.6 mm at the maximum, but EPSON
recommends printing on paper that is not wider than 215.9 mm.
*3
Not available in PS3 mode.
Page Size
Specifies the paper size.
Wide A4
Selecting On decreases the left and right margins from 4 mm to 3.4 mm.
Downloaded from ManualsPrinter.com Manuals
Using the Control Panel
243
Orientation
Specifies whether the page is printed in portrait or landscape orientation.
Resolution
Specifies the printing resolution.
RITech
Turning RITech on produces smoother and crisper lines, text, and graphics.
Toner Save
When this setting is selected, the product saves toner by substituting a gray shade for the
black inside of characters. The characters are outlined in full black on the right and lower
edges.
Image Optimum
When this mode is on, the quality of graphics is reduced. It reduces the amount of graphics
data when the data reaches the memory limit, allowing complex documents to be printed.
Top Offset
Makes fine adjustments to the vertical printing position of the page.
c
Caution:
Make sure that the printed image does not extend beyond the edge of the paper. Otherwise,
you may damage the product.
Left Offset
Makes fine adjustments to the horizontal printing position of the page. This is useful for fine
adjustments.
c
Caution:
Make sure that the printed image does not extend beyond the edge of the paper. Otherwise,
you may damage the product.
Setup Menu
This menu allows you to make various basic configuration settings related to paper
sources, feeding modes, and error handling. You can also use this menu to select the LCD
panel display language.
Downloaded from ManualsPrinter.com Manuals
Using the Control Panel
244
Item
Settings
Language (Display Language)
English, French, German, Italian, Spanish, Swedish, Danish,
Dutch, Finnish, Portuguese, Simplified Chinese, Traditional
Chinese, Korean
Time to Sleep
5, 15, 30, 60, 120, 180 min.
Time Out
0 to 300 min.
Paper Source
Auto, MP, LC
MP Mode
Normal, Last
Manual Feed
Off, 1st Page, EachPage
Copies
1 to 999
Paper Type
Normal, SemiThk, Thick, ExtraThk, Transparency, Coated
Page Side
Front, Back
Auto Eject Page
Off, On
Size Ignore
Off, On
Auto Cont (Auto Continue)
Off, On
LCD Contrast
0 to 15
Time Setting
YYYY/MM/DD, HH/MM
Date Format
DD/MM/YY, MM/DD/YY, YY/MM/DD*
* This item differs depending on the destination.
Language (Display Language)
Specifies the language displayed in the LCD panel and that printed on the status sheet.
Time To Sleep
Specifies the length of time until the printer enters the sleep mode if there are no button
operations.
Time Out
Specifies the length of the time, in seconds, before a time out when interfaces are being
switched automatically. The time before a time out occurs is the length of time from the
point when no data is being received from an interface until the point of switching the
interface. If the printer has a print job when switching the interface, the printer prints the
print job.
Paper Source
Downloaded from ManualsPrinter.com Manuals
Using the Control Panel
245
Specifies whether paper feeds into the printer from the MP tray or the optional paper
cassette unit. If you select Auto, paper feeds from the paper source containing paper that
matches your Paper Size setting. If an envelope size (C5, C6, C10, DL, Mon, IB5) or
custom size is selected as the Page Size setting, paper always feeds from the MP tray.If
you select Thick, ExtraThk, or Transparency as the Paper Type setting, paper always
feeds from the MP tray.
MP Mode
This setting determines whether the MP tray has the higher or lower priority when Auto is
selected as the Paper Source setting in the printer driver. When Normal is selected, the MP
tray has the higher priority as the paper source. If you select Last, the MP tray has the
lower priority.
Manual Feed
Allows you to select the manual feed mode for the MP tray.
Copies
Designates the number of copies to be printed, from 1 through 999.
Paper Type
Specifies the type of paper to be used for printing. The printer adjusts the printing speed
according to this setting. The printing speed is reduced when Thick, ExtraThk,
Transparency or Coated is selected.
Page Side
Select Front when printing on the front of paper. Select Back when printing on the back of
paper.
Auto Eject Page
Specifies whether or not to eject paper when the limit specified in the Time Out setting is
reached. The default is Off, which means paper is not ejected when the time-out limit is
reached. This setting is invalid in PS3 mode.
Size Ignore
If you want to ignore a paper size error, select On. When you turn this item on, the product
keeps printing even if the image size exceeds the printable area for the specified paper
size. This may cause smudges because of the toner that is not transferred onto the paper
properly. When this item is turned off, the product stops printing if a paper size error occurs.
Auto Cont (Auto Continue)
Downloaded from ManualsPrinter.com Manuals
Using the Control Panel
246
When you turn this setting on, the product automatically continues printing after a certain
period of time when one of the following errors occurs: Paper Set, Print Overrun, or Need
More Memory. When this option is off, you must press the x B&W Start or x Color Start
button to resume printing.
LCD Contrast
Adjusts the contrast of the LCD panel. Use the u Up and d Down buttons or the numeric
keypad to set the contrast between 0 (lowest contrast) and 15 (highest contrast.)
Time Setting
Specifies the date and time used in fax communications. The letters YYYY, MM, DD, HH, and
MM indicate the Year, Month, Date, Hour, and Minute respectively. To specify the year,
date, and time use either the u Up and d Down button, or numeric keypad.
Date Format
Specifies the display format for the Time Setting. The letters DD, MM, and YY indicate the
Date, Month, and Year respectively.
Reset Menu
This menu allows you to cancel printing and reset the printer settings.
Clear Warning
Clears a warning message that shows an error except for those that occur from
consumable products or mandatory-replacement parts.
Clear All Warnings
Clears all warning messages that appear in the LCD panel.
Reset
Stops printing and clears the current job received from the active interface. You may want
to reset the product when there is a problem with the print job itself and the product cannot
print successfully.
Reset All
Stops printing, clears the printer memory, and restores the printer settings to their default
values. The print jobs received from all interfaces are erased.
Downloaded from ManualsPrinter.com Manuals
Using the Control Panel
247
Note:
Performing Reset All clears print jobs received from all interfaces. Be careful not to interrupt
someone else’s job.
SelectType Init
Restores the control panel menu settings to their default values.
Change Toner C/M/Y/K
Replace the indicated toner cartridge. See "Toner Cartridge" on page 278 for details.
Reset Fuser Counter
Reset the fuser unit service life when you replace the fuser unit.
PCL Menu
These settings are available in the PCL mode.
Item
Settings
FontSource
Resident, Download*1
Font Number
0… 65535 (depending on your settings)
Pitch*2
0.44 … 10.00 … 99.99 cpi in 0.01 cpi increment
Height*2
4.00 … 12.00 … 999.75 pt in 0.25 pt increment
SymSet
IBM-US, Roman-8, Roman-9, ECM94-1, 8859-2 ISO, 8859-9 ISO, 8859-10ISO,
8859-15ISO, PcBlt775, IBM-DN, PcMultiling, PcE.Europe, PcTk437, PcEur858,
Pc1004, WiAnsi, WiE.Europe, WiTurkish, WiBALT, DeskTop, PsText, VeInternati,
VeUS, MsPublishin, Math-8, PsMath, VeMath, PiFont, Legal, UK, ANSI ASCII,
Swedis2, Italian, Spanish, German, Norweg1, French2, Windows, McText,
Hebrew7, 8859-8 ISO, Hebrew8, Arabic8, OCR A, OCRB, Pc866Cyr, Pc866Ukr,
WinCyr, ISOCyr, Pc8Grk, Pc851Grk, WinGrk, ISOGrk, Greek8, Pc862Heb,
Pc864Ara, HPWARA
Form
5 … 64 … 128 lines
CR Function
CR, CR+LF
LF Function
LF, CR+LF
Tray Assign
4K, 5S, 4
*1
Available only when downloaded fonts are available.
*2
Depending on the font that has been selected.
FontSource
Sets the default font source.
Downloaded from ManualsPrinter.com Manuals
Using the Control Panel
248
Font Number
Sets the default font number for the default font source. The available number depends on
the settings you made.
Pitch
Specifies the default font pitch if the font is scalable and of fixed-pitch. You can select from
0.44 to 99.99 cpi (characters per inch), in 0.01-cpi increments. This item may not appear
depending on the Font Source or Font Number settings.
Height
Specifies the default font height if the font is scalable and proportional. You can select from
4.00 to 999.75 points, in 0.25-point increments. This item may not appear depending on
the Font Source or Font Number settings.
SymSet
Selects the default symbol set. If the font you selected in Font Source and Font Number is
not available in the new SymSet setting, the Font Source and the Font Number settings are
automatically replaced with the default value, IBM-US.
Form
Selects the number of lines for the selected paper size and orientation. This also causes a
line spacing (VMI) change, and the new VMI value is stored in the printer. This means that
later changes in the Page Size or Orientation settings cause changes in the Form value,
based on the stored VMI.
CR Function, LF Function
These functions are included for users of particular operating systems, such as UNIX.
Tray Assign
Changes the assignment for the paper source select command. When 4 is selected, the
commands are set as compatible with the HP LaserJet 4. When 4K is selected, the
commands are set as compatible with the HP LaserJet 4000, 5000, and 8000. When 5S is
selected, the commands are set as compatible with the HP LaserJet 5S.
PS3 Menu
This menu allows you to make settings which affect the printer when it is in the PS3 mode.
Downloaded from ManualsPrinter.com Manuals
Using the Control Panel
249
*
Item
Settings
Error Sheet
Off, On
Coloration
Color, Mono
Image Protect
Off, On
Binary*
Off, On
Text Detection
Off, On
Available only when connected via Network interface.
Error Sheet
When you select On, the printer prints out an error sheet when an error occurs in the PS3
mode or when the PDF file you tried to print is not a supported version.
Coloration
Allows you to select the color printing or black-and-white printing mode.
Image Protect
The printer employs lossy compression when Off is selected. The printer does not employ
lossy compression when On is selected. Lossy compression refers to a data compression
technique in which some amount of data is lost.
Binary
Specifies the data format. Select On for the Binary data and select Off for the ASCII data.
When you select On, PDF formatted files which are transferred via network interface can be
printed directly.
Note:
❏ Binary can only be used with network connection.
❏ You do not have to select On when using AppleTalk.
To use the Binary data, make sure your application supports Binary data and that SEND
CTRL-D Before Each Job and SEND CTRL-D After Each Job are set to No.
When this setting is set to On, you cannot use TBCP (Tagged binary communication
protocol) in the printer driver settings.
Text Detection
When you select On, the text file is converted to a PostScript file when printing. This setting
is available only when you select PS3 in the Emulation Menu.
Downloaded from ManualsPrinter.com Manuals
Using the Control Panel
250
USB Menu
These settings control communication between the product and the computer when using
a USB interface.
Item
Settings
USB I/F*1
On, Off
USB Speed*1
HS, FS
USB ExtI/FConfg*1
Yes, No
Get IPAddress*2
Panel, Auto, PING
IP (IP address)*2*3*4
0.0.0.0 to 255.255.255.255
SM (Subnet mask)*2
0.0.0.0 to 255.255.255.255
GW (Gateway address)*2
0.0.0.0 to 255.255.255.255
AppleTalk*2
On, Off
MS Network*2
On, Off
Bonjour*2
On, Off
USB EXT I/F Init*2
-
Buffer Size
Normal, Maximum, Minimum
*1
After this item is changed, the setting value takes effect after a warm boot or after the power is turned on
again. While it is reflected in the Status Sheet, the actual change takes effect after a warm boot or after the
power is turned on again.
*2
Displayed only when a USB external device is connected and the USB Ext I/F Confg is set to Yes. The
contents of the settings depend on the USB external device settings.
*3
This setting cannot be changed only when the Get IPAddress is set to Auto.
*4
When the Get IPAddress is changed from Panel or PING to Auto, the panel setting values are saved. When
Auto is changed to Panel or PING, the saved setting values are displayed. 192.168.192.168 if the settings
are not made from the panel.
USB I/F
Allows you to activate or deactivate the USB interface.
USB Speed
Allows you to select the operation mode of USB interface. Selecting HS is recommended.
Select FS if HS does not work on your computer system.
Buffer Size
Downloaded from ManualsPrinter.com Manuals
Using the Control Panel
251
Determines the amount of memory to be used for receiving data and printing data. If
Maximum is selected, more memory is allocated for receiving data. If set to Minimum is
selected, more memory is allocated for printing data.
Note:
❏ To activate Buffer Size settings, you must turn off the printer for more than five seconds then
turn it back on. Or, you can perform a Reset All operation, as explained in Reset Menu.
❏ Resetting the printer erases all print jobs. Make sure the Ready light is not flashing when you
reset the printer.
Network Menu
See the Network Guide for each setting.
Basic Settings
This menu allows you to specify the basic settings for the fax mode.
Item
Settings
Line Type
PSTN, PBX, FlashStart*1
Dial Type
Tone, 10 pps, 20 pps
Personal Number
Name*2: up to 32 characters
Number: up to 20 digits
Speaker Volume
Off, 1, 2, 3
Country/Area Setting
Austria, Belgium, Denmark, Finland, France, Germany, Greece,
Holland, Ireland, Italy, Luxemburg, Portugal, Spain, Sweden, U.K.,
Poland, Czech, Hungary, Switzerland, Norway
Report Print Setup*3
English, French, German, Italian, Spanish, Swedish, Danish, Dutch,
Finnish, Portuguese, Simplified Chinese, Traditional Chinese, Korean
*1
This item is only available in Germany and France.
*2
Name can be registered only with EPSON Speed Dial Utility.
*3
Default value is determined according to the country/area setting.
Note:
Press the * asterisk button on the numeric keypad when you want to enter a + mark in a Personal
Number. Also, press the # button on the numeric keypad when you want to enter a space.
Transmission Settings
This menu allows you to specify the transmission settings for the fax mode.
Downloaded from ManualsPrinter.com Manuals
Using the Control Panel
252
Item
Settings
Auto Redial Tries
0 to 99
Print Sender Info
On, Off
Reception Settings
This menu allows you to specify the reception settings for the fax mode.
Item
Settings
Paper Cassette
Auto, MP, LC
Incoming Mode
Auto switching, Fax only, Phone
only, TAM
Attached Phone
Timeout
1 to 99
Fit to page
On, Off
Speed Dial Settings
This menu allows you to specify the following setting items.
Item
Settings
Individual Speed
Dial
Register, Change, Delete
One-Touch Dial
Register, Change, Delete
Clear Speed Dial
Clears registered all speed dial
information.
Forward Settings
This menu allows you to specify the following setting items.
*
Item
Settings
Forward Number
Displays a list of the registered
forward numbers.
Forward
On, Off
“Unregistered” is displayed as one of the forward number options.
Downloaded from ManualsPrinter.com Manuals
Using the Control Panel
253
Communication Setup
This menu allows you to specify when you want to print the following reports.
Item
Settings
Activity Report
On, Off
Transmission
Report
On, Error Only, Off
Multiple Trans
Report
On, Error Only, Off
Fax Factory Settings
Item
Description
Factory Settings
Changes fax settings to their
factory settings.
Copy Settings
Item
Settings
Copy Function
Settings
Changes copy activity settings
to their default settings.
Copy Factory
Settings
Changes copy settings to their
factory settings.
Scan Settings
Item
Description
Carriage Lock
Returns the scanner’s carriage
to the locked position.
Printing a Status Sheet
To confirm the current status of the product, and that the options are installed correctly,
print a status sheet using the product’s control panel.
Follow the steps below to print a status sheet.
Downloaded from ManualsPrinter.com Manuals
Using the Control Panel
254
1. Make sure the product is turned on.
2. Raise and open the stopper on the extension tray.
3. Press the
Setup button to enter the Setup mode. The Setup light is lit and Setup
menu appears in the LCD panel.
4. Make sure Printer Settings is selected, and then press the r Right button. The
Printer Settings menu appears.
5. Make sure Information Menu is selected, and then press the r Right button.
6. Make sure Status Sheet is selected, and then press the r Right button.
The Data light blinks and the product starts printing a status sheet.
Note:
❏ Confirm that the information about the installed options is correct. If the options are installed
correctly, they appear under Hardware Configurations. If the options are not listed, try
reinstalling them.
❏ If the status sheet does not list your installed options correctly, make sure that they are securely
connected to the product.
❏ If you are unable to get the product to print a correct status sheet, contact your dealer.
Downloaded from ManualsPrinter.com Manuals
Using the Control Panel
255
❏ For the Windows printer driver, you can update the installed option information manually. See
"Making Optional Settings" on page 64.
Canceling a Job
Canceling printing
You can cancel printing from your computer by using the printer driver.
To cancel a print job before it is sent from your computer, see "Canceling Printing" on page
77 (for Windows) or "Canceling Printing" on page 113 (for Macintosh).
Using the Cancel button
The y Cancel button on your product is the quickest and easiest way to cancel printing.
Pressing this button cancels the currently printing job. Pressing and holding the y Cancel
button for more than three seconds deletes all jobs from the product memory, including
jobs the product is currently receiving or printing.
Using the Reset Menu settings
Selecting Reset from the Setup menu stops printing clears the print job being received from
the active interface, and clears errors that may have occurred at the interface.
Follow the steps below to use the Reset menu.
1. Press the
Setup button to enter the Setup menu.
2. Make sure Printer Settings is selected, and then press the r Right button.
3. Press the u Up or d Down button several times until Reset Menu is selected, then press
the r Right button.
4. Press the d Down button twice to select Reset.
5. Press the r Right button.
Printing is canceled.
The Print mode screen appears in the LCD panel, and the product is ready to receive a
new print job.
Downloaded from ManualsPrinter.com Manuals
Using the Control Panel
256
Canceling scanning
When you press the y Cancel button on the control panel, a scanning job in Scan mode is
canceled or the TWAIN processing is stopped.
Canceling copying
When you press the y Cancel button while scanning in Copy mode, the LCD panel shows
Cancel Print Job and the copy job is canceled.
Canceling faxing
Using the Cancel button
When you press the y Cancel button while scanning in Fax mode, the LCD panel shows
Cancel Print Job and the fax job is canceled.
Using the Fax Settings menu
This function is used to cancel the fax transmission job stored in the memory.
1. Make sure that the product is in Fax mode. If not, press the
Fax mode.
Fax button to enter the
2. Press the Advanced/Menu button.
3. Press the d Down button to select Fax Job Information, and then press the r Right
button.
4. Press the d Down button to select Fax Transmission Job, and then press the r Right
button.
The FAX Transmission Job list is displayed.
Note:
To cancel the receiving fax job stored in the memory, press the u Up or d Down button several
times until FAX Reception Job is selected and press the r Right button. Then select the
incoming fax you want to cancel from the FAX Reception Job list.
5. Press the u Up or d Down button to select the fax job you want to cancel, and then
press the
Reset button.
6. Press the u Up or d Down button to select Yes for confirmation, and then press the
r Right button
Downloaded from ManualsPrinter.com Manuals
Using the Control Panel
257
Status and Error Messages
This section contains a list of error messages shown in the LCD panel. They give a brief
description of each message and suggestions for correcting the problem. Note that not
every message shown in the LCD panel indicates a problem. When the mark is
displayed at the left of the warning message, multiple warnings have occurred.
Printer error messages
Calibrating Printer
The product automatically calibrates itself. This is not an error message, and will clear itself
after about one minute or more depending on the status of the product. While the product
displays this message, do not open the covers or turn off the product.
Cancel All Print Job
The product is canceling all print jobs in the product memory, including jobs the product is
currently receiving or printing. This message appears when the y Cancel button has been
pressed down for more than three seconds.
Cancel Print Job
The product is canceling the current print job. This message appears when the y Cancel
button has been pressed and released within three seconds.
Can’t Print
The print data is deleted because it is incorrect.
Make sure that the appropriate printer driver is being used.
Check Transparency
You have loaded media other than transparencies when the paper type settings in the
printer driver is Transparency, or transparencies are loaded when the paper settings in
the printer driver is not set to Transparency. Paper is jammed at the MP tray.
To clear the jam, see "When transparencies are jammed at the MP tray" on page 348.
Check Paper Size
The paper size setting is different from the size of paper loaded in the product. Check to
see if the correct size of paper is loaded in the specified paper source.
Downloaded from ManualsPrinter.com Manuals
Using the Control Panel
258
To clear this error, select Clear Warning from Reset Menu in the Setup menu’s Printer
Settings. See "How to access the Setup menu settings" on page 239 for instructions.
Check Paper Type
The media loaded in the product does not match the paper type setting in the printer driver.
Media that matches only the paper size setting will be used for printing.
To clear this error, select Clear Warning from Reset Menu in the Setup menu’s Printer
Settings. See "How to access the Setup menu settings" on page 239 for instructions.
Color Unmatched
The colors on your computer do not match the colors output by the product. The version of
the driver that is installed and the model of the product’s color screen are not compatible.
Install the latest version of the printer driver and printer firmware. For details, contact your
dealer or service agent.
Image Optimum
There is insufficient memory to print the page at the specified print quality. The product
automatically lowers the print quality so that it can continue printing. If the quality of the
printout is not acceptable, try simplifying the page by limiting the number of graphics or
reducing the number and size of fonts.
To clear this error, select Clear Warning from the Reset Menu in the Setup menu’s
Printer Settings. See "How to access the Setup menu settings" on page 239 for
instructions.
You may need to increase the amount of product memory to be able to print at the desired
print quality for your document. For more information on adding memory, see "Memory
Module" on page 273.
Install Photoconductor
There is no photoconductor unit installed or the photoconductor unit is not installed
properly. Install the photoconductor unit if it is not installed.
If a photoconductor unit is already installed, open cover B. Raise the yellow lever and
remove the photoconductor unit, then reinstall it correctly. Then close cover B. The error
clears automatically if the photoconductor unit is installed correctly.
Install uuuu TnrCart
The indicated toner cartridges are not installed in the product. Cyan (C), Magenta (M),
Yellow (Y), or Black (K) appear in place of uuuu.
Install the indicated cartridges. See "Toner Cartridge" on page 278.
Downloaded from ManualsPrinter.com Manuals
Using the Control Panel
259
Invalid Data
The spool file on the driver is deleted while printing or the data is abnormal. Press the
x B&W Start or x Color Start button to clear the error.
Invalid N/W Module
There is no network program, or the network program cannot be used with your product.
Contact a qualified service representative.
Irregular Density
The density of the print data is too high to print. Turn off the product and remove jammed
paper.
Manual Duplex
Printer stops because the printing on one side of the paper is finished in the manual duplex
mode. Reload the paper that has been printed on one side into the MP tray and press the
x B&W Start or x Color Start button.
Manual Feed ssss
The manual feed mode is specified for the current print job. Make sure the paper size
indicated by ssss is loaded, then press the x B&W Start or x Color Start button.
Need More Memory
The product has insufficient memory to execute the current task. Press the x B&W Start or
x Color Start button on the control panel to resume printing, or press the y Cancel button
to cancel the print job.
NonGenuine Toner
The installed toner cartridge is not an genuine Epson toner cartridge. Using a non-genuine
toner cartridge may affect print quality. Epson shall not be liable for any damages or
problems arising from the use of consumable products not manufactured or approved by
Epson. Installing a genuine toner cartridge is recommended. Press the x B&W Start or
x Color Start button on the control panel to resume printing.
NonGenuine Toner uuuu
The installed toner cartridge is not a genuine Epson product. Cyan (C), Magenta (M),
Yellow (Y), or Black (K) appear in place of uuuu. Installing a genuine toner cartridge is
recommended. Using a non-genuine toner cartridge may affect print quality. Epson shall
not be liable for any damages or problems arising from the use of consumable products not
manufactured or approved by Epson.
Downloaded from ManualsPrinter.com Manuals
Using the Control Panel
260
Install a genuine Epson product, or select Clear Warning or Clear All Warnings from
Reset Menu in the Setup menu’s Printer Settings to clear the warning message. See
"Toner Cartridge" on page 278 for instructions on replacing the toner cartridge.
Optional RAM Error
The optional memory module may be corrupted or incorrect. Replace it with a new one.
Paper Jam WWWWW
The location where the paper jam occurred is displayed at WWWWW. WWWWW indicates the
location of the error.
If a paper jam occurs at two or more locations simultaneously, the corresponding multiple
locations are displayed.
Locatio
n
Description
Jam C
Paper is jammed at cover C. For instructions on
how to remove jammed paper at cover C, see
"Jam C (cover C)" on page 335.
Jam E
Paper is jammed at cover E. For instructions on
how to remove jammed paper at cover E, see
"Jam E (cover E)" on page 339.
Jam F
Paper is jammed at cover F. For instructions on
how to remove jammed paper at cover F, see
"Jam F (cover F)" on page 340.
Jam MP
Paper is jammed at the MP tray. For instructions
on how to remove jammed paper at the MP
tray, see "Jam MP (MP tray)" on page 343.
Jam LC
Paper is jammed at the paper cassette. For
instructions on clearing this type of paper jam,
see "Jam LC/G (optional paper cassette and
cover G)" on page 345.
Jam G
Paper is jammed at cover G. For instructions on
how to remove jammed paper at cover G, see
"Jam LC/G (optional paper cassette and cover
G)" on page 345.
Paper Out tttt sssss
There is no paper in the specified paper source (tttt). Load paper of the size (sssss) into
the paper source.
Paper Set tttt sssss
Downloaded from ManualsPrinter.com Manuals
Using the Control Panel
261
The paper loaded in the specified paper source (tttt) does not match the required paper
size (sssss). Replace the loaded paper with the correct size paper and press the x B&W
Start or x Color Start button to resume printing, or press the y Cancel button to cancel the
print job.
If you press the x B&W Start or x Color Start button without replacing the paper, the
product will print on the loaded paper even though it does not match the required size.
Photoconductor Trouble
A read/write error has occurred for the photoconductor unit. Remove the photoconductor
unit and reinsert it. If that fails to clear the error, replace the photoconductor unit. To install
the photoconductor unit. See "Photoconductor Unit" on page 281.
Please Wait
The toner cartridge to be replaced is moving to the replacement position in the product.
Print Overrun
The required time to process the print data exceeded the print engine speed because the
current page is too complex. Press the x B&W Start or x Color Start button to resume
printing, or press the y Cancel button to cancel the print job. If this message appears
again, select Avoid Page Error on the printer driver.
If you continue to receive this message when printing a particular page, try simplifying the
page by limiting the number of graphics or reducing the number and size of fonts.
You can also add more memory to the product as described in "Memory Module" on page
273.
RAM CHECK
The product is checking the RAM.
Ready
The product is ready to receive data and print.
Remove Photoconductor
When setting up the product, the photoconductor unit was installed before all toner
cartridges were installed.
Open cover B, remove the photoconductor unit, then close cover B.
Replace Photoconductor
Downloaded from ManualsPrinter.com Manuals
Using the Control Panel
262
The photoconductor has reached the end of its service life. Replace the photoconductor
unit with a new one. See "Photoconductor Unit" on page 281 for instructions.
The error clears automatically after you replace the unit and close all product covers. The
photoconductor service life counter is reset automatically.
When the error light is blinking, you can continue printing by pressing the x B&W Start or
x Color Start button. However, the print quality is not guaranteed from then on.
Replace Toner uuuu
The Toner cartridge for the indicated color has reached the end of its service life. Cyan (C),
Magenta (M), Yellow (Y), or Black (K) appear in place of uuuu. Replace the cartridge with
a new one.
The error clears automatically after you replace the cartridge and close all product covers.
The toner cartridge service life counter is reset automatically.
Reset
The product’s current interface has been reset and the buffer has been cleared. However,
other interfaces are still active and retain their settings and data.
Reset All
All Printer Settings have been reset to the default configuration, or to the last settings that
were saved.
Reset to Save
A control panel menu setting was changed while the printer was printing. Press the x B&W
Start or x Color Start button to clear this message. The setting is enabled after printing has
finished.
Alternatively you can clear this message by performing Reset or Reset All on the control
panel. However, the print data will be deleted.
ROM CHECK
The product is checking the ROM.
Service Req Cffff/Service Req Eggg
A controller error or a print engine error has been detected. Turn off the product. Wait at
least 5 seconds, then turn it back on. If the error message still appears, write down the error
number listed in the LCD panel (Cffff/Eggg), turn off the product, unplug the power cord,
then contact a qualified service representative.
Sleep
Downloaded from ManualsPrinter.com Manuals
Using the Control Panel
263
The product is currently in power-save mode. This mode is canceled when the product
receives job data or the
Reset button is pressed.
Toner Cart Error uuuu
A read/write error has occurred for the indicated toner cartridges. Cyan (C), Magenta (M),
Yellow (Y), or Black (K) appear in place of uuuu. Remove the toner cartridges and reinsert
them. If that fails to clear the error, replace the toner cartridges.
To install the indicated cartridges. See "Toner Cartridge" on page 278.
Unable Clear Error
The product cannot clear an error message because the error status still remains. Try
solving the problem again.
uuuu Toner Low
This message indicates that the toner cartridge for the indicated color is near the end of its
service life. Cyan (C), Magenta (M), Yellow (Y), or Black (K) appear in place of uuuu.
Prepare a new toner cartridge.
Warming Up
The product is warming up so that printing, copying, faxing, or scanning can be done.
Worn Fuser
This message indicates that the fuser unit has reached the end of its service life. Prepare
a new fuser unit.
Worn Photoconductor
This message indicates that the photoconductor unit has reached the end of its service life.
Printing after this message appears is not guaranteed. Turn the product off, then replace
the photoconductor unit with a new one. See "Photoconductor Unit" on page 281 for
instructions. The error clears automatically after you replace the unit and close the printer
covers.
Worn uuuu Dev Unit
The developer unit for the indicated color has reached the end of its service life. Cyan (C),
Magenta (M), Yellow (Y), or Black (K) appear in place of uuuu. You can print after this
message appears, but it is recommended to replace the developer unit. Contact your
dealer and prepare a new developer unit.
Write Error ROM P
Downloaded from ManualsPrinter.com Manuals
Using the Control Panel
264
The product is unable to write data to the ROM module correctly. You cannot remove the
ROM P because the ROM P is a program ROM module. Contact your dealer.
Writing ROM P
The product is writing data into the ROM module in the ROM slot P.
Wrong Photoconductor
An inappropriate photoconductor unit is installed. Install only the photoconductor unit listed
in "Consumable products" on page 29.
See "Photoconductor Unit" on page 281 for instructions on replacing the photoconductor
unit.
Wrong Toner uuuu
An inappropriate toner cartridge is installed. Install only the toner cartridge listed in
"Consumable products" on page 29.
See "Toner Cartridge" on page 278 for instructions on replacing the toner cartridge. Cyan
(C), Magenta (M), Yellow (Y), or Black (K) appear in place of uuuu.
wwww Open
The specified cover (wwww) does not close securely. Open the cover once, then close it.
Scanner error messages
ADF jam
A paper jam occurred at the Auto Document Feeder. This error also occurs when the
product is turned off during a scan job.
Net connection failed
Unable to normally connect to a computer on the network in Scan mode. The product is not
connected with the computer, or Event Manager is not installed on the computer.
PC connection failed
Unable to normally connect to a computer via USB interface in Scan mode. The product is
not connected with the computer or Event Manager is not installed on the computer.
Release Carriage Lock
Downloaded from ManualsPrinter.com Manuals
Using the Control Panel
265
An error occurred when you set the transportation lock to the
locked position. To clear
the error message on the LCD panel, set the transportation lock to the
unlocked
position, and then turn on the product again or press the x B&W Start or x Color Start
button to restart the scanning job.
Scanner Cover Open
The ADF cover is opened.
Scanner error
An error occurred in the scanner unit. Turn off the product, and then turn it on again several
minutes later. If the error occurs again, contact your dealer or a qualified customer support
person for assistance.
Fax error messages
Cannot Fax cause of Power Off Report
An error occurs if you perform fax transmission when a power off report cannot be printed
after turning on the product.
Cannot Send when Receiving
An error occurs when you perform fax transmission while receiving a fax.
Fax Communication Error
A fax communication error occurred during transmission due to some cause.
Fax Error
An error occurred in the fax unit. Turn off the product, wait several minutes and then turn it
on again. If the error occurs again, contact your dealer or a qualified customer support
person for assistance.
Need More Memory
Unable to perform fax transmissions or receptions due to insufficient memory in the
product. Wait until the fax jobs stored in the memory are finished, and then try
transmission/reception again.
No Report Print Info.
This message appears when you specify printing a report or list that does not exist in the
Printing Report menu in Fax mode.
Downloaded from ManualsPrinter.com Manuals
Using the Control Panel
266
Please Wait
This message appears until a carriage lock is completed.
Set Document to ADF
This message appears when you set a legal size document on the document table for fax
transmission. Legal size documents can only be used in the Auto Document Feeder.
Unable to Send
Unable to perform fax transmissions. This message appears when you send a fax
manually or a color fax transmission fails. When sending a fax using the memory
transmission function, the message does not appear.
Unable to Transmit Color Fax
For color fax transmission, this message appears when fax transmission cannot be
performed while receiving a fax. When the recipient’s fax machine supports only
black-and-white faxes, this message does not appear since a color fax is transmitted as a
black-and-white fax.
Copier error messages
Document Error
This message appears when you set an original that is not supported by the product.
Need More Memory
Unable to copy due to insufficient memory of the product. Wait for a few minutes until the
current copy job is finished and try copying again, or add more memory.
When you place multiple documents on the Auto Document Feeder and make a
continuous high-quality (600 dpi) color copy with the default memory (128 MB), the product
may not work properly because of insufficient memory. We recommend adding a memory
module so that the total memory size is 256 MB or higher.
System error messages
Optional RAM error
A memory access error occurred. Check if the optional memory is installed correctly, and
then turn on the product again. If the error occurs again, contact your dealer or a qualified
customer support person for assistance.
Downloaded from ManualsPrinter.com Manuals
Using the Control Panel
267
Service Req Cffff/Service Req Exxx
A controller error or a print engine error has been detected. Turn off the printer. Wait at
least 5 seconds, then turn it back on. If the error message still appears, write down the error
number listed on the LCD panel (Cffff/Exxx), turn off the printer, unplug the power cord,
then contact a qualified service representative.
Downloaded from ManualsPrinter.com Manuals
Using the Control Panel
268
Chapter 12
Installing Options
Optional Paper Cassette Unit
For details about the paper types and sizes that you can use with the optional paper
cassette unit, see "Optional 500-Sheet Paper Cassette Unit" on page 35. For
specifications, see "Optional 500-Sheet Paper Cassette Unit" on page 365.
Handling precautions
Always pay attention to the following handling precautions before installing options:
The product weighs about 33.1 kg (73 lb), excluding consumable products. One person
should never attempt to lift or carry it alone. Two people should carry the product, lifting it
from the positions shown below.
w
Warning:
Use much care since the rear side of the product is heaver. If you lift the product incorrectly,
you could drop it and cause injury.
c
Caution:
Before transporting the product, make sure the transportation lock on the left side of the
document table is set in the
locked position. See "Scanner parts" on page 26.
Installing the optional paper cassette unit
Follow the steps below to install the optional paper cassette unit.
Downloaded from ManualsPrinter.com Manuals
Installing Options
269
1. Turn the product off and unplug the power cord and interface cable.
2. Take the optional paper cassette unit out of the cardboard box, then remove the
protective originals in the cassette.
3. Place the optional paper cassette unit where you intend to set up the product. Then, put
the product onto the optional paper cassette unit. Align each of the product’s corners
with those of the unit, then lower the product until it rests securely on the unit.
a
b
a. hole
b. projection
w
Warning:
Use much care since the rear side of the product is heaver. Two people should lift the
product by the correct positions.
Note:
The product and optional paper cassette unit are heavy so it is necessary to carry them
separately when you transfer them.
Downloaded from ManualsPrinter.com Manuals
Installing Options
270
4. Remove the paper cassette from the optional paper cassette unit.
5. Push up the fixing tabs inside the optional paper cassette unit, then turn them in a
clockwise direction to fix the unit and the product together.
Downloaded from ManualsPrinter.com Manuals
Installing Options
271
6. Reinsert the paper cassette into the optional paper cassette unit.
Note for Windows users:
If EPSON Status Monitor is not installed, you have to make settings manually in the printer
driver. See "Making Optional Settings" on page 64.
7. Reconnect the interface cable and power cord, then turn the product on.
8. To confirm that the option is installed correctly, print a Status Sheet. See "Printing a
Status Sheet" on page 356.
Note for Macintosh users:
When you have attached or removed product options, you need to delete the product using
Print Setup Utility (for Mac OS X 10.3) or Print Center (for Mac OS X 10.2), and then
re-register the product.
Downloaded from ManualsPrinter.com Manuals
Installing Options
272
Removing the optional paper cassette unit
Perform the installation procedure in reverse.
Memory Module
By installing a Dual In-line Memory Module (DIMM), you can increase product memory up
to 576 MB. You may need to add expansion memory if you are having difficulty printing
complex graphics.
Note:
This product has three slots, of which two have 128 MB DIMMs (64 MB each) already installed at
the time of manufacture.
Installing a memory module
Follow the steps below to install an optional memory module.
w
Warning:
Be careful when working inside the product as some components are sharp and may cause
injury.
c
Caution:
Before you install a memory module, be sure to discharge any static electricity by touching a
grounded piece of metal. Otherwise, you may damage static-sensitive components.
1. Turn the product off and unplug the power cord and interface cable.
2. Remove the option cover on the product’s left side by removing the screw from the
cover.
Downloaded from ManualsPrinter.com Manuals
Installing Options
273
3. Identify the expansion memory slot (s).
*
* Expansion memory slots (slot 2 and slot 3)
c
Caution:
Do not remove the memory module installed into slot 1, which is used for the system.
Note:
When adding an expansion memory module, normally install it into slot 3. However, when you
increase memory using two expansion memory slots (slot 2 and slot 3), you have to remove the
original 64 MB DIMM from slot 2 first, and then install two optional DIMMs.
4. Insert the memory module into slot until the clip locks onto the memory module. Make
sure that the upper slot (white) has a module at all times.
c
Caution:
❏ Do not force the memory module into the slot.
❏ Be sure to insert the memory module facing the correct way.
❏ You should not remove any modules from the circuit board. Otherwise, the product
will not work.
Downloaded from ManualsPrinter.com Manuals
Installing Options
274
5. Reattach the option cover with the screw as shown below.
6. Reconnect the interface cable and power cord, and turn the product on.
Note for Windows users:
If EPSON Status Monitor is not installed, you have to make settings manually in the printer
driver. See "Making Optional Settings" on page 64.
7. To confirm that the option is installed correctly, print a status sheet. See "Printing a
Status Sheet" on page 356.
Note for Macintosh users:
When you have attached or removed product options, you need to delete the product using
Print Setup Utility (for Mac OS X 10.3) or Print Center (for Mac OS X 10.2), and then
re-register the product.
Removing a memory module
c
Caution:
Before you remove a memory module, be sure to discharge any static electricity by touching
a grounded piece of metal. Otherwise, you may damage static-sensitive components.
Downloaded from ManualsPrinter.com Manuals
Installing Options
275
w
Warning:
Be careful when working inside the product as some components are sharp and may cause
injury.
Perform the installation procedure in reverse.
When removing a memory module from its slot, press the clip and pull out the memory
module as shown below.
Downloaded from ManualsPrinter.com Manuals
Installing Options
276
Chapter 13
Replacing Consumable Products
Replacement Messages
When you see the following messages in the LCD panel or the window of EPSON Status
Monitor, replace the appropriate consumable products. You can continue to print for a
short time after a message appears, but Epson recommends early replacement to maintain
print quality and extend the life of your product.
LCD Panel Message
Description
Worn Photoconductor
The photoconductor unit is near the end of its service life. Replace the
photoconductor unit with a new one.
Worn Fuser
The fuser unit has reached the end of its service life. Contact your
dealer.
Worn uuuu Dev Unit
The developer unit has reached the end of its service life. Contact
your dealer. Cyan (C), Magenta (M), Yellow (Y), or Black (K) appear
in place of uuuu.
uuuu Toner Low
The toner cartridge for the indicated color is near the end of its service
life. Prepare a new toner cartridge. Cyan (C), Magenta (M), Yellow
(Y), or Black (K) appear in place of uuuu.
Note:
To clear the warning, click the
Setup button on the control panel, select Reset Menu from
Printer Settings, then select Clear All Warning.
If a consumable product reaches the end of its service life, the product stops printing and
displays the following messages in the LCD panel or the window of EPSON Status Monitor.
When this happens, the product cannot resume printing until you replace the depleted
consumable products.
LCD Panel Message
Description
Replace Toner uuuu*
The indicated toner cartridge has reached the end of its service life.
Replace
Photoconductor
The photoconductor unit comes to the end of its service life. Even if
this message is displayed in the LCD panel, you can continue to print
for a short time by pressing the x B&W Start or x Color Start button on
the control panel. The message in the LCD panel changes from
Replace Photoconductor to Worn Photoconductor.
* Cyan (C), Magenta (M), Yellow (Y), or Black (K) appear in place of uuuu. For example, the message Yellow
(Y) Toner Low means that the yellow toner cartridge is near the end of its service life.
Downloaded from ManualsPrinter.com Manuals
Replacing Consumable Products
277
Note:
❏ Messages appear for one consumable product at a time. After replacing a consumable product,
check the LCD panel for replacement messages for other consumable products.
❏ Print quality cannot be guaranteed when printing with a worn consumable product. If print
quality is not what you expected, replace the consumable product.
❏ The product stops printing if printing with a worn consumable product might damage the
product. If the product stops printing, replace the consumable product.
Toner Cartridge
Handling precautions
Always observe the following handling precautions when replacing the consumable
products:
❏ Installing a genuine toner cartridge is recommended. Using a non-genuine toner
cartridge may affect print quality. Epson shall not be liable for any damages or problems
arising from the use of consumable products not manufactured or approved by Epson.
❏ When handling toner cartridge, always place them on a clean smooth surface.
❏ If you have moved a toner cartridge from a cool to a warm environment, wait for at least
one hour before installing it to prevent damage from condensation.
w
Warning:
❏ Do not touch the toner. Keep the toner away from your eyes. If toner gets on your skin or
clothes, wash it off with soap and water immediately.
❏ Keep consumable products out of the reach of children.
❏ Do not dispose of used consumable products in fire, as they may explode and cause
injury. Dispose of them according to local regulations.
❏ If toner is spilled, use a broom and dustpan or a damp cloth with soap and water to clean
it up. Because the fine particles can cause a fire or explosion if they come into contact
with a spark, do not use a vacuum cleaner.
Replacing a toner cartridge
Follow the steps below to replace a toner cartridge.
1. Turn the product on.
Downloaded from ManualsPrinter.com Manuals
Replacing Consumable Products
278
2. Check the color of the toner cartridge to be replaced in the LCD panel, and then open
cover A.
3. Push up the right lever to unlock the toner cartridge.
4. Remove the toner cartridge from the product.
Downloaded from ManualsPrinter.com Manuals
Replacing Consumable Products
279
5. Take the new toner cartridge out of its package and gently shake the toner cartridge as
shown below.
6. Hold the tag and gently pull the toner seal upward and remove it.
7. Insert the cartridge all the way until it stops securely with the arrow mark on the top of
the toner cartridge facing toward cover A.
8. Push down the right lever to lock the toner cartridge.
Downloaded from ManualsPrinter.com Manuals
Replacing Consumable Products
280
Note:
The toner cartridge is installed securely when the right lever cannot be turned any further. Make
sure that the toner cartridge is installed securely.
9. Close cover A.
10. Confirm the error message in the LCD panel. When another toner cartridge needs to be
replaced, an error message is displayed. Repeat steps 2 to 9 to replace the cartridge.
Photoconductor Unit
Handling precautions
Always observe the following handling precautions when replacing the consumable
products:
❏ The photoconductor unit weighs 2.8kg (6.16 lb). Be sure to hold it firmly by the handle
when carrying it.
❏ When replacing the photoconductor unit, avoid exposing it to light any longer than
necessary.
❏ Be careful not to scratch the surface of the drum and belt. Also, avoid touching the
drum, since oil from your skin may permanently damage its surface and affect print
quality.
❏ To get the best print quality, do not store the photoconductor unit in an area subject to
direct sunlight, dust, salty air, or corrosive gases (such as ammonia). Avoid locations
subject to extreme or rapid changes in temperature or humidity.
❏ Do not tilt the photoconductor unit.
Downloaded from ManualsPrinter.com Manuals
Replacing Consumable Products
281
w
Warning:
❏ Do not touch the lever under the scanner unit when you open or close the unit. Touching
it will cause the document cover of the scanner unit to fall down, which may damage the
product and cause injury.
❏ Do not dispose of the used consumable products in fire, as they may explode and cause
injury. Dispose of them according to local regulations.
❏ Keep consumable products out of the reach of children.
Replacing the photoconductor unit
Follow the steps below to replace the photoconductor unit.
1. Turn the product on.
Note:
Before raising the scanner unit, make sure that the document cover is closed firmly.
2. Raise the scanner unit.
Downloaded from ManualsPrinter.com Manuals
Replacing Consumable Products
282
c
Caution:
Do not touch the lever under the scanner unit when you open or close the unit. Touching
it will cause the document cover of the scanner unit to fall down, which may damage the
product and cause injury.
3. Contain the expansion tray in cover B.
4. Open cover B.
Downloaded from ManualsPrinter.com Manuals
Replacing Consumable Products
283
w
Warning:
Be careful not to touch the fuser, which is marked CAUTION HIGH TEMPERATURE, or
the surrounding areas. If the product has been in use, the fuser and the surrounding
areas may be very hot.
5. Raise the yellow lever inside cover B.
6. Remove the photoconductor unit.
7. Take the new photoconductor unit out of its package and remove the protective sheet.
Downloaded from ManualsPrinter.com Manuals
Replacing Consumable Products
284
c
Caution:
❏ Do not touch the belt on the top of the unit or the blue photoconductor area.
Otherwise, the print quality may decrease.
❏ When replacing the photoconductor unit, avoid exposing it to light any longer than
necessary.
8. Hold the photoconductor unit by its handle, and insert the unit until it clicks shut while
aligning the arrow marks on the product.
c
Caution:
Do not touch the parts inside the product.
9. Push the yellow lever down, and then close cover B.
Downloaded from ManualsPrinter.com Manuals
Replacing Consumable Products
285
10. Expand the extension tray if necessary.
11. Lower the scanner unit to the original position
Downloaded from ManualsPrinter.com Manuals
Replacing Consumable Products
286
Chapter 14
Cleaning and Transporting the Product
Cleaning the Product
The product needs only minimal cleaning. If the product’s outer case is dirty or dusty, turn
off the product and clean it with a soft, clean cloth moistened with a mild detergent.
c
Caution:
Never use alcohol or paint thinner to clean the product cover. These chemicals can damage
the components and the case. Be careful not to get water onto the product mechanism or any
electrical components.
Cleaning the pickup roller
Follow the steps below to clean the pickup roller.
1. Open the MP tray cover, then remove the loaded paper.
Downloaded from ManualsPrinter.com Manuals
Cleaning and Transporting the Product
287
2. Gently wipe the rubber parts of the pickup roller inside the MP tray with a wet,
well-wrung cloth.
*
* paper sensor
Note:
When cleaning the pickup roller, be careful not to damage the paper sensor.
Cleaning the print head
Follow the steps below to clean the printer head.
1. Open the cleaner cover on the right side of the product. Then, open cover A.
Downloaded from ManualsPrinter.com Manuals
Cleaning and Transporting the Product
288
2. Pull the cleaning knob access lever on the right inside of the product.
3. Move the blue cleaner knob slowly in and out once.
Note:
Move the cleaner completely in and out. Otherwise, the product may not be cleaned effectively.
4. Push back the cleaning knob access lever on the right inside of the product.
Downloaded from ManualsPrinter.com Manuals
Cleaning and Transporting the Product
289
5. Close cover A, then the cleaner cover.
Cleaning the exposure window
When the print quality has decreased, move the cleaner knob slowly in and out once to
clean the exposure window. For details, see "Cleaning the print head" on page 288.
a
b
a. document table
b. exposure window
Cleaning the document table
When the scanning quality has decreased, open the document cover and wipe away the
document table with a soft dry cloth.
Downloaded from ManualsPrinter.com Manuals
Cleaning and Transporting the Product
290
Cleaning the ADF pickup roller
When the Auto Document Feeder has failed to feed paper, open the ADF cover, and wipe
away the roller with a wet, well-wrung cloth and remove paper dust.
Cleaning the document table and the exposure window for Auto
Document Feeder
If a line of dots always appears in your scanned images, fax images, or copies, the
document table or exposure window for Auto Document Feeder may be dusty or
scratched. Clean those parts.
a
b
a. document table
Downloaded from ManualsPrinter.com Manuals
Cleaning and Transporting the Product
291
b. exposure window for Auto Document Feeder
Transporting the Product
Finding a place for the product
When relocating the product, always choose a location that has adequate space for easy
operation and maintenance. Use the following illustration as a guide for the amount of
space required around the product to ensure smooth operation. Dimensions shown in the
illustration below are in millimeters.
a
b
e
c
d
a. 920 mm (36.2 in.)
b. 258 mm (10.2 in.)
c. 868 mm (34.2 in.)
d. 100 mm (3.9 in.)
e. 300 mm (11.8 in.)
To install and use any of the following options, you will need the indicated amount of
additional space.
The 500-Sheet Paper Cassette Unit adds 130 mm (5.1 in.) to the bottom of the product.
In addition to space considerations, always heed the following precautions when finding a
place to locate the product:
Downloaded from ManualsPrinter.com Manuals
Cleaning and Transporting the Product
292
❏ Place the product where you can easily unplug the power cord.
❏ Keep the entire computer and product system away from potential sources of
interference, such as loudspeakers or the base units of cordless telephones.
❏ Avoid using an electrical outlet that is controlled by wall switches or automatic timers.
Accidental disruption of power can erase valuable information in your computer’s and
product’s memory.
c
Caution:
❏ Leave adequate room around the product to allow for sufficient ventilation.
❏ Avoid locations that are subject to direct sunlight, excessive heat, moisture, or dust.
❏ Avoid using outlets that other appliances are plugged into.
❏ Use a grounded outlet that matches the product’s power plug. Do not use an adapter
plug.
❏ Only use an outlet that meets the power requirements for this product.
For long distances
If you need to transport your product for long distances, carefully repack it using the original
box and packing originals.
Follow the steps below to repack your product.
1. Set the scanner’s carriage to the carriage lock position using the control panel. To do
so, press the
Setup button, select Scan Settings, and then select Carriage Lock.
2. Set the transportation lock on the left side of the document table is set in the
position. See "Scanner parts" on page 26.
Downloaded from ManualsPrinter.com Manuals
locked
Cleaning and Transporting the Product
293
3. Turn off the product and remove the following items:
a
b
c
e
d
a. installed option (only when the optional paper cassette
unit is installed)
b. photoconductor unit
c. loaded paper
d. interface cable
e. power cord
4. Attach the protective materials onto the product, then repack the product in its original
box.
c
Caution:
After transporting the product, set the transportation lock on the left side of the document
table in the
unlocked position before using the product. See "Scanner parts" on page 26.
For short distances
Always pay attention to the following handling precautions when you need to move the
product for short distances.
If you are moving the product on its own, two people should lift and carry the product.
Follow the steps below to move the product for short distances.
Downloaded from ManualsPrinter.com Manuals
Cleaning and Transporting the Product
294
1. Turn off the product and remove the following items.
a
b
c
e
d
a. installed option (only when the optional paper cassette
unit is installed)
b. photoconductor unit
c. loaded paper
d. interface cable
e. power cord
2. Be sure to lift the product by the correct positions as shown below.
w
Warning:
Use much care since the rear side of the product is heaver. Two people should lift the
product by the correct positions.
3. When moving the product, always keep it horizontal.
Downloaded from ManualsPrinter.com Manuals
Cleaning and Transporting the Product
295
Chapter 15
Printing Problems
Printer Operational Problems
The Print light does not turn on
Cause
What to do
The power cord may not be properly
plugged into the electrical outlet.
Turn off the product, check the power cord
connections between the product and the
electrical outlet, then turn the product back on.
The electrical outlet may be controlled by an
outside switch or an automatic timer.
Make sure that the switch is turned on or plug
another electrical device into the outlet to check
whether the outlet is operating properly.
The product does not print (Print light off)
Cause
What to do
The product is offline.
Press the x B&W Start or x Color Start button once to
switch the product to ready status.
The product is not in the Print mode.
If the mode light other than Print light lights, press the
mode button once to switch to the Print mode.
The Print light is on but nothing prints
Cause
What to do
Your computer may not be properly
connected to the product.
Perform the procedure described in “Connecting
the Product” in the Setup Guide.
The interface cable may not be plugged in
securely.
Check both ends of the interface cable between
the product and the computer. If you are using a
parallel interface, be sure to secure the connector
using the wire retaining clips.
You may not be using the correct interface
cable.
If you are using the USB interface, use a Revision 2.0
cable.
Your application software is not properly set
up for your product.
Make sure that the product is selected in your
application software.
Downloaded from ManualsPrinter.com Manuals
Printing Problems
296
Your computer system’s memory is too small
to handle the volume of data in your
document.
Try reducing the image resolution of your document
in the application software, or install more memory in
your computer if you can.
The Order Online function does not work
Cause
What to do
EPSON Status Monitor is not installed or the
URL was not specified during the installation.
Install EPSON Status Monitor correctly. See "Installing
EPSON Status Monitor" on page 64.
The remaining service lives of the consumables are not updated
(For Windows users only)
Cause
What to do
The time interval between updating
information for the Consumables is too long.
Press the Get Information Now button on the
Consumables Info Settings dialog box. You can also
change the interval for updating information about
consumables on the Consumables Info Settings
dialog box.
Printout Problems
The font cannot be printed
Cause
What to do
The selected font is not supported by your
printer.
Make sure that you have installed the correct font.
See the Font Guide for more information.
Printout is garbled
Cause
What to do
The interface cable may not be plugged in
securely.
Make sure that both ends of the interface cable are
plugged in securely.
You may not be using the correct interface
cable.
If you are using a USB interface, use a Revision 2.0
cable.
Downloaded from ManualsPrinter.com Manuals
Printing Problems
297
Note:
If a status sheet does not print correctly, your product may be damaged. Contact your dealer or a
qualified service representative.
Color Printing Problems
Cannot print in color
Cause
What to do
Black is selected as the Color setting in the
printer driver.
Change this setting to Color.
The color setting in the application you are
using is not appropriate for color printing.
Make sure that the settings in your application are
appropriate for color printing.
The printout color differs when printed from different printers
Cause
What to do
Printer driver default settings and color tables
vary by product model.
Set the gamma setting to 1.8 in the More Settings
dialog box in the printer driver, then print again. If
you still do not get the printouts you expect, adjust
the color using the slide bar for each color. For
details about the More Settings dialog box, see the
printer driver’s online help.
The color looks different from what you see on the computer screen
Cause
What to do
Printed colors do not exactly match the
colors on your monitor, since products and
monitors use different color systems: monitors
use RGB (red, green, and blue), while
products typically use CMYK (cyan,
magenta, yellow, and black).
Although it is difficult to match colors perfectly,
selecting the printer driver’s ICM setting (for Windows
XP, XP x64, Me, 98, 2000, Server 2003, or Server 2003
x64) or ColorSync setting (for Macintosh) can
improve color matching between different devices.
For details, see the printer driver’s online help.
For Macintosh, the System Profile setting is not
in use.
To apply ColorSync properly, your input device and
the application must support ColorSync, and a
System Profile must be used for your monitor.
PhotoEnhance may be selected in the printer
driver.
The PhotoEnhance feature corrects the contrast and
brightness of the original image data, and so may
not be suitable for printing vivid images.
Downloaded from ManualsPrinter.com Manuals
Printing Problems
298
Print Quality Problems
The background is dark or dirty
Cause
What to do
You may not be using the correct type of
paper for your product.
If the surface of your paper is too rough, printed
characters may appear distorted or broken. EPSON
special paper, or smooth, high-quality copier paper
is recommended for best results. See "Available
paper types" on page 359 for information on
choosing paper.
The paper path inside the product may be
dusty.
Clean internal product components by printing
three pages with only one character per page.
White dots appear in the printout
Cause
What to do
The paper path inside the product may be
dusty.
Turn off the product. Clean internal product
components by printing three pages with only one
character per page.
Print quality or tone is uneven
Cause
What to do
Your paper may be moist or damp.
Do not store paper in a humid or damp environment.
The print head is dirty.
See "Cleaning the print head" on page 288 and
clean the print head.
One of the toner cartridges may be near the
end of its service life.
If the message on the LCD panel or in EPSON Status
Monitor indicates that one of the toner cartridges is
near the end of its service life, replace it. See "Toner
Cartridge" on page 278.
You can also check the remaining service lives of the
toner cartridges by looking at the Basic Settings tab
in the printer driver.
There may be a problem with the
photoconductor unit.
Downloaded from ManualsPrinter.com Manuals
Replace the photoconductor unit. See
"Photoconductor Unit" on page 281.
Printing Problems
299
Half-tone images print unevenly
Cause
What to do
Your paper may be moist or damp.
Do not store paper in a humid or damp environment.
Be sure to use paper that is newly unwrapped.
One of the toner cartridges may be near the
end of its service life.
If the message on the LCD panel or in EPSON Status
Monitor indicates that one of the toner cartridges is
near the end of its service life, replace it. See "Toner
Cartridge" on page 278.
For Windows users, you can also check the
remaining service lives of the toner cartridges by
looking at the Basic Settings tab in the printer driver.
There may be a problem with the
photoconductor unit.
Replace the photoconductor unit. See
"Photoconductor Unit" on page 281.
The print head is dirty.
See "Cleaning the print head" on page 288 and
clean the print head.
Toner smudges
Cause
What to do
Your paper may be moist or damp.
Do not store your paper in a humid or damp
environment.
You may not be using the correct type of
paper for your product.
Epson special paper or smooth, high-quality copier
paper is recommended for best results. See
"Available paper types" on page 359 for information
on choosing paper.
The paper path inside the product may be
dusty.
Clean internal product components by printing
three pages with only one character per page.
There may be a problem with the
photoconductor unit.
Replace the photoconductor unit. See
"Photoconductor Unit" on page 281.
Areas are missing in the printed image
Cause
What to do
Your paper may be moist or damp.
This product is sensitive to moisture absorbed by the
paper. The higher the moisture content in the paper,
the lighter the printout. Do not store paper in a humid
or damp environment.
Downloaded from ManualsPrinter.com Manuals
Printing Problems
300
You may not be using the correct type of
paper for your product.
If the surface of your paper is too rough, printed
characters may appear distorted or broken. Epson
special paper or smooth, high-quality copier paper is
recommended for best results. See "Available paper
types" on page 359 for information on choosing
paper.
Completely blank pages are output
Cause
What to do
The product may have loaded more than
one sheet at a time.
Remove the paper stack and fan it. Tap it on a flat
surface to even the edges, then reload the paper.
One of the toner cartridges may be near the
end of its service life.
If the message on the LCD panel or in EPSON Status
Monitor indicates that one of the toner cartridges is
near the end of its service life, replace it. See "Toner
Cartridge" on page 278.
For Windows users, you can also check the
remaining service lives of the toner cartridges by
looking at the Basic Settings tab in the printer driver.
The problem may be with your application,
interface cable, or product.
Confirm the application setting and interface
connection, and print out a status sheet. See
"Printing a Status Sheet" on page 254. If a blank page
is ejected, the problem may be with the product.
Turn off the product and contact your dealer.
The Paper Size setting may be incorrect.
Make sure the correct paper size is set in the Tray
Menu on the control panel.
There may be a problem with the
photoconductor unit.
Replace the photoconductor unit. See
"Photoconductor Unit" on page 281.
The printed image is light or faint
Cause
What to do
Your paper may be moist or damp.
Do not store your paper in a humid or damp
environment.
The Toner Save mode may be on.
Turn off the Toner Save mode using the printer driver.
One of the toner cartridges may be near the
end of its service life.
If the message on the LCD panel or in EPSON Status
Monitor indicates that one of the toner cartridges is
near the end of its service life, replace it. See "Toner
Cartridge" on page 278.
For Windows users, you can also check the
remaining service lives of the toner cartridges by
looking at the Basic Settings tab in the printer driver.
Downloaded from ManualsPrinter.com Manuals
Printing Problems
301
There may be a problem with the
photoconductor unit.
Replace the photoconductor unit. See
"Photoconductor Unit" on page 281.
The print head is dirty.
See "Cleaning the print head" on page 288 and
clean the print head.
The non-printed side of the page is dirty
Cause
What to do
Toner may have spilled onto the paper feed
path.
Clean internal product components by printing
three pages with only one character per page.
Memory Problems
Print quality decreased
Cause
What to do
The product cannot print at the required
quality level because of insufficient memory,
and the product lowers the quality
automatically so that the product can
continue printing.
Check to see if the printout is acceptable.
If not, add more memory for a permanent solution or
lower print quality temporarily in the printer driver.
Insufficient memory for current task
Cause
What to do
The product has insufficient memory for
current task.
Add more memory for a permanent solution or lower
print quality temporarily in the printer driver.
Insufficient memory to print all copies
Cause
What to do
The product does not have sufficient memory
to collate print jobs.
Only one set of copies will be printed. Reduce the
contents of print jobs, or add more memory. For
information on installing more memory, see "Memory
Module" on page 273.
Downloaded from ManualsPrinter.com Manuals
Printing Problems
302
Printing in the PostScript 3 Mode Problems
The problems listed in this section are those that you may encounter when printing with the
PostScript driver. All procedural instructions refer to the PostScript printer driver.
The printer does not print correctly in the PostScript mode
Cause
What to do
The printer’s emulation mode setting is
incorrect.
The printer is set to the Auto mode by default, so that
it can automatically determine the encoding used in
the received print job data and select the
appropriate emulation mode. However, there are
situations where the printer cannot select the correct
emulation mode. In this case, it must be set manually
to PS3.
Set the emulation mode through the SelecType
Emulation menu on the printer. See "Emulation
Menu" on page 243.
The printer’s emulation mode setting for the
interface that you are using is incorrect.
The emulation mode can be set individually for each
interface which receives print job data. Set the
emulation mode for the interface you are using to
PS3.
Set the emulation mode through the SelecType
Emulation menu on the printer. See "Emulation
Menu" on page 243.
The printer does not print
Cause
What to do
The Print to file check box is selected in the
Print dialog box (except on Mac OS X).
Clear the Print to file check box in the Print dialog
box.
The Save as File check box is selected on the
Output Option sheet in the Print dialog box
(Mac OS X only).
Clear the Save as File check box on the Output
Option sheet in the Print dialog box.
An incorrect printer driver is selected.
Make sure that the PostScript printer driver that you
are using to print is selected.
The Emulation menu in the printer’s Control
Panel is set to a mode other than Auto or PS3
for the interface that you are using.
Change the mode setting to either Auto or PS3.
Downloaded from ManualsPrinter.com Manuals
Printing Problems
303
The printer driver or printer that you need to use does not appear in
the Printer Setup Utility (Mac OS 10.3.x and 10.4.x) or Print Center
(Mac OS 10.2.x)
Cause
What to do
The printer name has been changed.
Ask the network administrator for details, then select
the appropriate printer name.
The AppleTalk zone setting is incorrect.
Open the Printer Setup Utility (Mac OS 10.3.x and
10.4.x) or Print Center (Mac OS 10.2.x), then select
the AppleTalk zone that the printer is connected to.
The font on the printout is different from that on the screen
Cause
What to do
The PostScript screen fonts are not installed.
The PostScript screen fonts must be installed on the
computer that you are using. Otherwise, the font
that you select is substituted by some other font for
display on the screen.
For Windows users only
If the Send TrueType fonts to printer according to the
font Substitution Table setting on the Fonts sheet of
the printer’s Properties dialog box is turned on,
TrueType fonts are replaced by the printer fonts
before they are printed. Specify the appropriate
substitution fonts using the Font Substitution Table.
The Send TrueType fonts to printer according
to the font Substitution Table setting on the
Fonts sheet of the printer’s Properties dialog
box is turned on, but the TrueType fonts are
not replaced by the printer fonts.
(For Windows Me or 98)
The appropriate substitution fonts are not
correctly specified on the Device Settings
sheet of the printer’s Properties dialog box.
(For Windows XP. XP x64, or 2000)
Specify the appropriate substitution fonts using the
Font Substitution Table.
The edges of texts and/or images are not smooth
Cause
What to do
The Print Quality is set to Fast.
Change the Print Quality setting to Quality.
The printer does not have sufficient memory.
Increase the printer memory.
The printer does not print normally via the USB interface
Cause
Downloaded from ManualsPrinter.com Manuals
What to do
Printing Problems
304
For Windows users only
The Data Format setting in the printer’s
Properties is not set to ASCII or TBCP.
The printer cannot print binary data when it is
connected to the computer via the USB interface.
Make sure that the Data Format setting, which is
accessed by clicking Advanced on the PostScript
sheet of the printer’s Properties, is set to ASCII or
TBCP.
If your computer is running Windows XP, XP x64, click
the Device Settings tab in the printer’s Properties,
then click the Output Protocol setting and select
ASCII or TBCP.
The printer does not print normally via the network interface
Cause
What to do
The Data Format setting is different from the
data format setting specified in the
application (except on Mac OS X)
If the file is created in an application that allows you
to change the data format or encoding, such as
Photoshop, make sure that the setting in the
application matches that in the printer driver.
For Windows users only
Make sure that both the Send CTRL+D Before Each
Job and Send CTRL+D After Each Job settings are set
to No.
The computer is connected to the network
using AppleTalk in a Windows 2000
environment, and the Send CTRL+D Before
Each Job or Send CTRL+D After Each Job
setting on the Device Settings sheet of the
printer’s Properties dialog box is set to Yes.
For Windows users only
The print data is too large.
Click Advanced on the PostScript sheet of the
printer’s Properties, then change the Data Format
setting from ASCII data (default) to TBCP (Tagged
binary communications protocol).
When the Binary setting is set to On, TBCP is not
available. Use the Binary protocol. See "PS3 Menu" on
page 249 for details.
For Windows users only
Printing cannot be performed using the
network interface.
Click Advanced on the PostScript sheet of the
printer’s Properties, then change the Data Format
setting from ASCII data (default) to TBCP (Tagged
binary communications protocol).
When the Binary setting is set to On, TBCP is not
available. Use the Binary protocol. See "PS3 Menu" on
page 249 for details.
An undefined error occurs (Macintosh only)
Cause
What to do
The version of the Mac OS that you are using
is unsupported.
This printer’s driver can only be used on Macintosh
computers running Mac OS X version 10.2.8 or later.
Downloaded from ManualsPrinter.com Manuals
Printing Problems
305
Printing in the PCL6/5 Mode Problems
The problems listed in this section are those that you may encounter when printing in the
PCL6 mode. All procedural instructions, refer to the PCL6 printer driver.
The printer does not print
Cause
What to do
The Print to file check box is selected in the
Print dialog box.
Clear the Print to file check box in the Print dialog box.
The printer does not print correctly in the PCL mode
Cause
What to do
(PCL5c mode only) Graphics Mode may
be set to HP-GL/2 and the printing data
may include the data that cannot be
printed in the setting.
Access the printer driver, click the General tab, click
Options, then select Raster as Graphics Mode.
Image Optimum may be set to Auto or On
and the printing data may include the
data that cannot be printed in the setting.
Access the Printing Menu on your printer's control
panel, then set Image Optimum to Off.
The font on the printout is different from that on the screen
Cause
What to do
The EPSON screen fonts are not installed.
The screen fonts must be installed on the computer that
you are using. Otherwise, the font that you select is
substituted by some other font for display on the
screen.
The edges of texts and/or images are not smooth
Cause
What to do
The resolution is set to Fast (300 dpi).
Access the printer driver, click the Print Quality tab,
then select Fine (600 dpi) as the resolution.
The printer does not have sufficient
memory.
Increase the printer memory.
Downloaded from ManualsPrinter.com Manuals
Printing Problems
306
The RITech is set to Off.
Downloaded from ManualsPrinter.com Manuals
Access the printer driver, click the Print Quality tab,
then select On for RITech from the drop-down list.
Printing Problems
307
Chapter 16
Scanning Problems
Scanner Operational Problems
Problems you may have while using the product often involve the operation of your
software and computer. Operation problems usually occur because of:
❏ Incorrect setup of the interface
❏ Incorrect setup of your computer or software
❏ Incorrect operation of your software
See the Setup Guide to confirm that you have done the set up in the correct way. Also, see
the documentation that comes with your computer and software for possible solutions.
The Print light does not come on.
Make sure the power cord is plugged into an electrical outlet and the product is turned on
by pressing the Power button.
If you cannot solve a problem, contact your dealer or a qualified customer support person
for assistance.
The product does not scan.
Try one or more of the following solutions:
❏ Wait until the Print light stays on in green (ready for scanning).
❏ Your system may not work properly if you use a USB cable other than the one supplied
by Epson. Use the USB cable that comes with your product.
❏ The product may not work properly when connected to the computer through more than
one hub. In this case, connect the product directly to the computer’s USB port, or
through one hub only.
Downloaded from ManualsPrinter.com Manuals
Scanning Problems
308
Pressing the Start button does not start scanning.
Try one or more of the following solutions.
❏ Make sure EPSON Scan is installed.
❏ For Windows XP users:
Click the Events tab in your product’s Properties dialog box and make sure Take no
action is not selected. Also, make sure the desired button is selected in the Select an
event list box, and Start this program is selected.
❏ For Windows Me, 98, and 2000 users:
Click the Events tab in your product’s Properties dialog box and make sure the Disable
device events check box is clear. Also, make sure the desired button is selected in the
Scanner events list box, and the desired application in the Send to this application list
is selected.
❏ For Mac OS X users:
In the Classic mode, the x B&W Start or x Color Start button is disabled. Therefore,
quit the Classic mode.Initially, only the user who installed the scanner software can
scan using the x B&W Start or x Color Start button. For other users, they must first
start EPSON Scanner Monitor in the Applications folder; subsequently they can use the
button to automatically start the application to scan.
Pressing the Start button in a Mac OS X environment starts the
Classic mode.
Do not install the scanner software in a Mac OS X environment in the Classic mode.
You cannot scan multiple images.
Try one or more of the following solutions.
❏ Position photos at least 20 mm apart from each other.
❏ Make sure your application can scan multiple images.
Downloaded from ManualsPrinter.com Manuals
Scanning Problems
309
Scanning Software Problems
Note:
Some Epson Scan settings may be unavailable or grayed out based on your scanner’s capabilities
or the currently selected settings.
You Cannot Start Epson Scan
❏ Make sure the scanner’s P On light is turned on.
❏ Turn off your computer and scanner, then check the USB cable connection between
them to make sure it is secure.
❏ The scanner may not work properly when your computer is in standby mode
(Windows), or sleep mode (Mac OS X). Restart Epson Scan and try scanning again.
❏ The scanner may not work properly if you upgrade your operating system but do not
reinstall Epson Scan. See "Uninstalling Your Scanning Software" on page 316 for
instructions on uninstalling and reinstalling it.
❏ Make sure that Epson Scan is selected in your scanning program. See "Starting a Scan
With Another Scanning Program" on page 138 for instructions.
❏ In the Windows Device Manager, make sure your scanner’s name appears under
Imaging devices without a question (?) or an exclamation (!) mark. If the scanner
appears with one of these marks or as an Unknown device, uninstall Epson Scan as
described in "Uninstalling Epson Scan" on page 316. Then reinstall it by following the
instructions in your Start Here sheet.
The Scanner Software Does Not Work Properly
❏ Make sure your computer has enough memory and meets the other system
requirements for the software you are using. See your software and computer
documentation for details.
❏ With Windows, check whether your scanner appears more than once in the Scanners
and Cameras utility. Do one of the following:
Windows XP and Me:
Double-click the Scanners and Cameras icon in Control Panel. Delete your scanner's
icon and reinstall Epson Scan by following the instructions in your Start Here sheet.
Downloaded from ManualsPrinter.com Manuals
Scanning Problems
310
Windows 98 SE and 2000:
Double-click the Scanners and Cameras icon in Control Panel. Delete your scanner
from the list of installed devices and reinstall Epson Scan following the instructions in
your Start Here sheet.
❏ The scanner may not work properly when your computer is in standby mode
(Windows), or sleep mode (Mac OS X). Restart Epson Scan and try scanning again.
❏ The scanner may not work properly if you upgrade your operating system but do not
reinstall Epson Scan. See "Uninstalling Your Scanning Software" on page 316 for
instructions on uninstalling and reinstalling it.
Scanning Takes a Long Time
❏ Computers with USB 2.0 (high speed) ports can scan faster than those with USB 1.1
ports. If you are using a USB 2.0 port with your scanner, make sure it meets the system
requirements. See "System Requirements" on page 127 for details.
❏ Try scanning your original at a lower Resolution setting to speed up scanning. See
"Selecting the Scan Resolution" on page 147 for instructions.
Scan Quality Problems
The Edges of Your Document Are Not Scanned
Move the document about 2.5 mm (0.1 inches) away from the horizontal and vertical edges
of the document table to avoid cropping.
You See Only a Few Dots in Your Scanned Image
❏ Make sure the document is placed on the scanner’s document table with the side to be
scanned facing down. See "Setting Your Originals" on page 129 for details.
❏ When scanning with the Black&White setting in Home or Professional Mode, change
the Threshold setting. See "Adjusting the Color and Other Image Settings" on page
153 for instructions.
Downloaded from ManualsPrinter.com Manuals
Scanning Problems
311
A Line Of Dots Always Appears in Your Scanned Image
The document table may be dusty or scratched. Clean the document table. See "Cleaning
the document table and the exposure window for Auto Document Feeder" on page 291 for
details. If you still have the problem, contact your dealer.
Straight Lines in Your Image Come Out Crooked
Make sure the document lies perfectly straight on the document table. Align the vertical
and horizontal lines with the scales at the top and side of the document table.
Your Image is Distorted or Blurred
❏ Make sure the document lies flat on the document table. Also make sure your
document is not wrinkled or warped.
c
Caution:
Do not place heavy objects on the document table.
❏ Make sure you do not move the document or scanner while scanning.
❏ Make sure the scanner is placed on a flat, stable surface.
❏ Select Unsharp Mask Filter in Epson Scan’s Professional Mode window. See
"Adjusting the Color and Other Image Settings" on page 153 for instructions.
❏ Adjust the Auto Exposure setting in Epson Scan’s Professional Mode window. See
"Adjusting the Color and Other Image Settings" on page 153 for instructions.
You can also select Color Control and Continuous auto exposure in the
Configuration window, or select the Color tab and click the Recommended Value
button to return the Auto Exposure setting to the default. See Epson Scan Help for
details.
❏ Increase the Resolution setting. See "Selecting the Scan Resolution" on page 147 for
instructions.
Downloaded from ManualsPrinter.com Manuals
Scanning Problems
312
Colors Are Patchy or Distorted at the Edges of Your Image
If your document is very thick or warped at the edges, cover the edges with paper to block
external light as you scan.
Your Scanned Image is Too Dark
❏ Change the Display Gamma setting to match your output device, such as a monitor or
printer, in the Epson Scan Configuration window. See Epson Scan Help for details.
❏ Adjust the Auto Exposure setting in Epson Scan’s Professional Mode window. See
"Adjusting the Color and Other Image Settings" on page 153 for instructions.
You can also select Color Control and Continuous auto exposure in the
Configuration window, or select the Color tab and click the Recommended Value
button to return the Auto Exposure setting to the default. See Epson Scan Help for
details.
❏ Check the Brightness setting in Epson Scan’s Home or Professional Mode (see
"Adjusting the Color and Other Image Settings" on page 153). Or adjust brightness
using the Histogram in Professional Mode (see Epson Scan Help).
❏ Adjust the brightness using the Histogram in Epson Scan’s Professional Mode. See
Epson Scan Help for details.
❏ Check the brightness and contrast settings of your computer monitor.
Downloaded from ManualsPrinter.com Manuals
Scanning Problems
313
An Image on the Back of Your Original Appears in Your Scanned
Image
If your original is printed on thin paper, images on the back may be visible to the scanner
and appear in your scanned image. Try scanning the original with a piece of black paper
placed on the back of it. Also make sure the Document Type and Image Type settings are
correct for your original. See "Selecting Basic Settings" on page 142 for details.
Ripple Patterns Appear in Your Scanned Image
A ripple pattern (called moiré) is a pattern that may appear in a scanned image of a printed
document. It is caused by interference from the differing pitches in the scanner’s screen
and the halftone screen in your original.
Original image with
moiré pattern
Descreening Filter
applied
❏ Select the Descreening Filter check box in Epson Scan’s Home or Professional Mode
window. In Professional Mode, set the Screen Ruling of the Descreening Filter setting
to an appropriate setting for your document and deselect the Unsharp Mask Filter
setting. See "Adjusting the Color and Other Image Settings" on page 153 for
instructions.
❏ Select a lower Resolution setting. See "Selecting the Scan Resolution" on page 147
for instructions.
Note:
You cannot remove ripple patterns when you are scanning using a resolution higher than 601
dpi.
Characters Are Not Recognized Well When Converted Into Editable
Text (OCR)
❏ Make sure the document lies perfectly straight on the document table. Align the vertical
and horizontal lines with the scales at the top and side of the document table.
Downloaded from ManualsPrinter.com Manuals
Scanning Problems
314
❏ In Home Mode, select Black&White as the Image Type setting. In Professional Mode,
select None for the B&W Option setting. Then try adjusting the Threshold setting.
❏ Check your OCR software manual to see if there are any settings you can adjust in your
OCR software.
Scanned Colors Differ From the Original Colors
❏ Change the Image Type setting in Epson Scan’s Home or Professional Mode. See
"Selecting Basic Settings" on page 142 for instructions. Select different combinations of
this setting and the others mentioned below.
❏ Change the Display Gamma setting to match your output device, such as a monitor or
printer, in the Epson Scan Configuration window. See Epson Scan Help for details.
❏ Adjust the Auto Exposure setting in Epson Scan’s Professional Mode. Also try
selecting a different Tone Correction setting. See "Adjusting the Color and Other Image
Settings" on page 153 for instructions.
❏ Try selecting the following settings in the Configuration window: Color Control,
Continuous auto exposure, and Recommended Value (on the Color tab). See
Epson Scan Help for details.
❏ Check the color matching and color management capabilities of your computer, display
adapter, and software. Some computers can change the palette of colors on your
screen. See your software and hardware manuals for details.
❏ Use the color management system for your computer: ICM for Windows or ColorSync
for Macintosh. With Windows, add a color profile that matches your monitor to improve
on-screen color matching. (Exact color matching is very difficult. Check your software
and monitor documentation for information on color matching and calibration.)
❏ Printed colors can never exactly match the colors on your monitor because printers and
monitors use different color systems: monitors use RGB (red, green, and blue) and
printers typically use CMYK (cyan, magenta, yellow, and black).
You Have Trouble Adjusting the Scan Area in the Thumbnail Preview
❏ Create a marquee or adjust the existing marquee to select the area you want to scan.
See "Adjusting the Scan Area (Marquee)" on page 151 for instructions.
❏ In the Configuration window, adjust the thumbnail cropping area using the Thumbnail
Cropping Area slide. See Epson Scan Help for details.
Downloaded from ManualsPrinter.com Manuals
Scanning Problems
315
❏ Switch to the Normal preview type (if available) and preview your image again. See
"Previewing and Adjusting the Scan Area" on page 148 for instructions.
Uninstalling Your Scanning Software
You may need to uninstall and then reinstall your scanner software to solve certain
problems or if you upgrade your operating system.
Uninstalling Epson Scan
Follow the instructions in the section for your operating system to uninstall Epson Scan.
Windows
Note:
❏ The illustrations in this section show Windows XP screens. They may be different from the
screens for your operating system.
❏ To uninstall programs in Windows XP or 2000, you need to log on as a user with a Computer
Administrator account (Windows XP) or as a user who belongs to the Administrators group
(Windows 2000).
1. Turn off the scanner using its P On button.
2. Disconnect the scanner’s USB cable from your computer.
3. Open the Windows Control Panel and double-click the Add or Remove Programs icon
(Windows XP) or the Add/Remove Programs icon (Windows Me, 98 SE, or 2000).
Downloaded from ManualsPrinter.com Manuals
Scanning Problems
316
4. Click Epson Scan in the list of currently installed programs and click Change/Remove
(Windows XP or 2000) or Add/Remove (Windows Me or 98 SE).
5. When the confirmation window appears, click Yes.
6. Follow the on-screen instructions to uninstall Epson Scan.
In some cases, a message may appear to prompt you to restart the computer. If so,
make sure Yes, I want to restart my computer now is selected and click Finish.
Mac OS X
1. Insert the scanner software CD-ROM in your CD-ROM or DVD drive.
2. Double-click the EPSON CD-ROM icon on your desktop.
3. Open the EPSON Scan folder.
4. Double-click the EPSON Scan Installer icon.
Note:
If the Authorization window opens, click the key icon, enter the administrator's name and
password, click OK, and click Continue.
5. When you see the license agreement, click Accept. The Installer window appears.
Downloaded from ManualsPrinter.com Manuals
Scanning Problems
317
6. Select Uninstall from the pull-down menu at the top and click the Uninstall button.
Uninstalling the Epson Creativity Suite
Follow the instructions in the section for your operating system to uninstall the Epson
Creativity Suite.
Windows
Note:
❏ The illustrations in this section show Windows XP screens. They may be different from the
screens for your operating system.
❏ To uninstall programs in Windows XP or 2000, you need to log on as a user with a Computer
Administrator account (Windows XP) or as a user who belongs to the Administrators group
(Windows 2000).
1. Open the Windows Control Panel and double-click the Add or Remove Programs icon
(Windows XP) or the Add/Remove Programs icon (Windows Me, 98 SE, or 2000).
Downloaded from ManualsPrinter.com Manuals
Scanning Problems
318
2. Click EPSON Attach to Email in the list of currently installed programs and click
Change/Remove (Windows XP or 2000) or Add/Remove (Windows Me or 98 SE).
3. When the confirmation window appears, click Yes.
4. Follow the on-screen instructions to uninstall Epson Attach to Email.
5. Repeat steps 2 through 4 for each of the following programs in the Epson Creativity
Suite:
❏ Epson Copy Utility 3
❏ Epson Easy Photo Print
❏ Epson File Manager
❏ Epson Scan Assistant
Note:
Additional programs may be available, depending on the software you have installed on your
system.
6. In some cases, a message may appear to prompt you to restart the computer. If so,
make sure Yes, I want to restart my computer now is selected and click Finish.
Mac OS X
Note:
Log onto a Computer Administrator account to uninstall software. You cannot uninstall programs if
you log onto a Limited account.
1. Insert the scanner software CD-ROM in your CD-ROM or DVD drive.
2. Double-click the EPSON CD-ROM icon on your desktop.
Downloaded from ManualsPrinter.com Manuals
Scanning Problems
319
3. Double-click the EPSON Creativity Suite folder, then open the folder for the program
you want to uninstall. (If there are additional folders for specific language versions,
open the folder for the language you installed.)
4. If you see an Uninstaller icon, double-click it. Then enter your password or
pass-phrase as necessary and follow the on-screen instructions. When you are
finished, go to step 9.
If you see only an Installer icon, double-click it. Then enter your password or
pass-phrase as necessary and go to step 5.
5. If you see a license agreement screen, click Accept.
6. In the Installer window, select Uninstall from the pull-down menu in the upper left
corner.
7. Click the Uninstall button.
8. When uninstallation is finished, click OK, then click Quit.
9. Repeat steps 2 through 8 for each program you want to uninstall in the Epson Creativity
Suite folder.
10. If you need to uninstall the Attach to Email program, double-click the Applications
folder on your Mac OS X hard drive.
11. Open the EPSON folder, then open the Creativity Suite folder.
12. Select the Attach to Email folder icon and drag it to the Trash icon.
Uninstalling the On-screen User’s Guide
If you need to uninstall this on-screen User’s Guide, follow the steps here for your
operating system.
Windows
Note:
To uninstall programs in Windows XP or 2000, you need to log on as a user with a Computer
Administrator account (Windows XP) or as a user who belongs to the Administrators group
(Windows 2000).
1. Turn off the scanner using its P On button.
2. Disconnect the scanner’s USB cable from your computer.
Downloaded from ManualsPrinter.com Manuals
Scanning Problems
320
3. Open the Windows Control Panel and double-click the Add or Remove Programs icon
(Windows XP) or the Add/Remove Programs icon (Windows Me, 98 SE, or 2000).
4. Click (model name) User’s Guide in the list of currently installed programs and click
Change/Remove (Windows XP or 2000) or Add/Remove (Windows Me or 98 SE).
5. When the confirmation window appears, click Yes.
6. Follow the on-screen instructions to uninstall the User’s Guide.
Mac OS X
Drag the following folder and icon into the Trash:
❏ The User’s Guide folder inside the (model name) folder.
❏ The (model name) User’s Guide icon on the desktop.
Color Matching Problems
Colors on your monitor are different from those in the original
image.
Try one or more of these solutions:
❏ Check the image settings of your scanner software, especially the data format (bits,
pixel and color), gamma correction, and color correction. Try different combinations of
these settings.
❏ Check the color matching and color management capabilities of your computer, display
adapter, and software. Some computers can change the color palette to adjust the
colors on your screen. See your software and hardware manuals for details.
❏ Use the color management system for your computer: ICM for Windows, or ColorSync
for Macintosh. For Windows, add a color profile that matches your monitor.
❏ Exact color matching is very difficult. Check your software and monitor documentation
for information on color matching and calibration.
Downloaded from ManualsPrinter.com Manuals
Scanning Problems
321
Printed colors are different from those in the original image.
Exact color matching is very difficult. Check your software or contact the manufacturer of
your product for information on color matching and calibration.
ADF Scanning Problems
A blank copy is output even though an original is set on the Auto
Document Feeder during scanning.
Check if the ADF unit or ADF cover is closed firmly.
You cannot scan using the Auto Document Feeder.
Try one or more of the following solutions:
❏ Make sure either the Office Mode or the Professional Mode is selected in EPSON Scan.
❏ Make sure ADF-Single-sided or ADF-Double-sided is selected as the document
source in EPSON Scan.
❏ If the Auto Document Feeder is open, close it and then try again. If the Auto Document
Feeder is already open while you are scanning, remove any jammed paper; reload any
document not yet scanned and then restart EPSON Scan.
❏ Remove any jammed paper, and then reload the document and restart EPSON Scan.
❏ Check if the ADF pickup roller is dirty. If the pickup roller is not clean, wipe it with a wet,
well-wrung cloth. For details, see "Cleaning the ADF pickup roller" on page 291.
A line of dots always appears in your scanned image.
The exposure table for Auto Document Feeder may be dusty or scratched. Clean the table.
See "Cleaning the document table and the exposure window for Auto Document Feeder"
on page 291 for details. If you still have the problem, contact your dealer.
Downloaded from ManualsPrinter.com Manuals
Scanning Problems
322
Paper jams in the Auto Document Feeder.
1. Open the Auto Document Feeder’s cover.
2. Gently pull out any sheets of paper with both hands. Be careful not to tear the jammed
paper. If you cannot pull out the jammed paper, proceed to the next step.
Downloaded from ManualsPrinter.com Manuals
Scanning Problems
323
3. Gently pull out any sheets of paper by rolling the knob as illustrated below.
4. Close the Auto Document Feeder’s cover and turn the product on.
You cannot scan multiple documents.
Make sure your application can scan multiple images.
Downloaded from ManualsPrinter.com Manuals
Scanning Problems
324
Chapter 17
Copying Problems
Copy Operational Problems
The product does not copy
Try one or more of the following solutions.
❏ Make sure media is loaded in the MP tray or the paper cassette. See "Loading Paper"
on page 36.
❏ Make sure the original is loaded correctly. See "Setting Originals to Copy" on page 197.
Auto Document Feeder: Place the original face-up in
the Auto Document Feeder.
document table:
Place the original face-down
on the document table.
❏ Make sure the correct device is selected. The product you are intending to use is
selected in the Printer field as the current device when you press the x B&W Start or
x Color Start button.
Copy Quality Problems
Printout is not fine enough
Cause
Downloaded from ManualsPrinter.com Manuals
What to do
Copying Problems
325
You may not be using the correct type of
paper for copying.
The available paper types for copying are not the
same as that for printing. When you copy an original,
use the correct type of paper. Depending on the
paper source, the following paper types are
available.
MP tray:
Plain paper, EPSON Color Laser Paper, Letterhead,
Recycled paper, Colored paper, Transparencies,
Labels
Optional paper cassette:
Plain paper, EPSON Color Laser Paper, Letterhead,
Recycled paper, Colored paper
Coated paper, thick paper, and special paper such
as postcard or envelopes are not available for
copying.
The information on the back side or background color is printed on
the copy
Cause
What to do
The original is almost transparent or extremely
thin.
When you copy a thin double-sided original, the
information on the back side of the original may be
printed on the copy. Using black paper or an
underlay beneath the original may solve the
problem.
The copy setting may not be matched with
the original.
Select the settings that match the original and make
a copy. When the settings are made correctly, the
back side is not copied as the brightest part is
adjusted to white. This also removes the yellowish
color in the background.
If these problems cannot be solved even if the
settings are made correctly, select Text for
document type or set the contrast to a positive
value.
Copies are blank, or images are missing or faded
Try one or more of the following solutions.
❏ The sealing tape might still be in the toner cartridge. Remove the toner cartridge, pull
out the sealing tape, and reinstall the toner cartridge. See "Replacing a toner cartridge"
on page 278.
❏ If the toner cartridge is low on toner, the copies will be faded. Replace the toner
cartridge with a new one.
Downloaded from ManualsPrinter.com Manuals
Copying Problems
326
❏ The accuracy of the copy depends on the quality and size of the original. Try adjusting
the contrast with the product. If your original is too light, the copy might not be able to
compensate, even if you adjust the contrast.
❏ If the original have a colored background, images in the foreground might blend too
much or the background might appear in a different shade. Adjust the settings before
copying or enhance the image after it has been copied.
Improving copy quality
Try one or more of the following solutions.
❏ Copy from the document table. This will produce a higher quality copy than copying
from the Auto Document Feeder.
❏ Use quality originals.
❏ Load the media correctly. If the media is loaded incorrectly, it might skew, causing
unclear images and problems with the OCR application.
❏ Open or close the MP tray to accommodate the copy job. If you are copying to standard
weight media, use the paper cassette. If you are copying to heavy media, use the MP
tray.
❏ If your product frequently feeds more than one page at a time, replace the pickup roller.
❏ Use or make a carrier sheet to protect your originals.
Completely blank pages are output
Try one or more of the following solutions.
❏ The original might have been loaded upside down. In the Auto Document Feeder, load
the original with the short edge forward and the side to be scanned facing up.
❏ If you are getting blank pages when scanning from the document table, make sure the
original is loaded correctly. Place the original face-down on the document table with the
top left corner of the document located in the lower right corner of the glass.
❏ The media might not meet EPSON’s media specifications (e.g., the media is too moist
or too rough).
❏ The toner might be out.
❏ The tape might not have been removed from the toner cartridge.
Downloaded from ManualsPrinter.com Manuals
Copying Problems
327
The background is dark and dirty
Make sure you have the correct copy quality settings. Try adjusting the settings. See
"Making Changes to Copy Settings" on page 199.
Black vertical lines appear on the scanned image or the image is
all black.
Make sure if the transportation lock on the left side of the document table is set in the
unlocked position. The transportation lock must always be set in the
unlocked position
except when transporting the product. See "Scan Settings" on page 254.
The scanned area is inappropriate.
Make sure if the transportation lock on the left side of the document table is set in the
unlocked position. The transportation lock must always be set in the
unlocked position
except when transporting the product. See "Scan Settings" on page 254.
A blank copy is output even though an original is set on the Auto
Document Feeder during scanning.
Check if the ADF unit or ADF cover is closed firmly.
ADF Copying Problems
A line of dots always appears in your scanned image
The exposure table for Auto Document Feeder may be dusty or scratched. Clean the table.
See "Cleaning the document table and the exposure window for Auto Document Feeder"
on page 291 for details. If you still have the problem, contact your dealer.
Paper jams in the Auto Document Feeder
Follow the steps below to remove the jammed paper.
1. Turn the product off.
Downloaded from ManualsPrinter.com Manuals
Copying Problems
328
2. Open the Auto Document Feeder’s cover.
3. Gently pull out any sheets of paper with both hands. Be careful not to tear the jammed
paper. If you cannot pull out the jammed paper, proceed to the next step.
4. Gently pull out any sheets of paper by rolling the knob as illustrated below.
5. Close the Auto Document Feeder’s cover and turn the product on.
You cannot scan using the Auto Document Feeder.
Try one or more of the following solutions:
❏ Make sure either the Office Mode or the Professional Mode is selected in EPSON Scan.
Downloaded from ManualsPrinter.com Manuals
Copying Problems
329
❏ Make sure ADF-Single-sided or ADF-Double-sided is selected as the document
source in EPSON Scan.
❏ If the Auto Document Feeder is open, close it and then try again. If the Auto Document
Feeder is already open while you are scanning, remove any jammed paper; reload any
document not yet scanned and then restart EPSON Scan.
❏ Remove any jammed paper, and then reload the document and restart EPSON Scan.
❏ Check if the ADF pickup roller is dirty. If the pickup roller is not clean, wipe it with a wet,
well-wrung cloth. For details, see "Cleaning the ADF pickup roller" on page 291.
High quality color copy stops halfway
When you make a continuous high quality (600 dpi) color copy with the default memory
(128 MB), the product may not work properly because of insufficient memory. We
recommend adding an memory module so that the total memory size is 256 MB or higher.
Downloaded from ManualsPrinter.com Manuals
Copying Problems
330
Chapter 18
Faxing Problems
Sending and Receiving Faxes Problems
The document stops feeding during faxing
Try one or more of the following solutions.
❏ The maximum length of a page you can load is 355.6 mm. Faxing a longer page stops
at 355.6 mm. The minimum page size for the Auto Document Feeder is 182 × 257 mm
(7.1 × 10.1 in.). If the item is too small, it can jam inside the Auto Document Feeder.
❏ If there is no jam and it has been less than one minute, wait a moment before pressing
the y Cancel button. If there is a paper jam, see "Clearing Jammed Paper" on page
335.
❏ Try sending to a different fax machine. There might be problems with the fax machine
you are sending to.
❏ Try one of the followings. There might be problems with the phone line.
Turn up the volume on the product and press the x B&W Start or x Color Start button
on the control panel. If you hear a dial tone, the phone line is working. To change the
speaker volume, see "Basic Settings" on page 252. Disconnect the product from the
phone jack and connect a phone. Try to make a phone call to make sure the phone line
is working.
The product is receiving faxes but not sending them
Try one or more of the following solutions.
❏ If your product is on a PBX system, the PBX system might be generating a dial tone the
product cannot detect. Disable the detect dial tone setting. See "Basic Settings" on
page 252.
❏ If you think there might be a poor connection on this phone line, try sending the fax later
and see if it sends successfully.
Downloaded from ManualsPrinter.com Manuals
Faxing Problems
331
Outgoing fax calls keep dialing
The product will automatically redial a fax number if the Auto Redial Tries setting is set
between 1 and 99. To stop the redials while the product is dialing, press the y Cancel
button. Change the redial settings if necessary.
Faxes you send are not arriving
Try one or more of the following solutions.
❏ Call the recipient to make sure the fax machine is on and ready to receive faxes.
❏ Make sure the fax is still waiting in memory. A fax might be in memory because it is
waiting to redial a busy number, there are other jobs ahead of it waiting to be sent, or
the fax is set up for a delayed send. If a fax job is in memory for any of these reasons,
an entry for the job appears in the fax log. Print a fax activity report and check the Status
column for jobs with a Pending designation.
Incoming fax calls are not being answered
Try one or more of the following solutions.
❏ Check if the Incoming Mode is set to Fax only. If the Incoming Mode is set to Phone
only, the product never answers calls. Answer the phone and start receiving the fax
yourself. See "Reception Settings" on page 253.
❏ Make sure the product is connected properly to a phone line.
❏ Check if there are too many devices connected to the phone line. Try removing the last
device connected and see if the product works. If not, continue removing devices one
at a time and retry after removing each one.
❏ Make sure the phone line is working. Try one of the followings.
Turn up the volume on the product and press the x B&W Start or x Color Start button
on the control panel. If you hear a dial tone, the phone line is working.Disconnect the
product from the phone jack and connect a phone. Try to make a phone call to make
sure the phone line is working.
❏ Check if the product is out of paper. If the product is out of paper and its memory is full,
it will not be able to receive faxes. Refill the MP tray or the paper cassette. The product
will print all of the faxes it has saved in memory and will then resume answering fax
calls.
Downloaded from ManualsPrinter.com Manuals
Faxing Problems
332
Faxes are transmitting or being received very slowly
Try one or more of the following solutions.
❏ Check if you are sending or receiving a very complex fax. A complex fax, such as one
with many graphics, takes longer to be sent or received.
❏ Check if the receiving fax machine has a slow modem speed. The product only sends
the fax at the fastest modem speed the receiving fax machine can use.
❏ Check if the resolution at which the fax was sent or received is very high. A higher
resolution typically results in better quality, but also requires a longer transmission time.
If you are receiving the fax, call and ask the sender to lower the resolution and resend
the fax. If you are sending, lower the resolution and resend the fax. To change the
default setting, see "Making Changes to Fax Settings" on page 216.
❏ Check if there is a poor phone line connection. If there is a poor phone line connection,
the product and the receiving fax machine slow down line transmission to adjust for
errors. Hang up and resend the fax. If this does not work, have the phone company
check the phone line.
A blank copy is output even though an original is set on the Auto
Document Feeder during scanning.
Check if the ADF unit or ADF cover is closed firmly.
Time setting is incorrect
The time setting may be reset if the product’s power remains off for a long time. Set the
time again in Time Setting in the Setup menu. See "Using the Setup Menu" on page 238
for instructions.
Printout Problems
Black vertical lines appear on the scanned image or the image is
all black.
Make sure if the transportation lock on the left side of the document table is set in the
unlocked position. The transportation lock must always be set in the
unlocked position
except when transporting the product. See "Scan Settings" on page 254.
Downloaded from ManualsPrinter.com Manuals
Faxing Problems
333
The scanned area is inappropriate.
Make sure if the transportation lock on the left side of the document table is set in the
unlocked position. The transportation lock must always be set in the
unlocked position
except when transporting the product. See "Scan Settings" on page 254.
Faxes are not printing or are printing incorrectly
Make sure there is media in the MP tray or the paper cassette. If there is no media, load
the MP tray or the paper cassette. Any faxes received while the input tray is empty are
stored in memory and will print out once the tray has been refilled.
Received faxes are too light or are printing only on half of the page
Check if the product ran out of toner while printing a fax. The product stores up to 10 of the
most recently printed faxes. Replace the toner cartridge. See "Replacing a toner cartridge"
on page 278.
Reports are not printing correctly
If a transmission report or an activity report is not printed correctly, try one or more of the
following solutions.
❏ Check the driver settings, and the specifications and the status of the connection cable.
❏ If the product is connected with a network, consult the network administrator.
Downloaded from ManualsPrinter.com Manuals
Faxing Problems
334
Chapter 19
Other Problems
Clearing Jammed Paper
If paper becomes jammed in the product, the Print light (green) goes off and Error light
(red) is lit. The product’s LCD panel and EPSON Status Monitor provide alert messages.
Clear the paper jam by following the order of the indicated cover names displayed on the
control panel or EPSON Status Monitor.
Precautions for clearing jammed paper
Be sure to observe the following points when you clear jammed paper.
❏ Do not remove jammed paper by force. Torn paper can be difficult to remove and might
cause other paper jams. Pull it gently in order to avoid tearing.
❏ Always try to remove jammed paper with both hands to avoid tearing it.
❏ If jammed paper is torn and remains in the product, or if paper is jammed in a place not
mentioned in this chaptersection, contact your dealer.
❏ Make sure that the paper type that is loaded is the same as the Paper Type setting in
the printer driver.
w
Warning:
❏ Be careful not to touch the fuser, which is marked CAUTION HIGH TEMPERATURE, or
the surrounding areas. If the product has been in use, the fuser and the surrounding
areas may be very hot.
❏ Do not insert your hand deep into the fuser unit as some components are sharp and may
cause injury.
Jam C (cover C)
Follow the steps below to clear paper jams at cover C.
Note:
Before raising the scanner unit, make sure that the document cover is closed firmly.
Downloaded from ManualsPrinter.com Manuals
Other Problems
335
1. Raise the scanner unit.
c
Caution:
Do not touch the lever under the scanner unit when you open or close the unit. Touching
it will cause the document cover of the scanner unit to fall down, which may damage the
product and cause injury.
2. Open cover C.
Downloaded from ManualsPrinter.com Manuals
Other Problems
336
3. Raise the two green levers of the fuser unit to unlock it.
4. Hold the guide up by holding the green tab, and gently pull out any sheets of paper. Be
careful not to tear the jammed paper.
w
Warning:
Be careful not to touch the fuser, which is marked CAUTION HIGH TEMPERATURE, or
the surrounding areas. If the product has been in use, the fuser and the surrounding
areas may be very hot.
Downloaded from ManualsPrinter.com Manuals
Other Problems
337
5. Push down the two green levers of the fuser unit.
6. Close cover C.
Downloaded from ManualsPrinter.com Manuals
Other Problems
338
7. Lower the scanner unit to the original position.
Jam E (cover E)
Follow the steps below to clear paper jams at cover E.
1. Open cover E.
Downloaded from ManualsPrinter.com Manuals
Other Problems
339
2. Gently pull out any sheets of paper with both hands. Be careful not to tear the jammed
paper.
3. Close cover E.
Jam F (cover F)
Follow the steps below to clear paper jams at cover F.
Note:
Before raising the scanner unit, make sure that the document cover is closed firmly.
Downloaded from ManualsPrinter.com Manuals
Other Problems
340
1. Raise the scanner unit.
c
Caution:
Do not touch the lever under the scanner unit when you open or close the unit. Touching
it will cause the document cover of the scanner unit to fall down, which may damage the
product and cause injury.
2. Open cover C, then raise the two green levers on the fuser unit to unlock it.
Downloaded from ManualsPrinter.com Manuals
Other Problems
341
3. Open cover E, and then cover F.
4. Gently pull out any sheets of paper with both hands. Be careful not to tear the jammed
paper.
5. Close cover F, and then cover E.
Downloaded from ManualsPrinter.com Manuals
Other Problems
342
6. Push down the two green levers on the fuser unit, then close cover C.
7. Lower the scanner unit to the original position.
Jam MP (MP tray)
Follow the steps below to clear paper jams at the MP tray.
Downloaded from ManualsPrinter.com Manuals
Other Problems
343
1. Open the MP tray cover and remove all paper that is loaded.
2. Gently pull out any sheets of paper that have fed part way into the product.
3. Reload the paper and close the MP tray cover.
Downloaded from ManualsPrinter.com Manuals
Other Problems
344
4. Open and close cover A.
Note:
After removing the jammed paper from the MP tray, you need to open and close any cover
except the MP tray cover to clear the error message.
Jam LC/G (optional paper cassette and cover G)
Follow the steps below to clear paper jams at the optional paper cassette unit and cover G.
1. Pull out the paper cassette from the optional paper cassette unit.
Downloaded from ManualsPrinter.com Manuals
Other Problems
345
2. If you find any jammed paper, gently pull out any sheets of paper that have fed part way
into the product.
3. Reinsert the paper cassette.
If the jammed paper is not visible inside the optional paper cassette unit, or to check if
there is any jammed paper inside cover G, proceed to step 4.
Downloaded from ManualsPrinter.com Manuals
Other Problems
346
4. Open cover G.
5. Gently pull out any sheets of paper with both hands. Be careful not to tear the jammed
paper.
Downloaded from ManualsPrinter.com Manuals
Other Problems
347
6. Close cover G.
When transparencies are jammed at the MP tray
When transparencies are jammed, follow the steps below to clear the jam.
1. Open the MP tray cover and remove all transparencies that are loaded.
Downloaded from ManualsPrinter.com Manuals
Other Problems
348
2. Open cover E. Then, gently pull out any transparencies with both hands. Be careful not
to tear the jammed transparency.
3. Reload the transparencies into the MP tray.
Note:
After removing the jammed paper from the MP tray, you need to open and close any cover
except the MP tray cover to clear the error message.
Paper jams in the Auto Document Feeder
1. Open the Auto Document Feeder’s cover.
Downloaded from ManualsPrinter.com Manuals
Other Problems
349
2. Gently pull out any sheets of paper with both hands. Be careful not to tear the jammed
paper. If you cannot pull out the jammed paper, proceed to the next step.
3. Gently pull out any sheets of paper by rolling the knob as illustrated below.
4. Close the Auto Document Feeder’s cover.
Paper Handling Problems
Paper does not feed properly
Cause
Downloaded from ManualsPrinter.com Manuals
What to do
Other Problems
350
The paper guides are not set correctly.
Make sure that the paper guides in all the paper
cassettes are set in the correct paper size positions.
The paper source setting may not be correct.
Make sure that you have selected the correct paper
source in your application.
There may be no paper in the cassettes.
Load paper into the selected paper source.
The size of loaded paper differs from the
control panel setting.
Make sure that the correct paper size is set in MP Tray
Size or LC1 Size settings in the Tray Menu in the Setup
menu’s Printer Settings.
Too many sheets may be loaded in the MP
tray or paper cassettes.
Make sure that you have not tried to load too many
sheets of paper. For the maximum paper capacity
for each paper source, see "Loading Paper" on page
36.
The paper that is loaded is curled.
Straighten the paper.
If paper does not feed from the optional
paper cassette unit, the unit may not be
installed properly.
For instructions on installing the unit, see "Optional
Paper Cassette Unit" on page 269.
Problems Using Options
To confirm your options are installed correctly, print a status sheet. See "Printing a Status
Sheet" on page 356 for details.
Paper does not feed from the optional paper cassette
Cause
What to do
The optional paper cassette may not be
installed properly.
See "Optional Paper Cassette Unit" on page 269 for
instructions on installing an optional paper cassette
unit.
The paper source setting may not be correct.
Make sure you have selected the proper paper
source in your application.
There may be no paper in the paper
cassette.
Load paper into the selected paper source.
Too many sheets may be loaded in the paper
cassette.
Make sure that you have not tried to load too many
sheets of paper into the cassette. The cassette can
hold a maximum of 500 sheets of 64 to 105 g/m²
paper.
The paper size is not set correctly.
Make sure that the correct paper size is selected in
the Tray Menu on the control panel.
Downloaded from ManualsPrinter.com Manuals
Other Problems
351
Feed jam when using the optional paper cassette
Cause
What to do
The paper is jammed at the optional paper
cassette.
See "Clearing Jammed Paper" on page 335 to clear
jammed paper.
An installed option cannot be used
Cause
What to do
The installed option is not defined in the
printer driver.
For Windows users:
You have to install EPSON Status Monitor, or make
settings manually in the printer driver. See"Making
Optional Settings" on page 64.
For Macintosh users:
When you have attached or removed printer
options, you need to delete the printer using Print
Setup Utility (for Mac OS X 10.3 and 10.4) or Print
Center (for Mac OS X 10.2), start EPSON Status
Monitor, and then re-register the printer.
Correcting USB Problems
If you are having difficulty using the product with a USB connection, see if your problem is
listed below, and take any recommended actions.
USB connections
USB cables or connections can sometimes be the source of USB problems. Try the
following solution.
For best results, you should connect the product directly to the computer’s USB port. If you
must use multiple USB hubs, we recommend that you connect the product to the first-tier
hub.
Downloaded from ManualsPrinter.com Manuals
Other Problems
352
Windows operating system
Your computer must be a model pre-installed with Windows XP, Me, 98, 2000, or Server
2003, a model that was pre-installed with Windows 98 and upgraded to Windows Me, or a
model that was pre-installed with Windows Me, 98, 2000, or Server 2003, and upgraded to
Windows XP. You may not be able to install or run the USB printer driver on a computer
that does not meet these specifications or that is not equipped with a built-in USB port.
For details about your computer, contact your dealer.
Printer software installation
Incorrect or incomplete software installation can lead to USB problems. Take note of the
following and perform the recommended checks to ensure proper installation.
Checking printer software installation for Windows XP, XP x64, 2000, Server
2003, or Server 2003 x64
When using Windows XP, XP x64, 2000, Server 2003, or Server 2003 x64, you must follow
the steps in the Setup Guide packed with the printer to install the printer software.
Otherwise, Microsoft’s Universal driver may be installed instead. To check if the Universal
driver has been installed, follow the steps below.
1. Open the Printers folder, then right-click the icon of your printer.
2. Click Printing Preferences on the shortcut menu that appears, then right-click
anywhere in the driver.
If About is displayed in the shortcut menu that appears, click it. If a message box with
the words “Unidrv Printer Driver” appears, you must reinstall the printer software as
described in the Setup Guide. If About is not displayed, the printer software has been
installed correctly.
Note:
For Windows 2000, if the Digital Signature Not Found dialog box appears during the installation
process, click Yes. If you click No, you will have to install the printer software again.
For Windows XP, XP x64, Server 2003, or Server 2003 x64, if the Software Installation dialog box
appears during the installation process, click Continue Anyway. If you click STOP Installation,
you will have to install the printer software again.
Downloaded from ManualsPrinter.com Manuals
Other Problems
353
Checking printer software in Windows Me or 98
If you canceled the plug-and-play driver installation in Windows Me or 98 before the
procedure was complete, the USB printer device driver or the printer software may be
incorrectly installed. Follow the directions below to ensure that the driver and printer
software are installed correctly.
Note:
The screen shots shown in this section are taken from Windows 98. Windows Me screens may
differ slightly.
1. Access the printer driver, see "Accessing the printer driver" on page 48, then click the
Details tab.
If EPUSBX: (EPSON AcuLaser CXXX) is displayed in the “Print to the following port”
list, then the USB printer device driver and printer software are installed correctly. If the
correct port is not displayed, proceed to the next step.
2. Right-click the My Computer icon on your desktop, then click Properties.
3. Click the Device Manager tab.
Downloaded from ManualsPrinter.com Manuals
Other Problems
354
If your drivers are correctly installed, EPSON USB Printer Devices should appear on
the Device Manager menu.
If EPSON USB Printer Devices does not appear on the Device Manager menu, click the
plus(+) sign beside Other devices to view the installed devices.
If USB Printer or EPSON AcuLaser CXXX appears under Other devices, the printer
software is not installed correctly. Proceed to step 5.
If neither USB Printer nor EPSON AcuLaser CXXX appears under Other devices, click
Refresh or unplug the USB cable from the product, then plug it into the product again.
Once you have confirmed that these items appear, proceed to step 5.
Downloaded from ManualsPrinter.com Manuals
Other Problems
355
4. Under Other devices, select USB Printer or EPSON AcuLaser CXXX, click Remove,
then click OK.
When the following dialog box appears, click OK, then click OK to close the System
Properties dialog box.
5. Uninstall the printer software as explained in "Uninstalling the Printer Software" on page
78. Turn the product off, restart your computer, then reinstall the printer software as
described in the Setup Guide.
Printing a Status Sheet
To confirm the current status of the product, and that the options are installed correctly,
print a status sheet using the product’s control panel.
To print a status sheet from the printer’s control panel, see "Printing a Status Sheet" on
page 254.
Downloaded from ManualsPrinter.com Manuals
Other Problems
356
You can also print the status sheet from the printer driver.
Note for Windows users:
The status sheet which is printed from the printer driver has less information than the status
sheet which is printed from the printer's control panel if the EPSON Status Monitor is
installed.
Note for Mac OS X users:
The status sheet which is printed from EPSON Remote Panel in the printer driver has less
information than the status sheet which is printed from the printer's control panel.
Downloaded from ManualsPrinter.com Manuals
Other Problems
357
Appendix A
Customer Support
New :See comments to select sections you need. The word "other" indicates products exept for inkjet, SPC, Page, and SIDM.
Contacting Customer Support
New :For All products
Before Contacting Epson
If your Epson product is not operating properly and you cannot solve the problem using the
troubleshooting information in your product documentation, contact customer support
services for assistance. If customer support for your area is not listed below, contact the
dealer where you purchased your product.
Customer support will be able to help you much more quickly if you give them the following
information:
❏ Product serial number
(The serial number label is usually on the back of the product.)
❏ Product model
❏ Product software version
(Click About, Version Info, or similar button in the product software.)
❏ Brand and model of your computer
❏ Your computer operating system name and version
❏ Names and versions of the software applications you normally use with your product
Help for Users in Europe
Check your Pan-European Warranty Document for information on how to contact
EPSON Customer support.
Downloaded from ManualsPrinter.com Manuals
Customer Support
358
Appendix B
Technical Specifications
Paper
Since the quality of any particular brand or type of paper may be changed by the
manufacturer at any time, Epson cannot guarantee the quality of any type of paper. Always
test samples of paper stock before purchasing large quantities or printing large jobs.
Available paper types
Paper type
Description
Plain paper
General copier paper
(Recycled paper is acceptable.*)
Semi-Thick paper
Weight: 81 to 105 g/m²
Envelopes
No paste and no tape
No plastic window
Labels
The backing sheet should be
covered completely, with no gaps
between labels.
Thick paper
Weight: 106 to 163 g/m²
Extra thick paper
Weight: 164 to 210 g/m²
Transparencies
EPSON Color Laser Transparencies
Coated paper
Weight: 105 to 210 g/m²
Colored paper
Non-coated
Paper with
letterhead
Paper and ink of letterheads must be
compatible with laser printers.
* Use recycled paper only under normal temperature and humidity conditions. Poor quality paper may reduce
print quality, or cause paper jams and other problems.
Paper that should not be used
You cannot use the following paper in this product. It may cause product damage, paper
jams, and poor print quality:
❏ Media meant for color laser printer, color copiers, or ink jet printers
Downloaded from ManualsPrinter.com Manuals
Technical Specifications
359
❏ Printed paper on which printing has been done by any other color laser printers,
black-and-white laser printers, color copiers, black-and-white copiers, ink jet printers, or
thermal transfer printers
❏ Carbon paper, carbonless paper, thermal-sensitive paper, pressure-sensitive paper,
acid paper, or paper that uses high-temperature-sensitive ink (around 180°C)
❏ Labels that peel easily or labels that do not cover the backing sheet completely
❏ Coated paper or special surface-colored paper
❏ Paper that has binder holes or is perforated
❏ Paper that has glue, staples, paper clips, or tape on it
❏ Paper that attracts static electricity
❏ Moist or damp paper
❏ Paper of uneven thickness
❏ Overly thick or thin paper
❏ Paper that is too smooth or too rough
❏ Paper that is different on the front and back
❏ Paper that is folded, curled, wavy, or torn
❏ Paper of irregular shape, or paper that does not have right angle corners
Printable area
4-mm minimum margin on all sides.
(6-mm margin on both sides for DL size envelopes)
Downloaded from ManualsPrinter.com Manuals
Technical Specifications
360
Product
General
Printing method:
Laser beam scanning and dry electrophotographic
process
Print Quality
2400 RIT*1
Resolution:
600 dpi × 600 dpi
Continuous printing speed*2
(on A4/Letter):
25 pages per minute for black-and-white printing*3
5 pages per minute for color printing*3
Paper feed:
Automatic or manual feed
Paper feed alignment:
Center alignment for all sizes
Input paper supply:
MP tray:
Up to 180 sheets of plain paper (80 g/m²)
Up to 20 envelopes
Up to 75 sheets of transparencies
Up to 75 sheets of labels
Paper output:
For all paper types and sizes
Paper output capacity:
Up to 250 sheets of plain paper (80 g/m²)
RAM:
128 MB, expandable up to 576 MB
*1
Epson AcuLaser Resolution Improvement Technology.
*2
Printing speed varies by paper source or other conditions.
*3
The product may automatically calibrate during printing to improve printing quality. This may reduce the
printing speed to below that of the value described. Also, depending on paper size, the product may stop
momentarily to protect the fuser unit.
Scanner
Scanner type
Flatbed color image scanner
Photoelectric device
4-lines CCD (R, G, B, B/W)
Effective area
216 × 297 mm (85 × 11.7 in.)
Effective pixels
9600 × 9600 pixels at 600 dpi
Document size
A4, Letter
Image data
16 bits per pixel per color internal
1 to 8 bits per pixel per color external
Scanning speed
Black and white: 2 sec/A4 (300 dpi)
Full color: 11 sec/A4 (300 dpi)
Downloaded from ManualsPrinter.com Manuals
Technical Specifications
361
Copy
Copy mode
Color
A4/ 300 dpi
Black and White
A4/ 300 dpi
First copy
29 sec
12 sec
Multi-copy
5 ppm
25 ppm
Continuous copy
(ADF)
5 ppm
25 ppm
Copy
speed
Fax (fax model only)
Supported communications lines
PSTN (subscriber lines)
PBX (independent premises internal lines)
Communication speed
33600/ 31200/ 28800/ 26400/ 24000/ 21600/ 19200/ 16800/
14400/ 12000/ 9600/ 7200/ 4800/ 2400 bps
Protocol
G3, G3ECM
Transmission and reception mode
Color
Transmits and receives 8 bits each
for RGB
monochrome
Transmits and receives 1 bit
monochrome
Color
JPEG
monochrome
MH, MR, MMR
Transmission and reception of
scanning line density
Color
200 × 200 dpi
monochrome
8 × 15.4, 8 × 7.7. 8 × 3.85 dot/mm
Document size
Color
A4, Letter, Legal
monochrome
A4, Letter, Legal
Color
A4, B5, Letter, Legal
monochrome
A4, B5, Letter, Legal
Image compression method
Print paper size
Environmental
Temperature:
Humidity:
Altitude:
Downloaded from ManualsPrinter.com Manuals
In use:
10 to 32°C (50 to 89.6°F)
Not in use:
-20 to 40°C (-4 to 104°F)
In use:
15 to 80% RH
Not in use:
10 to 15%, 80 to 90% RH
3100 meters (10171 feet) maximum
Technical Specifications
362
Mechanical
a
b
c
a. 667 mm (26.2 in.)
b. 467 mm (18.4 in.)
c. 460 mm (18.1 in.)
Weight:
Approx. 33.1 kg (about 73 lb), excluding the toner cartridge and
photoconductor unit
Electrical
Base model
220 V Model KBB-2c
Fax model
220 V Model: KBB-2c
Voltage
220 V-240 V ± 10%
Rated frequency
50 Hz / 60 Hz
Rated current
4.0 A
Power consumption
During
printing*1
During standby
mode
Sleep mode
*1
Average
Color
191 W
B/W
294 W
MAX
790 W
Average
59 W
Up to 18 W
Includes optional paper cassette unit.
Downloaded from ManualsPrinter.com Manuals
Technical Specifications
363
Standards and approvals
European model:
[Printer]
Low Voltage Directive 73/23/EEC
EN 60950-1
EMC Directive 89/336/EEC
EN 55022 Class B
EN 61000-3-2
EN 61000-3-3
EN 55024
[EU-96] Fax modem
R&TTE Directive 1999/5/EC
EN 60950-1
EN 55022 Class B
EN 55024
TBR21
We, Seiko Epson Corporation, hereby declare that this
telecommunications equipment Model EU-96 is in
compliance with the essential requirements and other
relevant provisions of Directive 1999/5/EC.
For use only in;
Austria, Belgium, Czech, Denmark, Finland, France,
Germany, Greece, Hungary, Ireland, Italy, Luxembourg,
Netherlands, Norway, Poland, Portugal, Spain, Sweden,
Switzerland and UK.
Interfaces
USB interface
USB 2.0 High Speed mode
Note:
❏ Only computers equipped with a USB connector and running Mac OS X and Windows XP, Me,
98, 2000, or Server 2003 support the USB interface.
❏ Your computer must support USB 2.0 in order to use it as an interface.
❏ Since USB 2.0 is fully compatible with USB 1.1, USB 1.1 can be used as an interface.
❏ USB 2.0 can be used with Windows XP, 2000, and Server 2003 operating systems. If your
operating system is Windows Me or 98, use a USB 1.1 interface.
Downloaded from ManualsPrinter.com Manuals
Technical Specifications
364
Ethernet interface
You can use an IEEE 802.3 100BASE-TX/10 BASE-T straight-through shielded,
twisted-pair interface cable with an RJ45 connector.
Note:
❏ NetWare queue-based printing is not supported.
❏ Ethernet Interface may not be available depending on the product model.
Options and Consumables
Optional 500-Sheet Paper Cassette Unit
Product code:
C12C802181
Paper size:
A4, Letter
Paper weight:
64 to 105 g/m²
Paper feed:
One paper cassette mounted
Automatic feed delivery system
Cassette capacity up to 500 sheets
Paper types:
Plain paper
Power supply:
DC 5 V/0.1 A and 24 V/0.5 A supplied
by the product
Model:
KBA-3a*
Dimensions and weight:
Height:
130 mm (5.1 in.)
Width:
440 mm (17.3 in.)
Depth:
446 mm (17.6 in.)
Weight:
8 kg (17.6 lb) including a paper
cassette
* This product conforms to CE marking requirements in accordance with EC Directive 89/336/EEC.
Memory modules
Memory size:
Standard memory: 128 MB
Expansion memory: up to 576 MB
Downloaded from ManualsPrinter.com Manuals
Technical Specifications
365
Toner cartridge
Product code/Model:
*1
Yellow:
0316*1
Magenta:
0317*1
Cyan:
0318*1
Black:
0319*1
Storage temperature:
0 to 35°C (32 to 95°F)
Storage humidity:
15 to 80% RH
This product conforms to CE marking requirements in accordance with EC Directive 89/336/EEC.
The actual number of pages you can print with toner cartridges varies depending on the
type of printing.
Photoconductor unit
*1
Product code:
1104
Storage temperature:
0 to 35°C (32 to 95°F)
Storage humidity:
15 to 80% RH
Model:
1104*1
This product conforms to CE marking requirements in accordance with EC Directive 89/336/EEC.
The actual number of pages you can print with a photoconductor unit varies depending on
the type of printing.
Downloaded from ManualsPrinter.com Manuals
Technical Specifications
366
Appendix C
Information about Fonts
Working with Fonts
EPSON BarCode Fonts (Windows Only)
EPSON BarCode Fonts let you easily create and print many types of bar codes.
New :confirm the specification/ If unnecessary, delete (Windows Only) from the title
Normally, bar code creation is a laborious process requiring you to specify various
command codes, such as Start bar, Stop bar and OCR-B, in addition to the bar code
characters themselves. However, EPSON BarCode Fonts are designed to add such codes
automatically, allowing you to easily print bar codes that conform to a variety of bar code
standards.
EPSON BarCode Fonts support the following types of bar codes.
Bar code
Standard
EPSON BarCode
OCR-B
Check Digit
Comments
EAN
EPSON EAN-8
Yes
Yes
Creates EAN
(abbreviated
version) bar codes.
EPSON EAN-13
Yes
Yes
Creates EAN
(standard version)
bar codes.
UPC-A
EPSON UPC-A
Yes
Yes
Creates UPC-A
bar codes.
UPC-E
EPSON UPC-E
Yes
Yes
Creates UPC-E
bar codes.
Code39
EPSON Code39
No
No
EPSON Code39
CD
No
Yes
Printing of OCR-B
and check digits can
be specified with the
font name.
EPSON Code39
CD Num
Yes
Yes
EPSON Code39
Num
Yes
No
EPSON Code128
No
Yes
Code128
Downloaded from ManualsPrinter.com Manuals
Creates Code128
bar codes.
Information about Fonts
367
Interleaved 2 of 5
(ITF)
Codabar
EAN128
EPSON ITF
No
No
EPSON ITF CD
No
Yes
EPSON ITF CD
Num
Yes
Yes
EPSON ITF Num
Yes
No
EPSON Codabar
No
No
EPSON Codabar
CD
No
Yes
EPSON Codabar
CD Num
Yes
Yes
EPSON Codabar
Num
Yes
No
EPSON EAN128
Yes
Yes
Printing of OCR-B
and check digits can
be specified with the
font name.
Printing of OCR-B
and check digits can
be specified with the
font name.
Creates EAN128
barcodes.
Supported OS:
Windows
2000/XP/Server2003
System requirements
To use EPSON BarCode Fonts, your computer system should meet the following
requirements:
Computer:
IBM PC series or IBM compatible with an i386SX or higher CPU
Operating system:
Microsoft Windows XP, Me, 98, 2000, or Server 2003
Hard disk:
15 to 30 KB free space, depending on the font.
Note:
EPSON BarCode Fonts can only be used with Epson printer drivers.
Installing EPSON BarCode Fonts
Follow the steps below to install EPSON BarCode Fonts. The procedure described here is
for installation in Windows 98; the procedure for other Windows operating systems is
nearly the same.
1. Make sure that the product is off and that Windows is running on your computer.
2. Insert the printer software CD-ROM in the CD-ROM drive.
Note:
❏ If the language section window appears, select your country.
Downloaded from ManualsPrinter.com Manuals
Information about Fonts
368
❏ If the EPSON Installation Program screen does not appear automatically, double-click the
My Computer icon, right-click the CD-ROM icon, and click OPEN in the menu that appears.
Then double-click Epsetup.exe.
3. Click Continue. When the software Licence agreement screen appears, read the
statement, then click Agree.
4. Click User Installation.
5. In the dialog box that appears, click Local.
6. Click Custom.
7. Select EPSON BarCode Font check box, then click Install.
Downloaded from ManualsPrinter.com Manuals
Information about Fonts
369
8. When installation is complete, click Exit.
EPSON BarCode Fonts are now installed on your computer.
Printing with EPSON BarCode Fonts
Follow the steps below to create and print bar codes using EPSON BarCode Fonts. The
application featured in these instructions is Microsoft WordPad. The actual procedure may
differ slightly when printing from other applications.
1. Open a document in your application and enter the characters you want to convert into
a bar code.
2. Select the characters, then select Font from the Format menu.
Downloaded from ManualsPrinter.com Manuals
Information about Fonts
370
3. Select the EPSON BarCode Font you want to use, set the font size, then click OK.
Note:
In Windows XP, 2000, or Server 2003, you cannot use font sizes larger than 96 points when
printing bar codes.
4. The characters you selected appear as bar code characters similar to those shown
below.
5. Select Print from the File menu, select your EPSON printer, then click Properties.
Make the following printer driver settings. Your printer is a Black-and-White printer. See
the Black-and-White Printer Driver section in the table below.
Downloaded from ManualsPrinter.com Manuals
Information about Fonts
371
*
Black-and-white
Printer Driver
Color Printer
Driver
Host Based
Black-and-white
Printer Driver
Host Based
Color Printer
Driver
Color
(not available)
Black
(not available)
Black
Print Quality
Text & Image*
Text & Image*
Text & Image*
Text & Image*
Toner Save
Not selected
Not selected
Not selected
Not selected
Zoom Options
Not selected
Not selected
Not selected
Not selected
Graphic mode
(in the Extended
Settings dialog
box accessed
through the
Optional
Settings tab)
High Quality
(Printer)
(not available)
(not available)
(not available)
Printing Mode
(in the Extended
Settings dialog
box accessed
through the
Optional
Settings tab)
(not available)
High Quality
(Printer)
(not available)
(not available)
These settings are available when the Automatic check box is selected on the Basic Settings tab. When
the Advanced check box is selected, click the More Settings button and set the Resolution or Print Quality
to 600dpi.
6. Click OK to print the bar code.
Note:
If there is an error in the bar code character string, such as inappropriate data, the bar code will
be printed as it appears on the screen, but it cannot be read by a bar code reader.
Notes on inputting and formatting bar codes
Please note the following when inputting and formatting bar code characters:
❏ Do not apply shading or special character formatting, such as bold, italic, or underline.
❏ Print bar codes in black and white only.
❏ When rotating characters, only specify rotation angles of 90°, 180°, and 270°.
❏ Turn off all automatic character and word spacing settings in your application.
❏ Do not use features in your application that enlarge or reduce the size of characters in
only the vertical or horizontal direction.
Downloaded from ManualsPrinter.com Manuals
Information about Fonts
372
❏ Turn off your application’s auto-correct features for spelling, grammar, spacing, etc.
❏ To more easily distinguish bar codes from other text in your document, set your
application to show text symbols, such as paragraph marks, tabs, etc.
❏ Because special characters such as Start bar and Stop bar are added when an EPSON
BarCode Font is selected, the resulting bar code may have more characters than were
originally input.
❏ For best results, use only the font sizes recommended in "BarCode Font specifications"
on page 373 for the EPSON BarCode Font you are using. Bar codes in other sizes may
not be readable with all bar code readers.
Note:
Depending on the print density, or on the quality or color of the paper, bar codes may not be
readable with all bar code readers. Print a sample and make sure the bar code can be read before
printing large quantities.
BarCode Font specifications
This section contains details on the character input specifications for each EPSON
BarCode Font.
EPSON EAN-8
❏ EAN-8 is an eight-digit abbreviated version of the EAN bar code standard.
❏ Because the check digit is added automatically, only 7 characters can be input.
Character type
Numbers (0 to 9)
Number of characters
7 characters
Font size
52 pt to 130 pt (up to 96 pt in Windows XP/2000/Server 2003).
Recommended sizes are 52 pt, 65 pt (standard), 97.5 pt, and 130 pt.
The following codes are inserted automatically and need not be input by hand:
❏ Left/Right margin
❏ Left/Right guard bar
❏ Center bar
❏ Check digit
❏ OCR-B
Downloaded from ManualsPrinter.com Manuals
Information about Fonts
373
Print sample
EPSON EAN-8
EPSON EAN-13
❏ EAN-13 is the standard 13-digit EAN bar code.
❏ Because the check digit is added automatically, only 12 characters can be input.
Character type
Numbers (0 to 9)
Number of characters
12 characters
Font size
60 pt to 150 pt (up to 96 pt in Windows XP/2000/Server 2003).
Recommended sizes are 60 pt, 75 pt (standard), 112.5 pt, and 150 pt.
The following codes are inserted automatically and need not be input by hand:
❏ Left/Right margin
❏ Left/Right guard bar
❏ Center bar
❏ Check digit
❏ OCR-B
Print sample
EPSON EAN-13
Downloaded from ManualsPrinter.com Manuals
Information about Fonts
374
EPSON UPC-A
❏ UPC-A is the standard bar code specified by the American Universal Product Code
(UPC Symbol Specification Manual).
❏ Only regular UPC codes are supported. Supplementary codes are not supported.
Character type
Numbers (0 to 9)
Number of characters
11 characters
Font size
60 pt to 150 pt (up to 96 pt in Windows XP/2000/Server 2003).
Recommended sizes are 60 pt, 75 pt (standard), 112.5 pt and 150 pt.
The following codes are inserted automatically and need not be input by hand:
❏ Left/Right margin
❏ Left/Right guard bar
❏ Center bar
❏ Check digit
❏ OCR-B
Print sample
EPSON UPC-A
EPSON UPC-E
❏ UPC-E is the UPC-A zero-suppression (deletes extra zeros) bar code specified by the
American Universal Product Code (UPC Symbol Specification Manual).
Character type
Numbers (0 to 9)
Number of characters
6 characters
Font size
60 pt to 150 pt (up to 96 pt in Windows XP/2000/Server 2003).
Recommended sizes are 60 pt, 75 pt (standard), 112.5 pt, and 150 pt.
Downloaded from ManualsPrinter.com Manuals
Information about Fonts
375
The following codes are inserted automatically and need not be input by hand:
❏ Left/Right margin
❏ Left/Right guard bar
❏ Check digit
❏ OCR-B
❏ The numeral “0”
Print sample
EPSON UPC-E
EPSON Code39
❏ Four Code39 fonts are available, allowing you to enable and disable the automatic
insertion of check digits and OCR-B.
❏ The height of the bar code is automatically adjusted to 15% or more of its total length,
in conformance to the Code39 standard. For this reason, it is important to keep at least
one space between the bar code and the surrounding text to prevent overlapping.
❏ Spaces in Code39 bar codes should be input as “_” underbars.
❏ When printing two or more bar codes on one line, separate the bar codes with a tab, or
select a font other than a BarCode Font and input the space. If a space is input while a
Code39 font is selected, the bar code will not be correct.
Character type
Alphanumeric characters (A to Z, 0 to 9) Symbols (- . space $ / + %)
Number of characters
No limit
Downloaded from ManualsPrinter.com Manuals
Information about Fonts
376
Font size
When OCR-B is not used: 26 pt or more (up to 96 pt in Windows
XP/2000/Server 2003). Recommended sizes are 26 pt, 52 pt, 78 pt, and
104 pt.
When OCR-B is used: 36 pt or more (up to 96 pt in Windows
XP/2000/Server 2003). Recommended sizes are 36 pt, 72 pt, 108 pt, and
144 pt.
The following codes are inserted automatically and need not be input by hand:
❏ Left/Right quiet zone
❏ Check digit
❏ Start/Stop character
Print sample
EPSON Code39
EPSON Code39 CD
EPSON Code39 Num
EPSON Code39 CD Num
EPSON Code128
❏ Code128 fonts support code sets A, B, and C. When the code set of a line of characters
is changed in the middle of the line, a conversion code is automatically inserted.
❏ The height of the bar code is automatically adjusted to 15% or more of its total length,
in conformance to the Code128 standard. For this reason, it is important to keep at least
one space between the bar code and the surrounding text to prevent overlapping.
❏ Some applications automatically delete the spaces at the end of lines or change
multiple spaces into tabs. Bar codes containing spaces may not be correctly printed
from applications that automatically delete spaces from the ends of lines or change
multiple spaces into tabs.
Downloaded from ManualsPrinter.com Manuals
Information about Fonts
377
❏ When printing two or more bar codes on one line, separate the bar codes with a tab, or
select a font other than a BarCode Font and input the space. If a space is input while
Code128 is selected, the bar code will not be correct.
Character type
All ASCII characters (95 in total)
Number of characters
No limit
Font size
26 pt to 104 pt (up to 96 pt in Windows XP/2000/Server 2003).
Recommended sizes are 26 pt, 52 pt, 78 pt, and 104 pt.
The following codes are inserted automatically and need not be input by hand:
❏ Left/Right quiet zone
❏ Start/Stop character
❏ Check digit
❏ Change code set character
Print sample
EPSON Code128
EPSON ITF
❏ The EPSON ITF fonts conform to the USS Interleaved 2-of-5 standard (American).
❏ Four EPSON ITF fonts are available, allowing you to enable and disable the automatic
insertion of check digits and OCR-B.
❏ The height of the bar code is automatically adjusted to 15% or more of its total length,
in conformance to the Interleaved 2-of-5 standard. For this reason, it is important to
keep at least one space between the bar code and the surrounding text to prevent
overlapping.
❏ Interleaved 2 of 5 treats every two characters as one set. When there are an odd
number of characters, EPSON ITF fonts automatically add a zero to the beginning of
the character string.
Character type
Numbers (0 to 9)
Downloaded from ManualsPrinter.com Manuals
Information about Fonts
378
Number of characters
No limit
Font size
When OCR-B is not used: 26 pt or more (up to 96 pt in Windows
XP/2000/Server 2003). Recommended sizes are 26 pt, 52 pt, 78 pt, and
104 pt.
When OCR-B is used: 36 pt or more (up to 96 pt in Windows
XP/2000/Server 2003). Recommended sizes are 36 pt, 72 pt, 108 pt, and
144 pt.
The following codes are inserted automatically and need not be input by hand:
❏ Left/Right quiet zone
❏ Start/Stop character
❏ Check digit
❏ The numeral “0” (added to the beginning of character strings as needed)
Print sample
EPSON ITF
EPSON ITF CD
EPSON ITF Num
EPSON ITF CD Num
EPSON Codabar
❏ Four Codabar fonts are available, allowing you to enable and disable the automatic
insertion of check digits and OCR-B.
❏ The height of the bar code is automatically adjusted to 15% or more of its total length,
in conformance to the Codabar standard. For this reason, it is important to keep at least
one space between the bar code and the surrounding text to prevent overlapping.
Downloaded from ManualsPrinter.com Manuals
Information about Fonts
379
❏ When either a Start or a Stop character is input, Codabar fonts automatically insert the
complementary character.
❏ If neither a Start nor a Stop character is input, these characters are automatically input
as the letter “A”.
Character type
Numbers (0 to 9)
Symbols (- $ : / . +)
Number of characters
No limit
Font size
When OCR-B is not used: 26 pt or more (up to 96 pt in Windows
XP/2000/Server 2003). Recommended sizes are 26 pt, 52 pt, 78 pt, and
104 pt.
When OCR-B is used: 36 pt or more (up to 96 pt in Windows
XP/2000/Server 2003). Recommended sizes are 36 pt, 72 pt, 108 pt, and
144 pt.
The following codes are inserted automatically and need not be input by hand:
❏ Left/Right quiet zone
❏ Start/Stop character (when not input)
❏ Check digit
Print sample
EPSON Codabar
EPSON Codabar CD
EPSON Codabar Num
EPSON Codabar CD Num
EPSON EAN128
❏ EAN128 fonts support code sets A, B, and C. When the code set of a line of characters
is changed in the middle of the line, a conversion code is automatically inserted.
Downloaded from ManualsPrinter.com Manuals
Information about Fonts
380
❏ The following 4 kinds of the properties are supported as the Application Identifier (AI).
01: Global traded item number
10: Batch / Lot number
17: Expiry date
30: Quantity
❏ The height of the bar code is automatically adjusted to 15% or more of its total length,
in conformance to the Code128 standard. For this reason, it is important to keep at least
one space between the bar code and the surrounding text to prevent overlapping.
❏ Some applications automatically delete the spaces at the end of lines or change
multiple spaces into tabs. Bar codes containing spaces may not be correctly printed
from applications that automatically delete spaces from the ends of lines or change
multiple spaces into tabs.
❏ When printing two or more bar codes on one line, separate the bar codes with a tab, or
select a font other than a BarCode Font and input the space. If a space is input while
EAN128 is selected, the bar code will not be correct.
Character type
Alphanumeric characters (A to Z, 0 to 9)
Parenthesis are only for identification of the Application Identifier (AI)
Only the capital letters are supported by the small letter key input.
Number of characters
It changes with the Application Identifier (AI).
01: 4 characters "(01)" and 13 numbers
17: 4 characters "(17)" and 6 numbers
10: 4 characters "(10)" and maximum of 20 alphanumeric characters
30: 4 characters "(30)" and maximum of 8 numbers
Font size
36 pt or more
Recommended sizes are 36 pt, 72 pt
The following codes are inserted automatically and need not be input by hand:
❏ Left/Right quiet zone
❏ Start/Stop character
❏ FNC1 character
It inserts for discernment from Code128 and for a pause of the variable length
application identifier.
❏ Check digit
❏ Change code set character
Print sample
Downloaded from ManualsPrinter.com Manuals
Information about Fonts
381
EPSON EAN128
Available fonts
The following table lists the fonts that are installed in your printer. The names of all the fonts
appear in your application software’s font list if you are using the driver provided with the
printer. If you are using a different driver, all of these fonts may not be available.
New :Print font samples need to be insert a cross-reference.
The fonts provided with the printer are shown below, according to the emulation mode.
PCL5 mode
Font Name
Family
HP Equivalent
Courier
Medium, Bold, Italic, Bold
Italic
Courier
ITC Zapf Dingbats
-
ITC Zapf Dingbats
CG Times
Medium, Bold, Italic, Bold
Italic
CG Times
CG Omega
Medium, Bold, Italic, Bold
Italic
CG Omega
Coronet
-
Coronet
Clarendon Condensed
-
Clarendon Condensed
Univers
Medium, Bold, Medium Italic,
Bold Italic
Univers
Univers Condensed
Medium, Bold, Medium Italic,
Bold Italic
Univers Condensed
Antique Olive
Medium, Bold, Italic
Antique Olive
Garamond
Antiqua, Halbfett, Kursiv,
Kursiv Halbfett
Garamond
Marigold
-
Marigold
Albertus
Medium, Extra Bold
Albertus
Ryadh
Medium, Bold
Ryadh
Malka
Medium, Bold, Italic
Miryam
Dorit
Medium, Bold
David
Naamit
Medium, Bold
Narkis
Downloaded from ManualsPrinter.com Manuals
Information about Fonts
382
Arial
Medium, Bold, Italic, Bold
Italic
Arial
Times New
Medium, Bold, Italic, Bold
Italic
Times New
Helvetica
Medium, Bold, Oblique, Bold
Oblique
Helvetica
Helvetica Narrow
Medium, Bold, Oblique, Bold
Oblique
Helvetica Narrow
Palatino
Roman, Bold, Italic, Bold Italic
Palatino
ITC Avant Garde
Book, Demi, Book Oblique,
Demi Oblique
ITC Avant Garde Gothic
ITC Bookman
Light, Demi, Light Italic, Demi
Italic
ITC Bookman
New Century Schoolbook
Roman, Bold, Italic, Bold Italic
New Century Schoolbook
Times
Roman, Bold, Italic, Bold Italic
Times
ITC Zapf Chancery Italic
-
ITC Zapf Chancery Medium
Italic
Symbol
-
Symbol
SymbolPS
-
SymbolPS
Wingdings
-
Wingdings
Letter Gothic
Medium, Bold, Italic
Letter Gothic
Naskh
Medium, Bold
Naskh
Koufi
Medium, Bold
Koufi
CourierPS
Medium, Bold, Oblique, Bold
Oblique
CourierPS
Line Printer
-
Line Printer
OCR A
-
-
OCR B
-
-
Code39
9.37cpi, 4.68cpi
-
EAN/UPC
Medium, Bold
-
When selecting fonts in your application software, choose the font name listed in the HP
Equivalent column.
Note:
Depending on the print density, or on the quality or color of the paper, OCR A, OCR B, Code39, and
EAN/UPC fonts may not be readable. Print a sample and make sure the fonts can be read before
printing large quantities.
Downloaded from ManualsPrinter.com Manuals
Information about Fonts
383
PS 3 mode
Seventeen scalable fonts. The fonts include: Courier, Courier Oblique, Courier Bold,
Courier Bold Oblique, Helvetica, Helvetica Oblique, Helvetica Bold, Helvetica Bold
Oblique, Helvetica Narrow, Helvetica Narrow Oblique, Helvetica Narrow Bold, Helvetica
Narrow Bold Oblique, Times Roman, Times Italic, Times Bold, Times Bold Italic, and
Symbol.
New :PostScript standard only
PCL6 mode
For symbol set, see "In the PCL6 Mode" on page 392.
New :P5C Emulation Kit
Scalable Font
Font Name
Symbol Set
Courier
*1
Courier Bold
*1
Courier Italic
*1
Courier Bold Italic
*1
Letter Gothic
*1
Letter Gothic Bold
*1
Letter Gothic Italic
*1
CourierPS
*1
CourierPS Bold
*1
CourierPS Oblique
*1
CourierPS Bold Oblique
*1
CG Times
*1
CG Times Bold
*1
CG Times Italic
*1
CG Times Bold Italic
*1
CG Omega
*1
CG Omega Bold
*1
CG Omega Italic
*1
CG Omega Bold Italic
*1
Coronet
*1
Clarendon Condensed
*1
Downloaded from ManualsPrinter.com Manuals
Information about Fonts
384
Univers Medium
*1
Univers Bold
*1
Univers Medium Italic
*1
Univers Bold Italic
*1
Univers Medium Condensed
*1
Univers Bold Condensed
*1
Univers Medium Condensed Italic
*1
Univers Bold Condensed Italic
*1
Antique Olive
*1
Antique Olive Bold
*1
Antique Olive Italic
*1
Garamond Antiqua
*1
Garamond Halbfett
*1
Garamond Kursiv
*1
Garamond Kursiv Halbfett
*1
Marigold
*1
Albertus Medium
*1
Albertus Extra Bold
*1
Arial
*1
Arial Bold
*1
Arial Italic
*1
Arial Bold Italic
*1
Times New Roman
*1
Times New Roman Bold
*1
Times New Roman Italic
*1
Times New Roman Bold Italic
*1
Helvetica
*1
Helvetica Bold
*1
Helvetica Oblique
*1
Helvetica Bold Oblique
*1
Helvetica Narrow
*1
Helvetica Narrow Bold
*1
Helvetica Narrow Oblique
*1
Downloaded from ManualsPrinter.com Manuals
Information about Fonts
385
Helvetica Narrow Bold Oblique
*1
Palatino Roman
*1
Palatino Bold
*1
Palatino Italic
*1
Palatino Bold Italic
*1
ITC Avant Garde Gothic Book
*1
ITC Avant Garde Gothic Demi
*1
ITC Avant Garde Gothic Book Oblique
*1
ITC Avant Garde Demi Oblique
*1
ITC Bookman Light
*1
ITC Bookman Demi
*1
ITC Bookman Light Italic
*1
ITC Bookman Demi Italic
*1
New Century Schoolbook Roman
*1
New Century Schoolbook Bold
*1
New Century Schoolbook Italic
*1
New Century Schoolbook Bold Italic
*1
Times Roman
*1
Times Bold
*1
Times Italic
*1
Times Bold Italic
*1
ITC Zapf Chancery Medium Italic
*1
Symbol
*2
Wingdings
*3
ITC Zapf Dingbats
*4
SymbolPS
*2
Bitmap Font
Font Name
Symbol Set
Line Printer
*5
Printing font samples
New :with control panel/ use caution with the icon or button
Downloaded from ManualsPrinter.com Manuals
Information about Fonts
386
You can print samples of the fonts available in each mode by using the control panel’s
Information Menu. Follow these steps to print font samples.
1. Make sure that paper is loaded.
2. Make sure the LCD panel displays Ready or Standby, then press the
Enter button.
3. Press the d Down button to select the font sample for the appropriate mode.
4. Press the
Enter button to print the selected font sample sheet.
Adding more fonts
You can add a wide variety of fonts to your computer. Most font packages include an
installer for this purpose.
See your computer documentation for instructions on installing fonts.
Selecting fonts
Whenever possible select fonts in your application. See your software documentation for
instructions.
If you are sending unformatted text to the printer directly from DOS or if you are using a
simple software package that does not include font selection, you can select fonts using
the product’s control panel menus when in the LJ4, ESC/P 2, FX, or I239X emulation
mode.
Downloading fonts
Fonts that reside on your computer’s hard disk can be downloaded, or transferred, to the
printer so they can be printed. Downloaded fonts, also called soft fonts, remain in printer
memory until you turn off the product or otherwise reset it. If you plan on downloading many
fonts, make sure your printer has sufficient memory.
Most font packages make it easy to manage fonts by providing their own installer. The
installer gives you the option of having the fonts automatically downloaded whenever you
start your computer or having fonts downloaded only when you need to print a particular
font.
EPSON Screen Fonts (Windows Only)
New :confirm the specification/ If unnecessary, delete (Windows Only) from the title
Downloaded from ManualsPrinter.com Manuals
Information about Fonts
387
Note:
If your printer is host based, EPSON Screen Fonts are not included in the software CD-ROM
because it cannot be used with host based printers.
EPSON Screen Fonts provide you with 131 software fonts.
System requirements
To use EPSON Screen Fonts, your computer system should meet the following
requirements:
Computer:
IBM PC series or IBM compatible with an 486 or higher CPU
Operating system:
Microsoft Windows XP, Me, 98, 2000, or Server 2003
Internet Explorer 4.0 or higher
Hard disk:
At least 15 MB of free space
Installing EPSON Screen Fonts
Follow the steps below to install EPSON Screen Fonts.
1. Make sure that the product is off and that Windows is running on your computer.
2. Insert the printer software CD-ROM in the CD-ROM drive.
Note:
❏ If the language selection window appears, select your country.
❏ If the EPSON Installation Program screen does not appear automatically, double-click the
My Computer icon, right-click the CD-ROM icon, click OPEN in the menu that appears, then
double-click Epsetup.exe.
3. Click Continue. When the software Licence agreement screen appears, read the
statement, then click Agree.
4. Click User Installation.
Downloaded from ManualsPrinter.com Manuals
Information about Fonts
388
5. In the dialog box that appears, click Local.
6. Click Custom.
7. Select EPSON Screen Font check box, then click Install.
8. When installation is complete, click Exit.
EPSON Screen Fonts are now installed on your computer.
Downloaded from ManualsPrinter.com Manuals
Information about Fonts
389
Symbol Sets
Introduction to symbol sets
Your printer can access a variety of symbol sets. Many of these symbol sets differ only in
the international characters specific to each language.
Note:
Since most software handles fonts and symbols automatically, you will probably never need to
adjust the printer’s settings. However, if you are writing your own printer control programs, or if you
are using older software that cannot control fonts, refer to the following sections for symbol set
details.
When you are considering which font to use, you should also consider which symbol set to
combine with the font. Available symbol sets vary depending on which emulation mode you
use and which font you choose.
In the PCL5 mode
The following symbol sets are available in LJ4 emulation mode.
Available typefaces
Symbol set name:
19 Typefaces
Courier
CG Times
Universe
Letter Gothic
Line Printer
IBM-US (10U)
Roman-8 (8U)
ECM94-1 (0N)
8859-2 ISO (2N)
8859-9 ISO (5N)
8859-10ISO (6N)
IBM-DN (11U)
PcMultilingual (12U)
Legal (1U)
8859-15ISO (9N)
Downloaded from ManualsPrinter.com Manuals
Information about Fonts
390
PcBlt775 (26U)
Pc1004 (9J)
WiBALT (19L)
DeskTop (7J)
PsText (10J)
Windows (9U)
McText (12J)
MsPublishi (6J)
PiFont (15U)
VeMath (6M)
VeInternational (13J)
VeUS (14J)
PcE.Europe (17U)
PcTk437 (9T)
WiAnsi (19U)
WiE.Europe (9E)
WiTurkish (5T)
UK (1E)
Swedis2 (0S)
Italian (0I)
Spanish (2S)
German (1G)
Norweg1 (0D)
French2 (1F)
Roman-9 (4U)
PcEur858 (13U)
19 Typefaces
Courier
CG Times
Universe
Letter Gothic
Dorit
Malka
Naamit
Naskh
Koufi
Ryadh
PsMath (5M)
Math-8 (8M)
Courier
CG Times
Universe
Letter Gothic
Pc866Cyr (3R)
Pc866Ukr (14R)
WinCyr (9R)
Pc8Grk (12G)
Pc851Grk (10G)
WinGrk (9G)
ISOGrk (12N)
Greek8 (8G)
19 Typefaces
Courier
CG Times
Universe
Letter Gothic
ANSI ASCII (0U)
Courier
CG Times
Universe
Letter Gothic
Line Printer
ISOCyr (10N)
Line Printer
Roman Extension (0E)
Courier
Letter Gothic
Dorit
Naamit
Malka
Hebrew7 (0H)
Hebrew8 (8H)
Downloaded from ManualsPrinter.com Manuals
ISO 8859/8 Hebrew (7H)
PC-862, Hebrew (15H)
Information about Fonts
391
Koufi
Naasskh
Ryadh
Arabic8 (8V)
PC-864, Arabic (10V)
Symbol
Symbol (19M)
Wingdings
Wingdings (579L)
ITC Zapf Dingbats
ZapfDingbats (14L)
OCR A
OCR A (0O)
OCR B
OCR B (1O)
Code3-9
Code3-9 (0Y)
EAN/UPC
EAN/UPC (8Y)
HPWARA (9V)
OCR B Extension (3Q)
The 19 typefaces refer to those listed below:
CG Omega
Coronet
Clarendon Condensed
Univers Condensed
Antique Olive
Garamond
Marigold
Albertus
Arial
Times New
Helvetica
Helvetica Narrow
Palatino
ITC Avant Garde Gothic
ITC Bookman
New Century Schoolbook
Times
ITC Zapf Chancery Medium Italic
CourierPS
In the PCL6 Mode
Symbol Set Name
Attribute
Font Classification
*1
*2
*3
*4
*5
ISO 60: Danish/Norwegian
4
N
-
-
-
-
ISO 15: Italian
9
N
-
-
-
-
ISO 8859/1 Latin 1
14
N
-
-
-
N
ISO 11: Swedish
19
N
-
-
-
-
ISO 6: ASCII
21
N
-
-
-
-
Downloaded from ManualsPrinter.com Manuals
Information about Fonts
392
ISO 4: United Kingdom
37
N
-
-
-
-
ISO 69: French
38
N
-
-
-
-
ISO 29: German
39
N
-
-
-
-
Legal
53
N
-
-
-
N
ISO 8859/2 Latin 2
78
N
-
-
-
N
ISO 17: Spanish
83
N
-
-
-
-
Roman-9
149
N
-
-
-
-
Ps Math
173
N
-
-
-
-
ISO 8859/9 Latin 5
174
N
-
-
-
N
Windows 3.1 Latin 5
180
N
-
-
-
-
Microsoft Publishing
202
N
-
-
-
-
ISO 8859/10 Latin 6
206
N
-
-
-
N
DeskTop
237
N
-
-
-
-
Math-8
269
N
-
-
-
-
Roman-8
277
N
-
-
-
N
Windows 3.1 Latin 2
293
N
-
-
-
-
Pc1004
298
N
-
-
-
-
ISO 8859/15 Latin 9
302
N
-
-
-
-
PC-8 Turkish
308
N
-
-
-
-
Windows 3.0 Latin 1
309
N
-
-
-
-
PS Text
330
N
-
-
-
-
PC-8, Code Page 437
341
N
-
-
-
N
PC-8, D/N, Danish/Norwegian
373
N
-
-
-
N
MC Text
394
N
-
-
-
-
PC-850, Multilingual
405
N
-
-
-
N
PcEur858
437
N
-
-
-
-
Pi Font
501
N
-
-
-
-
PC852, Latin 2
565
N
-
-
-
-
Unicode 3.0
590
N
-
-
-
-
Windows Baltic
620
N
-
-
-
-
Windows 3.1 Latin/Arabic
629
N
-
-
-
-
PC-755
853
N
-
-
-
-
18540
-
-
N
-
-
Wingdings
Downloaded from ManualsPrinter.com Manuals
Information about Fonts
393
Symbol
621
-
N
-
-
-
ZapfDigbats
460
-
-
-
N
-
Downloaded from ManualsPrinter.com Manuals
Information about Fonts
394
Index
Numerics
2 pages per sheet copy, 204
A
Activity report, 221, 222
Attach to Email, 193, 195
Attach to e-mail program, 177
Auto Document Feeder
available paper, 131
Auto redial, 219
Available paper, 197, 199, 359
B
Backlight Correction, 166
Basic Settings, 252
Blurry image, 312
Button
Cancel, 182, 199
One Touch Dial, 211
Reset, 205
Speed Dial, 210
Start, 179
C
Cancel button, 182
Canceling printing, 256
from printer driver (Macintosh), 113
from printer driver (Windows), 77
Cleaning
ADF pickup roller, 291
document table, 290
exposure window, 290
pickup roller, 287
print head, 288
Color palette, 161
Color Restoration, 159
Communication Setup, 254
Consumables
replacement messages, 277
replacing the photoconductor unit, 281
Downloaded from ManualsPrinter.com Manuals
replacing the toner, 278
specifications (photoconductor unit), 366
specifications (toner), 366
Contacting Epson, 358
Contrast, 201
Control panel
overview, 27
Control panel menus
emulation, 243
PCL, 248
printing, 243
PS3, 249
Copy
2 pages per sheet, 204
full-page copy, 203
Copying with scanner/printer, 169
Copy Settings
Copy Function Settings, 254
Correcting backlit photos, 166
Creativity Suite
Attach to Email, 193
Event Manager, 192
File Manager, 191
Image Clip Palette, 193
Scan Assistant, 192
Custom paper size
printer settings, 46
D
Dark images, fixing, 166
Density, 201
Descreening Filter, 314
Distorted image, 312
Documents or photos
copying, 169
restoring color in, 159
scanning to e-mail, 177
scanning to PDF, 172
Duplex printing manually (Macintosh), 106
Duplex printing manually (Windows), 53
Dust Removal, 164
Index
395
E
E-mail, scanning to, 177
Emulation menu, 243
Envelopes
printer settings, 44
EPSON BarCode Fonts
about, 367
how to install, 368
how to print, 370
specifications, 373
system requirements, 368
Epson color laser paper
printer settings, 41
Epson color laser transparencies
printer settings, 42
Epson Copy Utility, 169
Epson Creativity Suite
copying with, 169
finishing scan, 158
scanning with, 135
uninstalling, 318
EPSON File Manager, 194
Epson Scan
basic settings, 142
changing scan mode, 142
color, adjusting, 153
finishing scan, 158
image settings, 153
marquee, 151
modes, overview, 139
previewing, 148
problems, 310
resolution, 147
scan area, 148
scanning with, 133
scan size, 155
selecting settings, 139
uninstalling, 316
EPSON Screen Fonts
about, 387
how to install, 388
system requirements, 388
EPSON Speed Dial Utility, 224
EPSON Status Monitor
Downloaded from ManualsPrinter.com Manuals
About EPSON Status Monitor (Windows), 68
Accessing EPSON Status Monitor (Macintosh),
107
Accessing EPSON Status Monitor (Windows),
67
Consumables Information (Windows), 70
Consumables Information Tab (Macintosh), 109
Getting printer simple status (Windows), 68
Getting printer status details (Windows), 69
Installing EPSON Status Monitor (Windows), 64
Job Information (Windows), 71
Job Information Tab (Macintosh), 110
Monitoring Your Printer Using EPSON Status
Monitor (Macintosh), 107
Monitoring Your Printer Using EPSON Status
Monitor (Windows), 64
Notice Settings (Windows), 73
Order Online, 74
Status Tab (Macintosh), 109
Tray Icon Settings, 75
EPSON Web-To-Page, 194
Ethernet, 365
Event Manager, 192
F
Face-down tray, 40
Faded photos, 159
Fax
output paper size, 213
Fax communication setup, 222
Fax Setting List, 221
Fax Settings menu
Basic Settings, 252
Communication Setup, 254
Forward Settings, 253
Reception Settings, 253
Speed Dial Settings, 253
Transmission Settings, 252
Features
Adobe PostScript 3 Mode, 31
High-quality printing, 30
PCL Emulation Mode, 31
Pre-defined color settings in printer driver, 30
Resolution Improvement Technology and
Enhanced MicroGray technology, 31
Index
396
Toner save mode, 30
Wide variety of fonts, 31
File Manager, 191
Files
scanning to, 139
File Save Settings
selecting, 139
Fonts
adding fonts, 387
available fonts, 382
downloading fonts, 387
EPSON BarCode Fonts (about), 367
EPSON BarCode Fonts (how to install), 368
EPSON BarCode Fonts (how to print), 370
EPSON BarCode Fonts (specifications), 373
EPSON BarCode Fonts (system requirements),
368
EPSON Screen Fonts (about), 387
EPSON Screen Fonts (how to install), 388
EPSON Screen Fonts (system requirements),
388
how to print samples, 387
LJ4 mode, 382
PCL6 mode, 384
PS 3 mode, 384
selecting fonts, 387
Forward Settings, 253
Full Auto Mode
finishing scan, 158
Full-page copy, 203
G
Group dial, 212
Guides
Basic Operation Guide, 23
Network Guide, 23
Online Help, 23
Setup Guide, 23
H
Headers and footers
how to use (Macintosh), 105
how to use (Windows), 62
Help
Downloaded from ManualsPrinter.com Manuals
Epson, 358
Home Mode
basic settings, 142
color, adjusting, 153
finishing scan, 158
image settings, 153
marquee, adjusting, 151
previewing, 148
resolution, 147
scan area, 148
scan size, 155
Host I/F Settings menu
Network Menu, 252
USB Menu, 251
I
Image Clip Palette, 193, 195
Information Menu, 240
Installing
TCP/IP protocol, 185
Installing options
installing a memory module, 273
installing the paper cassette unit, 269
memory module, 273
paper cassette unit, 269
removing a memory module, 276
removing the paper cassette unit, 273
Installing the PostScript printer driver for the
network interface (Windows), 118
Installing the PostScript printer driver for the USB
interface (Windows), 116
Interfaces
ethernet, 365
USB, 364
L
Labels
printer settings, 45
LJ4 emulation mode, 390
LJ4 mode, 382
Loading paper
MP tray, 36
optional paper cassette, 38
Index
397
M
Maintenance
ADF pickup roller, 291
consumables, 277, 278, 281
document table, 290
pickup roller, 287
printer (print head), 288
product, 287
Memory Job Info, 221
Memory module
how to install, 273
how to remove, 276
specifications, 365
Mode, changing, 142
Mode menus
Copy mode, 236
Fax mode, 237
Print mode, 235
Scan mode, 237
Moire pattern, removing, 314
MP tray
available paper, 34
loading paper, 36
Multi transmission report, 222
N
Network Image Express Card
client computer settings, 185
EPSON Scan settings, 183
Network Menu, 252
O
One Touch Dial, 211
Operating system, upgrading, 316
Optional paper cassette
available paper, 35
loading paper, 38
Optional paper cassette unit
how to install, 269
how to remove, 273
specifications, 365
Options
specifications (memory module), 365
specifications (optional paper cassette unit), 365
Downloaded from ManualsPrinter.com Manuals
Output tray, 40
Overviews
Epson Scan modes, 139
P
Paper
available paper, 359
custom size paper, 46
envelopes, 44
Epson color laser paper, 41
labels, 45
printable area, 360
thick paper and extra thick paper, 46
transparencies, 42
unavailable paper, 359
Paper jams
how to clear, 335
Paper sources
MP tray, 34
optional paper cassette, 35
selecting a paper source (automatically), 36
selecting a paper source (manually), 35
PCL6 mode, 384, 392
PCL menu, 248
PCL printer driver
about the PCL Mode, 125
hardware requirements, 125
system requirements, 125
Photoconductor unit
how to replace, 282
specifications, 366
Photos or documents
copying, 169
correcting backlighting in, 166
fade, 159
removing dust marks from, 164
restoring color in, 159
scanning to e-mail, 177
scanning to PDF, 172
Polling, 216
PostScript printer driver
Accessing the PostScript printer driver
(Macintosh), 123
Accessing the PostScript printer driver
(Windows), 119
Index
398
hardware requirements, 115
Installing the PostScript printer driver for Mac
OS X users, 121
Selecting a printer in a network environment for
Mac OS X users, 122
system requirements (Macintosh), 116
system requirements (Windows), 115
PostScript printer driver settings
Making changes to PostScript printer settings
(Macintosh), 124
Making changes to PostScript printer settings
(Windows), 120
Using AppleTalk under Windows 2000, 120
Predefined print settings
Using the predefined settings (Macintosh), 95
Using the predefined settings (Windows), 50
Previewing, 148
Printer
cleaning (print head), 288
consumable products, 29
electrical, 363
environmental, 362
general, 361
mechanical, 363
optional products, 29
transporting, 292
transporting (long distance), 293
transporting (short distance), 294
Printer, using with scanner, 169
Printer driver
About the Printer Software (Macintosh), 93
About the Printer Software (Windows), 48
Accessing the printer driver (Macintosh), 93
Accessing the printer driver (Windows), 48
Uninstalling the printer driver (Windows), 78
Uninstalling the Printer Software (Macintosh),
113
Uninstall the USB device driver (Windows), 80
Printer driver settings
automatically resizing printout (Windows), 56
Canceling Printing (Macintosh), 113
Canceling Printing (Windows), 77
customizing print settings (Macintosh), 96
customizing print settings (Windows), 51
Duplex printing (Macintosh), 106
Duplex printing (Windows), 52
Downloaded from ManualsPrinter.com Manuals
Making a new watermark (Macintosh), 100
Making a new watermark (Windows), 61
Making Extended Settings (Macintosh), 107
Making Extended settings (Windows), 63
Making Optional settings (Windows), 64
print layout (Macintosh), 97
print layout (Windows), 58
print quality (Macintosh), 94
print quality (Windows), 49
print settings (Macintosh), 95
print settings (Windows), 50
resizing printout (Macintosh), 97
resizing printout (Windows), 57
saving (Macintosh), 96
saving (Windows), 52
Setting Up the USB Connection (Macintosh),
112
Setting Up the USB connection (Windows), 76
Using a watermark (Macintosh), 98
Using a watermark (Windows), 60
Using headers and footers (Macintosh), 105
Using headers and footers (Windows), 62
Printer Settings menu
Information Menu, 240
Reset Menu, 247
Setup Menu, 244
Tray Menu, 242
Printing menu, 243
Printing report
activity report, 221
fax settings list, 221
memory job info, 221
speed dial list, 221
Print layout
Modifying the print layout (Macintosh), 97
Modifying the print layout (Windows), 58
Print quality settings
Making the print quality settings (Macintosh), 94
Making the print quality settings (Windows), 49
Problems, solving
contacting Epson, 358
Epson Scan, 310
scanner software, 310
scan quality, 311
Product
Index
399
cleaning, 287
parts (front view), 24
parts (inside), 26
parts (rear view), 25
parts (scanner), 26
Professional Mode
basic settings, 142
color, adjusting, 153
finishing scan, 158
image settings, 153
marquee, adjusting, 151
previewing, 148
resolution, 147
scan area, 148
scan size, 155
Projects, scanning special, 159
PS3 menu, 249
PS 3 mode, 384
R
Reception Settings, 253
Relocating the printer, 292
Removing dust marks, 164
Report settings
activity report, 222
multi transmission report, 222
transmission report, 222
Reset Menu, 247
Resizing page
Resizing pages by a specified percentage
(Windows), 57
Resizing printouts (Macintosh), 97
To automatically resize pages to fit the output
paper (Windows), 56
Resolution
selecting, 147
Restoring color, 159
RGB color, 202
Ripple pattern, 314
S
Saving customized settings
Saving your settings (Macintosh), 96
Saving your settings (Windows), 52
Downloaded from ManualsPrinter.com Manuals
Scan Assistant, 192, 194
Scanner
copying with, 169
Scanner software
basic settings, 142
changing scan mode, 142
color, adjusting, 153
finishing scan, 158
image settings, 153
marquee, 151
modes, overview, 139
previewing, 148
problems, 310
resolution, 147
scan area, 148
scanning size, 155
scanning with, 133
scanning with another program, 138
selecting settings, 139
uninstalling, 316
Scan quality problems, 311
Service, 358
Settings
selecting Epson Scan, 139
Setup Menu, 244
Setup menu, 254
about, 238
how to access, 239
menu settings, 240
panel settings, 238
Sharing the printer
For Mac OS X users, 114
Installing the printer driver from the CD-ROM
(Windows), 91
Setting up clients (Windows), 87
Setting up your printer as shared printer
(Windows), 82
Sharing the printer (Macintosh), 114
Sharing the printer (Windows), 81
Using an additional driver (Windows), 83
Software
Creativity Suite, 191
EPSON Web-To-Page, 190
Speed Dial, 210
Speed Dial List, 221
Index
400
Speed Dial Settings, 253
Start button, 178, 179
Status and error messages, 258
Status sheet
how to print, 254, 356
Symbol sets
introduction, 390
LJ4 emulation mode, 390
PCL6 mode, 392
T
Target Size
selecting, 155
TCP/IP, 185
Thick paper and extra thick paper
printer settings, 46
Toner
how to replace, 278
specifications, 366
Transmission report, 222
Transmission Settings, 252
Transparencies
printer settings, 42
Transportation lock, 27
Transporting the printer (long distance), 293
Transporting the printer (short distance), 294
Tray Menu, 242
Troubleshooting, 254, 256, 258, 335, 356
color printing problems, 298
faxing problems, 331
memory problems, 302
operational problems, 296
options, 351
paper handling problems, 350
PCL6 mode, 306
PostScript 3 mode, 303
printing problems, 296
printout problems, 297
print quality problems, 299
scanning problems, 308
USB problems, 352
Uninstalling software, 316
USB, 364
USB Menu, 251
W
Watermark (Macintosh)
how to make, 100
how to use, 98
Watermark (Windows)
how to make, 61
how to use, 60
Z
Zoom ratio, 202
U
Unavailable paper, 359
Downloaded from ManualsPrinter.com Manuals
Index
401