1
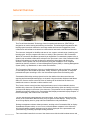
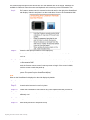
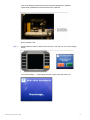
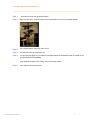
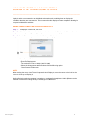
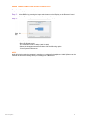
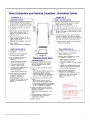
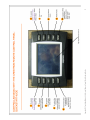
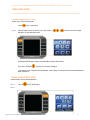
EXPERIMENTAL CLASSROOM Fourth Street Academic Technology Center _________________________________ ITS Student Technology Services Reference Manual Table of Contents ________________________________________________ General Overview…………………………………………………................ 3 Classroom Set Up and Shut Down………………………………………… Preparing the Classroom at the Start of the Day………………. Restoring the Classroom Between Classes……………………. Turning off the Presentation Wall………………………………… Closing Down the Classroom…………………………………….. 5 5 8 9 11 Gaming………………………..………………………………………………. 12 Using the Microsoft XBox with Display 2……………………………….. 12 Using the Sony PlayStation3 with Display 3……………………………. 12 Using the Nintendo Wii on the Presentation Wall……………………… 13 Team Computers……….....………………………………………………… 14 Using Team Computer #18 with Display 2……………………………... 14 Using Team Computer #6 with Display 3……………………….. 15 Appendices I. Technical Specifications…………………………………………………... 18 II. Team Computers and Gaming Consoles: Quickstart Guide………… 22 III. Controlling Media with the Crestron Remote Control Panel: Quickstart Guide……………………………………………………………… 23 IV. Using the CRESTRON Remote Control to Route Video and Audio…………………………………………………………………………... 24 General Overview _______________________________________________ The Fourth Street Academic Technology Centerʼs experimental classroom, (FSATCEC) is designed as an active learning and teaching environment. The technologies integrated into this learning space have been selected to encourage student and instructor engagement, foster collaboration and facilitate a constructivist (constructionist) approach to teaching and learning. The classroom, designed for flexibility and ease of use, supports a broad range of teaching and learning styles. A major component and focus of activity in the classroom is the Presentation Wall. A 65” interactive SmartBoard, powered by an Apple Mac Pro networked computer offers a dynamic and recordable collaborative workspace. An open area in front of the Presentation Wall, invites all 25 students to join with the instructor and actively share ideas and discoveries. Annotate, notate, capture and record board activity using the SmartBoard Tools. Captured material can then be archived in a Course Management System (CMS) or Learning Management System (LMS), e.g. Blackboard, for later review and reflection. The Presentation Wall includes a rich array of multimedia devices and work surfaces, mounted on articulating arms that enable the presenter, faculty, student or guest speaker, to shape the presentational space according to his or her instructional requirements and teaching style. Presentation Wall activity can be projected out into the middle of the classroom where two opposing wall-mounted plasma displays, are located. Using the wireless Keyboard and Mouse and/or the Crestron remote control the focus of learning can be shifted into the classroom enabling the centers of learning to shift around the room. The Crestron remote control provides simple push-button control of the multimedia devices available in the classroom. By default the Presentation Wall activity (video and audio) is mirrored on the two HD displays in the center of the classroom. The presenter has the capability to display SmartBoard computer activity on the Presentation Wall, display an attached Laptop computer on the second display, and a DVD movie on the third. The two wall-mounted plasma displays are multi-purpose. Firstly, they are used to mirror the activity of the Presentation Wall. Secondly, they are game console displays. Thirdly, they can be as a large display area for group and team collaborations and presentations. Desktop management software allows presenters, working at the Presentation Wall, to display SmartBoard computer activity on one or more of the 25 student computers in the classroom. All of the 25 student computer desktops may be actively displayed on the presentation wall (simultaneously) facilitating impromptu learning moments. Two round tables located in the center of the classroom provide physical breakout Gemeral Overview spaces and space for student laptops and the wireless Crestron remote control and the wireless keyboard & mouse. 3 Two round tables located in the center of the classroom provide physical breakout spaces and space for student laptops and the wireless Crestron remote control and the wireless keyboard & mouse. An online Computer Classroom Reservation Form must be submitted to reserve an ITS Student Technology Servicesʼ experimental classroom, http://www.nyu.edu/its/classrooms. Gemeral Overview 4 Preparing the Classroom at the Start of the Day Presentation Wall ________________________________________________ Preparing the Classroom at the Start of the Day CLASSROOM SET UP AND SHUT DOWN 5 The lab assistant or lab tech assigned to the MM2 Classroom is in charge of the Library and MM3 as well. The classroom key (MM2) and the library key (CAB 1) are in the same key-chain and must be carried by the person in charge for the duration of the shift. The keys are in the key box behind the front desk. The classroom air conditioner must be turned on at least one hour before the first class of the day to give the classroom sufficient time to cool down. The classroom setup procedure must begin at least 15 minutes before a classʼ scheduled meeting time. At the end of this procedure, the Mac Pro Tower on the Presentation Wall is mirrored on the two side displays by default. The following procedures must be performed in step order. Step 1: Step 2: Unlock the classroom and turn on the classroom lights. Unlock Cabinet 6 and Cabinet 8 with the classroom key. Cabinet 6 contains the SmartBoard markers and eraser, Apple wireless keyboard and mouse and their battery chargers. These will be needed during the setup procedure. Step 3: Place the four SmartBoard markers and the eraser in their designated spots on the SmartBoard main display. Step 4: Turn on the Apple wireless keyboard and mouse by flipping the switches on the bottom of the devices. !"#$%&'()*+,$"-.* /01"*23"4 3"5366*7/$'%0 Preparing the Classroom at the Start of the Day 6 The wireless keyboard and mouse will not turn on if their batteries are out of charge. Batteries are available in Cabinet 6. Place the mouse and keyboard on the work tray on the Presentation Tree. Step 5: The Crestron remote control is mounted on the north wall, to the right of the SmartBoard main display. Undock it and place it on the round table, closer to the Presentation Wall. Step 6: Secure the A/V laptop connectors to the laptop tray. The Mac Pro tower is in Cabinet 8. Press the power button on the Mac Pro Tower to turn it on. Step 7: The Mac Pro display preferences are set to 1280 x 768 @ 60Hz for optimal display to the Presentation Wall. Touch the Crestron remote controlʼs start-up screen to begin. If the screen is black, touch the screen to wake the panel up. When the screen says “Press to begin…” tap anywhere on the screen to start up the system. This powers up the SmartBoard display. NOTE: NOTE: Video on the SmartBoard is SmartBoard displayed onisthe side displays default. Video on the displayed on theby side displays by default. Step 8: Uncover and unfold the document camera. Step 9: Ensure that the instructorʼs stool is in place. Step 10: Position the Presentation Tree based on any class requirements that you know of. Step 11: Check the classroom temperature and turn off the air-conditioner if the classroom is sufficiently cool. Step 12: Straighten all classroom chairs and turn on individual workstations. Step 13: Greet faculty and offer to help them set up. Preparing the Classroom at the Start of the Day 7 Restoring the Classroom Between Classes ________________________________________________ Begin this process 15 minutes before the designated class time. If the room is in use by individual students allow a half hour interval to clear the room and restart the computers. NOTE: If there is less than a 15-minute interval between classes, wait till the class in session leaves and begin this process immediately at the first opportunity. In the meanwhile, ensure that students for the next class wait in the outside lobby and donʼt crowd the area outside the classroom. Step 1: Use Remote Desktop to restart the workstations. (See pg. 10-11 and click on Manage Select Restart) Step 2: Turn off the gaming consoles and ensure that their remote controls and controllers are in Cabinet 7. Step 3: Restart the Instructor Computer (See pg. 11 and select Restart) Step 4: Perform a technology check, ensuring that all classroom technology is in working order. *Check: Keyboard and mouse batteries, status of printer ink and paper, the remote control batteries for all remote controls are charged etc. Step 5: Straighten the chairs and tables in the classroom. Remove all items that do not belong in the classroom. Step 6: Check the classroom temperature. Step 7: Greet faculty and offer to help them set up. Restoring the Classroom Between Classes 8 Turning off the Presentation Wall ________________________________________________ Step 1: Step 2: Launch Remote Desktop from dock. Select Classroom from the list on the left. From the list that appears on the right, select all the computers except the MM2 Instructor Computer. Turning off the Presentation Wall 9 Turn off the wireless keyboard and mouse and place them back in Cabinet 6. Place all the SmartBoard pens and eraser back in Cabinet 6. Step 6: Insert the Crestron remote control back in its designated place on the wall to the right of the Presentation Tree, Step 7: Hit the PWR-OFF button to power off the Crestron. Then tap over ʻYesʼ on the display screen. The “Press to Begin…” screen signals that the Crestron has been turned off. Turning off the Presentation Wall 10 Closing Down the Classroom _______________________________________________ Step 1: Fold down and cover the document camera. Step 2: Make sure the decks, arms and trays on the Presentation Tree are in their default position. Step 3: Turn off both printers and put on their covers. Step 4: Turn the classroom air conditioners off. Step 5: Turn all classroom lights off. The switch for the lights above the Presentation Wall is located on the back behind the SmartBoard. Turn wall all classroom lights off. The switch for the lights above the Presentation Wall is located on the back wall behind the SmartBoard. Keep one bank of lights on the ceiling on for the security system. Keep one bank of lights on the ceiling on for the security system. Step 6: Close and lock the classroom door Close and lock the classroom door Step 4: Step 5: Step 6: Closing Down the Classroom 11 GAMING ________________________________________________________________________________________________ The three gaming consoles are connected to their own display. USING THE MICROSOFT XBOX USING THE MICROSOFT XBOX Step 1: The XBox remote is located in Cabinet 7. A client can check out the XBox remote from Step 1: the TheAcademic XBox remote is located in Cabinet 7. A Library client can check the XBox remote from Technology Centerʼs Lending using theirout NYUCard. the Academic Technology Centerʼs Lending Library using their NYUCard. Step 2: Step 2: If Display 2 is turned off, turn it on. If Display 2 is turned off, turn it on. Step 3: Step 3: If the XBox console is turned off, turn it on. The Xbox console is physically mounted If the console is turned off, turn it on. The Xbox console is physically mounted next toXBox Display 2. next to Display 2. Step 4: Select Input1B by pressing the Input Select button on the display or the remote control. Step 4: Select Input1B by pressing the Input Select button on the display or the remote control. Step 5: Press the Guide button on the XBox remote control to check the battery power level. Step 5: Press the Guide button on the XBox remote control to check the battery power level. Step 6: Begin playing. Step 6: Begin playing. NOTE: NOTE: The batteries for the Xbox remote control are in Cabinet 6. The batteries for the Xbox remote control are in Cabinet 6. USING THE SONY PLAYSTATION3 Step 1: THE The PlayStation3 remote is plugged into the Mac Pro for charging. A client can check out the USING SONY PLAYSTATION3 PlayStation3 remote from the Academic Technology Centerʼs Lending Library using their Step 1: NYUCard. The PlayStation3 remote is plugged into the Mac Pro for charging. A client can check out the PlayStation3 remote from the Academic Technology Centerʼs Lending Library using their Step 2: IfNYUCard. Display 3 is turned off, turn it on. Step Step3:2: IfIfthe PlayStation3 console is turned Display 3 is turned off, turn it on. off, turn it on. The PlayStation3 console is physically mounted next to Display 3. Step 3: If the PlayStation3 console is turned off, turn it on. The PlayStation3 console is physically Step 4: Select RGB3 byto pressing mounted next Displaythe 3. Input Select button on the display or the remote control. Step 5: Press the Guide button on the Sony PlayStation3 remote control to check the battery power Step 4: level. SelectToRGB3 bythe pressing the Input Select button on thecable display the remote control. charge PS3 remote control, plug the USB intoorthe USB charger attached to the Mac Pro. Step 6: Begin playing. Audio will play through Display 3ʼs speakers. NOTE: Audio will play through the computerʼs speakers or a plugged in headphone. Audio splitters can be checked out from the Lending Library in exchange for a NYUCard. Gaming 12 USING THE NINTENDO WII Step 1: The Nintendo Wii is mounted on the Presentation Tree. Step 2: The Wii remote with auxiliary toggle attachments (two parts) are in Cabinet 7. A client can check out the Wii remote from the Academic Technology Centerʼs Lending Library using their NYUCard. Step 3: Press the ROUT VID (Route Video) button on the Crestron. I. II. Step 4: Select Source (Input): Press Aux 1, to select the Wii game console. Select Destination (Output): press SmartBoard, to display the game on the Presentation Wall. Press the ROUT AUD (Route Audio) button. I. Select Audio Source (Input): Press Aux 1, to select Wii game audio. II. Audio Select Destination (Output): Press All Speakers to play audio on the four classroom speakers. *Refer to Appendix III and IV for more details. Step 5: Check the battery power level by looking at the battery indicator on the Wii remote control. Step 6: The Wii Sensor is located on the Presentation Wall, below the SmartBoard display. Step 6: Begin playing. NOTE: NOTE: The batteries for the Wii remote control are in Cabinet 6. The batteries for the Wii remote control are in Cabinet 6. Gaming 13 USING THE TEAM COMPUTERS ________________________________________________ Display 2 and 3 are connected to an individual workstation each, enabling them to display the workstation that they are connected to. This converts the side displays to team computers allowing for group and collaborative activities. USING TEAM COMPUTER #18 WITH DISPLAY 2: Step 1: If Display 2 is turned off, turn it on. Step 2: Select Input1A by pressing the Input select button on the Display or the Remote Control. Step 3: Set the Team computer to mirror its Desktop on Display 2. i. Open System Preferences ii. Open the Display pane iii. The resolution is set to 1080p (1920 X 1080) iv. Select the Arrangement tab and select-click the Mirroring option v. Close System Preferences NOTE: When moving the cursor from Team Computer #18 to Display 2, move the cursor to the Left for the cursor to show up on Display 2. Audio will play through the computerʼs speakers or a plugged in headphone. Audio Splitters can be checked out from the Lending Library in exchange for a NYUCard. Team Computers 14 USING TEAM COMPUTER #6 WITH DISPLAY 3: Step 1: If Display 3 is turned off, turn it on. Step 2: Select RGB1 by pressing the Input select button on the Display or the Remote Control. Step 3: Set the Team computer to mirror its Desktop on Display 2. i. Open System Preferences ii. Open the Display pane iii. The resolution is set to 1080p (1920 X 1080) iv. Select the Arrangement tab and select-click the Mirroring option v. Close System Preferences NOTE: Audio will play through the computerʼs speakers or a plugged in headphone. Audio Splitters can be checked out from the Lending Library in exchange for a NYUCard. Team Computers 15 APPENDICES TECHNICAL SPECIFICATIONS ________________________________________ Presentation Wall Apple Mac Pro Tower The Mac Pro controls the Presentation Wallʼs SmartBoard Interactive White Board. It is pre-configured to connect the NYU Network and is customized for presentational use. All the software applications including the SmartBoard tools and devices available to the presenter are installed on this computer. Specifications: Model: A1289 Hard Drive Storage: 640 GB Serial ATA/300 7200 rpm Memory (RAM): 3 GB Processor Speed: 2.6 GHz Processor Type: Xeon Controller: Serial ATA/300 Graphics Controller: nVIDIA GeForce GT 120 512 MB GDDR3 SDRAM PCI Express x16 Processor: 1 X Intel Xeon Quad-core 2.66 GHz SmartBoard Interactive Overlay The SmartBoard overlays a1080p flat-panel plasma display. It is the desktop display for the Presentation Wallʼs Mac Pro computer adding touch screen capabilities to the underlying plasma display. Specifications (Smart Technologies Overlay): Model: PA365 Resolution: 1280 X 768, 60 Hz Dimensions: Interactive Whiteboard- 66 5/8” (W) X 42 1/8” (H) X 2 3/8” (D), Pen Tray- 3 5/8” added to the interactive whiteboardʼs height, 2” added to the interactive whiteboardʼs depth Specifications (Panasonic Display): Model: TH65PH10UK Serial No.: MG81270215 Dry Erase Wall The wall, behind the SmartBoard, doubles as a writeable and erasable surface, using dry erase markers. Markers are available in the Presentation Wallʼs Cabinet 6. Specifications: Paint Brand: Rust-Oleum- Specialty Dry Erase Apple Wireless Keyboard & Mouse The wireless keyboard and mouse can be used from anywhere in the classroom. They are usually positioned on one of the two work trays. Specifications: Wireless Keyboard Specifications: Model: A1016 Batteries: Three rechargeable AAA batteries Wireless Mouse Specifications: Appendix 1: Technical Specifications Model: A1015 EMC No.: 1938 Batteries: Two rechargeable AA batteries 16 Wireless Mouse Specifications: Model: A1015 EMC No.: 1938 Batteries: Two rechargeable AA batteries Crestron Remote Control Panel The Crestron Remote Control Panel is mounted on the wall to the right of the Presentation Tree. It controls the video and audio devices available on the Presentation Wall. During a class the Remote Panel is removed from its wall mount and positioned on the Presentation Tree. Specifications: Model: TPS4000LW Presentation Tree Wolfvision VZ- 8LightDocument Camera The VZ-8Light, displays and records flat documents and three-dimensional objects, using a video camera (720p). It is mounted on the Presentation Tree. The document camera may be controlled in one of two ways: Via the Crestron Control Panel (providing a high resolution image); or Using the cameraʼs proprietary software installed on the Presentation Wallʼs computer (includes video and image capture capabilities). Specifications: Model: VZ-8Light3 Serial No.: 1010050 Resolution: SXGA- (1280X960) Weight: 11 lbs Sony VCR/DVD Player The dual VCR/DVD deck is controlled through the Crestron Control Panel. It is mounted on the Presentation Tree. VHS tapes only display on the two opposing wall-mounted HD Displays (composite/RCA card), not on the Presentation Wall. DVDs will display on any one or all of the displays in the classroom. Specifications: Model No.: SLV-D380P (2187172 8B) Serial No.: SLV-D380P Dimensions: (Approx) 16.9” X 3.4” X 11.3” Weight: (Approx) 7.94 lbs Video Features: DVD Playback: Yes DVD+R Read Compatibility: Yes DVD+RW Read Compatibility: Yes DVD-R Read Compatibility: Yes DVD-RW Read Compatibility: Yes Laptop tray with AV Connectors Laptops connected to the Presentation Wall are controlled through the Crestron Control Panel. The tray is mounted on the Presentation Tree. Place the laptop on the Laptop tray and connect the VGA cable to the laptop using one of the many adapter cables available on the tray. An audio connector is also available on the tray. Specifications: Size: 17” (W) X 10” (L) Appendix 1: Technical Specifications 17 Work Tray This work tray is mounted on the Presentation Tree. The articulating arm extends 42” and provides the presenter with a workspace that is adjustable. The extension allows the presenter face both the Presentation Wall and the classroom more easily. Both the laptop tray and work tray can be used in conjunction with each other to create a multi-level work surface. Specifications: Size: 20.5” (W) X 14” (L) A stool is available for sitting. Wall-Mounted Displays (Mid Room) Plasma Display (Display 2) 1080p and Plasma Display (Display 3) 720p These are the two side display monitors that display from a variety of media: the SMARTBoard, the document camera, DVD/VHS player etc., game consoles etc. Display 2 Specifications: Display Type: Panasonic High Definition Plasma Display Model No.: TH-50PH50UK Serial No.: LG1980073 Display 3 Specifications: Display Type: Sony High Definition Plasma Display Model No.: PX-50X5A Serial No.: 6500402 9M Game Consoles Nintendo Wii- V3, Sony PlayStation 3 and Xbox 360 Game Consoles These game consoles allow for a variety of games to be displayed and played in the classroom. This is geared towards interactive game design education. The Xbox 360 displays on Display 2, the PlayStation 3 displays on Display 3 and the Nintendo Wii- V3 displays on the Presentation Wall. Instructional Software Apple Remote Desktop (ARD) Allows for work on the individual workstation screens to be displayed on the presentation wall. Additionally, it allows for remote access to the student workstation from the instructorʼs computer. The student workstation can be displayed on the presentation wall. Files can be copied between the student workstations and the instructorʼs computer. This tool also enables the instructor to send out documents and files to student workstations. SmartBoard Notebook Tools This is a presentation application that provides instructional tools to build better lessons that can later be archived. Presenters can use the drawing tools with clipart, capture snapshots of the Presentation Wall, record screen activity and even record audio to build and archive an entire class discussion. Appendix 1: Technical Specifications 18 Student Computer Workstations 27” IMacs Students have access to 25 personal workstations. 7 Sony DSR-11 DV Decks These enable users to digitize DV footage as well as make and copy DV tapes of their edited work. Specifications: Model: DSR-11 Recording Format: DVCAM/DV (SP) format, rotating 2-head helcal scan digital component recording Media: NTSC and PAL Compatibility Usable cassettes: Standard-DVCCAM cassettes and Mini-DVCAM cassettes Sony HDMI- Progressive Deck- HDV, DVCCam and DV This deck allows users to digitize HDV, DVCCam or DV footage as well as make taped copies of their edited work on either format. A display screen on the deck gives users a quick view of the contents of the tapes. Specifications: Model: HVR-M25AU Dimensions: 8 3/8” (W) X 3 ½” (H) X 15 3/8” (D) Media Specifications: Type- DV cassette X1 (mini / standard compatible) 2 Sony Trinitron Color Video Monitors These monitors display what is played on the DV and HDV decks. They are useful for calibrating color when color-correcting video footage. Specifications: Model: PVM-14N5U System: NTSC, PAL, SCAM, NTSC 4.43 (automatically selected) Dimensions: 13 5/8 (W) X 13 3/8 (H) X 16 5/16 (D) Screen Size (Viewable Area): 13 1/8” (Measured diagonally) Samsung HDTV Monitor This monitor displays HD footage played on the HDV deck or as a secondary display for the student workstation. It is useful for calibrating color when color-correcting HD footage. Specifications: Model: P2370HD Model Code: LS23EMNKVY/ZA Color Display Unit: Type No.: EM23TS Screen Size: 23” Resolution: 1920X1080 Dimensions: (with stand) 22.5” X 17” X 7.5” 5 Epson Perfection 4490-Photo Flatbed Scanners Adjoining workstations are connected to a flatbed desktop scanner to scan and digitize paper documents. Specifications: Part Number: B11B176011 Max supported media size: 8.5” x 11.7” Supported Media Type: Fil, Plain paper, Transparencies Appendix 1: Technical Specifications Grayscale Depth: 16-bit (64K gray levels) Color Depth: 48-bit color 19 Supported Media Type: Fil, Plain paper, Transparencies Grayscale Depth: 16-bit (64K gray levels) Color Depth: 48-bit color Optical Resolution: 4800 dpi X 9600 dpi Scan Element Type: CCD Lamp / Light Source Type: Cold Cathode Fluorescent Lamp 25 Headphones Each workstation is supplied with a pair of headphones enabling learners to play sound on their workstations and listen better without disturbing others and the classroom environment. Specifications: Model: Beyerdynamic DT231 Pro Transducer Type: Dynamic Length: 2.5 m / straight cable Connection: Stereo jack plug (3.5 mm) and ¼” adapter (6.35 mm) Printers: Epson Stylus Pro 3800 InkJet Printer Specifications: Model: K141A Unit ID No. 8474038 Printer Type: Ink Jet Printer Measurements: 27.36” (W) x 10.28 (H) x 14.88” (D) Max Resolution (B&W) 2880dpi X 1440 dpi Max resolution (color) 2880 dpi X 1440 dpi Total Media Capacity: 120 sheets HP 9050dn Laser Printer Specifications: Product No.: Q3723A Printer type: Laser Printer Measurements: 39 (W) X 24.9 (D) X 23.6 (H) Weight: 168 lbs Print Quality (B&W): 600 X 600 dpi (with HP FastRes 1200 and Resolution Enhancement Technology) Print Trays: 4 Input capacity, std: Up to 1100 sheets Output capacity, std: Up to 600 (500 sheets face down, 100 sheets face up) Ceiling Speakers Specifications: Model: JBLControl25 Appendix 1: Technical Specifications 20 Appendix 2: Team Computers and Gaming Consoles- Quickstart Guide 22 Appendix III: Controlling Media with the Crestrol Remote Control Panel- Quickstart Guide 23 USING THE CRESTRON REMOTE CONTROL PANEL TO ROUTE AUDIO AND VIDEO _______________________________________ * Route Video (ROUT VID) Adjusts Video Source Destinations. Step Step 1: 1: Press the the ROUT VID VID button. Press ROUT button. Step 2: Step Step 2: 2: Select an Input Source by clicking one one of the or or Select an Input Source by clicking of options, the options, Destination for the selected source. Output Destination for the selected source. or or and and thenthen select an Output select an The default setting is the MAC Instructor Computer (Input Source) directed to the The default setting is the MAC Instructor Computer (Input Source) directed to the SmartBoard Main Display, Display 2 and Display 3 (output destinations). SMARTBoard Main Display, Display 2 and Display 3 (output destinations). The The Combo, DVD/VCR ONLY be routed to Display 3. 3. Combo, DVD/VCR can can ONLY be routed to Display If you want to route a laptop to the SmartBoard, select Laptop as the Input Source and SmartBoard as the If you want to route a laptop to the SMARTBoard, select Laptop as the Input Source and output destination. SMARTBoard as the output destination. * Route Audio (ROUT AUD) Controls Audio Source and Destinations. * Route Audio (ROUT AUD) Controls and Destinations. PressSource the ROUT AUD button. Step 1: Audio Step Step2:1: Step 2: Select the desired Audio Source, and then select the desired destination for the selected source. Press the ROUT AUD button. Select the desired Audio Source, and then select the desired destination for the selected source. Appendix IV: Using the Crestron Remote Control to Route Video and Audio 24 The default setting is the MAC Instructor Computer, directing its sound to All Speakers. You may choose to use all speakers, or pick specific ones, such as Front Speakers or Rear Speakers. For example, you can select the MAC Instructor Computer and direct its sound to the Front Speakers, and also select the connected laptop and direct its sound to the Rear Speakers. Appendix IV: Using the Crestron Remote Control to Route Audio and Video 25