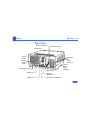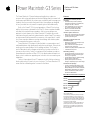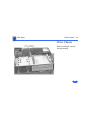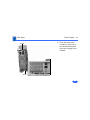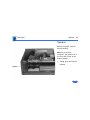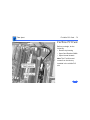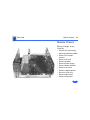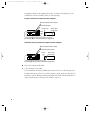
1
K Service Source Power Macintosh G3 Desktop K Service Source Hot Issues Power Macintosh G3 Desktop Hot Issues Introduction - 1 Introduction This chapter is designed to highlight unique or highpriority product issues that you should be aware of before servicing the Power Macintosh G3 Desktop computer. This chapter alerts you to important issues and provides links to other areas in the manual where more complete information can be found. This chapter is not intended to replace other parts of this manual; it merely provides a pointer to pertinent information in those chapters. To familiarize yourself with a new product family, always read the Basics chapter in its entirety. Hot Issues Shared Logic Board - 2 Shared Logic Board The Power Macintosh G3 Desktop and Minitower computers use the same logic board, but there are jumper settings that differ between them (see “Jumper Location J28” and “Jumper Location J16” in the Troubleshooting chapter). Processor Module Vs. Card Whereas previous Power Macintosh computers featured a user-installable processor card, this logic board uses a processor module that must not be removed by the customer (see “Processor Module” in the Take-Apart chapter). Hot Issues Power Supply Jumper - 3 Power Supply Jumper The Power Macintosh G3 Desktop logic board has a power supply jumper, which is installed at J28. The setting of this jumper differs between the Power Mac G3 Desktop and Minitower. Failure to install this jumper in the correct position may result in a computer that won’t boot up. (See “Jumper Location J28” in the Troubleshooting chapter.) Processor Module Jumper The Power Macintosh G3 Desktop logic board has a processor module jumper, which is installed at J16. The processor jumper is color coded for the speed of processor module used. Failure to install the correct jumper may result in a computer that won’t boot up. (See “Jumper Location J16” in the Troubleshooting chapter.) Hot Issues Warranty Sticker - 4 Warranty Sticker There is a warranty sticker that covers the processor module jumper. The customer’s warranty is void if this sticker is tampered with. Service Providers must replace this sticker if they have removed it during servicing to protect the customer’s warranty. (See “Processor Module” in the Take-Apart chapter.) Power Supply Voltage Setting There is a switch on the back of the power supply that controls the voltage setting. The voltage switch must be set correctly to avoid damaging the computer. (See “Voltage Switch” in the Basics chapter for more information, including an international voltage chart.) Hot Issues Voltage Regulator - 5 Voltage Regulator There is a removable voltage regulator on the logic board, which comes with the logic board and can also be ordered as a separate module. (See “Voltage Regulator” in the Troubleshooting chapter.) I/O Card Some I/O functions on the logic board are handled through a removable I/O card that must be installed for the computer to operate properly. (See “I/O Cards” in the Troubleshooting chapter.) Hot Issues ROM DIMM - 6 ROM DIMM The Power Macintosh G3 Desktop logic board uses a ROM DIMM as opposed to soldered ROM. You should not remove the ROM DIMM from the logic board. (See “Logic Board” in the Take-Apart chapter for instructions on how to prepare the logic board for return to Apple Computer.) SDRAM DIMMs The Power Macintosh G3 Desktop uses SDRAM DIMMs. DIMMs from older Macintosh computers, although they will fit, are not compatible and should never be used in the Power Macintosh G3 computers. (See “SDRAM DIMMs” in the Basics chapter and refer to the Power Macintosh G3 Desktop section of the Memory Guide.) Hot Issues SGRAM Video Memory - 7 SGRAM Video Memory Power Macintosh G3 computers use SGRAM video memory. Use only SGRAM SO-DIMMs in these machines. Never install the 256K or 512K video memory DIMMs used in older Macintosh computers. (See “SGRAM Video Memory” in the Basics chapter.) EIDE Bus Issue If you have only one device connected to the EIDE bus, the device must be plugged into the first EIDE connector on the logic board (the one closer to the rear panel), which is marked J9. If you plug the device into J10 and leave J9 empty, the device may not boot up. (See “Connecting EIDE Devices to the Logic Board” in the Basics chapter.) Hot Issues Master/Slave Support - 8 Master/Slave Support Some Power Macintosh G3 Desktop computers support adding two ATA/IDE devices to the same ATA/IDE channel, or what is commonly known as master and slave. This configuration provides user with the ability to add additional hard drives or removal media devices to their system. Because the cabling is different, you cannot replace ATA drives with SCSI drives and vice versa. (See “Support for Master and Slave” in the Basics chapter.) Ultra Wide SCSI Cable Routing The Ultra Wide SCSI cable (if present) must be routed inside the computer’s chassis in a very specific manner. Failure to route the cable correctly could result in performance problems. (See “Ultra Wide SCSI PCI Card” in Hot Issues DVD-ROM Disk Damage - 9 the Take-Apart chapter.) DVD-ROM Disk Damage The Power Macintosh G3 Desktop offers DVD-ROM drives as a build-to-order option. It is important to note that DVD disks are much more prone to damage than CD-ROM disks. Any type of scratch or other abuse may result in a disk that is unreadable. (See “DVD-ROM Drive Technology” in the Basics chapter.) CD-ROM Ejection Problem If you have a CD-ROM drive in a Power Mac G3 Desktop that fails to eject CDs properly, you may need to install poron bumpers. (See “CD-ROM Drive” in Troubleshooting.) Hot Issues HFS+ Formatted Drives - 10 HFS+ Formatted Drives Hard drives that ship with the Version 2 Power Macintosh G3 logic board (part number 661-2063) use a file format called Mac OS Extended format, also referred to as HFS+. Norton Utilities version 3.5 is not compatible with Mac OS and version 3.5.1 and earlier can result in hard drive corruption and loss of all data on the hard drive. If you experience problems with a hard drive in one of these systems, Apple Computer recommends using the version of Disk First Aid included on the system software CD that shipped with the unit. (See “HFS+ Formatted Drives” in the Troubleshooting chapter.) Hot Issues Power-On Issue - 11 Power-On Issue If you experience a power-on issue with the Power Macintosh G3 Desktop where the power supply fan is spinning, but there is no boot tone, no hard drive noise, no power LED, and no video, you may have an improperly installed or faulty voltage regulator. You should always reseat and/or replace the voltage regulator before replacing the logic board. (See “System” symptom/cures in the Troubleshooting chapter.) K Service Source Basics Power Macintosh G3 Desktop Basics Overview - 1 Overview The Power Macintosh G3 desktop chassis design allows you to access the logic board and its components, including the removable processor, without having to remove the power supply or any drives. This flexible design makes this computer easy to service and upgrade. The Power Macintosh G3 desktop has a unique PERCH slot that accepts an I/O card that provides audio capabilities of the computer. Basics Overview - 2 Features of the Power Mac G3 Desktop include: • PowerPC G3 microprocessor running at 233 MHz, 266 MHz, or 300 MHz • RAM expandable to 384 MB in 3 DIMM card slots using 64-bit 168-pin JEDEC-standard 3.3 V unbuffered SDRAM DIMM cards (Note: to expand to the maximum capacity of 384 MB requires low-profile DIMMs with maximum height of 1.15”. Using higher-profile DIMMs with a height of 1.25”, the maximum SDRAM capacity is 192 MB.) • 512K backside L2 cache (233 or 266 MHz) or 1 MB backside L2 cache (300 MHz) on processor module • Built-in 2D and 3D hardware graphics acceleration • PERCH slot to support I/O card • One modem slot on the I/O card for optional fax/modem card • 4 GB or 6 GB ATA hard drive(s) Basics Overview - 3 • Three expansion bays for adding internal 3.5-inch SCSI devices • Optional 100 MB SCSI Iomega or ATAPI Zip drive in one of the expansion bays • CD-ROM ATAPI drive at 24X speed (unless customer orders DVD-ROM drive) • 1.4 MB SuperDrive • One SCSI port • Two GeoPort serial ports • 10BASE-T Ethernet port • One ADB port • Three PCI expansion slots to accept • three 7-inch or 12-inch PCI cards, or • three 15 W cards, or • two 25 W cards • Voltage switch • Fan speed thermally controlled • Energy Saver control panel Basics Overview - 4 • 2 MB video RAM expandable to 4 MB or 6 MB with 3.3 V, 83 MHz or faster SGRAM on a 144-pin small outline dual inline memory module (SO-DIMM) Optional Build-to-Order Power Mac G3 Desktop Features: • ATAPI or SCSI Zip drive • Ultra Wide SCSI PCI card • 4 GB or 9 GB Ultra Wide 3.5” SCSI hard drive(s) (replaces 4 GB or 6 GB ATA hard drive(s)) • DVD-ROM Drive (in place of CD-ROM drive) • 10/100 BaseT ethernet card • FireWire DVC card Basics Data Buses - 5 Data Buses The data buses on the Power Macintosh G3 Desktop include: • Narrow SCSI-1: The SCSI-1 chain transfers data at up to 5 MB per second. The narrow SCSI-1 chain supports up to seven internal and external SCSI devices. The Narrow SCSI-1 bus is used to connect the ZIP drive (if present) and any SCSI-1 hard drives. • Ultra Wide SCSI-3 (provided on Ultra Wide SCSI card, which is optional): The Ultra Wide SCSI-3 chain can transfer data at up to 40 MB per second and supports up to three internal devices. This bus is used to connect any Ultra Wide SCSI devices. • EIDE (Extended Integrated Drive Electronics): There are two EIDE connectors on the logic board (the ATAPI CDROM drive or DVD-ROM drive uses one of these connectors, and if an ATA hard drive is installed, it uses the second connector). Basics Data Buses - 6 Note: Some Power Mac G3 system use a Master/Slave interface. See “Support for Master and Slave” later in this section for more information. The following table gives more information about the data buses in the Power Macintosh G3 Desktop computer. Basics Data Buses - 7 Table 1: Internal Buses on G3 Desktop Interface Connector Type Notes Max # of Drives Max Data Transfer Rate SCSI-31 (Ultra Wide) 68-Pin Requires Ultra Wide SCSI PCI card. 22 EIDE 40-Pin There are two EIDE connectors on the logic board. 23 SCSI-24 (Fast) 50-Pin Requires Ultra Wide SCSI PCI card. 7 10 MB per second SCSI-1 (Narrow) 50-Pin Standard connector on logic board. Used to connect internal devices to Narrow SCSI-1 bus (e.g. ZIP drive). 75 5 MB per second 40 MB per second — Basics Data Buses - 8 Notes for Table 1: 1 The Ultra Wide SCSI PCI card is optional on the G3 Desktop unit. The Apple Ultra Wide SCSI card and cable allow you to connect a maximum of 2 devices to this bus. 2 Physical space inside the computer limits this number to 2. 3 The ATAPI CD-ROM drive, ATAPI DVD-ROM drive, and ATA hard drive (if present) use this bus. 4 Ultra Wide SCSI PCI card is optional on the G3 Desktop unit. It’s best not to use this bus because it will cause any Ultra Wide SCSI-3 devices to transfer data at the slower SCSI-2 rate. No cable is provided for the SCSI-2 bus. 5 The G3 Desktop unit may come with a Zip drive attached to this bus. You can add additional SCSI-1 devices as long as the combined number of internal and external devices is no more than seven. Basics Data Buses - 9 Narrow SCSI-1 Bus All internal and external devices on the SCSI-1 chain must have unique ID numbers. SCSI ID numbers 0 through 6 are available. Always terminate the last internal and the last external SCSI-1 device. Ultra Wide SCSI-3 Bus Ultra Wide SCSI support is offered on the Power Macintosh G3 Desktop as an optional feature via an Ultra Wide SCSI PCI card (p/n 661-2011). If present, this card is installed in the first PCI slot on the logic board. You can connect a total of two internal devices to the Ultra Wide SCSI-3 bus. Important: Before you connect an internal device to the Ultra Wide SCSI-3 bus, refer to the information on cable length limits and termination later in this section. Basics Data Buses - 10 Important: Detailed information on how to route and tape the Ultra Wide SCSI cable can be found in the Take-Apart chapter in the Hard Drive topic. All devices on the same SCSI bus must have unique ID numbers, but devices on different SCSI buses may use the same SCSI ID number. (For example, you could have a removable media drive with ID number 3 connected to the Narrow SCSI-1 bus and a hard drive with ID number 3 connected to the Ultra Wide SCSI-3 bus.) Some of the drives that were installed at the factory, as well as the SCSI card itself, have already reserved certain SCSI ID numbers on the Ultra Wide SCSI-3 bus. Other ID numbers are available for assignment to SCSI devices that are added later. The following table provides more information on assigning SCSI ID numbers to Ultra Wide devices. Basics Data Buses - 11 Table 2: Assigning Ultra Wide SCSI ID Numbers Ultra Wide SCSI ID # Device 0 Factory-installed hard drive (terminated) 1 Factory-installed hard drive (optional) 2—6 Available (but not recommended) 7 8 —15 SCSI PCI card (terminated) Available Important: The factory-installed internal hard drive and the SCSI card are both terminated. Other SCSI devices you install and connect to the internal Ultra Wide SCSI-3 bus must not be terminated, or the computer will malfunction. Basics Data Buses - 12 EIDE Bus The internal EIDE bus supports the internal CD-ROM or DVD-ROM drive. You can connect another EIDE device, such as an EIDE hard drive, to the second channel of the EIDE bus. (Note that in the standard G3 Desktop configuration, there is already an ATA hard drive attached to the second EIDE channel. Some build-to-order G3 Desktops, however, come with the optional Ultra Wide SCSI card and Ultra Wide SCSI hard drive, in which case the second EIDE channel is available.) You can install an EIDE device in one of the available expansion bays. Connecting EIDE Devices to the Logic Board There are two EIDE connectors on the G3 Desktop logic board, which are marked J9 and J10. Use the internal ribbon cable with the 40-pin connector to connect EIDE Basics Data Buses - 13 devices to the EIDE bus. If you are connecting a single device to the EIDE bus, you should use the J9 connector (the one closer to the rear panel). If you plug a single device into the J10 EIDE connector and leave J9 empty, the device may not boot. If the Power Macintosh G3 Desktop ships with two EIDE devices (a CD-ROM or DVD-ROM drive and an ATA hard drive), both EIDE connectors (J9 and J10) will be automatically used. Service Providers should keep the J9 vs. J10 issue in mind, however, when testing G3 Desktop units. Support for Master and Slave Some Power Macintosh G3 Desktop computers support adding two ATA/IDE devices to the same ATA/IDE channel, or what is commonly known as master and slave. This configuration provides user with the ability to add additional Basics Data Buses - 14 hard drives or removal media devices to their system. The Power Macintosh G3 Desktop units that support this feature can only be identified by looking at the logic board itself and verifying the revision of the built-in video ASIC made by ATI Technologies. If you are looking at the logic board with the rear connector towards you, the video ASIC is located approximately 1” from the built-in video connector on the logic board. If the ASIC reads: “ATI 3D Rage II+DVD,” the logic board does not support the master and slave configuration; If the controller reads: “ATI 3D Rage Pro PCI,” the logic board does support the master and slave configuration. Note: Although the ATI chip is an ideal way to identify the version of the logic board, it does not control the EIDE interface. Basics Data Buses - 15 Configuring or Connecting Master/Slave Devices Each IDE channel can support either one or two devices. All Power Macintosh G3's have two ATA/IDe channels. ATA/IDE devices each contain their own integrated controllers, and so in order to maintain order on the channel, it is necessary to have some way of differentiating between the two devices. This is done by giving each device a designation as either master or slave, and then having the controller address commands and data to either one or the other. The drive that is the target of the command responds to it, and the other one remains silent. Note: Despite the hierarchical-sounding names of "master" and "slave", the master drive does not have any special status compared to the slave one; they are really equals in most respects. The slave drive doesn't rely on the master drive or anything like that, despite the names. Basics Data Buses - 16 Devices are designated as master or slave using jumpers, small connectors that fit over pairs of pins to program the drive through hardware. Each hard drive manufacturer uses a different combination of jumpers (usually named differently) for specifying whether its drive is master or slave on the channel. Some disks put this information right on the top label of the drive itself, while many do not; it sometimes takes some hunting around to find where the jumper pins are on the drive even once you know how the jumpers are supposed to go. ATAPI drives, or ATA/IDE devices that support removable media like CD-ROM's are jumpered in exactly the same way, and they have the advantage of having their jumpers much more universally labeled than their hard disk counterparts. If you are using two drives on a channel, it is important to ensure that they are jumpered correctly. Making both Basics Data Buses - 17 drives the master, or both the slave will likely result in a very confused system. Note: It makes no difference which connector on the ATA/ IDE cable is used in a standard ATA/IDE setup, because it is the jumpers that control master and slave, not the cable. As long as one device is jumpered as master and the other as slave, any two ATA/IDE or ATAPI devices should work together on a single channel. Basics Ultra Wide SCSI Card - 18 Ultra Wide SCSI Card Ultra Wide SCSI support is offered on the Power Macintosh G3 Desktop as an optional feature via an Ultra Wide SCSI PCI card (p/n 661-2011). If present, this card is installed in the first PCI slot on the logic board. Connecting Additional Internal Devices If you add an internal drive to the Ultra Wide SCSI bus, you need to assign it a SCSI ID number in the 8 to 15 range. Devices assigned to numbers 2 through 6 may not work reliably. Only internal SCSI devices may be attached to the primary Ultra Wide SCSI card; that is to say, you cannot use the external 68-pin connector on the card. To connect external Ultra Wide SCSI devices to the computer, you must install a Basics Ultra Wide SCSI Card - 19 second Ultra Wide SCSI card. To install a second Ultra Wide SCSI card, follow these guidelines: • Use a single-channel card if possible. • If you need to add a dual-channel Ultra Wide SCSI card, contact the PCI card vendor to verify compatibility with the Power Macintosh G3 Desktop. • Do not use the Apple Ultra Wide SCSI PCI card (p/n 661-2011) as the second card unless it is shipped from the factory this way. Specifications for the Ultra Wide SCSI Card The Ultra Wide SCSI PCI card specifications are as follows: • Automatic termination • Advanced Data Streaming Technology (ADS) • RAID Ready Basics Ultra Wide SCSI Card - 20 • • • • • • • • • • Embedded RISC I/P processor Ultra SCSI connector: Fine pitch 68-pin “P” Flash ROM BIOS PCI 2.1 compliant Large command FIFO Supports disconnect/reconnect Asynchronous I/O support Multiple initiator support SCSI-3 tagged command queuing SCSI Manager 4.3 compatible SCSI-3 Bus • Adapter interface: Special Bus management hardware for video, fileservers, and real-time environments • Maximum host transfer rate: 133 MB/sec. • Maximum SCSI transfer rates: Synchronous data rate— 40 MB/sec. per channel; asynchronous data rate— 12 MB/sec. Basics Ultra Wide SCSI Card - 21 • SCSI interface: SCSI-1, SCSI-2, SCSI-3, Ultra SCSI • Electrical signals: Single-ended versions • Extensive device support: Up to 105 Through Logical Unit Numbers (LUN’s) (Wide and Narrow devices) Cable Length Limits When using Ultra SCSI single-ended devices, you can connect up to 8 devices if the total cable length is no longer than 1.5 meters (about 4.5 feet). If total cable length is between 1.5 meters and 3.0 meters (about 9 feet), you can connect only 4 SCSI devices. Error-free operation is not guaranteed if you exceed these limits. When not using Ultra SCSI devices, SCSI specification limits total bus cable length for single-ended SCSI to 6 meters or approximately 18 feet (this is a combined figure of both internal and external cable lengths). You should keep cable Basics Ultra Wide SCSI Card - 22 lengths as short as possible to ensure high signal quality and performance. If you connect a combination of Wide 16-bit devices and Narrow 8-bit devices on the same connector (not recommended), Wide devices must be connected first (closest to the connector), followed by the Narrow devices. Refer to the documentation that came with your SCSI devices to determine if your device is Wide or Narrow, and if it is an Ultra SCSI device. Basics 10/100 BaseT Ethernet Card - 23 10/100 BaseT Ethernet Card The specifications for the 10/100 BaseT ethernet card, which is an optional feature in the G3 Desktop, are as follows: • Open Transport: Mac OS 8.1 or later, AppleShare, AppleTalk, NetWare for Macintosh, TCP-IP • Connector: RJ-45 (for 10BaseT and 100BaseT) • Media, 10BaseT: Cat 3, 4, or 5 UTP on 2 pairs up to 100M • Media, 100BaseT: Cat 5 UTP on 2 pairs up to 100M • Bus interface: PCI revision 2.0 and 2.1, share interrupt A • Channel speeds: IEEE Auto Negotiation of 10BaseT and 100BaseTX • Communications: IEEE 802.3u 100BaseTX; IEEE 802.3i 10BaseT • Power: 1.2A @ 5V typical Basics 10/100 BaseT Ethernet Card - 24 • Controllers: DECchip 21140, 32-bit internal processor per channel Basics DVD-ROM Drive Technology - 25 DVD-ROM Drive Technology DVD stands for Digital Versatile Disc, an audio/video/data standard based on high-density next-generation optical discs. Apple Computer offers a DVD-ROM drive through the build-to-order (BTO) program which is capable of playing DVD-ROM disks. Warning: DVD disks are much more prone to damage than CD-ROM disks. Any type of scratch or other abuse may result in a disk that is unreadable. DVD Discs The DVD Forum designed several standards for disk manufacture ranging from a single-sided, single-layer disk with 4.7 Gigabytes of data to a double-sided, double-layer disk with 17 Gigabytes of data stored on the disk. Basics DVD-ROM Drive Technology - 26 DVD discs can hold nearly 26 times the amount of data that can be stored on a conventional CD. This capacity virtually eliminates the need to swap discs in the middle of a game or application and at the same time reduces the cost and the number of discs necessary to hold the data. The following table clearly illustrates the difference between CD and DVD storage possibilities. Basics DVD-ROM Drive Technology - 27 Table 3: Storage Capacities Disc Type Diameter Sides & Layers Capacity Playback Time (video) CD-ROM 120mm SS 650 MB Max 74 min audio DVD-5 120mm SS/SL 4.7 GB Over 2 hours of video DVD-9 120mm SS/DL 8.5 GB Approx. 4 hours DVD-10 120mm DS/SL 9.4 GB Approx. 4.5 hours DVD-18 120mm DS/DL 17 GB Over 8 hours Table Notes: SS=Single Sided, SL=Single Layer, DS=Double Sided, DL=Double Layered Basics DVD-ROM Drive Technology - 28 To squeeze all this information onto the CD-sized disc, DVD disc designers: 1)made track spacing and the pits and lands used to record data nearly half the size of the original CD design; 2) made the discs double sided and added another data layer to each side creating a potential for four layers of data per disc. The figure below illustrates the layers of a DVD disc. Basics DVD-ROM Drive Technology - 29 DVD Layers Basics DVD-ROM Drive Technology - 30 Compared to CD, DVD uses smaller pits and a more closely spaced track.The result is a significant increase in data density. The higher Numerical Aperture (NA) lens of DVD helps the laser focus on the smaller pits. Like CD, DVD is 120 mm (4-3/4 inches) in diameter. Like CD, DVD is 1.2 mm thick composed of (2) 0.6 mm substrates bonded together. The new DVD Players will be able to play existing music CDs. The DVD standard defines a disc that maintains the overall dimensions, look and feel of the current Compact Disc. Some of these similarities will be unmistakable to customers experiencing DVD for the first time. Basics DVD-ROM Drive Technology - 31 Table 4: CD vs. DVD Comparison CD DVD Disc Diameter 120mm 120mm Disc Thickness 1.2mm 1.2mm Disc Structure Single substrate Two bonded 0.6mm substrates Laser Wavelength 780nm (infrared) 650 and 635nm (red) Numerical Aperature 0.45 0.60 Track Pitch 1.6um 0.74um Shortest Pit/Land Length 0.83um 0.4um Basics DVD-ROM Drive Technology - 32 Table 4: CD vs. DVD Comparison CD DVD Data Layers 1 1 or 2 Data Capacity Approx. 680 MB Single Layer: 4.7 GBx2 Dual Layer: 8.5 GBx2 Data Transfer Rate Mode 1: 153.6 KB/sec Mode 2: 176.4 KB/sec 1,108 KB/sec, nominal Basics DVD-ROM Drive Technology - 33 Apple DVD-ROM Drive Specs The Apple DVD-ROM Drive is an ATAPI drive. It uses an IDE port on the Macintosh for connection to the computer. Below are some of the specs for the drive. Note that the above transfer rate info varies from the data below. The numbers above reflect the DVD specification where the below numbers are for the drive that Apple is shipping. Access Times (including latency) DVD 170 ms or faster typical CD 100 ms or faster typical Data Capacity DVD maximum 17 GB 256K Buffer Basics DVD-ROM Drive Technology - 34 Transfer Rate DVD: 2,705 KB/second CD Mode 1: 1,293 to 3,000 KB/second CD Mode 2: 1,474 to 3,429 KB/second Disk Format Support DVD 9660 Bridge (DVD-ROM Book, DVD-Video Book) RedBook, Yellow-Book, CD-ROM XA, DA-I Bridge, Photo-CD, Video CD, CD-I Ready, CD-G, Multi-session (Photo-CD, CD Extra) Note: To be able to play the DVD-Video disks, you must have an additional PCI decoder card installed that will allow the playback of movie disks. This PCI card contains controllers that decode the MPEG-2 video and Dolby AC-3 audio tracks on the movie. Without the card, movies cannot be played. Because of this, the DVD-ROM drive is only intended for DVD-ROM disks. These are DVD disks that contain data just like CDs do currently. If you wish to play DVD Video disks, Basics DVD-ROM Drive Technology - 35 you will need to purchase a PCI decoder card. DVD Software Drivers Apple DVD-ROM UDF Volume Access These two extensions will allow a DVD disk to be mounted on the desktop. DVD disks use a format called universal disk format (UDF) to store data on the disks. All DVD disks are formatted UDF; this includes DVD-VIDEO and DVD-ROM disks. Basics DVD-ROM Drive Technology - 36 File Management System Micro UDF & ISO9660 Universal Disk Format (UDF) is a file system standard that supports both rewritable and write-once media. It is a cross-platform data format that allows transparent interchange of data via optical discs or CD-ROMs. UDF also defines methods for reading, writing and other operations. Discs that are read on a Mac OS-based computer may also be read on a DOS, UNIX or Windows based computer. The format can coexist with CD-ROM data format (ISO 9660) but also incorporates the International Standards Organization interchange standard for rewritable and write-once media (ISO 13346) thus providing support for CD-Recordable discs (CD-R). Before UDF was available, every CD-Recordable drive used a proprietary format of writing data, which prevents the ability to interchange files. Fortunately, most drives Basics DVD-ROM Drive Technology - 37 supported either software or hardware updates to allow the drive to be upgraded so that it could write UDF. The first generation of DVD drives could not read CD-R media and in some cases actually damaged the media. UDF Features • Enables operating system independent interchange on optical media. • Designed to support the massive capacities of optical jukeboxes. • Only ISO standard file system for WORM media (Write Once Read Many). • Industry selected file system for second generation (high capacity) CD-ROM. • Industry selected file system for DVD. • Enables full interchange between computer-based and entertainment-based media. • Endorsed by world leading optical manufacturers. Basics DVD-ROM Drive Technology - 38 Stand-alone players use UDF while computer applications use the UDF bridge format, which consists of both ISO-9660 CD-ROM format and UDF. Basics FireWire Technology - 39 FireWire Technology This section explains what FireWire technology is and gives specific information on Apple Computer’s FireWire card, which ships as an optional build-to-order module on the Power Macintosh G3 Desktop. FireWire Defined FireWire technology refers to Apple Computer’s crossplatform implementation of the high-speed serial data bus (defined by IEEE Standard 1394-1995) that can move large amounts of data between computers and peripheral devices. FireWire is: • A digital interface - no need to convert digital data into analog for better signal integrity Basics FireWire Technology - 40 • A physically small thin serial cable - replaces today's bulky and expensive interfaces • Easy to use - no need for terminators, device IDs, screws, or complicated set-ups • Hot pluggable - devices can be added and removed while the bus is active • Scalable - the Standard defines 100, 200, and 400 Mbps devices and can support the multiple speeds on a single bus • Flexible - the Standard supports freeform daisy chaining and branching for peer-to-peer implementations • Fast, guaranteed bandwidth - the Standard supports guaranteed delivery of time critical data which enables smaller buffers (lower cost) • Non-proprietary - no licensing problems, adoption is encouraged Basics FireWire Technology - 41 FireWire technology speeds up the movement of multimedia data and large files and enables the connection of digital consumer products -- including digital camcorders, digital video tapes, digital video disks, set-top boxes, and music systems -- directly to a personal computer. Devices can be connected in any combination of branching and chaining, as long as no loops are formed. A FireWire bus can support up to 16 consecutive cable hops of 4.5 meters each. There are no SCSI-style ID numbers to set and no termination requirements. FireWire supports two types of data transfer: asynchronous and isochronous. For traditional computer memory-mapped, load and store applications, asynchronous transfer is appropriate and adequate; but, one of FireWire's key features is its support of isochronous data channels. Basics FireWire Technology - 42 Isochronous data transfer provides guaranteed data transport at a pre-determined rate. This is especially important for multimedia applications where uninterrupted transport of time-critical data and just-in-time delivery reduce the need for costly buffering. This leads to perhaps one of the most important uses of FireWire as the digital interface for consumer electronics and AV peripherals. FireWire is a peer-to-peer interface. This allows dubbing from one camcorder to another without a computer. It also allows multiple computers to share a given peripheral without any special support in the peripheral or the computers. It is a result of all of these features that FireWire has become the digital interface of choice and its acceptance is growing. In the world of video editing, FireWire enabled cameras remove the need for costly analog video computer frame Basics FireWire Technology - 43 buffers to capture digital video. FireWire will gradually improve upon existing interfaces such as SCSI. FireWire provides higher speed, lower cost, and is more user friendly than most existing interfaces. SCSI products such as scanners, CDROMs, disk drives, and printers are already evaluating when they will move to FireWire. FireWire has the bandwidth capacity to replace and consolidate most other peripheral connection communication methods in use today. Hot plugging, power sourcing, and dynamic reconfiguration make FireWire a user-friendly alternative to today's interconnects. These features will allow "plugging in" of computer peripherals as easily as plugging in a home appliance. The Apple FireWire Digital Video Camera Card The optional Apple FireWire Digital Video Camera (DVC) Basics FireWire Technology - 44 card is Apple Computer’s first implementation of FireWire technology. This card is designed to work with digital video camcorders and decks that use the DV format and have a FireWire port (sometimes marked IEEE 1394 or DV IN/ OUT). The FireWire DVC hardware and software, together with a non-linear editing application, allow the user to capture DV movie clips to their hard disk. They can view the clips in MoviePlayer or other QuickTime 3.0 applications, and edit and render the DV movies. If the user has a video editing application with an export function, they can send (print or record) movies back to the tape in their camcorder or deck. The software also allows the FireWire device to be controlled from the computer. The Apple FireWire DVC card installs in any available PCI slot on the Power Mac G3 Desktop logic board. It operates at Basics FireWire Technology - 45 200 Mbps and supports a single digital video camera. The external FireWire cable, which ships with the card, connects any one of the 6-pin, external connectors on the card to a 4-pin connector on the digital video camera. The Apple FireWire Card is designed to keep the network alive even if the Macintosh is shut down. Loss of power to the Macintosh will not affect the operation of a FireWire card as long as it can draw power from other cards on the bus. Each card provides power which is available to other devices on the network. This means that a system shutdown will not result in interrupted transmission over a FireWire network. Important: For more information about cable management and power issues, please refer to the FireWire ReadMe file on the FireWire CD. Basics FireWire Technology - 46 Connecting the FireWire DVC Card The 6-pin connector on the external FireWire cable plugs into the card and the 4-pin connector plugs into the camera’s DV port. Both connectors snap into place when properly engaged. A third-party cable is required in order to connect two computers together (or if the camera has a 6pin FireWire port). External FireWire Cable Connectors Basics FireWire Technology - 47 Installing the FireWire Card Software To install the Apple FireWire Card software: 1 Insert the FireWire CD. 3 Follow the on-screen instructions. 2 4 Double-click the Installer icon. Restart the computer. Important: An extension called FireWire Support may be located in a folder titled FireWire in the Apple Extras folder on the Macintosh. Do not move this older extension to the Extensions folder, as it may interfere with the operation of the new Apple FireWire software. Basics The Cuda Chip - 48 The Cuda Chip The Cuda is a microcontroller chip. Its function is to • Turn system power on and off • Manage system resets from various commands • Maintain parameter RAM (PRAM) • Manage the Apple Desktop Bus (ADB) • Manage the real-time clock Many system problems can be resolved by resetting the Cuda chip (see Symptom Charts for examples). Press the Cuda reset button on the logic board to reset the Cuda chip. (See “Logic Board Diagram” later in this chapter to locate the Cuda reset button.) If you continue to experience system problems, refer to “Resetting the Logic Board” in this Basics chapter. Basics Resetting the Logic Board - 49 Resetting the Logic Board Resetting the logic board can resolve many system problems (refer to “Symptom Charts” for examples). Whenever you have a unit that fails to power up, you should follow this procedure before replacing any modules. 1 Unplug the computer. 3 Disconnect the power supply cable from the logic board and then press the Power On button. (See “Logic Board Diagram” later in this chapter to locate the Power On button.) 2 4 5 Remove the battery from the logic board. Wait at least 10 minutes before replacing the battery. Make sure the battery is installed in the correct +/direction. Basics Resetting the Logic Board - 50 6 Reassemble the computer and test the unit. Note: This procedure resets the computer’s PRAM. Be sure to check the computer’s time/date and other system parameter settings afterwards. Basics Sound - 51 Sound The sound system for the Power Macintosh G3 computers is implemented entirely on the I/O cards. (There are two versions available.) Each supports 16-bit stereo sound output and input, available simultaneously. The sound circuitry on the I/O card and system software can create sounds digitally and either play the sounds through speakers inside the enclosure or send the sound signals out through the sound output jacks. The sound circuitry digitizes and records sound as 16-bit samples. The computer can use 11.025K, or 22.050K, or 44.100K samples per second. The sound system plays samples at the sampling rate specified in the Monitors & Sound control panel. Basics Sound - 52 The Power Macintosh G3 also records sound from several sources: • A microphone connected to the line-level sound input jack • A compact disc in the CD-ROM player • Analog sound from the cross-platform card in a PCI slot • Analog sound from optional communication cards With each sound input source, sound playthrough can be enabled or disabled. Basics Sound - 53 Sound Output All sound output features for the Power Macintosh G3 computer are provided by an I/O card. The Audio I/O card (standard feature) provides one mini jack for sound output on the back of the enclosure. The AV I/O card (optional build-to-order feature) provides three sound output connectors—two RCA jacks for right and left sound out, and one 1/8-inch mini jack for a stereophonic phone plug. The output jacks are connected to the sound amplifier. The mini jack is intended for connecting a pair of headphones or amplified external speakers. There is one built-in speaker. Inserting a plug into the sound output mini jack disconnects the internal speaker. An optional front headphone jack requires an I/O card to connect the headphone jack to the sound system. Basics Sound - 54 Sound Input The I/O card provides a stereo sound input jack on the back of the enclosure for connecting an external Apple PlainTalk line-level microphone or other sound source pair of linelevel signals. The sound input jack accepts a standard 1/8inch stereophonic phone plug (two signals plus ground). Note: The microphone for the Macintosh LC and LC II does not work with the I/O cards. The AV I/O card provides an additional pair of RCA jacks for right and left sound input for an external source, such as a TV, VCR, or VTR. Options in the Monitors & Sound control panel determine the interaction between the sound input and output devices. The sound circuitry normally operates in one of three modes: • Sound playback—computer-generated sound is sent to the Basics Sound - 55 speaker and the sound output jacks. • Sound playback with playthrough—computer sound and sound input are mixed and sent to the speakers and sound output jacks. • Sound record with playthrough—input sound is recorded and also sent to the speakers and sound output jacks. Basics Video Input and Output - 56 Video Input and Output The AV I/O card (an optional build-to-order feature) supports video input and output of composite and S-video signals. The card supports input and output of NTSC, PAL, and SECAM video formats. The AV I/O card accepts video from an external source and displays it in a window on the computer’s display. The features of the video portion of the card include: • • • • • Video display in a 320 X 240 pixel window Pixel expansion for 640 X 480 pixel maximum display Video overlay capability YUV format for digital video input A bi-directional digital audio video (DAV) connector for adding a video processor on a PCI expansion card Basics Video Input and Output - 57 The card can accept video input from an external device, such as a VCR or camcorder. Sound Output Port Sound Input Port Composite Video Ports (OUT and IN) S-Video Ports (OUT and IN) Audio Output Ports (left & right) Audio Input Ports (left & right) AV I/O Panel Basics The DAV Connector - 58 The DAV Connector The AV I/O Personality card has a digital audio video (DAV) connector. The DAV connector allows a PCI expansion card to access the AV I/O card video input data bus and associated control signals. The PCI card can use the digital video bus on the AV I/O card to transfer real-time video data to the computer. The PCI expansion card can contain a hardware video compressor or other video processor. The DAV connector is a 60-pin flat-ribbon connector located at the top edge of the AV I/O card. A PCI expansion card can connect to the AV I/O card with a 7-inch 60-conductor flatribbon cable that is installed between the DAV connector and the PCI card. The DAV connector accepts YUV video and analog sound from the PCI expansion card. Basics Voltage Switch - 59 Voltage Switch Voltage Switch The voltage switch must be set correctly to avoid damaging the computer. Insert a screw driver in the slot to set the switch to show “115” for voltages between 100 and 130. Set the switch to show “230” for voltages between 200 and 270. Some countries use two standardized voltages. If you aren’t sure which voltage is available, check with the electricity supply company before plugging in the computer. Basics Voltage Switch - 60 Here is a table listing voltages for some countries: Country Voltage Japan 100 Jamaica, Taiwan 110 South Korea Peru Brazil, Lebanon Philippines 100 or 220 110 or 220 110–220 115 Bermuda, Canada, Puerto Rico, United States, Venezuela 120 Saudi Arabia 127 or 220 Mexico Hong Kong 127 200 Basics Voltage Switch - 61 Country Voltage India, South Africa 220–250 Australia, Kuwait, Malta, New Zealand, Northern Ireland, Papua New Guinea, Oman, Qatar, United Kingdom 240 Bahrain, Chile, China (People’s Republic), Czechoslovakia, Egypt, Greenland, Hungary, Iceland, Iran, Jordan, Liechtenstein, Nepal, Paraguay, Poland, Romania, United Arab Emirates, Russia and the Commonwealth of Independent States (CIS), Yemen, Yugoslavia 220 Israel, Pakistan, Singapore Austria, Belgium, Denmark, Finland, France, Germany, Greece, Italy, Luxembourg, Netherlands, Norway, Portugal, Spain, Sweden, Switzerland 230 220–230 Basics PowerPC G3 and Backside Cache - 62 PowerPC G3 and Backside Cache Backside cache is a significant architectural design change from earlier PowerPC processors. The main advantage of the backside cache architecture is the speed of the dedicated CPU-to-L2 cache interface. Using the dedicated bus allows the CPU to access the fast L2 cache storage through a high speed bus without addressing the slower system bus or competing with other devices attached to the system bus. In comparison, a “far-side” cache running on the system bus would limit that SRAM interface to 50MHz. The PowerPC G3 microprocessor interfaces with SRAM storage via a dedicated bus running at various multiples of the core PLL CPU speed. With high speed L2 SRAM and a dedicated L2 bus, the CPU can access stored information up to the speed of the processor clock. L2 access is determined by the clock ratio setting. For example, with a 250MHz Basics SDRAM DIMMs - 63 PowerPC G3, and a 2.5 L2 bus ratio, the backside cache bus speed will be 100MHz, twice the speed of the system bus. SDRAM DIMMs Three DRAM expansion slots on the logic board accept 3.3 V SDRAM unbuffered 8-byte DIMMs. The 168-pin DIMM has a 64-bit-wide data bus per bank. The minimum bank size supported on the Power Mac G3 Desktop model is 2 MB, and the largest is 32 MB. The largest DIMM supported is a twobank DIMM of 64 MB using 32 Mbit SDRAM devices. While the Power Mac G3 Desktop logic board supports a maximum RAM expansion of 384 MB, the 128 MB JEDEC industry-standard DIMMs are too tall to fit in the Desktop chassis. (The Power Mac G3 Desktop accommodates a DRAM DIMM height of 1.15 inches maximum.) Therefore, low- Basics SDRAM DIMMs - 64 profile DRAM DIMMs must be used to reach the maximum DRAM expansion of 384 MB. Using higher-profile DRAM DIMMs, the maximum DRAM expansion for the Power Mac G3 Desktop is 192 MB. The DRAM DIMMs can be installed one or more at a time. The logic board supports only linear memory organization. Therefore, no performance gains are seen when two DIMMs of the same size are installed. Any supported size DIMM can be installed in any DIMM slot, and the combined memory of all the DIMMs installed will be configured as a contiguous array of memory. Important: Power Macintosh G3 computers use SDRAM DIMMs. DIMMs from older Macintosh computers are not compatible and should not be used even though they fit into the Power Mac G3 DRAM DIMM slots. Basics SGRAM Video Memory - 65 SGRAM Video Memory The Power Macintosh G3 logic board comes with 2 MB of Synchronous Graphic RAM (SGRAM) video memory soldered on. The logic board also contains a video memory expansion slot that accepts a Small Outline DIMM (SO-DIMM) to increase video memory up to a maximum of 6 MB. Apple supports a 4 MB SGRAM SO-DIMM that is 32-bit wide, 144-pin, fast-paged, 83 MHz/12 ns cycle time or faster. Important: Use only SGRAM SO-DIMMs. Never use the 256K or 512K video memory DIMMs used in older Macintosh computers. Basics DIMM Slots - 66 DIMM Slots Video Memory Slot ROM Slot (Do not remove the ROM DIMM.) DRAM DIMM Slots Basics Peripheral Component Interconnect (PCI) - 67 Peripheral Component Interconnect (PCI) The Peripheral Component Interconnect (PCI) expansion slots accept 6.88-inch and 12.283-inch PCI cards. Because the PCI bus is an industry standard, most existing PCI 2.0compliant cards (with the addition of a Mac OS-specific software driver) will work in these computers. PCI offers significantly higher performance than the NuBus architecture used in previous Macintosh models. Running at 33 MHz, the PCI bus is up to three times faster than NuBus, offering overall enhanced system performance, particularly in the areas of video and networking. Basics Front View - 68 Front View Zip Drive (Optional) Expansion Bay Floppy Disk Drive Speaker CD-ROM Drive Open/Close Button Power-On Light Power Button Internal Hard Drive CD-ROM Drive Basics Rear View - 69 Rear View Sound Output Port Sound Input Port Printer Port Power Socket Expansion Slot Access Covers (3) Monitor Power Socket Security Lock Ports Monitor Port SCSI Port ADB Port External Modem Port Ethernet Port (10Base-T) Internal Modem Card (Optional) Basics Internal Locator - 70 Internal Locator Logic Board Power Supply Zip Drive Sound Card Hard Drive Floppy Drive CD-ROM Drive Basics Logic Board - 71 Logic Board Power Supply PERCH Jumper Block Slot Ethernet ADB Port Port Monitor Serial SCSI Port Ports Port Internal SCSI Connector CUDA Reset Button IDE Connector PCI Slots Power Supply Connector Video Memory SO DIMM Floppy Drive Connector Voltage Regulator Processor Jumper Block Battery LED Speaker Power CD ROM On/Off Audio DIMM DRAM DIMM Microprocessor Basics Repair Strategy - 72 Repair Strategy Service the Power Macintosh G3 Desktop computers through module exchange and parts replacement. Customers can request on-site service from an Apple Authorized Service Provider Plus (AASP+) Apple Assurance (US only), or Apple Canada Technical Answerline (Canada only). They can also choose carry-in service from an AASP. Ordering Apple Service Providers planning to support the computer systems covered in this manual may purchase Service modules and parts to develop servicing capability. To order parts, use the AppleOrder (US only) or ARIS (Canada only) system and refer to the Power Macintosh G3 “Service Price Pages.” Basics Repair Strategy - 73 Large businesses, universities, and K-12 accounts must provide a purchase order on all transactions, including orders placed through the AppleOrder (US only) or ARIS (Canada only) system. USA Ordering US Service providers not enrolled in AppleOrder may fax their orders to Service Provider Support (512-9088125) or mail them to Apple Computer, Inc. Service Provider Support MS 212-SPS Austin, TX 78714-9125 For US inquiries, please call Service Provider Support at 800-919-2775 and select option #1. Basics Repair Strategy - 74 Canadian Ordering Canadian Service providers not enrolled in ARIS may fax their orders to Service Provider Support in Canada (1-800-903-5284). For Canadian inquiries, please call Service Provider Support at 905-513-5782 and select option #3. Basics Warranty/AppleCare/ARIS - 75 Warranty/AppleCare/ARIS US Only The Power Macintosh G3 computers are covered under the Apple One-Year Limited Warranty. The AppleCare Service Plan is also available for these products. Service Providers are reimbursed for warranty and AppleCare repairs made to these computers. For pricing information, refer to “Service Price Pages.” Canada Only The Power Macintosh G3 computers are covered under AppleCare. The Extended AppleCare Service Plan is also available for these products. Service Providers are reimbursed for warranty and AppleCare repairs made to these computers. For pricing information, refer to “Service Price Pages.” The Power Macintosh G3 Series: Innovative Product Design for Affordable High Performance A little background Two decades ago, Apple made its name by bringing advanced technology to mainstream users through extraordinarily easy-to-use products. In particular, we gained a reputation for success in pioneering the educational use of computers and championing the advancement of multimedia technology. Although that reputation has remained remarkably unchanged through the years— Apple is still regarded as the industry leader in both education and multimedia—the technology behind it has been altered practically beyond recognition, as have customer expectations. Today’s mainstream computer users want affordable high-performance systems that provide outstanding communications and multimedia capabilities. The Power Macintosh G3 series was developed to satisfy that need—and to exceed customer expectations about price/performance value. The Power Macintosh G3 series product design When you talk about overall system design, you are really talking about a number of things—from the processor to the physical enclosure to the system software to the logic board—whose interrelationships are central to the user experience. The Power Macintosh G3 products were designed to meet the needs of our customers for performance, flexibility, and expandability through a streamlined development process in which a single logic board design provides a variety of capabilities. This approach simplifies testing, speeding development and increasing system reliability. In addition, the use of greater numbers of industry-standard parts than in previous Apple systems makes Power Macintosh G3 computers even more affordable. Logic board. A computer’s logic board design is the ultimate determinant of its functionality, involving such key features as processor, memory setup (controller and expansion capabilities), graphics support, and storage capabilities. The Power Macintosh G3 series systems use a mini-ATX board, which features, among other innovations, a faster system bus (66 megahertz as opposed to 50 megahertz, with room for further growth as processor speeds continue to increase) to support higher performance. This relatively tiny board, roughly the size of this fact sheet, allows for outstanding expandability—for example, by permitting the hard disk drive to fit within the base of the desktop model, so that it can also easily accommodate a Zip drive. In addition, it features an easy-to-access audio/video card slot that gives Apple the flexibility of offering a single product that provides a range of communications and multimedia capabilities to meet the varying needs of our users. For example, the Power Macintosh G3 is currently available in two versions: one system with stereo-quality audio capabilities and the other a full-featured, multimedia-optimized computer that also provides video-input/output capabilities and is suitable for content authoring. Enclosure. The board’s efficient use of space is also the key to our ability to use the same logic board in two very different physical enclosures. The Power Macintosh G3 series is currently available in a sleek, low-lying desktop model and a convenient, space-saving minitower. Both enclosures reflect Apple’s tradition of user-centered design—offering exceptionally easy access to the board for expansion and servicing. System software. These systems run Apple’s latest and already outstandingly successful system software: Mac OS 8. Providing significant enhancements in the areas of user interface (including true multitasking and virtual memory capabilities) and Internet access and publishing (including integrated support for Java, and software tools that let users easily publish information on the Internet or a local intranet), Mac OS 8 has quickly gained a reputation for providing the industry’s best overall user experience. http://www.apple.com Graphics controller and video expansion 3 PCI slots Audio/Video card slot In addition, the logic board design of the Power Macintosh G3 systems exhibits the following characteristics in these vital areas: Processor. These computers use the innovative, next-generation PowerPC G3 processor, which was designed specifically to provide increased power at affordable cost. It does so through three major innovations: a state-of-the-art 0.25-micron manufacturing process, optimization for the Mac OS, and a new, more efficient approach to level 2 cache known as backside cache. Backside cache boosts performance far above the performance of earlier systems—even those with higher clock speeds—by positioning the cache directly on the processor module and making it directly accessible through a faster, dedicated bus. This bus can run at varying speeds in proportion to the processor speed. So, for example, the Power Macintosh G3 system based on a 266-megahertz PowerPC G3 processor features a 133-megahertz dedicated backside bus—more than twice the speed of the system bus. Memory. The memory controller I/O: graphics, 2 serial, and PCI bridge support the Power Ethernet, ADB, SCSI Macintosh G3 systems’ three memory slots and three PCI expansion slots. These systems make use of a faster, industry-standard memory, SDRAM, I/O ASIC which adds to both their economy and their availability. Memory Graphics controller. The controller and PCI bridge Power Macintosh G3 series systems incorporate an ATI RAGE II+ graphics controller, which not only provides outstanding performance, but also enables far greater expandability (2MB to 6MB) than was previously available, so users can choose the level of graphics performance that PowerPC G3 meets their needs. processor with I/O ASIC. This component backside cache 3 DIMM (RAM) slots provides support for the input and output of all standard Macintosh graphics functionality and Apple Desktop Bus (ADB), serial, and SCSI connections. It also efficiently incorporates 10BASE-T Ethernet, to meet users’ growing demands for easy and immediate access to high-performance networking capabilities. The “why” The motivation behind this innovative product design is the same simple idea that drives all of Apple’s efforts: bringing truly outstanding computing performance to our users more and more easily and economically. So when you’re looking for the computer that’s just right for you, don’t just look at the numbers (things such as processor speed and hard disk capacity). Because today, it’s more important than ever to consider overall product design. Apple Computer, Inc. 1 Infinite Loop Cupertino, CA 95014 (408) 996-1010 www.apple.com © 1997 Apple Computer, Inc. All rights reserved. Apple, the Apple logo, Mac, Macintosh, and Power Macintosh are trademarks of Apple Computer, Inc., registered in the U.S.A. and other countries. Java is a trademark or registered trademark of Sun Microsystems, Inc. in the U.S.A. and other countries. PowerPC is a trademark of International Business Machines Corporation, used under license therefrom. Other product and company names mentioned herein may be trademarks of their respective companies. November 1997. Product specifications are subject to change without notice. Printed in the U.S.A. L02589A The PowerPC G3 Processor: Taking the Macintosh to the Next Level A little background Nearly six years ago, Apple, IBM, and Motorola joined forces to create a new processor technology that would bring the performance advantages of the RISC (Reduced Instruction Set Computing) architecture—at that time limited to costly workstations—to personal computers. The result of this initiative was the development of PowerPC processor technology, which Apple debuted in 1994 with the introduction of the Power Macintosh line. The initial Power Macintosh models were based on the first implementation of the new chip technology: the PowerPC 601, which was intended for use in high-end personal computers. In early 1995, Apple introduced products based on the PowerPC processor technology’s second generation—the PowerPC 603, which utilized a chip design optimized for use in low-end to midrange desktop systems and portables. This was quickly followed by the introduction of the second-generation high-end PowerPC processor: the PowerPC 604. Since then, both IBM and Motorola have made enhancements to the PowerPC 603 and 604 (now the 603e and 604e), and these enhanced chips have been used in subsequent Apple systems. The PowerPC G3 performance story PowerPC Processor Roadmap A roadmap for the development of PowerPC processor technology, from its inception to the end of the century. PowerPC G3 optimization features include the following: • Addition of a second integer ALU (arithmetic and logic unit), which allows the processor to execute two successive integer operations in parallel • The ability to fetch four instructions per cycle from the cache • A “hardware tablewalk” feature, which allows the CPU to access virtual page tables directly • Adoption of a dynamic prediction method for improving the efficiency of branch handling The emergence of the PowerPC G3 processor marks the third phase in the development of this advanced processor technology. Touted by Microprocessor Report (February 17, 1997) as “an outstanding combination of high performance and low cost,” the PowerPC G3 builds on many of the features pioneered by the PowerPC 603 and 604. However, this innovative chip differs from the earlier implementations of PowerPC processor technology in several significant ways: • The PowerPC G3 is the first processor specifically optimized for the Mac OS. • It incorporates an innovative backside cache design that speeds access to level 2 cache. • It contains large (32K) on-chip level 1 data and instruction caches, for a total of 64K level 1 cache. • It’s produced using an industry-leading 0.25-micron manufacturing process. These four innovations share one very important characteristic: the capacity to provide significant performance gains. Following is a more detailed breakdown of the advantages offered by each. Mac OS optimization. Because the earlier PowerPC processor models were essentially developed simultaneously with Apple’s Power Macintosh line, there was no opportunity to optimize these chips’ performance for running Mac OS–based applications. But that was more than half a decade ago. Today, the Power Macintosh line is well established and Mac OS–based software abounds, placing the developers of the PowerPC G3 processor in the unique position of having the luxury to consider—and optimize—chip design in light of actual software performance. http://www.apple.com Learning to look beyond megahertz The performance enhancements of the PowerPC G3 processor significantly reduce the usefulness of clock speed in attempting to compare computer performance. Apple systems based on this processor consistently outperform systems with higher clock speeds—in fact, they also outperform Pentium II–based systems. Some examples follow. • A 250-megahertz Macintosh PowerBook G3 is faster than a 266-megahertz Pentium II desktop.* • A 233-megahertz Power Macintosh G3 is faster than the Power Macintosh 6500/300 and the Power Macintosh 8600/300.** • A 266-megahertz Power Macintosh G3 provides performance that is on average 30 percent faster than that of a comparable 266-megahertz Pentium II system.* All of which means that when you’re looking for the computer that’s right for you, it’s more important than ever to consider overall product design—megahertz alone does not tell the whole story. * Based on Apple internal tests running 15 separate Adobe Photoshop filters. ** Based on Apple internal testing using MacBench 4.0 processor performance scores. Actual performance on applications may vary. MacBench is a subsystem-level benchmark that measures the relative performance of Mac OS–based systems. Level 2 backside cache. By far the biggest boost to performance that the PowerPC G3 offers can be credited to its incorporation of an approach to level 2 cache memory known as backside cache. This approach effectively bypasses limitations on the speed at which transactions between the processor and the level 2 cache can occur. Earlier PowerPC processors used the system bus to access both the level 2 cache memory and the main memory, which could result in conflicts. For example, under the previous approach, at processor clock speeds above 200 megahertz, the CPU would often stall as it waited for data to arrive from the level 2 cache. To prevent such slowdowns, the PowerPC G3 processor features a new dedicated bus that handles only the CPU/cache transactions. This bus can operate at higher speeds than the system bus—speeds that relate incrementally to the clock speed of the processor. This enables the more effective use of level 2 cache, because even the relatively large amounts of data it can store can be accessed by the processor rapidly and efficiently. In fact, as clock speeds increase, so does the performance value offered by the backside cache design. Large level 1 (on-chip) data and instruction caches. In comparison with the 8K on-chip caches incorporated into the design of the original PowerPC 603, the PowerPC G3 processor includes 32K of instruction cache and 32K of data cache, for a total of 64K level 1 cache. These relatively large on-chip caches support—and add to—the overall performance gains offered by the PowerPC G3 processor. New manufacturing process. Finally, the industry-leading 0.25-micron process used to produce the PowerPC G3 processors does more than merely boost performance; it also enables the creation of smaller, cooler processors with extremely low power requirements. In essence, it represents a brand-new approach to chip design, one that brings workstation-class performance not only to desktop systems, but even to notebook computers—using the same processor. Benefits to the user As the PowerPC G3 processor becomes central to Apple system designs, increasing numbers of Macintosh users will enjoy these benefits: • Significant performance gains, which enhance the power available to handle such resource-intensive tasks as video editing, Internet authoring, and Processor card Windows emulation through software alone, rather than requiring more costly and complex hardware add-ons Level 2 Cache CPU • Even more affordable higher performance—in particular, providing a radical I improvement in the value proposition offered by our entry-level and midrange Dedicated processor bus System bus systems RAM • The ability to purchase a notebook system that can truly offer the performance of a desktop computer IIIIIIIIIIIIIIIIIIIIIIIIIII PCI slots The “why” Memory bus Backside Cache The backside cache design allows the CPU to access the cache directly at speeds that vary proportionally to the CPU speed The rationale for Apple’s introduction of the PowerPC G3 processor is strikingly simple. It’s the same concept that led us to embark on the PowerPC effort initially: At Apple, we are committed to developing and supporting processor technology that can offer our entire range of users truly outstanding performance—so they can spend less time dealing with the mechanics of computing and more time exploring their creative potential. Apple Computer, Inc. 1 Infinite Loop Cupertino, CA 95014 (408) 996-1010 www.apple.com © 1997 Apple Computer, Inc. All rights reserved. Apple, the Apple logo, Mac, Macintosh, PowerBook, and Power Macintosh are trademarks of Apple Computer, Inc., registered in the U.S.A. and other countries. Adobe is a trademark of Adobe Systems Incorporated. PowerPC is a trademark of International Business Machines Corporation, used under license therefrom. November 1997. Product specifications are subject to change without notice. Printed in the U.S.A. L02588A K Service Source Specifications Power Macintosh G3 Desktop Specifications Introduction - 1 Introduction Specifications information for this product can be found in this chapter and also in the Spec Database, which you can access in one of three ways: — Launch it directly by double-clicking the Apple Spec Database runtime alias at the top level of the Main Service Source CD. — Select "Apple Spec Database" from the Service Source drop-down main menu. — Click the Acrobat toolbar icon for the database, which is near the right end of the toolbar with the letters "SP." Specifications Processor - 2 Processor CPU Processor Bus PowerPC G3 RISC microprocessor running at 233, 266, or 300 MHz Built-in FPU Original logic board requires system software version 8.0 or later with appropriate Enabler version; Version 2 of the logic board requires system software version 8.1 or later with system enabler 777 64-bit wide, 66 MHz, supporting split address and data tenures Specifications Memory - 3 Memory SDRAM 32 MB standard, expandable to expandable to 384 MB Uses 168-pin, 64-bit, 70 ns or faster 3.3 V unbuffered synchronous dynamic access memory (SDRAM) DIMMs (1K, 2K, or 4K refresh rate) Cache Supports 512K Level 2 cache module, 3.3 V with SRAM on 178pin card ROM 4 MB ROM on 160-pin DIMM, 64-bit ROM data bus width Video RAM 2 MB expandable to 4 MB or 6 MB using 32-bit wide, 144-pin, 3.3 V, fast-paged SGRAM SO-DIMM connector with 70 ns RAM access time or faster Specifications I/O Interfaces - 4 I/O Interfaces SCSI Port External SCSI connector is 25-pin D-type connector; supports up to seven SCSI devices. Serial Port Two serial ports support AppleTalk and GeoPort serial protocols; accepts 8-pin or 9-pin plugs ADB Port One Apple Desktop Bus port for a keyboard, mouse, etc. Ethernet Port 10Base-T, RJ-45 Specifications Expansion I/O Interfaces - 5 Three PCI expansion slots, compatible with all PCI 2.0 specification-compliant cards with the addition of Mac OSspecific software driver (not NuBus compatible) Accepts three PCI cards (6.88" or 12.283"), or three 15 W cards, or two 25 W cards Two SCSI expansion bays for 3.5" devices. 50-pin connectors for internal SCSI devices. Specifications I/O Devices - 6 I/O Devices Keyboard AppleDesign Keyboard Mouse ADB Mouse II Microphone Apple PlainTalk microphone standard Specifications Disk Storage - 7 Disk Storage Hard Drive 4 GB or 6 GB internal ATA hard drive standard; 4 GB or 9 GB Ultra Wide hard drive optional Floppy Drive One Apple SuperDrive 1.4 MB floppy drive CD-ROM or DVD-ROM Drive One internal 24x ATAPI CD-ROM drive or one internal 2x ATAPI DVD-ROM drive Zip Drive Optional 100 MB SCSI Iomega or ATAPI Zip drive (depending on the version of the logic board) Specifications Video - 8 Video Video Display Modes Graphics acceleration Built-in monitor port supports: • 640 x 480, 800 x 600, 832 x 624 at 32 bits per pixel • 1024 x 768, 1152 x 870, 1280 x 1024, 1600 x 1200 at 16 bits per pixel Built-in graphics controller, 2D and 3D hardware graphics acceleration of QuickDraw graphics Specifications I/O Cards - 9 I/O Cards PERCH Slot Sound Modem Slot The PERCH slot connector is a 182-pin microchannel connector that supports the Apple Audio or Audio and Video I/O cards. Note: The PERCH slot does not accept PCI cards. Rear jack for stereophonic speakers Supports 16 bits/channel stereo input and output External 1/8" jack for sound in Sample rates of 11.025, or 22.050, or 44.100 kHz 112-pin connector to accept optional fax/modem card Note: Does not carry PCI signals Specifications Electrical - 10 Electrical Line Voltage 100–130 V or 200–240 V AC, rms, single phase, depending on voltage switch setting Frequency 50–60 Hz Maximum Power 230 W maximum continuous 290 W peak input Specifications Physical - 11 Physical Dimensions Height: Width: Depth: Weight: 6.15 in. (15.6 cm) 14.37 in. (36.5 cm) 16.93 in. (43.0 cm) 22 lb. (9.97 kg); weight varies depending on devices installed Specifications Environmental - 12 Environmental Operating Temperature 50 to 104° F (10 to 40° C) Storage Temperature -40 to 116° F (-40 to 47° C) Relative Humidity 5–95% noncondensing Maximum Altitude 10,000 ft. (3,048 m) Power Macintosh G3 Series The Power Macintosh G3 series features exciting Apple innovations in processor technology and system architecture that significantly increase both performance and flexibility, to enhance your productivity and encourage your creativity. Like the processors that power them, these systems are designed to turn your ideal vision of powerful computing into an affordable reality. Built on the PowerPC G3—the next generation of PowerPC technology, and the first processor optimized for the Mac OS—these computers dramatically alter the price/performance equation. And by incorporating a new approach to cache memory, the Power Macintosh G3 models can provide nearly twice the performance of systems based on earlier PowerPC processors, an improvement that far exceeds the increases in clock speed alone. In addition, these computers feature a new logic board design with a faster system bus, to maximize their power—and yours. Power Macintosh G3 systems include the latest in communications and multimedia features: high-quality audio and video input/output, Ethernet networking, and a communications slot for adding a modem.* So it’s easy to work collaboratively with colleagues, whether they’re just across the hall or clear across the country. Finally, to complement their hardware innovations, these advanced computers run Mac OS 8.1—the latest system software from Apple—which combines an appealing new look with even more exciting new capabilities. Factor in these systems’ three PCI expansion slots for further enhancing functionality, and you’ll reach only one conclusion: The Power Macintosh G3 series offers an outstanding value—now and in the future. Desktop and Minitower Computers Features Next-generation PowerPC processor technology • Introduces the first processor specifically optimized for the Mac OS—the PowerPC G3, running at 233, 266, or 300 MHz • Uses a leading-edge, 0.25-micron process, for a smaller, lower-power chip design • Features an innovative backside cache architecture to increase performance Innovative system architecture • Debuts a new, more efficient logic board design • Increases the system bus speed to maximize processor performance gains High-quality communications and multimedia support • Makes communications fast and easy through built-in Ethernet networking • Offers 16-bit stereo audio input/output and high-quality video input/output* • Includes a 24x-speed (maximum) CD-ROM drive • Is available with a Zip drive* Outstanding flexibility • Provides three standard 12-inch PCI slots for easy expansion of system functionality (open slots vary by configuration) • Includes expansion bays for additional storage devices (varies by configuration) • Speeds system expansion and servicing through an exceptionally easy-to-access design Communications package* • Includes an internal 56-Kbps data/14.4-Kbps fax modem** plus Microsoft Internet Explorer, Netscape Navigator, America Online, SurfWatch, Adobe PageMill, FAXstf, Now Up-to-Date and Contact, Jack Nicklaus 4, Master of Orion II, and Microsoft Bookshelf 98 Power Macintosh Performance Comparisons Based on MacBench Processor Scores*** 1050 G3 at 300 878 G3 at 266 774 G3 at 233 733 8600/300 6500/300 7300/200 432 358 *Available in some configurations; see Configurations chart for product details. **Data speeds up to 56 Kbps, fax speeds up to 14.4 Kbps. Actual download speeds vary with line conditions and your Internet service provider’s modem capabilities. FCC regulations limit ISP transmission speeds to 53 Kbps in the U.S. Note that only one serial port is available in systems with the internal modem installed. ***Based on Apple internal testing using MacBench 4.0 processor performance scores. Actual performance on applications will vary. MacBench is a subsystem-level benchmark that measures the relative performance of Mac OS–based systems. Power Macintosh G3 Series Technical Specifications Processor and memory • 233-, 266-, or 300-MHz PowerPC G3 processor • 512K or 1MB backside level 2 cache on processor module; 117-, 133-, or 150-MHz dedicated 64-bit backside bus • 66-MHz system bus • Integrated floating-point unit and 64K on-chip level 1 cache (32K for data and 32K for instruction) • At least 32MB of SDRAM (3.3-volt, unbuffered, 64-bit wide, 168-pin, running at more than 100 MHz, 10-nanosecond cycle time); three DIMM slots support up to 384MB • 64-bit memory bus Storage • One or two internal IDE or Ultra/Wide SCSI hard disk drives • Internal high-capacity floppy disk drive — Accepts high-density 1.44MB disks and 800K disks — Reads, writes, and formats Mac OS, Windows, MS-DOS, OS/2, and ProDOS disks • Internal 24x-speed (maximum) ATAPI CD-ROM drive • Optional internal ATAPI DVD-ROM drive supports CD-ROMs at 20x speed (maximum) or DVD-ROMs at 2x speed (maximum) • Internal 100MB Zip drive* • Expansion bays for additional storage devices — Desktop models: One or two 3.5-inch drive bays — Minitower models: One or two 5.25-inch drive bays Video capabilities* • 24-bit video input — Support for NTSC, PAL, and SECAM — Up to 320- by 240-pixel capture at up to 30 frames per second — Maximum capture size of 640 by 480 pixels • 24-bit video output — High sample rate on output signal eliminates need for external and analog filtering — Support for NTSC and PAL Interfaces • Three 12-inch PCI expansion slots compatible with PCI 2.1–compliant cards (open slots vary by configuration) • Two high-speed DMA serial (RS-232/RS-422) ports compatible with LocalTalk cables • Built-in 10BASE-T Ethernet connector; 10/100BASE-T Fast Ethernet PCI card* • Internal and external SCSI buses (up to 5 MBps) • Apple Desktop Bus (ADB) expansion port • DB-15 connector for monitor • Communications slot for modem card* • Minijacks for 16-bit stereo audio input/output; up to 44.1-kHz sampling rate • Composite and S-video connectors for video input/output* ADB power requirements • Maximum current draw for all devices: 500 mA (maximum of three ADB devices recommended) • Mouse draws 10 mA • Keyboard draws 25 to 80 mA Graphics support • Built-in 64-bit graphics and multimedia accelerator chip • 2MB or 6MB of SGRAM video memory; supports up to 6MB • 128-bit 2D/3D graphics PCI card with 8MB of EDO VRAM for accelerated high-resolution graphics and connection of a second monitor* Electrical requirements and agency approvals • Line voltage: 100 to 125 V AC or 200 to 240 V AC, RMS single phase, automatically configured • Frequency: 50 to 60 Hz, single phase • Power: 230W maximum for desktop, 240W maximum for minitower; not including display • EPA Energy Star and Blue Angel compliant (desktop models only) Environmental requirements • Operating temperature: 50° to 104° F (10° to 40° C) • Storage temperature: –40° to 116° F (–40° to 47° C) • Relative humidity: 5% to 95% noncondensing • Maximum altitude: 10,000 ft. (3,048 m) *Available in some configurations; see Configurations chart for product details. **May differ based on configuration. Desktop and Minitower Computers Power Macintosh G3 Series Desktop and Minitower Computers Ordering Information For detailed information about the currently available configurations, see the chart below. All models also include an internal 1.44MB floppy disk drive; keyboard and mouse; Mac OS 8.1 (which includes Internet access software); complete setup, learning, and reference documentation; and limited warranty. Build-to-order (BTO) options These systems can also be ordered through the online Apple Store, which allows you to customconfigure your computer in such areas as processor speed, RAM, hard disk drive, Zip drive, DVD-ROM drive, graphics support, audio/video capabilities, high-speed Ethernet, FireWire, and modem. For more information For more information about these products, or to find out where to buy Apple products—through a reseller or from the Apple Store—visit www.apple.com or call 1-800-538-9696. Configurations Order no. M6141LL/A M6202LL/A Power Macintosh G3 desktop computers Processor speed Memory (SDRAM) Backside level 2 cache Backside bus speed System bus speed Hard disk drive CD-ROM drive Zip drive Graphics support Audio/Video capabilities Ethernet Communications package (modem and software) 233 MHz 32MB; supports up to 384MB 512K 117 MHz 66 MHz 4GB IDE drive 24x speed (maximum) — 2MB SGRAM Audio input/output Built-in 10BASE-T — 266 MHz 32MB; supports up to 384MB 512K 133 MHz 66 MHz 4GB IDE drive 24x speed (maximum) Yes 2MB SGRAM Audio input/output Built-in 10BASE-T — Order no. M6431LL/A M6142LL/A M6459LL/A Processor speed Memory (SDRAM) Backside level 2 cache Backside bus speed System bus speed Hard disk drive CD-ROM drive Zip drive Graphics support 233 MHz 32MB; supports up to 384MB 512K 117 MHz 66 MHz 4GB IDE drive 24x speed (maximum) — 2MB SGRAM 266 MHz 32MB; supports up to 384MB 512K 133 MHz 66 MHz 6GB IDE drive 24x speed (maximum) Yes 2MB SGRAM Audio/Video capabilities Ethernet Communications package (modem and software) Audio input/output Built-in 10BASE-T Yes Audio/Video input/output Built-in 10BASE-T — 266 MHz 128MB; supports up to 384MB 512K 133MHz 66 MHz 4GB Ultra/Wide SCSI drive and PCI card 24x speed (maximum) — 6MB SGRAM; 8MB EDO VRAM on 2D/3D graphics PCI card Audio input/output Built-in 10BASE-T; 10/100BASE-T PCI card — Order no. M6572LL/A M6494LL/A Processor speed Memory (SDRAM) 300 MHz 64MB (one 64MB DIMM); supports up to 384MB 1MB 150 MHz 66 MHz 4GB Ultra/Wide SCSI drive and PCI card 24x speed (maximum) — 6MB SGRAM 300 MHz 128MB (one 128MB DIMM); supports up to 384MB 1MB 150 MHz 66 MHz Two 4GB Ultra/Wide SCSI drives and PCI card 24x speed (maximum) — 6MB SGRAM; 8MB EDO VRAM on 2D/3D graphics PCI card Audio input/output Built-in 10BASE-T; 10/100BASE-T PCI card — Power Macintosh G3 minitower computers Backside level 2 cache Backside bus speed System bus speed Hard disk drive CD-ROM drive Zip drive Graphics support Audio/Video capabilities Ethernet Communications package (modem and software) Apple Computer, Inc. 1 Infinite Loop Cupertino, CA 95014 (408) 996-1010 www.apple.com Audio input/output Built-in 10BASE-T — © 1998 Apple Computer, Inc. All rights reserved. Apple, the Apple logo, LocalTalk, Mac, Macintosh, Power Macintosh, and ProDOS are trademarks of Apple Computer, Inc., registered in the U.S.A. and other countries. The Apple Store is a trademark of Apple Computer, Inc. PowerPC is a trademark of International Business Machines Corporation, used under license therefrom. Other product and company names mentioned herein may be trademarks of their respective companies. Mention of non-Apple products is for informational purposes only and constitutes neither an endorsement nor a recommendation. Apple assumes no responsibility with regard to the selection, performance, or use of these products. All understandings, agreements, or warranties, if any, take place directly between the vendors and the prospective users. Product specifications are subject to change without notice. May 1998 L02515F K Service Source Take Apart Power Macintosh G3 Desktop Take Apart Top Housing Top Housing - 1 Top Housing No preliminary steps are required before you begin this procedure. Note: The top housing covers the top, front, and left and right sides of the computer. Take Apart Top Housing - 2 1 Left Tab Right Tab Press the two tabs at the front corners of the top housing to release the top housing from the bottom chassis. Take Apart Top Housing - 3 2 Pull the top housing forward about 1 to 2 inches and lift straight up to remove the top housing from the computer. Take Apart Bezels - 4 Bezels Before you begin, remove the top housing. Blank Bezel CD-ROM Bezel Note: As you face the computer, the bezels are in the middle of the top housing’s front panel. Depending on the unit, you may either see a blank bezel or a Zip drive bezel in the middle of the front panel, and you may have either a CD-ROM or a DVD-ROM bezel. Take Apart Bezels - 5 1 Tab From the underside of the top housing, pull out on the moon-shaped opening at the bottom of the bezel to release the tab. Lift up the bezel to remove it from the top housing. Take Apart Chassis Latch - 6 Chassis Latch Before you begin, remove the top housing. Note: The chassis latches mount in the internal chassis and secure the internal chassis to the external chassis frame. Take Apart Chassis Latch - 7 1 Tab Use a screwdriver to push out the tab indicated in the illustration. Slide the latch forward and lift it from the chassis. Take Apart CD-ROM or DVD-ROM Drive - 8 CD-ROM or DVD-ROM Drive Before you begin: • Remove top housing • Remove CD-ROM or DVDROM EMI shield Note: Special cable routing instructions for Master/ Slave IDE configurations can be found at the end of this section. Replacement Note: Be sure the EMI shield doesn’t interfere with the CD-ROM drive opening. Take Apart CD-ROM or DVD-ROM Drive - 9 1 Disconnect the SCSI data cable, power cable, and CD audio cable from the back of the CD-ROM or DVD-ROM drive. Take Apart CD-ROM or DVD-ROM Drive - 1 0 2 Pull up the release tab and slide the CD-ROM or DVD-ROM forward to remove it from the internal chassis. Note: Be sure to remove the CD-ROM or DVD-ROM drive from its carrier before returning the drive to Apple. Note: If you have an ultra wide hard drive installed in the unit, you must have a leaf gasket installed in between the right side of the CD-ROM drive and the internal drive chassis. Take Apart CD-ROM or DVD-ROM Drive - 1 1 Replacement Note: When replacing the CD-ROM drive, you must install two or more poron bumpers (p/n 922-3554) at the rear of the CD-ROM carrier (i.e., where the carrier meets the metal chassis tabs when installed). Start by installing one bumper on each side of the carrier and test the CD eject function. If the CD exhibits ejection problems, you will need to install an additional bumper on top of each of the bumpers already in place. You may have to install up to three bumpers on each side to correct the problem, but be sure to test the CD eject function before installing additional bumpers. Take Apart CD-ROM or DVD-ROM Drive - 1 2 Master/Slave Cable Routing Some G3 Desktop logic boards support master and slave IDE configurations, allowing you to connect two devices to a single IDE channel. These boards ship with a special split IDE cable that also supports master and slave configurations. The graphic at left shows how the split master/slave IDE cable connects to the devices in the unit. Take Apart CD-ROM or DVD-ROM Drive - 1 3 The graphic at left shows how the split master/slave IDE cable connects to the logic board. The same connector is used for both the regular IDE and the master/slave IDE cables. Take Apart Zip Drive - 1 4 Zip Drive Before you begin: • Remove top housing • Remove Zip and CD/DVD EMI shield Note: Special cable routing instructions for Master/ Slave IDE configurations can be found at the end of this section. Replacement Note: Be sure you install the EMI shield carefully so that it doesn’t interfere with the CD-ROM drive opening. Take Apart Zip Drive - 1 5 1 Disconnect the cable from the back of the Zip drive. 2 Push up on the tab underneath the zip drive and slide the zip drive out of the chassis. Take Apart Zip Drive - 1 6 Master/Slave Cable Routing Some G3 Desktop logic boards support master and slave IDE configurations, allowing you to connect two devices to a single IDE channel. These boards ship with a special split IDE cable that also supports master and slave configurations. The graphic at left shows how the split master/slave IDE cable connects to the devices in the unit. Take Apart Zip Drive - 1 7 The graphic at left shows how the split master/slave IDE cable connects to the logic board. The same connector is used for both the regular IDE and the master/slave IDE cables. Take Apart Floppy Drive - 1 8 Floppy Drive Before you begin, remove the top housing. Note: As you face the computer, the floppy drive is in the top right drive bay. Take Apart Floppy Drive - 1 9 1 Remove the blank shield and the floppy drive shield from the front of the unit. Take Apart Floppy Drive - 2 0 2 Flip open the chassis support foot. Take Apart Floppy Drive - 2 1 3 Floppy Drive Cable Floppy Drive Disconnect the floppy drive cable from the back of the floppy drive. Take Apart Floppy Drive - 2 2 4 Drive Rails Floppy Drive Pull out on the plastic drive rails that secure the floppy drive to the drive chassis and push back the drive to release it. Take Apart Floppy Drive - 2 3 Replacement Note: When replacing the floppy drive, you must install an EMI gasket (p/n 922-1895). Peel off the adhesive and attach the gasket in the center of the drive’s top surface, with the “V” of the gasket pointing at the front edge of the drive. Take Apart Drive Chassis - 2 4 Drive Chassis Before you begin, remove the top housing. Take Apart Drive Chassis - 2 5 1 Push in on the two tabs securing the drive bracket to the internal chassis and slide the drive bracket out to remove it. Take Apart Open/Remove Card Retainer Baffle - 2 6 Open/Remove Card Retainer Baffle Before you begin, remove the top housing. Take Apart Open/Remove Card Retainer Baffle - 2 7 To Open the Card Retainer Baffle: 1 With one hand lift up on the baffle while, with the other hand, pushing in on the tab that secures the baffle to the internal chassis. This procedure opens the card retainer baffle. Take Apart Open/Remove Card Retainer Baffle - 2 8 To Remove the Card Retainer Baffle: 2 With the baffle slightly raised, push in on the top tab to release it from the chassis frame and then pull the baffle out and away from the chassis to free the bottom tab. Take Apart Open Internal Chassis - 2 9 Open Internal Chassis Before you begin, open the card retainer baffle. 1 Release the chassis latches. Take Apart Open Internal Chassis - 3 0 2 Flip out the chassis support foot. Take Apart Open Internal Chassis - 3 1 3 Swing open the internal chassis that contains the power supply. Be sure the internal chassis is perpendicular to the bottom chassis and fully supported by the chassis support foot. Take Apart Open Internal Chassis - 3 2 4 Chassis Support Arm To secure the internal chassis in the up position, flip down the chassis support arm. Make sure the tab on the bottom of the support arm is securely fastened in the hole provided in the bottom chassis. Warning: To be safe, never work on the computer with the internal chassis in the up position unless the chassis support arm is down and securely fastened. Tab Take Apart Hard Drive - 3 3 Hard Drive Before you begin, do the following: • Remove top housing • Open Card Retainer Baffle • Open internal chassis Note: The hard drive is in the bottom of the chassis, in front of the logic board. Take Apart Hard Drive - 3 4 1 Disconnect the cables from the hard drive. Take Apart Hard Drive - 3 5 2 Pull up the release tab at the front of the hard drive and push the back of the hard drive to remove it from the drive chassis. Note: For information on removing the hard drive from its carrier and returning drives, cables, and carriers to Apple, refer to Additional Procedures in the Hard Drives manual. Take Apart Drive Rails - 3 6 Drive Rails Before you begin, do the following: • Remove top housing • Remove CD-ROM or DVDROM drive • Remove Zip drive • Open Card Retainer Baffle • Open internal chassis • Remove hard drive Note: The drive rails attach to the chassis underneath the CD-ROM or DVD-ROM drive, Zip drive, and hard drive. Take Apart Drive Rails - 3 7 1 Use a screwdriver to push out the tab indicated in the illustration. 2 Slide the drive rail either forward or backward (depending on which way the tabs are facing) and lift it from the chassis. Tab Take Apart Power Supply - 3 8 Power Supply Before you begin • Remove top housing • Open Card Retainer Baffle • Open internal chassis Note: As you face the computer, the power supply is in the back right corner. IMPORTANT: To avoid damaging the computer, be sure the voltage switch on the back of the power supply is set correctly (115V in the U.S.)when you replace the power supply. Take Apart Power Supply - 3 9 1 Disconnect the power supply cable from the CD-ROM or DVD-ROM drive. 2 Open the internal chassis. Take Apart Power Supply - 4 0 3 Disconnect the power supply cable from the hard drive and the logic board. Take Apart Screw Screw Power Supply - 4 1 4 From the back of the computer, remove the two screws that secure the power supply to the chassis. Take Apart Power Supply - 4 2 5 Chassis Support Arm Tab Release the chassis support arm and swing down the internal chassis. Take Apart Power Supply - 4 3 6 Remove the screw that secures the power supply to the bottom of the internal chassis Take Apart Power Supply - 4 4 7 Slide the power supply forward and pull it out of the computer. You will need to feed the power supply cables that connect to the logic board up through the hole in the chassis. IMPORTANT: Make sure the switch on the back of the power supply is set to the correct voltage (115V in the U.S.). (Refer to the international voltage chart in the Basics chapter under the topic “Voltage Switch” for more information.) The Take Apart Power Supply - 4 5 switch is accessible through the computer’s rear panel when the power supply is installed. Replacement Note: There are two metal tabs on the back of the metal chassis and one metal tab on the bottom of the chassis that lock into the power supply. When replacing the power supply, slide it back until it locks into place. Take Apart Speaker - 4 6 Speaker Before you begin, remove the top housing. Note: As you face the computer, the speaker is in the front left corner of the bottom chassis. 1 Swing open the internal chassis. Take Apart Speaker - 4 7 2 Screw Screw Remove the two Torx screws that secure the speaker to the metal chassis. Take Apart Speaker Cable Speaker - 4 8 Latch 3 Disconnect the speaker cable from the logic board. 4 Press the latch holding the speaker to the chassis and lift the speaker out of the computer. Take Apart Power Actuator - 4 9 Power Actuator Before you begin, remove the top housing. Note: As you face the computer, the power actuator is in the front left corner of the bottom chassis (directly beneath the speaker). Take Apart Power Actuator - 5 0 1 Tab Power Actuator Push in the tab that secures the power actuator to the chassis and push the power actuator out of the computer. Take Apart Processor Module - 5 1 Processor Module Before you begin, do the following: • Remove top housing • Open Card Retainer Baffle • Open internal chassis Take Apart Processor Module - 5 2 1 Remove the screw that holds the processor module wire to the logic board. Replacement Note: The processor module wire attaches to the top of the logic board (not underneath). When screwing down the wire, be careful not to damage the capacitor that is next to the screw hole. Use a manual screw driver to avoid damaging the capacitor. Take Apart Processor Module - 5 3 Warning: The heat sink may be hot to the touch. 2 While pressing down on the top of the clip that secures the heatsink, use a small flatblade screwdriver to lift up on the front tab of the clip to release it. Take Apart Processor Module - 5 4 3 Lift up the clip and remove it from heatsink. Take Apart Processor Module - 5 5 4 Lift up the heatsink to remove it from the processor module. Take Apart Processor Module - 5 6 5 Lift the metal lever at the left of the processor module. Take Apart Processor Module - 5 7 6 Pick up the processor module by the edges and gently lift straight up to remove it. Be careful not to bend the pins underneath the module. IMPORTANT: If you are only replacing the processor module, stop here. If, however, you are removing the processor module in order to replace the logic board, continue on to the next page. Replacement Note: Don’t force the processor module. Take Apart Processor Module - 5 8 7 Remove the warranty sticker and red jumper block located next to the battery if replacing the logic board only. IMPORTANT: When replacing the processor module, you must change the processor jumper block and warranty sticker to be compatible with the processor module you are installing. Failure to install the jumper block properly will result in a unit that does not power on. See the instructions on the following page. Take Apart Processor Module - 5 9 8 Processor Jumper Block Pin1 Pin1 Pin1 233 MHz 266 MHz 300 MHz Black Red White Battery The graphic at left shows the proper installation for the processor module jumper. Depending on the computer’s processor speed, you will either install a red jumper (233 MHz), a white jumper (266 MHz), or a black jumper (300 MHz). Be sure to cover the pins as shown and to install the jumper block with the gold connector pins facing down towards the board. Take Apart Processor Module - 6 0 Replacement Note: Position the processor module evenly over the processor module slot and make sure the card is seated evenly. Press down gently on the processor module to install it. Never force the module into place or you may damage the gold connector pins on the underside. Flip down the metal lever that secures the processor module to the board. Replace the heat sink on top of the processor module. Secure the heat sink by inserting the clip into the slot at the rear of the processor and then swinging the clip down over the heat sink. Press the clip into the front latch to fasten in place. Take Apart Battery - 6 1 Battery Before you begin, do the following: • Remove top housing • Open Card Retainer Baffle • Open internal chassis Note: As you face the computer, the battery is near the front left corner of the logic board. Take Apart Battery - 6 2 1 Use a screwdriver to gently pry up one side of the battery cover. Take Apart Battery - 6 3 2 Lift up the battery to remove it from the logic board. Take Apart PCI Cards - 6 4 PCI Cards Before you begin, do the following: • Remove top housing • Open Card Retainer Baffle • Open internal chassis Note: PCI expansion cards, if present, install perpendicularly to the logic board (and directly behind the I/O audio card) in one of three PCI slots. Note: Take-apart for Ultra Wide and FireWire PCI cards follows this topic. Take Apart PCI Cards - 6 5 1 Remove the screw that secures the PCI card to the back of the chassis. Take Apart PCI Cards - 6 6 2 Grab the corners of the PCI card and pull up the card to remove it. Take Apart Ultra Wide SCSI PCI Card - 6 7 Ultra Wide SCSI PCI Card The ultra wide SCSI card installs like any other PCI card (see the PCI Cards take-apart topic for more information); however, the ultra wide SCSI card must be installed in the first PCI slot (that is, the PCI slot nearest the video card). In addition, the ultra wide SCSI cable must be routed in a very specific manner. The procedure for installing and routing the ultra wide SCSI cable is explained on the following pages. Take Apart Ultra Wide SCSI PCI Card - 6 8 1 Attach the end of the ultra wide SCSI cable that has just one connector to the ultra wide SCSI PCI card. 2 Route the cable along the back edge of the chassis and away from the logic board. If there is an additional hard drive installed in the bottom chassis, the cable will run between the hard drive and the back chassis wall. Take Apart Ultra Wide SCSI PCI Card - 6 9 3 Feed the ultra wide SCSI cable through the first cut out in the drive chassis. Take Apart Ultra Wide SCSI PCI Card - 7 0 4 Attach the very end of the cable that has two connectors to the upper (maybe only) ultra wide hard drive. If a second ultra wide hard drive is installed in the lower bay, connect the second to last ultra wide SCSI cable connector to this lower drive. Take Apart Ultra Wide SCSI PCI Card - 7 1 5 Route the ultra wide SCSI cable on top of the 50-pin SCSI cable and tape them both to the power supply. The ultra wide SCSI cable must be away from the CD-ROM drive, and the floppy cable should be routed on top of the other cables. Note: Be sure to use the Kapton tape that is on the service price list to secure the cables. Take Apart Ultra Wide SCSI PCI Card - 7 2 Note: You must order leaf gaskets to install on the ultra wide hard drive whenever you replace this module. 6 If the ultra wide hard drive is installed in the upper bay, place one leaf gasket on the top front end of the hard drive (as shown here) and place another leaf gasket on the right side of the CDROM or DVD-ROM drive so that it makes contact with the drive and the internal chassis. Take Apart FireWire PCI Card - 7 3 FireWire PCI Card Before you begin, do the following: • Remove top housing • Open Card Retainer Baffle • Open internal chassis Note: The FireWire card comes from the factory installed in the middle PCI slot. Take Apart FireWire PCI Card - 7 4 1 Disconnect the internal FireWire cable from the card. 2 Using a Phillips screwdriver, remove the screw securing the FireWire card to the rear panel and gently lift up on the card to remove it. Take Apart FireWire PCI Card - 7 5 Replacement Note: The following steps explain how to route and reconnect the FireWire cable. 3 After connecting the internal FireWire cable to the card, route the cable along the edge of the logic board. Tuck the cable underneath the corner of the logic board to keep it out of the way. 4 Run the internal FireWire cable through the opening in the drive chassis as shown. Take Apart FireWire PCI Card - 7 6 5 Run the FireWire cable up to meet the drives. Then, connect the very end of the FireWire cable to the power supply cable. 6 Connect the second to last connector on the FireWire cable to the back of the CD-ROM or DVD-ROM drive. Take Apart FireWire PCI Card - 7 7 Note: The graphic at left shows the internal FireWire cable and each of its connectors. Take Apart I/O Card - 7 8 I/O Card Before you begin, do the following: • Remove top housing • Open internal chassis Note: The I/O card installs perpendicularly to the logic board. It’s located under the expansion card cover next to the PCI expansion slots. 1 Remove the two screws that secure the I/O card to the back of the chassis. Take Apart I/O Card - 7 9 2 Grab the corners of the I/O card and pull up the card to remove it. Take Apart Logic Board - 8 0 Logic Board Before you begin, do the following: • Remove top housing • Open Card Retainer Baffle • Open internal chassis • Remove PCI cards (if present) • Remove I/O card • Remove processor module (only if you are replacing the logic board) Note: The logic board is located in the very bottom of the bottom chassis. Take Apart Logic Board - 8 1 1 Swing open the expansion card cover to provide access to the logic board. 2 Disconnect all cables from the logic board. 3 Remove the screw inside the top column support that secures the logic board to the chassis. Take Apart Logic Board - 8 2 4 Remove the screw that attaches the processor module wire to the logic board. Replacement Note: The processor module wire attaches to the top of the logic board ( not underneath). Be careful not to damage the nearby capacitor when screwing down the processor wire. Take Apart Logic Board - 8 3 5 Press down on the two tabs at the front of the logic board and slide the board forward (away from the rear panel) to release it from the tabs. Lift the logic board from the chassis to remove it. IMPORTANT: There is a power supply jumper on the logic board at J28 (near the PCI slots). If the logic board is installed in the PM G3 Minitower, this jumper must cover the pins marked “PS”. If the logic board is installed in the PM G3 Take Apart Logic Board - 8 4 Desktop model, this jumper must cover the pins marked “Mac”. (Replacement logic boards should come preset for the Desktop model.) When replacing the logic board, be sure to check the power supply jumper setting. If this jumper is missing or set incorrectly for the computer model, the computer will not boot up. IMPORTANT: If you are replacing the logic board, you must transfer the processor module and processor jumper from the original logic board to the replacement board. See the take-apart instructions for the “Processor Module” for more information. You must also cover the processor jumper with a new warranty sticker, which comes with the replacement logic board. This sticker must be in place to protect the customer’s product warranty. Note: Before returning the logic board to Apple, remove the processor module, processor jumper and warranty sticker, Take Apart Logic Board - 8 5 DRAM, SGRAM, the I/O card, and any PCI cards (if present). Do NOT remove the voltage regulator or ROM DIMM. Replacement Note: As a final step you must reconnect all cables to the logic board. See the graphic on the following page for more information. Take Apart Logic Board - 8 6 The graphic at left shows how the split master/slave IDE cable connects to the logic board. The same connector is used for both the regular IDE cable and the master/slave IDE cable that connect to the CD-ROM and Zip drives, depending on which one comes with the unit. Take Apart Rear Panel - 8 7 Rear Panel Before you begin, do the following: • Remove top housing • Open Card Retainer Baffle • Open internal chassis • Remove I/O card • Remove PCI cards (if present) • Remove logic board (only to replace rear panel) Note: The rear panel covers the back side of the computer and provides access to all the external connectors. Take Apart Rear Panel - 8 8 1 Lift the rear panel straight up to unhook it from the metal chassis. Once the rear panel is unhooked, you can remove it from the computer. Note: There are tabs on the rear panel that hook into the metal chassis. Replacement Note: To replace the rear panel, you must first follow the procedures for removing the logic board. Instead of fully removing the logic board Take Apart Rear Panel - 8 9 from the chassis, however, just slide it forward about an inch. Once you have the rear panel in place, slide the logic board back toward the rear panel until the board locks into place. Be sure the logic board connectors are lined up properly with the openings in the rear panel. Take Apart Bottom Chassis - 9 0 Bottom Chassis Before you begin, do the following: • Remove the top housing • Open Card Retainer Baffle • Remove PCI cards if present • Remove I/O card • Remove speaker • Remove power supply • Remove power actuator • Remove all drives • Remove chassis latches • Remove drive rails • Remove logic board • Remove rear panel Take Apart Bottom Chassis - 9 1 Note: The bottom chassis is what is left once all other modules have been removed. K Service Source Upgrades Power Macintosh G3 Desktop Upgrades PCI or I/O Cards - 1 PCI or I/O Cards Before you begin, remove the top housing. 1 Expansion Card Cover Open the expansion card cover. Upgrades PCI or I/O Cards - 2 Port Access Cover Screw Port Access Cover Sheet Metal Shield 2 3 Remove the screw that holds the port access cover in place. Pull out the access cover. Note: If you remove all three port access covers, be sure the sheet metal shield remains under the edge of the logic board. Upgrades Port Access Opening PCI or I/O Cards - 3 4 Screw PCI Slots Align the card connector with the expansion slot and press straight down until the connector inserts all the way into the slot. Note: It may be helpful to hold the card slightly away from the port access opening until the card fits into the slot. Note: If the PCI card is a full 12 inches, be sure it fits into one of the three card guides at the front of the computer. PCI Card Guide Upgrades PCI or I/O Cards - 4 Screw 5 6 7 If you meet resistance, pull the card out and try again. To test the connection, pull the card up gently. The card should remain firmly in place. Reinstall the screw to secure the card in place. Upgrades PCI or I/O Cards - 5 8 Expansion Card Cover Close the expansion card cover. Upgrades Expansion Card Cover Memory—DRAM or VRAM - 6 Memory—DRAM or VRAM Release Switches Support Foot Open Chassis Before you begin, remove the top housing. 1 2 To unlock the chassis, move the release switches toward the inside of the computer. Tip the support foot out until it snaps into the locked position. Upgrades Memory—DRAM or VRAM - 7 3 Tab Lift up on the tab to open the chassis. Upgrades Memory—DRAM or VRAM - 8 4 Support Arm Hole in Chassis Floor Swing the chassis up and insert the support arm in the hole. Upgrades Memory—DRAM or VRAM - 9 DRAM DRAM DIMM Note: DIMM shape and components may vary. Ejector DRAM Slot 1 To remove existing DRAM DIMMs to make room for new ones, push down on the ejectors. Upgrades Memory—DRAM or VRAM - 10 2 DRAM DIMM Notches Connectors DRAM Slot Ribs (Inside Slot) Ejector 3 Align DIMM notches with DRAM slot ribs. Note: The DIMM is designed to fit in the slot only one way. With ejectors open, press the DIMM into the slot. Note: Slot may have one or two ejectors. Upgrades Memory—DRAM or VRAM - 11 VRAM SGRAM DIMM Note: SGRAM DIMM shape and components may vary. 1 Video Memory Slot Video Memory Slot Arm To remove existing SGRAM DIMM, spread arms of video memory slot apart slightly. The SGRAM DIMM will pop up. Upgrades Memory—DRAM or VRAM - 12 2 SGRAM DIMM Rib Notch Connectors Video Memory Slot Video Memory Slot Arm 3 Align SGRAM DIMM notches with VRAM slot ribs. Note: SGRAM DIMM fits into slot only one way. Press the SGRAM DIMM into the slot. Note: SGRAM DIMM should be flat and parallel to the logic board. Upgrades Memory—DRAM or VRAM - 13 Close Chassis 1 Chassis Top Support Arm Hole on Chassis Floor Lift up the chassis support arm from the hole on the chassis floor and gently swing the chassis back into place. Upgrades Memory—DRAM or VRAM - 14 2 Expansion Card Cover Release Switches Support Foot 3 4 Close expansion card cover. Press the release switches toward the outside of the computer. Swing the support foot back inside the computer housing. K Service Source Troubleshooting Power Macintosh G3 Desktop Troubleshooting General/ - 1 General The Symptom Charts included in this chapter will help you diagnose specific symptoms related to your product. Because cures are listed on the charts in the order of most likely solution, try the first cure first. Verify whether or not the product continues to exhibit the symptom. If the symptom persists, try the next cure. (Note: If you have replaced a module, reinstall the original module before you proceed to the next cure.) If you are not sure what the problem is, or if the Symptom Charts do not resolve the problem, refer to the Flowchart for the product family. For additional assistance, contact Apple Technical Support. Troubleshooting New Components Theory of Operation/Voltage Regulator - 2 New Components Theory of Operation New components on the Power Macintosh G3 logic boards and new strategies for parts replacement make troubleshooting these systems significantly different from previous models. Take a moment to read and understand how each of these new components interacts with the system. Voltage Regulator The voltage regulator module regulates the voltage for the particular processor used in different Power Mac G3 systems. The voltage regulator provides an easy way to regulate voltage without changing specific resistor values on the logic board. When you order the Power Mac G3 logic board from Service, the voltage regulator comes with the board, and it can also be ordered as a separate part. (Note: Always try replacing the voltage regulator to resolve power-on problems before replacing the logic board.) Troubleshooting New Components Theory of Operation/Processor Module - 3 Processor Module The Power Macintosh G3 logic board comes with a removable processor module. You can replace this module when the logic board or processor module fails. The processor module sits in a ZIF socket for easy removal. Processor modules can be ordered from Service, and each is shipped with the appropriate jumper configuration block to place in location J16. The processor should rarely fail. Replace it only as a last resort. When replacing the processor module, you must change the processor jumper block and warranty sticker to be compatible with the processor module you are installing. Failure to install the jumper block properly will result in a unit that does not boot up. Refer to “Processor Module” in Take-Apart for installation instructions. Troubleshooting New Components Theory of Operation/Jumper Location J16 - 4 Jumper Location J16 The jumper block you place at location J16 configures the board to work with different processor modules. Use the appropriate jumper block, identified by color, for each processor module. Refer to “Processor Module” in Take-Apart for instructions. Processor Speed Jumper Color 266 White 233 300 Red Black The jumper block is protected by a void-warranty sticker. End users are not allowed to remove this jumper block. If the sticker has been tampered with on a unit you receive for repair, do not honor the service warranty on the system. Troubleshooting New Components Theory of Operation/Jumper Location J28 - 5 Jumper Location J28 Jumper location J28 controls which power supply the Power Macintosh G3 logic board can accommodate. When you receive a Power Macintosh G3 logic board from Service, you need to place the jumper in the proper location. The power supply used in the Power Macintosh G3 Desktop computer is different from the power supply used in the G3 Minitower computer. If the logic board is installed in the PM G3 Minitower, the power supply jumper must cover the pins marked “PS”. If the logic board is installed in the PM G3 Desktop model, this jumper must cover the pins marked “Mac”. (Replacement logic boards should come preset for the Desktop model.) When replacing the logic board, be sure to check the power supply jumper setting. If this jumper is missing or set incorrectly for the computer model, the computer will not boot up Troubleshooting New Components Theory of Operation/I/O Cards - 6 I/O Cards Power Macintosh G3 computers require an I/O card that moves audio and/or video from the main logic board. These cards are placed in the PERCH connector on the main logic board. If the card is not seated correctly, different symptoms appear. Look in the Symptom Charts for details on troubleshooting these cards. Note: the Power Macintosh G3 computers will boot up without the I/O card installed, but they will not operate properly. Troubleshooting New Components Theory of Operation/HFS+ Formatted Drives - HFS+ Formatted Drives Some Power Macintosh G3 Desktop computers ship with hard drives that are formatted with HFS and some later models ship with hard drives that are formatted with HFS+ (also referred to as Mac OS Extended format). Before you try to repair a customer’s hard drive, it is imperative that you determine how the drive has been formatted. Norton Utilities version 3.5 is not compatible with HFS+ (or Mac OS Extended format), and in fact, can destroy data on the hard drive. Norton Utilities version 3.5.3 or 3.5.2 will not attempt to repair a drive formatted with Mac OS Extended format and versions 3.5.1 and earlier cannot recognize that a hard drive is in Mac OS Extended format and can result in hard drive corruption and loss of all data on the drive. Note: When diagnosing hard drive problems, it is important to Troubleshooting New Components Theory of Operation/HFS+ Formatted Drives verify whether or not the customer may have used the wrong disk repair software for their drive before assuming that the problem is hardware related. If you experience problems with a hard drive that has been formatted with HFS+, Apple Computer recommends using the version of Disk First Aid included on the system software CD that shipped with the unit. (See the Symantec Web site at http:// www.symantec.com/nu/num-hfs.html for more information on Norton Utilities and Mac OS Extended format.) Some other disk utility and disk locking programs are incompatible with Mac OS Extended format. Before you attempt to use a disk utility or disk locking program, make sure the version you have is compatible with Mac OS Extended format. Check the documentation that came with the program or contact the manufacturer or the vendor that supplied the program. Use the Get Info command in system 8.1 to determine how a hard Troubleshooting New Components Theory of Operation/HFS+ Formatted Drives drive has been formatted. Drives formatted with HFS will appear as “Mac OS Standard”, while drives formatted with HFS+ will appear as “Mac OS Extended.” For more information on HFS+ formatting of hard drives, refer to the Technical Info Library, article # 30344. Troubleshooting Cleaning Procedure for Card Connectors/HFS+ Formatted Drives Cleaning Procedure for Card Connectors It is possible for residue to build up on the gold edge connector pins on some PCI cards, which could cause a variety of symptoms. If you are having problems with a PCI card, inspect the connector pins with a magnifying glass. If you find residue, use a pencil eraser to gently clean the pins. Troubleshooting Power Supply Verification/Verification Procedure - 11 Power Supply Verification The Power Macintosh G3 logic board requires a “trickle” power of +5V in order to power-up. If this trickle power is not present, the system will not power-up. If the system fails to power-up, follow the procedure outlined below to determine whether or not the problem is related to the power supply. Note: In order to verify the power supply you will need a voltmeter. Verification Procedure Follow the procedures in the Take-Apart chapter to access the power supply. IMPORTANT: For all the following steps you will want to leave the power supply connector plugged into the logic board during testing. Troubleshooting Power Supply Verification/Verification Procedure - 12 1. Plug in a known-good power cord into the back of the computer. Note: Do NOT power on the computer. Note: For the next steps, refer to Figure 1 on the next page to identify the pins indicated. 2. Connect the black lead of the voltmeter to pin 16 of the power supply connector. Connect the red lead of the voltmeter to pin 9 (purple wire) of the 20-pin power supply cable. The voltmeter should measure approximately +5V. If you do not measure +5V then re-check the voltmeter connections and check for voltage again. If voltage is still not present then replace the power supply; otherwise, continue on to the next step. If you DO measure +5V on pin 9 (purple wire) then the power supply is likely OK. Continue on to the next step for further verification. Troubleshooting Power Supply Verification/Verification Procedure - 13 Figure 1. Power Supply 20-Pin Connector Troubleshooting Power Supply Verification/Verification Procedure - 14 3. Power up the computer by pressing the On/Off button on the front of the Power Mac G3. Note: Verify that the power on/ off cable is plugged into connector J30. If the computer powers up normally then the power supply is OK. If the power supply does not power up, continue on to the next step. 4. Check to see if the power supply fan is spinning. If the power supply fan is not spinning then verify that the jumper at connector J28 is installed in the correct location (on the Minitower, the correct location is “PS/2 Supply”; on the Desktop, the correct location is “MAC Supply”); otherwise, continue to the next step. 5. Connect the black lead of the voltmeter to pin 16 of the power supply connector. Connect the red lead of the voltmeter to pin 1 (orange cable) of the 20-pin power supply cable. The Troubleshooting Power Supply Verification/Verification Procedure - 15 voltmeter should measure approximately +3.3V. If you do not measure +3.3V, re-check the voltmeter connections and check for voltage again. If voltage is still not present, replace the power supply; otherwise, continue on to the next step. 6. Connect the black lead of the voltmeter to pin 16 of the power supply connector. Connect the red lead of the voltmeter to pin 4 (red cable) of the 20-pin power supply cable. The voltmeter should measure approximately +5V. If you do not measure +5V, re-check the voltmeter connections and check for voltage again. If voltage is still not present, replace the power supply; otherwise, continue on to the next step. 7. Measure the voltage of pin 10 (yellow cable) of the 20-pin power supply connector. The voltage should measure Troubleshooting Power Supply Verification/Verification Procedure - 16 approximately +12V. If you do not measure +12V, re-check the voltmeter connections and check for voltage again. If voltage is still not present, replace the power supply; otherwise, continue on to the next step. 8. The testing is complete. You have just verified that the power supply is not faulty and is not the cause of the “No powerup” problem. Troubleshooting Symptom Charts/System - 17 Symptom Charts System Fan on power supply is running, but no startup chime, screen is black, drive not accessed at startup, and no LED on front of system 1 2 3 4 5 Verify power supply voltage switch is set correctly for your region (see “Voltage Switch” in Basics chapter for more information). Check jumper block J28. Be sure setting is correct for type of power supply installed (see “Logic Board” in Take-Apart chapter for more information). Check jumper block configuration at J16. Make sure jumper block is correct color for processor type installed (see “Processor Module” in Take-Apart chapter for more information) and that it is installed in the correct direction. Reseat voltage regulator. Reseat processor module. Make sure locking arm is in down position. Troubleshooting Symptom Charts/System - 18 6 7 8 9 Reseat ROM DIMM. Replace voltage regulator. Replace logic board. Replace processor module. Fan is running, LED is on, drive is accessed at startup, but no startup chime and screen is black Reseat ROM DIMM. No apparent power, fan isn’t running, no LED 1 2 3 4 5 Verify power cord is attached securely at both ends. Verify that the power outlet is good. Verify ADB cable is good and connected properly. Check internal power cables and verify they are attached securely at both ends. Check jumper block J28. Make sure setting is correct for type of power supply installed (see “Logic Board” in Take- Troubleshooting Symptom Charts/System - 19 Apart chapter for more information). 6 Reset Cuda chip. (Refer to “The Cuda Chip” in Basics chapter for instructions.) 7 Reset logic board. (Refer to “Resetting the Logic Board” in Basics chapter for instructions.) 8 Replace power cord. 9 Reseat voltage regulator. 10 Check the power supply by following the procedures in “Power Supply Verification” outlined earlier in this troubleshooting chapter. 11 Replace logic board. Troubleshooting Symptom Charts/System - 20 Computer begins to power up, the fan and hard drive are spinning, the power LED is lit, but there is no video and the boot chime is followed by sound of breaking glass 1 2 Clicking, chirping, thumping, or rubbing 1 3 4 5 2 3 4 Reseat ROM DIMM. Reseat DRAM DIMMs. (Note: the computer does not ship with any on-board memory. You must have a DRAM DIMM installed for the computer to boot properly.) Test for a bad DRAM DIMM by removing the DIMMs one at a time (replacing each one afterwards). Replace any faulty DRAM DIMMs. Verify external SCSI cabling is secure. Verify external SCSI devices are good. Remove all PCI cards and test unit. If problem does not occur with cards removed, begin replacing cards one at a time to determine which card is causing problem. Replace problem card with known-good card. Remove hard drive. If problem no longer occurs, replace hard drive with a known-good drive. Replace power supply. Replace processor module. Troubleshooting System shuts down intermittently Symptom Charts/System - 21 5 6 7 8 Replace logic board. Replace floppy drive cable. Replace floppy drive. Replace I/O card. 1 Make sure air vents are clear. Thermal protection circuitry may shut down system. After 30 to 40 minutes, system should be OK. Make sure power cord is plugged in firmly. Replace power cord. Check battery. Reset Cuda chip. (Refer to “The Cuda Chip” in Basics chapter for instructions.) Reset logic board. (Refer to “Resetting the Logic Board” in Basics chapter for instructions.) Replace power supply. Replace logic board. Replace processor module. 2 3 4 5 6 7 8 9 Troubleshooting System intermittently crashes or hangs Symptom Charts/System - 22 1 2 3 4 5 6 7 Verify system software is version 8.0 or later with enabler 770. Verify software is known-good. Do a clean install of system software. Verify software is Power Macintosh compatible (contact developer). Also, try booting with extensions off to determine if there are system init problems. Clear parameter RAM. Hold down <Command> <Option> <P> <R> during startup but before "Welcome to Macintosh" appears. Remove all SDRAM DIMMs and try replacing them one at a time to test. Replace any bad DIMMs. Replace logic board. Replace processor module. Troubleshooting During startup, following message is displayed, "This startup disk will not work on this Macintosh model...." Symptom Charts/System - 23 1 2 3 Verify startup disk is good. Verify system software is version 8.0 or later with enabler 770. Do a clean install of system software. Troubleshooting Symptom Charts/Error Chords - 24 Error Chords One-part error chord (sound of breaking glass) sounds during startup sequence 1 2 3 4 5 Disconnect IDE data cable from hard drive and reboot system. If startup sequence is normal, initialize hard drive. Test unit again with IDE data cable connected. If error chord still sounds, replace hard drive. Disconnect floppy drive cable from floppy drive and reboot system. If startup sequence is normal, replace floppy drive. Reseat processor module. Replace logic board. Replace processor module. Troubleshooting Symptom Charts/Video - 25 Video Screen is black, but boot tone is present, drive operates, fan is running, and LED is lit 1 2 3 4 5 6 7 8 9 Adjust brightness on monitor. Clear parameter RAM. Hold down <Command> <Option> <P> <R> during startup but before "Welcome to Macintosh" appears. Reset Cuda chip. (Refer to “The Cuda Chip” in Basics chapter for instructions.) Reset logic board. (Refer to “Resetting the Logic Board” in Basics chapter for instructions.) Replace monitor cable. Remove all SDRAM DIMMs and try replacing them one at a time to test. Replace any bad DIMMs. Test with known-good monitor. Replace monitor if necessary. Refer to appropriate monitor manual to troubleshoot defective monitor. Replace logic board. Replace processor module. Troubleshooting Screen is black, no boot tone and drive does not operate, but fan is running and LED is lit Symptom Charts/Video - 26 1 2 3 4 5 6 Boot tone is present and screen lights up, but nothing is displayed on screen 1 2 3 4 Reset Cuda chip. (Refer to “The Cuda Chip” in Basics chapter for instructions.) Reset logic board. (Refer to “Resetting the Logic Board” in Basics chapter for instructions.) Remove all SDRAM DIMMs and try replacing them one at a time to test. Replace any bad DIMMs. Replace logic board. Replace power supply. Replace processor module. Reset Cuda chip. (Refer to “The Cuda Chip” in Basics chapter for instructions.) Reset logic board. (Refer to “Resetting the Logic Board” in Basics chapter for instructions.) Replace monitor cable. Test with known-good monitor. Replace monitor if necessary. Refer to appropriate monitor manual to troubleshoot defective monitor. Troubleshooting Symptom Charts/Video - 27 5 6 Replace logic board. Replace processor module. Troubleshooting Symptom Charts/Floppy Drive - 28 Floppy Drive Internal floppy drive does not operate 1 2 3 4 5 Replace floppy disk with known-good disk. Replace floppy drive cable. Replace floppy drive. Replace logic board. Replace processor module. During system startup, disk ejects; display shows icon with blinking "X" 1 2 3 4 5 Replace disk with known-good system disk. Replace floppy drive cable. Replace floppy drive. Replace logic board. Replace processor module. Disk does not eject 1 Switch off computer. Hold down mouse button while you switch computer on. Replace floppy drive cable. Replace floppy drive. 2 3 Troubleshooting Symptom Charts/Floppy Drive - 29 4 5 Replace logic board. Replace processor module. Drive attempts to eject disk, but doesn’t 1 2 Reseat floppy drive bezel and drive so bezel slot aligns correctly with drive. Replace floppy drive. Internal floppy drive runs continuously 1 2 3 4 5 Replace disk with known-good floppy disk. Replace floppy drive cable. Replace floppy drive. Replace logic board. Replace processor module. MS-DOS drive does not recognize a disk formatted on a 1.4 MB drive To read and write files with either MS-DOS or 1.4 MB drive, format all disks with MS-DOS drive first. Troubleshooting Symptom Charts/Hard Drive - 30 Hard Drive Single internal hard drive does not operate; drive doesn’t spin 1 2 No internal SCSI drives operate 1 3 2 3 4 5 6 7 Replace hard drive power cable. Replace hard drive. If problem resolved, reinstall IDE device driver and system software. Replace power supply. Verify there are no duplicate SCSI device addresses on a single SCSI bus. Disconnect external SCSI devices and check for proper termination. Only last device in SCSI chain should be terminated. Check internal SCSI devices for proper termination. Replace internal SCSI data cable to which non-operational devices are attached. Replace power supply. Replace logic board. Replace processor module. Troubleshooting Works with internal or external SCSI devices but not with both Symptom Charts/Hard Drive - 31 1 2 3 4 Verify there are no duplicate SCSI device addresses Replace terminator on external SCSI device. Verify that SCSI device at end of internal SCSI data cable is only device terminated. Refer to appropriate manual to troubleshoot defective external device. Troubleshooting Symptom Charts/Peripherals - 32 Peripherals Cursor does not move 1 2 6 7 Check mouse connection. Inspect inside of mouse for buildup of dirt or other contaminants. Clean mouse if necessary. If mouse was connected to keyboard, connect mouse to computer ADB port instead. If mouse works, replace keyboard. Replace ADB cable. If mouse does not work in any ADB port on computer, replace mouse. Replace logic board. Replace processor module. 1 2 3 Boot from floppy or bootable CD. Replace mouse. Replace logic board. 3 4 5 Cursor moves, but clicking mouse button has no effect Troubleshooting Double-click doesn’t open application, disk, or server Symptom Charts/Peripherals - 33 1 2 5 Remove duplicate system folders. Clear parameter RAM. Hold down <Command> <Option> <P> <R> during startup but before "Welcome to Macintosh" appears. If mouse was connected to keyboard, connect mouse to computer ADB port instead. If mouse works, replace keyboard. If mouse does not work in any ADB port on computer, replace mouse. Replace logic board. Retain customer's DIMMs. 1 2 3 4 Check keyboard connection to ADB port. Replace keyboard cable. Replace keyboard. Replace logic board. 3 4 No response to any key on keyboard Troubleshooting Symptom Charts/Peripherals - 34 Known-good serial printer does not work 1 2 3 4 5 6 Verify you have correct version of system software. Verify that Chooser is set correctly. Reinstall correct printer drivers. Do clean install of system software. Replace printer interface cable. Replace logic board. Retain customer's DIMMs. Known-good network printer does not print 1 2 3 4 Check network connections. Verify you have correct version of system software. Verify that Chooser is set correctly. Does printer show up in Chooser? If so, do clean install of system software and/or network and printer software. Replace logic board. Retain customer's DIMMs. 5 Troubleshooting Symptom Charts/CD-ROM Drive - 35 CD-ROM Drive CD-ROM drive does not work 1 2 Try using known-good compact disc. Replace CD-ROM drive mechanism. Macintosh does not display CD-ROM icon once CD is inserted in drive 1 2 3 Verify that CD-ROM software is installed. Replace CD-ROM drive mechanism. Replace CD-ROM data cable. CD-ROM drive does not eject discs 1 Install poron bumpers (part number 922-3554) on the back of the CD-ROM carrier, where the carrier touches the metal tabs on the chassis (see drawing next page). First install two bumpers, one on each end of the carrier, and test to see that the CD-ROM tray ejects properly. If not, install an additional bumper on each side, stacking them on top of the bumpers you previously installed, and test again. You may need to install up to three bumpers on each side before Troubleshooting Symptom Charts/CD-ROM Drive - 36 the CD-ROM tray ejects properly. Troubleshooting Symptom Charts/Miscellaneous - 37 Miscellaneous No sound from speaker 1 2 3 4 5 6 7 Disconnect any microphones or external speakers. Verify that volume setting in Control Panel is adequate and mute is not checked. Clear parameter RAM. Hold down <Command> <Option> <P> <R> during startup but before "Welcome to Macintosh" appears. Verify speaker is plugged into logic board. Plug headphones or external speakers into the external jack. If the the external jack works, replace the internal speaker or logic board. If the external jack doesn’t work, proceed to the next step. Replace I/O Audio card. Replace speaker. Replace logic board. K Service Source Exploded View Power Macintosh G3 Desktop Exploded View 2 Top Housing 922-3282 Power Supply 661-1445 CD-ROM Bezel 922--3276 Zip Drive Bezel 922-3285 Card Retainer Baffle 922-3281 Rear Panel (Part of Chassis) Blank Bezel 922-1651 I/O Card (Audio Only) 661-1457 Floppy Drive Cable 922-1636 Floppy Drive 661-1390 Voltage Regulator Card Column 922-3292 Support 922-1643 Blank PCI Cover 922-1628 Processor Module 661-1460 (233) 661-1461 (266) 661-2059 (300) Heat Sink Kit 076-0715 Floppy/Hard Drive Chassis Bracket 922-1657 Floppy/Hard Drive Shield 922-1648 Blank Shield 922-1652 SCSI Cable Zip Drive 922-3271 661-1331 Support Foot 922-1661 Support Arm 922-1730 Bottom Chassis 922-3286 Jumper Block Kit 076-0716 (233MHz) 076-0717 (266 MHz) 076-0737 (300MHZ) CD Audio Cable 922-2663 Logic Board 661-1302 CD-ROM Drive 661-1401 Foot 922-2611 Speaker Housing 922-1640 Speaker 922-1639 Chassis LED Latch Cable Power 922-1656 922-3273 Actuator 922-3280 6GB Hard Drive 661-1451 Hard Drive Carrier 922-1124 IDE Data Cable 922-3272 Drive Rail 922-3228 Product family configurations may vary. CD-ROM Carrier 922-0850 033-1009 AV Card Update 4/7/98 7:18 PM Page 1 About Your Optional Power Macintosh Audio/ Video Card The information in this update describes the additional capabilities of Power Macintosh computers that are equipped with an optional Audio/Video (AV ) card. For more information on setting up or using your Power Macintosh computer, see the setup manual that came with you computer. Left and Right RCA-Type Audio Ports In addition to the standard sound input and output ports, the Power Macintosh AV card provides additional sound input and output capabilities through RCA-type connectors. These connectors are found on devices such as videocassette recorders ( VCRs) and tape decks. The RCA-type ports are color-coded: red for right, and white for left. (The yellow ports are for connecting video equipment.) - Audio output ports - Audio input ports (left & right) (left & right) Connect your Macintosh to the RCA-style Audio In ports of video or audio equipment such as VCRs and tape decks Connect your Macintosh to the RCA-style Audio Out ports of video or audio equipment such as VCRs and tape decks - Sound output port Connect your Macintosh to headphones, externally powered (amplified) speakers, or other audio equipment using a 3.5-mm miniplug connector ≈ Sound input port Connect your Macintosh to an Apple PlainTalk microphone or other audio input equipment using a 3.5-mm miniplug connector The left and right RCA-type ports accept this type of connector: 033-1009 AV Card Update 4/7/98 7:18 PM Page 2 RCA-type plug If your equipment has a different connector, you can purchase an adapter at an electronics supply store. Connecting Audio Equipment Using the RCA Ports To connect audio equipment using the RCA ports on the AV card, follow the steps below. For instructions on connecting an audio device using the standard sound input and output ports, see the setup manual that came with your computer. 1 Make sure that the audio equipment has a cable like this one that has two RCA plugs at each end: RCA plugs RCA plugs 2 Shut down the computer, turn off the audio equipment, and place the equipment near the computer. 3 Attach cables to the audio equipment following the instructions that came with the equipment. 4 If your audio equipment is a sound input device, such as a tape deck, audio CD player, or VCR, attach it to the RCA-type left and right audio input ports (-). 5 If your audio equipment is a sound output device, such as amplified speakers, attach it to the optional RCA-type left and right audio output ports (-). The following illustration shows a typical cable arrangements for a tape deck connected with RCA-type connectors. - Audio output ports (left and right) Audio In ports (left and right) Tape deck 6 2 Turn on the computer and the audio equipment. 033-1009 AV Card Update 4/7/98 7:18 PM Page 3 Connecting Video Equipment The Power Macintosh AV card provides additional ports for connecting video equipment so that you can view TV and other video images on your computer monitor and store the images on your hard disk. You can also view the Macintosh desktop on a television screen attached to the computer and record images from the desktop to a videocassette recorder ( VCR). Your Macintosh can work with two major video formats: m Composite video, which is used by most televisions, most VCRs, and laserdisc players. Composite video devices plug into the computer’s RCA-type video ports (˜ and Â). m S-video, which is a high-quality video format used by many video cameras, VCRs, and televisions. S-video devices plug into the computer’s S-video ports (æ and Æ). The illustration below shows the computer’s video input and output ports. (The RCA-type ports are color-coded: yellow for composite video, red for right audio, and white for left audio.) Â Composite video ˜ Composite video output port input port Connects your Macintosh to the RCA-style Video In port of most VCRs or other video recording or video display equipment Connects your Macintosh to the RCA-style Video Out port of most VCRs, laserdisc players, video cameras, and other video input equipment Æ S-video output port æ S-video input port Connects your Macintosh to the S-video In port of VCRs or other video recording or video display equipment that uses an S-video connector Connects your Macintosh to the S-video Out port of VCRs, laserdisc players, video cameras, or other video input equipment that uses an S-video connector The S-video input and output ports accept S-video connectors, and the composite video input and output ports accept RCA-type connectors. S-video connector RCA-type connector 3 033-1009 AV Card Update 4/7/98 7:18 PM Page 4 Note: The S-video input port is compatible with both seven-pin and four-pin S-video connectors. Important The S-video connector is a round plug with several small metal pins. It resembles other Macintosh connectors, such as those for a printer, modem, mouse, or keyboard. Don’t confuse the connectors; they’re not interchangeable. Depending on what kind of ports are available on your video equipment, you’ll need different cables (available at an electronics supply store). m If your equipment has an S-video Out port, you’ll need a video cable with S-video connectors at each end, and two audio cables with RCA-type connectors at each end. (The audio cables can be separate, or joined like the one in the illustration.) S-video plug RCA plugs S-video plug RCA plugs m If your equipment has an RCA Video Out port, you’ll need one video cable with RCA-type connectors (plugs) at each end, and two audio cables with RCA-type connectors at each end. (The cables can be separate, or joined like the one in the illustration.) RCA plugs RCA plugs Connecting Video Equipment for Input to the Computer When you connect video equipment to the video input port on your computer, you can view video on your monitor, capture video images, and hear the sound from the video equipment through the computer’s speaker. The instructions that follow are for connecting a stereo VCR and video camera, but you can use them as a model for connecting your computer to any video equipment. To connect a VCR or video camera for input, do the following: 1 Shut down the Macintosh and turn off the VCR or video camera. 2 Attach one end of the video cable to the Video Out port on the video equipment. Follow the directions that came with the VCR or camera. 3 4 Plug the other end of the video cable into either the S-video input port (æ) or the yellow composite video input port (˜) on the Macintosh. 033-1009 AV Card Update 4/7/98 7:18 PM Page 5 If the S-video connector doesn’t slide easily into the port, check the pin alignment and try again. Don’t use force, which could damage the computer or cable. 4 Plug the RCA-type connectors on the audio cables into the left and right RCA Audio Out ports on the VCR or camera. 5 Plug the RCA-type connectors on the audio cables into the left and right RCA input ports (-) on the computer. If the cable is color-coded, the red connector is for the right port, and the black or white connector is for the left port. The next four illustrations show S-video connections and composite video connections for both a VCR and a camera. Your finished connections should look like one of the following: S-video connection for input from a VCR - Audio input ports (left and right) S-video Out port Audio Out ports (left and right) æ S-video input port S-video cable VCR Dual RCA-plug cable (available at most electronics supply stores) Composite video connection for input from a VCR - Audio input ports (left and right) Video Out port Audio Out ports (left and right) ˜ Composite video input port VCR Triple RCA-plug cable (available at most electronics supply stores) 5 033-1009 AV Card Update 4/7/98 7:18 PM Page 6 S-video connection for input from a camera - Audio input ports (left and right) S-video Out port Audio Out ports (left and right) æ S-video input port S-video cable Dual RCA-plug cable (available at most electronics supply stores) Composite video connection for input from a camera - Audio input ports (left and right) Video Out port Audio Out ports (left and right) ˜ Composite video input port Triple RCA-plug cable (available at most electronics supply stores) 6 Turn on the computer and the VCR or camera. 7 To hear or capture on your computer the audio coming into the RCA input ports, open the Monitors & Sound control panel, click the Sound button, and make sure that the RCA input ports are the selected sound input source. Click the button labeled h for help. You can now begin working with the video equipment connected to your computer. To learn more about using the AV features of your computer to play or capture video on your computer, open Mac OS Help (available in the Help menu) and look up “video” in the index. 6 033-1009 AV Card Update 4/7/98 7:18 PM Page 7 Connecting Video Equipment for Output From the Computer You can connect a VCR to record computer images and audio on videotape. The VCR records what is happening on the computer’s monitor, sounds generated by the computer, and speech spoken into a microphone if one is connected. This capability is useful for creating video presentations or software demonstrations. Note: The video out ports are primarily intended for recording what is happening on the computer’s monitor. You can use video-editing software to save captured and edited video on a VCR if the video-editing software supports the use of a single monitor. However, to get full video-editing support with independent monitor and video (or TV) output, you need to purchase and install a third-party video capture PCI card. To connect a VCR for output from the computer, do the following: 1 Shut down the Macintosh and turn off the VCR. 2 Attach one end of the video cable to the Video In port on the VCR. Follow the directions that came with the VCR. 3 Plug the other end of the video cable into either the S-video output port (Æ) or the yellow composite video output port (Â) on the Macintosh. If the S-video connector doesn’t slide easily into the port, check the pin alignment and try again. Don’t use force, which could damage the computer or cable. 4 Plug the RCA-type connectors on the audio cables into the left and right Audio In ports on the VCR. 5 Plug the RCA-type connectors on the audio cables into the left and right audio output ports (-) on the Macintosh. If the cable is color-coded, the red connector is for the right port, and the black or white connector is for the left port. 7 033-1009 AV Card Update 4/7/98 7:18 PM Page 8 Depending on whether your equipment has S-video or composite video (RCA-type) ports, your finished connections should look like one of the following: S-video connection for output from the computer - Audio output ports (left and right) Æ S-video output port S-video In port S-video cable Audio In ports (left and right) VCR Dual RCA-plug cable (available at most electronics supply stores) Composite video connection for output from the computer - Audio output ports (left and right) Â Composite video output port Video In port Audio In ports (left and right) VCR Triple RCA-plug cable (available at most electronics supply stores) 6 Turn on the computer and the VCR. 7 Select “line input” on your VCR. See the manual that came with your VCR for instructions on how to select the line input source. For further instructions on how to record the computer’s output on videotape and add voice annotation, open Mac OS Help (available in the Help menu) and look for the information on saving computer images to videotape in the “Monitors” topic area. 8 033-1009 AV Card Update 4/7/98 7:18 PM Page 9 Connecting a Television You can connect to your computer any television that has either an S-video or composite video input port and Audio In ports. The television displays a mirror image of the computer monitor display, and (if the television has speakers) plays the sounds generated by the computer. This capability is especially useful for giving presentations if you have a largescreen television. To connect a television for TV mirroring, first you turn off the computer and connect the television to it. Then you use the Control Strip to turn on TV mirroring. (If you need to learn more about the Control Strip, see Mac OS Help, available in the Help menu.) Because TV mirroring uses a limited number of resolutions supported by televisions, it works best with multisynchronous monitors that support many resolutions. If you are using a fixedfrequency monitor, the monitor display will be disabled when you turn on TV mirroring. (Most newer monitors are multisynchronous; refer to the manual that came with your monitor if you are not sure.) To connect a television and turn on TV mirroring, do the following: 1 Turn off your computer and connect the television according to the instructions in the previous section, “Connecting Video Equipment for Output From the Computer.” Depending on the type of connectors your equipment has (S-video or composite video), your connection should look like one of the following illustrations. Television used as a monitor with an S-video connection - Audio output ports (left and right) S-video In port Audio In ports (left and right) Æ S-video output port TV S-video cable Dual RCA-plug cable (available at most electronics supply stores) 9 033-1009 AV Card Update 4/7/98 7:18 PM Page 10 Television used as a monitor with a composite video connection - Audio output ports (left and right) Video In port Audio In ports (left and right) Â Composite video output port TV Triple RCA-plug cable (available at most electronics supply stores) 2 Turn on the television and the computer. 3 Click the TV Mirroring icon in the Control Strip, and choose Turn TV Mirroring On from the menu that appears. TV Mirroring icon Resolution icon A message warns you to make sure a television is connected before continuing. 4 Click OK to close the message. The screen resolution changes to one that is compatible with the television. 5 10 To improve the screen display of the monitor and the television, do one or more of the following: m Choose a different resolution from the Resolution icon in the Control Strip. m Choose a different Overscan setting from the TV Mirroring icon in the Control Strip. When Overscan is turned on, the computer image fills the whole television screen, but the edges may not be visible. Turning off Overscan adds a black border around the computer image so that the entire computer image is visible on the television. m Choose the television standard supported by your television (either NTSC or PAL) from the TV Mirroring icon in the Control Strip. m Adjust the image controls such as brightness and contrast on the television. m To rearrange desktop icons that are no longer on the screen, click anywhere on the Finder desktop and choose Clean Up from the View menu. 033-1009 AV Card Update 4/7/98 7:18 PM Page 11 To turn off TV Mirroring, click the TV Mirroring icon in the Control Strip, and choose Turn TV Mirroring Off from the menu that appears. Power Macintosh AV Card Specifications Video Input m m m m m m Type: composite or S-video Standards supported: NTSC, PAL, and SECAM Resolution supported: 320 x 240, which scales to any size up to the size of the monitor Polarity: sync negative Voltage level: 0.7 Vpp minimum, 1.0 Vpp typical, 1.4 Vpp maximum Impedance: 75 ohms (Ω) internally terminated Video Output m m m m m m Type: composite and S-video Standards supported: NTSC and PAL Resolutions supported: 512 x 384, 640 x 480, 800 x 600, and 832 x 624 Polarity: sync negative (no sync on S-video chroma signal) Voltage level: 1.0 Vpp ±5% into a 75 Ω resistive load (S-video chroma 0.7 Vpp) Impedance: 75 Ω source Sound input using the RCA-type audio input ports m m m m Input impedance (preamplifier off ): more than 80 kΩ Maximum input voltage (preamplifier off ): 1 Vrms = 2.8 Volts peak-to-peak (Vpp), nominal Input impedance (preamplifier on): more than 5 kΩ Maximum input voltage (preamplifier on): 62 millivolts (mVrms) = 175 mVpp, nominal Sound output using the optional RCA-type audio output ports m Output impedance: 400 Ω m Maximum output voltage: 1 Vrms = 2.8 Vpp, nominal Noise, distortion, and bandwidth m Audio input signal-to-noise ratio (SNR): 85 decibels (dB) unweighted (add +8 dB to estimate A weighting) m Total harmonic distortion: 0.05% m Bandwidth: 20 Hz–20 kHz at 44.1-kHz sample rate (Other sample rates scale the upper cutoff frequency.) 11 3-0926.BTO Update 4/7/98 6:45 PM Page 1 Update: About Your Build-To-Order Macintosh Congratulations on purchasing your Macintosh computer. Since you chose the components of your computer, parts of it may differ from what’s described in the manual that came with it. This update addresses the differences and also includes information on additional components not covered in the manual. 10/100Base-T Network Connection If your computer came with the 10/100Base-T Ethernet option, a 10/100Base-T Ethernet card is installed in one of your computer’s PCI slots. You can connect a cable for a 10Base-T or a 100Base-T Ethernet network to this card. 10/100Base-T Ethernet port (RJ-45) Note: The type of twisted-pair cable you use depends on whether you connect to 10Base-T or 100Base-T Ethernet. Category 5 twisted-pair cable must be used to connect to 100Base-T if you want to get the maximum speed from this connection. Checking the Status of a 10/100Base-T Network Connection If you connect your computer to a network using the 10/100Base-T Ethernet card, you can check the card’s LED indicators to monitor network activity. There are four indicators: m ACT (Activity): Blinks when the 10/100Base-T Ethernet card is active m COL (Collision): Glows when a network collision has occurred (a temporary condition that occurs when two computers on a network try to send data simultaneously) m LNK (Link): Glows when a reliable 10 megabit (Mbit) or 100 Mbit network connection has been established m 100 Mb: Glows when a reliable 100 Mbit link is established 1 3-0926.BTO Update 4/7/98 6:45 PM Page 2 10/100Base-T Ethernet Card Specifications m m m m m m m m m Open Transport: Mac OS 7.5.2 or later, AppleShare, AppleTalk, NetWare for Macintosh, TCP/IP Connector: RJ-45 (for 10Base-T and 100Base-T) Media, 10Base-T: Cat 3, 4, or 5 UTP on 2 pairs up to 100 meters (m) Media, 100Base-T: Cat 5 UTP on 2 pairs up to 100 m Bus interface: PCI revision 2.0 and 2.1, share interrupt A Channel speeds: IEEE Auto Negotiation of 10Base-T and 100Base-T Communications: IEEE 802.3u 100Base-T; IEEE 802.3i 10Base-T Controllers: DECchip 21140, 32-bit internal processor per channel Power: 1.2 amperes (A) @ 5 volts (V ) typical Ultra Wide SCSI Hard Disk Drive and PCI Card If your computer came with an Ultra Wide SCSI hard disk drive, it includes some or all of the following components: m an internal Ultra Wide SCSI hard disk drive m in certain configurations, additional internal Ultra Wide SCSI hard disk drives m an Ultra Wide SCSI card in one of your computer’s PCI slots m an internal Ultra Wide SCSI cable that supports up to three internal devices (including your pre-installed Ultra Wide hard disks) Do not connect any SCSI devices to the external 68-pin SCSI-3 connector or to the internal 50-pin SCSI-2 connector on the PCI card that supports the internal hard disk. Connecting even one external SCSI device to the external 68-pin connector extends the overall cable length of the SCSI bus beyond the limit for which error-free operation can be guaranteed; the combined length of the internal cable and the external cable reduces the reliability of all the devices connected to the Ultra Wide SCSI bus. Connecting a device to the internal 50-pin SCSI-2 connector will cause your Ultra Wide SCSI devices to transfer data at the slower, SCSI-2 rate. Warning 2 3-0926.BTO Update 4/7/98 6:45 PM Page 3 About the Ultra Wide SCSI Bus Up to three internal devices can be connected to the Ultra Wide SCSI bus on this card. All devices on the same SCSI bus must have unique ID numbers, but devices on different SCSI buses may use the same SCSI ID number. (For example, you could have a removable media drive with ID number 3 connected to the computer’s built-in regular SCSI-1 bus and a hard disk with ID number 3 connected to the Ultra Wide SCSI-3 bus.) The hard disks installed in your computer at the factory and the SCSI card have reserved certain SCSI ID numbers on the Ultra Wide SCSI bus. Other ID numbers are available for assignment to SCSI devices that are added later, as described in the following table. Ultra Wide SCSI ID Number Device 0 1 through 6 Factory-installed hard disk drive (terminated) Available1 7 8 through 15 SCSI PCI card (terminated) Available 1 If your computer came with two or more Ultra Wide SCSI hard disk drives, use the System Profiler program (available in the Apple menu) to find out the SCSI ID numbers of your drives. Important The factory-installed internal hard disk and the SCSI card are both terminated. Other SCSI devices that you install and connect to the Ultra Wide SCSI bus must not be terminated. If you attach a terminated device to the internal SCSI interface, the computer will malfunction. You use the internal ribbon cable with the 68-pin connector to connect an internal SCSI device to the Ultra Wide SCSI bus. 68-pin connector 3 3-0926.BTO Update 4/7/98 6:45 PM Page 4 Ultra Wide SCSI Card Specifications m m m m m m m m m m m m m Automatic termination Advanced Data Streaming Technology (ADS) RAID-ready Embedded RISC I/P processor Ultra SCSI connector: Fine pitch 68-pin “P” Flash ROM BIOS PCI 2.1 compliant Large command FIFO Supports disconnect/reconnect Asynchronous I/O support Multiple initiator support SCSI-3 tagged command queuing SCSI Manager 4.3 compatible RAID Disk Volume Management Software Certain Power Macintosh G3 configurations are supplied with RAID disk volume management software. This software enables your hard disk drives to be striped or mirrored. The RAID CD can be used as a startup disk. You can restart from it and use the RAID application to initialize and stripe or mirror your hard disks. You can also use the RAID Installer to place a copy of the RAID application on one of your hard disks. To restart your computer from the RAID CD, insert the CD and hold down the C key while you restart. Refer to the documentation supplied on the RAID CD for full instructions on how to set up and maintain RAID volumes. 4 3-0926.BTO Update 4/7/98 6:45 PM Page 5 Using Disk Utilities and Formats With RAID Drive Setup, the disk utility from Apple Computer, should not be used with RAID volumes. You must manage your RAID volumes using the RAID application. Important To set up your RAID volumes to take advantage of Mac OS Extended (HFS Plus) format: 1 Create and set up your RAID volumes using the RAID application. 2 Quit the RAID application and return to the Finder. 3 Select the new RAID volume and choose Erase Disk from the Special menu to reformat the volume in Extended format. This process will erase all the data on your RAID volume. Be sure you back up your files before reformatting RAID volumes. Warning 128-Bit 2D/3D Graphics Accelerator Card If your computer came with an additional graphics card, you have the following options for connecting an external monitor to your computer: m connect an external monitor to the built-in monitor port (shown in the manual that came with your computer) m connect an external monitor to the graphics card installed in one of the PCI slots There are two ports on the optional graphics card. One is the type found on the back of most Macintosh computers; the other is a VGA port so you don’t need an adapter for a VGA monitor. Note: You cannot use both ports on the optional graphics card at the same time. m connect two external monitors to your computer You can connect one monitor to the built-in monitor port and the other monitor to one of the ports on the graphics card, which is installed in one of the PCI slots. Apple monitor port VGA monitor port Important To capture video using the video input ports on the optional Power Macintosh Audio/ Video card, a monitor needs to be connected to the built-in monitor port. If you have only one monitor connected to the optional 128-bit 2D/3D graphics accelerator card, you will not be able to capture video. If you want to capture video, switch your monitor to the built-in monitor port or connect a second monitor. When performing video capture with two monitors connected to your Power Macintosh, make sure that the video capture window is displayed on the monitor that is connected to the built-in monitor port. 5 3-0926.BTO Update 4/7/98 6:45 PM Page 6 Display Modes and Color Depths 1 Resolution Color Depths Vertical Refresh Rate (Hertz) 512 x 384 640 x 480 640 x 870 800 x 600 832 x 624 1024 x 768 1152 x 870 1280 x 960 1280 x 1024 1600 x 1024 1600 x 1200 1920 x 1080 1920 x 1200 256, thousands, millions 256, thousands, millions 256, thousands, millions 256, thousands, millions 256, thousands, millions 256, thousands, millions 256, thousands, millions 256, thousands, millions 256, thousands, millions 256, thousands, millions 256, thousands, millions 256, thousands, millions 256, thousands 60 60, 67, 75, 85, 120 75 60, 72, 75, 85 75 60, 70, 75, 85 75 60, 75, 85 60, 75, 85 76 60, 65, 70, 75, 85 60, 72 76 1 The resolutions that appear in the Monitors & Sound control panel are dependent upon the type of monitor you are using. Graphics Card Specifications m m m m m m m 260 megabytes (MB) per second sustained image scroll rate 4.2 gigabytes (GB) per second sustained color fill rate Up to 1.2 million Gouraud shaded polygons per second 240 megahertz (MHz) RAM digital-to-analog converter (RAMDAC) 8 MB VRAM (Note: Additional VRAM cannot be added.) Supports QuickDraw 3D QuickTime video playback (video scaling and color space conversion handled in software) Video Memory (SGRAM) The manual Setting Up Your Power Macintosh and the Technical Information booklet state that your computer only has 2 MB of video memory built into the computer’s main logic board and that you can add video memory by installing a Small Outline (SO) Dual Inline Memory Module (DIMM) in a slot on the logic board. However, if your computer came with 6 MB of video memory, a 4 MB SO-DIMM has already been installed in the expansion slot on the logic board. You will not be able to add any more video memory. 6 3-0926.BTO Update 4/7/98 6:45 PM Page 7 Apple FireWire Card The optional Apple FireWire Card is designed to work with digital video camcorders and decks that use the DV format and have a FireWire port (sometimes marked IEEE 1394 or DV IN/OUT). The included hardware and software, together with a non-linear editing application, allow you to capture DV movie clips to your hard disk. You can view the clips in MoviePlayer or other QuickTime 3.0 applications, and edit and render the DV movies. If you are using a video editing application with an export function, you can send (print or record) movies back to the tape in your camcorder or deck. The software also allows the FireWire device to be controlled from the computer. The FireWire Bus FireWire is a serial bus that can support high-performance devices, such as DV cameras and printers. Devices can be connected in any combination of branching and chaining, as long as no loops are formed. A FireWire bus can support up to 16 consecutive cable hops of 4.5 meters each. There are no SCSI-style ID numbers to set and no termination requirements. The Apple FireWire Card is designed to keep the network alive even if the Macintosh is shut down. Loss of power to the Macintosh will not affect the operation of a FireWire card as long as it can draw power from other cards on the bus. Each card provides power which is available to other devices on the network. This means that a system shutdown will not result in interrupted transmission over a FireWire network. For more information about cable management and power issues, please refer to the FireWire ReadMe file on the FireWire CD. Important Apple FireWire Hardware If you ordered the Apple FireWire Card with your computer, you have received the following items: m the Apple FireWire Card, installed in one of your computer’s PCI slots m a FireWire cable, 4-pin to 6-pin, 2 meters long m a FireWire software installation CD Your Apple FireWire Card has three FireWire ports, as shown in the following illustration. 7 3-0926.BTO Update 4/7/98 6:45 PM Page 8 To connect your Macintosh to a DV camera, plug the 6-pin connector into the Apple FireWire Card and the 4-pin connector into the camera’s DV port. Both of these connectors snap into place when properly engaged. If you want to connect two computers together (or if your device has a 6-pin FireWire port), you can obtain cables through an AV equipment retailer or electronics store. 4-pin 1394 (FireWire) connector 6-pin 1394 (FireWire) connector Apple FireWire Card Software To install the Apple FireWire Card software: 1 Insert the FireWire CD. 2 Double-click the Installer icon. 3 Follow the onscreen instructions. 4 Restart your computer. An extension called FireWire Support may be located in a folder titled FireWire in the Apple Extras folder on your Macintosh. Do not move this older extension to your Extensions folder, as it may interfere with the operation of the new Apple FireWire software. Important 8 3-0926.BTO Update 4/7/98 6:45 PM Page 9 DVD-ROM Drive If you chose the DVD-ROM option for your computer, you have a DVD-ROM drive in place of the CD-ROM drive. This type of drive is used in the same way as a CD-ROM drive, but allows you to use a wider range of disc formats: m DVD-ROM m CD-ROM (Modes 1 and 2) m CD-ROM XA (Mode 2, Forms 1 and 2) m CD-I (Mode 2, Forms 1 and 2) m CD-Audio m Photo CD m video CD Disc speeds and capacities vary depending upon the type of disc used. Note: This DVD-ROM drive supports the use of DVD movie titles. However, third-party MPEG-2 hardware is required for actual playback. 9