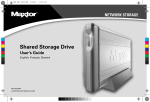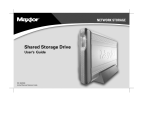
1
MAXTOR SHARED STORAGE II
“
User’s Guide
MAXTOR SHARED STORAGE II USER’S GUIDE
Contents
Windows Installation
Introduction . . . . . . . . . . . . . . . . . . . . . . . .
Macintosh Installation
Introduction. . . . . . . . . . . . . . . . . . . . . . . .
Web User Interface
20
Accessing the Web UI . . . . . . . . . . . . . . 37
About this Guide. . . . . . . . . . . . . . . . . . . . 1
About this Guide . . . . . . . . . . . . . . . . . . . 20
Run Set-up Wizard . . . . . . . . . . . . . . . . 38
Components . . . . . . . . . . . . . . . . . . . . . . . 1
Components . . . . . . . . . . . . . . . . . . . . . . 20
Accounts Management . . . . . . . . . . . . . 39
Included in Package . . . . . . . . . . . . . . . . 2
Included in Package . . . . . . . . . . . . . . . . 21
Shared Folders Management. . . . . . . . 41
System Requirements. . . . . . . . . . . . . . . 2
System Requirements . . . . . . . . . . . . . . 21
Manage Digital Photos, Music, Video. . 43
Handling Precautions . . . . . . . . . . . . . . . 2
Handling Precautions. . . . . . . . . . . . . . . 21
Shared Folder Backup . . . . . . . . . . . . . 43
Maxtor Product Support . . . . . . . . . . . . . 2
Maxtor Product Support . . . . . . . . . . . . 21
Advanced Settings . . . . . . . . . . . . . . . . . . 45
Installing the Shared Storage II
1
... 3
Installing the Shared Storage II . . .
22
Step 1 - Connect the Drive . . . . . . . . . . . .3
Step 1 - Connect the Drive. . . . . . . . . . . 22
Step 2 - Power up the Drive . . . . . . . . . . .4
Step 2 - Power up the Drive. . . . . . . . . . 23
Step 3 - Setup the Drive . . . . . . . . . . . . . .5
Step 3 - Setup the Drive . . . . . . . . . . . . . 24
Using the Shared Storage II
. . . . . . . .6
Using the Shared Storage II
. . . . . . 25
Using EasyManage . . . . . . . . . . . . . . . . . 6
Using EasyManage . . . . . . . . . . . . . . . . . 25
SimpleView™ . . . . . . . . . . . . . . . . . . . . . . 6
Create and Use Shared Folders . . . . . . 25
Create User Account . . . . . . . . . . . . . . . . 7
Creating Shared Folders . . . . . . . . . . . . 25
Settings. . . . . . . . . . . . . . . . . . . . . . . . . . 10
Drag and Sort™ . . . . . . . . . . . . . . . . . . . 28
Backup . . . . . . . . . . . . . . . . . . . . . . . . . . 12
Backup Settings . . . . . . . . . . . . . . . . . . . 29
Backup File Management . . . . . . . . . . . 12
Editing Backup Settings. . . . . . . . . . . . . 30
Restore . . . . . . . . . . . . . . . . . . . . . . . . . . 14
Advanced Settings . . . . . . . . . . . . . . . . . 30
OneTouch Status Icons . . . . . . . . . . . . . .15
SimpleView™ Storage and Backup . . . . 33
Using Media Server . . . . . . . . . . . . . . . . .16
Using Media Server . . . . . . . . . . . . . . . . 33
Storing Audio . . . . . . . . . . . . . . . . . . . . . 17
Storing Audio . . . . . . . . . . . . . . . . . . . . . 34
Shutting Down Your Shared Storage II 17
Shutting Down Your Shared Storage II . 34
Resetting Your Shared Storage II . . . . 17
Resetting Your Shared Storage II . . . . . 34
Security Lock . . . . . . . . . . . . . . . . . . . . . 18
Security Lock . . . . . . . . . . . . . . . . . . . . . 35
Media Serving . . . . . . . . . . . . . . . . . . . . .18
Media Serving . . . . . . . . . . . . . . . . . . . . . 35
Network Settings. . . . . . . . . . . . . . . . . . . 46
System Maintenance. . . . . . . . . . . . . . . . 47
Configure Your USB Devices . . . . . . . . 48
System Status . . . . . . . . . . . . . . . . . . . . 49
Using External USB Drives . . . . . . . . . . 50
Using USB Printers . . . . . . . . . . . . . . . . 50
© 2006 Maxtor Corporation. All rights reserved. Changes are periodically made to the information herein which will be incorporated in revised editions of this publication. Maxtor may make changes or improvements to the product(s)
described in this publication at any time and without notice. Maxtor is a registered trademark of Maxtor Corporation. All other brands or products are trademarks or registered trademarks of their respective holders. Maxtor
Corporation, 500 McCarthy Blvd., Milpitas, California 95035 USA
MAXTOR SHARED STORAGE II WINDOWS INSTALLATION
Introduction
About this Guide
Thank you for selecting the Maxtor Shared Storage II Drive.
The following symbols and conventions are used in this guide:
Connecting this storage solution to your network in a home or
small office is a simple and economical way for users to
share and backup files. Your new Maxtor Shared Storage II
drive offers a winning combination of capacity, simplicity of
use and helpful software features that automate configuration, privacy and more. The simple installation allows you to
start using your drive as quickly as possible. You can also
change settings on your drive at any time, and manage user
access through web browsers.
Shared Storage II Features
Instantly add storage to your network, back up files across
every compatible computer on your network, and stream
music, videos and photos from your drive to your home
entertainment system.
Bold
Used for menu, command, and keyboard selections you make and
screens you will see.
Italics
Used for emphasis and to identify new terms.
Components
Before installing, review the solution features in Figure 1.
FIGURE 1 SOLUTION FEATURES
1. Status Lights
2. Power Switch
3. Power Connector
4. USB 2.0 Ports
5. Ethernet Port
6. Security Lock
Simple Installation and Setup
– Automatically configure the drive to your network
– Manage the drive using our simple user interface
– Connect and share additional hard drives using the
drive’s 2 USB ports
– Easily store and share access to files, photos, music
and videos
– Organize files automatically using Drag and Sort™
– Give users full access to public folders, while keeping
others private
– Get backup and storage status for all users with
SimpleView™
– Back up user files/folders to an external USB drive
– Protect data on all of your networked PCs using
Maxtor® Backup
– Playback of Videos, Music and Photos
– Use our media streaming feature to play digital photos,
music and video on a networked home entertainment
system - even without turning on your computer
– Connect automatically through a UPnP™ AV
compatible digital media adapter
PAGE 1
MAXTOR SHARED STORAGE II WINDOWS INSTALLATION
Handling Precautions
FIGURE 2 INCLUDED IN PACKAGE
1. Backup Solution
2. Power Adapter
3. Ethernet Cable
4. EasyManage CD
Please handle your new Maxtor Shared Storage II with care!
Follow the precautions listed here or you could damage your
drive and void the product warranty. Review the Maxtor Limited
Warranty for more information.
Follow these precautions to prevent data loss
– Do not bump, move or drop the drive while in operation.
Installation Software
Maxtor Shared Storage™ II
Logiciel d’installation, Installationssoftware,
Software di installazione, Installationsprogram,
Software de instalación, Installatiesoftware,
Asennusohjelma, Software de Instalação,
Includes:
– Maxtor EasyManage™
Software
– Maxtor Backup™ Software
– Maxtor Shared Storage II
User Guide (English)
WINDOWS
English
Français
Deutsch
Español
Italiano
MACINTOSH
English
Français
Deutsch
© 2006 Maxtor Corporation and its Licensors. Maxtor and the stylized
Maxtor logo are registered trademarks,and Maxtor Shared Storage,
Maxtor EasyManage, and Maxtor Backup are trademarks of
Maxtor Corporation. U.S. patents 5,150,473 and 5,966,730.
Other patents pending. Other trademarks are the property
of their respective holders. All rights reserved.
06/06 PN: 20337500
– Do not remove the interface cable or power cord
without first disconnecting the drive properly through
the operating system.
– Do not set any liquids or drinks on or near the drive.
Liquids will damage the internal electronics.
– Do not open the drive enclosure. This can cause loss of
data and will void the product warranty.
System Requirements
– Wired or wireless router with an available
10/100/1000 Ethernet port
– Pentium III, 500 Mhz equivalent processor or higher
– Windows® 2000 Professional, XP Professional, or
Media Center
– 256MB RAM (512MB recommended) or more as
required by operating system
– Internet connection (for system updates)
– Internet Explorer 6.0 or higher
(for management interface of Shared Storage II)
– UPnP certified Digital Media Adapter
(if using Media Serving)
– CD-ROM/DVD-ROM drive
Maxtor Product Support
Maxtor Corporation provides a comprehensive product
support section on its web site, including the latest software
drivers, product specifications, a complete troubleshooting
section, and the Maxtor Knowledge Base.
Maxtor USA Support
Visit www.maxtorkb.com for the following information:
– Search the Hard Drive Knowledge Base
We store all resolved problems and FAQ’s in our
knowledge base. Search by product, category,
keywords, or phrases.
– My Stuff
Login to modify or view your FAQ update
notifications or update your personal profile.
– Most Popular Help Topics
Top five most frequently asked questions.
– Software Download
Download installation and diagnostic programs
for your hard drive or external storage device.
Maxtor Worldwide Support
Visit www.maxtor.com and click worldwide support or
contact us for product support outside of the USA.
PAGE 2
MAXTOR SHARED STORAGE II WINDOWS INSTALLATION
Installing the Shared Storage II
Step 1 – Connect the Drive
Connecting the Power
1. Plug the round female connector from the power adapter
into the drive’s power connector.
The Maxtor Shared Storage II connects to your computer with
a Cat5 Ethernet cable.
2. Plug the female connector on the power cord into the
power adapter.
Connecting the Ethernet Cable
1. Plug one end of the Ethernet cable into your network,
router or switch.
3. Plug the standard electrical plug from the power adapter
into your power source.
FIGURE 4 CONNECTING THE POWER
2. Plug the other end of the Ethernet cable into the Ethernet
port on your Shared Storage II drive.
3. Once connected, the Ethernet status LED(s) located on
either side of the Ethernet port will illuminate:
– If connected through a 10/100 cable/router – the Green
LED on the left side of the connector will show activity
when the Shared Storage Drive is powered on. This LED
will also illuminate when connected to a Gigabit cable/
router too.
– If connected through a Gigabit cable/router – the
Amber LED on the right side of the connector will show
activity when the Shared Storage Drive is powered on.
FIGURE 3 CONNECTING THE ETHERNET CABLE
PAGE 3
MAXTOR SHARED STORAGE II WINDOWS INSTALLATION
Step 2 – Power up the Drive
Front Panel LEDs
1. Press the round black button on the back panel of your
Maxtor Shared Storage Drive. The green LED (light) with
illuminate in the center of the power button.
Top
LED
Definition
Power Activity
Status
Illuminated – Power On
Blinking – Drive is either powering up or
shutting down
Not Illuminated – Power Off
Center Hard Disk Activity Illuminated – Power On
Power Button
Blinking – Data is being transferred to/from the
drive
Not Illuminated – Power Off
Activity LED
Bottom Network Activity
Illuminated – Power On
Blinking – Network communication is occurring
Ethernet LED
Not Illuminated – Power Off
2. Your drive will now start. The startup process can take up
to one minute to complete.
Shared Storage Drive Power/Status LED Definitions
Various LED activity will appear on your Shared Storage II
Drive when power is applied. The following tables define the
meaning/status of each LED on the back and front panels:
Back Panel LEDs
LED
Definition
Status
Power LED
(located in
center of the
power button)
Power switch
Ethernet LED
(located on
bottom side of
Ethernet
connector)
Shows if the drive is
Illuminated – Power On
connected through a 10/100 or
Blinking – Network
a 1 Gb Ethernet connection.
communication is occurring
Left Green – 10/100 Mbps
Ethernet connectivity
Not Illuminated – Power Off
Not Illuminated – Power Off
Left Amber – 1 Gbps Ethernet
connectivity
Activity LED
(located on top
side of Ethernet
connector)
PAGE 4
Illuminated – Power On
A flashing Activity LED
indicates that the network
connection is functional and
that packets are being
transmitted or received.
Power Activity
Hard Disk Activity
Network Activity
MAXTOR SHARED STORAGE II WINDOWS INSTALLATION
Step 3 – Set up the Drive
1. Insert the Maxtor Shared Storage II Installation Software
into your CD-ROM drive. The Select Language window will
display.
Note: In the event that the CD does not autorun, click
Start ➔ Run. Browse to the drive letter associated with
the EasyManage CD. Click on Setup, click Open, and then
click OK.
2. The Select Language window opens. Choose your
language (e.g., English).
3. From the main menu, click Install Software.
4. You will be asked if you wish to install the software.
Click OK.
5. The License Agreement screen will appear. Click Yes.
6. The Choose Destination Location screen will appear. If
you wish to change the location of the installation, you
may do so by clicking the Browse button and selecting a
new location. Click Next.
7. The Setup Status screen will appear as the software is
installed, followed by the InstallShield Wizard Complete
screen when the installation is complete. Click Finish to
restart your system.
8. After system restart, EasyManage will discover Shared
Storage Drive(s) on you network segment.
Note: In the event that No Shared Storage Drives were
found, please refer to the Help File for available
troubleshooting tips.
This simply means that you can use EasyManage in
conjunction with these products provided one of the following
software packages is installed:
–
–
–
–
–
Maxtor OneTouch III USB 2.0
Maxtor OneTouch III FireWire 400/USB 2.0
Maxtor OneTouch III FireWire 800/FireWire 400/USB 2.0
Maxtor OneTouch III Turbo Edition
Maxtor OneTouch III Mini Edition
Granted, you can use these software packages completely
separate from EasyManage. However, it is suggested that you
use the EasyManage application with all of these products.
Note: Please refer to Maxtor’s Knowledge Base for
examples and more information.
9. Once detected, a window displays informing you that your
Shared Storage drive has no security password set for the
administrative function.
To set a password for the drive, click Manage. This will
launch the Web User Interface (Web UI). Follow the
onscreen prompts in you browser to configure your
Shared Storage Drive.
Note: See “The Web UI” later in this guide for details on
using the Maxtor Shared Storage Web UI. Run Set-up
Wizard for more information on configuring these
settings.
10. When finished, close your browser to return to the
Storage Manager’s Settings screen, and then click the
Home button.
A Note About EasyManage
EasyManage is an all encompassing application that will,
under specific conditions, allow you to manage both Maxtor
OneTouch III and Shared Storage Drive products through one
single interface.
PAGE 5
MAXTOR SHARED STORAGE II WINDOWS INSTALLATION
Using the Shared Storage II
If you select a Shared Storage II Drive, EasyManage will display
this image:
Using EasyManage
Home
The EasyManage Home window provides access to
the following:
Search for Shared Storage Drives
When selecting this option, EasyManage discovers Shared
Storage Drives located on your network segment. When
detected, the following information is displayed:
–
–
–
–
–
Hostname (e.g., MSS-000155)
IP Address
MAC Address
Mounted Share
Drive (letter assigned to the Mounted Share – e.g. Z:)
Note: Mounted Share and Drive entries will be blank
unless a user account is connected.
Detection of Shared Storage Products
EasyManage can detect all Maxtor Shared Storage Drive
products located on your network segment. If you select a
Shared Storage or Shared Storage Plus Drive, EasyManage
will display this image:
PAGE 6
Note: In the event that no Shared Storage Drives were
found, please refer to the Help File for available
troubleshooting tips.
SimpleView™
When selected, SimpleView provides the following
information:
– Space Used - Total size of all user's files
– Last Backup - Date of user's last backup
– Backup Status - Success of user's last backup. This
information is displayed via backup status indicators
(icons) in the Backup Status column.
Backup Status Indicators Definitions
Color
Status
Meaning
Complete
All files successfully backed up
Incomplete
Some files backed up
Failed
No files backed up
MAXTOR SHARED STORAGE II WINDOWS INSTALLATION
Backup Log File
You can see the details of a backup by reading the log file.
To view the log file, click the colored status indicator in the
Backup Status column.
Depending on your operating system, you will be prompted
with Open File window. If so, click the Open button.
This will launch your system’s text editor (e.g., Notepad) and
show you information regarding the backup in question.
Below is an excerpt from a log file:
*******************************************
Friday, June 02, 2006, at 09:15
\\MSS-000155\Maxtor\My Backup Destination is not accessible
\\MSS-000155\Maxtor\My Backup Destination is not accessible
\\MSS-000155\Maxtor\My Backup Destination is not accessible
Create User Account
This feature gives the admin the capability to create user
accounts on the Shared Storage drive. The admin can create
Public or Private user accounts and further customize these
accounts for either Home or Business use.
Account Types
Public
With a public account, all of your files are accessible to anyone
who has an account on the Shared Storage Drive.
Private
With a private account, all of your files are password-protected
except for those that you place in your “public” folder to share
with others.
Home and Business Folders
You can choose a set of folders appropriate for Home or
Business use. The folders created are listed below.
Home Folders
Folder
Appropriate for
My Backup
Backed-up files
My Documents
Word processing files
My Library
Electronic books
My Movies
Home videos
My Music
Digital music collection
My Photos
Digital photos and artwork
My Sites
Web pages
My Software
Software storage
Public
Sharing files with others
Business Folders
Folder
Appropriate for
My Backup
Backed-up files
My Documents
Word processing files
My Multimedia
Audio and video files
My Photos
Digital photos and artwork
My Presentations
Presentation files
My Projects
Project files
My Sites
Web pages
My Spreadsheets
Spreadsheet files
My Software
Software storage
Public
Sharing files with others
PAGE 7
MAXTOR SHARED STORAGE II WINDOWS INSTALLATION
Naming Conventions
– A User Name may contain 1 - 20 characters
– Users with a Private user account can have a Password
that contains 1 - 32 characters
– Both the User Name and Password may contain
letters, numbers, and underscores “_”, but no spaces
or symbols can be used
To Create a Public Home User Account
1. From the EasyManage home page, click the Create a user
account button.
To Create a Public Business User Account
1. From the EasyManage home page, click the Create a user
account button.
2. The Create a user account screen opens. Click on the
Public and Business buttons.
3. In the Name field, type the name for the user.
4. Click the Create button.
5. At this point, the user is created. A status bar shows the
creation of the account. This process may take awhile.
2. The Create a user account screen opens. Click on the
Public and Home buttons.
3. In the Name field, type the name for the user.
6. When finished, you will be notified that a folder has been
created for the user. A shortcut icon (by default, this
shortcut maps to Drive Z: - or the next available drive
letter) will appear on the system’s desktop for the user.
4. Click the Create button.
5. At this point, the user is created. A status bar shows the
creation of the account. This process may take awhile.
6. When finished, you will be notified that a folder has been
created for the user. A shortcut icon (by default, this
shortcut maps to Drive Z: - or the next available drive
letter) will appear on the system’s desktop for the user.
7. Click Open to use the folder right away.
8. Click Done to return to the EasyManage Home Window.
Note: The Mounted Share and Drive fields, located in the
EasyManage Home window, are now populated with the
user account’s information.
PAGE 8
7. Click Open to use the folder right away.
8. Click Done to return to the EasyManage Home Window.
Note: The Mounted Share and Drive fields, located in the
EasyManage Home window, are now populated with the
user account’s information.
MAXTOR SHARED STORAGE II WINDOWS INSTALLATION
To Create a Private Home User Account
1. From the EasyManage home page, click the Create a user
account button.
To Create a Private Business User Account
1. From the EasyManage home page, click the Create a user
account button.
2. The Create a user account screen opens. Click on the
Private and Home buttons.
2. The Create a user account screen opens. Click on the
Private and Business buttons.
3. In the Name field, type the name for the user.
3. In the Name field, type the name for the user.
4. In the fields provided, enter a password and confirm the
password.
4. In the fields provided, enter a password and confirm the
password.
5. Click the Create button.
5. Click the Create button.
6. At this point, the user is created. A status bar shows the
creation of the account. This process may take awhile.
6. At this point, the user is created. A status bar shows the
creation of the account. This process may take awhile.
7. When finished, you will be notified that a folder has been
created for the user. A shortcut icon (by default, this
shortcut maps to Drive Z: - or the next available drive
letter) will appear on the system’s desktop for the user.
7. When finished, you will be notified that a folder has been
created for the user. A shortcut icon (by default, this
shortcut maps to Drive Z: - or the next available drive
letter) will appear on the system’s desktop for the user.
8. Click Open to use the folder right away.
8. Click Open to use the folder right away.
9. Click Done to return to the EasyManage Home Window.
9. Click Done to return to the EasyManage Home Window.
Note: The Mounted Share and Drive fields, located in the
EasyManage Home window, are now populated with the
user account’s information.
Note: The Mounted Share and Drive fields, located in the
EasyManage Home window, are now populated with the
user account’s information.
PAGE 9
MAXTOR SHARED STORAGE II WINDOWS INSTALLATION
Connect to a User Account
This feature of EasyManage allows you to select the user
account’s share that you wish to use on your PC.
1. Click the Connect to a user account button.
2. The Connect to a user account window is displayed. At
this point, EasyManage identifies all user accounts on the
Shared Storage drive and lists them in the Name field.
3. Click on the triangle to the right of the Name field and
select a name from the drop-down menu.
Settings
Drag and Sort
The Drag and Sort feature automatically sorts files into a set
of folders inside your personal folder or the public folder.
Every time you drag files to your Shared Storage Drive, each
file is sorted into the appropriate folder based on its file type.
By default, the Drag and Sort feature is turned On and files
will sort into the My Personal folder.
To Disable Drag and Sort Settings
4. If you are selecting a Private Account, type the password
for the user in the Password field.
1. Open EasyManage and click on the Settings button.
5. Click the Mount button.
2. From the Settings screen, click Drag and Sort.
6. When finished, you will be notified that you can access the
folder for the selected user. A shortcut icon (by default,
this shortcut maps to Drive Z: - or the next available drive
letter) will appear on the system’s desktop for the user.
3. Click the Off button and click Apply.
4. At this point, the Drag and Sort feature is turned Off and
you are returned to the Settings window.
To Enable Drag and Sort Settings
1. Open EasyManage and click on the Settings button.
7. Click Open to use the folder right away.
8. Click Done to return to the EasyManage Home Window.
Note: The Mounted Share and Drive fields, located in the
EasyManage Home window, are now populated with the
user account’s information.
What’s New?
Click on this button to go to www.maxtorsolutions.com. There
you can find more information on Shared Storage II Drive.
Maxtor Support
Click on this button and your browser will launch to the home
page for Maxtor’s Knowledge Base. There you can find comprehensive articles related to troubleshooting, FAQs and
other information for the Shared Storage drive and other
Maxtor products.
PAGE 10
2. From the Settings screen, click Drag and Sort.
3. Click the On button and click Apply.
4. At this point, the Drag and Sort feature is turned On and
you are returned to the Settings window.
MAXTOR SHARED STORAGE II WINDOWS INSTALLATION
To Sort Files into Our Public Folder
2. From the Settings screen, click Drag and Sort.
Folder Tags
By default, this feature adds a special icon to each folder on
your computer that is set to be backed up to the Shared
Storage Drive.
3. Click the Sort files into “Our” public folder button and
click Apply. At this point, the Drag and Sort feature is
configured to copy files to “Our” public folder and you are
returned to the Drive Management window.
Example of a Folder Tag denoted by the blue circle with a check.
Sorted File Types
To Disable Folder Tags
A complete list of default, sorted file types can be found via
the Help menu. Click the “Which file types work and how are
they sorted?” link for more information. The Sorted File
Types list can be configured to meet your needs.
1. Open EasyManage and click on the Settings button.
1. Open EasyManage and click on the Settings button.
Advanced Web Page
The Advanced Web Page feature launches the Shared Storage
Drive’s Web User Interface (aka Web UI).
Note: You must login as the admin user to use the Web UI.
To access this feature:
1. Open EasyManage and click on the Settings button.
2. From the Settings screen, click Advanced Web Page. This
will launch the Web UI. If prompted, type the User name
and Password to authenticate.
2. Click on Folder Tags.
3. From the Settings: Folder Tags window, click the Off
button.
4. Click Apply to Disable Folder Tags.
To Re-enable Folder Tags (when it has been shut off)
1. Open EasyManage and click on the Settings button.
2. Click on Folder Tags.
3. From the Settings: Folder Tags window, click the
On button.
4. Click Apply to Enable Folder Tags.
The admin user can select this option to configure the Shared
Storage Drive’s:
–
–
–
–
–
–
–
–
Language
Network Time Protocol
Date/Time Format
Date
Time
Computer Name
Workgroup Name
Password
Note: See “The Web UI” later in this guide for details on using
the Maxtor Shared Storage Web UI. Run Set-up Wizard for
more information on configuring these settings.
PAGE 11
MAXTOR SHARED STORAGE II WINDOWS INSTALLATION
Shared Folder Backup
This option will launch your browser and open the Shared
Folder Backup portion of the Web UI. From this, you can:
– Format an external USB drive for use as a backup for
Shared Folders located on the Shared Storage Drive
– Backup and Restore data
Note: See “The Web UI” later in this guide for details on using
the Maxtor Shared Storage Web UI - Shared Folder Backup
for more information on configuring these settings.
Backup
From this screen, you can:
Edit My Backup Settings
1. Open EasyManage and click on the Backup button.
2. The Backup: Settings window opens. Check the boxes
associated with the files and or folders you want to back
up and click Next.
3. A second Backup: Settings window opens. By default,
your selected files and/or folders will be backed up daily
at 10:00 pm. Check the days/time that you wish to run
your edited backup and click Finish.
4. The Backup Files to My Shared Storage Device window
opens. To launch your first backup, click Back Up Now.
The backup will launch copying selected files/folders
from your PC to your User Account’s My Backup folder on
the Shared Storage Drive. Backup times may vary pending
on how much data has to be copied.
– Set a backup so that local files from your PC will
backup to the Shared Storage Drive
Backup File Management
– Begin an immediate backup of your selected files/
folders from your PC to the Shared Storage Drive
Edit Historical Versions
This option allows you to change the number of Historical File
Versions you wish to store on your Shared Storage Drive. You
can select between 1 – 10 Historical Versions to save. By
default, 5 historical versions of each file are stored.
– Perform file maintenance tasks that delete historical
file versions from the Shared Storage Drive and remove
files from the shared Storage Drive if they are no
longer on your PC
1. Open EasyManage and click on the Backup button.
To Setup a Backup
1. Open EasyManage and click the Backup button.
2. The Backup Files to My Shared Storage Device window
opens. Click Backup File Management.
2. The Backup: Settings Part 1 of 2 – Select Folders window
opens. Check the boxes associated with the files and or
folders you want to back up and click Next.
3. Click Edit to open the Advanced Settings window.
3. The Backup: Settings Part 2 of 2 – Schedule Days/Time
window opens. By default, your selected files and/or
folders will be backed up daily at 10:00 pm. Click Finish to
continue.
4. The Backup Files to My Shared Storage Device Window
opens. To launch your first backup, click Back Up Now.
The backup will launch copying selected files/folders
from your PC to your User Account’s My Backup folder on
the Shared Storage Drive. Backup times may vary pending
on how much data has to be copied.
PAGE 12
4. Click on the down arrow of the Historical Versions dropdown menu.
5. Choose the number of Historical Versions you wish to
backup (between 1 – 10) and click Save to return to the
Backup File Management window.
MAXTOR SHARED STORAGE II WINDOWS INSTALLATION
Delete Historical Versions
This option will delete all but the most recent Historical File
Versions from your user account’s My Backup folder.
1. Open EasyManage and click on the Backup button.
2. The Backup Files to My Shared Storage Device window
opens. Click Backup File Management.
Automatic Backups On/Off
You can turn Off/On Automatic Backups on your Shared
Storage Drive. Automatic Backups are beneficial because you
don’t have to remember to backup your data regularly.
However, some users like the flexibility of managing their
backups manually.
To Turn Automatic Backups Off
3. Click Delete.
1. Open EasyManage and click on the Backup button.
4. A confirmation window opens asking you to confirm the
deletion.
2. The Backup Files to My Shared Storage Device window
opens. In the upper-right corner of the window you will
see that, by default, Automatic Backups is turned On.
Click Off to continue. At this point, the Automatic Backup
feature is disabled.
Note: All Historical File Versions will be deleted except for
the most recent if you continue.
Click Yes to delete the Historical File Versions.
5. Click OK to return to the Backup File Management
window.
Note: When the Automatic Backup feature is turned Off, all
backup functionality must be done manually. To manually
launch a backup:
Clean Up Deleted Files
This option will remove all files from your user account’s My
Backup folder if they have been deleted from your PC.
– Open EasyManage, click on the Backup button.
– The Backup Files to My Shared Storage Device window
opens. To manually launch a backup, click Back Up
Now.
1. Open EasyManage and click on the Backup button.
2. The Backup Files to My Shared Storage Device window
opens. Click Backup File Management.
3. Click Clean Up.
4. A confirmation window opens asking you to confirm the
deletion.
Note: All files will be deleted from the user account’s My
Backup folder if you continue.
Click Yes to delete these files.
5. Click OK to return to the Backup File Management
window.
or
– Click on the OneTouch Status icon in the System Tray
and select Back Up Now from the menu
To Turn Automatic Backups On
1. Open EasyManage and click on the Backup button.
2. The Backup Files to My Shared Storage Device window
opens. In the upper-right corner of the window you will
see that Automatic Backups are turned Off. Click On to
continue. At this point, the Automatic Backup feature is
enabled and you can schedule backups.
PAGE 13
MAXTOR SHARED STORAGE II WINDOWS INSTALLATION
Restore
Restore to Folder
Original
Differences Between Restore Methods
Restore Historical Versions of Individual Backed-up Files
Choosing this option allows you to restore an individual historical version of a file, based on the date it was backed up.
The number of historical versions available is based on the
number selected in the Backup File Management option
under Edit Historical Versions. You can select between 1 – 10
Historical Versions to save. By default, 5 historical versions of
each file are stored.
Restore Most Recent Files and Folders
Choosing this option will open the “My Backup” folder inside
the folder for your user account on the Shared Storage drive.
You can then restore multiple files and folders by clicking and
dragging them to wherever you want to put them.
Restore Historical Versions of Individual Backed-up Files
1. Open EasyManage and click the Restore button.
2. From the Restore a Backup from my Storage Device
window, click Restore historical versions of individual
backed-up files.
Temporary
Restores files to its original folder on
your computer
Restores file to the following folder:
C:\MyDocuments\YourUserName\MSS
Restore
Note: “YourUserName” is your account Name.
3. Click Restore to restore files to your computer.
Restore Most Recent Files and Folders
1. Open EasyManage and click on the Restore button.
2. From the Restore a Backup from my Storage Device
window, click the Restore most recent files and folders
button.
3. This will launch a window showing the root directory
structure of the My Backup folder for the user connected
to the Shared Storage Drive. To restore files, simply
browse to the file(s) location and drag and drop (copy and
paste) files/folders from the Shared Storage Drive to your
computer.
Media Server
Select a File
+” sign next to your Shared Storage
– Click the plus “+
Drive to reveal the folders stored inside the folder for
your account.
This option will launch your browser and open the Manage
Digital Photos, Music, and Video portion of the Web UI.
+” sign next to the My Backup folder
– Click the plus “+
and select the file you would like to restore by clicking
its checkbox.
Note: See “The Web UI” later in this guide for details on using
the Maxtor Shared Storage Web UI - Manage Digital Photos,
Music, and Video for more information on configuring these
settings.
Select a Version
Click the checkbox next to the version you would like to
restore. Versions are listed by date.
PAGE 14
MAXTOR SHARED STORAGE II WINDOWS INSTALLATION
OneTouch Status Icons
The OneTouch Status Icon can:
– Report the connectivity of your Shared Storage Drive
and or the status of the last backup
– Can be used for accessing certain EasyManage
software features
Color Definitions
Icon
Gray
Green
Yellow
Red
Blue
Meaning
No Shared Storage Drive is connected.
Last backup completed successfully.
Change Account
This feature will launch the EasyManage’s Connect to a user
account window.
Note: See “Connect to a User Account” on page 10 for
more information regarding the use of these options.
Backup Settings
This feature opens EasyManage’s Backup My Files to My
Shared Storage Device window. From which you can Edit
Backup Settings, perform Backup file Management tasks
(e.g., Edit Historical Versions, Delete Historical Versions,
Clean Up files), launch immediate backups and/or Turn On/
Off Automatic Backups.
Note: See “Edit My Backup Settings” on page 12 for more
information regarding the use of these options.
Last backup completed with errors.
Last backup failed.
Backup needs to be configured.
Features
Access to User Shared Folder
This feature will open up the connected user share in an
explorer window.
1. Click on the OneTouch Status icon.
2. Select the share displayed (e.g., Public) at the top of the
menu. An explorer window opens showing you the
contents of the share’s files and folders.
Restore
This feature opens EasyManage’s Restore window. From
which you can Restore Historical Versions of Individual
backed Up Files or Restore Most Recent Files and Folders
Note: See “Restore” on page 14 for more information
regarding the use of these options.
MSS Settings
This feature opens EasyManage’s Settings window. From
which you can configure Drag and Sort, launch the Web UI,
configure Folder Tags, review backup status and disk usage
with SimpleView, and launch the Web UI’s Shared Folder
Backup options.
Note: See “Settings” on page 10 for more information
regarding the use of these options.
Backup Now
This feature will launch an immediate backup of selected files
and folders to the connected user account’s My Backup folder
1. Click on the OneTouch Status icon.
2. Click on Back Up Now. An immediate backup will be
performed. You will notice that the OneTouch Status Icon
will turn yellow (denoting backup activity) during the
backup process.
PAGE 15
MAXTOR SHARED STORAGE II WINDOWS INSTALLATION
Exit
This feature exits (closes and removes) the OneTouch Status
icon from your System Tray. To exit OneTouch Status:
Using Media Server
1. Click on the OneTouch Status icon and select Exit from
the menu.
2. A window appears asking you to confirm this task. Click
Yes to continue. This closes the OneTouch Status
application. In the event that the OneTouch Status Icon
still appears in the System Tray, simply move your mouse
over it to remove it.
To Re-open the OneTouch Status Application
1. Click Start ➔ Programs (all Programs with Windows XP)
➔ Maxtor ➔ OneTouch Status. The OneTouch Status
application will load the icon back into the System Tray.
Use Media Server to Manage your Digital Photo, Music and
Video Collection
If you have a networked home entertainment system, you can
use Media Server to manage your digital photo, music and
video collection on your Shared Storage Drive and use it with
your entertainment system. Media Server can even search
your iTunes Music folder for music and video files.
Media Server recognizes files in the following folders on your
Shared Storage Drive: Our Photos, Our Music, Our Movies, My
Photos, My Music, My Movies or My Multimedia. By placing
your files in these folders, they will automatically be available
for use with your entertainment system. In order to use Media
Server, your entertainment system will need to be compatible
with UPnP (Universal Plug and Play).
To enable Media Server on your Shared Storage Drive, click
the Media Server button in the main EasyManage screen.
To Enable Media Server
1. From the EasyManage main menu, click the Media Server
button.
2. This will launch your browser. When prompted, type the
User Name and Password to authenticate.
3. Click Login.
This will launch your browser directly to the Manage
Digital Photos, Music, and Video page.
Note: See “The Web UI” later in this guide for details on using
the Maxtor Shared Storage Web UI - Manage Digital Photos,
Music, and Video for more information on configuring these
settings.
PAGE 16
MAXTOR SHARED STORAGE II WINDOWS INSTALLATION
Storing Audio
Resetting Your Shared Storage II Drive
Using your computer as an audio jukebox is a very popular
application. This allows you to store and play thousands of
your favorite songs. You can also create and manage an audio
library from your Maxtor Shared Storage II.
If you can not access your drive after moving it to another network, turning it on after it has been off for a period of time, or
if you have forgotten/lost the admin password it may need to
be reset.
Shutting Down Your Shared Storage II Drive
To Reset Your Drive
1. With the drive turned on, use the tip of a pen or paperclip,
then press and hold the reset button on the back of your
drive. After a few seconds, the drive will reboot.
To Shut Down Your Drive
Power Button
Reset Button
1. Press the round black button on the back panel of your
Maxtor Shared Storage Drive. Upon doing so, the power
status button on the front panel of the Shared Storage
Drive will blink rapidly.
Power Status Light
The power down sequence will take 1 – 10 seconds to
complete. When properly shutdown, all LEDs on the front
and back will no longer be illuminated.
2. The power status LED will return to a blink state of about
1 second between blinks. The reset is complete and your
drive is ready for use.
Power Status Light
After Resetting Your Drive
– The admin password will be removed
– The computer name will reset back to its default name
(Example: MSS-000155)
– The workgroup name will be reset to MSHOME
PAGE 17
MAXTOR SHARED STORAGE II WINDOWS INSTALLATION
Security Lock
Media Serving
Your new Maxtor Shared Storage II includes a security locking
slot on the back of the drive. The slot is compatible with most
security locking cables.
With the Shared Storage Drive’s Media Serving capabilities,
you can view videos or photos and listen to music on your
home entertainment center without ever turning on your
computer. The Media Server feature is disabled by default on
the Shared Storage Drive.
Security Lock
Once your Shared Storage Drive is properly connected to your
network, you can copy music, movies, or videos directly to it.
Next, connect an UPnP™ AV compatible digital media adapter
(DMA) through your router, and your home network becomes
a home entertainment center.
PAGE 18
MAXTOR SHARED STORAGE II WINDOWS INSTALLATION
Considerations for Home Media Networks
– Some data may not be available for access for up to two
(2) hours after being copied to the Shared Storage
Drive. To obtain immediate access to these media files,
click the Refresh button located in Web UI.
– Take a survey and note all of the wireless devices in
your household (e.g., radio’s, stereo’s, speakers,
phones, cell phones, microwave ovens, alarms, etc.).
– Use of a hand held WiFi detector will help determine
strength and weakness of WiFi signals in your home.
– Be suspicious of any wireless devices in the same
general area and remove them from the WiFi paths of
your routers and media players.
– In some cases, firewalls may need to be disabled and
re-enabled.
– Most wireless devices broadcast a wireless frequency
by default. Check the documentation of your wireless
media players for configuration (WEP) settings.
– Check that your wireless router (WEP) security settings
will allow detection and connection of new devices.
– Try moving your media player within a couple of feet of
your wireless router for configuration and connection.
– When configuring and detecting wireless devices, keep
an Ethernet cable handy to hard wire the devices
together for diagnosis.
– If you continue to have problems with your WiFi
connection dropping off line, consider hardwiring the
devices with Cat5e Ethernet cabling.
– If you’re still having detection issues, reset all network
devices by physically unplugging them from power.
Power on all routers, switches, the Maxtor Shared
Storage Drive, computers, and finally media players.
PAGE 19
MAXTOR SHARED STORAGE II MACINTOSH INSTALLATION
Introduction
About this Guide
Thank you for selecting the Maxtor Shared Storage II Drive.
The following symbols and conventions are used in this guide:
Connecting this storage solution to your network in a home or
small office is a simple and economical way for users to
share and backup files. Your new Maxtor Shared Storage II
drive offers a winning combination of capacity, simplicity of
use and helpful software features that automate configuration, privacy and more. The simple installation allows you to
start using your drive as quickly as possible. You can also
change settings on your drive at any time, and manage user
access through Safari or other web browsers.
Shared Storage II Features
Instantly add storage to your network, back up files across
every compatible Macintosh on your network, and stream
music, videos and photos from your drive to your home
entertainment system.
Simple Installation and Setup
– Automatically configure the drive to your network
– Manage the drive using our simple user interface
– Connect and share additional hard drives using the
drive’s 2 USB ports
– Easily store and share access to files, photos, music
and videos
– Organize files automatically using Drag and Sort™
– Give users full access to public folders, while keeping
others private
– Get backup and storage status for all users with
SimpleView™
– Back up user files/folders to an external USB drive
– Protect data on all of your networked Macs using
Maxtor® Backup
– Playback of Videos, Music and Photos
– Use our media streaming feature to play digital photos,
music and video on a networked home entertainment
system - even without turning on your Macintosh
– Connect automatically through a UPnP™ AV
compatible digital media adapter
PAGE 20
Bold
Used for menu, command, and keyboard selections you make and
screens you will see.
Italics
Used for emphasis and to identify new terms.
Components
Before installing, review the solution features in Figure 1.
FIGURE 1 SOLUTION FEATURES
1. Status Lights
2. Power Switch
3. Power Connector
4. USB 2.0 Ports
5. Ethernet Port
6. Security Lock
MAXTOR SHARED STORAGE II MACINTOSH INSTALLATION
Handling Precautions
FIGURE 2 INCLUDED IN PACKAGE
1. Backup Solution
2. Power Adapter
3. Cat5 Ethernet Cable
4. EasyManage CD
Please handle your new Maxtor Shared Storage II with care!
Follow the precautions listed here or you could damage your
drive and void the product warranty. Review the Maxtor Limited
Warranty for more information.
Follow these precautions to prevent data loss
– Do not bump, move or drop the drive while in operation.
Installation Software
Maxtor Shared Storage™ II
Logiciel d’installation, Installationssoftware,
Software di installazione, Installationsprogram,
Software de instalación, Installatiesoftware,
Asennusohjelma, Software de Instalação,
Includes:
– Maxtor EasyManage™
Software
– Maxtor Backup™ Software
– Maxtor Shared Storage II
User Guide (English)
WINDOWS
English
Français
Deutsch
Español
Italiano
MACINTOSH
English
Français
Deutsch
© 2006 Maxtor Corporation and its Licensors. Maxtor and the stylized
Maxtor logo are registered trademarks,and Maxtor Shared Storage,
Maxtor EasyManage, and Maxtor Backup are trademarks of
Maxtor Corporation. U.S. patents 5,150,473 and 5,966,730.
Other patents pending. Other trademarks are the property
of their respective holders. All rights reserved.
06/06 PN: 20337500
– Do not remove the interface cable or power cord
without first disconnecting the drive properly through
the operating system.
– Do not set any liquids or drinks on or near the drive.
Liquids will damage the internal electronics.
– Do not open the drive enclosure. This can cause loss of
data and will void the product warranty.
System Requirements
– Wired or wireless router with an available
10/100/1000 Ethernet port
– Apple G4 processor or greater
– Mac OS X (10.3.9 or later)
– 256MB RAM (512MB recommended) or more as
required by operating system
– Internet Explorer 6.0 or higher
(for management interface of the Shared Storage II drive)
– Internet connection (for system updates)
– UPnP certified Digital Media Adapter
(if using Media Serving)
– CD-ROM/DVD-ROM drive
Maxtor Product Support
Maxtor Corporation provides a comprehensive product
support section on its web site, including the latest software
drivers, product specifications, a complete troubleshooting
section, and the Maxtor Knowledge Base.
Maxtor USA Support
Visit www.maxtorkb.com for the following information:
– Search the Hard Drive Knowledge Base
We store all resolved problems and FAQ’s in our
knowledge base. Search by product, category,
keywords, or phrases.
– My Stuff
Login to modify or view your FAQ update
notifications or update your personal profile.
– Most Popular Help Topics
Top five most frequently asked questions.
– Software Download
Download installation and diagnostic programs
for your hard drive or external storage device.
Maxtor Worldwide Support
Visit www.maxtor.com and click worldwide support or
contact us for product support outside of the USA.
PAGE 21
MAXTOR SHARED STORAGE II MACINTOSH INSTALLATION
Installing the Shared Storage II
Step 1 – Connect the Drive
Connecting the Power
1. Plug the round female connector from the power adapter
into the drive’s power connector.
The Maxtor Shared Storage II connects to your computer with
a Cat5 Ethernet cable.
2. Plug the female connector on the power cord into the
power adapter.
Connecting the Ethernet Cable
1. Plug one end of the Ethernet cable into your network,
router or switch.
3. Plug the standard electrical plug from the power adapter
into your power source.
FIGURE 4 CONNECTING THE POWER
2. Plug the other end of the Ethernet cable into the Ethernet
port on your Shared Storage II drive.
3. Once connected, the Ethernet status LED(s) located on
either side of the Ethernet port will illuminate:
– If connected through a 10/100 cable/router – the Green
LED on the left side of the connector will show activity
when the Shared Storage Drive is powered on. This LED
will also illuminate when connected to a Gigabit cable/
router too.
4. If connected through a Gigabit cable/router – the Amber
LED on the right side of the connector will show activity
when the Shared Storage Drive is powered on.
FIGURE 3 CONNECTING THE ETHERNET CABLE
PAGE 22
MAXTOR SHARED STORAGE II MACINTOSH INSTALLATION
Step 2 – Power up the Drive
Front Panel LEDs
1. Press the round black button on the back panel of your
Maxtor Shared Storage Drive. The green LED (light) with
illuminate in the center of the power button.
Top
LED
Definition
Power Activity
Status
Illuminated – Power On
Blinking – Drive is either powering up or
shutting down
Not Illuminated – Power Off
Center Hard Disk Activity Illuminated – Power On
Power Button
Blinking – Data is being transferred to/from the
drive
Not Illuminated – Power Off
Activity LED
Bottom Network Activity
Illuminated – Power On
Blinking – Network communication is occurring
Ethernet LED
Not Illuminated – Power Off
2. Your drive will now start. The startup process can take up
to one minute to complete.
Power Activity
Shared Storage Drive Power/Status LED Definitions
Various LED activity will appear on your Shared Storage II
Drive when power is applied. The following tables define the
meaning/status of each LED on the back and front panels:
Hard Disk Activity
Network Activity
Back Panel LEDs
LED
Definition
Status
Power LED
(located in
center of the
power button)
Power switch
Illuminated – Power On
Ethernet LED
(located on
bottom side of
Ethernet
connector)
Shows if the drive is
Illuminated – Power On
connected through a 10/100 or
Blinking – Network
a 1 Gb Ethernet connection.
communication is occurring
Left Green – 10/100 Mbps
Ethernet connectivity
Not Illuminated – Power Off
Not Illuminated – Power Off
Left Amber – 1 Gbps Ethernet
connectivity
Activity LED
(located on top
side of Ethernet
connector)
A flashing Activity LED
indicates that the network
connection is functional and
that packets are being
transmitted or received.
PAGE 23
MAXTOR SHARED STORAGE II MACINTOSH INSTALLATION
Step 3 - Setup the Drive
1. Insert the Maxtor Shared Storage II Installation Software
into your CD-ROM drive and double-click the Install CD
icon.
2. Then double-click the Maxtor EasyManage.pkg icon to
launch the program.
13. The EasyManage software will begin locating Shared
Storage Drives detected on the network.
14. When found, you will see the Network ID number and
IP address for the located drive(s). For example:
MSS-0170CA (192.169.1.108).
4. Review the License Agreement and click Continue.
15. The EasyManage - Shared Storage Administrator
Password window will appear for all new drives, allowing
you to set administrative security on the Shared Storage
drive.
5. To accept the terms of the License Agreement, click
Agree.
16. Click Yes to launch the Web User Interface and set an
administrative password.
3. From the Welcome screen, click Continue.
6. Select a destination to install the EasyManage software
and click Continue.
7. To start the installation, click Install.
8. When prompted, type your Name and Password of the
user to authenticate.
Click OK to proceed.
9. A restart is required to complete the installation. Click
Continue Installation to proceed.
10. The EasyManage software will install on your computer.
11. When finished, click Restart.
12. When the computer is ready, double-click the
EasyManage icon.
PAGE 24
Note: See “The Web UI” later in this guide for details on
using the Maxtor Shared Storage Web UI - Shared Folder
Backup for more information on configuring these
settings.
MAXTOR SHARED STORAGE II MACINTOSH INSTALLATION
Using the Shared Storage II
Create and Use Shared Folders
Using EasyManage
User Account Types
Public – With a public account, all of your files are accessible
to anyone who has an account on your Shared Storage Drive.
Once installed, you can use your new Maxtor Shared Storage
II in the same way you use the other drives on your computer.
Some of the basic ways you can use your new drive are:
Select Your Drive
Make sure your Shared Storage Drive is connected to your
network and turned on. Its name and IP address will appear
in the “Select a Maxtor Shared Storage Drive” list.
1. Double-click the Maxtor EasyManage icon located on your
Desktop.
Private – With a private account, all of your files are password-protected except for those which you place in your
“Public” folder to share with others.
Name and Password
Length – Name may be up to 20 characters in length. Password may be up to 32 characters in length.
Characters – Both may contain letters, numbers, and underscores (_), but no spaces or symbols.
2. Click the name of your Shared Storage Drive in the list.
3. Select a user account.
4. Click Select Drive.
5. If it is a private account, enter the password and click OK.
A shortcut to the shared folder for this user account will
appear on the desktop of your Macintosh.
Note: If you are already connected to an account and want to
connect to another account on your Shared Storage Drive, you
do not need to select the drive (step 3, above). If you are setting up your Shared Storage Drive for the first time, you will
need to create a user account.
Maxtor EasyManage Help
Help can be accessed from:
– The Help Button located on the EasyManage main
menu.
– The Help Menu located at the top of the desktop.
When selecting one of these options, the Help Menu is
displayed.
Creating Shared Folders
Shared Folder Types
While creating a user account you can select a shared folder
type to associate with the user. You can choose between three
shared folder types:
Home – With this folder type, a series of sub-folders are created that help with organizing files/folders commonly used in
the Home environment (My Music, My Documents, etc.). A
shortcut to the Public folder is provided as well.
Business - With this folder type, a series of sub-folders are
created that help with organizing files/folder commonly used
in a business environment (My Documents, My Spreadsheets,
My Presentations, etc.). A shortcut to the Public folder is provided as well.
None - With this folder type, no sub-folders are created; however, there is a shortcut to the Public folder.
Note: The Public account, for all users, contains a set of
folders identical to the Home folders shown above, but
using the name “Our.” For example: “Our Music.”
PAGE 25
MAXTOR SHARED STORAGE II MACINTOSH INSTALLATION
Creating a Public/Home User Account
1. From the main EasyManage screen, click the Create a
User Account button.
Creating a Public/None User Account
1. From the main EasyManage screen, click the Create a
User Account button.
2. Select the Public User Account type.
2. Select the Public User Account type.
3. Select the Home Folder type.
3. Select the None Folder type.
4. Type a Name for your shared folder.
4. Type a Name for your shared folder.
5. Click Create. At this point, the account is created (this
may take a few minutes to complete).
5. Click Create. At this point, the account is created (this
may take a few minutes to complete).
6. When created, the word “Success” will appear near the
help button and a shortcut to the shared folder for this
user account will appear on the desktop.
6. When created, the word “Success” will appear near the
help button and a shortcut to the shared folder for this
user account will appear on the desktop.
7. Double-click the shortcut to view its contents.
7. Double-click the shortcut to view its contents.
Creating a Public/Business User Account
1. From the main EasyManage screen, click the Create a
User Account button.
Creating a Private/Home User Account
1. From the main EasyManage screen, click the Create a
User Account button.
2. Select the Public User Account type.
2. Select the Private User Account type.
3. Select the Business Folder type.
3. Select the Home Folder type.
4. Type a Name for your shared folder.
4. Type a Name for your shared folder.
5. Click Create. At this point, the account is created (this
may take a few minutes to complete).
5. Type and re-type a Password.
6. When created, the word “Success” will appear near the
help button and a shortcut to the shared folder for this
user account will appear on the desktop.
6. Click Create. At this point, the account is created (this
may take a few minutes to complete).
7. When created, the word “Success” will appear near the
help button and a shortcut to the shared folder for this
user account will appear on the desktop.
7. Double-click the shortcut to view its contents.
8. Double-click the shortcut to view its contents.
PAGE 26
MAXTOR SHARED STORAGE II MACINTOSH INSTALLATION
Creating a Private/Business User Account
1. From the main EasyManage screen, click the Create a
User Account button.
7. When created, the word “Success” will appear near the
help button and a shortcut to the shared folder for this
user account will appear on the desktop.
2. Select the Private User Account type.
3. Select the Business Folder type.
8. Double-click the shortcut to view its contents.
4. Type a Name for your shared folder.
Using Shared Folders to Connect to User Accounts
5. Type and re-type a Password.
There are two (2) methods for connecting to User Accounts.
This section provides you with the steps for connecting a
Public or Private User:
6. Click Create. At this point, the account is created (this
may take a few minutes to complete).
7. When created, the word “Success” will appear near the
help button and a shortcut to the shared folder for this
user account will appear on the desktop.
Method 1 – Connect a Public User Account
1. From the main EasyManage screen, click the Connect to a
User Account button.
The Connect to User Account window is displayed.
8. Double-click the shortcut to view its contents.
2. Select the Public User Account that you wish to connect.
Creating a Private/None User Account
1. From the main EasyManage screen, click the Create a
User Account button.
3. Click Connect. At this point the EasyManage software
connects to the user account.
4. When connected the word “Success” will appear near the
help button and a shortcut to the shared folder for this
user account will appear on the desktop.
2. Select the Private User Account type.
3. Select the None Folder type.
4. Type a Name for your shared folder.
5. Type and re-type a Password.
6. Click Create. At this point, the account is created (this
may take a few minutes to complete).
PAGE 27
MAXTOR SHARED STORAGE II MACINTOSH INSTALLATION
Method 2 – Connect a Private User Account
1. From the main EasyManage screen, click the Connect to a
User Account button.
The Connect to User Account window is displayed.
2. Select the Private User Account that you wish to connect.
3. Type the Password.
4. Click Connect. At this point, the EasyManage software
connects to the user account.
5. When connected the word “Success” will appear near the
help button and a shortcut to the shared folder for this user
account will appear on the desktop of your Macintosh.
Drag and Sort™
Drag and sort is an easy and powerful way to sort files on
your Shared Storage Drive. When you drag a group of files to
the Shared Storage Drive icon, each file is automatically
sorted into a specific folder, based on its file type.
Enable Drag and Sort
This turns Drag and Sort on or off. It is turned on by default
when you install the Shared Storage Drive software. You may
also control this setting using the Drag and Sort button in the
main EasyManage screen.
Note: Drag and Sort can also be enabled and/or disabled
from the Settings – Drag and Sort menu.
Folders and their Sorted File Types
Two types of folder sets exist on your Shared Storage Drive:
– “My” folders - a set of folders unique to each user.
– “Our” folders - a set of folders for all users.
Files dragged to a user-specific shared folder are sorted into
the “My” Personal Folders. Files dragged to the Public shared
folder are sorted into the “Our” Public Folders.
“My” Personal Folders and their Sorted File Types
* Business user account folders.
“Our” Public Folders and their Sorted File Types
PAGE 28
MAXTOR SHARED STORAGE II MACINTOSH INSTALLATION
Adding Drag and Sort Folders
To add a new folder:
1. Click the plus sign (+) at the bottom of the column. A
sheet will drop down where you can enter the new folder
name.
2. After clicking OK, the new folder will appear in the list in
alphabetical order.
Adding Drag and Sort File Types
To Add a New File Type:
1. Select the folder in which you want to store the new file
type.
2. Click the plus sign (+) at the bottom of the File Types
column. A sheet will drop down where you can enter a
new file type.
3. After clicking OK, the new file type will appear in the list in
alphabetical order.
Note: To add a file type, you need to know its extension.
For example: .DOC for a text file.
Backup Settings
To Launch Your First Backup
1. From the EasyManage menu, click Settings.
2. This will launch the EasyManage Settings menu. By
default, Backup is selected. If necessary, click the Backup
tab. You will see the following:
Select Folders to Back Up
1. Click the plus sign (+).
2. From the Finder window, select a folder and click Open.
Repeat steps 1 and 2 to add additional folders or select
multiple folders in a list by holding down the command
key while clicking each folder.
3. To launch an immediate backup, click Back Up Now.
4. At this point, the backup will prepare. Files will start
backing up to the Shared Storage Drive.
5. When finished, a message will be displayed notifying you
that the backup has completed.
PAGE 29
MAXTOR SHARED STORAGE II MACINTOSH INSTALLATION
Editing Backup Settings
Set Day and Time
Choose a time for your backup by clicking the arrow buttons
or typing. Then choose day(s) by clicking them.
Enable Scheduled Backups
This turns scheduled backups on or off.
You may also control this setting using the Scheduled Backup
button in the main EasyManage screen.
Back Up Now
After you've selected the folders to back up, the day and the
time, you can back up your folders immediately by clicking
Back Up Now.
Historical Versions
When you back up your files, you have the option to store previous, or “historical,” versions of each file. You can then
restore any historical version based on the date when it was
backed up.
1. Click the drop menu.
2. Choose the number of historical versions from the menu.
By default, 5 historical versions of each file are stored.
Advanced Settings
To open, click Tab Advanced. The following options are
displayed:
Wake My Macintosh if it is Asleep
Select this option to automatically wake up your Macintosh,
so the backup can take place. If you do not select this option,
you will need to manually wake up your Macintosh before
backup can start. This option is enabled by default.
Start My Macintosh if it is Not Running
Select this option to automatically start your Macintosh, so
that backup can take place.
This requires that the “automatically log in…” option is
selected for your Mac OS X user account.
If you currently log in manually and would like to switch to
automatic login:
1. Go to the Apple Menu and choose System Preferences.
2. Click Accounts.
3. Click the lock at the bottom of the window.
4. Type your password and click OK.
Delete History
This deletes all but the most current historical version of
each backed-up file, creating extra space on your Shared
Storage Drive.
5. Select your user account.
1. Click Delete History. The deletion begins.
8. Choose your user name from the drop-down list.
2. When finished, the message “Delete history” will display.
9. Type your password and click OK.
Delete Unused
This deletes all backed-up files from your Shared Storage
Drive that no longer exist on your Macintosh, creating extra
space on your Shared Storage drive.
10. Click Login.
1. Click Delete Unused. The deletion begins.
2. When finished, the message “Delete Unused has
completed” will be displayed.
PAGE 30
6. Click Login Options.
7. Click Automatically log in as.
11. The browser then launches to the Maxtor Shared Storage
Drive – home page.
Shut Down My Macintosh when Backup is Finished
This option is only available if the Start My Macintosh if it is
Not Running is checked. When selected, your Macintosh will
shutdown after a scheduled backup has completed.
MAXTOR SHARED STORAGE II MACINTOSH INSTALLATION
Shared Storage Administration
The button launches the Shared Storage Drive’s Web User
Interface (Web UI).
Backup
Connect to My Selected User Account at Login
Note: You must login as the admin user to use the Web UI.
Select this option if you want to connect to the selected User
Account when you login to your Mac computer.
To Access this Feature
1. Open EasyManage and click on the Settings button.
If configured through settings, you can launch a backup from
EasyManage.
2. From the Settings screen, click Advanced Web Page. This
will launch the Web UI. If prompted, type the User name
and Password to authenticate.
1. Click the Back Up button. The backup prepares to launch.
then starts to backup the files to your Shared Storage
Drive.
The admin user can select this option to configure the Shared
Storage Drive’s:
–
–
–
–
–
–
–
–
Language
Network Time Protocol
Date/Time Format
Date
Time
Computer Name
Workgroup Name
Password
2. When finished, a screen notifies you that the Backup
completed.
3. Click the red button to close the screen.
Note: See “The Web UI” later in this guide for details on using
the Maxtor Shared Storage Web UI. Run Set-up Wizard for
more information on configuring these settings.
Drag and Sort™
Drag and Sort is an easy and powerful way to sort files on
your Shared Storage II Drive. When you drag a group of files
to the Shared Storage Drive icon, each file is automatically
sorted into a specific folder, based on its file type.
Note: See “Drag and Sort™” on page 31 for more information
regarding the use of this feature.
PAGE 31
MAXTOR SHARED STORAGE II MACINTOSH INSTALLATION
Restore
Select a Restore Location
Restore Recent Files and Folders
Original: Restores file(s) to their original location, replacing
the existing version.
You can restore the most recent version of backed-up files
and folders.
Select a File or Folder
1. From the EasyManage main menu, click the Restore
button.
Temporary: Restores files to the temporary location in the
Documents folder of the current user. For example: /Users/
John/Documents/Maxtor Restore.
Restore the files and folders
After you've selected the file(s) and the restore location, click
Restore.
Historical Versions
2. Click the arrow next to the hard drive where the current
files are stored to reveal the folders from which files or
folders were backed up.
3. Click the arrow next to each folder to reveal its contents
until you find the specific files and/or folders you wish to
restore.
4. Click the checkbox next to the files and/or folders you
wish to restore.
or
To restore a historic version of a file, click the latest drop
down menu and select the Historic file version that you
wish to restore.
PAGE 32
When you back up your files, you have the option to store previous, or “historical,” versions of each file. You can then
restore any historical version based on the date when it was
backed up.
You can choose the number of historical versions from the
Historical Versions pop-up menu in the Backup Settings window. By default, 5 historical versions of each file are stored.
MAXTOR SHARED STORAGE II MACINTOSH INSTALLATION
SimpleView™ Storage and Backup Status
Using Media Server
This screen provides you with an overview of each user's
storage and backup information:
Click SimpleView.
Last Backup
Date of the user's latest backup
Space Used
Total size of all user's files
Backup Status
Success of user's last backup
The following displays:
Backup Status Indicators
Icon
Status
Meaning
Complete
All files successfully backed up
Incomplete
Some files backed up
Failed
No files backed up
Use Media Server to Manage Your Digital Photo, Music and
Video Collection
If you have a networked home entertainment system, you can
use Media Server to manage your digital photo, music and
video collection on your Shared Storage Drive and use it with
your entertainment system. Media Server can even search
your iTunes Music folder for music and video files.
Media Server recognizes files in the following folders on your
Shared Storage Drive: Our Photos, Our Music, Our Movies, My
Photos, My Music, My Movies or My Multimedia. By placing
your files in these folders, they will automatically be available
for use with your entertainment system. In order to use Media
Server, your entertainment system will need to be compatible
with UPnP (Universal Plug and Play).
To enable Media Server on your Shared Storage Drive, click
the Media Server button in the main EasyManage screen.
To enable Media Server:
Backup Log File
You can see the details of a user's backup by reading the log
file. To view the log file, double-click the icon in the Status
column.
The log files launches in a Console window.
1. From the EasyManage menu, click the Media Server button.
2. This will launch your browser. When prompted, type the
User Name and Password to authenticate.
3. Click Login.
This will launch your browser directly to the Manage
Digital Photos, Music, and Video page.
Note: See “The Web UI” later in this guide for details on
using the Maxtor Shared Storage Web UI - Manage Digital
Photos, Music, and Video for more information on
configuring these settings.
PAGE 33
MAXTOR SHARED STORAGE II MACINTOSH INSTALLATION
Storing Audio
Resetting Your Shared Storage II Drive
Using your computer as an audio jukebox is a very popular
application. This allows you to store and play thousands of
your favorite songs. You can also create and manage an audio
library from your Maxtor Shared Storage II.
If you can not access your drive after moving it to another network, turning it on after it has been off for a period of time, or
if you have forgotten/lost the admin password it may need to
be reset.
Shutting Down Your Shared Storage II Drive
To Reset Your Drive
1. With the drive turned on, use the tip of a pen or paperclip,
then press and hold the reset button on the back of your
drive. After a few seconds, the drive will reboot.
To Shut Down Your Drive
Power Button
Reset Button
1. Press the round black button on the back panel of your
Maxtor Shared Storage Drive. Upon doing so, the power
status button on the front panel of the Shared Storage
Drive will blink rapidly.
Power Status Light
The power down sequence will take 1 – 10 seconds to
complete. When properly shutdown, all LEDs on the front
and back will no longer be illuminated.
2. The power status LED will return to a blink state of about
1 second between blinks. The reset is complete and your
drive is ready for use.
Power Status Light
After Resetting Your Drive
– The admin password will be removed
– The computer name will reset back to its default name
(Example: MSS-000155)
– The workgroup name will be reset to MSHOME
PAGE 34
MAXTOR SHARED STORAGE II MACINTOSH INSTALLATION
Note: See “The Web UI” later in this guide for details on using
the Maxtor Shared Storage Web UI. Run Set-up Wizard for
more information on re-configuring these settings.
Security Lock
Your new Maxtor Shared Storage II includes a security locking
slot on the back of the drive. The slot is compatible with most
security locking cables.
Media Serving
With the Shared Storage Drive’s Media Serving capabilities,
you can view videos or photos and listen to music on your
home entertainment center without ever turning on your
computer. The Media Server feature is disabled by default on
the Shared Storage Drive.
Security Lock
Once your Shared Storage Drive is properly connected to your
network, you can copy music, movies, or videos directly to it.
Next, connect an UPnP™ AV compatible digital media adapter
(DMA) through your router, and your home network becomes
a home entertainment center.
PAGE 35
MAXTOR SHARED STORAGE II MACINTOSH INSTALLATION
Considerations for Home Media Networks
– Some data may not be available for access for up to two
(2) hours after being copied to the Shared Storage
Drive. To obtain immediate access to these media files,
click the Refresh button located in Web UI.
– Take a survey and note all of the wireless devices in
your household (e.g., radio’s, stereo’s, speakers,
phones, cell phones, microwave ovens, alarms, etc.).
– Use of a hand held WiFi detector will help determine
strength and weakness of WiFi signals in your home.
– Be suspicious of any wireless devices in the same
general area and remove them from the WiFi paths of
your routers and media players.
– In some cases, firewalls may need to be disabled and
re-enabled.
– Most wireless devices broadcast a wireless frequency
by default. Check the documentation of your wireless
media players for configuration (WEP) settings.
– Check that your wireless router (WEP) security settings
will allow detection and connection of new devices.
– Try moving your media player within a couple of feet of
your wireless router for configuration and connection.
– When configuring and detecting wireless devices, keep
an Ethernet cable handy to hard wire the devices
together for diagnosis.
– If you continue to have problems with your WiFi
connection dropping off line, consider hardwiring the
devices with Cat5e Ethernet cabling.
– If you’re still having detection issues, reset all network
devices by physically unplugging them from power.
Power on all routers, switches, the Maxtor Shared
Storage Drive, computers, and finally media players.
PAGE 36
MAXTOR SHARED STORAGE II WEB USER INTERFACE
Web User Interface
The Web User Interface (Web UI) is used for the following
actions:
– Setup the Shared Storage Drive (Language, Date/Time
Settings, Administrative Password, etc.)
– By IP Address – Each Shared Storage Drive has its own
IP Address, whether it is Static, assigned from a DHCP
Server, or by default via Automatic Private IP Addressing
(APIPA). To launch the Web UI via its IP Address if the
Shared Storage Drive’s address is 169.254.26.69, you
would type: http://169.254.26.69
– Create/Manage User Accounts
– Create/Manage Shared Folders
– Advanced Settings - configure network settings, adjust
power settings, perform diagnostics, setup USB
devices (external drives, printers)
– View Drive Status
Accessing the Web UI
To Open or Start the Web UI
1. Through your browser application:
– By Network ID – Each Shared Storage Drive has its
own Network ID. The Network ID is located on the label
located on the back panel of the Shared Storage Drive.
Locate the label on the back panel and find the text,
MSS Network ID: mss-xxxxxx; “mss-“are the first four
characters found at the beginning of each Network ID
and the “x” are denoted by numeric characters – for
example, 123456); then to access the Web UI:
2. Through the Maxtor EasyManage software, you can
launch the Web UI. To do so:
– Start Maxtor EasyManage software.
– For Windows: Click Settings ➔ Advanced Web Page.
– For Macintosh: Click Settings ➔ Advanced ➔ Shared
Storage Administration.
– At this point, your web browser launches. Type in your
administrative username and password for
authentication and click OK.
– Launch your computer’s web browser (e.g., Microsoft
Internet Explorer) and type the following in the address
field: http://mss-xxxxxx/
For example, if the Shared Storage Drive’s Network ID
is 123456, you would type: http://mss-123456/
The Shared Storage II Drive – Home Page opens in your
browser. The Web UI is used to administrate the Shared
Storage Drive via a simple, but thorough web interface.
In the following pages, you will learn how to use all features
of the Web UI.
PAGE 37
MAXTOR SHARED STORAGE II WEB USER INTERFACE
Run Set-up Wizard
3. Select your Time Zone.
The Run Set-up Wizard will aid in the initial configuration of
your Shared Storage Drive. From the Wizard, you can:
4. To disable the Network Time Protocol feature, click
Disable and then click Next.
– Change the language used by the Web UI
– Manually set Date/Time or enable/configure a Network
Time Server
– Name your Shared Storage Drive and assign it to a
workgroup
– Create the administrative password to secure the
administrative functionality of the Shared Storage
Drive
1. From the Maxtor Shared Storage Drive – Home Page,
click Run Set-up Wizard.
To Set the Date
Note: Skip this step if Network Time Protocol was
configured.
1. Type in the Date using the (mm/dd/yyyy) format.
To Set the Time
Note: Skip this step if Network Time Protocol was
configured.
1. Type in the current time using the (hh:mm:ss) format,
make sure to indicate AM or PM.
2. Click Next.
The following page is displayed:
Step 1 of 2
Use this page to enter your language preference, today’s
date, and the current time. To change the date and time later,
use the Advanced, Language, Date and Time settings page.
To Select the Language
1. Use the pull down menu and select your language.
Step 2 of 2
Use this page to assign the Shared Storage Drive a network
name, identify the workgroup (Domain) to which it belongs,
and to add/change the Admin password for your Shared
Storage Drive.
To Set the Name of Your Shared Storage Drive
1. Enter the name of your choice in the Name field.
To Set the Workgroup (Domain) that you would like your
Shared Storage Drive to be in
Network Time Protocol
1. Enter the Workgroup (Domain) name of your choice in the
Workgroup field.
This option allows the Shared Storage Drive to maintain time
via an Internet time server. By default, this feature is disabled.
To Set an Administrator Password
Note: This feature can only be used if the Shared Storage
Drive is connected to the Internet.
1. To enable the Network Time Protocol, click Enable.
2. Choose a continent (Asia or Europe), country (USA) or a
user defined NTP server name as the default NTP server.
If you choose to use a user defined NTP server name,
enter the name in the field provided.
PAGE 38
1. Select the Yes button to indicate that you want to have a
password on the Administrator account.
2. Type in the new password and then verify the password by
retyping it.
3. Click Next.
MAXTOR SHARED STORAGE II WEB USER INTERFACE
Note: If you do not want an Administrator password on
your Shared Storage Drive, select the NO button
indicating that you do not want to assign an Administrator
password and then click Next.
You will be prompted to authenticate using the
Administrator’s name (admin) and type the newly created
administrator password. Click OK.
Configuration Complete
After completing the Set-up wizard, you should see a
Congratulations message followed by an overview of all of
the settings that were made. Please take a minute to either
print or write down the information for future reference.
To print the summary of your Shared Storage Drive
1. Click the print icon below the information.
2. When finished printing or writing down the information,
click OK to return to the Shared Storage home page.
Accounts Management
Using the Accounts Management Pages
– Select what action you would like to do
– If you want to redisplay a page (to change something
you entered on it, for example), click Back
– After making a change, click Next
– Go back and forth between pages until you are satisfied
that the information is correct
– To stop and lose your changes, click Cancel. You can
stop at any time
Creating a New User Account
Add a user to your Shared Storage Drive and you want someone to have a particular level of access to information in a
share. You can then define the appropriate level of access for
that user to that information.
When Shared Storage Drive is installed, it includes an Admin
user by default. Admin is the user name you or whoever else
administers Shared Storage Drive use to log in to exercise
administrative privileges.
Note: This is the only account that will allow you to login to
the Web Administration portion of the Shared Storage Drive.
To Add a User
Overview
Use the Accounts Management link to manage the way
people access and store information on your Shared Storage
Drive.
The Accounts Management page is where you can:
– Create a New User Account
– Modify Account settings and Sharing Privileges
– Delete User Accounts
1. Click Create A New User Account.
2. Type the user name in the name field. (Note: The name
must have alpha numeric characters and can be a
maximum length of 32 characters.)
3. Type a password in the Password field. You must enter a
password for the user in order to continue.
4. Click Next.
5. Set the permissions for the user account by selecting the
appropriate buttons for the folders that you want the user to
have access to. Note: By default, the user has permissions to
all Shared folders on the Shared Storage Drive.
6. Click Next.
7. A screen will appear showing that the user was created.
Click OK to return to the Accounts Management page.
PAGE 39
MAXTOR SHARED STORAGE II WEB USER INTERFACE
The user is added and should immediately have access to
the Shared Storage Drive.
Modify Account Settings and Shared Privileges
Use this page to change a password as well as modify what
shared folders a user has access to on pre-existing accounts.
Note: The Admin account always has access to every folder
on the Shared Storage Drive.
To Change Folder Permissions
1. Click Modify Account Settings and Shared Privileges.
2. Find the user to modify the permissions for and click
Modify.
3. Set the permissions for the user account by selecting the
appropriate buttons for the folders that you want the user
to have access to.
4. Click Next.
5. A screen will appear notifying you that access privileges
have been successfully modified. Click OK to return to the
Accounts Management page.
To Change the Password on a User Account
1. Click Modify Account Settings and Shared Privileges.
2. Find the user to modify the permissions for and click
Change.
3. Enter the new password for the user.
4. Confirm the password by re-entering it.
Note: If the passwords do not match, an error message
will appear.
5. Click Next.
6. A screen will appear notifying you that the password has
been successfully changed.
7. Click OK to return to the Accounts Management page.
Delete User Accounts
To Delete a User Account
1. Click Delete User Accounts.
2. Find the user that you would like to remove and click
Delete.
3. Confirm that you selected the correct user account to
delete and click Yes.
4. A screen will appear notifying you that the user was
successfully deleted. Click OK to return to the Accounts
Management page.
Note: A User Folder will still remain on the Shared
Storage Drive when the User Account has been deleted.
Refer to Shared Folders Management for the procedure
used to delete a shared folder.
PAGE 40
MAXTOR SHARED STORAGE II WEB USER INTERFACE
Shared Folders Management
3. Set the Access Privileges at:
– Public shared folder if you would like everyone to have
access.
4. Click Next.
Overview
Use the Shared Folders Management page to manage the
way people access and store information on your Shared
Storage Drive.
5. You will see confirmation that the share was successfully
created. Click OK to go back to the Shared Folders
Management page.
The Shared Folders Management page is where you can:
6. Click New if you want to create another Share on your
Shared Storage Drive.
– Create a New Shared Folder
– Modify Shared Folder Access Privileges.
– Delete, Suspend or Re-Activate Shared Folders.
– Manage Digital Photos, Music and Video for UPnP
Audio/Video players connected to you home/office
network
Using the Shared Folders Management Page
– Select what action you would like to do.
– If you want to redisplay a page (to change something
you entered on it, for example), click Back.
– After making a change, click Next.
– Go back and forth between pages until you are satisfied
that the information is correct.
– To stop and lose your changes, click Cancel. You can
stop at any time.
Create a New Shared Folder
To Create a New Public Shared Folder
If you create a share that has Public access, this means that
all users will be able to access the folder as well as read and
write to the folder.
1. Click Create a New Shared Folder.
2. Type in the desired name for the new shared folder. Note:
the Name can be no longer than 32 characters.
To Create a New Defined Access Shared Folder
If you Define the shared folder access you will be able to limit
the users that can access the Shared Folder.
1. Click Create a New Shared Folder.
2. Type in the desired name for the new shared folder. Note:
the Name can be no longer than 32 characters.
3. Set the Access Privileges at:
– Define shared folder access privileges if you would like
to limit user access to this share.
4. Click Next.
5. Set User Access for the share by selecting the appropriate
buttons for the users that you want to have access to the
folder.
– Full Access - This will allow the selected user to Read,
Write, and Create new files in the selected Shared Folder
– Read Only Access - This will allow the selected user to
only read the files in the selected shared folder
– No Access - This will allow no access to the selected
shared folder.
6. Click Next.
7. You will see a confirmation that the share was created. Click
OK to return to the Shared Folders Management page.
Click New if you want to create another Share on your
Shared Storage Drive.
PAGE 41
MAXTOR SHARED STORAGE II WEB USER INTERFACE
Modify Shared Folder Access Privileges
To Change Folder Permissions
To Suspend a Shared Folder
1. Click Delete, Suspend or Re-Activate Shared Folders.
1. Click Modify Shared Folder Access Privileges.
2. Find the Shared Folder to Suspend and click Suspend.
2. Find the Share to modify the permissions for and click
Modify.
3. It will confirm that the selected Shared Folder has been
suspended. Click OK to return to the Shared Folders
Management page.
3. Set the permissions for the share by selecting the
appropriate buttons for the users that you want to have
access to the folder.
– Full Access - This will allow the selected user to Read,
Write, and Create new files in the selected Shared
Folder
– Read Only Access - This will allow the selected user to
only read the files in the selected shared folder
– No Access - No access will allowed to the selected
shared folder.
4. Click Next.
5. You will see a confirmation that the share permissions
were successfully set on the selected folder. Click OK.
Delete, Suspend or Re-Activate Shared Folders
To Delete a Shared Folder
1. Click Delete, Suspend or Re-Activate Shared Folders.
2. Find the Share that you would like to remove and click
Delete.
3. Confirm that you selected the correct Shared Folder and
click Yes.
4. It will confirm that the selected Shared Folder has been
deleted. Click OK to return back to the Shared Folders
Management Page.
PAGE 42
To Re-Activate a User Account
1. Click Delete, Suspend or Re-Activate Shared Folders.
2. Find the shared folder to Reactivate and click Reactivate.
3. It will confirm that the selected Shared folder has been
re-activated. Click OK to return to the Shared Folders
Management page.
MAXTOR SHARED STORAGE II WEB USER INTERFACE
Manage Digital Photos, Music, Video
Media server technology enables digital photo, music, and
video playback to networked home entertainment systems.
By default, the Media Server is disabled.
To Disable Media Server
1. Click Manage Digital Photos, Music and Videos.
2. Click Disable Media Server.
3. Click Next.
To Manage Digital Photos, Music and Videos
1. Click Manage Digital Photos, Music and Videos.
4. Click Done to return to the Shared Folders Management
page.
2. Click Enable Media Server.
3. Click Next.
Shared Folder Backup
4. Select the shared folders that will be searched for music,
videos and/or pictures and click Next.
Note: You can only check one (1) iTunes folder at any given
time.
5. Click Done to return to the Shared Folders Management
page.
To Refresh Media Server
This option is only available if Media Server is enabled. By
default, the Media Server automatically searches for new
media files every two (2) hours. To perform an immediate
update to the Media Server database, you must refresh it.
1. Click Manage Digital Photos, Music and Videos.
2. Click Refresh. The Media Server will refresh
automatically in the background.
3. Click Done to return to the Shared Folders Management
page.
To Clean Up Media Server
This option is only available if Media Server is disabled. This
feature allows you to prevent potential database corruption
when the Shared Storage Drive’s Media Serving feature is
disabled.
1. Click Manage Digital Photos, Music and Videos.
2. Click Clean Up. The Media Server’s database will be
cleaned in the background.
3. Click Done to return back to the Shared Folders
Management Page.
To use this feature, an external USB drive must be connected
to the Shared Storage Drive. After connecting, the External
Storage unit will require a re-format from the Shared Storage’s browser interface.
For connection information, refer to the Shared Storage II
User manual regarding the use of external USB drives.
Formatting the External USB drive
This procedure must be followed in order to use the Shared
Folder Backup features of the Shared Storage Drive.
1. Connect the external USB drive to your Shared Storage
Drive.
2. From the Web User Interface (Web UI), select Shared
Folder Backup.
3. A page displays notifying you that, “Your backup drive is
not formatted properly. Do you wish to format it now?”
Select Yes to continue.
4. A page will display prompting you to select a USB drive to
format. Select the drive from the drop-down menu and
choose Next.
5. A warning will display, notifying you that formatting will
erase all data currently on the USB drive. Choose Yes.
6. A page appears showing format status of the USB drive.
When finished, a page appears notifying you that the drive
is formatted and ready for use. Choose Done and return to
the Shared Folder Backup page.
PAGE 43
MAXTOR SHARED STORAGE II WEB USER INTERFACE
Create Backup Set
This option allows you to create a backup of shared files and
folders that reside on your Shared Storage Drive.
Delete Backup Set
This feature allows you to delete a backup set stored on the
External USB drive connected to the Shared Storage Drive.
1. Select Shared Folder Backup.
1. From the Shared Folder Backup Home Page, select
Delete Backup Set.
2. From the Shared Folder Backup Home Page, select
Create Backup Set.
3. From the Create Backup Set page, select the shared
folders you wish to add to the Backup Set or you can
maintain the default, All Shared Folders option.
4. Enter a Name for your backup set and choose Next.
5. You will be prompted to select an external drive to backup
to. Select the external USB drive from the drop-down
menu and choose Next.
6. You will then be prompted to create a Backup Schedule.
By default, your selected shared folders will backup daily
at 10:00 pm; the backup set will also maintain three
months of the files located in the backup set.
Make your selections to the backup schedule and choose
Next.
7. A page opens showing that the Backup Set has been
created, and displays the Backup Name, Backup Source,
Destination, and Schedule. Choose Done and return to the
Shared Folder Backup page, or choose Back Up Now to
launch your first backup.
8. If you select Back Up Now, a page launches showing you
the status of the backup. When finished, a page opens
showing when the backup is complete.
9. Choose Done and return to the Shared Folder Backup
page.
PAGE 44
2. A page opens listing the Backup Sets located on the
Shared Storage Drive. Select the backup set you want to
delete and choose Delete.
NOTE: Deleting a Backup Set does not remove files/
folders from the external USB drive.
3. You will be asked to confirm that you wish to delete the
Backup Set. Choose Delete.
4. A page opens showing the progress of the backup set
removal. When complete, choose Done and return to the
Shared Folder Backup page.
MAXTOR SHARED STORAGE II WEB USER INTERFACE
Back Up
This option allows you to perform an immediate backup of all,
or selected Backup Sets.
1. From the Shared Folder Backup Home Page, select
Back Up.
2. A page opens prompting you to select which backup sets
you wish to immediately backup. Select the backup sets
and choose Back Up Now.
3. A page opens showing you the status of the backup. When
finished, choose Done and return to the Shared Folder
Backup page.
Restore
This option will restore data located in a backup set on the
External USB drive to the Shared Storage Drive.
1. From the Shared Folder Backup Home Page, select
Restore.
2. A page opens prompting you to select which backup sets
you wish to restore to the Shared Storage Drive. Select the
backup set you wish to restore and choose Next.
Advanced Settings
Overview
Use the Advanced Settings page to manage the Language,
Date, Time, and Network Settings. As well as, run Diagnostics, set power management options, update the Shared Storage Drive software and manage any USB peripherals that you
have attached to the Shared Storage Drive.
From the Advanced Settings You Can
– Set the Language, Date, and Network Time Protocol
– Adjust Network Settings
– Run Diagnostics, set power management and update
the software
– Manage any USB peripherals attached to the Shared
Storage Drive
Using the Advanced Settings Pages
– Select what action you would like to do.
3. Select the Year, Month, Date and Time that you wish to
restore from.
– If you want to redisplay a page (to change something
you entered on it, for example), click Back.
Select the location where to restore your data:
– After making a change, click Next.
– Public
– Original location
4. Choose Restore.
Go back and forth between pages until you are satisfied
that the information is correct.
– To stop and lose your changes, click Cancel. You can
stop at any time.
5. If you selected to restore to the original location of the
data, a page opens warning you that, “…files in the
original location will be overwritten with the
corresponding backup version you have just selected.”
6. To continue, choose Restore.
7. A page opens showing the status of the restore. When
finished, choose Done and return to the Shared Folder
Backup page.
PAGE 45
MAXTOR SHARED STORAGE II WEB USER INTERFACE
Language, Date and Time
Enter your language preference, date, and Network Time
To select the Language
Network Settings
Use this page to assign the file server a name, identify the
workgroup to which it belongs, and to set the IP configuration
of the Shared Storage Drive.
1. Use the pull down menu and select the your language.
Network Time Protocol
To Set the Name of Your Shared Storage Drive
1. Click Network Settings.
This option allows the Shared Storage Drive to maintain time
via an Internet time Server. By default, this feature is disabled.
2. Enter a name for the Shared Storage Drive in the name field.
Note: This feature can only be used if the Shared Storage
Drive is connected to the Internet.
1. To enable the Network Time Protocol, click Enable.
2. Choose a continent (Asia or Europe), country (USA) or a
User defined NTP Server name as the Default NTP
server.
If you choose to use a User defined NTP Server Name,
enter the name in the field provided.
To set the Workgroup that you would like Your Shared
Storage Drive to be in
1. Enter the Workgroup name of your choice in the
workgroup field.
2. Click Next.
To set the IP address on the Shared Storage Drive using a
DHCP server (default)
1. Select the button indicating that you would like to obtain
an IP address from a DHCP server.
3. Select your Time Zone.
2. Click Next.
4. To disable the Network Time Protocol feature, click
Disable and then click Next.
3. A message will appear indicating that the network settings
have been submitted to the Shared Storage Drive.
To Set the Date
4. Click Done to return to the Advanced Settings page.
Note: Skip this step if Network Time Protocol was configured.
To set the IP address on the Shared Storage Drive using a
STATIC IP address (advanced users only)
1. Select Network Settings.
1. Type in the Date using the (mm/dd/yyyy) format.
To Set the Time
Note: Skip this step if Network Time Protocol was configured.
1. Type in the current time using the (hh:mm:ss) format,
make sure to indicate AM or PM.
2. Click Next.
3. Click Done to return to the Advanced Settings page.
PAGE 46
2. Select the button indicating that you would like to use
manual TCP/IP settings.
3. Enter the IP Address, Subnet Mask, and Default Gateway.
4. Click Next. You will see a status and a message asking
you to, “…stand by.”
5. Once the network settings have been applied, click Done
to return to the Advanced Settings page.
MAXTOR SHARED STORAGE II WEB USER INTERFACE
System Maintenance
Use these pages to run disk utilities and perform diagnostics;
modify power management settings, and to update your
Shared Storage Drive software.
To Change Power Management Settings
1. Click Power Management.
2. Select the Drive that you would like to apply power
management settings to.
3. Use the pull down menu to select the time which you
would like the drive to sit idle before “Going to sleep.”
Note: By default, the drive inactivity period is set to
1 hour.
4. Click Next.
5. It will confirm the amount of time that you set.
4. A status bar will appear showing the status of the scan.
The Diagnostic process takes between 2 - 5 minutes.
5. Upon successful completion, a window will appear
notifying you that your Shared Storage Drive is functioning
within normal operating parameters.
6. Click on Done to return to the System Maintenance
Options page. If there are errors that are not repairable, a
screen will prompt you with a diagnostics code. Record
this error code and contact Maxtor Technical Assistance.
System Update
1. Click System Update.
2. A warning will appear notifying you that the drive will be
inaccessible to users while running. Click Next.
3. Follow the on screen instructions. This process does
require a firmware download from the Maxtor website.
6. Click Done to return to the System Maintenance page.
4. After the file is downloaded, click the Browse button and
search for the firmware update.
To Run Diagnostics
1. Click Diagnostics Scan and Repair.
5. Once the file is selected, click Update.
2. A warning will appear notifying you that the drive will be
inaccessible to users while running. Click Next.
3. The diagnostic feature inspects your hard drive for defects.
– Click Proceed to start the diagnostic process.
– Click Cancel if you would like to back up your data first.
Selecting Cancel will require a re-test.
6. A progress bar will show the status of the update. The
drive does reboot during this process. You will have a
countdown. Once the countdown is finished, close your
browser and then reopen it to the Shared Storage Drive
home page.
7. Click Done to return to the System Maintenance page.
PAGE 47
MAXTOR SHARED STORAGE II WEB USER INTERFACE
Configure Your USB Devices
Use these pages to configure USB drives and to manage
USB printers plugged into the Shared Storage Drive.
Format USB Drive
1. Click Format USB Drive.
2. Select the button indicating if you would like to:
– Re-format the drive and create a single partition
– Re-format a specific existing partition
3. If necessary, select the partition you wish to format and
click Next.
4. Enter a Volume name and click Next.
5. A warning will appear stating that if you continue, you will
lose all of your data. Click Next.
6. You will then see a status page with an elapsed time on it.
When the drive has finished formatting, you will see a
message that the USB drive has been successfully
formatted. Click Done to return to the Configure Your
USB Devices page.
Printer Support Management
1. Click Printer Support Management.
2. You will see the current status of your printer support. It
will be Enabled or Disabled. Depending on the state, the
button on the screen will read to opposite. If the printer
support is disabled and you want to enable it, click Enable.
3. You will see a message stating that the Printer Support is
enabled. Click Done to return to the Configure Your USB
Devices page.
4. If Printer Support is enabled and you want to disable it,
click Disable. You will see a message stating that the
Printer Support is disabled.
5. Click Done to return to the Configure Your USB Devices
page.
Unplug USB Devices from the Shared Storage Drive
1. Click Unplug USB devices from the Shared Storage
Drive. It will list all of the USB devices currently plugged
into the drive.
2. Click the Safely Remove button next to the device that you
would like to unplug.
3. A message will appear stating that you can remove the
selected device. Click Done to return to the Configure
Your USB Devices page.
PAGE 48
MAXTOR SHARED STORAGE II WEB USER INTERFACE
System Status
Online Help
Your Shared Storage Drive has advanced help features. To
access these files, click on the Online Help link at the bottom
of the drive file screen.
Overview
Use the System Status page to get a summary of your Maxtor
Shared Storage Drive, including IP address, Users and
Shares, USB Devices and Printers attached to the unit.
The System Status page is where you can see your current:
–
–
–
–
User Accounts and Shares
Network Settings
USB devices attached
Printers
User Accounts
This section will tell you the user accounts that are currently
created on your Shared Storage Drive.
Network Settings
This section will tell you the Current Network configuration
that is on your Shared Storage Drive, including IP Address,
subnet Mask, and default Gateway.
Accounts & Share Status
Click on this link to show a summary of the current accounts
and what shares those accounts have permissions to.
USB Devices
This section will tell you what type of devices are attached to
the USB ports on the back of the unit. Supported devices are
external USB drives and USB flash drives.
Printing Devices
This section will tell you the current status of any printer that
is attached to the unit including Manufacturer, Model and
Serial Numbers.
PAGE 49
MAXTOR SHARED STORAGE II WEB USER INTERFACE
Using External USB Drives with Your
Shared Storage II
There are 2 USB ports on the back of your drive which allow
you to connect USB hard drives, such as the Maxtor
OneTouchTM and Maxtor Personal Storage 5000 drives.
Note: The Maxtor Shared Storage Drive is only compatible with
USB drives that are formatted with the FAT32 file system. With
the FAT32 file system, the size of a single file is limited to 4 GB.
Connecting a USB Drive
You may connect a USB drive while your Shared Storage Drive
is on. It will automatically recognize the drive.
You may also connect a USB drive while your Shared Storage
Drive is off. It will be recognized the next time you turn your
Shared Storage Drive on.
Accessing the external USB Drive
1. Open your Shared Storage Drive by double-clicking its
desktop icon.
2. Your external USB drive will appear as a folder on the
Shared Storage Drive.
The name of this folder will correspond to the volume
name of your external USB drive.
Disconnecting a USB Drive
To disconnect a USB drive from your Shared Storage Drive:
1. Go to the Maxtor Shared Storage Drive home page.
2. Click the Advanced Settings button.
3. Click Configure Your USB Devices.
4. Click Unplug USB devices from the Shared Storage Drive.
5. Click the Safely Remove button, next to the USB drive you
want to disconnect. A message will appear informing you
that your drive can be safely removed. Then click Done.
6. Disconnect your USB drive from your Shared Storage Drive.
PAGE 50
Using USB Printers with Your Shared Storage II
You may connect a USB printer to your Shared Storage II
Drive and share it with anyone on your network.
Connecting a USB Printer
– Connect the USB printer while your Shared Storage II
Drive is on.
– The printer will appear in the list of shares displayed in
the Printers and Faxes folder on your Shared Storage II
Drive.
Configuring Network Printing
Configuring a networked USB Printer varies depending on
your operating system and/or platform (Windows and/or
Macintosh). Please refer to Maxtor's Knowledge Base for
more information regarding network printer setup and
configurations.
20344100