1
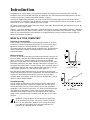
MATRIX MANUAL
Safety Considerations
You must carefully read this entire manual before using your Matrix.
WARNING: Diving has many inherent risks. Decompression
sickness is among the most serious of those risks. Even if you
follow the instructions in this manual carefully, it is possible
that you may be seriously injured or die from decompression
sickness, or some other inherent risk of SCUBA diving. Unless
you are fully aware of these risks and are willing to personally
accept and assume responsibility for those risks, do not use the
Matrix!
The Matrix is a sophisticated decompression tool to assist a trained and certified
SCUBA diver in making decisions concerning dive planning and execution. As with any
tool, the Matrix may be misused if the following safety and operational precautions are
not strictly followed. If they are followed, careful use of the Matrix can increase your
diving enjoyment and reduce the risk of decompression sickness; if they are not
followed, you will be placing yourself at serious risk for decompression sickness.
Pay special attention to
warnings and cautions, which
are denoted by this symbol
WARNINGS are used before a
procedure or situation that may
result in serious injury or
death.
CAUTIONS are used before
any situation or technique that
will result in damage to the
product.
The Matrix is a technically advanced tool based on a biophysical model of decompression theory. However, neither it nor
any other diving computer (or table) can actually monitor the physical changes that occur in your body as you dive. Each
diver varies in his or her susceptibility to decompression sickness, and that susceptibility may vary from day to day.
Decompression modeling is an inexact science; it is based, at least partly, on certain unproven assumptions. Therefore,
you must dive responsibly and to carefully follow all standard safe diving practices as well as the warnings and cautions
contained in this manual.
Guidelines for Using the Matrix
The following guidelines for using the Matrix are derived from the latest medical research and the recommendations of
the American Academy of Underwater Sciences for diving with dive computers. Following these guidelines will greatly
increase your safety while diving, but cannot guarantee that decompression sickness will not occur.
1. In accordance with the recommended maximum diving limit of all instructional agencies, do not dive deeper than
130 feet (40 meters).
2. Do not use the Matrix for planned decompression diving. The decompression algorithm contained in the Matrix
should be used only for emergency or unintended decompression.
3. On all no-decompression dives with the Matrix, make a safety stop for three to five minutes between 10 and 30
feet (3 and 12 m) before surfacing.
4. Never use the Matrix for repetitive, “square” dives deeper than 60 feet (18 meters). A square dive is a dive that is
performed for its duration at a uniform depth.
5. Always make the deepest dive of the day first when repetitive dives are planned, and for each successive dive make
sure that the deepest portion of that dive is done at the beginning of the dive.
6. The Matrix is designed for dives made with compressed air only. Do not use the Matrix for dives made with nitrox or
other mixed gases.
7. All divers using dive computers to plan dives and indicate or determine no-decompression/decompression status
must use their own computer.
8. If the Matrix fails at any time during the dive, the dive must be terminated and appropriate procedures (including a
slow ascent and a 3 to 5 minute safety stop) should be initiated immediately (see page 38).
9. On any given dive, all divers in a buddy group must follow the most conservative dive computer for that particular
dive.
10. Do not dive for 24 hours before using the Matrix for the first time.
11. You MUST follow the ascent rates as indicated by the Matrix. If the computer fails, ascend to surface no faster than
60 ft/min (18 m/min).
12. You MUST be familiar with all signs and symptoms of decompression sickness before using the Matrix! Seek
IMMEDIATE treatment for decompression sickness should any of these signs or symptoms occur after a dive! There
is a direct correlation between effective treatment and the delay between the onset of symptoms and the treatment
for decompression sickness.
13. Always observe the optical alarm signals of the Matrix. Avoid situations of increased risk for decompression sickness
which are marked with a warning sign in this manual.
14. Never dive the Matrix to its limits, as well as other dive computers and tables. Give yourself a margin of safety by
always leaving a few minutes of no-stop time before making an ascent.
15. Avoid repeated ascent and descents (yo-yo diving) while using the Matrix.
16. DO NOT perform repetitive decompression dives. Doing so greatly increases the risk of decompression sickness.
17. Carefully inspect your Matrix computer for any signs of damage or malfunction before every dive.
Introduction
Congratulations on the purchase of your Matrix dive computer. Our designers have condensed all the crucial dive
information into a user-friendly dive instrument. By combining a color-coded system with bold alphanumerics, we have
created an easy-to-use computer that provides dive data at a glance.
As with all life support diving equipment, it is crucial to understand the features and functions of the Matrix. Before
using the Matrix, it is essential to read this manual in its entirety. Contained within this easy to read manual are illustrations to aid you in the complete understanding of the computer.
This manual covers both the imperial and metric versions of the Matrix. Where applicable, two illustrations are used - an
imperial version and metric version.
Chapter 1 covers all the operating instructions, including attaching the computer to the regulator. Chapter 2 is dedicated
to diving conditions that U.S. Divers considers extreme, or are past the operational limits of the Matrix. Chapter 3 offers
advise on care and maintenance, and instructions on changing the battery. Lastly, the reference section contains the
technical specifications and glossary.
WHAT IS A “DIVE COMPUTER”
Definition of Compartments
A dive computer is an instrument that mathematically simulates the absortion
and release of nitrogen by hypothetical tissue types in the human body. These
hypothetical tissues are commonly referred to as “compartments.” Each
compartment absorbs and releases nitrogen at different rates. The Matrix tracks
these compartments constantly, providing you with up-to-the-minute decompression information.
Multi-Level Diving
If you use, or have used, dive tables you know the total amount of time you can
stay under water is based on the maximum depth reached during the dive. Dive
tables, such as the U.S. Navy dive tables, assume that you immediately
descend to a single depth, stay at that depth for the duration of the dive, then
immediately surface from that depth. This type of dive profile is referred to as a
rectangular dive profile (figure 1). In reality, however, most recreational divers go
to the deepest depth first and make a gradual ascent to the surface. This type
of dive profile is referred to as a multi-level dive profile (figure 2).
Figure 1
Rectangular Profile
Multi-level diving is where the Matrix excels. By continuously calculating the
nitrogen absorption/release of all the compartments, the computer updates the
amount of no-decompression time (NDT) you have left. As you ascend to
shallower depths, the computer credits you with more allowable NDT; if you go
deeper, it reduces the NDT available.
Diving Responsibly
Years of research and thousands of dives have gone into the mathematical
formulas used by the Matrix. However, the computer does not have special
sensors attached to your body; it doesn’t know if you are tired, dehydrated,
overweight, or out of shape. For this reason, U.S. Divers recommends that you
never push the no-decompression limits of the computer. Always leave a
comfortable safety margin in respect to no-decompression time and ascent
speed. Let the computer assist you in making a safe dive. Do not let it control
your dive.
WARNING: Using the Matrix will not prevent the possibility
of decompression sickness, but using it sensibly reduces
this risk. Any sport diver, however, must accept that there
is no device or procedure which will totally prevent the
possibility of a decompression accident.
Figure 2
Multi-Level Profile
Operating the Matrix
ATTACHING THE MATRIX TO YOUR REGULATOR
If you have purchased the Matrix in the Pivot® console, have your Authorized U.S. Divers Dealer attach the console to
your first-stage regulator. If this is not possible, follow the steps below to do it yourself:
1. Remove the high pressure (HP) port plug from your first-stage regulator using the appropriate wrench. The HP port
on all U.S. Divers first-stage regulators is clearly marked with the letters “HP.”
Note: The end fitting of the HP hose has 7/16" threads. On some early model first-stages, the HP port is only 3/8". If
this is the case with your regulator, you need to purchase a 7/16" female to 3/8" male adapter (U.S. Divers part
number 1017-85) from your U.S. Divers dealer.
2. Thread the end of the HP hose into the HP port of the first-stage until finger tight. Using a 5/8" open-end wrench,
tighten the hose fitting until snug. DO NOT overtighten.
3. Attach the first-stage to a charged SCUBA cylinder. Slowly turn the valve handwheel counterclockwise until the valve
is fully open. Submerge the first-stage in water and check for any leaks. If you detect leaks, take your regulator and
computer to your U.S. Divers dealer and have the O-ring inspected and/or replaced. Then have the U.S. Divers
dealer attach the Matrix to your regulator.
STARTUP/DIAGNOSTIC MODE
Starting the Matrix
To activate the Matrix, simply press and release the neon-yellow button (figure 3,a). After
pressing the button, the Matrix displays all “8”s followed by dashes, followed by all the
digits counting down from 9 to 0. During this countdown, the Matrix goes through a selfdiagnostic test to check all its functions, battery power and barometric pressure (altitude).
After the Matrix completes it diagnostics, it goes into Surface Mode and is ready to make
a dive. If you do not make a dive within two hours after turning on the Matrix, the
computer will turn off automatically. Always be sure to check to see if the unit is activated
before entering the water.
WARNING: Never activate the Matrix while underwater. This may
result in inaccurate depth and no-decompression time displays.
Activation is not possible deeper than ten feet.
Figure 3
Startup/Diagnostic Mode
Low Battery Warning
If the Matrix detects low battery power, the battery warning icon appears (see figure 4,a).
If the battery icon remains flashing on the screen after startup, you have enough power to
complete one day of diving. If you intend to do multi-day diving, replace the battery
immediately.
WARNING: If the low battery icon appears, U.S. Divers strongly
recommends that you DO NOT dive until you change the battery.
Although there may be enough power to finish a full day of diving,
sudden changes in temperature can cause the battery voltage to
drop below the operational level, causing the computer to shut off.
WARNING: DO NOT change the battery between dives, or between
days of diving. Once the battery is removed, all residual nitrogen
information is erased. When the Matrix is activated after new
batteries have been installed, the computer assumes you are on
the first dive of the first day of a multi-day trip. This means the
computer may allow you more no-decompression time than you
really have, resulting in a greater chance of decompression
sickness.
Figure 4
Low Battery Display
Altitude Diving
The mathematical model in the Matrix accounts for the reduced no-decompression time available at higher elevations
based on the National Oceanic and Atmospheric Administration (NOAA) guidelines. When diving in high altitude lakes or
rivers (from 3,000 to 14,000 ft; 915 to 4267 m), the Matrix automatically adjusts to these conditions providing correct
depth and reduced no-decompression times. At altitudes over 3,000 ft (915 m), depth calibration automatically
changes to read in feet/meters of freshwater (FFW, MFW) instead of feet/meters of seawater (FSW, MSW).
WARNING: Until it has shut itself off, you must not use the Matrix at an altitude other than
the altitude where it was originally activated. Doing so will result in an error equal to the
difference in barometric pressure, and possibly a false dive mode.
SURFACE MODE
The Matrix enters Surface Mode when (1) the computer completes the startup/
diagnostic procedures, or (2) ten minutes after completing a dive deeper than 5 feet,
or 1.5 meters. While in Surface Mode, the Matrix alternates between the following
three informational displays:
Imperial
1: Standard surface information
2. Pre-dive planning sequence
3. Wait-to-fly time
Standard Surface Information
The first display to appear in Surface Mode is standard surface information (figure 5).
This display gives the following information:
a.
Surface Time. Notice how the wave icon is below the time display, meaning that
it is “time above the water.” The time is displayed in HH:MM
b.
Dive number. The computer displays the number of the dive just completed. After
startup, this number will be 0. The Matrix counts up to 10 dives. After dive 10, it
cycles back to 1.
c.
Depth. Depth always shows 00 ft., or 0.0 m during Surface Mode.
d.
Compartment Loading Bar Graph (CLBG). The CLBG is only displayed after
making a dive. During the surface interval, the CLBG starts to recede, indicating
that you are off-gassing nitrogen. When you first turn on the Matrix, you will not
see the CLBG.
Figure 5
Standard Surface mode
Wait-to-fly Time
The second display to appear during Surface Mode is wait-to-fly time (figure 6). It
appears about twenty seconds after the standard surface information, and only
appears after a dive. Only two elements appear: (a) the no-fly icon (airplane icon) and
(b) the wait-to-fly time.
Wait-to-fly time starts to count down from 23:50 (24 hours less the first 10 minutes of
surface interval). At the 12:00 mark, the Matrix shuts down internally, but continues to
display the countdown from 11:59 to zero. Therefore, if you want to make a dive while
wait-to-fly time is 12 hours or less, you must first reactivate the computer by pressing
the neon-yellow button.
■
Wait-to-fly guidelines
In 1990, the Undersea and Hyperbaric Medical Society (UHMS) published a set of
guidelines for lowering the chance of decompression sickness due to flying too
soon after diving. The UHMS suggests divers using standard air tanks and exhibiting no symptoms of decompression sickness wait 24 hours after the last dive to fly
in an aircraft with an internal cabin pressure of 8,000 feet (2438 m) or less. The
only two exceptions to this recommendation are:
Figure 6
Wait-to-fly Time
1. If a diver had less than two hours total accumulated dive time in the last 48 hours, then a 12 hour surface
interval before flying is recommended.
2. Following any dive that requires a decompression stop, flying should be delayed for at least 24 hours, and if
possible, for 48 hours.
Since the introduction of the 1990 UHMS guidelines, the Divers Alert Network (DAN) has introduced data that
resulted in DAN’s position that:
“A minimum surface interval of 12 hours would be required in order to be reasonably assured a diver will remain
symptom free upon ascent to altitude in a commercial jetliner (altitude up to 8,000 feet). Divers who plan to make
daily, multiple dives for several days, or make dives that require decompression stops, should take special precautions and wait for an extended surface interval beyond 12 hours before flight.”
Both the UHMS and DAN agree that:
“There can never be a flying after diving rule that is guaranteed to prevent decompression sickness completely.
Rather, there can be a guideline that represents the best estimate for a conservative surface interval for the vast
majority of divers. There will always be an occasional diver whose physiological makeup or special diving circumstances will result in the bends”
Pre-Dive Planning Sequence
The last display shown during Surface Mode is the Pre-Dive Planning Sequence
(PDPS). See figure 7. The Pre-Dive Planning Sequence allows you to plan your
next dive by giving you the maximum no-decompression time for various
depths. Since the computer is always monitoring the off-gassing of nitrogen,
the longer you stay on the surface, the more NDT you get. In the PDPS, the
Matrix displays the following information:
a.
Dashed no-decompression time icon. The no-decompression time icon
is dashed during the pre-dive planning sequence, as opposed to the solid
line displayed while diving.
b.
Depth Scrolling. The PDPS scrolls from 30 ft. to 160 ft. in 10-foot
increments. The metric version scrolls from 9m to 48m in 3-meter increments.
c.
Adjusted no-decompression times. For each depth, the Matrix shows
the maximum allowable no-decompression time. This time increases the
longer you stay on the surface.
d.
Dive number. Dive number is the number of the dive just completed.
Before the first dive of the day, this number is 0.
Figure 7
Pre-Dive Planning
Sequence
NO-DECOMPRESSION DIVE MODE
When the Matrix goes deeper than five feet, it switches from Surface Mode to NoDecompression Dive Mode (figure 8). In No-Decompression Dive Mode, the computer
displays the following information:
a.
Current Depth. Current depth is displayed to 250 feet (76 m). At depths deeper
than 250 feet (76 m), the depth display is replaced with three dashes. (See
Chapter 3, “Extreme Situations”)
b.
No-decompression Time (NDT). NDT is the amount of time you can stay at the
current depth before entering decompression mode. If you stayed at a constant
depth, the NDT would countdown to zero. As you ascend to shallower depths, the
computer credits you with more NDT.
c.
Maximum Depth. Maximum depth is the deepest depth reached during the dive. It
only appears when you ascend 3 feet (1 m) shallower than the deepest depth
reached during the dive. For example, if you made a dive to 100 feet (30 m), the
max depth display would not appear until you ascended to 97 feet (29 m).
d.
Bottom Time. Bottom time is the total amount of time spent underwater. The
bottom timer begins when you descend below five feet and stops when you ascend
above 3 feet.
Figure 8
No-decompression Dive
Mode
e.
Compartment Loading Bar Graph (CLBG). As you dive, the Matrix
monitors the nitrogen absorption of 12 tissue groups simultaneously
and displays the controlling tissue group via the CLBG. The CLBG has
three sections: The green zone means you are within the no-decompression limits; the yellow zone means you are approaching decompression and should start your ascent; the red zone means you’ve
exceeded the no-decompression stop limits and must perform a
decompression stop. When the bar graph reaches the red zone, the
Matrix will switch to decompression dive mode and give you all the
necessary decompression stop information.
f.
Ascent Rate Indicator. The ascent rate indicator consists of six
triangles that appear, from bottom to top, as your ascent rate
increases. Figure 9 shows each triangle with its corresponding ascent
rate. While making your ascent to the surface, always try to keep the
ascent rate indicator in the green zone. If it enters the yellow caution
zone, slow down or stop until the triangles recede into the green zone.
If the ascent rate indicator enters the red zone, you are making an
unsafe ascent and risk the possibility of decompression sickness.
While in the red zone, the ascent rate indicator flashes. Always make
an ascent such that the ascent rate indicator never enters the red
zone.
Ft./Min
M/Min.
a= 21 - 30
6-9
b= 31 - 40
9.1 - 12
c= 41 - 50
12.1 - 15
d= 51 - 60
15.1 - 18
e= 61 - 70
18.1 - 21
f=
21.1+
DECOMPRESSION DIVE MODE
71+
Figure 9
Ascent Rate Values
WARNING: U.S. Divers does not recommend decompression diving
or diving deeper than 130 feet. Doing so increases the risk of
decompression sickness.
When you exceed the no-decompression time limits, the Matrix enters Decompression Dive
Mode (figure 10). There are three visual cues that alert you that you are in decompression:
1. The last segment of the compartment loading bar graph (a) has entered the red zone.
2. The “DECO” label (b) appears.
3. The ceiling indicator (c) flashes.
As soon as the Matrix enters Decompression Dive Mode, the maximum depth is replaced
with the depth of the first decompression stop (d), and the bottom time is replaced with
the decompression stop time (e). Also, no-stop time is replaced with total ascent time (f).
Total ascent time is the sum of all your decompression stop times plus the ascent time to
the first stop at a rate of 60 ft/min. The example shown in figure 10 shows that the diver
must make a 20-foot (6 m) stop for 3 minutes, with a total ascent time of 14 minutes.
Figure 10
Decompression Dive Mode
After entering decompression, it is imperative that you begin your ascent immediately.
Ascend to a depth slightly deeper than or equal to 10 feet. The amount of decompression
credit time depends on the depth, with slightly less credit given the deeper you are.
You must never ascend shallower than the prescribed decompression stop depth (ceiling). Doing so will put the Matrix
into a Conditional Violation Mode (see page 32) and greatly increase your risk of decompression sickness. If there is
heavy surge or large swells, it is difficult to stay at a chosen depth. To ensure that you do not enter a violation mode,
stay slightly deeper than the required decompression stop depth until the next shallower stop depth appears. For
example, if you are required to make a 20-foot (6 m) decompression stop, perform the stop at 23 or 24 feet (7 or 7.5
m) until the computer tells you to ascend the 10-foot (3 m) stop. Then perform the 10-foot (3 m) stop at 13 or 14 feet
(4 or 4.5 m) until you clear the decompression requirement.
Once you complete all the necessary decompression stops, the Matrix returns to normal Dive Mode, allowing you
additional time underwater. To add a greater margin of safety, U.S. Divers strongly recommends that you wait until the
segments of the CLBG are well within the green zone before surfacing, unless a low air situation dictates that you
surface.
At the end of all decompression dives, spend as much time as possible at your safety stop and on the surface to reduce
your compartment loading before the next dive.
VIOLATION MODES
The Matrix enters one of three different Violation Modes when you dive the computer beyond its normal operating limits,
because continued exposure is outside the mathematical model used to calculate decompression status. These modes
are explained in detail in the next chapter, “Extreme Situations.”
GAUGE MODE
If the Matrix enters a Permanent Violation Mode, it will only operate in Gauge Mode on subsequent dives. The Matrix
removes all displays that relate to decompression. No dives must be made for 24 hours for the Matrix to reset itself.
Gauge Mode is explained in detail in the next chapter, “Extreme Situations.”
DIVE LOG MODE
Accessing the Dive Log Mode
Ten minutes after surfacing from a dive, you can access the Dive Log Mode by
pressing the neon-yellow button at any time. After entering the Dive Log, the Matrix
scrolls through all dives in memory, beginning with the most recent dive. The Matrix
displays each dive for 4 seconds. However, if you need to pause the dive log scrolling
to write down the information in a logbook, press and hold the neon-yellow button
anytime during the scroll to freeze the display. When you release the button, the
scrolling continues.
Note: If you hold the button down to enter Dive Log Mode, and do not release
the button for eight seconds, the Matrix enters External Access Mode. In External
Access, the Matrix displays the letters “EA” and counts down from 6 to 0. This
mode is for factory use only.
Figure 11
Dive Log Mode
Memory Capacity
The Matrix retains the information for the last 10 dives indefinitely, even if you remove
the batteries. After exceeding the 10 dive limit, the newest dive is added to memory
while the oldest dive is deleted.
Dive Log Display
When you enter Dive Log Mode (figure 11), the Matrix displays the logbook Icon (a)
with the dive number (b) immediately to the right. Maximum depth (c) and total
bottom time (d) are located at the bottom of the screen. The Compartment Loading
Bar Graph (e) shows the nitrogen loading level at the end of the dive. The ascent rate
indicator (f) shows the fastest ascent rate during the dive. Lastly, if a decompression
stop was required during the dive, the "DECO" label (g) is displayed.
Extreme Situations
EXCEEDING THE MAXIMUM DEPTH
The Matrix displays the current depth down to 250 feet (76 m). If you exceed 250 ft. (76
m), the current depth and maximum depth will display three dashes (figure 12), indicating
that the Matrix is beyond its depth range. After ascending shallower than 250 ft. (76 m),
the current depth display returns to normal, while the maximum depth continues to show
three dashes.
Note: If you exceed the 250 foot (76 m) limit, three dashes will be displayed as the
maximum depth when you view the dive in Dive Log Mode.
Although the Matrix withstands the pressure at 250 ft. (76 m), the depth at which you can
use all its features can be much shallower. Before going further, read the following warning:
WARNING: The maximum recommended sport diving limit is 130 feet (40
m). Diving any deeper than 130 feet (40m) should be avoided. Special
equipment and training are necessary for this type of diving. U.S. Divers
strongly recommends against diving to depths below 130 ft. (40 m) or
decompression diving.
Figure 12
Exceeding the Maximum
Depth
EMERGENCY DECOMPRESSION
After entering decompression, the prescribed decompression stop depths may move quickly through the 10, 20, 30 and
40 foot (3, 6, 9, 12 m) displays. Once you enter decompression, it is imperative that you ascend toward the required
stop depth immediately. If you continue the dive at a greater depth, you increase decompression risk and may also
exceed the operating limits of the computer to such an extent that the computer will cease to provide ascent information.
WARNING: If the Matrix display indicates you have entered decompression mode, do not
descend further or remain at the same depth. The decompression stop obligation can increase quickly and once the exposure requires a greater than 40-foot (12 m) stop, the Matrix
will enter Immediate Violation Mode, and no longer provide ascent information. This situation
increases the risk of decompression sickness and must be avoided.
Decompression diving requires special training and equipment. For these reasons, sport divers should not attempt
decompression diving. Making a dive that requires decompression stops should be avoided because you cannot ascend
directly to the surface without risking personal harm. If equipment problems delayed your ascent, your risk of decompression sickness would increase. Your buddy would be unable to lend assistance without also risking decompression
sickness.
VIOLATION MODES
If you exceed certain limits, the Matrix will not be able to tell you how to get back to the surface. These situations will
make the Matrix enter Violation Mode and must be avoided at all costs. They push decompression theory to the limits
and can result in loss of some Matrix functions for 24 hours after the last dive of the day in which a violation occurred.
There are three different Violation Modes, which vary in seriousness. They are termed “Conditional Violation,” “Delayed
Violation Mode,” and “Immediate Violation Mode.” It is important to understand how each of these modes function and
how to carry out decompression procedures in the event you encounter one.
Conditional Violation Mode
Before a situation causes the loss of nitrogen monitoring functions, the Matrix enters Condition Violation Mode. If
properly handled, the Conditional Violation Mode will not only assist you in getting back to the surface, but will also
allow continued use of the computer. There is only one situation that forces the Matrix to enter a Conditional Violation
Mode: Ascending above the required decompression stop.
■
Ascending Shallower than the Required Decompression Stop
The Matrix will enter a Conditional Violation Mode if you ascend shallower than the
indicated stop depth for less than five minutes. Figure 13 shows an example of a diver
at a depth of 15 feet (4.6 m) when his decompression stop is 20 feet (6.0 m). This
can easily happen if you temporarily lose control of your buoyancy, or get caught in a
surge or swell. Immediately after breaching the decompression stop depth, the total
ascent time (figure 12,a) starts to flash..
While in the Conditional Violation Mode, the Matrix stops calculating decompression
information. In fact, the computer penalizes you with 1.5 minutes of additional
decompression time for each minute spent above the decompression ceiling. For
example, if you have 10 minutes of decompression time and ascend shallower than
the decompression stop depth for 4 minutes, you will now have 16 minutes of
decompression time
(10 + (4 x 1.5) = 16).
If you descend to, or slightly below, the decompression ceiling within five minutes, the
Matrix will resume normal operation and allow you to complete the decompression
stop(s) successfully and allow you to keep diving for the rest of the day. If you stay
above the decompression ceiling for more than five minutes, the Matrix will enter
Delayed Violation Mode.
Figure 13
Conditional Violation
Delayed Violation Mode
■
■
Spending more than five minutes above the decompression stop depth.
If you stay shallower than the required decompression stop depth for more than five
minutes, the Matrix enters Delayed Violation Mode (figure 14). Immediately after
entering Delayed Violation Mode, the Compartment Loading Bar Graph starts to flash
and the total ascent time continues to flash (continued from Conditional Violation
Mode). If you descend below the decompression ceiling after 5 minutes, the Matrix
can still assist you in getting back to the surface. Stay at, or slightly below, the
decompression ceiling until you complete the decompression requirement. Once you
clear decompression, remain underwater until the CLBG recedes to well within the
green zone. After five minutes of surface time, the Matrix enters Immediate Violation
Mode and will operate only in Gauge Mode (see page 36).
Figure 14
Delayed Violation Mode
Decompression stop greater than 40 feet
The maximum decompression stop depth for the Matrix is 40 feet (12 m). As soon as the computer calculates a
decompression stop depth slightly greater than 40 ft. (12 m), the Matrix goes into Delayed Violation Mode. Once
the Matrix enters Delayed Violation, the CLBG will continuously flash.
To get back to the surface safely, you must immediately ascend to, or slightly deeper than, 40 feet (12 m) until the
CLBG stops flashing. Continue to make your decompression stops as indicated by the computer. After you clear
decompression and the CLBG recedes into the yellow zone, continue decompressing until the leading segment is
near, or into the green zone. After five minutes of surface time, the Matrix will enter Immediate Violation Mode for
24 hours.
If you do not make an immediate ascent to the 40-foot (12 m) decompression stop after entering Delayed Violation
Mode, the calculation limits will be exceeded and the computer will enter Immediate Violation and operate only in
Gauge Mode (see page 36) for 24 hours.
Immediate Violation Mode
The Matrix enters Immediate Violation Mode when a dive profile represents gross excursions into decompression that
are beyond the boundaries of the Matrix’s computer model. If you intend to make these types of decompression dives,
you should not be using the Matrix.
Two situations cause the Matrix to enter Immediate Violation Mode:
1. Five minutes after surfacing from a dive in which you entered Delayed Violation.
2. A calculated decompression stop much greater than 40 feet (12 m).
While in Immediate Violation Mode, the Matrix makes the following function changes:
1. The Matrix only operates in Gauge Mode (explained in the next section)
2. Pre-Dive Planning Sequence is disabled
3. Wait-to-fly display (from 24 to 12 hours) is disabled
Gauge Mode
After the Matrix has experienced an Immediate Violation, the computer only operates
in Gauge Mode. In Gauge Mode the computer no longer calculates decompression
information. In essence, the computer becomes a depth gauge and bottom timer.
■
Underwater
When in Gauge Mode underwater (figure 15), the Matrix flashes the CLBG and
only displays current depth, maximum depth, bottom time, and ascent rate .
■
On the surface (24 - 12 hrs.)
During the first 12 hours on the surface while in Gauge Mode (figure 16),
the Matrix gives you the dive number, depth, and surface time. The Wait-tofly display and Pre-Dive Planning Sequence are disabled. The Dive Log
Recall Mode is not affected and can be accessed as described in the
previous chapter.
■
On the surface (12 - 0 hrs.)
During the second 12 hours on the surface (figure 17), the Matrix contin-
Figure 15
Gauge Mode - Underwater
Figure 16
Gauge Mode - Surface (24 to 12 hrs)
ues to count down from 12 - 0 hrs. It also displays a single dash (a) which
denotes that the computer has been violated and, if turned on, will only
work in Gauge Mode.
Caution Zone
The yellow caution zone offers you a convenient way to monitor how close you
are to the no-decompression limit. U.S. Divers strongly recommends that you
leave the water with CLBG well inside the green zone.
WARNING: Never exit the water with the Compartment
Loading Bar Graph in the red decompression zone. Doing
so greatly increases the risk of decompression sickness,
and may result in injury or death.
Figure 17
Gauge Mode - Surface (12 to 0 hrs)
A diver’s metabolism varies from person to person, and even from day to day. If
you are feeling less than 100%, or you are in less than perfect shape, use the
yellow caution zone as a visual reference to place a wider margin of protection
between you and the no-decompression limit.
What to do if your computer quits working
Because a dive computer is an electronic, battery powered instrument, the possibility that it may quit working unexpectedly is very real, even with new, high quality batteries. While no-decompression diving, if you find that any major piece of
equipment is not working, you must abort the dive immediately and surface slowly in a controlled manner. If your dive
computer quits for any reason, it is important that you have anticipated this possibility and are prepared for it. This is an
important reason not to push your dive profiles to the limit. U.S Divers advises you to bring additional backup instruments with you on your dives, and to log each dive profile during every surface interval.
Dive computers make diving easier and provide a planning tool to enable you to increase dive time for more enjoyment
underwater. Yet, as with any high tech instrument in a harsh environment, unforeseen things may happen. If you do not
prepare for the unexpected, you may be unprepared to respond adequately. If you dive in situations where your trip
would be ruined, or your safety jeopardized by losing the use of a dive computer, an analog or digital backup system is
highly recommended.
Night Diving with the Matrix
The Matrix uses a high contrast liquid crystal display with large numerals for easy readability in low light conditions.
However, the display is not internally illuminated for night diving because of the excess power consumption that would
be required. Therefore, on night dives, cave dives, or any low-light situation, you must use your dive light to illuminate
the display. If your dive light were to fail, you would be unable to read your critical dive information. U.S. Divers recommends that you carry a backup light in case of primary light failure.
Sharing the Matrix
The Matrix provides information based upon your personal dive profile and, therefore, must not be shared between
divers. You should never, under any circumstances, swap your computer with another unit between dives, or share your
computer with another diver underwater.
WARNING: Never participate in sharing or swapping of a dive computer. Doing so may result
in injury or death.
A Final Word of Caution
Although the Matrix represents the latest in user-friendly dive computer technology, it cannot force you to understand
how to use it. Before diving with the Matrix, be sure you thoroughly understand its functions and displays. If you have
any questions, call your local Aqua Lung dealer. Remember, technology is not a substitute for training, experience, and
common sense.
CARE & MAINTENANCE
The Matrix is a robust instrument designed to withstand the rigors of SCUBA diving. However, you still need to protect it
from shock, extreme heat, chemical attack, and tampering.
Even though the Matrix’s material is tough and durable, it is susceptible to chemical attack and scratches. Chemical
attack can be in the form of spray propellants, gasoline fumes in your garage or boat, and alcohol. U.S. Divers can
replace scratched gauge faces. However, small scratches naturally disappear underwater.
CAUTION: Never use aerosol sprays, including silicone sprays, on or near the Matrix. The
propellants may chemically attack the plastic, causing the plastic case to crack.
Before the Dive
The Matrix’s plastic housing is made of a shock resistant resin. This housing, combined with the rubber console boot,
protects the Matrix from the normal bumps that occur when diving. However, the computer cannot withstand the impact
of heavy objects, such as weight belts or SCUBA cylinders. Impact from heavy objects is the most common cause of
computer damage. When you set up your dive gear on a boat or the beach, tuck the Matrix into your BC pocket, or
between the BC and cummerbund. Never leave the computer exposed where someone could accidentally step on it or
drop something on it.
During the Dive
The most common damage inflicted on a computer while underwater is scratches to the computer face. Scratches
occur when a dangling computer gets dragged over coral or rocks. Most BCs have gauge hose retainers that keep the
computer close to your body for easy access and reduce the possibility of scratching the computer face.
Note: Dangling gauges are a major cause of damage to delicate marine life, such as corals. Always keep secondary
hoses, such as your octopus and gauge, retained close to your body.
After the Dive
CAUTION: If the Matrix is not attached to a first-stage regulator while soaking (explained
below), make sure that water is not allowed to enter the high pressure hose. Water entering
the submersible pressure gauge (SPG) via the high pressure hose may cause damage to the
internal components.
After each day of diving, soak the Matrix in a warm, fresh water bath to dissolve salt crystals. To dissolve heavy salt
buildup, use a slightly acidic vinegar/water bath. After removing the computer from the bath, rinse thoroughly with fresh
water. Towel dry the computer before final storage. Place the Matrix in a cool, dry and protective case to transport.
CAUTION: Never, under any circumstances, poke any object through any slots or holes on the
rear of the Matrix. Doing so may damage the depth sensor resulting in erroneous depth and/
or dive time remaining displays.
ANNUAL DEALER INSPECTIONS & FACTORY SERVICE
The Matrix should be inspected annually by an Authorized U.S. Divers Dealer. The dealer will perform a depth accuracy
test, function check, and routine inspection for damage or wear. To keep the two-year limited warranty in effect, this
annual inspection must be done one year from the purchase date, plus or minus 30 days. U.S. Divers recommends that
you continue to have yearly inspections to ensure the Matrix is working properly, even after the warranty period expires.
An annual inspection record is provided in the rear of this manual, which should be signed by the technician after each
inspection. The cost of this service is not covered under the two-year limited warranty. Also, be sure to record any
factory services that are performed.
If you ever doubt the accuracy of the Matrix’s depth readings, DO NOT dive with it until you have it inspected by a U.S.
Divers dealer. Some dive stores who provide this service do not have test gauges on their pressure chambers as
accurate as the depth sensor on the Matrix. Therefore, if you request a depth check, verify that the test chamber gauge
accuracy is better than ±2 feet.
It is possible to damage the Matrix’s depth sensor if it is not pressure tested properly. Please heed the following caution:
CAUTION: Always fully submerge the Matrix in water when performing a pressure test. Pressure testing the Matrix in an air environment may damage the depth sensor, resulting in
erroneous depth and time readings.
OPERATING TEMPERATURE
The Matrix operates normally between 32oF to 140oF (0oC to 60oC). You may notice the liquid crystal display (LCD)
becoming sluggish at extremely low temperatures. This is normal and will not affect the computer’s accuracy.
It is possible to damage the electronics if left exposed to direct sunlight or in a hot, confined space (like a car trunk).
After the dive, cover the computer and keep it out of the sun. If inadvertently left in direct view of the sun, the LCD may
become totally black. If this occurs, immediately immerse the Matrix in water. The display should recover its normal
appearance after a few minutes. Damage from extreme heat or cold is not covered under the two-year limited warranty.
REPLACING THE BATTERY
By continuously flashing, the battery icon (figure 17, a) alerts you to that the batteries are
low and must be changed as soon as possible. If there is not enough battery power to
complete a full day of diving, the Matrix immediately shuts down after activation. Since
changes in temperature can suddenly shorten battery life, U.S. Divers advises that you do
not dive when the battery icon is displayed. Furthermore, U.S. Divers recommends that
you install fresh batteries before any extended, multi-day dive trip.
CAUTION: Damage from improper battery replacement is not covered under the two-year limited warranty. It is advisable to have
your Authorized U.S. Divers Dealer perform the battery replacement.
At the same time, the dealer can perform an inspection to make
sure the computer functions properly.
Figure 17
Low Battery Display
WARNING: All memory of tissue loading is erased when the batteries are removed. If you
change batteries between dives, you must wait 24 hours before diving again. Otherwise, you
may increase the risk of decompression sickness.
If you need to change the batteries yourself, follow these simple procedures:
Removing the Matrix from the Console Boot
1. To avoid damage to the gauge, make sure to work over a soft, cushioned surface. Using two hands, push in on the
back of the console boot with your thumbs, while, at the same time, peeling the upper lip of the console boot over
the top of the Matrix module. Take special care not to let the module fall out onto the floor.
2. Beneath the Matrix module is a spacer. Remove and clean the spacer. At this time, you may want to clean the
interior of the console boot with warm fresh water to remove any salt crystals. Towel dry and insert the spacer back
into the console boot.
Battery Removal and Installation
Note: Perform battery removal and installation in a dry, clean environment,
taking extreme care to prevent the entrance of moisture or dust.
a
1. Using a nickel or quarter (never use a screwdriver), turn the battery hatch
(figure 18, a) counterclockwise and remove it from the case back.
2. Using your fingers, remove the O-ring from the battery hatch and discard.
Do not use tools to remove the O-ring.
b
3. Examine the threads of the battery hatch and case back for signs of
damage which may impair proper threading. If damage is found, return the
Matrix to an Authorized U.S. Divers Dealer. Do not attempt to use until the
unit has received service.
WARNING: DO NOT attempt to remove the outer case back
ring (figure 18, b). Doing so may cause the Matrix to
malfunction, resulting in injury or death; it also voids the
warranty.
Figure 18
Battery hatch
4. Run your finger around the outer edge of the top battery in a circular motion until one edge of the battery pops up.
Remove the top battery. Turn the unit over so the bottom battery drops out into your hand. Discard the used
batteries, regardless of age or amount of use. Closely examine the metal contacts inside the battery compartment;
check for signs of bending, breakage or corrosion, which indicates the entrance of moisture into the battery
compartment. If you see any signs of damage, return the Matrix to an Authorized U.S. Divers Dealer and do not
attempt to use it until after it receives service. If everything looks good, proceed to the next step.
5. Install two new 3-volt lithium batteries (Duracell® DL 2032, Radio Shack® 23-162, Maxell® CR 2032, or
Panasonic® CR 2032) into the battery compartment directly on top of each other with the positive (+) side of both
batteries facing upward. Note: Avoid touching the metal contacts, or the flat sides of the batteries, as skin oil
impairs correct contact.
6. Lightly lubricate a new O-ring using a food grade silicone grease, such as Dow Corning 111. This grease is available
at most dive shops. Do not over lubricate. Install the new O-ring onto the battery hatch, making sure to gently
stretch it over the threads; do not roll it down the threads. Only use the proper U.S. Divers O-ring. Use of the
incorrect O-ring may void the warranty.
7. Carefully thread the battery hatch into the case back in a clockwise direction until snug. Using a quarter or nickel,
tighten the battery hatch until it is flush with the case back.
Check for Proper Function
1. To ensure that the battery installation was successful, activate the unit and watch it go through its diagnostic mode
and battery check as described on pages 15 & 16. If the battery icon is still displayed, return the unit to an Authorized U.S. Divers Dealer for service.
2. Observe the LCD to ensure it is consistently clear and sharp in contrast throughout the screen. If any segments
appear dim or are missing, return the unit to your Authorized U.S.Divers Dealer for service. If everything is working
properly, proceed to the next step.
Installing the Matrix Module Back Into the Boot
1. Make sure the spacer is in the boot.
2. Place the Matrix module over top of the hole in the boot, making sure it is properly aligned. Dip the top edge of the
module into the hole and press the bottom edge with your palm until the bottom edge just enters the hole.
3. If necessary, correct the alignment of the module. Press the module completely into the boot until it “snaps” into
place.