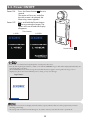
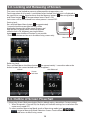
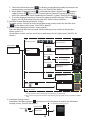
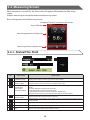
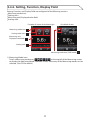
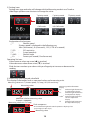
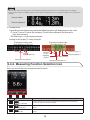
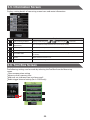
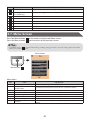
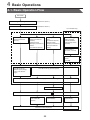
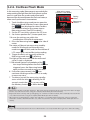
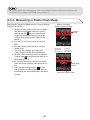
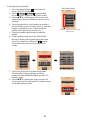
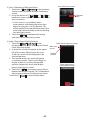
1
LITEMASTER PRO
L-478D / L-478DR
Operating Manual
Thank you for purchasing LITEMASTER PRO L-478D/L-478DR.
Please read this Users’ Manual thoroughly in order to become acquainted with the light
meter and thus be able to use it safely and correctly.
The LITEMASTER PRO L-478D/L-478DR (referred to as L-478D/L-478DR from
here on) comes with “Camera exposure profile” to offer today’s digital and film
shooter with repeatable precision, accurate measurement and digital exposure
control.. What is more, L-478D/L-478DR are equipped with exceptional functions
to deal with images and all sorts of shooting/filming intentions whether you are a
DSLR videographer, cinematographer, still photographer or involved in any faced
of image capture.
Using the latest Data Transfer Software*1, you can set your camera exposure
profiles*2 in the L-478D/L-478DR (up to ten camera profiles). And, by calling
up these settings when you need them, you can measure exposure accurately.
Moreover, when metering light, you can check in an instant whether or not the
subject is in the exposure range. Additionally, you can also make User Setting and
Custom Setting Function in the Data Transfer Software.
*1 Data Transfer Software is an application software provided on the CD-ROM
or downloaded from www.sekonic.com. To use this software, you will need
to install it onto your computer and connect it to L-478D/L-478DR via a
USB cable. Please see the Operating Manual on the CD-ROM for details of
operation.
*2 Exposure profile is the information denoting the characteristics of your digital
cameras and matching the light meter’s value to the unique variations in the
camera, lens shutter speed, aperture, etc. First, authenticate the information
by test shooting and then create exposure profiles using the Data Transfer
Software.
,
1.The reproduction of all or any part of this document without permission is strictly forbidden.
2.The product concerned and/or this manual may be subject to future changes without prior notification.
2
Accompanying Accessories
The following items are included with the L-478D/L-478DR. After opening the package,
please be sure that everything is included. If any of the following items should be
missing, please contact your local camera store or retail organization.
Start-up Guide
CD-ROM
(Operating Manual and Data Transfer Software)
Two AAA manganese batteries
Strap
Soft case
Anti-glare film
<
•Please see “7. Separately Sold Accessories” (P65) for details about available accessories.
3
Safety Precautions
Before using this product, please read this “Safety Precautions” for proper operation.
C
The warning symbol indicates the possibility of death or serious injury
if the product is not used properly.
B
The caution symbol indicates the possibility of minor to moderate
personal injury or product damage if the product is not used properly.
,
The note symbol indicates cautions or restrictions when using the
product. Please read all notes to avoid errors in operation.
<
The reference symbol indicates additional information about the
controls or related functions. Reading these is recommended.
C
•Infants or toddlers may accidentally wrap the strap around their neck, so please place it in a location out of their reach.
There is a danger of suffocation.
•Do not place batteries in open fl ame, attempt to short them, disassemble them, apply heat to them, or recharge them
(except rechargeable batteries). They may burst and cause fi res, serious injury, or damage to the environment.
•Do not look directly at the sun via the viewfinder (sold separately), as doing so may damage eyesight.
•For L-478DR only: If user intentionally modifies or converts the L-478DR, there is a risk that doing so may violate
the Radio Law, which may make the user liable to punishment according to the law.
B
•Do not handle this product with wet hands, or leave it in the rain or in a location where it may be splashed with water
or come into contact with moisture. There is a danger of electric shock if the “Cord Flash Mode” is used. This may also
result in damage to the product.
Do not disassemble this product for modification or parts replacement. Refer servicing only to qualified and authorized
personnel in case of product’s malfunction.
Do not play the accompanying CD-ROM in a music-type CD player, as there is a risk of hearing damage as well as
damage to speakers and/or earphones.
Use fingers to lightly touch the LCD when operating. Do not use sharp objects such as ballpoint pens or pencils, as
doing so may damage the LCD or cause malfunction.
•
•
•
,
The LCD is covered by a protective sheet. Please peel off this sheet before using the screen.
4
Table of Contents
Accompanying Accessories..............................................................................................3
Safety Precautions...............................................................................................................4
1 Parts Designations...................................................................................................................8
1-1. Parts Designations.....................................................................................................8
2 Before Using..............................................................................................................................9
2-1. Attaching the Strap...................................................................................................9
2-2. Inserting the Batteries..............................................................................................9
2-3. Power ON/OFF.......................................................................................................... 10
2-4. Checking the Battery Capacity........................................................................... 11
2-5. Cautions about Changing the Batteries during
Measurement.......................................................................................................... 11
2-6. Auto Power OFF Function.................................................................................... 11
3 Screen Operations................................................................................................................ 12
3-1. On-screen Operations............................................................................................ 12
3-2. Locking and Releasing of Screen....................................................................... 14
3-3. Outline of Screen Flowchart................................................................................ 14
3-4. Measuring Screen.................................................................................................... 16
3-4-1. Status/Title Field........................................................................................ 16
3-4-2. Setting, Function, Display Field ........................................................... 17
3-4-3. Measuring Function Selection Icon.................................................... 19
3-5. Information Screen................................................................................................. 20
3-6. Tool Box Screen........................................................................................................ 20
3-7. Menu Screen............................................................................................................. 21
4 Basic Operations................................................................................................................... 22
4-1. Basic Operation Flow............................................................................................. 22
4-2. Setting Light Receiving System.......................................................................... 23
4-2-1. Measuring with Incident Light Function
(Lumisphere Extended /Retracted) ................................................. 23
4-2-2. Measuring with Reflected Light System .......................................... 24
4-3. Setting Measuring Mode...................................................................................... 25
5 Measuring................................................................................................................................ 27
5-1. Measuring in Ambient Light Mode................................................................... 27
5-1-1. T (Shutter Speed) Priority Mode........................................................... 27
5-1-2. F (f-stop) Priority Mode .......................................................................... 28
5-1-3. TF Priority Mode ........................................................................................ 28
5-1-4. Illuminance/Luminance Mode.............................................................. 28
5-1-5. Measuring Exposure for Video and Movies...................................... 31
5
Table of Contents
5-2. Measuring in Flash Light Mode.......................................................................... 33
5-2-1. Cord (PC) Flash Mode............................................................................... 34
5-2-2. Cordless Flash Mode ............................................................................... 35
5-2-3. Cord Multi (Cumulative) Flash Mode.................................................. 36
5-2-4. Cordless Multiple (Cumulative) Flash Mode.................................... 37
5-3. Measuring with Radio-controlled Flash (for L-478DR only) .................... 38
5-3-1. How to Measure Using Radio Control................................................ 38
5-3-2. How to Measure with Radio Control Channels............................... 38
5-3-3. Using the Power Control Settings........................................................ 40
5-3-4. Measuring in Radio Flash Mode........................................................... 41
5-3-5. Measuring in Radio Triggering Multiple (Cumulative)
Flash Mode................................................................................................. 42
5-4. Out of Displayed Range or Measuring Range............................................... 42
5-4-1. When Displayed Range is Exceeded................................................... 42
5-4-2. When Measuring Range is Exceeded.................................................. 42
6 Functions................................................................................................................................. 43
6-1. Memory Function.................................................................................................... 43
6-1-1. Memory......................................................................................................... 43
6-1-2. Memory Recall............................................................................................ 44
6-1-3. Memory Clear.............................................................................................. 45
6-2. Mid. Tone Function................................................................................................. 46
6-2-1. Setting Measuring Value as Mid. Tone............................................... 46
6-2-2. Setting Memorized Value as Mid. Tone.............................................. 46
6-2-3. Mid. Tone Modification............................................................................ 47
6-2-4. Mid. Tone Clearing..................................................................................... 47
6-2-5. Mid. Tone Recall ......................................................................................... 48
6-3. Average Function.................................................................................................... 49
6-4. Contrast Function.................................................................................................... 50
6-5. Filter Compensation Function ........................................................................... 51
6-5-1. Setting Filter Numbers and Compensation Values ...................... 51
6-5-2. Selecting Filter Factor Number............................................................. 52
6-5-3. Deselecting Filter....................................................................................... 52
6-6. Functions by Menu Selection............................................................................. 53
6-6-1. Analog Scale Switching .......................................................................... 53
6-6-2. Exposure Compensation Function ..................................................... 53
6-6-3. Custom Setting Function ....................................................................... 55
6-6-4. Exposure Profile Function....................................................................... 56
6-6-5. Frame Rate Editing.................................................................................... 58
6-6-6. Shutter Angle Editing............................................................................... 59
6
6-6-7. Filter Name Editing................................................................................... 60
6-7. Hardware Setting Function.................................................................................. 62
7 Optional Accessories (Sold Separately)........................................................................ 65
8 Registered Filters .................................................................................................................. 66
9 Specifications......................................................................................................................... 67
10 Safety Guide and Maintenance..................................................................................... 69
7
1 Parts Designations
1-1. Parts Designations
Front View
Rear View
1
2
Lock lever
Strap
eyelet
Lumisphere
retracting ring
3
5
Lumisphere
Memory
button*1
4
Touch panel
6
USB port
8
Menu button
13
Measuring
button *1
Synchro terminal
9
Battery Cover Open
Battery
cover latch
10
7
Bottom View
12
Power button
11
Battery cover
14
Battery
compartment
The following table lists the functions of each part.
No.
Part Name
1
Lock lever
2
3
Lumisphere retracting
ring
Lumisphere
4
Touch panel
5
Memory button*1
6
USB port
7
Menu button
8
Explanation
Slide back when removing the lumisphere from the meter. (See P24 for
details.)
Turn to switch between extended and retracted lumisphere. (See P23
for details.)
Extend to measure exposure. Retract to measure contrast.
Can be freely rotated through 270°to receive light.
Displays measuring screens and setting screens. Touch this panel to perform
settings and operations. (See P12 for details.)
Press to memorize current measured value. Press in multi (cumulative)
mode to clear memorized measurements.
Accepts USB Mini B cable for connection to computer for use with Data
Transfer Software.
Press to enter Menu mode from any of the screens.
Press again to return to the previous screen. (See P21 for details.)
Measuring button*1
Press when the Measuring screen is displayed to implement measuring.
9
10
Battery cover latch
Power button
Slide up to open battery cover.
11
Use to turn power ON and OFF.
Hold down (approximately one second) when turning power ON and
OFF.
Battery cover
Lift up to reveal 2x AAA batteries that power the meter.
12
13
Strap eyelet
Attach accessory strap here.
Synchro terminal
Plug in synchro cord (sold separate) connected to separate flash here
when using Cord (PC) Mode.
14
Battery compartment
Holds 2x AAA size batteries. Insert as indicated in compartment.
*1 Using Custom Setting Function, the Memory button 5 and the Measuring button 8 can be switched (See P55 for
details.)
8
2 Before Using
2-1. Attaching the Strap
1)Pass the strap included through the outer hole
of the Strap eyelet 12 .
2)Pass the opposite end of the strap through the
loop at the end of strap.
C
Infants or toddlers may accidentally wrap the strap around their
neck, so please place it in a location out of their reach. There is a
danger of suffocation.
Strap eyelet 12
2-2. Inserting the Batteries
1) Requires two AAA alkaline manganese batteries.
2)Slide the Battery cover latch 9 in the direction
of the arrow and remove the Battery cover 11 .
3)Insert the batteries according to the “+” and “–”
symbols in the Battery compartment 14 .
*A
s shown in the diagram to the right, please
note both positive sides of the batteries are
facing in the same direction.
4)While lining up the two tabs on the Battery
cover 11 , press the Battery cover 11 back into
place from above.
C
Do not place batteries in open fl ame, attempt to short them,
disassemble them, apply heat to them, or recharge them (except
rechargeable batteries). They may burst and cause fi res, serious
injury, or damage to the environment.
B
•Insert the batteries minus (-) side first. When removing batteries,
pull out plus (+) side first.
•Do not use batteries with any other rating than the one specifi ed.
Also, do not mix old and new batteries.
•If the meter will not be used for an extended period of time, it is
recommended to remove the batteries to avoid possible damage
caused by battery leaking.
9
Tabs
Battery cover
11
Battery cover latch 9
Battery compartment 14
2-3. Power ON/OFF
Press the Power button 10 for one
second.
The meter will turn on, and after
the title screen is displayed, the
Measuring screen appears.
Power OFF: Press and hold the Power button
10 for one second or longer. The
meter will turn off and the display
disappears.
Power ON:
Title Screens
L-478D
L-478DR
Power button 10
,
•Please wait 3 seconds between repeated power on and power off sessions.
•Directly after replacing the batteries, a white screen with the SEKONIC logo in blue will be displayed, followed by the
appropriate title screen above.
•An L-478D/DR memory check is being executed while the blue bar graph is moving when the Logo screen is
displayed, so please do not turn OFF the power, as doing so may cause damage.
Logo Screen
<
•If the LCD screen shows no display, check the battery capacity indicator. Also check for proper battery insertion
(Pos/Neg positioning).
•All settings and measurements made during use are saved in memory even after the meter is powered off.
10
2-4. Checking the Battery Capacity
When the power is turned on, the battery power indicator is displayed at the upper left
of the LCD.
Full battery power remaining.
Sufficient battery power remaining.
Low battery power remaining. Have spare batteries ready.
When the indicator blinks, replace batteries immediately.
<
•When the batteries are out of power and the meter is turned ON, the LCD screen will appear and then turn off immediately.
This is an indication that the batteries are depleted and they should be replaced immediately. Having spare batteries on hand
is recommended.
W hen the meter is continuously used at room temperature, the battery life with alkaline batteries will last 10 hours
(based on our testing).
D ue to temperature and length of time stored, the batteries included with this meter may have a shorter live span.
•
•
2-5. Cautions about Changing the Batteries during Measurement
1) Always turn off the power before replacing batteries.
2)If an unexpected display appears on the LCD during battery replacement or
measurement, ie. settings other than selected, or if the meter does not respond
when a button is pressed, remove the batteries, wait at least 10 seconds, and then
re-install them.
2-6. Auto Power OFF Function
To save battery power, the meter will automatically turn off five minutes after the last
button is pressed.
<
•All settings and measurements are saved in memory even after the meter has automatically turned off. When the power
is turned ON, they will be displayed again.
•Default Auto Power OFF is 5 minutes. Select longer time in Custom Setting. (See P56 for details).
•To prevent battery drain during transport, the meter will switch OFF after approximately one mnute if the Power
Button is held down continuously.
11
3 Screen Operations
The data display is also a touch panel that is used to make all settings
<Display illumination>
The Display illumination is activated as soon as the meter is turned ON. The
illumination level is user adjustable. The panel dims during measuring and cordless
flash standby to eliminate its influence in the measurement.
The display Illumination of your meter has been set to “Bright” at the factory to enable best
operation for outdoor use.For indoor viewing and better battery life, you may set the screen
illumination to “Normal” in Custom Setting. Please see P55 for details
•
•
3-1. On-screen Operations
Touch the icons on screen to perform various operations.
The following are the icon types.
1) Measuring Mode Icon
Touch the Measuring mode icon to display the Measuring Mode Selection screen.
Touch any icon to switch to the desired Measuring mode. (See P25 for details.)
Measuring Screen
Measuring Mode Selection Screen
2) Setting Value Change/Item Selection Icon
Touch Operation:
Touch the up arrow (▲) to increase the value or change up to the next item.
Touch the down arrow (▼) to decrease the value or change down to the next item.
Slide Operation:
Slide your finger tip up or down over the value to change the value amount.
Sliding your finger over scroll bars provides fast navigation of large menus.
Measuring Screen
Edit Frame Rate Screen
Scroll bar
12
3) Radio Buttons
Touching Radio buttons selects the item to the right of it.
Only one item in a group can be selected at one time.
Filter Compensation Setting Screen
4) Alpha-Numeric Keypad
Value Input Screen
Alphabet Input Screen
Number Input Screen
Inputting Values (Value Input Screen):
0-9, Decimal point, +/-: Value displayed on screen when key touched.
OK: Confirms input value and returns to previous screen.
DEL: Deletes input value.
Cancel: Cancels input and returns to previous screen.
Inputting Alphabet and Numbers (Alphabet Input Screen and Number Input Screen):
1/A/a: Switches between Ten Key input/Uppercase/Lowercase.
ABC(abc), 0-9, Decimal Point:
Value displayed on screen when key touched.
Repeated pressing of the same button for alphabet
(ABC/abc) will change the alphabet character in order.
← →: Shift input position.
OK: Confirms input value and returns to previous screen.
DEL: Deletes input value.
Cancel: Cancels inputting and returns to previous screen.
13
3-2. Locking and Releasing of Screen
The screen can be locked to prevent unforeseeable misoperations, etc.
Touch operation of all screens is prohibited when locked (the lock icon is displayed at
the top of the screen). Note however that the Memory button 5 , Measuring button 8
and Power button 10 will be operational even if lock is ON.
Lock status will be maintained even when power is turned OFF.
Setting Lock:
Press and hold down Menu button 7 for approximately
1 second to lock the screen (the lock icon will be
displayed at the top right of the screen). Buttons and
icons on the LCD (touch panel) cannot be operated
while the lock is ON. Moreover, pressing the Menu
button 7 to open the Menu Functions is not possible.
* This lock function can be set in the Measuring screen only.
Menu button 7
Releasing Lock:
Press and hold down the Menu button 7 for approximately 1 second to release the
locked screen (the screen locked icon will disappear.)
Locked
Lock Released
Screen
lock icon
3-3. Outline of Screen Flowchart
1)Measuring Screen (Background color: Black in default setting, selectable in Custom setting)
1.When the power is turned ON, the display will indicate settings last used when the
meter was turned OFF.
To select another Measuring Mode, touch a Measuirng mode icon ( , , , ,
, ) to go to Measuing Mode Selection Screen. Touch different Icon to select
mode and return to Measuring screen.
14
2.Touch the Information icon (
) to display current display mode, input exposure
compensation, and exposure profile in use. (See P20 for details.)
is selected, the Power Control icon ( ) appears
3.When Radio Triggering mode
under the icon of . Press Power Control icon for ControlTL power adjustment
and Zone selection for both Standard and ControlTL system. (See P38 for details.)
To use the Average Function or Contrast Function, touch the Average/ΔEV icon (
). (For
4.
details, see P49 for Average Function, and see P 50 for Contrast Function.)
2) Tool Box Screen (Background color: Green)
To make various settings for the current Measuring screen, touch the Tool Box icon
) at the Measuring screen. (See P20 for details.)
(
3) Menu Screen (Background color: Light orange)
Press the Menu button on the meter (while working in any screen) to display the
Menu screen (*1).
At the Menu screen, you can set all menu operations for this light meter. (See P21 for
details.)
3-4
Measuring screen
Measuring Mode Icon
Measuring Mode
Select Screen
Power button 10
Power ON
Info icon
Measuring
screen
Information screen
Radio Control
icon
Power Control
screen (L-478DR) *2
Average icon
Measuring screen
(Average)
3-6 Tool Box screen
Tool Box icon
Tool Box screen
Menu button *1 7
Menu screen
3-7 Menu screen
*1 If you press the Menu button while working at another Setting screen, the settings in
mid-operation will be interrupted and the Menu List displayed.
*2 This screen is displayed only when the Radio Triggering mode is being used (for L-478DR
only).
4) Hardware Setting Screen
Hold down the Menu button 7 and then turn ON the power to display the Hardware
Setting screen. (See P62 for details.)
6-7 Hardware Setting Screen
Menu button 7
Power button 10
Power ON
15
3-4. Measuring Screen
When the power is turned ON, the Title screen will appear, followed by the Measuring
screen.
Subject measuring can be performed at the Measuring screen.
Basic Configuration of the Measuring Screen
Example of T priority in Ambient Light Screen
Status/Title field
Measuring operations/Display area
Measuring function selection icon
3-4-1. Status/Title Field
1 2
3
4
5
6
7
8
No.
1
2
3
4
Icon Name
Battery Power
Indicator Display
Exposure
compensation
Multiple
(Cumulative)
Flash mode/
Cumulative count
Explanation
Battery power display in four stages. (See P11 for details.)
Displayed when Exposure compensation (adjustment) is set. The displayed
measured value is calculated with this compensation value.
Displayed when Accumulative Mode is selected for the following flash measuring
modes.
Cordless Multiple (cumulative) Flash mode
Cord (PC) Multiple (cumulative) Flash mode
Radio Multiple (cumulative) Flash mode (for L-478DR only)
Cumulative count (up to 99) is displayed to the right of the MLT symbol.
•
•
•
5
Filter
compensation
Screen lock
6
USB display
Displayed when meter is connected to a computer by USB cable.
7
Memory count
Displays up to 9 memorized readings.
8
Title
Appears to indicate which setting mode is active.
Displayed when filter compensation is selected.
Displayed when screen Lock is active. Touch secreen is not active when displayed. (See
P14 for details.)
16
3-4-2. Setting, Function, Display Field
Setting, Function, and Display Field are configured of the following sections.
Measuring mode icons
Setting icons
Measuring unit/Displayed value field
Analog scale
•
•
•
•
Example of Screen for Ambient light
Cine Mode Screen
Measuring mode icon 1
Setting value icons 2
Measuring unit/
Displayed value field 3
Analog scale 4
Measuring mode icon [CINE mode] 1
1) Measuring Mode Icons
Touch a Measuring mode icon ( , , , , , ) at the top left of the Measuring screen
to display the Measuring Mode Selection screen, where any of the Measuring modes can be
selected. (See P25 for details.)
17
2) Setting Icons
Setting icons type and value will change with the Measuring mode in use. Touch or
slide finger up/down over the icons to change the value.
T priority mode
CINE mode
F priority mode
TF priority mode
HD CINE mode
Explanation of value types
T
:
Shutter speed
Shutter speed is displayed in the following way.
30m (30 minutes), 8s (8 seconds), 125 (1/125 of a second)
ISO :
ISO sensitivity
F
:
f-stop (aperture)
ANG :
Shutter angle
f/s :
Frames per second (Cine frame rate)
•
•
•
•
•
Operating Set Icon:
Value increases when up arrow (▲) is touched.
Value decreases when down arrow (▼) is touched.
Slide the icon number up or down with your fingertip to increase or decrease the
reading.
3) Measuring unit/Displayed value field
This displays information such as measured values and measuring units.
Measuring value unit: T (shutter speed), F (f-stop), ISO (ISO sensitivity)
Measuring values
Measuring mode information
display
•lx,:
Ambient light illuminance
lx independent display
•fc:
Ambient light illuminance
fc independent display
2:
•cd/m Ambient light luminance
cd/m2 independent
display
•fl:
Ambient light luminance
fl independent display
Additional info for measuring value
Example: 1,900,000lx
Measuring value unit: F (f-stop)
Flash component
•The ratio of flash light to the total exposure is displayed as a
percentage (in 10% steps)
Measuring value
18
<
The fractions of the measuring values can be hidden by changing setting at the Custom Setting Function. Display
setting number 2 (fraction display) and then select 0 (ON) to display fraction and 1 (OFF) to hide fraction. (See P55 for
details.)
Fraction hidden
Fraction displayed
4) Analog Scale
Depending on the Measuring mode, the following values will be displayed in the scale.
F value, T value, EV value (for incident), EV value (for reflected), illuminance lx
(lux), illuminance fc
The following is a scale display example.
•
Analog Scale Display (T value) Example
[Example of analog scale
when Mid.Tone is NOT set]
Memory pointers
[Example of analog scale
when Mid.Tone is set]
Dynamic
range [-]
Clippoing
point [-]
Measured value pointer
Dynamic range [+]
Clippoing point [+]
Memory pointers
Measuring value pointer
3-4-3. Measuring Function Selection Icon
Press any one of the icons to execute that function.
1
No.
1
2
3
2
3
Icon
Explanation
Average/ΔEV icon
Touch to average one or more memorized measurements (see 6-3 P49) or
to activate Contrast Function (6-4 P50).
Information icon
Touch to display Measuring mode and meter in formation (see 3-5 P20 for
details)
Tool Box icon
Touch to display Tool Box screen to set various functions. (see 3-6 P20 for
details)
19
3-5. Information Screen
Displays setting details of measuring screen icons and meter information
1
2
3
4
5
6
7
No.
Item
Explanation
1
Light receiving method
Displays incident light (
2
Exposure compensation
(adjustment)
User-set exposure compensation value (see P53 for details)
3
Filter compensation
User-set filter compensation value (see P51 for details)
4
Exposure profile name
Name of exposure profile in use (See P56 for details)
5
User information
Set user information in “Edit User Info” of Hardware Setting is displayed (See P60
for details).
6
Version
Meter firmware version in use.
7
Close
Returns to Measuring screen.
or
)/reflected light (
) selection.
3-6. Tool Box Screen
The following settings can be made by selecting the Tool Box from the Measuring
screen.
Filter compensation setting
Memory recall, memory clear
Mid tone set, mid tone clear, mid tone recall
Radio trigger channel setting (for L-478DR only)
•
•
•
•
1
2
3
4
5
6
7
8
20
No.
1
Item
Explanation
Filter compensation
Displays Filter compensation setting screen. (See P51 for details.)
2
Radio trigger channel
(for L-478DR only)
Displays Radio Trigger Channel Setting screen. (See P38 for details.)
3
Memory clear
Displays Memory Clear screen. (See P45 for details.)
Memory recall
Displays Memory Recall Selection screen. (See P44 for details.)
Mid tone set
Displays Mid. Tone Set screen (See P46 for details.)
Mid tone clear
Displays Mid. Tone clear screen. (See P47 for details.)
Mid tone recall
Displays Mid. Tone Recall screen. (See P48 for details.)
Close
Returns to Measuring screen.
4
5
6
7
8
3-7. Menu Screen
Press the Menu button 7 on the meter to display the Menu screen.
Press the Menu button 7 again to return to the previous screen.
,
•If the Menu button
7 is pressed while entering or editing settings in another screen, the settings will be lost and the
Menu screen will be displayed.
Menu Screen
Menu button 7
Menu Items
No.
1
2
3
4
5
6
7
8
Item
Set Analog Scale
Set Exposure
Compensation
Custom Setting
Set Profile
Check/Editing Profile
Edit Frame Rate
Edit Shutter Angle
Edit Filter
Explanation
Select Analog Scale type for use (See P53 for details.)
Input Exposure Compensation values for use. (See P53 for details.)
Displays list of available Custom Settings. (See P55 for details.)
Select Exposure Profile for use. (See P56 for details.)
Create, edit and select profiles for display and use (See P56 for details.)
Create and Select frame rates for display and use. (See P58 for details.)
Create and Select shutter angles for use. (See P59 for details.)
Select and edit filter compensation values for display and use (See P60 for
details.)
21
4 Basic Operations
4-1. Basic Operation Flow
Power ON
Set light receiving method
Select exposure profile
(See P23 for details.)
(See P56 for details.)
For L-478DR only
Setting Measuring mode (See P25)
Ambient Light
mode (See P27 for
details.)
Cordless Flash
mode (See P35 for
details.)
Cordless Flash
Multiple (cumulative)
mode
(See P38 for details.)
Cord (PC) Flash
mode
(See P34 for details.)
Cord (PC) Flash
Multiple (cumulative)
mode (See P38 for
details.)
Radio Flash Triggering
mode (See P41)
Radio Flash Multi
(Cumulative) mode
(See P42 )
Channel/Zone
selection (See P38)
Power Control
screen
(See P40)
Set ISO sensitivity,
Shutter Speed, f-stop,
Frame rate/Shutter
Angle
Set ISO sensitivity, Shutter Speed
Set Exposure Compensation (See P20 for display and P56 for setting), Set Filter Compensation (See
Connect Cord (sold separately)
Press Measuring button 8
Manually trigger
flash within 90
seconds
Flash triggers
automatically
Measured value displayed
22
Flash triggers
automatically
4-2. Setting Light Receiving System
4-2-1. Measuring with Incident Light Function (Lumisphere Extended /Retracted)
Use either extended or retracted (flat) lumisphere
to measure incident light. Point the lumisphere at
the camera (lens optical axis) from a position close
to the subject and then measure.
1. Extending Lumisphere
Rotate the Lumisphere retracting ring 2 to
align the mark with the extended symbol ( )
on the meter head.
2. Retracting Lumisphere
Rotate the Lumisphere retracting ring 2 to
)on
align the mark with retracted symbol (
the meter head.
Lumisphere alighining mark
Lumisphere
retracting ring
2
Lumisphere
retracting ring
2
Extended (
)
Retracted (
Lumisphere Extended
Lumisphere Retracted (flat)
)
Lumisphere Retracted (flat)
Retract lumisphere when measuring flat subjects
such as manuscripts, books, pictures, green
screens, or when measuring lighting ratio
(Contrast function) (see P50 for details) or simply
measuring intensity of illumination (see P28 for
details).
,
•Try to minimize the influence fo the person taking the light measurements. (Do not obstruct the light sources. There
will also be reflected light from the person’s clothing, so do not allow this reflected light to enter the light receptor.)
•If the light meter is used with the Lumisphere retracting ring in a middle position, distributed light quality will change,
and suitable measurements cannot be made.
•Do not push down the lumisphere with your hand.
•Because it may affect the precision of the measurements, be careful not to damage or dirty the Lumisphere/Light
receptor. When Lumisphere becomes dirty, wipe it with a dry, soft cloth. Never use organic solvent such as thinner or
benzene.
23
4-2-2. Measuring with Reflected Light System
Use 5-degree Viewfinder, reflected light attachment,
(sold separately) to make reflected light readings with
the L-478D/DR.
This method measures the brightness (luminance)
of the light reflected from the subject. It is useful for
distant objects such as landscapes, when you cannot
go to the position of the subject , or for metering
subjects that generate light (neon signs, etc), highly
reflective surfaces or translucent subjects (stained
glass, etc).
Reflected light measurements are made at the
camera position by aligning the circle in the
viewfinder eyepiece with the subject area to be
measured.
* See operating manual included with 5-Degree
Viewfinder (sold separately).
1. Remove the Lumisphere
The lumisphere unit is removed by holding
both the upper and lower sections of
Lumisphere retracting ring and turning it
to the left while pushing the Lock lever 1
downward
2. Attach the Lumisphere
Align the mark on the Lumisphere with the
mark on the meter head and, while pressing
it in, turn the Lumisphere to the right until it
clicks into place.
* Check to see that the Lumisphere lock lever
1 is engaged.
Lumisphere
retracting ring
2
Lumisphere lock lever 1
Mark
Light receiving
element
,
Meter mark
•When attaching/detaching lumisphere or viewfinder, be sure not to touch the light receiving element inside the meter
head.
•When the light receiving element gets dirty, clean it with soft and dry cloth. Never use organic cleaners such as thinner
or benzene.
24
4-3. Setting Measuring Mode
Touch the Measuring mode icon ( , , , , ) at the top left of the Measuring
screen and then select any one of the Measuring modes.
* The Measuring modes displayed on the Measuring Mode Selection screen will change
depending on the settings at Custom Setting. (See P55 for details.)
Measuring Mode Selection Screen
Currently selected
measuring mode
Return to measuring
screens after
selecting any of icons.
1
2
3
4
5
6
25
7
8
9
10
11
12
About Measuring Modes
Mode
Ambient Light
Mode
No.
1
2
3
4
5
6
Flash Light Mode
7
8
9
10
11
12
Icon
Explanation
T (shutter speed) priority
Displays f-stop (aperture) value for input shutter speed and ISO
sensitivity. (See P27 for details.)
F (stop) priority
Displays shutter speed value for input f-stop and ISO sensitivity.
(See P28 for details.)
TF (shutter speed and f-stop) priority
Displays ISO sensitivity value for input shutter speed and f-stop. (See
P28 for details.)
HD Cine mode
Displays f-stop value for input shutter speed, ISO sensitivity and frame rate
(f/s). (See P32 for details.)
Cine mode
Displays f-stop value for input frame rate (f/s), ISO sensitivity and shutter
angle. (See P31 for details.)
Illuminance (lux) mode
Displays brightness value in lux unit in incident light. (See P29 for details.)
Illuminance (fc) mode
Displays brightness value in foot-candle (fc) unit in incident light. (See
P29 for details.)
Luminance (cd/m2) mode (with 5-degree viewfinder sold separately)
Displays brightness value in cd/m2 unit in reflected light. (See P30
for details.)
Luminance (fl) mode (with 5-degree viewfinder sold separately)
Displays brightness value in foot-lambert (fl) unit in reflected light.
(See P30 for details.)
Cordless flash mode
Detects flash brightness without meter-flash connection after measuring
button pressed to arm meter for 90 seconds and flash fired separately.
Displays f-stop (apertures) value for input shutter speed and ISO
sensitivity. (See P35 for details.)
Cordless multiple (cumulative) flash mode
Detects flash brightness without meter-flash connection after measuring
button pressed to arm meter for 90 seconds and flash fired separately.
Displays f-stop (apertures) value for input shutter speed and ISO sensitivity.
(See P37 for details.)
Cord (PC) flash mode
Detects flash brightness with PC cord meter-flash connection.
Displays f-stop (apertures) value for input shutter speed and ISO
sensitivity. (See P34 for details.)
Cord multiple (cumulative) flash mode
Detects and accumulates flash brightness with PC cord meter-flash
connection.
Displays f-stop (apertures) value for input shutter speed and ISO sensitivity.
(See P36 for details.)
Radio triggering mode *L-478DR only
Detects flash brightness without meter-flash connection after radio
transmitted trigger signal is received by PocketWizard® radio-receiver
connected flash.
Displays f-stop (apertures) value for input shutter speed and ISO sensitivity.
(See P41 for details.)
Radio triggering multi (cumulative) flash mode *L-478DR only
Detects and accumulates flash brightness without meter-flash
connection after radio transmitted trigger signal is received by radioreceiver connected flash
Displays f-stop (apertures) value for input shutter speed and ISO
sensitivity. (See P42 for details.)
<
•Ambient Light refers to natural light (sunlight) as well as continuous light like tungsten lamps and fluorescent lamps.
•Flash refers to momentary light such as that produced by a flashlight or flash bulb.
•If all light measuring modes are turned OFF, Ambient Light T priority will be selected.
26
5 Measuring
5-1. Measuring in Ambient Light Mode
Continuous light like natural light (sunlight) as well as tungsten lamps and fluorescent
lamps are measured in Ambient Light Mode.
The following are the measuring methods in the Ambient Light Mode.
T (shutter speed) priority
F (stop) priority
TF (EV) priority
Illuminance lux independent display
Illuminance fc independent display
Luminance cd/m2 independent display (with reflected light attachment sold separately)
Luminance fl independent display (with reflected light attachment sold separately)
See 4-3 “Setting Measuring Mode” (P25) for details on changing measuring mode.
•
•
•
•
•
•
•
<
•Shutter speed and f-stop (aperture) values can be displayed in full, ½ and 1/3 stop increments in Custom Setting (See
P55 for details.)
•After taking a measurement, changing a T or F setting value will also change the measured value.
) at the bottom of the screen activates the Contrast Function. (See P50 for
•Touching the Average/ΔEV button (
details.)
•The Analog Scale display will change according to Measuring Mode, Incident/Reflected and Mid-Tone mode selected
as well as “Set Analog Scale” in Menu list (See P19 and P53 for details.)
•See P42 for details about reading outside the display range or beyond the measuring range.
5-1-1. T (Shutter Speed) Priority Mode
1.Touch the Measuring mode icon to open the
Measuring Mode Selection Screen, then touch
icon to select T Priority Mode and
the
return the screen view to Measuring screen. (See
P25 for details.)
2.Set the ISO sensitivity value on the ISO icon.
3.Set the shutter speed on the T icon.
4.Press the Measuring button 8 on the side of
meter.
Release the Measuring button 8 to
complete the measurement. The measured
f-stop (aperture) value at that time will be
displayed.
While pressing the Measuring button 8 , the
meter measures continuously until it is
released.
27
Mesuring Screen
(T Priority Mode)
Setting
Value
Measured value (f-stop)
5-1-2. F (f-stop) Priority Mode
1.Touch the Measuring mode icon to open the
Measuring Mode Selection Screen, then touch
icon to select F Priority Mode and
the
return the screen view to Measuring screen (See
P25 for details.)
2.Set the ISO sensitivity value on the ISO icon.
3.Set the f-stop (aperture) value on the F icon.
Press the Measuring button 8 on the side of meter.
4.
Release the Measuring button 8 to complete
the measurement. The measured shutter speed
value at that time will be displayed.
While pressing the Measuring button 8 , the
meter measures continuously until it is released.
Mesuring Screen
(F Priority Mode)
Setting
Value
Measured value (shutter speed)
5-1-3. TF Priority Mode
TF Mode is useful for today’s digital cameras when a fixed speed and aperture are desired and the
ISO can be adjusted for proper exposure. (See Custom Setting Function P55 to activate TF mode
Icon.)
Mesuring Screen
(TF Priority Mode)
1.Touch the Measuring mode icon To open the
Measuring Mode Selection, then touch the
icon to select TF Priority Mode and
return the screen view to Measuring screen. Setting value
Measuring
(See P25 for details.)
Value(f-stop)
2.Set shutter speed on the T icon.
3. Set f-stop on the F icon.
4.
Press Measuring button 8 on the side of meter
Release the Measuring button 8 to complete
the measurement. The measured ISO sensitivity
Measured value (ISO)
value at that time will be displayed.
While pressing the Measuring button 8 , the
meter measures continuously until it is released.
5-1-4. Illuminance/Luminance Mode
Illuminance can be measured using the incident light mode and luminance can be measured
using the reflected light attachment (5-degree viewfinder sold separately). The following are the
units that can be set.
Incident light measurement (Illuminance)
Lux (Unit: lx)
Foot-candle (Unit: fc)
Reflected light measurement (Luminance)
Candela per square meter (Unit: cd/m2)
Foot-lambert (Unit: fl)
•
•
•
•
<
•Any calibration or exposure compensation will not be in effect with illuminance/luminance measurements.
28
1) Illumination Measuring in Lux
1.Rotate the Lumisphere retracting ring 2 and
symbol.
align the mark with the
2.Touch the Measuring mode icon to open
the Measuring Mode Selection Screen, then
icon to select Illuminance
touch the
Measuring (lux) Mode and return the screen
view to Measuring screen. (See P25 for
details.)
3.Position the Retracted Lumisphere so that
it is parallel with the light source being
measured and press the Measuring Button
8 on the side of the meter.
Release the Measuring button 8 to
complete the measurement. The measured
illuminance (lux) at that time will be displayed.
While pressing the Measuring button 8 , the
meter measures continuously until it is
released.
Lumisphere retracting ring 2
Measuring screen (lx)
Measured value (lx)
2) Illuminance measuring in Foot-candle
1.Rotate the Lumisphere retracting ring 2 and
symbol.
align the ring with the
2.Touch the Measuring mode icon to open
the Measuring Mode Selection Screen, then
icon to select Illuminance
touch the
Measuring (fc) Mode and return the screen
view to Measuring screen. (See P25 for
details.)
3.Position the Retracted Lumisphere so that
it is parallel with the light source being
measured and press the Measuring Button
8 on the side of the meter.
Release the Measuring button 8 to
complete the measurement. The measured
illuminance (fc) at that time will be displayed.
While pressing the Measuring button 8 , the
meter measures continuously until it is
released.
29
Measuring screen (fc)
Measuring value (fc)
3)Luminance measuring in Candela per square
meter
1.Attach a 5-degree viewfinder (sold
separately). (See P24 for details.)
2.Touch the Measuring mode icon to open
the Measuring Mode Selection Screen, then
icon to select Luminance
touch the
Measuring (cd/m2) Mode and return the
screen view to Measuring screen. (See P25
for details.)
3.While looking through the viewfinder, place
the reading circle on the light source or
surface to be measured and press the
Measuring button 8 on the side of the
meter.
Release the Measuring button 8 to
complete the measurement. The measured
luminance (cd/m2) at that time will be
displayed.
While pressing the Measuring button 8 , the
meter measures continuously until it is
released.
4)Luminance measuring in Foot-lambert
1.Attach a 5-degree viewfinder (sold
separately). (See P24 for details.)
2.Touch the Measuring mode icon to open
the Measuring Mode Selection Screen, then
icon to select Luminance
touch the
Measuring (fl) Mode and return the screen
view to Measuring screen. (See P25 for
details.)
3.While looking through the viewfinder, place
the reading circle on the light source or
surface to be measured and press the
Measuring button 8 on the side of the
meter.
Release the Measuring button 8 to
complete the measurement. The measured
luminance (fl) at that time will be displayed.
While pressing the Measuring button 8 , the
meter measures continuously until it is
released.
30
[Measuring screen (cd/m2)]
Measuring value (cd/m2)
Measuring screen (fl)
Measuring value (fl)
5-1-5. Measuring Exposure for Video and Movies
1) CINE Mode
This is a measuring exposure for cine cameras
1.Touch the Measuring mode icon to open
the Measuring Mode Selection Screen,
icon to select CINE
then touch the
Measuring Mode and return the screen view
to Measuring screen. (See P25 for details.)
2.Set frame rate on f/s icon.
3.Touch the ISO icon to expand it, and set ISO
sensitivity value. The ISO icon will return to
its reduced size after a setting is made and
the icon is not touched for a short time
4.Touch the ANG icon to expand it, and set shutter
angle value. The ANG icon will return to its
reduced size after a setting is made and the icon
is not touched for a short time
5.Add any filter compensation value to adjust the
reading to the light source or lens filtration in
use. (see P51 for details)
6.Press the Measuring button 8 on the side of
meter.
Release the Measuring button 8 to
complete the measurement. The measured
f-stop (aperture) value at that time will be
displayed.
While pressing the Measuring button 8 , the
meter measures continuously until it is
released.
<
Measuring Screen (cine camera)
Setting
value
Measuring value
(f-stop)
Measuring value
(illuminance)
•F-stop (aperture) values can be displayed in full, 1/2 and 1/3 stop increments in Custom Setting (See P55 for details.)
•There are 20 preset of frame rates that can be set at “Edit Frame Rate” in the MENU list. (See P58 for details.)
•There are 20 preset of shutter angles that can be set at “Edit Shutter Angle” in the MENU list (See P59 for details.)
•After taking a measurement, changing frame rate value will also change the measured value (f-stop).
•After taking a measurement, changing ISO value will also change the measured value (f-stop).
•After taking a measurement, changing shutter angle will also change the measured value (f-stop).
) at the bottom of the screen activates the Contrast Function. (See P50 for
•Touching the Average/ΔEV button (
details.)
•The Analog Scale display will change according to Measuring Mode, Incident/Reflected and Mid-Tone mode selected as
well as “Set Analog Scale” in Menu list (See P19 and P53 for details.)
•See P42 for details about reading outside the display range or beyond the measuring range
31
2) HD CINE mode
This is a measuring exposure for HD Video/DSLR
Cameras
1.Touch the Measuring mode icon to open
the Measuring Mode Selection Screen, then
icon to select HD CINE
touch the
Measuring Mode and return the screen view
to Measuring screen. (See P25 for details.)
2.Set the shutter speed on the T icon.
3.Touch the ISO icon to expand it, and set ISO
sensitivity value. The ISO icon will return to
its reduced size after a setting is made and
the icon is not touched for a short time.
4.Touch the f/s icon to expand it, and set
frame rate value. The f/s icon will return to its
reduced size after a setting is made and the
icon is not touched for a short time.
5.Add any filter compensation value to adjust the
reading to the light source or lens filtration in
use. (see P51 for details)
6.Press the Measuring button 8 on the side of
meter.
Release the Measuring button 8 to
complete the measurement. The measured
f-stop (aperture) value at that time will be
displayed.
While pressing the Measuring button 8 , the
meter measures continuously until it is
released.
<
Measuring Screen (HD Cine Camera)
Setting
value
Measuring value
(f-stop)
Measuring value
(illuminance)
•Shutter speed and f-stop (aperture) values can be displayed in full, 1/2 and 1/3 stop increments in Custom Setting (See
P55 for details.)
•There are 20 preset of frame rates that can be set at “Edit Frame Rate” in the MENU list. (See P58 for details.)
•After taking a measurement, changing a T setting value will also change the measured value (f-stop).
•After taking a measurement, changing frame rate value will also change the measured value (f-stop).
•After taking a measurement, changing ISO value will also change the measured value (f-stop).
) at the bottom of the screen activates the Contrast Function. (See P50 for
•Touching the Average/ΔEV button (
details.)
•The Analog Scale display will change according to Measuring Mode, Incident/Reflected and Mid-Tone mode selected
as well as “Set Analog Scale” in Menu list (See P19 and P53 for details.)
•See P42 for details about reading outside the display range or beyond the measuring range.
32
5-2. Measuring in Flash Light Mode
Flash illumination is light that is produced by the very brief light pulse of an electronic flash
unit or flash bulb. Flash measurement is available in the following modes:
Cord (PC) Flash Mode (PC/synchro cord connected)
Cordless Flash Mode
Cord Multiple (Cumulative) Flash Mode
Cordless Multiple (Cumulative) Flash Mode
Radio Triggering Mode (for L-478DR only)
Radio Triggering Multi (Cumulative) Mode (for L-478DR only)
Also see 4-3 Setting Measuring Mode (P25) for details on changing Measuring mode.
•
•
•
•
•
•
1.Screen Display Details
When flash light is measured, f-stop (Ambient
brightness + Flash brightness = total
exposure) is displayed on screen. The ratio of
flash light to the total exposure is displayed
at that time as a percentage in 10% steps.
Analog scale displays the relationship of both
the ambient component (orange line) and
flash component (blue).
Measuring screen
[Cord(PC) flash mode]
Setting
value
Percentage
of flash
Measuring value (f-stop)
2. About the Analog Scale Details
Touch the Analog scale to toggle the ambient/flash component ratio display ON or OFF.
3. Flash Analyzing Function
When measuring Flash light, the shutter speed
and f-stop (aperture) value, which is combining
ambient light and flash light: total amount of light,
are displayed on the LCD screen.
Ambient light and flash light are each
displayed as separate values along with the
total amount of light on the analog scale.
In addition, the ratio of flash light to the total
mount of light is displayed as a percentage (in 10
% steps) at the same time. The ratio of flash to the
total amount of light is useful when a desired flash
to ambient lighting ratio is needed.
Measuring screen
(Cordless Flash Mode
Percentage
of Flash
Ambient component
Flash component
<Example>
As in the screen on the right, if shutter speed is 1/125s and ISO sensitivity is 400, the
flash component and tungsten lamp light will be 50% each. Likewise, the respective
measuring results in the Analog Scale for flash light (blue) and Ambient Light (orange)
will denote this.
33
<
•Shutter speed and f-stop (aperture) values can be displayed in full, 1/2 and 1/3 stop increments in Custom Setting
(See P55 for details.)
•After taking a measurement, changing T setting value will also change the measured value (f-stop).
•After taking a measurement, changing ISO value will also change the measured value (f-stop).
) at the bottom of the screen activates the Contrast Function. (See P50
•Touching the Average/ΔEV button (
for details.)
•The Analog Scale display will change according to Measuring Mode, Incident/Reflected and Mid-Tone mode
selected as well as “Set Analog Scale” in Menu list (See P25 and P69 for details.)
•See P42 for details about reading outside the display range or beyond the measuring range.
•The shutter speeds that can be set will vary depending on the displayed step.
5-2-1. Cord (PC) Flash Mode
In this measuring mode, a synchro cord (sold separately) is used to connect the flash to
the meter . Use Cord Mode when you need to measure to total output of the flash or
for measuring flash bulbs.
1.Connect the synchro cord (sold separately) to
the meter’s synchro terminal 13 .
2.Touch the Measuring mode icon to open
the Measuring Mode Selection Screen, then
icon to select Cord (PC)
touch the
Flash Mode and return the screen view to
Measuring screen. (See P25 for details.)
3.Set the ISO sensitivity value on the ISO icon.
4.Set shutter speed on the T (shutter speed)
icon.
* Be sure the settings are within the
specifications of the flash equipment.
5.Press the Measuring button 8 on the side of
meter.
The flash will fire and the measured value (f-stop)
will be displayed.
Synchro terminal 13
Measuring screen
[Cord(PC) Flash Mode]
Setting
values
Percentage
of flash
Measuring value (f-stop)
,
•The electronic flash unit may trigger when the meter or flash is turned ON or when the synchro cord is plugged into
the meter.
•Triggering voltage is 2.0 to 300 volts. Below 2.0V, trigger the flash with Cordless Flash Mode. (See P35 for details) or
Radio Triggering Mode (See P41 for details).
•When measuring a flash bulb, be sure to check the synchronization range and set the proper shutter speed.
34
5-2-2. Cordless Flash Mode
In this measuring mode, Measurements are made by the
meter receiving the light from the flash without synchro
cord. It is used when the synchro cord will not reach
because of the distance between the flash and meter, or
when use of synchro cord is inconvenient.
1.Touch the Measuring mode icon to open the
Measuring Mode Selection Screen. then touch
icon displayed to select Cordless
the
Flash Mode and return the screen view to
Measuring screen. (See P25 for details.)
2.Set the ISO sensitivity value on the ISO icon.
3. Set shutter speed on the T (shutter speed) icon.
* Be sure the settings are within the
specifications of the flash equipment.
4.Press the Measuring button 8 on the side of
meter.
The meter will be put into measuring standby
mode for 90 seconds and the measuring
will blink, and the illumination of
mode icon
LCD screen dims not to affect to the reading.
5.Trigger the flash unit manually while the
is blinking.
Measuring mode icon
The light will be measured and the measured
value (f-stop) is displayed.
* If 90 seconds period is exceeded and the
icon stops blinking before the flash has been
triggered, press the Measuring button 8
again to return to ready to measure status.
icon
6.Even after measurement, the
continues blinking and the meter is in ready
to measure status.
7.To release (cancel) the measuring standby
is blinking for 90
status while the icon
seconds, touch the screen, or press either
the Memory button 5 or Menu button 7 .
Measuring screen
(Cordless Flash Mode)
Setting
values
Percentage
of flash
Measuring value (f-stop)
,
•When firing the flash, if the flash brightness 8EV lower than the ambient light, the meter may fail to detect the light.
IN this case, make measurements using the Cord (PC) Flash Mode (See P34 for details).
•Rapid start fluorescent lamp and special lightings are sometimes mistaken for flash, and accidentally measured. In this
case, make measurements using the Cord (PC) Flash Mode (See P34 for details)
•The waveform of a flash bulb has a slight slope and there is a possibility that the light meter cannot recognize the
flashbulb in Cordless Flash Mode. In this case, make measurements using the Cord (PC) Flash Mode (See P34 for
details)
<
•Right after measurement, the LCD screen is illuminated for 3 seconds, and then dims again not to affect the reading.
35
5-2-3. Cord Multi (Cumulative) Flash Mode
This Measuring mode is used when the light
generated by the flash is inadequate for proper
exposure. Use a synchro cord (sold separately) and
connect the flash to the meter to fire the flash. The
repeated flash pops can be accumulated until the
desired aperture is displayed.
The cumulative count is up to 99 times, and
displayed in the Test/Title field on the LCD screen.
To activate this multi (cumulative) mode, set Cord
Multiple (Cumu.) Flash mode ON in the Custom Setting
(See P55 for details).
1.Connect the synchro cord (sold separately) to
the synchro terminal 13 of the meter.
2.Touch the Measuring mode icon to open
the Measuring Mode Selection Screen, then
icon to select Cord Multiple
touch the
(Cumulative) Flash Mode and return the
screen view to Measuring screen. (See P25
for details.)
3.Set ISO sensitivity value on ISO icon.
4.Set shutter speed on T (shutter speed) icon.
* Be sure the settings are within the
specifications of the flash equipment.
5.Press the Measuring button 8 on the side of
meter.
The flash will fire and the measured value (f-stop)
will be displayed.
6.Repeat this operation (pressing the
Measuring button 8 on the side of meter)
only for the number of times necessary.
The accumulated measured value (f-stop)
and the number of cumulative flashes are
displayed.
,
Synchro terminal 13
Measuring screen
(Cord multi flash Mode)
Setting
values
Percentage
of flash
Measuring value (f-stop)
•The electronic flash unit may trigger when the meter or flash is turned ON or when the synchro cord is plugged into
the meter.
•Triggering voltage is 2.0 to 300 volts. Below 2.0V, trigger the flash with Cordless Flash Mode. (See P35 for details) or
Radio Triggering Mode (See P41 for details).
•When measuring a flash bulb, be sure to check the synchronization range and set the proper shutter speed.
36
5-2-4. Cordless Multiple (Cumulative) Flash Mode
This Measuring mode is used when the light generated by the flash is inadequate
for proper exposure. The repeated flash pops can be accumulated until the desired
aperture is displayed.
The cumulative count is up to 99 times, and displayed in the Test/Title field on the LCD
screen.
To activate this multi (cumulative) mode, set Cord Multiple (Cumu.) Flash mode ON in the
Custom Setting (See P55 for details).
In this measuring mode, the meter is set to measuring standby status (90 seconds) by
pressing the Measuring button 8 on the side of meter, and during this standby time
fire the flash to take measurements. The measured value (f-stop) is displayed for each
trigger of the flash.
1.Touch the Measuring mode icon to open
the Measuring Mode Selection Screen, then
icon to select Cordless
touch the
Multiple (Cumulative) Flash Mode and return
the screen view to Measuring screen. (See
P25 for details.)
2.Set the ISO sensitivity value one the ISO
icon.
3.Set the shutter speed on the T (shutter
speed) icon.
* Be sure the settings are within the
specifications of the flash equipment.
4.Press the Measuring button 8 on the side of
meter.
The meter will be put into measuring standby
mode for 90 seconds and the measuring
will blink, and the illumination of
mode icon
LCD screen dims not to affect to the reading.
5.Trigger the flash unit manually while the
is blinking.
Measuring mode icon
The light will be measured and the measured
value (f-stop) is displayed.
* If 90 seconds period is exceeded and the
icon stops blinking before the flash has been
triggered, press the Measuring button 8
again to return to ready to measure status.
icon
6.Even after measurement, the
continues blinking and the meter is in ready
to measure status.
7.Repeat this operation (pressing the
Measuring button 8 on the side of meter)
only for the number of times necessary.
The accumulated measured value (f-stop) and
the number of cumulative flashes are displayed.
8.To release (cancel) the measuring standby
is blinking for 90
status while the icon
seconds, touch the screen, or press either
the Memory button 5 or Menu button 7 .
37
Measuring screen
(Cordless multi flash mode)
Setting
values
Percentage
of flash
Measuring value (f-stop)
5-3. Measuring with Radio-controlled Flash (for L-478DR only)
5-3-1. How to Measure Using Radio Control
Triggering flashes by radio requires connecting a PocketWizard® radio receiver (sold
separately) to the flash unit to receive the trigger signal transmitted by the meter. Radio
triggering enables a single photographer to easily trigger and measure flash.
The followings are the modes that can be set to measure this way.
Radio Triggering Flash Mode
Radio Triggering Multiple (Cumulative) Flash Mode
* The radio transmitter built into the L-478DR is compatible with PocketWizard brand radio
products as well as flash brands that have PocketWizard® radio receivers built into them.
Please read the instruction manuals provided with these products for details about using
them.
Please go to www.pocketwizard.com to learn more about radio triggering compatibility.
•
•
,
•Successful radio triggering depends on several factors. Please read these setup steps before using the L-478DR to radio
trigger flash units.
1.It is best to position the meter in sight of the radio receiver.
2.Position the radio receiver so that it is away from large metallic objects, concrete, or containers of water (like people).
3.Secure the radio receiver to the flash using hook-and-loop-type attachment tape or the threaded socket on the radio.
Make sure the radio’s antenna is above the flash body or generator pack. Do not allow the receiver antenna to contact
metal objects.
4.Sometimes, conditions will not allow radio reception. These could include strong local radio interference, or being near
objects that blocking or absorb the signal. Repositioning the radio, even slightly, can reestablish contact. Alternatively,
check to see if the radio receiver is behind an object that absorbs or blocks radio waves, such as concrete, metal or low
hill.
5.Operation is best when the meter to receiver distance is within 30 meters.
5-3-2. How to Measure with Radio Control Channels
1) Radio System
The L-478DR can transmit both Standard and ControlTL® radio signals.
<ControlTL® Channel>
When used with ControlTL® receivers, the L-478DR is capable of controlling
the power level of the compatible flashes connected.
The ControlTL® system features 20 channels for FCC&IC version or 3
channels for CE version, and three zones (A, B, C) allowing control of three
separate flashes on each channel.
<Standard Channel>
PocketWizard® Standard radios provide simple triggering and do not allow
power control. The feature 32 channels: Channels 1-16 fire single trigger
signals; Channels 17-32 have four zones (A, B, C, D) which enable triggering
four separate flashes on each channel.
38
2) Setting ControlTL® Channels and Zones
at the bottom of
1.Touch the Tool Box icon
the Measuring screen to display the Tool Box
screen. Then touch the [Radio CH/Zone] to
display the Radio CH/Zone Setting screen.
Measuring screen
(Radio triggering Mode)
Tool Box Screen
Tool Box
icon
2.Touch the CTL tab.
3.Either touch the arrows ▲/▼ or slide the
channel number dial to select a channel.
4.Set one or more zones (A, B, C).
5.Touch the [OK] to confirm settings and then
return to the Measuring screen. (Touch the
[Cancel] to cancel settings)
3) Setting Standard Channels and Zones
1.Touch the Tool Box icon
at the bottom of
the Measuring screen to display the Tool Box
screen. Then touch the [Radio CH/Zone] to
display the Radio CH/Zone Setting screen.
2.Touch the STD tab.
3.Either touch the arrows ▲/▼ or slide the
channel number dial to select channel number
from 1 to 32.
4.When the channel number is set to 17 – 32,
Zones (A, B, C, D) will appear to select
(No Zones for channels 1 to 16)
5.Touch the [OK] to confirm settings and return
to the Measuring screen. (Touch [Cancel] to
cancel settings.)
<
Radio CH/Zone Setting Screen
(When ControlTL® system
is selected)
Zones
Channel numbers
Radio CH/Zonel Setting Screen
(When Standard Channel is
selected)
Zones
Channel numbers
•The [OK] button must be touched to activate the ControlTL and Standard Channel and Zone settings.
®
39
5-3-3. Using the Power Control Settings
Measuring Screen
(Radio Trigger mode)
Select Radio Triggering Mode and ControlTL® under
Radio System Preference within Custom Setting to use
the Power Control Function.
*B
e sure to set the T (shutter speed) and ISO
sensitivity values desired in the Measuring screen
before adjusting power levels and metering the
controlled flash intensity.
1.Touch the Measuring mode icon to open the
Measuring Mode Selection screen, then touch
icon to activate Radio Triggering Mode
the
and return the screen view to the Measuring
screen (See P25 for details.)
2.Touch the Power Control icon ( ) 1 to display
the Power Control screen.
3.Adjust flash intensity for ControlTL®.
* Please set the ControlTL® and Standard
channels in advance. (See P39 for details.)
a.Touch the ControlTL® Zone buttons at the
bottom to select A, B, C 6 .
b.The Power Bar 4 and values 3 will
be activated as each Zone (A,B,C) is
selected. The current level appears at the
top of the bar.
c.Touch the +/- icons or slide finger up/
down on the slider to set values.
d.Repeat a to c above to select other zones and
set values.
e.Pressing the Measuring button on the side
of meter will display the F value (f-stop) for
each zone 5 as measured value for the
set T (shutter speed) and ISO sensitivity
value.
f.The total F value (f-stop) for selected
zones will be displayed in item 8 .
to turn
g.Touch the 7 modeling lamp icon
ON or OFF studio flash modeling lamps.
h.Touch the Radio Triggering Mode icon 9
to return to the Measuring screen.
4.In this screen, Zones of Standard CH can be
turned ON or OFF 2 for the Channel from 17 to
32. If the standard CH is set to 1 to 16, receivers
are set to ON or OFF toggle the [CL] icon 2 .
5.Be sure the Channels and Zones are the same for
meter and the radio receivers in use.
40
Setting
value
1
Power Control Screen
(ControlTL® +
Standard 17~32 Channels)
3
9
4
2
5
6
8
7
Power Control Screen
(ControlTL® +
Standard 1~16 Channels)
2
ControlTL® channel &
zone display
Standard
channel &
zone display
Percentage
of flash
Measuring value (f-stop)
,
•The working distance of the radio triggering system can vary with the orientation and location of the meter and
receivers. Be sure to carefully set them within their specifications.
5-3-4. Measuring in Radio Flash Mode
Select Radio Triggering Mode within Custom Setting.
(See P55 for details.)
a.Touch the Measuring mode icon to open
the Measuring Mode Selection screen,
icon to select Radio
then touch the
Triggering Mode and return the screen
view to Measuring screen. (See P25 for
details.)
b.Set the ISO sensitivity value on the ISO
icon.
c.Set the shutter speed on the T (shutter
speed) icon.
* Be sure the settings are within the
specifications of the flash equipment.
d.To adjust flash intensity, touch the Power
and make adjustments as
Control icon
described in 5-3-3.
e.Be sure the Channels and Zones are the
same for meter and the radio receivers in
use.
f.Press the Measuring button 8 on the
side of meter to radio trigger the flashes
and display the measured exposure value
(f-stop).
41
Measuring Screen
(Radio triggering mode)
Setting
value
ControlTL®
channel &
zone display
Standard
channel &
zone display
Percentage
of flash
Measured value (f-stop)
5-3-5. Measuring in Radio Triggering Multiple (Cumulative) Flash Mode
Select Radio Triggering Multiple (Cumulative) Mode within
Custom Setting (See P55 for details.)
1.Touch the Measuring mode icon to open the
Measuring Mode Selection screen, then touch
icon to select Radio Triggering Multiple
the
(Cumulative) Mode and return the screen view to
Measuring screen. (See P25 for details.)
2.Set the ISO sensitivity value on the ISO icon.
3.
Set the shutter speed on the T (shutter speed) icon.
* B e sure the settings are within the specifications of the
flash equipment.
4.
To adjust flash intensity, touch the Power Control icon
and make adjustments as described in 5-3-3.
5.
Be sure the Channels and Zones are the same for
meter and the radio receivers in use.
6.Press the Measuring button 8 on the side of
meter to radio trigger the flashes and display the
measured exposure value (f-stop).
7.
Repeat this operation (pressing the Measuring button 8 on
the side of meter) only for the number of times necessary.
The accumulated measured value (f-stop) and the
number of cumulative flashes are displayed.
[ Measuring Screen ]
Setting
value
ControlTL® channel & zone
display
Standard channel &
zone display
Percentage
of flash
Measuring value (f-stop)
5-4. Out of Displayed Range or Measuring Range
(*This example explains what needs to be done in Cord (PC) Flash mode.)
5-4-1. When Displayed Range is Exceeded
For any given shutter speed and ISO setting, “Over” will be displayed when the measured light value requires an f-stop
setting that is greater than the maximum available f-stop (f/128). “Under” will be displayed when low light requires a
setting lower than the minimum f-stop (f/0.5).
Example of Over Exposure Display
Example of Under Exposure Display
1) When over exposure “Over” is displayed:
When the display range is exceeded and “Over” appears, make one of the following adjustments until a suitable
f-stop appears on the measuring display.
Change the T (shutter speed) to a faster setting.
Set the ISO sensitivity to lower setting.
If possible, lower the output power of light source, and take another measurement.
2) When under exposure “Under” is displayed:
When the display range is exceeded and “Under” appears, make one of the following adjustments until a
suitable f-stop appears on the measuring display.
Change the T (shutter speed) to a lower setting.
Set the ISO sensitivity to higher setting.
If possible, raise the output power of light source, and take another measurement.
••
•
••
•
5-4-2. When Measuring Range is Exceeded
When the amount of light is outside the measuring range of the meter, the “Over” and “Under” displays will appear and blink.
When this happens, adjust the brightness level to obtain a measurement.
When brightness exceeds measuring range
When brightness is under the measuring range
42
6 Functions
6-1. Memory Function
This meter can store up to nine measured values in memory for incident light
and reflected light simultaneously. This function can be used in all modes except
Illuminance/Luminance measuring and Multiple (cumulative) Flash modes.
6-1-1. Memory
1.
Press the Measuring button 8 on the side of
meter to take a measurement and display a
value on the measuring screen.
2.Press the Memory button 5 to memorize
measured value. An M 1 will appear at the to
of the screen to indicate one value has been
memorized and an indicator will appear on the
analog scale.
3.Repeat steps 1 and 2 as desired to memorize
up to 9 values for comparison.
Example of T priority
in Ambient light
Setting
value
Measuring
value (f-stop)
Memorized measuring values (f-stop)
,
•Memory Function cannot be used with the following modes.
• Illuminance Measuring Mode (lux, fc)
• Luminance Measuring Mode (cd/m2, fl)
• Cord Flash Accumulative Mode
• Cordless Flash Accumulative Mode
• Radio Flash Accumulative Mode (for L-478DR only)
The tenth or more measurement will be displayed but can not be memorized.
•
43
6-1-2. Memory Recall
Memorized measurements can be recalled to view
each value in detail. The memorized measurements
appear in the order they were recorded and
or reflected light
icons
incident light
indicate the type of reading made. An analog scale
also displays each reading in relationship.
at the bottom
1.Touch the Tool Box icon
of the Measuring screen.
2.Touch the [Memory Recall] on the Tool Box
screen to view the Memory Recall screen.
3.Measurements will appear, numbered in the
order they were made. Touching one of the
numbered values will display a Green Measuring
Recall screen that indicates all settings made for
that measurement.
4.Touching the Memory Recall button at
the bottom of the screen will return to the
Memory Recall screen with all memorized
readings displayed.
5.Touching the Close button on any screen will
return the display to the Measuring screen.
44
Tool Box Screen
Memory Recall Selection Screen
Memory Recall Screen
6-1-3. Memory Clear
Memorized measuring values can be cleared
individually or collectively.
The memorized measurements appear in the
or
order they were recorded and incident light
icons indicate the type of reading
reflected light
made. An analog scale also displays each reading
in relationship.
) at the bottom
1.Touch the Tool Box icon (
of the Measuring screen.
2.Touch the [Memory Clear] on the Tool Box
screen to view the Memory Clear screen.
3.Measurements will appear, numbered in the
order they were made. Touch the measurements
you want to clear to see it highlighted. Touch
the [Clear] at the bottom of the screen to begin
clearing the reading. A Selected Memory Clear
Confirmation screen will appear. Press the [OK]
to clear the value and return to the Memory
Clear screen.
4.Repeat steps 2. and 3. above to clear other
memorized measurements as desired.
<
•Touch the [ALL] in step 3) above to begin clearing all readings. A
Selected Memory Clear Confirmation screen will appear. Touch
the OK button to clear all items and return to the Measuring
screen.
5.Touch the [Close] to return to the Measuring
screen.
45
Tool Box Screen
Memory Clear Screen
6-2. Mid. Tone Function
This is used to place a measured value at the center of the Analog EV Scale.
The Mid Tone function has four operations:
Sets current measured value as Mid Tone
Sets memorized value as Mid Ton
Modifies Mid Tone value
Recalls Mid Tone Measuring Screen
•
•
•
•
6-2-1. Setting Measuring Value as Mid. Tone
1.Press the Measuring button 8 to take reading
and display the resulting value.
at the bottom of the
2.Touch the Tool Box icon
Measuring screen to display the Tool Box screen.
3.Touch the [Mid. Tone Set] to display Mid. Tone
Set screen.
4.Touch the [Set from Current Measurement] to
set the current measured value as the Mid. Tone
and return the meter to the Measuring screen.
Mid. Tone Set Screen
<
•Touching the [CLOSE] button on any screen cancels the operation and returns the meter to the Measuring screen.
6-2-2. Setting Memorized Value as Mid. Tone
1.Touch the Tool Box icon
at the bottom of
the Measuring screen to display the Tool Box
screen.
2.Touch the [Mid. Tone Set] to display Mid.
Tone Set screen.
3.Touch the [Set from Memory] to display Mid.
Tone Set from Memory screen and display all
memorized values.
will appear next to incident light
measurements;
will appear next to reflected light
measurements. The analog scale will also appear
with measurement indicators displayed.
4.Touch the memorized value you want to set
as a Mid Tone. The display will return to the
Measuring screen and the analog scale will show
all memorized values with your selection as the
Mid Tone. Touch the [CLOSE] to return to the
Measuring screen without setting the Mid. Tone.
46
Mid. Tone Set Screen
Mid. Tone Set
(Memory) Screen
6-2-3. Mid. Tone Modification
This enables minute adjustment of the currently
set Mid.
Tone value.
1.Touch the Tool Box icon
at the bottom
of the Measuring screen to display the Tool
Box screen.
2.Touch the [Mid. Tone Set] to display Mid.
Tone Set screen.
3.Touch the [Modify Current Mid. Tone] to
display the Modify Mid.Tone screen.
4.Touch the arrows ▲/▼ or slide your finger over
the numbers to modify the value.
5.Touch the [OK] to confirm the modification
and return to the Measuring screen. Touch
the [Cancel] to return to the Measuring
screen without making the modification.
Mid. Tone Set Screen
Mid. Tone Modification Screen
Displayed
settings
during
measuring
Displays measuring result
6-2-4. Mid. Tone Clearing
Set Mid.Tone value can be cleared.
at the bottom
1.Touch the Tool Box icon
of the Measuring screen to display the Tool
Box screen.
2.Touch the [Mid. Tone Clear] to display the
Mid.Tone Clear screen.
3.Touch the [OK] to clear the Mid Tone and
return to the Measuring screen. Touch the
[Cancel] to return to the Measuring screen
without clearing contents.
47
Tool Box Screen
6-2-5. Mid. Tone Recall
Tool Box Screen
This enables recalling the measuring screen
information for the set Mid Tone.
at the bottom
1.Touch the Tool Box icon
of the Measuring screen to display the Tool
Box screen.
2.Touch the [Mid. Tone Recall] to display the
measuring screen information for the Mid
Tone reading.
3.Touch the [Close] at the bottom of the Mid.
Tone Recall screen to return to the Measuring
screen.
48
Mid. Tone Recall Screen
6-3. Average Function
Up to nine memorized measurements can be averaged and the result displayed.
This function can be used in all modes except Illuminance/Luminance measuring and
Multiple (cumulative) Flash modes.
1. Press the Measuring button 8 on the side of meter to take a measurement.
2.Press Memory button 5 to memorize the measured value.
The memorized value will also appear on the analog scale.
3.Repeat steps 1. and 2. to remeasure and memorize up to nine values.
at the bottom of the screen to calculate and display
4.Touch the Average icon
the result on the Digital display as well as Analog Scale.
in reverse to indicate the
“AVE” will appear on the screen and Average icon
Measuring screen is displaying an Averaged Value.
again to return the Measuring screen value to the
5.Touch the Average icon
value last measured.
Measuring Screen
(after memory)
Measuring Screen
(Average)
Setting
value
Measuring value
(f-stop)
Memorized measurements (f-stop)
49
Averaged values
6-4. Contrast Function
This function is useful for evaluating studio lighting, checking evenness of backgrounds such as
green screens, and quick set up of lighting ratios.
After establishing a standard value, press and hold the Measuring button 8 to display the
difference between the standard and new measured value. The exposure value will change to an
EV value (difference in stops) change as brightness of the measured value changes. The Analog
Scale will display the current measured value.
* I f no values are in memory, the standard value will be the last value measured. If values
are in memory, the standard value will be the average of all memorized values.
Creating Lighting ratios with Contrast Function (in Shutter Speed Priority Mode in incident light):
Retract the Lumisphere when making contrast readings.
1.Rotate the Lumisphere retracting ring 2 until
Lumisphere retracting ring 2
fully switching to the flat position.
2.Switch ON the main light source and point the
retracted lumisphere at the light source from
the subject position.
at the bottom
3.Touch the Average/ΔEV icon
of the screen to use the current reading (or
memorized value) as “Standard Value" and display
AVE on the measuring screen. The Average/ΔEV
will appear in reverse as long as it is the
icon
Contrast Function is active.
Next turn ON a second light source (fill light, hair
4.
light, etc.). Point the retracted lumisphere at the
source from the subject position and press the
Measuring button 8 . The display will change
from exposure setting to EV value and indicate the
difference in brightness between the Standard and
the second value being measured. The analog scale
will also display the two values. The table below
shows the lighting ratio according to the difference
in brightness.
EV Difference of Measuring Value
1
1.5
2
3
4
Illumination Ratio
2:1
3:1
4:1
8:1
16:1
Example of Main Light
Source Measuring
Example of while contrast
function is active
Setting
value
Setting
value
Touch AVE/
ΔEV icon
Measuring value (f-stop)
using main power supply
Measuring value (EV) while metering
with support light source
Monitored f-stop (support
light source) during measuring
5.To return to normal measuring, touch the Average/ΔEV icon
<
Memorized f-stop
(main power supply)
again.
•To determine the final exposure after setting the lighting ratio, extend the lumisphere, switch ON all lights, and point
the Lumisphere back towards the camera from the subject position and press the measuring button.
•The Contrast Function also can be used when measuring with reflected light.
50
6-5. Filter Compensation Function
The L-478’s filter compensation system uses industry-standard filter naming to
introduce lens and light source filtration to the meter. It also enables entering favorite
filter names and values to customize meter to your shooting needs. Up to four filters
can be used as a pack with the exposure display compensated for all.
will appear at the top of the Measuring display screen whenever a filter
A filter Icon
factor is being used.
6-5-1. Setting Filter Numbers and Compensation Values
These can be set in steps of 0.1 EV at a range of
±5.0EV.
) at the bottom
1.Touch the Tool Box icon (
of the screen to open the Tool Box screen.
2.Touch the [Filter Compensation] to display
the Filter Compensation Setting screen.
3.Touch the radio button of [Input Filter
Comp. Value] to display the keypad on Input
Filter Comp. Value.
4.Touch numbers on the keypad to input the
transmission loss amount in EV (stops) (See
P12 for details) and the value will appear in a
box at the top of the display. Touch the [OK]
to enter the compensation amount and return
to the Filter Compensation Setting screen
where the compensation amount will appear
next to the to the Input Filter Comp Value
indication.
5.Touch [OK] at the bottom of the screen to
return to Measurement Screen to start taking
readings with entered filter factor.
<
•Plus compensation will cause over exposure in shooting and
minus compensation will cause under exposure. Use minus
compensation value for filter compensation.
51
Tool Box Screen
Filter Compensation
Setting Screen
Current filter
compensation
value
Filter Value Setting Screen
6-5-2. Selecting Filter Factor Number
Up to four filters can be used as a pack with the
exposure display compensated for all.
Select the necessary filter name only which will be
used in the measurement.
1) Setting Amount of Filter Compensation
1.
Touch the Tool Box icon
at the bottom of the
Measuring screen to open the Tool Box screen.
2.Touch the [Filter Compensation] to display
the Filter Compensation Setting screen.
3.Touch the radio button of [Filter pack in use] to
display the Select (Filter Pack in Use) screen. If
no filters Names are present, touch one of the
buttons marked 1, 2, 3, 4 to view a list of industry
standard filter names.
4.Touch a Filter Name to enter it and return to the
(Filter Pack in Use) screen.
5.If the filter you want is not immediately visible,
move your finger over the Slide or touch the
UP/DOWN arrows ▲/▼ to view additional filter
names. Touch a Filter Name to enter it and return
to the Filter Pack in Use screen.
6.Repeat pressing a numbered button and
entering a Filter Name until you have created
the filter pack you want. When finished,
touch the [Close] to return to the Filter
Compensation Setting Screen.
7.A numbered list of the filters you selected will
appear on the screen. The radio button will
also show that this filter selection will be in
use when a measurement is made.
8.
Touch the [OK] to return to the Measurement Screen
to start metering with the filter pack you created.
Tool Box Screen
Filter Compensation Setting Screen
Filter
factor
numbers
Filter pack in use
<
•See “8. Registered Filters (See P66)” for details about preset filters
registered in the default setting, and “6-6-7.Filter Name Editing
(See P60 )” for details about customized preset filters.
6-5-3. Deselecting Filter
1.
Touch the Tool Box icon
at the bottom of the
Measuring screen to open the Tool Box screen.
2.Touch the [Filter Compensation] to display
the Filter Compensation Setting screen.
3.Touch the radio button of [No Filter] in the
displayed Filter Compensation Setting screen
to deselect the filter in use.
4.Touch the [OK] to return to the Measuring screen
for normal metering with no compensation.
52
Filter Compensation
Setting Screen
6-6. Functions by Menu Selection
6-6-1. Analog Scale Switching
The Analog Scale at the bottom of the Measuring screen graphically displays the latest
measurement value, values memorized, averaged values and exposure limits (range)
for exposure profile. The scale has two selectable modes: Measurement Scale and EV
Scale.
1.Press the Menu button 7 on the meter. (See
Analog Scale Selection Screen
P21 for details.) to open the Menu screen.
(for incident light)
2.Touch [1. Set Analog Scale] to display the
Set Analog Scale screen.
3.Touch the [Measurement Scale] radio
Measuring
button or [EV Scale] radio button to select
value
the desired scale.
scale
4.Touch the [OK] to return to the Menu screen.
Touch [Cancel] button to return to the
EV scale
Measuring button without selection.
6-6-2. Exposure Compensation Function
Exposure compensation can be made in +/-9.9EV in 1/10 step increments. Exposure
compensation may be necessary when compensation for highlight, shadow in
reflected light, bellows, extension tube, etc is required.
When using the Exposure Compensation Function, first set the measuring mode
(incident light or reflected light). Compensation can be set independently for both
incident and reflected light.
Minus Compensation:
Making minus compensation will decrease the exposure (darker image).
Plus Compensation:
Making plus compensation will increase the exposure (brighter image).
Minus or plus compensation results can be reverted in the Custom Setting (See P55 for
details)
1.Be sure that the Measuring method (incident
or reflected light) is selected.
2.Press the Menu button 7 on the meter. (See
Previously
P21 for details.) to open the Menu screen.
Touch the [2. Set Exposure Compensation] set value
3.
to display the keypad on the Set Exposure
Compensation screen.
4.Touch numbers on the keypad to input the
Exposure compensation value in EV (stops) (See
P13 for details) and the value will appear in a box
at the top of the display.
The input range is +/-9.9EV in 1/10 step
increments.
53
Set Exposure Compensation
Screen
Input value
5.Touch the [OK] to enter the compensation
amount and return to the Menu screen
,
•Exposure compensating should be made after sufficient test shooting of the camera or film in use.
<
icon will be displayed on the title field in the Measuring screen to
•When exposure compensation is activate,
show that compensation is being performed.
icon in the Information screen.
•The value of exposure conpensation is displayed with
•The conventional Sekonic setting method (*1) can be selected in the Custom Setting. (See P55 for details.)
*1 Plus compensation for under exposure (increase f-stop or shutter speed [= plus] achieves under exposure) and minus
compensation for over exposure (decrease f-stop or shutter speed [= minus] achieves over exposure).
54
6-6-3. Custom Setting Function
This enables quick and easy setup of individual meter preference.
1) Custom Setting Function List
Setting No.
Custom Setting Name
1
2
3
Increments of T+F
Display of 1/10 Step Increments*2
Compensation +/- Preference
4
7
Switching Measuring/Memory
Buttons*3
Ambient Mode*4,8
T Priority Mode*4
F Priority Mode*4
T+F Priority Mode*4
HD Cine mode*4
Cine mode*4
Flash measuring*5,8
Cordless mode*5
Cord-in mode*5
Radio trigger mode*5,6
(L-478DR only)
Radio System Preference*6
(for L-478DR only)
Multiple (Cumu.) Flash Mode*5,7
Additional Data
1/3 step
Off
Subtractive
Direction
Reverse
On
On
On
On
On
On
On
On
On
On
Off
Off
Off
Off
Off
Off
Off
Off
Off
Off
ControlTL
Standard
On
None
Off
EV
8
Illuminance/Luminance Unit
Lux (lx) or
cd/m2
9
10
11
Illuminance/Luminance Individual
Display
Color Theme
Auto Power Off
12
13
14
Backlight Brightness
Auto Dimmer
Reset Custom Setting *9
5
a)
b)
c)
d)
e)
6
a)
b)
c)
c)-1
d)
Default
Setting
Item
1 step*1
On
Additive
Direction
Standard
1/2 step
-
-
AutoSwitching*3
-
-
1 step
On
Additive
Direction
Standard
-
On
On
On
Off
Off
Off
On
On
On
On
ControlTL +
Standard
Off
None
On
Footcandle (fc)
or Footlambert (fl)
Off
ControlTL +
Standard
Luminance/ lIluminance
-
-
Off
Black
5 min.
White
10 min.
Rose
20 min.
-
Blue
No auto
power off
Bright
Normal
Dark
20 sec.
40 sec.
60 sec.
No dimmer
Select [OK] or [Cancel] to reset Custom Setting
Lux (lx) or
cd/m2
Black
5 min
Bright
20 sec.
*1 1/10 step increments is always displayed in the setting of 1 step regardless of setting of “2. Display of 1/10 Step Increments”.
*2 1/10 step increments ON/OFF will be effective only when 1/3 step or 1/2 step is selected.
*3 Auto switching: Measuring button 8 and Memory button 5 will be standard configuration in incident light mode,
however the button configuration will be switched (in reverse) automatically in reflected light mode.
*4 When Ambient Mode is set to Off, sub settings of a) T priority Mode to e) Cine Mode cannot be selected.
*5 When Flash Mode is set to Off, sub settings of a) Cordless Mode to d) Multiple (Cumu.) Flash Mode cannot be selected.
*6 When Radio Triggering Mode is set to Off, sub setting of c)-1 Radio System Preference cannot be selected.
*7 When Multiple (Cumu.) Flash Mode is set to On, the following mode is active in the Measuring Mode Selection screen:
Cordless Multiple (Cumu.) Flash mode, Cord Multiple (Cumu.) Flash mode and Radio Triggering Multiple (Cumu.) Flash
mode (for L-478DR only).
*8 When both Ambient Mode and Flash Mode are set to Off (all measuring modes are off ), only T Priority Mode in Ambient
Light is active.
*9 This operation returns all items set in Custom Setting to the default settings. Touch [OK] to return default setting or touch
[Cancel] to cancel the reset of custom setting.
55
2) How to set Custom Setting
1. Press the Menu button 7 on the meter (See P21
for details) to open the Menu screen.
2.Touch “3. Custom Setting# in the displayed
Menu screen.
3.In the displayed Custom Setting screen, either
touch the arrows ▲/▼ or slide the screen with
your finger to display the desired Custom Setting
Name numbered and then touch it to select
Touch the radio button of desired item from the
4.
options in the screen.
The • symbol appears to show the currently
selected item.
5.Touch the [OK] to complete the setting and
return to the Custom Setting screen.
Touch the [Cancel] to return to the Custom
Setting screen without change.
6.Repeat steps 3) to 5) above to set other
Custom Setting items.
7.Press the Menu button 7 at the Custom
Setting screen to return to the Menu screen.
Custom Setting Screen
Example of Increments of T+F
setting screen
6-6-4. Exposure Profile Function
The L-478D/DR can store up to 10 camera profiles. The profiles can be created using
Sekonic’s Data Transfer Software system with profile targets (sold separately) or from
data obtained from other testing methods and input manually into the meter. Once input
or downloaded, they can be edited, named and easily called up for use at any time.
1)Selecting a Camera Exposure Profile in Use in
the Measuring Screen
1.Press the Menu button 7 on the front of the
meter (See P21 for details.)
2.Touch [4. Set Profile] to view stored profiles.
3.Touch ▲/▼ or slide finger on bar to view the
name of the Exposure Profile you desire. (Profiles
can be added or removed from the list in the
[Check/Edit Profile] function.)
4. Touch the profile name to select it and return to
the Measuring screen.
56
2) Editing Exposure Profile
1.Press the Menu button 7 on the front of
meter. (See P21 for details.)
2.Touch [5. Check/Edit Profile] to view profile
list in the Select Profile to Edit/Check screen.
3.Touch ▲/▼ or slide finger on bar to view the
name of the Exposure Profile you desire to use
and edit.
4.Touch the check box to display the profile in
the Set Profile screen. (A check mark
indicates
profile is available for use. To deactivate the
profile, touch box again to return to □.)
5.Touch the profile name button to edit the
profile.
6.To edit profile name, touch the [Edit Profile
Name] to display the keypad. Input the name
(up to 31 characters) and touch [OK] to enter
the profile name and return to profile edit
screen.
7.Touch one of the icons of Measuring mode
(Ambient/flash light) and light receiving
method (incident/reflected light) to enter ISO
editing screen.
8.Touch ▲/▼ or slide finger on bar to view ISO
values and touch the desired ISO button to enter
the profile editing screen.
57
Edit Profile Screen
Check to display or not in the Set
Profile Screen
9.Input/Edit the camera /film profile
characteristics.
a.Touch +/- buttons or move slider to set
desired exposure compensation value within
+/- 5 EV (stop) range.
b.Touch +/- buttons or move slider to
desired values of dynamic ranges and
clipping points for profile within +/- 10 EV
(stop) range.
* Clipping points cannot exceed Dynamic
range.
c.Touch [OK] to return to ISO selection
screen. (Touch [Cancel] if editing is not
needed. Touch [Default] if reset the profile
of ISO being selected.)
10.Touch [Close] to return to Start screen for Edit
profile. Create or Edit profile name if desired (See
P55 for details)
ISO Selection Screen
Profile Characteristic Edit
Screen
Exposure Comp.
Value
Dynamic
range (+)
11.Touch [Close] to return to the Select Profile to
Edit/Check screen.
Dynamic
range (-)
Clipping point (+)
Clipping point (-)
6-6-5. Frame Rate Editing
In addition to the standard frame rates available in the L-478D/DR, up to 20 frame rates
can be customized and displayed in the meter screen.
* Frame rate is set in 0.001(f/s) step over a range of
Frame rate Edit Selection Screen
0.001 to 9999.999(f/s).
1.Press the Menu button 7 on the meter. (See P21
for details.) to open the Menu screen.
2.Touch [6. Edit Frame Rate] to display Select
Frame Rate to Edit screen.
to display the
3.Touch the check box
customized frame rate in the f/s setting icon in
the Measuring screen for HD CINE mode and
CINE mode. (A check mark indicates frame
rate is available for use. To deactivate the frame
Check to display or not in the Frame
Rate setting in the Measuring Screen
rate, touch box again to return to □.)
4)Touch ▲/▼ or slide finger on bar to select frame
Input Frame rate Screen
rate and touch one of the frame rate button to
display Input Frame Rate screen.
5)Touch buttons on the keypad to input the
value of frame rate (See P13 for details on
inputting.)
6)Touch [OK] to return to Select Frame Rate to
58
Edit screen. (Touch [Cancel] if editing is not
needed.
7)Press the Menu button 7 to return to the
Menu screen.
8)These customized frame rate will appear
to the tail end of the selection order in the
f/s setting icon in the Measuring screen for
HD CINE mode and CINE mode.(From 1 to
1000 f/s are standard available frame rates,
and after 1000f/s, customized frame rates
appear.)
6-6-6. Shutter Angle Editing
In addition to the standard shutter angles available in the L-478D/DR, up to 20 shutter
angles can customized and displayed in the meter screen.
* Shutter angle is set in 0.001° step over a range from
0.001 to 360°.
1.Press the Menu button 7 on the meter. (See
P21 for details.) to open the Menu screen.
2.Touch [7. Edit Shutter Angle] to display
Select Shutter Angle to Edit screen.
3.Touch the check box to display the
customized shutter angle in the ANG setting
icon in the Measuring screen for CINE mode. (A
check mark indicates shutter angle is available
for use. To deactivate the frame rate, touch box
again to return to ❑.)
4.Touch ▲/▼ or slide finger on bar to select
shutter angle and touch one of the shutter angle
button to display Input Shutter Angle screen.
5.Touch buttons on the keypad to input the
value of shutter angle (See P13 for details on
inputting.)
6.Touch [OK] to return to Select Shutter Angle
to Edit screen. (Touch [Cancel] if editing is
not needed.
7.Press the Menu button 7 to return to the
Menu screen.
8.These customized shutter angle will appear
to the tail end of the selection order in the
ANG setting icon in the Measuring screen
for CINE mode.(From 1 to 358° are standard
available shutter angles, and after 358°,
customized shutter angles appear.)
59
Select Shutter Angle to Edit
Screen
Check to display or not in the
Shutter angle setting in the
Measuring Screen
Input Shutter Angle Screen
6-6-7. Filter Name Editing
In addition to the standard frame rates available in the L-478D/DR, up to 30 Filter Name and
compensation value can be customized and displayed in the meter screen.
* Filter compensation is set in 1/10 steps in a range of ±5.0EV.
* See P65 for details on registered filter name and value.
1.Press the Menu button 7 on the meter to open the Menu
screen. (See P21 for details.)
Select Filter Name to Edit
Screen
2.Touch the [8. Edit Filter] at the Menu screen.
3.Touch the check box to display the customized Filter
name in the Filter pack in use (Filter compensation) in
the Tool Box.(A check mark indicates the Filter name is
available for use. To deactivate the Filter name, touch the
box again to return to □.)
4. Touch the arrows ▲/▼ or slide finger on the bar to select
the Filter name to display the Edit Filter screen.
5.To edit the filter name, touch the [Edit Filter Name] to
display the keypad. Input the name (Up to 31 characters)
and touch [OK] to enter the filter name and return to Edit
Filter screen. (See P13 for details on inputting the name.)
Edit Filter Screen
Edit Filter Name Screen
Filter name
edit button
6. Touch the [Edit Filter Comp. Value] to display the keypad.
Input the filter compensation value (+/-5.0EV in 1/10 step
increments), and touch the [OK] to enter the filter comp.
value and return to Edit Filter screen. (See P13 for details on
inputting.) 60
Edit Filter Screen
Edit Filter CompensationScreen
Filter
compensation
value button
Edit Filter Screen
7.Touch the [Close] to return to start screen for Select
Filter Name to Edit screen. Create or Edit other Filter
name and value if desired.
8.Press the Menu button □ to return to the Menu
screen.
<
•Filter name and comp. value from 1 to 24 are preset as shown in “8. Registered Filters” on page 65. However, these 24
preset filters can be freely edited.
•For additional filter name and comp. value, use filters from 25 to 30 .
61
6-7. Hardware Setting Function
The following settings can be made in the Hardware Setting screen.
User calibration of measured value
Adjust touch panel display position
Returning to Factory settings (default settings)
Editing user information
1) Hardware Setting Screen
1.Hold down the Menu button 7 and press
the Power button 10 to enter the Hardware
Setting screen.
•
•
•
•
2. Touch the desired menu item.
a. User Calibration
This meter has been calibrated to Sekonic
standards. However, it provides the ability
to match exposure measurements with
meters to meters, correct exposure for
special requirements, etc. in 1/10 step
increments in a +/-1.0EV.
b. Adjust Touch Panel
This enables to adjust the position of
touch panel display.
c. Factory Setting
All parameters and settings are initialized
and set to factory default setting.
Custom setting will be set to default
setting, and customized Filter, frame rates
and shutter angles will be deleted.
d. Edit User Information
Up to 31 characters can be entered to
personalize the meter to distinguish
from other meters, or to input contact
information in case of loss.
This user information is displayed in the
Information screen
3.Press the Power button 10 to turn OFF the
power.
62
Menu button 7
Power button 10
Hardware Setting Screen
2) User Calibration of Measured Value
1.Touch the ①[User Calibration] in the Hardware
Setting screen to display the User Calibration
screen.
2.Using the button of ②[+0.1EV] or ③[-0.1EV] at
bottom of screen, adjust calibration value in 0.1
step increments.
* I n this screen, it is possible to take a
measurement and display the value, then
adjust by using the +/-0.1EV buttons. This
will be helpful if you would like to match the
measured value to another meter by reading
the same light source.
3.Touch the [Close] to complete the setting
and return to the Measuring screen.
3) Adjust Touch Panel Display Position
1.Touch the [Adjust Touch Panel] in the
Hardware Setting screen to display the Touch
Panel Adjusting screen.
2.A white cross mark will appear at the upper
left of the screen. Please touch this cross.
A red cross mark will be displayed in the
touched position.
3.The second white cross mark will appear
in another position. Touch it with finger to
display a red cross mark in the touched
position. Repeat this touch-and-display
process eight times in total.
4.Touch the ④[OK] in the screen saying [Data is
determined by pressing the “OK”.] to complete
adjustments and return to Measuring screen.
Touch the ⑤[Cancel] to cancel adjustments.
63
User Calibration Screen
Calibration
value
Touch Panel Adjusting Screen
White cross
(cursor)
Touched
position
Touch Panel Adjust
Confirmation Screen
4) Factory Setting
1.Touch the ⑥[Factory Setting] in the Hardware
Setting screen to display the Factory Setting
Confirmation screen.
2.Touch the [Yes] to proceed factory setting
(Touch the [No] if factory setting is not
needed.)
3.Touch the [Yes] in the Final Confirmation
screen to complete the setting and return to
Measuring screen.
(Touch the [No] if factory setting is not
needed and return to Hardware Setting
screen.)
5) User Information Editing
1.Touch the [Edit User Info] in the Hardware
Setting screen to display the keypad to input
user information.
2.Currently set information (characters) appears at
the top of screen.
Up to 31 characters can be entered (See P13 for
details.). Touch the ⑦[OK] to complete the input
and return to the hardware Setting screen.
3.Input user information will be displayed on
the Information screen.
64
Factory Setting Confirmation
Screen
Final Confirmation Screen
Edit Use Information Screen
7 Optional Accessories (Sold Separately)
Cord
• Synchro
This is a five-meter long cord with three plugs.
An exposure meter, a camera and a flash can all
be connected at the same time without need to
plug or unplug the cord during a shooting. Also,
one of the terminals has a locking mechanism to
ensure connection with a meter.
Cord has two male connectors and one female
one.
The connector with the lock function is a male
one.
Standard Gray Card
• 18%
This is a gray card (110mm x 102mm = 4.3” x
4”) with 18% reflection ratio, and folds to 72mm
x 125mm (=2.8” x 4.9”) to fit in a shirt pocket.
Use this for proper reflected light measurements
of mostly bright (white) or dark (black) subjects.
Profile Target II
• Exposure
Simpler to use, this is the test target (350mm x
120mm = 13.8” x 4.7”) used to create camera
exposure profiles. One side consists of a
central 18% gray patch that is surrounded by
25 patches arranged in 1/6th stop values that
are successively brighter and darker, while the
other side is 18% gray card, so it can be used
to determine digital camera white balancing and
spot metering.
Profile Target
• Exposure
This is more economical test target (260mm x
160mm = 10.2” x 6.3”) used to create camera
exposure profiles. One side is nine gray patches
including black and white, and the other side
is an 18% gray card for digital camera white
balancing and spot metering.
5°
• Viewfinder
This is a viewfinder with a five degree light
receiving angle for spot metering in reflected
light.
It is useful for distant objects such as landscapes,
when you cannot go to the position of the subject
, or for metering subjects that generate light (neon
signs, etc), highly reflective surfaces or translucent
subjects (stained glass, etc). (See P24 for details.)
65
8 Registered Filters
Preset filters can be displayed in the Filter Compensation Setting. The following are the
registered filters name and compensation values. (See P60 for details.)
These filter names and compensation values are preset, however, can be edited for your
preferences.
No.
1
2
3
4
5
6
7
8
9
10
11
12
13
14
15
16
17
18
19
20
21
22
23
24
Filter Name
Compensation
CTO Double
CTO Full
CTO Three-Quarter
CTO Half
CTO Quarter
CTO Eighth
No.85
CTB Double
CTB Full
CTB Three-Quarter
CTB Half
CTB Quarter
CTB Eighth
Minusgreen Full
Minusgreen Half
Minusgreen Quarter
Minusgreen Eighth
Plusgreen Full
Plusgreen Half
Plusgreen Quarter
Plusgreen Eighth
ND0.3
ND0.6
ND0.9
-2.1
-1.1
-0.8
-0.5
-0.3
-0.1
-0.8
-3.3
-1.5
-1.3
-0.9
-0.4
-0.3
-0.9
-0.5
-0.3
-0.2
-0.4
-0.2
-0.1
-0.2
-1.0
-2.0
-3.0
66
9 Specifications
Type
Light Receiving Method
Light Receptor
• Digital light meter for flash and ambient light
• Incident light and reflected light
• Incident light
Lumisphere convertible to flat diffuser (with retracted
lumisphere)
• Reflected light
5-degree spot metering with optional viewfinder
Light Receptor Element • Silicon photo diodes
Measuring Mode
• Ambient Light
Aperture priority measuring
Shutter speed priority measuring
TF priority measuring
Cine measuring
HD Cine camera measuring
Illuminance measuring (lux, foot candle)
Luminance measuring (foot-lambert, cdm2)
• Flash
Cord Mode (with/without multiple cumulative)
Cordless Mode (with/without multiple cumulative)
Radio triggering Mode (with/without multiple
cumulative) (for L-478DR only)
Measuring Range (ISO100)
• Ambient Light
Incident light EV-2 (F2.0, 15 sec) to EV22.9 (Approx
F22.9, 1/8000 sec)
Reflected light EV3.0 to EV19.9
• Flash light
Incident light F1.0 to F128.9
Reflected light F2.8 to F128.9
• Illuminance
0.63(EV-2.0) to 2,000,000 (EV19.6) lux
0.10 (EV-2.0) to 180,000 (EV19.6) foot candle
• Luminance
(Reflected light)
1.0 (EV3) to 980,000 (EV22.9) cdm2
0.29 (EV1.5) to 290,000 (EV22.9) foot-lambert
Repeat accuracy
• ±0.1EV or less
Calibration Constant • Incident light
Lumisphere C = 340, Flat C = 250
• Reflected light
K = 12.5
Display Range
• ISO
ISO 3 to 409600 (in 1/3 steps)
• Shutter speed
Ambient Light
30 min to 1/64000 sec (in 1, 1/2 and 1/3 steps)
Other possible settings: 1/200, 1/400 sec
Flash light
30 min to 1/1000 sec (in 1, 1/2 and 1/3 steps)
Other possible settings: 1/75, 1/80, 1/90, 1/100, 1/200,
1/400
• Aperture
F0.5 to F162.2(in 1/3steps)
• Frame rate (f/s)
1 to 1000, other possible settings: 20 types
• Shutter angle
1°to 358°other possible settings: 20 types
• EV value
EV-27.9 to EV55.8 (only effective with Ambient Light)
• Analog display
T scale 4s to 1/2000(in 1/3 steps)
F scale F1.0 to F90(in 1/3 steps)
EV scale
-3EV to +3EV (incident light, in 1/3 steps)
-7EV to +7EV (reflected light, in 1/3 steps)
Illuminance lux 0 to 50,000 lux
Illuminance fc (foot candle)0 ~5,000 fc
2
Luminance cd/m (candela per square meter)
0~2,500 cd/m2
Luminance fl (foot-lambert)
0~1,000 fl
• Contrast display
-9.9EV to +9.9EV (in 1/10 steps)
• Filter compensation -5.0EV to +5.0EV(in 1/10 steps)
• Filter compensation selection
Maximum of 4 types can be used
simultaneously
• Cumulative count
0 to 99 times (Maximum of 99 times is
displayed)
• Compensation display -9.9EV to +9.9EV (in 1/10 steps)
67
Other Functions • Exposure Compensation • Exposure profile • Flash analyzing function
• Memory function
• Memory clear/recall function
• Average function
• Exposure out of range and display
• Battery power indicator display
• Auto power OFF function
• Liquid crystal backlight (EL)
• Touch Panel lock function
• Custom setting function
Battery
• Dry cell battery
-9.9EV to +9.9EV(in 1/10 steps) Max 10 profiles
0 to 100% (in 10% increments)
9 readings
Under, Over warning display
4 stages
Can be selected at Custom Setting ON (OFF after set time elapses)
22 items (L-478D), 24 items (L-478DR)
2 AAA dry cell batteries (alkaline,
manganese, lithium, nickel hydride, or
nickel based)
Operating temperature range
• -10oC to 50oC (no condensation)
Storage temperature range
• -20oC to 60oC (no condensation)
Dimensions
• Approx 57(W)×140(H)×26(D)mm (excluding protrusions)
Weight
• Approx 130g (L-478D without batteries), 140g (L-478DR without batteries)
Standard accompanying accessories
• Soft case, strap, 2 AAA dry cell batteries, Startup Guide, CD-ROM [Users’ Manual (this
manual) and Applications]
For improvement reasons the specifications in this manual and external appearance may be
subject to future changes without prior notification.
68
10 Safety Guide and Maintenance
,
•To avoid damaging this meter, never drop it or subject it to shock.
•Avoid using it in water spray or rain as doing so may cause damage.
•Avoid storing it in high-temperature and/or humid locations as doing so may cause damage.
•Beware of condensation caused by sudden temperature change, as such condensation may cause damage or malfunction.
•Do not place the meter in direct sunlight during midsummer or near heaters, etc., as the temperature of the meter will
rise beyond that of the air temperature. Be careful when using the meter in hot locations.
Maintenance Notes
If your meter is splashed with water, wipe immediately with a soft dry cloth. Leaving the meter wet may cause rust or
corrosion
Keep the light receptor head clean and free from dust,/dirt and avoid scratching as accuracy may be affected.
W hen light meter gets dirty, clean it with soft dry cloth. Never use organic cleaners (like thinner or benzene).
Refer servicing only to qualified and authorized personnel in case of product’s malfunction.
Contact your local camera store or retail organization for warranty and service.
•
•
•
•
•
69
70
71
7-24-14, Oizumi-Gakuen-Cho, Nerima-Ku, Tokyo
178-8686 Japan
Tel: +81(0)3-3978-2335 Fax: +81(0)3-3978-5229
http://www.sekonic.com
JR1297631
August, 2012