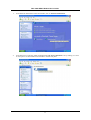
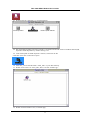
1
DSL-302G ADSL Modem User’s Guide Third Edition July 2003 i DSL-302G ADSL Ethernet Modem User’s Guide Wichtige Sicherheitshinweise 1. Bitte lesen Sie sich diese Hinweise sorgfältig durch. 2. Heben Sie diese Anleitung für den spätern Gebrauch auf. 3. Vor jedem Reinigen ist das Gerät vom Stromnetz zu trennen. Vervenden Sie keine Flüssig- oder Aerosolreiniger. Am besten dient ein angefeuchtetes Tuch zur Reinigung. 4. Um eine Beschädigung des Gerätes zu vermeiden sollten Sie nur Zubehörteile verwenden, die vom Hersteller zugelassen sind. 5. Das Gerät is vor Feuchtigkeit zu schützen. 6. Bei der Aufstellung des Gerätes ist auf sichern Stand zu achten. Ein Kippen oder Fallen könnte Verletzungen hervorrufen. Verwenden Sie nur sichere Standorte und beachten Sie die Aufstellhinweise des Herstellers. 7. Die Belüftungsöffnungen dienen zur Luftzirkulation die das Gerät vor Überhitzung schützt. Sorgen Sie dafür, daß diese Öffnungen nicht abgedeckt werden. 8. Beachten Sie beim Anschluß an das Stromnetz die Anschlußwerte. 9. Die Netzanschlußsteckdose muß aus Gründen der elektrischen Sicherheit einen Schutzleiterkontakt haben. 10. Verlegen Sie die Netzanschlußleitung so, daß niemand darüber fallen kann. Es sollete auch nichts auf der Leitung abgestellt werden. 11. Alle Hinweise und Warnungen die sich am Geräten befinden sind zu beachten. 12. Wird das Gerät über einen längeren Zeitraum nicht benutzt, sollten Sie es vom Stromnetz trennen. Somit wird im Falle einer Überspannung eine Beschädigung vermieden. 13. Durch die Lüftungsöffnungen dürfen niemals Gegenstände oder Flüssigkeiten in das Gerät gelangen. Dies könnte einen Brand bzw. Elektrischen Schlag auslösen. 14. Öffnen Sie niemals das Gerät. Das Gerät darf aus Gründen der elektrischen Sicherheit nur von authorisiertem Servicepersonal geöffnet werden. 15. Wenn folgende Situationen auftreten ist das Gerät vom Stromnetz zu trennen und von einer qualifizierten Servicestelle zu überprüfen: a – Netzkabel oder Netzstecker sint beschädigt. b – Flüssigkeit ist in das Gerät eingedrungen. c – Das Gerät war Feuchtigkeit ausgesetzt. d – Wenn das Gerät nicht der Bedienungsanleitung ensprechend funktioniert oder Sie mit Hilfe dieser Anleitung keine Verbesserung erzielen. e – Das Gerät ist gefallen und/oder das Gehäuse ist beschädigt. f – Wenn das Gerät deutliche Anzeichen eines Defektes aufweist. 16. Bei Reparaturen dürfen nur Orginalersatzteile bzw. den Orginalteilen entsprechende Teile verwendet werden. Der Einsatz von ungeeigneten Ersatzteilen kann eine weitere Beschädigung hervorrufen. 17. Wenden Sie sich mit allen Fragen die Service und Repartur betreffen an Ihren Servicepartner. Somit stellen Sie die Betriebssicherheit des Gerätes sicher. 18. Zum Netzanschluß dieses Gerätes ist eine geprüfte Leitung zu verwenden, Für einen Nennstrom bis 6A und einem Gerätegewicht großer 3kg ist eine Leitung nicht leichter als H05VV-F, 3G, 0.75mm2 einzusetzen Limited Warranty Hardware: D-LINK WARRANTS EACH OF ITS HARDWARE PRODUCTS TO BE FREE FROM DEFECTS IN WORKMANSHIP AND MATERIALS UNDER NORMAL USE AND SERVICE FOR A PERIOD COMMENCING ON THE DATE OF PURCHASE FROM D-LINK OR ITS AUTHORIZED RESELLER AND EXTENDING FOR THE LENGTH OF TIME STIPULATED BY THE AUTHORIZED RESELLER OR D-LINK BRANCH OFFICE NEAREST TO THE PLACE OF PURCHASE. THIS WARRANTY APPLIES ON THE CONDITION THAT THE PRODUCT REGISTRATION CARD IS FILLED OUT AND RETURNED TO A D-LINK OFFICE WITHIN NINETY (90) DAYS OF PURCHASE. A LIST OF D-LINK OFFICES IS PROVIDED AT THE BACK OF THIS MANUAL, TOGETHER WITH A COPY OF THE REGISTRATION CARD. IF THE PRODUCT PROVES DEFECTIVE WITHIN THE APPLICABLE WARRANTY PERIOD, D-LINK WILL PROVIDE REPAIR OR REPLACEMENT OF THE PRODUCT. D-LINK SHALL HAVE THE SOLE DISCRETION WHETHER TO REPAIR OR REPLACE, AND REPLACEMENT PRODUCT MAY BE NEW OR RECONDITIONED. REPLACEMENT PRODUCT SHALL BE OF EQUIVALENT OR BETTER SPECIFICATIONS, RELATIVE TO THE DEFECTIVE PRODUCT, BUT NEED NOT BE IDENTICAL. ANY PRODUCT OR PART REPAIRED BY D-LINK PURSUANT TO THIS WARRANTY SHALL HAVE A WARRANTY PERIOD OF NOT LESS THAN 90 DAYS, FROM DATE OF SUCH REPAIR, IRRESPECTIVE OF ANY EARLIER EXPIRATION OF ORIGINAL WARRANTY PERIOD. WHEN D-LINK PROVIDES REPLACEMENT, THEN THE DEFECTIVE PRODUCT BECOMES THE PROPERTY OF D-LINK. WARRANTY SERVICE MAY BE OBTAINED BY CONTACTING A D-LINK OFFICE WITHIN THE APPLICABLE WARRANTY PERIOD, AND REQUESTING A RETURN MATERIAL AUTHORIZATION (RMA) NUMBER. IF A REGISTRATION CARD FOR THE PRODUCT IN QUESTION HAS NOT BEEN RETURNED TO D-LINK, THEN A PROOF OF PURCHASE (SUCH AS A COPY OF THE DATED PURCHASE INVOICE) MUST BE PROVIDED. IF PURCHASER'S CIRCUMSTANCES REQUIRE SPECIAL i DSL-302G ADSL Ethernet Modem User’s Guide HANDLING OF WARRANTY CORRECTION, THEN AT THE TIME OF REQUESTING RMA NUMBER, PURCHASER MAY ALSO PROPOSE SPECIAL PROCEDURE AS MAY BE SUITABLE TO THE CASE. AFTER AN RMA NUMBER IS ISSUED, THE DEFECTIVE PRODUCT MUST BE PACKAGED SECURELY IN THE ORIGINAL OR OTHER SUITABLE SHIPPING PACKAGE TO ENSURE THAT IT WILL NOT BE DAMAGED IN TRANSIT, AND THE RMA NUMBER MUST BE PROMINENTLY MARKED ON THE OUTSIDE OF THE PACKAGE. THE PACKAGE MUST BE MAILED OR OTHERWISE SHIPPED TO D-LINK WITH ALL COSTS OF MAILING/SHIPPING/INSURANCE PREPAID. D-LINK SHALL NEVER BE RESPONSIBLE FOR ANY SOFTWARE, FIRMWARE, INFORMATION, OR MEMORY DATA OF PURCHASER CONTAINED IN, STORED ON, OR INTEGRATED WITH ANY PRODUCT RETURNED TO D-LINK PURSUANT TO THIS WARRANTY. ANY PACKAGE RETURNED TO D-LINK WITHOUT AN RMA NUMBER WILL BE REJECTED AND SHIPPED BACK TO PURCHASER AT PURCHASER'S EXPENSE, AND D-LINK RESERVES THE RIGHT IN SUCH A CASE TO LEVY A REASONABLE HANDLING CHARGE IN ADDITION MAILING OR SHIPPING COSTS. Software: WARRANTY SERVICE FOR SOFTWARE PRODUCTS MAY BE OBTAINED BY CONTACTING A D-LINK OFFICE WITHIN THE APPLICABLE WARRANTY PERIOD. A LIST OF D-LINK OFFICES IS PROVIDED AT THE BACK OF THIS MANUAL, TOGETHER WITH A COPY OF THE REGISTRATION CARD. IF A REGISTRATION CARD FOR THE PRODUCT IN QUESTION HAS NOT BEEN RETURNED TO A D-LINK OFFICE, THEN A PROOF OF PURCHASE (SUCH AS A COPY OF THE DATED PURCHASE INVOICE) MUST BE PROVIDED WHEN REQUESTING WARRANTY SERVICE. THE TERM "PURCHASE" IN THIS SOFTWARE WARRANTY REFERS TO THE PURCHASE TRANSACTION AND RESULTING LICENSE TO USE SUCH SOFTWARE. D-LINK WARRANTS THAT ITS SOFTWARE PRODUCTS WILL PERFORM IN SUBSTANTIAL CONFORMANCE WITH THE APPLICABLE PRODUCT DOCUMENTATION PROVIDED BY D-LINK WITH SUCH SOFTWARE PRODUCT, FOR A PERIOD OF NINETY (90) DAYS FROM THE DATE OF PURCHASE FROM D-LINK OR ITS AUTHORIZED RESELLER. D-LINK WARRANTS THE MAGNETIC MEDIA, ON WHICH D-LINK PROVIDES ITS SOFTWARE PRODUCT, AGAINST FAILURE DURING THE SAME WARRANTY PERIOD. THIS WARRANTY APPLIES TO PURCHASED SOFTWARE, AND TO REPLACEMENT SOFTWARE PROVIDED BY D-LINK PURSUANT TO THIS WARRANTY, BUT SHALL NOT APPLY TO ANY UPDATE OR REPLACEMENT WHICH MAY BE PROVIDED FOR DOWNLOAD VIA THE INTERNET, OR TO ANY UPDATE WHICH MAY OTHERWISE BE PROVIDED FREE OF CHARGE. D-LINK'S SOLE OBLIGATION UNDER THIS SOFTWARE WARRANTY SHALL BE TO REPLACE ANY DEFECTIVE SOFTWARE PRODUCT WITH PRODUCT WHICH SUBSTANTIALLY CONFORMS TO D-LINK'S APPLICABLE PRODUCT DOCUMENTATION. PURCHASER ASSUMES RESPONSIBILITY FOR THE SELECTION OF APPROPRIATE APPLICATION AND SYSTEM/PLATFORM SOFTWARE AND ASSOCIATED REFERENCE MATERIALS. D-LINK MAKES NO WARRANTY THAT ITS SOFTWARE PRODUCTS WILL WORK IN COMBINATION WITH ANY HARDWARE, OR ANY APPLICATION OR SYSTEM/PLATFORM SOFTWARE PRODUCT PROVIDED BY ANY THIRD PARTY, EXCEPTING ONLY SUCH PRODUCTS AS ARE EXPRESSLY REPRESENTED, IN D-LINK'S APPLICABLE PRODUCT DOCUMENTATION AS BEING COMPATIBLE. D-LINK'S OBLIGATION UNDER THIS WARRANTY SHALL BE A REASONABLE EFFORT TO PROVIDE COMPATIBILITY, BUT D-LINK SHALL HAVE NO OBLIGATION TO PROVIDE COMPATIBILITY WHEN THERE IS FAULT IN THE THIRD-PARTY HARDWARE OR SOFTWARE. D-LINK MAKES NO WARRANTY THAT OPERATION OF ITS SOFTWARE PRODUCTS WILL BE UNINTERRUPTED OR ABSOLUTELY ERROR-FREE, AND NO WARRANTY THAT ALL DEFECTS IN THE SOFTWARE PRODUCT, WITHIN OR WITHOUT THE SCOPE OF D-LINK'S APPLICABLE PRODUCT DOCUMENTATION, WILL BE CORRECTED. D-Link Offices for Registration and Warranty Service THE PRODUCT'S REGISTRATION CARD, PROVIDED AT THE BACK OF THIS MANUAL, MUST BE SENT TO A D-LINK OFFICE. TO OBTAIN AN RMA NUMBER FOR WARRANTY SERVICE AS TO A HARDWARE PRODUCT, OR TO OBTAIN WARRANTY SERVICE AS TO A SOFTWARE PRODUCT, CONTACT THE D-LINK OFFICE NEAREST YOU. AN ADDRESS/TELEPHONE/FAX/E-MAIL/WEB SITE LIST OF D-LINK OFFICES IS PROVIDED IN THE BACK OF THIS MANUAL. LIMITATION OF WARRANTIES IF THE D-LINK PRODUCT DOES NOT OPERATE AS WARRANTED ABOVE, THE CUSTOMER'S SOLE REMEDY SHALL BE, AT D-LINK'S OPTION, REPAIR OR REPLACEMENT. THE FOREGOING WARRANTIES AND REMEDIES ARE EXCLUSIVE AND ARE IN LIEU OF ALL OTHER WARRANTIES, EXPRESSED OR IMPLIED, EITHER IN FACT OR BY OPERATION OF LAW, STATUTORY OR OTHERWISE, INCLUDING WARRANTIES OF MERCHANTABILITY AND FITNESS FOR A PARTICULAR PURPOSE. D-LINK NEITHER ASSUMES NOR AUTHORIZES ANY OTHER PERSON TO ASSUME FOR IT ANY OTHER LIABILITY IN CONNECTION WITH THE SALE, INSTALLATION MAINTENANCE OR USE OF D-LINK'S PRODUCTS D-LINK SHALL NOT BE LIABLE UNDER THIS WARRANTY IF ITS TESTING AND EXAMINATION DISCLOSE THAT THE ALLEGED DEFECT IN THE PRODUCT DOES NOT EXIST OR WAS CAUSED BY THE CUSTOMER'S OR ANY THIRD PERSON'S MISUSE, NEGLECT, IMPROPER INSTALLATION OR TESTING, UNAUTHORIZED ATTEMPTS TO REPAIR, OR ANY OTHER CAUSE BEYOND THE RANGE OF THE INTENDED USE, OR BY ACCIDENT, FIRE, LIGHTNING OR OTHER HAZARD. LIMITATION OF LIABILITY IN NO EVENT WILL D-LINK BE LIABLE FOR ANY DAMAGES, INCLUDING LOSS OF DATA, LOSS OF PROFITS, COST OF COVER OR OTHER INCIDENTAL, CONSEQUENTIAL OR INDIRECT DAMAGES ARISING OUT THE INSTALLATION, MAINTENANCE, USE, PERFORMANCE, FAILURE OR INTERRUPTION OF A D- LINK PRODUCT, HOWEVER CAUSED AND ON ANY THEORY OF LIABILITY. THIS LIMITATION WILL APPLY EVEN IF D-LINK HAS BEEN ADVISED OF THE POSSIBILITY OF SUCH DAMAGE. IF YOU PURCHASED A D-LINK PRODUCT IN THE UNITED STATES, SOME STATES DO NOT ALLOW THE LIMITATION OR EXCLUSION OF LIABILITY FOR INCIDENTAL OR CONSEQUENTIAL DAMAGES, SO THE ABOVE LIMITATION MAY NOT APPLY TO YOU. ii DSL-302G ADSL Ethernet Modem User’s Guide Trademarks Copyright 2000 D-Link Corporation. Contents subject to change without prior notice. D-Link is a registered trademark of D-Link Corporation/D-Link Systems, Inc. All other trademarks belong to their respective proprietors. Copyright Statement No part of this publication may be reproduced in any form or by any means or used to make any derivative such as translation, transformation, or adaptation without permission from D-Link Corporation/D-Link Systems Inc., as stipulated by the United States Copyright Act of 1976 FCC Warning This device complies with part 15 of the FCC Rules. Operation is subject to the following two conditions: (1) This device may not cause harmful interference, and (2) this device must accept any interference received, including interference that may cause undesired operation. This equipment has been tested and found to comply with the limits for a Class B digital device, pursuant to part 15 of the FCC Rules. These limits are designed to provide reasonable protection against harmful interference in a residential installation. This generates, uses and can radiate radio frequency energy and, if not installed and used in accordance with the instructions, may cause harmful interference to radio communications. However, there is no guarantee that interference will not occur in a particular installation. If this equipment does cause harmful interference to radio or television reception, which can be determined by turning equipment off and on, the user is encouraged to try to correct the interference by one or more of the following measures: - Reorient or relocate the receiving antenna. - Increase the separation between the equipment and receiver. - Connect the equipment into an outlet on a circuit different from that to which the receiver is connected. - Consult the dealer or an experienced radio/TV technician for help. iii CONTENTS About This User’s Guide ........................................................................................................................................ 1 Before You Start ................................................................................................................................................. 1 Installation Requirements................................................................................................................................ 1 Installing the USB Driver and Ethernet Diagnostic Utility............................................................................. 3 Accessing the Modem’s Web Configuration Pages ........................................... Error! Bookmark not defined. Configure the Internet Connection (ADSL Service Connection).................................................................. 12 Introduction............................................................................................................................................................. 1 Modem Description and Operation ..................................................................................................................... 1 Modem Features.............................................................................................................................................. 3 Packing List .................................................................................................................................................... 3 Front Panel & LED Indicators ........................................................................................................................ 4 Rear Panel ....................................................................................................................................................... 4 Connecting the Modem........................................................................................................................................... 5 Detailed Set Up Instructions ................................................................................................................................... 7 Installation Requirements................................................................................................................................ 8 Configuring IP Settings on Your Computer.................................................................................................... 9 Accessing the Modem’s Web Configuration Manager ..................................................................................... 16 Configure the Internet Connection (ADSL Service Connection)...................................................................... 18 Configure PPPoA and PPPoE Connections .................................................................................................. 18 Configuring the Modem for a Bridged or an IPoA Connection .................................................................... 19 Web-based Configuration ..................................................................................................................................... 27 Quick Configuration ..................................................................................................................................... 28 System View ..................................................................................................................................................... 29 System Time ................................................................................................................................................. 30 Changing the LAN IP Settings...................................................................................................................... 30 DHCP Modes ................................................................................................................................................ 31 DHCP Server................................................................................................................................................. 32 DHCP Relay.................................................................................................................................................. 35 WAN Configuration Options ............................................................................................................................ 36 DSL Status .................................................................................................................................................... 36 PPP Configuration......................................................................................................................................... 38 EOA Configuration ....................................................................................................................................... 40 IPoA Configuration....................................................................................................................................... 43 NAT .............................................................................................................................................................. 45 Bridge Configuration .................................................................................................................................... 47 Bridging Configuration ................................................................................................................................. 48 ATM VC Configuration................................................................................................................................ 49 The Administration Folder................................................................................................................................ 51 Changing the Manager Password.................................................................................................................. 51 Save & Reboot .............................................................................................................................................. 52 Image Upgrade.............................................................................................................................................. 53 Alarms........................................................................................................................................................... 53 Diagnostics.................................................................................................................................................... 54 Technical Specifications ....................................................................................................................................... 55 Ethernet Diagnostic Utility ................................................................................................................................... 56 Uninstalling the Modem Software ........................................................................................................................ 62 Low Pass Filters.................................................................................................................................................... 64 DSL-302G ADSL Ethernet Modem User’s Guide About This User’s Guide This user’s guide provides instructions on how to install the DSL-302G ADSL Modem and use it to connect a computer or Ethernet LAN to the Internet. If you are using a computer with a functioning Ethernet port or an available USB port, the quickest and easiest way to set up the DSL-302G is to insert the Installation CD into the CD-ROM drive of your computer and follow the instructions provided in the Quick Installation Guide, or just click the “Install DSL-302G” link on the initial pop-up menu that appears shortly after inserting the CD and follow the instructions as they are presented.. If the menu fails to appear, explore the CD and find the file “autorun.exe” and double-click it to launch the installation software. Before You Start Please read and make sure you understand all the prerequisites for proper installation of your new Modem. Have all the necessary information and equipment on hand before beginning the installation. Note If you will use the DSL-302G’s USB port to connect to your computer, do not connect the USB cable to the modem until you have finished all of the steps to install the USB driver, and your computer has restarted. Installation Requirements Information you will need from your ADSL service provider: Username This is the Username that is used to log on to your ADSL service provider’s network. It is commonly in the form − [email protected]. Password This is the Password that is used, in conjunction with the Username above, to log on to your ADSL service provider’s network. Connection Protocol This is the method that your ADSL service provider uses to send and receive data between the Internet and your computer. Your DSL-302G supports PPPoE LLC, PPPoE VC-Mux, PPPoA LLC, and PPPoA VCMux, Bridged Ethernet and IPoA. Security Protocol This is the method your ADSL service provider will use to verify your Username and Password when you log on to the remote network. Your DSL-302G supports the PAP and CHAP protocols. VPI This is the Virtual Path Identifier (VPI). It is used in conjunction with the Virtual Channel Identifier (VCI) below, to identify the data path between your ADSL service provider’s network and your computer. VCI This is the Virtual Channel Identifier (VCI). It is used in conjunction with the VPI above to identify the data path between your ADSL service provider’s network and your computer. 1 Record your info here. DSL-302G ADSL Ethernet Modem User’s Guide Information you will need about your DSL-302G ADSL modem: Modem Username This is the Username you will be prompted to enter when you access the DSL-302G’s configuration screens using a Web browser. The default Username is admin. Modem Password This is the Password you will be prompted to enter when you access the DSL-302G’s configuration screens using a Web browser. The default Password is admin. LAN IP address for the DSL-302G This is the IP address you will enter into the Address field of your Web browser to access the DSL-302G’s configuration screens using a Web Browser. The default for the Ethernet interface is 10.1.1.1 and for the USB interface it is 10.1.1.2. LAN Subnet Mask for the DSL-302G This is the subnet mask used by the DSL-302G, and will be used throughout your LAN. The default subnet mask is 255.0.0.0. Record your info here. Information you will need about your LAN or computer: Ethernet NIC If your computer has an Ethernet NIC, you can connect the DSL-302G to this Ethernet port using an Ethernet cable. You can also use the Ethernet port on the DSL-302G to connect to other Ethernet devices, such as a Wireless Access Point. USB port If your computer has an available USB port, you can connect the DSL-302G to this USB port using a USB cable. DHCP Client status Your DSL-302G ADSL modem is configured, by default, to be a DHCP server. This means that it can assign an IP address, subnet mask, and a default gateway address to computers on your LAN. The range of IP addresses the DSL-302G will assign are from 10.1.1.3 to 10.1.1.34. Your computer (or computers) needs to be configured to Obtain an IP address automatically (that is, they need to be configured as DHCP clients.) Record your info here. It is recommended that your collect and record this information here, or in some other secure place, in case you have to re-configure your ADSL connection in the future. Once you have the above information, you are ready to setup and configure your DSL-302G ADSL modem. 2 DSL-302G ADSL Ethernet Modem User’s Guide Installing the USB Driver and Ethernet Diagnostic Utility Congratulations on your purchase of a D-Link DSL-302G ADSL Modem! This booklet will guide you through the initial installation steps necessary to be up and running on your ADSL service provider’s network in minutes! There are two options available to set up the modem: • Use the DSL-302G Installation Utility located on the CD included with the modem. This Quick Installation Guide contains illustrated step-by-step instructions on how to use the Installation Utility. • Use your browser software (such as Internet Explorer) to access the embedded management software on the DSL-302G modem. This method requires that your computer’s Ethernet network interface be configured to “Obtain an IP Address automatically”. See the DSL-302G User’s Guide for instructions on how to change the IP settings on your computer so you can access the modem’s management and configuration software from your Internet browser. IMPORTANT If you will use the DSL-302G’s USB port to connect to your computer, do not connect the USB cable to the modem until you have finished all of the steps to install the USB driver, and your computer has restarted. Using the DSL-302G Installation Utility Follow these instructions to quickly setup the DSL-302G for use with a PPPoA or PPPoE connection (Your ADSL Service Provider can tell you which of these methods is required for your setup installation) Insert the DSL-302G CD-ROM into the CD-ROM drive. Within a few seconds you should see the following dialog box: Click the Install DSL-302G link to launch the installation software. If you do not see the auto-run dialog box pictured above, browse to the CD using ‘My Computer’ or ‘Windows Explorer’ and double-click the setup application file dsl302g.exe. 3 DSL-302G ADSL Ethernet Modem User’s Guide 1. Click the Next button in the first InstallShield dialog box. 2. Enter your name and company information and click Next. 4 DSL-302G ADSL Ethernet Modem User’s Guide 3. Click Next to use the folder displayed or Browse… to choose a different location. 4. Click Next to use the folder listed or enter a different folder name. 5. The Installation software is now installing the necessary drivers and diagnostic tools for your Operating System. This may take up to 2 minutes depending on your computer. 5 DSL-302G ADSL Ethernet Modem User’s Guide 6. Connect the power cord as instructed. Click Next. 7. For Ethernet installation, please now connect the Ethernet cable. Then click Next. 8. If you are using USB, DO NOT connect your modem until this installation is finished and your PC has restarted. For now, just click Next to continue. 6 DSL-302G ADSL Ethernet Modem User’s Guide 9. Now, connect the ADSL cable. Click Next. 10. (1) If your Operating System is Windows 95/98/ME, you must restart your computer now by clicking on the Finish button. (2) If your Operating System is Windows 2000/XP, you must restart your computer if using an Ethernet connection. For a USB connection, simply connect the USB ports as shown below. 11. Upon restart or installation, you will find two new icons displayed on your computer’s desktop, as shown below. (1) If you are using an Ethernet connection, please double-click on the DSL-302G Ethernet diagnostics icon and continue reading. (2) If you are using a USB connection, please double-click on the DSL-302G USB Config icon and skip to the next section, Using the Web Browser. 7 DSL-302G ADSL Ethernet Modem User’s Guide (FOR ETHERNET USER) (FOR USB USER) The Ethernet Diagnostics software can be used to monitor and quickly diagnose the device, or change the user name and password used for your ADSL account. The diagnostics program is Note only suitable for a PPP connection. If using an IPoA/Bridge connection, please use the Web Browser interface only. (See ‘Using the Web Browser’ below) For further instructions, please read the DSL-302G User Guide. 12. The first time you click the DSL-302G Ethernet Diagnostics icon, you will be prompted for your username and password. Please enter these as shown in the above, using the username and password given to you by your ISP. 13. Click on the Setup button on the Ethernet Diagnostics display. A new menu will appear as shown below: 8 DSL-302G ADSL Ethernet Modem User’s Guide 14. Under the User Details menu tab, please check your ADSL account username and password is correct as per step 12. If not, please re-enter these and then click ‘Save’. The device will reboot itself after saving. 15. You should now be successfully connected to your ADSL Service provider. Please launch your Web Browser and test by going to http://www.dlink.com.au Using the Web Browser To configure settings you must now access the configuration manager using your web browser. This is done by entering the IP address in the Address bar of the browser window as follows: 1. If you wish to access the configuration software through the Ethernet port, enter http://10.1.1.1 (default Ethernet IP address of the DSL-302G). 2. If you wish to access the configuration software through the USB port, double-click on the icon below or enter http://10.1.1.2 (default USB IP address of the DSL-302G). 3. Press the Enter key and the following prompt will appear: Note Be sure that the web browser on your computer is not configured to use a proxy server in it’s Internet settings. In Windows Internet Explorer, you can check if a proxy server is enabled using the following procedure: 1. In Windows, click on the START button, go to Settings and choose Control Panel. 2. In the Control Panel window, double-click on the Internet Options icon. 3. Select the Connections tab and click on the LAN Settings button. 4. Verify that the “Use proxy server” option is NOT checked. If it is checked, click in the checkbox to deselect the option and click OK. 9 DSL-302G ADSL Ethernet Modem User’s Guide 4. Enter the User Name admin and Password admin and click the OK button. The default page of the web configuration manager appears as below in your web browser: Note Do not confuse the user name and password used to access this web configuration manager with the ADSL account user name and password needed for PPP connection to access the ADSL service provider’s network. 5. In the Quick Configuration menu, enter the PPP account information (Username and Password) given to you by your ADSL service provider. Most users will be able to connect to the Internet using the default connection settings (Connection Type: PPPoA VC-Mux, VPI:8, VCI:35, Security Protocol: CHAP). Do not change any of these settings unless you have been instructed to do so and you have the correct settings as supplied by your ADSL service provider. The available connection types are: PPPoA VC-Mux, PPPoA LLC, PPPoE VC-Mux, PPPoE LLC. 6. Once you have completed the settings, click on the Save & Reboot button to save the settings and reboot the modem. 7. The DSL-302G will negotiate the ADSL connection automatically upon rebooting. This will normally take about a minute. When the ADSL connection has been successfully established, the green ADSL Link LED indicator will be lit steadily. If the ADSL Link indicator is not lit after a minute or so, double check the cable connections and make sure the correct information has been entered in the Quick 10 DSL-302G ADSL Ethernet Modem User’s Guide Configuration menu, including the Username and Password (case-sensitive) used for your ADSL account. 8. You should now be successfully connected to your ADSL service provider. Please launch your Web Browser and test by going to http://www.dlink.com.au 9. You can also use the System View display to check the full status of the DSL-302G. Web-based Manager – First Time Log On 11 DSL-302G ADSL Ethernet Modem User’s Guide Configure the Internet Connection (ADSL Service Connection) All the settings necessary to establish the connection to your service provider’s network and ultimately to the Internet can be configured in the Quick Configuration menu. Make sure you know what connection type is used for your ADSL service. Follow the steps below to establish the Internet connection: 1. Choose the Connection Type. Select PPPoA LLC, PPPoA VC-Mux, PPPoE VC-Mux, or PPPoE LLC, from the pull-down menu. 2. Enter the VPI and VCI values provided by your ADSL service provider. Most users will use the default values VPI: 8 and VCI: 35. 3. Select the type of Security Protocol used by your ADSL service provider. This is the method used to verify your Username and Password. 4. Type in the Username or account number used to access the service provider’s network. 5. Type in the Password for your account used to access the service provider’s network. Quick Configuration Save & Reboot When you have defined the Quick Configuration settings, click the Save & Reboot button to save the settings in temporary and reboot the system. The Modem will negotiate the ADSL connection automatically upon rebooting. This will normally take a few seconds. When the ADSL connection has been successfully established, the ADSL Link LED indicator will light a steady green colour. If the ADSL Link indicator does not light after a minute or so access the web configuration manager and double check the settings. 12 DSL-302G ADSL Modem User’s Guide 1 Introduction This section provides a brief description of the Modem, its associated technologies and a list of Modem features. What is ADSL? Asymmetric Digital Subscriber Line (ADSL) is broadband access technology that provides high-speed digital data transmission and interactive multimedia applications for business and residential customers over ordinary telephone lines. ADSL greatly increases the signal carrying capacity of copper telephone lines without interfering with regular telephone services. For the ADSL user, this means faster downloads and more reliable connectivity. ADSL devices enable high-speed Internet access without any loss of quality or disruption of telephone services. ADSL provides a dedicated service over a single telephone line operating at speeds of up to 8 Mbps downstream and up to 640 Kbps upstream. A secure point-to-point connection is established between the user and the central office of the service provider. D-Link ADSL devices incorporate the recommendations of the ADSL Forum regarding framing, data format, and upper layer protocols. Modem Description and Operation The DSL-302G ADSL Modem is designed to provide a simple, cost-effective and secure ADSL Internet connection for your small to medium-sized private network. The ADSL connection technology enables many interactive multi-media applications such as video conferencing and collaborative computing. The Modem is easy to install and use. The DSL-302G connects to an Ethernet LAN via a standard Ethernet interface, or a single computer via a USB connection. The ADSL connection is made using ordinary twisted-pair telephone line with standard RJ-11 connectors. Low Pass Filters Since ADSL and telephone services share the same copper wiring to carry their respective signals, a filtering mechanism may be necessary to avoid mutual interference. A low pass filter device can be installed for each telephone that shares the line with the ADSL line. These filters are easy to install passive devices that connect to the ADSL device and/or telephone using standard telephone cable. Ask your service provider for more information about the use of low pass filters with your installation. Appendix D provides illustrated examples of how to install two common styles of low pass filters. Web-based Modem Configuration The DSL-302G can be configured by using an HTML-based web interface for setup and management. The web configuration manager may be accessed using any operating system capable of running web browser software. Computer using the USB port to connect to the Modem must install additional software. The additional software will run on Windows operating systems. Web Browser Any common web browser can be used to configure the Modem using the web configuration management software. The program is designed to work best with more recently released browsers such as Microsoft Internet Explorer® version 6.0, Netscape Navigator® version 5.2, or later versions. The web browser must have JavaScript enabled. JavaScript is enabled by default on many browsers. Make sure JavaScript has not been disabled by other software (such as virus protection or web user security packages) that may be running on your computer. Ethernet Port (NIC Adapter) Any computer that uses the Modem must be able to connect to it through either the USB or Ethernet port on the Modem. The Ethernet connection therefore requires that your computer be equipped with an Ethernet port as 1 DSL-302G ADSL Modem User’s Guide well. Most notebook computers are now sold with an Ethernet port already installed. Likewise, most fully assembled desktop computers come with an Ethernet NIC adapter as standard equipment. If your computer does not have an Ethernet port, you must install an Ethernet NIC adapter before you can use the Modem, or use the USB port if available. If you must install an Ethernet NIC adapter, follow the installation instructions that come with the Ethernet NIC adapter. USB Port The Modem’s USB Port can be used for Internet access and for Ethernet LAN functions. To use the USB port a software driver must be installed on the system using it. To install the USB driver insert the Installation CD into the CD-ROM drive of the computer that will use the USB connection and click the “Install DSL-302G” link in the window that pops up. The DSL-302G supports USB connection for computers running Windows 98SE, 2000, Me and XP. Additional Software It may be necessary to install software on your computer that enables the computer to access the Internet (through computers operated by your ISP or service provider). Additional software must be installed if you are using what is called a “bridged” connection. For a bridged connection, the information needed to make and maintain the Internet connection is stored on your computer, not in the Modem. This type of connection is similar to the arrangement used for analog dial-up modems, but the connection speed is much faster. Various terms are to describe a bridged ADSL connection including the term “RFC 1483 Bridge” which is used in this guide. If your ADSL service is delivered through a PPP (Point to Point Protocol) connection, the information needed to establish and maintain the Internet connection is stored in the Modem. In this case, it is not necessary to install software on your computer. Account Information (User Name and Password) Most users will need to supply a user name and password used to access the service provider’s network (and ultimately, the Internet). This information is stored either in the Modem’s memory or on your computer depending on the type of ADSL connection you have. ACCOUNT INFORMATION (PPP Connections Only) User Name: Password: Additional PVC Settings If you are using multiple virtual connections it will be necessary to provide additional VPI and VCI values for the device (the combination of VPI and VCI values are called a PVC). These numbers define a unique route used on the ATM backbone of the WAN. Chapter 5 contains instruction on how to set up additional PVCs for accounts using more than one virtual connection. About Bridged Ethernet Connections (RFC 1483) Using this method, the DSL-302G acts as a transparent bridge, and is invisible to other devices on both the WAN (wide area network) and LAN (local area network) side of the bridge. It is “invisible” in the sense that it does not have an IP address associated with it. Every device connected to the WAN must have an IP address to be “seen” on the IP network. Devices that connect to the Internet have a “global” IP address that is unique and is used to identify the device so that it can send and receive data. All connections to the Internet require a global IP address. It is therefore necessary to provide some means of acquiring global IP settings for your account. For bridged connections, the global IP settings must reside in a TCP/IP enabled device on the LAN side of the bridge, such as a computer, a server or a firewall device. The IP address can be assigned in a number of ways. Your network service provider will give you instructions about any additional connection software or NIC configuration that may be required. 2 DSL-302G ADSL Modem User’s Guide Modem Features The DSL-302G ADSL Ethernet Modem utilizes the latest ADSL enhancements to provide a reliable Internet portal suitable for most small to medium sized offices. DSL-302G advantages include: • Network Address Translation (NAT) allows simultaneous connection of two computers via USB and Ethernet ports • Data rates up to 8 Mbps for downstream and 640 Kbps for upstream • Friendly web-based graphical user interface for configuration and management • Supports up to eight simultaneous virtual connections for a single ADSL account • Supports T1.413 issue 2, G.dmt and G.lite standards • Auto-handshake and rate adaptation for different ADSL flavors • Widest range of DSLAM interoperability • Supports bridged Ethernet over ATM (RFC 2684) • Built-in MIBs for SNMP management • Upgradeable firmware through TFTP Packing List Open the shipping carton and carefully remove all items. In addition to this User's Guide, ascertain that you have the following: One DSL-302G ADSL Ethernet Modem One CD-ROM with this User’s Guide, USB Device Driver and Ethernet Diagnostic Utility One twisted-pair telephone cable used for ADSL connection One straight-through Ethernet cable One AC power adapter One USB Cable 3 DSL-302G ADSL Modem User’s Guide Front Panel & LED Indicators Place the Modem in a location where the LED indicators can be easily viewed. Front Panel Display with LED Indicators The LED Indicators read as follows: Power Steady green light indicates the unit is powered on. Status Blinking green indicates normal operation. ADSL: Link/Act Steady green light indicates a valid ADSL connection. This will light after the ADSL negotiation process has been settled. Blinking green light indicates an active WAN session. Ethernet: Link/ Act Steady green light indicates a valid Ethernet connection. Blinking green indicates an active Ethernet session. USB: Link/ Act Steady green light indicates a valid USB connection. Blinking green indicates an active USB session. Rear Panel All cable connections to the Modem are made at the rear panel. The factory-reset button is located here as well. ADSL port, connect ADSL cable here Ethernet port, connect Ethernet cable here Factory Reset button USB port, connect USB cable here Power cord connects here Rear Panel Cable and Power Connections 4 DSL-302G ADSL Modem User’s Guide 2 Connecting the Modem In this chapter you will learn about the various physical connections you will need to make in order to use the Modem. When selecting the location for the Modem, allow ample room to access the connections on the rear panel. Allow some space above the Modem for ventilation to avoid problems with overheating. For convenience, try to place the Modem near your computer so you can monitor the LED indicators. Note The LED indicators can also be viewed on the desktop of your computer if you install the Ethernet Diagnostic Utility software shipped with the device. Connecting the ADSL Line Use the twisted-pair ADSL cable (standard telephone cable) included with the Modem to connect it to your telephone line. Simply plug one end of the cable into the ADSL port (RJ-11 receptacle) on the rear panel of the Modem and insert the other end into the wall jack. Computer to Modem Connection PC to Modem Connection You can connect the Modem directly to a 10/100BASE-TX Ethernet adapter card (NIC) installed on a PC using the Ethernet cable provided as shown in this diagram. 5 DSL-302G ADSL Modem User’s Guide Connecting the Ethernet LAN to Modem The Modem may be connected to any 10/100BASE-TX Ethernet LAN. Any connection to an Ethernet concentrating device such as a switch or hub must operate at a speed of 10/100 Mbps only. When connecting the Modem to any Ethernet device that is capable of operating at speeds higher than 10Mbps, be sure that the device has auto-negotiation (NWay) enabled for the connecting port. Use standard twisted-pair cable with RJ-45 connectors. The RJ-45 port on the Modem is a crossed port (MDI-X). Follow standard Ethernet guidelines when deciding what type of cable to use to make this connection. When connecting the Modem directly to a PC or server use a normal straight-through cable. You should use a crossed cable when connecting the Modem to a normal (MDI-X) port on a switch or hub. Use a normal straight-through cable when connecting it to an uplink (MDI-II) port on a hub or switch. The Ethernet Link LED indicator will indicate a valid connection. The rules governing Ethernet cable lengths apply to the LAN to Modem connection. Be sure that the cable connecting the LAN to the Modem does not exceed 100 meters. Powering up the Modem To power on the device: 1. Insert the AC Power Adapter cord into the power receptacle located on the back of the Modem and plug the adapter into a nearby power source. 2. You should see the Power LED indicator light up and remain lit. WARNING Using a power supply with a different voltage rating than the one included with the DSL-302G will cause damage and void the warranty for this product. USB Connection The USB port on the DSL-302G can be connected to a single computer. A software driver must first be installed on the computer to use the USB interface. The driver is installed using the automatic installation software found on the Installation CD. Installing this software will create a new network connection with an IP address of 10.1.1.2 on the computer. This is the IP address used to access the management software through the USB connection. See Chapter 5 for instructions on installing the the USB driver on a computer running a Windows operating system. 6 DSL-302G ADSL Modem User’s Guide 3 Detailed Set Up Instructions The easiest way to set up the DSL-302G ADSL Modem is to simply insert the Installation CD into the CD-ROM drive of a computer you intend to use with the device, launch the automatic installation software and follow the instructions as they are presented. You will need some information from your ISP or ADSL service provider about your account, and some information about your computer or LAN. For your convenience, a table listing the required information is presented below. It is recommended that you record this information in the table provided, or some other secure place, in case Installation Overview The steps listed here are a summary of the procedure used to access the management software and configure the Modem without using the automatic installation software. 1. Install the USB driver and Ethernet diagnostic utility on your computer. 2. Restart your computer. 3. Connect the modem to your computer and the ADSL telephone line and power it on as described in the previous section. 4. If you are using the USB port to connect the modem to your computer, the USB driver you installed above will now find the modem and establish the connection. Once the connection is made, the USB connection will appear in the Windows Control Panel as an Ethernet NIC. 5. If you are using the Ethernet port to connect the modem to your computer, the connection will now be active. 6. Change the IP settings of your computer so you can access the web-based configuration software through the Ethernet port or the USB port. The factory default LAN IP settings for the Modem are: Ethernet port: IP address = 10.1.1.1 subnet mask = 255.0.0.0 USB port: IP address = 10.1.1.2 subnet mask = 255.0.0.0 7. Configure your modem using information given to you by your service provider. The modem uses this information to establish the ADSL connection to the WAN. 8. Save the settings and restart your modem. Before You Start Please read and make sure you understand all the prerequisites for proper installation of your new Modem. Have all the necessary information and equipment on hand before beginning the installation. Note If you will use the DSL-302G’s USB port to connect to your computer, do not connect the USB cable to the modem until you have finished all of the steps to install the USB driver, and your computer has restarted. 7 DSL-302G ADSL Modem User’s Guide Installation Requirements Information you will need from your ADSL service provider: Username This is the Username that is used to log on to your ADSL service provider’s network. It is commonly in the form − [email protected]. Password This is the Password that is used, in conjunction with the Username above, to log on to your ADSL service provider’s network. Connection Protocol This is the method that your ADSL service provider uses to send and receive data between the Internet and your computer. Your DSL-302G supports PPPoE LLC, PPPoE VC-Mux, PPPoA LLC, and PPPoA VCMux, Bridged Ethernet and IPoA. Security Protocol This is the method your ADSL service provider will use to verify your Username and Password when you log on to the remote network. Your DSL-302G supports the PAP and CHAP protocols. VPI This is the Virtual Path Identifier (VPI). It is used in conjunction with the Virtual Channel Identifier (VCI) below, to identify the data path between your ADSL service provider’s network and your computer. VCI This is the Virtual Channel Identifier (VCI). It is used in conjunction with the VPI above to identify the data path between your ADSL service provider’s network and your computer. Record your info here. Information you will need about your DSL-302G ADSL modem: Modem Username This is the Username you will be prompted to enter when you access the DSL-302G’s configuration screens using a Web browser. The default Username is admin. Modem Password This is the Password you will be prompted to enter when you access the DSL-302G’s configuration screens using a Web browser. The default Password is admin. LAN IP address for the DSL-302G This is the IP address you will enter into the Address field of your Web browser to access the DSL-302G’s configuration screens using a Web Browser. The default for the Ethernet interface is 10.1.1.1 and for the USB interface it is 10.1.1.2. LAN Subnet Mask for the DSL-302G This is the subnet mask used by the DSL-302G, and will be used throughout your LAN. The default subnet mask is 255.0.0.0. 8 Record your info here. DSL-302G ADSL Modem User’s Guide Information you will need about your LAN or computer: Ethernet NIC If your computer has an Ethernet NIC, you can connect the DSL-302G to this Ethernet port using an Ethernet cable. You can also use the Ethernet port on the DSL-302G to connect to other Ethernet devices, such as a Wireless Access Point. USB port If your computer has an available USB port, you can connect the DSL-302G to this USB port using a USB cable. DHCP Client status Your DSL-302G ADSL modem is configured, by default, to be a DHCP server. This means that it can assign an IP address, subnet mask, and a default gateway address to computers on your LAN. The range of IP addresses the DSL-302G will assign are from 10.1.1.3 to 10.1.1.34. Your computer (or computers) needs to be configured to Obtain an IP address automatically (that is, they need to be configured as DHCP clients.) Record your info here. It is recommended that your collect and record this information here, or in some other secure place, in case you have to re-configure your ADSL connection in the future. Once you have the above information, you are ready to setup and configure your DSL-302G ADSL modem. Configuring IP Settings on Your Computer In order to configure your system to receive IP settings from the Modem it must first have the TCP/IP protocol installed. If you have an Ethernet port on your computer, it probably already has TCP/IP protocol installed. If you are using Windows XP the TCP/IP is enabled by default for standard installations. Below is an illustrated example of how to configure a Windows XP system to automatically obtain IP settings from the Modem. Following this example is a step-by-step description of the procedures used on the other Windows operating systems to first check if the TCP/IP protocol has been installed, if it is not instruction are provided for installing it. Once the protocol has been installed you can configure the system to receive IP settings from the Modem. For computers running non-Windows operating systems, follow the instructions for your OS that configure the system to receive an IP address from the Modem, that is, configure the system to be a DHCP client. Note If you are using this Modem to provide Internet access for more than one computer, you can use these instructions later to change the IP settings for the other computers. However you cannot use the same IP address since every computer must have its own IP address that is unique on the local network. 9 DSL-302G ADSL Modem User’s Guide Configure Windows XP for DHCP Use the following steps to configure a computer running Windows XP to be a DHCP client. 1. 2. From the Start menu on your desktop, go to click on Control Panel. In the Control Panel folder, click on Network and Internet Connections. 10 DSL-302G ADSL Modem User’s Guide 3. 4. In the Network and Internet Connections folder, click on Network Connections. In the Network Connections folder, highlight the Local Area Connection icon by clicking on it once. A new option is revealed under Network Tabs in the left side panel. 11 DSL-302G ADSL Modem User’s Guide 5. Click on Change settings of the connection under Network Tabs. 6. In the General Tab of the Local Area Connection Properties menu, highlight Internet Protocol (TCP/IP) under “This connection uses the following items:” by clicking on it once. Click on the Properties button. 12 DSL-302G ADSL Modem User’s Guide 7. Select “Obtain an IP address automatically” by clicking once in the circle. Click the OK button. Your computer is now ready to use the Modem’s DHCP server. Windows 2000 First, check for the IP protocol and, if necessary, install it: 1. 2. 3. 4. 5. 6. 7. In the Windows task bar, click the Start button, point to Settings, and then click Control Panel. Double-click the Network and Dial-up Connections icon. In the Network and Dial-up Connections window, right-click the Local Area Connection icon, and then select Properties. The Local Area Connection Properties dialog box displays with a list of currently installed network components. If the list includes Internet Protocol (TCP/IP), then the protocol has already been enabled, skip ahead to Configure Windows 2000 for DHCP. If Internet Protocol (TCP/IP) does not display as an installed component, click Install. In the Select Network Component Type dialog box, select Protocol, and then click Add. Select Internet Protocol (TCP/IP) in the Network Protocols list, and then click OK. 8. You may be prompted to install files from your Windows 2000 installation CD or other media. Follow the instructions to install the files. 9. If prompted, click OK to restart your computer with the new settings. Configure Windows 2000 for DHCP 1. 2. In the Control Panel, double-click the Network and Dial-up Connections icon. In Network and Dial-up Connections window, right-click the Local Area Connection icon, and then select Properties. 3. In the Local Area Connection Properties dialog box, select Internet Protocol (TCP/IP), and then click Properties. 4. In the Internet Protocol (TCP/IP) Properties dialog box, click the button labeled Obtain an IP address automatically. 5. Double-click OK to confirm and save your changes, and then close the Control Panel. Your computer is now ready to use the Modem’s DHCP server. 13 DSL-302G ADSL Modem User’s Guide Windows ME First, check for the IP protocol and, if necessary, install it: 1. 2. 3. In the Windows task bar, click the Start button, point to Settings, and then click Control Panel. Double-click the Network and Dial-up Connections icon. In the Network and Dial-up Connections window, right-click the Network icon, and then select Properties. 4. The Network Properties dialog box displays with a list of currently installed network components. If the list includes Internet Protocol (TCP/IP), then the protocol has already been enabled. Skip ahead to Configure Windows ME for DHCP. 5. If Internet Protocol (TCP/IP) does not display as an installed component, click Add. 6. In the Select Network Component Type dialog box, select Protocol, and then click Add. 7. Select Microsoft in the Manufacturers box. 8. Select Internet Protocol (TCP/IP) in the Network Protocols list, and then click OK. 9. You may be prompted to install files from your Windows Me installation CD or other media. Follow the instructions to install the files. 10. If prompted, click OK to restart your computer with the new settings. Configure Windows ME for DHCP 1. In the Control Panel, double-click the Network and Dial-up Connections icon. 2. In Network and Dial-up Connections window, right-click the Network icon, and then select Properties. 3. In the Network Properties dialog box, select TCP/IP, and then click Properties. 4. In the TCP/IP Settings dialog box, click the Obtain and IP address automatically option. 5. Double-click OK twice to confirm and save your changes, and then close the Control Panel. Your computer is now ready to use the Modem’s DHCP server. Windows 95, 98 First, check for the IP protocol and, if necessary, install it: 1. In the Windows task bar, click the Start button, point to Settings, and then click Control Panel. Double-click the Network icon. 2. The Network dialog box displays with a list of currently installed network components. If the list includes TCP/IP, and then the protocol has already been enabled, skip to Configure IP Information Windows 95, 98. 3. If TCP/IP does not display as an installed component, click Add. The Select Network Component Type dialog box displays. 4. Select Protocol, and then click Add. The Select Network Protocol dialog box displays. 5. Click on Microsoft in the Manufacturers list box, and then click TCP/IP in the Network Protocols list box. 6. Click OK to return to the Network dialog box, and then click OK again. You may be prompted to install files from your Windows 95/98 installation CD. Follow the instructions to install the files. 7. Click OK to restart the PC and complete the TCP/IP installation. 14 DSL-302G ADSL Modem User’s Guide Configure Windows 95, 98 for DHCP 1. Open the Control Panel window, and then click the Network icon. 2. Select the network component labeled TCP/IP, and then click Properties. 3. If you have multiple TCP/IP listings, select the listing associated with your network card or adapter. 4. In the TCP/IP Properties dialog box, click the IP Address tab. 5. Click the Obtain an IP address automatically option. 6. Double-click OK to confirm and save your changes. You will be prompted to restart Windows. 7. Click Yes. When it has restarted your computer is ready to use the Modem’s DHCP server. Windows NT 4.0 workstations: First, check for the IP protocol and, if necessary, install it: 1. 2. 3. 4. 5. 6. 7. 8. In the Windows NT task bar, click the Start button, point to Settings, and then click Control Panel. In the Control Panel window, double click the Network icon. In the Network dialog box, click the Protocols tab. The Protocols tab displays a list of currently installed network protocols. If the list includes TCP/IP, then the protocol has already been enabled. Skip to “Configure IP Information” If TCP/IP does not display as an installed component, click Add. In the Select Network Protocol dialog box, select TCP/IP, and then click OK. You may be prompted to install files from your Windows NT installation CD or other media. Follow the instructions to install the files. After all files are installed, a window displays to inform you that a TCP/IP service called DHCP can be set up to dynamically assign IP information. Click Yes to continue, and then click OK if prompted to restart your computer. Configure Windows NT 4.0 for DHCP 1. Open the Control Panel window, and then double-click the Network icon. 2. In the Network dialog box, click the Protocols tab. 3. In the Protocols tab, select TCP/IP, and then click Properties. 4. In the Microsoft TCP/IP Properties dialog box, click the Obtain an IP address automatically option. 5. Click OK twice to confirm and save your changes, and then close the Control Panel. Your computer is now ready to use the Modem’s DHCP server. 15 DSL-302G ADSL Modem User’s Guide Accessing the Modem’s Web Configuration Manager Once the computer has IP settings that allow it to access the web-based configuration software, you can change the settings to enable the Modem to connect to the Internet. If the browser software on the computer you are using is configured to use a proxy server for Internet access, it is necessary to first disable the proxy connection. Note Be sure that the web browser on your computer is not configured to use a proxy server in the Internet settings. In Windows Internet Explorer, you can check if a proxy server is enabled using the following procedure: 1. In Windows, click on the START button, go to Settings and choose Control Panel. 2. In the Control Panel window, double-click on the Internet Options icon. 3. Click the Connections tab and click on the LAN Settings button. 4. Verify that the “Use proxy server” option is NOT checked. If it is checked, click in the checked box to deselect the option and click OK. Alternatively you can access this Internet Options menu using the Tools pull down menu in Internet Explorer. To use the web-based management software, launch your web browser software and use the LAN IP address of the Modem to access the management software. The default LAN IP address of the Modem is used in the Address bar of your web browser window. If you are using an Ethernet NIC to connect your computer to the modem, type in http:// followed by the default IP address, 10.1.1.1 in the address bar of the browser. The URL in the address bar should read: http://10.1.1.1 If you are using a USB port to connect your computer to the modem, type in http:// followed by the default IP address, 10.1.1.2 in the address bar of the browser. The URL in the address bar should read: http://10.1.1.2 You can also use the DSL 302G USB Config link that the USB Driver installation program will put on your computer’s desktop. A new window appears prompting you for a user name and password needed to gain access the web configuration manager. Use the default User Name: admin and Password: admin for the first time set up. You can change the password once you have established the ADSL connection. The user name and password allows any computer on the same subnet as the Modem to access the web configuration manger. This password can also be used to Telnet to the device through the Ethernet or the Internet interfaces. To change this password, see the next chapter. Note Do not confuse the user name and password used to access the web-based manager with the ADSL account user name and password needed for PPP connections to access the ADSL or network service provider’s network. 16 DSL-302G ADSL Modem User’s Guide The first web page you will see when you successfully login is the Quick Configuration page. This page can be used to establish the ADSL connection. Web-based Manager – First Time Log On Use the Quick Configuration menu to change the Modem’s configuration settings as instructed by your ISP. You will then need to save or the settings to the flash memory and reboot the Modem. IMPORTANT If you are using IPoA or a bridged Ethernet connection (RFC 1483) you cannot use the Quick Configuration menu to establish the connection. Please read the next chapter for instructions for using IPoA and bridged Ethernet connections. 17 DSL-302G ADSL Modem User’s Guide Configure the Internet Connection (ADSL Service Connection) For ADSL connections using either a PPPoE or PPPoA type of connection, all the settings necessary to establish the connection to your service provider’s network and ultimately to the Internet can be configured in the Quick Configuration menu of the web manager. Most users will use the Quick Configuration menu. If you are instructed to configure the device for a bridged connection or if you are setting up an IPoA connection, follow the instructions beginning on the next page. Configure PPPoA and PPPoE Connections For ADSL accounts using PPPoA or PPPoE connections, follow the steps below to establish the Internet connection: 1. Choose the Connection Type. Select PPPoA LLC, PPPoA VC-Mux, PPPoE VC-Mux, PPPoE LLC, from the pulldown menu. 2. If necessary, change the VPI/VCI values. Many users will use the default values VPI: 8 and VCI: 35. 3. Type in the Username or account number used to access the service provider’s network. 4. Type in the Password for your account used to access the service provider’s network. Quick Configuration Save & Reboot When you have defined the Quick Configuration settings, click the Save & Reboot button to save the settings in temporary and reboot the system. The Modem will negotiate the ADSL connection automatically upon rebooting. This will normally take a few seconds. When the ADSL connection has been successfully established, the ADSL Link LED indicator will light steady green. If the ADSL Link indicator does not light after a minute or so access the web configuration manager and double check the settings. 18 DSL-302G ADSL Modem User’s Guide Configuring the Modem for a Bridged or an IPoA Connection Bridge Mode When your DSL-302G ADSL modem operates in Bridge mode (EoA), it only handles the transfer of data between your ADSL service provider and your computer. Your computer will need to have software installed that will allow it to “accept” the ADSL connection, and your ADSL service provider will need to provide you with this software, along with instructions about how to install the software and configure your computer for the ADSL connection. IPoA Mode If your ADSL service provider is using the Internet Protocol over ATM (IPoA), you will need to configure your DSL-302G modem to use this protocol. The configuration steps are nearly the same as the steps required to configure the modem for Bridge mode. Follow the steps below, and watch for the IPoA heading. Configuring the DSL-302G for a Bridged (EoA) or IPoA ADSL Connection The DSL-302G ADSL modem is shipped from the factory with PPPoA as the default operating mode. To ensure that the DSL-302G configuration is set to it’s factory default settings, you should reboot the modem using the Reboot from Default Configuration option. Click on the Admin folder and then click the Save & Reboot link. This will open the Save & Reboot menu, as shown below. Choose Reboot from Default Configuration from the Reboot Mode: drop-down menu and then click the Reboot button. Once the modem reboots, click the Refresh button on your Web browser. When the modem’s configuration manager reappears, open the Bridging folder and click on the ATM VCC link. This will open the ATM VC Configuration menu, as shown below. 19 DSL-302G ADSL Modem User’s Guide Verify that the VPI/VCI and Mux Type (VC-Mux or LLC) settings match those provided to you by your ADSL service provider. If you need to change these settings, click on the pencil icon. This will open the ATM VC Interface – Modify menu, as shown below. Enter the VPI/VCI and Mux Type settings as provided by your ADSL service provider. Most users will use LLC Mux Type. Click the Submit button to make the changes current. A screen will appear to confirm the change in the ATM VC interface. Next, open the WAN folder and click on the PPP link. This will open the Point to Point Protocol (PPP) Configuration menu, as shown below. 20 DSL-302G ADSL Modem User’s Guide Click on the Trash Can icon to delete the current PPP configuration, then click on the Submit button to make the change current. Configuring the Modem for Bridge Mode (EoA) To configure the DSL-302G ADSL modem to operate in Bridge mode (Ethernet over ATM (EoA)), follow these instructions. Open the WAN folder, and then click on the EOA link. This will open the RFC1483/Ethernet over ATM (EoA) Config menu, as shown below. Click the Add button to open the EOA Interface – Add menu, as shown below. 21 DSL-302G ADSL Modem User’s Guide Simply click the Submit button. Close the EOA Interface – Add menu, and click the Refresh button on the RFC1483/Ethernet over ATM (EoA) Config menu. This will now display the new protocol assignment, as shown below. Next, you need to disable Network Address Translation (NAT) on the modem. Open the WAN folder (if it is not already open) and click on the NAT link. This will open the Network Address Translation (NAT) Configuration menu, as shown below. 22 DSL-302G ADSL Modem User’s Guide Click the Disable click-box, and then click the Submit button to make the change current. Now open the Bridging folder and click on the Bridging link. This will open the Bridge Configuration menu, as shown below. Select eoa-0 from the drop-down menu opposite the Add button. Next, click on the Add button. confirmation screen will appear briefly to confirm the addition of the new bridge configuration. A Finally, you will need to open the Admin folder and then click on the Save & Reboot link to open the Save & Reboot menu, and finally click the Save button to enter the settings into the modem’s permanent memory. Now you can setup your computer to use the IP address assigned to you by your ADSL service provider. Your ADSL service provider should give you the necessary software and instructions to setup your computer. 23 DSL-302G ADSL Modem User’s Guide Configuring the Modem for IPoA Mode To configure the DSL-302G ADSL modem to operate in Internet Protocol over ATM (IPoA) mode, follow these instructions. Open the WAN folder and then click on the IPOA link. Configuration menu, as shown below. This will open the IP over ATM (IPoA) Click the Add button to open the IPoA Interface – Add menu, as shown below. Enter the IPoA configuration information supplied to you by your ADSL service provider. In the example above, the ADSL service provider assigned an IP address of 203.1.1.2, a netmask of 255.255.255.252, and a gateway IP address of 203.1.1.1. Click the Submit button to make the change current. A confirmation screen will appear to confirm the changes. Close the IPoA Interface – Add menu. Now open the WAN folder (if it is not already open) and click the IPoA link. The newly created IPoA interface will now be displayed, as shown below. 24 DSL-302G ADSL Modem User’s Guide Now, click on the Map button. This will open the IPoA Interface – Map menu, as shown below. Simply click the Add button. You will see the No Low I/F ! entry change to aal5-0, as shown below. Close the IPoA Interface – Map menu. When the configuration manager reappears, click the Refresh button to update the information on the IP over ATM (IPoA) Configuration screen. It should look something like this: 25 DSL-302G ADSL Modem User’s Guide Next, you need to confirm that Network Address Translation (NAT) is enabled on the modem. Open the WAN folder (if it is not already open) and click on the NAT link. This will open the Network Address Translation (NAT) Configuration menu, as shown below. Click the Enable click-box, and then click the Submit button to make the change current. Finally, you will need to open the Admin folder and then click on the Save & Reboot link to open the Save & Reboot menu, and finally click the Save button to enter the settings into the modem’s permanent memory. You will need to set your computer to Obtain IP address automatically to connect to your ADSL service provider’s network and the Internet. Instructions about how to do this are included earlier in this DSL-302G User’s Guide, if you do not know how. 26 DSL-302G ADSL Modem User’s Guide 4 Web-based Configuration This chapter describes how to use the embedded web-based management software to configure the Modem for additional PVC connection profiles, to change the LAN IP address, to change the global WAN IP address and to perform other management functions. Manager Interface Layout The management software used for the Modem initially presents the Quick Configuration menu shown below when you first log in. On the left side you see folders and hyperlinks. The folders contain hyperlinks used to access configuration and management menus. The LAN folder is used for assigning LAN IP settings to the Ethernet and USB interfaces. The WAN folder is used to configure settings that allow the Modem to operate on the service provider’s network. If you have a bridged Ethernet or IPoA connection, find the EOA and IPOA hyperlinks in the WAN folder to configure the settings for these connection types. The Bridging folder contains information regarding the virtual circuits and protocols. If you are using the Modem for multiple virtual connections, this menu is used to configure these additional virtual connections. The last folder, Admin, is used for administration and diagnostics procedures. Modem Web-based Quick Configuration Manager GUI 27 DSL-302G ADSL Modem User’s Guide Note If you do not want the page to automatically refresh, choose “No Refresh” from the Refresh Rate: pull-down menu. Commonly Used Buttons The following buttons are used throughout the web management application. Stores in temporary system memory any changes you have made on the current page. Redisplays the current page with updated statistics or settings. On pages that display accumulated statistics, this button resets the statistics to their initial values. Launches the online help for the current topic in a separate browser window. Help is available from the main topic pages. Buttons Used in the Configuration Manager Quick Configuration The Quick Configuration displays the settings you are most likely to need to change when you first set up the Modem. These settings are explained briefly below: Refresh Rate Select the time interval from the drop-down menu. The screen will be updated (refreshed) at this interval. If you do not want the page to automatically refresh, choose No Refresh. Connection Type Select PPPoA LLC, PPPoA VC-Mux, PPPoE VC-Mux, PPPoE LLC, from the pull-down menu. VPI and VCI These settings determine the unique data path your modem uses to communicate with your ISP. Do not change these unless you have been instructed to do so by your ISP. See ATM VC Configuration for more information on these settings. Username and Password Enter the username and password you use to log in to your ISP. Note: this is not the same as the User Name and Password you used to log in to Web Configuration Manager. 28 DSL-302G ADSL Modem User’s Guide System View The System View read-only table on the displays a summary of various system settings and functions as described in the table below. Red colored text headings in this display are hyperlinked to a relavent menu. System View Display Device Displays the basic information about the device hardware and software versions, the system uptime, and the operating mode. DSL Displays the operational status and performance statistics for the DSL line. WAN Interface Displays the names and settings for the device WAN interfaces that communicate with your ISP via DSL, such as a PPP, EOA, or IPoA interface. Most users will use a single connection labeled ppp-0. Multiple softwaredefined interfaces may be configured to use the DSL connection. Click on the interface names to view the configuration menus for these interfaces. Each interface should display a lower interface name such as aal-5. Click on the lower interface name to view or change the ATM VC settings that this interface uses. To change the system time, click the Modify button (see next page). 29 DSL-302G ADSL Modem User’s Guide System Time Synchronize to local PC time 1. Click Modify button on the System View (HOME menu) page to open the System Parameters configuration. 2. Enter the current Date and Time 3. Click Submit. A page displays to confirm your change. 4. Click the Admin tab, and then click Save & Reboot in the task bar. 5. Click Save to save your changes to permanent memory. System - Modify Changing the LAN IP Settings The LAN IP address identifies the LAN port (eth-0) as a node on your network; that is, its LAN IP address must be in the same subnet as the computers on your LAN. You can change the default LAN IP address and Net Mask for both the Ethernet and the USB port to suit the IP address arrangement you want to set up for your LAN. Click the LAN hyperlink to view the LAN Configuration menu. LAN Configuration 30 DSL-302G ADSL Modem User’s Guide To change the Modem Ethernet IP address, click the Refresh button and type in the new settings as described below. System Mode Read-only, lists the current mode of operation for the device. LAN IP Address The IP address your computers use to identify the device’s LAN port. Note that the public IP address assigned to you by your ISP is not your LAN IP address. The public IP address identifies the WAN (ADSL) port on your Modem to the Internet. Type in the IP address for the Ethernet LAN interface. Default = 10.1.1.1 LAN Network Mask The LAN Network mask identifies which parts of the LAN IP Address refer to your network as a whole and which parts refer specifically to nodes on the network. Type in the Subnet Mask for the Ethernet LAN IP interface. Default = 255.0.0.0 USB IP Address The IP address your computers use to identify the device’s USB port. Note that the public IP address assigned to you by your ISP is not your USB IP address. The public IP address identifies the WAN (ADSL) port on your Modem to the Internet. Type in the IP address for the USB interface. Default = 10.1.1.2 USB Network Mask The USB Network mask identifies which parts of the USB IP Address refer to your network as a whole and which parts refer specifically to nodes on the network. Type in the Subnet Mask for the USB interface. Default = 255.0.0.0 Click the Submit button to save the settings in temporary memory. If you are changing the IP address you will need to login again to access the web manager. If you are getting IP settings from DHCP, the new IP settings will be applied after you submit, commit and reboot. You must Commit & Reboot the device to save your changes to permanent memory. DHCP Modes DHCP services can be employed in one of three different ways; it can provide DHCP services, it can receive DHCP services, or it can relay DHCP service. By default the device is configured to act as a DHCP server on the Ethernet LAN. In this case it will supply IP settings to hosts that are configured to receive IP settings from a DHCP server. The device may also be configured to relay IP settings from your ISP’s DHCP server. In this case, you will want to configure the client hosts on your LAN to automatically obtain IP settings. Finally the Modem can perform no DHCP function at all. In this case, it will need to be either manually assigned IP settings or receive them from a DHCP server on your LAN or from the ISP (see previous section). 31 DSL-302G ADSL Modem User’s Guide DHCP Mode Configuration Choose one the options below from the DHCP Mode: drop-down menu. DHCP Server This is the default mode for the Modem. In this mode it provides DHCP services to properly configured hosts on the Ethernet LAN. DHCP Relay In this mode the Modem is an intermediary device or relay agent between a DHCP server owned by the ISP and host systems on your LAN. none In this mode the device does deliver or relay any DHCP services. If you choose this option and are operating in Modem mode you will need to supply IP settings to the device manually (see previous section). Click the Submit button to save the settings in temporary memory. When you are done making changes to the configuration settings, open the Commit & Reboot menu and click the Commit button to save your changes to permanent memory. DHCP Server In order to use more than one DHCP server, it will be necessary to define one or two sets of parameters for each IP address pool. First use the DHCP Server menu to define new DHCP server IP address pool settings. All additional DHCP servers must be added using the DHCP Server menu. To modify an existing DHCP Pool setting, click the pencil icon ( ) for that set. When you choose to add a new set, a new menu appears (see Additional DHCP Server). To delete an existing DHCP Pool setting, click the trashcan ( ) for that set. To check the detailed DHCP server setting information, click ( ) for that set. DHCP Server Configuration Menu 32 DSL-302G ADSL Modem User’s Guide Adding to the DHCP Server Pool Click Add, the DHCP Server Pool – Add page will be displayed, as below. DHCP Server – Add Parameters To Add DHCP server parameters define the following: Start IP Address Type in the base address for the IP pool of unassigned IP addresses. End IP Address Type in the last address of the contiguous IP address range to be used by the Modem for DHCP function. Mac Address A MAC address is the series ID unique for each device on a network. Use this field only if you want to assign a specific IP address to the computer that uses this MAC address. If you type a MAC address here, you must have specified the same IP address in both the Start IP Address and End IP Address fields. NetMask Type in a subnet mask IP address. Domain Name Enter a domain name for the network group or leave blank. Gateway Address Type in the Default Gateway IP Address that will be assigned to and used by the DHCP clients. DNS Address Enter any Internet DNS server IP address available through the WAN connection or use the DNS settings supplied by your service provider. SDNS Address Enter a backup DNS IP address or leave blank. WINS Address Some LANs may require using WINS servers, enter the IP address of the WINS server or leave blank. SWINS Address Enter a back-up WINS server IP address or leave blank. Click the Submit button to save the settings in temporary memory. When you are done making changes to the configuration settings, open the Commit & Reboot menu and click the Commit button to save your changes to permanent memory. 33 DSL-302G ADSL Modem User’s Guide Modify DHCP Server To modify the pool, click . The DHCP Server Pool – Modify page displays as below. DHCP Server Pool – Modify To modify DHCP server parameters define the following: Domain Name Enter a domain name for the network group or leave blank. Status Enable/disable the pool. By default, a pool is enabled when you create it. Excluded IP If you have IP addresses that are designated for fixed use with specific devices, or for some other reason you do not want to make them available to your network, you can exclude them from the pool. Click the Submit button to save the settings in temporary memory. When you are done making changes to the configuration settings, open the Commit & Reboot menu and click the Commit button to save your changes to permanent memory. View current DHCP address assignments When the Modem acts as a DHCP server, it keeps a record of any address currently leased to your computers. To view a table of all current IP address assignments, display the DHCP Server Configuration page, and then click Address Table. A page displays similar to that shown as below. DHCP Server Address Table 34 DSL-302G ADSL Modem User’s Guide To following definitions may be helpful in reading the DHCP Server Address Table: IP Address The address that has been leased from the pool. Netmask The network mask associated with the leased address. Mac Address The unique hardware ID of the computer to which the IP address has been assigned. Pool Start The start IP which identify this pool from which the leased address was assigned. Address Type Static or Dynamic. Static indicates that the IP number has been assigned permanently to the specific hardware device. Dynamic indicates that the number has been leased temporarily for a specified length of time. Time Remaining The amount of time left for the device to use the assigned address. DHCP Relay Some ISPs perform the DHCP server function for their customers’ home/small office networks. In this case, you can configure the Modem as a DHCP relay agent. When a computer on your network requests Internet access, the Modem contacts your ISP to obtain an IP address (and other information), and then forwards that information to the computer. Follow these instructions to configure DHCP relay. First of all, you must configure your PCs to accept DHCP information assigned by a DHCP server. Open the Windows Control Panel and display the computer's Networking properties. Configure the TCP/IP properties to "Obtain an IP address automatically". For detailed instructions, see the section of “Configure the Host PC as a DHCP Client” Next, you specify the IP address of the DHCP server and select the interfaces on your network that will be using the relay service in DHCP Relay configuration menu as below. DHCP Relay Configuration Menu 35 DSL-302G ADSL Modem User’s Guide WAN Configuration Options If you are using the Modem with two or more virtual connections (VC) one way to configure the additional connections is by using the WAN folder menus. You can use the ATM VC configuration menu to first create the additional VC. You may then need to create or modify a WAN interface using the PPP or IPoA configuration menus. DSL Status The DSL Status page displays current information on the DSL line configuration parameters and performance statistics as following. DSL Status Table Refresh Rate Set the rate of automatically refresh the screen Clear Reset all counters to zero DSL Param Display data about the configuration of the DSL line Stats Display DSL line performance statistics Refresh Redisplay the page with newly accumulated values DSL Param The DSL Parameters and Status table displays settings pre-configured by the product manufacturer or your ISP. The Config Data table lists various types of error and defects measurements found on the DSL line. You cannot modify this data. 36 DSL-302G ADSL Modem User’s Guide DSL Parameters and Status DSL Statistics This page displays DSL line performance statistics as below. DSL Line Performance Statistics The DSL Statistics page reports error data relating to the last 15-minute interval, the current day, and the previous day. At the bottom of the page, the Detailed Interval Statistic table displays links you can click on to 37 DSL-302G ADSL Modem User’s Guide display detailed data for each 15-minute interval in the past 24 hours. For example, when you click on 1-4, data displays for the 16 intervals (15-minutes each) that make up the previous 4 hours. DSL Interval Statistics PPP Configuration PPP is configured as a group of software settings associated with the ADSL port. Although the device has only one physical ADSL port, the Modem can be defined with more than one group of PPP settings. Each group of settings is called a PPP interface and is given a name, such as ppp-0, ppp-1, etc. To modify an existing PPP configuration, click the pencil icon ( ) for that set. When you choose to add a new set, a new menu appears. To delete an existing PPP configuration, click the trashcan ( ) for that set. To check the detail PPP configuration information, click ( ) for that set. PPP Configuration You can configure the following settings on the PPP Configuration page: Inactivity TimeOut(mins): - The time in minutes that must elapse before a PPP connection times-out due to inactivity. Ignore WAN to LAN traffic while monitoring activity: - When enabled, data traffic traveling in the incoming direction -- from the WAN port to the LAN port -- will not count as activity on the WAN port; i.e., it will not prevent the connection from being terminated if it has been otherwise inactive for the specified time. 38 DSL-302G ADSL Modem User’s Guide To configure a new PPP interface click the Add button. A new menu appears. PPP Interface - Add The PPP Configuration table displays the following fields: PPP Interface The PPP interface you are configuring. ATM VC The Virtual Circuit over which this PPP data is sent. The VC identifies the physical path the data takes to reach your ISP. The type of Firewall protections that are in effect on the interface. A public interface connects to the Internet (PPP interfaces are typically public). Packets received on a public interface are subject to the most restrictive set of firewall protections defined in the software. Interface Sec Type A private interface connects to your LAN, such as the Ethernet interface. Packets received on a private interface are subject to a less restrictive set of protections, because they originate within the network. The term DMZ (de-militarized zone), in Internet networking terms, refers to computers that are available for both public and in-network accesses (such as a company's public Web server). Protocol The type of PPP protocol used. Your ISP may use PPP-over-Ethernet (PPoE) or PPP-over-ATM (PPoA). Service Name This feature is available with PPoE interfaces but not with PPoA interfaces. The name of the ISP service you are using with this PPP connection. ISPs may offer different types of services (for example, for online gaming or business communications), each requiring a different login and other connection properties. Use DHCP When set to Enable, the device will acquire additional IP information from the ISP's DHCP server. The PPP connection itself acquires the device's IP address, mask, DNS address, and default gateway address. 39 DSL-302G ADSL Modem User’s Guide Use DNS When set to Enable, the DNS address learned through the PPP connection will be distributed to clients of the device's DHCP server. This option is useful only when the Modem is configured to act as a DHCP Server for your LAN. When set to Disable, LAN hosts will use the DNS address(es) pre-configured in the DHCP pool. Default Route Indicates whether the Modem should use the IP address assigned to this connection as its default route. Security Protocol Protocol used to confirm the identity of the subscriber. Login Name The name you use to log in to your ISP each time this PPP connection is established. Login Password The password you use to log in to your ISP each time this PPP connection is established. Click the Submit button to save the settings in temporary memory. When you are done making changes to the configuration settings, open the Commit & Reboot menu and click the Commit button to save your changes to permanent memory. EOA Configuration Ethernet-over-ATM (EOA) is a commonly used protocol for data transfer between Ethernet LANs and wide area networks that use the ATM protocol. Telecommunications industry networks often use the ATM in the within the their primary infrastructure or backbone. Network service providers that sell DSL services often use the EOA protocol for data transfer with their customers’ DSL Modems. EOA is implemented to create a bridged connection between a DSL Modem and the ISP. In a bridged connection, data is shared between the ISP’s network and their customer’s as if the networks were on the same physical LAN. Bridged connections do not use the IP protocol. EOA can also be configured to provide a routed connection with the ISP, which uses the IP protocol to exchange data. This section describes how to configure an Ethernet-over-ATM interface on the Modem, if one is needed to communicate with your ISP. Before creating an EOA interface or modifying the default settings, contact your ISP to determine which type of protocol they use. IMPORTANT Your ISP may use a protocol other than EOA for communication with the Modem, such as the point-to-point protocol (PPP). One type of PPP, named PPP over Ethernet (PPPoE), actually works “on top” of the EOA protocol. The other type, PPP over ATM (PPPoA), does not. However, if your ISP uses either type of PPP, you do not need to separately create an EOA interface. If your service provider has given you PPP software for installation on your computer, follow the instructions given to you by your ISP and do not change the EOA settings. To view your current EOA configuration, log into the Configuration Manager, click the EoA button in the Bridging folder, the EOA Configuration page appears: 40 DSL-302G ADSL Modem User’s Guide EOA Configuration The EoA Configuration table displays the following fields: EoA Interface The EoA interface you are configuring. The type of Firewall protections that are in effect on the interface. A public interface connects to the Internet (PPP interfaces are typically public). Packets received on a public interface are subject to the most restrictive set of firewall protections defined in the software. Interface Sec Type A private interface connects to your LAN, such as the Ethernet interface. Packets received on a private interface are subject to a less restrictive set of protections, because they originate within the network. The term DMZ (de-militarized zone), in Internet networking terms, refers to computers that are available for both public and in-network accesses (such as a company's public Web server). Lower Interface The name of the lower-level interfaces on which EoA interface will operate. The low-level interface names are pre-configured in the software and identify the type of traffic that can be supported, such as data or voice. Internet data services typically use an AAL5-type interface. If you are adding a new VCC Interface, choose the AAL5 set you want to define from the pull-down menu (Add menu only). Conf. IP Address The IP address you want to assign to the interface. Netmask The netmask you want to assign to the interface. Use DHCP When set to Enable, the device will acquire additional IP information from the ISP's DHCP server. The PPP connection itself acquires the device's IP address, mask, DNS address, and default gateway address. Default Route Indicates whether the Modem should use the IP address assigned to this connection as its default route. Gateway IP Address The external IP address that the Modem communicates with via the EoA interface to gain access to the Internet. This is typically an ISP server. To define EOA settings for a new virtual connection, click the Add button. To modify an existing EOA setting, click the pencil icon ( ) for that set. When you choose to add a new set or modify an existing set, a new menu appears (see below). To delete an existing AAL5 setting, click the trashcan ( ) for that set. 41 DSL-302G ADSL Modem User’s Guide EOA Interface – Add To Add or Modify AAL5 Parameters define the following: EOA Interface Lower Interface Conf. IP Address: Net Mask: Use DHCP: This is used (by the Modem) to identify the EOA interface. If you are adding a new EOA interface, choose the EOA set you want to define from the pull-down menu (Add menu only). The name of the lower-level interfaces on which EoA interface will operate. The low-level interface names are pre-configured in the software and identify the type of traffic that can be supported, such as data or voice. Internet data services typically use an AAL5-type interface. If you are adding a new VCC Interface, choose the AAL5 set you want to define from the pull-down menu (Add menu only). The IP address assigned to the interface. If the interface will be used as a simple bridge to your ISP, then you do not need to specify IP information. If you enable DHCP for this interface, then the Configured IP address will serve only as a request to the DHCP server. The actual address that is assigned by the ISP may differ if this address is not available. Some ISPs use static IP settings that are manually assigned to each account. If your service provider instructs you to configure a Static IP Address, type in the global IP Address for this EOA interface. If you are assigned a Static IP Address and Net Mask, type in the Net Mask for this EOA interface. When checked, this setting instructs the device to accept IP information assigned dynamically by your ISP’s DHCP server. If the interface will be used for bridging with your ISP, leave this checkbox unselected. Select Enable or Disable for DHCP service. Click the Submit button to save the settings in temporary memory. When you are done making changes to the configuration settings, open the Commit & Reboot menu and click the Commit button to save your changes to permanent memory. 42 DSL-302G ADSL Modem User’s Guide IPoA Configuration The IPoA table contains a row for each EOA interface currently defined on the device. The table may initially contain no entries. IPoA Configuration The IPoA Configuration table displays the following fields: IPoA Interface The IPoA interface you are configuring. The type of Firewall protections that are in effect on the interface. A public interface connects to the Internet (PPP interfaces are typically public). Packets received on a public interface are subject to the most restrictive set of firewall protections defined in the software. Interface Sec Type A private interface connects to your LAN, such as the Ethernet interface. Packets received on a private interface are subject to a less restrictive set of protections, because they originate within the network. The term DMZ (de-militarized zone), in Internet networking terms, refers to computers that are available for both public and in-network accesses (such as a company's public Web server). RFC 1577 Specifies whether the IPoA protocol to be used complies with the IEFT specification named "RFC 1577 - Classical IP and ARP over ATM" (contact your ISP if unsure). Lower Interface The name of the lower-level interfaces on which IPoA interface will operate. The low-level interface names are pre-configured in the software and identify the type of traffic that can be supported, such as data or voice. Internet data services typically use an AAL5-type interface. If you are adding a new VCC Interface, choose the AAL5 set you want to define from the pull-down menu (Add menu only). Peer IP Address The IP address of the remote computer you will be connecting to via the WAN interface. Conf. IP Address The IP address you want to assign to the interface. Netmask The netmask you want to assign to the interface. Gateway IP Address The external IP address that the Modem communicates with via the IPoA interface to gain access to the Internet. This is typically an ISP server. 43 DSL-302G ADSL Modem User’s Guide To configure a new IPoA interface click the Add button. A new menu appears. Enter information needed for the IPoA connection follwing the steps below. Add IPoA Interface Follow these instructions to add an IPoA interface: 1. 2. 3. 4. 5. 6. 7. 8. 9. 10. 11. 12. 13. Select the next available interface name from the IPoA Interface drop-down list. From the Interface Sec Type drop-down list, select the level of firewall security for the interface: Public, Private, or DMZ. In the Configured IP Address and Net Mask boxes, type the address and mask that you want to assign to the IPoA interface. In the RFC 1577 Click the Yes radio button if the interface complies with the IETF specification RFC 1577 and click the Add button. If you enable the DHCP option (in step 6 below), then the IP address you enter here will serve as a requested address; the remote computer may assign another address if necessary. If the remote your ISP provides a DHCP server, you can click the Enable radio button in the Use DHCP field to have the IP address dynamically assigned from the server. If you want to enable the IP Unnumber function, you can click the Enable radio button. If you want the IPoA interface to serve as the default route for your LAN, click the Enable radio button in the Default Route field. In the Gateway IP Address field, enter the address of the Internet computer to contact to gain initial access to the Internet. Click the Submit button. A confirmation page will display to confirm your changes. Click the Close to return to the IPoA page and view the new interface in the table. Display the Admin tab, and click Save & Reboot in the task bar. Click the Save button to save your changes to permanent memory. 44 DSL-302G ADSL Modem User’s Guide NAT Network Address Translation is a method for disguising the private IP addresses you use on your LAN as the public IP address you use on the Internet. You define NAT rules that specify exactly how and when to translate between public and private IP addresses. NAT is enabled by default. You can enable or disable NAT by selecting the Enable or Disable option in the configuration menu and submitting the settings. NAT Configuration Information displayed in the NAT Configuration is summarized below: UDP Timeout(sec) When two computers communicate via the Internet, a TCP-based communication session is created between them to control the exchange of data packets. The TCP session can be in viewed as being in one of three states, depending on the types of packets being transferred: the establishing state, where the connection is being set up, the active state, where the connection is being used to transfer data, and the closing state, in which the connection is being shut down. When a NAT rule is in effect on a TCP session in the active state, the session will timeout if no packets are received for the time specified in TCP Idle Timeout. When in the closing state, the session will timeout if no packets are received for the time specified in TCP Close Wait. When in the establishing state, the session will timeout if no packets are received for the time specified in TCP Def Timeout. Same as TCP Idle Timeout, but for UDP-based communication sessions. ICMP Timeout(sec) Same as TCP Idle Timeout, but for ICMP-based communication sessions. GRE Timeout(sec) Same as TCP Idle Timeout, but for GRE-based communication sessions. Default Nat Age(sec) Same as TCP Idle Timeout, but for GRE-based communication sessions. NAPT Port Start/End When an NAPT rule is defined, the source ports will be translated to sequential numbers in this range. TCP Idle Timeout(sec) TCP Close Wait(sec) TCP Def Timeout(sec) 45 DSL-302G ADSL Modem User’s Guide NAT Rule Entry To view the NAT Rule setting menu or the NAT Translations entries, select the option from the NAT Options: drop-down menu. To configure NAT Rules, select the NAT Rule Entry option and click the Add button. A new window is displayed: Add NAT Rule From the Rule Flavor drop-down list, select Basic, Filter, NAPT, BIMAP, RDR or PASS. The page redisplays with only the fields that are appropriate for the chosen NAT flavor. Enter information appropriate to the NAT flavor. The information in the various menus is summarized in the table below. Rule ID IF Name Protocol Local Address From The Rule ID determines the order in which rules are invoked (the lowest numbered rule is invoked first, and so on). In some cases, two or more rules may be defined to act on the same set of IP addresses. Be sure to assign the Rule ID so that the higher priority rules are invoked before lower-priority rules. It is recommended that you select rule IDs as multiples of 5 or 10 so that, in the future, you can insert a rule between two existing rules. Once a data packet matches a rule, the data is acted upon according to that rule and is not subjected to higher-numbered rules. Typically, NAT rules are used for communication between your LAN and the Internet. Because the device uses the WAN interface (which may be named ppp-0, eoa-0, or ipoa-0) to connect your LAN to your ISP, it is the usual IF Name selection. This selection specifies which type of Internet communication will be subject to this translation rule. You can select ALL if the rule applies to all data. Or, select TCP, UDP, ICMP, or a number from 1-255 that represents the IANA-specified protocol number. Type the starting IP of the range of private address you want to be translated. You can specify that data from all LAN addresses should be translated by typing 0 (zero) in each From field and 255 in each To field. Or, type the same address in both fields if the rule only applies to one LAN computer. 46 DSL-302G ADSL Modem User’s Guide Local Address To Type the ending IP of the range of private address you want to be translated. Global Address From Type the public IP address assigned to you by your ISP. If you have multiple WAN interfaces, in both the Global Address From and Global Address To fields, type the IP address of the interface to which this rule applies. This rule will not be enforced for data that arrives on other PPP interfaces. Global Address To If you have multiple WAN interfaces and want the rule to be enforced on a range of them, type the starting and ending IP addresses of the range. You can specify a single value by entering that value in both the From and To fields. Specify a range of destination addresses if you want this rule to apply only to Destination outbound traffic to addresses in that range. Address (or If you enter only the network ID portion of the destination address, then the rule addresses)* will apply to outbound traffic to all computers on network. You can specify a single value by entering that value in both the From and To fields. Specify a range of destination ports if you want this rule to apply to any outbound traffic to the types of servers identified by that port number. For example, if you do not specify a destination address, but specify a Destination Port From/To of 21, then this translation will occur on all accesses Destination Port (or by your LAN to all external FTP servers (that is, when one of your LAN ports)* computers communicates with an external FTP server, the source IP address in the packet headers is changed to the public address, replacing the initiator's private IP address). Common port numbers include: 21-FTP (file transfer protocol) server 25-SMTP (simple mail transfer protocol) server 80-HTTP (World Wide Web) server. * Specify both a destination address (or range) and a destination port (or range) if you want this translation rule to apply to accesses to the specified server type at the specified IP address or network. Bridge Configuration The Modem can be configured to act as a bridging device between your LAN and your ISP. Bridges are devices that enable two or more networks to communicate as if they are two segments of the same physical LAN. This section describes how to configure the Modem to operate as a bridge. IMPORTANT Before changing the bridge configuration, check with your ISP to determine the type of connection used to exchange data with their client’s DSL Modems (such as Ethernet bridging). A bridge is a device used to connect two or more networks. A bridge device is able to learn the unique manufacturer-assigned hardware identifier (MAC Address) of each computer or device on either or both networks to which it is connected. It learns that some of the MAC addresses represent computers attached via one of the device's interfaces and other MACs represent computers connected via other interfaces. For example, the MAC addresses of your home computers are learned through (or associated with) the Ethernet port, and the MACs of your ISP's computers are attached via the WAN (DSL) port. It stores the MAC addresses and the interface associated with each MAC in its bridge forwarding table. When the bridge receives a data packet, it compares its destination MAC to the entries in the bridge forwarding table. When the packet's destination MAC address matches one of the entries, it forwards the packet through the interface that connects to the corresponding network. The bridge does not send the data directly to the receiving computer, but broadcasts it to the receiving network, making it available to any node on that network. On the receiving network, the packet is delivered in a form recognized by the network protocol (Ethernet for the LAN side of the Modem) and delivered to its destination. When the bridge does not recognize a packet’s destination MAC address, it broadcasts the packet through all of its interfaces – to both networks. You may need to use the device as a bridge if: 47 DSL-302G ADSL Modem User’s Guide Your ISP uses protocols that require bridging with your LAN. The device can be configured to appear as a bridge when communicating with your ISP, while continuing to provide Modem functionality for your LAN. Your LAN may include computers that communicate using "layer-3" protocols other than the Internet Protocol. These include IPX® and AppleTalk®. In this case, the device can be configured to act as a bridge for packets that use these protocols while continuing to serve as a Modem for IP data. Bridging Configuration To add or change bridge configuration settings, log into the Configuration Manager and click on the Bridging button in the Bridging folder. Bridge Configuration Menu To define Bridge settings for a new virtual connection, click the Add button. To delete an existing setting, click the trashcan ( ) for that set. To enable bridging, you simply specify the device interfaces on which you want to bridge data, and then enable bridging mode by clicking the Enable option. Click the Submit button to save the settings in temporary memory. When you are done making changes to the configuration settings, open the Commit & Reboot menu and click the Commit button to save your changes to permanent memory. Note If you enable bridging on an interface that has already been assigned an IP address, then it is considered IP-enabled and will route (rather than bridge) IP packets received on the interface. The interface will bridge non-IP data it receives, however. You can determine whether the Ethernet (eth-0) and USB (usb-0) interfaces have been assigned IP addresses by displaying the IP Address Table (display the Routing tab, then click IP Addr). These interfaces will display in the table only if they have been assigned IP addresses. You can check whether the eoa-0 interface has been assigned an IP address by displaying the EOA configuration table (display the WAN tab, and then click EOA). If the Config IP Address field is empty and the Use DHCP field contains the word Disable, then no IP address has been assigned. 48 DSL-302G ADSL Modem User’s Guide ATM VC Configuration When computers access the Internet using the Modem, data is exchanged with your network service provider or ISP through a complex network of telephone switches, Internet Modems, servers, and other specialized hardware. These various devices communicate using a common language, or protocol, called Asynchronous Transfer Mode (ATM). On the Wide Area Network (WAN) that connects you to your ISP, the ATM protocol performs functions like those that the Ethernet protocol performs on your LAN. This section describes how to configure the ATM virtual channel connection (VCC). The VC properties define the path the Modem uses to communicate with your ISP over the ATM network. To view your current configuration, log into the Configuration Manager, and then click the ATM VCC button in the Bridging folder. The ATM VCC Configuration page displays, as shown below: ATM VC Configuration Menu Additional Virtual Connections In order to use more than one PVC setting, it will be necessary to define one or two set of parameters for each virtual connection. First use the ATM VC Configuration menu to define new AAL5 settings. All additional PVCs must be added using the ATM VC menu. For connections that do not use PPPoE or PPPoA, it will also be necessary to use the EOA Configuration menu to establish Ethernet over ATM settings for the PVC adding in the ATM VC menu. To define AAL5 settings for a new virtual connection, click the Add button. To modify an existing AAL5 setting, click the pencil icon ( ) for that set. When you choose to add a new set or modify an existing set, a new menu appears (see below). To delete an existing AAL5 setting, click the trashcan ( ) for that set. ATM VCC – Add (or Modify) Parameters 49 DSL-302G ADSL Modem User’s Guide The ATM VC add (or modify) parameters define the following : VC Interface The name of the lower-level interface on which this VC operates. The lowlevel interface names are pre-configured in the software and identify the type of traffic that can be supported, such as data or voice. Internet data services typically use an AAL5-type interface. VPI This setting (together with the VCI and Mux Type) identifies a unique ATM data path for communication between the Modem and service provider. VCI If you are adding a new VCC Interface or changing the existing VCI value, type in the new VCI value. Mux Type Select VC-Mux or LLC from pull-down menu. MAX Proto per AAL5 This setting indicates the number of higher-level interfaces that the VC can support (the higher level interfaces can be PPP, EoA, or IPoA interfaces). The Modem supports up to eight however you must make arrangements your service provider for this additional service. Add or Modify PVC 1. Choose the AAL5 set you want to define from the pull-down menu (Add menu only). 2. Select PVC from the pull-down menu. 3. Type in the new VPI and VCI values for a new VC Interface or changing the existing values. 4. Select VC-Mux or LLC from pull-down menu. 5. Type the number of MAX Proto per AAL5. The default value of VC-Mux mode is 1 and LLC is 2. 6. Click Submit. A page displays to confirm your change. 7. Click Close to return to the System View page. 8. Click the Admin tab, and then click Save & Reboot in the task bar. 9. Click Save to save your changes to permanent memory. Add or Modify SVC 1. Choose the AAL5 set you want to define from the pull-down menu (Add menu only). 2. Select SVC from the pull-down menu. 3. Select E.164 or ATM as ATM Address Type from the pull-down menu. 4. Type the ATM Address in this column. The ATM Address’s length of E.164 is equal to 15 and of ATM is equal to 40. 5. Click Submit. A page displays to confirm your change. 6. Click the Admin tab, and then click Save & Reboot in the task bar. 7. Click Save to save your changes to permanent memory. 50 DSL-302G ADSL Modem User’s Guide The Administration Folder The Administration folder (labeled Admin) in the web mananger contains links to menus used for system maintenance functions including firmware upgarde and username/password configuration. Changing the Manager Password The first time you log into the Web Configuration Manager, use the default user ID and password (admin and admin). The system allows only one user ID and password. Access the User Configuration menu in the Admin folder. Change User Password To change user name and password used for management privileges, log into the Configuration Manager, click on the Add button and change these settings in a new window: User Configuration – Add Menu 51 DSL-302G ADSL Modem User’s Guide User ID: This lists the current User ID (user name). Old Password: Type in the password used with the current User ID. New Password: Type in the new password. Confirm New: Type in the new password a second time for confirmation. Click Submit to save the settings in temporary memory. When you are done making changes to the configuration settings, open the Save & Reboot menu and click Save to save your changes to permanent memory. Save & Reboot Whenever you use the Web Configuration Manager to change system settings, the changes are initially placed in temporary storage (called random access memory or RAM). Your changes are made effective when you submit them, but will be lost if the device is reset or turned off. To save your changes for future use, you can use the commit function. This function saves your changes from RAM to permanent storage (called flash memory). Note When you Submit changes, they are activated immediately, but they are only saved until the device is reset or turned off. You must Commit the changes to saves them permanently. Use the Save & Reboot menu to commit changes to permanent storage. After you have submitted all the configuration changes you want to make for this session, click on the Save & Reboot button in the Admin folder to view the Commit & Reboot page. Save and Reboot To save current configuration settings as they have been submitted click Save. (Disregard the selection in the Reboot Mode drop-down list; it does not affect the commit process.) The changes are now saved to permanent storage (flash memory), and the previous settings are copied to backup storage so that they can be recalled if your new settings do not work properly (see the rebooting instructions below). Reboot the Modem To reboot the device using the Configuration Manger, display the Commit & Reboot page, select the appropriate reboot mode from the drop-down menu, and then click Reboot. IMPORTANT Do not reboot the device using the Reset button on the back panel of the Modem to activate new changes. This button resets the device settings to the manufacturer’s default values. Any custom settings will be lost. 52 DSL-302G ADSL Modem User’s Guide Reboot Options Select the reboot option from the pull-down menu. The options are a described here: A simple reboot. This will put into effect any configuration changes that have been successfully committed to flash memory. Reboot Image Upgrade You can use the image upgrade feature to upload a new software image, or a specific part of the image, to the memory on the ADSL/Ethernet Modem. When the filenames have been entered, click the Upload button to commence loading the firmware file. If the upload is successful, a message informs you that is was successfully loaded and asks you to reboot the device. Go to the Reboot menu and perform and simple reboot. If the firmware does not load, an error message informs you to try the upload again. Check the filenames and attempt to upload again. If the file still will not load, reboot the device and try again. Image (Firmware) Upgrade Upgrade File: Type in the full path and file name of the firmware file to be uploaded. Alternatively you may click the Browse button to search for the file on your system. Alarms The Configuration Manager can be used to view alarms that occur in the system. Alarms, also called traps, are caused by a variety of system events, including connection attempts, resets, and configuration changes. Although you will not typically need to view this information, it may be helpful in working with your ISP to troubleshoot problems you encounter with the device. (Despite their name, not all alarms indicate problems in the functioning of the system.) To display the Alarm page, log into the Configuration Manager, click the Alarm button in the Admin folder. 53 DSL-302G ADSL Modem User’s Guide Alarm/Trap Information Page Listed under Alarm/Trap Information are the time and date of each recorded alarm event, the type of alarm, and a brief statement indicating its cause. To remove all entries from the list, click Clear. To save the system logs into your computer, click Save. New entries will begin accumulating and will display when you click Refresh. Diagnostics The diagnostics feature executes a series of test of your system software and hardware connections. Use this feature when working with your ISP to troubleshoot problems. Diagnostics Table Select the Virtual Circuit and click Submit. A message will appear informing you if the loop test succeeded or failed. The diagnostics utility will run a series of test to check whether the device's connections are up and working. This takes only a few seconds. The program reports whether the test passed or failed. A test may be skipped if the program determines that no suitable interface is configured on which to run the test. 54 DSL-302G ADSL Modem User’s Guide A Technical Specifications GENERAL STANDARDS: ITU G.992.1 (G.dmt) ITU G.994.1 (G.hs) ITU G.992.2 (G.lite) ANSI T1.413 Issue # 2 G.dmt full rate: Downstream up to 8 Mbps Upstream up to 640 Kbps DATA TRANSFER RATE: G.lite: Downstream up to 1.5 Mbps Upstream up to 512 Kbps RJ-11 port ADSL telephone line connection MEDIA INTERFACE EXCHANGE: RJ-45 port for 10/100 BASE-T Ethernet connection USB 1.1 Type B connector to host PHYSICAL AND ENVIRONMENTAL DC INPUTS: 120 VAC to 230 VAC 60Hz 24W POWER ADAPTER: 9 V AC 1.0A POWER CONSUMPTION: 9 Watts Max. OPERATING TEMPERATURE: 0° to 40° C ( 32° to 104° F) HUMIDITY: 5 to 95% (non-condensing) DIMENSIONS: 142 mm x 117 mm x 31 mm WEIGHT: 360 gm EMI: FCC Class B, CE Class B SAFETY: CSA International Mark 55 DSL-302G ADSL Modem User’s Guide B Ethernet Diagnostic Utility The DSL-302G is shipped with optional Ethernet Diagnostic Utility software that can be installed on a computer running Windows. This can be used to monitor and troubleshoot the Modem. It can also be used to change the ADSL account user name and password used for PPPoE and PPPoA connection types. Remember that installing the Ethernet Diagnostics will change the IP settings of the Ethernet interface so it will obtain IP settings from the built-in DHCP server. It is not necessary to install this software to use the Modem. To install the software insert the Installation CD into the CD-ROM drive of your computer and click the Install DSL-302G link on the pop-up menu. Follow the instructions as they are presented. Be sure that the Ethernet Diagnostics option is selected in the Select Components dialog box. When you have installed the software and restarted your computer a new icon should appear on your desktop: Double-click on the DSL-302G Ethernet Diagnostics icon. A login dialog box will ask you to enter your ADSL Account information (user name and password used for the PPP connection). 56 DSL-302G ADSL Modem User’s Guide A successful login brings up the DSL302G Ethernet Diagnostics display. The Ethernet Diagnostics display appears on your desktop. This virtual front panel display can be used to monitor the Modem in near real time. To access the Ethernet Diagnostic Utility click the Setup button, a new dialog box appears: The first tab of the Diagnostic menu presented is the User Details tab. Here you can change your ADSL account user name and password. If you need to change this information just enter the new user name and password, click on the Save button. The new information will be saved and the modem will reboot itself. 57 DSL-302G ADSL Modem User’s Guide The Diagnostic tab can be used to run a basic test for ADSL connectivity. The test is initiated automatically when the tab is displayed. Success or failure of the ADSL connection is indicated in the first box. If the connection is established, an ATM loopback test will proceed automatically. Success or failure of the loopback test is indicated in the second box. If the ADSL connection fails, check to be sure the ADSL cable is connected firmly at both ends and verify that the Modem is configured with the correct VPI/VCI settings. Click the Connection tab to display the ADSL connection settings (VPI/VCI) and connection type used for the Modem. The Connection tab displays basic connection information about the Modem. If necessary this menu can be used to change the basic connection settings. To change the VPI, VCI or Encapsulation method, select to highlight the connection (Channel) you want to change and click the Update button, a new dialog box is displayed. The Connection menu can also be used to configure basic connection settings for additional virtual connections. 58 DSL-302G ADSL Modem User’s Guide Additional virtual connections must be arranged with your ADSL service provider before they are set up. Contact your ADSL service representative for information on how to obtain additional virtual connections. To add and configure basic settings for another Channel (virtual connection), click the Add button. If you are updating an existing connection the Channel number will appear automatically and cannot be changed. If you are using a single connection the Channel will be number 1. If you are adding a new virtual connection, type in a unique Channel number to identify the connection. Numbers 1 - 8 are valid identifiers used for the Channel value. Any new virtual connections must have a VPI/VCI combination that is unique to the device. Use the values assigned by your ADSL service provider. Select the Encapsulation method used for the connection and click the OK button to add the new Channel to the list. The remaining configuration for the new channel must be completed using the web-based management software. See Additional Virtual Connections on page 49 for more information. To check the firmware version, the USB driver version or the hardware version of the Modem you are currently using click the Version tab. 59 DSL-302G ADSL Modem User’s Guide Basic performance information including the ADSL mode or “flavor” used by the device is listed in the ADSL menu tab. The ATM menu tab displays ATM cell data. 60 DSL-302G ADSL Modem User’s Guide The AAL5 menu tab displays still more performance data pertinent to AAL5 (ATM Adaptive Layer 5) transport. The Ethernet menu tab displays data packet statistics for the Ethernet interface. 61 DSL-302G ADSL Modem User’s Guide C Uninstalling the Modem Software To remove the Ethernet Diagnostic Utility and the USB driver from a computer in which this software has been installed it is best to use the associated Uninstall feature located in the D-Link DSL Family Folder. This folder also contains the Ethernet Diagnostic Utility and is located in your Programs folder (unless you specified a different location during the installation of the DSL-302G software). To launch the automatic uninstall program that will remove the DSL-302G Ethernet Diagnostics Utility and the USB device driver: 1. From the Start menu, go to Programs and find the D-Link DSL Family folder. Double-click on Uninstall DSL302G Diagnostic and USB Driver. 2. Follow the instructions as they appear in the dialog boxes that appear on your desktop. First you are asked to confirm that you want to remove the software. Click OK to proceed. 3. It will take a few seconds to remove the various components of the application from your system. After the software has been deleted you will need to restart your computer to fully remove the application. 62 DSL-302G ADSL Modem User’s Guide 4. You may restart the computer immediately or choose to restart later by selecting the appropriate option. Click the Finish button to complete the removal. 63 DSL-302G ADSL Modem User’s Guide D Low Pass Filters Most ADSL clients will be required to install a simple device that prevents the ADSL line from interfering with regular telephone services. These devices are low pass filters and are variously referred to as in-line filters, micro-filters, line splitters or split line filters. They are easy to install and use standard telephone connectors and cable. For some ADSL clients, a telecommunications technician will be sent to the client’s premises to modify the telephone line, usually at the point where the telephone line enters the building. If a technician has divided or split your telephone line into two separate lines - one for regular telephone service and the other for ADSL – then you do not need to use any type of filter device. Follow the instructions given to you by your ADSL service provider, ISP or telephone company about where and how you should connect the Modem to the ADSL line. In-Line Filters Two common styles of low pass filters are shown in this section, the first is an in-line filter and is illustrated in Figure 16 below. In-line filters are easy-to-install, in-line devices, which attach to the telephone cable between the telephone and wall jack. In-line Filter Installation Note Do not install an in-line filter between the Modem and the telephone jack. Inline filters are only intended for use with regular telephones, Fax machines and other regular telephone devices 64 DSL-302G ADSL Modem User’s Guide Split Line Filter If you are instructed to use a split line style filter you must install the device between the Modem and the phone jack. Use standard telephone cable with standard RJ-11 connectors. The splitter has three RJ-11 ports used to connect to the wall jack, the Modem and if desired, a telephone or telephone device. The connection ports are typically labeled as follows: Line - This port connects to the wall jack. ADSL – This port connects to the Modem. Phone – This port connects to a telephone or other telephone device. The diagram below illustrates the proper use of the split line style filter. Split Line Filter Installation 65 DSL-302G ADSL Modem User’s Guide E Mac OSX 10.1 & 10.2 USB Driver Version 1.0.0000E Mac OSX 10.1 & 10.2 USB Driver Introduction............................................................................................... Error! Bookmark not defined. MAC OSX Operating System Version Compatibility .............................. Error! Bookmark not defined. Installation and Connection Establishment Instructions ........................... Error! Bookmark not defined. USB Installation (One time only)...................................................... Error! Bookmark not defined. Ethernet Installation .......................................................................... Error! Bookmark not defined. Uninstall Instructions ................................................................................ Error! Bookmark not defined. Driver and ‘USB Modem’ uninstall .................................................. Error! Bookmark not defined. Removal of previously created Network Interfaces .......................... Error! Bookmark not defined. 1 DSL-302G ADSL Modem User’s Guide Introduction The Drivers are version 1.0.0000E The Installer is version 1.0.2 MAC OSX Operating System Version Compatibility This driver was developed for Operation under Mac OSX 10.1 and Mac OSX 10.2 This driver CANNOT be used with MacOS9 or earlier. This driver CANNOT be used with Mac OSX version 10.0 Unless otherwise noted, these drivers were not developed for any particular version of Mac OSX 10.1 or OSX 10.2 and should work with all available versions. However, please note that the vast majority of the testing of this package has been done with the latest versions available during the latest weeks of its development: Mac OSX 10.1.5 & Mac OSX 10.2 Installation and Connection Establishment Instructions Make sure you have Administrator rights for your account, as you will need to authenticate as such. Unlike Mac OS9, Mac OSX allows several network adapters to be “bound” to TCP/IP at the same time. In order to avoid routing problems, the following instructions assume your computer is stand alone and NOT connected to any network (Ethernet, Airport, etc) at the time of the Installation of the D-Link DSL-302G. Make sure you disconnect any existing network connection (i.e.: unplug the Ethernet cable) and restart the computer before starting the installation USB Installation (One time only) 1. Insert the Driver CD into your Mac CD-ROM, then you can find the icon “DLINK_DSL302G_DRIVER” on your Mac Desktop. 2. Double click on the icon “DLINK_DSL302G_DRIVER”, then on the folder “Driver”, there is the folder “Mac”. 2 DSL-302G ADSL Modem User’s Guide 3. Double click on the icon “Mac” there is the file “302G.sit”. 4. Dragging the file “302G.sit” to your Mac Desktop. 5. Double click on the icon “302G.sit”. ps. There seems to be a problem with OSX 10.1 and/or Alladin Stuff-It expander that sometimes causes the Window contents not to be refreshed automatically after decompression. If you do not see the Installer icon at this point drag the file “302G.sit” to the Trash (this is an intermediate decompression file which is not needed later in the installation anyway) and this will force OSX to refresh the Window contents causing the “Installer” icon to appear. 6. After that, you will find the folder “302G_Mac” on your Mac Desktop. 7. Double click on the icon “302G_Mac”,there is the file “Installer” 8. Double click the “Installer” icon (i.e.: /302G_Mac/Installer). 3 DSL-302G ADSL Modem User’s Guide 9. At the Welcome screen click “Next”, then enter your username and password to Authenticate as a user with Administrative rights and click OK. 4 DSL-302G ADSL Modem User’s Guide 10. A License Agreement will show up, click “Accept” to continue. 11. The installation will proceed to copy all necessary files and prompt for a Restart. Select “Restart Now” and Click “Finish”. If you selected “Restart Later” make sure to RESTART THE COMPUTER before you attempt to use the driver, the installation will not be complete until restarting the system. 12. If you have not done so yet, connect the DSL-302G USB Modem to the computer now using the proper USB Device cable. Connect the DSL line to the USB Modem as well. 13. Open the System Preferences and select the Network Preferences Pane. 5 DSL-302G ADSL Modem User’s Guide 14. A window should pop up indicating “New Port Detected”. It will be a port of type “Ethernet Adaptor” and its interface name “en<N>” will be displayed as well. (i.e.: “Ethernet Adaptor en1”). Click “OK”. 15. From the “Show” pull down menu, select the new port (i.e.: “Ethernet Adaptor en1”). 16. Select the “TCP/IP” tab. From “Configure” menu, select “Using DHCP” or the way you would like to obtain an IP address. 17. Click “Apply Now”. Wait for a minute. 18. Close the System Preferences application. The installation of DSL-302G is done and now you need to configure your ADSL account username and password into the DSL-302G. 19. Open the Internet Explorer. Enter the address http://10.1.1.2/ and a window will pop up asking for User ID and Password. This is the user ID to get into the DSL-302G (this is not your ADSL account details). Enter “admin” (without the quote) into both User ID and Password boxes, and click “OK”. 20. Under “Quick Configuration” page, from “Refresh Rate” pull down menu, select “No Refresh”. 21. Enter your ADSL account details into “Username” (eg. [email protected]) and “Password” boxes. 22. Click “Save & Reboot”. Wait for a minute or so. 23. You might need to refresh the “Quick Configuration” page. Select “Refresh Rate” back to “5 Seconds” and you could check your “Connection Status” at the bottom of the “Quick Configuration” page. If it shows “Connected”, you are now connected to the Internet; else check all the cable connections, username and password again (steps 20 to 22). If you have further enquiry, please contact your ADSL service provider. Ethernet Installation 1. If you prefer to use Ethernet connection (instead of USB), you could simply connect up the Ethernet and DSL lines (not USB) to the DSL-302 modem. 2. In Network Preferences, on “Show” menu, select “Built-in Ethernet”. 3. Under “TCP/IP” tab, on “Configure” menu, select “Using DHCP”. 4. Click “Apply Now”. Wait for a minute. 5. Open the Internet Explorer. Enter the address http://10.1.1.1/ and a window will pop up asking for User ID and Password. Enter “admin” (without the quote) into both User ID and Password boxes, and click “OK”. 6. Follow the steps 20 to 23 given above. 6 DSL-302G ADSL Modem User’s Guide Uninstall Instructions Driver and ‘USB Modem’ uninstall 1. Run the uninstaller application located at “/Applications/D-Link DSL-302G /Uninstall”. 2. Select “Yes, remove the software from my computer.” and click Next. 3. Authenticate entering an administrator Name & password. 7 DSL-302G ADSL Modem User’s Guide 4. Select “Restart Now” and click “Finish”. If you select “Restart later” please remember to do it later, the Uninstallation will not be complete until then. Removal of previously created Network Interfaces 1. Unplug the USB cable from the USB Modem. 2. Open the System Preferences and select the Network Preference Pane. 3. From the “Show” pull down menu select “Active Network Ports”. Highlight the interface you created during driver configuration (i.e., “Ethernet Adaptor en1”) . Click “Delete” and confirm deletion in the following pop up dialogue. 4. OSX may not allow you to completely remove the interface. If that’s the case (the checkbox was removed from the Network interface but the interface itself was not deleted) you may need to Restart the system and then repeat steps 2-3 in order to completely get rid of it. 5. Close the System preferences Application completely by pressing Option-Q (“Apple” key and the ‘Q’ key simultaneously) 8 DSL-302G ADSL Modem User’s Guide F Mac OS 9 Driver Version 4.00.0001E Mac OS 9 Driver Introduction............................................................................................... Error! Bookmark not defined. MAC OS 9 Operating System Version Compatibility .............................. Error! Bookmark not defined. Installation and Connection Establishment Instructions ........................... Error! Bookmark not defined. USB Installation (One time only)...................................................... Error! Bookmark not defined. Ethernet Installation .......................................................................... Error! Bookmark not defined. Uninstall Instructions ................................................................................ Error! Bookmark not defined. Driver and ‘USB Modem’ uninstall .................................................. Error! Bookmark not defined. 9 DSL-302G ADSL Modem User’s Guide Introduction MAC OS Package 1.00.0002Q includes: The Installer is version 1.0.2 The Mac OSX Drivers are version 1.00.0002Q The Mac OS9 Drivers are version 4.00.0001E MAC OS 9 Operating System Version Compatibility This driver was developed for Operation for Mac OS 9.x Installation and Connection Establishment Instructions USB Installation (One time only) 24. Insert the Driver CD into your Mac CD-ROM, then you can find the Icon”DLINK_DSL302G_DRIVER” on your Mac Desktop. 25. Double click on the icon “DLINK_DSL302G_DRIVER”, then on the folder “Driver”, there is the folder “Mac”. 26. Double click on the icon “Mac” there is the file ”302G.SIT”. 10 DSL-302G ADSL Modem User’s Guide 27. Dragging the file ”302G.SIT” to your Mac Desktop. 28. Run the Stuffit Expander application located at “/Applications/ Internet Utilities/ Aladdin Folder/ Stuffit Expander/ Stuffit Expander” by double-clicking on it. 29. Click File/Expand on Stuffit Expander’s task bar, and choose the file “302G.SIT”,then click on the button “Open”. 30. After that, you will find the folder “302G_Mac” on your Mac Desktop. 31. Double click on the icon “302G_Mac”,there is the file “Installer.app”. 32. Double click the Installer icon (i.e. Installer.app). 11 DSL-302G ADSL Modem User’s Guide 33. At the Welcome screen click “Next”. 34. A License Agreement will show up, click “Accept” to continue. 12 DSL-302G ADSL Modem User’s Guide 35. The installation will proceed to copy all necessary files and prompt for a Restart. Select “Restart Now” and Click “Finish”. If you selected “Restart Later” make sure to RESTART THE COMPUTER before you attempt to use the driver, the installation will not be complete until restarting the system. 36. If you have not done so yet, connect the DSL-302G USB Modem to the computer now using the proper USB Device cable. Connect the DSL line to the USB Modem as well. 37. Open the Control Panel: TCP/IP Windows. 38. A window should pop up indicating the TCP/IP settings. 39. From the “Connect via:” pull down menu, select the new port (i.e.: “Ethernet slot 0”). 40. From the “Configure:” pull down menu, select the “Using DHCP Server”. 13 DSL-302G ADSL Modem User’s Guide 41. Close window and select “Save”. The installation of DSL-302G is done and now you need to configure your ADSL account username and password into the DSL-302G. 42. Open the Internet Explorer. Enter the address http://10.1.1.2/ and a window will pop up asking for User ID and Password. This is the user ID to get into the DSL-302G (this is not your ADSL account details). Enter “admin” (without the quote) into both User ID and Password boxes, and click “OK”. 43. Under “Quick Configuration” page, from “Refresh Rate” pull down menu, select “No Refresh”. 44. Enter your ADSL account details into “Username” (eg. [email protected]) and “Password” boxes. 45. Click “Save & Reboot”. Wait for a minute or so. 46. You might need to refresh the “Quick Configuration” page. Select “Refresh Rate” back to “5 Seconds” and you could check your “Connection Status” at the bottom of the “Quick Configuration” page. If it shows “Connected”, you are now connected to the Internet; else check all the cable connections, username and password again (steps 20 to 22). If you have further enquiry, please contact your ADSL service provider. Ethernet Installation 7. If you prefer to use Ethernet connection (instead of USB), you could simply connect up the Ethernet and DSL lines (not USB) to the DSL-302 modem. 8. Open the Control Panel: TCP/IP Windows. On “Connect via:” menu, select “Built-in Ethernet”. 9. On “Configure:” menu, select “Using DHCP Server”. 10. Close window and select “Save”. Wait for a minute. 11. Open the Internet Explorer. Enter the address http://10.1.1.1/ and a window will pop up asking for User ID and Password. Enter “admin” (without the quote) into both User ID and Password boxes, and click “OK”. 12. Follow the steps 20 to 23 given above. Uninstall Instructions Driver and ‘USB Modem’ uninstall 5. Run the uninstaller application located at “/Applications/D-Link DSL-302G/Uninstall”. 14 DSL-302G ADSL Modem User’s Guide 6. Select “Yes, remove the software from my computer.” and click Next. 7. Unplug the USB cable from your DSL-302G. 8. Select “Restart Now” and click “Finish”. If you select “Restart later” please remember to do it later, the Uninstallation will not be completed until then. 15 Offices Australia D-Link Australasia D-Link Australia Pty. Ltd. 1 Giffnock Avenue North Ryde, NSW 2113 Sydney, Australia TEL: Aust: 1300-766-868 NZ: 0800-900900 Fax: 61-2-8899-1868 URL: www.dlink.com.au E-MAIL: [email protected] & [email protected] Taiwan D-Link Taiwan 2F, No. 119 Pao-Chung Rd, Hsin-Tien, Taipei, Taiwan TEL: 886-2-2910-2626 FAX: 886-2-2910-1515 URL: www.dlinktw.com.tw E-MAIL: [email protected] U.K. D-Link Europe th 4 Floor, Merit House, Edgware Road, Colindale, London NW9 5AB United Kingdom TEL: 44 (0) 20-8731-5555 FAX: 44 (0) 20-8731-5511 BBS: 44 (0) 181-235-5511 URL: www.dlink.co.uk E-MAIL: [email protected] U.S.A. D-Link U.S.A. 53 Discovery Drive, Irvine, CA 92618, USA TEL: 1-949-788-0805 FAX: 1-949-753-7033 BBS: 1-949-455-1779 & 1-949-455-9616 INFO: 1-800-326-1688 URL: www.dlink.com E-MAIL: [email protected] & [email protected]