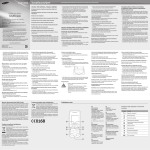
1
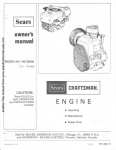
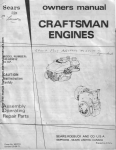
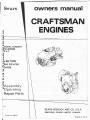
Sears
owners manual
another free manual from www.searstractormanuals.com
CRAFTSMAN
ENGINES
MODEL NUMBER :
143.625082
5 H.P.
~AUT ION
Read Instructions
Carefully
Assembly
Operating
Repair Parts
SEARS,ROEBUCK AND CO. U.S.A .
SIMPSONS - SEARS LIMITED. CANADA
Form No. 692719
Printed in U.S.A.
I
-
I CAUTION I
Be Sure To Observe
Safety Precautions
v
another free manual from www.searstractormanuals.com
To Prevent Accidents
1.
Stop the engine whenever you leave the equipment, even for a moment. Make sure blades and
all moving parts have stopped, disconnect the spark plug wire from the plug and keep wire
away from plug to prevent accidental starting before cleaning, making any adjustments, inspecting or repairing.
2.
Check fuel before each using. Do not fill gasoline tank when engine is running or while engine
is hot. Wipe off any spilled gasoline before starting engine - - gasoline is highly flammablealways handle with care.
3.
Do not run engine indoors, exhaust gases contain carbon monox ide which is odorless and
deadly poison. If for some reason engine must be run indoors, open all doors and windows to
provide sufficient ventilation.
4.
For engines equipped with a No Pull Starter, be sure and read the handling and safety precautions in your engine manual.
5.
Disengage self propelling unit or drive clutch on units so equipped before starting engine- - Keep
guards in place.
6.
Don't change governor settings or overspeed the engine. The governor controls the speed and
protect the engine from damaging, excessive speeds. Excessive speeds are dangerous.
7.
Don't store equipment with fuel in the tank inside a building where fumes may reach an
open flame or spark. Let the engine cool before storing in any enclosure.
~
8.
Never leave engine running unattended.
9.
Keep all screws, nuts and bolts tight to be sure equipment is in safe OP.erating condition. Keep
equ ipment clean at all times.
10. If your equipment should start vibrating, stop the engine and check for damage or loose
parts.
Vibration generally is a warning of trouble.
IMPORTANT
1.
READ ALL INSTRUCTIONS CAREFULLY BEFORE OPERATING THIS ENGINE.
2.
MAKE ONLY THE SIMPLE ADJUSTMENTS AS OUTLINED IN THIS BOOK.
3.
FOR ANY MAJOR ADJUSTMENTS OR REPAIRS CONTACT YOUR NEAREST SEARS,
ROEBUCK AND CO. OR SIMPSON-SEARS RETAIL,
MAIL ORDER OR CATALOG
SALES OFFICE STORE.
4.
KEEP THIS BOOK HANDY AT ALL TIMES FOR FUTURE REFERENCE .
READ IT
CAREFULLY AND FAMILIARIZE YOURSELF WITH THE OPERATING AND MAINTENANCE INSTRUCTIONS. THIS BOOK ALSO CONTAINS A COMPLETE PARTS LISTING.
2
CRAfTSMAN QUALITY ENGINE
another free manual from www.searstractormanuals.com
GUARANTEE
We guarantee all Craftsman Engines to be free from defects in material and workmanship. When properly used, cared for, and maintained, we will replace at our option and install, without cost to you, for a period of one (1) year from date of sale, any part which
proves, upon our examination, to be defective under normal use.
This guarantee does not cover adjustments
of spark plugs, clean ing, sharpen ing of blades,
by normal use and wear nor does it cover
care, negligence, abuse, failure to lubricate
lubricants.
Damage resulting from striking solid or foreign objects (rocks, tree roots, sprinkler heads,
iron pipe, walk edge, etc.) is not covered by this guarantee.
Equipment used for rental or commerc ial purposes is guaranteed only for th irty (30)
days.
SEARS, ROEBUCK AND CO.
C U S T 0 M E R' S
R ESP0 N S I B I L I T I E S
Always use care when operating mechanical or powered equipment.
Keep clear of
moving parts, belts or cha ins. Do not work on equipment with the engine running.
Avoid striking or running into solid objects or debris in the area to be worked. Clear
the area of foreign objects such as: sticks, stones, wire, etc.
Keep your equipment
clean and check for loose bolts, nuts and fasteners.
Check the engine oil regu larly
and change it as outlined in your engine manual.
Your guarantee is intended to provide you w ith adequate protection against failures due
to defects in material or workmansh ip but it does not cover adjustments or replacement
of parts due to normal wear or use nor does it cover damage that may result in use.
3
I
to carburetors, !gnition points, replacement
or any serv ice or adjustment made necessary
any failures which are a result of improper
properly or use of contaminated fuels or
•
BEFORE STARTING ENGINE
AIR CLEANER
another free manual from www.searstractormanuals.com
OI L FILLER Plug
FIG. 2
Fill here with
clean fresh regular grade
of gasoline.
MODEL and
SERIAL
NUMBER
PLATE
lever
Against spark plug
TO STOP
STARTER
AIR CLEANER
SERVICE INSTRUCnONS
1. Before starting, f ill crankcase to "Full" mark
on dip stick. Be sure dip stick is screwed in and that
engine is level. Oil capacity is 3 pints.
To obtain longest life and trouble free use of your
engine, certain normal maintenance must be performed as outlined below:
Disconnect spark plug wire at spark plug
before performing any maintenance to prevent occidental starting of engine.
..._d
2. Use S.A.E. No. 30 MS, SC, SO or SE oil. If not
available, use Muiti·Grade oil (S.A.E. 10W-40W) MS,
SC, SO or SE. (Note: Below 32° Fuse 10W MS SC
SO or SE.
'
'
CHANGE OIL
[!]
3. Change oil after first 2 hours of operation and
every 25 operating hours thereafter. Check oil every
8 operating hours.
Replace oil drain plug and refill engine
crankcase with oil as per instructions in
Figure 1.
TO START ENGINE
Thereafter check oil level often, before each
using, at each eight hours of operation and
odd oil if necessary to bring up to proper
level. (See Fig. 1)
CAUTION: Keep hands and feet clear of blades
and all moving parts.
[!]
To start cold engine, move choke lever to
"FULL CHOKE" position.
Change oil at each 25 hours of operation.
HOW TO USE STARTER
PROPER FUEL
QJ
[D. Grasp recoil starter handle and pull sharply.
Do not allow starter rope to snap back.
Rewind slowly keeping hold of the starter
handle at all times.
0
r::,
~
Change oil in engine crankcase after first
2 hours of operation. Unscrew oil dr"in
plug located on end of engine bose. (See
Fig. 1)
Use a good grade of fresh CLEAN Regular
gasoline.
CLEAN ENGINE
[!]
After engine starts move choke lever to
open position. Note: If engine is warm do
not choke to start.
[I]
To stop engine press stop lever against spark
plug and hold until engine stops. Fig. 1.
4
Wipe off all spilled fuel and oil.
Keep ·engine clean of foreign matter at all
times. Be sure air fins on Cylinder ore
kept clean to. permit proper ventilation.
Remember, this is on air cooled engine
ond free air flow is important for proper
engine performance and life.
CARBURETOR ADJUSTMENT
SERVICE AIR CLEANER
Do not make unnecessary adjustments. Factory settin~s are correct for most aeplications.
If adjustments are needed proceed as follows :
Your engine is equipped with o dry type air
cleaner and must be periodically removed and
cleaned to maintain maximum engine perform~nce.
After making initial adjustments os shown
below (Fig. 4) start engine.
Turn "High Speed Adjusting Needle" for.word or back l/t1 turn at a time until engine
runs smoothly. If engine tends to stall when
unit is in use open needle % turn.
another free manual from www.searstractormanuals.com
Hold throttle lever in idle position.
Turn "Idle Adjusting Needle" forward or
back 1fs turn ot a time until engine runs
smoothly.
BODY
/
/
~ATTACHING
FIG. 3
SCREW
IDLE ADJUSTING NEEDLE
Close FINGER TIGHT only and
then re-open three \fourths of one turn.
To clean, loosen screws that hold air filter body to
brocket. Twist body and lift body from brocket,
then proceed os follows :
OJ
W
Pull element out of. the body.
CHOKE
L EVER
Top elerr.ent lightly to dislodge accumulated dirt and brush dirt from element.
Do not wash element in gasoline o r other
solvent.
m
0
Clean the body and brocket with gasoline or
any solvent.
Reassemble (See Fig. 3.)
(o) Insert element into body with smaller
diameter end firs t
(b)
m
Place body into brocket. Twist body,
tighten screws.
It is recommended that 0 new air cleaner
element be pu rchased and installed ot beginning of each mowing season
Th is is
your best protection against excessive engine wear.
FU L BOWL
DRAIN PLUG
H IGH SPEED ADJ
NG NEEDLE
Close FINGER T IGHT only and then
reopen one turn .
FIG. 4
TO CLEAN STARTER AIR CLEANER
SEE FIG. 2
Remove polyurethane cleaner from around
air intake on blower housing and tap lightly.
Allow several seconds between each adjust.
ment fo r engine carburetor to reac t to the:
new setting.
Knead in hands to remove all dirt and larger particles of foreign matter.
CAUTION: Ne ve r atte mpt to chan ge ma ximum e ng ine speed. This is preset at fac tory a nd can o nly be changed by a qualif ied Se rvice re pairman who has th e ne c essary equipme nt.
Use compressed air if available to clean
tho roughly.
Install clean starter air cleaner before starting engine.
NEVER RUN YOUR ENGINE WITHOUT AIR
CLEANER COMPLETELY ASSEMBLED.
5
I
STORAGE INSTRUCTIONS
CHECK SPARK PLUG
Remove the spa rk plug each time you
change oil and inspect it.
If you are going to store your engine for
any length of time (30 days or longer or
at the end of the season) you must :
a. The electrodes shou ld be kept clean
a nd free of carbon. The presence of
ca rbon o r excess oil will greatly deter
proper engine performance.
a. DRAIN THE GAS TANK.
b. DRAIN THE CARBURETOR by allowing
engine to run out of gas. Gasoline left
in your engine wi ll leave gum depos 1ts
in the carburetor and gas tank. This
makes fuel system inoperative and will
result in hard or non-starting of engine.
c. CLEAN ENGIN E of all foreign matter.
another free manual from www.searstractormanuals.com
b. If possible, check the spark plug gap
(area between electrodes) using a wire
fee ler gauge. This specification should
be .030.
If you need a new Spark Plug refer to the
parts list for the proper replacement Spark
Plug.
d. LUBRICATE CYLINDER by removing the
spa rk plug and pouring one ounce of
clean lubricating oil through the spark
plug hole into the cylinder. Crank engine slowly to spread oil and replace
Spark Plug.
Before insta lling Spark Plug coat threads
lightly with Graphite Grease if possible to
insure easy removal next time the Spark.
Plug needs inspection.
GENERAL
J ust as you r automobile needs profess1onal
mechanical maintenance from time to time,
so does your ai r cooled engine. Cleaning
and adjusting of the Carburetor and periodic
replacement of the Spark Pl ug and igni tion
points is made necessary by NORMAL use.
0
Professional Air Cooled Engine Service is
as close as your nearest SEARS STORE.
A yearly check-up or tune-up by Sears is a
good idea to avoid breakdowns or delay ...
do it at the end of the season, then you're
ready for the next. We even prepare it for
storage for you.
6
SERVICE
TIPS
REFERENCE TO THIS SECTION MAY HELP AVOID A DELAY IN YOUR WORK OR SAVE •• HE
EXPENSE OF A SERVICE CALL.
Q
another free manual from www.searstractormanuals.com
A
The engine won't start or is hard to start.
1.
You're not out of gos ore you?
2.
Is the spark plug wire attached to the plug?
3.
Check the spark plug porcelain, maybe it is crocked.
4.
The spark plug may be fouled; clean the electrodes and reset the plug gop;
under "CHECK SPARK PLUG" in this manual.
5.
Is the gas line obstructed? Remove fuel line at carburetor and check for obstruction.
gas tank and replace with clean, fresh gasoline.
6.
Is the fuel clean? You didn't use o dirty or rusty gos con did you?
better to let Sears check the fuel system and carburetor.
7.
Stale gas that has set around and lost its strength is a trouble maker . . . hard starting and
loss of power results.
8.
Maybe there is water in the gos.
9.
Carburetor could be out of adjustment . . . check " CARBURETOR ADJUSTMENT" in manual.
Your throttle control may be set so that it does not fully close the choke.
12.
Dirty or plugged air cleaner?
Put throttle in run or fast position and crank
See "SERVICE INSTRUCTIONS" in this manual.
My engine misses or locks power under lood.
What might cause this?
Your throttle control could be set too close to choke position and flooding the engine.
See under "HARD TO START".
2.
Spark plug?
3.
Water in the fuel does not help the engine to run very good and robs it of power.
See under "HARD TO START".
4.
Improper carburetor adjustment.
Maybe it needs cleaning or replacing.
5.
Got enough oil in crankcase?
6.
A partially plugged air cleaner will restrict the air flow to the carburetor and reduce power.
See manual. The engine breathes through the air cleaner.
7.
Don't put oil in the gas.
Check " CARBURETOR ADJUSTMENT" in this manual.
Low oil level or dirty oil makes trouble.
It reduces the efficiency of the engine.
The engine seems to overheat.
What should I do?
1.
Be sure you hove plenty of oil in the crankcase and that it is clean. When did you change last?
2.
Check the oil level in your crankcase.
3.
Sometimes the
loss of power.
muffler
con
get
low oil level will cause overheating.
plugged.
7
I
Drain
Condensation in the tonk or in your gos con sometimes happens.
11.
1.
instructions ore
If you did, it might be
Maybe you over-choked and flooded the engine.
several times to clear out the excess gas.
Q
A
It happens sometimes.
10.
Q
A
What con I do?
This causes bock pressure, over-heating and
•
CRAFTSMAN 4-CYCLE ENGINE
MODEL NUMBER: 143.625082
another free manual from www.searstractormanuals.com
BASIC ENGINE
--70
8
PARTS LIST
CRAFTSMAN 4-CYCLE ENGINE
another free manual from www.searstractormanuals.com
Y
l
y
~
Ref.
No.
Part
No.
1
33311A
2
3
4
5
27652
27642
27876B
27877A
5
27879A
6
27878A
6
27880A
7
8
9
11
27882
27881
32581
31826
12
13
14
29783
27884
33312
14
33313
14
33314
15
15
33315
33316
15
33317
16
17
27888
31295B
18
19
20
21
21718
26073
28264
33156
22
23
27893
32523
24
25
26
28
28460
30924A
*30684
650488
31
650489
32
33
34
35
*28938B
30938A
30939A
650697
36
37
32862
21943
MODEL NUMBER: 143.625082
Ref.
No.
Part Name
Cylinder Assembly (Incl. Nos.
2, 3 & 4)
Pin, Dowel
Plug, Sq. hd. pipe (oil drain)
Seal, Oil
Valve, Intake (Standard) (Incl.
No.9)
Valve, Intake (1/32" oversize)
(Incl. No. 9)
Valve, Exhaust (Standard)
(Incl. No. 9)
Valve, Exhaust (1/32"
oversize) (Incl. No.9)
Cap, Upper valve spring
Spring, Valve
Cap, Lower valve spring
Crankshaft Assembly (Incl.
Nos. 12 & 13)
Pin, Groove
Gear, Crankshaft
Piston & Pin Assembly
(Standard) (Incl. 2 of No. 16)
Piston & Pin Assembly (.010
oversize) (Incl. 2 of No. 16)
Piston & Pin Assembly (.020
oversize) (Incl. 2 of No. 16)
Ring Set, Piston (Standard)
Ring Set, Piston (. 010
oversize)
Ring Set, Piston (. 020
oversize)
Ring, Piston pin retaining
Rod Assembly, Connecting
(Incl. Nos. 18, 19 & 20)
Bolt, Connecting rod
Washer, Connecting rod
Nut, Lock
Camshaft (Compression
Release)
Lifter, Valve
Cover, Cylinder (Incl. Nos. 24,
106, 153, 154 & 155)
Seal, Oil
Dipstick, Oil (Incl. No. 161)
Gasket, Cylinder cover
Screw, Hex hd. Sems, 1/4-20 x
1-1/4
Screw, Hex hd. Sems w/flat
washer, 1/4-20 x 11/16
Gasket, Cylinder head
Head, Cylinder
Cover, Cylinder head
Screw, Hex hd. cap, 5/16-18 x
2-1/2
Nut, Conduit
Plug, Spark (Allstate No.
60130 or equivalent)
38
39
40
41
42
43
44
45
46
48
49
50
51
52
55
56
58
63
64
65
66
69
70
71
72
73
74
75
76
77
78
79
80
81
82
83
84
85
86
87
88
89
Part Name
Gasket, Valve spring cover
Body Assembly, Breather
Element, Breather
Cover, Valve spring
Clip, Conduit
Screw, Fil. slotted hd. Sems,
10-24 X 1/2
27627
Tube, Breather
*27915
Gasket, Intake
30195A Flange, Carburetor (Incl. Nos.
76 & 80)
30196
Screw, Fil. hd. machine P.C.R.,
5/16-18 X 3/4
650152
Screw, Fil. slotted hd. Sems,
8-32 X 3/8
650548
Screw, Hex slotted hd. S.T.,
8-32 X 3/8
30319
Rivet, Split
31709
Lever, Governor
30205
Bracket, Governor adjusting
31879
Link,
Governor
lever-to-bellcrank
30206
Link, Governor-to-throttle
30699A Rod Assembly, Governor
29536
Baffle, Blower housing
650561
Screw, Phil. Hex hd. Sems,
1/4-20 X 5/8
30592
Decal, Instruction
29747A Screw, 5/16-24 x 3/4 Hex hd.
Sems cap
32158B Housing, Blower
650490
Washer, Belleville
8116
Nut, Crankshaft
30700
Yoke, Governor
650494
Screw, Phil. fil. hd. Sems, 6-40
X 5/16
*31688
Gasket, Carburetor
29752
Nut, Lock, 1/4-28
Bushing
28562
26460
Clamp, Fuel line
27275
Clip, Wire
650572
Screw, Phil. Flat hd. Sems,
1/4-28 X 1-1/8
30590A Washer, Flat
321 25
Cup, Starter
Gasket, Air cleaner
*27272
Ring, Retaining
29642
29826
Screw, Hex washer hd. cap,
10-32 X 3/4
590417
Screen, Starter hub
31691
Bracket, Air cleaner
28820
Screw, Phil. fil. hd. mach.
Sems, 10-32 x 1/2
30727
Element, Air cleaner
*27896
28423
28424
28425
27793
650128
*Indicates Parts Included in
Gasket Set, Ref. No. 169.
9
I
Part
No.
CRAFTSMAN 4-CYCLE ENGINE
Ref.
No.
Part
No.
90
91
31715
30312
another free manual from www.searstractormanuals.com
92
93
94
95
96
97
98
99
100
102
103
104
106
107
108
109
110
111
112
113
114
115
116
117
118
119
120
121
122
123
124
125
126
129
MODEL NUMBER: 143.625082
Part Name
Ref.
No.
Part
130
131
31843A
28763
No.
Part Name
I
I'"'
Body Assembly, Air cleaner
Screw, Hex slotted washer hd.
Sems, 10-32 x 1/2
30712
Lever, Bell crank
29530
Bushing
30202
Spring, Extension
30201A Lever, Speed control
30199A Bracket, Speed control (Incl.
Nos. 98 & 99)
650399
Screw, Fil. hd. Sems, 10-32 x
5/8
32924
Spring, Compression
650688
Screw, Hex hd., 10-32 x
1-5/16 (Drilled thru)
29538
Base, Engine
32394
Elbow, 90°
33287
Muffler
29443
Nut, Conduit
31845
Shaft, Mechanical governor
30591
Gear Assembly, Governor
29193
Ring, Retaining
30588A Spool, Governor
33426
Nipple, Pipe
6202
Screw, Hex hd. cap, 1/4-28 x 1
31694
Bracket, Fuel tank
650561
Screw, Phil. hex hd. Sems,
1/4-20 X 5/8
31301
Tank Assembly, Fuel (Incl.
No.l15)
32387A Cap, Fuel tank
31697
Strap, Fuel tank
28584
Strainer & Elbow, Fuel
30705
Line, Fuel
29212
Screw, Hex hd. Sems, 1/4-28 x
7/16
650128
Screw, Fil. slotted hd. Sems,
10-24 X 1/2
30622
Extension, Blower housing
29752
Locknut, Hex, 1/4-28
27276
Cover, Spark plug
29716
Screw, Pan hd. P.C.R. Sems,
1/4-28 X 7/16
31345
Plate, Identification
29309
Stud, Drive
Key, Flywheel
30884
133
650493
134
135
144
30322
29216
650542
145
148
149
150
151
152
153
154
155
156
157
31752
30529
30747
16645
31793
31792
31855
27183
650580
31988
650163
158
159
160
161
162
165
166
167
168
169
32203
32204
32179
*29673
29918
29916
610689A
631067A
590420
33235
692719
Bracket, Governor
Screw, Slotted hex hd., 10-24
x 7/16 thr'd cutting
Screw, Hex hd. Sems, 1/4-20 x
1-3/4
Nut, Lock, 8-32
Nut, Square, 10-32
Screw, Hex hd. cap, 5/16-18 x
13/16
Decal, Air cleaner
Locknut, 10-32
Clip, Spark plug shorting
Lockwasher, 5/16 E.T.
Bearing, Ball
Washer, Thrust
Retainer, Bearing
Washer, Fiber
Nut, Lock, 10-24
Elbow, Air cleaner
Screw, Fil. slotted hd. Sems,
10-32 X 3/4
Cleaner, Starter air
Bracket, Starter air cleaner
Decal, Super start
Gasket, Dipstick
Lockwasher, No.8 E.T.
Clamp, Governor
Magneto
Carburetor
Starter Assembly, Rewind
Gasket Set (Incl. items marked
*)
Owners Manual
r../
*Indicates Parts Included in
Gasket Set, Ref. No. 169.
~
10
MAGNETO NO. 610689A
,,...........................................................................
another free manual from www.searstractormanuals.com
~
20
~
d
4
Ref.
No.
Part No.
1
2
3
4
5
6
7
8
9
610689A
30555
30551
30550
30883
30992
30547A
610385
610408
29181
Ref.
No.
10
11
13
14
15
16
17
18
19
20
Part Name
Magneto
Flywheel
Spring, Breaker box dust cover
Cover, Breaker box dust
Gasket, Dust cover
Cam, Breaker
Breaker Assembly
Washer, Terminal
Nut, Terminal
Screw and Washer Assembly,
Breaker
11
I
19
Part No.
Part Name
Screw, Condenser fastening
610593
30843
Tab, Ground terminal
30560A Coil Assembly (Incl. Ref. No. 14)
Wire, Ignition lead
30554
30548A Condenser
Core and Plate Group
30545
30561A Stator Assembly
Felt, Cam wiper
30549
Spring, Coil wedge
29629
Clip, Coil locking
31311
another free manual from www.searstractormanuals.com
CARBURETOR NO. 631067A
v
32
'
Ref.
No.
Part No.
631067A
31834
1
630731
2
631036
3
4
650506
5
630766
6
650417
7
31836
31837
9
10 *630748
11 *631027
12 *631021
13
14
15
16
631022
631023
*631024
631025
....
Ref.
No. Part No.
27136A
17
18
*27554
630739
19
27110
21
*31839
22
Part Name
Carburetor
Shaft & Lever Assy., Throttle
Spring, Throttle return
Shutter, Throttle
Screw, 4-40 x 3/16
Spring, Idle regulating screw
Screw, Idle regulating
Shaft & Lever Assy., Choke
Shutter, Choke
Plug, Welch
Plug, Welch
Inlet Needle, Seat & Clip Assy.
(Incl. No. 13)
Clip, Inlet needle
Float, Carburetor
Shaft, Float
Bowl & Drain Assy., Float
(Incl. No. 1 7)
23
24
25
26
27
28
29
30
31
32
*630740
*631078
*631028
31838
631039
630747
631081
630738
630735
31840
Part Name
Plunger Assy., Drain (Incl. No.18)
Gasket, Drain plunger
Washer
Gasket, Bowl-to-body
Adjustment Screw Assy., Main
(Incl. Nos. 19, 21, 23 & 30)
"0, Ring, Adjustment screw
Screw, Idle adjustment
Gasket, Bowl-to-body
Fitting, Fuel inlet
Pin
Ball, Steel
Ball, Steel
Spring, Main adjustment screw
Spring, Choke stop
Repair Kit (Incl. items marked*)
~
12
another free manual from www.searstractormanuals.com
v
STARTER NO. 590420
..REWIND
~~~~~~~~~~~~~~~~...........................................
11--ID
Ref.
No.
1
2
3
4
5
6
Part No.
590420
590409
590410
590411
590148
590412
590413A
Part Name
Starter, Rewind
Screw, Retainer
Retainer, R.H.
Spring, Brake
Dog, Starter
Spring, R.H. dog
Pulley
13
I
Ref.
No.
Part No.
7
8
9
10
11
590414
590415
590386
590387
590459
Part Name
Spring & Keeper Assy.
Housing Assy. , Starter
Rope, Starter
Handle Assy., Starter
Pin, Centering
another free manual from www.searstractormanuals.com
--------- N 0 T E 5 ---------
\
14
another free manual from www.searstractormanuals.com
N 0 T E S --------
v
t,
15
I
I
another free manual from www.searstractormanuals.com
Sears
owners manual
CRAFTSMAN
ENGINES
The Model Number shown on the cover page will be
found on a plate attached to the cylinder. Always mention the model number in all correspondence regarding
the Craftsman engine.
HOW TO ORDER
REPAIR PARTS
All parts listed herein may be ordered through SEARS,
ROEBUCK AND CO. or SIMPSONS-SEARS LIMITED.
When ordering parts by mail, selling prices will be furr
ished on request or parts will be shipped at prevailin'g-prices and you will be billed accordingly.
WHEN ORDERING REPAIR PARTS, ALWAYS GIVE
THE FOLLOWING INFORMATION AS SHOWN IN THIS
LIST:
1. The PART NUMBER.
3.
The MODEL NUMBER
2.
The PART NAME.
OF THE ENGINE.
4. The NAME OF ITEMEngine
SEARS SERVICE
IS AT YOUR SERVICE
WHEREVER YOU LIVE
OR MOVE IN
THE U.S.A.
Your Sears Merchandise takes an added value when you
discover that Sears has over 2,000 Service Units throughout the country. Each is staffed by Sears-trained, professional technicians using Sears approved parts and
methods.
SEARS, ROEBUCK AND CO. U.S.A
SIMPSONS- SEARS LIMITED, CANADA