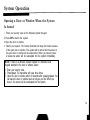
1
Security System 8000
Owner’s Manual
’
Contents
Introduction . . . . . . . . . . . . . . . . . . . . . . . . . . . . . . . . . . . . . . . . . . . . . . . . . . . . . .
1
Safety Procedures . . . . . . . . . . . . . . . . . . . . . . . . . . . . . . . . . . . . . . . . . . . . . . .
2
2
3
Safety Planning .........................................................................................
Fire Protection ..........................................................................................
System Operation . . . . . . . . . . . . . . . . . . . . . . . . . . . . . . . . . . . . . . . . . . . . . . .
Sensors .....................................................................................................
Wireless System Keypad (Wireless Remote Transmitter) .....................
When Leaving Home ................................................................................
When Returning Home .............................................................................
Turning Your System Off ..........................................................................
Sounding a Panic Alarm ...........................................................................
Opening a Door or Window When the System is Armed .......................
Alarms and Trouble Beeps . . . . . . . . . . . . . . . . . . . . . . . . . . . . . . . . . .
Alarms.. .....................................................................................................
Trouble Beeps ..........................................................................................
10
11
14
Contents
Components . . . . . . . . . . . . . . . . . . . . . . . . . . . . . . . . . . . . . . . . . . . . . . . . . . . . . . .
Central Controller.. ....................................................................................
The Wireless System Keypad (Wireless Remote Transmitter) .................
Wireless Local Keypad (Keypad Transmitter) ..........................................
Supervised Smoke Detector .....................................................................
Universal Transmitter.. ..............................................................................
Passive Infrared Transmitter (PIRT) .........................................................
Wireless Siren/Controller ..........................................................................
Testing and Maintenance . . . . . . . . . . . . . . . . . . . . . . . . . . . . . . . . . . . . . .
18
18
20
21
22
25
26
27
Replacing Batteries in Keypads and Universal Transmitters ....................
Replacing PIRT Batteries .........................................................................
Replacing Smoke Detector Batteries ........................................................
Replacing Wireless Siren/Controller Batteries ..........................................
Weekly System Test .................................................................................
28
28
29
30
31
32
Warranty . . . . . . . . . . . . . . . . . . . . . . . . . . . . . . . . . . . . . . . . . . . . . . . . . . . . . . . . . .
35
FCC Registration and Repair Information.. ..............
36
Index . . . . . . . . . . . . . . . . . . . . . . . . . . . . . . . . . . . . . . . . . . . . . . . . . . . . . . . . . . . . . . .
39
Quick Reference . . . . . . . . . . . . . . . . . . . . . . . . . . . . . .
inside back cover
Transmitter Identification Numbers . . . . . . . . . . . . .
back cover
Introduction
Congratulations on the purchase of your new AT&T Security System 8000.
Your dealer has demonstrated the correct way to operate your new
system. Use this booklet as a reference when you have questions about its
operation or maintenance.
Remember, no security system prevents emergencies. Instead, a security
system alerts you and your family in the event of an emergency. Your
AT&T Security System 8000 cannot be a substitute for sound safety
practices or insurance. Contact your insurance company to inform them
that you have installed a security system-you may be entitled to a
reduction in premiums.
In Case of Emergency
Contact your local police department, fire department, and alarm dealer for
advice on handling household emergencies. Ensure that every member of
your household knows exactly what to do if an emergency occurs.
This AT&T security system is
suitable for use as a Grade A
Household Burglary Warning
System (UL1023).
847 2 3 8 771
1
Safety Procedures
Safety Planning
Plan in advance how each member of your family should respond to
an alarm. Discuss the different alarm signals, make sure each person is
familiar with them, and make a plan for each person. If you have children,
be sure that you instruct them carefully and that they understand. Establish
a meeting place outside the house, so you can account for everyone in
case of fire or other emergency. Practice safety procedures so that
everyone can respond quickly in a crisis.
In case of a fire alarm, every member of your family should leave the
house immediately by way of planned escape routes and meet at a
planned location.
Returning Home to an Audible Alarm
If you return home to an audible alarm, do not enter your house. You might
be walking into a fire or an intruder might still be inside. Go to a neighbor or
public phone and call the fire department or police.
Using the Universal Transmitter as a Panic Button
Press Alarm on the Universal Transmitter and hold it down for 2 seconds.
Testing Your Alarm System Weekly
Test your wireless alarm system every week, using the procedures on
page 32. To prevent false alarms, check with your dealer before testing.
2
Safety Procedures
Fire Protection
To Reduce the Risk of Fire
Minimize hazards:
Store flammable materials properly. Avoid cleaning with flammable
liquids such as gasoline. If at all possible, eliminate explosive or fastburning materials from your home.
Use good housekeeping techniques. A cluttered attic, basement, or
storage area increases the risk of fire.
Never smoke in bed.
Do not leave children unattended.
Do not overload electrical outlets.
If you have children or invalids in your home, the fire department can
provide you with window decals that will show the fire department where to
look first in the event of a fire.
l
l
l
l
l
If the Smoke Alarm “Beeps” Repeatedly
The Supervised Smoke Detector beeps once every 7 seconds when the
batteries are low. Replace the batteries immediately (see page 30).
If the Smoke Alarm Is Triggered
Smoke detectors warn you of a fire in its early stages, so that you can
escape from your house before smoke reaches a dangerous concentration
level.
3
Safety Procedures
When the smoke alarm is triggered, the smoke detector’s internal siren
sounds and the smoke detector transmits the alarm to the Central Controller. Also, the On/Alarm light in the center of the Supervised Smoke Detector
Transmitter glows steadily. (During normal operation, this On/Alarm light
flashes about once every 7 seconds.) Immediately follow the evacuation
instructions given below. If your security system is connected to a central
monitoring service, an emergency call will be initiated.
Evacuation Procedures
Do not panic-escape may depend upon clear thinking.
Get out of the house following planned escape routes, if possible. Do
not stop to dress or collect valuables.
Open doors carefully only after feeling them to see if they are hot. If a
door is hot, do not open it-follow an alternate escape route.
Keep close to the floor-smoke and hot gases rise.
Keep doors and windows closed unless it is necessary to open them to
escape.
Meet at a pre-established meeting place after leaving your house.
Never re-enter a burning building. Use a neighbor’s phone or a street
fire alarm box to call the fire department.
4
System Operation
Sensors
The AT&T Security System 8000 consists of various types of sensors.
These sensors are attached to transmitters that report to the Central
Controller. These sensors are set in one of the following ways:
24-Hour sensors are always armed. You cannot turn these sensors off.
Smoke detectors, environmental and auxiliary sensors are 24-hour
sensors.
Perimeter sensors are usually located at windows and exterior doors.
These sensors are armed when your system is in the HOME or AWAY
mode.
Interior sensors are only armed when the system is in the AWAY mode.
These sensors are usually motion detectors or intrusion sensors on
interior doors.
5
System Operation
Wireless System Keypad
(Wireless Remote Transmitter)
In order to operate your system correctly, you should be familiar with the
Wireless System Keypad. Please read this section carefully and keep it
handy as a reference source.
NOTE: You need the security code to operate any keypad. When your
dealer tells you the security code, write it down and store it safely. DO
NOT WRITE YOUR SECURITY CODE IN THIS BOOK OR ANYWHERE
THAT AN INTRUDER COULD FIND IT.
The Wireless System Keypad enables you to set your system to Home,
Away, or Off. It also enables you to open any door or window that is connected to this keypad. The keypad can also be used to generate a Panic
Alarm in an emergency.
The Wireless System Keypad is usually mounted at the principle access
door, but additional units can be converted for use as portable keypads.
6
System Operation
When Leaving Home
Enter your security code on the Wireless System Keypad attached to
the door from which you will be leaving. The transmitter beeps once
after each number you enter and will beep three times after the entire
code is entered correctly.
Press Away. If the Central Controller beeps once, the system is secure
-continue to step 3. If the Central Controller beeps four times, one or
more of the transmitters is not secure. Go to the Central Controller to
find out where the problem exists. Check to see if:
a window or door is open
a keypad is disarmed
the cover is off one of the transmitters
a transmitter has been tampered with
something is triggering a motion detector.
l
l
l
l
l
If you correct the problem, the Central Controller will beep once when
you arm the system. If you do not correct the problem, the system will
arm itself within 40 seconds, but the alarm point that caused the
problem will remain unprotected.
Press Open and then go out the door and close it. The system will arm
itself in about 40 seconds. If you do not leave within 40 seconds, enter
your security code and press Open. You can exit through that door and
the system will remain armed.
7
System Operation
When Returning Home
Enter your home through a door that is close to a Wireless System
Keypad. The Central Controller will begin beeping at an interval of once
every three seconds.
Enter your security code on the keypad within 40 seconds of entering
the door. This will cancel the delayed alarm.
Press Home. This will disable all Interior sensors. The Central Controller
will beep once to indicate the change in status.
Turning Your System Off
1
Enter your security code on the Wireless System Keypad. The keypad
will beep three times when the code is entered correctly.
2 Press Off. All internal and perimeter sensors are deactivated. All 24-hour
sensors (fire, auxiliary, environmental, tamper and panic) remain armed.
The Central Controller will beep once to indicate the change in status.
Sounding a Panic Alarm
Simultaneously press both sets of red dots in the Alarm area of any keypad
(see illustration). This will immediately sound an intrusion alarm and
activate your telephone dialer.
8
System Operation
Opening a Door or Window When the System
Is Armed
1
Enter your security code on the Wireless System Keypad .
2 Press Off to disarm the system.
3 Open the door or window.
4 Rearm your system. The Central Controller will beep four times because
of the open door or window. The system will be armed but the sensor at
the open door or window will be unprotected. When you close the door
or window the sensor will be reaccepted into the system immediately.
NOTE: If there is a Wireless System Keypad or a Wireless Local
Keypad attached to the door or window sensor:
1 Enter your security code.
2 Press Open. The transmitter will beep three times.
3 Open the door or window within 40 seconds after pressing Open. You
can leave the door or window open as long as you like. When you
close it, the sensor will be reaccepted into the system.
Alarms and Trouble Beeps
The System 8000 generates two types of warnings: alarms and trouble beeps. The
following chart will help you distinguish between these warnings.
1 This Pattern
every 40 seconds
uninterrupted tone
Means
Trouble Beeps-A system problem has been detected. Your
system is still operable, but the problem should be corrected as
soon as possible (see page 14).
Fire Alarm-Either the Smoke Detector Transmitter or a transmitter
configured for fire emergency has been triggered. Your system will
sound this alarm and activate your telephone dialer. Depending on
your programming, there may be a 40-second delayed alarm from
external sirens.
repeating pattern:
long tones only
Intrusion Alarm-A door or window has been opened or broken;
a motion detector has been triggered; or a tamper switch has been
activated. Your system will sound this alarm and activate your
telephone dialer, unless the keypad is set on the 40-second delay.
repeating pattern:
one long tone,
3 short tones
Auxiliary Alarm-An auxiliary transmitter has been triggered. Your
system will sound this alarm and activate your telephone dialer.
repeating pattern:
8 short tones
Environmental Alarm-A sensor has been triggered by heat, cold,
moisture, etc. Your system will sound the alarm and activate your
telephone dialer. External sirens are silent.
t
NOTE: Your system may not
be equipped for all these
alarms. Ask your dealer
which alarms are included in
your system.
10
Alarms and Trouble Beeps
Automatic Disarm Period
After your system sounds a fire, environmental, or auxiliary alarm, it will not
repeat the same kind of alarm for five minutes. This Automatic Disarm
Period gives you time to clear away smoke or otherwise tend to the
emergency, without having another alarm of this type go off. During this
period, AA will be displayed at the Central Controller.
Silencing Alarms
To silence any alarm, enter your security code on a keypad. This will
silence an alarm that is already sounding and will cancel a delayed alarm
that has not yet sounded. You can cancel any type of alarm this way-fire,
intrusion, environmental, or auxiliary.
The Cancel key on your Central Controller will cancel a fire, environmental,
or auxiliary alarm, but it will not cancel an intrusion alarm. Intrusion alarms
can only be cancelled by entering your security code on a keypad.
NOTE: If a false alarm occurs and your system is equipped with a
telephone dialer, call your monitoring service to inform them that there is
no emergency.
12
Alarms and Trouble Beeps
The Ambush Feature
The Ambush Feature is designed to protect you in the event that you must
unwillingly cancel an intrusion alarm. Should an intruder force you to cancel
an alarm, enter your security code backwards on the keypad. For example,
if your code is 7-6-4, enter 4-6-7.
The audible alarm will immediately go silent, but your Central Controller will
continue to dial your monitoring service and will report a special Ambush
alarm. During this period, all other system functions - such as changing
states - will operate normally.
NOTE: If you are not connected to a monitoring service this feature is
not included in your system.
Sounding a Panic Alarm
If an intruder is attempting to enter your house, you can trigger the alarm
immediately-even before the intruder sets off the alarm at a door or
window.
Simultaneously press both sets of red dots in the Alarm area of any keypad
(see illustration). This will sound an intrusion alarm and activate your
automatic telephone dialer.
In many installations, Universal Transmitters are also set up as Panic
Alarms. To activate the Panic Alarm on the Universal Transmitter, press the
button and hold it down for 2 seconds.
13
Alarms and Trouble Beeps
Trouble Beeps
If your Central Controller starts to beep twice every 40 seconds, NO ALARM
IS SOUNDING. The system is sounding Trouble Beeps to alert you to a
problem it has detected. Trouble beeps can come from the Central Controller (see below), from the Wireless Siren/ Controller (see page 17), or from a
Smoke Detector (see page 17).
When You Hear Trouble Beeps from the Central Controller
1
Press Test/Demo on your Central Controller. This will silence the beeps.
2
Press Messages once. This will display any trouble messages detected
by the Central Controller.
3
Check the digital display to see where the problem is. If the display shows
I
I
This Display
0 through 31
I
Means
There is a problem with a numbered transmitter. Check the list of
I numbers on the back cover of this booklet to identify the transmitter.
cc
There is a problem with your Central Controller (see page 18).
(Continue 1)
14
Alarms and Trouble Beeps
(Continued)
4 Check the Indicator Light to determine what the problem is.
This Light
Means
Alarm
The transmitter shown in the display has recently registered an alarm
that has not been canceled. If you cannot account for a recent alarm,
contact your dealer immediately.
No Check In
The transmitter has not checked in with the Central Controller during
the Controller’s normal supervisory time. Replace the battery in the
affected transmitter (see pages 28-31). If that doesn’t correct the
problem, have your dealer check the transmitter for problems.
Low Battery
The unit indicated in the display needs a new battery (see pages
28-31).
AC Power
This light should be on. If it is not, the power supply to the Central
Controller has been interrupted and your system is running on backup
batteries. (This will not be the cause of the trouble beeps, unless the
backup batteries are running low.) Check your household fuses or
circuit breakers for the source of the power interruption. The backup
(Continued)
15
Alarms and Trouble Beeps
NOTE: If AC Power is the only indicator light on, the device shown in the
display is NOT SECURE-it may be disarmed or its sensor may be open.
This will not cause trouble beeps, but the Central Controller will beep four
times when you try to set your system to HOME or AWAY.
5 Press Messages again to check for additional problems. The system will
display additional trouble messages, if there are any, each time you
press Messages.
When the digital display shows -A, -0, or -H, (Away, Off, or Home), you
have seen all the trouble messages. To run through them again, press
Messages.
6 Press Messages until the display shows -A, -0, or -H. This will silence the
trouble beeps unless the system detects a new problem. The trouble
messages will stay in the Central Controller memory until you clear
them.
7 After you have corrected the problem, press Clear Display to erase the
trouble messages shown in the digital display. Trouble messages can
only be erased if the problem has been fixed.
16
Alarms and Trouble Beeps
When you hear Trouble Beeps from the Wireless Siren/
Controller
Press Test/Demo on the Central Controler to silence the trouble beeps.
When you press Test/Demo, each Wireless Siren/Controller will respond
1,4,8, or no beeps.
1 beep means - the Wireless Siren/Controller is okay.
4 beeps mean - the Wireless Siren/Controller needs new batteries.
See page 31 for instructions on replacing batteries.
8 beeps or no beeps mean - a problem with the radio link between the
Central Controller and the Wireless Siren/Controller.
Call your dealer for assistance.
If the Test/Demo button fails to silence the trouble beeps at a Wireless
Siren/Controller, got to that unit, remove its cover by lifting it up and away
from the bottom, and press the area marked Cancel.
When you hear Trouble Beeps Directly from a Smoke Detector
The batteries in the smoke detector need to be replaced (see page 30).
The smoke detector’s internal warning signal will sound before sending a
low battery signal to the Central Controller.
17
Components
Different systems offer different selections of components to meet your specific
needs. Your dealer will let you know what components are in your system.
Central Controller
The Central Controller is the brain of the system. When a transmitter broadcasts an alarm, the Central Controller sounds the audible alarm. It can also
sound an alarm outside the home with optional sirens, and inside the home
with the optional Wireless Siren/Controller. If your system is equipped with a
telephone link, the Central Controller will also report all alarms to your monitoring service.
This Display
Means
-O
I
Your system is OFF.
I
-H
I
Your system is set to HOME.
I
-A
I Your system is set to AWAY.
0 through 31
~1
There is an alarm or a problem with a numbered transmitter. Check
I the list of numbers on the back cover of this booklet to identify the
cc
I
transmitter, and use the indicator lights to help identify the problem.
There is a problem with your Central Controller. Check the indicator
lights to see what the problem is. Call your dealer if you cannot
determine the cause of the problem.
I
Components
If there is trouble with your system, Indicator Lights will tell you what the problem
is. See page 15 for what each Indicator Light means.
l
l
l
l
Press Messages to see if any trouble conditions or alarms have occured
(see page 14).
Press Clear Display to erase records of alarms and trouble messages.
Press Test/Demo to silence trouble beeps (see page 14). This button is also
used during a test or demonstration (see page 32). This button will not cancel
an intrusion alarm.
Press Cancel to cancel an accidental alarm (see page 12). This button will not
cancel an intrusion alarm.
The Wireless System Keypad
(Wireless Remote Transmitter)
The Wireless System Keypad transmits commands to the Central Controller. It may be mounted on a wall and connected to one or more intrusion
sensors, or it can be used as a portable device.
Number Keys are used to enter your security code-either to cancel an
alarm or to use other buttons (see page 7).
Open enables you to open a door or window connected to the keypad
without setting off an alarm (see page 9).
Alarm sets off an immediate Panic alarm when both sets of dots are
pressed simultaneously.
Away, Home, and Off let you arm and disarm various sensors in your
system (see page 7).
20
l
Components
Wireless Local Keypad (Keypad Transmitter)
The Wireless Local Keypad enables you to change the settings of the door
controlled by this keypad. Like the Wireless System Keypad, it can also cancel an
alarm, generate a Panic Alarm, and generate an Ambush Alarm, if your system is
equipped with this feature. To change the settings of the Wireless Local Keypad:
1 Enter your security code on the keypad.
2 Move the slide switch to the setting you want. The settings are:
Instant - The sensor attached to this keypad will generate an immediate
alarm when your system is in the AWAY or HOME mode.
Delay - The sensor attached to this keypad will generate a 40-second
delayed alarm when your system is in the AWAY or HOME
mode. During the delay the Central Controller will beep every 3
seconds. Use this setting if you intend to use this door to enter
your home.
Interior - The sensor attached to this keypad will generate an alarm only
when your system is in the AWAY mode. It is disarmed when
your system is set to HOME.
Disarm - The sensor attached to this keypad is disarmed even if your
system is set to HOME or AWAY.
l
l
l
l
NOTE: Setting the Wireless Local Keypad to Disarm does not disarm the
Panic Alarm feature, the tamper detector, or any 24-hour sensors that are
connected to the transmitter. However, if you try to arm the system when a
keypad is set to Disarm, the Central Controller will beep 4 times to indicate that
the transmitter is not secure.
21
Components
Supervised Smoke Detector
The AT&T Supervised Smoke Detector is a photoelectric type, designed to
detect a fire in its early stages so that you can escape from your house
before smoke reaches a dangerous concentration level. When the detector
senses smoke particles, it simultaneously sounds an alarm (using a built-in
siren) and sends an alarm to the Central Controller.
During normal operation, the On/Alarm light in the center of the smoke
detector flashes once every 7 seconds. During an alarm, it remains lighted.
Pressing and holding Test for approximately 20 seconds checks the
operation of the smoke detector.
NOTE: When the smoke detector batteries are low, a built-in horn beeps
once every 7 seconds. If the batteries are not replaced, the smoke
detector will send a message to the Central Controller. See 30 for
instructions on battery replacement.
22
Components
NFPA Recommendations for Detector Installation
The National Fire Protection Association’s Standard 74, Section 2-1, reads
as follows:
2-1.1.1 : Smoke detectors shall be installed outside of each separate
sleeping area in the immediate vicinity of the bedrooms and on each
additional story of the family living unit, including basements and
excluding crawl spaces and unfinished attics. The provisions of 2-1.1 .1
represent the minimum number of detectors required by this standard. It
is recommended that the householder consider the use of additional
smoke or heat detectors for increased protection for those areas
separated by a door from the areas protected by the required smoke
detectors under 2-1.1 .1 above. The recommended additional areas are:
living room, dining room, bedroom(s), kitchen, attic (finished or unfinished), furnace room, utility room, basement, integral or attached
garage, and hallways not covered under 2-1.1.1 above. However, the
use of additional detectors remains the option of the householders.
Typical Multi-Floor Installation
n Smoke detector for minimum protection
0 Smoke detector for additional protection
A Heat-activated detectors
Components
NOTES:
l
l
l
The Central Controller has a 3-AG 3/4-amp fuse on the external
siren leads. If the external sirens do not sound when they should,
the fuse may need replacing.
Underwriter’s Laboratory requires the use of a UL-listed, single
station smoke detector with a relay connected to a universal transmitter in fire applications.
UL requires that any fire application includes either a supervised
smoke detector transmitter, or a universal transmitter configured for
fire and connected to a UL-listed, single station smoke detector with
relay. Other types of smoke/fire sensors (such as heat sensors) may
be included in the system.
72
Typical Single-Floor InstallationOne Bedroom Area
Typical Single-Floor InstallationTwo Bedroom Areas
24
Components
Universal Transmitter
Transmitters are used differently in each system and are preset by your
dealer. The back cover of this manual lists each transmitter and where it is
located.
Transmitters may be mounted on walls and connected to smoke or fire
sensors, intrusion sensors, or other sensors. They can also be set up as
portable units that you can carry with you.
The button on the Universal Transmitter can either be a Test or Alarm
button. To activate the button, press and hold it for 2 seconds.
25
Components
Passive Infrared Transmitter (PIRT)
The PIRT is a space protector which detects intruders by measuring
changes in heat patterns. When the PIRT detects an intruder, it transmits
an alarm to the Central Controller. Most PlRTs are interior sensors and are
only armed when your system is set to Away.
The PIRT is used in areas which would be difficult to protect with other
types of sensors or as additional protection against intrusion. It is usually
mounted on a wall to monitor an entire room or hallway.
NOTE: The PIRT sends an alarm signal when it first detects motion
and will not send another until it resets itself. The PIRT will reset itself
only after it does not detect any movement for 2-1/2 minutes.
26
Components
Wireless Siren/Controller
This is an extension siren for remote areas of your home. It echoes trouble
beeps and alarms sounded at the Central Controller. It also controls any
optional sirens mounted inside or outside your home.
The Wireless Siren/Controller operates on household power, but automatically switches to a backup battery during a power failure. To conserve
backup power, the controller will not activate the external sirens when
battery-operated.
27
Testing and Maintenance
Replacing Batteries in Keypads and Universal Transmitters
Batteries should be replaced whenever they are low. Test the Universal
Transmitter weekly to be sure it is working properly (see page 32 for the
procedure used to test the transmitter battery power and operation).
To Replace Batteries:
1 Put your system in the DEMONSTRATION mode. (Set the system to
Off, then press and hold Test/Demo on the Central Controller for 3
seconds.)
2 To remove the transmitter cover, press upward on the release tab at
the bottom of the transmitter. Remove the transmitter cover by lifting it
up and out at the bottom.
NOTE: This will set off an alarm, but since the system is in the
DEMONSTRATION mode, it is only a test alarm. It will sound at a
lower volume and will not activate your telephone dialer or any external
sirens. Cancel the test alarm if you wish.
3 Remove the battery and discard it.
4 Replace the battery with a 9-volt battery (Duracell MN1 604, or
Eveready 522). Attach the battery lead and set battery into the
transmitter body.
5 Re-attach transmitter cover to the backplate.
6 Test transmitter to be sure it operates properly (see page 32).
7 Take your system out of the DEMONSTRATION mode by pressing
Test/Demo on the Central Controller. The system will automatically
return to normal operation if no activity occurs within 10 minutes while
in the DEMONSTRATION mode.
28
Testing and Maintenance
Replacing PIRT Batteries
Batteries should be replaced whenever they are low. Test the PIRT weekly
to be sure it is working properly (see page 32 for procedures used to test
PIRT battery power and operation).
To Replace Batteries:
1 Put your system in the DEMONSTRATION mode. (Set the system to Off,
then press and hold TestDemo in the Central Controller for 3 seconds.)
2 Use a coin to press down on the PIRT release tab (located in a slot at the
top of the backplate). Pull the top of the backplate away from the transmitter body to release it.
NOTE: This will set off an alarm, but since the system is in the
DEMONSTRATION mode, it is only a test alarm. It will sound at a lower
volume and will not activate your telephone dialer or any external sirens.
Cancel the test alarm if you wish.
Remove the PIRT housing by pulling it up and away from the bottom of
the baseplate.
Remove the batteries and discard them.
Replace the batteries with new 9-volt batteries (Duracell MN1 604, or
Eveready 522). Attach the battery leads and set the batteries into the
transmitter body.
Re-attach the PIRT housing to the backplate.
Test the PIRT to be sure it operates properly (see page 32).
Take your system out of the DEMONSTRATION mode by pressing
Test/Demo on the Central Controller. The system will automatically return
to normal operation if no activity occurs within 10 minutes while in the
DEMONSTRATION mode.
29
I
Testing and Maintenance
Replacing Smoke Detector Batteries
Batteries should be replaced annually or when low. See page 32 for the
procedure used to test the transmitter battery power and operation.
To Replace Batteries:
Remove the smoke detector from the mounting bracket by pressing the
black tab on the side marked PRESS. Lift the detector away from PRESS
and lift up until the top is free from its hook.
Remove both old batteries and discard them.
Wait at least one minute before inserting new batteries. This allows the
Low Battery detector in the transmitter to reset. Replace the batteries
with two 9-volt batteries (Duracell MN1604 only). Insert the batteries
with leads pointed to the center of the transmitter, as shown in the figure
at the right.
Re-attach the detector to the mounting bracket by hooking it at the top,
then swing the bottom down until it snaps into place (you may need to
press the detector into the bracket at both top and bottom).
Test the detector to be sure it operates properly.
NOTE: Different manufacturers make 9-volt alkaline batteries in
slightly different case sizes. To ensure proper fit and performance in
your smoke detector, You should use only Duracell MN1 604.
30
Testing and Maintenance
Replacing Wireless Siren/Controller Batteries
Go to the Wireless Siren/Controller and remove the cover by lifting it up
and away from the bottom.
Remove the old battery and replace it with a new one (Duracell MN1604
or Eveready 522).
Press Cancel for 1 second (you will hear a chirp) to reset the low
battery sensor in the Wireless Siren/Controller.
Replace the cover securely.
Testing and Maintenance
Your AT&T Security System 8000 requires very little maintenance. All you will
normally need to do is replace its batteries whenever they run low. YOU
SHOULD ALSO TEST YOUR SYSTEM WEEKLY-WITH AND WITHOUT AC
POWER-TO BE SURE EVERYTHING WORKS PROPERLY.
Weekly System Test
Perform the following test procedure every week; once with the Central
Controller plugged in and once with the Central Controller unplugged. This will
ensure that the backup batteries operate properly.
Enter your security code on your keypad. Press Off. Your system is now set
to OFF.
Within 2 minutes of setting your system to OFF, press and hold Test/Demo
on your Central Controller for 3 seconds until a decimal point appears in
the display. Your system is now in the DEMONSTRATION mode.
Enter your security code on the keypad and press Away.
Go to each transmitter and cause it to set off an alarm. (Open the door or
window, activate its motion or smoke detector, or otherwise trip its sensor.)
In the DEMONSTRATION mode, the alarm you hear will not be as loud as
a normal alarm. (The automatic telephone dialer and any external sirens
will be deactivated and the volume on internal sounders will be lowered.)
The pattern of the alarm you hear should correspond to the type of alarm
you triggered-fire, intrusion, environmental, or auxiliary (see page 10).
(Continued)
32
Testing and Maintenance
(Continued)
After a fire, environmental, or auxiliary alarm, the system will normally
not respond to the same type of alarm again for about 5 minutes. (See
“Automatic Disarm Period,” page 12.) But in the DEMONSTRATION
mode, this disarm period is only 2 minutes.
5 After you hear the alarm sound, cancel the alarm by entering your
security code on the keypad of any transmitter.
6 Repeat for each transmitter in your system.
NOTE: The Passive Infrared Transmitter (PIRT) sends an alarm signal
when it first detects motion and will not send another until it resets itself.
The PIRT will reset itself only after it does not detect any motion for
2-1/2 minutes.
7 Enter your security code on your keypad and set your system to the
mode you want. (It is currently set to the AWAY mode.)
8 Press Test/Demo on your Central Controller once to take the system out
of the DEMONSTRATION mode. Your system is now in the mode you
selected in step 7.
(Continued)
Testing and Maintenance
If any of the transmitters fails to trigger an alarm, and the cause is not
obvious, call your dealer immediately.
If you forget to take the system out of the DEMONSTRATION mode, it will
reset itself in about 10 minutes.
NOTE: When you are done testing, be sure to restore AC power to your
Central Controller. The power transformer should be secured to the outlet
34
Warranty
Important
AT&T does not provide a warranty on these products to consumers.
Consumer warranties and maintenance arrangements are provided only by
the dealer who installed your system and who is best equipped to maintain
it. You should inquire of your dealer as to the nature and extent of the
dealer’s warranty and maintenance agreements, if any. There are no
obligations or liabilities on the part of AT&T for loss of use of these
products, or property damage or any other incidental or consequential damages arising out of or in connection with the use or performance of these products. AT&T makes no guaranty or warranty,
including any implied warranty of merchantability or fitness regarding these products. Some states do not allow the exclusion or limitation
of consequential damages, so the above limitations or exclusions may not
apply to you.
AT&T Security Systems
5 Wood Hollow Road
Parsippany, New Jersey 07054
35
FCC Information
FCC Registration and Repair Information
Your new AT&T product has been registnred with the Federal Communications Commission (FCC). This product complies with standards in Part 68
of the FCC Rules. The FCC requires us to provide you with the following
information.
Connection and use with the nationwide telephone network
The FCC requires that you connect your product to the nationwide
telephone network through a modular telephone outlet or jack. The
modular jack to which this equipment must be connected is a USOC RJ31x.
This equipment may not be used with Party Line Service or Coin
Telephone Lines.
Notification to the Telephone Company
Upon request of your local telephone company, you are required to
provide them with the following information:
A The “line” which you will connect the telephone equipment (that
is, your phone number), and
B The telephone equipment’s FCC registration number and ringer
equivalence number (REN). Those numbers are on the back or
bottom of your telephone equipment.
36
FCC Information
The REN is useful to determine how many devices you may connect to
your telephone and still have them ring when you are called. In most,
but not all areas, the sum of all REN’s should be 5 or less. You may
want to contact your local telephone company.
Repair instructions
If it is determined that your telephone equipment is malfunctioning, the
FCC requires that it not be used and that it be unplugged from the
modular outlet until the problem has been corrected. Repairs to this
telephone equipment can be made only by the manufacturer or its
authorized agents or by others who may be authorized by the FCC. For
repair procedures, contact your AT&T authorized security dealer.
Rights of the telephone company
If your telephone is causing harm to the telephone network, the telephone company may temporarily discontinue your telephone service. If
possible, the telephone company will notify you before interrupting
service. If advance notice is not practical, you will be notified as soon as
possible.
You will be given the opportunity to correct the problem and you will be
informed of your right to file a complaint with the FCC. Your telephone
company may make changes in its facilities, equipment, operations, or
procedures that could affect the proper functioning of your telephone. If
such changes are planned, you will be notified.
37
FCC Information
Interference Information: Part 15 of FCC Rules
Some telephone equipment generates and uses radio-frequency energy and,
if not installed and used properly, may cause interference to radio and
television reception.
Your AT&T product has been tested and found to meet the standards for a
Class B computing device, as specified in Subpart B of Part 15 of the FCC
Rules. These specifications are designed to provide against such interference
in a residential installation. However, there is no guarantee that interference
will not occur in a particular installation.
If your AT&T product causes interference to radio or television reception
when it’s in use, you might correct the interference with any one or all of
these measures:
Where it can be done safely, re-orient the receiving television or radio
antenna.
To the extent possible, relocate the television, radio, or other receiver with
respect to the telephone equipment.
Plug your radio or television into an AC outlet that is not on the same
circuitas your security system.
If you need assistance, call your AT&T authorized security dealer.
38
Index
Alarms (see also Trouble Beeps)
Ambush, 13
Automatic disarm period, 12
Cancelling, 12
Environmental, 10
Fire, 10
Intrusion, 10
Panic, 2, 8, 13
Tamper, 21, 28-32
Ten minute maximum, 11
Triggering, 13
Central Controller, 12, 14-16, 18-l 9
Digital display, 12, 14, 16, 18
Indicator lights, 15, 19
Disarming the system, 8, 20
Displays
Digital, 12, 14, 16, 18
Indicator Lights, 15, 19
Doors or windows, opening, 9
Arming the system, 7
Emergency Procedures, 1
Evacuation, 4
Fire protection, 3
Safety, 2
Automatic Disarm Period, 12
Environmental Alarm, 10
Batteries, replacing
Keypads, 28
Passive Infrared Transmitter (PIRT), 29
Supervised Smoke Detector, 30
Universal Transmitter, 28
Wireless Siren/Controller, 3 1
Evacuation Procedures, 4
Ambush Alarm, 13
Cancelling an Alarm, 12
FCC Registration and Repair Information, 36-38
Fire alarm, 10
NFPA Recommendations, 23-24
Fire protection, 3
39
Index
ID numbers for transmitters, back cover
Monitoring service, 10-13
Indicator Lights 15, 19
Operation Procedures, 5-9
Leaving home, 7
Opening door or window, 9
Returning Home, 8
Turning system on (arming), 7
Turning system off (disarming), 8, 21
Intrusion Alarm, 10
Keypad, Wireless System
Operation, 6, 20
Battery replacement, 28
Panic Alarm, 2, 8, 13
Keypad, Wireless Local
Operation, 21
Replacing batteries, 28
Passive Infrared Transmitter (PIRT)
Operation, 26
Battery replacement, 29
Maintenance, 28-34
Quick Reference, inside back cover
Modes
Away, 5-7, 15, 18, 21, 26
Delay, 21
Demonstration, 28-34
Home, 5-6, 8, 15, 18, 21
Instant, 21
Off 6, 8, 18, 21
Safety Procedures, 2-4
NFPA Recommendations, 23-24
Security Code, 6, 13, 20-21
Sensors, 5
Interior, 5, 21
Perimeter, 5
24 hour, 5, 21
40
Index
Smoke Detector
Operation, 22
Battery replacement, 30
Trouble Beeps from, 22
Tamper Alarm, 21, 28-32
Testing the system, 32-34
Transmitters
ID Number List, back cover
Passive Infrared, 26
Universal, 25
Wireless Local Keypad
Operation, 21
Replacing batteries, 28
Wireless Siren/Controller
Battery replacement, 31
Trouble beeps, 17
Operation, 27
Wireless System Keypad
Operation, 6, 20
Battery replacement, 28
Trouble Beeps
From the Central Controller, 10, 14-l 6
From the Wireless Siren/Controller, 17
From the Supervised Smoke Detector, 22
UL Requirements, 24
Universal Transmitter
Battery replacement, 28
ID number list, back cover
Operation, 25
Warranty Information, 35
41
Here is a brief guide to the operation of your AT&T Security System 8000. For more
detailed instructions, see the Owner’s Manual pages noted. Please pay special attention
to the Safety Procedures (pages 2-4) which give important information not covered here.
When Leaving Home (see page 7)
1
Enter your security code on the keypad attached to the door. The transmitter will
beep 3 times in quick succession as the last number is entered correctly.
2
Press Away. The Central Controller will beep once.
3
Press Open. The transmitter will beep 3 times.
4 Go out the door and close it. The system will arm itself in about 40 seconds
When Returning Home (see page 8)
1
Enter your home through a door that has been set for entry. The Central Controller
will begin beeping once every 3 seconds.
2
Enter your security code within 40 seconds. This will cancel the delayed alarm.
3
Press Home. This will disable all the interior sensors.
Sounding a Panic Alarm (see page 8)
Simultaneously press both sets of red dots on the keypad.
Turning Your System Off (see page 8)
1
Enter your security code on the keypad. The system will beep 3 times.
2
Press Off. All intrusion sensors will be turned off. Fire alarms remain armed.
Quick Reference
Silencing Trouble Beeps from the Central Controller (see page 14)
l
Press Test/Demo on the Central Controller.
OR
Press Cancel on your Central Controller.
Silencing Trouble Beeps from a Smoke Detector (see page 30)
Replace battery in smoke detector.
Silencing Trouble Beeps from the Wireless Siren/Controller (see page 17)
Press Test/Demo on the Central Controller. If this fails to silence Trouble Beeps,
remove cover of Wireless Siren/Controller and press the Cancel button inside.
Silencing Alarms (see page 12)
l
Enter your security code on the keypad.
OR
Press Cancel on your Central Controller
NOTE: The Cancel button on your Central Controller will not cancel an intrusion
alarm.
Opening a Door or Window When the System is Armed (see page 9)
l
l
l
Enter your security code on a keypad and press Off.
Open door or window.
Enter your security code on a keypad and press Home.