1
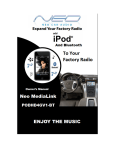
Neo ProLink v2
IPOD TO HONDA/ACURA (R3) – PODHONR3V2Y
IPOD CONNECTION KIT
INSTRUCTION MANUAL
With the Neo ProLink for Honda/Acura you can fully control the iPod at ALL times. This adapter does not disable your iPod
screen, buttons or click wheel. There are no special playlists that need to be setup, or specific naming of playlists. Your iPod
will operate the same when connected in the car as it does when you listen to it with headphones. You can access up to the first
5 playlists and you’ll also have track control from the radio buttons and steering wheel (if available) by using the track up,
track down, fast forward and reverse buttons to change songs.
FEATURES
Direct Connect - iPod plugs directly into car radio’s CD Changer port.
Track Control – Change iPod songs from CD Changer buttons on car radio.
Direct Mode - Direct access and control of every playlist, song, artist and menu setting from your iPod
Advanced Mode – Access up to 5 playlists from the radio buttons.
Charging and Power – iPod is powered and charging while in use, auto stops after 1 hour of non use.
Auxiliary input – Add a DVD, Satellite radio or any audio device in conjunction with iPod.
COMPATIBILITY
The Neo ProLink is compatible with all iPods with a DOCK connection located on the bottom of the iPod. This includes the
following iPods;
4th Generation, Mini, Photo, U2, HP, Nano and Video.
Models Compatible
Accord
Civic
CRV
Element
Fit
Odyssey
Pilot
Ridgeline
S2000
MDX
TL
TSX
RL
RDX
Yrs Compatible
2003-2007
2006-2007
2005-2007
2003-2007
2006-2007
2005-2007
2006-2007
2006-2007
2004-2007
2005-2007
2004-2007
2004-2007
2005-2007
2007
∗ If vehicle is equipped with GPS Nav, it will work as normal.
∗ If vehicle has stock SAT radio option, it will work as normal, SAT radio is not affected.
The Neo ProLink connects your iPod directly to your stereo by connecting to the external CD changer port on the back of the
radio. It will replace the external 6-disc CD changers. External CD changers plug into the actual radio and therefore it is not
possible to have both an external 6-disc CD changer and the Neo ProLink connected at the same time. The CD player/changer
which is an “in-dash” built into the radio will not be affected.
WARNING!
Do not allow the Apple iPod to distract you from driving! Only operate the unit when stationary or ask passengers to operate it for you.
Neither Neo Car Audio Inc., Apple Computer, Inc., its regional offices, distributors or resellers accept any responsibility for any damage or
injury as a result of using Neo iPod Integration Kits. The use of this product constitutes your acceptance of our terms and conditions. Please
return the kit immediately if you do not agree. Exercise good judgment and keep your eyes on the road at all times!
IMPORTANT INSTALLATION INSTRUCTIONS - PLEASE READ BEFORE INSTALLING
Before you begin the installation, you need to set the dip switches to the correct settings – depending on how you choose to use
it. They can be changed at ANY time if you change your mind. Make sure Power is OFF and box is unplugged before
making changes. Also, NEVER permanently hide the box, it should be placed somewhere for you to access easily.
DIP SWITCH NUMBER ONE:
Aux Input Option
The Neo ProLink adapter comes equipped with a second AUX input which is an RCA connector. This second AUX input
allows you to connect two devices to this adapter; an iPod and any other audio device that has a headphone or RCA jack. You
will need to use an RCA to headphone jack cable (not included). To access AUX source, go to CD 6 Track 1 after selecting CD
changer SOURCE on the radio.
Selected Mode
AUX OFF
AUX ON
iPod Dip Switch Position
1
ON – DWN
OFF – UP
AUX INPUT ACTIVE
NO
YES
If you would like to use the AUX input (now or in the future), please make sure its set to OFF / UP.
If you are NOT going to use the AUX and you don’t foresee yourself using it anytime soon, set it to ON / DOWN
DIP SWITCH NUMBER TWO:
IPOD CONFIGURATION - 2 MODES TO CHOOSE FROM:
Advanced Mode.
Advanced Mode allows you to experience all the adapter has to offer. You will be able to change tracks and shuffle through up
to 5 of your playlists. Text if the radio supports it will be displayed. Response time between changing tracks is quick. And
DON’T worry, your ipod is fully functional, it is NOT LOCKED OUT like other adapters do. Neo recommends this mode.
Important: After plugging in your iPod you will see an “ok to disconnect”, followed by a series of iPod initialization screens for up to
30 seconds before your iPod menu returns to normal. If your ipod does not go back to normal, you will need to UPDATE the ipod to the
newest firmware.
Direct Mode.
If you prefer to use the adapter for next and previous track ONLY, Direct Mode is the best option. Text, playlist, etc, are not
supported. Track numbers and times are not synchronized between the iPod and radio. Because there is less data to transfer
between the iPod and the radio, the response time is quicker than Advanced Mode. iPod is accessed ONLY from disc 5.
Selected Mode
Advanced Mode
Direct Mode
iPod Dip Switch Position
2
ON – DWN
OFF – UP
PLAYLISTS
YES
NO
RADIO CONTROLS
YES
YES
IPOD CONTROLS
YES
YES
INITILIZATION
YES
NO
PACKAGE CONTENTS
Neo ProLink – White Box, Honda Cable, iPod Cable
INSTALLATION STEPS
Step 1: Remove radio from dash.
Step 2: Plug the vehicle cable into the port on the radio. (If port is taken, unplug and connect into the female plug on the
neo cable)
Step 3: Plug the round din plug on the Honda cable to the Neo ProLink where it is labeled “RADIO”.
(Do Not connect your ipod until the install is complete).
Step 4: If using the AUX, connect the audio output of your auxiliary device to the AUX input jack on the Neo iOn.
Step 5: Plug the iPod cable to the Neo ProLink adapter box where it is labeled “iPod”.
Step 6: Test to make sure everything is working before you reinstall the radio.
Step 7: Reinstall the radio back into the dash of the vehicle. DO NOT PERMANENTLY HIDE BOX/MODULE BEHIND
RADIO. If possible, put in a place where its relatively easy to get to in the future. Customer should NOT have to return to
installer just to access box.
*NOTE* Display of artist & song title on the radio LCD is NOT supported with this interface.
If the radio is not recognizing the kit or it’s not working correctly do NOT change ANY of the dip switches, this will not
fix anything. Please call Neo Tech Support at 619-819-0758.
IS YOUR IPOD UP TO DATE? If the radio recognizes the adapter, but the control is NOT correct, your iPod is not up to
date. Check Apple for the latest FW version updates. You must update your iPod.
USING THE NEO ADAPTER
As mentioned before, setting up playlists is NOT required. But to take full advantage of our adapter when in Advanced Mode
and its quick music browsing system, we recommend you have your music organized in playlists on your iPod before using
your iPod Integration Kit. Once again this is not needed, but may help in overall use.
Study Your Radio’s Manual !
Please review the owner's manual for your vehicle's entertainment system. This guide does not provide details on the various
button-specific features. Every radio is different and have buttons assigned to perform specific functions. It is up to you to
determine which buttons correspond to the adapter’s functions.
Important: Not all radio’s have the capabilities to perform every function that adapter can, this will depend on the radio
capabilities and/or which level of radio came with your car (base, premium, etc..)
General Operation
A Connect the iPod to the docking cable
B Turn on your radio
C Select the CD Changer source. (CD, CDC, DISC button etc)
When the iPod is connected to the adapter, the iPod screen will go blank for a few seconds before the normal screen returns OR
go through initialization depending on which mode you chose. Push the CD button to access the iPod (if you have a CD
player/changer, press the button twice). The CD button is the ONLY button that will access our adapter.
For a few seconds the iPod may cycle through a set of screens while it initializes in the Advanced Mode. Wait for the
iPod screen to return to normal before making any selections or changes to iPod.
If playback does not automatically begin, then select a playlist or song. You can browse music directly on your iPod radio or
steering wheel. Both the iPod and radio controls are ALWAYS active in both modes.
Song Browsing
Direct Mode: The iPod’s audio will be played on Disc 5, Track 1.
Advanced Mode: The Neo iPod integration kit gives you the following features while in advanced mode.
IF DIP Setting are set to AUX OFF and Advanced Mode:
Disc #
Playlist
Next Track Button
“”
DISC 1
Playlist #1 in ipod
Next Track
DISC 2
Playlist #2 in ipod
“
DISC 3
Playlist #3 in ipod
“
DISC 4
Playlist #4 in ipod
“
DISC 5
Playlist #5 in ipod
“
DISC 6
ALL songs in ipod
“
Prev Track Button
“”
Prev Track
“
“
“
“
“
IF DIP Setting are set to AUX ON and Advanced Mode:
Disc #
Playlist
Next Track Button
“”
DISC 1-4 (same)
Playlist in ipod
Next Track
DISC 5
ALL songs in ipod
“
DISC 6
Aux Source
-
Prev Track Button
“”
Prev Track
“
-
FFW
Rewind
FF Song
“
“
“
“
“
RW Song
“
“
“
“
“
FFW
Rewind
FF Song
“
-
RW Song
“
-
Navigating the iPod:
Changing Songs: To change songs. Press Track Up and song advances.
Changing Playlists: To change a playlist, Press Disc Up until you get to the disc number of your playlist you want. To get to
more playlists, you must do it manually.
Accessing All songs: Go to disc number represented above. (depends on how you set the dip switches up).
Changing to the Aux input: To change to your Aux device, press Disc up until you get to DISC 6.
There may be slight delay times when changing tracks depending on the radio software loaded from the factory and how
quickly it will communicate with the adapter and the iPod. If the or buttons are pressed very quickly and the iPod has not
been allowed enough time to change tracks, the track number display on the radio may not load correctly. You will also hear
short bits of audio if these buttons are pressed too quickly. Remember that you have full access to your iPod buttons, so if you
need to quickly change through track or are searching for a particular artist/song, you can also use the iPod itself.
NOTICES, WARNINGS, AND WARRANTY
One Year Limited Warranty
The quality controls used in the manufacture of this product ensure your satisfaction. This warranty applies only to the original purchaser of this product
from an authorized dealer. This warranty covers any supplied or manufactured parts of this product that, upon inspection by NEO CAR AUDIO authorized
personnel, is found to have failed in normal use due to defects in material or workmanship. This warranty does not apply to installation expenses.
Operating this unit under conditions other than those recommended or voltages other than the voltage indicated on the unit, or attempting to service or
modify the unit, will render this WARRANTY VOID. Unless otherwise proscribed by law, NEO CAR AUDIO shall not be liable for any personal injury,
property damage or any incidental or consequential damages of any kind (including water damage) resulting from malfunctions, defects, misuse, improper
installation or alteration of this product.
All parts of this NEO CAR AUDIO product are guaranteed for a period of 1 year as follows:
Within the first 12 months from date of purchase, subject to the conditions above, NEO CAR AUDIO will repair or replace the product if it is defective in
material or workmanship providing it is returned to NEO CAR AUDIO, with PROOF OF PURCHASE from an authorized dealer. If you have a problem
with this product, please call or write to our Customer Service Dept.
All warranty repair must have a RMA number from our service department. Contact Neo Car Audio for further warranty repair info.
Warning:
1. This equipment may be reset by unintentional electrostatic discharge during operation. Exposure to direct sunlight or extreme heat may cause
damage or malfunction.
2. Do not disassemble or alter the cable and interface box.
3. Make the connections correctly
4. Do not cut away the wire sheath and use the power for other equipments.
5. Do not install in locations which might hinder vehicle operation or create hazards for vehicle occupants.
6. Have the wiring and installation done by professionals.
7. Arrange wiring so it is not crimped or pinched.
8. Do not use this product for purposes other than stated for the vehicle.
Caution:
1.
2.
3.
The ACC Switch Output Connector has 10mA drive capability only. You must use a relay if higher ACC power output is required.
Use of headphones while operating an automobile or moving vehicle is not recommended and is unlawful in some countries and areas.
Be careful and attentive on the road. Stop operation of the Neo Adapter if you find it disruptive or distracting while driving. The driver of a motor
vehicle should not operate the Neo Adapter while driving.
FCC Class B Radio Frequency Interference Statement
This equipment has been tested and found to comply with the limits for a Class B digital device, pursuant to Part 15 of FCC rules. These limits are
designed to provide reasonable protection against harmful interference in a residential installation. This equipment generates, uses, and can radiate radio
frequency energy and, if not installed and used in accordance with the instructions, may cause harmful interference to radio communications. However,
there is no guarantee that interference will not occur in a particular installation. If this equipment does cause harmful interference to radio or television
reception, which can be determined by turning the equipment off and on, the user is encourages to try to correct the interference by one or more of the
following measures:
1. Reorient or relocate the receiving antenna.
2. Increase the separation between the equipment and receiver.
3. Connect the equipment into an outlet on a circuit different from that to which the receiver is connected.
4. Consult the dealer or an experienced radio/television technician for help.
Notice 1: The changes or modifications not expressly approved by the party responsible for compliance could void the user authority to operate the
equipment.
Notice 2: Shielded interface cables, if any, must be used in order to comply with the emission limits.
Copyrights, warnings, and other information
The illustrations, technical information, data and descriptions contained in this publication are subject to change without notice. This publication, together
with all information contained in it, and all intellectual property rights on this publication remain the property of NEO CAR AUDIO. The user may not
pass this publication on to third parties. No liability will be accepted for any inaccuracies or omissions in this publication, although due care has been
taken to make it as complete and accurate as possible
iPod, 3rd Generation, 4th Generation, Mini, Photo, U2, HP, Nano and Video are registered trade marks of Apple Computers, Inc.
Honda/Acura is a registered trade mark of Honda Co. Ltd
Design and specifications are subject to change without notice.
Looking for an iPod Car Connection Kit for another vehicle radio?
Visit www.neocaraudio.com for more info. 619-819-0758