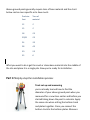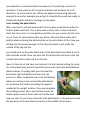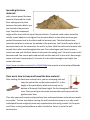
1
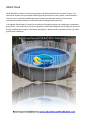
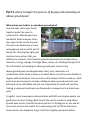
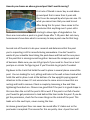
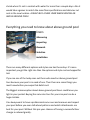
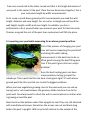
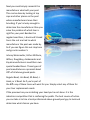
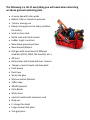
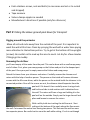
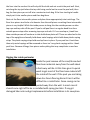
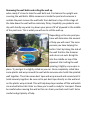
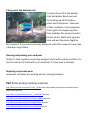
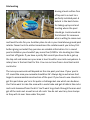
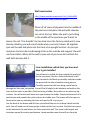
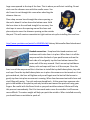
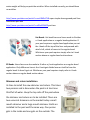
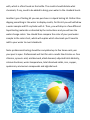
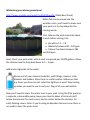
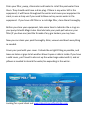
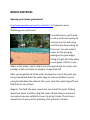
How to Move an Above Ground Swimming Pool Everything you would ever want to know about moving an above ground pool from one location to another By David Mispilkin: Owner of www.AboveGroundPoolBuilder.com, www.AboveGroundPoolFinder.com and www.MAPoolFinder.com Table of Contents How to move an above ground pool written by: David Mispilkin Part 1 where to begin the process of buying and relocating an above ground pool Where does one look for a used above ground pool what is a good price for a used above ground pool how to you choose an above ground pool that’s worth moving Everything you would ever want to know about above ground pool liners‐ (Expanded Information) Tools and materials you will need to relocate your pool Part 2 Taking the above ground pool down for transport Digging around the perimeter removing the old liner Digging the inside perimeter taking the top caps, top rails and top plates off the pool removing then uprights Removing the wall bolts and rolling the wall up taking apart the bottom track cleaning and packing your used pool replacing any broken parts Part 3 Site leveling and base materials Site leveling Sand or Stone base Foam floor padding and foam covings Part 4 Step by step the installation process Track set up and measuring Laser leveling the patio blocks spreading the base materials Floor work, how to tamp and trowel the base material Wall construction Liner installation, which liner you have and how it gets installed Skimmer and return installation Ladder installation Pump and filter installation Crushed stone around the pool Part 5 Caring for your new/used above ground pool Chemistry Cleaning Winterizing Opening About Dave David Mispilkin has been in the above ground pool installation business for the past 20 years. His experience includes, but not limited to above ground pool and liner sales, repairs, and installations. Over the years, David has installed thousands of above ground pools and liners from various manufacturers and has expertly installed moved and changed pools and liners. In this guide, David shares his expertise to guide you through the process of relocating a round above ground pool. The combination of pictures, graphics and text will help guide you through the process of buying, installing and caring for used above ground pool. Always consult a professional for any above ground pool installation. Recent pool installation by www.AboveGroundPoolBuilder.com Part 1 where to begin the process of buying and relocating an above ground pool Where does one look for a used above ground pool? Few activities can bring a family together quite like a pool in summertime. Most people have wonderful fond memories of fun days spent in the sun by the pool. The pool is as Americana as mom and apple pie and a central part of family life. Choosing the right pool involves many options that you will have to research. You’ll need to understand phrases like beaded liners, skimmers, coving, copings, Cartridge filters, valves, etc. Wading through all of the information surrounding an above‐ground pool can be tricky. Above‐ground pools are designed with steel, resin, aluminum or a combination of the three, known as a hybrid. Resin can be the most durable in regions with cold winters, but are more costly because of their resiliency. Steel pools have been known to corrode. Adding an above‐ground pool into your backyard can be affordable and not too complicated to install and maintain. Finding a used pool could save you thousands in comparison to a brand new pool. Craigslist, Local newspapers and pool stores with left over display models are good places to start looking. Best time of the year to conduct a used above ground pool search is late fall and early winter. It’s 40 degrees or less and no one seems to be in the market for a swimming pool! You’ll find that many home owners are desperate to get rid of their slightly used pools before winter. This is when you’ll get your best deal. I have spent many cold days taking down nice above ground pools for short money. Refurbishing them to almost brand new during the winter and then selling them for a nice little profit in the spring/summer time. What is a good price for a used above ground pool? Some of the deals I have come across have been simply a home owner needing a pool removed from their yard. Yes, some of the best deals I received have been free! Of course not every pool you come across will be free. The most I’ve ever paid is $500 for a 24rd sharkline pool with deck, aluminum fencing, pump, cartridge filter, solar cover, winter cover and all the accessories a family could ever need including chemicals. The homeowner originally paid over $5,000.00 brand new not counting original installation and the collection of accessories in the years after his purchase. So a good range perhaps 0‐$500.00 for a used pool is fair in colder months. The same used pool package in summer could fetch $1,500.00 easily. You will find that in the springtime/summertime that pool owners are very attached to the prices they paid when they first purchased their above ground pool packages. A pool owner selling an above ground pool simply cannot wrap their mind around practically giving something away after paying big bucks to get it in the first place. If possible keep a description of all the pools and prices you come across. Chances are that in the future you may come across the same pool for far less than you originally seen it priced for. Also remember that most homeowners want you to dismantle the pool. This action should always give you a little bargaining power. Chances are a homeowner didn’t install the pool themselves. Although pretty easy to dismantle it is a task that is worth bargaining the cost thereof. How do you choose an above ground pool that’s worth moving? First rule of thumb is never buy a used above ground pool that is more than 5 years old. Don’t ever be swayed by what you can see. It’s what you cannot see that you need to see! After doing this for years I have come to the conclusion that anything over 5 years old is starting to show signs of degradation. Yes there are cases when a pool is in great shape after 7‐10 years. But not many homeowners have done what is necessary to keep a pool new for that long. Second rule of thumb is to do your research and determine that the pool you’re inspecting is still in manufacturing somewhere. You don’t want to waste all your valuable time taking the pool down and find out the one piece of the pool that is missing cannot be gotten because the company went out of business. Make sure you can still get parts if you need to. Count on a local pool pro or retailer for figuring out if you’ll be able to get parts if needed. Dig down to the track that holds the wall in place in several places around the pool. You are looking for rust, pitting and holes in the wall or base track which holds the wall in place. Look at the bottom of a few uprights paying special attention to the screws. It’s not uncommon to come across screws that are rusting and hard to remove. Check a couple by loosening a few and then tightening them back on. Chances are good that if the pool is in good shape in this area then the rest of the pool is OK as well. If the pool is not full of water you’ll want to get permission to look behind the liner inside the pool. If you do get the permission, check for the same things on the inside of the pool. This leads us to the next topic, never reusing the liner. An above ground pool liner can never be reused after it’s taken out or the pool water is emptied. The reasons for this are pretty clear. A pool liner will shrink when it’s not in contact with water for more than a couple days. Also it would take a genius to match the same floor specifications and skimmer cut outs in the new location. ALWAYS BUY A NEW LINER WHEN MOVING AN ABOVE GROUND POOL! Everything you need to know about above ground pool liners Measuring Inspecting Research Selection Installation There are many different options and styles one has these days. It’s more important you get the right size then the options and style can be shopped for last. If you are one of the lucky ones out there who need an above ground pool liner because your pool is in need of one. Then there are some things you must know before you swipe that debit card. The Biggest misconception about above ground pool liners could leave you light in your pocket. Buying the same size liner for your size pool can be a huge mistake. You always want to have a professional come over and measure and inspect your pool before you even talk about patterns and which attachments are best for your pool. Without this pro your chances of having a successful liner change is reduced greatly. As with anything in life needing repair you get what you pay for. Having a qualified professional can make the process of changing your pool liner fast and likely to last a long time. Many people hire someone recommended by a friend or even hire from the craigslist in order to replace their pool liners. As a twenty year veteran above ground pool installer I find this a huge reason why pool liner replacement is often given a bad rap. I’ve heard many horror stories about contractors who really mess up ones pool and even some that have ruined pools. Many installation issues can be done right simply by taking a few steps to insure the best fitting pool liner for your pool. Let’s explore these steps and options that you can do to insure you the novice can end up with professional results. First step is finding someone qualified to measure and inspects your pool. You can do this yourself if you continue reading this guide. 5 steps to a successful above ground pool liner replacement 1. Measuring an above ground swimming pool for a new liner Before you can replace an Above Ground Pool Liner you will need to measure your pool. If you have around pool, you will need to know the diameter and wall height. Oval and rectangle pools will require measurements for the length and width. You will also need to know information about the bottom of your pool. A standard floor has a coving (Floor Base where meets the wall) that is about 4 inches in height up the wall and 3 inches inward from the wall. Overlap lined pools tend to have larger coves and most overlap lined pools are built to fit with universal overlap liners ranging from 48”‐54” in height. Don’t Measure wall height on the inside! When you measure the wall height, Measuring from the base of the bottom track to the top of the pool’s wall is the only way to measure effectively. Do not measure from inside the pool, always measure from the outside. Move any debris that may be in the way so you can measure from the base of the pool. Measure upward to underneath your pools top rail. This is your wall height. Next you will need the diameter, if your pool is round. Using the examples below, you will be able to determine the diameter of your round pool. In this example, the pool has a total of 14 uprights. Since it is an even number you simply split that in half which is 7. So you mark the #1 upright and count 7 uprights over being careful not to count the first upright. Use a tape measure to determine the distance between the #1 upright and the #7 upright; this is your diameter of the pool. In this example the pool has 15 uprights. To get the halfway point you’ll need to first find the highest even number of uprights your pool has. In the above example this number is 14. Simply count 7 uprights in either direction and be sure not to count the #1 upright when counting to the #7 upright. Use a tape measure to measure from the #1 upright to between the #7 upright and next upright which is the #8 upright. This is your pools diameter. How to measure an oval pools length and width. Notice in the pictures that sometimes your length measurement is from upright to upright and sometimes it is between two uprights. Take your measurements from the inside of the pool wall near the top of the pool. Use a tape measure and measure from straight side to the other straight side (this is the width measurement) on the inside of the wall. Next use a tape measure from one curved end to the other curved end (this is the length dimension of your pool) in the center of the pool. Place the two dimensions together; this is your oval pools length by width measurements. So to recap a round above ground pool’s measurements you need the wall height, diameter and cove height. For an oval or rectangle you will need the wall height, length x width and cove height. So whether you hire a professional or do it yourself when you measure your pool first and correctly. Chances are good the rest of the pool liner replacement will fall into place. 2. Inspecting your pool while measuring for an above ground pool liner Part of the process of changing your pool liner will involve inspecting the pool itself and doing this while talking measurements is the best time to do so. What good is buying the best fitting pool liner if the pool it goes into has a major problem? Even the best looking pools can have major problems lurking just past the naked eye. Take a pool like this one here. Looks great right? It’s with above ground pools like this one that can create the biggest problems. When you have vegetation growing close to the pools wall you can end up having rust or rot issues because the greenery holds moisture close to the pools wall. You always want to check the wall in several places no matter what is growing around the pool. Next check out the bottom ends of the uprights to see if they are still attached with manufactured screws. Sometimes the screws can rust and break long before the pool’s uprights. With any kind of material on the outside of the wall cam mask this issue. So take back whatever material you have and have a look. You need not ch3eck every single one. Check about 25% of the up rights. Next check out the skimmer and return and it’s always a good idea to replace them with new ones. But if they are in good shape consider just buying the gaskets instead. Some other important things to check are: Whether you’re going to replace or add floor padding. Floor padding can add a layer of protection between your liner and the base material. It can help with floor divots by almost eliminating them. It can also provide a soft feel when swimming. Whether you’re going to replace or add wall padding. Wall padding can help maintain pool water temperature. It will also help retain this heat better than the metal wall itself. You will want to note what the manufacturer of your pool is. You may have this information from when you purchased your pool. If you’re not sure it’s best not to guess. Take pictures if you’re not hiring a professional. These pictures will help the sales staff knowing the manufactured pool you have. 3. Ready yourself it’s now time to research above ground pool liner. Once you are armed with the correct measurements and the pool you’re replacing the liner in is capable of receiving a new liner. Now the real challenge comes at finding the best above ground pool liner for your particular pool. Not every liner is designed, manufactured or sold the same way. Many customers do steps 1 and 2 perfectly and then after buying a pool liner provided by their local pool retailer find themselves with bigger problems then before they started this process. I mean congratulations on getting through step one and two as you have already done more than many above ground pool contractors. Let’s now look at the replacement pool liner world for clues. What makes a good above ground pool liner? There are different manufacturing techniques used in the manufacturing of above ground pool liners. The best manufacturers are the ones who build your liner after measurement has been taken. Most companies brag about how fast they can produce what a customer is looking for. Having a liner to your home overnight is not always a good deal. In fact it’s probably a liner that has been sitting on a shelf for years. All pool liners are made of a type of vinyl, which is a durable surface to keep your pool water‐tight. You can purchase either a recycled or a virgin vinyl for your pool. Recycled vinyl will be thinner and stretch more easily, which can be problematic and make the liner more at risk for rips or punctures in the liner. Virgin vinyl is naturally made with thicker sheeting which will more easily resist the tears and stretching that may happen, thus lasting longer than recycled vinyl. Next the seams that holds the liner in its shape. There are different ways a manufacturer uses to make these seams. Vinyl Pool Liners that are manufactured with ¾” Lap Welded Seams are the best quality on the market right now. There is typically 2‐3 seams that make up a round liner and 3‐5 that make up an oval. One common seam to all above ground pool liners is the one that runs along the bottom where the liner sides meet the bottom. Vinyl Pool Liners manufactured in climate and environmentally controlled facilities with premium materials designed to withstand harsh environments are best. Also it’s even better to have a facility use UV inhibitors to protect against sun damage and Algae inhibitors which aid normal sanitizers to protect the liner itself. The better manufacturers can produce material that can have cold crack temperature protection to at least zero degrees farenheit. Another process that some manufacturers use is they use non embossed vinyl. Embossed vinyl varies in thickness, leading to a sub‐standard product that is more apt to rip, wear unevenly or otherwise fail prematurely. The illustration below shows how embossed vinyl measures the thickness of the material at the highest point of the embossing rather than the valley which is the true thickness of the material. Non‐embossed Vinyl is best compared to embossed vinyl. Embossed vinyl Non embossed vinyl Mil vs Gauge Material thickness The biggest secret to consider about above ground pool liners. This is perhaps the biggest secret kept from the public’s trustful eyes. When retail establishments advertise certain mil or gauge materials what they don’t tell you is. The thickest part of the liner is the sides of the liner. The floor is not guaranteed to be at that thickness advertised. That’s huge to know isn’t it? Most manufactures sell liner thickness with two choices. There is the mil choice and the gauge choice. The fact is that these terms are not interchangeable and are different in the pool industry. So when you have the choice of a 20 mil it’s not the same as a 20 gauge. A typical above ground pool liner is 15‐16mil which is .0015‐.0016 of an inch. There are places who advertise higher mil such as 20‐25 mil and this means the liner thickness is .0020‐.0025 of an inch. Gauge is not an exact measurement and can vary in the form of thickness from one to the other because it’s a term used when measuring different metals. Having a heavy gauge liner doesn’t mean it’s thicker than a higher mil choice. It’s easier to produce long sheets being the same Mil thickness than it is to produce larger areas of the liner, like the bottom section. Gauge would be a term used for metal. If someone gives you gauge choice then chances are the liner is not as thick as it could be. Please refer to (Metal thicknesses table). All liners are subject to punctures and tears from outside elements. This picture represents thicknes as 27.5 Mil thickness. That is the skinny on Mil Vs. Gauge and I believe you feel liberated right? Hold on Liner pro there is more! So now you are armed with some knowledge now let’s explain how these products are turned into the named products we see in the stores and online Here is a list of some common names given to pool liners: Overlap Standard Bead Uni‐Beaded J‐Hook V‐Beaded Johnny Weissmuller and Esther Williams Beaded Ambassador Beaded Kayak Bead Wilkes Beaded Ez‐Beaded EZ‐Clip Doughboy bead Expandable Hopper (Oval expandable) If you’re thinking that’s many kinds of liners then you’re completely right. I was dizzy researching all these liner styles myself. Most are just manufacturers’ guaranteeing that customers only use their replacement liners. Kind of like how Apple makes all their own products to maximize profits. There are many ways to overcome allot of this confusion. Let’s try and make hay of these different liners. There are three styles of liners and the rest are the different manufacturers making their own mark on the industry. They are Overlap, Beaded and J‐hook and the rest are variations of these liners. The definitions of these three: Overlap Will overlap the top rim of the wall and are clamped down with a coping strip. These pool liners are the most affordable. You may not be able to find many colors or patterns in this type of liner though. Overlap liners are the hardest to install, requiring basic items which will come with your pool. These liners now come universal to fit pool wall heights of between 48” ‐54”. J‐Hook They are called that because of the way that are mounted and hang on the top of your pool wall via a J‐shaped adapter. They are not as cheap as overlap pool liners, but are easier to remove and replace should you need to do so. J‐ hook liners also come in a wider variety of patterns and colors than overlap liners. Standard Bead These pool liners are considered the best available, mainly because they include the largest variety of pattern selection, they are easily installed. They require a track system called bead receivers. The tracking is placed on the wall itself to receive the bead directly into the groove of the bead receiver. The bead snaps into the track. If your pool was installed with this system then replacing your liner could not be easier. Taking apart the top rails is not necessary. Just remove old liner and the new liner fits in the same bead track. Now let’s look at the variations of these liners next: Johnny Weissmuller, Esther Williams, Wilkes, Ambassador and Kayak are beaded liners with varying bead thicknesses. Weissmuller and Esther Williams have a metal bead track that requires the bead to be thicker. Kayak and Wilkes require their own thickness bead to fit their special sized bead tracks. Ambassador has its own system that requires their liner to fit into a special opening built into their walk deck system. V‐Bead is the same as a J‐Hook Uni‐Beaded is the J‐hook and regular beaded together as one. You can use both applications separately. For J‐hook you simply hook the liner over the top of your pools wall. For a regular bead you cut away the J‐hook portion and tuck the bead into your bead receivers. EZ‐bead is slightly different as the J‐hook portion is folded over on itself to make the bead. Nothing gets cut away. EZ‐Clip is Doughboy’s way of selling a beaded liner. They advertise it to clip into place instead of the regular bead that snaps into place. It’s the same thing. Expandable liners are designed with extra material that stretches making it possible to make a deeper swim area. Hooper Liners are designed for special hopper style deep end in doughboy pool. 4. Which is right for your pool? Most swimming pools sold today come with beaded liners. So chances are good that yours will be a beaded liner. When it comes to replacing any pool liner the general rule of thumb is to get exactly what is in your pool now. First thing to do is to look at your purchase receipts. Chances are great the pool liner is listed within this paperwork. However if you are becoming a new owner because you purchased a home with an above ground pool finding paper work might be impossible. If you see the pool liner on the outside wall of the pool then your pool liner is an overlap liner. If it doesn’t your next agenda should be to determine which particular beaded style you have because if it’s not an overlap then it can only be a beaded style liner. Look at the outside of the top of the pool wall close up. If you see what appears to be liner material coming over the top wall about a quarter to a half inch. Then you have ether J‐Hook, V‐Bead, Uni‐Bead or EZ‐Bead pool liner. If you don’t see liner material on the outside wall of your pool then you are left with the following pool liner choices. Regular beaded Kayak, Wilkes, Johnny Weissmuller, Esther Williams, Uni‐Beaded, EZ‐Clip and or EZ‐Beaded. Next you could simply research the manufacturer who built your pool. This can be done by looking at top caps and other places on the pool where manufacturers leave their branding. If you’re lucky enough to determine the manufacturer than you solve the problem of which liner is right for your pool. Besides the regular bead liner, J‐Hook and V‐bead liners the rest are tied to which manufacturer the pool was made by. So if you can figure this out stop here and go onto number 5. Johnny Weissmuller, Esther Williams, Wilkes, Doughboy, Ambassador and Kayak manufacturers need their own special beaded liners. These types of pool manufacturers represent about 20% of all above ground pools. Regular Bead, Uni‐Bead, EZ‐Bead, J‐ Hook, or V‐Bead. So if you’re part of the 80% any of these liners will work for you. Simply select any of them for your liner replacement needs. If the previous has you scratching your head you’re not alone. It is the industries competition that is confusing the public. The best course of action you can take is to hire a local professional above ground pool guy to look and determine what choices you have. 5. Hiring the right professional to get the liner installed correctly Always check the bbb and reviews of all contractors especially pool guys in the above ground pool filed. Often times states don’t require specific licencing for above ground pool installers. If the used pool you’re looking at comes with accessories like a pump and filter and or other pool equipment. Make sure the pump and filter runs by plugging them in Check the valves and the clamps in case you may need new ones. Get on that ladder or decking and check it out. Make sure it does what it is meant to do. If everything checks out to your liking and it’s less than 5 years old and you cannot find any meaningful rust. Then make your deal it’s time to dismantle your catch. Tools and materials you may need to move your used pool When it comes to above ground pool installation having the right tool at the right time is an absolute must. It often takes three people doing three things at once and having all the tools on hand is crucial to relocating an above ground pool properly. I have been installing above ground pools for more than 15 years and have seen everything that could go wrong with an installation. Weather plays a huge factor in above ground pool installation. Windy weather can wreak havoc on an installation not to mention cold raw weather or rain all not wanted when relocating your pool. Choose a nice sunny day with little to no wind. You will be glad you did! The following is a list of everything you will need when relocating an above ground swimming pool. A sunny day with calm winds Bobcat, tiller or shovels to excavate Truck or moving van Handy‐strong persons to help you (More the better) Sand or stone dust Metal rake and metal shovels Ladder to get in and out New above ground pool liner New skimmer/Return Drill gun with assortment of different sized bits (#2 bit, #3bit, flat head bit, etc...) 4ft level Rotary laser with tripod and laser receiver Tamper or pool trowels and knee pads Push broom Duct tape Spray tack glue Silicone sealant (Marine) Teflon tape 4ftx4ft plywood Patio Blocks Water hose electrical outlet with extension cord Shop‐vac C‐ clamps for decks Large channel lock pliers Vise grip pliers Extra stainless screws, nuts and bolts (in case some are lost or to rusted and stripped) Tape measure Valves‐clamps‐nipples as needed Manufacturer’s directions if possible (only for reference) Part 2 Taking the above ground pool down for transport Digging around the perimeter Move all soil and rocks away from the outside of the pool. It is important to wash the wall at this time. Clean by spraying the wall with a water hose paying more attention to the bottom portion. Try to get at the bottom of the uprights (screws). Be careful not to mud up the area to much. Let dry for a few minutes if things get to muddy. Removing the old liner you’ll need empty all the water from the pool. This can be done with a small sump pump and a Frisbee. First, place your sump pump on the Frisbee and put it in the deepest part of the pool. Once your pool is empty remove the Frisbee and sump pump. Detach the hoses from your skimmer and return. Carefully remove the skimmer and return with the help of another person. The person on the inside will remove skimmer screws with the #3 screw driver, while the person on the outside holds the skimmer in its connected position. Once all the screws are out, the skimmer should separate from the pool wall. If it doesn’t then carefully move it using a back and forth and side to side motion until it detaches from the wall. The return will have a large nut holding it to the pool wall on the outside. Simply use the large channel lock pliers and loosen to remove the return. With a utility knife start cutting the old liner out. Start cutting at the bottom of the pool; where the floor meets the wall. Cut around the entire liner leaving two pieces. The floor and the wall are now two separate pieces. Be careful not to score the wall while cutting. It’s ok to cut though the liner into the sand as this will only dull the knife and not scratch the pool wall. Next, cut along the top just below the top rails being careful not to score the pool wall; then bag the liner piece you cut off into a contractor trash bag. If the liner too big to handle simply cut it into smaller pieces and then bag them. Next cut the floor into smaller pieces and place them appropriately into trash bags. The floor liner pieces tend to be a lot heavier than the wall pieces so cutting them into smaller pieces is very helpful. While the inside person is doing this the outside person can take top caps and top rails off the pool. If you’re old pool liner is a regular bead liner then outside person stops after removing top caps and rails. If it’s an overlap or j‐hook liner then outside person will continue to take hold down plates off. These are attached to the top of the uprights and usually hold down metal copings which hold down plastic coping strips. The plastic coping strips hold overlap liners in place. If your pool has J‐hook liner than only metal copings will be removed as there isn’t any plastic copings with a J‐hook pool liner. Remove all bags; liner pieces and anything that may complicate a new liner installation. Digging the inside perimeter Inside the pool remove all the sand/stone dust floor base materials away from the wall about a foot away will do. At this time give it a quick wash to get most of the floor base material off the inside of the wall. If the pool you are taking down has Foam flooring discard it as it will be difficult to re install later. Foam coving can be peeled away from the wall. In most cases it should come right off to be re‐installed with spray glue later. If any get damaged take note and get replacements before installation in its new place. Taking the top caps, top rails and top plates off the pool Remove the top caps and top rails of the pool and try to keep all parts together for re assembly. Screws go into Ziploc bags and try to keep count of the screws you lose so that you can replace them at the next location. Once the top caps and rails are removed unscrew the metal caps that are on top of the uprights. These caps lock down the plastic coping which holds the liner in place. On most pool models it also holds in place the top track which the plastic copings are inside of. So you have the top caps and the top rails removed. Next you have the metal top caps and metal track removed as well as the plastic coping which holds the liner in place. This part of the process should only take you about 30 minutes to complete. Removing the uprights simply get down on your knees and remove the screws that hold uprights onto the bottom plates. Be careful not to strip the screws. Every now and then you’ll come across a stripped out screw. You will want to remove either with a pair of vise grip pliers or drill into the screw head with a drill bit. Place all screws in a zip lock bag and replace any with a trip to the hardware store later. Removing the wall bolts and rolling the wall up when ready it's time to take the wall bolts out. Find where the upright was covering the wall bolts. While someone is inside the pool and someone is outside the pool remove the wall bolts from bottom to top. At this stage of the take down the wall will be extremely flimsy. Hopefully you picked a nice day with hardly any wind. Lay down your piece of 4’x4’ plywood in the middle of the pool area. This is what you will use to roll the wall up. Depending on the size pool you have will determine the amount of help you will need. The more persons you have helping the better. Start by taking the side of the wall that has the skimmer and return cut outs. Bring this into the middle on top of the plywood. Start rolling the wall spiraling it tightly as you spin in place. Try and get it as tightly rolled as you can. Once completely rolled take some plastic and wrap around the wall while someone else holds the spiraled wall together. Then take some duct tape and wrap around and around until it holds securely together. Be sure not to put duct tape directly on the wall and on the plastic wrap instead. This will help keep tape residue off the wall which can and will attract dirt later on. Now you’re wall is ready for transport. Please be careful when moving the wall as this can strain your back and it will. So be careful and get plenty of help. Taking apart the bottom track so all you have left is the bottom track and plates. Bend over and start picking up all the bottom plates and track pieces. Take note of their condition, if you inspected them right in the beginning then their probably fine and just need to be free of dirt. Wash with a garden hose and put like pieces together for transport. If you come across any bad parts order them asap as it may take a few days to get them. Cleaning and packing your used pool finally it’s time to gather everything and give a final wash and dry and then it’s time to load up the truck with your used pool. It’s now time to relocate. Replacing any broken parts remember to replace any missing parts or missing hardware. Part 3 Site leveling and base materials http://www.youtube.com/watch?v=IKJx_1174do Super simple above ground pool installation (Above Ground Pros) part one http://www.youtube.com/watch?v=__v6wFDXTHY part two http://www.youtube.com/watch?v=DS9sw_tNfQM part three http://www.youtube.com/watch?v=XgBYzc0RIHE part four http://www.youtube.com/watch?v=rleCZDSZtzg part five Site leveling Having a level surface free of top soil is a must to a perfectly installed pool. A bobcat is the best choice for taking up top soil and leveling where the pool should go. Look around on the Internet for someone who is willing to come over and level the site for you. Another place to ask is your local above ground pool retailer. Never hurts to ask but sometimes the retailers want you to buy first before giving out what they perceive as valuable information. For a round pool installation you shouldn’t pay more than $250 for site leveling less than one foot off grade. If you have a pretty flat area all you have to do is get up the top soil and make sure your area is level to within one inch everywhere. A rotary laser is the best tool for this. You can rent one from a local tool rental contractor. The area you excavate will depend on the size pool you have. If your pool is 24’ round the area you excavate should be 26’. Always dig an extra two feet larger to accommodate construction of the pool. If you have to use shovels to get this part done you’re in for quite a challenge but one which can be done. You’ll also want to rake the area with a metal rake and get all debris like rocks and roots loosened from the dirt. You’ll want to go back through the area and get all the rocks out as well as cut all roots. You do not want any tree stumps as they will rot over time under the pool. Sand or Stone base Most pools require a base material to be laid before beginning installation of the pool structure. Either a mason, (basic pool building sand) material can be used, or a stone base material. Mason sand, also known as pool sand, will create a very smooth bottom layer and is often more popular. The mason sand feels softer on feet as swimmer’s play in the pool, and because of the more pliable content, if a pebble begins to poke through the liner, you’ll likely be able to tap them back down into the sand without hurting the liner. Stone base is made up of stones crushed into dust and will create a harder, cement‐like bottom under the pool liner. This may create problems later in the pool’s life when sharp pebbles may begin to poke into the liner. Foam floor padding and foam covings Other base materials include manufactured foam padding underneath the liner, which makes an extra layer between the base material (sand or Stone dust) and the liner. Many owners choose to use this because it will protect the liner from anything poking underneath. Foam padding can come either as a pre‐ordered piece that is cut exactly to your pool’s size, or it may come in a roll about four feet wide that can be cut into strips and taped together. Foam covings are a choice in regards to an above ground pool liner installation. We recommend if your pool has them to inspect for any damaged pieces and replace them. If your pool doesn’t have any and you want them. Then you will have to take the entire base of your pool down to accommodate the installation of the covings. The picture represents at what level the floor will needs to be. There are two choices when it comes to covering the bottom of your floor base. First is regular foam which comes on a roll and can be cut and taped into place before the liner is set. Second choice is a geotextile material that is manufactured to fit your floor exactly. Just lay it out into pace and tape it to the bottom of the wall. Not all cut to fit pads fit perfectly so adjusting for fit will be necessary. The geotextile is more expensive but it was developed and used for trash dump containers. So it is very tough when it comes to protecting against rocks and other debris that may make it to your floors bottom. To get the sand to your home, a heavy‐duty truck or small dump truck should be used, and dropped or shoveled directly to the pool site. Above‐ground pools generally require tons of base material and the chart below can be more specific as to how much: Pool size Tons of feet material 12 2 15 2 18 2.5 20/21 2.5 24 3.5 28 4.5 30 5.5 33 6 What you want to do is get the sand or stone base material into the middle of the site and place it in a single pile. Now you’re ready for Installation. Part 4 Step by step the installation process Track set up and measuring you’ve already learned how to find the diameter of your above ground pool when you measured for a new liner earlier and before you started taking down the pool to relocate. Apply the same rule when setting the bottom track and plates together. Once you connect the bottom track to the bottom plates. Measure your diameter in several locations to make sure it’s perfectly round in all directions. If your pool is a 24’ round its diameter will measure 24’ in all directions, no more and no less. When you apply the measuring diameter example from earlier example you will get it set perfectly round and ready to install patio blocks and laser leveling can take place. Laser leveling the patio blocks After your track is set and measured its time to place patio blocks under the bottom plates and track. This is done with a rotary laser, shovel and small level. Set rotary laser in a low position and then set you receiver for the laser on a 4’ level. At each bottom plate you place a full patio block under each bottom plate centering the bottom plate on the patio block. At this time you will dig into the ground enough so that the patio block is just under the surface of the top soil. Put your small level on the patio block and set the patio block level both front to back and side to side. Once you have the first patio block set level to the top soil and level side to side and front to back. Now it is time to set the laser level and set it to that leveled setting. By using the rotary laser level you will repeat this process at each patio block/bottom plate locations. Providing that your site level has been done right will determine how easy this process is. When completed your track and bottom plates are resting on top soil and the patio blocks are set below the surface providing the support needed at the upright location. Once you complete the leveling process take a part bottom track and bottom plates and set them aside so that the next step can start. So you have a level site with patio blocks in the ground around the perimeter and a pile of base material in the middle of this space. Spreading the base materials with a shovel spread the base material all around the inside floor making sure to place between the patios blocks you just leveled in the previous step. Your final compacted height will be level with the top of the patio blocks. The whole inside radius should be initially spread about an inch higher than the patio blocks so that when the base gets packed it becomes level to the blocks and the bottom track. Take the leftover base materials and place in a pile on the outside of the pool area. You’ll use this extra when it becomes time to set the coves after the wall is in place. With the back end of a metal rake smooth the surface area throughout the area. Once raked again you’ll want to use a water hose and soak the floor almost to the point of creating mud. Too much water and it becomes mud. You cannot pack mud and will need to wait until it dries a bit. Not enough water and it won’t pack properly. You want it to be soaked enough to pack tight; the wetter the better. http://www.youtube.com/watch?v=u7fyLEUS9gI How to pack sand on bottom (Edwards pools) Floor work, how to tamp and trowel the base material After soaking the floor base material next, you use a tamping tool and tamp the entire floor so that when packed it’s at the height of the patio blocks which are already set to bottom of the pools final base height. Do this throughout the entire area. Then you will give the whole area another quick spray with the garden water hose. Then take your pool trowels and spread any lines and imperfections and make as smooth as possible. The last step before starting the wall construction process is to take a soft ended push broom and gently brush any imperfections after using trowels. At this point you’ll have a nicely perfected base in which to build on. Now it is on to the wall construction. Wall construction http://www.youtube.com/watch?v=A_Dm0czEXkY Wall installation Video (Sharkline pool) Place a 4’x4’ piece of plywood into the middle of the pool area and place the wall with skimmer cut out at the top. When the wall is just sitting in the middle of the pool area you’ll want to loosen the coil. This shouldn’t be too hard since the factory coiled wall is now loosely rolled by you and some friends when you took it down. All together spin out the wall and place into the track at an upright location. As you spin and place track in take Landscaping sticks on the outside and support the wall via these stakes. When all the wall is spun out all you have do to attach the wall bolts and you did it. Liner installation, which liner you have and how it gets installed You will want to unfold the liner outside the pool and let the sun warm it up for a little while about a half hour should do. Roll back up carefully and place inside the pool with the help of another strong person. Carefully spread out the liner being careful not to damage the floor you just packed. You will find it helpful to be barefoot and walk on the liner itself as much as possible. Climb out using a ladder. Be careful not to make any big creators. You will make small ones once you remove the ladder. Simply take the back of a push broom and smooth the surface where the ladder was. The broom will also come in handy when you are attaching the liner and need to lift it up to you. Use the back of the broom and lift liner up and hold liner as not to drop it back into the pool. You will need one to three people to help set the liner in place. Find the liners seam at the bottom of the pool where the floor meets the wall. This seam is the largest and stretches around the entire pool bottom. Locate another seam that will run from the large seam upward to the top of the liner. That is where you will start installing. Do not start near the skimmer area with the smaller seam. You don’t want to cut through this seam when attaching the skimmer later on. Place shop vacuum hose through the return opening so the end is about 4 inches above the bottom cove. Hold the hose close to the wall and straight for accuracy. Use duct tape to secure the opening around the hose and place strips to cover the skimmer opening on the outside of the pool. This will create a somewhat air tight suction set‐up for installing the new liner. http://www.youtube.com/watch?v=UWS0K3c1bj0 Johnny Weissmuller Bead attachment Beaded connection – Snap bead into bead receivers and continue until entire liner is in place. When liner is in all the way around take the back of your push broom and use the back side of it and gently tap the liner bottom toward the outer wall all the way around. Don’t secure top hold down plates, rails and caps until liner is all the way on. Once the liner is on all the way around this is the time to install the top hold down plates, top rails and caps. Once the top hold down plates are in place the vacuum can be turned on. As air gets sucked out, the liner will tighten and you will again use the back of the broom to gently tap liner into place as vacuum is running. When liner becomes taut add a hose and start filling with water. Top rails and caps placed back. At the same time someone else gets in the middle of the pool to push any wrinkles out toward the pool wall using your fingers. Be careful with the floors finish as you push wrinkles outward. Water will help this process tremendously. Don’t let too much water cover the wrinkles it will become more difficult. The water weight will help you push the wrinkles. When installed correctly you should have no wrinkles to speak of. J‐hook connections – place J‐hook over the pool wall and continue until entire liner is in place. As you place J‐hook over the pool wall secure with the metal copings that were removed earlier. Don’t secure top hold down plates, rails and caps until liner is all the way on. When the liner is on all the way around this is the time to install the top hold down plates, top rails and caps. Once the top hold down plates are in place the vacuum can be turned on. As air gets sucked out the liner will tighten and you will again use the back of the broom to gently tap liner into place as vacuum is running. When liner becomes taut, add a water hose and start filling. Once your top rails and caps are on, someone gets in the middle of the pool to start to push any wrinkles out toward the pools wall. Be careful with the floors finish as you push wrinkles outward. Water will help this process tremendously. Don’t let too much water cover the wrinkles you need to push out as it will make it harder to do so. The water weight will help you push the wrinkles. When installed correctly you should have no wrinkles in the liner. Overlap connection‐ place liner over the top of the pool wall and make sure that the larger seam at the bottom is traveling along the bottom cove were the wall meets the cove. You will set the liner over the top for about a 6‐8 foot span and then make sure that the rest of the liner matches the length of liner hanging on the outside. Just use plastic coping strips to set liner in place. You may use a hold down plate here or there to keep wall upright or other people can help during this process. It is possible that when you get to the end, you may have to stretch liner to fit properly. Do not be alarmed if the wall bends and seems as if it is going to fall in on you. Once the liner is over the top it will be easier to handle. When the liner is on all the way, start securing the hold down plates. The vacuum can be turned on. As air gets sucked out the liner will tighten and you will again use the back of the broom to gently tap liner into place as the vacuum is running. When the liner becomes taut adds a water hose and start filling. Once your top rails and caps are, on someone gets in the middle of the pool and to push any wrinkles out toward the pools wall. Be careful with the floors finish as you push wrinkles outward. Water will help this process tremendously. Don’t let too much water cover the wrinkles because it will make it more difficult to push out the wrinkles. The water weight will help you push the wrinkles. When installed correctly you should have no wrinkles. http://www.youtube.com/watch?v=nmJIRMh4CV8 super simple above ground pool liner installation part one http://www.youtube.com/watch?v=o8XvASfbVEE part two Uni‐Beads‐ Uni‐bead liners are liners made to fit ether a J‐hook application or a regular bead application. If your pool requires a regular bead application you cut the J‐hook off the top of the liner and proceed with what’s left, which of course is the regular bead. Whichever your pool requires simply refer to J‐hook section above or regular bead section above. EZ‐Beads‐ these liners are also made to fit ether a j‐hook application or a regular bead application. Only difference here is the J‐hook gets folded over on itself to form the regular bead. It doesn’t get cut. Whichever your pool requires simply refer to J‐hook section above or regular bead section above Skimmer and return installation its time to install the new skimmer and return. This takes two persons and is done when the pool is at least one third full of water. Keep the top rails off the pool where the skimmer and return are to be installed. There are two universal skimmers on the market today a small mouth skimmer and a large mouth skimmer. Both are installed to the pool wall the same way. One person gets in the inside and one gets on the outside. The inside person will handle a #3 Phillips screw driver and the inside plate of the skimmer. For per‐assembly directions on putting your particular skimmer together refer to your manufacturer’s directions. The person on the outside will handle the outside portion of the skimmer and will have one skimmer screw at his disposal. The outside person uses his skimmer screw and starts to poke a hole through the top middle hole at the skimmer’s pre‐cut out. All above ground pool walls have a cut out for the skimmer with pre‐cut screw holes around the cut out. The inside person see’s this screw starting to poke thorough the liner he will then take the skimmer plate and place a screw through his top middle hole and then connect that screw to the outside portion of the skimmer through the wall. Then tighten this one screw to about %80 tight. Then the person on the inside will move to the next hole and repeat screw installation until all screws are in place %80 tight. Then the inside person will fully tighten all the screws. Once all screws are tightened the inside person will cut the liner inside the plate’s opening. Depending on which kind of return you have will determine how it gets installed. Typically the return is installed like this. The person on the inside will cut the liner where the pre‐cut opening is located. Once liner circle piece is removed the inside person will push through the inside portion of the return to the outside. The outside person will place the retaining nut on the outside and when taut the outside person takes a pair of large channel lock pliers and tightens the outer large nut tight to the wall. The nut should be tight but not too tight. If you over tighten the nut the gasket will leak. It’s always a good idea to place marine silicone sealant around the outside of the skimmer and return after they are attached to the wall. http://www.youtube.com/watch?v=Xw4e3axOkOU a good overall pool installation video (Edwards pools) Ladder installation most likely when you purchased your used above ground pool it came with a ladder already installed and all you have to do is place over the pool wall when you’re ready to start using your pool. Pump and filter installation before you can make any connections to a pump/filter you want to start filling with a garden hose until you pool is about 1/3 rd full. When you get to this point it will be time to install the skimmer and return. Installing the skimmer and return is done with two persons one on the outside and one on the inside of the pool. It can be done with one person only but you’ll have to take apart the top rail where the skimmer and return are to gain over the wall access to installing it. Install your hoses back on the right places. Remember this; Basket to basket and the other is the return. So one hose runs from the bottom of the skimmer to where the pump intake is. Both the skimmer and the pump hold baskets in them hence, basket to basket. And the other hose connects from filter outlet back to the return fitting. If installed correctly no silicone sealant is necessary but most first timers will be required to use a marine silicone sealant around the skimmer where it meets the wall and around the return. This is to prevent possible dripping that over time can rust out a pools wall prematurely. Crushed stone around the pool http://www.youtube.com/watch?v=wfp4rhY__xU random crushed stone landscape project (BigRizTV) The last step before enjoying a swimming you’re new used above ground pool will be to add a crush stone base around the perimeter of the pool. Remember earlier when leveling your pool site that you made the site 2’ larger than the pool itself. It’s this area around the perimeter where you’ll place the crushed stone base. When choosing a crushed stone for around the pool keep in mind that not all crushed stone is the same. Pea stone is small and retains moisture and large 2 inch diameter rocks are tough to walk on. The reason why crushed stone is laid around the outside of the pool is to help irrigate moisture away from the pool. So don’t use pea stone or smaller sized crushed stone. I recommend a stone that is ¾ of an inch in diameter and is rounded so you can walk on it. Natural river rocks seem to be the best. Stay away from any crushed stone that is chemically washed as it retains some chemistry that will rust the bottom of the pool fast. Place crushed stone around the perimeter about 3 inches high and then landscape to your taste after that. Construction phase is completed, congratulations! You’ve relocated an above ground pool and know it’s time to care for it. Good luck and the next chapter deals with caring for your above ground pool. Part 5 Caring for your new/used above ground pool Chemistry Your pool water will need to be regularly tested for maintenance and at other times as needed for various issues. Some examples of other instances where you may need to test your pool waster are (link other pages here to show when testing might be needed). When you test the water, you’ll be looking to find an exact measurement of the pH balance, alkalinity, free chlorine (or bromine), and calcium hardness of the water, which will tell you how clean and safe your pool water is for swimming in. There are two ways to test your pool’s water content: yourself, with a purchased testing kit, or by taking a sample of water to your local pool specialist store. Pool stores will usually test your water for free, and they will also run tests beyond what your pool water testing kit may come equipped to do. A testing kit may come with test strips, which are simple to use. Each strip has built‐in chemicals that react a certain way with the particular chemicals in your pool. To perform the test, dip the strip into your pool’s water and pull out quickly. Do not shake off excess water. Hold the test strip parallel to the pool water (horizontally) and review against the color chart that the kit comes with, which is often found on the bottle. The results should dictate what chemicals, if any, need to be added to bring your water to the standard levels. Another type of testing kit you can purchase is a liquid testing kit. Rather than dipping something in the water to display results, for this kit you will withdraw a water sample and fill a cylinder with it. Then, you will drop in a few different liquid testing materials as directed by the instructions and you will see the water change colors. You should then compare the color of your pool water sample to the color chart, which will explain which chemicals you’ll need to add to your water to meet standards. Note: professional testing should be completed up to five times each year your pool is open. Professionals will test for extra results like chlorine vs. free chlorine, cyanuric acid, acid demand, alkali demand, adjusted total alkalinity, calcium hardness, water temperature, total dissolved solids, iron, copper, quaternary ammonium compounds and algicide level. Cleaning Equipment When you’ve put in your use pool, you’ll need all the right tools at your disposal to keep it in pristine condition, ready for swimming at a moment’s notice. Like anything else, a pool needs to be properly maintained and you’ll need the tools below to do so: Handheld skimmers Skimmers are made of thin, mesh nets that will help you remove items floating on the surface of your pool, like leaves, bugs, or things blown into the pool by wind. Skimmers will attach to a utility pole and come in various sizes to fit your pool. They can be heavy duty to pick up leaves or small sticks without harming the skimmer. Buying and regularly using a pool skimmer will keep that debris from getting into your pump and filter. Pool brushes Coming in either plastic or with steel‐bristles, a pool brush is essential to scrub the floor and walls of your pool to keep away stains like scum, algae and other growths. Note that a steel‐bristled brush can only be utilized with concrete or granite surfaces; otherwise it will cause damage to the surface. There are also some plastic brushes that have a specific make‐up to use on vinyl and fiberglass surfaces, which are often easily scarred and damaged from brushes that are too hard. For difficult stains, you can purchase a brush that is vacuum‐powered that will work off of our pool’s suction and can be connected right to your vacuum hose. Pool hoses Pool hoses come in either one and a half or one and a quarter inch diameters with varying length to fit your pool area. They are made of heavy‐duty plastic which is ribbed for durability. You can use the pool hose to connect vacuum heads, pool cleaners and any other equipment. Pool vacuum heads Vacuum heads are powered with the suction from your pool pump and are used to clean surfaces. They’re easier than using a regular pool brush and scrubbing by hand or pulling out your pool cleaner just to clean a spot or two. Brushes that rotate will quickly clean up any stains or spots to be scrubbed, and they can be used with even a fragile liner. Like the skimmer, pool vacuum heads can be attached to a standard utility pole. How to vacuum your pool (with sand or DE filter): http://www.youtube.com/watch?v=ntG50rvQcio (Family Leisure) Attach vacuum hose to the vacuum head. Flood the vacuum hose with water, and then place the adapter in the skimmer. An easy way to flood the hose without trying to dunk it is to hold the head over the return outlet. Some skimmers need you to remove the basket before attaching the hose. Vacuum your pool following the manufacturer’s instructions for your particular vacuum. Watch the flow of water in and out of your pool and the suction power of your vacuum. If you notice the water flow stopping or the suction slowing, stop vacuuming to clean out the hair basket by the pump, and then continue. Disconnect your hose from the skimmer and then remove the other vacuum equipment. Turn off your pump. Clean out the skimmer basket and the hair basket. Change your filter’s setting to ‘backwash’ and then turn your pump back on. The backwash setting will remove all of the collected debris from your filter. If you don’t do this regularly, your filter will become clogged over time and pressure will build up within it which may cause it to crack or explode. Keep running the pump until the water in the sight glass you can see through is clear. Turn the pump off and then make sure to re‐set your filter to the ‘filter’ setting. Do not try and turn the filter settings while the pump is running, because you will then have to replace the gaskets within the filter. If you have a DE filter, check to see if it requires more DE to be added now. Turn your pump back on. Note: If your pool is very dirty and full of nasty microbes, you’ll probably prefer to vacuum to waste instead. Turn your pump off, set the filter to “waste” and then vacuum. This will let everything you vacuum bypass the filter and keep it from clogging or damage while you take the large amount of dirt out of your pool. Be sure to keep the water level at the skimmer height – refill if necessary. Pool thermometer A pool thermometer can help you save money if you have a pool heater and want to keep the water at a nice temperature to swim in. They’re available to either float in the pool or sink into the water. Many people like to purchase sinking thermometers because they stay in one specific spot rather than floating around in the middle of the pool where it can be hard to see them, or floating into the skimmer basket. Pool liner repair kit You can purchase a pool repair kit that will include patch kits to repair tears and holes in your pool’s liner, lubricants to keep your pool’s plumbing connections from degrading and other helpful tools to keep easily repair the wear and tear on your pool. Winterizing your above ground pool http://www.youtube.com/watch?v=05ZK2ZueuQg (Teddy Bear Pools) When fall comes around and the weather cools, you’ll want to make sure your pool is in tip‐top shape for the coming winter. First, balance the pool chemicals about a week before closing it to: pH within 7.2 – 7.6 Alkalinity between 80 – 120 ppm Calcium hardness between 180 and 220 ppm. Next, shock your pool water with at least one pound per 10,000 gallons. Allow the chlorine level to drop back down to 1 – 3 ppm. Add winter algaecide to the water. Remove all of your skimmer basket(s), wall fittings, cleaners, solar blankets and ladders. Store them in a safe location. Make sure that any hoses you have are not coiled too tightly so it won’t keep coiling up when you want to use it next year. Plug all of your wall outlets. Now you’ll need to lower the water level in your pool. Using the filter pump or a separate, submersible pump, lower your level to about a foot and a half below the skimmer for mesh covers and six inches below the skimmer for solid, floating covers. Note: if you’re using an Aquador skimmer cover there is no need to lower the water level. Drain your filter, pump, chlorinator and heater to rid all the pool water from them. They should each have a drain plug. If there is any water left in the equipment, it will freeze throughout the winter and cause your equipment to crack, so use a shop vac if you need to blow out any excess water in the equipment. If you have a DE filter or a cartridge filter, clean them thoroughly. Before you store your equipment, take some time to lubricate the o‐rings on your pump lid with Magic Lube. Also lubricate your push‐pull valve on your filter (if you have one) and the threads of any gas heaters you may have. Now you can clean your pool thoroughly. Skim, vacuum and brush everything as needed. Cover your pool with your cover. It should be as tight‐fitting as possible, and leave no holes or gaps to let weather blow it open or debris inside. If you have a solid cover, you’ll need to also set up the water bags underneath it, and air pillows as needed to absorb the water/ice expanding in the winter. Looking for a pool check out www.AboveGroundPoolFinder.com THE HOMEOWNERS OFF‐SEASON RESPONSIBILITIES (NOTE: Winter covers are not 100% water barriers. Water seepage is a normal occurrence.) 1. Keep some water (1‐3 inches) on your cover. This helps to prevent wind damage. Use quick clips on the aboveground winter cover in high wind areas to keep it secure. Fill water bags only 2/3 of the way so there is room for ice expansion. 2. Remove excessive water (anything more than 3 inches) from the cover during the off‐season. If you use an electric pump, make sure you put a Frisbee or similar object under the pump. If you don't you may draw your pool water through the cover. You should also remove the leaves from the cover before the first freeze. If they remain on top, they will rot and seep through the cover and contaminate your pool. 3. In the early spring, raise the water to normal swimming height (half‐ skimmer). If the water has started to turn color (look under the cover, immediately add algaecide to the pool under the cover If excessive weight is allowed to collect on the cover: A. The water under the cover will become displaced, resulting in the loss of the chemically treated water in the pool B. Damage to your cover may occur C. Debris from the cover may fall into the pool water if the cover tears or is pulled into the pool. D. Allow over 6 inches of water, ice or snow on the pool cover over the winter. This will stretch and damage pool covers, and may damage your pool Note: NEVER TOUCH A FROZEN POOL AS THIS MAY DAMAGE YOUR POOL BONUS MATERIAL Opening your above ground pool http://www.youtube.com/watch?v=‐qDx7HzU_YQ (Teddy Bear Pools) Removing your pool cover: For solid covers, you’ll need to use a small cover pump to remove any rain and snow melt that you have sitting on the cover. You can make it easier for the pump by pulling on the pool edges, tilting it to get all of the water in one place. If there is any debris in the water, you’ll need to use your pool brush on a pole, and perhaps a leaf net similar to a bag to scrape them off. After you’ve gotten rid of the water and gunk on top of the pool, you can go ahead and drain the water bags or remove whatever you’re using to hold down the sides of the cover. Hose the water bags off and fold them to store them. Begin to ‘fan‐fold’ the pool cover from one end of the pool, folding about five times, and then drag the cover off and away to a cleared area where you can unfold the cover to spray it clean. If you have a sloped area in your yard or driveway, this will make it easier. Once your pool cover is clean, let it dry out or use a blower to make it dry faster. Next, fan‐fold the whole cover to make it easy to re‐install over your pool when the weather turns colder. Beginning at one end, roll the cover tightly and wrap the roll with rope or twine to hold in place and store in a dry locale without risk of rodents chewing at it in the future. Now, head back to your pool and remove the expansion (freeze) plugs from the skimmers and the wall returns. Put them together in a sealed bag and put near the cover to use again in the fall. If you find any that are deteriorating or cracked, make sure you replace them or note to replace them instead of re‐using the old ones in the fall. Get out your filter, pump, pool heater and other equipment. Reassemble according to manufacturer’s instructions. If you have a DE powder tight filter, be sure that the clamp band is tight and positioned correctly. Replace all of the drain plugs in the pump, filter, heater and chlorinator and reattach all of the hoses necessary to run your equipment. Use a thread sealant such as Teflon tape on all threaded plugs and connections, and make sure everything is sealed but not too tight to prevent cracks. Now you can put in the skimmer basket(s), pressure gauges, pool ladders and other extra equipment that your pool uses. Now, place your filter’s valve to the filter position (while the pump is still turned off) and open the air bleeder. The bleeder is usually beneath the pressure gauge. Open all of the incoming valves and all return side valves. Next, lubricate the valves and o‐rings since they may need to be flexible. Fill your pump basket with water from your hose. Replace the lid on your pump very tightly. Look for leaks that may be coming out, and re‐check that all of the valves and pressure relief openings are open and ready to go (down position for DE filters, up for sand filters, and filter for multiport valves). Turn on your pump and watch the pressure gauge very closely while your hand is still on the power switch. If the pressure rises above normal range (usually 30 pse), turn the pump off. If the pressure does rise too much, re‐check all of the return side valves and try again. If the pump still doesn’t work, don’t let it run for more than one minute. Try closing the main drain valve and start off the skimmer alone. If the pump still won’t catch after turning it on again, try up to five times to see if it catches. If the pump still won’t work, you may need to look at your incoming pipes for air leaks. Note: You’ll need to add new DE to your DE filter every season, preferably within two minutes of starting the filter again for the year. If you have a cartridge filter system, replace the cartridge every two years, and sand filters need the sand changed every five years. Once your system is going, adjust any valves and return fittings to maintain proper flow of water. Look for leaks around the pump and filter and repair them quickly as needed. Check your start‐up pressure on the filter’s gauge. When the pse reaches 10 pounds above the start‐up pressure, backwash the filter and empty the pump basket. Or, if you notice a drop in filter pressure before it rises to 10 pounds more than when you started, backwash the filter them. If you have a pool heater, follow the pilot lighting and test firing instructions as included with the product. The instructions can often be found on the back of the front heater door. Take time to test all of your other pool equipment as well now. Inspect your pool accessories for safety and wear and tear – check electric outlets for damage, assure proper grounding, make sure no wires were exposed over the colder seasons. Re‐check for any leaks while your pool filter is beginning to work and keep checking over the next few days to make sure the water level in your pool is maintained and no rips or tears were made in the liner since you last used it. Clear the area and inspect for safety hazards to those using the pool, like tripping hazards or slippery places. Now, you’ll need to give your pool a thorough cleaning before getting into the water. Skim the pool, then vacuum and brush out the water. If the water is particularly cloudy or full of algae, make sure you vacuum to waste (fill the pool close to the top if you’ll be vacuuming a lot of water out to waste). Once your water is on its way to being crystal clear, check your pool’s chemical balance with a quality test kit. You’ll need to purchase new test reagents every year when you open your pool. Chemicals should be set at: Aklalinity, 80 – 120 ppm , add total alkalinity increaser at a rate of 1 pound ber 10,000 gallons to raise 10 ppm. Calcium should be 180 – 220 ppm, add calcium hardness increaser at a rate of 1 pound per 10,000 gallons to raise the level 5 ppm pH balance should be 7.4 – 7.6, and should be tested 8 hours after opening your pool, ad pH increaser if the water is acidic, or below 7.4 and add decreaser if water is basic or going above 7.6. After your chemicals have been in the water for eight hours, shock or super‐chlorinate your pool. If you use granular shock, add it at 1 pound per 10,000 gallons, or if you’re using Clorox bleach, add it at 5 gallons per 10,000 gallons. If you use chlorine, then you’ll need to test your cyanuric acid following, which should be at 30 – 50 ppm; add CYA to raise the levels if they are too low. Note: never mix pool chemicals in any way other than instructions describe. After you’ve added your chemicals, brush your pool again to help distribute. Backwash your filter 24 hours after balancing your chemicals. Your pool can be swum in after the chlorine level drops below 3 ppm and you can see clear water. Note: If you don’t really close your pool for the winter but merely use it less, you can skip the removing of the cover and re‐installing all of the equipment, but you should take an opportunity annually to inspect all of your equipment, valves, openings, hoses and test everything for proper working use.