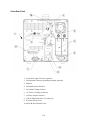
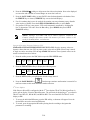
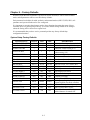
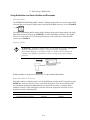
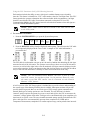
1
ESCORT Prism™ & Prism SE
Patient Monitor
Reference Manual
Prism Model
20401
20403
Prism SE Model
20411
20412
20413
20414
ESCORT Prism™ & Prism SE
Patient Monitor
Reference Manual
Prism SE Model
20411
20412
20413
20414
Prism Model
20401
20403
Federal law restricts this device to sale by or on the order of a physician.
E9030-33R Rev F
Medical Data Electronics • 12723 Wentworth Street • Arleta, California 91331-4330
(818) 768-6411 • FAX (818) 768-0759
Medical Data Electronics • Rembrandtlaan 1B, 3723 BG • Bilthoven, The Netherlands
Tel: +31 (0) 30 2289711 Fax: +31 (0) 30 2286244
Preface
The ESCORT Prism and Prism SE Series monitors are intended only as an adjunct to patient
assessment. They cannot replace skilled nursing care and proper surveillance. Carefully read this
reference manual, all directions for use of monitor accessories, and all precautionary information
before attempting clinical use of any Prism or Prism SE. Always keep high-risk patients under
close surveillance. This monitor is a portable patient monitor intended for monitoring vital signs
of critically ill adult, pediatric and neonatal patients in the hospital environment.
Carefully read the Defibrillator/Pacer section of this manual, all directions for use of the
defibrillator/pacer, and all precautionary information before attempting clinical use of the
defibrillator/pacer.
The information in this document is subject to change without notice.
Warranty
The Prism, Prism SE and the Defibrillator/Pacer are warranted against defects in materials and
workmanship for a period of twelve (12) months from the date of shipment to the original
purchaser. Batteries, cables, cuffs, and sensors are warranted ninety (90) days from date of
shipment. Warranty is valid only to the original buyer. Defective equipment should be returned
freight prepaid to Medical Data Electronics. Equipment returned with defective parts and
assemblies will be either repaired or replaced. This warranty is not applicable if repair has been
attempted, if the instrument has been damaged due to operation outside the environmental and
power specifications for the product, or due to improper handling or use.
The foregoing warranty is in lieu of all other warranties expressed or implied, including but not
limited to any implied warranty or merchantability, fitness or adequacy for any particular purpose or
use. Medical Data Electronics shall not be liable for any incidental or consequential damages.
Technical Service
If you experience any problems with this product, please call:
Technical Service Tel:
(818) 768-6411
Technical Service FAX: (818) 768-2899
Email
[email protected]
Trademarks and Acknowledgments
ESCORT® and the MDE logo are registered trademarks of MDE.
ESCORT GuardianTM, and ESCORT PrismTM are trademarks of MDE.
MASIMO® is a registered trademark of Masimo Corp.
C-Lock® and NELLCOR® are registered trademarks of Nellcor, Inc.
SureTemp® is a registered trademark of Welch AllynTM Inc.
Medico2 is a trademark of Oridion Systems Ltd.
Mircrostream® and FilterLine® are registered trademarks of Oridion Systems Ltd.
ii
Safety Considerations (Prism & Prism SE)
Read the following sections before using the Prism or Prism SE monitors. These cautions and
warnings are presented to both increase patient safety and prevent damage to the monitor.
WARNING: Shock hazard. Do not remove cover. There are NO user
serviceable parts. Contact qualified service personnel for all service
and repair.
Do not under any circumstances remove grounding conductor from
power plug. If there is any doubt about the integrity of the protective
earth conductor arrangement, operate monitor on internal battery
power until AC power supply protective conductor is fully functional.
To maintain patient electrical isolation, connect only to other
equipment with electronically isolated circuits.
WARNING: As with all electrical equipment, carefully route patient
cabling to reduce possibility of patient entanglement or strangulation.
WARNING: There is a potential fire hazard when used with oxygenemitting equipment, and danger of explosion when used near
flammable anesthetics.
WARNING: Do not use monitor during magnetic resonance imaging
(MRI). Induced current could potentially cause burns. The monitor
may affect MRI image and the MRI unit may affect the accuracy of the
monitor.
WARNING:
To avoid shock hazard with RS-232 System
Interconnection, first consult IEC60601-1 for system interconnection
guidance. Specific requirements for system interconnection are
dependent upon device connected to the monitor and relative locations
of each device from patient, and relative location of connected device
to room containing the monitor. In all circumstances, the monitor
must be connected to a grounded AC power supply. The monitor is
referred to as an IEC 601/F device in the Summary of Situations
contained in IEC60601-1.
WARNING: When a remote display monitor is connected to the unit
via the VGA connector on side of unit, it is essential the remote
monitor is powered from a properly rated and approved isolation
transformer. This is required to meet earth leakage limits of 0.5 mA,
as per IEC60601-1, Cl. 19.3 for monitor.
WARNING: When connecting monitor to any other instrument, verify
proper operation before clinical use. Refer to the other instrument’s
operation manual for complete instructions.
WARNING: All input/output interfaces to the patient monitors must
be CSA601.1/UL2601-1, EN 60601-1 approved devices.
WARNING: Do not under any circumstance use replacement parts
and connect devices that are not approved by Medical Data
Electronics.
iii
CAUTION: Always locate the Prism or Prism SE and its power cord
away from any electrosurgery and diathermy equipment and its power
cord and cables.
CAUTION: When operating either the Prism or Prism SE monitor
from an AC power source, the wall receptacle must be a three-wire,
grounded, hospital grade outlet. Use only the monitor’s original
hospital grade AC power plug and cord, or an equivalent hospital
grade plug and cord. If in doubt about integrity of grounding of the
main supply connection, the unit must be operated by battery power.
CAUTION: DO NOT plug the unit into a multiple outlet power strip
to avoid summation of leakage currents.
CAUTION: Do not use in ambient temperatures above 40° C or below
5° C.
CAUTION:
When using an external DC power source, the
equipotential connector must be used as a protective ground terminal.
Symbols (Prism & Prism SE)
The following symbols appear on the Prism and Prism SE monitors, and may appear on accessory
items. Familiarize yourself with these symbols and their meaning before using the monitor.
Type CF Defibrillation Protected Equipment: Isolated patient connections
comply with allowable leakage current limits for direct cardiac application
and are protected against effects of defibrillation.
Type CF Applied Part: Isolated Patient connections comply with the
allowable leakage current limits for direct cardiac application.
Attention: Consult accompanying documents.
Replace Fuses as Marked: For protection against fire, replace only with
fuses of same type and rating.
Caution: Dangerous voltage.
Alternating Current: 100-240V @ 50/60 Hz.
Equipotential Connection: When external DC power is used, the
equipotential connection must be used as a protective ground terminal.
Fuse: Voltage and current ratings appear adjacent to symbol.
The CE symbol indicates device conforms to the Medical Device Directive.
Single patient use only.
iv
Table of Contents
Chapter 1 – Physical Description ........................................................................................................... 1-1
Prism & Prism SE Front Panel ..................................................................................................... 1-1
Fixed Function Keys (USA and International)............................................................................. 1-2
ON/STBY .............................................................................................................................. 1-2
ALARM SUSPEND .............................................................................................................. 1-2
ALARM SETUP.................................................................................................................... 1-3
FREEZE................................................................................................................................. 1-3
NIBP START/STOP.............................................................................................................. 1-3
PATIENT TYPE.................................................................................................................... 1-3
SYSTEM SETUP .................................................................................................................. 1-3
PAGE HOME ........................................................................................................................ 1-3
RECORD ............................................................................................................................... 1-4
Parameter Softkeys....................................................................................................................... 1-4
WAVEFORM SOFTKEYS ................................................................................................... 1-4
SYSTEM SOFTKEYS........................................................................................................... 1-4
Indicators ...................................................................................................................................... 1-5
AC ON INDICATOR ............................................................................................................ 1-5
BATTERY CHARGING INDICATOR ................................................................................ 1-5
ALARM INDICATORS ........................................................................................................ 1-5
Prism & Prism SE Display Screen ............................................................................................... 1-6
ECG Lead in Use ................................................................................................................... 1-7
Softkey Labels for Parameters Displayed in the Waveform Display Zone (WDZ)............... 1-7
Alarm Status for Parameters in the Waveform Display Zone................................................ 1-7
Alarm Status for Parameters in the NODZ ............................................................................ 1-7
Numeric-Only Display Zone (NODZ)................................................................................... 1-7
Message Area for Parameters in the NODZ .......................................................................... 1-7
System Message Area ............................................................................................................ 1-8
Message Area for Parameters in the WDZ ............................................................................ 1-8
Waveform Display Zone with Associated Numerics............................................................. 1-8
Current Monitoring Mode (Patient Type selected) ................................................................ 1-8
Prism SE Rear Panel..................................................................................................................... 1-9
External DC Input (12 - 28V) Connector ............................................................................ 1-10
Fuse Holder and Fuse Replacement..................................................................................... 1-10
AC Power Cord Input Connector and Optional Power Cord Mounting Bracket................. 1-10
Battery Compartment........................................................................................................... 1-11
Model & Serial Number Label............................................................................................. 1-11
Add-On Module Interface.................................................................................................... 1-11
Auxiliary Output Connector ................................................................................................ 1-11
VGA Output Connector ....................................................................................................... 1-11
Serial Interface (ISP Port).................................................................................................... 1-11
Equipotential Connector (Grounding Terminal).................................................................. 1-11
Prism Rear Panel ........................................................................................................................ 1-12
External DC Input (12 - 28V) Connector ............................................................................ 1-13
Equipotential Connector (Grounding Terminal).................................................................. 1-13
Batteries ............................................................................................................................... 1-13
Defibrillator/Pacer Interface ................................................................................................ 1-13
Fuse Holder/Voltage Selector and Fuse Replacement ......................................................... 1-13
v
AC Power Cord Input Connector and Optional Power Cord Mounting Bracket................. 1-13
Auxiliary Output Connector ................................................................................................ 1-14
Add-On Module Interface.................................................................................................... 1-14
Recorder Release Lever ....................................................................................................... 1-14
Model & Serial Number Label............................................................................................. 1-14
Prism SE Side Panel ................................................................................................................... 1-15
Connector Panel ................................................................................................................... 1-15
Dual Channel Recorder........................................................................................................ 1-15
SureTemp Unit..................................................................................................................... 1-15
Prism Side Panel......................................................................................................................... 1-16
Multiparameter Module ....................................................................................................... 1-16
Dual Channel Recorder Module .......................................................................................... 1-16
Serial Interface (ISP Port).................................................................................................... 1-16
VGA Output Connector ....................................................................................................... 1-17
Prism’s Modular Components.................................................................................................... 1-18
Prism SE’s Modular Components .............................................................................................. 1-19
Chapter 2 – General Instructions for Using the Patient Monitor ....................................................... 2-1
Determine the Power Source ........................................................................................................ 2-1
Prism’s Modular Batteries............................................................................................................ 2-1
Prism SE’s Battery ....................................................................................................................... 2-1
Prism’s Multiparameter Module................................................................................................... 2-1
Prism SE’s Connector Panel......................................................................................................... 2-2
Turning Monitor ON and OFF ..................................................................................................... 2-2
Vital Sign Setup Menus................................................................................................................ 2-2
Temporary Suspension of Monitoring.......................................................................................... 2-3
Basic Configuration Functions ..................................................................................................... 2-3
Monitor Default Settings .............................................................................................................. 2-5
Setting Up Parameter Display Options......................................................................................... 2-5
Parameter Availability and ON/OFF Status........................................................................... 2-5
Parameter ON/OFF ................................................................................................................ 2-5
Parameter Labels ON/BLANK .............................................................................................. 2-5
Parameter Colors and Tones .................................................................................................. 2-5
“MORE PRAMS AVAIL” .................................................................................................... 2-6
Chapter 3 – Vital Sign Parameter Usage............................................................................................... 3-1
ECG .............................................................................................................................................. 3-1
Patient Preparation ................................................................................................................. 3-2
Selecting a Telemetry Patient to Monitor .............................................................................. 3-4
Correcting CHK Leads (Check Leads) Errors ....................................................................... 3-4
Respiration.................................................................................................................................... 3-5
Cardiovascular Artifact Detection (CVA) ............................................................................. 3-5
Using CO2 as the Resp Source .............................................................................................. 3-5
Pulse Oximetry (SPO2) ................................................................................................................ 3-6
SPO2 Sensor Accessories—Nellcor ...................................................................................... 3-8
SPO2 Sensor Accessories—Masimo ..................................................................................... 3-9
SPO2 Alarm Delay ................................................................................................................ 3-9
SPO2 Averaging Time........................................................................................................... 3-9
Temperature Monitoring ............................................................................................................ 3-10
vi
Measuring a Patient’s Temperature with Continuous Probes .............................................. 3-10
Measuring a Patient’s Temperature with SureTemp® .......................................................... 3-10
Noninvasive Blood Pressure Measurements (NIBP).................................................................. 3-11
Selecting an appropriate NIBP Cuff .................................................................................... 3-13
Displaying the NIBP Table.................................................................................................. 3-13
Invasive Blood Pressure ............................................................................................................. 3-14
Pulmonary Artery Monitoring ............................................................................................. 3-15
Storage of Invasive Pressure Values to VSC ....................................................................... 3-16
5th Trace Option ................................................................................................................... 3-16
Cardiac Output and Hemodynamic Calculations ....................................................................... 3-17
Selecting a Thermodilution Catheter ................................................................................... 3-18
End Tidal Carbon Dioxide (ETCO2) (Prism Only).................................................................... 3-19
ETCO2 (CO2) Sensor and Airway Adapter Maintenance (Prism Only) ............................. 3-21
End Tidal Carbon Dioxide (ETCO2) (Prism SE Only).............................................................. 3-22
Graphical Trends ........................................................................................................................ 3-24
Vital Sign Chart (VSC) .............................................................................................................. 3-24
Storing VS Charts in Monitor Memory ............................................................................... 3-26
“Episodic” VS Entries.......................................................................................................... 3-26
Clearing Patient Data from VSC (Vital Sign Chart)............................................................ 3-26
Oxycardiorespirogram (OxyCRG/CRG).................................................................................... 3-27
Alarms ........................................................................................................................................ 3-28
Alarm Bells .......................................................................................................................... 3-30
Alarm Tones......................................................................................................................... 3-30
Latch Alarms........................................................................................................................ 3-31
Recorder ..................................................................................................................................... 3-31
Chapter 4 – Additional User Infromation............................................................................................. 4-1
Wireless Communication to a Central Station ............................................................................. 4-1
Guidelines for Cleaning................................................................................................................ 4-1
Maintenance and Calibration........................................................................................................ 4-2
Telemetry Monitoring .................................................................................................................. 4-2
CIS Functions ............................................................................................................................... 4-2
Storage and Transport .................................................................................................................. 4-2
Chapter 5 – Main Setup Menus ............................................................................................................. 5-1
System Setup Menus .................................................................................................................... 5-1
ECG Setup Menus ........................................................................................................................ 5-2
Respiration Setup Menus.............................................................................................................. 5-2
Pulse Oximetry (SPO2) Setup Menus .......................................................................................... 5-3
Invasive Blood Pressure (IBP) Setup Menus ............................................................................... 5-3
Noninvasive Blood Pressure (NIBP) Setup Menus...................................................................... 5-4
Continuous Temperature Setup Menus ........................................................................................ 5-5
SureTemp Menu ........................................................................................................................... 5-5
End Tidal Carbon Dioxide (ETCO2) Setup Menus ..................................................................... 5-6
Cardiac Outpt Setup Menus.......................................................................................................... 5-6
Vital Sign Chart (VSC) Setup Menus .......................................................................................... 5-7
Chapter 6 – Factory Defaults ................................................................................................................. 6-1
vii
System Setup Factory Defaults .................................................................................................... 6-1
Recorder Factory Defaults............................................................................................................ 6-2
Vital Signs Chart Factory Defaults............................................................................................... 6-2
ECG Setup Factory Defaults ........................................................................................................ 6-3
Respiration Setup Factory Defaults.............................................................................................. 6-3
SPO2 Setup Factory Defaults....................................................................................................... 6-4
BP1 Setup Factory Defaults ......................................................................................................... 6-5
BP2 Setup Factory Defaults ......................................................................................................... 6-6
BP3 Setup Factory Defaults ......................................................................................................... 6-7
NIBP Setup Factory Defaults ....................................................................................................... 6-8
CO2 Setup Factory Defaults......................................................................................................... 6-9
CO Setup Factory Defaults........................................................................................................... 6-9
Temp1 Setup Factory Defaults................................................................................................... 6-10
Temp2 Setup Factory Defaults................................................................................................... 6-10
Chapter 7 – System & Parameter Messages ......................................................................................... 7-1
System Messages.......................................................................................................................... 7-1
System Messages ................................................................................................................... 7-1
Battery Messages ................................................................................................................... 7-2
Parameter Messages ..................................................................................................................... 7-2
ECG/Respiration Messages ................................................................................................... 7-2
SPO2 Messages...................................................................................................................... 7-3
Invasive Blood Pressure (BP1/BP2/BP3) Messages.............................................................. 7-3
Noninvasive Blood Pressure (NIBP) Messages..................................................................... 7-4
ETCO2 Messages................................................................................................................... 7-4
SureTemp Messages .............................................................................................................. 7-5
Cardiac Output (CO) Messages ............................................................................................. 7-6
Chapter 8 – Defibrillator/Pacer.............................................................................................................. 8-1
Introduction .................................................................................................................................. 8-1
Safety Considerations (Defib/Pacer) ............................................................................................ 8-1
Symbols (Defib/Pacer) ................................................................................................................. 8-2
Cleaning, Maintenance, & Calibration ......................................................................................... 8-2
Defibrillator/Pacer Front Overview.............................................................................................. 8-3
Defibrillator/Pacer Rear Overview............................................................................................... 8-4
Defibrillator/Pacer Front Panel..................................................................................................... 8-5
Using Defibrillator and Pacer Paddles and Electrodes ................................................................. 8-6
External Paddles .................................................................................................................... 8-6
Pediatric Paddles.................................................................................................................... 8-6
Disposable Adhesive Electrodes............................................................................................ 8-6
To Apply Disposable Adhesive Electrodes to the Patient: .................................................... 8-7
Internal Paddles...................................................................................................................... 8-7
Operating the Defibrillator ........................................................................................................... 8-8
Disarming the Defibrillator.................................................................................................... 8-9
“Hands-Off” Defibrillation........................................................................................................... 8-9
To Defibrillate Using “Hands-Off” Procedure: ..................................................................... 8-9
Synchronized Cardioversion ...................................................................................................... 8-11
To Initiate Synchronized Cardioversion Procedure:............................................................ 8-11
Operating the Pacer .................................................................................................................... 8-11
To Pace with Dedicated Electrodes: .................................................................................... 8-12
Pacing and Defibrillating with the Same Electrodes............................................................ 8-14
viii
Chapter 9 – Clinical Information System.............................................................................................. 9-1
Introduction............................................................................................................................ 9-1
Operation ............................................................................................................................... 9-1
Accessing the CIS Menu........................................................................................................ 9-2
Interacting with the CIS Menu............................................................................................... 9-3
CIS Status Message Zone ...................................................................................................... 9-4
Setting up a Patient for Data Collection ................................................................................ 9-4
Initializing a New Patient Record: .................................................................................. 9-5
Initiating a Patient Query: ............................................................................................... 9-5
Confirming the Patient: ................................................................................................... 9-7
Filing Vital Signs / Results .................................................................................................... 9-7
Selecting the Appropriate Filing Mode: .......................................................................... 9-7
Using the VSC Function to Set Up CIS Charting Intervals ............................................ 9-8
Manually Entering Vital Signs Data Using the CIS Menu............................................ 9-13
CIS Module Storage Capacity ....................................................................................... 9-14
Deleting Vital Signs Entries................................................................................................. 9-14
Viewing the Current Patient Information............................................................................. 9-15
Special Circumstances ......................................................................................................... 9-15
Sending Patient Data Stored in the CIS Module After the Fact .................................... 9-15
Using the Temporary Name Feature ............................................................................. 9-17
Retrieving Vital Signs from Previous Patients .............................................................. 9-18
RS-232 Communication....................................................................................................... 9-19
Parameter Packet ........................................................................................................... 9-19
Waveform Packet .......................................................................................................... 9-20
Additional Waveforms .................................................................................................. 9-23
Wiring Diagrams ........................................................................................................... 9-24
Chapter 10 – Troubleshooting.............................................................................................................. 10-1
Chapter 11 – Supplies, Accessories, & Options .................................................................................. 11-1
Chapter 12 – Specifications .................................................................................................................. 12-1
ix
THIS PAGE LEFT BLANK INTENTIONALLY
x
Chapter 1 – Physical Description
This section describes the controls, indicators, and features located on the front, back, and side
panels of the Prism and Prism SE Patient Monitors.
Prism & Prism SE Front Panel
1. Monitor On/Standby Keys
2. Battery Charging Indicator
3. AC Power Indicator
4. Alarm Indicator Lights
When flashing, one or more parameters are alarming
When lit, one or more alarms are suspended, OR all alarms are
turned off
5. Alarm Suspend Key (180 seconds)
6. Alarm Setup Key
7. Softkeys for Parameters in Waveform Display Zone
8. Freeze/Unfreeze All Waveform Traces
9. NIBP Start/Stop Key
1-1
10. Patient Type Selection Key (Adult, Ped, Neo)
11. Start/Stop Manual Recordings
12. Display System Setup Menu
13. Return to Home Page
14. Seven Parameter/System Softkeys
Fixed Function Keys (USA and International)
The Prism & Prism SE monitor includes the following nine (9) fixed functions keys: ON/STBY,
ALARM SUSPEND, ALARM SETUP, FREEZE, NIBP START/STOP, PATIENT TYPE,
SYSTEM SETUP, PAGE HOME, and RECORD. Each of these keys, as the name implies (or
symbol for International), is fixed and performs its intended function regardless of the monitoring
scenario. A brief description of each is provided below.
ON/STBY
Turns the display on and initializes the monitor when ON is pressed. When the monitor is turned
on, you will hear two beeps. The monitor is returned to standby status by pressing STBY. When
in STBY, the batteries continue to be charged if the monitor is connected to AC power, but no
monitoring or storing of data occurs. The Prism SE batteries will also charge when using eternal
DC power.
ALARM SUSPEND
Temporarily suspends alarm tones. The factory defaults for alarm suspend intervals are 180
seconds in adult mode, 90 seconds in pediatric mode, and 60 seconds in neonatal mode. If an
alarm limit is violated, pressing ALARM SUSPEND will silence the alarm tone. Pressing the
key again before the suspend time period has elapsed will reactivate the audible alarm tones if the
alarm condition still exists. While alarms are suspended, the following message will appear on the
monitor screen:
ALARMS SUSPENDED XXX
The XXX will be replaced with the number of seconds remaining until the alarm suspend
condition is removed.
1-2
ALARM SETUP
Displays the alarm status for all vital sign parameters. Alarm ON/OFF status, alarm priority
level, high and low limits, and recording type for each active parameter are displayed.
A bell…
… next to the listed parameter indicates that one or more alarms for that parameter
is ON. An X is displayed when all alarms for the associated parameter are OFF.
FREEZE
Freezes all displayed waveforms for evaluation purposes. Pressing FREEZE again releases
waveforms.
NOTE: Waveforms cannot be frozen during recording. Initiating a
recording will also release the frozen waveforms.
NIBP START/STOP
Pressing the NIBP START/STOP key immediately initiates an inflation and measurement. You
can also press the NIBP softkey to access the setup keys for setting automatic measurement
intervals.
PATIENT TYPE
The PATIENT TYPE key is used to select or display the current patient type. The selections are
ADULT, PED, and NEO.
SYSTEM SETUP
SYSTEM SETUP is used to change the monitoring conditions that your monitor is currently set
up for.
PAGE HOME
Returns the monitor display to the HOME PAGE screen (i.e., the screen normally displayed
during patient monitoring).
1-3
RECORD
Initiates a 16-second recording of any one or two parameter waveforms. To stop a recording in
process, press RECORD prior to completion of a manual or alarm recording. To specify the
parameters to be recorded, press the softkey(s) of the desired parameter(s) within two seconds
after pressing the RECORD key. If no parameters are selected after pressing record, a 16-second
strip of ECG waveform will be recorded.
NOTE: Active waveforms (i.e., parameters currently being monitored)
do not need to be displayed in order to acquire a recorded waveform.
Parameter Softkeys
The monitor is equipped with eleven (11) softkeys. Softkey operation changes depending upon
the monitoring mode, parameter, or configuration options being accessed. Four parameter
softkeys are located to the right of the display screen. Seven parameter/system softkeys are
located below the display screen.
WAVEFORM SOFTKEYS
These four softkeys, located on the right side of the front panel, provide access to the function
keys of the parameters displayed in the waveform display zone. ECG is always assigned to the
top waveform trace, and as many as three additional parameters, when available (i.e., installed),
can be assigned to trace 2, 3, 4, or 5 depending upon options.
SYSTEM SOFTKEYS
The function of these seven softkeys, located directly below the display screen, depends on the
label or function key displayed directly above the softkey. In the HOME PAGE state, parameter
labels and associated numeric values may be displayed directly above one or more of the
softkeys. To access the function keys for any of these parameters, press the softkey under the
parameter label and a page of function keys that relates specifically to that parameter will be
displayed.
1-4
Indicators
The monitor includes up to four indicators, which illuminate to notify the operator of a specific
activity or situation. These indicators notify the operator of AC power, battery charging, and
alarm status.
AC ON INDICATOR
The green AC ON LED (Light Emitting Diode) illuminates when the monitor is connected to AC
power.
BATTERY CHARGING INDICATOR
The yellow CHARGING LED illuminates when the monitor’s batteries are charging. The
CHARGING LED will not be illuminated when the batteries are fully charged, or when the
monitor is not connected to AC power.
ALARM INDICATORS
When flashing, one or more parameters are alarming.
When lit, one or more alarms are suspended, OR all alarms are turned off.
1-5
Prism & Prism SE Display Screen
1. ECG Lead in Use
2. Softkey Labels for Parameters Displayed in the Waveform Display Zone (WDZ)
3. Alarm Status for Parameters in the Waveform Display Zone
4. Alarm Status for Parameters in the Numeric Only Display Zone
5. Numeric-Only Display Zone (NODZ)
6. Message Area for Parameters in the Numeric Only Display Zone
7. System Message Area
8. Message Area for Parameters in the Waveform Display Zone
9. Waveform Display Zone with Associated Numerics
10. Current Monitoring Mode (Patient Type selected)
1-6
1. ECG Lead in Use
Indicates the ECG lead displayed in the top trace of the WDZ. Choices include lead I, II, III, or
V LD (and depending on hardware and software, choices may include aVF, aVL, or aVR) (for
“chest lead” in a 5-lead configuration). If heart rate is being derived from SpO2 or Invasive Blood
Pressure, PULSE is displayed.
2. Softkey Labels for Parameters Displayed in the Waveform Display Zone (WDZ)
The labels displayed adjacent to the parameter softkeys specify the parameters displayed in the WDZ.
3. Alarm Status for Parameters in the Waveform Display Zone
Each bell displayed in the WDZ indicates the alarm ON/OFF status for the parameter adjacent to it.
If a solid bell is displayed, one or more alarm for the associated parameter is ON.
If the bell is displayed with an X through it, the alarms for the associated parameter are OFF.
4. Alarm Status for Parameters in the Numeric-Only Display Zone (NODZ)
Each bell displayed in the Numeric-Only Display Zone indicates the alarm ON/OFF status for
the parameter listed below it.
If a solid bell is displayed, one or more alarm for the associated parameter is ON.
If the bell is displayed with an X through it, the alarms for the associated parameter are OFF.
5. Numeric-Only Display Zone (NODZ)
The parameter labels displayed above the softkeys at the bottom of the front panel specify the
parameters associated with each softkey. The numeric data associated with the parameters are
displayed above the parameter labels in the Numeric-Only Display Zone.
NOTE: In the HOME PAGE state, the parameter labels and numeric data are
displayed directly above the softkeys. When a parameter or system setup page is
displayed above the softkeys, the Numeric-Only parameter labels and associated
data are displayed slightly above the setup page.
6. Message Area for Parameters in the NODZ
Messages concerning parameters in the NODZ will be displayed in a reverse-video box on the
left side of the screen, just above the NODZ. Message display is temporarily obscured when a
parameter or system setup page is displayed. In the HOME PAGE state, the message continues
to be displayed as long as the message condition exists.
1-7
7. System Message Area
A message that is not specific to a single parameter, such as “ALARMS SUSPENDED 180”, is
displayed in a reverse-video box, just below the WDZ. Message display is temporarily obscured
when a parameter or system setup page is displayed. In the HOME PAGE state, the message
continues to be displayed as long as the message condition exists.
8. Message Area for Parameters in the WDZ
Messages concerning parameters displayed in the WDZ will be displayed in a video box below
the numeric data for the corresponding waveform parameters. The message is displayed as long
as the message condition exists.
9. Waveform Display Zone with Associated Numerics
The Waveform Display Zone displays waveform traces and associated numeric data for as many
as four different parameters. The top waveform trace is reserved for the ECG waveform;
however, you can assign different parameters to the other three waveform traces.
10. Current Monitoring Mode (Patient Type selected)
The current monitoring mode is displayed at the top of the screen — ADULT, PED, or NEO.
The monitoring mode can be changed through the system function key ADULT/PED/NEO.
1-8
Prism SE Rear Panel
1. External DC` Input Connector (optional)
2. Fuse Holder
3. AC Power Cord Input Connector
4. Battery Compartment
5. Model & Serial Number Label
6. Add-On Module Interface (MDE Modules)
7. Auxiliary Output Connector (optional)
8. VGA Output Connector (optional)
9. Serial Interface (ISP Port)
10. Equipotential Connector (grounding terminal) (optional)
1-9
1. External DC Input (12 - 28V) Connector
Allows an external DC power source to be connected for extended use during transport where AC
power is not available. Batteries are also charged with external DC power.
2. Fuse Holder and Fuse Replacement
The fuse holder contains the fuses for the monitor. Open the door of this holder to replace fuses.
It is recommended that qualified technical service personnel replace fuses when necessary.
WARNING: For protection against fire, replace the fuses only with
those of the same type and rating.
The Prism SE requires two identical slow blow T2.5A / 250V fuses for operation. Ensure that the
AC power cord has been disconnected before replacing fuses. Carefully open the door of the fuse
holder with a short 1/8" flat screwdriver. Replace the blown or defective fuse with one of the
same type and rating. Noting orientation, gently slide the fuse holder back until it locks snugly
into its original place. After the fuse replacement, connect the AC power cord to the Prism SE.
The unit is now ready for operation.
3. AC Power Cord Input Connector and Optional Power Cord Mounting Bracket
Allows connection of the AC power cord to the monitor. In addition, the AC power cord must be
plugged into an AC source before the monitor can operate on AC power and before the batteries
can be charged.
For permanent connection, the MDE power cord bracket should be installed. See the following
figure for instructions on installing the power cord mounting bracket.
1-10
4. Battery Compartment
This compartment houses one battery (or up to two batteries on earlier units) which provide
power in transport situations or when AC power is not available.
5. Model & Serial Number Label
This label contains the model number and serial number of the monitor.
6. Add-On Module Interface
If a transceiver module is connected here, wireless communications between the monitor and an
MDE Central Station can be established.
If a telemetry receiver module is connected, communication between the monitor and an
ambulatory transmitter can be established.
If a CIS module is connected, communication to a hospital information system computer can be
established, or RS232 communications can be established.
7. Auxiliary Output Connector
Provides analog waveform or alarm relay closure interface signals from the Prism SE to other
clinical instruments.
WARNING: When connecting the Prism SE to any other instrument,
verify proper operation before clinical use. Refer to the other
instrument’s operation manual for complete instructions.
8. VGA Output Connector
Allows for an external VGA monitor to be connected. The same information that is displayed on
the Prism SE monitor will display on the external VGA monitor. Output resolution is 640 x 480
pixels.
9. Serial Interface (ISP Port)
This port is used to upload and download software data from external sources.
10. Equipotential Connector (Grounding Terminal)
Provides grounding for the monitor when the monitor is used with other medical equipment. It
must be used as a protective ground terminal when the monitor is operated with external DC
power.
1-11
Prism Rear Panel
1. External DC Input Connector (optional)
2. Equipotential Connector (grounding terminal) (optional)
3. Batteries
4. Defibrillator/ Pacer Interface
5. Fuse Holder/Voltage Selector
6. AC Power Cord Input Connector
7. Auxiliary Output Connector
8. Add-On Module Interface (J1 Connector)
9. Recorder Release Lever
10. Model & Serial Number Label
1-12
1. External DC Input (12 - 28V) Connector
Allows an external DC power source to be connected for extended use during transport where AC
power is not available. Batteries are not charged with external DC power.
2. Equipotential Connector (Grounding Terminal)
Provides grounding for the monitor when the monitor is used with other medical equipment. It
must be used as a protective ground terminal when the monitor is operated with external DC
power.
3. Batteries
These two slots contain modular batteries which provide power in transport situations or when
AC power is not available.
4. Defibrillator/Pacer Interface
Provides connection and communication between the Prism monitor and the ESCORT
Defibrillator/Pacer.
5. Fuse Holder/Voltage Selector and Fuse Replacement
The fuse holder contains the fuses and the voltage selector for the monitor. Open the door of this
holder to replace fuses or to configure the voltage selection block — 115 VAC or 230 VAC. The
present voltage setting can be read through the small rectangular window on the door of the
holder. It is recommended that qualified technical service personnel replace fuses or change the
voltage selection when necessary.
WARNING: For protection against fire, replace the fuses only with
those of the same type and rating.
The Prism requires two identical slow blow 0.5A fuses for 115 VAC operation, or two slow blow
0.25A fuses for 220 VAC operation. Ensure that the AC power cord has been disconnected before
replacing fuses. Carefully open the door of the fuse holder with a short 1/8" flat screwdriver.
Replace the blown or defective fuse with one of the same type and rating. Noting orientation,
gently slide the fuse holder back until it locks snugly into its original place. After the fuse
replacement, connect the AC power cord to the Prism. The unit is now ready for operation.
6. AC Power Cord Input Connector and Optional Power Cord Mounting Bracket
Allows connection of the AC power cord to the monitor. In addition, the AC power cord must be
plugged into an AC source before the monitor can operate on AC power and before the batteries
can be charged.
For permanent connection, the MDE power cord bracket should be installed. See the following
figure for instructions on installing the power cord mounting bracket.
1-13
7. Auxiliary Output Connector
Provides analog waveform or alarm relay closure interface signals from the monitor to other
clinical instruments.
WARNING: When connecting the Prism to any other instrument,
verify proper operation before clinical use. Refer to the other
instrument’s operation manual for complete instructions.
8. Add-On Module Interface
If a transceiver module is connected here, wireless communications between the monitor and an
MDE Central Station can be established.
If a telemetry receiver module is connected, communication between the monitor and an
ambulatory transmitter can be established.
If a CIS module is connected, communication to a hospital information system computer can be
established, or RS232 communications can be established.
9. Recorder Release Lever
Push this lever towards the recorder to release.
10. Model & Serial Number Label
This label contains the model number and serial number of the monitor.
1-14
Prism SE Side Panel
1-15
Connector Panel
The Prism SE can monitor several parameters. They include ECG, SPO2, IBP (Invasive Blood
Pressure), NIBP (Noninvasive Blood Pressure), Respiration, ETCO2, Cardiac Output and
Temperature.
Dual Channel Recorder
The Recorder unit provides manual and alarm recordings of any one or two waveforms
simultaneously.
SureTemp Unit
Allows you to take a patient’s temperature with different types of SureTemp probes and
measurements sites.
Prism Side Panel
1-16
1-17
Multiparameter Module
The Multiparameter Module is configured for several parameters; however your Multiparameter
Module may be configured for fewer parameters. The parameters include ECG, SPO2, IBP
(Invasive Blood Pressure), NIBP (Noninvasive Blood Pressure), Respiration, ETCO2,
Cardiac Output, Temperature and SureTemp. This module may be interchanged with any
Prism monitor.
Dual Channel Recorder Module
The Recorder module provides manual and alarm recordings of any one or two waveforms
simultaneously.
Serial Interface (ISP Port)
This port is located inside the MPM well and is used to upload and download software data from
external sources. Only Prism LCD models 20403 with CPU Board assembly 403950 has ISP
capability.
VGA Output Connector
The VGA OUTPUT port allows for an external VGA monitor to be connected. The same
information that is displayed on the Prism monitor will display on the external VGA monitor. See
the following.
1-18
Prism’s Modular Components
There are several modular (user-movable) components that can be shared by all Prism monitors.
•
Multiparameter Module (MPM) – allows you to share various configurations of parameters
between monitors.
•
Dual Channel Recorder Module – provides manual and alarm recordings of any one or two
waveforms simultaneously.
•
Modular Batteries – supplies battery power to the Prism monitor for operation in transport
situations, or when AC power is not available.
•
Transceiver Module – provides two-way wireless communication to the ESCORT-Link or
ESCORT Vision Central Station, and serves as a repeater for the wireless network.
•
Telemetry Module – allows for bedside monitoring of telemetry patients.
•
CIS Communication Module – provides serial and Ethernet TCP/IP interface to HIS/CIS
systems for automated charting.
1-19
Prism SE’s Modular Components
There are several modular (user-movable) components that can be shared by all Prism & Prism
SE monitors.
•
Transceiver Module – provides two-way wireless communication to the ESCORT-Link or
ESCORT Vision Central Station, and serves as a repeater for the wireless network.
•
Telemetry Module – allows for bedside monitoring of telemetry patients.
•
CIS Communication Module – provides serial and Ethernet TCP/IP interface to HIS/CIS
systems for automated charting.
1-20
1-21
THIS PAGE LEFT BLANK INTENTIONALLY
1-22
Chapter 2 – General Instructions for Using the Patient Monitor
Determine the Power Source
The Prism and Prism SE can be powered in one of three ways: AC, battery, and external DC
power.
An optional auxiliary DC connector (center pin positive) labeled EXT DC 12-28V, 30VA is
located on rear panel of monitor to allow external DC power source when AC is not available.
NOTE:
Monitor should be plugged into AC power at every
opportunity to allow batteries (optional) to charge.
Prism batteries remain at their current power level during external
DC operation, but will not charge until plugged into AC power. Prism
SE batteries charge during DC operation.
To avoid corrosion, remove batteries if the monitor is disconnected
from AC power for an extended period of time.
Prism’s Modular Batteries
The Prism utilizes up to two (2) rechargeable sealed lead-acid batteries.
NOTE: Never discharge batteries completely. To insure long battery
life, always recharge batteries immediately after use. An optional
battery charger (MDE Part Number E2700-12) is recommended.
Batteries should be replaced every two (2) years regardless of test
results. Used batteries should be recycled or disposed of properly.
To install or remove a modular battery:
1. Turn the battery latch on rear of Prism monitor to allow installation or removal of battery.
2. Gently slide battery in/out from battery slot (if installing, latch battery after installing).
Prism SE’s Battery
The Prism SE utilizes one (1) rechargeable sealed lead-acid battery (up to two batteries for earlier
units). Battery or batteries can only be changed or removed by qualified technical service
personnel.
Prism’s Multiparameter Module
Vital sign parameters for your Prism monitor are factory configured in a Multiparameter Module
(MPM). The MPM is removable, allowing you to move it from one monitor to another.
NOTE: Not all parameters and options are available for CE marked
monitors. Consult your sales representative for more information.
2-1
To install the Multiparameter Module:
1. Align the Multiparameter Module’s front panel with the parameter labels facing you and
right-side up. Insure the edges of module are square with the edges of monitor housing.
2. Push the Multiparameter Module into monitor until it clicks into place.
To remove the Multiparameter Module:
1. Turn power OFF by pressing the STBY key or unplugging the power cord.
2. Release the Multiparameter Module by squeezing the side handles toward center of module.
3. While squeezing handles, pull module straight out.
Prism SE’s Connector Panel
Vital sign parameters for your Prism SE monitor, are factory configured in the Connector Panel.
The Connector Panel is not removable.
Turning Monitor ON and OFF
•
Press the ON key to turn monitor on.
•
Press the STBY key to turn monitor off.
Vital Sign Setup Menus
All vital signs have setup menus to adjust/alter the settings/limits. The following are some of the
typical vital sign setup menu items.
To open vital sign setup menu:
1. Touch softkey next to vital sign label on screen. Pressing the MORE softkey from SETUP
MENU accesses second page of menu. Some common functions are:
2-2
ALARM ON/OFF—Allows alarm to be turned ON/OFF.
ALARM LIMITS—Allows adjustment of limits through use of ↑↓ arrow keys.
SIZE/SCALE—Allows adjustment of waveform in size or sensitivity. In an invasive waveform,
allows adjustment of scale for waveform being displayed.
TONE—Allows audible tone for ECG, SpO2, and Respiration.
WF ON/OFF—Allows waveform for vital sign to be turned ON or OFF.
VITAL SIGN ON/OFF—Alarms for vital sign must be turned off to allow vital sign to be turned
off. Turn off SpO2 and Respiration at completion of their use to eliminate data from these
parameters being stored in Vital Signs Chart.
NEXT ↑↓→ —Allows movement of highlighted cursor.
ADJ ↑↓ —Allows numeric adjustment to highlighted cursor value.
Temporary Suspension of Monitoring
The Prism and Prism SE allow you to temporarily halt all monitoring/vital sign gathering to allow
the patient to be removed from the monitor for procedures, maneuvers, etc. All alarm settings,
automated NIBP measurements, trace settings are “held” by the monitor until monitoring is
resumed.
To halt monitoring:
1. Press the SYSTEM SETUP key to open the System Setup menu.
CLEAR
PT
DATA
STORE
VS
DISP
VSC
PT
SETUP
HR
AUTO
ECG
TRACE
SEL
MORE
2. Press the PT SETUP softkey to open the following menu.
SUSP
ALL
MONTR
ENTER
HT/WT
ENTER
NAME
ENTER
ID
CLEAR
NAME/
ID
ENTER
VS
DATA
EXIT
3. Press the SUSP ALL MONTR softkey.
To resume monitoring:
1. Press any key on faceplate of monitor. All alarm settings, NIBP intervals, and trace settings
will resume.
Basic Configuration Functions
The Prism and Prism SE monitors allow viewing a variety of formats. Waveform and vital sign
displays can be altered via a Trace selection feature. The monitor can be utilized for adult,
pediatric, and neonatal patients. You can also configure the date and time settings.
To assign parameters to waveform areas (Trace 2, Trace 3, Trace 4):
1. Press the SYSTEM SETUP key to open the System Setup menu.
CLEAR
PT
DATA
STORE
VS
DISP
VSC
PT
SETUP
2-3
HR
AUTO
ECG
TRACE
SEL
MORE
2. Press the TRACE SEL softkey to open the following menu.
DISP
VSC
DISP
OCRG
TRACE
2
AUTO
TRACE
3
AUTO
TRACE
4
AUTO
MORE
3. Press the softkey under desired TRACE until the parameter to be displayed is highlighted.
Note that the only available parameters are those that are turned ON.
4. Press the PAGE HOME key.
The change will occur on the screen. Note that by
selecting AUTO, the monitor will automatically assign parameters to traces according to the
factory-defined hierarchy. In addition, when AUTO is selected, parameters that already
occupy traces are selection choices.
To select patient monitoring mode (Adult/Pediatric/Neonatal):
1. Press the PATIENT TYPE key to open the following menu.
ADULT
PED
NEO
2. Press the softkey under desired patient type.
3. Press the PAGE HOME key.
4. Note monitor screen displays current patient type in upper left of screen.
5. The monitor holds present monitoring mode until it is changed again.
To set date and time:
1. Press the SYSTEM SETUP key to open the System Setup menu.
CLEAR
PT
DATA
STORE
VS
DISP
VSC
PT
SETUP
HR
AUTO
ECG
TRACE
SEL
2. Press the MORE softkey to open the following menu.
ADULT
PED
NEO
VOL
DISP
OCRG
REC
SETUP
TIMER
CLOCK
MORE
3. Press the CLOCK softkey to open the following menu.
SET
SEC
MIN
SEC
↑↑
SEC
↓↓
FORM
D/M/Y
M/D/Y
CLOCK
TIME
OFF
MORE
4. Press the FORM softkey to select the display format.
5. Press the SET softkey to select desired unit to be changed
(SEC, MIN, HOUR, DAY, MONTH, YEAR).
2-4
MORE
6. Use the UP ARROW ↑ ↑ and DOWN ARROW ↓ ↓ softkeys to adjust the date and time
settings.
7. Press the PAGE HOME key.
Monitor Default Settings
If you need to change power-up defaults so that your monitor powers up every time in a
specialized mode or with settings different than the factory defaults, please refer this process to
service personnel.
Setting Up Parameter Display Options
Parameter Availability and ON/OFF Status
The Parameter Availability ON/OFF feature is a default configuration function that allows you to
cease monitoring selected vital sign parameters altogether. When a parameter is turned OFF in
the factory defaults, it will not be available to be monitored until it is turned back ON again. This
feature's default is "ON", permitting all installed vital signs to be monitored. Please consult
service personnel to change the default value.
Parameter ON/OFF
Each parameter has a setting in its setup menu and in the default configuration menu that allows
you to turn it ON or OFF. When turning a parameter OFF, the parameter will cease being
monitored, and the alarm status/alarm bell will not display. Furthermore, if your monitor is
configured with parameter labels "BLANK", and the sensor has been disconnected, no parameter
label will appear. To turn a parameter back ON, you can change the value in default
configuration, or simply plug in the associated connector. Once a parameter is displayed, you can
change the ON/OFF value in its setup menu. This feature's factory default is "OFF". Please
consult service personnel to change the default value.
Parameter Labels ON/BLANK
The Parameter Label ON/BLANK feature is a default configuration function that allows you to
either display all parameter labels for all parameters installed, or display labels for only those
vital signs that are actively being monitored. When parameter labels are set to "BLANK", the
monitor will detect whether or not a connector is plugged in for each installed parameter, and will
only display labels for those parameters that it detects (note that NIBP will always display, and if
CO is available it will also display). This feature's factory default is "BLANK". Please consult
service personnel to change the default value.
Parameter Colors and Tones
On a color Prism or Prism SE, you can change the colors of the parameter numerics and their
associated waveforms in the power-up defaults. You can choose to assign any of 15 different
colors to each parameter. It is recommended that service personnel perform this function.
Many parameters also have a tone associated with them. You can turn the tones ON or OFF in
each respective parameter’s setup menu, and can adjust the tone volume for all parameters by
accessing the VOL key on the second System Setup page.
2-5
To adjust tone volumes for all parameters:
1. Press the SYSTEM SETUP key to open the System Setup menu.
2-6
CLEAR
PT
DATA
STORE
VS
DISP
VSC
PT
SETUP
HR
AUTO
ECG
TRACE
SEL
MORE
2. Press the MORE softkey to open the following menu.
ADULT
PED
NEO
VOL
DISP
OCRG
REC
SETUP
TIMER
CLOCK
MORE
3. Press the VOL softkey to cycle through the 8 volume selections. The menu that displays after
pressing VOL also allows you to set up tone volumes for all parameter alarms.
NOTE: Minimum alarm volume can be defined in the power-up
defaults.
“MORE PRAMS AVAIL”
If you have more than eleven different vital sign parameters being monitored at the same time, or
have traces turned off that could accommodate some of the eleven parameters, you will see a
message that says “MORE PRAMS AVAIL” in the system message area. You can access a
second row of parameters by pressing SYSTEM SETUP, which will move the top row of vital
signs up one level to allow the second row below them. To move back to the first row of vital
signs, press the PAGE HOME key.
Please note that if the “MORE PRAMS AVAIL” message is displayed, you need to press the
SYSTEM SETUP key to get past the second row of parameters before any System Setup menus
can be accessed with the SYSTEM SETUP key.
2-7
2-8
Chapter 3 – Vital Sign Parameter Usage
NOTE: The Prism SE monitor can be used during defibrillation, but
certain parameter readings may be inaccurate for a short time.
ECG
Prism and Prism SE monitors provide clinical viewing of the conduction of electrical impulses
through various parts of the heart (ECG). Limb lead (I, II, and III) measurements are available
when using a 3-lead ECG cable. Precordial leads (V1, V2, V3, V4, V5, and V6) can be viewed by
using a 5-lead cable and selecting VLD (V-lead) on ECG setup page.
In many clinical situations it is necessary to view two ECG leads simultaneously to accurately
assess a patient’s condition. This “dual-lead” capability is an optional feature in MDE monitors.
WARNING: For pacemaker patients, HR may continue to count
pacemaker artifact during cardiac arrest or other arrhythmia. Keep
pacemaker patients under close surveillance.
WARNING: Prism and Prism SE monitors are intended only to be
used with “safety-protected” ECG cables and lead wires. These cables
and lead wires prevent inappropriate connection of ECG lead wires to
a power source, which could potentially result in burns or
electrocution. ECG electrode wires should only be connected to
patient ECG cable.
WARNING: After applying a defibrillator discharge to a patient
being monitored by Prism SE, wait 5 seconds for a valid ECG
indication on the monitor.
NOTE: For pacemaker rhythms, confirm PACE ON/OFF softkey is
ON to enable pacer rejection and flagging. When PACE softkey is ON,
monitor will indicate correct heart rate for all pacer pulse amplitudes
and widths, with and without overshoot/undershoot (per AAMI/ANSI
Standard EC-13, 1992, paragraphs 3.1.4.1 and 3.1.4.2). If PACE
softkey is OFF, cardiotach may erroneously detect pacer artifact.
Pacemaker output pulse detection and rejection vary from patient to
patient and with type of pacemaker and pacing catheter.
3-1
Patient Preparation
When doing any patient monitoring, proper skin prep and electrode placement are critical to
ensuring patient safety as well as accurate ECG, heart rate, and respiration readings. Follow the
steps and diagrams below carefully:
1. Shave areas where electrodes are to be applied if hair is present.
2. For adult patients, rub electrode location briskly with dry gauze until skin is pink. If alcohol
is used to prepare the electrode site, wait until it has completely evaporated before applying
electrodes.
3. Attach lead wires to electrodes before applying the electrodes to patient’s skin.
4. Apply electrodes to the patient’s skin, pressing firmly around entire edge of the adhesive
surface.
5. To help maintain stable ECG baseline, tape each electrode lead wire to skin.
6. When possible, locate positive and negative ECG electrodes at equal distances from
electrosurgical sites.
7. Check that electrodes are placed in proper locations. See the following diagrams:
Adult Electrode Placement
3-2
Neonatal Electrode Placement
This placement is also
good for RESP
monitoring
Alternate Method:
Position RA and LA
electrodes at the 2nd
intercostal space,
midclavicular line
To monitor a patient’s ECG:
1. Open the ECG SETUP menu by pressing the softkey next to the ECG label.
ALM
ON
OFF
ALM
LIM
SIZE
LEAD
SEL
PACE
ON
OFF
MORE
2. Press the ALM LIM softkey to adjust the values for current heart rate alarms.
3. Press the SIZE softkey to allow increase or decrease of QRS display. QRS needs to be at
least 1/2 millivolt.
4. Press the LEAD SEL softkey to select desired cable and lead. This page allows choice of
3-lead or 5-lead cable.
5. Insure cable matches selected lead cable. An error message “CHK LEADS” may indicate
device is looking for a 5-lead cable when a 3-lead cable is in use.
6. Press the PACE ON softkey to activate reject/flag pacer function (if applicable).
7. Press the MORE softkey.
8. Press the FILT softkey to turn filter OFF when ST segment monitoring is to be activated
(if applicable).
3-3
Selecting a Telemetry Patient to Monitor
“Telemetry-monitored” patients must be prepared properly for telemetry functions to work. A
3-lead or 5-lead ECG cable (depending on the type of transmitter used) must be correctly
connected to both the patient and the telemetry transmitter. The transmitter must then be secured
to the patient with an appropriate transmitter pouch.
1. Open the ECG SETUP menu by pressing the softkey next to the ECG label.
ALM
ON
OFF
ALM
LIM
LEAD
SEL
SIZE
PACE
ON
OFF
MORE
2. Press the MORE softkey twice to access the third ECG Setup Page.
TLM
ID
↑↑
TLM
ID
↓↓
MODE
CABLE
TLM
3. Press the MODE softkey to select TLM (telemetry) if it is not already selected.
4. Press the TLM ID UP ARROW ↑ ↑ or DOWN ARROW ↓ ↓ softkeys until the transmitter
ID of the patient you wish to monitor appears in the ECG numeric display zone, directly
under the heart rate numerics.
NOTE: If you cannot find the transmitter ID of the patient you wish
to monitor, they may not be setup correctly. Contact service personnel
to perform this procedure.
5. Press the PAGE HOME key
to activate your selection and return to the main
monitoring screen. Telemetry ECG monitoring will begin automatically.
Correcting CHK Leads (Check Leads) Errors
If a CHK LEADS message is displayed on the screen after connecting the patient cable to the
monitor or anytime during monitoring, check the following:
The ECG cable, lead wires, and electrodes are properly and firmly connected
Electrodes are not excessively dry
The lead selected can be monitored with the ECG cable and lead wires currently connected
(for example, you are trying to monitor a V-lead with a 3-lead cable)
3-4
Respiration
Respiratory monitoring may be done either by impedance pneumography via ECG leads of RA
(right arm) and LA (left arm) or through ETCO2. Location of ECG electrodes may need to be
altered to allow correct count of RESPS. Review lead placement charts for respiratory
monitoring. The monitor can be set to look via an AUTO mode for source of RESPS.
To monitor a patient’s Respiration:
1. Open the RESP SETUP menu by pressing the softkey next to the RESP label.
ALM
ON
OFF
ALM
LIM
SIZE
MM/S
25
12.5
RR
AUTO
LEADS
APNEA
DELAY
20S
MORE
2. Press the ALM ON softkey if respiratory alarms are to be activated.
3. Press the ALM LIM softkey to adjust values for current respiratory high/low alarms. Apnea
delay alarms can be set as needed.
4. Press the SIZE softkey to allow increase or decrease of RESP waveform. Adjusting
“sensitivity” may improve count accuracy.
5. If this parameter is no longer desired or patient is not a good candidate for respiratory count
via impedance pneumography, press the MORE softkey, then press the RESP OFF softkey.
TONE
ON
OFF
CVA
ON
OFF
RESP
ON
OFF
Cardiovascular Artifact Detection (CVA)
MDE’s cardiovascular artifact detection gives you the ability to determine whether or not a
patient’s (typically a neonate’s) heart beat is being interpreted as an inspiration. When ECG leads
are used as a RESP source, artifact can occur because of the relative size of a neonate’s heart, and
the close proximity of the leads to the movement created by the heart. To alert personnel to this
possible occurrence, CVA detection looks for any period when 8 out of 10 RESP’s appear to
occur simultaneous with a heartbeat. If this happens, the monitor will alarm when CVA is ON.
Using CO2 as the RESP Source
When you monitor ETCO2 (CO2) in addition to ECG and your RESP source (RR) is set to
AUTO, the monitor will choose CO2 as the primary RESP source. This can be overridden if
desired in the RESP setup menu.
3-5
Pulse Oximetry (SPO2)
A noninvasive method for continuously measuring oxygen saturation and pulse rate. Hospital
policies, along with the sensor's directions for use, should be followed in care and rotation of
monitored sites. Insure correct sensor is being used for the type of oximetry in your monitor.
To monitor a patient’s SPO2:
1. Apply sensor to appropriate sensor site on patient. SPO2 monitoring commences
automatically.
2. Open the SPO2 menu by pressing softkey next to SPO2 label.
ALM
ON
OFF
ALM
LIM
ALM
DELAY
5
MODE
NORM
FAST
LOCK
ON
OFF
MORE
3. Press the ALM ON softkey if alarms are to be activated.
4. Press the ALM LIM softkey to adjust high and low values for saturation.
5. Press the ALM DELAY softkey to toggle between 5 or 10 seconds.
6. Press the LOCK ON softkey to activate C-LOCK (with Nellcor only).
7. Press the MODE softkey to choose averaging time of data (refer to the following tables,
MODE for Masimo, MODE for Nellcor MP204, or MODE for Nellcor MP405).
8. Press PAGE HOME.
NOTE: To turn SPO2 OFF, press the SPO2 OFF softkey. Turning parameter off eliminates
SEARCH message and halts further SPO2 storage into VSC preventing 00% data storage.
MODE for Masimo
Averaging Time
Application
NORM (standard)
8 seconds
Use when patient is relatively
inactive.
FAST
6 seconds
Use for fast response
situations such as sleep
studies.
SLOW
12 seconds
Use during periods of
excessive patient motion.
Note: Pulse rate will be
displayed in all three SpO2
monitoring modes.
MODE for Nellcor MP204
Averaging Time
Application
NORM (standard, NELLCOR
Mode 1)
5 to 7 seconds
Use when patient is relatively
inactive.
FAST (NELLCOR Mode 2)
2 to 3 seconds
Use for fast response
situations such as sleep
studies.
SLOW (NELLCOR Mode 3)
10 to 15 seconds
Use during periods of
excessive patient motion.
3-6
MODE for Nellcor MP405
*NORM (NOT USED)
FAST (NELLCOR Mode 2)
Averaging Time
Application
(NOT USED)
(NOT USED)
Typically 7-8 seconds for
average pulse.
All monitoring situations.
Varies + – with pulse quality
and other functions.
*SLOW (NOT USED)
(NOT USED)
(NOT USED)
*Nellcor OxiSmartXL Technology has eliminated the need for operation in NORM and
SLOW modes. Refer to the following NOTE.
NOTE: Since Nellcor OxiSmartXL technology has eliminated the need
for operation in the SLOW mode, and depending on the version of
main software, the following may occur if the SLOW mode is
accidentally selected:
•
Pulse waveform will be replaced by dotted lines
•
Dashed lines will replace pulse rate
•
Dashed lines will replace saturation values
•
A“02 WRT ER” message will be posted on the display
Upon returning to NORM or FAST mode, all SPO2 values and
waveform will return, and the “02 WRT ER” message will disappear
from the display.
WARNING: Incorrect sensor application or use may cause tissue
damage or improper operation of the monitor. Follow directions for
use provided with sensor.
NOTE: Regarding use of NELLCOR sensors:
•
Before use, carefully read NELLCOR sensor directions for use.
•
Use only NELLCOR oxygen transducers. Use of oxygen transducers
produced by other manufacturers may result in improper
performance.
•
Do not use damaged NELLCOR sensors or patient cables. Do not
use a NELLCOR sensor with exposed optical components. Do not
immerse sensor or patient cable in water, solvents, or cleaning
solutions (sensors, cable, and connectors are not waterproof). Do
not sterilize by irradiation, steam, or ethylene oxide. See cleaning
instructions in Directions for Use for reusable NELLCOR sensors
and patient cables.
3-7
SPO2 Sensor Accessories—Nellcor
Nellcor Sensors – Contact Nellcor
Sensor
Model
Patient size
Oxisensor® II oxygen transducers
(Sterile, Single-use only)
N-25/N-25LF
I-20
D-20
D-25/D25-L
R15
<3 or > 40Kg
3 to 20 Kg
10 to 50Kg
>30Kg
>50Kg
Oxiband® oxygen transducer
(reusable with nonsterile adhesive)
OXI-A/N
OXI-P/I
<3 or > 40 Kg
<3 to 40Kg
Durasensor® oxygen transducer
(Reusable, Nonsterile)
DS-100A
>40Kg
OxiCliq® oxygen transducers
(sterile, single use only)
P
N
I
A
10 to 50 Kg
<3 or > 40Kg
3 to 20 Kg
>30Kg
Nellcor MP405 SPO2 Ext Cable –
10 Foot, must be used with the
above sensors
E2800-64
WARNING: A pulse oximeter is an early warning device. Use a lab
co-oximeter to completely understand the patient’s condition.
NOTE: Inaccurate measurements or loss of pulse signal may be
caused by:
• Incorrect sensor application or use
• Significant levels of dysfunctional hemoglobins (HbCO or MetHb)
• Intravascular dyes such as indocyanine green or methylene blue
• Darkly pigmented skin
• Exposure to excessive illumination, such as surgical lamps
(especially ones with a xenon light source), bilirubin lamps,
fluorescent lights, infrared heating lamps, or direct sunlight
(exposure to excessive illumination can be corrected by covering
sensor with a dark or opaque material)
• Excessive patient movement
• Venous pulsations
• Placement of a sensor on an extremity with a blood pressure cuff,
arterial catheter, or intravascular line
NOTE: Loss of pulse signal can occur in any of the following
situations:
• Sensor is too tight
• Patient has hypotension, severe vasoconstriction, severe anemia,
or hypothermia
3-8
•
•
There is arterial occlusion proximal to sensor
Patient is in cardiac arrest or is in shock
SPO2 Sensor Accessories—Masimo
Name/Type
®
Model Number
®
LNOP - ADT
LNOP - ADT
®
®
LNOP - PDT
LNOP - PDT
®
®
LNOP - NEO
LNOP - NEO
®
®
Application
Adult, digit
Adult/Pediatric
Neonatal < 10 kg
LNOP - NEO PT
Neonatal < 1 kg
LNOP® - DC I
Adult/Pediatric
PC04 Patient Cable: 4 Ft.
PC04
Adult/Pediatric/Neonatal
PC08 Patient Cable: 8 Ft.
PC08
Adult/Pediatric/Neonatal
PC12 Patient Cable: 12 Ft.
PC12
Adult/Pediatric/Neonatal
LNOP - NEO PT
LNOP®- DC I
WARNING: Incorrect sensor application or use may cause tissue
damage or improper operation of the monitor. Follow directions for
use provided with sensor.
NOTE: Regarding use of LNOP ® sensors:
•
Before use, carefully read LNOP ® sensor directions for use.
•
Use only Masimo oximetry sensors for SPO2 measurements. Other
oxygen transducers (sensors) may cause improper performance.
•
Do not use damaged LNOP ® sensors or patient cables. Do not use
an LNOP ® sensor with exposed optical components. Do not
immerse sensor or patient cable in water, solvents, or cleaning
solutions (sensors, cable, and connectors are not waterproof). Do
not sterilize by irradiation, steam, or ethylene oxide. See cleaning
instructions in Directions for Use for reusable Masimo LNOP ®
sensors and patient cables.
SPO2 Alarm Delay
The SPO2 alarm incorporates a delay to minimize nuisance alarms related to brief erroneous
SPO2 measurements that can be caused by patient artifact or external noise. The factory default
time for this delay is 5 seconds and, if desired, a 10-second delay is also available by accessing
the ALM DELAY softkey under the SPO2 setup menu. The monitor will generate an alarm if the
averaged SPO2 numeric value exceeds the alarm limit for more than 5 or 10 seconds, depending
on the delay selected.
SPO2 Averaging Time
SPO2 measurements are taken every 2 seconds and are averaged over a period of time (the
designated averaging MODE) to display the most accurate oxygenation percentage and pulse
rate. The MODE key in the SPO2 setup page lets you select a mode of measurement averaging to
best fit your clinical needs.
3-9
Temperature Monitoring
The Prism and Prism SE can accommodate a variety of continuous temperature probes, as well as
MDE SureTemp oral/axillary and rectal fast temperature probes. The unit automatically senses
and configures the monitor for the probe type that it detects.
MDE SureTemp temperature measurements can be accomplished in either “normal” or “monitor”
modes. In normal mode, the thermometer “predicts” body temperature in about 4 seconds for oral
readings and 15 seconds for rectal. When in monitor mode, the thermometer measures body
temperature in about 3 minutes, and will continue for as long as the probe remains in place (this is
the only available mode for axillary temperatures).
Measuring a Patient’s Temperature with Continuous Probes
1. Connect the temperature probe to monitor.
2. Press the softkey below the TMP1 or TMP2 label to access setup functions, if necessary.
Note that if your monitor is equipped with both continuous and SureTemp capability,
SureTemp is configured for TMP1.
ALM
ON
OFF
UNIT
°C
°F
ALM
LIM
MORE
3. Press the PAGE HOME key to activate any new setup functions.
4. Place the probe in the appropriate measurement site to begin continuous monitoring.
Measuring a Patient’s Temperature with SureTemp®
A temperature methodology that allows predictive or monitored temperatures. Blue top probe is
used for oral or axillary modes with red top probe for rectal temperatures. Only Welch Allyn™
manufactured probe covers are to be used for this device. Probe covers by other manufacturers
cause inaccurate results.
1. Open the SURETEMP menu by pressing the softkey next to the TMP 1 label. Note current
MODE and SITE. Pressing the softkeys allows changes to these settings.
MODE
NORM
MONTR
SITE
ORAL
AXIL
UNIT
°C
°F
MORE
NOTE: If TMP1 label is not present on monitor screen, remove probe
from probe well and reinsert probe into probe well to display TMP1
label.
2. Once the TMP1 label appears, and MODE and SITE are established as described in Step 1,
remove probe from well and place probe cover onto probe. The message on screen is
3-10
T1 WAIT. DO NOT place probe into position until message reads T1 READY and an
audible tone is heard.
3. When ready, place probe in position. ORAL and RECTAL methods require caregiver to
hold probe in position.
4. An audible tone for NORM mode signals completion of the measurement. A message on
screen displays T1 FINAL. The MONIT mode is continuous monitoring of temperature so
no audible tone will occur to signal a final temperature. The message on screen notes
T1 MONITOR.
5. Probe covers are discarded after use by “ejecting” probe cover off probe via blue/red ejects
button.
6. Replacement of probe into probe well is required to “reset” device.
WARNING: Incorrect insertion of rectal probe can cause bowel
perforation. Read all instructions thoroughly before proceeding with
probe placement.
NOTE: Regarding the use of SureTemp:
•
Do not initiate a temperature while unit is displaying T1 INIT on
screen (when monitor is first activated)
•
Correct positioning of probe tip is critical with oral method
•
NORM mode allows predictive temps of 4 seconds for oral site and
15 seconds for rectal site
•
Axillary site should be assessed in MONITOR mode
•
Probe should be reseated in probe well between temperatures to
allow recalibration of parameter
•
If ambient temperature of monitor is above 90 o F, or if the body
temperature is below 94 o F, then NORMAL mode cannot be used
and the monitor will automatically switch to MONITOR mode
Noninvasive Blood Pressure Measurements (NIBP)
Prism and Prism SE noninvasive blood pressure (NIBP) monitoring can be started at any time by
pressing the NIBP START/STOP key on the monitor’s front panel, or is user-configurable to take
measurements at preset intervals. NIBP measures oscillometric waveforms as the air pressure in a
standard cuff gradually reduces.
Additionally, initial and subsequent cuff inflations are adaptable for different patient types and
blood pressure ranges. Depending on which patient mode is selected (ADULT, PED, or NEO),
initial inflations can be setup anywhere from 60 to 220 mmHg, and subsequent readings will
automatically inflate to only 25 mmHg above the previous systolic reading to increase
measurement speed and patient comfort.
3-11
Each NIBP reading, recording, and trend printout will display an ET (elapsed time) number. This
number indicates the number of minutes that have passed since the start of the last NIBP
measurement.
To manually measure NIBP:
1. Select proper cuff size and patient-monitoring mode for patient.
2. Place cuff snugly on patient with artery indicator over artery to be assessed.
3. Press the NIBP/PNI START/STOP key.
To set automatic intervals:
1. Press the softkey next to the NIBP label to open the NIBP SETUP menu.
ALM
ON
OFF
START
STOP
4MIN
5MIN
10MIN
5MIN
AUTO
ON
PROG
MORE
2. Press the softkey under timing interval to highlight desired interval (for example, 5MIN).
3. Press softkey to turn AUTO ON.
4. Press the NIBP/PNI START/STOP key.
5. Note display of A:ET indicates auto mode is functioning and time since last reading.
To set programming cycles:
1. Press the softkey next to the NIBP label to open the NIBP SETUP menu.
ALM
ON
OFF
START
STOP
4MIN
5MIN
10MIN
5MIN
AUTO
ON
PROG
MORE
2. Press softkey under PROG to open the following menu.
PROG
ON
OFF
NEXT
↓↓
→→
ADJ
↑↑
ADJ
↓↓
START
MORE
3. Press the PROG ON OFF softkey to turn PROG ON.
4. Utilize NEXT ↓↓ → → softkey to move highlighted cursor after value has been adjusted to
desired setting via the ADJ ↑↓ softkeys.
5. Press the NIBP/PNI START/STOP key.
6. Note display of P:ET indicates programmed mode is functioning.
7. At conclusion of programmed cycle, PROGRAM ENDED is displayed.
3-12
Selecting an Appropriate NIBP Cuff
For patient safety and accurate NIBP readings, it is essential to select an appropriate cuff for
patient type and size being monitored. The following table shows MDE part numbers for a
variety of cuff sizes and types:
MDE Part Number
E2910-06
E2910-07
E2910-08
E2910-09
E2910-12
E2910-13
E2910-14
E2910-15
E2910-16
E2910-17
Application
Neonatal - size 1 Box of 10
Neonatal - size 2 Box of 10
Neonatal - size 3 Box of 10
Neonatal - size 4 Box of 10
NIBP Cuff Infant – Screw Fittings
NIBP Cuff Child – Screw Fittings
NIBP Cuff Small Adult – Screw Fittings
NIBP Cuff Adult – Screw Fittings
NIBP Cuff Large Adult – Screw Fittings
NIBP Cuff Thigh – Screw Fittings
WARNING: Excessive tightness of cuff may cause venous congestion.
It may also cause pinching of skin, or bruising of arm, particularly if
patient’s skin folds under cuff, causing uneven distribution of pressure
on arm.
WARNING: Do not place cuff on an extremity being used for IV
infusion, pulse oximetry, or direct (invasive) pressure monitoring.
WARNING: Operators should exercise caution and position distal
edge of inflatable cuffs higher on patient’s arm, away from elbow, to
avoid differential pressure damage to radial nerve.
WARNING: Closely observe patients undergoing thrombolytic or
anticoagulant therapy for bruising or petechiae under or distal to
cuff. Position the arm to minimize any artifact that could prolong
inflation period.
CAUTION:
Calibration tubing should be kept dry and free of
particulate matter. Moisture or foreign substances in pneumatic
system can cause damage to unit.
NOTE: Avoid compression or restriction of pressure tubes during
NIBP reading.
3-13
Displaying the NIBP Table
The Prism and Prism SE monitors stores up to 100 NIBP readings, as well as any other
parameters being monitored, with their corresponding time of measurement. When you turn the
NIBP table ON, the most recent readings will be displayed in tabular format in the NIBP trace
(NIBP must be set up in one of the three lower traces in the waveform display zone).
Additionally, tabular information for all other parameters being monitored will also display in
their corresponding times. You can press the RECORD key followed by the NIBP softkey to
print all readings stored in memory.
Invasive Blood Pressure
INVASIVE PRESSURE monitoring allows user to simultaneously derive pressures from up to 3
different transduced lines. The system works with standard pressure transducers having
5 µV/V/mmHg sensitivity. Following placement of invasive lines, evaluate alarms and alarm
limits to insure settings appropriate for patient. Default settings are set to label most commonly
used pressures.
1. For optimum waveform size on screen, connect higher pressures to BP1 and lower pressures
such as pulmonary artery, CVP, or ICP to BP2 and BP3.
2. Connect transducer cable to monitor. Invasive BP automatically activates on screen.
To display IBP in Trace slot:
1. Press the SYSTEM SETUP key to open the System Setup menu.
CLEAR
PT
DATA
STORE
VS
DISP
VSC
PT
SETUP
HR
AUTO
ECG
TRACE
SEL
MORE
2. Press the TRACE SEL softkey to open the following menu.
DISP
VSC
DISP
OCRG
TRACE
2
AUTO
TRACE
3
AUTO
TRACE
4
AUTO
MORE
3. Scroll through TRACE 2, 3, or 4 to highlight desired IBP.
4. Press the PAGE HOME key to initiate change.
5. Insure pressure line is level with transduced vessel or its reference point.
6. Open the BP setup menu by pressing the softkey next to the BP label:
ALM
ON
OFF
ALM
LIM
SIZE/
SCALE
SITE
OFF
ART
ZERO
ALL
ZERO
BP1
MORE
7. Press the ALM ON softkey to activate alarms.
8. Press the ALM LIM softkey to set alarms for displayed values.
9. Press the SIZE/SCALE softkey to change displayed scale or to turn scale on/off. A new
scale for the pressure line can be set at any time. Changing scales may be necessary to insure
an appropriate waveform display.
3-14
10. Press the SITE softkey to cycle through site labels for invasive pressure line. Highlight
desired site.
11. Press the MORE softkey to access second page of menu.
SMD
S/D
MEAN
CAL
BP1
ON
OFF
12. Displayed values for SYSTOLIC/MEAN/DIASTOLIC are chosen by pressing the
SMD-S/D-MEAN softkey.
13. Press the CAL softkey to initiate a calibration wave (waveform must be displayed in trace).
14. Press the BP ON/OFF softkey to turn vital sign on/off. Alarm must be OFF to turn parameter
off. Turn parameter off to eliminate technical messages and halt data into VSC.
To zero invasive blood pressure:
1. Press the ALARM SUSPEND key.
2. Turn the stopcock off to patient and open to atmospheric air. WAIT for waveform to flatten.
3. Press the softkey under ZERO. User can zero all invasives simultaneously through ZERO
ALL.
ALM
ON
OFF
ALM
LIM
SIZE/
SCALE
SITE
OFF
ART
ZERO
ALL
ZERO
BP1
MORE
4. Observe for the 00 (± 1) on screen. Turn the stopcock off to atmospheric air and open to
patient.
5. Press the PAGE HOME key.
Pulmonary Artery Monitoring
PULMONARY ARTERY monitoring on the Prism or Prism SE allows additional menu keys
that specifically address functions of pulmonary artery catheter. These menu keys are displayed
when invasive pressure is labeled for PA. Additional key(s) available are PAWP and
SAVE:PAM:CVP.
Measurement of pulmonary artery pressure (PAWP):
1. Press the softkey next to the PA label.
2. Press the PAWP softkey. Note display initiates a background scale and slows speed of PA
display to allow easier visualization of end expiratory phase of respiration.
3. Inflate balloon per manufacturer guidelines and observe for flattening of PA waveform,
indicating balloon is wedged. Allow full-screen display of wedged waveform. The FREEZE
key allows display to be held on screen as user allows passive balloon deflation.
3-15
4. Press the CURSOR ↑↓ softkeys to align cursor bar with end expiration. Note value displayed
on cursor bar and at bottom of screen changes as cursor bar is moved.
5. Press the SAVE PAWP softkey to store PAWP value for hemodynamic calculations. Press
the FREEZE key to release (if FREEZE key was used to hold display).
6. For a PA catheter that is not to be wedged, the monitor can store pulmonary artery diastolic
value in place of PAWP. Press the PAWP=CURSOR/PAD softkey to select PAD.
7. If a separate CVP line is not present, CVP can be temporarily measured by “bridging PA
line” to determine CVP value. Press the PA softkey, press MORE, then press SAVE
PAM;CVP softkey.
NOTE: Storage of PAWP and CVP values requires initiation of
Cardiac Output injections within 30 minutes for these values to be
used for hemodynamic calculations.
Storgae of Invasive Pressure Values to VSC
STORAGE OF INVASIVE PRESSURE VALUES TO VSC: Invasive pressure values are
dynamic values that store into VSC any time a static value such as NIBP or SureTemp is stored.
A single set can be stored into VSC through STORE VS function. These dynamic values can be
stored at a timed interval as follows:
1. Press the softkey next to the VSC label to open the VSC SETUP menu.
VSC
SETUP
STORE
VS
TABLE
→→
TABLE
↑↑
TABLE
↓↓
TEXT
SIZE
MORE
2. Press the VSC SETUP softkey to display the following menu.
AUTO
OFF
1MIN
STORE
ALM
SETUP
STORE
NIBP
ON
STORE
TMP1
ON
STORE
CO
ON
MORE
3. Press the AUTO softkey to highlight the desired storage interval.
4. Press the PAGE HOME key.
Timed storage continues until monitor is turned off or
until user returns to this menu and makes another selection.
5th Trace Option
If the Prism or Prism SE is configured with the 5th Trace Option, TRACE 4 (Waveform Zone 4)
can be split to display 2 Invasive Blood Pressures. The selections for displaying a 5th waveform in
TRACE 4 are BP1 & 2, BP1 & BP3, and BP2 & BP3. The waveform label for TRACE 4 will
display as IBP.
1. To access the individual BP menu, press the IBP softkey, a submenu will appear. Press the
desired BP to access the associated BP menu.
2. To record, press the appropriate BP softkey during the tab recording to designate that
parameter for recording.
3-16
If a BP in TRACE 4 or 5 is turned OFF, that BP will be removed from the waveform zone.
The remaining BP will be expanded into the full Trace 4 area. The 5th TRACE Mode will
then be terminated. Turning BP ON again will not restore it as the 5th TRACE.
Cardiac Output and Hemodynamic Calculations
The monitor allows cardiac output injections and hemodynamic calculations. Use only a SwanGanz® (or equivalent catheter).
Follow hospital policy/procedure for assembling cardiac output setup. Connect system after
attaching bifurcated CO cable to port on monitor. To allow appropriate data acquisition for
hemodynamics, insure invasive pressure lines are labeled correctly. The recommended procedure
prior to completing cardiac outputs/hemodynamic profile is:
To monitor a patient’s cardiac output:
1. Insure a MAP (mean arterial pressure) value is available via an arterial pressure or from
NIBP.
2. Zero all lines.
3. Obtain the PAWP/PAD and CVP values.
4. Open the menu for Cardiac Output by pressing softkey next to the CO label. CO display is
temporarily displayed on screen.
COMP
CONST
.470
START
AVG
VIEW
RUN
1
DEL
RUN
1
ENTER
HT
WT
MORE
5. On initial use of CO, press the ENTER HT/WT softkey to enter values utilizing softkeys.
6. Once these values are complete, press the SAVE HT/WT softkey. Height and weight are
required for indexed values.
7. Verify displayed COEFFICIENT is correct. If value needs to be changed, press softkey under
COEF and use softkeys to change values.
8. Press the MORE softkey to return to prior menu.
9. Prepare to inject by obtaining needed injection volume.
10. Press the START softkey to initiate cardiac output measurement. Injection must be started
within 10 seconds of pressing START. Cardiac output injections should be a smooth, swift
injection completed within 4 seconds of starting injection.
3-17
Injections are labeled as RUN 1, 2, etc. Subsequent injections are completed once START is
redisplayed. A total of 6 RUNS can be displayed. Further RUNS require deletion of one of
the 6.
11. Press the VIEW RUN 1 (2-6) softkey to view injection. To delete the run, press DEL RUN 1
(2-6) softkey and press the YES softkey.
12. Press the AVG CO softkey after all runs to be computed in the average are present. The
preliminary hemodynamic table is displayed.
NOTE: Injectate temperature (Ti), and blood temperature (Tb) are
displayed in the CO trace. There must be at least a 12° C difference
between Ti and Tb. When using iced solution or a CO-SET ® — due to
remaining fluid in the line— the Ti measured by the in-line probe will
be more than 12° C cooler than Tb at the time of the injection
regardless of the value of Ti displayed prior to the injection.
13. Vital sign parameter data that may require editing is displayed in right hand column. Review
these values.
To edit these values:
•
Press the EDIT VS softkey
•
Press the ADJ ↑↓ softkeys to adjust highlighted value
•
Press the NEXT ↑↓ → softkeys to move cursor to next vital sign for editing
14. Press the RUN CALCS softkey to display altered preliminary hemodynamic table.
15. Press the STORE CALCS softkey to display completed hemodynamic table.
16. Press the INDEX ON/OFF softkey to toggle between indexed and nonindexed values.
17. Hemodynamic table can be recorded with a bedside recorder. While hemodynamic table is
displayed on monitor screen, press the RECORD key and within 2 seconds press the softkey
next to CO label.
CO allows 22 sets of hemodynamic data to be stored.
18. To view hemodynamic table at a later time, press the CO softkey, press the MORE softkey,
and press HEMOCALCS. Use softkey arrows to scroll table information.
Selecting a Thermodilution Catheter
The following Baxter-Edwards models of thermodilution catheters or their equivalent are
recommended. “H” in part number refers to Heparin coating, and can be ordered without Heparin
by excluding the “H” from part number.
Part Number
131HF7
831HF75
93A-931H-7.5F
93A-439H-7.5F
Application
Standard, non-REF capable
Standard, non-REF capable with venous infusion port
Non-REF capable, infusion and pacing
REF capable, volumetric
3-18
End Tidal Carbon Dioxide (ETCO2) (Prism Only)
End tidal carbon dioxide (ETCO2) monitoring can show early indications of circulatory and
pulmonary problems. In order to have a “normal” ETCO2 (CO2) reading a patient must have
active cellular metabolism that produces CO2, a functional cardiovascular system to transport
CO2 to the lungs and a normal intrinsic pulmonary function or proper ventilator-assist function.
The Prism monitor uses infrared absorption spectroscopy to measure CO2. MDE’s selfcalibrating sensor directs a single infrared beam through both a sampling chamber containing
patient exhaled CO2, and a reference chamber containing a known concentration of CO2. Based
on a comparison of these two values, the monitor calculates the patient’s CO2 concentration for
each exhaled breath.
Both the mainstream and sidestream sensor continuously measures the level of CO2 during
inspiration and expiration, and detects changes of CO2 levels during the respiratory cycle. These
changes are shown on the CO2 capnogram waveform, with numeric values reflecting the highest
level of CO2 detected at the end of expiration. Additionally, the monitor senses and displays
respiration rate (if CO2 is selected as the respiration source), measures inspired CO2 (ICO2) to
compare to an adjustable ICO2 alarm limit, and provides the ability to compensate for oxygen
(O2) and nitrous oxide (N2O) greater than 50%.
ETCO2 setup:
1. Press the softkey next to ETCO2 label to open the ETCO2 Setup menu.
ALM
ON
OFF
ALM
LIM
SCALE
50
75
MM/S
12.5
6.25
CO2
ON
OFF
MORE
2. Press the ALM ON/OFF softkey to set patient alarms.
3. Press the ALM LIM softkey to adjust alarm values.
4. Press the SCALE softkey to chose appropriate scale.
5. Press the CO2 OFF to turn off ETCO2 function. Turn ETCO2 off after conclusion of
monitoring to prevent technical messages on screen.
6. Press the MORE softkey to view and select the UNIT softkey (% or mmHg), O2 ON/OFF
compensation softkey, or N2O ON/OFF compensation softkey.
UNIT
%
mmHg
O2
ON
OFF
N2O
ON
OFF
ETCO2 allows numeric information and waveform to be displayed. ETCO2 waveform can be
placed in a trace slot. Refer to configuration instructions.
3-19
WARNING: Do not allow CO2 sensor to come in contact with
patient’s skin for prolonged period of time. CO2 sensor heats to
prevent fogging of airway adapter windows.
WARNING:
Do not use damaged sensor or one with exposed
electrical contacts. Refer any servicing to qualified personnel.
CAUTION: Do not apply tension to sensor cable.
CAUTION:
only.
CO2 sensor is for use with approved airway adapters
CAUTION: CO2 airway adapter is non-sterile and intended for single
patient use only.
CAUTION: Do not re-circulate exhaust gas back into closed loop
breathing system.
Mainstream:
MDE’s mainstream CO2 sensor attaches to a disposable airway adapter, which is installed in the
ventilator circuit tubing.
3-20
1. Inspect circular window on airway adapter for cracks or blemishes. Replace if necessary.
2. Attach airway adapter and sensor in line proximally to patient between endotracheal,
nasotracheal or tracheal tube and ventilator circuit, T-tube setup or bag/valve setup.
3. Carefully press sensor down onto airway adapter being careful not to damage glass window.
4. Connect ETCO2 cable to port on monitor. Function automatically activates.
5. Allow device to warm up for 45-60 seconds. The message WARM-UP is present on screen.
6. Support under sensor housing may be necessary to prevent excess traction on airway tube. Do
not allow sensor housing to set on patient’s skin.
Sidestream:
The sidestream CO2 sensor attaches to a nasal cannula or in-line airway sampling system (for
intubated patients). It can even attach to a divided oxygen delivery CO2 sampling nasal cannula if
you need to deliver O2 while monitoring sidestream CO2.
1. Connect ETCO2 cable to monitor connector.
2. Insert fresh watertrap into sidestream motor port with a gentle twisting motion.
3. Place respiratory device (nasal cannula, facemask, airway tubing) to patient and attach
sampling port line from respiratory device to watertrap.
4. Allow device to warm up for 45-60 seconds. The message WARM-UP is present on screen.
3-21
ETCO2 (CO2) Sensor and Airway Adapter Maintenance (Prism Only)
CO2 sensor is a precision instrument, which requires proper maintenance to verify accuracy and
durability. Great care must be exercised in handling the CO2 sensor. There are no user serviceable
parts inside sensor. The following precautions will help protect sensor and patients:
•
Do not autoclave airway adapter or sensor
•
Do not immerse sensor or cable in liquid
•
Avoid damaging mainstream adapter glass window
•
Connect mainstream adapter to sensor away from patient
•
Mainstream airway adapter is non-sterile and intended for single patient use only
•
Always use mainstream neonatal adapter (MDE part #E2900-21) for neonatal patients.
•
After use, clean sensor with cloth moistened with green soap/green soap tincture
(V34 or equivalent)
•
Always replace sensor and cable in its protective foam-lined case when not in use
End Tidal Carbon Dioxide (ETCO2) (Prism SE Only)
End tidal carbon dioxide (ETCO2) monitoring can show early indications of circulatory and
pulmonary problems. In order to have a “normal” ETCO2 (CO2) reading a patient must have
active cellular metabolism that produces CO2, a functional cardiovascular system to transport
CO2 to the lungs and a normal intrinsic pulmonary function or proper ventilator-assist function.
Prism SE uses molecular comparison spectroscopy to measure CO2. Prism SE’s sensor directs a
single laser beam specific to CO2 through a sampling chamber containing patient exhaled CO2.
The monitor calculates patient’s CO2 concentration for each exhaled breath.
Both intubated and nonintubated techniques continuously measure level of CO2 during
inspiration and expiration, and detect changes of CO2 levels during respiratory cycle. These
changes are shown on CO2 capnogram waveform, with numeric values reflecting highest level of
CO2 detected at end of expiration. Additionally, Prism SE senses and displays respiration rate (if
CO2 is selected as respiration source), and measures inspired CO2 (ICO2) to compare to an
adjustable ICO2 alarm limit.
ETCO2 setup:
1. Press the softkey next to ETCO2 label to open the ETCO2 Setup menu.
ALM
ON
OFF
ALM
LIM
SCALE
50
75
MM/S
12.5
6.25
CO2
ON
OFF
MORE
2. Press the ALM ON/OFF softkey to set patient alarms.
3. Press the ALM LIM softkey to adjust alarm values.
4. Press the SCALE softkey to chose appropriate scale.
5. Press the CO2 OFF to turn off ETCO2 function. Turn ETCO2 off after conclusion of
monitoring to prevent technical messages on screen.
6. Press the MORE softkey to view and select the UNIT softkey (% or mmHg), O2 ON/OFF
compensation softkey, or N2O ON/OFF compensation softkey.
3-22
UNIT
%
mmHg
O2
ON
OFF
N2O
ON
OFF
ETCO2 allows numeric information and waveform to be displayed. ETCO2 waveform can be
placed in a trace slot. Refer to configuration instructions.
CAUTION: Do not over tighten FilterLine tubing in connector.
CAUTION: The Microstream CO2 FilterLine tubing is for use with
approved airway adapters only.
CAUTION: CO2 airway adapter and FilterLine are non-sterile and
intended for single patient use only.
CAUTION: Do not re-circulate exhaust gas back into closed loop
breathing system.
WARNING: Do not attempt to clear or “blow out” the FilterLine.
Replace FilterLine when occluded.
To measure a patient’s ETCO2 (intubated):
1. Attach airway adapter proximally to patient between endotracheal, nasotracheal or tracheal
tube and ventilator circuit, T-tube setup or bag/valve setup. CO2 airway adapter is non-sterile
and intended for single patient use only.
2. Connect appropriate end of ETCO2 FilterLine tubing to Prism SE’s connector panel. CO2
airway adapter and FilterLine are non-sterile and intended for single patient use only.
3. Observe WARM UP message on screen (WARM UP appears 5 seconds after a NO
SENSOR message). ETCO2 monitoring will commence approximately 10 seconds following
setup and connection.
To measure a patient’s ETCO2 (nonintubated):
3-23
1. Position nasal cannula on patient.
2. Connect ETCO2 tubing to Prism SE’s connector panel.
3. Observe WARM UP message on screen. ETCO2 monitoring will commence approximately
10 seconds following connection. If an error message appears, check tubing for blockage. If
this does not correct problem, see the Troubleshooting section.
Graphical Trends
Graphical trend allows view of compilation of data collected for given parameter over defined
time period. Time period choices are 1, 8, and 24 hours for each monitored parameter.
1. Press the SYSTEM SETUP key to open the System Setup menu.
CLEAR
PT
DATA
STORE
VS
DISP
VSC
PT
SETUP
HR
AUTO
ECG
TRACE
SEL
MORE
2. Press the MORE softkey twice to access the TREND softkey.
CONF
TREND
TEST
3. Press TREND softkey to display Trend Setup Page. Trend is displayed in TRACE 3.
4. Press the softkeys to alter display for parameter, trend time base, and scales. Use arrows to
move time visible on graph.
HR
RESP
SPO2
1 HR
8HR
24HR
SCALE
250
200
CURS
←←
CURS
→→
5. TREND can be recorded with use of bedside recorder. Press the RECORD key and within
two seconds press the softkey next to TRACE 3 (TREND GRAPH).
6. Press PAGE HOME
display.
to remove trend display and return to main monitoring
3-24
Vital Sign Chart (VSC)
VSC is a feature that allows storage, display, documentation and editing of vital signs. The
monitor stores 100 sets of tabular vital signs with most recent visible when VSC is viewed. To
continuously display VSC in a trace slot, refer to configuration page.
1. VSC can be temporarily viewed in trace slot. Press SYSTEM SETUP key, then softkey
under DISP VSC.
CLEAR
PT
DATA
STORE
VS
DISP
VSC
PT
SETUP
HR
AUTO
ECG
TRACE
SEL
MORE
2. To open VSC menu, press the softkey next to the VSC label.
VSC
SETUP
STORE
VS
TABLE
→→
TABLE
↑↑
TABLE
↓↓
TEXT
SIZE
MORE
3. Press the TABLE ↓ (↑or →) softkey to scroll and view vital signs.
4. Press the TEXT SIZE softkey to alter text size of vital signs.
5. Press the STORE VS softkey to manually store all vital signs currently displayed on-screen.
6. Press the VSC SETUP softkey to access the AUTO store key for timed storing of dynamic
vital signs.
AUTO
OFF
1MIN
STORE
ALM
SETUP
STORE
NIBP
ON
STORE
TMP1
ON
STORE
CO
ON
MORE
7. Press the MORE softkey to access DEL VSC ENTRY (allows deletion of lines of vital sign
entries). CLEAR VSC TABLE allows deletion of entire VSC.
CLEAR
VSC
TABLE
DEL
VSC
ENTRY
MORE
8. Recording Vital Signs: VSC can be recorded with use of bedside recorder. Press the
RECORD key and within two seconds press softkey next to VSC label.
9. Letter/symbol to left of vital sign entry indicates what prompted data to be stored.
As entries are added to the table, the oldest entries cycle down and off the screen but remain in
memory. However, if a parameter trace below the VS chart is off, the table will automatically
continue to fill downward until it fills the second trace as well.
There are a variety of options that can be selected to determine when vital signs are stored, as
listed below. Each VSC storage option includes a small letter or symbol, which displays to the
left of the time displayed for that entry. Each entry option can be turned ON or OFF depending
on your charting requirements.
(blank)
Entry made according to preselected automatic time interval.
3-25
(bell)
Entry made when an alarm is violated (alarming vital sign is shown in inverse video).
n
Entry made when a user-initiated NIBP reading is completed.
a
Entry made when an automatic (timed interval) NIBP reading is completed.
t
Entry made when a predictive SureTemp reading is completed.
v
Entry made when the user presses the STORE VS key (indicates “validated” entry).
m
Entry made when the vital signs are manually entered via the CIS module or
Guardian telemetry transmitter.
p
Indicates that the monitor was powered down prior to clearing VSC data. All
entries listed below the “p” entry were stored before the monitor was powered
down.
s
Indicates that ALL monitoring was SUSPENDED at this time entry.
r
Indicates that monitoring was RESTORED at this time entry.
Storing VS Charts in Monitor Memory
Up to 100 VSC entries remain stored in the monitor’s memory for the entire time the monitor is
turned on. Additionally, you can set power-up defaults for your monitor so that these entries stay
in memory for 5, 15, or 30 mins., or 1, 4, 8, or 24 hours after you shut off the monitor (this
feature can also be turned OFF). This “power down memory” is factory set to 15 minutes. If you
need to change this factory default, please consult service personnel.
“Episodic” VS Entries
Episodic entries are defined as vital sign measurements that are not continuously monitored,
including NIBP and predictive SureTemp. Prism and Prism SE monitors include a VALID TIME
setting in power-up defaults that defines how long episodic measurement numerics display onscreen. The factory default for this valid time is 15 minutes. This setting should only be changed
by service personnel.
Episodic entries can initiate VSC entries if these functions are turned on in the VSC setup menu.
Additionally, episodic measurements that are on-screen (i.e. within the valid time) will post once
to the VS chart when entries are initiated by automatic VSC entry options.
NOTE: Episodic measurements will not post to a VS chart more than
once for all automatic entries, even if they are displayed and within
the Valid Time. There is one exception to this rule: the STORE VS key
will capture ALL measurements displayed on the monitor at a given
time, regardless of their continuous or episodic nature.
Clearing Patient Data from VSC (Vital Sign Chart)
Prism and Prism SE monitors allow power down memory for retention of vital signs/trends and
can be cleared by user. This timeframe is configured as a default setting.
1. Press the SYSTEM SETUP key.
3-26
CLEAR
PT
DATA
STORE
VS
DISP
VSC
PT
SETUP
HR
AUTO
ECG
TRACE
SEL
MORE
2. Press the CLEAR PT DATA softkey and press YES softkey.
3. Press the PAGE HOME key.
Oxycardiorespirogram (OxyCRG/CRG)
OxyCRG is an optional trend that allows display of compressed respiration waveform (1mm/sec)
correlated with trend data derived from heart rate and SpO2 over most recent two minutes of
monitoring. ECG, Respiration, and SpO2 must be actively monitored for proper monitoring of
OxyCRG. OxyCRG can be temporarily or continually displayed (Trace 2 only).
To temporarily display OxyCRG:
1. Monitor ECG, Respiration, and SpO2.
2. Press the SYSTEM SETUP key.
CLEAR
PT
DATA
STORE
VS
DISP
VSC
PT
SETUP
HR
AUTO
ECG
TRACE
SEL
3. Press the MORE softkey to display the following menu.
ADULT
PED
NEO
VOL
DISP
OCRG
REC
SETUP
TIMER
CLOCK
4. Press the DISP OCRG to display OxyCRG.
3-27
MORE
MORE
5. To remove temporary display, press the PAGE HOME key.
To display OxyCRG in Trace 2:
1. Monitor ECG, Respiration, and SpO2.
2. Press the SYSTEM SETUP key.
CLEAR
PT
DATA
STORE
VS
DISP
VSC
PT
SETUP
HR
AUTO
ECG
TRACE
SEL
MORE
3. Press the TRACE SEL softkey to display the following menu.
DISP
VSC
DISP
OCRG
TRACE
2
CRG
TRACE
3
AUTO
TRACE
4
AUTO
MORE
4. Press TRACE 2 until CRG is highlighted.
5. Press the PAGE HOME key.
OxyCRG information will display in TRACE 2.
To access CRG setup page and available functions:
1. Press softkey next to the CRG label. Available functions are:
•
SCALE ON softkey to activate parameter scales. Data display is 1.75 minutes if scales
are ON.
•
CLEAR DATA softkey to clear all stored events from memory.
•
EVNT SCROL softkey to scroll through stored low alarm events. EVENT 01 is the most
recent.
To record displayed event:
1. Press the RECORD key and within two seconds press softkey next to CRG label. Displayed
EVENT will be recorded to bedside recorder.
3-28
Alarms
Alarm ON/OFF status and limits can be set from individual parameter menus or from ALARM
SETUP page. Do not temporarily silence or disable audible alarm if patient safety would be
compromised. During alarm, bell next to parameter will flash.
To temporarily suspend patient alarms:
1. ALARMS IN CURRENT VIOLATION – Press the ALARM SUSPEND key to temporarily
silence any alarm in violation. Note screen message says ALARM SILENCED. Alarms are
silenced until silence interval on screen has elapsed OR until the alarm in violation falls
within alarm settings.
2. NO CURRENT ALARM VIOLATION – Press the ALARM SUSPEND key to temporarily
suspend all alarms. Note screen message says ALARM SUSPEND and suspend interval on
screen.
3. Alarms can be enabled again by pressing the ALARM SUSPEND key, or by waiting until
the alarm suspend interval has elapsed.
To change alarm ON/OFF status using parameter menu:
1. Press the softkey next to the parameter label.
2. Press the ALM ON/OFF softkey to highlight desired status.
3. Press the PAGE HOME key.
To change alarm limits using parameter menu:
1. Press the softkey next to the parameter label.
2. Press the ALM LIM softkey to access alarm limits menu and adjust accordingly.
To change alarm ON/OFF status and limits using alarm setup page:
1. Press the ALARM SETUP key.
NEXT
↑↑
NEXT
↓↓
NEXT
→→
ADJ
↑↑
ADJ
↓↓
2. Press the NEXT ↑↓ → softkey to select alarm status or limit to be changed.
3. Press the ADJ ↑↓ softkey to alter alarm status or limits.
4. Press the PAGE HOME key.
Alarm settings and limits are user configurable. Alarm criteria can be set for different
environments and patient types. Turn alarms on or off by parameter and specify limits such as
High and Low Heart Rate on Alarm Setup page or from individual parameter menus. Fully
3-29
understand the ramifications of turning alarms off, silencing alarms, suspending alarms, and
resetting alarm criteria from factory defaults. Please read this section carefully.
WARNING: Do not temporarily silence or disable an audible alarm if
patient safety would be compromised. In the event of an adverse
patient condition, the audio alarm will not sound if it has been
temporarily silenced or disabled.
NOTE: During an alarm, bell next to SETUP page will flash, but all
alarm tones are suspended while ALARM SETUP screen is displayed.
Alarm tones are immediately enabled when you exit ALARM SETUP
screen.
NOTE: Check alarm limits each time a parameter is used to insure
they are appropriate for patient being monitored.
NOTE: Alarms for some parameters are factory set to default to OFF
setting. This may not be consistent with policies of your institution or
types of patients being monitored by Prism and Prism SE monitors.
Alarm Bells
If a steady solid bell is displayed, an alarm for associated parameter is turned
ON. Bell will also remain steady during a technical alarm, and an error
message will flash in associated parameter’s waveform display zone. On color
monitor, bell will turn from white to yellow during a technical alarm.
If a bell is displayed with an X through it, alarms for associated parameter are
turned OFF.
3-30
(FLASHING)
A solid bell will flash if one or more alarm criteria are violated for associated
parameter, and an alarm message will display in parameter’s message area.
When monitored vital sign has returned within set up alarm limits, or when
alarm is suspended, bell will stop flashing. On color monitor, bell will turn
from white to red when in alarm.
(BLANK)
If there is no bell displayed, associated parameter is not enabled.
Alarm Tones
Alarm tone priorities can be assigned to each parameter. Factory defaults are Priority Level 2 for
all parameters. Priority Level Alarms differ in the frequency rate as follows:
Priority Level
Level 1
Level 2
Level 3
Technical
Alarm Frequency
0.4 seconds
1.0 seconds
2.4 seconds
3 seconds
Alarm priority levels can be changed on the Alarm Setup page and/or in the deep configuration of
the monitor. It is recommended that you have service personnel perform any factory default/deep
configuration functions, or consult the service manual.
Latch Alarms
The latch alarms function can be enabled in the deep configuration of the monitor. Factory
default is OFF. It is recommended that you have service personnel perform any factory
default/deep configuration functions, or consult the service manual. The alarm will remain
latched after the limit is no longer violated and until manually cleared by the operator by pressing
any key on the monitor.
The tone, alarm LED, softkey page, output(s), and status to the transponder will continue as if the
limit is still in violation. The alarm page will no longer automatically return to the home page.
The current alarm page is latched on the display. The recorder will stop recording the event (as it
currently does) when the alarm condition disappears. Other alarms will not be recorded while the
last alarm is latched. Other alarms will cause that parameters alarm bell to flash. It will continue
to flash until the latch is cleared.
Recorder
The recorder is an option for the Prism and Prism SE monitors.
Manual recordings:
1. For ECG, press the RECORD key to initiate a 16 second strip.
2. For other parameters, press the RECORD key, and within two seconds press softkey next to
vital sign label.
Dual parameter recordings:
1. Press the RECORD key followed by softkeys next to each of selected parameters within two
seconds.
3-31
Continuous recordings:
1. For ECG, press and hold the RECORD key for approximately three seconds.
2. For all other parameters, press the RECORD key followed by pressing softkey next to
selected parameter for approximately three seconds.
To stop a recording in progress:
1. Press the RECORD key to stop current recording.
To install or remove the dual channel recorder module: (Prism only)
1. Align recorder module so recorder door is facing you, door release is at top, and edges of
module line up with edges of monitor’s housing.
2. Push recorder module straight into monitor until securely in place and it cannot be removed
unless release tab is pressed again.
3. To remove, press recorder release tab inward while pulling recorder module out. See the
“Prism Rear Panel” section for location of recorder release tab.
NOTE: Prism SE recorder is not removable by user.
Manually marking events on recordings:
1. Press the SYSTEM SETUP key.
3-32
CLEAR
PT
DATA
STORE
VS
DISP
VSC
PT
SETUP
HR
AUTO
ECG
TRACE
SEL
MORE
2. Press the MORE softkey to display the following menu.
ADULT
PED
NEO
VOL
DISP
OCRG
REC
SETUP
TIMER
CLOCK
MORE
3. Press the REC SETUP softkey to access the Recorder Setup page.
REC
ON
OFF
DELAY
ON
OFF
TRACE
SNGL
DUAL
MARK
EVENT
MORE
4. Press MARK EVENT to access the event marker softkeys.
MARK
EVENT
E1
MARK
EVENT
E2
MARK
EVENT
E3
MARK
EVENT
E4
MARK
EVENT
E5
MORE
5. Begin your recording, then press any of the event marker softkeys (E1-E5) during the
recording at the point where you want the marker to be printed.
Load new roll of paper:
3-33
1. Press the door release to open recorder.
2. Remove the empty spool.
3. Install new roll with paper unrolling from bottom side.
4. Pull out five (5) inches (12.7 cm) of paper.
5. Close the recorder door.
6. Tear excess paper using downward motion.
3-34
THIS PAGE LEFT BLANK INTENTIONALLY
3-35
Chapter 4 – Additional User Information
Wireless Communication to a Central Station
The Prism and Prism SE monitors have the capability to send vital sign data and waveforms
wirelessly to ESCORT-Link and ESCORT Vision central stations via modular transponders
(900 MHz - MDE part #20011 or 20011V, and 2.4 GHz - MDE part #20019 or 20019V) that
attach to the back of monitor. It is recommended service personnel install this if not already
installed.
NOTE: Transponders (both 900 MHz and 2.4 GHz) should be located
in an open area at least 6.30 inches (16 cm) from any metal objects
which could block or distort transmission or reception of signals.
NOTE: Do not route patient monitoring cables near transponder’s
antenna.
WARNING: Make sure main power to monitor is disconnected from
its AC source before attempting to attach or remove transceiver,
telemetry, or CIS module. Refer all servicing to qualified technical
personnel.
Guidelines for Cleaning
WARNING:
cleaning.
To avoid electric shock, unplug AC power cord before
CAUTION: Do not immerse instrument, switches, cables, connectors
or accessories in liquids. Do not use isopropyl alcohol, caustic or
abrasive cleaners, or other solvents that will damage housing. If
disinfectants or alcohol must be used, apply sparingly to nonabrasive
cloth first and gently wipe surfaces taking care not to let pool on
plastic surfaces.
Use following guidelines and considerations when cleaning the Prism or Prism SE monitor:
•
Clean monitor, cuffs, and hoses as required per hospital procedures. Only use lint free,
nonabrasive cloth that has been slightly dampened with mild detergent.
•
Do not spray or pour liquids directly onto monitor or accessories.
•
Do not allow any liquid to come into contact with power connector, fuse holder, or switches.
4-1
Maintenance and Calibration
There are no user-serviceable parts in Prism or Prism SE monitors. MDE recommends a yearly
performance check to verify all functions on the Prism and Prism SE monitors. All maintenance
and calibration should be performed by qualified personnel only. Refer to Chapter 9 in the
ESCORT Prism or ESCORT Prism SE Patient Monitor Service Manual for periodic
maintenance and calibration instructions. If returned to MDE, the Prism/Prism SE must be
shipped in packaging specified by MDE.
Telemetry Monitoring
The Prism and Prism SE monitors have the ability to receive ECG plus other data from wireless
telemetry transmitters. Because the monitor can receive signals from approximately 200 different
remote transmitters, it is necessary to first set up all of the transmitter types and ID’s of any
patients you may wish to monitor. This procedure was most likely done upon installation of the
monitors, but if it was not, or transmitters need to be added or removed, it is recommended that
service personnel perform this function because it requires power-up configuration of each
monitor.
CIS functions
Prism and Prism SE monitors equipped with MDE’s CIS Module can share patient data with a
CIS (Clinical Information System). In order to accomplish this, the monitor must be set up with
the patient’s name and ID to match patient data with the correct patient record in the CIS. If your
monitor is not equipped with a CIS Module, you can use this function to display the patient’s
name/ID at the center/top of the screen. The information entered will also print in the tabular area
of a recording strip. Refer to the Clinical Information System section later in this manual.
Storage and Transport
Storage and transport specifications are:
Temperature = -10° C to 40° C
Humidity = 0% to 90%
Pressure = 500 to 1060hpa
4-2
4-3
Chapter 5 – Main Setup Menus
This section describes the main system setup and vital sign menus on the Prism and Prism SE
monitors. The menus are the same for both monitor types.
System Setup Menus
Pressing the System Setup key accesses the following menus:
CLEAR
PT
DATA
STORE
VS
DISP
VSC
PT
SETUP
HR
AUTO
ECG
TRACE
SEL
MORE
CLEAR PT DATA—Clears all stored readings (NIBP, Temp) and trended data.
STORE VS—Manually stores a Vital Sign Chart (VSC).
DISP VSC—"Pops up" display of current vital sign chart (VSC).
PT SETUP—Access to patient name and ID, and to Suspend Monitoring key.
HR AUTO ECG—Specifies default parameter for heart rate derivation.
TRACE SEL—Selects parameters displayed in Waveform Display Zone.
MORE—Displays the next menu.
ADULT
PED
NEO
VOL
DISP
OCRG
REC
SETUP
TIMER
CLOCK
MORE
ADULT PED NEO—Selects the patient type with new alarm limits, etc.
VOL—Adjusts the volume of alarm and parameter tones.
DISP OCRG—Pops-up an Oxycardiorespirogram in Trace 2 (if installed).
REC SETUP—Changes settings for general recording functions.
TIMER—Sets up/displays elapsed time or current time of day.
CLOCK—Sets the system date and time.
MORE—Displays the next menu.
CONF
TREND
TEST
CONF—Accesses monitor configurations and power-up defaults.
TREND—Sets up/displays graph of trended vital sign data.
TEST—Displays system test screens for service personnel.
5-1
ECG Setup Menus
ECG function menus are accessed by pressing the softkey adjacent to the ECG label. The menus
are as follows:
ALM
ON
OFF
ALM
LIM
SIZE
PACE
ON
OFF
LEAD
SEL
MORE
ALM ON OFF—Toggles ECG alarms ON or OFF.
ALM LIM—Accesses alarm limits menu.
SIZE—Accesses menu to increase/decrease ECG size.
LEAD SEL—Accesses menu to select ECG cable (3/5) and ECG lead (I, II, III, V).
PACE ON OFF—Turn on to reject and flag pacer artifact.
MORE—Displays next menu.
TONE
ON
OFF
FILT
ON
OFF
MM/S
25
12.5
WF
ON
OFF
MORE
TONE ON OFF—Toggles QRS tone ON or OFF.
FILT ON OF—Toggles ECG filtering between norm. (ON) and diag.(OFF) modes.
MM/S 25/12.5—Selects ECG sweep speed.
WF ON OFF—Turns ECG Waveform display ON or OFF.
MORE—Displays next menu (the following menu is only available if the Telemetry option is
installed).
TLM
ID
↑↑
TLM
ID
↓↓
MODE
CABLE
TLM
TLM ID ↑ ↑—Selects the next higher telemetry transmitter for monitoring.
TLM ID ↓ ↓—Selects the next lower telemetry transmitter for monitoring.
MODE CABLE TLM—Selects ECG source from the monitor or telemetry receiver.
Respiration Setup Menus
Respiration function menus are accessed by pressing the softkey adjacent to the RESP label. The
menus are as follows:
ALM
ON
OFF
ALM
LIM
SIZE
MM/S
25
12.5
RR
AUTO
LEADS
APNEA
DELAY
20S
MORE
ALM ON OFF—Toggles RESP alarms ON or OFF.
ALM LIM—Accesses alarm limits menu.
SIZE—Accesses menu to increase/decrease RESP waveform size.
MM/S 12.5/25—Selects RESP sweep speed.
5-2
RR AUTO LEADS—Selects RESP source, ECG leads, CO2, or AUTO detect.
APNEA DELAY 20S—Selects allowable apnea period before alarming.
MORE—Displays the next menu.
TONE
ON
OFF
CVA
ON
OFF
RESP
ON
OFF
TONE ON OFF—Toggles RESP tone ON or OFF.
CVA ON OFF—Toggles cardiovascular artifact detection ON or OFF.
RESP ON OFF—Turns RESP monitoring ON or OFF.
Pulse Oximetry (SPO2) Setup Menus
SPO2 function menus are accessed by pressing the softkey adjacent to the SPO2 label. The menus
are as follows:
ALM
ON
OFF
ALM
LIM
ALM
DELAY
5
MODE
NORM
FAST
LOCK
ON
OFF
MORE
ALM ON OFF—Toggles SPO2 alarms ON or OFF.
ALM LIM—Accesses alarm limits menu.
ALM DELAY—Selects SPO2 delay time.
MODE—Selects SPO2 averaging time (not used for Nellcor MP405).
LOCK ON OFF—Toggles ECG Sychronization (C-LOCK) ON or OFF (Nellcor only).
MORE—Displays the next menu.
WF
ON
OFF
TONE
ON
OFF
SPO2
ON
OFF
WF ON OFF—Turns waveform ON or OFF in Waveform Display Zone.
TONE ON OFF—Toggles saturation tone ON or OFF.
SPO2 ON OFF—Turns SPO2 monitoring ON or OFF.
Invasive Blood Pressure (IBP) Setup Menus
Invasive Blood Pressure function menus are accessed by pressing the softkey adjacent to the BP1,
BP2, BP3, or IBP label. The menus are as follows:
ALM
ON
OFF
ALM
LIM
SIZE/
SCALE
SITE
OFF
ART
ZERO
ALL
ZERO
BP1
MORE
ALM ON OFF—Toggles alarms ON or OFF.
ALM LIM—Accesses alarm limits menu.
SIZE/SCALE—Accesses menu to increase/decrease waveform size.
5-3
SITE OFF ART—Adds label next to numeric to identify IBP sites.
ZERO ALL—Zeroes all connected transducers.
ZERO BP1—Zeroes the transducer offset.
MORE—Displays the next menu.
SMD
S/D
MEAN
BP1
ON
OFF
CAL
SMD S/D MEAN—Selects numeric display format.
CAL—Simulates a 100/50 mmHg square wave (hold for 5-10 sec.).
BP1 ON OFF—Turns BP monitoring ON or OFF.
Noninvasive Blood Pressure (NIBP) Setup Menus
Noninvasive Blood Pressure function menus are accessed by pressing the softkey adjacent to the
NIBP label. The menus are as follows:
ALM
ON
OFF
START
STOP
4MIN
5MIN
10MIN
5MIN
AUTO
ON
PROG
MORE
ALM ON OFF—Toggles NIBP alarms ON or OFF.
START—Initiates an NIBP measurement.
STOP—Stops an NIBP measurement in progress.
4MIN/5MIN/10MIN—Selects automatic reading interval.
5MIN AUTO ON—Turns AUTO mode ON/OFF and displays current selected interval.
PROG—To program an NIBP sequence.
MORE—Displays the next menu.
ALM
ON
OFF
ALM
LIM
1ST
INFL
170
SMD
S/D
MEAN
SITE
OFF
LIST
NIBP
TABLE
MORE
ALM ON OFF—Toggles NIBP alarms ON or OFF.
ALM LIM—Accesses alarm limits menu.
1ST INFL 170—Sets default first inflation pressure (mmHg).
SMD S/D MEAN—Sets NIBP numeric display format.
SITE OFF LIST—Adds label next to numeric to identify NIBP site.
NIBP TABLE—Displays NIBP table.
MORE—Displays the next menu.
NIBP
ON
OFF
5-4
NIBP ON OFF—Press the NIBP softkey to turn ON or OFF.
Continuous Temperature Setup Menus
Continuous Temperature menus may be accessed by pressing the softkey adjacent to either of the
Temp labels (TMP1, TMP2). Note that these menus are different for SureTemp (shown later):
ALM
ON
OFF
UNIT
°C
°F
ALM
LIM
MORE
ALM ON OFF—Toggles Temp alarms ON or OFF.
ALM LIM—Accesses alarm limits menu.
UNIT °C / °F—Switches between °C and °F for temperature measurement.
MORE—Displays the next menu.
TMP
ON
OFF
TMP ON OFF—Turns Temp monitoring ON or OFF.
SureTemp Menu
If SureTemp is installed, SureTemp menu may be accessed by pressing the softkey adjacent to the
TMP1 label. The menu is as follows:
MODE
NORM
MONTR
SITE
ORAL
AXIL
UNIT
°C
°F
MORE
MODE NORM MONTR—Toggles between predictive and monitored measurements.
SITE ORAL AXIL—Selects oral or axillary measurement site (or rectal for rectal probe).
UNIT °C / °F—Switches between °C and °F for temperature measurement.
MORE—Displays the next menu.
TMP1
ON
OFF
TMP1 ON OFF—Turns Temp monitoring ON or OFF.
End Tidal Carbon Dioxide (ETCO2) Setup Menus
ETCO2 menus may be accessed by pressing the softkey adjacent to the CO2 label. The menus are
as follows:
5-5
ALM
ON
OFF
ALM
LIM
SCALE
50
75
MM/S
12.5
6.25
CO2
ON
OFF
MORE
ALM ON OFF—Toggles CO2 alarms ON or OFF.
ALM LIM—Accesses alarm limits menu.
SCALE 50/75—Selects CO2 waveform scale (50, 75, 100 mmHg).
MM/S 12.5/6.25—Selects CO2 sweep speed.
CO2 ON OFF—Turns CO2 monitoring OFF (alarms must be disabled).
MORE—Displays the next menu.
UNIT
%
mmHg
O2
ON
OFF
N2O
ON
OFF
UNIT % / mmHg—Toggles measurement units (% or mmHg).
O2 ON OFF—Toggles O2 compensation ON or OFF (Prism only).
NO2 ON OFF—Toggles N2O compensation ON or OFF (Prism only).
Cardiac Output Setup Menus
CO menus may be accessed by pressing the softkey adjacent to the CO label. The menus are as
follows:
COMP
CONST
.470
START
AVG
VIEW
RUN
1
DEL
RUN
1
ENTER
HT
WT
MORE
COMP CONST .470—Adjusts computational constant for catheter and injectate volume.
START—Starts cardiac output measurement run.
AVE—Calculates average of CO, REF, and derived parameter.
VIEW RUN—Allows you to cycle through runs prior to averaging.
DEL RUN—Allows deletion of unwanted runs prior to averaging.
ENTER HT WT—Allows entry of patient height/weight.
MORE—Displays the next menu.
CONST
.470
↑
CONST
.470
↑
CONST
.470
↑
MORE
5-6
CONST .470 (ARROW ON 4)—Use to change the tenths column of the constant.
CONST .470 (ARROW ON 7)—Use to change the hundredths column of the constant.
CONST .470 (ARROW ON 0)—Use to change the thousandths column of the constant.
MORE—Displays the previous menu
Vital Sign Chart (VSC) Setup Menus
VSC menus are accessed by pressing the softkey adjacent to the VSC label. The menus are as
follows:
VSC
SETUP
STORE
VS
TABLE
→→
TABLE
↑↑
TABLE
↓↓
TEXT
SIZE
MORE
VSC SETUP—Accesses setup options for events that trigger entries.
STORE VS—Manually stores a VSC entry including all VS data on-screen.
TABLE → →—Scrolls to the right to show additional data, if available.
TABLE ↑ ↑—Scrolls up to show additional data, if available.
TABLE ↓ ↓—Scrolls down to show additional data, if available.
TEXT SIZE—Decreases/enlarges the VSC table approx. 50%.
MORE—Displays the next menu.
CLEAR
VSC
TABLE
DEL
VSC
ENTRY
MORE
CLEAR VSC TABLE—Clears all VSC data currently stored in memory.
DEL VSC ENTRY—Allows selective deletion of individual VSC entries.
MORE—Returns to the first VSC Setup menu.
5-7
THIS PAGE LEFT BLANK INTENTIONALLY
5-8
Chapter 6 – Factory Defaults
When the Prism & Prism SE monitor is powered on for the first time, it will be in the Neonatal
mode, and all parameters will be set to their factory defaults.
Each parameter has defaults for adult, pediatric, and neonatal modes (ADULT, PED, NEO). All
parameter and system defaults can be user-configured.
It is important to recognize that changes made to these functions determine the status of those
functions upon every subsequent power-up. As a result, default settings should not be changed
unless the setting will be desired on a regular basis.
It is recommended that you have service personnel perform any factory default/deep
configuration functions.
System Setup Factory Defaults
SYSTEM SETUP
FACTORY DEFAULTS
PWR DN MEMORY
ALRM VOLUME
ADULT
NO
15MIN
7
PED
NO
15MIN
7
NEO
NO
15MIN
7
ALM VOL MIN
1
1
1
TONE VOLUME
TRACE 2
TRACE 3
TRACE 4
HR SOURCE
ALM SUSPND
PRAM LABELS
CLOCK DISPLY
CABLE / TELM
REMOTE RECD
ALARM FLASH
4
AUTO
AUTO
AUTO
AUTO
180
BLANK
OFF
CABLE
OFF
ON
4
AUTO
AUTO
AUTO
AUTO
90
BLANK
OFF
CABLE
OFF
ON
4
AUTO
AUTO
AUTO
AUTO
60
BLANK
OFF
CABLE
OFF
ON
LANGUAGE
ENGL
ENGL
ENGL
LINE FREQ
PATIENT TYPE
60HZ
ALL
60HZ
ALL
60HZ
ALL
ALARM CNTRL
ON
ON
ON
6-1
DESCRIPTION
To restore all settings to factory defaults
Selected time for saving VSC settings
Alarm tone volume setting (1-8)
Sets minimum allowable alarm tone
volume setting (1-8)
Key tone setting
Waveform or feature for second trace
Waveform or feature for third trace
Waveform or feature for fourth trace
Heart rate source, ECG, SPO2, BP’s
Alarm suspend time
To blank parameters when off
Time displayed on screen
ECG mode - telemetry or cable
Telemetry recording
Flashing alarm LED
Sets language (English, French,
German, Spanish, Swedish, or Italian)
50Hz or 60Hz input line frequency
ADULT, PED, NEO, or ALL
When default is set to ON, allows
enabled alarms to be turned OFF
Recorder Factory Defaults
RECORDER SETUP
RECD DELAY
ALRM RECDNG
DUAL RECDNG
REMOTE RECD
ADULT
ON
ON
ON
OFF
PED
ON
ON
ON
OFF
NEO
ON
ON
ON
OFF
ADULT
PED
NEO
OFF
ON
ON
ON
OFF
ON
ON
ON
OFF
ON
ON
ON
30
30
30
OFF
ON
ON
ON
ON
ON
ON
ON
OFF
ON
ON
ON
ON
ON
ON
ON
OFF
ON
ON
ON
ON
ON
ON
ON
DESCRIPTION
Four second delay
Alarm recording enable/disable
Dual trace recording
Telemetry recording
Vital Signs Chart Factory Defaults
VITAL SIGNS
CHART
STORE AUTO
STORE NIBP
STORE TMP
STORE CO
VALID TIME
STORE ALARM
STR ECG ALM
STR SPO2 ALM
STR RESP ALM
STR CO2 ALM
STR BP ALM
STR NIBP ALM
STR TMP ALM
6-2
DESCRIPTION
Auto stores at selected intervals
Storing NIBP values
Storing Temperature values
Storing Cardiac Output values
Displayed time for NIBP, Suretemp,
and CO
Storing alarm violations
Storing ECG alarm violations
Storing SPO2 alarm violations
Storing Respiration alarm violations
Storing CO2 alarm violations
Storing IBP alarm violations
Storing NIBP alarm violations
Storing temperature alarm violations
ECG Setup Factory Defaults
ECG SETUP
ALARMS
ALARM LEVEL
LATCH ALARMS
HIGH LIMIT
LOW LIMIT
RCD ON ALARM
FILTER
SIZE VCTR 1
SIZE VCTR 2
SWEEP SPEED
PACE DETECT
LEAD SELECT
5 LEAD
QRS TONE
WAVEFORM ON
PRAM COLOR
ADULT
ON
2
OFF
140
50
WF
ON
1.00
1.00
25
OFF
II
OFF
OFF
ON
GREEN
PED
ON
2
OFF
180
80
WF
ON
0.80
0.80
25
OFF
II
OFF
OFF
ON
GREEN
NEO
ON
2
OFF
200
100
WF
ON
0.80
0.80
25
OFF
II
OFF
OFF
ON
GREEN
DESCRIPTION
Enables ECG alarms
Sets alarm priority level (1, 2, or 3)
Latches the ECG alarms until reset
High alarm limit setting
Low alarm limit setting
Record when ECG alarm enabled
ECG filter enable
3 lead select size
5 lead select size
Waveform speed
Pacer detection enable
Lead select I, II, III, or V
5 lead mode enable
QRS detect tone
ECG waveform enable
Sets on-screen color of parameter
Respiration Setup Factory Defaults
RESPIRATION
SETUP
ALARMS
ALARM LEVEL
ADULT
PED
NEO
OFF
2
ON
2
ON
2
LATCH ALARMS
OFF
OFF
OFF
HIGH LIMIT
LOW LIMIT
PRAM AVAIL
PRAM ON/OFF
RCD ON ALARM
RESP SIZE
SWEEP SPEED
APNEA DELAY
APNEA ALM LVL
CVA
TONE
CRG SCALES
PRAM COLOR
OFF
5
ON
OFF
WF
1.00
12.5
20
2
ON
OFF
ON
CYAN
OFF
5
ON
OFF
WF
0.77
12.5
20
2
ON
OFF
ON
CYAN
OFF
5
ON
OFF
WF
0.57
12.5
20
2
ON
OFF
ON
CYAN
6-3
DESCRIPTION
Enables respiration alarm
Sets alarm priority level (1, 2, or 3)
Latches the Respiration alarms until
reset
High alarm limit setting
Low alarm limit setting
Respiration enable or disable
Respiration standby
Record when Resp alarm enabled
Respiration waveform size
Respiration waveform speed
Time delay for apnea alarm
Sets alarm priority level (1, 2, or 3)
Artifact detection
Respiration Rate tone
OXYCRG scales enable
Sets on-screen color of parameter
SPO2 Setup Factory Defaults
SPO2 SETUP
ADULT
PED
NEO
OFF
ON
ON
ALARM LEVEL
2
2
2
Sets alarm priority level (1, 2, or 3)
ALARM DELAY
5
5
5
Delay time for alarm
LATCH ALARMS
OFF
OFF
OFF
Latches the SPO2 alarm until reset
ALARM TONE
STD
STD
STD
Tone during alarm
HIGH LIMIT
100
100
95
High alarm limit setting
LOW LIMIT
85
85
80
Low alarm limit setting
PRAM AVAIL
ON
ON
ON
SPO2 enable or disable
PRAM ON / OFF
OFF
OFF
OFF
SPO2 standby
RCD ON ALARM
VS
VS
VS
Record when SPO2 alarm enabled
TONE
OFF
OFF
OFF
Tone enable for SPO2
TONE RANGE
WIDE
WIDE
WIDE
SPO2 tone frequency range
MODE
NORM
NORM
NORM
SPO2 averaging time
C-LOCK
OFF
OFF
OFF
ECG synchronization
WAVEFORM ON
ON
ON
ON
SPO2 waveform enable
PURPL
PURPL
PURPL
ALARMS
PRAM COLOR
6-4
DESCRIPTION
Enables SPO2 alarm
Sets on-screen color of parameter
BP1 Setup Factory Defaults
BP1 SETUP
ALARMS
ALARM LEVEL
LATCH ALARMS
SYS HI LIMIT
SYS LO LIMIT
DIA HI LIMIT
DIA LO LIMIT
MN HI LIMIT
MN LO LIMIT
PRAM AVAIL
PRAM ON / OFF
RCD ON ALARM
SIZE
SCALE
DISPD VALUES
SITE
PRAM COLOR
ADULT
OFF
2
OFF
170
90
100
50
120
60
ON
OFF
WF
120
OFF
S/D
OFF
RED
PED
OFF
2
OFF
130
65
90
40
100
50
ON
OFF
WF
120
OFF
S/D
OFF
RED
6-5
NEO
OFF
2
OFF
100
50
70
30
80
35
ON
OFF
WF
120
OFF
S/D
OFF
RED
DESCRIPTION
Enables BP1 alarm
Sets alarm priority level (1, 2, or 3)
Latches the BP1 alarm until reset
Systolic high alarm limit setting
Systolic low alarm limit setting
Diastolic high alarm limit setting
Diastolic low alarm limit setting
Mean high alarm limit setting
Mean low alarm limit setting
BP1 enable or disable
BP1 standby
Record when BP1 alarm enabled
BP1 waveform size
BP1 scale enable
BP1 numeric display format
BP1 catheter site
Sets on-screen color of parameter
BP2 Setup Factory Defaults
BP2 SETUP
ALARMS
ALARM LEVEL
LATCH ALARMS
SYS HI LIMIT
SYS LO LIMIT
DIA HI LIMIT
DIA LO LIMIT
MN HI LIMIT
MN LO LIMIT
PRAM AVAIL
PRAM ON / OFF
RCD ON ALARM
SIZE
SCALE
DISPD VALUES
SITE
PRAM COLOR
ADULT
OFF
2
OFF
50
20
25
5
30
10
ON
OFF
WF
30
OFF
S/D
OFF
YELLW
PED
OFF
2
OFF
40
5
15
00
25
5
ON
OFF
WF
30
OFF
S/D
OFF
YELLW
6-6
NEO
OFF
2
OFF
20
5
10
00
15
5
ON
OFF
WF
30
OFF
MEAN
OFF
YELLW
DESCRIPTION
Enables BP2 alarm
Sets alarm priority level (1, 2, or 3)
Latches the BP2 alarm until reset
Systolic high alarm limit setting
Systolic low alarm limit setting
Diastolic high alarm limit setting
Diastolic low alarm limit setting
Mean high alarm limit setting
Mean low alarm limit setting
BP2 enable or disable
BP2 standby
Record when BP2 alarm enabled
BP2 waveform size
BP2 scale enable
BP2 numeric display format
BP2 catheter site
Sets on-screen color of parameter
BP3 Setup Factory Defaults
BP3 SETUP
ALARMS
ALARM LEVEL
LATCH ALARMS
SYS HI LIMIT
SYS LO LIMIT
DIA HI LIMIT
DIA LO LIMIT
MN HI LIMIT
MN LO LIMIT
PRAM AVAIL
PRAM ON / OFF
RCD ON ALARM
SIZE
SCALE
DISPD VALUES
SITE
PRAM COLOR
ADULT
OFF
2
OFF
25
5
5
00
5
00
ON
OFF
WF
30
OFF
MEAN
OFF
LTBLU
PED
OFF
2
OFF
25
5
5
00
5
00
ON
OFF
WF
30
OFF
MEAN
OFF
LTBLU
6-7
NEO
OFF
2
OFF
25
5
5
00
5
00
ON
OFF
WF
30
OFF
MEAN
OFF
LTBLU
DESCRIPTION
Enables BP3 alarm
Sets alarm priority level (1, 2, or 3)
Latches the BP3 alarm until reset
Systolic high alarm limit setting
Systolic low alarm limit setting
Diastolic high alarm limit setting
Diastolic low alarm limit setting
Mean high alarm limit setting
Mean low alarm limit setting
BP3 enable or disable
BP3 standby
Record when BP3 alarm enabled
BP3 waveform size
BP3 scale enable
BP3 numeric display format
BP3 catheter site
Sets on-screen color of parameter
NIBP Setup Factory Defaults
NIBP SETUP
ALARMS
ALARM LEVEL
LATCH ALARMS
SYS HI LIMIT
SYS LO LIMIT
DIA HI LIMIT
DIA LO LIMIT
MN HI LIMIT
MN LO LIMIT
PRAM AVAIL
PRAM ON/OFF
RCD ON ALARM
AUTO
INTERVAL
1ST INFLATE
TABLE DSPLY
DISPD VALUES
TONE
SITE
PRAM COLOR
ADULT
OFF
2
OFF
170
90
100
50
120
60
ON
ON
VS
OFF
5MIN
170
OFF
S/D
ON
OFF
ORNGE
PED
OFF
2
OFF
130
65
90
40
100
50
ON
ON
VS
OFF
5MIN
140
OFF
S/D
ON
OFF
ORNGE
6-8
NEO
OFF
2
OFF
100
50
70
30
80
35
ON
ON
VS
OFF
5MIN
90
OFF
S/D
ON
OFF
ORNGE
DESCRIPTION
Enables NIBP alarm
Sets alarm priority level (1, 2, or 3)
Latches the NIBP alarm until reset
Systolic high alarm limit setting
Systolic low alarm limit setting
Diastolic high alarm limit setting
Diastolic low alarm limit setting
Mean high alarm limit setting
Mean low alarm limit setting
NIBP enable or disable
NIBP standby
Record when NIBP alarm enabled
Automatic mode enable
Automatic reading interval
First inflation pressure
Enables NIBP table display
NIBP numeric disply format
Enables end value tone
NIBP cuff site
Sets on-screen color of parameter
CO2 Setup Factory Defaults
CO2 SETUP
ADULT
PED
NEO
OFF
OFF
OFF
2
2
2
OFF
OFF
OFF
HIGH LIMIT
50
50
50
High alarm limit setting
LOW LIMIT
25
25
25
Low alarm limit setting
ICO2 LIMIT
8
8
8
Inspired CO2 alarm limit setting
PRAM AVAIL
ON
ON
ON
CO2 enable or disable
PRAM ON/OFF
OFF
OFF
OFF
CO2 standby
RCD ON ALARM
WF
WF
WF
Record when CO2 alarm enabled
SCALE
50
50
50
CO2 waveform scale size
UNITS
mmHg
mmHg
mmHg
O2 COMPNSAT
OFF
OFF
OFF
O2 compensation enable
N2O COMPNSAT
OFF
OFF
OFF
N2O compensation enable
CYAN
CYAN
CYAN
ADULT
ON
PED
ON
NEO
ON
CONSTANT
.470
.470
.470
PRAM ON/OFF
OFF
OFF
OFF
REF ON/OFF
ON
ON
ON
5
IN/LB
PINK
5
IN/LB
PINK
5
IN/LB
PINK
ALARMS
ALARM LEVEL
LATCH ALARMS
PRAM COLOR
DESCRIPTION
Enables CO2 alarm
Sets alarm priority level (1, 2, or 3)
Latches the CO2 alarm until reset
Measurement units % or mmHg
Sets on-screen color of parameter
CO Setup Factory Defaults
CO SETUP
PRAM AVAIL
DISP TIMEOUT
UNITS
PRAM COLOR
6-9
DESCRIPTION
Cardiac output enable or disable
Adjusts computational constant for
catheter and injectate volume
Cardiac output standby
Right ejection fraction measurement
enable
Displayed time for CO measurement
Inches/pounds or centimeters/kilograms
Sets on-screen color of parameter
Temp1 Setup Factory Defaults
TEMP1 SETUP
ALARMS
ALARM LEVEL
LATCH ALARMS
UNITS
HIGH LIMIT
LOW LIMIT
PRAM AVAIL
PRAM ON/OFF
TONE
PRAM COLOR
ADULT
OFF
2
OFF
ο
C
38.0
36.0
ON
OFF
ON
WHITE
PED
OFF
2
OFF
ο
C
38.0
36.0
ON
OFF
ON
WHITE
NEO
OFF
2
OFF
ο
C
37.5
36.0
ON
OFF
ON
WHITE
DESCRIPTION
Enables Temp1 alarm
Sets alarm priority level (1, 2, or 3)
Latches the Temp1 alarm until reset
Celsius or Fahrenheit
High alarm limit setting
Low alarm limit setting
Temp1 enable or disable
Temp1 standby
Measurement update tone enable
Sets on-screen color of parameter
PED
OFF
2
OFF
38.0
36.0
ON
OFF
GRAY
NEO
OFF
2
OFF
37.5
36.0
ON
OFF
GRAY
DESCRIPTION
Enable Temp2 alarm
Sets alarm priority level (1, 2, or 3)
Latches the Temp2 alarm until reset
High alarm limit setting
Low alarm limit setting
Temp2 enable or disable
Temp2 standby
Sets on-screen color of parameter
Temp2 Setup Factory Defaults
TEMP2 SETUP
ALARMS
ALARM LEVEL
LATCH ALARMS
HIGH LIMIT
LOW LIMIT
PRAM AVAIL
PRAM ON/OFF
PRAM COLOR
ADULT
OFF
2
OFF
38.0
36.0
ON
OFF
GRAY
6-10
Chapter 7 – System & Parameter Messages
System and parameter messages remind, prompt, or warn you about the current condition of the
monitor or its parameters. These messages are displayed in reverse video and may flash on and
off to get your attention.
System Messages
The system messages, explained in the following tables, are displayed in a reverse-video box, just
below the WDZ. They apply to conditions of the monitor that are not specific to any one
parameter. See the “System Message Area” section for more information.
System Messages
SYSTEM MESSAGE
MEANING
RECORDER PAPER
The recorder is out of paper, or the paper is not installed
correctly.
REC DISABLE FREEZE
You are trying to freeze waveforms while recording is in
progress. You can only freeze waveforms when they are not
being recorded.
REC IN CONT RUN MODE
Indicates that you have pressed and held the RECORD key so
that the recorder will run continuously. Press RECORD again to
end continuous recording.
FREZ RELEASE FREZ
Waveforms are currently frozen. To release the frozen
waveforms, you must press either the FREEZE or the RECORD
key.
LINK RECORD SENT
A record has been sent to the Central Station because the recorder
at PRISM monitor is either not present or out of paper.
ALARM SUSPEND XXX
You have pressed the ALARM SUSPEND key, disabling all
alarm tones for the number of seconds (XXX) displayed. To
enable alarm tones before the suspend time has expired, press the
ALARM SUSPEND key again. The ALARM SUSPEND
function is also enabled at power-up.
7-1
Battery Messages
MESSAGE
BATTERY LEVEL
MONITOR BAT HI
> 60% Charge
MONITOR BAT MID
20-60% Charge
MONITOR BAT LOW
< 20% Charge
BATTERY VERY LOW
(Intermittent Alarm Tone Sounds)
Approximately 10 minutes of battery life remains
Parameter Messages
The following tables explain messages that are parameter specific. Messages concerning
parameters displayed in the WDZ will be displayed in a video box below the numeric data for the
corresponding waveform parameters. The message is displayed as long as the message condition
exists. All messages that apply to parameters in the numeric-only zone are displayed in the
numeric display area.
ECG/Respiration Messages
ECG/RESP MESSAGE
MEANING
CVA
Cardiovascular artifact (CVA) coincidence has been detected on
respiration. Respiration will reject coincident respiration while
the message is displayed. At least 8 out of 10 coincident
respirations are required to initiate and maintain the CVA
message.
APNEA
The apnea alarm limits have been exceeded.
APN ALM OFF
Respiration alarms are ON, but apnea alarm is OFF.
CHK LEADS
One or more electrodes or lead wires may be dry or loose. In
addition to the message, the ECG waveform and respiration
waveform, if it is displayed, become dotted lines.
7-2
SPO2 Messages
SPO2 MESSAGE
SPO2 SRCH
(Nellcor only)
NO C-LOCK
(Nellcor only)
MEANING
The monitor cannot locate the patient’s pulse. The patient’s
perfusion may be too poor to detect an acceptable pulse. Confirm
proper application of the sensor; make sure the ECG parameter is
available for C-LOCK synchronization; try another sensor site; or
try the OXISENSOR II R-15 sensor.
Indicates loss of synchronization between the ECG and SPO2
pulse waveform. Take steps to eliminate ECG artifact, or if the Rwave amplitude is less than 4 mm, increase the ECG waveform
size by using the ECG SIZE softkey.
NO SENSOR
The SPO2 parameter is ON, but the sensor and/or sensor cable
is/are not connected to the monitor.
SPO2 CAL
The monitor is performing automatic self-calibration. The
calibration range is 50 to 100%.
Invasive Blood Pressure (BP1/BP2/BP3) Messages
BP1/BP2/BP3 MESSAGE
MEANING
NO XDUCER
The pressure transducer is not connected to the monitor.
ZERO BP1
ZERO BP2
ZERO BP3
Message flashes until the pressure channel is zeroed as a
reminder that pressures must be zeroed prior to use.
NO ZERO: PULSE DETECT
Displayed over the BP SETUP page to indicate that either a pulse
or electrical noise was detected, which precluded zeroing the
transducer. Confirm that the transducer is vented to air before
pressing the ZERO key.
ZERO OUT OF RANGE
Displayed over the BP SETUP page to indicate that a
transducer’s offset exceeds the zero range (±100 mmHg) of the
monitor. Confirm that the transducer is vented to the air and
attempt to zero again.
7-3
Noninvasive Blood Pressure (NIBP) Messages
NIBP MESSAGE
MEANING
ET = MM:SS
Indicates elapsed time (ET) since last NIBP measurement.
AET = MM:SS
Indicates elapsed time since last NIBP measurement while auto
timer is on.
AUTO
Monitor is in NIBP AUTO mode.
CUFF = XXX
Displays as the cuff inflates and deflates, giving the pressure in
mmHg.
LOW OSCIL
Oscillation amplitudes are too low to obtain measurement.
ARTIFACT
Excessive artifact precluded measurement within a 145-second
timeout.
MAX 2 LOW
Cuff inflation was too low to take a reading. May indicate either
incorrect operating mode (ADULT, PED, NEO) or a need to
increase the initial inflation.
CHECK CUF
40-second timeout exceeded for inflation to at least 20 mmHg.
ETCO2 Messages
ETCO2 MESSAGE
MEANING
NO SENSOR
The MediCO2 module has detected that NO FilterLine is
currently connected. This message will remain displayed until a
FilterLine is connected or another CO2 status message is
displayed.
WARM UP
This message is displayed for approximately 5-10 seconds after
the installation of the FilterLine, or after power-up with the
FilterLine already installed.
FILT OCCL
The MediCO2 module has detected an airway blockage. If
blockage remains for more than 30 seconds, the MediCO2
module will go into standby mode and this message will remain
displayed until FilterLine is disconnected.
CO2 ERROR
This message will be displayed if the CO/CO2 firmware has not
received valid data from the MediCO2 module for more than 30
seconds.
ICO2
This message will be displayed when the INSPIRED CO2 value
has exceeded the alarm limit set in the CO2 Setup page in deep
configuration or in the Alarm Limits page under the CO2
Parameter menu.
7-4
SureTemp Messages
SURETEMP MESSAGE
MEANING
T1 INITIAL
This message display for a few moments as the probe warms up.
T1 WAIT
This message displays momentarily when the probe is removed
from the well.
T1 READY
This message means it is time to insert the probe (orally or
rectally).
T1 FINAL
This message displays when the final temperature is reached.
T1 POSITN
If a “t1 POSITN” error displays during the reading, reposition the
probe, and initiate a new measurement.
T1 MONITOR
Displays when taking a patient’s axillary temperature.
7-5
Cardiac Output (CO) Messages
CO MESSAGE
MEANING
NO CATH
No catheter connected to the monitor.
NO PROBE
No temperature probe (bath or injectate) connected to the
monitor.
∧ ∧ RANGE ∧ ∧
Signal over range.
∨ ∨ RANGE ∨ ∨
Signal under range.
<< RANGE >>
Cardiac output out of range.
BASELINE
Noisy baseline detected.
IRG CURVE
Irregular curve detected.
PEAKS
Multiple curve peaks detected.
INJ LATE
Delayed injection detected.
DRIFT
Excessive thermal drift detected.
SHORT CUR
Short thermodilution curve detected.
LONG CURV
Long thermodilution curve detected.
WARM H2O
Warm H2O for injectate or bath detected.
NO ECG
No ECG signal detected by the monitor.
<<EF HR>>
REF HR out of range.
IRG ECG
Irregular rhythm.
<<CO EF>>
REF out of range.
FAST DROP
Fast drop curve.
EF EARLY
Premature beat.
EF LATE
Delayed beat.
<<BOLUS>>
REF post bolus out of range.
RUNS FULL
Maximum number of runs performed.
DELETED
Measurement run deleted.
7-6
Chapter 8 – Defibrillator/Pacer
Introduction
The portable ESCORT defibrillator/pacer can attach to any ESCORT 300, II 300, or Prism
monitor to provide full resuscitation and pacing capability during transport or at the bedside via
AC power or modular batteries.
NOTE: The Prism monitor must be equipped with a “defibrillator
slide mount” (Option 21) to properly attach to the defibrillator.
During AC power operation, the internal batteries in both the Prism and the defib/pacer unit are
continuously charged. When the defib/pacer is used as a stand-alone field unit, the internal
battery provides sufficient power to provide up to thirty-five (35) charge/discharge cycles and the
noninvasive pacer can supply up to five (5) hours of continuous operation.
The noninvasive pacer is particularly useful for fast application of pacing for asystolic or severely
bradycardic patients until a temporary endocardial pacing electrode can be inserted. It can also be
used in standby applications if arrhythmia or abnormal conduction anomalies are present or
suspected.
When in asynchronous mode, the pacer will pace at the selected rate independent of any
monitored intrinsic ECG rhythm. When in synchronous (demand) mode, the pacer will pace only
if the patient’s intrinsic heart rate is below the selected pace rate.
Safety Considerations (Defib/Pacer)
Read the following sections before using the defibrillator/pacer. These cautions and warnings are
presented to increase both user and patient safety, and to prevent damage to the
defibrillator/pacer.
WARNING: Shock hazard. The user should not perform any servicing
unless qualified to do so.
WARNING: Keep hands and paddles free of gel. Paddles must be
cleaned after each use to avoid the danger of operator shock.
WARNING: User contact with patient, bed, or electrodes presents a
potential shock hazard during defibrillation. Operator and other
members of the resuscitation team should stand clear of the patient
and bed during defibrillation.
WARNING: When operating the defibrillator from an AC power
source, the wall receptacle must be a three-wire, grounded, hospital
grade outlet. Use only defibrillator’s original hospital grade AC
power plug and cord, or an equivalent hospital grade plug and cord.
If in doubt about the integrity of the grounding of the main supply
8-1
connection, the unit must be operated by battery power.
CAUTION: Make sure to use an ECG cable with an inline resistor so
the monitor is protected from high voltage during defibrillation.
CAUTION: Do not operate defibrillator in the presence of highenergy electrical fields. External electrical noise may corrupt the
ECG tracing.
CAUTION: Do not immerse paddles, cables, or electrical connector
in liquids during cleaning and disinfecting. Do not allow liquid or
electrode gel to enter switches, cable entrance, or connector.
Symbols (Defib/Pacer)
The following cautionary symbols appear on the defibrillator/pacer. Familiarize yourself with
these symbols and their meaning before using the defibrillator/pacer.
Type CF Defibrillation Protected Equipment: Isolated patient connections
comply with allowable leakage current limits for direct cardiac application and
are protected against effects of defibrillation.
Attention: Consult accompanying documents.
Replace Fuses as Marked: For protection against fire, replace only with fuses
of same type and rating.
Caution: Dangerous voltage.
Alternating Current: 100-240V @ 50/60 Hz.
Fuse: Voltage and current ratings appear adjacent to symbol.
Cleaning, Maintenance, & Calibration
Clean the Defibrillator/Pacer as required per hospital procedures.
There are no user-serviceable parts in the Defibrillator/Pacer. All maintenance and calibration
should be performed by qualified personnel only. Circuit diagrams, component part lists,
descriptions, and calibration instructions are available on request. Storage and transport
specifications are: Temperature = -10 degrees Celsius to 40 degrees Celsius, Humidity = 0% to
90%, Pressure = 500 to 1060hpa.
8-2
Defibrillator/Pacer Front Overview
1. Defibrillator/Pacer Carrying Handle
2. APEX Defibrillator Paddle
3. Energy CHARGE (transparent/lighted) and DISCHARGE (red)
Buttons on APEX Paddle
4. Energy DISCHARGE Button on Sternum Paddle
5. Sternum Defibrillator Paddle
8-3
Defibrillator/Pacer Rear Overview
1. AC Receptacle
2. Defibrillator Test Lamp
3. Voltage Select/Fuse Holder
4. Battery
5. Battery Lock
8-4
Defibrillator/Pacer Front Panel
1. External Pace Rate Adjustment Knob
2. QRS Indicator
3. External Pacing Mode Key
4. Pace Current Adjustment Knob
5. Pace STOP/START Key
6. CHECK PACE ELECTRODES Indicator
7. ENERGY SELECTOR Control
8. INTNL PADDLE DISCHG Key (Internal Paddle Discharge)
9. BATTERY CONDITION Indicators
10. Battery Charging Indicator
11. AC Power Indicator
12. ECG Lead Source Key
13. Synchronized Cardioversion Selector
14. Energy DISARM Key
15. Defib/Pacer Power ON Key
16. Power Standby Key
8-5
17. Defib Energy CHARGE Key
Using Defibrillator and Pacer Paddles and Electrodes
External Paddles
The STERNUM defibrillating paddle contains a discharge button and serves as the negative ECG
electrode (placed on the upper right sternum) when the defib ECG source key is set to PADDLE.
The APEX defibrillating paddle contains both a discharge button and a charge button with ready
light that functions the same as the CHARGE key on the defibrillator front panel. This paddle
also serves as the positive ECG electrode (placed on top of the cardiac apex) when the defib
source is set to PADDLE.
Pediatric Paddles
WARNING: Pediatric paddles have no internal protection. Therefore,
improper defibrillator energy settings can cause permanent
myocardial damage to pediatric patients. Follow ACLS (Advanced
Cardiac Life Support) guidelines when setting energy for pediatric
patients.
Pediatric paddles are designed to slide directly over the standard adult paddles.
Disposable Adhesive Electrodes
Disposable adhesive electrodes can be used for defibrillation, pacing, and ECG acquisition when
PADDLE is selected as the ECG source on the defib front panel. If you are monitoring in this
way and obtain an inadequate QRS amplitude, reposition the electrodes, or monitor using a
standard 3-lead ECG cable with proper electrodes. Select the appropriate electrodes for your
application from the following table:
Disposable Electrode Diameter
13 cm (back) and 10 cm (apex)
10 cm (back) and 7 cm (apex)
MDE Part Number
E2700-64
E2700-65
8-6
Application
Adult
Pediatric
To Apply Disposable Adhesive Electrodes to the Patient:
1. In a non-emergency application, clean and dry skin in electrode areas, preferably with a
coarse dry terry cloth. If necessary, use alcohol for removal of lotions or moisturizers, and
allow area to dry completely prior to application of pads. Do not shave electrode sites.
2. Check expiration date stamped on the electrode package. Do not use beyond this date.
Remove Defib/Pace Electrodes from package and pull apart lead wires to required length.
3. Remove protective cover to expose hydrogel and adhesive ring. Do not use if hydrogel area is
dry. Apply promptly to patient. Adhere edge of pad to patient and firmly roll pad against
patient’s skin. Apply pressure over ring and hydrogel area of each pad to assure adhesion.
Use all opened pouches within 24 hours.
NOTE: While defib/pace electrodes can be effective in both
anterior/posterior and anterior/anterior positions, anterior/posterior
positions are preferred. Apply FRONT/APEX defib/pace electrode in
apex anterior (ECG V 2 - 3 ) position and BACK electrode in posterior
(left side below scapula) position.
WARNING: Adhesive type electrodes must adhere securely to
patient’s skin across entire electrode surfaces. Improper electrode to
skin adhesion or the use of dry or otherwise defective electrodes may
result in patient burns.
Internal Paddles
Internal paddles are used for open heart surgery. Sterile techniques are required to handle these
paddles and their connectors. These paddles are screw-mounted to MDE’s internal paddle cable
(MDE part # E2700-69) before they are connected to the defib/pacer. Energy selection when
using internal cables is limited to 50 joules or less. Select the appropriate paddles from the
following:
Internal Paddle Diameter
8.9 cm
3.8 cm
MDE Part Number
E2700-70
E2700-72
Application
Adult
Pediatric/Neonatal
When placing internal paddles, locate one paddle over the right atrium and the other paddle over
the left ventricle.
8-7
Operating the Defibrillator
1. Ensure that the paddle cable is connected to the back of the defib/pacer behind the monitor.
2. Apply conductive gel (MDE part # E2700-83 or equivalent) to paddles. Do not let conductive
gel form an alternate conductive path to the operator or between paddle sites. Otherwise,
energy may flow across, rather than into, the chest cavity.
3. Follow numbered sequence on front panel, starting with Number “1”—with the Prism
powered ON, press the POWER ON key on the defib/pacer. The green indicator confirms
ON status.
4. Number “2”—select energy to be delivered using ENERGY SELECT knob on front panel.
NOTE: If the energy select knob is changed after a charge is
initiated, the energy will change to the new level immediately, and an
intermittent tone will sound. Once it has reached the new level, the
tone will sound continuously to indicate full charge.
5. Number “3”—press the CHARGE button on the apex paddle or defib/pacer front panel. The
charge indicator will flash with an intermittent tone until the energy reaches the pre-selected
level, when you will hear a continuous tone and the light stays on.
NOTE: If the indicator does not illuminate and/or a warning beep
sounds, check the paddle cable connection on the back of the
defib/pacer (behind the monitor).
NOTE: If the unit is not manually discharged, an intermittent
warning tone will sound about 30 seconds after being charged, and
the stored energy will automatically discharge internally after
approximately 60 seconds.
8-8
6. Place defibrillator paddles firmly on the patient’s chest with the STERNUM paddle near the
upper sternum and slightly toward the patient’s right shoulder, and the APEX paddle over the
cardiac apex.
7. Instruct all personnel to stand away from the patient and the bed before proceeding.
8. Press the paddles firmly against the chest wall (about 25 pounds of pressure per paddle) and
discharge by pressing BOTH red paddle discharge buttons simultaneously.
9. Observe the patient and check Prism monitor to determine results. If repeat defibrillation is
necessary, readjust the energy level as prescribed by ACLS (Advanced Cardiac Life Support)
protocol, and repeat the above steps.
Disarming the Defibrillator
When an unwanted charge is present or suspected, press the DISARM key on the defib/pacer
front panel to discharge the unit internally. To disarm internal paddles, press the INTNL
PADDLE DISCHG key on the defibrillator front panel.
DO NOT discharge defibrillator paddles into open air or short them together.
“Hands-Off” Defibrillation
Defibrillation can also be accomplished with MDE’s “hands-off” defib/pace adapter cable and
junction box (MDE part #E2700-66) and disposable adhesive electrodes (refer to Section “Using
Defibrillator and Pacer Paddles and Electrodes” for proper selection and application).
To Defibrillate Using “Hands-Off” Procedure:
1. Plug locking connector on defib/pace disposable adhesive electrodes into the mating
connector of “hands-off” adapter cable. Ensure that the connectors are locked into place.
2. Follow the numbered sequence on the front panel of the defib/pacer, starting with Number
“1”—with the Prism powered ON, press the POWER ON key on the defib/pacer. The green
indicator confirms ON status.
8-9
3. Number “2”—select the energy to be delivered using the ENERGY SELECT knob on the
front panel.
NOTE: If the energy select knob is changed after a charge is
initiated, the energy will change to the new level immediately, and an
intermittent tone will sound during the change. Once it has reached
the new level, the tone will sound continuously.
4. Number “3”—press the CHARGE button on the defib/pacer front panel. The charge
indicator will flash with an intermittent tone until the energy reaches the pre-selected level,
when you will hear a continuous tone and the light stays on.
NOTE: If the indicator does not illuminate and/or a warning beep
sounds, check the paddle cable connection on the back of the
defib/pacer (behind the monitor).
NOTE: An intermittent warning tone will sound about 30 seconds
after being charged, and the stored energy will automatically
discharge internally after approximately 60 seconds if the unit is not
manually discharged.
5. Instruct all personnel to stand away from the patient and the bed before proceeding.
6. Discharge the defibrillator by simultaneously pressing and holding all four buttons on the
“hands-off” adapter cable’s junction box.
8-10
7. Observe the patient and check Prism monitor to determine results. If repeat defibrillation is
necessary, readjust the energy level as prescribed by ACLS (Advanced Cardiac Life Support)
protocol, and repeat the above steps.
Synchronized Cardioversion
Synchronized cardioversion is the delivery of a defibrillator shock synchronized with the
patient’s R-wave in order to convert abnormal rhythms to a normal sinus rhythm.
Certain rhythms such as atrial fibrillation/flutter or ventricular tachycardia (with a pulse) require
defibrillation discharge synchronized with the ECG R-wave to avoid inducing ventricular
fibrillation. In SYNC mode, when the discharge buttons are pressed, the defibrillator discharges
with the next detected R-wave to avoid the vulnerable T-wave segment of the cardiac cycle.
When discharge buttons are pressed, a marker pulse is superimposed on the ECG waveform to
mark the time that discharge will occur.
To Initiate Synchronized Cardioversion Procedure:
1. Prepare the patient by connecting a standard 3-lead ECG cable with proper electrodes.
2. On the monitor, select desired ECG lead to maximize R-wave amplitude while minimizing Pand T-wave amplitudes and adjust ECG size as necessary.
3. Select LEADS using the ECG source key on the front panel of the defibrillator and confirm
that the indicator is illuminated.
NOTE: It is recommended that LEADS be selected as the ECG source.
A standard 3-lead ECG cable with proper electrodes should be used.
Although PADDLE can be selected as the ECG source during
synchronized cardioversion, artifact induced by paddle motion could
resemble an R-wave and trigger a discharge.
4. Select SYNC mode by pressing the SYNC key on the front of the defibrillator. A green LED
will flash synchronously with each detected R-wave to ensure that the SYNC mode is
operating correctly.
5. Confirm via ECG display and recording that the SYNC marker pulse, a pulse extending to the
baseline, falls on or immediately after an R-wave and not on a T-wave. If necessary, select
another ECG lead or adjust ECG size to improve ECG quality and synchronization.
8-11
6. Follow defibrillation procedure in the section “Operating the Defibrillator”.
NOTE: The defib/pacer automatically goes to defib (async) mode
after sync discharge.
Operating the Pacer
You can use MDE’s standard disposable adhesive electrodes for either pacing, or for both pacing
and defibrillation. In either case, it is necessary to capture the patient’s ECG with a standard 3lead cable and proper ECG electrodes.
CAUTION: Prolonged noninvasive pacing can cause skin irritation
or burns under the pacing electrodes. Noninvasive pacing should be
discontinued as soon as an alternative pacing method is available.
CAUTION: The pacing stimulus may cause discomfort or pain in
conscious patients, depending on the pace current magnitude.
Sedation with analgesic medication may be required.
NOTE: Maintain constant surveillance of patient during noninvasive
pacing.
To Pace with Dedicated Electrodes:
1. Apply MDE disposable adhesive defib/pace electrodes as shown in section “Using
Defibrillator and Pacer Paddles and Electrodes”.
2. Connect the pace output cable (MDE part #E2700-73) behind the Prism monitor on the
defib/pacer base as shown:
Tighten the locking ring and make sure the connection is secure.
3. Press the POWER ON key to turn the defib/pacer on. The green indicator light will come on.
Similarly, turn the Prism monitor on by pressing the ON/STBY key.
8-12
4. Select the desired pace rate with the external pace rate switch on the defib/pacer front panel.
5. Select either asynchronous (continuous) or synchronous (demand) pacing with the
ASYNC/DMAND MODE key. The current operating mode will be shown by the green
indicator light.
In demand mode the QRS indicator will flash if R-waves are being detected properly for
synchronization. If the indicator does not flash, QRS sensing may not be occurring because of
artifact. In this case it is recommended that you switch to asynchronous mode.
6. Turn the CURRENT level switch to the 10 mA position.
7. Press the PACE STOP/START key to start pacing. The indicator will flash with each
delivered pace stimulus.
8. Increase the current slowly (by turning the CURRENT level switch clockwise) and observe
the ECG trace on the Prism screen for evidence of electrical capture (which should occur
between 60-100 mA). You should see a rhythm with pace flags.
In demand mode it is necessary to select a pace rate above the patient’s intrinsic rate before
determining the optimal pace current level.
9. Confirm mechanical capture by palpating the patient’s pulse or checking blood pressure. It is
also recommended that you monitor pulse oximetry for further confirmation of perfusion.
NOTE: The CHECK PACE ELECTRODES indicator flashes for each
failed pace pulse delivery attempt if the electrode-to-electrode
impedance is beyond the range of the pacer’s current output
capabilities. To correct, make sure that:
•
both pacing electrodes are properly applied to the patient
•
neither pacing electrode is dry or otherwise defective
8-13
•
the pacing cable is properly connected to the electrodes and to the pace output
connector
Pacing and Defibrillating with the Same Electrodes
In order to both pace and defibrillate a patient through the same set of electrodes, you will need
the “Hands-Off” Adapter Cable (MDE part #E2700-66), the Multifunction Adapter (MDE part
#E2700-89), as well as disposable adhesive electrodes. See the following for proper connection:
1. Apply MDE disposable adhesive defib/pace electrodes as shown in section “Using
Defibrillator and Pacer Paddles and Electrodes”.
2. Connect the multifunction adapter (MDE part #E2700-89) and hands-off adapter cable (MDE
part #E2700-66) behind the monitor on the defib/pacer base as shown:
3. Tighten the larger locking ring on the multifunction adapter first, followed by the smaller
ring, and make sure that all connections are secure.
4. Follow steps # 3 through 9 of “To Pace with Dedicated Electrodes” in section “Operating
the Pacer”.
8-14
8-15
Chapter 9 – Clinical Information System
Introduction
The CIS Communication Module when attached to a Prism or Prism SE Patient Monitor, allows
for the remote gathering of patient vital signs and data, and automatically recording them into the
patient(s) records on a remote computer system. This is performed by connecting the CIS
Communication Module to the user’s Clinical Information System via the Local Area Network
(Ethernet) or via an RS-232 system.
With the RS-232 system, virtually all information displayed on the monitor is available for serial
transmission, including parameter values, alarm status, leads status, remote status, and waveform
information.
Operation
This section discusses the operation and interaction between bedside monitors equipped with a
CIS Communication Module and the hospital’s Clinical Information System (CIS).
The primary purpose of the CIS Communication Module is to transmit vital signs to the CIS at
user-selectable intervals for the purpose of automating the vital sign collection process. In
addition, the CIS Communication Module includes numerous features to maximize the reliability
and flexibility of the automated charting process. Many of these advanced features are made
possible by two-way communication between the CIS Communication Module and the hospital’s
CIS and Admit/Discharge/Transfer (ADT) systems – which permits data obtained from these
hospital information systems such as patient name and ID to be displayed on the MDE monitors
at the point of care.
CIS information is displayed in two areas on the bedside monitor (see following illustration). The
top portion of the display is used to indicate the status of the connection to the CIS as well as
patient name and ID. The Trace 2 waveform area is used to display patient demographic data
obtained from the hospital’s ADT system and is also used to present the user with a list of
potential CIS functions (CIS menu). The desired function is selected by pressing the appropriate
softkey located at the bottom of the display. Additional details regarding these features are listed
in the next section.
9-1
1. CIS Status Message Zone
2. CIS Parameter Label
3. Softkeys for Interfacing with the CIS Menu
4. CIS Menu Display Zone
NOTE: At power up, the CIS Status Message Zone (item 1 above)
will begin flashing either a “NO CIS FOUND”, “SETUP PATIENT”,
or “CONFIRM PATIENT” message depending on your configuration.
This indicates the CIS Communication Module was successfully
recognized by the patient monitor. If you do not see the message
after a few moments, contact service personnel to inspect your
monitor .
Accessing the CIS Menu
The CIS menu can only be displayed in the Trace 2 waveform zone. The monitor can be set up to
display the CIS menu in this area at all times, or you can elect to display the CIS menu only when
interaction with the CIS is desired. With this display option, the Trace 2 waveform zone can be
used to display vital sign waveform and numeric data whenever the CIS menu is not displayed.
The CIS Menu must be displayed when interacting with the CIS Communication Module to allow
access to menu item functions.
To display a temporary CIS menu:
1. Press the SYSTEM SETUP key to open the System Setup menu.
CLEAR
PT
DATA
STORE
VS
DISP
VSC
PT
SETUP
HR
AUTO
ECG
TRACE
SEL
2. Press the PT SETUP softkey to display the CIS Menu.
9-2
MORE
3. Press the PAGE HOME key
to remove the CIS Menu display and replace the
regularly monitored parameters in the waveform display zone. The display will automatically
return to the Home page if there is no interaction with the CIS softkeys for 90 seconds.
To set up CIS for continuous display in Trace 2:
1. Press the SYSTEM SETUP key to open the System Setup menu.
CLEAR
PT
DATA
STORE
VS
DISP
VSC
HR
AUTO
ECG
PT
SETUP
TRACE
SEL
MORE
2. Press the TRACE SEL softkey to open the following menu.
DISP
VSC
DISP
OCRG
TRACE
2
CIS
TRACE
3
AUTO
TRACE
4
AUTO
MORE
3. Press the TRACE 2 softkey until CIS is highlighted.
4. Press the PAGE HOME key
. The CIS Menu will now display in Trace 2.
NOTE:
The second option for assigning CIS to the Trace 2
waveform zone will retain the setting for as long as the monitor is
powered on. Turning the monitor to the STANDBY position, then
back ON, will re-apply all of the monitor’s deep configuration
settings. To assign CIS to the Trace 2 waveform zone each time the
monitor is powered on, please consult the service manual for your
monitor.
Interacting with the CIS Menu
Manipulation of the CIS menu can be performed using the softkeys located on the monitor or
through an optional PS/2 keyboard attached to the CIS Communication Module. This interaction
with the CIS menu allows a variety of options including selecting a patient for data collection,
entering the patient’s name, and entering manual vital signs data into the patient record, among
others.
To use the monitor softkeys:
1. Access the CIS menu as described previously in section “Accessing the CIS Menu”.
2. Once the CIS menu is displayed in the Trace 2 waveform zone, press the softkey adjacent to
the CIS label. The following CIS selections will appear at the bottom of the monitor.
F1
F2
F3
F4
F5
9-3
The action taken upon the selection of a softkey is determined by the current menu selections
displayed on the CIS menu located in the Trace 2 waveform zone. To select a function, press the
monitor softkey associated with the appropriate key label. During certain menu operations, the
F1-F5 function key selections may be replaced by other softkey selections to match the on-screen
choices displayed in the CIS Menu. Selection of these choices is identical to that of the F1-F5
function keys
To use an optional keyboard:
1. Locate the port labeled “Keyboard” on the CIS Communication Module.
2. Insert the keyboard connector (noting the proper orientation).
3. If the CIS menu has not yet been placed into the Trace 2 waveform zone, select it for the
trace using the method described in section “Accessing the CIS Menu”.
Once the CIS menu is displayed in the Trace 2 waveform zone, the menu can be manipulated
using the keyboard.
4. Press the function keys on the keyboard to select the appropriate menu item indicated by that
key.
CIS Status Message Zone
The CIS Communication Module will report the status of the monitor’s connection to the CIS in
the CIS Status Message Zone. This message zone is visible at all times regardless of the CIS
menu being assigned to a trace location. This message area should be consulted during normal
patient monitoring. The status message will provide information such as patient confirmation, the
patient’s name under which data will be filed, as well as any loss of communication between the
CIS Communication module and the Clinical Information System. Confirming a patient will
result in the patient’s name and identification number being displayed continuously in the
message zone (the confirmation process will be discussed in subsequent sections). Messages that
are flashing are intended to alert the user that an additional action is required. When the
CIS Status Message Zone is flashing, select the CIS menu for display in the Trace 2 waveform
zone (if not present already) in order to obtain additional information about the action that is
requested. The status messages and their meanings are outlined in the applicable sections
throughout this manual.
Setting up a Patient for Data Collection
To allow vital sign data from the monitor to be sent to the correct patient record in the Clinical
Information System, the operator must “CONFIRM” that the patient identified in the hospital
ADT for that monitoring location is in fact the correct patient. Until this “confirmation process” is
completed, no vital sign data will be sent to the CIS. However, vital sign data obtained prior to
the completion of the confirmation process will be stored in the CIS Communication Module and
transmitted to the CIS once the patient is confirmed.
The objective of the CIS Communication Module is to automate the vital sign collection process.
Patient confirmation process should ideally be completed before vital sign measurements are
initiated. For those patient care applications that involve using one monitor for multiple
patients, it is imperative that the NEW PATIENT function is selected from the CIS menu
prior to taking new measurements. This is because all vital sign data obtained after the patient
has been confirmed via the monitor will be sent to the confirmed patient’s record in the Clinical
Information System.
9-4
A brief overview of the patient confirmation process is included here to provide a better
understanding of the significance and overall scope of this process. Upon turning the monitor ON
or after selecting a NEW PATIENT via the CIS menu, the operator will interact with the monitor
to “ask” the hospital ADT system which patient is listed in that room/bed location. This is known
as the patient “query” process. The ADT system will respond to this query by sending
demographic data for the patient it lists in that location to the monitor, which will be displayed in
the CIS menu area in Trace 2. If this is the correct patient, the operator will select the appropriate
CIS softkey to confirm the patient. If the demographic data displayed does NOT reflect the
patient to be monitored, the operator can re-query the ADT system by the actual patient ID
number or assign a temporary name until the patient confirmation process can be completed.
Initializing a New Patient Record:
CIS STATUS MESSAGE:
“SETUP PATIENT” (flashing)
A new patient record must be initialized for each new patient for whom vital signs data is to be
collected. This initialization consists of clearing all prior data from the monitor such that future
data is assigned to the new patient. This can be done by:
1. Turning the monitor OFF and then ON.
—OR—
2. Selecting the “New Patient” function from the CIS main menu.
Once either of these methods is performed, the CIS Module can query the hospital ADT System
for the desired patient.
Initiating a Patient Query:
CIS STATUS MESSAGE:
“SETUP PATIENT” (flashing)
A patient query can be initiated in several ways. The best method will vary depending on the
application. In general, a query can be performed based on a room/bed location or based on the
patient’s identification number. Each query method will be discussed.
Query By Room/Bed Location
The room/bed location is defined as the location in which the patient is being monitored.
A query of this type will send the desired room/bed location number to the hospital ADT
System. The ADT System will respond to this query by sending the patient demographic
data to the Patient Monitor for the patient assigned to this location in the ADT system.
This patient demographic data will be displayed in the CIS menu area in Trace 2 of the
monitor.
Monitors that are used only at a single room/bed location may be set up to query the ADT
system automatically for that room/bed location each time the monitor is powered on as
well as whenever “NEW PATIENT” is selected from the CIS menu. In this operational
mode, there are no additional steps necessary to initiate the query. In addition, a query
can be manually initiated by selecting the “Query by Room/Bed” selection on the CIS
menu. In this configuration, patients situated in a room/bed location that is not the default
9-5
location, must be queried using the “Query By Patient Identification” method described
below.
Monitors that are situated between multiple room/bed locations may be configured to
present the user with a list of query options. In this case, a room/bed query can be
initiated by:
(a) Selecting the desired room/bed location presented in the CIS menu
(choices F1-F2).
(b) Selecting the desired room/bed location from a list of locations preconfigured in the module (F3 Selection).
—OR—
(c) Manually entering the room/bed location using the F4 selection.
Any of these methods will send the query request to the ADT system for the selected
room/bed location. Choices F1-F2 represent the last two room/bed locations previously
confirmed by that monitor.
Query By Patient Identification
When a patient has not been assigned to a room/bed location in the hospital ADT system
or the patient shown in the ADT system for that location is incorrect, the operator can
query the ADT system using the patient’s ID number rather than the room/bed location.
This query requires the entry of the patient’s identification as it is listed in the hospital’s
Information System.
To perform a query by patient ID:
1. Select the “Enter ID to Query” choice from the CIS menu.
2. Enter the patient’s ID. If your facility uses an ID prefix that is the same for each
patient, the entry of this prefix may already have been configured in the module
facilitating the entry process. In this case, only the number following the prefix
should be entered.
Selecting a Different Patient
After a query is initiated, the results of that query will be displayed in the CIS display
area. If the information returned by the Clinical Information System does not match the
patient that is to be monitored, selected the “Change Patient” option from the CIS menu.
This will allow a new query to take place using the methods described above.
9-6
Confirming the Patient:
CIS STATUS MESSAGE:
CIS STATUS MESSAGE:
“CONFIRM PT” (flashing)
Displays Confirmed Patient’s Name and Identification
Once the query has been performed, the CIS Communication Module will display the results of
that query in the CIS display zone. The results should be checked for accuracy and the name/ID
verified as correct. If the information matches the patient that will be monitored, select the
“Confirm This Patient” option from the CIS menu display. All results gathered since the new
patient record was initialized, as well as all future data, will be sent to this patient record (refer to
section “Filing Vital Signs / Results” for instructions regarding sending vital sign information).
Note that the CIS status message area will change from the flashing “CONFIRM PT” message to
constantly displaying the confirmed patient’s name and identification number (NOTE: The
display of the identification number depends upon type of monitor). This is used to signify that a
confirmed patient is present at the monitor. This is especially useful under circumstances where
the CIS menu is not continuously displayed in the Trace 2 waveform zone. The confirmed
patient’s name should be checked every time vital signs are taken to ensure that the data
will be filed under the correct patient record. If at any time during the monitoring of the
Patient, the CIS message line begins to flash, place the CIS menu in to the Trace 2 position to
gather additional information regarding steps that need to be taken.
Filing Vital Signs / Results
After a patient has been confirmed, all vital signs data is sent to the corresponding patient record
in the CIS. This section discusses how to tailor the monitor to send the vital sign information in
the desired intervals for each patient. After the patient confirmation is completed, the following
CIS menu will be presented:
F1-FILING MODE: REVIEW: FINAL
F2-ENTER VITAL SIGNS
F3-CURRENT PATIENT INFO
F4-NEW PATIENT
Selecting the Appropriate Filing Mode:
The “Filing Mode” selection determines how the vitals signs information will be filed at the
Clinical Information System. There are two filing modes available to choose from, FINAL or
REVIEW. Selecting the “Final” filing mode will cause all patient vital signs information to be
filed directly into the patient record. The “Review” filing mode will place all patient vital signs
information into a section of the Clinical Information System that can be reviewed by the nursing
staff before being filed into the patient record. This provides the opportunity to review the vital
signs information and eliminate any invalid entries before they are filed into the patient’s record.
To change the filing mode:
1. Select the softkey adjacent to the CIS parameter label in order to display the CIS Menu
softkeys at the bottom of the monitor.
2. Press the F1 softkey to adjust the filing mode. The mode will toggle between REVIEW and
FINAL.
9-7
Using the VSC Function to Set Up CIS Charting Intervals
Each monitor includes the ability to store vital signs in a tabular format at user-selectable
intervals. This feature is identified as “VSC” in the monitor, short for Vital Sign Chart. This VSC
feature permits the operator to determine how often and under which circumstances vital signs
should be stored in the VSC table. For monitors connected to a hospital CIS via a CIS
Communication Module, the VSC storage intervals selected also determine when vital signs are
sent to the Clinical Information System.
NOTE: ONLY those entries that are stored in the VSC will be sent
to the CIS system.
To access the VSC feature:
1. Press the SYSTEM SETUP key to open the System Setup menu.
CLEAR
PT
DATA
STORE
VS
DISP
VSC
PT
SETUP
HR
AUTO
ECG
TRACE
SEL
MORE
2. Press the DISP VSC softkey from the displayed menu options. This will cause the VSC table
to be temporarily displayed in the Trace 3 zone. A sample of VSC table information is
presented below:
The VSC table in each monitor can store up to 100 entries of tabular data including all vital signs
measured in each of the 100 entries. The operator can scroll up or down to review all 100 entries
on screen, as well as left to right in the event all monitored vital signs cannot be displayed on the
screen at the same time. In the event that more than 100 vital sign entries are collected, the oldest
entry is removed from the monitor’s memory to make room for the most recent entry.
NOTE: The CIS Communication Module can store a total of 2500
total VSC entries for anywhere from 1 to 10 patients. However, only
the most recent 100 VSC entries can be reviewed via the Patient
Monitor’s VSC feature.
A brief overview of the VSC Setup options is included here to provide a better understanding of
the overall scope of the charting flexibility that is available. Subsequent sections will provide
specific details. In general, there are two basic types of VSC storage options, automatic and
manual. Both types of storage options are user-selectable. The only difference is that the
“manual” storage requires an operator key press to send vitals signs to the CIS, in contrast to the
“automatic” storage options which allow vital signs to be sent automatically upon completion of a
time interval or specific event. The user-selectable automatic storage options included in the VSC
allow vital signs to be sent automatically upon an alarm, completion of a NIBP and/or
Temperature measurement, completion of a cardiac output average, and at periodic time intervals.
9-8
In the sample VSC table illustration, notice that there is an unlabeled column to the left of the
TIME column. This column is used to display a letter or symbol that represents the catalyst for
that entry in the VSC table. This allows the operator to differentiate types of vital sign entries,
which may be important in determining which entries should be included in the patient’s
permanent record. For example, an entry that was initiated because the operator pressed the
STORE VS softkey might be considered differently than an automatic entry that required no
operator validation at the time of the entry. A complete listing of the available symbols and their
description is presented below:
VCS
Symbol
Description
(blank)
Entry made according to preselected automatic time interval.
(bell)
Entry made when an alarm is violated (alarming vital sign is shown in inverse video).
n
Entry made when a user-initiated NIBP reading is completed.
a
Entry made when an automatic (timed interval) NIBP reading is completed.
t
Entry made when a predictive SureTemp reading is completed.
v
Entry made when the user presses the STORE VS key (indicates “validated” entry).
m
Entry made when the vital signs are manually entered via the CIS module or
Guardian telemetry transmitter.
p
Indicates that the monitor was powered down prior to clearing VSC data. All
entries listed below the “p” entry were stored before the monitor was powered
down.
s
Indicates that ALL monitoring was SUSPENDED at this time entry.
r
Indicates that monitoring was RESTORED at this time entry.
Storing VSC Data in Patient Monitor Memory
Up to 100 of the most recent VSC entries are stored in the monitor’s memory for the
entire time the monitor is turned on. Additionally, you can set power-up defaults for your
monitor to permit these entries to stay in memory for 5, 15, or 30 minutes, or 1, 4, 8, or
24 hours after you shut off the monitor (this storage of VSC data after power down can
also be turned OFF in power-up defaults). This “power down memory” is factory set to
15 minutes. If you need to change this factory default, please consult service personnel.
It is assumed that the operator(s) will not want to have vital sign data for more than one
patient displayed in the VSC table. Since the monitor is capable of saving VSC data when
the monitor is powered down, turning the monitor OFF may not clear the VSC table –
unless the length of time that the monitor is turned OFF exceeds the power-down
memory value discussed in the above paragraph. There are two methods to clear the VSC
data between patients:
9-9
1. Press the SYSTEM SETUP key then select the CLEAR PT DATA softkey. Be sure
to select “YES” when faced with the “Are You Sure?” question.
CLEAR
PT
DATA
STORE
VS
DISP
VSC
PT
SETUP
HR
AUTO
ECG
TRACE
SEL
MORE
—OR—
2. Select the “NEW PATIENT” function from the CIS menu. This will clear the VSC
table in preparation for the new patient record.
NOTE: Even if you do not clear the vital sign data in the monitor’s
VSC memory between patients, vital sign data for the new patient
will be sent to the correct patient record in the CIS provided you
confirmed the new patient prior to gathering new vital sign data. If
the monitor is turned OFF without selecting the CLEAR PT DATA
softkey, the VSC table will reflect a “p” symbol next to the TIME
column at the time the monitor was powered up. This will help the
operator to distinguish data in a VSC table that was not cleared
between patients. If you access the patient confirmation process by
selecting the “NEW PATIENT” function from the CIS menu, it will
clear the Monitor’s VSC memory in addition to starting the patient
query function.
Monitor & VSC Functionality for “Continuous” vs “Episodic” Vital Signs
The monitors exhibit subtle differences in how the monitor and VSC table handle
“episodic” versus “continuous” vital sign measurements. Episodic vital signs are defined
as vital sign measurements that are not continuously monitored, including NIBP, cardiac
output, and predictive SureTemp. Since episodic measurements represent vital sign
values measured at a specific point in time, the monitors will only display these values
for a limited time after the measurement is completed. The length of time episodic vital
sign values are displayed is determined by the VALID TIME setting in the monitor’s
power-up defaults—the factory default for this setting is 30 minutes. This setting should
only be changed by service personnel.
As indicated in the previous overview of the VSC functionality, the operator can set the
monitor to automatically send all vital signs to the VSC table and CIS upon completion
of a NIBP, cardiac output, and/or SureTemp measurement. Note that even though the
catalyst for this type of VSC entry is the completion of one of these measurements, the
value for ALL of the vital signs measured at that time will be sent to the VSC table and
CIS. Hence, to minimize redundant entries for those applications where both of the
measurements will occur at about the same time, do NOT select BOTH of these
automatic charting options. Also, it is important to understand that the episodic NIBP,
CO, and/or SureTemp values will only be sent to the VSC table and CIS if they are
displayed at the time of the entry (for example, within the valid time as discussed in
paragraph above). Additionally, individual NIBP, CO, and SureTemp measurements will
only be sent to the VSC table and CIS one time when the VSC entries are initiated by any
of the automatic VSC entry options. This is not the case with the operator requested
STORE VS function, as described below.
9-10
NOTE: Episodic measurements will not post to a VS chart more
than once for all automatic entries, even if they are displayed and
within the Valid Time. There is one exception to this rule: the
STORE VS softkey will capture ALL measurements displayed on the
monitor at a given time, regardless of their continuous or episodic
nature. The purpose of this exception is to ensure that ALL vital
signs displayed at the time the user selects the STORE VS softkey
will be sent to the VSC table and CIS.
Setting Vital Sign Storage Options
To set up storage options for vital sign charts, you must first either pop-up VSC or assign
VSC to a waveform trace. The following illustrates how to set up storage options while
VSC is in a pop-up:
1. Press the SYSTEM SETUP key to open the System Setup menu.
CLEAR
PT
DATA
STORE
VS
DISP
VSC
PT
SETUP
HR
AUTO
ECG
TRACE
SEL
MORE
2. Press the DISP VSC softkey to display VSC in the waveform display zone and to
display the following menu.
VSC
SETUP
STORE
VS
TABLE
→→
TABLE
↑↑
TABLE
↓↓
TEXT
SIZE
MORE
3. Press the VSC SETUP softkey. The following VSC setup softkeys will be displayed.
4HR
OFF
1MIN
STORE
ALM
SETUP
STORE
NIBP
ON
STORE
TMP
ON
STORE
CO
OFF
4. On this screen you can:
Select time intervals between automatic VSC entries
Press the STORE ALM SETUP softkey to define which parameter alarms will
generate VSC entries:
(a) Toggle storage on all parameter alarms with STORE ALM ON softkey
(b) Touch the vital sign softkey on the menu to select a parameter
(c) Toggle storage on alarms for selected parameter with the ON/OFF softkey
(d) Select next parameter and on/off status, or MORE to exit menu
Turn storage on NIBP measurement ON/OFF
Turn storage on predictive TEMP readings ON/OFF
Turn storage on Cardiac Output measurement ON/OFF
NOTE: Options for parameters that are not installed will not
display on this screen.
9-11
5. Press the PAGE HOME key
return to the main monitoring screen.
when you have finished setting up VSC to
Assigning VSC to a Waveform Trace
1. Press the SYSTEM SETUP key to open the System Setup menu.
CLEAR
PT
DATA
STORE
VS
DISP
VSC
PT
SETUP
HR
AUTO
ECG
TRACE
SEL
MORE
2. Press the TRACE SEL softkey to open the following menu.
DISP
VSC
DISP
OCRG
TRACE
2
CIS
TRACE
3
VSC
TRACE
4
AUTO
MORE
3. Press any of the TRACE keys until VSC appears as the selection.
4. Press PAGE HOME
to display VSC in the trace you have selected. You
can now access VSC Setup menus by pressing the VSC softkey in the waveform
display zone.
VSC Function Keys
The VSC menus are accessed by pressing the softkey adjacent to the VSC label. The
menus are as follows:
VSC
SETUP
STORE
VS
TABLE
→→
TABLE
↑↑
TABLE
↓↓
TEXT
SIZE
MORE
VSC SETUP—Accesses setup options for events that trigger entries.
STORE VS—Manually stores a VSC entry including all VS data on-screen.
TABLE → →—Scrolls to the right to show additional data, if available.
TABLE ↑ ↑—Scrolls up to show additional data, if available.
TABLE ↓ ↓—Scrolls down to show additional data, if available.
TEXT SIZE—Decreases/enlarges the VSC table approx. 50%.
MORE—Displays the next menu.
CLEAR
VSC
TABLE
DEL
VSC
ENTRY
MORE
CLEAR VSC TABLE—Clears all VSC data currently stored in memory.
DEL VSC ENTRY—Allows selective deletion of individual VSC entries.
MORE—Returns to the first VSC Setup menu.
9-12
Refer to section “Deleting Vital Signs Entries”, for details on the DEL VSC ENTRY
option.
Manually Entering Vital Signs Data Using the CIS Menu
Vital signs that are not directly monitored can still be filed into the patient record using the “Enter
Vital Signs” function in the CIS menu. The parameters RESPIRATION, TEMPERATURE,
NIBP, SPO2, and PULSE RATE can be entered by this process with the manual entry sent to the
VSC table and CIS. This feature allows all vital signs data to be filed into the patient record to
create one complete and continuous record. To facilitate the entry of manually taken vital signs
information into the monitor, two separate entry screens are presented depending on the presence
or absence of the optional keyboard.
Manual Entry Using the Monitor Softkeys (Keyboard Connected)
1. Select the softkey adjacent to the CIS parameter label to display the CIS menu
softkeys at the bottom of the monitor.
F1
F2
F3
F4
F5
2. Press the CIS softkey associated with the ENTER VITAL SIGNS function. The
following CIS menu will be displayed with the corresponding CIS softkeys shown
below.
F1 - RESP:
F2 - TEMP:
F3 - NIBP:
F4 - SPO2:
PR:
F5 - STORE / EXIT
3. Select the desired with the associated function key on keyboard and enter the vital
sign data.
F1
F2
F3
F4
F5
4. Press ENTER on the keyboard to accept the value.
5. After all desired values have been entered, select the F5 function key on the keyboard
to store and exit the Manual Entry menu.
Manual Entry Using the Monitor Softkeys (Keyboard Not Connected)
1. Select the softkey adjacent to the CIS parameter label to display the CIS menu
softkeys at the bottom of the monitor.
F1
F2
F3
F4
9-13
F5
2. Press the CIS softkey associated with the ENTER VITAL SIGNS function. The
following CIS menu will be displayed with the corresponding CIS softkeys shown
below. NOTE: the following values depict the default values.
RESP:
TEMP:
NIBP:
SPO2:
PR:
12
98.6 (37.0)
120 / 80 (95)
95
95
3. Enter manual vital sign data using softkeys shown below.
NEXT
↓↓
→→
ADJ
↑↑
ADJ
↓↓
F4
F5
NEXT ↓ ↓→ → —Moves cursor to the next parameter.
ADJ ↑ ↑—Increases value.
ADJ ↓ ↓—Decreases value.
QUIT—Exits the manual entry mode without saving values.
STORE—Stores all valid values into the VSC table.
NOTE: To facilitate the entry of manual vital signs, the first time
the ADJ key is pressed, the last saved parameter value will appear.
If no prior value has been stored, the parameter default value will
be displayed. Upon selection of the NEW PATIENT function, all
parameter values will return to their default values.
4. Press the STORE softkey to save manually entered values in the patient record.
CIS Module Storage Capacity
The CIS Communication Module has the ability to store unsent patient vital signs information
collected for a given patient. This feature is useful in the event of a network failure or when there
is a need to store vital signs data for several patients prior to the ability to confirm the patients
with the hospital’s ADT system. The vital sign data is stored directly in the CIS Module which
contains its own backup battery such that all data is retained even when the Patient Monitor is
turned off. A total of 2500 entries for up to 10 patients can be stored in the CIS module. Please
see section “Special Circumstances”, for details on how to send vital sign data stored in the CIS
module to the Clinical Information System.
Deleting Vital Signs Entries
The CIS Communication Module has the ability to allow the deletion of vital signs entries from
the VSC table and CIS. When an entry is deleted from the VSC table, that entry will no longer
appear in the patient record at the Clinical Information System.
To delete an entry from the VSC table:
9-14
1. Display the VSC parameter in the monitor waveform zone (refer to section “Assigning VSC
to a Waveform Trace”).
2. Press the softkey adjacent to the VSC parameter label to display the VSC function keys at the
bottom of the monitor (refer to section “VSC Function Keys” for additional information
regarding these keys).
3. Press the MORE softkey to display the second page of VSC function keys.
4. Press the DEL VSC ENTRY key. Using the arrow keys, highlight the desired entry and
press the DEL ENTRY softkey.
5. Confirm the deletion.
Viewing the Current Patient Information
The current patient information can be viewed at any time following the confirmation of the
patient. This information is referred to as the patient demographic information and consists of the
patient name, patient identification number, room/bed location (if available), sex, date of birth,
and physician’s name. The patient demographic information is obtained from the hospital’s ADT
system during the query process.
To display the current patient information:
1. Select the “F3-CURRENT PATIENT INFO” item from the CIS menu.
Special Circumstances
This section discusses situations that will not ordinarily be encountered. However, these
situations may occur under certain circumstances.
Sending Patient Data Stored in the CIS Module After the Fact
Situation 1:
Hospital Network Goes Down Temporarily After the Patient is Confirmed.
CIS STATUS MESSAGE:
“NO CIS FOUND” and Patient Name (Alternating and Flashing)
The CIS Communication Module relies on the hospital’s network to send vital sign data from the
monitor to the Clinical Information System. In cases where the network goes down after the
patient is confirmed via the monitor, the CIS Module will save ALL vital sign entries that could
not be sent to the CIS because of the network status. Once the network connection is restored, the
CIS Module will automatically send ONLY the previously non-transmitted vital sign entries to
that patient’s record in the CIS. Since the vital sign data in this situation is saved in the CIS
Module based upon the patient’s hospital ID, the saved data can still be sent to the correct CIS
patient record even if the patient has been relocated or even discharged from the hospital. See
Situation 2 for additional steps necessary to send saved vital sign data for patients that were not
confirmed prior to the circumstances precluding the transmission of vital signs to the CIS.
9-15
NOTE: If the network connection is lost per the above situation, the
CIS Status Message at the top of the monitor will no longer simply
display the confirmed patient name. Instead, the patient name will
flash and alternate with the message “NO CIS FOUND”. This will
not only alert you to the fact that your network connection is lost,
but will also indicate the patient the CIS Module is saving vital sign
data for in the absence of the network connection.
Situation 2:
Inability to Complete the Patient Confirmation Process Prior to Measuring Vital Signs for a
New Patient.
CIS STATUS MESSAGE:
“SETUP PATIENT” and Temp Patient Name (Alternating and Flashing)
Under certain circumstances, it is possible that the patient confirmation process may not be
completed prior to your need to monitor a different patient with that same monitor. One example
of these potential circumstances could include the hospital network being down during the entire
monitoring period for the prior patient – which of course precludes the ability to confirm the
patient. Another scenario that could prohibit the completion of the confirmation process prior to
monitoring a subsequent patient is if the patient has not been entered into the hospital’s ADT
system.
As indicated previously, vital sign data can only be sent to the CIS after the patient has been
confirmed via the monitor. In the situations described above where this confirmation cannot be
completed, each CIS Module is capable of storing a total of 2500 vital sign entries for up to (10)
different patients. This saved vital sign data can be sent to the CIS once the confirmation process
can be completed for any patient whose data is stored in the CIS Module. The key to successfully
storing vital sign data in the CIS Module for multiple patients is assigning a patient name for each
patient – even though circumstances preclude the operator from confirming the patient with the
ADT system. The CIS Module permits the operator to enter the patient’s name for this purpose
(referred to as a “temporary” name in the Monitor’s CIS menu) as described in detail below.
NOTE: When the user has entered a “temporary” name, the CIS
Status Message at the top of the monitor will flash this temporary
name and alternate with the message “Setup Patient”. This should
alert you to the fact that the patient is NOT confirmed while also
indicating the patient name the CIS Module is saving vital sign data
for, prior to the completion of the confirmation process.
9-16
Using the Temporary Name Feature
CIS STATUS MESSAGE:
Displays Temporary Patient’s Name (Flashing)
Patient vital signs information that is taken on an unconfirmed patient must be assigned a
temporary patient name at the monitor. This will assist in identifying which patient record in the
Clinical Information System the stored data should be sent to when the operator is ready and able
to send the vital sign data to the CIS. Since the CIS Module permits vital sign data for up to (10)
patients to be stored for later transmission to the CIS, the ability to enter a temporary name may
become a very important feature.
To assign a temporary name to the vital signs data being collected:
1. Place the CIS Menu into the Trace 2 waveform zone using the steps outlined in section
“Accessing the CIS Menu”.
2. Press the softkey associated with the “TEMP NAME:” function.
3. At the prompt, enter the temporary patient name under which all collected data will be
associated. See instructions listed below for entering this information via the patient monitor
softkeys and optional keyboard.
Instructions for Entering the Temporary Patient Name:
Selecting the “TEMP NAME” function from the CIS menu will display a menu similar to
the following, along with the corresponding softkeys. The temporary name CASTAGNA
is in the process of being entered.
ENTER TEMPORARY PT NAME
CASTAGN
ABCDEFGHIJKLMNOPQRSTUVW
XYZ .,/-%*;:#0123456789
SAVE / QUIT
←←
→→
↓↓
BKSP
ENTER
To enter the temporary patient name:
1. Move the cursor to the character to be selected using the arrow keys.
2. Press ENTER to select the character. The character will appear in the second line of
the menu display. To delete a character, select the BKSP key.
3. After the desired name has been entered, move the cursor to the SAVE / QUIT
selections and highlight the SAVE function.
4. Press ENTER to accept the name, or move cursor to the QUIT selection and press
ENTER to quit without saving the name.
To simplify the process of entering a temporary patient name, the CIS softkeys have the
ability to scroll when the key is held. This allows faster selection of the characters. It is
not necessary to enter the full patient name since the temporary name will be converted to
the hospital ADT name when the confirmation process is completed at a later time.
9-17
The optional keyboard can be used to facilitate entry of the temporary name.
To use the keyboard:
1. Access the TEMP NAME function as described in the previous section “Using the
Temporary Name Feature”.
2. Type in the name using the keyboard and press <Enter> on the keyboard.
Retrieving Vital Signs from Previous Patients
Previous patient information can be filed to the Clinical Information System any time a
connection to the network exists. The following steps outline the procedure for accomplishing
this:
1. Place the CIS Menu into the Trace 2 waveform zone using the steps outlined in section
“Accessing the CIS Menu”.
2. Locate the CIS menu item “SEND # Old PT(S)” where # indicates the number of stored
patient records that can be filed.
NOTE: This item will not be present if there are no previous
patients to be filed.
3. Press the function key associated with that menu item. The menu similar to the following will
appear:
TEMP NAME: DEBORAH FORESTER
10/18 1358 → 10/18 1406
F1-FILE OLD PT DATA
F2-CLEAR OLD PT DATA
F3-NEXT PT / EXIT
The “Temp Name” represents the temporary name assigned in the “Using the Temporary Name
Feature” described in the previous section. The next line indicates the date and time range of the
data associated with this patient.
To file the data for this patient, select the F1 softkey.
To delete the data for this patient, select the F2 softkey.
To retrieve a different patient or to exit this menu, select the F3 softkey.
1. When the F1 softkey is selected, a menu similar to the following will appear:
FILE OLD PT DATA: FINAL
TEMP NAME: DEBORAH FORESTER
10/18 1358 → 10/18 1406
F1-ENTER ID FOR FILING
F2-FILE MODE F3-CANCEL
2. To file the data into the CIS System, select the F1 key and enter the patient identification
number to which the data is associated. The CIS Module will perform a patient identification
query and return the patient information listed in the ADT System. Verify that the correct
patient is returned and select “F1-CONFIRM THIS PATIENT” to file the results. Select
“F2-CHANGE PATIENT” to select a different patient.
9-18
To change the filing mode for this record, select the F2 key. The filing mode will toggle
between FINAL and REVIEW modes. Refer to section “Selecting the Appropriate Filing
Mode” for a description of the filing mode feature.
To cancel filing for this patient, select the F3 softkey.
RS-232 Communication
Port 1 of the CIS module is a shielded EIA/TIA RS-232 (9-pin mini-DIN) connector that allows
for serial data acquisition by the user’s Clinical Information System once the port is configured
for this mode. Virtually all information displayed on the monitor is available for serial
transmission, including parameter values, alarm status, leads status, remote status, and waveform
information.
Port 2 is not used at this time and is for future applications.
WARNING: Do not attempt accessing RS-232 information unless you
are familiar with UART (Universal Asynchronous Receiver and
Transmitter) operation and setup. Only qualified and experienced
technicians or programmers should attempt using the following data
formats. The user will be required to develop program code to access
and display the acquired data.
UART configuration for serial communication is 19,200 baud, one (1) start bit, eight (8) data bits,
one (1) stop bit, and no parity. The CIS module will transmit two types of packet information: a
parameter packet and a waveform packet. Each packet contains several segments outlined in the
following sections. All Check Sums are modulo 256 over the indicated ranges.
Parameter Packet
Table 1 shows the parameter packet format sent by the CIS module. It is identified by its 2 byte
ID <ESC> <P>. Parameter numbers and names are outlined in Table 3 along with their waveform
numbers.
Table 1. Port 1 - Escort II Parameter Packet
2
bytes
3
bytes
42 bytes
1 byte
1 byte
1 byte
1 byte
1 byte
1 byte
Packet
ID
P0
P1 thru P14
HR
HIGH
LIMIT
HR
LOW
LIMIT
REMOTE
STATUS
REMOTE
RECORD
BACKPORT
WAVEFORM
CHECK
SUM
The above segments are as follows:
The ID field consists of <ESC> <P> and is 2 bytes long. [1Bh] [50h]
The Parameter #0 segment (P0) is for ECG. The parameter segment is 3 bytes long. The first
2 bytes contain the 16-bit binary value of the parameter, measured within a range of zero to
five hundred (0 – 500). Data is transmitted LSB, MSB. The third byte contains parameter
status information as described in Table 4.
The Parameter #1 – #14 segment (P1 thru P14) is for all other parameters. Each parameter
segment is 3 bytes long. The first 2 bytes contain the 16-bit binary value of the parameter,
measured within a range of zero to five hundred (0 – 500). Data is transmitted LSB, MSB.
The third byte contains parameter status information as described in Table 4.
9-19
HR HIGH LIMIT is 1 byte long and represents heart rate HIGH alarm limit (not currently
supported at this time).
HR LOW LIMIT is 1 byte long and represents heart rate LOW alarm limit (not currently
supported at this time).
REMOTE STATUS is 1 byte long (see Table 5 for Remote Status).
REMOTE RECORD is 1 byte long.
BACKPORT WAVEFORM is 1 byte long. The Backport Waveform byte is divided into
three fields, Port 1, Port 2, and Port 3. The value of each field is defined in Table 6.
Sample Parameter Packet
Packet ID
2 bytes
P0
3 bytes
P1
3 bytes
P2
3 bytes
P3
3 bytes
P4
3 bytes
P5
3 bytes
P6
3 bytes
P7
3 bytes
1b 50
42 00 46
12 00 46
75 00 46
4d 00 46
57 00 46
1b 00 46
08 00 46
11 00 46
P9
3 bytes
P10
3 bytes
P11
3 bytes
P12
3 bytes
P13
3 bytes
P14
3 bytes
52 00 46
63 00 46
5e 00 46
72 01 46
00 00 56
22 00 46
P8
3 bytes
7a 00 46
HR High
Limit
1 byte
HR Low
Limit
1 byte
00
00
Remote
Status
1 byte
Remote
Record
1 byte
Backport
Waveform
1 byte
Check
Sum
1 byte
00
00
40
2d
Waveform Packet
The waveform packet is identified by its 2 byte ID <ESC> <W>, followed by a 1 byte
<Waveform No.>, followed by a length byte. Table 2 shows the waveform packet format sent by
the CIS module.
Table 2. Waveform Packet
2 bytes
1 byte
Packet
ID
Waveform
Number
1 byte
<Length>
1 byte
Length
Approximately 160ms of Waveform Data sent at a
sample rate of 120Hz for 110V/60Hz monitors.
—OR—
Approximately 200ms of Waveform Data sent at a
sample rate of 100Hz for 220V/50Hz monitors.
CHECK SUM
The above segments are as follows:
The ID field consists of <ESC> <W> and is 2 bytes long. [1Bh] [57h]
The Waveform Number field consists of <Waveform No.> and is 2 bytes long. Refer to
Table 3 for waveform numbers of each parameter.
The Length field is 1 byte long. The length byte represents the number of bytes that include
waveform data. Waveform resolution is limited to 00h – FEh (254 decimal). FFh (255d) sets
a pacer flag, which may be used for pacer detection when PACER ON is selected.
Transmitted waveform information varies depending on monitor’s configuration. Please note
the voltages and Hz information in Table 2.
9-20
Sample Waveform Packet
Packet ID
2 bytes
Waveform
Number
1 byte
Length
1 byte
Data
Check
Sum
1 byte
1b 57
00
13
83 83 81 80 7d 98 b3 cb b3 96 7a 7e 80 81 83 83 83 83 83
7e
Table 3: Parameter Indices
Parameter #
0
1
2
3
4
5
6
7
8
9
10
11
12
13
14
15
Waveform #
0
1
2
5
Not Available
11
Not Available
Not Available
Not Available
15
Parameter Name
ECG
Respiration
BP1 Systolic
BP1 Diastolic
BP1 Mean
BP2 Systolic
BP2 Diastolic
BP2 Mean
NIBP Systolic
NIBP Diastolic
NIBP Mean
SaO2
Temperature
CO - Escort II packets only
CO2 - Escort II packets only
ECG Vector 2 (No Parameter – Waveform Only)
NOTE: Temperature is transmitted as an integer value with a range
between 200 and 500 (Base 10). Each integer represents one-tenth
degree Celsius (0.1° C). This translates to an actual temperature
range transmitted between 20 and 50 degrees Celsius
(20-50° C).
NOTE: There is no parameter block for ECG Vector 2 although it is
listed as “Parameter and Waveform #15”. This is simply an
additional waveform associated with ECG Parameter and Waveform
#0.
Table 4: Parameter Status
Hex
Value
4Eh
46h
41h
44h
56h
5Ah
ASCII
Value
‘N’
‘F’
‘A’
‘D’
‘V’
‘Z’
Parameter Status
Parameter Connected, Alarms ON
Parameter Connected, Alarms OFF
Parameter Connected, in Alarm
Parameter Disconnected
Parameter not Available
Parameter not Zeroed
9-21
Table 5: Remote Status
Remote Status
Hex Value
Null Status
Low Battery
Alarm Suspend
Description
00h
10h
70h
No activity
Battery voltage is low
Alarm Suspend activated
NOTE: In the event a low battery condition occurs coincident with
an alarm suspend, the monitor will prioritize the event. Priority will
be given to the low battery signal and the CIS module will transmit
10h.
Table 6. Ports 1, 2, & 3 Backport Waveform Bit Values
MSB
LSB
7
6
Port 1
B7
0
0
1
1
B6
0
1
0
1
B5/2
0
0
0
0
1
1
1
1
B4/1
0
0
1
1
0
0
1
1
5
4
Port 2
3
Ports 1 Waveform Bit Values
Waveform
Invalid Selection
ECG Waveform
Invalid Selection
Invalid Selection
Ports 2 and 3 Waveform Bit Values
B3/0 Waveform
0
Invalid Selection
1
BP1 Scale Mode
0
BP1 Pulse Mode
1
BP2 Scale Mode
0
BP2 Pulse Mode
1
Respiration
0
SpO2
1
CO2
9-22
2
1
Port 3
0
Additional Waveforms
As previously stated, the CIS module transmits two type of packet information, a parameter
packet and a waveform packet. The ECG waveform is always transmitted through the serial port
by default. The Clinical Information System may request additional waveforms by issuing the
following command:
<ESC> <R> <Waveform No.>
[1Bh] [52h] <Waveform No.>
The CIS Module will respond by sending the additional waveform packet in the previously
described format (for example, <ESC> <W> <Waveform No.>).
IMPORTANT – Remember the differences in transmission information for 110V/60Hz and
220V/50Hz!
It is particularly important that special attention is applied when counting the number of bytes
received, and to properly use the waveform length byte to locate the appropriate waveform data.
The following command will stop all additional waveforms except ECG:
<ESC> <R> <O>
NOTE: The ECG waveform packet is always sent by default and
cannot be turned off.
9-23
9-24
Chapter 10 – Troubleshooting
General Solutions
Problem
Monitor does not turn on.
Possible Causes
AC power may not be
connected.
Action/Solution
Verify AC ON light is on.
Parameter labels display, but
without alarm status or data.
Sensor or cable is not connected
to monitor.
Connect appropriate sensor or
cable to monitor.
Parameter does not display label
or data.
Parameter is “not available” in
power-up defaults.
Contact service personnel to
change power-up status.
Parameter does not display label
or data.
Sensor or cable is not connected
to monitor.
Connect appropriate sensor or
cable to monitor.
Possible Causes
Electrodes may not be
conductive enough to provide
signal.
Action/Solution
Confirm electrode placement
and skin preparation and
adhesion.
ECG Solutions
Problem
CHK LEADS message.
LEAD SEL softkey may be set
incorrectly (3-lead or 5-lead).
ECG patient leads and/or cable
are not connected.
Verify LEAD SEL is set for
correct lead configuration.
Confirm connections at lead
block and monitor.
CHK LEADS message is
displayed with ECG waveform.
Lead I, II, or III is being
monitored with 5-lead cable
installed and selected. One or
more leads not used for ECG
waveform is disconnected (e.g.
Lead II is being monitored and
LA is disconnected.
Confirm electrode placement
and skin preparation. Confirm
leads are connected at lead
block. Make sure cable is
connected to monitor. If
possible, use 3-lead cable when
monitoring Leads I, II, or III.
Displayed heart rate too low.
Insufficient R-wave amplitude.
Use ECG SIZE to increase
waveform size.
Select an ECG vector that
provides an R-wave amplitude at
least twice the T and P-wave.
Displayed heart rate too high.
Amplitude of ECG waveform is
too high.
10-1
Use ECG SIZE function to
decrease waveform size.
Respiration Solutions
Problem
Erratic Respiration rate and
waveform.
Possible Causes
Poor electrode placement or
conductivity.
Action/Solution
Confirm proper electrode
placement and adhesion.
Respiration rate displayed less
than actual rate.
Respiration waveform amplitude
is too low.
Use RESP SIZE function to
increase waveform amplitude.
Respiration rate displayed higher
than actual rate.
Cardiovascular artifact (CVA) is
interfering with signal.
Reposition LA electrode to
reduce CVA.
Possible Causes
Sensor is not applied correctly.
Action/Solution
Check sensor application.
Damaged sensor or cable.
Verify red light on sensor
illuminates. Replace cable if
needed.
Patient’s perfusion too poor for
oximeter to detect pulse.
Try another sensor site.
Excessive patient motion.
Reduce patient motion or set
response mode to SLOW.
Poor patient perfusion.
Try another sensor site.
ECG electrode or lead is loose.
Check all ECG connections.
Sensor not connected.
Check sensor connections.
Damaged Sensor or cable.
Verify red light on sensor
illuminates. Replace cable if
necessary.
Unknown sensor connected.
Replace with Nellcor sensor.
LOW SIG is displayed.
Sensor off patient.
Place sensor on patient.
ARTIFACT is displayed.
Excessive patient motion.
Reduce patient motion.
O2 WRT ER
May indicate an older version of
main software and SLOW mode
is selected.
Select either NORM or FAST
mode.
Possible Causes
Sensor not applied correctly.
Action/Solution
Check sensor application.
Damaged Sensor or cable.
Verify red light on sensor
illuminates. Replace cable if
needed.
Patient’s perfusion too poor for
oximeter to detect pulse.
Try another sensor site.
Disconnect and reconnect sensor
from cable to reacquire SpO2
data.
Excessive patient motion.
Reduce patient motion.
Environmental interference.
Move from light or noise source.
SpO2 Solutions with Nellcor
Problem
Pleth waveform does not track
pulse; SPO2 SRCH is displayed,
or oxygen saturation does not
display.
NO C-LOCK message.
NO SENSOR is displayed.
SpO2 Solutions with Masimo
Problem
Pleth waveform does not track
pulse; SPO2 SRCH is displayed,
or oxygen saturation does not
display.
10-2
NO SENSOR is displayed.
Sensor not connected.
Check sensor connections.
Damaged Sensor or cable.
Verify red light on sensor
illuminates. Replace cable if
necessary.
Unknown sensor connected.
Replace with Masimo sensor.
Invasive Blood Pressure Solutions
Problem
Will not zero - ZERO OUT OF
RANGE displays.
Possible Causes
Faulty transducer or transducer
not zeroed.
Action/Solution
Try new transducer or rezero
current transducer.
Will not zero - NO ZERO:
PULSE DETECT displays.
Monitor has detected a pulse.
Open stopcock on transducer to
air and rezero.
Pressure values lower than
expected.
Dampened waveform from
bubbles in line.
Flush line.
Transducer was repositioned
after zeroing was completed.
Rezero transducer.
Excessive tubing length causing
resonance.
Reduce tubing length and rezero
transducer.
Pressure values higher than
expected.
Noninvasive Blood Pressure Solutions
Problem
CHECK CUFF message.
Possible Causes
Poor connection to monitor or
cuff.
Action/Solution
Verify NIBP assembly is
connected.
Cuff or hose assembly is
leaking.
Check cuff and hose for leaks.
Cuff is loose on patient.
Make sure cuff is correct size
and snug.
ARTIFACT message.
Too much patient movement.
Reduce patient movement and
retake reading.
LOW OSCIL message.
Pulse detected too low due to
improper placement or tightness
of cuff.
Make sure cuff is positioned
correctly and snug on patient.
NIBP pump turns on and off
during inflation.
Monitor is set to PED or NEO
mode.
If monitoring an adult patient,
switch to ADULT mode,
otherwise this behavior is
acceptable.
Inaccurate NIBP readings.
Improper cuff placement or size.
Check proper cuff placement or
size.
MAX 2 LOW message.
Monitor did not obtain valid
systolic reading.
Retry reading. Note:
subsequent inflations are 25
mmHg higher.
10-3
Mainstream ETCO2 Solutions (Prism Only)
Problem
NO SENSOR message.
Possible Causes
Sensor not connected.
Action/Solution
Confirm proper sensor
connection.
LOW SIGNAL message.
Airway adapter obstructed.
Check airway adapter for
obstruction. Use another airway
adapter.
OCCLUSION message.
Particulate matter obstructing
airway.
Check airway adapter for
obstruction. Use another airway
adapter.
BAD SENSOR message.
Sensor not functioning properly.
Try sensor with different
monitor. If problem persists,
replace sensor.
CO2 ERROR message.
Hardware problem with ETCO2.
Contact MDE Technical
Support.
WARM UP message.
Sensor has not warmed to 42o C.
Allow sensor to warm up prior
to ETCO2 monitoring.
Sidestream ETCO2 Solutions (Prism Only)
Problem
NO SENSOR message.
Possible Causes
Pump not operative.
Action/Solution
Try sensor with another monitor.
If problem persists, replace
sensor.
NO FILTER message.
No watertrap filter.
Insert watertrap filter into
sidestream module.
FILT OCCU message.
Filter obstructed.
Replace watertrap filter.
EXH OCCLU message.
Exhaust obstructed.
Clear exhaust of any obstruction.
LOW SIGNAL or OCCLUSION
message.
Watertrap flow restricted or
pump inoperative.
Check tubing for kinks or
blockage. Replace tubing if
necessary. Replace watertrap if
message persists.
Exhaust/scavenger port flow
impaired.
Move objects away from exhaust
port or check scavenger tubing.
BAD SENSOR message.
Sensor not functioning properly.
If possible, try sensor with
another monitor. If problem
persists, replace sensor.
PUMP ERR message.
Hardware error.
Contact MDE Technical
Support.
5V FAULT message.
Hardware error.
Contact MDE Technical
Support.
CO2 COMM message.
Hardware error.
Contact MDE Technical
Support.
CO2 ERROR message.
Hardware error.
Contact MDE Technical
Support.
WARM UP message.
Sensor has not finished warming
up to 42o C.
Allow sensor to warm up prior
to ETCO2 monitoring.
10-4
ETCO2 Solutions (Prism SE Only)
Problem
Possible Causes
Action/Solution
No Sensor message.
No filterline connected.
Connect a filterline to monitor.
Filt Occl message.
Filter occluded/airway blockage
detected.
Remove/Replace filterline.
SureTemp Solutions
Problem
Possible Causes
Action/Solution
T1 Position message.
Incorrect probe placement or
movement.
Check location of probe to verify
monitor is set for position used.
For example, axillary, oral, or
rectal.
Unit never displays T1 Ready.
Probe switch failure.
Check/Replace probe switch.
Probe not attached properly.
Reattach probe properly.
Probe never inserted into well.
Insert probe into well.
Defective probe.
Replace probe.
Defective cable.
Replace cable.
Unit constantly displays T1
initial.
Defective probe.
Check/Replace probe.
Suspected inaccurate reading.
Incorrect probe covers.
Verify Welch Allyn probe
covers are used.
T1 not ready.
Ready message not displayed
before attempted temperature.
Technique.
Verify good clinical technique.
For example, sublingual pocket
w/oral reading.
Defective probe.
Check/Replace probe.
Loss of communication.
Check/Replace SureTemp board.
Ambient temperature above
90o F.
Relocate/Reposition unit.
Patient temperature outside
predictive temperature range.
Use MONITOR mode for
temperature measurement.
T1 Error message.
Unit switches from predictive to
monitor mode automatically.
10-5
Cardiac Output (CO) Solutions
Problem
NO CATH message.
Possible Causes
Catheter not connected.
Action/Solution
Confirm catheter connected
properly.
NO PROBE message.
Either injectate probe or bath
temperature probe not
connected.
Confirm both probes connected
properly. Without probe,
monitor assumes 0o C injectate
temperature.
∧ ∧RANGE∧ ∧ message.
Blood temperature change
greater than 4o C at beginning of
run.
Verify initial blood temperature
change not greater than 4o C.
∨ ∨RANGE∨ ∨ message.
Injectate probe bath temperature
less than 10o C within 30
seconds after start of run.
Increase initial bath temperature.
<<RANGE>> message.
Cardiac output greater than
19.99 liters/minute or less than
0.01 liters/minute.
Reduce input signals if CO too
high. Increase input signals if
CO too low.
BASELINE message.
Fluctuations in patient blood
temperature or instrumentation
problems.
Check cable connections.
Repeat test with another cable if
necessary.
NO ECG message.
Either ECG cardiotach channel
is in check lead or insufficient
beats detected.
Verify ECG leads connected
properly. System will proceed to
calculate CO, but REF and other
parameters will not be
computed.
Possible Causes
Improper paper or an obstruction
in paper exit area.
Action/Solution
Confirm proper paper is
installed.
Recorder Solutions
Problem
Paper jams.
Remove paper. Clear paper path.
Reinstall paper. Retry.
No recording on paper.
Paper not installed properly.
Verify paper is properly
installed. Confirm correct paper
being used.
Possible Causes
Batteries not adequately
charged.
Action/Solution
Verify batteries are at least 90%
charged.
Battery installed incorrectly.
Make sure batteries installed
correctly.
Battery Solutions
Problem
Battery cycle time less than
expected.
Replace battery.
Battery old or damaged.
Batteries will not charge and
Battery Charging indicator is
OFF.
AC power not connected
properly.
Confirm front panel AC ON
indicator is on.
Verify unit connected to AC
10-6
power.
Defib/Pacer Solutions
Problem
Defibrillator will not charge
(beeps intermittently) when
CHARGE key is pressed.
Possible Causes
Defibrillator cable is either
disconnected or defective.
Action/Solution
Ensure that defibrillator cable
is properly connected to the
defibrillator behind the Prism
monitor. If problem persists,
replace defibrillator cable.
Defibrillator beeps intermittently
when attempting to charge the
internal paddles.
Internal paddle cable is either
disconnected or defective.
Ensure that internal paddle
cable is properly connected to
defibrillator behind the Prism
monitor. If problem persists,
replace internal paddle cable.
Energy selected exceeds 50 joules.
Ensure that energy selected is
not more than 50 joules (max.
setting for internal paddles).
Improper electrode to skin adhesion
or use of dry or otherwise defective
electrodes.
Ensure that disposable
defibrillator/ pace electrodes
are not outdated.
Patient’s skin burns during
pacing.
Replace electrodes that are
dry or defective.
Pacing current may be set too high.
If possible, reduce pacing
current.
Incorrect ECG electrode placement.
Apply standard 3-lead ECG
cable with proper electrodes
to obtain ECG waveform.
Defibrillator ECG source is set to
PADDLES.
Set defibrillator ECG source
to LEADS with ECG
SOURCE key. Then connect
a standard 3-lead ECG cable
with proper electrodes.
Patient and/or paddle motion.
If possible, reduce patient
and/or paddle motion.
Discomfort or pain during pacing.
Excessive pacing current.
If possible, reduce pacing
current. If high pacing current
is warranted for capture,
sedation with analgesic may
be required.
Unable to obtain ventricular
capture.
External pacer is either not in
DEMAND mode or the pace rate is
too low.
Ensure that pacer is set to
DEMAND mode and pace
rate is higher than that of the
patient. Also ensure that
sufficient pacing current is
being delivered to patient.
Insufficient ECG waveform
during defibrillation or pacing.
10-7
THIS PAGE LEFT BLANK INTENTIONALLY
10-8
Chapter 11 – Supplies, Accessories, & Options
The supplies, accessories, and options listed in this section can be ordered by calling
Medical Data Electronics at the following telephone number:
(818) 768-6411
To make the order of the process smoother, note the part or option/model number of the
item(s) you are ordering, and be prepared to give the number to MDE personnel.
Part
Number
E100009
E100002
E100010
E100004
E100011
E100006
E100007
E100008
Part
Number
E2700-37M
E270037SE7
Accessory Starter Kits
Adult Accessory Kit – Nellcor XL – Consists of: 5-Lead ECG cable,
5-Lead Snap Leadwires, Adult NIBP Hose & Cuff, Nellcor MC-10 SPO2
10 foot cable, Oxisensors
Adult Accessory Kit – Masimo – Consists of: 5-Lead ECG cable, 5-Lead
Snap Leadwires, Adult NIBP Hose & Cuff, Masimo 8 foot SPO2
extension cable, Masimo Sensor Starter Kit
Pediatric Accessory Kit – Nellcor XL – Consists of: 3-Lead ECG cable,
3-Lead Pinchclip Leadwires, NIBP Hose, Pediatric Cuff, Nellcor MC-10
SPO2 10 foot cable, Oxisensors
Pediatric Accessory Kit – Masimo – Consists of: 3-Lead ECG cable,
3-Lead Pinchclip Leadwires, NIBP Hose, Pediatric Cuff, Masimo 8 foot
SPO2 extension cable, Masimo Sensor Starter Kit
Neonatal Accessory Kit – Nellcor XL – Consists of: 3-Lead ECG cable,
Neonatal NIBP Hose, Nellcor MC-10 SPO2 10 foot cable, Oxisensors
Neonatal Accessory Kit – Masimo – Consists of: 3-Lead ECG cable,
Neonatal NIBP Hose, Masimo 8 foot SPO2 extension cable, Masimo
Sensor Starter Kit
Defib / Pacer Accessory Kit – Adult – Includes adult defib electrode set,
3-Lead Fixed ECG cable, Pace output cable, gel, and (1) battery
Defib Pacer Rolling Stand Kit – Includes GCX Rolling Stand, Basket,
Fixed mounting Plate, and Rolling Stand Counterweight
Battery Accessories
Modular Battery Medical Grade – ESCORT II, Prism
Battery (3.5 hours) – Prism SE
11-1
Part
Number
E2700-03
E2700-80A
E2900-07
3840000161
3840000160
3840000162
E2700-64
E2700-65
E2700-66
E2700-69
E2700-70
E2700-72
E2700-73
E2700-83
E2700-89
E2900-54
E2900-52
Part
Number
E2900-01
401603
401503
E2900-02
401604
401504
E2700-24
E2700-25
E2700-46
E2700-47
E2700-43
E2700-62
E2700-75
E2700-77
E2700-78
E2700-27
Defibrillator / Pacer Accessories / Supplies
GCX Defib Slide Mount Adapter Plate – Allows monitor equipped with
Defib base to attach to a GCX wall mount or rolling stand
Defib/Pacer Tester (One recommended with each Defibrillator purchase)
Defib 3-Lead Cable (fixed)
Pediatric Defib/Pace Electrodes (1 set)
Adult Defib/Pace Electrodes (1 set)
Defib Gel (1 tube)
Adult Disposable Defib/Pace Electrodes (box of 10)
Pediatric Disposable Defib/Pace Electrodes (box of 10)
“Hands Off” Defib/Pace Adapter Cable
Defib Internal Paddles Cable Only – Order internal paddles separately
Defib Internal Paddles – Adult (8.9 cm) – requires E2700-69
Defib Internal Paddles – Pediatric (3.8 cm) – requires E2700-69
Pace Output Cable
Signal Electrode Gel (box of 12 tubes)
Multi-function Defib/Pace Adapter – Order if defib and pace both have
Hands Off
External Pediatric Slide-On Paddle Set
External Adult Paddles
ECG Accessories – U.S.A
3-Lead ECG Safety Cable
24 inch 3-Lead Snap Safety Leadwires (1 set)
24 inch 3-Lead Neo Safety Pinchclip Leadwires (1 set)
5-Lead ECG Safety Cable
24 inch 5-Lead Snap Safety Leadwires (1 set)
24 inch 5-Lead Neo Safety Pinchclip Leadwires (1 set)
24 inch HP 3-Lead ECG Safety Cable
24 inch HP 5-Lead ECG Safety Cable
24 inch HP 3-Lead Safety Pinchclip Leadwires for E2700-24
24 inch HP 5-Lead Safety Pinchclip Leadwires for E2700-25
24 inch HP 3-Lead Shielded Snap Leadwires
24 inch 3-Lead Neonatal Safety Pinchclip Leadwires (5 sets)
24 inch 5-Lead Neonatal Safety Pinchclip Leadwires (5 sets)
24 inch 5-Lead Safety Snap Leadwires (10 sets)
24 inch 3-Lead Safety Snap Leadwires (10 sets) U.S.A
24 inch ECG Electrode Set – For Veterinarian use
11-2
Part
Number
E2900-04
E2900-03
E2700-60
401505
401506
E2700-76
E2700-61
E2700-63
Part
Number
E2800-30
E2800-31
E2800-33
E2800-34
E2800-32
Part
Number
20020
20021
E2900-20
E2900-21
E2900-26
E2900-38
E2900-39
ECG Accessories – CE Approved
5-Lead ECG Safety Cable (Red, Yellow, Green, Black, White)
3-Lead ECG Safety Cable (Red, Yellow, Green)
24 inch 3-Lead Safety Snap Leadwires (Red, Yellow, Green) (10 sets)
24 inch 3-Lead Safety Pinchclip Leadwires (1 set)
24 inch 5-Lead Safety Pinchclip Leadwires (1 set)
24 inch 5-Lead Neonatal Safety Pinchclip Leadwires (5 sets)
24 inch 5-Lead Safety Snap Leadwires (Red, Yellow, Green, Black,
White) (10 sets)
24 inch 3-Lead Neonatal Safety Pinchclip Leadwires (5 sets)
ECG ESIS Accessories
ESIS Patient Cable 5-Lead USA
ESIS Patient Cable 5-Lead CE
ESIS Leadwire Set 3-Lead 36 inch Snap USA
ESIS Leadwire Set 5-Lead 36 inch Snap CE
ESIS Leadwire Set 5-Lead 36 inch Snap USA
ETCO2 Accessories / Supplies (Prism Only)
Mainstream Sensor – (for intubated use only) – For use with MPM
OPT36, must use with Airway adapter E2900-20, or E2900-21
Sidestream Sensor – (for some intubated and all non-intubated patients) –
For use with MPM OPT36, must use with Watertrap E2900-26.
ETCO2 Airway Adapter – Standard (box of 10, single use)
ETCO2 Airway Adapter – Neonatal (box of 10, single use)
Watertrap – (box of 24)
ETCO2 Nasal Cannula – Adult (box of 10, single use)
ETCO2 Nasal Cannula – Pediatric (box of 10, single use)
11-3
Part
Number
E2910-20
E2910-21
E2910-22
E2910-35
E2910-34
E2910-28
E2910-29
E2910-30
Contact
MDE
Technical
Support
Part
Number
E2910-01
E2910-02
E2910-03
E2910-10
E2910-04
E2910-05
E2910-06
E2910-07
E2910-08
E2910-09
E2810-06
E2810-11
E2810-12
E2810-13
Microstream ETCO2 Accessories / Supplies (Prism SE Only)
Adult / Pediatric Filterline & Airway Adapter Set – for intubated CO2
sampling, 6 foot (box of 25)
Adult / Pediatric Filterline & Airway Adapter Set – High Humidity – for
long term intubated CO2 sampling, 6 foot (box of 25)
Infant / Neonatal Filterline & Airway Adapter Set – High Humidity – for
intubated CO2 sampling, 6 foot (box of 25)
Adult O2/CO2 Nasal Filterline – non-intubated CO2 sampling, deliver
O2 (box of 25)
Pediatric O2/CO2 Nasal Filterline – non-intubated CO2 sampling,
deliver O2 (box of 25)
Adult Nasal Cannula with Filterline (box of 25)
Pediatric Nasal Cannula with Filterline – non-intubated CO2 sampling
(box of 25)
Infant / Neonatal Nasal Cannula with Filterline – non-intubated CO2
sampling (box of 25)
MICROSTREAM ETCO CALIBRATION KIT – Includes 5%
Calibration Gas Canister with Tubing Adapter
NIBP Accessories / Supplies – Quick Disconnect Type Fittings
NIBP CUFF Thigh – CE
NIBP CUFF Large Adult – CE
NIBP CUFF Adult – CE
NIBP Cuff Small Adult – CE
NIBP CUFF Child – CE
NIBP CUFF Infant – CE
Neo Size 1 – Box of 10
Neo Size 2 – Box of 10
Neo Size 3 – Box of 10
Neo Size 4 – Box of 10
Adult NIBP Hose
Neonatal NIBP Hose
SE to EII NIBP CUFF ADAPTER
EII to SE NIBP CUFF ADAPTER Screw fitting to Quick Disconnect
11-4
Part
Number
E2800-06
E2800-11
E2810-12
E2810-13
E2910-06
E2910-07
E2910-08
E2910-09
E2910-12
E2910-13
E2910-14
E2910-15
E2910-16
E2910-17
404016
404017
404018
403958
3607000020
Part
Number
401609
E2700-34
E2700-10
E2700-91
E2700-11
E2700-90
NIBP Accessories / Supplies – Screw Type Fittings
Adult / Pediatric Hose Assembly (12 foot)
Neonatal Hose Assembly (8 foot)
SE to EII NIBP CUFF ADAPTER (Quick disconnect to screw fitting)
EII to SE NIBP CUFF ADAPTER (Screw fitting to Quick Disconnect)
Neo Size 1 – Box of 10
Neo Size 2 – Box of 10
Neo Size 3 – Box of 10
Neo Size 4 – Box of 10
NIBP Cuff Infant – Screw Fittings
NIBP Cuff Child – Screw Fittings
NIBP Cuff Small Adult – Screw Fittings
NIBP Cuff Adult – Screw Fittings
NIBP Cuff Large Adult – Screw Fittings
NIBP Cuff Thigh – Screw Fittings
NIBP Board Exchange Kit, MPM (Prism Only)
NIBP Connectors Conversion Kit (Prism SE Only)
NIBP Factory Conversion Kit, MPM (Prism Only)
Hose Conversion Kit
Male Screw-on Fittings Plastic
Mounting Accessories
GCX Plate
Wall Mount less Wall Channel
Wall Mount with Wall Channel
6 inch Wall Mount Utility Basket with SureTemp holder
Rolling Stand
6 inch Rolling Stand Utility Basket with SureTemp holder
11-5
Part
Number
E2810-50
E2810-51
E2810-52
E2810-53
E2810-54
E2810-55
E2810-56
E2810-57
E2810-58
E2810-59
E2810-60
E2810-61
Part
Number
E2800-50
E2800-64
Part
Number
E2900-55
E2900-56
E2900-57
E2900-58
E2900-62
Part
Number
E3202-05
E3202-08
E3202-06
E2900-91
E2900-90
E2900-98
E2900-95
E2900-94
SPO2 Accessories / Supplies – Masimo
Adult Finger Sensor-Reusable
Adult Disposable Adhesive Sensors (box of 20)
Pediatric Disposable Adhesive Sensors (box of 20)
Neonatal Disposable Adhesive Sensors (box of 20)
Neonatal and Preterm Disposable Adhesive Sensors (box of 20)
Neonatal Masimo SpO2 Adhesive Sample pack
Adult/Pediatric Masimo SpO2 Adhesive Sample pack
SpO2 Masimo Replacement Tape 100 (pk) (For use with E2810-53)
SpO2 Masimo Replacement Posey Wrap (12 pk) (For use with E281054)
SpO2 Extension Cable-4 foot Masimo
SpO2 Extension Cable-8 foot Masimo
SpO2 Extension Cable-12 foot Masimo
SPO2 Accessories / Supplies – Nellcor
Nellcor Durasensor – Reusable
Nellcor MC-10 Pulse Oximetry Cable – 10 foot
SureTemp Accessories / Supplies
SureTemp Oral Probe
SureTemp Rectal Probe
SureTemp Probe Covers – Disposable (box of 500)
SureTemp Probe Covers Snap on Holder for Monitor
SureTemp Probe Covers – Disposable (case of 1000)
Remote Displays
17 inch Color Remote Display
18 inch Color Remote Display – Flat Panel
21 inch Color Remote Display
17 inch Remote Display Wall Mount
17 inch Remote Display Ceiling Mount
18 inch Flat Panel Remote Display Wall Mount
21 inch Remote Display Wall Mount
21 inch Remote Display Ceiling Mount
11-6
Part
Number
E2800SC25
E2800SC50
E2800PC50
Part
Number
E2900-49
E2900-50
Part
Number
E2700-32
E2700-54
E2700-14
E2900-51
E2900-30
E2900-31
E2900-33
E2700-87
Part
Number
E9040-62
E9040-63
E9040-55
E9030-31
E9030-33R
E9030-36
E9040-54
Video Cable
25 Foot Standard Cable
50 Foot Standard Cable
50 Foot Plenum Cable
Remote Display Power Isolation Transformers
Power Isolation Transformer 150VA floor mount, single outlet 110 volts
Power Isolation Transformer 150VA wall mount, single outlet 110 volts
Miscellaneous Accessories/ Supplies
Recorder Paper (box of 10 rolls)
Recorder Paper (case of 100 rolls)
Monitor Accessory Pouch – Snaps to side of monitor
Cable Strap – Snaps to monitor for cable management when monitor is
not in use
Power Cord Clamp
Nurse Call Interface Cable (unterminated)
High Level Interface Cable
Power Cord USA – Replacement
Educational Material
ESCORT Prism Service Manual
ESCORT Prism SE Service Manual
Service Manual CDROM
ESCORT Prism & Prism SE Operator’s Manual
ESCORT Prism & Prism SE Reference Manual
Reference Manual CDROM
ESCORT Prism & Prism SE Quick Reference Guide
11-7
Part
Number
OPT25
OPT37
OPT53A
OPT53B
OPT70
OPT103
OPT104
20002
20002CVR
20202
OPT21
500256
E2900-40A
E2900-40B
Options (Prism Only)
BEDRAIL HANDLE – Need 9040-60 upgrade on older units
CRG and OXYCRGS – Provides CRG (Cardiorespirogram) to standard
MPM equipped with ECG/Resp. Provides OXYCRG
(Oxycardiorespirogram) when and SpO2 option is purchased.
VGA Output for Prism model 20401 Only – Permits all Prism
waveforms and numeric data to be displayed on any standard VGA
display. The remote display may require an Isolation Transformer
depending upon its location. Remote Display, Isolation Transformer can
be purchased from a commercial source or MDE.
VGA Output for Prism model 20403 Only – Permits all Prism
waveforms and numeric data to be displayed on any standard VGA
display. The remote display may require an Isolation Transformer
depending upon its location. Remote Display, Isolation Transformer can
be purchased from a commercial source or MDE.
ADD 5TH TRACE
External DC Jack – Prism – Includes Grounding Plug
Prism Aux I/F Option
Dual Channel Recorder Module – Diagnostic quality, thermal array
Modular Recorder Housing Cover
Defibrillator / Pacer
Defibrillator Slide Mount– 20401, 20403 only.
Defibrillator Skin (Prism Housing) – Required when adding a
defibrillator to an existing Prism monitor
UHF Tlm RF/Transceiver antenna Adapter for defib – Required when
defib monitor is equipped with a bedside telemetry receiver AND a
central station receiver
Spectrum RF/Transceiver antenna Adapter for defib – Required when
defib monitor is equipped with a central station receiver
11-8
20001-M
20001-N
20001CVR
OPT101-N
OPT101-M
OPT28
OPT30-M
OPT30NEL
OPT31
OPT31I
OPT31M
OPT33
OPT33I
OPT33M
OPT48
OPT48I
OPT48M
OPT35
OPT36
OPT38-M
OPT38-N
OPT39
OPT72
OPT50
OPT50S
OPT54
OPT54I
MULTIPARAMETER MODULE – M
MPM for use with Masimo SpO2 or when no SpO2 is ordered.
Includes single or dual lead ECG and Respiration.
MULTIPARAMETER MODULE – N
MPM for use with Nellcor SpO2. Includes single or dual lead ECG
and Respiration.
MULTIPARAMETER MODULE Housing Cover Plate
MPM Standard Connectors with Nellcor SpO2
MPM Standard Connectors with Masimo SpO2 or no SpO2
NON-INVASIVE BLOOD PRESSURE
MASIMO SpO2
NELLCOR OxismartXL SpO2
(1) INVASIVE BLOOD PRESSURE
(1) INVASIVE BLOOD PRESSURE CE
(1) INVASIVE BLOOD PRESSURE HP
(2) INVASIVE BLOOD PRESSURES
(2) INVASIVE BLOOD PRESSURE CE
(2) INVASIVE BLOOD PRESSURE HP
(3) INVASIVE BLOOD PRESSURES
(3) INVASIVE BLOOD PRESSURES CE
(3) INVASIVE BLOOD PRESSURES HP
Standard Temperature – does not include SureTemp
ETCO2 – PRYON – Requires Model 20020 or 20021 sensors, purchased
separately
HP MERLIN CONNECTORS – ECG & IBP only. For MPM’s equipped
with Masimo SpO2 or no SpO2
HP MERLIN CONNECTORS – ECG & IBP only. For MPM’s equipped
with Nellcor SPO2
CARDIAC OUTPUT / REF – Available in MPM’s for ESCORT II
20101 & 20300 monitors ONLY. Requires purchase of (2) or (3)
Invasive Blood Pressures.
CARDIAC OUTPUT WITH HEMODYNAMIC CALCULATION –
Available in MPM’s for PRISM 20401 & 20403 monitors ONLY.
Requires purchase of (2) or (3) Invasive Blood Pressures.
ADD SECOND STANDARD TEMPERATURE – When first temp is a
standard temp
ADD SECOND STANDARD TEMPERATURE – When first temp is a
SureTemp
SURETEMP ELECTRONIC THERMOMETER – Provides episodic
measurements of patient temperature, oral, axillary, rectal
SURETEMP ELECTRONIC THERMOMETER CE – Provides episodic
measurements of patient temperature, oral, axillary, rectal
11-9
Part
Number
OPT53-SE
OPT70-SE
OPT27-SE
OPT30SEM
OPT30SENEL
OPT36-SE
OPT37-SE
OPT31-SE
OPT33-SE
OPT48-SE
OPT72-SE
OPT73-SE
OPT54-SE
OPT50-SE
OPT03-SE
OPT61-SE
OPT25-SE
OPT105-SE
OPT103-SE
Options (Prism SE Only)
VGA Output for Prism SE series monitors – Permits all Prism SE
waveforms and numeric data to be displayed on any standard VGA
display. The remote display may require an Isolation Transformer
depending upon its location. Remote Display, Isolation Transformer can
be purchased from a commercial source or MDE.
ADD 5TH TRACE
RESPIRATION – Impedance Pneumography
MASIMO SPO2
NELLCOR OxismartXL SpO2
ETCO2 Microstream Technology
OXY CRG's – Provides Oxycardiorespirograms when purchased when a
respiration option is included
(1) INVASIVE BLOOD PRESSURE
(2) INVASIVE BLOOD PRESSURES
(3) INVASIVE BLOOD PRESSURES
CARDIAC OUTPUT with HEMODYNAMIC CALCS – Requires
purchase of (2) or (3) Invasive Blood Pressures.
CARDIAC OUTPUT with HEMODYNAMIC CALCS / ETCO2
Combination – Requires purchase of (2) or (3) Invasive Blood Pressures.
Microstream ETCO2.
SURETEMP ELECTRONIC THERMOMETER – Provides episodic
measurement of patient temperature, oral, axillary, rectal
SECOND STANDARD TEMPERATURE – Add second standard
temperature to any single temp option
Recorder – Dual Channel, Thermal array – Add integral dual-channel
recorder to provide documentation of all vital sign waveforms and
numeric data
High level outputs (alarm relay, defib-sync & analog out)
BEDRAIL HANDLE – Add Bedrail Handle to PRISM SE
Prism SE Accessory Snaps (set of 4, installed)
External DC Jack – SE – Includes Grounding Plug
11-10
Part
Number
20011V
20011
20019V
20019VS
Part
Number
20012V
20012VDP
20012V-M6
Part
Number
20030-MT1
20030-HB1
20030-CN1
20030-EC1
20030RS232
E9040-26
Wireless Communication Modules
VISION TRANSCEIVER MODULE – (900 MHz BAND) Spread
Spectrum communication with Vision central station. Requires (1) per
monitor.
ESCORT-LINK TRANSCEIVER MODULE – (900 MHz BAND)
Spread Spectrum communication with existing E3200B central stations.
Requires (1) per monitor.
VISION TRANSCEIVER MODULE – (2.4 GHz BAND) Spread
Spectrum communication with Vision central station in the 2.4 GHz
BAND. Requires (1) per monitor.
VISION TRANSCEIVER MODULE – (2.4 GHz BAND) – SP – Spread
Spectrum communication with Vision central station in the 2.4 GHz
BAND. Requires (1) per monitor. (FOR USE IN FRANCE)
Guardian Receivers – Bedside
TELEMETRY BEDSIDE RECEIVER MODULE – (450-470 MHz). For
bedside monitor to receive Guardian telemetry transmitter signal.
Requires Guardian transmitter. One required for each transmitter to be
monitored.
TELEMETRY BEDSIDE RECEIVER MODULE – (450-470 MHz). For
bedside equipped with Defib/Pacer to receive Guardian transmitter
signal. Requires Guardian transmitter. One required for each transmitter
to be monitored.
TELEMETRY BEDSIDE RECEIVER MODULE – (608-614 MHz). For
bedside monitor to receive Guardian telemetry transmitter signal.
Requires Guardian transmitter. One required for each transmitter to be
monitored.
CIS Communication Modules – Bedside
Meditech CIS Communication Module
HBOC CIS Communication Module
Cerner CIS Communication Module
Eclipsys CIS Communication Module
RS232 Communication Module
MDE Engineering CIS Software Support
11-11
THIS PAGE LEFT BLANK INTENTIONALLY
11-12
Chapter 12 – Specifications
PRISM & PRISM SE SPECIFICATIONS
PHYSICAL (Prism Only)
Size: 9.3 x 11.8 x 10.2 in./23.6 x 30.0 x 25.9 cm (HWD)
Weight: 12.35 lb/5.6 kg (includes MPM with ECG, NIBP, SPO2, Temp)
Weight with 2 Batteries: add 2.9 lb/1.3 kg
PHYSICAL (Prism SE Only)
Size: 8.9 x 11.8 x 8.3 in./22.6 x 30.0 x 21.1 cm (HWD)
Weight: 10.5 lb/4.8 kg (includes one battery pack)
DISPLAY
Type: Color Active Matrix TFT LCD
Size: 10.4 in./26.4 cm diagonal
Resolution: 640 x 480 pixels
Number of Traces: 3, 4, or 5
Trace Length: 5 seconds
POWER (Prism Only)
Modular Batteries: 2 – each 12V; 2.0 AH Rechargeable Sealed Lead Acid
Battery Capacity with 2 batteries: – 1.25 to 2.25 hrs, depending on configuration
Battery Charge Time: 5hrs to 90% with unit in standby
Battery Level Indicator: Screen messages and audio tones
Ac Main: 115/230VAC selectable, 48 to 62 Hz autosensing
External DC In: 12 to 28VDC, 3A max
Power: 27 W
POWER (Prism SE Only)
Battery Pack: 1 – each 12V; 7.0AH Rechargeable Sealed Lead Acid
Maximum Operating Time: 3.5 hrs.
Battery Charge Time: 8-10 hrs to 90% with unit in standby
Battery Level Indicator: Screen messages and audio tones
Ac Main: 115/230VAC autosensing, 50 to 60 Hz selectable
External DC In: 12 to 28VDC, 3A max – charge batteries
Power: 27 W
ENVIRONMENTAL
Operating Temp: 5 to 40° C
Relative Humidity: 0 to 90% noncondensing
See shipping carton for storage and transport specifications
INPUT/OUTPUT OPTIONS AVAILABLE
Analog Out, Recorder Out, Alarm Relay Closure, HR, SpO2 Out, Defibrillator Sync (Prism
only), DB-15 VGA Out
ECG
12-1
Range: 10 to 300 BPM
Accuracy: ±2% or ±2 BPM
Sweep Speed: 12.5, 25 mm/sec selectable
Display Update Information: Display update interval is 2 seconds
High Limit Range: 50 to 250 BPM in 5 BPM steps
Low Limit Range: 20 to 150 BPM in 5 BPM steps
Bandwidth: 0.5 to 40 Hz (monitor); 0.05 to 100 Hz (diagnostic)
Leads: 3 lead: I, II or III selectable;
5 Lead/Dual Vector: I, II, III, or V selectable
Sensitivity: 0.25 to 3 mV/cm selectable (12 levels)
Pacer Rejection: 0.1 to 2 msec; 2 to 700 mV
Tall T-wave Rejection Capability: Tall T-wave rejection of 1.2 mV with 1 mV R-wave
Heart Rate Source: ECG, IBP, SpO2, NIBP
Heart Rate Averaging Method:
If the present HR is less than 100, the last 6 R-R intervals are averaged
If the HR is greater than 100, the last 12 R-R intervals are averaged
Heart Rate Response Time:
Response time to reach 105 bpm from 80 bpm with 120 bpm applied is 5.7 sec avg with
range of 5.5 to 6 seconds
Response time to reach 54 bpm from 80 bpm with 40 bpm applied is 6.9 sec avg with
range of 6.5 to 7 seconds
Time to Alarm for Tachycardia:
For waveform 4a. @ 1 mV: 7.7 sec avg, 6-9 sec range
For waveform 4a. @ .5 mV: 8.7 sec avg, 8-9.5 sec range
For waveform 4a. @ 2 mV: 5.4 sec avg, 5.1-6.5 sec range
For waveform 4b. @ 2 mV: 5.7 sec avg, 5.3-6.5 sec range
For waveform 4b. @ 1 mV: 5.7 sec avg, 4.9-6.8 sec range
For waveform 4b. @ 4 mV: 5.8 sec avg, 5.3-6.1 sec range
Horizontal Time Bases: 25, 12.5 mm/sec
Vertical Ranges: 0.25, 0.30, 0.40, 0.50, 0.65, 0.80, 1.0, 1.25, 1.50, 2.0, 2.5, 3.0 mv/cm
Defib Tolerance: 400 joules with 50 ohm series lead impedance
Connector: Std 6 pins MS
Isolation: Full electrical isolation
RESPIRATION
Range: 4 to 200 BPM
Accuracy: ±2% or ±2 BPM
Lead: RA to LA
Leads Off Sense: 30 na DC per lead
Resp Drive: 10 vpp sinewave @ 1.2 mA @ 62.5 khz
Display Sensitivity: 0.25 to 3 ohm/cm selectable
Minimum Detection Sensitivity: 0.1 to 1.2 ohm depending on display setting
High Limit Range: 5 to 150
Low Limit Range: 5 to 50
Apnea Delay: 10, 15, 20, 30, 40
Sweep Speed: 1.56, 6.25, 12.5, 25 mm/sec selectable
Respiration Rate Source: ETCO2 or ECG Leads
CVA Rejection: Rejects most cardiovascular coincidence
STANDARD TEMPERATURE
Channels: 1 or 2
12-2
Range: 20 to 50° C (68 to 122° F)
Alarm Limit Range 20-44° C
Accuracy: ±0.1° C
Probe: YSI 700 or 400, autosensing
Connector: 1/4 inch (0.6 cm) stereo phone jack
SURETEMP® TEMPERATURE
Patient Temperature Range: 28.9 to 42.2 ° C (84.0 to 108.0 ° F)
Predictive Temperature Range: 34.5 to 42.2 ° C (94.0 to 108.0 ° F)
Accuracy: ±0.1 ° C (±0.2 ° F)
Response Time: Oral - approx. 4 sec., Rectal - approx. 15 sec., Axillary – continuous
Monitor Mode: 3 minutes
Cord Length: 9 ft. or 16 ft.
NIBP
Measurement Method: Oscillometric
Measurement Range: Systolic: 30 to 275 mmHg ADULT, 30 to 170 mmHg PED,
30 to 140 mmHg NEO
Diastolic: 20 to 240 mmHg ADULT, 20 to 125 mmHg PED, 20 to 100 mmHg NEO
Alarm Limit Range:
Systolic: ADULT
50-240 mmHg
PED
25-165 mmHg
NEO
25-135 mmHg
Mean:
ADULT
PED
NEO
40-200 mmHg
15-135 mmHg
15-105 mmHg
Diastolic:
ADULT
30-180 mmHg
PED
10-120 mmHg
NEO
10- 95 mmHg
Pulse Rate: 30 to 250 BPM
Measurement Time: 40 seconds typical
Modes: Manual - initiated via START key; Automatic - STAT, 1, 2, 3, 4, 5, 10, 15, 30, 45
minutes, 1, 2, 3, 4 hrs
1st Cuff Inflation: ADULT: 90 to 220 mmHg; PED: 60 to 140 mmHg selectable,
NEO: 60 to 140 mmHg selectable
Subsequent Inflations: Systolic +30 mmHg
Alarms: SYS, DIAS, MEAN selectable in 5 mmHg steps
System Accuracy: ±5 mmHg mean error, ±8 mmHg SD
Cuff Sizes: Thigh, Large Adult, Adult, Child, Infant, Neo sizes 1, 2, 3, 4
SpO2 (Nellcor MP204)
Display: % SpO2, Plethysmographic Waveform or Pulse Amplitude Bar
Range: 1 to 100%
Accuracy: ADULT: 70 to 100% ±2 digits; 50 to 69% ±3 digits; NEO: 70 to 94% ±3 digits
Pulse Rate Range: 20 to 250 BPM
Pulse Rate Accuracy: ±3 BPM
High Limit Range: 70 to 100%
Low Limit Range: 50 to 99%
Sensors: Neonatal through Adult (NELLCOR)
12-3
Pulse Tone: Pitch varies with SpO2 value
ECG Sync: NELLCOR C-LOCK
SpO2 (Nellcor MP405)
Display: % SpO2, Plethysmographic Waveform or Pulse Amplitude Bar
Range: 0 to 100%
Accuracy: ADULT: 0 to 69% unspecified; 70 to 100% ±2 digits; NEO: 0 to 69%
unspecified; 70 to 100% ±3 digits
Pulse Rate Range: 20 to 250 BPM
Pulse Rate Accuracy: ±3 BPM
High Limit Range: 70 to 100%
Low Limit Range: 50 to 99%
Sensors: Neonatal through Adult (NELLCOR)
Pulse Tone: Pitch varies with SpO2 value
ECG Sync: NELLCOR C-LOCK
SpO2 (Masimo SET)
Display: % SpO2, Plethysmographic Waveform or Pulse Amplitude Bar
Range: 1 to 100%
Accuracy:
Calibrated to functional saturation
During NO Motion Conditions:
Saturation (% SpO2):
ADULT, PED:
70 to 100% ±2 digits
NEO:
70 to 100% ±3 digits
Pulse Rate: 25 to 240 bpm ±3 digits (Adult, Ped, and Neo)
During Motion Conditions:
Saturation (% SpO2):
ADULT, PED:
70 to 100% ±3 digits
NEO:
70 to 100% ±3 digits
Pulse Rate: 25 to 240 bpm ±5 digits (Adult, Ped, and Neo)
Low Perfusion Performance:
>0.02% Pulse Amplitude
Saturation (%SpO2)±2 digits and %Transmission > 5%
Pulse Rate (bpm)±3 digits
High Limit Range: 70 to 100%
Low Limit Range: 50 to 99%
Sensors: Neonatal through Adult (Masimo)
Pulse Tone: Pitch varies with SpO2 value
INVASIVE PRESSURE
Channels: 1, 2, or 3
Range: -40 to 300 mmHg
Accuracy: ±1% or ±1 mmHg
Parameter Display: SYS, DIAS, and MEAN selectable
Pressure Labels: ART, PA, CVP, ICP, RA, LAP, FEM, UA, UV, PRES
Alarm Limit Range:
Systolic: ADULT
0-240 mmHg
PED
0-210 mmHg
NEO
0-210 mmHg
Diastolic:
ADULT
0-180 mmHg
12-4
PED
NEO
0-150 mmHg
0-150 mmHg
Mean:
ADULT
0-200 mmHg
PED
0-170 mmHg
NEO
0-170 mmHg
Display Scale: 15, 30, 60, 120, 180, 240 mmHg selectable
Input Connector: Std 6 pin MS, 5 uV/V/mmHg
CARDIAC OUTPUT/HEMODYNAMIC CALCULATIONS
CO Range: 0.1 to 19.99 liters/minute
CO Repeatability: ±2% or 0.2 liters/minute from mean value, whichever is greater, as
measured by electronically generated standard flow curves
REF Range: 1% to 85%
Blood Temperature Range: 17.5 to 43° C
Blood Temperature Accuracy: ±0.5° C from 17.5 to 31° C, ±0.3° C from 31 to 43° C
Injectate Temperature Range: 0 to 27° C
Injectate Temperature Accuracy: ±0.3° C from 0 to 25° C, ±0.5° C from 25.5 to 27° C
Hemodynamic Calculations Provided: CI, SV, SVI, SVR, SVRI, PVR, PVRI, LVSW,
LVSWI, RVSW, RVSWI, REF, PAWP,BSA
Catheters & Accessories: Baxter-Edwards compatible
ETCO2 (Prism Only)
Type: NDIR single beam, ratiometric
Sensor Size: Mainstream: 0.78 x 1.036 x 1.003 inches/1.98 x
2.63 x 2.55 cm (LWD); Sidestream: 6.3 x 3.15 x 2.17 Inches/
160 x 80 x 55 cm (LWD)
Sensor Weight: Mainstream: <10 g, without cable; Sidestream:
1.5 lbs (0.68 kg) with cable
Airway Adapter Dead Space: Mainstream < 6cc (std), 0.6 cc NEO
Altitude/Barometric Pressure Compensation: Automatic
Warm Up: 45 seconds typical
Range: 0 to 99 mmHg
Accuracy: ±2 mmHg or ±5% of reading below 77 mmHg,
±10% above 77 mmHg
Sweep Speed: 1.56, 6.25, 12.5, 25 mm/sec selectable
Display Scale: 50, 75, 100 mmHg
Alarm Limit Range: 5 to 100 mmHg
High Limit Inspired CO2: 4 to 12 mmHg, selectable
Sampling Flow Rate: Sidestream: 150 cc/min
Response Time: Mainstream: <60 msec max, 30 msec typical;
Sidestream: <100 msec max
Calibration: None required; annual check recommended
O2 and N2O Compensation: Independently selectable
ETCO2 (Prism SE Only)
Type: Oridion Module
Noise Emission: 45 db
Operating Temperature: 0 to 50° C
Maximum Change Rate in Temperature: 0.5° C
12-5
Operating Pressure: 430 to 795 mmHg
Maximum Change Rate in Pressure: 12.4 mmHg/min
Operating Altitude: -1,250 to 15,000 ft.
Maximum Change Rate in Altitude: 500 ft./min
Relative Humidity: 10 to 95%
Ambient CO2: 0 to 700 ppm
Flow Rate: 50 ml.min ±7.5 ml/min
Resp Range: 0 to 150 bpm
BTPS: 37° C, 47 mmHg
System Response Time: 2.9 seconds
Rise Time Adult and Neonatal: 190 msec max
Delay Time: 2.7 seconds typical
CO2 Report Resolution: 1 mmHg
Calibration Interval: 4000 operating hours or I year
Power:
1.5 Watts
Normal Operation
2.5 Watts
In AutoZero Mode
0.9 Watts
MediCO2 Standby Mode
4.7 Watts
Initialization Mode
Accuracy:
TIME
0-20 minutes
20 minutes and up
CO2 CONCENTRATION*
0-38 mmHg
39-99 mmHg
0-38 mmHg
39-99 mmHg
ACCURACY**
±4 mmHg
±12% of reading
±2 mmHg
±5% of reading + 0.08%
of every 1 mmHg above
40 mmHg
* At sea level.
** Accuracy applies for breath rates of up to 80 bpm. For breath rates above 80 bpm,
accuracy complies with EN 864/ISO 9918 (4 mmHg or 12% of reading whichever is
greater).
The accuracy is maintained to within 4% for the following Vol. % gas mixtures:
CO2
N2
O2
N2O
H2O
Anesthetic Agents
0-13
0-97.5
0-100
0-80
Dry-Saturated According to EN864
Leak Tightness: The leak rate of the module flow system is less than 40 mBar per
minute when a 30% vacuum is invoked on the flow system.
THERMAL RECORDER
Channels: Any 1 or 2 waveforms, user selectable
Resolution: 8 dots/mm vertical, 32 dots/mm horizontal
Paper: 40 mm grid; 50 mm width
Sweep Speed: 6.25, 12.5, 25 mm/sec; 1 mm/sec Trend
Manual Record Duration: 16 seconds, 12 seconds memory
Annotation: Time, date, parameter values, scales, source, speed
Weight: 1.15 lb (0.52 kg) with full roll of paper (Prism Only)
12-6
Weight: 0.85 lb (0.39 kg) with full roll of paper (Prism SE Only)
AutoNet TRANSCEIVER MODULE
Indicator: Green light indicates comm. Status
Frequency: Spread spectrum 902 to 928 MHz or 2.4 GHz
Transmission: Bidirectional with seamless auto-retry
Weight: 0.55 lb (0.25 kg)
TELEMETRY RECEIVER MODULE
Frequency Range: UHF 450 to 470 MHz (20012/20012V)
Frequency Range: UHF 608 to 614 MHz (20012V-M6)
Sensitivity: 1 uV typical
Available Transmitters: MDE models 1200LR, 20013, ESCORT Guardian models
20601,20602, 20603
Weight: 0.85 lb (0.39 kg)
CIS INTERFACE MODULE
Size: 13.5 x 6.6 x 3.4 cm (HWD)
Weight: 0.50 kg
Network Interface: IEEE 802.3 10 BaseT Ethernet RJ45
Serial Interface: 2 shielded EIA/TIA RS232 (9-pin mini-DIN) ports, 1 shielded EIA/TIA
RS 485 IEEE 1073.4.1 MIB compliant) port
Keyboard Interface: PS/2 Compatible (6-pin mini-DIN)
Interface Software: TCP/IP and HL7 – other protocols/data formats available at additional
cost
Ancillary Devices: driver software required for each different device type at additional cost
PATENT INFORMATION
MDE US Patents:
4,757,520; 4,922,918
Nellcor US Patents:
4,621,643; 4,830,014; 4,700,708; 4,770,179; 4,869,254; 4,685,464;
4,802,486
Masimo US Patents: 5,482,036; 5,490,505; 5,632,272; 5,685,299; 5,758,644; 5,769,785;
6,002,952; 6,036,642; 6,067,462; 6,206,830; 6,157,850; 6,002,962
Oridion US Patents: 4,755,675; 5,300,859; 5,063,275; 5,675,750; 5,875,461
CERTIFICATIONS (Prism)
CSA601.1, IEC 60601-1, IEC 60601-2, UL2601-1, CE/MDD, FCC Part 90.217 (UHF), FCC
Part 15 (Spread Spectrum), ETS 300328
CERTIFICATIONS (Prism SE)
CSA601.1, IEC 60601-1, IEC 60601-2, UL544, CE/MDD, FCC Part 90.217 (UHF), FCC
Part 15 (Spread Spectrum), ETS 300328
DEFIBRILLATOR / PACER SPECIFICATIONS
PHYSICAL
Size: 13.56 x 13.86 x 17.10 in./34.44 x 35.20 x 43.43 cm (HWD)
Weight: 22.5 lb/10.2 kg
12-7
POWER
Modular Batteries: 1-each 12V; 2.0 AH Rechargeable Sealed Lead Acid
Modular Battery Capacity: 35 charges @ 360 joules or 5 hours pacing at100 mA 70 ppm
Battery Charge Time: 6 hours to 90%
AC Main: 115/230 VAC selectable, 48 to 62 Hz autosensing
Power Consumption: Normal – 2 watts, charging battery – 12 watts, charging paddles, - 135 volts
DEFIBRILLATOR
ECG Source: Monitor leads or defib paddles, selectable
Waveform: Damped sinusoid per AAMI spec
Energy Selection: 2, 3, 5, 10, 20, 30, 50, 100, 150, 200, 300, 360 joules
Charge Time: To 360 joules, 12 seconds or less
Auto Internal Discharge: 60 seconds after charge, or power off
Armed Indication: Charge tone, indicator on front panel and paddle
Synchronizer: Sync discharge within 60 msec of R-wave peak
Paddles; Standard-Adult anterior/anterior; Optional-internal paddles, hands-off,
and pediatric paddles to slide over adult paddles
NONINVASIVE PACER
Type: Selectable, demand or asynchronous
Rate: 40, 60, 70, 80, 90, 100, 120, 140, 160 ppm +/- 3% or +/- 3 ppm
Waveform: Monophasic truncated exponential
Current: 10 to 80 mA, continuously adjustable
Leads Off Detect: Pace electrode lead fail indicator
CERTIFICATION
UL 2601-1, IEC 60601-1, IEC 60601-2
ENVIRONMENTAL
See shipping carton for storage and transport specifications
12-8
© 2003 Medical Data Electronics Inc.
Part Number: E9030-33R Rev F
June 2003