1
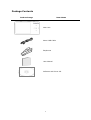
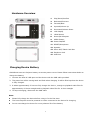
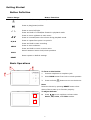
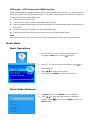
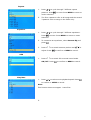
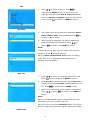
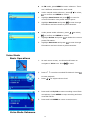
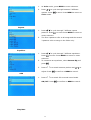
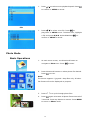
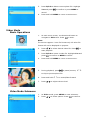
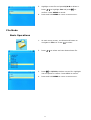
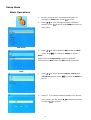
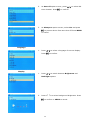
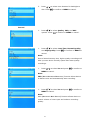
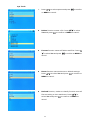
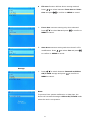
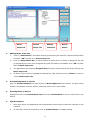
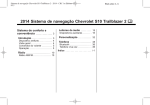
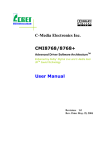
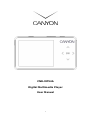
CNR-MPV4A Digital Multimedia Player User Manual 1 Table of Contents Introduction…………………………………………………………………………………3 Safety Precautions…………………………………………………………………..3 Package Contents……………………………………………………………………4 Hardware Overview…………………………………………………………………5 Charging Device Battery…………………………………………………………..5 Getting Started…………………………………………………………………………….6 Button Definition……………………………………………………………………..6 Basic Operations………………………………………………………………………6 Connectivity…………………………………………………………………………….7 MSC device………………………………………………………………………………7 MTP device………………………………………………………………………………8 Music Mode……………………………………………………………………………………8 Basic Operations……………………………………………………………………….8 Music Mode Submenu…………………………………………………………………8 FM Mode………………………………………………………………………………………11 Basic Operations………………………………………………………………………11 FM Mode Submenu……………………………………………………………………12 Voice Mode…………………………………………………………………………………..12 Basic Operations……………………………………………………………………...12 Voice Mode Submenu………………………………………………………………..13 Photo Mode…………………………………………………………………………………..14 Basic Operations………………………………………………………………………14 Video Mode…………………………………………………………………………………..15 Basic Operations………………………………………………………………………15 Video Mode Submenu………………………………………………………………..15 EBook Mode………………………………………………………………………………….16 Basic Operations………………………………………………………………………16 File Mode……………………………………………………………………………………..17 Basic Operations………………………………………………………………………17 Setup Mode………………………………………………………………………………….18 Basic Operations……………………………………………………………………..18 Sys Info Mode………………………………………………………………………………24 Utility Applications……………………………………………………………………….24 Music Classifier……………………………………………………………………….24 Slide Show Maker…………………………………………………………………….26 Video Converter……………………………………………………………………….27 Appendix……………………………………………………………………………………29 Technical Specifications………………………………………………………….29 2 Thank you for purchasing CANYON CNR-MPV4A. We sincerely wish you to enjoy the state of art digital multimedia player. To fully utilize the functions and features of CNR-MPV4A, please read through the user manual before you get started. Introduction Safety Precautions Please observe all safety precautions before using the device. Please follow all procedures outlined in this manual to properly operate the device. z Do NOT attempt to disassemble or alter any part of the device that is not described in this guide. z Do NOT place the device in contact with water or any other liquids. The device is NOT designed to be liquid proof of any sort. z In the event of liquid entry into device interior, immediately disconnect the device from the computer. Continuing use of the device may result in fire or electrical shock. Please consult your product distributor or the closest support center. z To avoid risk of electrical shock, do not connect or disconnect the device with wet hands. z Do NOT place the device near a heat source or directly expose it to flame. z Never place the device in vicinity of equipments generating strong electromagnetic fields. Exposure to strong magnetic fields may cause malfunctions or data corruption and loss. 3 Package Contents Product Image Item Name Main Unit 60cm USB Cable Earphones User Manual Software and Driver CD 4 Hardware Overview 1. Play/Pause/Confirm 2. Backward/Previous 3. Forward/Next 4. Upward/Volume Up 5. Downward/Volume Down 6. LCD Display 7. LOCK Button 8. Record/A-B Repeat 9. MENU Button 10. Power ON/OFF 11. RESET/Microphone 12. Speaker 13. Micro SD/T-Flash Card Slot 14. Earphone Jack 15. USB Port Charging Device Battery CNR-MPV4A uses a Li-Polymer battery as a main power source. Please follow instructions below to charge the battery. 1. Connect the host PC USB port and the device with the USB cable provided. 2. The power bar will be moving back and forth when charging. It will be filled up when the device is fully charged. 3. It takes approximately 3 hours to fully charge the device., enough to playback audio files for approximately 18 hours straight and to playback video files for 10 hour straight 4. To stop recharging, disconnect the USB cable. Note: z Please fully charge the device before using it for the first time. z The host computer must be powered on while connected to the device for charging. z Do not overcharge the device for it may shorten life of the battery. 5 Getting Started Button Definition Button Image Button Functions Press and hold to turn power on/off Press to play/pause/confirm <> ∧∨ R/A-B MENU HOLD RESET Press to move left/right Press and hold to rewind/fast forward in playback mode Press to move up/down at main menu Press to increase/lower the volume during playback mode Press to repeat from point A to point B Press and hold to start recording Press to enter submenu Press and hold to return to main menu Switch between button lock/unlock positions Reset system to default settings Basic Operations 2 3 To Turn on the Device: 1 1. Connect earphone to earphone jack. 2. Move HOLD button from lock to unlock position. 3. Press and hold button to turn on the device. Note: Reset the device by pressing RESET button when device fails to start up or function properly. To adjust Volume: z Press ∧ ∨ to turn up/down volume under Music, FM, Voice, and Video modes. 6 Connectivity Besides working as a portable digital multimedia player, Canyon CNR-MPV4A also works as a removable USB storage device (MSC mode), or MTP device (MTP mode with DRM function). Please follow instructions below on how to store/extract data from the device. To switch between MSC and MTP modes: z Connect the device to host computer with USB cable provided. z After the device finished loading process, press and hold button to switch between MSC and MTP modes. Note: The mode switch can also be done while the device is disconnected from host computer. Please refer to Settings section for more information. MSC mode - Removable USB storage device: 1. Connect the host PC USB port and the device USB port with the USB cable provided. 2. A new system drive will be displayed under “My Computer” momentarily. 3. The drive works as any other USB storage device. Files and folders can be created/edited in the drive. 4. To remove the device from host computer, simply right click on the safe removal icon from system notification area and select “Safely remove hardware” option. 5. Highlight the device and click on “Stop” button. The device can be safely unplugged after system notification. Note: z Before removing the USB device, make sure to end all applications running on the device. Do NOT remove the USB device at this moment. Violation may cause data loss or even damages to the device z If you do not follow the safe removal procedures on Windows ME, Windows 2000 and Windows XP operating systems, data loss and/or damage to the device may occur due to “write cache” issue. Note: Windows 98 SE does not support default mass storage driver. Please follow the instructions below to install the driver. z Turn on the computer. z Connect device to the USB port of the computer using USB cable provided in the package. z Place the driver CD enclosed in the package into the CD ROM drive of the computer. z Windows 98 SE will automatically detect the newly connected device and a dialog box “Add New Hardware” will pop up. Please follow the step-by-step instructions to properly install the driver. 7 MTP mode – MTP device with DRM Function Canyon CNR-MPV4A is capable of DRM (Digital rights management) function. The device receives music file update from Window Media Player 10 or above. Please follow the instructions below to synchronize the device with DRM songs. z Switch device to MTP mode. z Connect the device to host PC with USB cable provided. z Start up Window Media Player. Window Media Player will automatically detect the presence of the device. z Rename the device to display it in Window Media Player. z Simply follow the step by step instructions given by Window Media Player. Note: All songs previously existing in the device will be deleted permanently upon synchronization. Music Mode Basic Operations 1. At main menu screen, use directional button to navigate to Music icon. Press 2. Press to enter. < > to select music file desired. Press to start playback. 3. Press ∧ ∨ to adjust volume level. 4. Press and hold MENU to return to main menu. 1. At Music mode, press MENU to enter submenu. 2. Press ∧ ∨ to cycle through between 8 different Music Mode Submenu options. Press Music mode. 8 to enter. Press MENU to return to Repeat 1. Press ∧ ∨ to cycle through 7 different repeat patterns. Press to enter. Press MENU to return to music submenu. 2. The first 4 patterns refer to all songs and the second 3 patterns refer to songs in the folder only. Equalizer 1. Press ∧ ∨ to cycle through 7 different equalizers. Press to enter. Press MENU to return to music submenu. 2. To customize an equalizers, select Custom EQ and press 3. Press . < > to switch between pitches and ∧ ∨ to adjust. Press to confirm or MENU to cancel. A3D 1. Press < > to switch 3D surround sound mode ON/OFF. Press to confirm or MENU to cancel. Play Rate 1. Press ∧ ∨ to select music playback speed. Press to confirm or MENU to cancel. Note: This function does not support *.wma files. 2. 9 File 1. Press ∧ ∨ to select music file. Press to play/enter or MENU to exit. To edit a music file, highlight a file and press R/A-B. Add to List adds the file to My List and Delete erases the file from the device. Press to confirm or MENU to cancel. Classified 1. This option sorts all files with their attributes (Genre, Artist, Album, Title). Select Yes and press to confirm or No to cancel. 2. After sorting is completed, the device displays all nested files with their attributes. Press ∧ ∨ to select, to confirm, and MENU to return. Note: Classifying process may require a longer time period to complete. Press ∧ to cancel process. Refer to Music Classification Tool section for editing music files. It is an application that assists user to maintain music database. Play List 1. Press ∧ ∨ to select list, highlight desired file and press 2. to start playback or MENU to return. Press R/A-B to removal functions. Select Del List to delete current list and Delete to delete specific music file. Press 3. to confirm and to MENU cancel. Both removal functions require further confirmation. Press ∧ ∨ to select, to confirm, and MENU to return. Note: Refer to Windows Media Player’s help manual for more information on how to create a play list. Play lists must be stored at PLAYLIST folder. The device will not recognize any play list located outside of the folder. Slide Show 10 1. Press ∧ ∨ to select required idle time. Slide show will start after the user defined idle time. Press to confirm or MENU to cancel. Note: Refer to Slide Show Maker section for creating slide shows. Slide show files must be stored at SLS.DIR folder. The device will not recognize any slide show files located outside of the folder. FM Mode Basic Operations 1. At main menu screen, use directional button to navigate to FM icon. Press 2. Press to enter. to switch between manual mode and preset mode. 3. Press ∧ ∨ to adjust volume level. 4. Press and hold R/A-B to start recording current FM transmission. Press MENU to stop recording and save recorded FM file. 5. Under manual mode, press < > for FM frequency tuning between 87.5 MHz and 108.0 MHz (at intervals of 0.1 MHz) 6. Under preset mode, press < > to cycle through preset FM stations (Maximum of 30 stations). FM Mode Submenu 11 z At FM mode, press MENU to enter submenu. There are 2 different submenus for each mode. z Under manual mode submenu, press ∧ ∨ to select, to confirm and MENU to cancel. 1. Highlight Save Preset and press to save the current FM station into preset station queue. 2. Highlight Auto Scan and press to scan through FM stations and save them as preset stations. z Under preset mode submenu, press ∧ ∨ to select, to confirm and MENU to cancel. 1. Highlight Delete and press to delete the current preset FM station. 2. Highlight Auto Scan and press to scan through FM stations and save them as preset stations. Voice Mode Basic Operations 1. At main menu screen, use directional button to navigate to Voice icon. Press 2. Press to enter. < > to select recorded file desired. Press to start playback. 3. Press ∧ ∨ to adjust volume level. 4. Press and hold R/A-B to start recording sound from microphone. Press MENU to stop recording and save recorded FM file. 5. Press and hold MENU to return to main menu. Voice Mode Submenu 12 1. At Voice mode, press MENU to enter submenu. 2. Press ∧ ∨ to cycle through between 5 different options. Press to enter. Press MENU to return to Voice mode. Repeat 1. Press ∧ ∨ to cycle through 7 different repeat patterns. Press to enter. Press MENU to return to music submenu. 2. The first 4 patterns refer to all songs and the second 3 patterns refer to songs in the folder only. Equalizer 1. Press ∧ ∨ to cycle through 7 different equalizers. Press to enter. Press MENU to return to music submenu. 2. To customize an equalizers, select Custom EQ and press 3. Press . < > to switch between pitches and ∧ ∨ to adjust. Press to confirm or MENU to cancel. A3D 1. Press < > to switch 3D surround sound mode ON/OFF. Press Play Rate 13 to confirm or MENU to cancel. 1. Press ∧ ∨ to select music playback speed. Press to confirm or MENU to cancel. File 1. Press ∧ ∨ to select voice file. Press to play/enter or MENU to exit. To delete a file, highlight a file and press R/A-B. Select Yes Press to confirm or MENU to cancel. Photo Mode Basic Operations 1. At main menu screen, use directional button to navigate to Photo icon. Press 2. to enter. Press directional buttons to select photo file desired. Press to view. Note: The device supports *.jpg and *.bmp files only. All other file format will not be displayed on purpose. 3. Press 4. Press < > to cycle through photo files. again to browse all photo files at interval of 3 seconds. Press any button to resume. Press MENU to return to Photo mode. 14 5. Press R/A-B to delete current photo file. Highlight Yes and press to confirm or press MENU to cancel. 6. Press and hold MENU to return to main menu. 1. At main menu screen, use directional button to Video Mode Basic Operations navigate to Video icon. Press to enter. Note: The device supports *.mtv file format only. All other file format will not be displayed on purpose. 2. Press ∧ ∨ to select desired video file. Press to start playback. 3. Press R/A-B to erase a video file. Highlight Yes and press to confirm or MENU to cancel. 4. Press and hold MENU to return to main menu. 5. During playback, press to pause/resume, <> to skip to previous/next file. < > to rewind/fast forward. 6. Press and hold 7. Press ∧ ∨ to adjust volume level. 1. At Video mode, press MENU to enter submenu. 2. Press ∧ ∨ to select options. Press Video Mode Submenu 15 to confirm. Repeat 1. Press ∧ ∨ to cycle through 7 different repeat patterns. Press to enter. Press MENU to return to music submenu. 2. The first 4 patterns refer to all songs and the second 3 patterns refer to songs in the folder only. Video OSD Color 1. Press ∧ ∨ to select OSD color. Press 1. At main menu screen, use directional button to to confirm. EBook Mode Basic Operations navigate to EBook icon. Press 2. to enter. Press ∧ ∨ to select desired text file. Press to start browsing. Note: The device supports *.txt file format only. All other file formats will not be displayed on purpose. 3. Press ∧ ∨ to scroll up/down between pages. 4. Press MENU to return to EBook menu. 16 5. Highlight a text file and press R/A-B to delete it. Press ∧ ∨ to highlight Yes and press to confirm. Press MENU to cancel. 6. Press and hold MENU to return to main menu. 1. At main menu screen, use directional button to File Mode Basic Operations navigate to File icon. Press to enter. 2. Press ∧ ∨ to select and view desired text file. 3. Press or R/A-B to delete current file. Highlight Yes and press to confirm. Press MENU to cancel. 4. Press and hold MENU to return to main menu. 17 Setup Mode Basic Operations 1. At main menu screen, use directional button to navigate to Setup icon. Press 2. to enter. Press ∧ ∨ to cycle through between 9 different options. Press to enter. Press MENU to return to main menu. USB Mode 1. Press ∧ ∨ to select between MSC mode and MTP mode. Press to confirm or MENU to cancel. Note: Please refer to Connectivity section for detailed instructions on MSC mode and MTP mode operations Time 1. Press ∧ ∨ to select between Adjust, Alarm, and Time Zone options. Press to confirm or MENU to cancel. 1. Press < > to switch between AM/PM, hour, minute, year, month, and day. Press ∧ ∨ to adjust the values and press 18 to confirm. z Press ∧ ∨ to select between Adjust and On/Off. Press 1. to confirm selection At Adjust option screen, press < > to select AM/PM, hour, and minute. Press ∧ ∨ to adjust the values and press 2. to confirm. At On/Off option screen, press ∧ ∨ to select On/Off and press to confirm. Note: The alarm time durations is 5 seconds when power is on and 60 seconds when power is off respectively. 1. At Time Zone option screen, press ∧ ∨ to select GMT zone number and press to confirm. Power 1. Press ∧ ∨ to switch between Auto off and Always on. Press 19 to confirm or MENU to cancel. 2. At Auto off option screen, press ∧ ∨ to select idle time duration. Press 3. to confirm. At Always on option screen, select Yes and press to prevent device from auto shut off. Press MENU to cancel. Language 1. Press ∧ ∨ to select a language for screen display. Press to confirm. Display 1. Press ∧ ∨ to switch between Brightness and Backlight options. 2. Press < > to select background brightness. Press to confirm or MENU to cancel. 20 3. Press ∧ ∨ to select time duration for backlight to dim. Press to confirm or MENU to cancel. Record 1. Press ∧ ∨ to select Quality, VAD, and AGC options. Press 1. to confirm or MENU to cancel. Press ∧ ∨ to select Long Time, Normal Quality, and High Quality. Press to confirm or MENU to cancel. Note: Due to limited memory size, higher quality recordings will take up more device memory space than lower quality recordings. 1. Press ∧ ∨ to select Yes and press to confirm or MENU to cancel. Note: VAD (Voice Activation Detection) function allows device to detect voice and automatically start recording. 1. Press ∧ ∨ to select Yes and press to confirm or MENU to cancel. Note: AGC (Automatic Gain Control) function allows device to control volume of noise input and enhance recording quality. 21 Sys Tools 1. Press ∧ ∨ to select options and press to confirm or MENU to cancel. z Delete function erases a file. Press ∧ ∨ to select Yes and press z to confirm or MENU to cancel. Format function erases all folders and files. Press ∧ ∨ to select Yes and press to confirm or MENU to cancel. z Reset function restores device to default settings. Press ∧ ∨ to select Yes and press to confirm or MENU to cancel. z Refresh function, similar to classify function sorts all files according to their attributes. Press ∧ ∨ to select Yes and press cancel. 22 to confirm or MENU to z File sort function defines device sorting method. Press ∧ ∨ to select between Force Sort and Auto Sort and press 1. to confirm or MENU to cancel. Force Sort executes sorting only when selected. Press ∧ ∨ to select Yes and press to confirm or MENU to cancel. 2. Auto Sort executes sorting each time there’s a file modification. Press ∧ ∨ to select Yes and press to confirm or MENU to cancel. Storage 1. Press ∧ ∨ to switch between Internal and Micro SD/T-Flash storage and press to confirm or MENU to cancel. Note: To prevent from system malfunction or data loss, the device will not switch storage to Micro SD/T-Flash mode when the card is not present. 23 Speaker 1. Press ∧ ∨ to switch On/Off and press to confirm or MENU to cancel. Note: The speaker is switched Off by default upon powering on. The speaker can be switched ON/Off by short press MENU when playing music/ FM/ Video. Sys Info Mode 1. At main menu screen, use directional button to navigate to Sys Info icon. Press 2. to enter. System Information including Firmware version, Free memory capacity, and Total memory capacity are displayed at the page. Utility Applications Music Classification Tool Music classification Tool is an application that assists user to organize music files in the device. It provides an easier means to sort, transfer and edit files. Refer to below document for more detailed instructions. Note: z The device must be connected to the host PC while the application is running. Please connect the device before executing the functions in the application. z The application and device supports *.wma and *.mp3 file formats only. The application will not take in other files with different formats. 24 z Music Device Editing Device Input List Music List Functions Status Editing Music Input List 1. Click on “Select Music”. A window will pop up prompting for music file. Select the desired file and click “OK” to place it on Music Input List. 2. Click on “Select Music Dir” to select a batch of music files in a folder. A dialog box will pop up prompting for music files. Designate the path and folder to be added. Click “OK” to place files on Music Input List. 3. The application also supports drag and drop functions. Drag and drop the desired file(s) into Music Input List. 4. To delete a file in the list, highlight the desired file, right click and click on “delete” to remove it from Music Input List. z Downloading Music to Device Click on “Download Music” to copy all files on Music Input List to the device. The files will be sorted in accordance of artist, album, and song name in the music folder. z Deleting Music in Device Highlight the file in the Device Music List and click on Delete Music to remove music files in the device. z Synchronization 1. After each action, the application will automatically refresh itself to reflect the changes on the interface. 2. To manually refresh the interface, click on Create Classes to update editing. 25 Slide Show Maker Slide show maker AP is an application that assists user to make a slide show file for viewing while playing music in the device. It combines many images files into one single slide show file. The effect of the slide show is similar with the screen saver mode on Windows platform. The slide show will be automatically displayed when the device is left idle for a period of time defined by user. Note: z The device must be connected to the host PC while the application is running. Please connect the device before executing the functions in the application. z The application and device supports *.jpg, *.gif, and *.bmp file formats only. The application will not take in other files with different formats. Preview Panel Mode Selection z Image Editing Input List Functions Loading Images 1. Click on Load Image icon to select desired image files. A window will pop up prompting for files to be added on Image Input List. Select the files and click OK to confirm. 2. Highlight a file in Image Input List to display the actual image at the Preview Panel. Repeat step 1 until all files are loaded in the list. z Selecting Display Mode Click on Mode Selection drop down box to select the appropriate presentation mode. 4 modes (Normal, Left to right shutter, Top to down shutter, Circle) are available for user preference. z Organizing Image Input List 26 1. Click on Preview button to run image slide show at the Preview Panel. 2. Highlight a file in Image Input List and click on Up/Down button to change its displaying order. Click on Delete to remove unwanted image files from the list. z Converting Image Input List into a Slide Show File Click on Transform to convert all images on the list to a slide show file. A window will pop up prompting for the saving location. Designate the path and click OK to confirm. The slide show format (*.sls) is designed specifically for the device use only. Video Converter Video Converter AP is an application that converts a video file into a file with specific format (*.mtv) for the device use only. Note: z The device must be connected to the host PC while the application is running. Please connect the device before executing the functions in the application. z The application and device supports *.avi, *.wmv, *.asf, *.mpg, *.mov, *.qt, *.vob, *.rm, *.rmvb, *.mpg4 and *.3gp file formats only. The application will not take in other files with different formats. z DirectX 9.0 or above, Media Player 9.0 or above, or other DirectShow based codecs must be installed for the application to recognize all suitable file formats. Failure to comply will result incomplete conversion to *.mtv file format. Editing Functions Preview Panel Conversion Functions Video Input List 27 z Loading File to Video Input List 1. Click on Input Video icon to load a video file to Video Input List. A window will pop up prompting for file for conversion. Specify the path and click OK to confirm. 2. Click on Output Video icon to specify the destination path. A window will pop up prompting for the location. The default path is C:\MTV_OUTPUT\ 3. The selected file will be displayed at Video Input List. Click and drag the slider at the bottom to review attributes of the highlighted file. Right click on the highlighted file and left click on Delete to remove it. z Advanced Setting 1. Right click and click on Advanced Setting on the highlighted file in Video Input List or simply click on Advanced Setting at Conversion Functions area. A window as shown below will pop up for more detailed setting. 2. To redefine file attributes, click and select from drop down text box to modify each category. 1. Output Frame Rate defines how frequent the video frame refreshes itself. 2. Output Audio Quality defines the quality of audio. 3. Output Frame Size defines the resolution of the video file. 4. Click on Input Music to insert a different background audio. A window will pop up prompting for the location of file. Specify the file path and click OK to confirm. z Video File Editing 1. At Editing Functions panel, click to start preview playback, to pause playback, and to stop playback. 2. Drag Volume vertical slider to adjust audio volume and horizontal slider to start playback at a specific time point. 3. z Click on → to select a starting point of the video clip and ← to specify the end point. Video File Preview and Conversion 1. At Conversion Functions field, place a ˇ on MTV Preview check box to activate preview function. The video will be displayed as edited. 2. Click on the check box again to activate conversion function. Click on Start Conversion to 28 start conversion. Click Cancel Conversion to stop conversion process. The bar diagram labeled Conversion Status at the bottom of the application will indicate conversion progress. 3. Click on Help to see further detailed instructions on making a video clip. 4. Upon completion, the converted video file (*.mtv) will be stored at the destination folder specified at Output Video. Appendix Technical Specifications Flash Memory Capacity z Micro SD/T-Flash Card, up to 2GB z Build in flash memory, up to 8G USB Interface USB2.0 (High Speed) Interface LCD Display 262K TFT LCD Display Power Supply Li-Polymer Battery S/N ratio ≥85dB Audio Frequency Range 20Hz – 20kHz Equalizer Preset Modes Normal, Pop, Rock, Classic, Jazz, Bass, Custom EQ Supporting File Format *.mp3, *.wma, *.mtv, *.bmp, and *, jpg FM Frequency Range 87.50 MHz ~ 108.00 MHz File System FAT16, FAT32 29