1
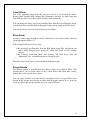
Aurora Sound Studio HD
&
Aurora Sound Studio
User Manual
1
About Aurora Sound Studio HD
Welcome to Aurora Sound Studio HD for the iPad, the fun way to create musical
compositions.
Whether you’re a complete musical novice or a seasoned musician Aurora is an
inspirational tool for creative live music.
Complete with real-time effects and the ability to sample and create your own
instruments you are limited only by your imagination.
By default Aurora runs in BASIC mode which helps you get accustomed to Aurora
before getting too complex, it means that some abilities and functions are not available
for example the ability to edit and create your own instruments. However you can change
to ADVANCED mode at any time by selecting 'Switch to Advanced Mode' from the 'File'
menu.
Aurora uses 3 custom synthesizer engines which have been optimized to achieve
maximum polyphony on the iPad. The program ships with approx 100 preset instruments
but unlike most other music software you have complete freedom to create your own
unique sounds whilst learning the fundamentals of synthesizer programming.
Each instrument has up to 12 notes of polyphony, and you can have up to 14 instruments
playing at the same time. That's a lot of processing so some compromises had to be made
during development regarding sound quality. After all you wouldn't want the most
amazing sounding instruments but only be limited to 8 notes for instance!
Aurora's synth engines generate sounds in real time, so they aren't just pre-recorded
samples. Adding effects such as echo, reverb, chorus etc. makes a big difference to
perceived quality of an instrument so experiment with adding effects.
If you create your own instruments for the Sampler using custom samples, try and keep
samples as small as possible and use the looping feature (under 250K is recommended).
The bigger the samples, the more CPU intensive it is to play.
If you push the processor too hard it is likely that this will result in audio stuttering or
breakups. In these situations we recommend you turn off HQ Mode or reduce the sample
rate to 22KHz. These options can be found in the 'Program Settings' from the 'File' menu.
You can also try reducing the number of effects in use at any one time.
Have fun!
2
Getting Started ................................................................................................................ 5
Musical Scales ............................................................................................................ 6
Selecting a Scale ......................................................................................................... 6
Blocks and Layers....................................................................................................... 7
The Note Grid ............................................................................................................. 7
Changing Layers ......................................................................................................... 7
Changing Blocks......................................................................................................... 7
Creating a New Song .................................................................................................. 8
Copy and Paste............................................................................................................ 8
Transposing................................................................................................................. 8
Note Length ................................................................................................................ 9
Play Modes.................................................................................................................... 10
Changing Modes ....................................................................................................... 10
Live Play Mode......................................................................................................... 10
Play Mode Options - Only available on iPad HD version ....................................... 10
Record Mode............................................................................................................. 11
Machine Gun Mode .................................................................................................. 11
Automation Mode ..................................................................................................... 12
Effects Setup Mode................................................................................................... 12
Song Mode ................................................................................................................ 13
Atomizer Mode ......................................................................................................... 14
XY Mode .................................................................................................................. 14
Instruments.................................................................................................................... 15
Drum kit Instrument.................................................................................................. 15
Edit Drum kit ............................................................................................................ 15
Drum Filter................................................................................................................ 16
Sampler Instrument................................................................................................... 16
Edit Sampler.............................................................................................................. 16
Loop Points ............................................................................................................... 17
Synthesizer Instrument.............................................................................................. 17
Edit Synthesizer ........................................................................................................ 18
Modulation Sequencer .............................................................................................. 18
PadSynth Instrument................................................................................................. 19
Edit PadSynth............................................................................................................ 19
Edit Harmonics ......................................................................................................... 20
Assigning Instruments .............................................................................................. 20
Mixers ........................................................................................................................... 21
Live Mix Mode - Only available on iPad HD version ............................................. 21
Master Mixer - Only available on iPad HD version................................................. 22
Layer Mix - Only available on iPad HD version ..................................................... 22
Layer Properties ........................................................................................................ 23
Instrument Settings ....................................................................................................... 24
ADSR Settings .......................................................................................................... 24
VCF Settings............................................................................................................. 24
LFO Settings ............................................................................................................. 25
FM Modulation ......................................................................................................... 25
3
Advanced ...................................................................................................................... 26
Random Mode........................................................................................................... 26
Sample Recording..................................................................................................... 26
Record to File............................................................................................................ 27
Visual Effects............................................................................................................ 28
Effect Sends .............................................................................................................. 28
Effects Window ........................................................................................................ 28
Program Settings........................................................................................................... 29
Visualization ............................................................................................................. 29
Master Volume.......................................................................................................... 29
Global Tuning ........................................................................................................... 29
Show Visual Effects on All Layers........................................................................... 29
Enable Scroller.......................................................................................................... 29
Colored Lights .......................................................................................................... 29
HQ Mode .................................................................................................................. 29
Song Settings ............................................................................................................ 29
Managing Files.............................................................................................................. 30
Manage Files............................................................................................................. 30
Deleting Files ............................................................................................................ 30
Saving Bundles ......................................................................................................... 30
Data Exchange .......................................................................................................... 31
Record to MIDI - Only available on iPad HD version............................................. 31
Aurora Song Library..................................................................................................... 32
Sharing Songs ........................................................................................................... 32
Uploading A Song..................................................................................................... 32
Downloading Songs .................................................................................................. 33
User Profiles.............................................................................................................. 33
Tips and Tricks ............................................................................................................. 34
Troubleshooting ............................................................................................................ 35
4
Getting Started
Aurora allows you to create a song with up to 14 different tracks, each track having it's
own assigned instrument. We call these tracks layers, and a group of layers we call a
block of layers. Songs are constructed out of blocks which you can eventually piece
together into a complete song. It is often easier to work on song construction in blocks
which you can think of as intro, verse, chorus, bridge etc.
When the program launches you will be editing layer 1 of block 1, which by default is a
set of drums. Select Record mode, then press the Loop Play button in the bottom right of
the screen. Try laying a few notes by tapping on the grid. As the play cursor passes a note
it will sound. When the cursor hits the end of the grid it will loop back to the beginning of
the block.
Try changing layer and adding notes to a different layer / instrument. Experiment until
you have an interesting loop going.
Try changing block and creating a variation on the original block. You can even use
Copy and Paste to help with this task. Once you have several blocks you can try chaining
them together into a complete song using Song Mode.
You can add layer effects using Effects Mode or even jam over the top of your loops in
Play Mode.
Some of the more advanced features are initially hidden away to prevent you getting too
overwhelmed with options. When you feel confident enough you can make these features
available by selecting 'Switch to Advanced Mode' from the 'File' menu.
5
Musical Scales
One of the best things about Aurora is that you really don't need any musical knowledge
to create great sounding tunes. By default each block is assigned the 'Major C' scale, but
you are free to choose any scale you like. The advantage of this is that you can never hit a
bum note. Each light on the grid represents a note in the scale.
Layers that are assigned a drum kit simply ignore the selected scale, but all other
instruments follow the scale unless told otherwise. The piano roll at the bottom of Play
Mode will show little square boxes on the notes that are part of the selected scale.
The image above shows the musical scale of C minor. When a note is played on the grid
it will show the corresponding note on the piano roll.
If you don't want to use a scale, select the Chromatic scale from the list, as this includes
all notes. If you want a particular instrument layer to play notes that are not part of the
selected scale you can de-select the 'Link To Scale' option in the Layer Properties dialog.
Each block can have its own root note and scale assigned, which allows you to have key
changes as you change from block to block.
Selecting a Scale
By default the C-Major scale is selected, equivalent to all the white notes on a piano. You
are free to choose any root key and scale you like using the drop down lists.
Once a scale is selected the grid contains only notes from that scale making it impossible
for you to play a wrong note.
Ideally the scale should be selected before you start your composition. You can check the
notes in a particular scale by playing the notes on the grid and noting their relative
positions on the piano roll.
Please Note: The root note and key are set on a block by block basis and not global to a
song. This allows you to change key in the middle of a performance.
6
Blocks and Layers
A song is constructed using one or more blocks, one block for the verse, one for the
chorus etc.
Each block consists of 14 layers, each layer or voice containing musical notes. Each layer
is associated with an instrument which is shared between all blocks. In other words, you
can assign any instrument of your choice to a layer, but that instrument cannot be
changed when moving from one block to another.
See The Note Grid for more information on constructing layers.
The Note Grid
The note grid allows you to manipulate notes on a layer. The vertical axis represents
notes in the selected musical scale, whilst the horizontal axis represents time.
When the sequencer is running a vertical cursor moves from left to right triggering notes
as it passes over them.
As notes are played the corresponding keys on the piano roll will light.
Changing Layers
Pressing the 'Layer' button will display the level selection screen with a flashing green
cursor.
Layers are displayed vertically from 1 to 14. Simply tap the layer you wish to view.
Changing Blocks
Pressing the block button will display the block selection screen. The first 16 of 32 blocks
are displayed in columns with a flashing green cursor on the currently selected block.
Simply select the block you want to play.
If the sequencer is playing, the selected block will play once the current block has
finished playing.
You can access additional blocks 17-32 by dragging your finger to the far left or right
edge to scroll other blocks into view.
7
Creating a New Song
To wipe the current layers and blocks and start a new song press the 'File' menu key and
select 'New' from the menu. This will wipe all data and set the tempo to 80bpm.
You can adjust the tempo of the new song from the 'Song Settings' dialog in the 'Edit'
button menu. Alternatively select 'Automation Mode' and select 'Tempo + Master Vol'
from the green 'Automation Type' button. Now simply touch the grid to change the
tempo.
Please note 'Automation Mode' is not available in 'Basic Mode'
See Automation Mode for more information on adjusting the tempo.
Copy and Paste
You can use the copy and paste functions to allow copying of whole blocks or individual
layers.
All layer information such as automation, key, root note and loop points will also be
copied. These options are available from the 'Edit' menu button.
Transposing
You can transpose the whole song up or down by a given number of semitones by simply
tapping the piano roll and selecting a new value from the grid. A guide is displayed at 0
semitones to help quickly select the required value. Once selected a RED marker will
appear on the piano roll showing the transposed root note.
Another method of transposing your song is available in 'Song' mode. In this mode there
is a popup list allowing you to choose between -12 and +12 semitones. You can even add
transposed blocks into the song chain.
8
Note Length
Creating sequences of 16th notes can be rather limiting, especially if you want to play
1/32 or 1/64 note hi-hats. To help solve this problem you can specify a different note
length for each layer.
Press the 'Edit' menu button and select 'Note Length' from the menu. You can even
choose eighth and quarter notes, which make the pattern seem much longer than 16 beats
and stops the pattern from sounding so repetitive.
Using this option means that some patterns play longer than others. The sequencer will
only move onto the next block when all layers from the current block have played
through at least once. This means that some layers will play multiple times during
playback of a block.
9
Play Modes
Changing Modes
The 'Mode' bar runs along the bottom of the main window and is used to select various
editing and performance modes.
There are several modes available allowing you to construct blocks, add automation, mix
tracks and finally piece everything together as a finished composition.
Some modes such as the XY and Atomizer, are performance modes which can be used to
modify songs in real-time.
Live Play Mode
As it's name suggests this mode allows you to jam over the top of a composition or to
simply try out ideas. Simply run your finger over the grid to play the instrument. In this
mode each row represents a musical note and every column represents
volume/filter/pitch/mod of note (depending on the play mode selected). The play modes
(volume, pitch, filter and fm mod) are only intended for live performance and cannot be
recorded.
If the RECORD button is enabled, tapping the grid will set/clear note events without the
need to change to Record Mode. In this case a note will be set using the specified layer
volume.
For more information on layer volume, see Layer Properties and Live Mix Mode.
Play Mode Options - Only available on iPad HD version
The various options volume, bend, filter and FM Mod are intended to be used whilst
soloing during a live performance. Notes played in any of these modes cannot be
recorded to the sequencer.
When 'Volume' is selected, each horizontal position from left to right represent notes of
increasing volume.
When 'Bend' is selected, you can pitch bend a note by touching and dragging left or right
on the display. This feature can also be used to achieve vibrato. You can even bend drum
notes, or use the bottom two rows of notes to bend an entire drum layer!
When 'Filter' or 'FM Mod' is selected, each horizontal position from left to right
represents an increasing amount of that effect.
10
Record Mode
This 'Mode' allows you to toggle, paint or erase groups of notes.
Toggle
Simply tapping on an unlit light sets a note, tapping on a lit note removes the note.
Paint
This mode allows you to quickly lay a row of notes by simply dragging your finger over
the screen. This is great for laying hi-hats or triggered bass lines.
Erase
Use this mode to quickly erase groups of notes.
If the sequencer is running notes will not sound as they are entered, allowing you to build
up a performance in real-time
Machine Gun Mode
This mode allows you to play repeated notes at varying speeds in real-time. The vertical
axis represents notes, whilst the horizontal axis represents repeat speed.
If the RECORD is enabled, tapping on the grid will lay repeated notes. Tapping on the
same note removes the note.
Machine Gun mode should be thought of as a performance mode used to jam during live
play.
11
Automation Mode
This mode allows you to make real-time changes of layer and instrument parameters such
as effect levels, song tempo, panning, and much more.
Each layer of every block can hold it's own unique automation. Select the 'Automation
Type' from the combo box popup list at the top right of the grid. Now simply touch the
grid to make parameter changes.
You can record automation by activating the RECORD button and dragging the pen over
the note grid. Recording begins when the play cursor hits column 1 and ends when the
cursor hits column 16. In other words each of the 16 horizontal locations can store a
value for the selected automation type.
You can erase automation from the selected layer, block or song from the 'Edit' menu
button.
NOTE: You can only record automation once notes have been assigned to a layer. Any
previously recorded automation to the selected layer is suspended whilst the RECORD
button is engaged.
If you want to perform real-time manipulation of multiple layers you should use the XY
Mode instead
Effects Setup Mode
Effects setup mode allows you to configure up to 3 simultaneous effects. Each layer can
route a specified amount of audio through all 3 effects using the 'FX Sends' in the Layer
Properties dialog or using 'Automation Mode'.
To assign an effect to an effect bus you first need to select one of the 3 FX Busses from
the left most popup list. Now select an effect to assign from the second popup list. After
you have selected an effect a list of effect parameters will appear in the third popup.
Simply select one of these parameters and tap the grid to make a change. A highlight bar
will indicate the current setting.
For example, suppose you wanted to add some reverb to the drums on layer 1. Ensure
layer 1 is selected and you are in 'Effects Mode'. Then select 'FX Bus 1' from the first list
and choose 'Reverb' from the second list. At this point you should hear the reverb. Finally
select parameters you wish to modify from the third list and tap the grid to make the
required changes. If you don't hear the effect, select 'Layer Properties' from the 'Edit'
menu and ensure 'FX1 Send' is not set to 0.
The 3 colored rotary controls at the bottom of the screen control the return levels from
each of the 3 effect busses.
12
Song Mode
Song mode allows you to piece together multiple blocks into a completed song. To create
a song press the 'Loop Play' button start the sequencer, then simply select a block
(vertical column from the grid), select a song position 1-199 and press the 'Add' button.
Repeat this process adding blocks to the song chain.
Press the 'Delete' button to erase / remove an event from the chain. To hear your
completed song stop the sequencer, select the first block in the chain and press the 'Play
Song' button to begin playback. You can begin playback at any point in the chain by
selecting a block before pressing the 'Play Song' button.
As well as adding individual blocks to the song chain, you can also mix and match layers
from different blocks. To do this toggle the selection mode from 'All Layers' to 'Single
Layer' and you will now be able to individually select tracks from differing blocks.
You can also add transposed blocks to the chain using the 'Transpose' popup list. You can
quickly erase the contents of a song chain using the 'Erase Song Chain' option from the
'Edit->Erase' menu.
Please Note: If the sequencer is running, block changes will only take effect once the
current block has completed playing!
If you attempt to 'Add' a block to the chain, and the selected block is in use, you will be
asked if you wish to Overwrite or Insert into the chain.
If you 'Delete' a block that contains data, it will be cleared. Deleting an empty block will
cause the block to be removed and the remaining blocks to the right will move down one
position.
13
Atomizer Mode
The Atomizer allows you slice and dice audio in real-time. It achieves this by buffering
audio passing through the mixer and allowing you to mix slices of captured audio with
your song.
The grid is split horizontally into note lengths whilst the vertical axis represents volume.
Pressing the RECORD button allows you to reverse the slice.
Simply tap and hold on a given note length to hear the Atomizer in action.
XY Mode
This mode is similar to automation mode, but provides real time manipulation over all
layers at once, allowing you to blend and fade layers in and out of the mix. It can also be
used to set up sophisticated real-time panning, filtering and effect level changes.
First select a layer you wish to manipulate, and then select the parameter you wish to
manipulate from the 'Param' popup list.
Now you need to attach this parameter to one edge of the grid (i.e. left, top right or
bottom) using the second popup list. Now tap and hold the center of the grid and slowly
move around the grid to hear the effect.
Volume: When manipulating channel volumes the percentage value in the third popup
list represents the volume at the middle of the grid. A value of 100% means that at the
center of the grid the volume will not change, but moving away from the assigned edge
will reduce the volume. A value of 50% would indicate that at the center of the grid the
volume drops to 50%, but moving towards the assigned edge increases the volume to
100% and away from the assigned edge will decrease the volume to 0%.
Pan: Works in a similar manner to volume, only 50% would indicate center panning at
the center of the grid.
Filter: You can also manipulate the cutoff frequency of an instrument if the instruments
filter (VCF) is enabled. In this case the percentage value represents how much filter is
applied.
The XY assignment grid can be used to see which channels are being controlled by the
selected XY Param.
FX1-3 Send: Allows you to manipulate the selected layers send levels for each of the 3
assigned effects.
Hold: This button activates XY Mode without the need to touch the grid. It performs the
same task as touching the center of the grid.
See Automation Mode if you wish to record parameter changes to a particular layer.
14
Instruments
Drum kit Instrument
A drum kit is a type of instrument that can be assigned to a layer. Each note on the piano
roll represents a different drum or percussion sound, which means a drum kit consists of
up to 12 samples.
You can modify or create your own drum kits using samples stored on your device or
using the built-in sampler. Use the 'Edit Instrument' option on the 'Edit menu to make
changes to a drum kit (This option is only available in Advanced Mode).
NOTE: Drum kits work independently of the selected root note and scale, and they are
not effected by transposing your song.
Edit Drum kit
The drum kit consists of up to 12 samples which are assigned to the 12 notes on the piano
roll. Selecting a 'Note' from the 'Musical Note' button shows the 'Level' and 'Pitch' of that
sample.
Preview
Plays the currently selected sample at the specified volume and pitch.
Assign
Allows you to select a sample stored on your iPhone and assign it to the selected note.
Clear
Removed the sample from the selected note.
Save Patch
Saves the drum kit as a new or modified patch.
Revert
Abandons changes and loads the last saved patch settings.
Record
Allows you to record a sample from the built in microphone.
Optimize
Optimizes the selected sample by removing empty space from the end of the sample.
Filter
When enabled the filter allows you to perform real-time automation of the drum cutoff
frequency and resonance.
See also: Sample Recorder
15
Drum Filter
The drum filter works in a similar manner to the VCF found on the Synthesizer
instrument. The filter can be utilized by both Automation and XY modes to product realtime filtering effects.
Sampler Instrument
A sampler is a type of instrument that can be assigned to a layer. It uses a small sound
sample which is optionally looped and pitch shifted to create its sound.
You can modify its ADSR, VCF and LFO settings as well as assign your own samples.
Use the 'Edit Instrument' option on the 'Edit menu to make changes to a sampler. This
option is only available in Advanced Mode.
A sampler instrument is less CPU intensive than a synthesizer, but samples don't sound
so great when pitch shifted more than an octave.
Edit Sampler
The sampler uses a small static audio sample which it pitch shifts to the required note.
You can create your own instruments by assigning files on your device or by recording
your own sound samples.
The octave, semitone and detune settings are used to tune the sample, and the level can be
used to control the overall instrument volume.
Loop: Turns on and off sample loop points.
Edit LP: Allows you to edit the loop points of the current sample.
Save Patch: Saves the drum kit as a new or modified patch.
Revert: Abandons changes and loads the last saved patch settings.
Rec: Allows you to record a sample from the built in microphone.
Assign: Allows you to load a sample stored on your iPhone.
See also: ADSR Settings, VCF Settings, LFO Settings and Sample Recorder
16
Loop Points
Loop Points are used by the Sampler to artificially extend the length of sound samples. A
sample plays until the 'End Loop' point is reached at which point playback continues
from the 'Start Point'. This process is repeated until a note is released, at which point the
remainder of the sample is played.
To set a loop point presses either the 'Loop Start' or 'Loop End' buttons and then select a
point on the graphical sample display. Use the 'Zoom In' and 'Out' buttons to get a closer
look at the sample. You can use the nudge left and right buttons to fine tune your loop
one sample at a time.
Ideally loop points should be placed at the zero offset line to obtain the perfect loop.
Settings loop points isn't an exact science and requires a little time to find the perfect
points.
Synthesizer Instrument
A synthesizer is a type of instrument that can be assigned to a layer.
A synthesizer generates electronic type sounds in real time, without the need for samples.
You can modify its ADSR (attack, decay, sustain and release), VCF (voltage controlled
filter) and LFO (low frequency oscillator) settings by selecting the 'Edit Instrument'
option on the 'Edit menu. This option is only available in Advanced Mode.
This instrument has two oscillators which generate tones using sine, saw, square or more
advanced waveforms which when mixed together create the unique tonal qualities
associated with electronic music. The ADSR settings allow you to shape the volume
envelope, which controls the attack and decay of the sound. The VCF is used to adjust the
frequency envelope which gives a sweep type effect. The LFO is used to add tremolo,
vibrato and wahwah type effects.
See Edit Synthesizer for more details on editing.
17
Edit Synthesizer
A synthesizer has two oscillators which create tones based on sine, square, saw or more
advanced waveforms. When these tones are mixed together they create a unique tone
which is the basis of the sound.
Toggling between 'Osc1' and 'Osc2' displays the wave type, tuning and volume level of
that oscillator. You can even mix a third sound source 'Noise' to make interesting effects.
Portamento: Allows you to smoothly glide from one note to another.
Mono: Switches between monophonic and polyphonic modes.
MSEQ: Displays the wave sequencing dialog. Wave sequencing allows you to modulate
the volume, filter and wave types of consecutive notes.
Preview: Plays a note using the current settings.
Save Patch: Saves the drum kit as a new or modified patch.
Revert: Abandons changes and loads the last saved patch settings.
See also: ADSR Settings, VCF Settings, LFO Settings and FM Mod
Modulation Sequencer
The modulation sequencer is a part of a Synthesizer that morphs the sound in real time as
it is playing. This opens up many expressive and interesting possibilities which are well
worth exploring. This screen consists of 16 sliders, which correspond to each horizontal
position on the edit grid.
Params
You can assign a volume, cutoff frequency and wave type to each of the 16 locations.
Simply select the required 'Parameter' from the popup list and modify the sliders to suite.
Advance On
Allows you to specify the trigger for moving through the 16 sliders.
Preview
Press and hold this button to listen to the sequence.
Random
Assigns a random value to each of the 16 sliders. Press the 'Lock ALL Sliders' button and
the 'Random' button changes to 'Reset', which resets all sliders to their default value.
Lock ALL Sliders
When this option is enabled making modifications to one slider effects all sliders.
18
PadSynth Instrument
The PadSynth is an instrument that can be assigned to a layer. It is especially useful for
creating string and bell sounds which aren't possible using the traditional synthesizer. It
uses a special technique called additive synthesis, which allows you to build sounds from
their harmonic components.
You can modify its ADSR (attack, decay, sustain and release), VCF (voltage controlled
filter) and LFO (low frequency oscillator) settings by selecting the Edit Instrument option
on the 'Edit menu.
The ADSR settings allow you to shape the volume envelope, which controls the attack
and decay of the sound. The VCF is used to adjust the frequency envelope which gives a
sweep type effect. The LFO is used to add tremolo, vibrato and wahwah type effects.
Edit PadSynth
The PadSynth is an instrument which uses a technique called additive synthesis to create
sounds. This technique allows you to create more realistic instruments than the
stereotypical synthetic sounds of a traditional synthesizer, and works by layering
harmonics.
Harmonics: Press the Harmonics button to modify the tonal content of the voice.
Octave: Sets the octave of the generated sample.
Semitone: Allows you to re-tune to a specified musical note.
Detune: Lets you detune the sound by fractions of a semitone.
Mono: Switches between monophonic and polyphonic modes.
Revert: Loads the last saved patch settings.
Save Patch: Allows you to save the current settings to an instrument patch.
Preview: Press this button to hear your changes.
See also: ADSR Settings, VCF Settings, LFO Settings
19
Edit Harmonics
This dialog allows you to change the tonal content of a PadSynth.
You can add and mix up to 32 harmonics using the 8 sliders. By default the sliders
control harmonics 1-8, but you can select another bank of harmonics from the buttons
provided.
Detune
Enable the detune to create discordant bell like sounds. It works by randomly staggering
the harmonics in relation to the root note.
Reset
Press this button to revert back to a simple sine wave.
Bandwidth
Controls the frequency spread of each harmonic adding a chorus type effect to the sound.
Scale
Adjusts the amount of bandwidth applied to the sound.
Apply
Press this button to construct the sound from the harmonic preview. Be patient, this
process can take a couple of seconds.
Preview
Press this button to hear your changes. After making changes to the sound you must press
Apply before you can preview your changes.
Assigning Instruments
By default several instruments are loaded and automatically assigned to each layer.
There are 4 different types of instrument which can be freely assigned to a layer. To
assign a different instrument to the selected layer, select the 'Assign Instrument' option
from the 'Edit' menu button.
Select the type of instrument from the 4 buttons at bottom of the 'Assign Instrument'
dialog. Finally tap on an instrument name to assign it to the layer.
See also: Synthesizer Instrument, Sampler Instrument, Drum kit Instrument and Pad
Synth Instrument
20
Mixers
Live Mix Mode - Only available on iPad HD version
Live Mix mode is used to set the volumes of individual layers, adjust the master volume,
and set up effect send and return settings.
If an individual layers volume is too loud and clipping occurs a red light will appear in
the top row of that layer. If the light remains permanently lit, this can result in unwanted
distortion, so reduce the volume to fix this.
Rows 2-4 indicate which layers are using which effects. Blue indicates FX Bus 1, green
is Bus 2 and yellow is Bus 3. A flashing FX Bus light indicates that this layer is using
that effect.
Tap in the top row of lights to display the Layer Properties dialog. You can modify the
FX send levels and specify the effect routing (pre or post) from here. By default effects
are applied post fader.
The 3 rotary knobs at the bottom of the mixer screen control the return level for each of
the FX Busses. So in summery, each layer can specify an amount of signal to 'send' to an
effect, and the output of each effect returns into the mix using the 'return' knobs.
21
Master Mixer - Only available on iPad HD version
The mixer can be accessed from the bottom toolbar button and is a more comprehensive
alternative to the Live Mix option found on the Mode Bar.
The mixer is used to adjust relative volumes, panning and effect levels of each layer in
your song. You can also 'Mute' and 'Solo' tracks and assign effects from the Master Mixer
view.
Volume: Use the vertical slider to adjust the volume of layers 1-14. If the volume is set
too high then the red clipping light will light indicating possible distortion.
Pan: This knob controls the left to right speaker positioning of an instrument.
FX1-FX3: Controls the amount of a layers sound which is passed to one of 3 assignable
effects. Press the 'Effects' button to modify and assign effects.
Mute: The mute switches can be used to temporarily disable a layers output so that it can
no longer be heard. This is useful when you need to focus on other layers in your mix.
Solo: The solo switches can be used if you want to listen to a particular layer in isolation.
Effect Returns: Each layer can send a proportion of its sound to one of the 3 global
effects. The 3 return knobs control the output of each effect and how much of that signal
is passed back into the mix.
Reset Mix: Press this button to return your volume and pan sliders to default values.
Reset FX: Press this button to turn all effect settings to 0.
See also: Effects Window
Layer Mix - Only available on iPad HD version
The Layer Mix popup is used to make quick volume, pan and effect changes to the
currently selected layer. You also have the ability to 'Mute' and 'Solo' a layer. Solo is used
to listen to a layer in isolation which is useful when applying effects. Mute simply
removes the layer from the mix.
Each of the 3 effect levels also has a Pre Fader option. If the Pre-Fader is selected then
the whole signal is passed onto the effect and is unaffected by the layer volume knob.
You are now free to turn the volume knob to 0 ensuring no dry signal is present in the
mix.
You can quickly move between layers using the << and >> buttons.
22
Layer Properties
The Layer Properties dialog can be accessed via the 'Edit' button, and allows you to
modify parameters associated with the currently selected layer.
Layer Effect: Allows you to specify one of the 5 animation types for this layer.
Volume: Specifies the volume of notes played on this layer
Pan: Specifies if the sound is positioned to the left or right of the stereo field.
FX1-3: Allows you to specify the amount of effects 1-3 applied to this layer.
Pre-Faders 1-3: If enabled, the effect send is routed before the volume fader. In other
words the volume has no control over the send level. Turn Pre-Fader ON and the volume
fader down to pass 100% of the layers audio through the effect.
23
Instrument Settings
ADSR Settings
ADSR stands for Attack, Decay, Sustain and Release and is used to control the volume
envelope from the moment you trigger a note, to the moment you release the note.
Attack: Is the amount of time taken for the voice to reach it's maximum volume.
Decay: How quickly the sound reduces in volume after the initial peak.
Sustain: The constant volume that is maintained until the note is released.
Release: How quickly the sound fades after the note is released.
VCF Settings
VCF stands for Voltage Controlled Filter, and is used to filter out unwanted frequencies
of a sound.
Enable: Enables the filter.
Random: Enables random mode. This causes the cutoff settings to randomly change for
every triggered note.
Cutoff & Resonance: The 'Cutoff' frequency and 'Resonance' together allow you alter
the tone colors by boosting or cutting harmonics in the sound.
Changing the resonance accents frequencies around the cutoff frequency.
BEWARE: Setting the resonance too high can cause distortion on some sounds rich in
harmonics, so please be aware of this.
Filter ADSR: These settings work in a similar manner to the amplifier ADSR, only this
time the envelope is applied to the filter and not the volume.
24
LFO Settings
LFO stands for Low Frequency Oscillator, and is essentially a very slow sine wave used
to manipulate the sound in pleasurable ways.
The LFO is responsible for producing effects such as vibrato, tremolo and wahwah.
Speed: The speed of the oscillator.
Attack: How quickly the effect is applied to the voice.
Vibrato: The amount of vibrato, which is essentially a fluctuation in pitch.
Tremolo: The amount of tremolo which is a fluctuation in volume level.
WahWah: The amount of modulation applied to the VCF. You must have the VCF
enabled to hear this effect.
Wave Type: You can choose between four different types of oscillator, each giving it's
own unique sound (sine, square, triangle and random).
FM Modulation
FM or Frequency Modulation allows you to create interesting sounds by modulating the
oscillators to give the sound a hard or discordant quality.
Use the 'Octave' button to set the speed of the modulation and adjust the 'Level' to
achieve the desired effect.
25
Advanced
Random Mode
You can turn on random mode for each layer if you wish. This allows you to lay several
notes on a layer and have them play randomly.
You can still control the timing by carefully placing notes horizontally on the grid. Use in
conjunction with 'Loop Point' automation to create morphing arpeggios.
Sample Recording
This dialog allows you to record your own samples directly from your iPhones’ internal
microphone.
Trigger Level: This setting allows you to specify the volume level at which recording
begins after pressing the 'Rec' button. Modify the trigger level so that the vertical black
marker on the input meter is positioned just above any background noise.
Rec: Starts the recording process by placing the program into a ready state. Recording
actually begins only when the input signal reaches the trigger level.
Preview: Use this button to listen to any captured sounds.
Optimize: Displays a menu of options for normalizing, trimming and fading the sample
buffer.
Save: Allows you to save any captured samples to your samples folder. These samples
can be loaded into the sampler or drum kit instruments and used to create instrument
patches.<p><b>Please Note:</b> Sample recording may be disabled on 1st generation
iPhones unless you have an external microphone or headset attached. This is a hardware
limitation since the internal microphone is only capable of a recording at a sample rate of
8KHz."},
26
Record to File
This dialog allows you to capture your performance to a file on your iPhone. This file can
later be transferred by an FTP client and played on your desktop computer. The output
files can be extremely large as the files are recorded in uncompressed WAV format. This
format requires approx 5Mb for 30sec of audio at 44KHz
You can reduce the sample rate in Program Settings in order to reduce the size of the
output file.
Once the file has been recorded you can also convert the file to CAF format using one of
the supported codecs which reduces the file size.
Note: Recording to file is very CPU intensive and you may encounter audio stutters
durng this process, however the recorded audio file should be free from defects.
Manage Files: This option displays a dialog allowing you to audition recordings, convert
file formats and delete unwanted file.
Trigger: Specifies a volume level at which recording will begin. You must enable 'Use
Trigger Level' for this to work, otherwise recording begins immediately after pressing the
record button.
Start / Stop: Can be used to help set the trigger level. When pressed it starts and stops
playback of the song.
Rec: Exits the dialog and enters recording or standby mode depending on whether you
chose to use the trigger level.
After pressing the 'Rec' button you will exit the dialog and see a flashing border around
the grid, the colour of which indicates the recording status. A flashing green border tells
you that the program is waiting for the sound level to exceed the trigger level before it
starts recording. A red flashing border indicated recording has started.
To stop recording either press the 'Loop Stop' button or select 'Stop Recording To File'
from the 'File' menu.
Recording stops if the available free space is less that 5Mb.
27
Visual Effects
One of the appealing things about this program is that it is not all about the music.
Having visual feedback helps enhance the performance, but there are times when you
would like the effects to be more subtle or remove them completely.
You can change the effects type for an individual layer from the Layer Properties dialog,
or modify all layers globally from the Program Settings dialog, found in the 'File' menu.
You can also choose between colored and non colored lights.
Effect Sends
In order to route a layer through one of the 3 effect busses you need to set the send level
for the appropriate FX bus 1-3.
You accomplish this in one of two ways.
1) By selecting Layer Properties from the 'Edit' button menu. This will present you
with a dialog allowing you to modify all 3 effect send levels as well as volume
and pan.
2) By selecting Automation Mode and choosing 'FX Send Level' from the
'Automation Type' and modifying the level using the grid.
The return level for all 3 busses can be modified in the mixer page.
Effects Window
The Effects window is available from the 'Effects' button in the Master Mixer. This
window allows you to assign effects to the 3 effect busses and adjust there settings
without the need to exit the master mixer.
You can assign an effect to an effect bus by selecting one of the 3 Assign buttons at the
bottom of this window and selecting an effect from the popup window. It is a good idea
to remove effects that are not currently in use to reduce CPU load."
28
Program Settings
This dialog allows you to specify global program settings which are retained after you
exit the program.
Visualization
Allows you to specify the length of visual light effect when a note is being played.
Master Volume
This adjusts the master volume of your device.
Global Tuning
Allows you to tune all instruments by +/- 1 semitone.
Show Visual Effects on All Layers
Turn this ON when performing or playing a finished song as it allows you to visualize all
notes playing on all layers.
Enable Scroller
Enables scrolling messages such as patch names after changing layers etc.
Colored Lights
Turns on RED lights rather than the standard WHITE lights.
HQ Mode
Enables sample aliasing for instruments which helps prevent audio graining on lower
frequency notes. This option increases CPU load.
Song Settings
This dialog allows you to specify a song title, author and brief notes or copyright
information. Simply touch one of the 3 prompts and the popup keyboard will appear.
After editing press the return button to dismiss the keyboard.
The song tempo is also available from this screen. You can specify a tempo in the range
of 50-200bpm.
29
Managing Files
Manage Files
This dialog allows you to audition recordings made with the 'Record To File' function.
These recordings are very large and it is recommended that you either transfer the files to
your PC via the Data Exchange or convert the files to CAF format, which will reduce the
file size.
Browse: Allows you to select a file to audition or convert. You can also delete files from
the browse files dialog by swiping left to right across the file you want to delete.
Play: starts and stops playback of the selected file.
Convert Format: When selected reveals further options allowing you to choose the
format and sample rate of the converted file. Press the 'Convert WAV to CAF' button to
begin conversion.
Deleting Files
There will come a time when you need to delete one or more files from Aurora, whether
that be songs, samples, patches or recordings. Regardless of the type of file, you can
always delete a file from the file browse dialogs using the standard iPhone swipe gesture.
Simply run your finger from left to right over the item you want to delete from the list. A
RED confirmation button with titled 'Delete' will appear. Either press the button to delete
the item or tap elsewhere in the screen to abort.
Saving Bundles
There may be times when you want to archive a completed song with all it's instrument
patches. This is especially useful if you have created your own custom patches and want
to send someone your song, but don't want to have to sort out the additional required
samples. One down side to this is that bundles are much larger than a standard song file.
NOTE: One drawback with this method is that because the instrument patches don't exist
in your Patches folder, you can't use the Revert feature when editing voices, so saving
bundles is only recommended for completed songs.
30
Data Exchange
This option is accessible via the 'File' menu button, under 'Imports / Exports'. The data
exchange dialog activates a limited FTP server on your iPhone giving access to 4
locations on your device.
Sequences: This is the location in which your songs are saved.
Samples This is the location that all samples recorded by the sample recorder are stored.
This is also the location you should upload any samples you wish to use to create new
sampler patches. Please be careful to keep your samples as small as possible, as large
samples not only take up more storage space, but are more CPU intensive.
Patches: This is the location all your instrument patches are stored.
Exported: This is where exported song recordings are stored when using the Record To
File function. Please be aware that these files are stored in uncompressed WAV format
and will be quite large in size. For this reason it is recommended that you transfer them to
your desktop computer and remove them from the device in order to free up the storage
space for other programs.
Record to MIDI - Only available on iPad HD version
This feature enables you to record both the output of the internal sequencer and your live
improvisations to standard MIDI file format. You can then retrieve your .mid files using
an FTP client and import these files into most popular desktop sequencing packages.
To use this option you first need to select 'Export to MIDI File' from the 'File' menu and
select 'Enable' from the submenu. A green flashing border will now appear on the border
of the grid telling you the feature is active. Recording begins once you start the sequencer
(using either the loop play or song play buttons) at which point the green flashing border
turns to red.
You are free to improvise over the top of the sequencer, and these events will also be
output to the midi file. To stop recording simply stop the sequencer and you will be
prompted with a midi file name to save your performance. Finally you need to turn off
the 'Record to MIDI' option.
All 14 layers will be exported to separate midi tracks 1-14 which are labeled using
instrument names. All note on / off date is exported as well as volume, pan, bend, cutoff
and resonance controller data.
31
Aurora Song Library
Sharing Songs
You can share your completed songs with other Aurora users by uploading them to the
Aurora server. When a song is uploaded, you will be given a Song ID which can be used
to retrieve the song at a later date. You can also search for a song by 'Song Name' or
'Artist' if you are unsure of the Song ID.
Any uploaded songs are associated with the device on which they were created, so it is
easy to retrieve a list of your songs on the server by selecting 'My Songs' option. You are
free to remove file from the server only if they were created and uploaded from your
device.
All file sharing options can be located in the 'File' menu under 'Import / Export' Uploading a Song, Downloading a Song and Artist Profiles.
Uploading A Song
You can share a file with other Aurora users by uploading it to the Aurora server. To do
this select the 'Upload File' option from the 'Import / Export' options found under the
'File' menu.
You will be prompted for an 'Author' and 'Song Title' before being able to upload. After
uploading the file you will be given a 'Song ID' which can later be used to retrieve the file
or to send to a friend.
It is recommended that you create an Artist Profile which will allow other users to view
songs associated with you the artist, along with any contact details you choose to make
available.
Note: Only songs created using default patches can be uploaded to the Aurora server.
This ensures your compositions play back as expected on other users devices.
32
Downloading Songs
You can download songs which other people have shared with the Aurora community
using various options accessible via the 'Import Export' section of the 'File' menu.<p>The
easiest way to download a song is by selecting 'Download Latest Songs'. This presents
you with the most recently submitted songs for you to browse through. Simply select a
song to load and play.
If you know the Song ID of your song, you can download it using the 'Download Song'
option. Every song you upload is given a unique Song ID which is displayed once
uploading is complete.
If you know the name of a song or the author you use the 'Search for Song' option which
will return a list of songs matching your specified search string.
Finally, you can obtain a list of all the songs you have uploaded to the server using the
'My Songs' option. This option will only work if the songs were created using the device
they were uploaded from.
User Profiles
Uploading a user profile is optional, but an ideal way to tag your songs with additional
information and allows grouping your songs under a particular artist / alias.
You can setup your profile from Settings icon in your devices home screen. Simply select
Settings, then scroll down and tap on Aurora. To send your profile to the Aurora server
select 'Update Profile' from the 'Import Export' sub-menu within Aurora.
Songs are published using the 'Alias' name, and not your 'First' and 'Last' name. Your real
name is only used internally to help retrieve lost songs, or if you upgrade your device and
wish to assign previously created songs to a new device.
33
Tips and Tricks
Learn how to use the note length feature in order to make your loops more dynamic.
1)Loops using only 16th notes can become very repetitive and uninteresting.
2) Rather than creating a pattern for each chord of your song you can simply copy and
paste to a new block and change the root note of the block.
3) Use the automation feature to add tempo changes, or to automate volume and pan. The
'Gate Time' can be used to create slightly longer held notes, and the portamento can be
used to glide from one note to another.
4) You may have noticed that drums have a different visual effect to other instrument
layers. You can freely assign any visual effects to a layer using the Layer Properties
dialog. You can also change the color of the lights and the effect duration from the
Program Settings dialog in Preferences.
5) When adding patterns to the song chain, always wait until the pattern begins to play
before pressing the 'Add' button. You can also construct 'virtual' blocks containing layers
from different blocks into the song chain by engaging the RECORD button before
making a selection. This is especially useful for bringing individual layers of a block into
the mix.
6) Selecting a block during pattern play usually queues the new block until the current
block has finished playing. However, the current block may play for longer than
expected. If a block consists of layers that are all 16th notes then the block will last for 4
beats, but if one of those layers uses 8th notes, the block will play for 8 beats etc. You
cannot switch blocks until the longest layer has completed.
7) You can bypass individual effects in the mixer by clicking on the effects layers 1-3 of
the master fader. This toggles an effect on and off for all layers."
34
Troubleshooting
If you suffer audio stuttering or sound breakup try changing the sample rate to 22KHz in
Program Settings dialog.
Reducing the sample rate from 44 KHz to 22KHz will reduce CPU load. If problems
persist try on and off your iPhone to unload any memory resident programs hogging
memory and resources.
If you are receiving errors whilst importing samples into either a drum kit or a sampler
you need to ensure that the sample is the required format. Aurora supports mono or stereo
WAV files in 8,16,24 and 32 bit formats with sample frequencies in the range of 848KHz. All samples also need to be under 10secs in length.
If your iPad will not open an App or closes suddenly whilst you are using it you may be
running low on memory to solve this issue:
Double click the home button twice; this will open the task bar which will show all the
applications that are currently running in the background. Click and hold on one of the
apps and they will all start to jiggle and the “X” Close icon will appear in the corner of
each app. Close all the apps then Run Aurora again and it should work with no problems.
If you use your task bar to close unused apps it will help free up memory on your iPad.
35
Further information on Limelight Software’s 4Pockets range of products can be found at
www.4pockets.com
Online Support and Discussions on Aurora Sound Studio can be found at
http://www.facebook.com/LimelightSoftwareLimited
36