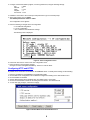
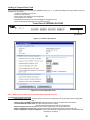
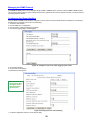
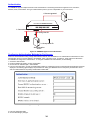
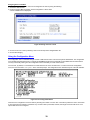
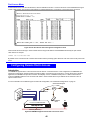
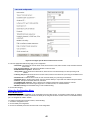
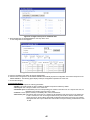
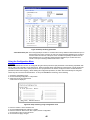
1
NTI
R
1275 Danner Dr Tel:330-562-7070
NETWORK
TECHNOLOGIES Aurora, OH 44202 Fax:330-562-1999
www.nti1.com
INCORPORATED
SERIMUX® SECURE
SERIMUX-SECURE-x
Secure Access Console Switch
Installation and Operation Manual
MAN008 Rev 2/10/2004
Warranty Information
The warranty period on this product (parts and labor) is one (1) year from the date of purchase. Please contact Network
Technologies Inc at (800) 742-8324 (800-RGB-TECH) or (330) 562-7070 or visit our website at http://www.nti1.com for
information regarding repairs and/or returns. A return authorization number is required for all repairs/returns.
COPYRIGHT
Copyright © 2004 by Network Technologies Inc. All rights reserved. No part of this publication may be reproduced, stored in a
retrieval system, or transmitted, in any form or by any means, electronic, mechanical, photocopying, recording, or otherwise,
without the prior written consent of Network Technologies Inc, 1275 Danner Drive, Aurora, Ohio 44202.
CHANGES
The material in this guide is for information only and is subject to change without notice. Network Technologies Inc reserves the
right to make changes in the product design without reservation and without notification to its users.
TABLE OF CONTENTS
Introduction...................................................................................................................................................................................... 1
SERIMUX Model Support .............................................................................................................................................................. 1
Key Features ................................................................................................................................................................................. 1
Materials ........................................................................................................................................................................................ 1
User Groups .................................................................................................................................................................................. 1
Root and Admin Usernames and Passwords ................................................................................................................................ 1
Adding Port Administrators and Users ........................................................................................................................................... 2
Features and Functions ................................................................................................................................................................. 2
Ways to Configure the SERIMUX .................................................................................................................................................. 3
Web Interface............................................................................................................................................................................. 3
Configuration Menu.................................................................................................................................................................... 3
Command Line Interface............................................................................................................................................................ 3
Ways of Accessing the SERIMUX: Overview ................................................................................................................................ 4
Web Interface Access Menu ...................................................................................................................................................... 4
Port Access Menu...................................................................................................................................................................... 4
Direct Port Access ..................................................................................................................................................................... 5
Custom Menus........................................................................................................................................................................... 5
Saving and Applying Changes ................................................................................................................................................... 5
Getting Started................................................................................................................................................................................. 5
Introduction .................................................................................................................................................................................... 5
Assigning IP Settings from the Console Port ................................................................................................................................. 5
Configuring HTTP and HTTPS ...................................................................................................................................................... 6
Configuring for SSH ....................................................................................................................................................................... 7
Options ...................................................................................................................................................................................... 7
Configuring the Port Access Menu for SSH ............................................................................................................................... 7
Configuring a Port for SSH ........................................................................................................................................................ 7
Adding, Editing, and Removing Users ........................................................................................................................................... 8
Procedure .................................................................................................................................................................................. 8
About Shell Options ................................................................................................................................................................... 9
Using the Configuration Menu ....................................................................................................................................................... 9
Configuring SSH ........................................................................................................................................................................ 9
Adding, Editing, and Removing Users ..................................................................................................................................... 10
Installing and Configuring PC Cards ........................................................................................................................................... 10
Introduction .................................................................................................................................................................................. 10
Compatible PC Cards .................................................................................................................................................................. 10
Adding a Compact-flash Card...................................................................................................................................................... 12
Configuring the Compact-flash Card........................................................................................................................................ 12
Automatic Configuration File Backup ....................................................................................................................................... 13
Adding a Network Card................................................................................................................................................................ 13
Adding a Wireless LAN Card ....................................................................................................................................................... 14
Adding A Serial Modem ............................................................................................................................................................... 15
Using the Configuration Menu ..................................................................................................................................................... 15
Adding and Configuring a PC Card.......................................................................................................................................... 15
Configuring Ports .......................................................................................................................................................................... 16
Introduction .................................................................................................................................................................................. 16
Host Mode Configuration ............................................................................................................................................................. 16
Console Server Mode .............................................................................................................................................................. 16
Terminal Server Mode ............................................................................................................................................................. 16
Dial-In Modem Mode................................................................................................................................................................ 17
Dial-In Terminal Server Mode .................................................................................................................................................. 17
Configuring Host Mode ................................................................................................................................................................ 18
Supported Protocols .................................................................................................................................................................... 19
Port Parameters........................................................................................................................................................................... 19
DTR Behavior .......................................................................................................................................................................... 19
Inter-character Timeout............................................................................................................................................................ 19
Using the Configuration Menu ..................................................................................................................................................... 20
Host Mode Configuration ......................................................................................................................................................... 20
Port Parameters....................................................................................................................................................................... 20
System and Port Logging ............................................................................................................................................................. 21
Introduction .................................................................................................................................................................................. 21
Enabling System Logging Services.............................................................................................................................................. 21
Enable Syslog Server .............................................................................................................................................................. 21
Enable NFS Server .................................................................................................................................................................. 21
Enable A Compact-flash Card.................................................................................................................................................. 22
Enable SERIMUX Memory....................................................................................................................................................... 22
Configuring System Logging Services ......................................................................................................................................... 22
Viewing System Logs............................................................................................................................................................... 23
Port Logging ................................................................................................................................................................................ 23
Using the Configuration Menu ..................................................................................................................................................... 24
System Logging ....................................................................................................................................................................... 24
Alerts and Notifications................................................................................................................................................................. 25
Introduction .................................................................................................................................................................................. 25
Configuring SMTP Alerts ............................................................................................................................................................. 26
SNMP Information........................................................................................................................................................................ 26
Configuring SNMP ....................................................................................................................................................................... 27
Managing the SNMP Protocol...................................................................................................................................................... 28
Configuring Port Event Handling.................................................................................................................................................. 28
Using the Configuration Menu ..................................................................................................................................................... 29
Configuring SNMP ................................................................................................................................................................... 29
Configuring SMTP.................................................................................................................................................................... 29
Configuring Security and Authentication .................................................................................................................................... 30
Introduction .................................................................................................................................................................................. 30
Configuring Network IP Filtering .................................................................................................................................................. 30
Console and Web IP Filtering .................................................................................................................................................. 30
Serial Port IP Filtering .............................................................................................................................................................. 31
Using IP Tables ........................................................................................................................................................................... 31
Configuring User Access Control ................................................................................................................................................. 31
Sniff Session ............................................................................................................................................................................ 32
Viewing A Sniff Session ........................................................................................................................................................... 33
Authentication .............................................................................................................................................................................. 34
Configuring Authentication Methods for Port Access ................................................................................................................... 34
Configuring Authentication for the Web Server............................................................................................................................ 35
Using the Configuration Menu ..................................................................................................................................................... 35
Network IP Filtering.................................................................................................................................................................. 35
Port IP Filtering ........................................................................................................................................................................ 36
Sniff Sessions .......................................................................................................................................................................... 36
Authentication .......................................................................................................................................................................... 36
Custom and Default Menus........................................................................................................................................................... 37
Introduction .................................................................................................................................................................................. 37
Making Custom Menus ................................................................................................................................................................ 37
Adding Users ........................................................................................................................................................................... 37
Creating Menu Names ............................................................................................................................................................. 37
Adding Menu Items .................................................................................................................................................................. 38
Assigning Users To A Menu .................................................................................................................................................... 39
Using the Configuration Menu ..................................................................................................................................................... 39
Port Access Menu........................................................................................................................................................................ 40
Configuring Remote Dial-In Access ............................................................................................................................................. 40
Configuring For Dial-In Modem Access ....................................................................................................................................... 41
Adding a PC Modem.................................................................................................................................................................... 41
Configuring For Dial-In Terminal Server Access .......................................................................................................................... 41
Using the Configuration Menu ..................................................................................................................................................... 42
Dial-in Modem Access ............................................................................................................................................................. 42
Dial-in Terminal Server Access................................................................................................................................................ 43
Port Clustering............................................................................................................................................................................... 44
Introduction .................................................................................................................................................................................. 44
Configuring Port Clustering.......................................................................................................................................................... 44
Assigning Master Clustering Mode .......................................................................................................................................... 44
Configuring Slave Ports on the Master Unit ............................................................................................................................. 44
Clustering Parameters ............................................................................................................................................................. 45
Using the Configuration Menu ..................................................................................................................................................... 46
Clustering................................................................................................................................................................................. 46
Command Line Interface ............................................................................................................................................................... 47
Introduction .................................................................................................................................................................................. 47
Linux Commands ......................................................................................................................................................................... 47
Important File Locations............................................................................................................................................................... 48
Default Script ........................................................................................................................................................................... 48
Booting Sequence.................................................................................................................................................................... 48
User Storage Space................................................................................................................................................................. 48
System Administration.................................................................................................................................................................. 48
Introduction .................................................................................................................................................................................. 48
Upgrading the Firmware .............................................................................................................................................................. 48
Web Interface........................................................................................................................................................................... 48
Resetting Factory Defaults....................................................................................................................................................... 48
Setting Date and Time ................................................................................................................................................................. 49
Configuring A Device Name......................................................................................................................................................... 50
Adding, Editing, and Removing Users ......................................................................................................................................... 50
Using the Configuration Menu ..................................................................................................................................................... 51
Firmware Upgrade ................................................................................................................................................................... 51
Restoring Factory Defaults ...................................................................................................................................................... 51
Setting Date and Time ............................................................................................................................................................. 52
Adding, Editing, and Removing Users ..................................................................................................................................... 52
Accessing the Boot Loader Program ........................................................................................................................................... 53
Hardware Test Menu ............................................................................................................................................................... 53
Disaster Recovery.................................................................................................................................................................... 53
Microsoft SAC Support ................................................................................................................................................................. 54
About SERIMUX Support for Microsoft Windows Server 2003 .................................................................................................... 54
Set Up Overview ...................................................................................................................................................................... 54
Setting Up the SERIMUX for SAC Support.................................................................................................................................. 54
Accessing the Windows Server 2003 Console Port from the SERIMUX GUI .............................................................................. 55
Hardware Information.................................................................................................................................................................... 56
Introduction .................................................................................................................................................................................. 56
Hardware Specifications: SERIMUX 16 and SERIMUX 32 AC Powered..................................................................................... 56
Hardware Specifications: SERIMUX 16 and SERIMUX 32 DC Powered..................................................................................... 57
Hardware Specifications: SERIMUX 8 AC Powered .................................................................................................................... 57
LED Indicators ............................................................................................................................................................................. 57
About Serial Port Cabling............................................................................................................................................................. 57
Serial Port Pinouts ....................................................................................................................................................................... 58
Cable Adapters ............................................................................................................................................................................ 58
Certifications.................................................................................................................................................................................. 60
Safety........................................................................................................................................................................................... 60
Working Inside the SERIMUX...................................................................................................................................................... 60
Replacing the Battery................................................................................................................................................................... 60
Safety Instructions ....................................................................................................................................................................... 61
Emissions .................................................................................................................................................................................... 61
Immunity ...................................................................................................................................................................................... 61
Index ............................................................................................................................................................................................... 62
TABLE OF FIGURES
Figure 1- SERIMUX SECURE WEB Interface- Main menu ............................................................................................................... 3
Figure 2- SERIMUX-SECURE Telnet Session- Configuration menu ................................................................................................. 3
Figure 3- WEB Interface- Port login screen ....................................................................................................................................... 4
Figure 4- Attach a workstation to the console port ............................................................................................................................. 5
Figure 5- The IP configuration menu.................................................................................................................................................. 6
Figure 6- Enable Web server HTTP/HTTPS service.......................................................................................................................... 6
Figure 7- Configure the port access menu for SSH ........................................................................................................................... 7
Figure 8- Configure a port for SSH .................................................................................................................................................... 8
Figure 9- The Edit user menu ............................................................................................................................................................ 9
Figure 10- Using configuration menu to configure SSH ................................................................................................................... 10
Figure 11- Location of PC card slot ................................................................................................................................................. 12
Figure 12- PC card configuration menu ........................................................................................................................................... 12
Figure 13- Network PC card configuration menu ............................................................................................................................. 13
Figure 14- Configure a Wireless Network PC card .......................................................................................................................... 14
Figure 15- Configure a Serial Modem PC card ................................................................................................................................ 15
Figure 16- Use Configuration menu to add a PC card ..................................................................................................................... 15
Figure 17- Host Mode Configuration- Console server mode............................................................................................................ 16
Figure 18- Host Mode Configuration- Terminal server mode ........................................................................................................... 16
Figure 19- Host Mode Configuration- Dial-In modem mode............................................................................................................. 17
Figure 20- Host Mode Configuration- Dial-In terminal server mode ................................................................................................. 17
Figure 21- Configure serial port for host mode ................................................................................................................................ 18
Figure 22- Setup serial port communication parameters ................................................................................................................. 19
Figure 23- Configure Host mode via Configuration menu ................................................................................................................ 20
Figure 24- Setup Port communication parameters via Configuration menu..................................................................................... 20
Figure 25- SYSLOG server configuration menu .............................................................................................................................. 21
Figure 26- NFS server configuration menu ...................................................................................................................................... 22
Figure 27- Configure system logging services ................................................................................................................................. 23
Figure 28- Port logging menu .......................................................................................................................................................... 24
Figure 29- System status logging setup via Configuration menu ..................................................................................................... 25
Figure 30- SERIMUX used for system alerts and notifications ........................................................................................................ 25
Figure 31- SMTP configuration menu .............................................................................................................................................. 26
Figure 32- SMNP configuration menu.............................................................................................................................................. 27
Figure 33- Configure a port for to enable logging of port events...................................................................................................... 28
Figure 34- Configure port for event handling ................................................................................................................................... 28
Figure 35- Configure SNMP via Configuration menu ....................................................................................................................... 29
Figure 36- Configure SMTP via Configuration menu ....................................................................................................................... 29
Figure 37- SERIMUX access controlled by IP filtering ..................................................................................................................... 30
Figure 38- IP filtering menu.............................................................................................................................................................. 30
Figure 39- Serial Port IP filtering...................................................................................................................................................... 31
Figure 40- Configure User access control........................................................................................................................................ 32
Figure 41- User in a Sniff Session ................................................................................................................................................... 33
Figure 42- Sniff session user menu ................................................................................................................................................. 33
Figure 43- SERIMUX supports user authentication ......................................................................................................................... 34
Figure 44- Configure SERIMUX for authentication .......................................................................................................................... 34
Figure 45- Configure WEB server for authentication........................................................................................................................ 35
Figure 46- Use Configuration menu to setup IP filtering .................................................................................................................. 35
Figure 47- Configure Port IP filtering through the Configuration menu ............................................................................................ 36
Figure 48- Setup user authentication through the Configuration menu............................................................................................ 36
Figure 49- Add users to the system ................................................................................................................................................. 37
Figure 50- Creating menu names .................................................................................................................................................... 37
Figure 51- Adding menu items......................................................................................................................................................... 38
Figure 52- Assign users to a menu .................................................................................................................................................. 39
Figure 53- The Configuration Menu ................................................................................................................................................. 39
Figure 54- The Port Access menu through the Configuration menu ................................................................................................ 40
Figure 55- SERIMUX supports remote dial-in access for users....................................................................................................... 40
Figure 56- Configure port for dial-in modem access ........................................................................................................................ 41
Figure 57- Configure port for dial-in terminal server access ............................................................................................................ 42
Figure 58- Use Configuration menu to configure port for dial-in modem access ............................................................................. 43
Figure 59- Use Configuration menu to configure port for dial-in terminal server access.................................................................. 43
Figure 60- SERIMUX used for port clustering.................................................................................................................................. 44
Figure 61- Assign the Master cluster device .................................................................................................................................... 44
Figure 62- Configure Slave ports on the Master Unit ....................................................................................................................... 45
Figure 63- Enable a Slave unit and setup the port information ........................................................................................................ 45
Figure 64- Setup clustering parameters........................................................................................................................................... 46
Figure 65- Setup clustering using Configuration menu .................................................................................................................... 46
Figure 66- Locate the firmware upgrade file .................................................................................................................................... 48
Figure 67- Reset factory defaults ..................................................................................................................................................... 48
Figure 68- Reset factory defaults through web interface.................................................................................................................. 49
Figure 69- Set the date and time ..................................................................................................................................................... 49
Figure 70- Administrator's user administration window.................................................................................................................... 50
Figure 71- Edit a user ...................................................................................................................................................................... 50
Figure 72- Configuration menu ........................................................................................................................................................ 51
Figure 73- Reset factory defaults through Configuration menu........................................................................................................ 51
Figure 74- Choose which factory defaults to reset ........................................................................................................................... 52
Figure 75- Edit users through Configuration menu .......................................................................................................................... 52
Figure 76- The Boot Loader program............................................................................................................................................... 53
Figure 77- Firmware upgrade via Boot Loader program .................................................................................................................. 53
Figure 78- Setup SERIMUX for SAC support .................................................................................................................................. 55
Figure 79- Access Windows Server 2003 console port from SERIMUX GUI................................................................................... 55
Figure 80- Windows Server 2003 controls ....................................................................................................................................... 56
INTRODUCTION
Introduction
SERIMUX Model Support
This manual offers information on SERIMUX 32-port, 16-port, and 8-port models.
Key Features
The SERIMUX (console management) provides secure, flexible management of servers, routers, switches, and other networked
devices. Key features include:
• SSH v1 and v2 for server and clients
• IP filtering
• Authentication using RADIUS, LDAP, TACACS+, Kerberos, and a local database
• Custom menuing
• System and port logging
• Microsoft Windows Server 2003 Special Administration Console (SAC) support
• A web interface that supports both HTTP and HTTPS and simplifies configuration
Materials
Materials Supplied with this kit:
•
NTI SERIMUX-SECURE Secure Console Access Server
•
RJ45 M/M UTP CAT5 Patch Cable
•
Console Adapter RJ45-DB25 Female
•
Console Adapter RJ45-DB25 Male
•
Modem Adapter RJ45- DB25 Male
•
Serial Adapter RJ45-DB9 Female
•
RJ45 Diagnostic Loop back Plug
•
Mounting Kit
•
AC Power Cable
•
This Owners Manual (on CD ROM)
•
Quick Start Guide (also on CD ROM)
•
Discovery Tool (on CD ROM)
Materials Not Supplied, but REQUIRED:
Ethernet cable is required to connect the SERIMUX to the network.
Note: In order to comply with FCC standards, the SERIMUX requires the use of a shielded Category 5 cable connected to
the Ethernet Interface
User Groups
The SERIMUX comes with built-in user groups, defined by access levels. The following table lists user groups, their access rights,
and default user names.
Group
--
Access Privileges
Configuration Privileges
Defaults
Root
System
Ports
Yes
Yes
Command Line
Yes
Yes (read only)
Ports
Yes
Yes
System
Yes
Yes
Login
root
admin
Password
dbps
admin
Admin
User
Yes
Yes
No
No
Yes
No
No
No
-
-
Root and Admin Usernames and Passwords
The SERIMUX comes with two default users, root and system admin.
User Name
Default Password
root
admin
dbps
admin
Note: Root's password can be modified through the command line interface using the command passwd.
1
Adding Port Administrators and Users
The system administrator and root user can add port administrators and users easily with the web interface by choosing System
administration > User administration > Add user. Root’s password must be modified from the command line using the command
passwd.
F r o n t V ie w
N T I
S E R IM U X
R
T M
o f S E R IM U X -S e c u r e
S E C U R E
N e t w o r k T e c h n o lo g ie s In c
1
P o w e r
R e a d y
2
3
1 0 0 M b p s
P C C a rd
5
4
L in k
A c t
1
2
3
4
5
6
7
8
9
1 0
1 1
1 2
1 3
1 4
1 5
1 6
1 7
1 8
1 9
2 0
2 1
2 2
2 3
2 4
2 5
2 6
2 7
2 8
2 9
3 0
3 1
3 2
In U s e
T X
R X
P C C a rd
7
6
R e a r V ie w
3 2
1 8
8
9
1 0
o f S E R IM U X -S E C U R E
1 6
2
1 0 0 -2 4 0 V A C
1 .2 A m p
5 0 -6 0 H z
F A C T O R Y
R E S E T
3 1
1 7
1 5
1
E T H E R N E T 1 0 /1 0 0
1 1
1 2
C O N S O L E
1 3
Features and Functions
1. Power LED- Indicates SERIMUX is powered up
2. Ready- Indicates SERIMUX is ready to run
3. 100Mbps LED- for visual indication that a 100Base-TX connection has been detected
4. PC Card LED- visual indication that a PCMCIA device is running
5. Link LED- visual indication of a connection to an ethernet network
6. ACT LED- visual indication of any activities, either transmitting or receiving data, through SERIMUX
7. RX LED- indicates the port is receiving data
8. TX LED- indicates the port is transmitting data
9. In Use- indicates the port has a connection an is enabled
10. PC Card- For attachment of optional PCMCIA device (memory card, LAN Card, or modem card)
11. RJ45 Connector- For attachment of devices to be connected by SERIMUX
12. RJ45 Connector- Ethernet 10/100- for connection to Ethernet LAN
13. Factory Reset- button to enable user reset to factory default settings
14. Console- RJ45 Connector- For attachment of local access user console
15. IEC Power Socket- for connection of power cord
16. Fuse- Overcurrent protection fuse
17. Power ON/OFF switch
2
1 4
1 5
1 6
1 7
Ways to Configure the SERIMUX
This section discusses the three ways to configure the SERIMUX, web interface, configuration menu, and command line interface.
Web Interface
The web interface provides an easy way to configure the SERIMUX. The root user and system administrator can configure all
features from it. Port administrators can configure ports, including port clustering, but cannot modify system settings. Users cannot
use the web interface for configuration. To access the web interface, enter the SERIMUX IP address or host name in a
browser’s URL window. The default IP address is 192.168.161.5. The following page is displayed after log in.
Note: The SERIMUX web interface features HTTPS for secure access
NTI
R
Figure 1- SERIMUX SECURE WEB Interface- Main menu
Configuration Menu
The root user and system administrator have full access to the configuration menu from a Telnet session or a serial connection
through the console port. Functionality is similar to the web interface, with the exception of custom menus, which can be created
only from the web interface. The configuration menu is presented to system administrators automatically. Root users access it by
entering the command configmenu. Port administrators can access this menu but can modify serial port configuration only.
Users cannot access this menu.
Figure 2- SERIMUX-SECURE Telnet Session- Configuration menu
Command Line Interface
The command line interface can be accessed from a Telnet session or from the console port. The root user always has access to
this interface. The system administrator can be granted read-only permission as well. No other users can access the command
line interface.
3
Ways of Accessing the SERIMUX: Overview
There are four ways to access the SERIMUX including:
• Web Interface
• Port Access Menu
• Direct Port Access
• Custom Menus
Web Interface Access Menu
The web interface menu provides easy and convenient access to ports. All users can access the menu by entering the SERIMUX
IP address or host name in a web browser’s URL window.
To access a port from the web interface, do the following:
1. Access the web interface.
2. Choose Serial port > Connection.
3. Choose a port by clicking in the appropriate icon.
A Java applet or Telnet window opens with a login prompt.
Figure 3- WEB Interface- Port login screen
Port Access Menu
The Port Access Menu provides access to ports. It is accessible to all users through the web interface, Telnet and SSH sessions,
and remote modem access. The information that follows shows how to access this menu.
Access Type
Permissions
Procedure
Web interface
Any user can use
This method.
1. Access the web interface.
2. Choose Serial port > Connection > Port access menu connection.
3. Log in.
Telnet
Any user can use
This method.
1. Telnet to the SERIMUX specifying its IP address and port 7000.
Example: Telnet 192.168.15.7 7000
2. Log in.
Command line
Root
From the command line, issue the portaccessmenu command.
Example: portaccessmenu
4
Direct Port Access
Users can connect directly to a properly configured port through a Telnet or SSH session. Configuration requirements include
setting the Host Mode to Console Server Mode and the Protocol to either Telnet or SSH. Ports, by default, are set to Console
Server Mode and Telnet. Use the information that follows to make a Telnet or SSH connection to a port:
Type
Command Syntax
Example Connection to Port 3
telnet ip-address tcp-port
where ip-address is the SERIMUX’s IP
address and tcp-port is the Listening
TCP port for a port
ssh user-name@ ip-address tcp-port
Telnet
telnet 192.168.15.7 7003
where user-name is a user’s name,
ipaddress is the SERIMUX’s IP address
and tcp-port is the Listening TCP port for
a port
SSH
ssh admin@ 192.168.15.7 7003
Note: The example assumes that the Listening TCP port is 7003, the default for port 3.
Custom Menus
Custom menus are created by either root or the system administrator to limit a user’s access to specific ports. For more
information, see "Making Custom Menus" on page 36.
Saving and Applying Changes
In the web interface, the user can save and apply configuration changes in two ways. With the one-step method, choose “Save &
apply” and changes are saved and applied enabling them to take effect immediately. With the two-step method, choose “Save to
flash,” which immediately saves changes but the changes do not take effect until choosing "Apply changes.” This might be more
efficiently used if multiple changes are being made. The following topics describe how to do each of these operations.
One Step: Save and Apply Changes
To save and apply changes immediately, choose the Save & apply button.
Two-Step: Save to Flash and then Apply Changes
To save multiple changes but apply changes once, do the following:
1. Choose the Save to flash button after each configuration change.
2. When finished changing the configuration, choose the Apply changes link, which is located on the main menu.
Getting
Started
Getting
Started
Introduction
This chapter covers basic configuration topics. Included is information on assigning IP settings, enabling secure access with the
web interface, accessing the unit through SSH, and adding and removing users.
Note: Initial setup is described in the Quick Start Guide included with the product packaging.
Assigning IP Settings from the Console Port
To use the console port to assign IP settings, do the following:
1. Connect the console port on the rear panel of the SERIMUX to a serial port on a workstation using the Ethernet console cable
and DB-9 adapter packaged with the SERIMUX. (See Fig. 4) The default IP address is 192.168.161.5.
R e a r V ie w
3 2
1 8
o f S E R IM U X -S E C U R E
1 6
2
1 0 0 -2 4 0 V A C
1 .2 A m p
5 0 -6 0 H z
F A C T O R Y
R E S E T
3 1
1 7
1 5
1
E T H E R N E T 1 0 /1 0 0
C O N S O L E
R J 4 5
P a tc h C a b le
(s u p p lie d )
Figure 4- Attach a workstation to the console port
5
D B -9 F e m a le
(s u p p ie d )
C o n n e c t to a w o r k s ta tio n
(T e r m in a l o r P C )
2. Configure a terminal emulation program, such as HyperTerminal, using the following settings:
bps
= 9600
data bits
=8
parity
= none
stop bits
=1
flow control = none.
3. Establish a connection to the console port and press Enter to get a command prompt.
4. At the login prompt, log in as admin.
The default password for admin is admin.
The Configuration menu appears.
5. Enter the following to navigate to the IP configuration:
a. 1 for Network configuration
b. 1 for IP configuration
c. The numbers for the individual IP settings.
The following menu is displayed.
Figure 5- The IP configuration menu
6. Press ESC when done to return to the main configuration menu.
7. Enter number 9 to exit and apply changes.
Changes are saved and applied immediately. There is no need to reboot.
Configuring HTTP and HTTPS
By default HTTP and HTTPS are enabled on the SERIMUX device. To modify these settings, do the following:
1. Enter the IP address for the SERIMUX in a web browser’s URL.
2. Choose Web server configuration from the Network Configuration heading on the web interface menu.
3. Choose Enabled or Disabled.
4. Set the desired refresh rate for statistics data. The default value is 10 seconds.
5. Choose an authentication method for accessing the web interface. The default is local.
6. To save and apply changes, choose Save & apply.
Figure 6- Enable Web server HTTP/HTTPS service
6
Configuring for SSH
Options
The Port Access Menu and individual ports can be configured for SSH.
Configuring the Port Access Menu for SSH
1. Access the web interface.
2. Log in as root, admin, or a member of the port administration group.
The default password for root is dbps,
The default password for admin is admin.
3. Choose Serial port > Configuration > Port access configuration menu.
The Port access configuration menu appears.
4. Choose SSH as the Port access menu protocol.
Figure 7- Configure the port access menu for SSH
5. Choose Save & apply.
Configuring a Port for SSH
1. Access the web interface.
2. Log in as root, admin, or a member of the port administration group.
The default password for root is dbps
The default password for admin is admin.
3. Choose Serial port > Configuration.
4. Choose the port or ports to be configured for SSH.
5. Choose Host mode configuration.
6. Specify SSH as the Protocol.
7. Choose Save & Apply.
Note: The SERIMUX supports Blowfish and 3DES encryption methods for SSH.
7
Figure 8- Configure a port for SSH
Adding, Editing, and Removing Users
The root user and system administrator can add, remove, or edit users from the web interface.
Procedure
1. Access the web interface.
2. Log in as root or admin.
The default password for root is dbps
The default password for admin is admin.
3. Under the System administration heading choose Users administration.
4. Choose Add User, Edit User, or Remove User.
• Add a user: Assign a name, user group, password, and shell.
• Edit user files: Change user group, password, or their shell
• Remove a user: Remove a user from the system
5. Choose Submit or Cancel.
Note: The root and admin users cannot be removed from the system. The password for root can be changed from the
command line only using the command passwd.
8
Figure 9- The Edit user menu
About Shell Options
The shell program selection determines the interface the user sees when establishing a Telnet or SSH session with the
SERIMUX.
User Group
root
system admin
port admin
user
Shell Program Options
Command line
Command line, configuration menu, port access menu, custom menus
Configuration menu, port access menu, custom menus
Port access menu, custom menus
Using the Configuration Menu
The configuration menu presents the same functionality in configuring the SERIMUX as does the web interface, excluding the
creation of custom menus. The configuration menu is navigated by using the number representing the menu item and the ESC
key to return to earlier menus.
Configuring SSH
1. Telnet to the SERIMUX.
2. Log in as root or admin.
The default password for root is dbps
The default password for admin is admin.
3. Do one of the following:
• If the user is logged in as admin, the configuration menu will automatically appear, so go to the next step.
• If the user is logged in as root, enter the configmenu command.
Note: The Save changes option saves changes to flash memory only.
9
Figure 10- Using configuration menu to configure SSH
4. Choose 2 (Serial port configuration) and then an individual port number or 0 (zero) for all ports.
5. Choose 3 (Host mode configuration) and then 4 (Protocol) and 2 (for SSH).
6. Use the ESC key to return to the main configuration menu.
7. Choose 9 (Exit and apply changes).
Adding, Editing, and Removing Users
1. Telnet to the SERIMUX.
2. Log in as root or admin.
The default password for root is dbps,
The default password for admin is admin.
3. Do one of the following:
• If the user is logged in as admin, the configuration menu will automatically appear, so go to the next step.
• If the user is logged in as root, enter the configmenu command.
4. Choose 6 (System administration) > 1 (User administration) and then choose an operation to perform (Add, Remove, or Edit).
5. Configure the user as required.
6. Use the ESC key to return to the main configuration menu.
7. Choose 9 (Exit and apply changes).
Note: Choose Exit and apply changes when all of the changes have been made.
Installing and Configuring PC Cards
Introduction
This chapter includes information on adding and configuring PC cards for the SERIMUX. PC devices that can be added to the
SERIMUX include a serial modem, compact-flash card, wireless LAN card, and a network LAN card.
Compatible PC Cards
All compact-flash cards work with the SERIMUX, but not all serial modem, wireless LAN, or regular LAN cards do. See the charts
below for compatible cards that have been tested with the SERIMUX.
10
SERIMUX Supported PC Card List
Ethernet LAN Cards:
Manufacturer
Description
Model Name
Specification
3COM
3CXE589ET-AP
3Com Megahertz 589E
TP/BNC LAN PC Card
10 Mbps LAN card
Manufacturer
Description
Model Name
Specification
Cisco Systems
AIR-PCM340/Aironet 340
Cisco Systems 340 Series
Wireless LAN Adapter
11 Mbps Wireless LAN
Adapter
Manufacturer
Description
Model Name
Specification
Billionton Systems Inc.
FM56C series
PCMCIA CARD
Ambient (Intel) V.90
56KFaxModem FM56C-NFS
FAX/MODEM PC Card
5.41
Viking
PC Card Modem 56K
Viking V.90 K56flex 021 A
MODEM PC Card
Multitech
MultiMobile PC Card
Modem
MT5634ZLXI
V.90 Data/Fax World
Modem
Actiontec
Datalink
FM560LK
V.90 Data/Fax Modem
Star Logic
Platinum
FM56C-NFS
V.92 56K PC Card
Modem
Zoom
Zoom/Modem
3075-00-00L
V.90/V.92 56K PCMCIA
Fax/Modem
Wireless LAN Cards:
Modem Cards:
11
Adding a Compact-flash Card
A PC card slot is located on the front panel of the SERIMUX. (See Fig. 11) To install and configure the compact-flash card on the
SERIMUX, do the following.
1. Insert the card into the PC card slot.
2. Access the web interface.
3. Under the PC card heading choose Configuration.
4. Choose Discover a new card.
The SERIMUX searches for a PC card and displays a configuration menu.
5. Enter the appropriate parameters in the configuration menu.
F r o n t V ie w
N T I
S E R IM U X
R
T M
o f S E R IM U X -S E C U R E
S E C U R E
N e t w o r k T e c h n o lo g ie s In c
P o w e r
R e a d y
1 0 0 M b p s
P C C a rd
L in k
A c t
1
2
3
4
5
6
7
8
9
1 0
1 1
1 2
1 3
1 4
1 5
1 6
1 7
1 8
1 9
2 0
2 1
2 2
2 3
2 4
2 5
2 6
2 7
2 8
2 9
3 0
3 1
3 2
In U s e
T X
R X
P C C a rd
P C c a r d s lo t
Figure 11- Location of PC card slot
Figure 12- PC card configuration menu
Note: Always select the Stop card service button before removing a PC card.
Configuring the Compact-flash Card
• Total data size to be used: Enter the amount of memory to be assigned to the compact-flash card for configuration
files.
• Delete all files in ATA/IDE Fixed Disk Card: Select this button to clear the compact-flash card of all files.
• Format ATA/IDE Fixed Disk Card: The options are EXT2 or FAT formats.
Select the format option and then select the Format button.
• Export configuration to PC card: Exports the current configuration to the compact-flash card.
• Import configuration from PC card: Imports the last saved configuration file from the compact-flash card.
• Import configuration except IP configuration: Imports the last saved configuration file from the compact-flash card,
excluding the IP settings.
12
Automatic Configuration File Backup
The SERIMUX provides for automatic configuration backup and restoration. The following describes fields related to this function.
• Automatically backup configuration: Choose Yes to enable and No to disable automatic backup.
• Restore previously saved configuration: Click Restore to import the previously saved configuration.
• Restore currently saved configuration: Click Restore to import the most recently saved configuration.
Adding a Network Card
To install and configure a network card on the SERIMUX, do the following.
1. Insert the card into the PC slot.
2. Access the web interface.
3. Under the PC card heading, choose Configuration.
4. Choose Discover a new card.
The SERIMUX searches for the PC card and displays a configuration menu. (See Fig. 13)
5. Enter the appropriate parameters in the configuration menu.
6. Choose Save & Apply.
Figure 13- Network PC card configuration menu
13
Adding a Wireless LAN Card
To install and configure a wireless LAN card on the SERIMUX, do the following.
1. Insert the card into the PC slot.
2. Access the web interface.
3. Under the PC card heading, choose Configuration.
4. Choose Discover a new card.
The SERIMUX searches for the PC card and displays a configuration menu.
5. Enter the appropriate parameters in the configuration menu.
WEP is the acronym for Wired Equivalent Privacy and is a security protocol for wireless LANs using encryption to protect data
transfers. If you are unsure of the settings for the wireless card, see your network administrator.
• SSID: Stands for Set Service Identifier and is the name of the wireless LAN network
• Use WEP key: The options are to enable or disable the WEP key
• WEP mode: Select the mode, either encrypted or unencrypted
• WEP key length: The options are 40 or 128 bits if the WEP key is enabled
• WEP key string: Refer to the wireless network administrator for the wireless encryption key string
6. Choose Save & apply.
Figure 14- Configure a Wireless Network PC card
14
Adding A Serial Modem
The modem must first be inserted and installed on the system before it can be used. To configure the modem do the following:
1. Access the web interface.
2. From the menu choose Configuration under the PC card heading.
3. Choose Discover a new card.
The SERIMUX searches for a PC card and displays a configuration menu.
4. Modify or accept the default Init string.
5. Choose Save & apply.
Figure 15- Configure a Serial Modem PC card
Using the Configuration Menu
Adding and Configuring a PC Card
To add a modem card, compact-flash card, wireless LAN card, or a network card to the SERIMUX using the configuration menu,
do the following:
1. Access the configuration menu.
2. Choose PC Card configuration then Discover a new card.
The system searches for the card and displays information on the product model number and type of card.
3. Configure the card by choosing Change card configuration.
4. Use the ESC key to back out to the main configuration menu.
5. Choose Save changes.
Figure 16- Use Configuration menu to add a PC card
15
Configuring
PortsPorts
Configuring
Introduction
This chapter provides information on configuring serial ports. Key port configuration attributes include the host mode, which
defines a type of communication between the port and a remote host, the protocol, authentication, user access restrictions, and
serial communication attributes.
Host Mode Configuration
The SERIMUX provides four modes of communication between serial devices and remote hosts. Console server, terminal server,
dial-in modem, and dial-in terminal server. These are described in the following sections.
Console Server Mode
Configuring a serial port as a console server creates a TCP socket on the SERIMUX that listens for a Telnet or SSH client
connection. Users who connect to the TCP socket have access to the device attached to the serial port as though the
device were connected directly to the network. RawTCP is also supported with the Console Server Mode.
C o n n e c tio n R e q u e s t
S e r ia l
P C
F r o n t V ie w
N T I
S E R IM U X
R
T M
o f S E R IM U X -S E C U R E
S E C U R E
N e t w o r k T e c h n o lo g ie s In c
P o w e r
R e a d y
1 0 0 M b p s
P C C a rd
1
L in k
A c t
2
3
4
5
6
7
8
9
1 1
1 0
1 2
1 3
1 4
1 5
1 6
1 7
1 8
1 9
2 0
2 1
2 2
2 3
2 4
2 5
2 6
2 7
2 8
2 9
3 0
3 1
3 2
In U s e
T X
R X
P C C a rd
N e tw o rk (E th e rn e t)
Figure 17- Host Mode Configuration- Console server mode
Terminal Server Mode
In terminal server mode, the SERIMUX serial port is configured to wait for data from the device connected to the port. If data is
detected, the SERIMUX starts a TCP session as a Telnet or SSH client to a pre-defined server. The server must be defined by the
user before the port can be configured for a Telnet or SSH client. This mode is used when the user wants to access servers on
the network from a serial terminal. RawTCP is also supported with the Terminal Server Mode.
S e r ia l
C o n n e c tio n R e q u e s t
T e r m in a ls
S e rv e r
F r o n t V ie w
N T I
S E R IM U X
R
T M
o f S E R IM U X -S E C U R E
S E C U R E
N e t w o r k T e c h n o lo g ie s In c
P o w e r
R e a d y
1 0 0 M b p s
P C C a rd
L in k
A c t
1
2
3
4
5
6
7
8
9
1 0
1 1
1 2
1 3
1 4
1 5
1 6
1 7
1 8
1 9
2 0
2 1
2 2
2 3
2 4
2 5
2 6
2 7
2 8
2 9
3 0
3 1
3 2
In U s e
T X
R X
P C C a rd
N e tw o rk (E th e rn e t)
Figure 18- Host Mode Configuration- Terminal server mode
16
Dial-In Modem Mode
In this mode, the SERIMUX assumes an external modem is attached to the serial port and is waiting for a dial-in connection from
a remote site. When a user dials-in using a terminal application, the SERIMUX accepts the connection and displays a menu listing
available serial ports. Users can then select a serial port and access the devices attached to the SERIMUX by selecting the serial
port number from the menu.
C o n n e c tio n R e q u e s t
P S T N
S e r ia l
M o d e m
F r o n t V ie w
N T I
S E R IM U X
R
T M
P C
P C M o d e m
C a rd
o f S E R IM U X -S E C U R E
P C
S E C U R E
N e t w o r k T e c h n o lo g ie s In c
P o w e r
R e a d y
1 0 0 M b p s
P C C a rd
1
L in k
A c t
2
3
4
5
6
7
8
9
1 0
1 1
1 2
1 3
1 4
1 5
1 6
1 7
1 8
1 9
2 0
2 1
2 2
2 3
2 4
2 5
2 6
2 7
2 8
2 9
3 0
3 1
3 2
In U s e
T X
R X
P C C a rd
N e tw o rk (E th e rn e t)
Figure 19- Host Mode Configuration- Dial-In modem mode
Dial-In Terminal Server Mode
Dial-in terminal server mode is a combination of the terminal server mode and the dial-in modem mode. In the dial-in terminal
server mode, the SERIMUX assumes the serial port is connected to an external modem and is waiting for a dial-in connection
from a remote site. When users dial-in using terminal applications, the SERIMUX accepts the connection as a Telnet or SSH client
to a pre-defined server. This mode is most frequently used when users want to use modems to access servers on a network.
C o n n e c tio n R e q u e s t
P S T N
M o d e m
T e r m in a ls
M o d e m
S e rv e r
F r o n t V ie w
N T I
S E R IM U X
R
T M
P C M o d e m
C a rd
o f S E R IM U X -S E C U R E
S E C U R E
N e t w o r k T e c h n o lo g ie s In c
P o w e r
R e a d y
1 0 0 M b p s
P C C a rd
L in k
A c t
1
2
3
4
5
6
7
8
9
1 0
1 1
1 2
1 3
1 4
1 5
1 6
1 7
1 8
1 9
2 0
2 1
2 2
2 3
2 4
2 5
2 6
2 7
2 8
2 9
3 0
3 1
3 2
In U s e
T X
R X
P C C a rd
N e tw o rk (E th e rn e t)
Figure 20- Host Mode Configuration- Dial-In terminal server mode
17
Configuring Host Mode
To configure a serial port for host mode, enter the values in the applicable fields. To access the Host mode configuration screen,
do the following:
1. Access the web interface.
2. Under the Serial Port heading, choose Configuration.
3. Choose All or an Individual port > Host mode configuration.
4. Fill in the highlighted fields as they apply to your configuration.
• Host mode: The options are console server mode, terminal server mode, dial-in modem mode, and dial-in terminal
server mode.
• Type of console server: The options are MS SAC console, which you use to provide a graphic user interface to the
Windows Server 2003 Special Administration Console (see "Microsoft SAC Support" on page 52) and Other, which you
use in all other cases.
• Enable/Disable Assigned IP address. Determines whether an IP address will be assigned to the port. The default is
Enable.
• Assigned IP: Also known as alternate IP, this field assigns an IP address to the port, enabling a user to Telnet directly to
the serial port using an IP address (without having to specify a TCP port).
• Listening TCP port: This is the TCP port users will specify to access the port when connecting directly to the port using
Telnet or SSH.
• Destination IP: Used in terminal server mode, this is the IP address of the system that users will be automatically
connected to when they access the port.
• Destination port: Used in terminal server mode, this is the TCP port that will be used when the user who accesses the
port is automatically connected to a system on the network.
• Protocol: The options are SSH, RawTCP, and Telnet.
• Telnet/SSH break sequence: The sequence of characters that sends a break character to a device.
• Inactivity timeout: The timeout length ranges from 1 to 3600 seconds. 0 means that there is no timeout.
• Modem init string: Use the default string or enter your own string.
• Dial-in modem escape sequence: The key sequence used to return to the menu in dial-in mode.
• Use comment: Determines whether a port user is prompted to add a comment each time the port is accessed.
• Quick connect via: Determines method for connecting to a port when in console server mode.
5. Choose Save & Apply.
Figure 21- Configure serial port for host mode
18
Supported Protocols
In configuring a serial port, the user has three protocol options. The three protocols available are: RawTCP, SSH, and Telnet.
•
Choose SSH as the protocol for users logging in from an SSH client program to access a port.
•
Choose RawTCP for users connecting directly to a TCP socket.
•
Choose Telnet for users logging in from a Telnet client program and accessing the ports.
Use the Host mode configuration page in the web interface to select the correct
protocol.
Port Parameters
In attaching a serial device to a SERIMUX serial port, the port parameters must match. The serial ports by default are enabled,
meaning users have full access to the port. To configure the port parameters for the SERIMUX, do the following:
1. Access the web interface.
2. Under the Serial Port heading, choose Configuration.
3. Choose All or an Individual port > Port parameters.
4. Fill in the serial port parameters. The following are the defaults:
bps
= 9600
data bits
= 8
parity
= none
stop bits
=1
flow control
= none
DTR behavior = always high
5. Choose Save & Apply.
Figure 22- Setup serial port communication parameters
DTR Behavior
DTR can be set on the serial port to one of three settings: always high, always low, or High when open. Setting the DTR to High
when open keeps the DTR high if a TCP connection is established. The DTR setting cannot be set by the user when the host
mode is configured for dial-in modem or dial-in terminal server mode.
Inter-character Timeout
This setting is only available when the host mode protocol is set for RawTCP. The parameter sets the time value for the SERIMUX
to transfer data stored in the buffer. The SERIMUX transfers data when the buffer is full using the TCP/IP protocol. However, if it is
not full, the SERIMUX will also transfer data dependent on the timeout value selected.
19
Using the Configuration Menu
Host Mode Configuration
1. Access the configuration menu.
2. Choose Serial port configuration > an individual port number or 0 (zero) for all ports > Host mode configuration.
Figure 23- Configure Host mode via Configuration menu
3. Enter the desired parameters for each menu item.
4. Use the ESC key when all parameters are entered to return to the main menu.
5. Choose Save changes.
Port Parameters
1. Access the configuration menu.
2. Choose Serial port configuration > an individual port number or 0 (zero) for all ports.
3. Enter the desired parameters for each menu item.
Figure 24- Setup Port communication parameters via Configuration menu
4. Use the ESC key when all parameters are entered to return to the main menu.
5. Choose Save changes.
20
System
andPort
Port
Logging
System and
Logging
Introduction
The SERIMUX provides four options for saving system and port logs. The options are: a syslog server, NFS server, compact-flash
card, and the SERIMUX memory. When memory is selected as the storage location, log files are saved to volatile memory,
meaning files are lost when the power is turned off. To use a syslog server, an NFS server, or a compact-flash card, the user must
first enable the devices and enter the required information. Compact-flash cards must be installed before they can be enabled and
configured for logging purposes. System logs track events such as logins, authentication failures, system configuration changes,
and more. Port logs on the other hand document the data flow through the serial ports. Locations for viewing the system and port
logs is outlined in this chapter.
Enabling System Logging Services
Enable Syslog Server
To enable the SERIMUX for system or port logging on a syslog server, do the following:
1. Access the web interface.
2. Under the Network heading, choose SYSLOG server configuration.
3. Choose Enabled.
4. Enter the IP address of the primary and secondary (if applicable) syslog server and select the syslog facility from the drop down
menu.
5. Choose Save & apply.
Figure 25- SYSLOG server configuration menu
Enable NFS Server
Log data can also be saved to an NFS server, but the NFS server must be configured with read and write privileges. To use an
NFS server, the user must specify the NFS server’s IP address and its mounting path. To enable the NFS server for port or
system logging, do the following:
1. Access the web interface.
2. Under the Network heading, choose NFS server configuration.
3. Choose Enabled.
4. Enter the IP address of the primary and secondary (if applicable) NFS server and the mounting path of each.
5. Choose Save & apply.
21
Figure 26- NFS server configuration menu
Enable A Compact-flash Card
The compact-flash card must be installed and configured on the SERIMUX before it can be used for system logging or storing
SERIMUX configuration information. See Adding a Compact-flash Card on page 11.
Enable SERIMUX Memory
The SERIMUX memory is already enabled for port logging and only needs to be configured for system or port logging. See
Configuring System Logging Services (next section).
Configuring System Logging Services
To configure the SERIMUX for system logging, do the following:
1. Access the web interface.
2. Under System status and log, choose System logging.
3. Choose Enabled for System logging and the log buffer size.
4. From the System log storage location, choose the location you want from the drop down menu. The choices available are
dependent on what has been enabled and/or installed. The SERIMUX memory choice is always available.
5. Choose to enable or disable email alerts and the number of log messages to send. The default value is 5 seconds for the delay
in log email messages.
6. Enter the contact person’s email address.
7. Choose Save & apply.
22
Figure 27- Configure system logging services
Viewing System Logs
The system logs can be viewed from the web interface on the System logging page or from the location where they have been
saved. The following table lists the file locations of the system logs.
Log Storage
Digi memory
Compact-flash card
Syslog server
NFS server
System Logfile
File Location
/tmp/logs
/mnt/flash/logs
must be viewed on the syslog server
/mnt/nfs/logs
Port Logging
If a serial port is configured for console server mode, the port logging feature can be enabled. Port logging allows the user to save
serial data to the memory of the SERIMUX, a compact-flash card, a syslog server, or to an NFS server. If the memory is used for
port logging, all data will be cleared when the system’s power is turned OFF.
Users can also define alarm keywords for each serial port and send email alerts or SNMP traps to enable unattended serial data
monitoring. To configure a serial port for port logging in console server mode, do the following:
1. Access the web interface.
2. Under the Serial Port heading, choose Configuration.
3. Choose All or the Individual port and then Port logging.
4. Configure the settings.
5. Choose Save & apply.
Note: When port logging is enabled, a Port Event Handling page is available to create alarm keywords and send alerts.
See Alerts and Notifications on page 24 for more information.
23
Figure 28- Port logging menu
Viewing Port Logs
The port logs can be viewed from the web interface on the Port logging page or from the location where they have been saved.
The following table lists the file locations of the system logs.
Log Storage
Digi memory
Compact-flash card
Syslog server
NFS server
System Logfile
File Location
/tmp/port#data
/mnt/flash/port#data
must be viewed from the syslog server
/mnt/nfs/port#data
To view the port logs on the NFS server for port number 5, enter the following command:
more /mnt/nfs/port5data
Partial logfiles can also be viewed on the web interface by going to Serial port > Configuration > select a port you want to view >
Port logging.
Using the Configuration Menu
System Logging
System logging is a two part process.
First, the device being used to record the system logs must be configured.
Secondly, system logging must be configured for the system under System status and log.
System logs can be saved to the SERIMUX system memory (there is no need to configure the memory), a compact-flash card, an
NFS server, or a Syslog server.
Configure the System Log Device
To configure the compact-flash card for system logging, see Adding a Compact-flash Card on page 11. For an NFS or Syslog
server, do the following:
1. Access the configuration menu.
2. Choose Network configuration > NFS or SYSLOG server configuration.
3. Enter the desired parameters for the menu items.
4. Use the ESC key when all parameters are entered to return to the main menu.
5. Choose Save changes.
24
Configure System Logging
To configure the SERIMUX for system logging, do the following:
1. Access the configuration menu.
2. Choose System Status and log > System logging.
Figure 29- System status logging setup via Configuration menu
3. Enter the desired parameters for the menu items.
4. Use the ESC key when all parameters are entered to return to the main menu.
5. Choose Save changes.
Alerts
and Notifications
Alerts
and Notifications
Introduction
The SERIMUX can be configured for system alerts and notifications. It sends email messages when the number of system log
messages reaches a certain value or when an alarm message is detected in the serial port data. The SERIMUX uses SMTP
(Simple Mail Transfer Protocol) for sending the notifications. To use SMTP, the system administrator must configure a valid
SMTP server for sending the emails. The SERIMUX supports three types of SMTP servers: SMTP server without authentication,
SMTP server with authentication, and POP before SMTP.
The SERIMUX also supports SNMP (Simple Network Management Protocol), a protocol used to manage a network and monitor
devices on a network. System and port alerts can also be sent using SNMP traps. The SERIMUX supports both versions 1 and 2
of the SNMP protocol. The main function of SNMP on the SERIMUX is to allow a system administrator to query remote devices for
information.
!
P a n ic
S e r ia l
P a n ic
P C
In te r n e t
S M T P
S e rv e r
F r o n t V ie w
N T I
S E R IM U X
R
T M
o f S E R IM U X -S E C U R E
S E C U R E
N e t w o r k T e c h n o lo g ie s In c
P o w e r
R e a d y
1 0 0 M b p s
P C C a rd
L in k
A c t
1
2
3
4
5
6
7
8
9
1 0
1 1
1 2
1 3
1 4
1 5
1 6
1 7
1 8
1 9
2 0
2 1
2 2
2 3
2 4
2 5
2 6
2 7
2 8
2 9
3 0
3 1
3 2
In U s e
T X
R X
P C C a rd
N e tw o rk (E th e rn e t)
Figure 30- SERIMUX used for system alerts and notifications
25
Configuring SMTP Alerts
Most SMTP servers check the sender’s email address with the host domain name to verify the address as authentic.
Consequently, when assigning an email address for the device email address, any arbitrary username with the
registered hostname may be used. An example is [email protected].
To configure the SERIMUX for SMTP alerts, the following parameters are required:
• SMTP server: Use either the hostname or the IP address.
• Device mail address: Specify the sender’s email address for the log and alarm delivery.
• SMTP mode: Specify the type of SMTP server to use.
• Username and password: These fields are required for POP before SMTP and SMTP with authentication servers.
To configure SMTP alerts on the SERIMUX, do the following:
1. Access the web interface.
2. Under the Network heading, choose SMTP configuration.
3. Fill in the required fields. SMTP with authentication and POP before SMTP require usernames and passwords.
4. Choose Save & apply.
Figure 31- SMTP configuration menu
SNMP Information
Applications such as NMS (Network Management System) or an SNMP browser can exchange information with the SERIMUX
and control actions to the unit. The protocol functions defined for SNMP includes GET, SET, GET-Next, GET-Bulk, and TRAP.
Below are the definitions of the protocol functions found in SNMP. Authentication, power on, and link up traps are supported.
Protocol
GET
SET
GET-Next
GET-Bulk
TRAP
Function
Queries a device for more information
Makes changes to a device's state
After an initial GET query, goes to the next value
Retrieves tables of information and security functions
Notifies a system administrator of a significant event
26
Configuring SNMP
To configure the SERIMUX for SNMP do the following:
1. Access the SERIMUX web interface.
2. Under the Network heading, choose SNMP configuration.
3. Fill in information for the MIB-II system objects section and choose Yes under EnableAuthenTrap.
• sysContact: Identity of the contact person managing the MIB-II system.
• sysName: The name identifying the system. By convention, this is the fully qualified domain name of the SERIMUX
unit.. An example is:[email protected].
• sysLocation: The physical location of the unit such as Room 264 or Engineering Lab.
• sysService (Read only): A series of values, separated by commas, indicating the set of services the system provides.
By default the SERIMUX only supports Application (7) service level.
• EnablePowerOnTrap: Determines whether the SNMP agent generates a trap each time the SERIMUX is started.
• EnableAuthenTrap: Indicates whether the SNMP agent process is permitted to generate authentication failure traps.
• EnableLinkUpTrap: Determines whether the SNMP agent generates a trap each time the network connection comes
up.
Note: Trap values override all other configuration information, meaning all other authentication failure traps can be
disabled with this setting.
4. Enter Access control settings.
• IP Address: Defines what applications can access the SERIMUX SNMP agent to exchange information and control
actions. If no IP addresses are listed, any application can access the SNMP agent.
• Community: The options are public or private.
• Permissions: The options are Read only or Read/Write.
5. Enter Trap receiver settings.
• IP Address: Enter the IP address of the device receiving the trap alerts.
• Community: The options are public or private.
• Version: Choose the SNMP version, either version 1 or version 2c.
6. Choose Save & apply.
Figure 32- SMNP configuration menu
27
Managing the SNMP Protocol
The SERIMUX SNMP protocol can be managed using an NMS or SNMP browser. However, before the NMS or SNMP browser
can access the data, the Access control settings must list the IP address of the host from which the browser is executed. See the
preceding graphic for details.
Configuring Port Event Handling
Once an SMTP or SNMP server has been configured, it can be used to send port-related alerts and notifications. The following
describes how to configure a port for port event handling.
1. Access the web interface.
2. Choose Serial port > Configuration.
3. Choose a port to configure and then Port logging.
4. Use the Port logging page to enable logging.
Figure 33- Configure a port for to enable logging of port events
5. Choose Save & apply.
6. Choose Port event handling.
The following window appears.
FYI: "Key word" is
any text string that
will trigger an alert
when it traverses
the serial port.
Figure 34- Configure port for event handling
7. Complete configuration and then choose Save & apply.
28
Using the Configuration Menu
Configuring SNMP
To configure SNMP from the configuration menu, do the following:
1. Access the Configuration menu.
2. Choose Network configuration > SNMP configuration.
Figure 35- Configure SNMP via Configuration menu
3. Enter the desired parameters for the menu items.
4. Use the ESC key when all parameters are entered to return to the main
menu.
5. Choose Save changes.
Configuring SMTP
To configure SMTP from the configuration menu, do the following:
1. Access the Configuration menu.
2. Choose Network configuration > SMTP configuration.
Figure 36- Configure SMTP via Configuration menu
3. If the Send mail option is disabled, you must first enable it to see the rest of the menu.
Press 1 to bring up the enable/disable option
press 1 again to enable it.
4. Enter the desired parameters for the menu items.
5. Press Enter to refresh the screen with the configuration changes
6. Use the ESC key when all parameters are entered to return to the main menu.
6. Choose Save changes.
29
Configuring
Security
and Authentication
Configuring
Security
and Authentication
Introduction
The SERIMUX provides several ways to control access to the network and the devices on the network. One method is through IP
filtering, which allows or prevents users with specific IP addresses from accessing devices or serial ports on the network. IP
filtering can be permitted or restricted for all ports globally or on a per port basis. Another access control method involves
restricting or permitting specific users. Users can be easily added or removed from either a restricted or permitted users list. Sniff
session access, which allows multiple users to access a single port, is also discussed.
The SERIMUX provides for various authentication methods. They are: Local, RADIUS, TACACS+, LDAP, and Kerberos.
Authentication may be configured where a secondary method is attempted if the primary method fails.
Configuring Network IP Filtering
Access to the SERIMUX can be controlled through IP filtering. IP filtering controls access to the SERIMUX from remote hosts
either trying to access from a remote console or a web browser. IP filtering can also be used to control access to individual ports.
1 9 2 .1 6 8 .1 .1 0 8
1 9 2 .1 6 8 .5 .1 0
S e r ia l
F r o n t V ie w
N T I
S E R IM U X
R
T M
1 9 2 .1 6 8 .5 .1 0
o f S E R IM U X -S E C U R E
S E C U R E
N e t w o r k T e c h n o lo g ie s In c
P o w e r
R e a d y
1 0 0 M b p s
P C C a rd
L in k
A c t
1
2
3
4
5
6
7
8
9
1 0
1 1
1 2
1 3
1 4
1 5
1 6
1 7
1 8
1 9
2 0
2 1
2 2
2 3
2 4
2 5
2 6
2 7
2 8
2 9
3 0
3 1
3 2
In U s e
T X
R X
P C C a rd
In te r n e t
N e tw o rk (E th e rn e t)
1 9 2 .1 6 8 .1 .1 0 8
Figure 37- SERIMUX access controlled by IP filtering
Console and Web IP Filtering
IP filtering is a way of controlling access to the SERIMUX from remote hosts. If the administrator wants to allow specific remote
hosts access to the SERIMUX, the administrator must provide the host’s IP address and subnet mask. To configure the SERIMUX
for IP filtering, do the following:
1. Access the web interface.
2. Under the Network
heading, choose IP filtering.
3. Choose Enabled for either Telnet
console, SSH console, Web IP
filtering or all.
4. Enter the IP address and subnet
mask for the remote host.
5. Choose Save and apply.
Figure 38- IP filtering menu
30
The following table displays examples of allowed remote hosts.
Input format
Allowable Hosts
Base Host IP
Address
Subnet mask
Any host
0.0.0.0
0.0.0.0
192.168.1.120
192.168.1.120
255.255.255.255
192.168.1.1 - 192.168.1.254
192.168.1.0
255.255.255.0
192.168.0.1 192.168.255.254
192.168.0.0
255.255.0.0
192.168.1.1 - 192.168.1.126
192.168.1.129 192.168.1.254
192.168.1.0
192.168.1.128
255.255.255.128
255.255.255.128
Serial Port IP Filtering
Each serial port can be configured individually for IP filtering. To configure a serial port for IP filtering, do the following:
1. Access the web interface.
2. Under the Serial Port heading, choose Configuration.
3. Choose All under All port configuration to configure all the ports or a specific port under Individual port configuration > Port IP
filtering.
4. Enter the IP address and subnet mask for the remote host that is allowed access.
5. Choose Save & apply.
Figure 39- Serial Port IP filtering
Using IP Tables
Linux and UNIX systems have an IP filtering program called IPtables. Administrators desiring to add further security by controlling
access to the SERIMUX should look at this program. Information about IPtables can be found on most Linux or UNIX systems by
viewing the man pages.
Configuring User Access Control
Another method to control access to the serial ports on the SERIMUX is through the User Access Control configuration. This
configuration can be done on a per port basis or globally by selecting the All Ports option. There are three options for user access
control: None, Restricted user list, and Permitted user list. Users must have already been added to the system before they can be
entered on a Restricted or Permitted user list or for a Sniff Session user list.
• When None is selected, any user that is registered on the authentication server can access a serial port.
• When Restricted user list is selected, a user cannot access a serial port even if they are registered on an authentication
server.
• When Permitted user list is selected, only this user can access a specific serial port.
Note: Users do not necessarily need to be local, but can be users on any configured authentication server.
31
Figure 40- Configure User access control
Sniff Session
A Sniff Session enables multiple users to access a single serial port for viewing the data stream. Users who are registered for a
sniff session can access a specific serial port even if another user is using the port. The SERIMUX supports multiple concurrent
sniff sessions.
• Allow all users to sniff: When checked, all users with permission to access the port can participate in sniff sessions.
• Sniff session escape sequence: Key sequence that ends a sniff session takes the user back to the sniff session
menu.
There are two options for Sniff mode:
• disabled: The sniff mode is disabled and no user can enter a sniff session
• enabled: The sniff mode is enabled and those in the Permitted user list can access the port
If enabled, the sniff session display mode has three options that can be configured on a per-port basis from the Serial port
configuration page.
• user input: A sniff user can view all data to a serial port from a remote connection
• server output: A sniff user can view all data from a serial port to a remote connection
• both: A sniff user can see all data transmitted or received through a serial port
32
S e r ia l
lo g in
p o rt 3
P o rt 3
F r o n t V ie w
N T I
S E R IM U X
R
T M
S n iff S e s s io n
(R e a d o n ly a c c e s s )
o f S E R IM U X -S E C U R E
S E C U R E
N e t w o r k T e c h n o lo g ie s In c
P o w e r
R e a d y
1 0 0 M b p s
P C C a rd
L in k
A c t
1
2
3
4
5
6
7
8
9
1 0
1 1
1 2
1 3
1 4
1 5
1 6
1 7
1 8
1 9
2 0
2 1
2 2
2 3
2 4
2 5
2 6
2 7
2 8
2 9
3 0
3 1
3 2
In U s e
T X
R X
P C C a rd
In te r n e t
N e tw o rk (E th e rn e t)
lo g in
p o rt 3
M a in S e s s io n
(R e a d /w r ite a c c e s s )
Figure 41- User in a Sniff Session
Viewing A Sniff Session
A sniff user enters a sniff session by starting a Telnet session on a specified port. In the following example, a sniff user Telnets to
port 7 of a SERIMUX. From the command prompt enter the following command:
telnet 192.168.100.42 7007
Figure 42- Sniff session user menu
When sniff users login to a port from a Telnet session, a sniff session menu is displayed with these options:
• 1 (Enter as the main session): Disconnects the user of the current main session from the system and allows the new user to
take over as the main session.
• 2 (Initiate a new sniff session): Initiates a new sniff session. Pressing the sniff session escape sequence (the default is Ctrl-Z)
returns the user to the sniff session menu.
• 3 (Take over a main session): Converts the user of the current main session to a sniff session user and enables the new user
to take over the current main session.
• 4 (Kill a sniff session): Kills the sniff session.
• 5 (Send message to port user): Enables sniff session user to send a message to other port users.
• 6 (Quit): Closes the Telnet session.
33
Authentication
The SERIMUX supports multiple methods of user authentication. The following methods are supported: Local, TACACS+,
RADIUS, LDAP, and Kerberos. The type of authentication protocol you use is dependent on your environment.
4 . A c c e s s g ra n te d
S e rv e r
F r o n t V ie w
N T I
S E R IM U X
R
T M
o f S E R IM U X -S E C U R E
S E C U R E
N e t w o r k T e c h n o lo g ie s In c
P o w e r
R e a d y
1 0 0 M b p s
P C C a rd
L in k
A c t
1
2
3
4
5
6
7
8
9
1 0
1 1
1 2
1 3
1 4
1 5
1 6
1 7
1 8
1 9
2 0
2 1
2 2
2 3
2 4
2 5
2 6
2 7
2 8
2 9
3 0
3 1
3 2
In U s e
T X
R X
P C C a rd
1 . C o n n e c tio n r e q u e s t
2 . Q u e r y U s e r ID
3 . A c c e p t U s e r ID
A u th e n tic a tio n
s e rv e r
Figure 43- SERIMUX supports user authentication
Configuring Authentication Methods for Port Access
Users can choose between having a single authentication method, such as RADIUS, or an authentication method where a Local
authentication service is used in addition to the RADIUS, LDAP, TACACS+ server, or Kerberos. These options are listed when
the SERIMUX is configured for authentication. To configure a SERIMUX for authentication, do the following:
1. Access the web interface.
2. Under the Serial Port heading, choose Configuration.
3. Choose All or an Individual port > Authentication.
4. From the drop down menu, choose an authentication method. A configuration screen for that particular authentication method is
displayed. The following figure displays the parameters for setting up a RADIUS server as the primary authentication server
and Local authentication if the primary authentication method fails.
Figure 44- Configure SERIMUX for authentication
5. Fill in the appropriate fields.
6. Choose Save & apply changes.
34
Configuring Authentication for the Web Server
1. Access the web interface.
2. Choose Network > Web server configuration.
The following screen appears.
Figure 45- Configure WEB server for authentication
3. Choose an authentication method and then Save & apply.
Note: When using remote authentication for the web server, such as Radius, TACACS+, LDAP or Kerberos, the user
must also be added to the local database. See "Adding, Editing, and Removing Users" on page 48 for details. Once the
user's password is approved by the authentication server, the SERIMUX uses the local permission rights to provide
proper access privileges for the user to ports and the configuration.
Using the Configuration Menu
Network IP Filtering
To configure the SERIMUX for Network IP filtering, do the following:
1. Access the configuration menu.
2. Choose Network configuration > IP filtering.
Figure 46- Use Configuration menu to setup IP filtering
3. Choose a menu item and enter the desired parameters for the menu items.
4. Use the ESC key to return to the main menu.
5. Choose Save changes.
35
Port IP Filtering
To configure the SERIMUX for Port IP filtering, do the following:
1. Access the configuration menu.
2. Choose Serial port configuration.
3. Choose an individual port number or 0 (zero) for all ports > IP filtering.
Figure 47- Configure Port IP filtering through the Configuration menu
4. Choose a menu item and enter the desired parameters for the menu items.
5. Use the ESC key when all parameters are entered to return to the main menu.
6. Choose Save changes.
Sniff Sessions
To configure a port or all ports for sniff users, do the following:
1. Access the configuration menu.
2. Choose Serial port configuration.
3. Choose an individual port number or 0 (zero) for all ports > User access control.
4. Choose a menu item and enter the desired parameters for the menu items.
5. Use the ESC key when all parameters are entered to return to the main menu.
6. Choose Save changes.
For information on entering a sniff session, see "Viewing A Sniff Session" on page 32.
Authentication
1. Access the configuration menu.
2. Choose Serial port configuration.
3. Choose an individual port number or 0 (zero) for all ports > Authentication.
Figure 48- Setup user authentication through the Configuration menu
4. Choose an Authentication type.
5. Use the ESC key to return to the main menu.
6. Choose Save changes.
36
Custom
Default
Custom
and and
Default
MenusMenus
Introduction
The SERIMUX has several default menus for easy configuration and access by different users. Depending on access privileges,
the menus available are the Web Interface, Configuration Menu, and Port Access menu. A custom menu feature for creating
menus is also available through the web interface. The custom menu feature enables system administrators to create menus for
specific users, which provide each with a customized interface to selected ports.
Making Custom Menus
Before making custom menus, plan the kind of menus and menu items to be made available to the users. A good plan would be
to:
1. Add users to the system.
2. Create a menu name with sort and display features.
3. Add menu items and submenus to the new menu.
4. Assign users to the menus.
Adding Users
Users cannot be assigned to a menu until the users have been added to the system.
To add users, do the following:
1. Access the web interface.
2. Choose Users administration under the System Administration heading.
3. Choose Add User and then fill in
settings to assign the user.
4. Choose Custom menu for the
Shell program.
5. Choose Add to add the user.
6. Continue to add users as
needed.
Note: It is not necessary to Save
to flash or Apply changes to add
users.
Figure 49- Add users to the system
Creating Menu Names
To make a custom menu, do the following:
1. Access the web interface.
2. Choose Configuration under the Custom Menus heading.
3. Enter the Menu Name to assign and choose the Add Menu button.
The menu is added.
4. Choose the hyperlink to the menu you just created.
5. From the drop down menu, select the way to Sort and Display items.
Figure 50- Creating menu names
6. Choose Save & apply.
7. Repeat as required to create additional menus.
37
Adding Menu Items
Once a menu name is defined and users are added, menu items can then be added. To add menu items, do the following:
1. Choose Configuration under Custom Menus and then the Menu Name hyperlink for the menu to be configured.
2. Choose Menu Items > Add Item.
The following screen appears.
Figure 51- Adding menu items
3. Fill in the desired parameters. The parameters are:
• Key: Assign any letter or number except a value already used by another menu item.
• Label: Assign a label or name for the menu item.
• Create new submenu: Assign a name for a new submenu that this menu item will be assigned or linked to.
• Go to existing submenu: Choose an existing submenu from the drop down menu that this menu item will be assigned
or linked to.
• Connect directly to a serial port: Connects the user to a specified port.
• Telnet to a remote host: Enter a remote host’s IP address or hostname.
• SSH to a remote host: Enter the hostname or IP address of a remote host and the remote username.
• Execute a custom command: Enter a customized command that is any valid command on the command line with
acceptable user privileges.
4. Choose Apply.
5. Repeat this procedure to add more menu items.
Note: To add or configure submenus, select the Submenus hyperlink on the Menu Configuration page.
38
Assigning Users To A Menu
Once a menu has been created, users can be assigned to the menu by doing the following:
1. Access the web interface.
2. Under the Custom Menus heading, choose Configuration > Menu Users.
A list of available users is displayed.
Figure 52- Assign users to a menu
3. Choose a menu for a user by selecting a menu from the drop down Assigned Menu list.
4. Choose Save & apply.
Using the Configuration Menu
The configuration menu is available through a Telnet or SSH session to the root user and system administrator. The configuration
menu enables the authorized users to configure the SERIMUX with the same functionality as is available with the web interface.
The only functionality missing from the configuration menu is the ability to create custom menus.
The root user, by default, is connected from a Telnet session to the Linux command line. In order to access the configuration
menu, the root user enters configmenu at the command prompt. The configuration menu follows the layout of the web interface.
Figure 53- The Configuration Menu
Choices for the configuration menu are made by selecting the number of a menu item. The ESC key allows the user to move back
a menu each time it is selected. Sometimes only one menu item is presented; however, that single menu item has two or more
options that have to be configured.
39
Port Access Menu
Another default menu is the Port Access Menu, which is available to all users. Access to this menu can be established through a
Telnet or SSH session or through the web interface by selecting Serial ports > Connection > Port access menu connection.
Figure 54- The Port Access menu through the Configuration menu
Users access this menu through a Telnet or SSH session using the IP address of the SERIMUX followed by the port number
7000. Here is an example:
telnet 192.168.100.200 7000
By default root is connected to the command line interface and the preceding option allows the root user access to the port access
menu.
Configuring
Remote
Configuring
Remote
Dial-InDial-In
AccessAccess
Introduction
The SERIMUX supports dial-in connections from remote sites for out-of-band access. In this configuration, the SERIMUX has
serial ports configured for external modems and waits for dial-in connections from remote sites. If users dial-in using a terminal
application, the SERIMUX accepts the connection and displays a menu of available serials ports. In a dial-in terminal server
mode, the SERIMUX makes a TCP connection with either a Telnet or SSH client to a pre-defined server. RawTCP is also an
option for dial-in users.
For more information on the different types of Host mode configuration, see "Host Mode Configuration" on page 15.
C o n n e c tio n R e q u e s t
P S T N
S e r ia l
M o d e m
F r o n t V ie w
N T I
S E R IM U X
R
T M
P C
P C M o d e m
C a rd
o f S E R IM U X -S E C U R E
S E C U R E
N e t w o r k T e c h n o lo g ie s In c
P o w e r
R e a d y
1 0 0 M b p s
P C C a rd
L in k
A c t
1
2
3
4
5
6
7
8
9
1 0
1 1
1 2
1 3
1 4
1 5
1 6
1 7
1 8
1 9
2 0
2 1
2 2
2 3
2 4
2 5
2 6
2 7
2 8
2 9
3 0
3 1
3 2
In U s e
T X
R X
P C C a rd
N e tw o rk (E th e rn e t)
Figure 55- SERIMUX supports remote dial-in access for users
40
P C
Configuring For Dial-In Modem Access
To configure a serial port for a dial-in modem, enter the values for these fields: Host mode, Modem init string, and Inactivity
timeout. To access the Host mode configuration screen, do the following:
1. Access the web interface.
2. Under the Serial Port heading, choose Configuration.
3. Choose a specific port under Individual port configuration and then choose Host mode configuration.
4. Choose Dial-in modem for the Host mode.
5. Enter the information for Inactivity timeout and Modem init string.
• Inactivity timeout: The default value is 100 seconds. You can set the timeout for 1 to 3600 seconds or 0, for unlimited
timeout.
• Modem init string: The default modem init string is q1e0s0=2. The init string sets the modem to quiet mode, echo off,
and Auto Answer on two rings. The modem init string is used for initializing an external modem
attached to a SERIMUX serial port. See your modem user manual for more information.
6. Choose Save & apply.
Figure 56- Configure port for dial-in modem access
Adding a PC Modem
To install and configure the PC modem on the SERIMUX, do the following.
1. Insert the PC modem card into the PC slot.
2. Access the web interface.
3. From the menu, choose Configuration under the PC card heading.
4. Choose Discover a new card.
The SERIMUX searches for a PC card and displays a configuration menu.
5. Enter the appropriate parameters in the configuration menu.
6. Choose Save & apply.
Configuring For Dial-In Terminal Server Access
To configure a serial port for a dial-in terminal server access, enter the values for these fields: Host mode, Destination IP, Base
Port, Protocol, Inactivity timeout, and Modem init string. To access the Host mode configuration screen, do the following:
1. Access the web interface.
2. Under the Serial Port heading, choose Configuration.
3. Choose a specific port under Individual port configuration and then choose Host mode configuration.
4. Choose Dial-in terminal server for the Host mode.
41
Figure 57- Configure port for dial-in terminal server access
5. Fill in the appropriate fields as they apply to the configuration.
• Host mode: The options are console server mode, terminal server mode, dial-in modem mode, and dial-in terminal
server mode.
• Type of Console Server: The options are MS SAC console or Other.
• Enable/Disable assigned IP: Choose one
• Assigned IP: This is also known as alternate IP, where the user can Telnet directly to a serial port using an IP
address.
• Listening TCP port: This is also known as reverse Telnet, where a user Telnets to a port using an IP address and a
port number.
• Destination IP: In terminal server mode, the user connects directly to a port using an IP address.
• Destination port: In terminal server mode, the user connects directly to a port with an IP address and port number.
• Protocol: The options are SSH, RawTCP, and Telnet.
• Telnet/SSH break sequence: This is a sequence of characters that sends a break character to a device.
• Inactivity timeout: The timeout length ranges from 1 to 3600 seconds; 0 is unlimited timeout.
• Modem init string: Use the default string or enter a different string.
6. Choose Save & apply.
Using the Configuration Menu
Dial-in Modem Access
Individual serial ports on the SERIMUX can be configured for dial-in modem access. To use dial-in modem mode, an external
modem is first attached to a serial port and then the serial port is configured for dial-in modem access. In the illustration below,
port 7 is configured for a dial-in modem.
To configure a serial port for a dial-in modem, do the following:
1. Access the configuration menu.
2. Choose Serial port configuration.
3. Choose an individual port number and then Host mode configuration.
42
Figure 58- Use Configuration menu to configure port for dial-in modem access
4. Choose Dial-in modem and configure the other configuration parameters.
5. Use the ESC key to return to the main menu.
6. Choose Save changes.
Dial-in Terminal Server Access
Individual serial ports on the SERIMUX can be configured for a dial-in terminal
server access. To use dial-in terminal server access, an external modem is
first attached to a serial port on the SERIMUX and then the serial port is
configured for dial-in terminal server mode. In the illustration below, port 7 is
configured for dial-in terminal server mode.
In terminal server mode, the user is connected directly to a server.
To configure a serial port for a dial-in terminal server, do the following:
1. Access the configuration menu.
2. Choose Serial port configuration.
3. Choose an individual port number and then Host mode configuration.
Figure 59- Use Configuration menu to configure port for dial-in terminal server access
4. Choose Terminal Server and configure the other configuration parameters.
5. Use the ESC key to return to the main menu.
6. Choose Save changes.
43
Port
Clustering
Port
Clustering
Introduction
Port clustering is the ability to manage many serial ports on one or multiple slave devices from one master device using a single
IP address. For instance, the SERIMUX can manage up to 16 slave devices or a maximum 544 serial ports with one Master
device. Ports can be configured either collectively or individually depending on user preference. Each master and slave device is
configured separately; they cannot be configured from one master console.
To set up the SERIMUX for port clustering you will need to:
• Configure all SERIMUX serial ports
• Assign one SERIMUX as the master clustering device; all other SERIMUXs default to slave devices.
• Import slave configuration to the SERIMUX master device
R e m o te P C
M a s te r
7 0 0 0 -7 0
8 0 0 0 -8 0
9 0 0 0 -9 0
2 1 1 .1 1 2
P o rts
P o rts
P o rts
IP
3 1
3 1
3 1
.6 7
- L o c a l
- S la v e 1
- S la v e 2
.3 4
T e ln e t 2 1 1 .1 1 2 .6 7 .3 4 8 0 0 5
S E R IM U X -S E C U R E
N T I
S E R IM U X
R
T M
In te r n e t
S E C U R E
N e t w o r k T e c h n o lo g i e s In c
P o w e r
R e a d y
1 0 0 M b p s
P C C a r d
1
L in k
A c t
2
3
4
5
6
7
8
9
1 1
1 0
1 2
1 3
1 4
1 5
1 6
1 7
1 8
1 9
2 0
2 1
2 2
2 3
2 4
2 5
2 6
2 8
2 7
2 9
3 0
3 1
3 2
In U s e
T X
R X
P C
C a rd
P o rt 5
S E R IM U X -S E C U R E
N T I
S E R IM U X
R
T M
S E R IM U X -S E C U R E
N T I
S E C U R E
N e t w o r k T e c h n o lo g i e s In c
S e rv e r
S E R IM U X
R
T M
S E C U R E
N e t w o r k T e c h n o lo g i e s In c
P o w e r
R e a d y
1 0 0 M b p s
P C C a r d
L in k
A c t
1
2
3
4
5
6
7
8
9
1 0
1 1
1 2
1 3
1 4
1 5
1 6
1 7
1 8
1 9
2 0
2 1
2 2
2 3
2 4
2 5
2 6
2 7
2 8
2 9
3 0
3 1
3 2
In U s e
T X
R X
P o w e r
R e a d y
P C
1 0 0 M b p s
P C C a r d
L in k
A c t
1
2
3
4
5
6
7
8
9
1 0
1 1
1 2
1 3
1 4
1 5
1 6
1 7
1 8
1 9
2 0
2 1
2 2
2 3
2 4
2 5
2 6
C a rd
S la v e 1
1 9 2 .1 6 8 .1 .1 0 2
2 7
2 8
2 9
3 0
3 1
3 2
In U s e
T X
R X
P C
C a rd
S la v e 2
1 9 2 .1 6 8 .1 .1 0 3
Figure 60- SERIMUX used for port clustering
Configuring Port Clustering
Assigning Master Clustering Mode
To assign a SERIMUX as the master cluster device, do the following:
1. Access the SERIMUX through the web interface. This SERIMUX needs to be the unit to be used as the Master.
2. Under the Clustering heading, choose Configuration.
3. Choose Master from the drop down menu.
Subsequent units will be configured in Slave mode by default.
4. Choose Save & apply.
Figure 61- Assign the Master cluster device
Configuring Slave Ports on the Master Unit
Ports on slave units are automatically enabled and set to the Telnet protocol. To disable some or all of the ports or to use a
different protocol, make these changes to the slave units before performing the autoconfigure on the slave ports on the master
unit.
To configure the slave serial ports on the master unit, do the following:
1. Access the SERIMUX through the web interface.
2. Under the Clustering heading, choose Configuration.
3. Select the hyperlinked number under Unit ID or the dashed line under IP address.
44
Figure 62- Configure Slave ports on the Master Unit
.
4. Select Enable from the "Enable/Disable this unit" drop down menu.
A new configuration screen appears.
Figure 63- Enable a Slave unit and setup the port information
5. Enter the IP address of the slave unit in the IP address field.
6. Select the Auto Config button and the Master SERIMUX automatically imports the configuration of the Slave serial ports to the
Master SERIMUX. The following figure displays serial port configuration imported from a slave unit.
7. Choose Save & apply.
Clustering Parameters
Below is a list and brief description of clustering parameters:
• Enable: This shows whether the port is enabled or disabled. All ports are enabled by default.
• Source port: This is the port number on the master unit.
• Destination port: The destination port is the corresponding port number on the slave unit. On a 32-port slave unit, the
destination port numbers range from 7001 to 7032.
• Protocol: The four options are N/A (not available), SSH, Telnet, and RawTCP.
• Base source port: This sets the first port number on a master unit. By default the base source port on the master unit
is 7001. However, the user can change the base source port number to another number and the
rest of the ports on the unit will be sequentially numbered from the base source port. For example,
starting the base source port number with 7010 results in a 32-port unit being numbered from 7010
to 7041.
45
Figure 64- Setup clustering parameters
• Base destination port: This is the physical port number on a remote slave unit. By default the base destination port on
the first slave unit is 7001. However, the user can change the base destination port number to
another number and the rest of the ports on the unit will be sequentially numbered from the
base destination port. For example, starting the base destination port number with 7010
results in a 32-port unit being numbered from 7010 to 7041.
Using the Configuration Menu
Clustering
By default clustered slave devices are configured using the Telnet protocol and port parameters of the following: bps=9600, data
bits=8, parity=none, stop bits=1, flow control=none. When the master device autoconfigures a slave device, it simply imports the
information from the slave unit. If other protocols or other port parameters are desired, configure the slave unit first with those
parameters before autoconfiguring. Before starting this configuration procedure, the slave units should already be configured
unless they are to be set to the default values. To set up the SERIMUX for clustering, do the following:
1. Access the configuration menu.
2. Choose Clustering configuration > Unit position.
3. Assign the unit as the master device.
A new screen is displayed.
Figure 65- Setup clustering using Configuration menu
4. Enter the number 1 for the first slave unit.
5. Choose Enable/Disable unit clustering > Enable.
6. Enter the values for Slave Unit IP, No. of ports, and Port configuration.
7. Choose ESC to return to the main menu.
8. Choose Exit and apply changes.
46
Command
Line Line
Interface
Command
Interface
Introduction
The SERIMUX runs the embedded Linux Hard Hat operating system. The command line interface for configuration purposes is
accessible only by the root user. The system administrator has read only privileges from the command line. By default the root
user is connected to the CLI (command line interface) when Telnetting to the SERIMUX. To gain access to the command
prompt, the root user uses the username root and the root password. The default root password is dbps.
This chapter includes the Linux commands available on the embedded Linux operating system and the location of files useful to
the root user for administrative purposes.
Note: The root user should be aware that deleting or corrupting files may prevent the SERIMUX from booting properly.
Before editing any files, be sure to back up the configuration files.
Linux Commands
The purpose of this section is to list the various Linux commands available on the SERIMUX. This is simply a listing of commands
and does not detail what the commands do or give their particular parameters. If more information is needed, see the man pages
on a Linux system.
Two commands that are very important for saving and applying changes to the configuration files are:
• saveconf: The saveconf command saves the configuration files to flash memory.
• applyconf: The applyconf command immediately applies the configuration changes.
The configuration files are located in /tmp/cnf directory.
Two system utility menus that are important for configuring the SERIMUX and the serial ports are the portaccessmenu and
configmenu.
• portaccessmenu: This menu allows the user to configure the serial ports on a SERIMUX.
• configmenu: This menu enables the system administrator to configure the SERIMUX. It has essentially the same
functionality as the web interface for configuring a unit with the exception of the ability to create custom
menus.
Shell and Shell Utilities
sh
env
pwd
ash
false
bash
grep
echo
more
sed
which
mv
mknod
gzip
du
mkdosfs
umount
rm
chmod
zcat
find
mke2fs
scp
mkdir
touch
tar
cat
e2fsck
hostname
insmod
killall
reboot
usermod
sleep
rmmod
ps
telnet
whoami
stty
lsmod
half
init
who
route
telnet
ftp
File and Disk Utilities
ls
rmdir
sync
dd
vi
fsck
cp
ln
gunzip
df
tail
mount
System Utilities
date
uname
modprobe
shutdown
useradd
id
free
reset
kill
poweroff
userdel
su
Network Utilities
ifconfig
ssh
iptables
ping
47
Important File Locations
The SERIMUX has several files that are important for administrative use. Below is a brief listing of some files that the root user or
system administrator might desire to either monitor or edit.
Default Script
The default script file is executed whenever the SERIMUX is booted. The file is /usr/rc.user and can be modified with the vi editor.
The modified script becomes effective when the system is rebooted.
Booting Sequence
When the SERIMUX boots, it uncompresses the /cnf/cnf.tar.gz file to /tmp/cnf/* and unmounts the /cnf file. If the configuration files
are modified in the /tmp/cnf file and the configuration is saved to flash (saveconf), the unit mounts the /cnf file and compresses the
/tmp/cnf/* to /cnf/cnf.tar.gz.
User Storage Space
The SERIMUX comes with 1 megabyte of user storage space. This storage space can be used to store custom scripts. The
location is /usr2.
System
Administration
System
Administration
Introduction
This chapter describes how to perform tasks performed either by root or the system administrator. These tasks fall under the
general heading of system administration and include firmware upgrades, resetting the unit to defaults, and disaster recovery
procedures.
Upgrading the Firmware
Web Interface
It will be necessary to download the latest firmware version to a system on the same subnet as the SERIMUX. The latest firmware
can be downloaded from the SERIMUX support site at: http://www.nti1.com. Do the following to upgrade the firmware:
1. Access the web interface.
2. Under the System administration heading, choose Firmware upgrade.
3. Choose the Browse button and locate the firmware download.
4. Choose Upgrade. The SERIMUX will automatically reboot when the upgrade is complete.
Figure 66- Locate the firmware upgrade file
Resetting Factory Defaults
There are two ways to reset the unit to the factory defaults. The quickest and simplest method is to push and hold the hardware
factory default reset button until the Ready light on the front panel goes out. The reset button is located on the back panel of the
unit next to the Ethernet port.
R e a r V ie w
3 2
1 8
o f S E R IM U X -S E C U R E
1 6
2
1 0 0 -2 4 0 V A C
1 .2 A m p
5 0 -6 0 H z
F A C T O R Y
R E S E T
3 1
1 7
1 5
1
E T H E R N E T 1 0 /1 0 0
C O N S O L E
F a c to ry re s e t b u tto n
Figure 67- Reset factory defaults
48
The alternative method to reset the unit is through the web interface. The web interface provides the option of retaining the IP
settings. To use the web interface to reset the SERIMUX, do the following:
1. Access the web interface.
2. Under the System administration heading choose Configuration Management.
Figure 68- Reset factory defaults through web interface
3. Choose Factory default under Configuration import. The SERIMUX will automatically reboot.
Suggestion: It may be desired to save the current configuration before restoring defaults. If this is the case, instead of
Configuration import, select a desired location to save the configuration file to (i.e. Local machine) under Configuration
export, type a desired file name in the block provided, and export the existing configuration to a desired location for
future reference.
The following are the default values when the SERIMUX is reset to the factory defaults.
• Static IP Address: 192.168.161.5
• Port Access Menu IP Address: 192.168.1.100
• Port Access Menu TCP Port Number: 7000
• Serial Port IP Address: 192.168.1.101• Serial Port TCP Port Number: 7001-
Setting Date and Time
The SERIMUX provides two options for keeping system time. The first is by using an NTP server and the other is through an
internal battery backup. To configure the SERIMUX for date and time, do the following:
1. Access the web interface.
2. Under the System administration heading, choose Date and time.
Figure 69- Set the date and time
49
3. To use an NTP server, choose Enable, the NTP server’s IP address, the Time offset, and the Date and Time fields.
or
To use the internal battery fill in the Date and Time fields only.
4. Choose Save & apply.
Configuring A Device Name
The system administrator can assign a device name to the SERIMUX. This is often helpful for administration purposes to locate a
specific SERIMUX on the network. To assign the SERIMUX a device name, do the following:
1. Access the web interface.
2. Under the System administration heading, choose Device name.
3. Enter the name you want to assign the SERIMUX.
4. Choose Save & apply.
Adding, Editing, and Removing Users
The system administrator can add, remove, or edit user files easily from the web interface by doing the following:
1. Access the web interface.
2. Under the System administration heading, choose Users administration.
Figure 70- Administrator's user administration window
3. Choose to Add User, Edit User, or Remove User:
• Add a user: Assign a name, user group, and a password.
• Edit user files: Change user group, password, or their shell.
• Remove a user: Remove a user from the system.
Note: The password
for root can be
changed from the
command line
interface only using
the command passwd.
Figure 71- Edit a user
4. Choose Save & apply.
50
Using the Configuration Menu
Firmware Upgrade
Before upgrading firmware from the configuration menu it is necessary to:
• Download the firmware to a system on the same subnet
• Set up a terminal emulation program that supports Zmodem transfer protocol
To upgrade the firmware with the configuration menu, do the following:
1. Access the configuration menu.
Figure 72- Configuration menu
2. Choose System administration.
3. Choose Firmware upgrade. Enter y for Yes when asked if the user wants to upgrade the firmware.
If the firmware upgrade is successful, the SERIMUX will reboot automatically. If a Firmware upgrade failed! warning appears, do
not reboot the unit but repeat the upgrade process.
Restoring Factory Defaults
You have 5 choices to restore the unit to its factory defaults. They are to restore:
•
•
•
•
•
Network configuration
Serial port configuration
Clustering configuration
System user configuration
Custom menu
All of the defaults can be selected, or only those that need to be reset to default while leaving the other settings unchanged.
To restore the unit to the factory defaults, do the following:
1. Access the Configuration menu.
2. Choose System administration.
3. Choose Configuration management.
Figure 73- Reset factory defaults through Configuration menu
51
4. Choose Configuration import.
5. Choose one or more selection to be reset to defaults.
Press A to toggle the Network Configuration to be restored. You will be prompted to import Network configuration with
or without the IP configuration, or not to Import the network configuration at all with this function.
Press B to toggle the Serial port to be restored,
Press C to toggle the Clustering configuration to be restored, and so on.
6. When finished selecting defaults to be restored, press 0 to restore chosen defaults. You will be prompted to confirm this
action by pressing Y for yes, or N for no.
The system will restore factory defaults, and the unit will automatically reboot.
An "X" indicates
no selection,
while an "O"
indicates the item
is selected for
restoration of
factory default
settings.
Figure 74- Choose which factory defaults to reset
Setting Date and Time
Date and time on the SERIMUX can either be kept internally or by an NFS server. To set the parameters for date and time on the
SERIMUX, do the following:
1. Access the configuration menu.
2. Choose System administration.
3. Choose Date and Time.
4. Enter the desired parameters.
5. Choose Save changes.
Adding, Editing, and Removing Users
1. Access the configuration menu.
2. Choose System administration > User Administration.
3. Choose Add, Remove, or Edit.
Users and the user groups are conveniently listed at the top of the configuration screen. The options are:
• Add a user: Assign a name, user group, and a password
• Edit user files: Change user group, password, or their shell
• Remove a user: Remove a user from the system
Figure 75- Edit users through Configuration menu
4. Choose Save changes.
52
Accessing the Boot Loader Program
The Boot Loader program can be accessed during the boot process. The main function of the program is to provide a backup
means for restoring the firmware if the SERIMUX will no longer boot. It also provides a hardware testing module that detects and
tests hardware components on the unit.
To access the Boot Loader program, do the following:
1. Connect the Ethernet cable from the console port on the rear panel of the SERIMUX to a serial port on a workstation. Use the
Ethernet cable packaged with the SERIMUX and attach the DB-9 adapter.
2. Set up a terminal emulation program, such as HyperTerminal, using the following port parameters: bps=9600, data bits=8,
parity=none, stop bits=1, and flow control=none.
3. Turn the power ON to the unit.
4. Press ESC within 3 seconds of booting the unit to get a command prompt.
5. Enter the username admin and the default password admin to access the Boot Loader menu.
Hardware Test Menu
The Boot Loader program provides a hardware test for detecting and testing hardware components on the SERIMUX. From the
Boot Loader menu, choose the number 3 to access the Hardware test. Options for several components appear.
Disaster Recovery
The SERIMUX provides a disaster recovery procedure in the event the configuration data is destroyed or corrupted. The
SERIMUX automatically restores a corrupted configuration file system to the factory default settings. However, if the SERIMUX
fails to boot in spite of being reset to the factory default settings, the firmware can be restored by using the Boot Loader program.
To restore the SERIMUX to the factory default configuration settings, the user must use a TFTP or BOOTP server. To use the
Boot Loader program to flash new firmware, do the following:
1.
Connect the console port on the rear panel of the SERIMUX to a serial port on a workstation. Use an Ethernet cable with a
DB-9 adapter.
2. Set up a terminal emulation program such as HyperTerminal. Use the following port parameters: bps=9600, data bits=8,
parity=none, stop bits=1, flow control=none
3. Reboot or power ON the SERIMUX.
4. Press the ESC key within three seconds of applying power to the device.
The following screen appears.
Figure 76- The Boot Loader program
5. Choose Firmware upgrade by entering 2.
The following screen appears.
Figure 77- Firmware upgrade via Boot Loader program
53
Note: Use the ESC key to back up to earlier menu screens.
6. Enter the information for the first menu items.
• Protocol: The choices are BOOTP or TFTP
• IP address assigned: Enter the IP address of the SERIMUX
• Server’s IP address: The IP address of the BOOTP or TFTP server
• Firmware File Name: The filename for the firmware
7. Choose Start firmware upgrade.
The firmware upgrade will take several minutes to process.
8. When the upgrade process is complete, choose ESC to return to the main menu.
9. Choose Exit and boot from flash.
Microsoft
Support
Microsoft
SAC SAC
Support
About SERIMUX Support for Microsoft Windows Server 2003
The SERIMUX provides a browser-based user interface to Microsoft’s text-based Special Administration Console (SAC), an
integral part of Windows Server 2003 Emergency Management Services (EMS). When a server running Windows Server 2003 is
connected to a SERIMUX serial port, key SAC functions--normally accessed from the command line--are available from a
graphical user interface (GUI). SAC features accessible from this interface include:
• Reset and shutdown
• Show ID
• Show and configure IP settings per interface
• Show the process list and kill processes
Note: While the EMS port is available at all times using Telnet or SSH, the special GUI is available only while SAC is
active.
Set Up Overview
Set up for SERIMUX SAC support is a three-step process:
1.
2.
3.
Set up the Windows Server 2003 for SAC support. To do this, ensure that the COM port used for console traffic is properly
set up. This includes designating a COM port for console communication and setting the port speed (baud) appropriately.
(See the next topic below.)
Cable the console port on the Windows Server 2003 to a SERIMUX port. See the cabling information on page 56.
Set up the SERIMUX for SAC support. See "Setting Up the SERIMUX for SAC Support" on page 52.
Setting Up the Windows Server 2003 Port
1. Sign on to the Windows Server 2003 as the administrator.
2. Access the command line.
3. Use the bootcfg command to redirect console traffic to the correct COM port. The following is the command syntax and an
example. See the Microsoft documentation for additional information on the SAC feature.
Command Syntax
bootcfg /ems on /port com# /id # /baud 115200
where com# is the COM port to which console traffic will be redirected, # is the is the number of the boot entry, and the port speed
is set to the SERIMUX recommended rate (although any rate supported by Windows Server 2003 can be used).
Command Example
In this example, console output is redirected to COM 2, the boot entry is specified as 1, and the port speed set to 115200.
bootcfg /ems on /port com2 /id 1 /baud 115200
Setting Up the SERIMUX for SAC Support
To set up a serial port to provide access to the Windows Server 2003 console port, do the following:
1. Access the web interface.
2. Choose Serial Port > Configuration.
3. Choose a port .
4. Choose Host mode configuration.
5. The Host mode configuration page appears.
Set the Host mode to Console server and the Type of console server to MS SAC console as shown in the following figure.
54
Figure 78- Setup SERIMUX for SAC support
6.
7.
8.
Set other fields as appropriate. See "Configuring Host Mode" on page 17 for more information.
Choose Save & apply.
Configure serial port communication settings, by doing the following:
a. Choose Serial port parameters from the menu.
b. Adjust settings as required. This includes ensuring that the Baud rate matches the setting on the Windows Server 2003
serial port and Flow control is set to None. Ignore the DTR behavior field.
c. Choose Save & apply.
Accessing the Windows Server 2003 Console Port from the SERIMUX GUI
To access the Windows Server 2003 console port, do the following:
1. Access the web interface.
2. Choose Serial Port > Connection.
A screen similar to the following appears.
Figure 79- Access Windows Server 2003 console port from SERIMUX GUI
3. Click on the title of the port to which the Windows Server 2003 console port is connected.
A screen similar to the following appears.
55
Figure 80- Windows Server 2003 controls
4.
Use the SERIMUX GUI to perform SAC functions. The following table describes attributes of the controls on the GUI.
Field
Connect
Restart
Shutdown
Performance
Description
Connects to the SAC console port via the command line interface.
Reboots the Microsoft Server 2003.
Shuts down the Microsoft Server 2003.
Provides access to Microsoft Server 2003 status information.
Process
Provides access to the process list, which allows you to view and kill active processes.
Serial Port Log
IP Settings
Provides access to port logging information.
Provides access to IP settings, enabling you to verify and change settings.
Hardware
Information
Hardware
Information
Introduction
This chapter provides information on SERIMUX hardware. Among the topics covered are the hardware specifications, LED
descriptions, pinouts for the Ethernet cable, and pinouts for the cable adapters.
Hardware Specifications: SERIMUX 16 and SERIMUX 32 AC Powered
Attribute
Operating temperature
Storage temperature
Humidity
Power supply Internal
Power consumption
Fuse (internal)
Operating system
SDRAM
Flash memory
Size (In.) WxDxH: unpackaged
Size (In.) WxDxH: packaged
Weight: unpackaged
Weight: packaged
Value
40°F to 120°F (5°C to 50°C)
-20°F to 140°F (-29°C to 60°C)
10% to 90% non-condensing
100 -240VAC, 50/60 Hz, 1.2A (max)
0.1A /120VAC (type), 12W (typical), 40W (max)
FUSE (Type L) AC250V, 2A
Linux Hard Hat embedded
64 megabytes
8 megabytes
17 x 8.5 x 1.75
20.375 x 15.25 x 4.75
5.8 lbs (2.63 kilograms)
8.6 lbs (3.9 kilograms)
56
Hardware Specifications: SERIMUX 16 and SERIMUX 32 DC Powered
Attribute
Operating temperature
Storage temperature
Humidity
Power supply Internal
Power consumption
Fuse (internal)
Operating system
SDRAM
Flash memory
Size (In.) WxDxH: unpackaged
Size (In.) WxDxH: packaged
Weight: unpackaged
Weight: packaged
Value
40°F to 120°F (5°C to 50°C)
-20°F to 140°F (-29°C to 60°C)
10% to 90% non-condensing
36 - 72 Vdc, 1.2A (max)
0.25A /48Vdc, 12W (typical), 40W (max)
FUSE (Type L) AC250V, 2A
Linux Hard Hat embedded
64 megabytes
8 megabytes
17 x 8.5 x 1.75
20.375 x 15.25 x 4.75
5.8 lbs (2.63 kilograms)
8.6 lbs (3.9 kilograms)
Hardware Specifications: SERIMUX 8 AC Powered
Attribute
Operating temperature
Storage temperature
Humidity
Power supply External
Power consumption
Value
40°F to 120°F (5°C to 50°C)
-20°F to 140°F (-29°C to 60°C)
10% to 90% non-condensing
100 - 240VAC, 50/60 Hz, 1.0A (max)
AC input: 0.05A /120VAC, 6W (typical), 12W (max)
DC input: 0.8A/5VAC, 4.5 W (typical), 8W (max)
Linux Hard Hat embedded
64 megabytes
8 megabytes
9.5 x 6.25 x 1.25
2.5 lbs (1.13 kilograms)
Operating system
SDRAM
Flash memory
Size (In.) WxDxH
Weight
LED Indicators
Use the LED indicators to confirm attachment to the network and that the SERIMUX is able to send and receive data.
System
Ethernet
Serial
port
LED
Power
Ready
PC
100Mbps
LINK
Act
In Use
Rx/Tx
Function
On when power is supplied
On when system is ready to run
On when a PC device is running
On when 100Base-TX connection is detected
On when connected to an Ethernet network
Blinks when there is activity on the Ethernet port
On when the serial port is ready to run
Blinks when there is traffic on the serial port
About Serial Port Cabling
The SERIMUX simplifies cabling. The RJ45 8-pin configuration matches all SUN and Cisco RJ45 console port configurations,
enabling CAT 5 cabling without pinout concerns. Three DB-25 and one DB-9 adapters come in the package. A DB-25 male, a DB25 female, and a DB-9 adapter support console management applications. A DB-25 male adapter provides a modem
connection. See the cable adapter information that follows later in this chapter.
Note: The cable length restrictions common to RS-232 cables apply to the SERIMUX serial cable as well.
57
Serial Port Pinouts
The SERIMUX uses an RJ45 connector for serial ports. Pin assignments are listed in the following table.
Pin
1
2
3
4
5
6
7
8
Description
CTS
DSR
RxD
GND
DCD: Note Inbound signal can also be used as a
second ground.
TxD
DTR
RTS
Cable Adapters
The SERIMUX comes with four cable adapters. The following illustrations show cable adapter pin outs. Additional adapters can be
purchased from NTI.
DB-25 Male Console Adapter (NTI P/N DB25M-RJ45F-T)
DB-25 Male to RJ45 Connector Pin Assignments
RJ45
Signal
1
2
5
3
4
6
CTS
DSR
DCD
RxD
GND
TxD
DB-25M
Signal
Connected to
4
RTS
Connected to
20
DTR
Connected to
Connected to
Connected to
2
7
3
6
8
5
TxD
GND
RxD
DCD
DSR
CTS
7
DTR
Connected to
8
RTS
Connected to
58
DB-9 Female Console Adapter (NTI P/N DB9F-RJ45F)
DB-9 Female to RJ45 Pin Assignments
RJ45
Signal
1
2
5
3
4
6
CTS
DSR
DCD
RxD
GND
TxD
DB-9F
Signal
Connected to
7
RTS
Connected to
4
DTR
Connected to
Connected to
Connected to
3
5
2
1
6
8
TxD
GND
RxD
DCD
DSR
CTS
7
DTR
Connected to
8
RTS
Connected to
DB-25 Female Console Adapter (NTI P/N DB25F-RJ45F)
DB-25 Female to RJ45 Pin Assignments
RJ45
Signal
1
2
5
3
4
6
CTS
DSR
DCD
RxD
GND
TxD
DB-25F
Signal
Connected to
4
RTS
Connected to
20
DTR
Connected to
Connected to
Connected to
2
7
3
6
8
5
TxD
GND
RxD
DCD
DSR
CTS
7
DTR
Connected to
8
RTS
Connected to
DB-25 Male Modem Adapter (NTI P/N DB25M-RJ45F-C)
59
DB-25 Male Modem to RJ45 Pin Assignment
RJ45
Signal
1
2
3
4
5
6
7
8
CTS
DSR
RxD
GND
DCD
TxD
DTR
RTS
Connected to
Connected to
Connected to
Connected to
Connected to
Connected to
Connected to
Connected to
DB-25M
Signal
5
6
3
7
8
2
20
4
CTS
DSR
RxD
GND
DCD
TxD
DTR
RTS
Ethernet Pinouts
The SERIMUX uses a standard Ethernet connector, that is a shielded and compliant with AT&T 258 specifications.
Pin
1
2
3
4
5
6
7
8
Description
Tx+
TxRx+
NC
NC
RxNC
NC
Certifications
Certifications
Safety
• US: UL1950
• Canada: CSA 22.2 No. 60950
• Europe: EN60950 (CB Scheme Report)
Working Inside the SERIMUX
NOTICE: Do not attempt to service the SERIMUX except when following the instructions from NTI Technical Support
personnel. In such a case, first perform the following actions:
• Turn OFF the SERIMUX.
• Ground yourself by touching an unpainted metal surface at the back of the equipment before touching
anything inside the equipment.
Replacing the Battery
A coin-cell battery maintains date and time information. If it is necessary to repeatedly reset time and date information after turning
on the SERIMUX, replace the battery.
CAUTION: A new battery can explode if it is incorrectly installed. Replace the 3 Volt CR2032 battery only with the same
or equivalent type recommended by the battery manufacturer. Discard used batteries according to the battery
manufacturer’s instructions.
60
Safety Instructions
CAUTION: Do not operate the SERIMUX with the cover removed.
•
In order to avoid shorting out the SERIMUX when disconnecting the network cable, first unplug the cable from the equipment
and then from the network jack. When reconnecting a network cable to the equipment, first plug the cable into the network
jack, and then into the equipment.
•
To help prevent electric shock, plug the SERIMUX into a properly grounded power source. The cable is equipped with a 3prong plug to help ensure proper grounding. Do not use adapter plugs or remove the grounding prong from the cable. If it is
necessary to use an extension cable, use a 3-wire cable with properly grounded plugs.
•
To help protect the SERIMUX from transients in electrical power, use a surge suppressor, line conditioner, or uninterruptible
power supply.
•
Be sure that nothing rests on the SERIMUX's cables and that the cables are not located where they can be stepped on or
tripped over.
•
Do not spill food or liquids on the SERIMUX. If it gets wet, contact NTI Technical Support.
•
Do not push any objects into the openings of the SERIMUX. Doing so can cause fire or electric shock by shorting out interior
components.
•
Keep the SERIMUX away from heat sources. Also, do not block cooling vents.
Emissions
• US: FCC part 15, Class A
• Canada: ICES 003 Class A
• Europe: EN55022, EN61000-3-2, EN61000-3-3
• Japan: VCCI
• Australia: AS3548
Immunity
Europe: EN55024
61
Index
Index
E
EMS support 54
enabling system logging 21
encryption
SSH 7
wireless LAN 14
A
accessing a port
web interface 4
applyconf 47
assigning IP settings 5
authentication 35
configuration menu 35
configuring 35
local 35
F
Blowfish 7
Boot Loader program 53
accessing 53
boot sequence 48
factory default reset button 48
factory default values 49
factory defaults
resetting 48
restoring (configuration menu) 51
firmware
firmware, upgrading 48
upgrade (configuration menu) 51
upgrading 48
C
H
cable adapters 58
command line interface 3
compact-flash card
adding 12
configuring 12
exporting configuration 12
formatting the card 12
importing configuration 12
configmenu 3, 47
configuration file backup 13
configuration menu 3
using 9
configuring host mode 18
configuring system logging 22
console server mode 16
custom menus 5, 37
hardware specifications 56
hardware test menu 53
host mode
configuring (configuration menu) 20
host mode configuration 16
hostname 3
HTTPS 6
HyperTerminal 6
B
I
inter-character timeout 19
IP filtering
configuring network 30
console and web 30
network (configuration menu) 35
port (configuration menu) 36
serial port 31
IP tables 31
D
date and time
configuration menu 49
setting 49
default password 1
device name
configuring 50
dial-in modem
configuring access 41, 42
dial-in modem mode 17
dial-in terminal server 17
configuring access 41
configuring access (configuration menu) 42
direct port access 5
disaster recovery 53
DTR settings 19
L
LDAP 35
LED Indicators 57
Linux commands 47
Linux default script 48
Linux file and disk utilities 47
Linux Hard Hat 47
Linux network utilities 47
Linux shell utilities 47
Linux system utilities 47
62
S
SAC support 54
saveconf 47
saving and applying changes 5
serial modem
adding 15
serial port pinouts 58
SMTP
configuring 29
SMTP alerts 25
sniff session 32
configuration menu 36
viewing 33
SNMP 26
configuring 27
configuring (configuration menu) 29
managing the SNMP protocol 28
SSH 5
accessing a port 7
configuring (configuration menu) 9
encryption methods 7
versions 1 and 2 1
Syslog server
enabling 21
system logging 24
configuration menu 25
configuring device (configuration menu) 25
system logs 23
M
menus
adding menu items 38
assigning users 39
creating menu names 37
creating submenu 38
port access menu 40
using the configuration menu 35
Microsoft Server 2003 SAC support 54
modem
adding 41
modem init string 41
N
network card
adding 13
NTP server 50
P
password 1
PC card
adding and configuring (configuration menu) 15
permitted user list 31
port access menu 4, 40
port clustering
assigning master unit 44
autoconfigure 44
configuration menu 46
configuring slave ports 44
port logging 23
enabling 21
port parameters 19
configuration menu 20
portaccessmenu 40
protocols 19
RawTCP 19
Telnet 19
T
TACACS+ 34
Telnet 5
terminal server mode 16
U
user access control 31
user groups 1
user storage space 48
username 1
users
adding 37
adding, editing, and removing 50
adding, editing, and removing (configuration
menu) 52
adding, editing, and removing users 8
changing root’s password 1
root 1
root username and default password 1
system admin 1
R
RADIUS 34
restricted user list 31
W
web interface menu 3
WEP 14
MAN008 Rev 2/10/2004
63