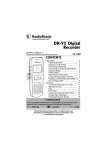
Download Radio Shack 14 Minute Owner`s manual
Transcript
www.radioshack.com™
&KIKVCN"4GEQTFGT
YKVJ"%COGTC
OWNER’S MANUAL —
Please read before using this equipment.
14-1197
+0641&7%6+10
Your RadioShack 130-Minute Digital Recorder with
Camera is ideal for quick note taking. Its light weight
and ultra-small size make it easy to slip into a pocket,
briefcase, or purse. You can use it at school, at
business conferences, or anywhere on the go. You
can start recording manually, set the recorder so
sound activates recording, or program delayed
recordings. With 8 MB of built-in memory, the recorder
provides up to 130 minutes of recording time in SP
(Standard Play) mode and 30 minutes in HQ (High
Quality) mode. The built-in digital camera lets you
take pictures and transfer them to your PC.
#
#
"+/2146#06"
If an icon appears at the end of a paragraph, go to the box on that
page with the corresponding icon for pertinent information.
— Warning
. — Caution
# — Important
° — Hint
± — Note
Rý
© 2002 RadioShack Corporation. All Rights Reserved.
RadioShack and RadioShack.com are trademarks used
by RadioShack Corporation.
%106'065
Level 2 Heading
Preparation ............ 7
Installing
Batteries ............ 7
Setting the
Clock ................. 8
Connecting
Earphones ......... 8
Connecting an
External
Microphone ..... 11
Attaching the
Wrist Strap ...... 11
Locking the
Recorder’s
Controls ........... 12
Recorder
Operation ............. 12
Setting the
Recording
Options ............ 13
Recording
Messages ........ 15
Using
Voice-Operated
Recording System
(VOS) .............. 17
Locking Message
Files ................. 18
(Continued)
2
PC Data Transfer Kit —
included USB PC link lets you
upload or download recorded
voice and image files to and
from a PC.
Built-in Mic — eliminates the
need to carry an additional
microphone.
1/3”
CMOS Image Sensor
(326,688 pixels) — saves VGA
(640 × 480) images using
Wavelet, the latest
compression algorithm.
VIP (Voice In Picture)
Recording — records voice
into picture data.
Automatic Focus and
Exposure — lets you easily
take pictures.
Flash Memory — retains all
data even without power.
Repeat Play — plays a
message or a part of a
message as often as desired.
Displaying
Recording
Information ........ 19
Editing
Messages .......... 19
Scan Play — plays the
Dividing a Message
beginning of each message for
File .................... 20
5 seconds successively.
Playing Back
Messages .......... 22
Automatic Power Off —
Camera
automatically turns off the
Operation ............... 26
power if you do not press any
Setting the Image
button.
Compression
Mode ................. 26
Stereo Phone Jack — lets you
Taking a
use an optional earphone or
Picture ............... 27
headphone to listen to
Locking
messages privately.
Images .............. 28
Adding a Message
Built-In Speaker — lets you
to an
play back notes anywhere.
Image File ......... 28
Erasing Files .......... 30
6*'"(%%"9#065";17" Erasing a
Single File ......... 30
61"-019
Erasing All Files in a
This equipment has been
Folder ................ 30
tested and found to comply with
Erasing All
the limits for a Class B digital
Files .# .............. 31
Using the Recorder
device, pursuant to Part 15 of
with a PC ............... 31
the FCC Rules. These limits
(Continued)
3
System Requirements ................ 31
Installing PVR Manager .................. 32
Connecting the
Recorder to Your
PC ..................... 34
PVR Manager
Structure ........... 39
Running PVR Manager .................. 43
Using the Image
Window ............. 47
Using the Image
Viewer ............... 48
About V.I.P.
Files .................. 52
Using the Voice
Player ............... 52
Sending an
E-mail ............... 53
Trouble
shooting ................. 55
Care ....................... 56
Service and Repair 57
Specifications ........ 58
are designed to provide
reasonable protection against
harmful interference in a
residential installation. This
equipment generates, uses and
can radiate radio frequency
energy and, if not installed and
used in accordance with the
instructions, may cause harmful
interference to radio
communications.
However, there is no guarantee
that interference will not occur
in a particular installation. If this
equipment does cause harmful
interference to radio or
television reception, which can
be determined by turning the
equipment off and on, the user
is encouraged to try to correct
the interference by one or more
of the following measures:
• Reorient or relocate the
receiving antenna.
4
• Increase the separation
between the equipment
and receiver.
• Consult your local
RadioShack store or an
experienced radio/TV
technician for help.
• If you cannot eliminate the
interference, the FCC
requires that you stop
using your recorder.
Changes or modifications not
expressly approved by
RadioShack may cause interference and void the user’s authority to operate the equipment.
You must use shielded
interface cables with this
equipment.
Material you record is for your
personal use or pleasure only.
It is prohibited to record copyrighted material without permission of the copyright holders
according to copyright law.
5
(%%"&'%.#4#6+10"1("
%10(14/+6;
This device complies with Part
15 of the FCC Rules. Operation
is subject to the following two
conditions: (1) this device may
not cause harmful interference,
and (2) this device must accept
any interference received,
including interference that may
cause undesired operation.
Product:
Model:
Responsible
Party:
Phone:
6
Digital Recorder
with Camera
14-1197
RadioShack
100 Throckmorton
Fort Worth, TX
76102
817-415-3200
24'2#4#6+10
+056#..+0)"$#66'4+'5
Your recorder requires two AAA
batteries (not supplied) for
power. For the best
performance and longest life,
we recommend RadioShack
alkaline batteries. .
1. Slide the battery cover in
the direction of the arrow.
2. Place the batteries in the
compartment as indicated
by the polarity symbols (+
and –) marked inside the
compartment.
3. Replace the cover.
When the batteries are low,
appears and the recorder
automatically shuts off.
Replace the batteries.
.
Rý
R
"9#40+0)
"R
"
Dispose of old
batteries promptly
and properly. Do not
burn or bury them.
."%#76+105"."
• Use only fresh
batteries of the
required size
and
recommended
type.
• Do not mix old
and new
batteries,
different types
of batteries
(standard,
alkaline, or
rechargeable),
or rechargeable
batteries of
different
capacities.
(continued)
7
."%#76+105"." 5'66+0)"6*'"%.1%-
(continued)
• If you do not
plan to use the
recorder for a
month or
longer, remove
the batteries.
Batteries can
leak chemicals
that can destroy
electronic parts.
±"016'"±"
If you do not press
any button for 30
seconds in camera
mode or 3 minutes in
recorder mode, the
recorder automatically
shuts off to save
battery power. If this
occurs during time
setting, your setting is
not saved.
8
1. Press POWER to turn on
the recorder. ±
When you turn on the
recorder for the first time,
#ý#ýO flashes for about 20
seconds. If it disappears
after the 20 seconds or if
you want to reset the clock,
hold down MENU until &&O
(year digits and Y) flashes.
2. While #ý#ýO (or &&O) is
flashing, repeatedly press
(or hold down) # #or ,
ý #to
set the year, then press
MENU to store the setting.
3. Repeat Step 2 to set the
month, day, and time.
%100'%6+0)"
'#42*10'5
You can use an optional mono
earphone or headphones with a
1/8-inch (3.5-mm) mini-plug for
private listening. You can also
use an earphone to monitor a
recording in progress. Your
local RadioShack store carries
a wide selection of earphones.
Insert the earphone's plug into
the recorder's V jack. The builtin speaker automatically
disconnects.
.KUVGPKPI"5CHGN[
To protect your hearing, follow
these guidelines when you use
earphones.
• Set the volume to the
lowest setting before you
begin listening. After you
begin listening, adjust the
volume to a comfortable
level.
• Do not listen at extremely
high volume levels.
Extended high-volume
listening can lead to
permanent hearing loss.
±"016'5"±"
• Hours are shown
in 12-hour format. For example, set 1 AM
as '0&& and 1PM
as Fý'0&&$ýYou
can change to
the 24-hour
format by pressing the clock icon
in the PVR Manager. (See “PVR
Manager Icons”
on Page 40.)
• The time appears briefly
each time you
turn the recorder
on. To read the
time while the
recorder is on,
hold down
POWER for 2
seconds.
Holding down
POWER after
the time appears
turns the
recorder off.
9
• Once you set the volume,
do not increase it. Over
time, your ears adapt to
the volume level, so a
volume level that does not
cause discomfort might still
damage your hearing.
6TCHHKE"5CHGV[
• Do not wear earphones
while operating a motor
vehicle or riding a bicycle.
This can create a traffic
hazard and could be illegal
in some areas.
• Even though some
earphones let you hear
some outside sounds
when listening at normal
volume levels, they still can
present a traffic hazard.
10
%100'%6+0)"#0"
':6'40#."
/+%412*10'
You can use an optional
microphone with a 1/8-inch (3.5mm) plug to extend the
recording range. Your local
RadioShack store carries a
wide selection of microphones.
Insert the microphone’s plug
into the recorder’s MIC jack.
The built-in microphone
automatically disconnects.
#66#%*+0)"6*'"94+56"
564#2
Thread the strap’s small loop
through the holes on the bottom
of the recorder. Slip the larger
end of the strap through the
smaller loop. Pull the larger
loop to tighten it.
11
.1%-+0)"6*'"
4'%14&'4N5"
%10641.5
You can lock the recorder’s
controls so you do not
accidentally change any
settings. To lock the recorder’s
controls, slide HOLD in the
direction of the arrow. >EB:
briefly appears and
appears at the bottom of the
display. To unlock the
recorder’s controls, slide HOLD
in the opposite direction of the
arrow.
4'%14&'4"
12'4#6+10
±"016'"±"
If you try to record
more than 100
message files or 250
image files in one
folder, <KBB appears.
12
The recorder has one folder for
image files and two folders (A
and B) for message files. The
folder for images can store up to
250 standard image files and
the folders for messages can
store up to 100 messages each.
To select message folders, see
“Setting the Recording Options”
on Page 13. ±
To turn on the recorder, press
®ýappears, the
recorder is in camera mode. To
select voice recorder mode,
press POWER again. ®
disappears
POWER. If
5'66+0)"6*'"
4'%14&+0)"126+105"
The recorder’s special features
and file organization tools are
accessed through the options
menu. These options include
Folders, Recording Mode,
Microphone Sensitivity, VoiceOperated Recording System,
Programmed Recording, File
Lock, and Continuous Play.
1. Repeatedly press MENU
while the recorder is
stopped to cycle through
the options menu. ±
±"016'5"±"
• If you do not
press any button
for about 5
seconds, the
recorder
automatically
exits the options
mode.
• Image and
message files
share the same
memory. The
maximum
number of image
files changes
depending on
how many
message files
are in the
memory.
13
2. While <EB:ý(Folders)ý
appears, press #ýor , to
select Folder A or Folder
B.
3. While CE: (Recording
Mode) appears, press #
or , to select IF or >G. You
can record up to 130
minutes in SP mode and
30 minutes in HQ mode.
4. While C?9 (Microphone
Sensitivity) appears, press
# or , to select >? or BE.
5. While LEI (Voice-Operated
Recording System)
appears, press # or , to
select ED or E<<. (See
“Using Voice-Operated
Recording System (VOS)”
on Page 17.)
6. While FHE#H (Programmed
Recording) appears,
repeatedly press # or ,
to select E<<, +C, '&C, '+C
14
or (&C. (See “Programmed
Recordings” on Page 18.)
7. While E<<ýBE9A (File Lock)ý
appears, press # or , to
select ED or E<<.
8. While 9edj_ý(Continuous
Play) appears, press # orý
, to select ED or E<<.
4'%14&+0)"/'55#)'5
1. Press POWER to turn on
the recorder. The current
date and time briefly
appear.
2. If the camera icon appears
at the upper left corner of
the display, press POWER
(PAUSE/DISPLAY) to select
the recorder mode. The
number at the top line
indicates the current
message file number and
the number at the bottom
line indicates the recording
15
time of the current
message.
3. Press REC/STOP.
Recording begins. The
display shows the current
folder name ( A or B ), the
current message number,
the recording mode (>G or
IF), and the elapsed
recording time.
±"016'"±"
The recorder
automatically turns off
if it is set to pause for
more than 30
minutes.
4. To temporarily stop
recording, press PAUSE/
DISPLAY. F7KI; appears.
To resume recording,
press PAUSE/DISPLAY
again. ±
5. During recording, you can
press # so the recording
starts from the next file
number.
6. Press REC/STOP to stop
the recorder.
16
7. Hold POWER until the
display disappears to turn
off the recorder.
75+0)"81+%'/
12'4#6'&"4'%14&+0)"
5;56'/"*815+
1. Turn on the voice-operated
recording system. (See
“Setting the Recording
Options” on Page 13.) ±
2. Set the mic sensitivity if
necessary. (See “Setting
the Recording Options” on
Page 13.)
3. Press REC/STOP.
±"016'"±"
If you set the mic
sensitivity to >?,
ambient noise might
cause the recording to
continue.
When the recorder detects a
voice input, it automatically
starts recording. When the
voice input stops, the recorder
automatically stops recording
within 1 second and enters
standby mode.
17
2TQITCOOGF"
4GEQTFKPIU
1. Turn on programmed
recording. (See “Setting
the Recording Options” on
Page 13.)
2. Hold down REC/STOP until
FHE#H appears. The
recorder starts recording
after the preset time.
3. To cancel the programmed
recording, press REC/STOP
again.
.1%-+0)"/'55#)'"
(+.'5
To prevent messages from
being accidentally erased:
1. Select the message you
want to lock.
2. Repeatedly press MENU
until E<<ýBE9A appears,
press # or , to select ED
or E<<.
18
&+52.#;+0)"
4'%14&+0)"
+0(14/#6+10
While the recorder is stopped,
hold down PAUSE/DISPLAY until
the current date and time
appear.
To display the recorded date
and time of a file, select the file
and press PAUSE/DISPLAY
while the current date and time
appear.
To display the remaining
available recording time, press
PAUSE/DISPLAY again while the
recorded date and time
appears.
'&+6+0)"/'55#)'5
#FFKPI"VQ"VJG"'PF"QH"C"
/GUUCIG
1. Select the message you
want to add to.
19
2. Press PLAY/STOP to play
the message.
3. Hold down REC/STOP for
more than 1 second. 7ZZ#H
appears briefly. Recording
starts immediately from the
end of the selected
message.
&+8+&+0)"#"/'55#)'"
(+.'
1. During play, press PAUSE
at the point where you
want to divide the
message.
2. Hold down MENU until E<<ý
Z?L appears.
3. Press # or , so E<<
changes to ED.
4. Press MENU. The next
number and IJEF appear.
For example, when file 4 is
successfully divided, &+ý
IJEFýappears. ±
20
%QODKPKPI"/GUUCIG"
(KNGU
±"016'5"±"
You can combine two
successive message files into
one file.
• You cannot
divide a file less
than 2 seconds
long.
1. Play back the first
message file and press
PAUSE.
• If the file number
exceeds 100,
<KBB appears
and editing is
canceled.
2. Hold down MENU until E<<ý
Z?L appears then press
MENU again so E<<ý@E?D
appears.
3. Press # or , so that E<<
is changed to ED.
4. Press MENU. The file
numbers and @E?D briefly
flash, followed by the lower
of the two numbers and
IJEF. For example, if file 3
and 4 are successfully
combined, the display
briefly flashes &)ý!ý&* @E?D,
followed by &) IJEF. ±
• The recording
dates of the two
divided files are
the same.
• If the file is
locked, the lock
is applied to both
files.
• If there is not
enough
remaining
memory, you
cannot divide a
file.
(continued)
21
±"016'5"±"
(continued)
• The recorded
date of the first
message file
number remains
in the combined
file.
• If either of the
files is locked,
the lock is
applied to the
combined file.
• You cannot
combine files
made using
different
recording
modes. For
example, you
can not combine
a file recorded in
HQ mode with
one recorded in
SP mode.
/QXKPI"C"/GUUCIG"(KNG
1. Play back the message file
you want to move and
press PAUSE.
2. Hold down MENU until E<<ý
Z?L appears, then press
MENU twice so E<<ýCEL
appears.
3. Press # or , so E<<
changes to ED.
4. Press MENU. 7#&&
appears.
5. Repeatedly press # or ,
until the desired file
number position appears.
6. Press MENU to move the
file.
2.#;+0)"$#%-"
/'55#)'5
1. Repeatedly press (or hold
down) #ýor , until the
22
message number that you
want to play back appears.
2. Press PLAY/STOP to start
playback.
3. Press VOLUME + or – to
adjust the volume.
4. To temporarily stop
playback, press PAUSE/
DISPLAY. To resume
playback, press PAUSE/
DISPLAY again. ±
5. To stop playback, press
PLAY/STOP.
4GUWOG"2NC[
When you press PLAY/STOP
during playback, the recorder
remembers the position. When
you press PLAY/STOP again,
the recorder starts playing the
message from the point where
you stopped it. If you press any
button other than PLAY/STOP,
that memory is lost.
±"016'5"±"
(continued)
• File locations
start with 7¶&&
or 8¶&& as the
first location,
7¶&' or 8¶&' as
the second, and
continue in this
fashion
throughout the
folder.
• The recorder
automatically
turns off if it is
set to pause for
more than 30
minutes.
23
(CUV/(QTYCTFKPI1
4GYKPFKPI
To fast-forward through a
message during playback, hold
down #ýfor more than 1
second.
To rewind through a message
during playback, hold down ,
for more than 1 second.
The recorder continues fastforwarding or rewinding as long
as you hold down #ýor ,.
7UKPI"(QTYCTF"5MKR1
4GXGTUG"5MKR
To skip forward or backward to
a message, repeatedly press
(or hold down) ##or #,#until
the desired message number
appears.
5ECPPKPI"/GUUCIGU
Press PLAY/STOP for more than
1 second. The recorder plays
back the first 5 seconds of each
message.
24
4GRGCV"2NC[
To repeat the current message,
press MENU for more than one
second during play. '
appears. To cancel the repeat,
press PLAY/STOP.
4GRGCVKPI"2CTV"QH"C"
/GUUCIG
1. During play, press MENU at
the point where you want
to start the repeat.
7ý
appears.
2. Press MENU again at the
point where you want to
finish the repeat. 8
appears. The recorder
automatically repeats the
selected part. ±
3. Press PLAY/STOP to cancel
the repeat.
±"016'"±"
If you do not
designate point B, the
recorder repeats
between point A and
the end of the
message.
%QPVKPWQWU"2NC[
1. Turn on continuous play.
(See “Setting the
25
±"016'5"±"
• If you do not
press any button
for 30 seconds in
camera mode,
the recorder
automatically
shuts off to save
battery power.
• If you do not
press any button
for about 5 seconds during the
options mode,
the recorder
automatically
exits options
mode.
• Image and
message files
share the same
memory. The
maximum
number of image
files changes
depending on
how many
messages are in
the memory.
26
Recording Options” on
Page 13.)
2. Press PLAY. The recorder
plays all files in the current
folder starting with the
selected file. For example,
if you have five files and
select file &', the recorder
plays all five files.
However, if file &) is
selected, the recorder
plays only &), &*, and &+.
%#/'4#"
12'4#6+10
To change from voice recorder
to camera mode, press
POWER. ® appears in the
display.
5'66+0)"6*'"+/#)'"
%1/24'55+10"/1&'
1. Press MENU. IFýCE:
(standard mode) or >GýCE:
(high quality mode)
appears.
2. Press # orý, to select the
mode. You can store up to
250 images in standard
mode and 126 in high
quality mode. ±
6#-+0)"#"2+%674'
1. Press PAUSE/DISPLAY or
press CAPTURE for more
than 1 second until the
camera icon appears. The
indicator in the viewfinder
lights red for several
seconds, then changes to
green to indicate that the
camera is ready.
2. Hold the unit horizontally
so the view finder is at the
left and the display is
toward you.
3. Press CAPTURE to take a
picture.
±"016'5"±"
• For best results,
point the camera
away from direct
sunlight.
• You cannot take
a picture while
the indicator
lights red.
• Hold the camera
still when you
press
CAPTURE, or
the image quality
might be
affected.
27
The top number on the display
indicates the current image file
number. The bottom number
indicates the remaining number
of image files or the recording
time of the current file. ±
.1%-+0)"+/#)'5"
To prevent images from being
accidentally erased:
1. Select the file you want to
lock.
2. Press MENU twice. E<<ý
BE9A or EDýBE9A appears.
Then press ## #or , to
select ED or E<<.
3. Press MENU. The image
number and BE9A appear.
#&&+0)"#"/'55#)'"61"
#0"+/#)'"(+.'
1. Press ## #
or , to select
the image file to which you
want to add a message.
28
2. Press REC/STOP to start
recording.
3. Press REC/STOP again to
stop the recording. ±
.KUVGPKPI"VQ"VJG"
#VVCEJGF"/GUUCIG
1. Press ## #or #, #to select
the image file.
2. Press PLAY/STOP to play
the message.
±"016'"±"
When adding a
message to an image
file, the recording
mode is preset to
standard mode. You
cannot select high
quality mode.
3. Press PLAY/STOP again to
stop.
29
±"016'5"±"
• You cannot
erase a file or all
files in a folder if
they are locked.
• If you erase an
image file with a
voice message,
the voice
message is also
erased.
'4#5+0)"(+.'5
'4#5+0)"#"5+0).'"(+.'
1. With the recorder stopped,
select the file number you
want to erase. ±
2. Hold down ERASE until
;H7I; flashes. When the
file is a message file, the
recorder plays back the
beginning and the end of
the message for a few
seconds.
3. Press ERASE again while
;H7I; flashes to delete the
file.
'4#5+0)"#.."(+.'5"+0"
#"(1.&'4
1. Select the folder you want
to erase.
2. Hold down ERASE and
REC/STOP until ;H7I;
appears and 7BB flashes.
30
3. Press ERASE again while
7BB flashes.
'TCUKPI"#NN"(KNGU".
1. With the recorder stopped,
hold down ERASE and
REC/STOP until 7BBý9B;7Hý
flashes.
."%#76+10"."
This procedure
clears all the files in
all folders, including
locked files.
2. Press ERASE again while
7BBý9B;7H flashes.
75+0)"6*'"
4'%14&'4"9+6*"
#"2%
5;56'/"4'37+4'/'065
Processor: Pentium 133 MHz
or better
OS: Windows 98 (with Internet
Explorer 5.0 or higher)/
Windows Me/Windows 2000/
Windows XP ±
±"016'"±"
To update Internet
Explorer 4.0, visit
http://windowsupdate.
microsoft.com.
Interface Port: USB
31
Hard Disk: Minimum of 100
MB free
±"016'5"±"
• The installation
procedure might
vary, depending
on your
computer’s
operating
system.
• If you are
installing the
software on
Windows 2000
or Windows XP
Professional,
you must log on
as the
administrator.
The installation
must be done by
the administrator
until the PC is
rebooted and the
recorder is
connected to the
PC.
32
MEMORY: More than 32 MB
RAM
CD ROM Drive: More than 4X
Sound Card: Microsoft
Windows Compatible
Video: SVGA (800×600) –
More than 16 Bit Color Display
+056#..+0)"284"
/#0#)'4
You must install PVR Manager
before connecting the recorder
and the PC. Close any open
applications before installing
PVR Manager. The USB driver
is automatically installed when
you install PVR Manager and
connect the recorder to the
PC.±
1. Place the RadioShack
PVR Manager DR-97
CD-ROM in the CD-ROM
drive.
2. Double-click the CD-ROM
icon in the Explorer
window, then double-click
the Setup icon.
3. Install RadioShack PVR
Manager by following the
on-screen instructions.
4. After setup is complete,
click OK on the screen and
remove the CD-ROM from
the CD-ROM drive.
7PKPUVCNNKPI"284"
/CPCIGT
1. Click Start/Settings/Control
Panel, and double click
Add/Remove Programs.
2. Follow the on-screen
instructions to uninstall the
PVR Manager.
33
%100'%6+0)"6*'"
4'%14&'4"61";174"
2%
Connect the recorder to your
PC by plugging one end of the
supplied USB cable into the
USB PORT on your recorder
and the other end of the cable
to your PC (refer to your PC’s
owner’s manual for the
location).
On Windows XP, <ekdZýD[mý
>WhZmWh[ýM_pWhZ appears to
prompt you to install Reset
Driver. Confirm that Install the
software automatically
(H[Yecc[dZ[Z) is selected and
follow the instructions to install
the driver. After the Reset
Driver is installed, <ekdZýD[mý
^WhZmWh[ýM_pWhZ appears again
to prompt you to install USB
Flash memory Controller.
Confirm that Install the software
automatically (H[Yecc[dZ[Z) is
34
selected and follow the
instructions to install the driver.
75$"%QPPGEVKQP"(CKNWTG
If D[mý>WhZmWh[ý<ekdZ or
M_dZemiý^Wiý\ekdZýd[mý^WhZmWh[ý
WdZý_iýbeYWj_d]ýj^[ýie\jmWh[ý\ehý_j
appears, the USB driver might
not be installed properly. Follow
these steps to install the USB
driver.
(QT"9KPFQYU";:1/G
1. Click Start/Settings/Control
Panel, then double click
Add New Hardware and
follow the instructions on
the wizard.
2. When :eýoekýmWdjýM_dZemiý
jeýi[WhY^ý\ehýoekhýd[mý
^WhZmWh[5ýappears, select
De"ý?ýmWdjýjeýi[b[Yjýj^[ý
^WhZmWh[ý\hecýWýb_ij and
click Next.
35
3. Among hardware types,
select Universal Serial Bus
Controllers and click Next.
4. When I[b[Yjýj^[ý
cWdk\WYjkh[hýWdZýceZ[býe\ý
oekhý^WhZmWh[ appears,
click Have Disk.
5. On the Install From Disk
screen, click Browse.
6. After selecting the disk
drive, open the
USB_STEP_1 folder and
click PortRst.inf and OK.
7. When installation is
complete, click Finish.
8. Double-click Add New
Hardware, select and opent
the USB_STEP2 folder.
Click fnd1197.inf and OK.
9. When installation is
complete, follow the
instructions on the wizard.
36
(QT"9KPFQYU"42221:2
1. Connect the recorder to
the PC if it is not
connected.
2. Click Start/(Settings)/
Control Panel switch to
Classic View if necessary,
then double click the
System icon.
3. Select Hardware/Device
Manager.
4. Choose ?Other device,
then click ?USB Device.
5. Click the right button of the
mouse on ?USB Device.
6. Select Uninstall and click
OK to confirm. The USB
driver is deleted.
7. Disconnect the recorder
from the PC. Then restart
the PC.
37
8. After restarting the PC,
connect the recorder, then
the USB driver will be
automatically installed.
±"016'"±"
For Windows 2000/
XP, uninstall PVR
Manager then install it
again instead of
following the steps.
If you cannot play a HQ mode
voice file from the voice player
screen, follow these steps to
install the MI-SC4 driver. ±
1. Click Start/Settings/Control
Panel and double click Add
New Hardware, then follow
the instructions on the
wizard.
2. When :eýoekýmWdjýM_dZemiý
jeýi[WhY^ý\ehýoekhýd[mý
^WhZmWh[5 appears, select
De"ý?ýmWdjýjeýi[b[Yjýj^[ý
^WhZmWh[ý\hecýWýb_ij and
click Next.
3. When I[b[Yjýj^[ýjof[ýe\ý
^WhZmWh[ýoekýmWdjýjeý_dijWbb
appears, select Sound,
video and game controller
and click Next.
38
4. When I[b[Yjýj^[ý
cWdk\WYjkh[hýWdZýceZ[býe\ý
oekhý^WhZmWh[ appears,
click Have Disk.
5. On the Install From Disk
screen, click Browse.
6. After selecting the disk
drive, open the HQ_Driver
folder and click mi-sc4.inf
and OK.
7. When installation is
complete, follow the
instructions on the wizard.
284"/#0#)'4"
5647%674'
The supplied RadioShack PVR
Manager DR-97 software
consists of the following
programs:
Image Window Program —
Lets you display uploaded
image data from each folder in
one screen.
39
Image Viewer Program —
Lets you display and edit
captured image data.
Voice Player Program — Lets
you play back recorded voice
files.
284"/CPCIGT"+EQPU
1
5
6
7
2
8
3
9
4
10 11
12 13 14
1. Voice Player Icon –
Starts the Voice
Player program.
40
2. Image Window Icon
– Starts the Image
Window program.
3. Image Viewer Icon –
Starts the Image
Viewer program.
4. Folder Refresh Icon
– Updates the data to
the PC.
5. Connection Indicator
– Indicates the
connection status between
the recorder and the PC.
6. Refresh Icon –
Refreshes the
connection between the
recorder and the PC.
7. Upload Icon –
Uploads selected files
from the recorder to the
PC.
8. Download Icon –
Downloads selected
41
voice files from the PC to
the recorder.
9. Voice A Folder Icon
– Displays the files in
Folder A of the recorder.
10. Voice B Folder Icon
– Displays the files in
Folder B of the recorder.
11. Camera Folder Icon
– Displays the files in
the recorder’s Image
Folder.
12. Erase Selected File
Icon – Erases the
selected file.
13. All Erase Icon –
Initializes the recorder.
14. Clock Mode Icon –
Switches the time
display between 12- and
24-hour formats.
42
4700+0)"284"
/#0#)'4
1. Double-click the
RadioShack DR-97 icon or
click Start/Programs/
RadioShack/DR-97/PVR
Manager. The PVR
Manager starts and the
main window automatically
appears.
2. To exit RadioShack PVR
Manager, click File/Exit. ±
7RNQCFKPI"(KNGU
1. To save uploaded files in
the PC, voice, picture, and
email folders are
automatically created
under C:/RadioShack/DR97 when PVR Manager is
installed. Specify one of
the folders so the folder
opens. If you do not
specify a folder, files will be
uploaded to the DR-97
folder.
±"016'"±"
Once the recorder
and the PC are
connected with USB
connecting cable,
9edd[Yj appears. If
the connection did not
work or was
obstructed, B?DAý;hheh
appears. If this
happens, click the
Refresh icon.
43
2. Click Voice A Folder, Voice
B Folder, or Camera Folder
to display the files in the
folder.
3. Select the file(s) you want
to upload.
To upload many files at the
same time, press Shift and
click the first file and the
last file.
To select many files which
are not successive, press
Ctrl and click the desired
files.
4. Click the Upload icon to
start uploading.
44
(KNG"0COGU
File names follow this convention:
Voice
file
(SP
mode)
Voice
file
(HQ
modes)
A
A001.
cvs
A002.
cvh
B
B001.
cvs
B002.
cvh
Folder
Image
Image
file
P0001.
cis
(Uploaded
image
files are
renamed
following the
convention
P0001.
bmp.
If you upload a Voice In Picture
(V.I.P.) file, it is divided into
separate voice and image files
(for example, P0001.cvs and
P0001.bmp). .
."%#76+10"."
If you change the
name of a V.I.P.
image file in the PVR
Manager, you must
change the voice file
name at the same
time. Otherwise, the
PVR Manager will
not recognize them
as related files.
45
If a file name already exists in
the specified PC folder when
you upload a file, the next file
number is automatically
assigned to it.
1RGPKPI"7RNQCFGF"
+OCIG"(KNGU
To open an image file, double
click it in the picture folder of
the PVR Manager. The Image
Viewer program opens (see
“Using the Image Viewer” on
Page 48.) To open a voice file,
double click it in the PVR
Manager’s voice folder. The
Voice Player opens (see “Using
the Voice Player” on
Page 52.)±
&QYPNQCFKPI"C"(KNG
1. Select a voice file which
you want to download from
the voice folder.
2. Select the download
destination (Voice A Folder
or Voice B Folder). ±
46
3. Click the Download icon.
±"016'5"±"
'TCUKPI"(KNGU
• Downloaded files
are sequentially
re-numbered
and the new
number is used
as the file name.
If you download
a file with prefix
A to Folder B,
the prefix
changes to B.
75+0)"6*'"+/#)'"
9+0&19
• If the total
number of files in
the recorder and
the files to be
downloaded is
over 100,
To erase individual files, select
the files you want to erase from
the recorder’s folder and click
the Erase Selected File icon. To
erase all data from the
recorder, press the All Erase
icon. All data except the time
set-up will be erased.
To open the Image Window,
click Programs/Image Window
on the PVR Manager. If you
select the picture folder, all
image files in the folder appear.
If you double click the file which
you want to open, the Image
Viewer program and the
selected image file opens.
9khh[djýFLHý
<ebZ[hý_iý<kbbé
appears.
• If you try to
erase a locked
file, a warning
message
appears. Click
Yes to erase the
file.
47
75+0)"6*'"+/#)'"
8+'9'4
To open the Image Viewer,
click Programs/Image Viewer on
the PVR Manager.
+OCIG"%QPXGTUKQP
Bright/Contrast – To
increase brightness or
contrast of the image, drag
either the Bright or Contrast
control clockwise. To decrease
the brightness or contrast, drag
either control counterclockwise.
Color Balance –
Adjusts the image color
balance.
Rotate – Lets you rotate
the image in 90, 180, or
270° angles.
Mirror – Flips the image
left or right, up or down.
Image Resize – Resizes
the image based on
48
dimensions you enter. Unlike
Zoom In/Out, it changes the
image data.
JPG Convert – Converts a
BMP to JPG to save
storage space and speed email
transmissions.
(KNVGTKPI
To access the filtering tools,
click Transfer/Filtering.
49
Invert – Converts the image
between positive and negative
status.
Blur – Softens the image.
Sharpen – Raises the image‘s
contrast.
Edge Detection – Marks the
outline of objects with
brightness and makes other
parts dark.
Emboss – Makes the boundary
of the image three dimensional.
%QR[KPI"C"5GNGEVGF"#TGC
To copy a part of opened image
file, click Edit/CopySelection/
Area Selection and select the
screen area you want to copy
by dragging the mouse and
clicking Edit/Copy Selection/
Area Copy. Another image file
with a different file name will be
created in the Image Viewer.
50
To cancel the screen area
selection, click Edit/Copy
Selector/Area Selection again.
#FLWUVKPI"VJG"+OCIG"
5K\G
Zoom In/Zoom Out –
Changes the size of the
image on the Image Viewer
screen without changing the
image data.
Original Size – Reverts
the zoomed image into the
original size.
#NKIPKPI"9KPFQYU
Cascade Align– Aligns
image files in a cascade
format.
Horizontal Align– Aligns
image files horizontally.
Vertical Align– Aligns
image files vertically.
51
±"016'"±"
To send a voice file,
open the voice file,
then click Send/Send
Mail and follow the
on-screen
instructions.
If the voice file is a
.cvs file (SP mode), it
is automatically
converted to an .exe
file so the recipient
can play it with the
Voice Player. If the
voice file is a .cvh file
(HQ mode), it is
automatically
converted to a .wav
file so the recipient
can play it using
widely-available
software such as
Microsoft Media
Player.
52
#$176"80+020"(+.'5
When you open a V.I.P. file on
the Image Viewer, the red clip
icon appears at the upper left
corner. Click this icon. The
voice player opens.
75+0)"6*'"81+%'"
2.#;'4
To open the voice player, click
Programs/Voice Player on the
PVR Manager.
1RGPKPI"CPF"2NC[KPI"
$CEM"C"8QKEG"(KNG
1. Click File/Open and select
the voice file to open it.
2. Click J to play back the
voice file.
If you click and drag the play
bar, the selected file will be
played from the part where the
icon is located. ±
(CUV"(QTYCTF"CPF"
4GXGTUG
To reverse or fast forward, click
# or , during playback. As
you press the icon, 5 seconds
of the recorded section is
skipped in the forward direction
or backward direction.
#FLWUVKPI"8QNWOG
Drag the VOL bar up or down to
adjust the volume level.
*QV"-G["1RGTCVKQP
To Do This
Press These Keys
Play
Reverse
Fast
Forward
Stop
Ctrl+Alt+F2
Ctrl+Alt+F3
Ctrl+Alt+F4
Ctrl+Alt+F5
5'0&+0)"#0"'//#+.
1. If the image file is BMP,
change it to JPG to make
the file smaller. (See
53
“Image Conversion” on
Page 48.)
2. Click File/E-Mail.
3. Follow the instructions on
the windows.
To send a V.I.P. file, open its
voice file using the Voice
Player, click Send/Send Mail to
convert it to an .exe file, then
attach the image file.
54
6417$.'
5*116+0)
2TQDNGO
5WIIGUVKQP
Nothing
happens after
pressing a
button.
Make sure
HOLD is set
in the
opposite
direction from
the arrow.
Make sure
that fresh
batteries are
correctly
installed.
There is no
sound.
Make sure the
volume is
turned up.
Make sure an
earphone is
not connected
to the
recorder.
55
2TQDNGO
5WIIGUVKQP
The recorder
will not
record. <KBB
appears
when there
should be
ample space.
Make sure the
number of
recorded
messages in
the selected
folder has not
reached 100.
Confirm there
is remaining
recording
time. (See
“Displaying
Recording
Information”
on Page 19.)
%#4'
Keep the recorder dry; if it gets
wet, wipe it dry immediately.
Use and store the recorder only
in normal temperature
environments. Handle the
recorder carefully; do not drop
it. Keep the recorder away from
dust and dirt, and wipe it with a
56
damp cloth occasionally to
keep it looking new.
Moisture condensation may
occur inside the product or
lens. When dew appears, turn
the power off and allow at least
one hour for the product to dry.
Use air blowers and lens paper
designed for photographic
lenses to clean the lens and
optical elements.
5'48+%'"#0&"
4'2#+4
If your recorder is not
performing as it should, take it
to your local RadioShack store
for assistance. Modifying or
tampering with the recorder’s
internal components can cause
a malfunction and might
invalidate its warranty and void
your FCC authorization to
operate it.
57
52'%+(+%#6+105
Image Sensor ........ 1/3-Inch CMOS
Resolution ........... 640 × 480 pixels
(VGA)
Image Capacity (SP) .. 250 images
Image Capacity (HQ) . 126 images
Lens ........................................F/3.2
Focus Range ........ 2.0 m to Infinity
Min. Illumination ................. 2.5 lux
(Image Sensor)
Exposure ....................... Automatic
View Finder ........................ Optical
Recording Time (HQ) .. 30 minutes
Recording Time (SP)
130 minutes
Max. File No. to Record .................
2 Folder × 100 Files
Frequency Response:
500 Hz–3,500 Hz
Max. Output Power ......... 200 mW
at 10% THD
Speaker .............. Dynamic, 28 mm
Dimensions (HWD):
47/16 × 111/16 x 3/4 Inches
(112 × 42 × 18 mm)
58
Weight (w/o battery) ............ 2.2 oz
(61 g)
Memory Medium ................ Built-In
Flash Memory
Power Source .................... DC 3V,
Two AAA Alkaline Batteries
Battery Life (Camera) ...... Approx.
150 images at intervals of
one minute of capture
Battery Life (Recorder) ................ ...
About 9 Hours (SP)/
16 Hours (HQ)
Operating Temperature
32° – 110°F
(0° – 43°C)
Accessories ............... USB Cable,
CD, Wrist Strap
Specifications are typical; individual
units might vary. Specifications are
subject to change and improvement
without notice.
59
Limited Ninety-Day Warranty
This product is warranted by RadioShack against manufacturing defects in material and workmanship under normal use for ninety (90)
days from the date of purchase from RadioShack company-owned
stores and authorized RadioShack franchisees and dealers. EXCEPT AS PROVIDED HEREIN, RadioShack MAKES NO EXPRESS
WARRANTIES AND ANY IMPLIED WARRANTIES, INCLUDING
THOSE OF MERCHANTABILITY AND FITNESS FOR A PARTICULAR PURPOSE, ARE LIMITED IN DURATION TO THE DURATION
OF THE WRITTEN LIMITED WARRANTIES CONTAINED HEREIN.
EXCEPT AS PROVIDED HEREIN, RadioShack SHALL HAVE NO
LIABILITY OR RESPONSIBILITY TO CUSTOMER OR ANY OTHER
PERSON OR ENTITY WITH RESPECT TO ANY LIABILITY, LOSS
OR DAMAGE CAUSED DIRECTLY OR INDIRECTLY BY USE OR
PERFORMANCE OF THE PRODUCT OR ARISING OUT OF ANY
BREACH OF THIS WARRANTY, INCLUDING, BUT NOT LIMITED
TO, ANY DAMAGES RESULTING FROM INCONVENIENCE, LOSS
OF TIME, DATA, PROPERTY, REVENUE, OR PROFIT OR ANY INDIRECT, SPECIAL, INCIDENTAL, OR CONSEQUENTIAL DAMAGES, EVEN IF RadioShack HAS BEEN ADVISED OF THE
POSSIBILITY OF SUCH DAMAGES.
Some states do not allow limitations on how long an implied warranty
lasts or the exclusion or limitation of incidental or consequential damages, so the above limitations or exclusions may not apply to you.
In the event of a product defect during the warranty period, take the
product and the RadioShack sales receipt as proof of purchase date
to any RadioShack store. RadioShack will, at its option, unless otherwise provided by law: (a) correct the defect by product repair without
charge for parts and labor; (b) replace the product with one of the
same or similar design; or (c) refund the purchase price. All replaced
parts and products, and products on which a refund is made, become
the property of RadioShack. New or reconditioned parts and products may be used in the performance of warranty service. Repaired
or replaced parts and products are warranted for the remainder of the
original warranty period. You will be charged for repair or replacement of the product made after the expiration of the warranty period.
This warranty does not cover: (a) damage or failure caused by or attributable to acts of God, abuse, accident, misuse, improper or abnormal usage, failure to follow instructions, improper installation or
maintenance, alteration, lightning or other incidence of excess voltage or current; (b) any repairs other than those provided by a RadioShack Authorized Service Facility; (c) consumables such as fuses
or batteries; (d) cosmetic damage; (e) transportation, shipping or insurance costs; or (f) costs of product removal, installation, set-up service adjustment or reinstallation.
This warranty gives you specific legal rights, and you may also have
other rights which vary from state to state.
RadioShack Customer Relations, 200 Taylor Street, 6th Floor,
Fort Worth, TX 76102
12/99
RadioShack Corporation
Fort Worth, Texas 76102
14-1197
08A02
Printed in Korea


