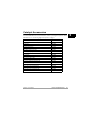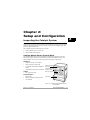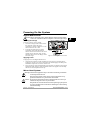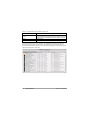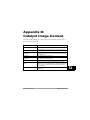
1
™
User Manual
© High End Systems, Inc. 2002, All Rights Reserved
Information and specifications in this document are subject to change without notice.
High End Systems, Inc. assumes no responsibility or liability for any errors or
inaccuracies that may appear in this manual.
Trademarks used in this text: High End Systems, WholeHog II, WholeHog III, Dataflash,
Intellebeam, and LithoPatterns are registered trademarks; and Catalyst, the Catalyst Logo,
TalkBack, the High End Systems globe logo and the Hog logo are trademarks of High End
Systems, Inc. or High End Systems Europe Ltd. Belden is a registered trademark of
Belden, Inc. Apple, FireWire, Mac, Power Mac, Finder, MacPaint, and QuickTime are
trademarks of Apple Computer, Inc., registered in the United States and other countries.
Adobe and Photoshop are registered trademarks of Adobe Systems. Digital Juice is a
trademark of Digital Juice, Inc. NVIDIA and GeForce2 are registered trademarks of
NVIDIA Corporation in the United States and /or other countries. Unistrut is a registered
trademark of Tyco International, LTD. Photoshop is a registered trademarks of Adobe
Systems, Inc. Macromedia is a registered trademark and Flash is a trademark of
Macromedia, Inc. ETL and C-ETL are registered trademarks of Intertek Testing Services.
Other trademarks and trade names may be used in this document to refer to either the
entities claiming the marks and names or their products. High End Systems disclaims any
proprietary interest in trademarks and trade names owned by others.
Catalyst User Manual
P/N 60600204 Version 2.0 July, 2002
Printed in the USA
S.G.
Catalyst™ User Manual
i
Contacting High End Systems®
US and the Americas
Sales Department:
High End Systems, Inc.
2217 West Braker Lane
Austin, TX 78758 USA
voice:
512.836.2242
fax:
512.837.5290
Customer Service:
High End Systems, Inc.
2227 West Braker Lane
Austin, TX 78758 USA
voice:
800.890.8989
24-hour fax:
512.834.9195
24-hour voice mail: 512.837.3063 or 800.890.8989
U.S. New York
High End Systems, Inc. New York
311 W. 43rd Street, Ste 400
New York, NY 10036
voice:
210.957.6840
fax:
212.957.4466
U.S. Los Angeles:
High End Systems, Inc.
8200 Haskell Avenue
Van Nuys, CA 91406 US
voice:
818.947.0550
fax:
818.908.8975
Europe:
High End Systems Europe Ltd.
53 Northfield Road
London W1395Y
voice:
+44 20.8579.5665
fax:
+44 20.8579.8469
Germany:
voice
fax:
Singapore:
High End Systems Singapore Pte. Ltd.
1 Tannery Road 06-05
Cencon 1
Singapore 1334
voice:
+65 742 8266
FAX:
+65 743 9322
World Wide Web:
http://www.highend.com
ii
+49 5331 9925-91
+49 5331 9925-92
Catalyst™ User Manual
Declaration of Conformity
according to ISO/IEC Guide 22 and EN45104
Manufacturer's name:
High End Systems
Distributor's name:
Distributor's address:
High End Systems Europe Ltd.
53 Northfield Road
London. W13 9SY
Declares that the product:
Product Name:
Product Number:
Product Options:
Catalyst
All
All
Conforms to the following EEC directives:
73/23/EEC, as amended by 93/68/EEC
89/336/EEC, as amended by 92/31/EEC and 93/68/EEC
Equipment referred to in this declaration of conformity was first manufactured in
compliance with the following standards in 2001:
Catalyst Interface Box
EMC:
EN55103-1:1996 (E2)
EN55103-2:1996 (E2)
Catalyst Head and Power Supply
EMC:
EN5002:1998 Class A
EN61000-3-2 Class A
EN61000-3-3 Class A
EN50024:1998
EN61000-4-2 Level 3 Class 2
EN61000-4-3 Level 2
EN61000-4-4 Level 2
EN61000-4-5 Level 3
EN61000-4-6 Level 2
EN61000-4-11
Catalyst Power Supply
Safety:
EN60950:2000
I, the undersigned, hereby declare that the equipment specified above conforms to
the above Directives and Standards.
Ken Hansen
22 May 2002
Catalyst™ User Manual
iii
Product Modification Warning
High End Systems products are designed and manufactured to meet the requirements of
United States and International safety regulations. Modifications to the product could
affect safety and render the product non-compliant to relevant safety standards.
Mise En Garde Contre La Modification Du Produit
Les produits High End Systems sont conçus et fabriqués conformément aux exigences
des règlements internationaux de sécurité. Toute modification du produit peut entraîner
sa non conformité aux normes de sécurité en vigueur.
Produktmodifikationswarnung
Design und Herstellung von High End Systems entsprechen den Anforderungen der U.S.
Amerikanischen und internationalen Sicherheitsvorschriften. Abänderungen dieses
Produktes können dessen Sicherheit beeinträchtigen und unter Umständen gegen die
diesbezüglichen Sicherheitsnormen verstoßen.
Avvertenza Sulla Modifica Del Prodotto
I prodotti di High End Systems sono stati progettati e fabbricati per soddisfare i requisiti
delle normative di sicurezza statunitensi ed internazionali. Qualsiasi modifica al prodotto
potrebbe pregiudicare la sicurezza e rendere il prodotto non conforme agli standard di
sicurezza pertinenti.
Advertencia De Modificación Del Producto
Los productos de High End Systems están diseñados y fabricados para cumplir los
requisitos de las reglamentaciones de seguridad de los Estados Unidos e internacionales.
Las modificaciones al producto podrían afectar la seguridad y dejar al producto fuera de
conformidad con las normas de seguridad relevantes.
FCC Information
This equipment has been tested and found to comply with the limits for a Class A digital
device, pursuant to part 15 of the FCC rules. These limits are designed to provide
reasonable protection against harmful interference when the equipment is operated in a
commercial environment. This equipment generates, uses, and can radiate radio
frequency energy and, if not installed and used in accordance with the instruction
manual, may cause harmful interference to radio communications. Operation of this
equipment in a residential area is likely to cause harmful interference, in which case the
user will be required to correct the interference at his own expense.
iv
Catalyst™ User Manual
Important Safety Information
Instructions pertaining to continued protection against fire, electric shock, and injury to
persons are found in Appendix C.
Please read all instructions prior to assembling, mounting, and operating this equipment.
Important: Informations De Sécurité
Les instructions se rapportant à la protection permanente contre les incendies,
l’électrocution, excessif et aux blessures corporelles se trouvent dans l’Annexe C.
Veuillez lire toutes les instructions avant d’assembler, de monter ou d’utiliser cet
équipement.
Wichtige Sicherheitshinweise
Sicherheitsanleitungen zum Schutz gegen Feuer, elektrischen Schlag, und Verletzung von
Personen finden Sie in Anhang C.
Vor der Montage, dem Zusammenbau und der Intbetriebnahme dieses Geräts alle
Anleitungen sorgfältig durchlesen.
Informazioni Importanti Di Sicurezza
Le istruzioni sulla protezione da incendi, folgorazione, e infortuni sono contenute
nell’appendice C.
Si prega di leggere tutte le istruzioni prima di assemblare, montare e azionare
l’apparecchiatura.
Informacion Importante De Seguridad
En el Apéndice C se encuentran instrucciones sobre protección continua contra incendios,
descarga eléctrica, y lesiones personales.
Lea, por favor, todas las instrucciones antes del ensamblaje, montaje y operación de este
equipo.
Symbols
The following international caution and warning symbols appear in margins
throughout this manual to highlight messages.
Caution: This symbol appears adjacent to Caution messages. Not heeding
these messages could result in personal injury and/or damage to
equipment.
Warning: This symbol appears adjacent to high voltage warning messages.
Not heeding these messages could result in serious personal
injury.
Catalyst™ User Manual
v
Warranty Information
Limited Warranty
Unless otherwise stated, your product is covered by a one year parts and labor limited
warranty. It is the owner’s responsibility to furnish receipts or invoices for verification of
purchase, date, and dealer or distributor. If purchase date cannot be provided, date of
manufacture will be used to determine warranty period.
Returning an Item Under Warranty for Repair
It is necessary to obtain a Return Material Authorization (RMA) number from your dealer
or point of purchase BEFORE any units are returned for repair. The manufacturer will
make the final determination as to whether or not the unit is covered by warranty.
Any Product unit or parts returned to High End Systems must be packaged in a suitable
manner to ensure the protection of such Product unit or parts, and such package shall be
clearly and prominently marked to indicate that the package contains returned Product
units or parts and with an RMA number. Accompany all returned Product units or parts
with a written explanation of the alleged problem or malfunction. Ship returned Product
units or parts to: 2227 West Braker Lane, Austin, TX 78758 USA.
Note: Freight Damage Claims are invalid for fixtures shipped in non-factory boxes
and packing materials.
Freight
All shipping will be paid by the purchaser. Items under warranty shall have return
shipping paid by the manufacturer only in the Continental United States. Under no
circumstances will freight collect shipments be accepted. Prepaid shipping does not
include rush expediting such as air freight. Air freight can be sent customer collect in the
Continental United States.
REPAIR OR REPLACEMENT AS PROVIDED FOR UNDER THIS WARRANTY IS THE
EXCLUSIVE REMEDY OF THE CONSUMER. HIGH END SYSTEMS, INC. MAKES NO
WARRANTIES, EXPRESS OR IMPLIED, WITH RESPECT TO ANY PRODUCT, AND
HIGH END SPECIFICALLY DISCLAIMS ANY WARRANTY OF MERCHANTABILITY OR
FITNESS FOR A PARTICULAR PURPOSE. HIGH END SHALL NOT BE LIABLE FOR
ANY INDIRECT, INCIDENTAL OR CONSEQUENTIAL DAMAGE, INCLUDING LOST
PROFITS, SUSTAINED OR INCURRED IN CONNECTION WITH ANY PRODUCT OR
CAUSED BY PRODUCT DEFECTS OR THE PARTIAL OR TOTAL FAILURE OF ANY
PRODUCT REGARDLESS OF THE FORM OF ACTION, WHETHER IN CONTRACT,
TORT (INCLUDING NEGLIGENCE), STRICT LIABILITY OR OTHERWISE, AND
WHETHER OR NOT SUCH DAMAGE WAS FORESEEN OR UNFORESEEN.
Warranty is void if the product is misused, damaged, modified in any way, or for
unauthorized repairs or parts. This warranty gives you specific legal rights, and you may
also have other rights which vary from state to state.
vi
Catalyst™ User Manual
Table of Contents
Contacting High End Systems® .................................................................................................... ii
Product Modification Warning ......................................................................................................iv
FCC Information .............................................................................................................................iv
Important Safety Information .........................................................................................................v
Symbols ............................................................................................................................................v
Warranty Information.....................................................................................................................vi
Chapter 1:
Features and Specifications
Catalyst System Components ..................................................................................................... 1-1
Digital Media Server ............................................................................................................. 1-2
Mirror Head System ............................................................................................................. 1-2
Other Requirements.............................................................................................................. 1-2
Features ........................................................................................................................................ 1-3
Catalyst Digital Media Server .............................................................................................. 1-3
Operation........................................................................................................................ 1-3
Image Control................................................................................................................. 1-3
Mirror Head System ............................................................................................................. 1-4
Catalyst Accessories .................................................................................................................... 1-5
Media Server Specifications........................................................................................................ 1-6
Electrical Specifications ....................................................................................................... 1-6
Environmental Specifications .............................................................................................. 1-6
Cable and Connector Specifications.................................................................................... 1-6
DMX and RS-485 Projector Link .................................................................................. 1-6
Video ............................................................................................................................... 1-6
Mirror Head System Specifications............................................................................................ 1-7
Physical Specifications ......................................................................................................... 1-7
Mirror Head.................................................................................................................... 1-7
Power Hub ...................................................................................................................... 1-8
Roadcase......................................................................................................................... 1-8
Electrical Specifications ....................................................................................................... 1-9
Environmental Specifications .............................................................................................. 1-9
Cable and Connector Specifications.................................................................................... 1-9
DMX and RS-485 Projector Link .................................................................................. 1-9
Mirror Head to Power Hub Connection ....................................................................... 1-9
Chapter 2:
Setup and Configuration
Inspecting the Catalyst System ................................................................................................... 2-1
Catalyst Media Server Control Rack ................................................................................... 2-1
Hardware ........................................................................................................................ 2-1
Cables ............................................................................................................................. 2-1
Documentation............................................................................................................... 2-1
Catalyst User Manual
vii
Mirror Head System ............................................................................................................. 2-2
Hardware ........................................................................................................................ 2-2
Mounting Parts............................................................................................................... 2-2
Cabling............................................................................................................................ 2-2
Save All Shipping Materials ................................................................................................. 2-2
Installing Power Cord Caps......................................................................................................... 2-3
Installing a Line Cord Cap - U.K. Only................................................................................ 2-3
Vatic Fitter Heads Information - Danmark ......................................................................... 2-3
Digital Media Server Setup ......................................................................................................... 2-4
Mirror Head System Setup.......................................................................................................... 2-4
Mounting the Catalyst Mirror Head .................................................................................... 2-4
Mounting Considerations .............................................................................................. 2-4
Mirror Head Mounting Procedure ................................................................................ 2-5
Mounting the Power Hub .............................................................................................. 2-7
Connecting the Catalyst System ................................................................................................. 2-7
Media Server Connections ................................................................................................... 2-8
Media Server to Power Source ..................................................................................... 2-8
Video Distribution Amplifier (VDA) Connections ....................................................... 2-8
Computer to Peripheral Device Connections .............................................................. 2-8
CIB Output Connection ................................................................................................. 2-9
CIB to DMX Controller Data Connections................................................................... 2-9
Mirror Head System Connections ....................................................................................... 2-9
Power Connection........................................................................................................ 2-10
Power Hub to Mirror Head Connection ..................................................................... 2-10
DMX Data Connection ................................................................................................ 2-10
Connecting to a DMX512 Link ................................................................................................. 2-10
Required Data Cabling and Connectors............................................................................ 2-10
DMX Data Cables ........................................................................................................ 2-10
Cable Connectors......................................................................................................... 2-11
Constructing a Terminator.......................................................................................... 2-11
Setting Up a DMX Link ...................................................................................................... 2-12
Powering On the System ........................................................................................................... 2-13
Digital Media Server ........................................................................................................... 2-13
Selecting the Voltage ................................................................................................... 2-13
Applying Power............................................................................................................ 2-13
Mirror Head System ........................................................................................................... 2-13
Before Applying Power................................................................................................ 2-14
Applying Power............................................................................................................ 2-14
Verifying/Uploading Mirror Head Software ............................................................................ 2-14
Setting a DMX Start Channel ................................................................................................... 2-15
Determining a Valid Start Channel ................................................................................... 2-15
Setting Media Server Start Channel.................................................................................. 2-15
Setting Mirror Head System Start Channel ...................................................................... 2-16
viii
Catalyst User Manual
Chapter 3:
Operation and Maintenance
Catalyst Media Server Operation................................................................................................ 3-1
Accessing the Catalyst Application...................................................................................... 3-2
Opening the Catalyst Application ................................................................................. 3-2
Closing the Catalyst Application................................................................................... 3-2
Library Files Folder ....................................................................................................... 3-2
Image and Video File Libraries ..................................................................................... 3-3
Creating Custom Image Files............................................................................................... 3-5
Naming and Saving Custom Image Files ............................................................................ 3-6
Creating a Library Folder .............................................................................................. 3-6
Storing an Image File .................................................................................................... 3-6
Creating Custom Gobos ....................................................................................................... 3-7
Preparing a New Gobo Image....................................................................................... 3-7
Saving the New Gobo .................................................................................................... 3-8
Info Display Screens ............................................................................................................. 3-9
File Info Screen ............................................................................................................ 3-10
Gobo Info Screen ......................................................................................................... 3-10
Color ............................................................................................................................. 3-10
Size................................................................................................................................ 3-10
Keystone ....................................................................................................................... 3-10
Sync Info Screen .......................................................................................................... 3-11
Setting a Start Channel Using the DMX Info Screen................................................ 3-11
Mirror Head System Control..................................................................................................... 3-12
The Power Hub Menu Display ........................................................................................... 3-12
Navigational Basics............................................................................................................. 3-13
Display in Menu Locked Mode .......................................................................................... 3-13
Fixture Software Version ............................................................................................ 3-13
System Configuration Type......................................................................................... 3-13
DMX Start Channel ..................................................................................................... 3-13
Error Message Display ................................................................................................ 3-13
Unlocking the Menu System .............................................................................................. 3-14
Exiting the Menu System ................................................................................................... 3-14
Menu Map............................................................................................................................ 3-14
DMX Address Menu ........................................................................................................... 3-15
Setting a DMX Start Channel ..................................................................................... 3-15
Set Parameters Menu ......................................................................................................... 3-16
Factory Default Settings.............................................................................................. 3-16
Display Invert ............................................................................................................... 3-17
Display Level ................................................................................................................ 3-17
Mirror 2 Quick Path..................................................................................................... 3-17
Fixture Mode Menu ........................................................................................................... 3-18
Protocol Mode ..................................................................................................................... 3-18
Crossloading Fixture Software .......................................................................................... 3-18
Catalyst User Manual
ix
Test Options Menu.............................................................................................................. 3-19
Homing the Fixture...................................................................................................... 3-19
Copying the Boot Code................................................................................................ 3-19
Self Test Menu ............................................................................................................. 3-20
Information Menu .............................................................................................................. 3-20
Sensor Status Menu..................................................................................................... 3-20
Unique Number............................................................................................................ 3-20
DMX Values Menu....................................................................................................... 3-21
Fixture Hours ............................................................................................................... 3-21
Fixture Hours Reset ..................................................................................................... 3-21
Software Version.......................................................................................................... 3-22
Module Version Menu ................................................................................................. 3-22
Display Errors .............................................................................................................. 3-22
Channels Needed ......................................................................................................... 3-22
Next DMX Channel ..................................................................................................... 3-22
Catalyst Maintenance ................................................................................................................ 3-23
Resetting Media Server ...................................................................................................... 3-23
Replacing the Power Hub Fuse.......................................................................................... 3-23
Replacement Parts .............................................................................................................. 3-23
Cleaning the Mirrors........................................................................................................... 3-24
Chapter 4:
DMX Programming
DMX Programming Terminology............................................................................................... 4-1
Digital Media Server DMX Parameters...................................................................................... 4-1
Image/Video Selection .......................................................................................................... 4-2
Locating and Selecting an Image/Video File................................................................ 4-2
Defining a Video Segment............................................................................................. 4-3
Video Playback............................................................................................................... 4-3
Synchronized Playback on Multiple Catalyst Systems ............................................... 4-3
Playback Speed .............................................................................................................. 4-4
Overlay Gobo Control........................................................................................................... 4-4
Gobo Selection ............................................................................................................... 4-5
Gobo Layer Sizing ......................................................................................................... 4-5
......................................................................................................................................... 4-5
Gobo Rotate.................................................................................................................... 4-5
Composite Image Control..................................................................................................... 4-6
Rotation .......................................................................................................................... 4-6
Scaling ............................................................................................................................ 4-7
Panning........................................................................................................................... 4-7
Image Movement Speed ................................................................................................ 4-7
Aspect Ratio ................................................................................................................... 4-7
Other Effects .................................................................................................................. 4-7
Mask Layer Control .............................................................................................................. 4-8
x
Catalyst User Manual
Color Control......................................................................................................................... 4-8
Visual Effects Control ........................................................................................................... 4-9
Keystone Correction ............................................................................................................. 4-9
Mirror Head Control Parameters.............................................................................................. 4-10
Mirror Head Positioning..................................................................................................... 4-10
MSpeed (Motor Speed) ...................................................................................................... 4-10
Appendix A:
Catalyst DMX Protocol
Media Server DMX Protocol ................................................................................................A-1
Mirror Head DMX Protocol .................................................................................................A-8
Recommended Media Server DMX Default Values ...........................................................A-9
Recommended Mirror Head DMX Default Values.............................................................A-9
Appendix B:
MSpeed Conversion Table
Appendix C:
Safety Information
Appendix D:
Catalyst Image Content
High End Systems Lithopatterns ................................................................................................D-2
DHA Gobos...................................................................................................................................D-7
List of Figures
Figure 1-1 Total Catalyst system ..................................................................................... 1-1
Figure 1-2 Mirror Head dimensions ........................................................................................1-7
Figure 1-3 Power Hub Dimensions ..........................................................................................1-8
Figure 2-1 Catalyst Digital Media Server Control Rack .........................................................2-1
Figure 2-2 Unistrut mounting parts .........................................................................................2-2
Figure 2-1 Attach Unistrut to projector .......................................................................... 2-5
Figure 2-2 Construct Unistrut crosspieces ..............................................................................2-5
Figure 2-3 Connecting Unistrut supports ................................................................................2-5
Figure 2-4 Attaching cantilever arms and adaptor plate ........................................................2-6
Figure 2-5 Mounting the Mirror Head .....................................................................................2-6
Figure 2-6 Mounting Power Hub .............................................................................................2-7
Figure 2-7 VDA connection ......................................................................................................2-8
Figure 2-8 Computer connections ...........................................................................................2-8
Figure 2-9 CIB connections ......................................................................................................2-9
Figure 2-10 Power Hub connections .......................................................................................2-9
Figure 2-11 XLR 5-pin connector cable .................................................................................2-11
Figure 2-12 Data cable terminator .........................................................................................2-12
Figure 2-13 Daisy-chaining fixtures in a DMX 512 link ......................................................2-12
Catalyst User Manual
xi
Figure 2-14 Voltage selection switch .....................................................................................2-13
Figure 2-15 Setting Start Channel on the CIB ......................................................................2-15
Figure 3-1 Library Files folder contents on Macintosh harddrive ................................ 3-3
Figure 3-2 File organization and naming on the Macintosh harddrive ................................3-4
Figure 3-3 Aspect ratio image adjustment ..............................................................................3-5
Figure 3-4 Art image size adjustment ......................................................................................3-6
Figure 3-5 Sample Gobo ...........................................................................................................3-7
Figure 3-6 Gobo image specifications .....................................................................................3-7
Figure 3-7 Locating dlaores.mov file .......................................................................................3-8
Figure 3-8 Adding a custom image to the gobo ‘movie’ .........................................................3-8
Figure 3-9 Info Display screen .................................................................................................3-9
Figure 3-10 File Info Screen ...................................................................................................3-10
Figure 3-11 File Sync Screen .................................................................................................3-11
Figure 3-12 DMX Info Screen ................................................................................................3-11
Figure 3-13 Power hub front panel display ...........................................................................3-12
Figure 4-1 Gobo rotation interaction with image layer ................................................. 4-5
Figure 4-2 X, Y, and Z rotation ................................................................................................4-6
Figure 4-3 Corner designation on unrotated image ............................................................... 4-9
List of Tables
Table 3-1 Catalyst Hot Keys ............................................................................................. 3-2
Table 3-2 Preloaded content folder descriptions ................................................................... 3- 3
Table 4-1 Selected rotation DMX values................................................................................ 4-6
Table 4-2 Sample size DMX values ........................................................................................ 4-7
Table 4-2 Visual Effect Options ............................................................................................... 4-9
xii
Catalyst User Manual
Chapter 1:
1
Features and Specifications
Catalyst System Components
The Catalyst system from High End Systems® combines a Digital Media Server with
an Orbital Movement System to integrate digital media projection with automated
lighting effects.
When used together on a standard DMX512 link (see Figure 1-1), a complete Catalyst
system provides both real time image control and precision image positioning. In
addition, multiple Catalyst systems can synchronize playback to single frame
accuracy.
Mirror
Head
System
Video
Signal
Digital
Media
Server
Module Link
Power and Data
DMX Data
DMX Data
Figure 1-1 Total Catalyst system
Catalyst™ User Manual
Features and Specifications
1-1
Digital Media Server
The Digital Media Server creates, manipulates and controls still images or digital
video and outputs to any device accepting an XGA signal. It can be controlled with a
lighting console to output a digital image to one or more projectors as part of a
DMX512 link.
The Digital Media Server can also provide independent control for LED panels and
video walls.
Each Media Server produces one video signal/image. That one image may be fed to
one or more projectors, each with its own Mirror Head for positioning. Even though
the same image will appear from each projector, the Mirror Head systems can be
independently controlled.
The Catalyst Digital Media Server control rack hardware consists of:
•
A video processing Macintosh® computer
•
Monitor, keyboard and mouse
•
Catalyst Interface Box (CIB)
•
Video Distribution Amplifier
•
Cabling for power and USB connections
Mirror Head System
The Mirror Head System utilizes a moving Mirror Head mounted on front of a video
projector to position a projected image anywhere in three-dimensional space. It
operates with the Catalyst Media Server or independently as a standalone fixture on
a DMX link. The Mirror Head system ships with:
•
A Periscopic Dual-Mirror Head
•
A Power Hub
•
Unistrut Universal mount kit
•
Cabling for XLR, RS-232 and power connections
Other Requirements
User provided components for the Catalyst system are:
•
1-2
A DMX lighting console that can control 56 channels per fixture and support true
16-bit values on 15+ channels. The Wholehog II® Wholehog III™, lighting
consoles, and the HandShake™ handheld controller are DMX controllers
available from High End Systems to control the Catalyst system (see “Catalyst
Accessories” on page 1-5). Contact the controller’s vendor regarding Catalyst
support on other DMX controllers. For more information on operating the fixture
with a controller (or control device such as DMX control software), consult
controller documentation.
Features and Specifications
Catalyst™ User Manual
•
The Catalyst system is compatible with most high-powered single lens video
projectors. High End System recommends using a 3-chip, DLP™–based projector.
•
Any video wall, LED panel or other video display required for a specific
application.
The Catalyst product components ship in customized roadcases under separate part
numbers.
•
Catalyst Media Server control rack (Part number 56020001)
•
Catalyst Orbital Movement System (Part number 56010001)
Features
Catalyst Digital Media Server
Operation
•
Real-time control of multi-layered video and still images
•
Frame-by-frame synchronization between multiple Catalyst systems
•
Digital still image and video playback from hard drive
•
A rackmount Apple® Power Mac® computer optimally configured for Catalyst
with preloaded Catalyst software and interface hardware
•
Live digital video input via Firewire® interface or other external video using
third-party format converters
•
USITT DMX512 compatible control interface
•
High resolution output on 5 BNC connectors to projector, video wall or LED
display panel
•
Connections for Midi In/Out/Through and RS-485
Image Control
•
Rotation and scaling of digital images and video in three planes
•
Visual effects including Invert, Wobble, and Tiling
•
Adjustable masking effects
•
Movie frame and playback direction control
•
Color mixing
•
Gradient color (fountain fills)
•
Adjustable beam shape and keystone correction on image layer
Catalyst™ User Manual
Features and Specifications
1-3
1
•
Capacity to store over 65,000 image files. Catalyst ships with over 200 video and
image files in onboard image libraries including:
— High End Systems® lithos
— DHA™ gobos
— Artbeats™ footage
— Digital Juice Ambient Loops
•
Apple® Quicktime™ technology for compatibility with content created in
Quicktime Pro®, Final Cut Pro®, After Effects®, and Photoshop® and other
image and move formats.
Mirror Head System
•
USITT DMX512 compatible control
•
High resolution 16–bit stepper motors (180,000 steps per revolution) to provide
smooth, micro-stepped 270° x 360° movement
•
Quick Path feature to allow faster position changes in Mirror 2 movement
•
Mounting hardware to allow mounting to a variety of video projectors
•
Variable 100–230V power input
•
On-board menu system with dot matrix display
•
Built in RS-485/RS-232 converter for projector control
1-4
Features and Specifications
Catalyst™ User Manual
Catalyst Accessories
The following table lists accessories available for the Catalyst system from your High
End dealer/distributor. For more information, contact your High End Systems dealer/
distributor or see “Contacting High End Systems” on page ii.
Part Description
Part Number
Additional Power Hub for Catalyst Mirror Head
56040001
Additional Video Distribution Amplifier
56040002
Unistrut kit
56040003
Catalyst Interface Box
56040004
Catalyst Outer Mirror
80180006
Catalyst Inner Mirror
80180007
Wholehog II lighting console
25020001
Wholehog III lighting console
61020001
Media Server control rack roadcase
56070001
LCD Monitor
56070009
HandShake handheld controller
10020001
Galvanized safety cable
12040001
Cheeseborough clamp
55040014
Lightwave Research Upload Dongle
26040002
Male 5-pin DMX terminator
90404039
Heavy duty 5-pin XLR cable (10’)
55050017
Heavy duty 5-pin XLR cable (25’)
55050018
Heavy duty 5-pin XLR cable (50’)
55050019
Heavy duty 5-pin XLR cable (100’)
55050020
User Manual
60600204
Catalyst™ User Manual
Features and Specifications
1-5
1
Media Server Specifications
Physical Specifications
The following specifications apply to the Media Server control rack as shipped in a
custom roadcase.
Dimensions (including casters): 686 mm (27in) x 610 mm (24in) x 737 mm (29in)
Weight: 81.6kg (180lbs)
Electrical Specifications
Warning: Class I equipment – This equipment must be earthed
Selectable input voltage: 115V or 230V (50-60Hz)
Rated Power: 400W
Environmental Specifications
Maximum ambient temperature (Ta): 35o C
Cable and Connector Specifications
DMX and RS-485 Projector Link
Cables: Belden 9841 or equivalent (meets specifications for EIA RS-485 applications)
with the following characteristics:
•
Two twisted pairs (4-conductor) plus a shield
•
Maximum capacitance between conductors: 30 pF/ft
•
Maximum capacitance between conductor and shield: 55 pF/ft
•
Maximum resistance: 20 Ohm/100 ft
•
Nominal impedance: 100–140 Ohm
Connectors: Two 5-pin male and female XLR connectors:
•
Pin 1 Ground
•
Pin 2 Data–
•
Pin 3 Data+
•
Pin 4 Secondary data–
•
Pin 5 Secondary data+
Note: Projector link communication is a full-duplex link and requires
both pairs be connected.
Termination connector: 5-pin male XLR connector with a 120 Ohm
terminating resistor fitted between pins 2 and 3.
Video
Cables: 75 Ohm co-axial cables
Connectors: 75 Ohm BNC
1-6
Features and Specifications
Catalyst™ User Manual
Mirror Head System Specifications
1
Physical Specifications
Mirror Head
Dimensions: 349mm x 369mm x 686mm (13.7in x 14.5in x 27in). See Figure 1-2 for
additional Dimensions.
Weight: 12.7kg (28lbs)
348.6mm
(13.7in)
76.7mm (3in)
15.8mm (.62in)
369.4mm (14.5in)
292.2mm (11.5in)
97mm
(3.8in)
285.2mm
(11.2in)
176mm
(6.9in)
685.8mm
(27in)
45°
109mm
(4.3in)
400.6mm
(15.8in)
116mm
(4.6in)
386mm
(15.2in)
299.7mm
(11.8in)
121.4mm
(4.8in)
289.9mm
(11.4in)
109.5mm 109.5mm
(4.3in)
(4.3in)
45°
30°
249.6mm
(9.8in)
162.7mm
(6.4in)
81.3mm (3.2in)
364mm
(14.3in)
249.6mm (9.8in)
Figure 1-2 Mirror Head dimensions
Catalyst™ User Manual
Features and Specifications
1-7
Power Hub
Dimensions: 276mm x 301mm x 120mm (10.9in x 11.8in x 4.7in). See Figure 1-3 for
additional dimensions.
Weight: 2.3kg (5lbs)
Roadcase
Dimensions (including casters): 1150 mm x 622mm x 660mm (45in x 24.5in x 26in)
Weight (with components loaded): 71.7kg (158lbs)
13.2mm
(.5in)
75mm
(3in)
40mm
(1.6 in)
60mm
(2.4in)
276.4mm (10.9in)
52mm
(2.1 in)
150mm
(5.9 in)
151mm
(5.9in)
119mm
(4.7 in)
15.5mm (.6 in)
300.7mm (11.8 in)
Figure 1-3 Power Hub Dimensions
1-8
Features and Specifications
Catalyst™ User Manual
Electrical Specifications
The following physical specifications apply to the the power hub component of the
Mirror Head System.
Warning: Class I equipment – This equipment must be earthed
Universal Input from 100–230 VAC, (50–60Hz)
Rated power:
100 W
Fuse:
Power supply output fuse: 2.5A, 250V slow blow only.
Environmental Specifications
Maximum ambient temperature (Ta): - 40o C
IP Rating: IP 20
Cable and Connector Specifications
DMX and RS-485 Projector Link
Cables: Belden 9841 or equivalent (meets specifications for EIA RS-485 applications)
with the following characteristics:
•
Two 4-conductor twisted pairs plus a shield
•
Maximum capacitance between conductors: 30 pF/ft
•
Maximum capacitance between conductor and shield: 55 pF/ft
•
Maximum resistance: 20 Ohm/100 ft
•
Nominal impedance: 100–140 Ohm
Connectors: Two 5-pin male and female XLR connectors:
•
Pin 1 Ground
•
Pin 2 Data–
•
Pin 3 Data+
•
Pin 4 Secondary data–
•
Pin 5 Secondary data+
Terminator: 5-pin male XLR connector with a 120 Ohm terminating resistor fitted
between pins 2 and 3.
Mirror Head to Power Hub Connection
Cable: 4–core, 1.5 mm2 with a maximum length of 2 meters
Connectors: 3-pin male and female XLR connectors:
•
Pin 1 Ground
•
Pin 2 Data Complement
•
Pin 3 Data True
•
Pin 4 +40V
Catalyst™ User Manual
Features and Specifications
1-9
1
1-10 Features and Specifications
Catalyst™ User Manual
Chapter 2:
Setup and Configuration
2
Inspecting the Catalyst System
Unpack the Catalyst fixture and verify that it is undamaged. Inspect both the outside
of the fixture for physical damage and the optical surfaces of the mirror head. If the
product is damaged or there are items missing, notify both the shipping agent and
your sales agent immediately.
The complete Catalyst system ships in two parts:
1.
Catalyst Media Server control rack
2.
Catalyst Mirror Head system
Catalyst Media Server Control Rack
The Catalyst Media Server is self contained in a flightcased equipment rack that
houses the system components and includes monitor and keyboard storage. The
Catalyst Media Server control rack ships with the following components:
Hardware
•
Apple Power Mac G4 computer
•
Catalyst Interface Box (CIB)
•
2-way Video Distribution Amplifier
(VDA)
•
LCD Monitor, Keyboard, and Mouse
Cables
•
Catalyst Interface
Box (CIB)
Video Distribution
Amplifier (VDA)
Mac G4 Computer
IEC 320 power cable
Documentation
•
MacOS CDs
•
Catalyst application software CDs
•
User Manual
Side Doors
Figure 2-1 Catalyst Digital Media Server
Control Rack
Catalyst™ User Manual
Setup and Configuration
2-1
Mirror Head System
The moving Mirror Head, Power Hub, and mounting hardware ship together. The
box contains the following components:
Hardware
•
Moving mirror head
•
Power hub
Mounting Parts
•
Projector mounting plate
•
Two each of Unistrut® in
lengths of 0.8m, 0.7m, 0.6m
and 0.4m
•
Two Unistrut splice plates
•
Four Cantilever arms in
two lengths
•
Four Unistrut bridge
components
•
Hardware kit
Unistrut
Splice plates
Bridge
components
Cantilever arms
Figure 2-2 Unistrut mounting parts
Cabling
•
4-pin XLR Power hub cable
•
US power cable
•
European power cable
Save All Shipping Materials
Do not discard shipping materials. Packing materials are specifically designed to
protect the product during transport.
High End Systems® assumes no responsibility for products that are damaged during
transport. Return a product for repair in its original shipping carton and packing
materials.
Before sending anything to the factory, call your High End Systems dealer/distributor
for a Return Material Authorization (RMA) number. The factory cannot accept any
goods shipped without an RMA number.
2-2
Setup and Configuration
Catalyst™ User Manual
Installing Power Cord Caps
Both the Catalyst Media Server control rack and the Power Hub for the Mirror Head
System may ship without an attached power cord cap. Different locations (even
within the same country) may require a different power cord cap to connect the
fixture to a power outlet.
Because of the variety of power cord caps used worldwide, High End Systems, Inc.
cannot make specific recommendations for the power cord cap.
Contact a local authority for the type of power cord cap needed. When installing the
power cord cap, note that the cores in the mains lead are colored in accordance with
the following code:
•
green and yellow = earth
•
blue = neutral
•
brown = live
Warning: Class 1 equipment - This equipment must be earthed.
Installing a Line Cord Cap - U.K. Only
In the United Kingdom, the colours of the cores in the mains lead of this equipment
may not correspond with the coloured markings identifying the terminals in the
fixture’s plug. Therefore, install a line cord cap in accordance with the following
code:
•
The core which is coloured green and yellow must be connected to the plug
terminal which is marked with the letter “E,” or by the earth symbol
, or
coloured green, or green and yellow.
•
The core which is coloured blue must be connected to the terminal which is
marked with the letter “N” or coloured black.
•
The core which is coloured brown must be connected to the terminal which is
marked with the letter “L” or coloured red.
Warning: Class 1 equipment - This equipment must be earthed.
Vatic Fitter Heads Information - Danmark
Advarsel: Beskyttelse mod elektrisk chock.
Vigtigt!
Lederne med gul/groen isolation maa kun tilsluttes en klemme maerket
eller
Catalyst™ User Manual
Setup and Configuration
2-3
2
Digital Media Server Setup
The roadcase serves as a control rack for the Catalyst Digital Media.
To set up control rack:
1.
Detach roadcase doors and remove monitor, keyboard and mouse from storage
compartments with doors. Doors can be stacked to use as a platform for the rest
of the case.
2.
Set monitor on top of rack plug power cord into the VDA ‘monitor in’ connection
on back of control rack.
3.
Place keyboard on shelf and connect to the shelf-mounted USB port.
4.
Attach mouse to keyboard.
Mirror Head System Setup
Mounting the Catalyst Mirror Head
Warnings: Equipment suitable for dry locations only. Do not expose this
equipment to rain or moisture.
Caution:
If mirror surface needs to be cleaned during setup procedure, use only
a mild glass cleaner (containing no ammonia) and a soft, lint-free
cotton cloth to avoid scratching mirror surface.
The Catalyst Mirror Head ships with a universal mounting kit adapted to suit most
major manufacturer's high output video projectors. Not all the mounting components
provided will be used on any one particular projector. Due to the wide variety of
possible projectors, High End Systems cannot make specific recommendations for
mounting. The following procedure is a suggested procedure for mounting the
Catalyst Mirror Head to a typical video projector.
Mounting Considerations
The Mirror Head must be able to rotate freely. When using the unistrut
system to mount the Mirror Head, position and adjust framing components and the mounting plate to avoid impeding Mirror Head movement.
Nuts and spaces have been included in the hardware kit to use where
needed.
Center the plate in front of the lens to allow for maximum beam area.
2-4
Setup and Configuration
Catalyst™ User Manual
Mirror Head Mounting Procedure
To mount the mirror head to the projector:
1.
Fix two lengths of 0.7m Unistrut across the projector as shown in Figure 2-1. For
smaller projectors, 0.6m Unistrut may be more appropriate. Using the supplied
hardware, attach to projector at four points, leaving the slot accessible from
above. The Unistrut™ should be fitted with slot facing upwards for top mounted
Unistrut, down for bottom mounted Unistrut. Where necessary, use nuts to space
the Unistrut away from the projector, and to keep it level.
Side
Top
Sectional Deta
Figure 2-1 Attach Unistrut to projector
2.
Construct two 1.2m Unistrut lengths by joining 0.8m and 0.4m lengths of Unistrut
using a splice plate inside the Unistrut and screws as shown in
Figure 2-2. Align screws so they bottom out against metal and don’t protrude
through the unistrut holes. The combination of Unistrut lengths required
depends on the overall length of the projector .
M10 screw
Unistrut
1st length of Unistrut
Splice plate
Splice plate (see detail)
2nd length of Unistrut
Sectional Detail
Figure 2-2 Construct Unistrut crosspieces
3.
Fix these two long lengths of Unistrut, channel downward to the top of the
projector as shown in Figure 2-3. The two lengths should run parallel 270mm
apart and be spaced equal distances from either side of the lens.
Lens
270
Top
Strut Orientation
Figure 2-3 Connecting Unistrut supports
Catalyst™ User Manual
Setup and Configuration
2-5
2
4.
Referring to Figure 2-4, attach the cantilever arms so that the channel runs
vertically each side of the lens. Attach each end of Unistrut using four M10 x
25mm cap screws and nuts.
Side
Unistrut cantilever arm
Head mounting plate
Lens
Mounting plate centered on Lens
M10 x 25mm Cap Screw
Shakeproof washer
Plain washer
Channel nut
Front
Sectional Detail
Figure 2-4 Attaching cantilever arms and adaptor plate
5.
Fit the Catalyst head adaptor plate
to the Cantilever arms using
channel nuts and M10 x 25mm cap
screws as shown in Figure 2-4.
Position the plate with the lens in
the centered in the opening and
flush with the plate. Use
countersunk screws to attach plate
to cantilever arms.
Cantilever arms
(attached to projector)
Countersunk
Screws
Pins
Note: The mounting can also be
attached to the base of the
projector.
6.
2-6
Fit the Mirror Head to the adaptor
plate by first hanging it on the
positioning pins and then securing
with cap screws. Loop a safety
cables through the hole provided in
the head mounting plate and
around an independent support.
Setup and Configuration
Adaptor plate
Mirror Head
Figure 2-5 Mounting the Mirror Head
Catalyst™ User Manual
Mounting the Power Hub
Attach one or two cheeseborough
clamps to the mounting bracket for
mounting on any standard truss. Use
safety cable to secure the Power Hub to
an independent support.
Note: The power hub must be located
within two meters of the projector
head for correct performance.
Mounting bracket
2
Figure 2-6 Mounting Power Hub
Connecting the Catalyst System
This section describes all the Catalyst system connections. The system ships with
most of the components already connected. In general, the user will only need to
make the following connections.
Media Server Connections
•
Media Server control rack to power source
•
Peripherals to Media Server
•
RGBHV from the CIB to the projector
•
DMX from a lighting console or previous fixture on a link to the CIB ‘DMX In’
connection
•
DMX from the CIB ‘DMX Thru’ connection to the next fixture or Catalyst system
on the link
•
Optional ethernet connections between multiple Catalyst systems to enable the
Synchronize feature
Mirror Head System Connections
•
Power Hub to power source
•
Power Hub to the mirror head
•
RS232 connection from the power hub to the projector
•
DMX connection to Power Hub ‘data in’ from the Lighting console or previous
fixture on a link
•
DMX connection from the Power Hub ‘data out’ to the next fixture on the DMX
link
Catalyst™ User Manual
Setup and Configuration
2-7
Media Server Connections
Media Server to Power Source
Caution: Before connecting power confirm that the voltage selection switch
on the rear of the Power Mac G4 computer is set to the appropriate
voltage, see “Selecting the Voltage” on page 2-13.
After attaching a suitable line cord plug (see “Installing Power Cord Caps” on page 23), connect the mains supply to the IEC power distribution strip at the rear of the
control rack. From here, power is distributed to the computer and the video
distribution amplifier.
Video Distribution Amplifier (VDA) Connections
The Catalyst Media Server uses a video distribution
amplifier to split the video signal and allow display on
the monitor as well as the projector. It also amplifies
the signal to accommodate the distance between the
Media Server and the projector.
Figure 2-7 VDA connection
The computer inputs to the VDA inside the control rack. The VDA outputs to the CIB
and the Monitor. VDA output connections are labeled Local Monitor and Data
Display. The CIB has been connected to the Data Display output. The user connects
the monitor VGA cable to the local monitor output port on the VDA.
Computer to Peripheral Device Connections
The mouse and keyboard connect to
USB to
the spare USB connector from the
computer mounted on the control rack keyboard
shelf.
Ethernet to other
Media Servers
Firewire for
external
digital video
Use the ethernet port to connect and
synchronize multiple Media Servers.
For more information about the
synchronize feature, see
“Synchronized Playback on Multiple
Catalyst Systems” on page 4-3
Connect optional external digital video
using the FireWire connection.
To power strip
Figure 2-8 Computer connections
Note: If the FireWire® technology’s hot-swap feature does not recognize input to
Catalyst, reset the computer.
For more information on using input and output devices with the computer, see the
documentation for the Power Mac G4.
2-8
Setup and Configuration
Catalyst™ User Manual
CIB Output Connection
The video connects to the projector or other compatible output device (LED Display
panel or Video wall) by way of five BNC connectors on the front of the Control
Interface Box, see (Figure 2-9).
2
Connect these to the video projector using high quality co-axial cable.
From DMX Link
Video signal
to projector
To DMX Link
Figure 2-9 CIB connections
CIB to DMX Controller Data Connections
Use the CIB ‘data in’ connection to bring data from a DMX link and the ‘data
through’ connection to route the signal back to the link, (see Figure 2-9) using
appropriate data cable, (see “Cable and Connector Specifications” on page 1-6).
Note: The Media Server should be connected to the same DMX controller as the
mirror head for operation as a unit. For further details on linking the Catalyst
system, see “Connecting to a DMX512 Link” on page 2-10.
Mirror Head System Connections
The Catalyst Power Hub has four XLR connections shown in Figure 2-10:
•
3-Pin: Power in
•
4-Pin XLR (female): Power/Data to mirror head: IEC320 receptacle
•
5-Pin XLR (male): DMX data in
•
5-Pin XLR (female): DMX data out (through)
Optional RS485 to
RS-232 conversion
To Mirror Head
Data out to next
fixture on DMX link
Data in from previous
fixture on DMX link
Power In
Figure 2-10 Power Hub connections
Catalyst™ User Manual
Setup and Configuration
2-9
Power Connection
After attaching a suitable line cord plug (see “Installing Power Cord Caps” on page 23), use the appropriate cable to connect the power hub a power source. Both US and
UK power cords ship with the unit.
Caution:
See “Before Applying Power” on page 2-14 before making this
connection.
Power Hub to Mirror Head Connection
The Power Hub provides data and power to the Mirror Head through the two meter,
4-pin XLR cable provided. This cable should not be lengthened.
Note: The cable has 1.5 mm2 cores designed to carry power to the Mirror Head. Do
not substitute a microphone or similar cable.
DMX Data Connection
The Power Hub connects to a DMX controller through the CIB or another fixture on
a DMX 512 link using a 5-pin DMX512 data connector compliant with the USITT
standard. See “Connecting to a DMX512 Link” for detailed instructions on data
cable construction and connection.
Connecting to a DMX512 Link
The complete Catalyst system (Media Server plus the Mirror Head system) can be
controlled with a DMX console on a DMX512 link for real time image manipulation
and positioning.
The Mirror Head system can also operate without the server as a standalone fixture
on a DMX link to position projector output utilizing the moving Mirror Head.
Required Data Cabling and Connectors
To link one or more fixtures to a controller and/or to each other, obtain data cabling.
Cabling can be purchased from High End Systems (see “Catalyst Accessories” on
page 1-5) or constructed according to the following specifications.
High End Systems recommends data-grade cable. Data-grade cable is designed to
carry a high-quality signal with less susceptibility to electromagnetic interference.
DMX Data Cables
Use Belden® 9842 or equivalent (meets specifications for EIA RS-485 applications)
data cables with the following characteristics:
—Two twisted pairs (4-conductors) plus a shield
—Maximum capacitance between conductors: <15 pF/ft.
—Maximum capacitance between conductor and shield: 55 pF/ft.
—Maximum resistance: 20
2-10
Setup and Configuration
/1000 ft.
Catalyst™ User Manual
—Nominal impedance: 120
Cable Connectors
The Catalyst Media Server CIB and the Mirror Head system Power Hub accept 5-pin
XLR cable connectors. Cabling must have a male XLR connector on one end of the
cable and a female XLR connector on the other end.
Pin one is the common (cable shield), pin two is the data complement (negative), pin
three is the data true (positive). Pins four and five are not used, but they allow a
secondary data link to pass through the fixture, (see Figure 2-11).
Test each cable with a voltage/ohm meter (VOM) to verify correct polarity and to
make sure that the negative and positive pins are not grounded or shorted to the
shield or to each other.
Caution:
Do not connect anything to the ground lug on the XLR connectors.
Do not connect or allow contact between the common (cable shield)
and the fixture’s chassis ground. Grounding the common could cause
a ground loop and/or erratic behavior.
Grounding lug (inside XLR shell)
Common
(cable shield)
Positive
(data true)
Negative
Negative
(data complement)
(data complement)
Positive
(data true)
Male XLR Connector
Positive
(data true)
5
4
Negative
(data complement)
3
1
2
Common
(cable shield)
Negative
(data complement)
Positive
(data true)
Female XLR Connector
Figure 2-11 XLR 5-pin connector cable
Constructing a Terminator
Install a 120 ohm, 1/4 watt (minimum) terminator in the fixture’s Data Out (female)
cable connector in the last fixture on each DMX link. A terminator on the last fixture
of the link prevents data reflection, which can corrupt the data communication on the
link.
Purchase a terminator from a High End Systems dealer/distributor (see “Catalyst
Accessories” on page 1-5), or follow the instructions below to construct a terminator.
Catalyst™ User Manual
Setup and Configuration 2-11
2
To construct a terminator:
1.
Disassemble a male 5-pin XLR connector.
2.
Solder a 120 ohm resistor, minimum of 1/4
watt, between pins two and three (see 3.).
3.
Reassemble the XLR connector
0Ω
12
1
2
3
5
4
Figure 2-12 Data cable terminator
Setting Up a DMX Link
Each fixture on a DMX link in and a data out (through) connection. The Catalyst
system can be daisy-chained to other automated lighting fixtures on the link. The
Media Server and the Mirror Head components of the Catalyst system connect to the
link as individual fixtures. They do not have to be physically linked to each other to
work together, only to the link.
Without the Digital Media Server, the Mirror Head system can function as a fixture
on the link using 6 channels to control mirror movement. In this application, the
controller sends commands through the Power Hub to control mirror movement and
position an image from the projector.
To connect the catalyst system to a DMX link:
1.
Connect the male XLR connector of a DMX data cable to the controller’s DMX
‘data out’ connector.
2.
Connect the Data cable’s female XLR connector to the ‘data in’ connector of the
the first (or next) unit on the DMX link. This connection is on the CIB for the
Media Server and on the Power hub for the Mirror Head system as shown in
Figure 2-13.
DMX CONSOLE
Place a terminator
in the ‘data out’
connector of last
fixture on the link
Figure 2-13 Daisy-chaining fixtures in a DMX 512 link
3.
Continue linking the remaining fixtures connecting a cable from the ‘data out’
(data thru) connector of each fixture to the ‘data in’ connector of the next fixture
on the link.
4.
Connect a male terminator to the ‘data out’ connector of the last fixture in the
link.
2-12
Setup and Configuration
Catalyst™ User Manual
Powering On the System
Digital Media Server
Caution: Before connecting power, confirm that the voltage selection switch
on the rear of the Power Mac G4 computer is set at the right voltage.
Selecting the Voltage
To verify or set the correct voltage:
1.
Locate the voltage switch on the back of
the computer next to the power
connection as shown in Figure 2-14. The
switch will show 115 or 230.
2.
To change the setting insert a small
screwdriver in the slot and slide the
switch. Set the switch to show 115 for AC
voltages in the 100-120V range. Set the
switch to show 230 for AC voltages in the
200-240V range.
Switch
Slot
Figure 2-14 Voltage selection switch
Applying Power
To apply power to the Digital Media Server
1.
Verify that the Control rack has suitable line cord plug (see “Installing Power
Cord Caps” on page 2-3) and is connected to the mains supply to the IEC power
distribution strip at the rear of the control rack.
2.
Power up the G4 via the On/Off Switch on front panel of computer. The Catalyst
application folder and any connected media devices will appear on the desktop
once the G4 has completed its boot up.
Mirror Head System
Warnings:Connect this equipment only to a branch circuit having a maximum
overload protection of 20 A.
The head moves under remote control, and is designed for use by
proficient technicians in a professional environment.
Caution: Do not power on the fixture until verifying that the line cord cap is
suitable for the power source in your location.
Keep hands free from the mirror head when powering up the system
to avoid a pinching hazard as the mirror head begins to move during
automatic homing.
Catalyst™ User Manual
Setup and Configuration 2-13
2
Before Applying Power
•
Manually rotate the head, checking that it can move freely on both axes without
hitting the projector or any rigging hardware.
•
Ensure that all cables, set pieces etc. are clear of the equipment.
•
Keep all clothing and body parts clear of the equipment.
•
Ensure that the equipment may not be accessed by the public or unqualified
persons.
Applying Power
Caution:
Keep hands free from the mirror head when powering up the system
to avoid a pinching hazard as the mirror head begins to move during
automatic homing.
To apply power, connect the appropriate power hub line cord into your power
source. For more information on attaching a linecord, see “Installing Power Cord
Caps” on page 2-3.
Once connected to power, the head will initialize (home). During this process, both
mirrors on the Mirror Head rotate to locate end stops and verify that the fixture is
operating correctly.
Verifying/Uploading Mirror Head Software
Check the Power Hub display in the Menu Locked mode to identify the software
version loaded on that fixture. Verify that the version displayed by the fixture is the
latest available. The latest software for the Catalyst system is available in the support
section of the High End Systems® web site (www.highend.com). If a software
upgrade is required, there are three ways to upload new software to the Catalyst
system:
1.
Attach a High End Systems Upload Dongle to the computer and upload the
software to the Catalyst system.
A High End Systems Upload Dongle requires a 386-based (or faster) computer,
MS DOS® version 3.3 (or later) or Windows 95/98/ME, and one MB of free disk
space. To obtain an Upload Dongle (with installation and operation instructions),
contact your High End Systems dealer/distributor (see “Contacting High End
Systems®” on page -ii).
2.
Crossload software from one system that contains the new software to all other
Catalyst systems on the link. See “Crossloading Fixture Software” on page 3-18.
3.
Upload the new software to all Catalyst fixtures on the link using a HandShake™
handheld controller from High End Systems.
Note: Before uploading new software, disconnect any controllers, bypass any serial
data distributors and/or data line optoisolators, and bypass or make sure that
2-14
Setup and Configuration
Catalyst™ User Manual
any fixtures using RS-422 communications (such as Dataflash® AF1000 xenon
strobes, and Intellabeam® fixtures) are located after all the Catalyst fixtures on
the link. These devices will block communication with any other Catalyst
fixtures on the link
Setting a DMX Start Channel
A lighting console uses a Start Channel to identify the range of channels on a DMX
link associated with a particular fixture. There are 512 available channels on each
DMX link divided among all the devices on the link. A fixture must have a unique
Start channel number in order to respond independently to controller commands.
Determining a Valid Start Channel
The Start channel is the first number a fixture’s channel range. To determine a
fixture’s DMX start channel in a link, identify the channel range of every fixture on
the link. Channel range is the number of consecutive channels a fixture requires.
Each Catalyst Media Server on a link requires a block of 56 consecutive channels on
a 512-Channel DMX link. A Mirror Head system requires 6 consecutive channels.
Catalyst has an extensive range of functions, and is recommended for use with an
advanced lighting control console that can accommodate it’s channel range. The
Wholehog II, Wholehog III consoles and the HandShake handheld controller from
High End Systems are all suitable, and fixture libraries are available to map the
fixture to these controllers.
Note: The channel range for Catalyst will continue to expand as new features are
added. Before setting the DMX channel, check that you have the latest
software and are using a controller that can accommodate the channel range,
(see “Verifying/Uploading Mirror Head Software” on page 2-14).
Setting Media Server Start Channel
There are two options for setting a start channel for
the Media Server. The start channel can be set
through the Software application or with the menu
buttons on the front of the CIB.
CHANNEL001
To set a Start Channel on the CIB:
1.
2.
Power up the G4 via the On/Off Switch on front
panel of computer. The Catalyst application
folder and any connected media devices will
appear on the desktop once the G4 has
completed its boot up.
Lower
Number
Enter
Higher
Number
Figure 2-15 Setting Start
Channel on the CIB
Double click on the application folder and then the application file to launch the
Catalyst application.
Catalyst™ User Manual
Setup and Configuration 2-15
2
3.
Locate the menu buttons on the CIB shown in Figure 2-15. The display will show
the current start channel.
4.
Press
to decrease value. Press
to increase value. Press
to enter value.
Note: The last valid Start channel for an Catalyst system is based on the channel
range required by fixture’s module configuration. The last valid start channel
for the complete Catalyst system is 457 (512–56+1).
For more information on setting a Start Channel for the Media Server using the
Catalyst application viewed on the monitor, see “Info Display Screens” and “Setting
a Start Channel Using the DMX Info Screen” on page 3-11.
Setting Mirror Head System Start Channel
Set the Start Channel for the Mirror Head using the Power Hub’s onboard menu
system.
To set the DMX start channel on the Power Hub:
1.
Press the Menu button to unlock the menu system or to move back up the system
to the top level menus. DMX ADDRESS MENU is the first menu item at the top level.
1.
Press the Enter button to select. The display will show SET DMX START
CHANNEL:###. The display will show the start channel currently assigned to the
fixture.
2.
Use the up and down arrows on the Navigation button to select the same DMX
start channel as the Media Server for the complete Catalyst system. The display
will flash a new option ready for selection.
Note: The last valid Start channel for an Catalyst system is based on the channel
range required by fixture’s module configuration. The last valid Start
channel for the Mirror Head System 507 (512–6+1).
3.
Press the Enter button to accept the new DMX Start channel.
Note: If the Enter button is not pressed, the old value will remain selected after
exiting the menu.
For more information on navigating the menu system, see “The Power Hub Menu
Display” on page 3-12.
2-16
Setup and Configuration
Catalyst™ User Manual
Chapter 3:
Operation and Maintenance
The Catalyst Media Server and the Mirror Head system are designed to function
together as a single system on a controller-managed DMX512 link, or as independent
systems. The Catalyst Media Server utilizes the video processing capability of a rackmount Apple Power Mac computer to create, manipulate and control images in real
time via any DMX lighting console. The Media Server can also function independently to drive LED Panels and video walls that accept XGA signals. The Mirror Head
system functions on a DMX link to position projector output.
Catalyst requires a DMX lighting console that can control 56 channels
per fixture and support true 16-bit values on 15+ channels. The Whole
Hog II® Whole Hog III™, lighting consoles, and the HandShake™ handheld controller are DMX controllers available from High End Systems to
control the Catalyst system (see “Catalyst Accessories” on page 1-5). Fixture libraries are available to map the fixture to any of these controllers.
This chapter outlines the Catalyst application software file organization and the
onboard menu system for the Mirror Head system. For basic DMX programming concepts, and a functional description of the Catalyst DMX protocol parameters, see
“Chapter 4: DMX Programming”. For a complete table of DMX values for the Catalyst
protocol, see. “Appendix A: Catalyst DMX Protocol”. For more information on operating the fixture with a controller, consult the controller documentation.
Catalyst Media Server Operation
The Catalyst system ships with the Catalyst Application loaded on the Power Mac G4.
The Catalyst Application folder contains:
•
Catalyst Application
•
Library Files Folder
•
Into Extensions Folder
•
Other related files including:
Sam SC Settings
Catalyst Library Files.txt
_lib.lib.
Catalyst™ User Manual
System Operation
3-1
3
Accessing the Catalyst Application
Opening the Catalyst Application
To open the Catalyst application on the media server:
1.
Complete the mounting and connection procedures described in “Chapter 2:
Setup and Configuration”.
Caution: Before powering up the Power Mac G4, ensure the correct local
voltage is set on the back of the computer. See “Selecting the
Voltage” on page 2-13 for information on how to change the voltage
setting.
2.
Power up the G4 via the On/Off Switch on front panel of computer. The Catalyst
application folder and any connected media devices will appear on the desktop
once the G4 has completed its boot up.
3.
Double click on the Catalyst application folder
and then the Catalyst Application icon. Catalyst
will launch into fullscreen mode.
Note: Hold down ‘Shift’ key to avoid entering
fullscreen mode while launching program.
Opening the Application activates Hot Keys that
allow a user to toggle between full screen and
preview modes and navigate through the Info
Screen options. Table 3-1 lists the available hot
keys and their associated actions.
Closing the Catalyst Application
To close the Catalyst application:
Table 3-1 Catalyst Hot Keys
Key
A
S
Q
W
E
R
T
Y
U
I
Action
Full Screen
Preview Mode
Info Display OFF
File Info Display
Gobo Info Display
Color Info Display
Size Info Display
Keystone
Sync
DMX Info Display
4.
To Exit the Catalyst Program, press Command (Apple) Key + Q to Quit program
or select ‘Quit’ from File Menu.
5.
To shutdown the Macintosh, select ‘Shut Down’ from the ‘Special’ Menu in the
Apple Finder.
Note:
The Power Mac G4 used in the Catalyst system is optimized to run with
the Catalyst software application. Changing system setting or loading
other applications may affect Catalyst performance.
For more information on Macintosh menus, command keys, and finder, see
the Power Mac documentation shipped with the Catalyst system.Image
File Organization
Library Files Folder
The Library Files folder is located in the Catalyst application folder on the desktop
and contains folders for different image and video collections. All image stills, Quick3-2
System Operation
Catalyst™ User Manual
Time movies and Flash™ animations reside in the Catalyst Library Files folder.
Image and Video File Libraries
After double clicking on the Catalyst application folder, double click on the Library
Files folder to open it. Inside the Library Files folder are folders holding collections of
media files, (see Figure 3-1). Each collection has a unique index number attached to
the folder name. Up to 255 folders can be specified for content.
3
Figure 3-1 Library Files folder contents on Macintosh harddrive
Each folder name begins with an index number. This index number corresponds to a
DMX value for the Library (Channel 7) parameter. The index number must be a
3-digit number from 000-255. For example, when the DMX value of Library (Channel
7) is 0, you will be able to access the 000High End Lithopatterns folder.
Any custom content created for the Catalyst system needs to follow this naming convention to work with the Catalyst application.
Table 3-2 describes the contents of the preloaded content folders that ship with the
Catalyst Media Server.
Table 3-2 Preloaded content folder descriptions
Folder Name
000HighEnd Gobos
Content Description
160 High End Systems lithopattern® images. See “Appendix D:
Catalyst Image Content” for file names and a thumbnail
representation of each pattern.
001Digital Juice Jumpbacks Twenty 15–30 sec. animated backgrounds
002Artbeats
Seven video clips including fire, water and cloud images
003images
Empty folder to hold custom images
254Aerials
Flash animations created exclusively for the Catalyst system achieve
multi-colored, rotating aerial effects.
255Video Input (Do Not Use) Reserved for Firewire input. Do not use for content
Catalyst™ User Manual
System Operation
3-3
Table 3-2 Preloaded content folder descriptions
Folder Name
Content Description
gobos
Contains a single ‘movie’ file of the DHA gobo library. Each gobo
occupies 50 frames at varying diffusion levels. “DHA Gobos” on page
D-7 shows a thumbnail and DMX index value for each Gobo pattern.
Masks
Mask pattern file
User Interface
Reserved for application menus. Do not alter.
Each collection can have up to 255 files. The indexed files within each folder use
the same indexing system as the folders, except the files are indexed to the File
(Channel 8) parameter from 000 to 255. The example in Figure 3-2 shows files in the
High End Lithopatterns collection.
Figure 3-2 File organization and naming on the Macintosh harddrive
3-4
System Operation
Catalyst™ User Manual
Creating Custom Image Files
The Catalyst system supports QuickTime technology and will accept the following
file formats:
3DMF
Karaoke
AVI
BMP
Cubic VR
DV
FlashPix*
FLC
*
JPEG/JFIF
MacPaint
Macromedia® Flash™ 4
Photoshop®*
PICS
PICT
GIF
PNG
QuickTime Image File
QuickTime Movie
Targa
Text
TIFF*
TIFF Fax
Virtual Reality (VR)
3
QuickTime also supports import of multiple images and layers in TIFF, FlashPix, and
Photoshop files.
In addition, use the following recommendation when creating still image files for use
in a Catalyst system to ensure the best results:
1.
The largest image dimensions the Catalyst system can display are 2048 pixels
wide by no more than 1024 pixels tall. Images beyond these dimensions will be
cropped along the right or bottom edge to these limits.
For most high resolution still image preparation, from scans or digital camera
over 1.5 MegaPixels, or images rasterized from line art or vector based graphics,
this will mean scaling the image to a height of 1024 pixels tall by whatever width
the aspect ratio of the source image will allow. Figure 3-3 shows aspect ratio
examples.
2.
Digital images with less than
1024 vertical pixels should be
kept at original size. Scaling
up may add distortion.
Square
1024×102
For “art images” meant to act
more as lighting textures than
pictures, make the image
square and/or keep important
parts of the image within an
imaginary circle inscribed and
centered within the image
area as shown in the two
examples in Figure 3-4 on
page 3-6.
2:3 Aspect
1536×102
Catalyst™ User Manual
1024
4:3 Aspect
1365×102
16:9
Aspect
2048
Figure 3-3 Aspect ratio image adjustment
System Operation
3-5
3.
Example 1
768
Example 2
1024
Art outside of this area may be
masked or clipped at times. Logos
with non-black backgrounds
should be kept well within this
circular area. Logo’s with pure
black backgrounds can extend to
the entire image area.
1024
1024
Although the file formats listed at
Figure 3-4 Art image size adjustment
the beginning of this section are all
accepted by the Catalyst system, the optimum format choice will depend on the
nature of the image. Most photographs work well in JPEG format, though TIFF
offers lossless compression for highest quality at the cost of file size. For simple
line art and graphics with 256 colors or fewer, GIF is a good choice. File size
primarily effects load time in the Catalyst system, as well as ultimate hard disk
capacity.
Naming and Saving Custom Image Files
Adding new images or video files requires using the existing Catalyst file organization and naming conventions.
Creating a Library Folder
To create a new Library folder:
1.
Choose a DMX address value that is not currently being indexed by another
folder. To open the Library folder, double click the mouse. Select File>New
Folder, or type Command + N. This will create a new folder in the Library Files
folder.
2.
Click on the new 'Untitled Folder' and type in a 3-digit index number not already
being used followed by a descriptive name, and press Enter. For example, to
create a folder called 'pictures' that indexes DMX address 12, name the folder
'012pictures'.
Note: The 255Video Input file is reserved to select live digital video input to the
system through the Firewire port and is not available to use for content.
Storing an Image File
To store a new image file:
1.
Ensure the file is compatible with the Catalyst system. See “Creating Custom
Image Files” on page 3-5 Catalyst uses Quick Time technology and supports Drag
and drop the image file into the relevant indexed folder.
2.
Click on the name portion of the file to rename the file. The file name must begin
with a 3-digit index number from 000–255 not already assigned to a file in that
3-6
System Operation
Catalyst™ User Manual
folder. Press Enter to store the name. For example, to index a QuickTime movie
called 'clouds' to DMX value 12, rename the file '012clouds'.
Creating Custom Gobos
The following example shows the steps for creating a
gobo like the one overlaying the flag in Figure 3-5.
These instructions are for use with the QuickTime
“Pro” application, which enables many features of the
free QuickTime player, including importing, basic editing, trimming, adjusting, compression, effects, and
exporting functions. QuickTime Pro gives full access
to any installed video compressors, several of which
are installed with QuickTime.
3
Figure 3-5 Sample Gobo
Image Preparation will also require an image editing application such as Adobe’s
PhotoShop.
Preparing a New Gobo Image
Use the following specifications shown in Figure 3-6 to
512
•
Images to be used as Catalyst gobos must be 512 x
512 pixels in size. Default values are acceptable (72
or 96 DPI).
•
The design should be kept within a circular area
centered inside the square image. This is not an
absolute requirement, but it will allow clean
rotation of the image.
•
512
create Gobo overlays.
Figure 3-6 Gobo image
The images should be in black and white, or
specifications
grayscale. Black represents the areas that will
become transparent allowing the background image to show through. White
represents the opaque or solid areas of the gobo (which will usually be projected
as black). Shades of gray represent proportional amount of transparency, often
used to create “soft” edged gobo images. As a matter of example, most gobo
image files will be a black design on a white background.
•
Files should be saved in a non-compressed file format such as TIFF, Pict, or BMP.
If using Adobe PhotoShop, the native PhotoShop .psd file will work as is.
•
Avoid JPEG, as it may introduce undesirable artifacts and distortion when used
with a non-photographic image.
Catalyst™ User Manual
System Operation
3-7
Saving the New Gobo
The entire DHA gobo library included
with Catalyst is stored as one large
movie file with each frame a different
image. As shipped, a gobo is repeated
in 50 consecutive frames, each having an increasing amount of diffusion
to produce soft edges.
It is not necessary to create 50 variations for each custom gobo since
frames are recalled individually. Create only the variations needed using
the following steps:
Figure 3-7 Locating dlaores.mov file
Locate the existing gobo file
1.
Open Catalyst application folder, then Library Files folder, then gobos folder.
Click on the file named dhalores.mov to select.
2.
Choose “Duplicate” from file menu or press Command+D to duplicate the file.
3.
Copy or move your new gobo images to this same gobos directory.
Add new image(s) to the dhalores.mov file
1.
Double click on the dhalores.mov file to launch QuickTime Player with this file
open. Or, from within QuickTime Player, open the file dhalores.mov from within
the gobos folder inside the Library Files folder located inside the Catalyst
application folder. The player should open onto a black design on a white
background (Figure 3-8 a.). The picture may be different if the movie is not
“rewound” to the beginning. Because gobos are selected by frame number, any
new gobos should be added at the end of the movie, so that the built-in gobos will
keep their existing frame numbers.
2.
Press the right transport button (Figure 3-8 b.) to jump to the end of the movie.
The inverted triangle on the top of the time line should move to the far right end
of the time line.
a. Press to jump to
end of movie
b. Last frame
position
c. New gobo is inserted in
last frame
Figure 3-8 Adding a custom image to the gobo ‘movie’
3-8
System Operation
Catalyst™ User Manual
3.
Drag the new gobo image from the gobos folder onto the open QuickTime player
window. The new image should now be visible as the last frame of the movie file
(Figure 3-8 c.). If there are additional images, drag them one by one onto the
QuickTime window in the order desired.
4.
Select save from the file menu.
Info Display Screens
The Info Screen shown in Figure 3-9 displays the current DMX parameter setting for
a selected image. It can be activated by choosing any of the Hot Keys ‘Q’ ‘W’ ‘E’ ‘R’ ‘T’
‘Y’ ‘U’ or ‘I’, see Table 3-1, “Catalyst Hot Keys,” on page 3-2. The Info Screen appears
as a transparent overlay on the currently selected image. Use a Hot Key or click on a
screen activation button to access a particular screen.
The File, Gobo, Color, Size and Keystone info screens function as display screens for
DMX values related to parameters associated with that item. Values can only be set in
the Sync and DMX info screens.
To remove the Info Screen, press the ‘Q’ Hot Key.
Parameter
Function
Displays which
channel of a
512-channel
DMX link is
associated with
the parameter
Parameter
Click on
a Screen
Activation
Button
to select
screen
Current DMX
value
Figure 3-9 Info Display screen
Catalyst™ User Manual
Frames per
second
System Operation
3-9
3
File Info Screen
The ‘File’ Info Screen displays
the parameter settings for the
current image. The current
DMX value is shown for each
parameter’s option. Use a
DMX controller to change the
values, according to “Appendix A: Catalyst DMX Protocol”. For additional
description of Parameters and
their options, see “Digital
Media Server DMX Parameters” on page 4-1, “Composite
Image Control” on page 4-6,
and “Visual Effects Control”
on page 4-9.
Gobo Info Screen
Load time
Image size in
pixels
This frame/Total
# of frames
Time Codes
Frames/sec.
Figure 3-10 File Info Screen
The Gobo Info Screen displays current settings for parameters related to a gobo or mask overlay on the current image. Gobo Frame, Gobo Size, Gobo Rotate Mask and Mask Rotate functions
are described further in “Overlay Gobo Control” on page 4-4 and “Mask Layer Control” on page 4-8. Use a controller to change values according to “Appendix A: Catalyst DMX Protocol”.
Color
The Color Info Screen displays selected options for parameters related to color. For
more information, see “Color Control” on page 4-8. DMX protocol for changing DMX
values can be found in “Color Control” on page A-4.
Size
The Size Info Screen shows the Scale, Aspect Ratio, Movement Speed, Position and
Rotation values currently selected. To change values for any parameter, see “Appendix A: Catalyst DMX Protocol”. See “Chapter 4: DMX Programming” for more information about individual parameters.
Keystone
Keystone correction for the image layer is displayed on the Keystone Info Screen.
The current DMX values for the x and y direction on each corner of the image are
shown. To change the Keystone values, see “Appendix A: Catalyst DMX Protocol”.
For more information on the Keystone feature, see “Keystone Correction” on page 49.
3-10
System Operation
Catalyst™ User Manual
Sync Info Screen
The Sync Info Screen displays the ID
assignment for every Catalyst systems
sharing an ethernet link. The Sync ID can be
set on the screen for the system in use with
the following procedure.
1.
Double click on the Catalyst application
to launch.
2.
While running catalyst, press the “U”
key to display the sync info screen.
3.
Click on the current sync ID value and
drag the mouse up or down to set the ID
from 0 to 19.
For more information on the Synchronize
feature, see “Synchronized Playback on
Multiple Catalyst Systems” on page 4-3.
3
Figure 3-11 File Sync Screen
Setting a Start Channel Using the DMX Info Screen
The Start channel for the Media Server can
be set in the info screen as an alternative to
the CIB. Before setting the Start channel,
see “Determining a Valid Start Channel”
on page 2-15.
To change or set a Start channel for the
Catalyst Digital Media Server:
1.
Double click on the Catalyst
application to launch.
2.
Press ‘I’ or click on the DMX button to
open the DMX Info screen shown in
Figure 3-12.
3.
Click on “Base DMX” at the top of the
window and drag the mouse up or
down to set the address.
To set the DMX Start channel address on
the Power Hub of the Catalyst mirror head,
see “Setting Mirror Head System Start
Channel” on page 2-16.
Catalyst™ User Manual
Figure 3-12 DMX Info Screen
System Operation
3-11
Mirror Head System Control
The Power Hub has an on-board menu system allows the user to:
•
Set a Start Channel
•
Enable and disable default parameter settings
•
View Protocol type
•
Crossload firmware
•
Home the mirror head
•
Test movement and sensor functions
•
View current DMX values for all parameters
•
View Fixture number, Software version, Errors, Channels needed, and Next
available DMX channel.
The Power Hub Menu Display
The front panel on the Catalyst Power Hub in Figure 3-13 has a dot matrix display
and six arrows on buttons that control navigation for the on-board menu system. The
buttons are configured with the Menu button on the left and the Enter button on the
right. The center button navigates through the current level of menu options [Left
and Right] and values available for the current option [Up and Down].
Alpha numeric display
Menu system buttons
Use up and down arrows to
select from available value or
setting options.
Use left and right arrows to
move through the current
menu level options
Use the Menu button (on the left
when viewing the display) to
unlock the menu and move
back to the previous menu level
4-way Navigation
button
Use the Enter button (on the
right when viewing the display)
to select the currently displayed
menu value or option.
Figure 3-13 Power hub front panel display
3-12
System Operation
Catalyst™ User Manual
Navigational Basics
1. Unlock the Menu system by pressing the Menu
the display goes to the 2-line format.
button for a few seconds until
2. Use the left and right arrows
on the 4-way Navigation button to scroll through
Menu options at the current level.
3. Stop at the desired menu and press the Enter button to select. The new option
will not be stored unless the Enter button is pressed.
4. If there is another level of menu choices repeat Steps 2 and 3.
5. At the option or setting menu level, use the up and down arrows on the Navigation
button to scroll to the desired option or setting. The option flashes until the
Enter button is pressed. Pressing the Enter button stores the new value for that
option. Pressing the Menu button returns to the previous menu level without
changing the value of an option.
6. Continue pressing the Menu button to move back up levels and exit the menu
system.
Display in Menu Locked Mode
The Catalyst Power Hub display panel gives access to the onboard Menu System.
When the Menu System is in locked mode, the panel displays in large 8-character
words designed to be viewed from a distance. Under normal circumstances, when the
display is locked, it cycles between displaying the fixture’s software version
[V##.##], the High End Systems logo, the Catalyst logo, the fixture’s configuration
type [STANDARD] and the fixture’s DMX Start channel [DMX_C###]. Any errors
present are also displayed in an 8-character error description.
Fixture Software Version
The software version loaded on the system can vary even between units purchased at
the same time. “Verifying/Uploading Mirror Head Software” on page 2-14 describes
the procedures to ensure that all Catalyst systems on the link are running the latest
software.
System Configuration Type
The configuration type indicates the system’s modular setup.
DMX Start Channel
The DMX Start Channel is the first channel currently assigned to that fixture in its
range of channels on a DMX link. For more information on DMX Start channels, see
“Setting a DMX Start Channel” on page 2-15.
Error Message Display
Errors are displayed in short 8-character form when the menu system is locked.
Unlocked, menu system’s 2-line format displays more detailed information.
Catalyst™ User Manual
System Operation
3-13
3
Unlocking the Menu System
To unlock the menu system, press and hold the Menu button until the display
changes to the 2-line format. The menu system is protected against inadvertent menu
changes by requiring the Menu button to be held for a few seconds before allowing
entry to the menus. DMX Address Menu is the first option on the top menu level.
Exiting the Menu System
To exit the menu system, keep pressing the Menu button to back out of each menu
level until the High End Systems logo appears. The word AUTOLOCK will appear
briefly on the display to indicate the fixture’s software is “locking” the display. The
display switches back to the large 8-character format and, after a few seconds, begins
the standard display for the locked mode as described above.
Menu Map
Use the following table to navigate the menu options on the Power Hub.
Level 1
Level 2
Level 3
Option/Setting
scrolls between values
selects
enters /exits Menu System and moves up levels
moves between items on same level. selects
DMX ADDRESS SET DMX START CHANNEL: ###
MENU
FACTORY DEFAULT
SETTINGS: ###
SET
PARAMETERS
MENU
DISPLAY INVERT:
DISPLAY LEVEL:
MIRROR 2 QUICK PATH:
FIXTURE
MODE MENU
PROTOCOL
MODE:
CROSSLOAD
FIRMWARE:
HOME MIRROR HEAD:
TEST
OPTIONS
MENU
COPY BOOT:
SELF TEST
MENU:
3-14
System Operation
Description/Notes
1-512
Selected value becomes the first DMX
value in the range for that mirror head
on a DMX 512 link.
ON
Reverts mirror head to default setting
OFF
Indicates a factory default has
changed
ENABLED
Inverts display functions
DISABLED
Prevents display inversion
AUTO
Returns display to normal orientation
ON
Turns display on
OFF
Display fully dimmed when menu is
locked
Allows mirror to take the shortest path
to the selected position
ON
OFF
Disables the Quick-Path feature
STANDARD
Factory default setting
NO
Safe setting
YES
Uploads Catalyst software to all other
Catalyst fixtures on the link
ALL
Homes the mirror head
NO
Safe position: no action when
selected
YES
Copies boot code to fixture
ALL
Performs and displays all self test
functions sequentially in the format:
STEP ## DMX:###
Catalyst™ User Manual
Level 1
Level 2
Level 3
Option/Setting
enters /exits Menu System and moves up levels
moves between items on same level. selects
MIRROR 1 ENCODER
SENSOR STATUS ####
MENU
MIRROR 2 ENCODER
######
DMX VALUES MENU
INFORMATION FIXTURE HOURS
MENU
FIXTURE HOURS RESET:
MODULE
VERSION MENU
Displays absolute position of Mirror 1
Displays absolute position of Mirror 2
Displays fixture’s unique 10-character
number
UNIQUE NUMBER
##########
SOFTWARE
VERSION:
Description/Notes
scrolls between values
selects
1:### ###
###
4:### ###
###
7 ### ###
###
10:### ###
###
###:### ##
### ###:###
## ###
Displays current values for Channels
001– 512 and 6 DMX values/screen.
The number at the beginning of each
line indicates the first channel with a
value displayed on that line.
NO
Displays fixture operation time in
hours:minutes
Default “safe” setting
Press Enter for 5 seconds to reset
fixture hours to 0
YES
V ##.##.###
Major.Minor.Build
MIRROR 1
HW:#
SW:#
Displays the Hardware and Software
versions for each logic board in the
fixture. Displays NOT AVAILABLE if
a board does not exist in that
position.
MIRROR 2
HW:#
SW:#
DISPLAY
ERRORS
MENU
XXXXXXXXXXXXXXX
XXXXXXXXXXXXXXX
CHANNELS
NEEDED:
##
NEXT DMX
CHANNEL:
##
Scrolls through errors displayed in 2line, 16-character format
Displays channel range for current
Mirror Head configuration
(Current start channel + channels
needed+1)
DMX Address Menu
DMX Address is the top level menu selection used to set the fixture’s DMX start
channel. Use this menu option, to change the existing DMX start channel to another
DMX start channel.
Setting a DMX Start Channel
To set the DMX start channel on the Power Hub:
1.
Press the Menu button to unlock the menu system or to move back up the system
to the top level menus. DMX ADDRESS MENU is the first menu item at the top level.
Catalyst™ User Manual
System Operation
3-15
3
1.
Press the Enter button to select. The display will show SET DMX START
CHANNEL:###.The display will show the start channel currently assigned to the
fixture.
2.
Use the up and down arrows on the Navigation button to select the same DMX
start channel as the Media Server for the complete Catalyst system. The display
will flash a new option ready for selection.
Note: The last valid Start channel for an Catalyst system is based on the channel
range required by fixture’s module configuration. The last valid Start
channel for the Mirror Head System 507 (512–6+1).
3.
Press the Enter button to accept the new DMX Start channel.
Note: If the Enter button is not pressed, the old value will remain selected after
exiting the menu.
Set Parameters Menu
The Set Parameters menu sets all factory options to their default settings or changes
the factory options individually.
Factory Default Settings
The Catalyst Mirror Head system ships with the following factory default settings:
Display Invert=AUTO
Display Level=ON
Mirror 2 Quick Path=OFF
If any of the default settings are changed, this menu reverts to the OFF option. The ON
option restores all factory defaults.
To check and reset factory defaults:
1.
Press the Menu button to unlock the menu system or to move back up the system
to the top level menus.
2.
Using the left and right arrows on the Navigation button, scroll through the top
level to SET PARAMETERS MENU and press the Enter button to select.
3.
Using the left and right arrows on the Navigation button, scroll to FACTORY
DEFAULT SETTINGS. The current state (ON or OFF) will be displayed.
4.
To reinstate the factory defaults if OFF is displayed, use the up and down arrows
on the Navigation button to scroll to ON and press the Enter button to select.
3-16
System Operation
Catalyst™ User Manual
Display Invert
This menu item selects automatic or manual control of the display invert feature. The
Power Hub is set to automatically invert the orientation of the display’s alphanumeric
characters and navigation control functions when the fixture rotates more than 45%
off the horizontal axis.
To control the DISPLAY INVERT feature:
1.
Press the Menu button to unlock the menu system or to move back up the system
to the top level menus.
2.
Using the left and right arrows on the Navigation button, scroll through the top
level to SET PARAMETERS MENU and press the Enter button to select.
3.
Using the left and right arrows on the Navigation button, scroll to the DISPLAY
INVERT MENU.
4.
Using the up and down arrows on the Navigation button, choose ENABLE to invert
the fixture’s alphanumeric characters, DISABLE option to prevent inverting or
AUTO to return the fixture’s alphanumeric characters to normal orientation. Press
the Enter button to accept the desired option.
Display Level
Use this menu option to turn the display on or off.
To change display level:
1.
Press the Menu button to unlock the menu system or to move back up the system
to the top level menus.
2.
Using the left and right arrows on the Navigation button, scroll through the top
level to SET PARAMETERS MENU and press the Enter button to select.
3.
Using the left and right arrows on the Navigation button, scroll to the DISPLAY
LEVEL.
4.
Using the up and down arrows on the Navigation button, choose ON to turn the
display on or OFF to dim the display and press the Enter button to store the
option.
Mirror 2 Quick Path
Turning this menu option ON directs the outer mirror to take the shortest path to the
selected position to provide very fast position changes. The default is OFF.
To turn Mirror 2 Quick Path ON:
1.
Press the Menu button to unlock the menu system or to move back up the system
to the top level menus.
2.
Using the left and right arrows on the Navigation button, scroll through the top
level to SET PARAMETERS MENU and press the Enter button to select.
Catalyst™ User Manual
System Operation
3-17
3
3.
Using the left and right arrows on the Navigation button, scroll to the MIRROR 2
QUICK PATH.
4.
Using the up and down arrows on the Navigation button, choose ON and press
the Enter button to store the option.
Fixture Mode Menu
The Mode menu sets the module and protocol configuration and crossloads software
from one fixture to other Mirror Head systems on the link.
Protocol Mode
This option sets the Protocol to be followed in assigning Start Channels and
programming parameters. STANDARD protocol is the default.
Crossloading Fixture Software
A fixture running a newer software version can load the new software to all other
Catalyst systems on the link using the CROSSLOAD FIRMWARE menu option.
To CROSSLOAD FIRMWARE from one fixture to all Mirror Head systems on the link:
1.
Disconnect or bypass any controllers, serial data distributors, data line
optoisolators, and any fixtures using RS-422 communications (such as
Dataflash® AF1000 xenon strobes, and Intellabeam® fixtures). These devices will
block communication between the crossloading fixture and any other Mirror
Head systems on the link.
2.
On the crossloading fixture only, unlock the menu system by pressing and
holding down the Menu button until the extended 2-line display appears
indicating the top menu level.
3.
Using the left and right arrows on the Navigation button, scroll to the FIXTURE
MODE MENU and press the Enter button to select.
4.
Use the left and right arrows on the Navigation button to scroll to CROSSLOAD
FIRMWARE.
5.
Use the up and down arrows on the Navigation button to scroll to the YES option
and press the Enter button to store. The fixture will upload its software to all
other Mirror Head systems on the link.
When the crossload has finished successfully, CROSSLOADING COMPLETE will appear
briefly in the display of the crossloading fixture, and all other fixtures will
automatically home.
Note: If a new boot code was included with the latest software, the fixture displays a
BOOTDIFF error when it returns to the locked mode of the menu system. To
correct the boot code, copy the new boot code to each fixture (see “Copying the
Boot Code” on page 4-19).
3-18
System Operation
Catalyst™ User Manual
Test Options Menu
The TEST OPTIONS MENU manually homes the fixture, performs fixture self tests, and
stores new boot code information. Performing fixture self tests may help identify
mechanical problems in the fixture.
Homing the Fixture
The Mirror Head system automatically homes all its functions whenever it is turned
on. This menu option manually homes the entire fixture.
To remotely home the fixture using a DMX controller, see “Mirror Head Positioning”
on page 4-10 and “Control Function” on page A-8.
To manually home the fixture:
1.
Press the Menu button to unlock the menu system or to move back up the system
to the top level menus.
2.
Use the left and right arrows on the Navigation button to scroll to the
TEST OPTIONS MENU and press the Enter button to select.
3.
Use the left and right arrows on the Navigation button to scroll to HOME FIXTURE.
4.
Use the up and down arrows on the Navigation button to scroll through the
homing options available from all to selected function homing options. Press the
Enter button to select.
Copying the Boot Code
When new software is uploaded to a Mirror Head system, it may contain a new boot
code which must be copied to each fixture. This is apparent if the fixture displays a
BOOTDIFF error.
Caution: Do not remove power from the fixture while performing a boot copy.
To accept and store the new boot code:
1.
Press the Menu button to unlock the menu system or to move back up the system
to the top level menus.
2.
Using the left and right arrows on the Navigation button, scroll to the
TEST OPTIONS MENU and press the Enter button to select.
3.
Using the left and right arrows on the Navigation button, scroll to the COPY BOOT
option and press the Enter button to select.
4.
Use the up and down arrows on the Navigation button to scroll to the YES option
and then press the Enter button to store the command. The fixture will store the
new boot code, then automatically home.
Catalyst™ User Manual
System Operation
3-19
3
Self Test Menu
This option displays the steps and DMX values generated as the fixture tests the
motor operation of various functions. Self test can be run and viewed on all the
fixture parameters sequentially, or individual parameters.
To access the SELF TEST MENU:
1.
Press the Menu button to unlock the menu system or to move back up the system
to the top level menus.
2.
Use the left and right arrows on the Navigation button to scroll to the
TEST OPTIONS MENU and press the Enter button to select.The menu displays
ALL.
3.
Press the Enter button to select. The fixture begins running the self tests
sequentially.
Information Menu
The Information menu displays current fixture information such as sensor status,
total fixture hours, hardware and software versions, DMX errors, and DMX data for
any device on the link. Fixture hours resets are also executed in the Information
Menu.
Sensor Status Menu
The Sensor Status displays the current numeric position of the fixture’s encoders.
To view encoder values:
To access the DMX VALUES MENU:
1.
Press the Menu button to unlock the menu system or to move back up the system
to the top level menus.
2.
Use the left and right arrows on the Navigation button to scroll to the
INFORMATION MENU and press the Enter button to select.
3.
Use the left and right arrows on the Navigation button to scroll to the SENSOR
MENU and press the Enter button to select.
4.
Use the left and right arrows on the Navigation button to scroll to view
MIRROR 1 ENCODER or MIRROR 2 ENCODER value.
Unique Number
Each Mirror Head system has a unique number similar to a serial number.
TalkBack™ protocol uses this number to identify a fixture for remote communication
over a DMX link. Use this option to view the fixture’s unique number.
3-20
System Operation
Catalyst™ User Manual
DMX Values Menu
Use this menu option to view current DMX value settings by channel or by
parameters. A Mirror Head system utilizes 6 channels on a DMX 512 link. Each DMX
value is from 0-255.
When viewing DMX value settings by Channel, the Mirror Head system displays
current values for Channels 001– 512 in two lines of three DMX values each per
screen. The number at the beginning of each line indicates the first channel with a
value displayed on that line.
When viewing current DMX value settings by the Parameters, the menu displays one
parameter with the DMX value below it per screen. Parameters will change for
different module configurations.
To access the DMX VALUES MENU:
1.
Press the Menu button to unlock the menu system or to move back up the system
to the top level menus.
2.
Use the left and right arrows on the Navigation button to scroll to the
INFORMATION MENU and press the Enter button to select.
3.
Use the left and right arrows on the Navigation button to scroll to the DMX
VALUES MENU and press the Enter button to select.
4.
Use the up and down arrows scroll through the channel range. The display shows
6 DMX values per screen in two lines of 3 values each. The number at the
beginning of the line indicates the channel number corresponding to the first
value in that line.
Fixture Hours
Use this option to view the fixture operation time in hours and minutes.
Fixture Hours Reset
Use this option to reset the fixture operation time to Zero.
To access the FIXTURE HOURS RESET option:
1.
Press the Menu button to unlock the menu system or to move back up the system
to the top level menus.
2.
Use the left and right arrows on the Navigation button to scroll to the
INFORMATION MENU and press the Enter button to select.
3.
Use the left and right arrows on the Navigation button to scroll to the
FIXTURE HOURS RESET option and press the Enter button to select.
4.
Use the up and down arrows on the Navigation button to scroll to YES. Press and
hold the Enter button down for 5 seconds to select.
Catalyst™ User Manual
System Operation
3-21
3
Software Version
This option display’s the fixture’s CPU board Software version. The version number
is composed of: V(Major).(Minor).(Build)
Module Version Menu
This option display’s the hardware and software version number for each logic board
in the fixture. Displays NOT AVAILABLE if a board does not exit in that position.
Display Errors
This menu option displays current errors in a descriptive 32-character text field.
To DISPLAY ERRORS:
1.
Press the Menu button to unlock the menu system or to move back up the system
to the top level menus.
2.
Use the left and right arrows on the Navigation button to scroll to the
INFORMATION MENU and press the Enter button to select.
3.
Use the left and right arrows on the Navigation button to scroll to the DISPLAY
ERRORS menu option and press the Enter button to select.
4.
Use the up and down arrows on the Navigation button to view the list of current
errors.
Channels Needed
Use this option to view the number of channels required (channel range) for the
fixture’s specific configuration. The Mirror Head System requires 6 channels on a
DMX link.
Next DMX Channel
Use this option to view the next available DMX Start channel on the link following
this fixture and is based on the fixture’s specific configuration. The value displayed
uses the formula (current Start channel + channels needed for this fixture +1).
3-22
System Operation
Catalyst™ User Manual
Catalyst Maintenance
Resetting Media Server
Use the following procedure to set up the Catalyst application if it becomes necessary
to re-install the Power Mac operating system software.
1.
Select control panel and extensions manager
2.
Turn the following extensions off
Applications switcher
Control strip extension
Desktop printer spooler
Desktop print manager
DVD autolauncher
Fax Monitor
Fax Print
FBC indexing scheduler
Find by content
Folder actions
Queue monitor
Queue watcher
3
Speakable items
Speech manager
Speech recognition
STF tool box
STF init
3.
Go to control panel, go to memory, turn off Virtual Memory
4.
Go to control panel and select “monitors” and choose 1024x768 60hz
5.
Go to control panel, select energy saver and set to “never”
6.
Restart
7.
Hit “cancel” when USB window pops up.
Replacing the Power Hub Fuse
Warning: Disconnect power before servicing.
This fixture must only be serviced by qualified personnel. The
following information is intended to assist qualified personnel only.
Replace fuses with the specified type and rating only.
To replace a fuse:
8.
Disconnect power to the power supply hub.
9.
Remove the three screws on the back of the power supply hub and lift the cover.
10. Locate the fuse on the bridge over the power supply.
11. Replace the Power supply fuse with the following:.
Fuse
Power supply
Fuse Type and Rating
2.5A, 250V, Slow Blow
Manufacturer
Littelfuse 215 02.5
High End Systems p/n
90403027
Replacement Parts
The Catalyst system has no user-serviceable parts. To return the Catalyst system
Catalyst™ User Manual
System Operation
3-23
for servicing, call your High End Systems dealer/distributor for a Return Material
Authorization (RMA) number. High End Systems cannot accept any goods
shipped without an RMA number. For more information, see “Warranty Information”
on page vi.
Cleaning the Mirrors
If the mirrors become dirty, clean them using a mild glass cleaner (containing no
ammonia) and a soft, lint-free cotton cloth.
3-24
System Operation
Catalyst™ User Manual
Chapter 4:
DMX Programming
The following sections describe the Parameter functions for the Catalyst Digital
Media Server and the Mirror Head system. For the complete DMX protocol for
controllers using decimal, percent, or hex values, see “Appendix A: Catalyst DMX
Protocol”.
Note: New channels are continually added to the Catalyst Protocol. The latest
software and DMX tables for Catalyst fixtures is available in the support
section of the High End Systems® web site (www.highend.com). For more
information on upgrading software, see “Verifying/Uploading Mirror Head
Software” on page 2-14.
DMX Programming Terminology
A Parameter (construct) is a fixture attribute that can be controlled to modify the
light beam in terms of color, beam quality and pattern, intensity, or focus (position).
To program fixtures, DMX values are assigned to each of the fixture’s parameters
according to that fixture’s DMX protocol.
A cue (sometimes referred to as a scene or look depending on the controller used) is
one set of attribute options. Combining cues into sequences, assigning times and
synchronizing fixtures on a link are the basics of show creation. Using a DMX
controller, a designer can control all the fixtures on a link programming an unlimited
number of sequences and their associated timing.
Digital Media Server DMX Parameters
DMX protocol for the Catalyst Media Server contains parameters that control:
•
image selection, scaling and rotation
•
gobo selection, scaling and rotation
•
mask layer selection
•
color
•
visual effects
•
keystone correction
Catalyst™ User Manual
DMX Programming
4-1
4
Image/Video Selection
Catalyst gives a designer the ability to manipulate images in a layered structure. A
base layer image can be overlaid with a gobo layer and/or a mask layer.
Image and Gobo layers can be controlled independently, but the image layer is
primary and gobo rotation and scale selections adjust in relationship to the image
layer. The mask layer is controlled independently from the other layers.
For a complete listing of DMX values for all image selection parameters, see “Video/
Image Selection” on page A-1.
Catalyst provides a wide range of pre-loaded images including:
•
The High End Systems® LithoPatterns® library
•
Digital Juice animated backgrounds
•
Artbeats digital video clips including fire, water and cloud images
•
Flash™ animations for creating aerial effects
•
DHA gobo library (for use in the Gobo layer, see “Overlay Gobo Control” on page
4-4).
•
Setup and test patterns
A user can also add custom images and video to the hard drive using the same file
structure (see “Creating Custom Image Files” on page 3-5).
Digital Video can be fed directly into the system via the Power Mac FireWire port.
Catalyst is compatible with formats supported by DVD, digital betacam players, and
professional studio cameras. A media converter can be used to convert most video
signals to Firewire so they may be input into Catalyst. This allows any device to be
used with Catalyst such as: tape decks, DVD players, live feeds, etc. Once input, all of
the real time manipulations available to any image within Catalyst are available to
the Firewire feed.
Note: A lag of 1/3 to 1/2 second is normal when using video through
the Firewire port.
Locating and Selecting an Image/Video File
Set the parameters in Channels 1 and 2 to select a still image, a movie file or a movie
segment from the Catalyst Library folders as the base layer image. To select an
image folder, set a DMX value in Channel 1. Use the DMX value that corresponds to
the index number in the desired Library folder name.
The Channel 2 DMX value determines the File to access within the selected folder.
For DMX value assignments and thumbnail images of High End Systems lithopattern
content and the DHA gobo file, see “Appendix D: Catalyst Image Content”.
For example, setting a DMX value of 0 in Channel 1 selects the High End Systems
Lithopattern library (000HighEnd Lithopatterns). Then setting a DMX value of 26 in
4-2
DMX Programming
Catalyst™ User Manual
Channel 2 selects the ‘Comets’ pattern (026Comets_STS575.tif) from the High End
Systems Lithopattern folder. (For more information on file organization and naming,
see “Library Files Folder” on page 3-2.
Note: A DMX value of 255 in Channel 1 selects external digital video input via
the FireWire port. This is a reserved value and cannot be assigned to a
image or video file.
Defining a Video Segment
In addition to playing movie files, it is possible to play just a portion or segment of a
movie. Select a video segment by choosing the 'In' Frame as a starting frame and an
'Out' Frame as an endpoint for movie playback. Channels 3 and 4 provide coarse and
fine scrolling and selection for In Frame. Channels 5 and 6 provide coarse and fine
scrolling and selection for Out Frame.
Video Playback
The Play Mode (Channel 7) controls how the video will play. The segment of a video
file between a selected ‘In’ Frame and ‘Out’ Frame can be set to play in any of the
following ways:
•
Play loop forward—Plays loop from ‘In’ frame to ‘Out’ frame and repeats.
•
Play loop reverse—Plays the movie from 'Out' frame to 'In' frame and repeats.
•
Play once forward—Plays the movie from 'In' frame to 'Out' frame and stops.
•
Play once reverse—Plays the movie from 'Out' frame to 'In' frame and stops.
•
Stop—Stops playing at current frame.
•
Random—Plays random frame from selected movie.
•
PlaySine—Plays the movie from 'In' frame to 'Out' frame, then plays from 'Out'
frame to 'In' frame with the playback rate varying as a sinewave.
•
Sync—Identifies the Catalyst system Sync ID number to reference for
synchronized playback of the selected file.
Synchronized Playback on Multiple Catalyst Systems
Synchronized playback mode allows two or more Catalyst systems to play video with
accurate frame by frame synchronization using an Ethernet network connection.
This works either for simultaneous playback of the same clip on multiple systems, or
for playback of multiple coordinated clips designed to play across multiple screens.
Note: To connect 2 media servers use a ethernet cable between the ethernet
connections on the Power Mac computer of each system or use an ethernet
hub to connect several systems. A crossover cable is not required to
connect Power Mac systems.
Synchronization requires assigning one system to provide the “Master” timing for a
cue. Other linked systems act as “Slaves”, taking their timings from the designated
master. Up to 20 different Catalyst systems may simultaneously act as masters by
Catalyst™ User Manual
DMX Programming
4-3
4
assigning each system to a unique ‘Sync ID’ value. Any system may then be set, using
the Play Mode DMX channel, to synchronize to any one of the 20 synchronization
ID's. Any system may synchronize to any other system at anytime using the ‘Sync to
0’ through ‘Sync to 19’ play modes. There is no need for a system to be permanently
designated as a master or slave.
Synchronization occurs on a frame by frame reference basis, so the video clips may
be different lengths or sizes or formats. If the master is playing the fiftieth frame of a
movie, for example, the systems synchronizing to that ‘Sync ID’ will play the fiftieth
frame of whatever movie is selected on those systems. The master may use any of the
play modes (Inframe, Outframe, PlayLoopForward, PlayLoopReverse,
PlayOnceForward, PlayOnceReverse, Stop, PlaySine, or Random). The slave systems
match the master system playback frame by frame, even if the frames are being
selected manually using the Inframe or Outframe mode.
If the master plays a frame number that does not exist in the slaved movie, the last
available frame of that movie will be displayed. Therefore, if the master movie is
longer than the slaved movie, the slave will effectively freeze on its last frame until
the master clip loops. If the Inframe of the master is set higher than the length of the
slave movie the slave will remain frozen on its last frame. If the slave movie is longer
than the master movie, the slave will loop at the same frame as the master, and the
end portion of the slaved movie will never be reached.
Set the Sync ID using the Info Screen as described in “Sync Info Screen” on page 3-11.
Playback Speed
Set the Playback speed in Channel 8 from 0.3 frames per second to 39.8 frames per
second. Channel 8 also includes an option to pause playback.
Setting playback speed to the maximum plays the movie at the fastest speed the
system will allow. This maximum speed may change between different versions of
software. So it is recommended that maximum speed be used only if timing is not
important. Actual programmed speeds will remain more consistent between software
updates.
Overlay Gobo Control
A selected Gobo can be sized and rotated independent of the base image layer. When
combined with a base image the settings in the Gobo control channels “track” image
manipulation in the underlying layer, see Figure 4-1. Transparency options for
displaying the pattern are available when Gobo is selected in the Effects Function
Channel, see “Effects Control” on page A-5.
For complete DMX values, see “Gobo Layer Control” on page A-2.
4-4
DMX Programming
Catalyst™ User Manual
=
+
(a) Image Layer
(b) Gobo Overlay
(c) Composite Image
4
(d) Gobo Rotate only
(e) Composite Image Rotate
Figure 4-1 Gobo rotation interaction with image layer
Gobo Selection
Channels 9 and 10 provide coarse and fine control for selecting a Gobo pattern to
overlay the base image. A Gobo pattern is actually a movie with each frame
modifying the pattern edges from sharp to diffused. This allows the user to select a
frame of that pattern with the desired “focus”.
The DHA gobo library has been pre-loaded in a Libraries folder named ‘Gobos’. For
more information on locating a gobo pattern on the Power Mac hard drive, see
“Image and Video File Libraries” on page 3-3. For a thumbnail image and DMX value
for a specific DHA gobo, see “DHA Gobos” on page D-7.
Gobo Layer Sizing
Channel 11 and 12 control gobo size with coarse and fine selection respectively. A
gobo can scale from 0–8x in a positive or negative direction with the midpoint of the
DMX value range equaling 0 scale. As the size moves between positive and negative
values along the x and y axis, the image “flips” horizontally and vertically. Actual size
and normal orientation occurs at a DMX 16-bit value of 36864 (decimal) or 9000
(hex).
Gobo Rotate
Gobo Rotate is controlled by Channels 13 and 14 allows coarse and fine rotation
adjustment. The Gobo Rotate parameter provides rotation independent of image
layer rotation, (see Figure 4-1) and includes options for clockwise and
counterclockwise rotation in continuous or variable modes.
Catalyst™ User Manual
DMX Programming
4-5
Composite Image Control
Channels 15-28 control the rotation, scaling and shaping of the base image along
with any selected gobo overlay as a composite image. Any size and rotation settings
made in the Gobo Layer Control Channels (11-14) adjust in relation to the image
controls set in the Composite Image Control Channels, see Figure 4-1 on page 4-5.
Rotation
Channels 15-20 provide image rotation control in forward and reverse directions
around the selected axis. Figure 4-2 illustrates the different rotation options.
X Rotation
Rotates image
about the x axis
Z Rotation
Rotates image
about the z axis
Y Rotation
Rotates image
about the y axis
Figure 4-2 X, Y, and Z rotation
The x axis is the reference for rotation with
y-axis rotation dependent on x, and z-axis
rotation dependent on y.
An ‘x’ rotation produces the effect of a vertical
flip and a ‘y’ rotation produces a horizontal flip.
Rotation selection for each axis is provided in
coarse and fine 16-bit control for accurate
adjustment.
Table 4-1 shows DMX values for some common
rotation points in decimal and hex units. In this
case, degrees positive indicate counterclockwise movement and degrees negative indicate
clockwise movement.
Note: In reality, motion stops just short
of ±720°.
4-6
DMX Programming
Table 4-1 DMX values for selected
degrees of rotation
Rotation
Dec.Value
Hex Value
–720°
49151
BFFF
–540°
45056
B000
–360°
40960
A000
–180°
36864
9000
–90°
34816
8800
0°
32768
8000
90°
30720
7800
180°
28672
7000
360°
24576
6000
540°
20480
5000
720°
16385
4001
Catalyst™ User Manual
Scaling
Channels 21 and 22 provide a scaling range
±8x with the midpoint of the DMX value
range equaling 0. As the size moves between
positive and negative values on the x and y
axes, the image “flips” horizontally and
vertically.
These settings scale the image along with
any accompanying Gobo pattern as a
composite image, (see “Gobo rotation
interaction with image layer” on page 4-5.
Table 4-2 Sample size DMX values
Rotation
Dec. Value
Hex Value
8x
49151
BFFF
4x
45056
B000
2x
40960
A000
1x
36864
9000
Zero
32768
8000
–1x
28672
7000
–2x
24576
6000
–4x
16684
4000
–8x
00000
0000
Panning
The Pan selections in Channels 23-26 allow the designer to pan across the image in
an x or y direction. This can yield striking effects when used in conjunction with
Scaling and Masking. For example, scaling an image up behind a mask gives the
appearance of “zooming in” on the image. Then, adjusting the pan in the x direction
creates an effect of sliding across the image.
Image Movement Speed
Channel 27 adjusts the time to complete a movement. This allows for a smooth
transitions with moving from one setting to another and can be applied to Scale, Xposition, Y-position, and Gobo Size parameters. The Image Movement Speed
parameter functions like the MSpeed parameter in the Mirror Head DMX protocol,
see “MSpeed (Motor Speed)” on page 4-10.
Aspect Ratio
Channel 28 allows horizontal or vertical image compression from full screen down to
a thin line (1-4 pixels). This function is useful to compensate for dissimilar aspect
ratios encountered in various video formats. For example, a designer can correct
D1/DV-NTSC Video to a 4:3 aspect ratio with a DMX setting of 242 or to a 16:9 aspect
ratio with a DMX setting of 120.
Other Effects
Additional effects can be applied to the composite image in Channels 40-45. Table 4-3
“Visual Effect Options” on page 4-9 shows the relationship between the Visual effects
channel functions selected and the image.
For complete DMX values, see “Composite Image Control” on page A-2.
Catalyst™ User Manual
DMX Programming
4-7
4
Mask Layer Control
A mask is an overlay layer that frames the composite image and blacks out the outer
edge of the image. Channels 29-32 control Mask shape selection, size and rotation.
Mask Shapes on Catalyst include variations of:
•
Circle
•
Vertical Rectangle
•
Horizontal Rectangle
•
Square
Unlike the image and gobo layers which can be manipulated separately or jointly, the
Mask layer is always manipulated independently from the other layers.
Select both the mask shape and the size using Channel 29(coarse) and Channel
30(fine).
Channels 31 and 32 control coarse and fine rotation adjustment of the selected mask
over the image in clockwise and counterclockwise directions.
For complete DMX Mask Parameter values, see “Mask Layer Control” on page A-4.
Color Control
Color Control Parameters (Channels 33-39) control the intensity, color filtering, and
gradient color effects.
Channel 33 provides digital adjustment to image intensity. The selectable intensity
levels range from black to full intensity.
The Catalyst product implements a RGB color mixing system that filters out specific
percentages of Red Green and Blue to modify image color. At a DMX value of 0 on
Color channels 34, 35, and 36; all color is filtered out and the result is black. A DMX
value of 255 yields white or no color adjustment to the image.
The Catalyst system provides a second color adjustment to create a color gradient
effect using Channels 37, 38, and 39. In an un-rotated image, the color transition
moves down the image from the top color setting (selected in Channels 34, 35, and
36) to the bottom color setting (selected in Channel 34, 35, and 36). To turn off this
effect, Channels 37, 38 and 39 must all be set to zero. Any other value in any of these
channels will automatically turn on the Gradient Color feature.
As another color related feature, Channel 42 allows an option for color rotation. For
complete DMX values, see “Color Rotate” on page A-5.
For complete DMX Color Parameter values, see “Color Control” on page A-4.
4-8
DMX Programming
Catalyst™ User Manual
Visual Effects Control
Channels 40-45 control visual effects that can be applied to an image including
strobing at variable speeds and variable color rotation. Selecting a Effect Function in
Channel 43 affects the options available through the Visual Effect 1 and Visual Effect
2 channels.
Table 4-3 describes the interaction between the various Effects Function Settings and
Visual Effects parameters
Table 4-3 Visual Effect Options
.
Effects Function
Setting
Visual Effect 1 Options
Visual Effect 2 Options
4
Transparent on Black
Black on White
Transparent
Black on Transparent
Gobo (Default)
Not used
Transparent on White
Edge outline
Transparent on 50% alpha white
Transparent on 75% alpha white
TBD
Wobble
Tile
Invert
No wobble
No wobble
Increasing x-axis wobble effect
Increasing y-axis wobble effect
Maximum x-axis wobble
Maximum y-axis wobble
Select from 1–8 image duplications
across the x-axis
Select from 1–8 image duplications
across the y-axis
Invert
No color
Normal
Variable color filtering in Cyan
Various inversion effects
Keystone
Not used
Variable color filtering in Magenta
Variable color filtering in Yellow
Not used
For complete DMX values, see “Effects Control” on page A-5.
Keystone Correction
Projected image shape is affected by the angle of
projection. A rectangular image may appear as a
keystone shape on the wall. Keystone correction
parameters allow adjustment of each corner in the
x and y direction to compensate for this effect.
Channels 46-53 each address one corner of the
image in the x or y direction.
Catalyst™ User Manual
1
2
Projected
Image
4
3
Figure 4-3 Corner designation
on unrotated image
DMX Programming
4-9
Keystone correction only affects the image layer and should only be applied after all
other image manipulation values are set.
For complete DMX values, see “Keystone Correction Control” on page A-7.
Mirror Head Control Parameters
The parameters for Channels 1-6 control the mirror head’s movement direction and
speed using 16-bit values to provide very smooth and accurate adjustment.
Mirror Head Positioning
The Catalyst Mirror Head system positions the projected image by independently
moving the inner and outer mirrors on the Mirror Head. The inner mirror (Mirror 1)
maps to Pan on DMX control consoles and can move from 0°–270°. The outer mirror
(Mirror2) maps to Tilt on DMX controllers and has a range of 360°. Channels 1 and 2
control coarse and fine adjustment of Mirror 1 and Channels 3 and 4 control coarse
and fine adjustment on Mirror 2.
MSpeed (Motor Speed)
DMX Channel 5 controls the MSpeed parameter. MSpeed is the time required for a
motor to complete movement when changing from one position to another. MSpeed
provides a means for all motors to reach their target position at the same time, even
though each motor may have different distances to travel. MSpeed movement is
extremely smooth because the fixture controls movements independent of DMX
refresh rates. In general, MSpeed provides a balance between quick response and
smooth motion with some lag.
MSpeed times vary from 0.15 seconds to 252.7 seconds. However, when MSpeed is
applied to a parameter, the delay value (length of time allowed for the entire scene)
needs to be longer than the MSpeed value to allow the motors to complete their
movement before the end of the cue.
An MSpeed value that is longer than the delay value can be used to smoothly change
directions or in creating circles or ballyhoos. It could also produce an undesirable
result; for example, no light output during the scene. For a listing of exact MSpeed
times, see “Appendix B: MSpeed Conversion Table”.
Note: In the Catalyst System, the MSpeed option only applies to mirror head
movement speed. Mirror head Speed can also be varied using XFADE time
on most DMX consoles. If a DMX controller cannot perform a smooth 16bit XFADE, an MSpeed between 95-99% may greatly improve smoothness.
For complete DMX values of all movement control parameters, see , on page A-8.
4-10
DMX Programming
Catalyst™ User Manual
Appendix A:
Catalyst DMX Protocol
The Catalyst Media Server and Mirror Head System are patched by a DMX controller
as individual fixtures on a DMX link. The Media Server requires a range of 56
channels on the link; the Mirror Head a 6-channel range. This appendix includes:
•
“Media Server DMX Protocol” on page A-1
•
“Mirror Head DMX Protocol” on page A-8
•
“Recommended Media Server DMX Default Values” on page A-9
•
“Recommended Mirror Head DMX Default Values” on page A-9
Note: Several Catalyst functions are programmed as 16-bit values whether
adjustment is coarse or fine. Values given in those cases are 16-bit values.
Media Server DMX Protocol
Chan
# Function
Description
VIDEO/IMAGE SELECTION
Selects folder to access from hard drive.
Live video input from firewire.
Selects image file to be accessed and
displayed.
Value
dec.
Value
%
Value
hex
0-254
255
0-99
100
0-FE
FF
0-255
1
Library
2
File
0-100
00-FF
3
4
5
6
In Frame Coarse
0Adjusts the 'In' frame point
0-100
65535
In Frame Fine
Out Frame Coarse
0Adjusts the 'Out' frame point
0-100
65535
Out Frame Fine
Display the 'In' frame
0-4
0-2
Display the 'Out' frame
5-9
2-4
Play loop forward
10-19
4-8
Play loop reverse
20-29
8-11
Play once forward
30-39 12-15
Play mode
Play once reverse
40-49 16-19
Stop
50-59 20-23
Random
60-69 24-27
PlaySine
70-79 28-31
Synchronize to master unit (1-19)
80-99 31-39
Reserved
100-255 40-100
Playback at maximum speed
0
0
Pause playback
1
0
Play speed
Playback at 0.3 frames per second to 39.8
2-255 2-100
frames per second
0000FFFF
7
8
Catalyst ™ User Manual
0000FFFF
0-04
05-09
0A-13
14-1D
1E-27
28-31
32-3B
3C-45
47-4F
50-63
64-FF
0
1
02-FF
DMX Protocol
A-1
A
Chan Function
#
Value
dec.
Value
%
Value
hex
065535
0-100
0000FFFF
00-49
32767
0 scale
32768
50
32769Sizes images from 0-1x
50-56
36863
Actual size
36864
56
36865Sizes image from 1x to +8x
57-100
65535
Continuous variable-speed counterclock00-25
wise gobo overlay rotation (fast to slow)
16383
Continuous Rotation Stop
16384
25
Counterclockwise rotation position from
1638526-49
720° - 0°
32767
0° rotation
32768
50
32769Clockwise rotation position from 0° to 720°
51-75
49151
Continuous Rotation Stop
49152
75
Continuous variable speed clockwise gobo 4915376-100
overlay rotation (slow to fast)
65535
00007FFF
8000
80018FFF
9000
9001FFFF
00003FFF
4000
40017FFF
8000
8001BFFF
C000
C001FFFF
Description
GOBO LAYER CONTROL
9 Gobo Frame Coarse
Select overlay frame from Gobo library file
10 Gobo Frame Fine
Sizes image from –8x to 0x
11 Gobo Size Coarse
12 Gobo Size Fine
13
Gobo Rotate
Coarse
14 Gobo Rotate Fine
COMPOSITE IMAGE CONTROL
Continuous variable-speed counterclockwise image rotation about the x axis (fast to
X-axis Rotate
slow)
15 Coarse
Continuous Rotation Stop
(Vertical flip)
Rotates the image counterclockwise about
the x axis from 720° to 0°
0° rotation about the x axis
Rotates the image clockwise about the x
axis 0° to 720°
X-axis Rotate Fine
16
Continuous Rotation Stop
(Vertical flip)
Continuous variable-speed clockwise
image rotation about the x axis (slow to
fast)
A-2
DMX Protocol
016383
16384
1638532767
32768
3276949151
49152
0-25
25
26-49
50
51-75
75
4915376-100
65535
00003FFF
4000
40017FFF
8000
8001BFFF
C000
C001FFFF
Catalyst™ User Manual
Chan Function
#
Y-axis Rotate
17 Coarse
(Horizontal flip)
Y-axis Rotate Fine
18
(Horizontal flip)
19
20
21
Z-axis Rotate
Coarse
(Circular rotation)
Z-axis Rotate Fine
(Circular rotation)
Scale Coarse
Description
Continuous variable-speed counterclockwise image rotation about the y axis (fast to
slow)
Continuous Rotation Stop
Rotates the image counterclockwise about
the y axis from 720° to 0°
0° rotation about the y axis
Rotates the image clockwise about the y
axis 0° to 720°
Continuous Rotation Stop
Continuous variable-speed clockwise
image rotation about the x axis (slow to
fast)
Adjusts size of inverted image from
8x to 0
Image scaled to zero
Sizes images from 0-1x
Actual size
22 Scale Fine
Adjusts normal image size from 0 to 8x
X position Coarse
23 (Pan Image Left to Pans the image from left to center
Right)
Centers image in projection area
X position Fine (Pan
24
Image Left to Right) Pans image from center to right
Y position Coarse
25 (Pan image top to
bottom)
Y position Fine
26 (Pan image top to
bottom)
Catalyst ™ User Manual
Pans image area from bottom to center
Value
dec.
Value
%
Value
hex
016383
0-25
00003FFF
16384
1638532767
32768
3276949151
49152
25
26-49
50
51-75
75
4000
40017FFF
8000
8001BFFF
C000
4915376-100
65535
C001FFFF
016383
00003FFF
16384
1638532767
32768
3276949151
49152
0-25
25
26-49
50
51-75
75
4915376-100
65535
0-32767
0-50
32768
50
3276950-56
36863
36864
56
3276951-100
65535
0-32767
0-50
32768
50
3276951-100
65535
0-32767
0-50
Centers image in projection area
32768
50
Pans image area from center to top
3276951-100
65535
4000
40017FFF
8000
8001BFFF
C000
C001FFFF
00007F7F
8080
80018FFF
9000
8081FFFF
00007FFF
8000
8001FFFF
00007FFF
8000
8001FFFF
DMX Protocol
A-3
A
Chan Function
#
27 Movement Speed
28 Aspect Ratio
Description
Image and Video speed
Compresses image horizontally
Compresses image vertically
MASK LAYER CONTROL
No mask
Big Circle
Value
%
0-255 0-100
0-128
0-50
129-255 51-100
COLOR CONTROL
Black
Adjusts intensity from black to full
Full Intensity
Filters out all Red in image
Adjusts less to full Red in image
Red in image unaffected
0
0-FE
FF
0
0-FE
FF
Variable width (vertical) rectangle
Narrow vertical rectangle
Large square
Variable height (horizontal) rectangle
Narrow horizontal rectangle
Large square
Variable size square
2-98
99
100
101-124
125
126
127-149
150
151
152-198
Small square
31
Mask Rotate
Coarse
32 Mask Rotate Fine
33 Intensity
34 Red
A-4
DMX Protocol
00-FF
00-80
81-FF
199
200Reserved
65535
Continuous variable-speed counterclock00-25
wise mask overlay rotation (fast to slow)
16383
Continuous Rotation Stop
16384
25
Counterclockwise rotation position from
1638526-49
720° - 0°
32767
0° rotation
32768
50
32769Clockwise rotation position from 0° to 720°
51-75
49151
Continuous Rotation Stop
49152
75
Continuous variable speed clockwise mask 4915376-100
overlay rotation (slow to fast)
65535
29 Mask Select Coarse Small circle
Large square
0
1
Value
hex
0000
0001
00020062
0063
0064
0065007C
007D
007E
007F0095
0096
0097
009800C6
00C7
00C8FFFF
00003FFF
4000
40017FFF
8000
8001BFFF
C000
C001FFFF
Variable size circle
30 Mask Select Fine
Value
dec.
0
1-254
255
0
1-254
255
0
0-99
100
0
0-99
100
Catalyst™ User Manual
Chan Function
#
35 Green
36 Blue
37
Gradient Color*
(Red)
38
Gradient Color *
(Green)
39
Gradient Color*
(Blue)
Description
Value
dec.
Value
%
Value
hex
Filters out all Green in image
Adjusts less to full Green in image
Green in image unaffected
Filters out all Blue in image
Adjusts less to full Blue in image
Blue in image unaffected
Filters out all Red in gradient color
Adjusts less to full Red in gradient color
Red in gradient color unaffected
Filters out all Green in gradient color
Adjusts less to full Green in gradient color
Green in gradient color unaffected
Filters out all Blue in gradient color
Adjusts less to full Blue in gradient color
Blue in gradient color unaffected
0
1-254
255
0
1-254
255
0
1-254
255
0
1-254
255
0
1-254
255
0
0-99
100
0
0-99
100
0
0-99
100
0
0-99
100
0
0-99
100
0
0-FE
FF
0
0-FE
FF
0
0-FE
FF
0
0-FE
FF
0
0-FE
FF
EFFECTS CONTROL
40 Strobe
41 Crossfade
42 Color Rotate
43 Effects Function
No strobe
Variable speed strobe
Reserved
Variable direction of color gradation
Gobo (Default)
Wobble effect
Tile effect
Invert image
Keystone correction to image layer
Reserved
0
0
1-255 1-100
0-255 0-100
0-255 0-100
0-4
0-2
5-9
2-4
10-19
4-8
20-29
8-11
30-39 12-14
40-255 15-100
0
01-FF
00-FF
00-FF
00-04
05-09
0A-13
14-1D
1E-27
28-FF
* To turn Gradient Function OFF, set Channels 37, 38 and 39 all to zero.
Catalyst ™ User Manual
DMX Protocol
A-5
A
Chan Function
#
44 Visual effect 1
A-6
DMX Protocol
Description
Gobo (Default) Mode
Transparent on Black
Black on White
Transparent
Black on Transparent
Transparent on White
Edge outline
Transparent on 50% alpha white
Transparent on 75% alpha white
Reserved
Wobble Mode
No Wobble
Variable Wobble on x axis from slow to fast
Tile Mode
Single image along x axis
Two images along x axis
Three images along x axis
Four images along x axis
Five images along x axis
Six images along x axis
Seven images along x axis
Eight images along x axis
Invert Mode
Normal
Various Inversion effects
Reserved
Value
dec.
Value
%
Value
hex
0-1
2
3
4
5
6
7
8
9-255
0-1
0
1
1
2
2
3
3
4-100
00-01
02
03
04
05
06
07
08
09-FF
0
1-255
0
1-100
0
01-FF
0-32
33-64
65-96
97-128
129-160
161-192
193-224
225-255
0-13
13-25
26-38
38-50
51-63
63-75
76-88
88-100
00-20
21-40
41-60
61-80
81-A0
A1-C0
C1-E0
E1-FF
0
0
1-29
0-11
30-255 12-100
0
0-1D
1E-FF
Catalyst™ User Manual
Chan Function
#
45 Visual effect 2
Description
Wobble Mode
No Wobble
Variable Wobble on y axis from slow to fast
Tile Mode
Single image along y axis
Two images along y axis
Three images along y axis
Four images along y axis
Five images along y axis
Six images along y axis
Seven images along y axis
Eight images along y axis
Invert Mode
No color
Variable Cyan filtering
Variable Magenta filtering
Variable Yellow filtering
Reserved
Value
dec.
Value
%
Value
hex
0
1-255
0
1-100
0
01-FF
0-32
33-64
65-96
97-128
129-160
161-192
193-224
225-255
0-13
13-25
26-38
38-50
51-63
63-75
76-88
88-100
00-20
21-40
41-60
61-80
81-A0
A1-C0
C1-E0
E1-FF
0-1
0-1
2-50
1-20
51-100 20-39
101-150 40-59
151-255 59-100
00-01
02-32
33-64
65-96
97-FF
KEYSTONE CORRECTION CONTROL
(left/right/top/down designations may be affected by pan and tilt position)
Moves upper left-hand corner left on x axis 0-127
0-49
0-79
No correction
128
50
80
46 Keystone 1x
Moves upper left-hand corner right on x
129-255 51-100 81-FF
axis
Moves upper left-hand corner left on y axis 0-127
0-49
0-79
No correction
128
50
80
47 Keystone 1y
Moves upper left-hand corner right on y
129-255 51-100 81-FF
axis
Moves lower right-hand corner left on x
0-127
0-49
0-79
axis
48 Keystone 2x
No correction
128
50
80
Moves lower right-hand corner right on x
129-255 51-100 81-FF
axis
Moves lower right-hand corner left on x
0-127
0-49
0-79
axis
49 Keystone 2y
No correction
128
50
80
Moves lower right-hand corner right on x
129-255 51-100 81-FF
axis
Moves lower right-hand corner left on y
0-127
0-49
0-79
axis
50 Keystone 3x
No correction
128
50
80
Moves lower left-hand corner right on y
129-255 51-100 81-FF
axis
Catalyst ™ User Manual
DMX Protocol
A-7
A
Chan Function
#
51 Keystone 3y
52 Keystone 4x
53 Keystone 4y
54
55 Information
56
Description
Value
dec.
Value
%
Moves lower right-hand corner left on y
0-127
0-49
axis
No correction
128
50
Moves lower right-hand corner right on y
129-255 51-100
axis
Moves lower left-hand corner left on y axis 0-127
0-49
No correction
128
50
Moves lower left-hand corner right on y
129-255 51-100
axis
Moves lower left-hand corner left on y axis 0-127
0-49
No correction
128
50
Moves lower left-hand corner right on y
129-255 51-100
axis
Reserved
Reserved
Reserved
Value
hex
0-79
80
81-FF
0-79
80
81-FF
0-79
80
81-FF
Mirror Head DMX Protocol
Chan Function
#
Mirror 1 Coarse
1
2
3
4
5
Mirror 1 Fine
Mirror 2 Coarse
Mirror 2 Fine
MSpeed
6
Control Function
A-8
DMX Protocol
Value
dec.
Value
%
Value
hex
Moves inner mirror from 0°–270°
(Maps to Pan)
065535
0-100
0000FFFF
Moves outer mirror from 0°–360°
(Maps to Tilt)
065535
0-100
0000FFFF
0-255
90-98
120-130
140-149
160-168
170-255
0-100
35-38
47-51
55-58
63-66
67-100
00-FF
5A-62
78-82
8C-95
A0-A8
AA-FF
Description
See Appendix B for conversion tables
Reserved
Shutdown
Reserved
Homes Mirror 1 and Mirror 2
Reserved
Catalyst™ User Manual
Recommended Media Server DMX Default Values
High End Systems recommends setting the following Default values on the Catalyst
system to create consistent and predictable profiles across several controllers.
# Channel Function
1
2
3
4
5
6
7
8
9
10
11
12
13
14
15
16
17
18
19
20
21
22
23
24
25
26
27
28
Library
File
In Frame Coarse
In Frame Fine
Out Frame Coarse
Out Frame Fine
Play mode
Play speed
Gobo Frame Coarse
Gobo Frame Fine
Gobo Size Coarse
Gobo Size Fine
Gobo Rotate Coarse
Gobo Rotate Fine
X-axis Rotate Coarse
X-axis Rotate Fine
Y-axis Rotate Coarse
Y-axis Rotate Fine
Z-axis Rotate Coarse
Z-axis Rotate Fine
Scale Coarse
Scale Fine
X -axis Pan Coarse
X -axis Pan Fine
Y-axis Pan Coarse
Y -axis Pan Fine
Movement Speed
Aspect Ratio
Dec.
%
Hex
0
0
0
0
0
0
0
0
0
0
0
0
0
0
0
0
0
0
0
0
0
36864 56 9000
36864 50 8000
36864 50 8000
36864 50 8000
36864 50 8000
36864 56 9000
36864 50 8000
36864 50 8000
0
0
0
0
0
0
# Channel Function
29
30
31
32
33
34
35
36
37
38
39
40
41
42
43
44
45
46
47
48
49
50
51
52
53
54
55
56
Mask Select Coarse
Mask Select Fine
Mask Rotate Coarse
Mask Rotate Fine
Intensity
Red
Green
Blue
Gradient Color (Red)
Gradient Color (Green)
Gradient Color (Blue)
Strobe
Crossfade
Color Rotate
Effects Function
Visual effect 1
Visual effect 2
Keystone 1x
Keystone 1y
Keystone 2x
Keystone 2y
Keystone 3x
Keystone 3y
Keystone 4x
Keystone 4y
Information
Reserved
Reserved
Dec.
%
Hex
0
0
0
36864 50 8000
0
255
255
255
0
0
0
0
0
0
0
0
0
128
128
128
128
128
128
128
128
0
0
0
0
100
100
100
0
0
0
0
0
0
0
0
0
50
50
50
50
50
50
50
50
0
0
0
0
FF
FF
FF
0
0
0
0
0
0
0
0
0
80
80
80
80
80
80
80
80
0
0
0
Recommended Mirror Head DMX Default Values
# Function
1
2
3
4
5
6
Mirror 1 Coarse
Mirror 1 Fine
Mirror 2 Coarse
Mirror 2 Fine
MSpeed
Control Function
Catalyst ™ User Manual
Dec.
%
Hex
32768 50 8000
32768 50 8000
0
0
0
0
0
0
DMX Protocol
A-9
A
A-10
DMX Protocol
Catalyst™ User Manual
Appendix B:
MSpeed Conversion Table
The following table lists the MSpeed (motor) movement times and their corresponding
DMX controller values. If you have a numeric-type controller, use the Value Decimal
(dec.) column. If you have a fader-type controller, use the Value Percentage (%) column.
If your controller allows you to program hex values, use the Value (hex) column.
Time
(sec.)
Value
(dec.)
Value
(%)
Value
(hex)
Time
(sec.)
Value
(dec.)
Value
(%)
Value
(hex)
0.15
255
100
FF
Time
(sec.)
3.07
228
89
E4h
11.84
227
89
E3
12.28
Value
(dec.)
Value
(%)
Value
(hex)
201
79
C9
200
78
C8
0.15
254
100
FE
3.29
0.17
253
99
FD
3.52
226
89
E2
12.72
199
78
C7
225
88
E1
13.17
198
78
C6
0.19
252
99
FC
3.76
0.21
251
98
FB
4.00
224
88
E0
13.63
197
77
C5
223
87
DF
14.10
196
77
C4
0.25
250
98
FA
4.25
0.29
249
98
F9
4.52
222
87
DE
14.58
195
76
C3
221
87
DD
15.07
194
76
C2
0.35
248
97
F8
4.78
0.41
247
97
F7
5.06
220
86
DC
15.56
193
76
C1
219
86
DB
16.06
192
75
C0
0.47
246
96
F6
5.34
0.55
245
96
F5
5.64
218
85
DA
16.57
191
75
BF
217
85
D9
17.09
190
75
BE
0.63
244
96
F4
5.94
0.73
243
95
F3
6.25
216
85
D8
17.61
189
74
BD
215
84
D7
18.14
188
74
BC
0.83
242
95
F2
6.56
0.94
241
95
F1
6.89
214
84
D6
18.68
187
73
BB
213
84
D5
19.23
186
73
BA
1.05
240
94
F0
7.22
1.18
239
94
EF
7.56
212
83
D4
19.79
185
73
B9
211
83
D3
20.36
184
72
B8
1.31
238
93
EE
7.91
1.45
237
93
ED
8.27
210
82
D2
20.93
183
72
B7
209
82
D1
21.51
182
71
B6
1.60
236
93
EC
8.63
1.75
235
92
EB
9.00
208
82
D0
22.10
181
71
B5
9.39
207
81
CF
22.70
180
71
B4
1.92
234
92
EA
2.09
233
91
E9
9.77
206
81
CE
23.30
179
70
B3
205
80
CD
23.92
178
70
B2
2.27
232
91
E8
10.17
2.46
231
91
E7
10.58
204
80
CC
24.54
177
69
B1
203
80
CB
25.17
176
69
B0
202
79
CA
25.80
175
69
AF
2.66
230
90
E6
10.99
2.86
229
90
E5
11.41
Catalyst™ User Manual
MSpeed Conversion Table
B-1
B
Time
(sec.)
Value
(dec.)
Value
(%)
Value
(hex)
Time
(sec.)
Value
(dec.)
Value
(%)
Value
(hex)
Time
(sec.)
Value
(dec.)
Value
(%)
Value
(hex)
26.45
174
68
AE
55.96v
137
54
89
97.70
99
39
63
27.10
173
68
AD
56.91
136
53
88
98.95
98
38
62
27.76
172
67
AC
57.87
135
53
87
100.22
97
38
61
28.43
171
67
AB
58.84
134
53
86
101.49
96
38
60
29.11
170
67
AA
59.81
133
52
85
102.77
95
37
5F
29.80
169
66
A9
60.79
132
52
84
104.05
94
37
5E
30.49
168
66
A8
61.78
131
51
83
105.35
93
36
5D
31.19
167
65
A7
62.78
130
51
82
106.65
92
36
5C
31.90
166
65
A6
63.79
129
51
81
107.96
91
36
5B
32.62
165
65
A5
64.80
128
50
80
109.28
90
35
5A
33.34
164
64
A4
65.82
127
50
7F
110.61
89
35
59
34.08
163
64
A3
66.85
126
49
7E
111.94
88
35
58
34.82
162
64
A2
67.89
125
49
7D
113.28
87
34
57
35.57
161
63
A1
68.94
124
49
7C
114.63
86
34
56
36.33
160
63
A0
69.99
123
48
7B
115.99
85
33
55
37.09
159
62
9F
71.05
122
48
7A
117.36
84
33
54
37.87
158
62
9E
72.13
121
47
79
118.73
83
33
53
38.65
157
62
9D
73.20
120
47
78
120.12
82
32
52
39.44
156
61
9C
74.29
119
47
77
121.5v
81
32
51
39.44v
156
61
9C
75.38
118
46
76
122.91
80
31
50
40.23
155
61
9B
76.49
117
46
75
124.31
79
31
4F
41.04
154
60
9A
77.60
116
45
74
125.73
78
31
4E
41.85
153
60
99
78.71
115
45
73
127.15
77
30
4D
42.68
152
60
98
79.84
114
45
72
128.58
76
30
4C
43.50
151
59
97
80.98
113
44
71
130.02
75
29
4B
44.34
150
59
96
82.12
112
44
70
134.39
72
28
48
45.19
149
58
95
83.27
111
44
6F
135.86
71
28
47
46.04
148
58
94
84.43
110
43
6E
137.34
70
27
46
46.90
147
58
93
85.59
109
43
6D
138.82
69
27
45
47.77
146
57
92
86.77
108
42
6C
140.32
68
27
44
48.65
145
57
91
87.95
107
42
6B
141.82
67
26
43
49.54
144
56
90
89.14
106
42
6A
143.33
66
26
42
50.43
143
56
8F
90.34
105
41
69
144.85
65
25
41
51.33
142
56
8E
91.55
104
41
68
146.38
64
25
40
52.24
141
55
8D
92.76
103
40
67
147.92
63
25
3F
53.16
140
55
8C
93.98
102
40
66
149.46
62
24
3E
54.09
139
55
8h
95.21
101
40
65
151.01
61
24
3D
55.02
138
54
8A
96.45
100
39
64
152.57
60
24
3C
B-2
MSpeed Conversion Table
Catalyst™ User Manual
Time
(sec.)
Value
(dec.)
Value
(%)
Value
(hex)
Time
(sec.)
Value
(dec.)
Value
(%)
Value
(hex)
154.14
59
23
3B
219.63
21
8
15
155.71
58
23
3A
221.51
20
8
14
157.30
57
22
39
223.40
19
7
13
158.89
56
22
38
225.30
18
7
12
160.49
55
22
37
227.20
17
7
11
162.09
54
21
36
229.11
16
6
10
163.71
53
21
35
231.03
15
6
0F
165.33
52
20
34
232.96
14
5
0E
166.96
51
20
33
234.90
13
5
0D
168.60
50
20
32
236.84
12
5
0C
170.25
49
19
31
238.79
11
4
0B
171.91
48
19
30
240.75
10
4
0A
173.57
47
18
2F
242.72
9
4
09
175.24
46
18
2E
244.70
8
3
08
176.92
45
18
2D
246.68
7
3
07
178.61
44
17
2C
248.68
6
2
06
180.30
43
17
2B
250.68
5
2
05
182.01
42
16
2A
246.68
7
3
07
183.72
41
16
29
248.68
6
2
06
185.44
40
16
28
250.68
5
2
05
187.17
39
15
27
252.68
4
2
04
188.90
38
15
26
190.65
37
15
25
192.40
36
14
24
194.16
35
14
23
195.92
34
13
22
197.70
33
13
21
199.48
32
13
20
201.28
31
12
1F
203.08
30
12
1E
204.88
29
11
1D
206.70
28
11
1C
208.52
27
11
1B
210.36
26
10
1A
212.19
25
10
19
214.04
24
9
18
215.90
23
9
17
217.76
22
9
16
Catalyst™ User Manual
MSpeed Conversion Table
B
B-3
B-4
MSpeed Conversion Table
Catalyst™ User Manual
Appendix C:
Safety Information
Warning: For Continued Protection Against Fire
1.
This equipment for connection to branch circuit having a maximum overload
protection of 20 A.
Warning: For Continued Protection Against Electric Shock
1.
2.
If this equipment was received without a line cord plug, attach the appropriate
line cord plug according to the following code:
•
brown–live
•
blue–neutral
•
green/yellow–earth
As the colours of the cores in the mains lead of this equipment may not
correspond with the coloured markings identifying the terminals in your plug,
proceed as follows:
•
the core which is coloured green and yellow must be connected to the
terminal in the plug which is marked with the letter E or by the earth symbol
, or coloured green or green and yellow.
•
the core which is coloured blue must be connected to the terminal which is
marked with the letter N or coloured black.
•
the core which is coloured brown must be connected to the terminal which is
marked with the letter L or coloured red.
3.
Class I equipment. This equipment must be earthed.
4.
Equipment suitable for dry locations only. Do not expose this equipment to rain
or moisture.
5.
Refer servicing to qualified personnel; no user serviceable parts inside.
Catalyst™ User Manual
Safety Information
C-1
C
Appendice C
Importantes Informations Sur La Sécurité
Mise En Garde: Pour Une Protection Permanente Contre Les
Incendies
1.
Cet appareil de connection au circuit comporte une protection contre les
surcharges de 20 A.
Mise En Garde: Pour Une Protection Permanente Contre Les Chocs
Électriques
1.
Si cet équipement est livré sans prise de cable, veuillez connecter la prise de
cable correcte selon le code suivant:
•
marron - phase
•
bleu - neutre
•
vert/jaune - terre
2.
Débrancher le courant avant de changer les lampes ou d'effectuer des
réparations.
3.
Cet équipement doit être uniquement utilisé dans des endroits secs. Ne pas
l'exposer à la pluie ou l'humidité.
4.
À l'intérieur de l'équipement il n'y a pas de pièces remplaçables par l' utilisateur.
Confiez l'entretien à un personnel qualifié.
5.
Equipement de Classe I. Cet équipement doit être mis à la terre.
C-2
Safety Information
Catalyst ™ User Manual
Anhang C
Wichtige Hinweise Für Ihre Sicherheit
Warnung: Zum Schutz Vor Brandgefahr
1.
Dieses Gerät darf nur an eine Zweigleitung mit einem Überlastungsschutz von
höchstens 20 A angeschlossen werden.
Warnung: Zum Schutz Gegen Gefährliche Körperströme
1.
Wenn dieses Gerät ohne einen Netzkabelstecker erhalten wurde, ist der
entsprechende Netzkabelstecker entsprechend dem folgenden Code
anzubringen:
•
Braun - Unter Spannung stehend
•
Blau - Neutral
•
Grün/Gelb - Erde
2.
Vor dem Austauschen von Lampen oder vor Wartungsarbeiten stets den
Netzstecker ziehen.
3.
Diese Geräte sind nur zum Einbau in trockenen Lagen bestimmt und müssen vor
Regen und Feuchtigkeit geschützt werden.
4.
Servicearbeiten sollten nur von Fachpersonal ausgeführt werden. Das Gerät
enthält keine wartungsbedürftigen Teile.
5.
Dieses Gerät gehört zur Klasse I. Dieses Gerät muß geerdet werden.
C
Catalyst™ User Manual
Safety Information
C-3
Apéndice C
Información Importante De Seguridad
Advertencia: Para Protección Continua Contra Incendios
1.
Este equipo debe conectarse a un circuito que tenga una protección máxima
contra las sobrecargas de 20 A.
Advertencia: Para La Protección Continua Contra Electrocuciones
1.
Si se recibió este equipo sin el enchufe de alimentacion, monte usted el enchufe
correcto según el clave siguente:
•
moreno - vivo
•
azul - neutral
•
verde/amarillo - tierra
2.
Desconecte el suministro de energía antes de recambiar lámparas o prestar
servicio de reparación.
3.
Este equipo se adecua a lugares secos solamente. no lo exponga a la lluvia o
humedad.
4.
Derive el servicio de reparación de este equipo al personal calificado. El interior
no contiene repuestos que puedan ser reparados por el usuario.
5.
Equipo de Clase I. Este equipo debe conectarse a la tierra.
C-4
Safety Information
Catalyst ™ User Manual
Appendice C
Importanti Informazioni Di Sicurezza
Avvertenza: Per Prevenire Incendi
1.
Questa apparecchiatura e' da collegarsi ad un circuito con una protezzione da
sovraccarico massima di 20 amperes.
Avvertenza: Per Prevenire Le Scosse Elettriche
1.
Se questa apparecchiatura è stata consegnata senza una spina del cavo di
alimentazione, collegare la spina appropriata del cavo di alimentazione in base ai
seguenti codici:
•
marrone - sotto tensione
•
blu - neutro
•
verde/giallo - terra
2.
Disinnestare la corrente prima di cambiare la lampadina o prima di eseguire
qualsiasi riparazione.
3.
Questa apparecchiatura e' da usarsi in ambienti secchi. Non e' da essere esposta
ne alla pioggia ne all' umidita'.
4.
Per qualsiasi riparazione rivolgersi al personale specializzato. L' utente non deve
riparare nessuna parte dentro l' unita'.
5.
Aparecchio di Classe I. Questa apparecchiatura deve essere messa a terra.
C
Vigtig Sikkerhedsinformation
Advarsel: Beskyttelse mod elektrisk chock.
VIGTIGT! LEDEREN MED GUL/GROEN ISOLATION MAA KUN TILSLUTTES
KLEMME MAERKET
ELLER .
Catalyst™ User Manual
Safety Information
C-5
C-6
Safety Information
Catalyst ™ User Manual
Appendix D:
Catalyst Image Content
The Catalyst Digital Media server ships with an extensive library of image files as
shown in the following table.
Folder Name
Content Description
000 High End Lithopatterns
160 High End Systems lithopattern® images. File names and a
thumbnail representation of each pattern begins on page D-2.
001Digital Juice Jumpbacks
Twenty 15–30 sec. animated backgrounds. For more information,
visit the Digital Juice website at http://www.digitaljuice.com
002Artbeats
Seven video clips including fire, water and cloud images. For more
information on Artbeats film library visit the Artbeats website at http://
www.artbeats.com
003images
Empty folder to hold custom images
254Aerials
Flash animations created exclusively for the Catalyst system achieve
multi-colored, rotating aerial effects.
255Video Input (Do Not Use) Reserved for Firewire input. Do not use for content
gobos
Contains a single ‘movie’ file of the DHA gobo library. Each gobo
occupies 50 frames. Each of the 50 frames displays a different level
of diffusion or “focus” applied to the image. The section entitled “DHA
Gobos” on page D-7 shows a thumbnail and DMX index value for
each Gobo pattern.
Masks
Mask pattern file includes variable rectangle, circular and square
mask patterns.
Catalyst™ User Manual
Library Content
D-1
D
High End Systems Lithopatterns
000aaopenwhite.pct
001abyss_yel_red.pict
002Amplitudes_STS575.tif
003Andramoda.pict
004Angles_575.tif
005Bamboo_575.tif
006BevelledSpirals_STS575.tif
007BillowyShells_STS575.tif
008BirdOfParadise.pict
009BlockWorld_STS575.tif
010Bout.pict
011BreakUpFlowers_575.tif
012BricksGobo_575.tif
013BrightStars.pict
014BrightStars.tif
015BuildingBlocks_STS575.tif
016Burrs.pict
017BurrsInverse.pict
018Butterfly_575.tif
019Caraf.pict
020Checkered.pict
021ChromeSpheres2_575.tif
022ChromeSpheres_STS575.tif
023CloudString1d_sts575.tif
024CloudyDrift_sts575.tif
025Colage.pict
026Comets_STS575.tif
027CometWings_STS575.tif
028CosmicStairway#92.tif
029Craters#157.tif
030DaisyChain_STS575.tif
031Dashing.tif
032DiaphragmWheel.pict
033DiskMan_575.tif
034Doily.pict
035downtown.pict
036Dradle.pict
037Drift_STS575.tif
038DripDrop.pict
D-2
Library Content
039EarthView_575.tif
Catalyst™ User Manual
040Earth_color.tif
041Eclipse1_sts575.tif
042Egypt_575.tif
043Eminent_575.tif
044Euphoriscape_STS575.tif
045Everglades.pict
046Everglades_575.tif
047Eyes_575.tif
048FaceintheSun_STS575.tif
049Fade_STS575.tif
050Finichy.pict
051Fireworks_STS575.tif
052FishEyes.pict
053Floris.pict
054FlyingPigColor.tif
055FractalBurst_STS575.tif
056Fracture.pict
060GothicVortex_STS575.tif
061Gradation.STS575.tif
065HalloweenSkull_STS575.tif
058Genisis_STS575.tif
059GlitteringStars_STS575.tif
062Grass_575.tif
063GuardsHall_STS575.tif
064Gyration#97.tif
066Halo_STS575.tif
067HappyDais_STS575.tif
068Herring.pict
069HES Logo color.tif
070Hive_STS575.tif
071HollywoodStars_STS575.tif
072HornsColor.tif
073HyophPalm.pict
074Intown.pict
075Inward.pict
076Jax_STS575.tif
077Lament_STS575.tif
078Lapse_STS575.tif
079LAVA_Cyan/Mgnt.tif
Catalyst™ User Manual
057Fracture_575.tif
Library Content
D
D-3
Catalyst - DHA Gobo List
080LeadCrystals_STS575.tif
DHA 041 / DMX 2000
085LumoilPink/Yellow.tif
DHA 046 / DMX 2250
090NativeArrows_STS575.tif
DHA 051 / DMX 2500
095Paragon_575.tif
081Leaves_575.tif
DHA 042 / DMX 2050
086MoireStraightFAKE_250.tif
DHA 047 / DMX 2300
091NudgeComposite.pict
DHA 052 / DMX 2550
096PARTY_575_rev2.tif
082LightFluffyClouds_575.tif
DHA 043 / DMX 2100
087MoireSwirlFAKE_575.tif
DHA 048 / DMX 2350
092PaisleySpin_STS575.tif
DHA 053 / DMX 2600
097Perfora_575.tif
083Linear.pict
084Lucid_575/Xspot.tif
DHA 044 / DMX 2150
088MoireSwirl_STS575.tif
DHA 049 / DMX 2400
093Paisley_575_rev2.tif
DHA 054 / DMX 2650
098Phantom_STS575.tif
DHA 045 / DMX 2200
089Native.pict
DHA 050 / DMX 2450
094Palm.pict
DHA 055 / DMX 2700
099PiercedCircles.pict
DHA 056 / DMX 2750
DHA 057 / DMX 2800
DHA 058 / DMX 2850
DHA 059 / DMX 2900
DHA 060 / DMX 2950
100place
holder.pict
DHA 061
/ DMX
3000
DHA 101Planetoids#107.tif
062 / DMX 3050
102praise.pict
DHA 063
/ DMX 3100
DHA103Proto_STS575.tif
064 / DMX 3150
104Psychedelic_STS575.tif
DHA
065 / DMX 3200
DHA 066105PsyDye.tif
/ DMX 3250
DHA 067106PsySpin.tif
/ DMX 3300
DHA 068
/ DMX 3350
107Puddle_575.tif
DHA108PulsarRays_575.tif
069 / DMX 3400
DHA
070 / DMX 3450
109RockRings_STS575.tif
DHA 071 / DMX 3500
DHA 072 / DMX 3550
DHA 073 / DMX 3600
DHA 074 / DMX 3650
DHA 075 / DMX 3700
DHA 076 / DMX 3750
DHA 077 / DMX 3800
DHA 078 / DMX 3850
DHA 079 / DMX 3900
DHA 080 / DMX 3950
110Rumihaze.pict
111Rumihaze_b/w.pict
115Sieve.pict
D-4
Library Content
116Sight(2).pict
112Running_575.tif
117SilcSquare_STS575.tif
2
113Sandscape_STS575.tif
118SkullExplosion.pict
114Shatter_STS575.tif
119SkullExplosion_STS575.tif
Catalyst™ User Manual
120Skycraper_575.tif
121Slinky.STS575.tif
122Slot_STS575.tif
123Snapshot.pict
124Snowflake_STS575.tif
125SpaceMines_STS575.tif
126Spangles_575.tif
127Spinner_STS575.tif
128Squiggle_575.tif
129StarryNight_STS575.tif
130StoneWall_575.tif
131Streaks_575.tif
132SunColor.tif
133SwayStar_STS575.tif
134ThirdEye_575.tif
135ThisWay_575.tif
136ThreeBrokenRings_575.tif
137Today.pict
138TonsofBlocks_STS575.tif
139Torches_STS575.tif
140TranquilityRock_STS575.tif
141Trees_STS575.tif
142TriadOne_STS575.tif
143TripWheel_STS575.tif
144Trust_STS575.tif
145TwoOrbRings_STS575.tif
146USflagColor.tif
147Vortex#167.tif
148WandWheel_Paradon_575.tif
149Warp_575.tif
150waterfan.pict
151WavyTunnel_STS575.tif
152WavyWhite_STS575.tif
153Wavy_575.tif
154Wheel_575.tif
155WildPlanet_STS575.tif
156WingRock_575.tif
157Ytacy.pict
158Zap2_TB.pict
159Zap_TB.pict
Catalyst™ User Manual
Library Content
D-5
D
160OceanPrint.pict
D-6
Library Content
Catalyst™ User Manual
DHA Gobos
DHA 001 / DMX 0
DHA 002 / DMX 50
DHA 003 / DMX 100
DHA 004 / DMX 150
DHA 005 / DMX 200
DHA 006 / DMX 250
DHA 007 / DMX 300
DHA 008 / DMX 350
DHA 009 / DMX 400
DHA 010 / DMX 450
DHA 011 / DMX 500
DHA 012 / DMX 550
DHA 013 / DMX 600
DHA 014 / DMX 650
DHA 015 / DMX 700
DHA 016 / DMX 750
DHA 017 / DMX 800
DHA 018 / DMX 850
DHA 019 / DMX 900
DHA 020 / DMX 950
DHA 021 / DMX 1000
DHA 022 / DMX 1050
DHA 023 / DMX 1100
DHA 024 / DMX 1150
DHA 025 / DMX 1200
DHA 026 / DMX 1250
DHA 027 / DMX 1300
DHA 028 / DMX 1350
DHA 029 / DMX 1400
DHA 030 / DMX 1450
DHA 031 / DMX 1500
DHA 032 / DMX 1550
DHA 033 / DMX 1600
DHA 034 / DMX 1650
DHA 035 / DMX 1700
DHA 036 / DMX 1750
DHA 037 / DMX 1800
DHA 038 / DMX 1850
DHA 039 / DMX 1900
DHA 040 / DMX 1950
DHA 041 / DMX 2000
DHA 042 / DMX 2050
DHA 043 / DMX 2100
DHA 044 / DMX 2150
DHA 045 / DMX 2200
DHA 046 / DMX 2250
DHA 047 / DMX 2300
DHA 048 / DMX 2350
DHA 049 / DMX 2400
DHA 050 / DMX 2450
DHA 051 / DMX 2500
DHA 052 / DMX 2550
DHA 053 / DMX 2600
DHA 054 / DMX 2650
DHA 055 / DMX 2700
DHA 056 / DMX 2750
DHA 057 / DMX 2800
DHA 058 / DMX 2850
DHA 059 / DMX 2900
DHA 060 / DMX 2950
DHA 061 / DMX 3000
DHA 062 / DMX 3050
DHA 063 / DMX 3100
DHA 064 / DMX 3150
DHA 065 / DMX 3200
DHA 066 / DMX 3250
DHA 067 / DMX 3300
DHA 068 / DMX 3350
DHA 069 / DMX 3400
DHA 070 / DMX 3450
Catalyst™ User Manual
Library Content
D-7
D
DHA 071 / DMX 3500
DHA 072 / DMX 3550
DHA 073 / DMX 3600
DHA 074 / DMX 3650
DHA 075 / DMX 3700
DHA 076 / DMX 3750
DHA 077 / DMX 3800
DHA 078 / DMX 3850
DHA 079 / DMX 3900
DHA 080 / DMX 3950
DHA 081 / DMX 4000
DHA 082 / DMX 4050
DHA 083 / DMX 4100
DHA 084 / DMX 4150
DHA 085 / DMX 4200
DHA 086 / DMX 4250
DHA 087 / DMX 4300
DHA 088 / DMX 4350
DHA 089 / DMX 4400
DHA 090 / DMX 4450
DHA 091 / DMX 4500
DHA 092 / DMX 4550
DHA 093 / DMX 4600
DHA 094 / DMX 4650
DHA 095 / DMX 4700
DHA 096 / DMX 4750
DHA 097 / DMX 4800
DHA 098 / DMX 4850
DHA 099 / DMX 4900
DHA 100 / DMX 4950
DHA 101 / DMX 5000
DHA 102 / DMX 5050
DHA 103 / DMX 5100
DHA 104 / DMX 5150
DHA 105 / DMX 5200
DHA 106 / DMX 5250
DHA 107 / DMX 5300
DHA 108 / DMX 5350
DHA 109 / DMX 5400
DHA 110 / DMX 5450
DHA 111 / DMX 5500
DHA 112 / DMX 5550
DHA 113 / DMX 5600
DHA 114 / DMX 5650
DHA 115 / DMX 5700
DHA 116 / DMX 5750
DHA 117 / DMX 5800
DHA 118 / DMX 5850
DHA 119 / DMX 5900
DHA 120 / DMX 5950
DHA 121 / DMX 6000
DHA 122 / DMX 6050
DHA 123 / DMX 6100
DHA 124 / DMX 6150
DHA 125 / DMX 6200
DHA 126 / DMX 6250
DHA 127 / DMX 6300
DHA 128 / DMX 6350
DHA 129 / DMX 6400
DHA 130 / DMX 6450
DHA 131 / DMX 6500
DHA 132 / DMX 6550
DHA 133 / DMX 6600
DHA 134 / DMX 6650
DHA 135 / DMX 6700
DHA 136 / DMX 6750
DHA 137 / DMX 6800
DHA 138 / DMX 6850
DHA 139 / DMX 6900
DHA 140 / DMX 6950
D-8
Library Content
Catalyst™ User Manual
DHA 141 / DMX 7000
DHA 142 / DMX 7050
DHA 143 / DMX 7100
DHA 144 / DMX 7150
DHA 145 / DMX 7200
DHA 146 / DMX 7250
DHA 147 / DMX 7300
DHA 148 / DMX 7350
DHA 149 / DMX 7400
DHA 150 / DMX 7450
DHA 151 / DMX 7500
DHA 152 / DMX 7550
DHA 153 / DMX 7600
DHA 154 / DMX 7650
DHA 155 / DMX 7700
DHA 156 / DMX 7750
DHA 157 / DMX 7800
DHA 158 / DMX 7850
DHA 159 / DMX 7900
DHA 160 / DMX 7950
DHA 161 / DMX 8000
DHA 162 / DMX 8050
DHA 163 / DMX 8100
DHA 164 / DMX 8150
DHA 165 / DMX 8200
DHA 166 / DMX 8250
DHA 167 / DMX 8300
DHA 168 / DMX 8350
DHA 169 / DMX 8400
DHA 170 / DMX 8450
DHA 171 / DMX 8500
DHA 172 / DMX 8550
DHA 173 / DMX 8600
DHA 174 / DMX 8650
DHA 175 / DMX 8700
DHA 176 / DMX 8750
DHA 177 / DMX 8800
DHA 178 / DMX 8850
DHA 179 / DMX 8900
DHA 180 / DMX 8950
DHA 181 / DMX 9000
DHA 182 / DMX 9050
DHA 183 / DMX 9100
DHA 184 / DMX 9150
DHA 185 / DMX 9200
DHA 186 / DMX 9250
DHA 187 / DMX 9300
DHA 188 / DMX 9350
DHA 189 / DMX 9400
DHA 190 / DMX 9450
DHA 191 / DMX 9500
DHA 192 / DMX 9550
DHA 193 / DMX 9600
DHA 194 / DMX 9650
DHA 195 / DMX 9700
DHA 196 / DMX 9750
DHA 197 / DMX 9800
DHA 198 / DMX 9850
DHA 199 / DMX 9900
DHA 200 / DMX 9950
DHA 201 / DMX 10000
DHA 202 / DMX 10050
DHA 203 / DMX 10100
DHA 204 / DMX 10150
DHA 205 / DMX 10200
DHA 206 / DMX 10250
DHA 207 / DMX 10300
DHA 208 / DMX 10350
DHA 209 / DMX 10400
DHA 210 / DMX 10450
Catalyst™ User Manual
Library Content
D-9
D
DHA 211 / DMX 10500
DHA 212 / DMX 10550
DHA 213 / DMX 10600
DHA 214 / DMX 10650
DHA 215 / DMX 10700
DHA 216 / DMX 10750
DHA 217 / DMX 10800
DHA 218 / DMX 10850
DHA 219 / DMX 10900
DHA 220 / DMX 10950
DHA 221 / DMX 11000
DHA 222 / DMX 11050
DHA 223 / DMX 11100
DHA 224 / DMX 11150
DHA 225 / DMX 11200
DHA 226 / DMX 11250
DHA 227 / DMX 11300
DHA 228 / DMX 11350
DHA 229 / DMX 11400
DHA 230 / DMX 11450
DHA 231 / DMX 11500
DHA 232 / DMX 11550
DHA 233 / DMX 11600
DHA 234 / DMX 11650
DHA 235 / DMX 11700
DHA 236 / DMX 11750
DHA 237 / DMX 11800
DHA 238 / DMX 11850
DHA 239 / DMX 11900
DHA 240 / DMX 11950
DHA 241 / DMX 12000
DHA 242 / DMX 12050
DHA 243 / DMX 12100
DHA 244 / DMX 12150
DHA 245 / DMX 12200
DHA 246 / DMX 12250
DHA 247 / DMX 12300
DHA 248 / DMX 12350
DHA 249 / DMX 12400
DHA 250 / DMX 12450
DHA 251 / DMX 12500
DHA 252 / DMX 12550
DHA 253 / DMX 12600
DHA 254 / DMX 12650
DHA 255 / DMX 12700
DHA 256 / DMX 12750
DHA 257 / DMX 12800
DHA 258 / DMX 12850
DHA 259 / DMX 12900
DHA 260 / DMX 12950
DHA 261 / DMX 13000
DHA 262 / DMX 13050
DHA 263 / DMX 13100
DHA 264 / DMX 13150
DHA 265 / DMX 13200
DHA 266 / DMX 13250
DHA 267 / DMX 13300
DHA 268 / DMX 13350
DHA 269 / DMX 13400
DHA 270 / DMX 13450
DHA 271 / DMX 13500
DHA 272 / DMX 13550
DHA 273 / DMX 13600
DHA 274 / DMX 13650
DHA 275 / DMX 13700
DHA 276 / DMX 13750
DHA 277 / DMX 13800
DHA 278 / DMX 13850
DHA 279 / DMX 13900
DHA 280 / DMX 13950
D-10
Library Content
Catalyst™ User Manual
DHA 281 / DMX 14000
DHA 282 / DMX 14050
DHA 283 / DMX 14100
DHA 284 / DMX 14150
DHA 285 / DMX 14200
DHA 286 / DMX 14250
DHA 287 / DMX 14300
DHA 288 / DMX 14350
DHA 289 / DMX 14400
DHA 290 / DMX 14450
DHA 291 / DMX 14500
DHA 292 / DMX 14550
DHA 293 / DMX 14600
DHA 294 / DMX 14650
DHA 295 / DMX 14700
DHA 296 / DMX 14750
DHA 297 / DMX 14800
DHA 298 / DMX 14850
DHA 299 / DMX 14900
DHA 300 / DMX 14950
DHA 301 / DMX 15000
DHA 302 / DMX 15050
DHA 303 / DMX 15100
DHA 304 / DMX 15150
DHA 305 / DMX 15200
DHA 306 / DMX 15250
DHA 307 / DMX 15300
DHA 308 / DMX 15350
DHA 309 / DMX 15400
DHA 310 / DMX 15450
DHA 311 / DMX 15500
DHA 312 / DMX 15550
DHA 313 / DMX 15600
DHA 314 / DMX 15650
DHA 315 / DMX 15700
DHA 316 / DMX 15750
DHA 317 / DMX 15800
DHA 318 / DMX 15850
DHA 319 / DMX 15900
DHA 320 / DMX 15950
DHA 321 / DMX 16000
DHA 322 / DMX 16050
DHA 323 / DMX 16100
DHA 324 / DMX 16150
DHA 325 / DMX 16200
DHA 326 / DMX 16250
DHA 327 / DMX 16300
DHA 328 / DMX 16350
DHA 329 / DMX 16400
DHA 330 / DMX 16450
DHA 331 / DMX 16500
DHA 332 / DMX 16550
DHA 333 / DMX 16600
DHA 334 / DMX 16650
DHA 335 / DMX 16700
DHA 336 / DMX 16750
DHA 337 / DMX 16800
DHA 338 / DMX 16850
DHA 339 / DMX 16900
DHA 340 / DMX 16950
DHA 341 / DMX 17000
DHA 342 / DMX 17050
DHA 343 / DMX 17100
DHA 344 / DMX 17150
DHA 345 / DMX 17200
DHA 346 / DMX 17250
DHA 347 / DMX 17300
DHA 348 / DMX 17350
DHA 349 / DMX 17400
DHA 350 / DMX 17450
Catalyst™ User Manual
Library Content D-11
D
DHA 351 / DMX 17500
DHA 352 / DMX 17550
DHA 353 / DMX 17600
DHA 354 / DMX 17650
DHA 355 / DMX 17700
DHA 356 / DMX 17750
DHA 357 / DMX 17800
DHA 358 / DMX 17850
DHA 359 / DMX 17900
DHA 360 / DMX 17950
DHA 361 / DMX 18000
DHA 362 / DMX 18050
DHA 363 / DMX 18100
DHA 364 / DMX 18150
DHA 365 / DMX 18200
DHA 366 / DMX 18250
DHA 367 / DMX 18300
DHA 368 / DMX 18350
DHA 369 / DMX 18400
DHA 370 / DMX 18450
DHA 371 / DMX 18500
DHA 372 / DMX 18550
DHA 373 / DMX 18600
DHA 374 / DMX 18650
DHA 375 / DMX 18700
DHA 376 / DMX 18750
DHA 377 / DMX 18800
DHA 378 / DMX 18850
DHA 379 / DMX 18900
DHA 380 / DMX 18950
DHA 381 / DMX 19000
DHA 382 / DMX 19050
DHA 383 / DMX 19100
DHA 384 / DMX 19150
DHA 385 / DMX 19200
DHA 386 / DMX 19250
DHA 387 / DMX 19300
DHA 388 / DMX 19350
DHA 389 / DMX 19400
DHA 390 / DMX 19450
DHA 391 / DMX 19500
DHA 392 / DMX 19550
DHA 393 / DMX 19600
DHA 394 / DMX 19650
DHA 395 / DMX 19700
DHA 396 / DMX 19750
DHA 397 / DMX 19800
DHA 398 / DMX 19850
DHA 399 / DMX 19900
DHA 400 / DMX 19950
DHA 401 / DMX 20000
DHA 402 / DMX 20050
DHA 403 / DMX 20100
DHA 404 / DMX 20150
DHA 405 / DMX 20200
DHA 406 / DMX 20250
DHA 407 / DMX 20300
DHA 408 / DMX 20350
DHA 409 / DMX 20400
DHA 410 / DMX 20450
DHA 411 / DMX 20500
DHA 412 / DMX 20550
DHA 413 / DMX 20600
DHA 414 / DMX 20650
DHA 415 / DMX 20700
DHA 416 / DMX 20750
DHA 417 / DMX 20800
DHA 418 / DMX 20850
DHA 419 / DMX 20900
DHA 420 / DMX 20950
D-12
Library Content
Catalyst™ User Manual
DHA 421 / DMX 21000
DHA 422 / DMX 21050
DHA 423 / DMX 21100
DHA 424 / DMX 21150
DHA 425 / DMX 21200
DHA 426 / DMX 21250
DHA 427 / DMX 21300
DHA 428 / DMX 21350
DHA 429 / DMX 21400
DHA 430 / DMX 21450
DHA 431 / DMX 21500
DHA 432 / DMX 21550
DHA 433 / DMX 21600
DHA 434 / DMX 21650
DHA 435 / DMX 21700
DHA 436 / DMX 21750
DHA 437 / DMX 21800
DHA 438 / DMX 21850
DHA 439 / DMX 21900
DHA 440 / DMX 21950
DHA 441 / DMX 22000
DHA 442 / DMX 22050
DHA 443 / DMX 22100
DHA 444 / DMX 22150
DHA 445 / DMX 22200
DHA 446 / DMX 22250
DHA 447 / DMX 22300
DHA 448 / DMX 22350
DHA 449 / DMX 22400
DHA 450 / DMX 22450
DHA 451 / DMX 22500
DHA 452 / DMX 22550
DHA 453 / DMX 22600
DHA 454 / DMX 22650
DHA 455 / DMX 22700
DHA 456 / DMX 22750
DHA 457 / DMX 22800
DHA 458 / DMX 22850
DHA 459 / DMX 22900
DHA 460 / DMX 22950
DHA 461 / DMX 23000
DHA 462 / DMX 23050
DHA 463 / DMX 23100
DHA 464 / DMX 23150
DHA 465 / DMX 23200
DHA 466 / DMX 23250
DHA 467 / DMX 23300
DHA 468 / DMX 23350
DHA 469 / DMX 23400
DHA 470 / DMX 23450
DHA 471 / DMX 23500
DHA 472 / DMX 23550
DHA 473 / DMX 23600
DHA 474 / DMX 23650
DHA 475 / DMX 23700
DHA 476 / DMX 23750
DHA 477 / DMX 23800
DHA 478 / DMX 23850
DHA 479 / DMX 23900
DHA 480 / DMX 23950
DHA 481 / DMX 24000
DHA 482 / DMX 24050
DHA 483 / DMX 24100
DHA 484 / DMX 24150
DHA 485 / DMX 24200
DHA 486 / DMX 24250
DHA 487 / DMX 24300
DHA 488 / DMX 24350
DHA 489 / DMX 24400
DHA 490 / DMX 24450
Catalyst™ User Manual
Library Content D-13
D
DHA 491 / DMX 24500
DHA 492 / DMX 24550
DHA 493 / DMX 24600
DHA 494 / DMX 24650
DHA 495 / DMX 24700
DHA 496 / DMX 24750
DHA 497 / DMX 24800
DHA 498 / DMX 24850
DHA 499 / DMX 24900
DHA 500 / DMX 24950
DHA 501 / DMX 25000
DHA 502 / DMX 25050
DHA 503 / DMX 25100
DHA 504 / DMX 25150
DHA 505 / DMX 25200
DHA 506 / DMX 25250
DHA 507 / DMX 25300
DHA 508 / DMX 25350
DHA 509 / DMX 25400
DHA 510 / DMX 25450
DHA 511 / DMX 25500
DHA 512 / DMX 25550
DHA 513 / DMX 25600
DHA 514 / DMX 25650
DHA 515 / DMX 25700
DHA 516 / DMX 25750
DHA 517 / DMX 25800
DHA 518 / DMX 25850
DHA 519 / DMX 25900
DHA 520 / DMX 25950
DHA 521 / DMX 26000
DHA 522 / DMX 26050
DHA 523 / DMX 26100
DHA 524 / DMX 26150
DHA 525 / DMX 26200
DHA 526 / DMX 26250
DHA 527 / DMX 26300
DHA 528 / DMX 26350
DHA 529 / DMX 26400
DHA 530 / DMX 26450
DHA 531 / DMX 26500
DHA 532 / DMX 26550
DHA 533 / DMX 26600
DHA 534 / DMX 26650
DHA 535 / DMX 26700
DHA 536 / DMX 26750
DHA 537 / DMX 26800
DHA 538 / DMX 26850
DHA 539 / DMX 26900
DHA 540 / DMX 26950
DHA 541 / DMX 27000
DHA 542 / DMX 27050
DHA 543 / DMX 27100
DHA 544 / DMX 27150
DHA 545 / DMX 27200
DHA 546 / DMX 27250
DHA 547 / DMX 27300
DHA 548 / DMX 27350
DHA 549 / DMX 27400
DHA 550 / DMX 27450
DHA 551 / DMX 27500
DHA 552 / DMX 27550
DHA 553 / DMX 27600
DHA 554 / DMX 27650
DHA 555 / DMX 27700
DHA 556 / DMX 27750
DHA 557 / DMX 27800
DHA 558 / DMX 27850
DHA 559 / DMX 27900
DHA 560 / DMX 27950
D-14
Library Content
Catalyst™ User Manual
DHA 561 / DMX 28000
DHA 562 / DMX 28050
DHA 563 / DMX 28100
DHA 564 / DMX 28150
DHA 565 / DMX 28200
DHA 566 / DMX 28250
DHA 567 / DMX 28300
DHA 568 / DMX 28350
DHA 569 / DMX 28400
DHA 570 / DMX 28450
DHA 571 / DMX 28500
DHA 572 / DMX 28550
DHA 573 / DMX 28600
DHA 574 / DMX 28650
DHA 575 / DMX 28700
DHA 576 / DMX 28750
DHA 577 / DMX 28800
DHA 578 / DMX 28850
DHA 579 / DMX 28900
DHA 580 / DMX 28950
DHA 581 / DMX 29000
DHA 582 / DMX 29050
DHA 583 / DMX 29100
DHA 584 / DMX 29150
DHA 585 / DMX 29200
DHA 586 / DMX 29250
DHA 587 / DMX 29300
DHA 588 / DMX 29350
DHA 589 / DMX 29400
DHA 590 / DMX 29450
DHA 591 / DMX 29500
DHA 592 / DMX 29550
DHA 593 / DMX 29600
DHA 594 / DMX 29650
DHA 595 / DMX 29700
DHA 596 / DMX 29750
DHA 597 / DMX 29800
DHA 598 / DMX 29850
DHA 599 / DMX 29900
DHA 600 / DMX 29950
DHA 601 / DMX 30000
DHA 602 / DMX 30050
DHA 603 / DMX 30100
DHA 604 / DMX 30150
DHA 605 / DMX 30200
DHA 606 / DMX 30250
DHA 607 / DMX 30300
DHA 608 / DMX 30350
DHA 609 / DMX 30400
DHA 610 / DMX 30450
DHA 611 / DMX 30500
DHA 612 / DMX 30550
DHA 613 / DMX 30600
DHA 614 / DMX 30650
DHA 615 / DMX 30700
DHA 616 / DMX 30750
DHA 617 / DMX 30800
DHA 618 / DMX 30850
DHA 619 / DMX 30900
DHA 620 / DMX 30950
DHA 621 / DMX 31000
DHA 622 / DMX 31050
DHA 623 / DMX 31100
DHA 624 / DMX 31150
DHA 625 / DMX 31200
DHA 626 / DMX 31250
DHA 627 / DMX 31300
DHA 628 / DMX 31350
DHA 629 / DMX 31400
DHA 630 / DMX 31450
Catalyst™ User Manual
Library Content D-15
D
DHA 631 / DMX 31500
DHA 632 / DMX 31550
DHA 633 / DMX 31600
DHA 634 / DMX 31650
DHA 635 / DMX 31700
DHA 636 / DMX 31750
DHA 637 / DMX 31800
DHA 638 / DMX 31850
DHA 639 / DMX 31900
DHA 640 / DMX 31950
DHA 641 / DMX 32000
DHA 642 / DMX 32050
DHA 643 / DMX 32100
DHA 644 / DMX 32150
DHA 645 / DMX 32200
DHA 646 / DMX 32250
DHA 647 / DMX 32300
DHA 648 / DMX 32350
DHA 649 / DMX 32400
DHA 650 / DMX 32450
DHA 651 / DMX 32500
DHA 652 / DMX 32550
DHA 653 / DMX 32600
DHA 654 / DMX 32650
DHA 655 / DMX 32700
DHA 656 / DMX 32750
DHA 657 / DMX 32800
DHA 658 / DMX 32850
DHA 659 / DMX 32900
DHA 660 / DMX 32950
DHA 661 / DMX 33000
DHA 662 / DMX 33050
DHA 663 / DMX 33100
DHA 664 / DMX 33150
DHA 665 / DMX 33200
DHA 666 / DMX 33250
DHA 667 / DMX 33300
DHA 668 / DMX 33350
DHA 669 / DMX 33400
DHA 670 / DMX 33450
DHA 671 / DMX 33500
DHA 672 / DMX 33550
DHA 673 / DMX 33600
DHA 674 / DMX 33650
DHA 675 / DMX 33700
DHA 676 / DMX 33750
DHA 677 / DMX 33800
DHA 678 / DMX 33850
DHA 679 / DMX 33900
DHA 680 / DMX 33950
DHA 681 / DMX 34000
DHA 682 / DMX 34050
DHA 683 / DMX 34100
DHA 684 / DMX 34150
DHA 685 / DMX 34200
DHA 686 / DMX 34250
DHA 687 / DMX 34300
DHA 688 / DMX 34350
DHA 689 / DMX 34400
DHA 690 / DMX 34450
DHA 691 / DMX 34500
DHA 692 / DMX 34550
DHA 693 / DMX 34600
DHA 694 / DMX 34650
DHA 695 / DMX 34700
DHA 696 / DMX 34750
DHA 697 / DMX 34800
DHA 698 / DMX 34850
DHA 699 / DMX 34900
DHA 700 / DMX 34950
D-16
Library Content
Catalyst™ User Manual
DHA 701 / DMX 35000
DHA 702 / DMX 35050
DHA 703 / DMX 35100
DHA 704 / DMX 35150
DHA 705 / DMX 35200
DHA 706 / DMX 35250
DHA 707 / DMX 35300
DHA 708 / DMX 35350
DHA 709 / DMX 35400
DHA 710 / DMX 35450
DHA 711 / DMX 35500
DHA 712 / DMX 35550
DHA 713 / DMX 35600
DHA 714 / DMX 35650
DHA 715 / DMX 35700
DHA 716 / DMX 35750
DHA 717 / DMX 35800
DHA 718 / DMX 35850
DHA 719 / DMX 35900
DHA 720 / DMX 35950
DHA 721 / DMX 36000
DHA 722 / DMX 36050
DHA 723 / DMX 36100
DHA 724 / DMX 36150
DHA 725 / DMX 36200
DHA 726 / DMX 36250
DHA 727 / DMX 36300
DHA 728 / DMX 36350
DHA 729 / DMX 36400
DHA 730 / DMX 36450
DHA 731 / DMX 36500
DHA 732 / DMX 36550
DHA 733 / DMX 36600
DHA 734 / DMX 36650
DHA 735 / DMX 36700
DHA 736 / DMX 36750
DHA 737 / DMX 36800
DHA 738 / DMX 36850
DHA 739 / DMX 36900
DHA 740 / DMX 36950
DHA 741 / DMX 37000
DHA 742 / DMX 37050
DHA 743 / DMX 37100
DHA 744 / DMX 37150
DHA 745 / DMX 37200
DHA 746 / DMX 37250
DHA 747 / DMX 37300
DHA 748 / DMX 37350
DHA 749 / DMX 37400
DHA 750 / DMX 37450
DHA 751 / DMX 37500
DHA 752 / DMX 37550
DHA 753 / DMX 37600
DHA 754 / DMX 37650
DHA 755 / DMX 37700
DHA 756 / DMX 37750
DHA 757 / DMX 37800
DHA 758 / DMX 37850
DHA 759 / DMX 37900
DHA 760 / DMX 37950
DHA 761 / DMX 38000
DHA 762 / DMX 38050
DHA 763 / DMX 38100
DHA 764 / DMX 38150
DHA 765 / DMX 38200
DHA 766 / DMX 38250
DHA 767 / DMX 38300
DHA 768 / DMX 38350
DHA 769 / DMX 38400
DHA 770 / DMX 38450
Catalyst™ User Manual
Library Content D-17
D
DHA 771 / DMX 38500
DHA 772 / DMX 38550
DHA 773 / DMX 38600
DHA 774 / DMX 38650
DHA 775 / DMX 38700
DHA 776 / DMX 38750
DHA 777 / DMX 38800
DHA 778 / DMX 38850
DHA 779 / DMX 38900
DHA 780 / DMX 38950
DHA 781 / DMX 39000
DHA 782 / DMX 39050
DHA 783 / DMX 39100
DHA 784 / DMX 39150
DHA 785 / DMX 39200
DHA 786 / DMX 39250
DHA 787 / DMX 39300
DHA 788 / DMX 39350
DHA 789 / DMX 39400
DHA 790 / DMX 39450
DHA 791 / DMX 39500
DHA 792 / DMX 39550
DHA 793 / DMX 39600
DHA 794 / DMX 39650
DHA 795 / DMX 39700
DHA 796 / DMX 39750
DHA 797 / DMX 39800
DHA 798 / DMX 39850
DHA 799 / DMX 39900
DHA 800 / DMX 39950
DHA 801 / DMX 40000
DHA 802 / DMX 40050
DHA 803 / DMX 40100
DHA 804 / DMX 40150
DHA 805 / DMX 40200
DHA 806 / DMX 40250
DHA 807 / DMX 40300
DHA 808 / DMX 40350
DHA 809 / DMX 40400
DHA 810 / DMX 40450
DHA 811 / DMX 40500
DHA 812 / DMX 40550
DHA 813 / DMX 40600
DHA 814 / DMX 40650
DHA 815 / DMX 40700
DHA 816 / DMX 40750
DHA 817 / DMX 40800
DHA 818 / DMX 40850
DHA 819 / DMX 40900
DHA 820 / DMX 40950
DHA 821 / DMX 41000
DHA 822 / DMX 41050
DHA 823 / DMX 41100
DHA 824 / DMX 41150
DHA 825 / DMX 41200
DHA 826 / DMX 41250
DHA 827 / DMX 41300
DHA 828 / DMX 41350
DHA 829 / DMX 41400
DHA 830 / DMX 41450
DHA 831 / DMX 41500
DHA 832 / DMX 41550
DHA 833 / DMX 41600
DHA 834 / DMX 41650
DHA 835 / DMX 41700
DHA 836 / DMX 41750
DHA 837 / DMX 41800
DHA 838 / DMX 41850
DHA 839 / DMX 41900
D-18
Library Content
Catalyst™ User Manual