1
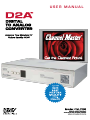
USER MANUAL
CM-7000 D2A DIGITAL TO ANALOG CONVERTER
PLEASE READ THIS OWNER’S GUIDE
Please take the time to follow this owner’s guide carefully. It will help you set up and operate
your system properly, and enjoy all of its advanced features. Save your owner’s guide for future
reference.
WARNING: To reduce the risk of fire or electric shock, do not expose the system to rain or
moisture.
WARNING: This apparatus shall not be exposed to dripping or splashing, and objects filled with
liquids, such as vases, shall not be placed on the apparatus. As with any electronic products, use care
not to spill liquids in any part of the system. Liquids can cause a failure and/or a fire hazard.
The CAUTION marks shown here are located on the back of your CM-7000 D2A Digital to Analog
Converter.
The lightning flash with arrowhead symbol, within an equilateral triangle, alerts the user to the
presence of uninsulated dangerous voltage within the system enclosure that may be of sufficient
magnitude to constitute a risk of electric shock.
The exclamation point within an equilateral triangle alerts the user to the presence of important
operating and maintenance instructions in this owner’s guide.
CAUTION
To prevent electric shock, match wide blade of plug to wide slot, insert
fully.
CAUTION
No open flame sources, such as lighted candles, should be placed on the
apparatus.
BATTERIES
Please dispose of used batteries properly, following any local regulations. Do not incinerate.
© 2010 Channel Master. Channel Master is a registered trademark. All rights reserved. No part of this document may be
reproduced, modified, distributed or otherwise used without written permission. The distinctive design of the D2A Digital
Converter is a trademark of Channel Master.
The Channel Master logo is used under licensed agreement.
Manufactured under license from Dolby Laboratories. “Dolby” and the double-D symbol are trademarks of Dolby Laboratories.
Confidential Unpublished Works. © 1992-1997 Dolby Laboratories. All rights reserved.
CM-7000 D2A DIGITAL TO ANALOG CONVERTER
TABLE OF CONTENTS
Q U I C K S E T - U P G U I D E .. . . . . . . . . . . . . . . . . . . . 2
digital tv transition . . . . . . . . . . . . . . . . 2
I N T R O D U C T I O n .. . . . . . . . . . . . . . . . . . . . . . . . . . . . . 3
Features.................................................................................. 3
S A F E T Y .. . . . . . . . . . . . . . . . . . . . . . . . . . . . . . . . . . . . . . . . 3
S P E C I F I C A T I O N S .. . . . . . . . . . . . . . . . . . . . . . . . . . . 4
C O N N E C T I N G - a N T E N N A .. . . . . . . . . . . . . . 5
CM-7000 to TV using RF Coaxial Cable......................... 5
CM-7000 to VCR using RF Coaxial Cable...................... 5
CM-7000 to TV using RCA Cable..................................... 6
CM-7000 to TV using RCA Cable & S-Video Cable..... 6
Analog Pass Through............................................................ 7
Audio/Video.......................................................................... 8
M E N U T R E E .. . . . . . . . . . . . . . . . . . . . . . . . . . . . . . . . . . 9
R E M O T E C O N T R O L .. . . . . . . . . . . . . . . . . . . . . . . . 1 0
O N L I N E G U I D E .. . . . . . . . . . . . . . . . . . . . . . . . . . . . . . 1 1
Channel Banner..................................................................... 11
Information Banner............................................................... 11
Menu........................................................................................ 12
Menu - Channel Edit............................................................. 12
Channel Scan......................................................................... 13
Re-Scanning for Digital Channels...................................... 13
Set Up..................................................................................... 14
Set Up - Closed Caption..................................................... 15
Turn Closed Caption On/Off............................................. 15
Set Up - Parental Control.................................................... 16
Quick Menu - Audio.............................................................. 16
C ontact / W arranty . . . . . . . . . . . . . . . . . . . 1 7
1
CM-7000 D2A DIGITAL TO ANALOG CONVERTER
QUICK SET-UP GUIDE
c onnect t h e C M - 7 0 0 0 u s i n g o n e o f t h e m e t h ods that best matches the
c onnect i o n s o n yo u r T V (s e e p a g e s 5 t o 8 ) .
1. Sele c t e i t h e r C h a n n e l 3 or 4 w i t h t h e C H 3 /CH4 switch on the back of
the C M - 7 0 0 0 .
a. S e t y ou r T V t o t h e c o r r e s p o n d i n g C h a n n el 3 or 4 if connecting via RF
COAXIAL CABLE (page 5).
b. S e t y o u r T V t o V I D E O o r A U X I L I A RY i f c onnecting via RCA or RCA &
S-VIDEO CABLE (page 6).
2. Pres s M E N U o n t h e C M - 7 0 0 0 r e m ot e . T h e main menu should appear on
the T V s c r e e n .
3. Pres s t h e pq b u t t o n a n d “ T E R RE S T RI A L ” s h ould appear on the menu.
4. Pres s O K b u t t o n 3 t i m e s t o s t a r t t h e A U T O CHANNEL SCAN.
5. Whe n t h e A U T O SC A N i s c o m p l e t e , p r e s s E X IT.
begi n w a t c h i n g d i g i t a l T V .
Use the pq buttons to
See pages 4 to 7 to view image details.
INFORMATION REGARDING THE DIGITAL TV TRANSITION
June 12, 2009, television receivers with only
an analog broadcast tuner started requiring
a converter box to receive full power, over
the air broadcasts with an antenna due to
the USA’s nationwide transition to digital
broadcasting. Analog only TVs continue to
work as before to receive low power, Class
A or translator TV stations, cable/satellite
services, gaming consoles, VCRs, DVD players,
and similar products.
Information about the DTV transition is
available at:
www.DTV.gov or 1.888.CALL.FCC
2
Information about subsidized coupons for
digital to analog converter boxes (like the
CM-7000) is available at:
www.dtv2009.gov or 1.888.DTV.2009
The CM-7000 digital to analog convert box
is capable of receiving digital broadcasts
via a TV antenna and displays them on an
analog TV set. This converter box does not
include analog pass through, so the use of an
A/B switch or splitter is required to receive
both digital and analog signals from one
antenna (see pages 7 and 8).
CM-7000 D2A DIGITAL TO ANALOG CONVERTER
INTRODUCTION
The Channel Master by PCT CM-7000 is a high quality
HD/SD (high definition/standard definition) digital ATSC
to analog NTSC television converter box. Using the CM7000 for direct terrestrial FTA HD reception allows users
to view HD programs on SD TV sets.
The combination of a CM-7000 Digital Analog Converter
with a Channel Master digital antenna is a perfect
solution for terrestrial reception in a very wide range of
reception conditions and landscape relief.
FEATURES
Power LED
Light*
On/Off
For energy saving, which is in compliance with NTIA
recommendations, the Auto-Sleep Function activates
Standby mode four (4) hours after last user entry from
the remote control, but not before the end of a currently
viewed event.
Channel Channel
Down
Up
IR Remote Window
Not a display window
• Converts all digital video formats,
including HD (High Definition) into
SD (standard definition)
analog format
• Easy installation and operation
• Automatic and manual programming
• Electronic Program Guide (EPG) support
• On Screen Display (OSD)
• Closed Caption (CC)
• Full function remote control
* Green = ON, Orange = Stand-By, Red = Booting Up
• Low power consumption
Note: Initial boot up process occurs when the unit is
• Auto-Sleep function
first plugged in. Boot up may take up to 45 seconds
to complete and is followed by a green LED.
SAFETY!
POWER
Power this box only from a power source within the specified voltage range
To prevent electrical shock, be sure the electrical plug used on the box’s power cord matches
the electrical outlet in use.
Do not open the top cover when the box is plugged into an electrical outlet.
CONNECTION
Connect all peripheral devices before plugging the power cord into the electrical outlet.
Unplug power cord from the electrical outlet before disconnecting any peripheral devices.
GROUNDING
Terrestrial antenna must be grounded to provide protection from lightning and build-up of
static electricity.
LIGHTNING
For protection from lightning or when the box is left unattended for a long period, disconnect
it from the power source.
VENTILATION
The slots on the top of the CM-7000 must be left uncovered to allow proper airflow to the unit.
Do not cover the top with fabric, paper, or other materials.
Do not stack electronic equipment on top of the CM-7000.
OVERHEATING
Do not install this box on soft furnishings or carpet.
Do not expose this box to direct sunlight or place it near a heater.
Do not install this box in small or non-ventilated openings between furniture.
LIQUIDS
This box should not be exposed to liquids nor should objects filled with liquid be placed on
top of the box.
ENVIRONMENT
CM-7000 is for indoor use only under specified conditions.
CLEANING
Disconnect the box from the electrical outlet before cleaning.
Use a light damp cloth (no solvents) to clean the box.
3
CM-7000 D2A DIGITAL TO ANALOG CONVERTER
SPECIFICATIONS
TUNER
Frequency Range
Input Impedance
Input Connector
Channel Bandwith
Input Dynamic Range
DEMODULATOR
Type
Performance
Input Video Formats
VIDEO
Output Format
Aspect Ratio
CONNECTORS
Video
Composite Video
Component Video
Audio
Left / Right
RF MODULATOR
Output RF Connector
Channel
POWER
Supply
Consumption “ON”
Consumption “STANDBY”
Auto-Sleep Mode
GENERAL
Dimensions (W x L x H)
Weight
ENVIRONMENT
Operating Temperature
Relative Humidity
4
54 to 864 MHz
75 Ohm
F-Type, Female
6 MHz
-83 to -5 dBM / SNR - 15 dB
8VSB / ATSC A/53 compliant
ATSC A/74 compliant
1080i, 720p, 480i, 480;
480i
4:3 / 16:9 with letter box pan and scan
RCA
S-Video
RCA, Stereo
F-Type, Female
3 / 4, Selectable, Mono Audio
120 VAC / 60 Hz
8W
2W
4 hours after last remote control entry
22 x 16 x 4 cm / 8.7 x 6.3 x 1.6 in
0.9 kg / 2.0 lbs
0 to 60° C / 32 to 140° F
10 to 90% noncondensing
CM-7000 D2A DIGITAL TO ANALOG CONVERTER
CONNECTING - ANTENNA
CONNEC T I N G C M - 7 0 0 0 T O A T V U S I N G RF coaxial CABLE
FIGURE 1
Terrestrial Antenna
(outdoor or indoor)
CVBS L R
Back of TV
Back of CM-7000
GOOD
ANT IN
RF Coaxial Cable
CONNEC T I N G C M - 7 0 0 0 T O A V C R U S I N G RF C O AXIAL CABLE
FIGURE 2
Terrestrial Antenna
(outdoor or indoor)
CVBS L R
ANT IN
Back of TV
RF Coaxial Cable
Back of CM-7000
GOOD
RF Coaxial Cable
OUT
IN
Back of VCR
5
CM-7000 D2A DIGITAL TO ANALOG CONVERTER
CONNECTING - ANTENNA
CONNEC T I N G C M - 7 0 0 0 T O A T V U S I N G RC A C A BLE
FIGURE 3
Terrestrial Antenna
(outdoor or indoor)
CVBS L R
Back of TV
Back of CM-7000
BETTER
ANT IN
RCA Audio/Video Cable
CONNEC T I N G C M - 7 0 0 0 T O A T V U S I N G RC A & S -VIDEO CABLE
FIGURE 4
Terrestrial Antenna
(outdoor or indoor)
CVBS L R
Back of TV
Back of CM-7000
BEST
Audio RCA Cable
S-Video Cable
6
ANT IN
CM-7000 D2A DIGITAL TO ANALOG CONVERTER
CONNECTING - ANTENNA
A nalog pass through
1. Sele c t e i t h e r C h a n n e l 3 or 4 w i t h t h e C H 3 /CH4 switch on the back of
the C M - 7 0 0 0 .
a. S e t y ou r T V t o t h e c o r r e s p o n d i n g C h a n n e l 3 or 4 if connecting via RF
COAXIAL CABLE.
b. S e t y o u r T V t o V I D E O o r A U X I L I A RY i f c onnecting via RCA or RCA &
S - V I D E O C A B L E.
2. Pres s M E N U o n t h e C M - 7 0 0 0 r e m ot e . T h e main menu should appear on
the T V s c r e e n .
3. Pres s t h e pq b u t t o n a n d “ T E RR E S T RI A L ” s h ould appear on the menu.
4. Pres s O K b u t t o n 3 t i m e s t o s t a r t t h e A U T O CHANNEL SCAN.
5. Whe n t h e A U T O S C A N i s c o m p l e t e , p r e s s E X IT.
begi n w a t c h i n g d i g i t a l T V .
1.
2.
3.
Use the pq buttons to
CM-7000 is connected to TV set via audio / video.
Antenna is connected to TV tuner.
Tune to analog channels with TV and select AV input for CM-7000.
Terrestrial
Antenna
(outdoor)
Back of TV
Antenna In
Back of CM-7000
CVBS L R
ANT IN
Splitter
RCA Audio/Video Cable
RF Coaxial Cable
7
CM-7000 D2A DIGITAL TO ANALOG CONVERTER
CONNECTING - ANTENNA
VIA SPL I T T E R combiner using filtering device hookup
1.
2.
3.
Terrestrial
Antenna
(outdoor)
Antenna is connected to TV tuner and CM-7000.
Converter box modulator is combined with antenna using a Ch 3/4 combiner
that filters 3 and 4 from the antenna side to reduce interference.
Select ??? to watch analog signals and ??? to watch digital signals
via CM-7000.
Antenna In
Back of CM-7000
Ch 3 or 4
RF Out
Ch 3 or 4
Back of TV
CVBS L R
Splitter
RF Coaxial Cable
8
IN
TV 3/4
Ch 3/4 Combiner
RF Coaxial Cable
ANT IN
CM-7000 D2A DIGITAL TO ANALOG CONVERTER
MENU TREE
Detail of the set- up functions.
MENU
CHANNEL EDIT
ALL
CHANNEL SCAN
TERRESTRIAL
CLOSED
CAPTIONED
SET UP
PARENTAL
CONTROL
CLOCK
SERVICE
PASSWORD
FAVORITES
LANGUAGE
PREFERENCES
MOVIE
RATING
DELETED
universal rc
TV
RATING
LOCKED
DEFAULTS
ADDITIONAL
RATING
VERSION
LOCK
AUTO
POWER DOWN
SET UP M E N U F U N C TI O N S
C LOCK
Sets date and time. Has auto or manual setting. Auto
setting is recommended. To set:
1. Press Menu
2. Use p q menu buttons to select SET UP screen
3. Press OK to select CLOCK
4. Press OK to select DATE and TIME
5. Use p q buttons to select AUTO DATE and
TIME
6. Press right button to select TIME ZONE
7. Use p q buttons to change TIME ZONE
8. Press u button to select DST
9. Use p q buttons to change DST
10. Press Exit to store
L ANGUAGE
Used to select between three (3) different onscreen
display languages. To change:
1. Press Menu
2. Use p q buttons to select SET UP screen
3. Press OK to select LANGUAGE
4. Use p q buttons to change LANGUAGE choice
5. Press OK to select
6. Press Exit to store
U niversal RC
Universal remote control function. Used to turn on or off
the universal remote control function. Factory setting is
set to ON. Use the Pioneer Cable Box code if using
a universal remote. If using a Channel Master remote
controlled rotator, you may turn the universal remote
control feature OFF to avoid conflicts between the rotator
remote control and the converter box. To turn OFF:
1. Press Menu
2. Use p q buttons to select SETUP screen
3.
4.
5.
6.
7.
Press OK to select Universal RC
Press OK to select ON
Press pq buttons to change to OFF
Press OK
Press Exit to store
defaults
Restores setting to factory default settings. The default
password is 0000. To reset password:
1. Press Menu
2. Use pq buttons to select PARENTAL CONTROL
screen
3. Press OK to select PASSWORD
4. Press OK then q button to select NEW
PASSWORD
5. Enter 0000 in new password field
6. Press q button to select RESET PASSWORD
7. Press OK
8. Password is now set to 0000
A uto power down
Turns unit off after four (4) hours without user input.
This is a required, energy saving feature. Factory default
is ON and the unit will shut OFF after four (4) hours
without user input (ex: pressing CH+, CH-, or Info).
To turn off this feature:
1. Press Menu
2. Use pq buttons to select SET UP screen
3. Press OK and a warning screen appears
4. Press u button to select YES
5. Press OK
6. Press OK to uncheck the AUTO POWER DOWN box
7. Press Exit to store
The length of time to power down, and the option
to turn off the warning screen are also accessed from
this menu.
9
CM-7000 D2A DIGITAL TO ANALOG CONVERTER
REMOTE CONTROL
REMOTE C O N T RO L
NOTE: To program a universal remote
to operate the CM-7000 digital to
analog converter box, use Pioneer cable
box codes.
10
Mute
Set volume to mute
Toggles mute on / off
Option
Not used
Info
Invokes the information banner
Standby
Enters and exits standby mode
Menu
Invokes Menu screen
Exit to previous Menu item
FAV
Invokes Channel List menu
Switches between Channel List and Favorites List
Exit
Exit from Menu
Arrow Up
p
Move focused item in menu or channel list
Arrow Down
q
Move focused item in menu or channel map
Arrow Left
t
Switch to Favorite Channel List in Channel List Menu
Change selection in menu
Switch to the next channel in EPG screen
Arrow Right
u
Switch to Favorite Channel List in Channel List Menu
Change selection in menu
Switch to the previous channel in EPG screen
OK
Select a channel or menu option
Back
Switch to previously viewed channel
PgU
Unused
PgD
Unused
0-9
Numeric key to change channel number or numeric value
CH +
Channel up
CH -
Channel down
Vol +
Increase volume
Vol -
Decrease volume
Audio
Select audio
Wide
Select picture shape
Subtitle
Select Closed Caption (CC)
Text
Unused
Guide
Invokes the EPG screen
Universal
Remote
Code
For universal remote, use Pioneer Cable Box code
Entering
Channel
Numbers
When entering channel numbers using the numeric
keypad, no “.” or “-” is necessary to tune directly to
a desired channel. For example: to tune to channel
8.3, press 83 and ENTER; to tune to channel 15.2,
press 152 and ENTER.
CM-7000 D2A DIGITAL TO ANALOG CONVERTER
ONLINE GUIDE
CHANNE L B A N N E R
• Provides channel major & minor numbers, station name and current time.
• Gets invoked during channel number entry, channel up/down.
• Automatically times out.
INFORMATION BANNER
• Provides channel major & minor numbers, station name and current
time, program name/description/duration, video resolution, audio
language, rating, cc information and signal strength.
• Allows user to browse thru the program description.
• Info button on remote invoke information banner.
• Allows user to fine tune antenna using signal strength meter.
• Banner does not timeout. Press Info to clear.
11
CM-7000 D2A DIGITAL TO ANALOG CONVERTER
ONLINE GUIDE
MENU
• Allows user to configure the system with easy to use graphical interface.
• Channel Edit
Channel Scan
System Setup
Closed Captions
Parental Control
• Menu button on remote allows access to access the menu.
• Use pqtu, Menu/OK buttons to navigate the menu.
MENU - CHANNEL EDIT
•
•
•
•
•
12
Allows user to set channel as favorite.
Allows user to delete channel.
Allows user to browse locked channel.
Invoke menu using Menu key.
Navigate to channel edit options using pq keys, click OK key to access
channel edit options that allows you to set channel as a favorite or delete a
channel.
CM-7000 D2A DIGITAL TO ANALOG CONVERTER
ONLINE GUIDE
CHANNEL SCAN
• Automatically searches all terrestrial channels.
• Automatically updates the channel list with only newly
found channels.
• Previously set channel properties such as favorite, delete
and lock remains the same.
• List the channels that are added to the channel list.
• Monitor the progress of the channel scan.
RE - SCANNING FOR DIGITAL
C H ANNELS
W h y Re-scan?
During the digital transition, digital
stations will continue to come on
air, so you may want to consider
re-scanning on a periodic basis to
get all of the digital programming
available.
Some digital stations that are
already on air are moving to
different channel numbers at the
end of DTV transition, you may need
to re-scan again even after the
conv ersion date to ensure that you
receive all of the digital stations
broadcasting in your area.
1. Press MENU
on the CM7000 remote.
The main menu
should appear
on the TV
screen.
Access channel scan OSD:
• Invokes menu using Menu key.
• Use pq and OK keys to access channel scan.
• Select either terrestrial or cable to search respective
channels.
• Select either scan all or update and click OK to start
channel scan.
• Scan/update operation shows progress and lists
channels as they are found.
• Update is used to add channels without loosing
previously found channels.
If using an antenna rotator, the update feature allows
you to turn the antenna to a different direction and
add channels without loosing the previously scanned
channels.
• Use Menu key return back to the previous option, Exit key
to quit the menu any time.
2.Press the pq
button,
TERRESTRIAL
should appear
on the menu.
3.Press OK
button
3 times
to start the
AUTO
CHANNEL
SCAN.
4.W hen the
AUTO SCAN
is complete,
press EXIT.
5.Use the pq
buttons to
begin watching
digital TV.
13
CM-7000 D2A DIGITAL TO ANALOG CONVERTER
ONLINE GUIDE
SET UP
Provides easy user interface to set the system properties like date &
time, OSD language, etc.
• Set date and time either automatically or manually.
• Choose English, Spanish, or French as OSD language.
• Set audio options:
- Internal speakers ON/OFF
• Returns all settings to factory defaults.
To access Setup OSD:
• Invokes menu using Menu key.
• Use pq and OK keys to access Setup.
• Select Clock, Language, Defaults, and Version. Click OK to access
respective option.
• Clock allows user to set the system time, time zone, daylight saving
time.
• Language option allows user to select OSD languages.
• Use Menu key return back to the previous option, Exit key to quit the
menu any time.
14
CM-7000 D2A DIGITAL TO ANALOG CONVERTER
ONLINE GUIDE
SET UP - CLOSED CAPTION
Provides easy to use interface to select one of the caption
services and caption font properties
• Allows user to select one of the available closed
caption services (analog and digital).
• Allows font set up of the caption like size, style,
edge effects, foreground and background color/
transparency.
• Sample caption window displayed reflects caption
preferences.
T U RN
C L O S ED CAPTION
O N / OFF
To toggle
closed captioning
on or off:
• Press the
Subtitle
remote button.
To access Setup OSD:
• Invokes menu using Menu key.
• Use pq and OK keys to access Closed Captions.
• Select Services or Preferences. Click OK to access
respective options.
• Services allows access to select a service.
• Preferences allows access to set captioning font
preferences.
• Use Menu key return back to the previous option, Exit
key to quit the menu at any time.
15
CM-7000 D2A DIGITAL TO ANALOG CONVERTER
ONLINE GUIDE
SET UP - PARENTAL CONTROL
Provides easy to use interface to set movie and TV limits to
block a program based on its rating
• Allows access to set, reset, and change password.
• Resetting password update Date and Count that will
indicate when the password was last reset and how many
times it was reset.
• Allows access to set movie rating limits to block the
programs exceeding the set rating limits.
• Allows access to set TV rating limits to block the programs
exceeding the set rating limits.
• Additional rating menu displays program DRRT and allows
the user to block those ratings.
• Allows access to block the channel completely
irrespective of
program ratings.
To access Setup OSD:
• Invoke menu using Menu key.
• Use pq and OK keys to access Parental Controls.
• Provide password and navigate pq and click OK to
access the Movie / TV / Lock screens.
• Access Movie, TV or Additional rating screen to set each
limits.
• Access Lock to block channel completely irrespective of
rating.
• Use Menu key return back to the previous option, Exit key to
quit the menu at any time.
QUICK MENU - AUDIO
Quick menu that gets invoked with a single key on remote to
select one of the multiple available audio.
• Provides the user with quick access to the list of audio
available for that particular program.
• Audio key on remote shall invoke this menu, same key
shall be used to browse thru the audio list.
• Exit key is used to quit this menu, or it timesp out after a
few seconds.
16
CM-7000 D2A DIGITAL TO ANALOG CONVERTER
CONTACT/ WARRANTY
CONTACT
Channel Master
WARRANTY
Product Return Policy & Procedure
In Warranty / Out of Warranty / Credit Procedure
Warranty Period:
90-day warranty applies to all Channel Master Products* Dealers & Consumers: Dealers
and consumers can return any In-Warranty Channel Master product to the Warranty
department for repair or replacement. For In-Warranty service the consumer or dealer
Customer Service
must call Technical Service and request an RMA number in order to return the product.
The returned product must have the RMA number visible on the box and must include
Tel
+1.877.746.7261
the bill of sale showing the unit is within the warranty period. If the unit is found to be
defective under our Warranty Policy Channel Master will repair or replace the item at
Fax
+1.877.746.7261
no charge. Products outside of the warranty period should not be returned to Channel
email [email protected]
Master with the exception of any product requested by Technical Support to be accessed
web
www.channelmaster.com
for quality assurance purposes. Technical Service Phone: +1.877.746.7261
Address: Channel Master: Consumer Warranty RMA # ---Technical Support
2260 West Broadway Road Mesa, AZ 85202
* Some products have extended term warranty periods
tel
+1.877.746.7261
WARRANTY GENERAL TERMS: 1.1 Subject to the provisions of this Warranty,
CHANNEL MASTER warrants that the equipment and software described in Paragraph 1.2 will conform to our specifications in all material respect and
that the equipment will be free from material defects in materials and workmanship during the Limited Warranty period. 1.2 This Warranty applies to
all original purchases by Customers of CHANNEL MASTER (“Equipment”).The warranties set forth herein are not transferable. 1.3 The Effective period
of this Warranty will start on the date of purchase of the Equipment or the date of installation by a CHANNEL MASTER approved technician and will
end, for the Equipment, ninety (90) days later (for all component parts and system upgrades), unless otherwise expressed or provided herein (in each
case the “Warranty Period”). RETURN OF EQUIPMENT UNDER WARRANTY: 2.1 If an item of Equipment malfunctions or fails in normal use within the
applicable Warranty Period: (a) the Customer shall notify CHANNEL MASTER within thirty (30) days of the problem. (b) CHANNEL MASTER will, at
its option, either resolve the problem over the telephone or provide the customer with a Return Authorization (“RMA”) Number and the address to which
the customer may ship the defective item; (c) If the problem can not be resolved over the telephone, the Customer shall attach a label showing the
RMA number to each returned item, and include a description of the problem. The Customer shall, at his or her own cost, properly pack the item to be
returned, mark the RMA# on the outside of the box, prepay the insurance and shipping charges, and ship the item to the specified CHANNEL MASTER
location. (d) Unauthorized return of any equipment, whether in or out of warranty, will be subject to a handling charge, in addition to all repair and
all transportation charges. (e) CHANNEL MASTER will, at its sole option, repair or replace the returned item. If replaced, the replacement item may be
new or refurbished; if refurbished it will be equivalent in operation to new Equipment. If a returned item is replaced by CHANNEL MASTER, the Customer
agrees that the returned item will become the property of CHANNEL MASTER. (f) CHANNEL MASTER will complete the exchange of CHANNEL MASTER
manufactured equipment returned under this Warranty within a reasonable time, subject to lead-times from factory, and will make a good faith effort
to minimize any and all delays where possible; and (g) CHANNEL MASTER will, at its cost, ship the repaired item or replacement to the Customer. If
the Customer requests express shipping, the Customer will pay CHANNEL MASTER an expediting fee. 2.2 Equipment which is repaired or replaced by
CHANNEL MASTER under this Warranty will be covered under all of the provisions of this Warranty for the remainder of the applicable Warranty period
(for that particular equipment) from the date of repair or replacement, whichever is longer. 2.3 If equipment is repaired beyond effective warranty
dates or if abnormal usage had occurred, Customer shall be charged applicable rates and the Customer will be advised of the estimated charges
prior to repair by CHANNEL MASTER ‘s authorized service center. 2.4 The price of out-of-warranty repairs payable by the Customer will be based
on standard labor and parts prices in effect at the time of the repair. CHANNEL MASTER will use its best efforts to ensure that the cost of such repair,
exchange, refurbishing, or substitution will not exceed the original price of Product. 2.5 If the problem reoccurs within the warranty period, CHANNEL
MASTER will, at its option: (1) re-perform the service; (2) replace the product pursuant to the terms of this warranty, (3) permit Customer to return
the product and issue a refund pursuant to this warrant, or (4) refund the amount the Customer paid for the services. PRODUCT MODIFICATION: 4.1
CHANNEL MASTER reserves the right to make changes or improvements to its products, during subsequent production, without incurring the obligation to
install such changes or improvements on previously manufactured or sold products. FORCE MAJEURE: 5.1 CHANNEL MASTER will not be liable if its
performance under this warranty becomes commercially impracticable due to any contingency beyond CHANNEL MASTER’s reasonable control, including
acts of God, fires, flood, wars, sabotage, civil unrest, accidents, labor disputes or shortages, government laws, rules and regulations, whether valid or
invalid, inability to obtain material, equipment or transportation, incorrect, delayed or incomplete specifications, drawings or data supplied by Customer
(collectively “Force Majeure”) LIMITATIONS AND QUALIFICATIONS OF WARRANTY: 6.1 This Limited Warranty extends only to the original purchaser
of the Equipment and is in lieu of all other express or implied warranties, including those of merchantability and fitness for a particular purpose. This
Warranty does not apply to any damage, defect of failure caused by: (a) any part of the equipment having been modified, adapted, repaired,
maintained, transported or relocated by any person; (b) Storage or environmental characteristics which do not conform to the applicable sections of the
appropriate Equipment Manual or Instruction Sheet; (c) Failure to conform with the Equipment Operating Instructions in the applicable Equipment Manual
or Instruction Sheet; (d) External causes, including external electrical stress or lightning, or use in conjunction with incompatible equipment, unless such
use was with CHANNEL MASTER’s prior written request; (e) Cosmetic damage; (f) Accidental damage, negligence, modification, mishandling, abuse or
misuse; or (g) Force Majeure. LIMITATION ON DAMAGES: 7.1 THIS WARRANTY IS THE CUSTOMER’S EXCLUSIVE WARRANTY FOR THE EQUIPMENT,
CHANNEL MASTER SPECIFICALLY DISCLAIMS ALL OTHER WARRANTIES OF ANY KIND, EXPRESS OR IMPLIED, INCLUDING ANY WARRANTIES OF FITNESS
FOR A PARTICULAR PURPOSE AND OF MERCHANTABILITY. 7.2 CHANNEL MASTER WILL NOT BE LIABLE IN TORT, INCLUDING LIABILITY IN NEGLIGENCE
OR STRICT LIABILITY, AND WILL HAVE NO LIABILITY AT ALL FOR INJURY TO PERSONS OR PROPERTY. CHANNEL MASTER’S LIABILITY FOR FAILURE TO
FULFILL ITS OBLIGATIONS UNDER THIS WARRANTY OR ANY OTHER LIABILITY UNDER OR IN CONNECTION WITH THE EQUIPMENT WILL BE LIMITED
TO THE AMOUNT OF THE PURCHASE PRICE OF THE EQUIPMENT AT THE TIME OF ORIGINAL PURCHASE. THE REMEDIES STATED IN THIS WARRANTY
ARE THE CUSTOMER’S EXCLUSIVE REMEDIES AGAINST CHANNEL MASTER REGARDING THE EQUIPMENT. 7.3 EVEN IF CHANNEL MASTER HAS BEEN
NOTIFIED OF THE POSSIBILITY OF THEM, CHANNEL MASTER WILL NOT BE LIABLE FOR ANY INDIRECT, INCIDENTAL, SPECIAL OR CONSEQUENTIAL
DAMAGES, INCLUDING LOST PROFITS AND REVENUES, FAILURE TO REALIZE EXPECTED SAVINGS, ANY CLAIM AGAINST A CUSTOMER BY A THIRD
PARTY, OR ANY OTHER COMMERCIAL OR ECONOMIC LOSSES OF ANY KIND. 7.4 THESE LIMITATIONS AND DISCLAIMERS ARE NOT MADE BY
CHANNEL MASTER WHERE PROHIBITED BY LAW.
2260 W. Broadway Road, Suite 101
Mesa, AZ 85202
USA
17
© 2010 Channel Master
www.channelmaster.com
Pub CM.CM7000.MANUAL. 2010.