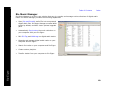
1
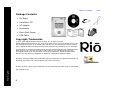
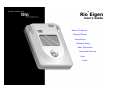
®
Rio Eigen
User’s Guide
Table of Contents
Getting Started
Connections
Software Setup
Basic Operations
Advanced Features
Help
Index
Table of Contents
Package Contents
• Rio Eigen
• Installation CD
• AC Adapter
• Earphones
• Quick Start Poster
• USB Cable
Copyright/Trademarks
© 2003, 2004 Digital Networks North America, Inc. All rights reserved.
Digital Networks North America, Inc. shall not be liable for any errors contained herein or for
any damages arising out of or related to this document or the information contained herein,
even if Digital Networks North America has been advised of the possibility of such damages.
This document is intended for informational and instructional purposes only. Digital Networks
North America, Inc. reserves the right to make changes in the specifications and other
information contained in this document without prior notification. Digital Networks North
America, Inc. disclaims any obligation to update the information contained herein.
Microsoft, Windows Media and the Windows Logo are trademarks or registered trademarks of
Microsoft Corporation in the United States and/or other countries.
All other product names may be trademarks of the companies with which they are associated.
Rio Eigen
P/N 41000857-004
ii
Index
Table of Contents
Index
Table of Contents
• Package Contents .......................... ii
• Copyright/Trademarks .................... ii
1 - Getting Started
Welcome ..................................... 1
• Learning More............................... 1
Tour of the Rio Eigen .................. 2
LCD Overview ............................. 4
• Playback Mode .............................. 4
• Menu Mode .................................. 4
• Date View .................................... 5
• Time Code View ............................ 5
• Track Format View ......................... 5
• Play Screens................................. 5
2 - Connections
Basic Connections ....................... 6
• AC Power Adapter .......................... 6
• Batteries ..................................... 6
• Earphones ................................... 7
• USB ........................................... 7
• Additional Accessories ..................... 8
Rio Eigen
3 - Software Setup
Software Installation .................. 9
• Rio Music Manager ....................... 10
4 - Basic Operations
Basic Operations ....................... 11
Copy ......................................... 12
• Copying Tracks with Rio Music Manager12
Transfer .................................... 13
• Rio Music Manager ....................... 13
Control...................................... 14
Play .......................................... 15
• Play All ..................................... 16
• Album....................................... 16
• Artist ........................................ 16
• Genre ....................................... 17
• Track ........................................ 17
• Year ......................................... 17
• New Music ................................. 18
• Playlist ...................................... 18
5 - Advanced Features
Advanced Features ................... 19
Equalizer .................................. 20
• Custom ..................................... 20
• Normal ..................................... 20
• Rock ........................................ 21
• Jazz ......................................... 21
• Classical .................................... 21
• Pop .......................................... 22
• Trance ...................................... 22
Bookmarks ............................... 23
Stopwatch ................................ 24
Settings .................................... 25
iii
Table of Contents
•
•
•
•
•
•
•
Playback.................................... 26
Power ....................................... 27
Resume..................................... 28
Display ..................................... 29
Time ........................................ 30
Language .................................. 31
Lock Setup ................................. 32
About........................................ 33
Rio Eigen
6 - Help
Troubleshooting........................ 34
• Customer Service Information ........ 34
• Frequently Asked Questions ........... 35
Glossary of Digital Audio Terms 39
• Bass ......................................... 39
• Bitrate ...................................... 39
• Codec ....................................... 39
• Firmware ................................... 39
• Gain ......................................... 39
• ID3 Tag..................................... 40
• MP3 ......................................... 40
• Rip and Encode ........................... 40
• Synchronize ............................... 40
• Treble ....................................... 40
• VBR ......................................... 40
• WMA ........................................ 40
Limited Warranty and Software
License ..................................... 41
• Warranty ................................... 41
• Warranty Service ......................... 41
• Scope of and Limitation on Warranty 42
iv
Index
FCC and Industry Canada Compliance
43
• Federal Communications Commission (FCC)
43
• Industry Canada.......................... 43
Safety ....................................... 44
• Warning .................................... 44
• CAUTION ................................... 44
Table of Contents
Chapter 1
Index
Getting Started
:: Welcome
Thank you for purchasing the Rio Eigen. Small and powerful, the Rio Eigen can store more than 400 4-minute
songs on its 1.5GB* hard drive. The Rio Eigen includes an AC adapter, earphones, a lighted LCD display, a long
lasting built-in battery, and high speed USB 2.0 connectivity.
Rio Eigen
Learning More
•
Refer to the Quick Start Poster for the basics on how to set up and start using the Rio Eigen.
•
Visit the Rio website at www.rioaudio.com.
* Actual formatted capacity less. 1GB = 1,000,000,000 bytes.
1
Table of Contents
Index
:: Tour of the Rio Eigen
Rotary control
Power
Press to turn the player on.
Press and hold to turn the
player off.
Press or rotate to control
menu navigation and select
menu options.
Volume + and Press to adjust the volume
level.
Menu
Press to enter Menu mode.
When in Menu mode, press to
return to Player mode.
Play/Pause
Select with the RioStick to
play or pause playback.
RIOSTICK
Forward and
Reverse
In Menu mode, press to select
menu options. Move to
control menu navigation.
Rio Eigen
Select with the RioStick to
skip to the next or previous
track.
Select and hold to scan
forward or reverse.
In Player mode press to
cycle through Time Code
View, Track Format View,
and Date View. Move to
Stop
control PLAY/PAUSE, STOP,
FORWARD, and REVERSE
playback functions.
Select with the RioStick to
stop playback.
2
Table of Contents
Index
invisible text
DC IN
Connects to AC
adapter.
USB
Connects to USB cable.
Earphones
Connects to earphones.
Rio Eigen
Reset hole
Insert pin to reset the
player.
Lock/Unlock
Slide into the LOCK position to
disable buttons and prevent
accidental operation.
3
Table of Contents
Index
:: LCD Overview
Playback Mode
Repeat Playback Indicator
Shuffle Playback Indicator
Lock Indicator
Volume Level
Power Indicator
Track
Artist
Album
Track Position Bar
Track Time
Play Indicator
Track Number/Total
Number of Tracks
Menu Mode
Menu Title
Selected Option
Rio Eigen
Options
4
Table of Contents
Index
invisible text
Time Code View
Play Screens
Press the RioStick to cycle through
Time Code, Track Format, and Date
Views.
Track Time
Track Number/Total
Number of Tracks
Track Format View
Codec
Bitrate
Track Size
Rio Eigen
Date View
Time
Month/Day/Year
5
Table of Contents
Chapter 2
Index
Connections
:: Basic Connections
This chapter describes how to connect the Rio Eigen to power adapters, USB cables, and
alternate audio devices. Basic connections include:
AC Power Adapter
Connect the AC adapter to the DC IN port on the player. The AC adapter will recharge the
battery, from 0% capacity to 60-70% capacity, within two hours.
1
2
3
Plug the AC adapter into an electrical outlet.
Connect the AC adapter to the Rio Eigen.
After the battery is fully charged, remove the AC adapter from the Rio Eigen.
Batteries
The Rio Eigen uses a built-in lithium-ion rechargable battery that lasts many hours
per charge. Lithium-ion batteries drain at a very slow rate even when they are not
being used. If you have not used your Rio Eigen in a long period of time you will
need to recharge the battery.
The battery should be charged for at least five hours during its initial charge. The
player will recharge anytime the AC adapter is plugged into the player.
Power Indicator
Full
Half
Low
Rio Eigen
Charging
(indicator grows)
Empty
(indicator flashes)
6
Table of Contents
Index
Earphones
Connect the supplied earphones to the EARPHONE port on the top of the player.
USB
The player must be connected using the included USB cable to the USB port on your computer to
transfer files to and from the player and your computer.
USB Detection with the Windows Device Driver
The Rio Eigen is ready to be connected to your PC after Rio Music Manager has been installed.
If for any reason the Windows Device Driver Wizard is displayed after the USB cable has
been plugged into both the Rio Eigen and the computer, please follow these steps:
1
2
Rio Eigen
3
Confirm the Rio installation CD is in the computer’s CD-ROM drive.
Check the CD-ROM Drives box when the Windows Device Driver Wizard requests the
location of the Rio Eigen drivers.
Click Next and follow the Windows Device Driver Wizard instructions.
7
Table of Contents
Index
Additional Accessories
You can get the most out of your Rio Eigen with additional accessories available online at the Rio website. Some of
the most popular accessories include the following:
• Rio Player AC Adapter
An extra AC adapter lets you recharge your batteries whenever you are near an electrical
outlet. Perfect for digital audio at the office.
• Rio Car Stereo Adapter
Rio Eigen
Upgrade your car stereo for hundreds of dollars less than buying a new MP3 CD player. The Rio
car stereo adapter lets you play your favorite tracks in any vehicle equipped with a standard
cassette deck.
8
Table of Contents
Index
Software Setup
Chapter 3
:: Software Installation
Follow these instructions to load software that enables a computer to recognize the Rio Eigen. The installation also
loads Rio Music Manager.
1
Place the Rio installation CD label-side up into the computer’s CD-ROM drive.
The Rio installation software launches automatically.
2
Click Rio Music Manager INSTALL NOW (required) and follow the on-screen instructions.
3
If prompted, reboot the computer when the installation is complete.
Rio Eigen
• If Rio installation software does not display automatically, follow these steps to begin the installation
manually:
4
Double-click the My Computer icon,
5
Double-click the CD-ROM icon,
6
Double-click the Install icon,
7
Go to Step 2.
, on the Windows desktop.
.
.
9
Table of Contents
Index
Rio Music Manager
Rio Eigen
Rio Music Manager is an all-in-one solution that can rip, encode, and manage entire collections of digital audio
tracks. Rio Music Manager provides the following capabilities:
•
Save (Rip and Encode) audio CDs into compressed
digital audio files. Rio Music Manager encodes WMA
tracks by default, and MP3 via an optional upgrade
pack.
•
Automatically Synchronize the music collection on
your computer with your Rio Eigen.
•
Edit ID3 Tag and WMA tags on digital audio tracks.
•
Organize and manage digital audio tracks on your
computer and Rio Eigen.
•
Search for tracks on your computer and Rio Eigen.
•
Create custom playlists.
•
Transfer tracks from your computer to Rio Eigen.
10
Table of Contents
Chapter 4
Index
Basic Operations
:: Basic Operations
Enjoying audio tracks on the Rio Eigen is easy. Basic operations of the Rio Eigen include:
Rio Eigen
Copy
Transfer
Control
Play
11
Table of Contents
Index
:: Copy
Copying Tracks with Rio Music Manager
Copying tracks from Audio CDs involves two steps commonly known as ripping and encoding. Ripping and
encoding refers to the process of ripping (copying) audio from a CD and encoding (saving) the audio content into a
compressed digital audio format like MP3 or WMA.
1
2
3
4
Track Type
Technique
Single track.
• Left-click the track.
Multiple tracks.
• Press SHIFT+Click or CTRL+Click.
All tracks.
• Press CTRL+A.
No tracks.
• Press CTRL+N.
Every track except for the currently selected
tracks.
• Select Edit, Invert Selection.
5
Rio Eigen
Launch the Rio Music Manager.
Insert an Audio CD into your CD-ROM drive.
Click the CD-ROM icon on the Rio Music Manager Device List.
Use any of the following techniques to select tracks:
Click
to begin copying tracks to your computer.
12
Table of Contents
Index
:: Transfer
Rio Music Manager
Transferring tracks from the PC to the Rio Eigen using Rio Music Manager involves selecting tracks and transferring
them to the player.
1
2
3
Launch the Rio Music Manager.
Click My Music in the left frame to access tracks. Rio Music Manager will scan the computer’s hard drives for
digital audio tracks that are compatible with the Rio Eigen player. Tracks are automatically categorized by
album title and displayed in the Track List.
Select tracks within a category of tracks. Categories include Albums, Artists, Genres, Songs, and Playlists.
For example, if you wish to copy all tracks from a favorite artist onto the player, click the Artists tab and then
use any of the techniques in Step 4 to select the desired tracks.
4
Track Type
Technique
Single track, album, or artist.
• Left-click the track, album, or artist.
Multiple tracks, albums, and/or artists.
• Press SHIFT+Click or CTRL+Click.
All tracks, albums, and artists.
• Press CTRL+A.
No tracks, albums, or artists.
• Press CTRL+N.
Every track except for the currently selected
tracks.
• Select Edit, Invert Selection.
5
Rio Eigen
Use any of the following techniques to select tracks:
After the tracks have been selected they can be transferred to the Rio Eigen by clicking
.
13
Table of Contents
Index
Rio Eigen
:: Control
•
POWER
Press to turn the player on. Press and hold to turn the player off.
•
MENU
Press to enter Menu mode. In Menu mode, press to return to Player mode.
•
ROTARY CONTROL (Rotate)
Rotate to control menu navigation and select menu options.
•
ROTARY CONTROL (Press)
Press to select menu options. In Player mode, press to cycle through Time Code
View, Track Format View, and Date View.
•
RIOSTICK (Press)
Press to select menu options.
•
RIOSTICK (Movement)
Move to control menu navigation. In Player mode, move to control PLAY/
PAUSE, STOP, FORWARD, and REVERSE playback functions.
•
PLAY/PAUSE
Select with the RioStick to play or pause playback.
•
STOP
Select with the RioStick to stop playback.
•
FORWARD and REVERSE
Select with the RioStick to skip to the next or previous track. Select and hold to
scan forward or reverse.
•
VOLUME + and Press to adjust volume level.
Controls
Locations of all controls can
be found on page 2 and 3.
14
Table of Contents
Index
:: Play
The Rio Eigen player can play audio tracks in multiple playback formats. Formats can be set within a matter of
seconds so you can spend more time enjoying your favorite tracks and less time arranging them.
Rio Eigen
Play All
Album
Artist
Genre
Track
Year
New Music
Playlist
• If the Rio Eigen does not power on after POWER has been pressed, check the LOCK/UNLOCK switch
and confirm it is in the UNLOCK position.
15
Table of Contents
Index
Play All
To play all tracks on the player please follow these steps:
1
2
3
4
5
Press MENU.
Select Play Music.
Press ROTARY WHEEL.
Select Play All.
Press ROTARY WHEEL to begin playback.
Album
To play tracks from specific albums please follow these steps:
1
2
3
4
5
6
7
Press MENU.
Select Play Music.
Press ROTARY WHEEL.
Select Album.
Press ROTARY WHEEL.
Select an album.
Press ROTARY WHEEL to begin playback.
Artist
To play tracks from a specific artist please follow these steps:
Rio Eigen
1
2
3
4
5
6
7
Press MENU.
Select Play Music.
Press ROTARY WHEEL.
Select Artist.
Press ROTARY WHEEL.
Select an artist.
Press ROTARY WHEEL to begin playback.
16
Table of Contents
Index
Genre
To play tracks from a specific genre please follow these steps:
1
2
3
4
5
6
7
Press MENU.
Select Play Music.
Press ROTARY WHEEL.
Select Genre.
Press ROTARY WHEEL.
Select a genre.
Press ROTARY WHEEL to begin playback.
Track
To play a specific track please follow these steps:
1
2
3
4
5
6
7
Press MENU.
Select Play Music.
Press ROTARY WHEEL.
Select Track.
Press ROTARY WHEEL.
Select a track.
Press ROTARY WHEEL to begin playback.
Year
Rio Eigen
To play tracks from a specific year please follow these steps:
1
2
3
4
5
6
7
Press MENU.
Select Play Music.
Press ROTARY WHEEL.
Select Year.
Press ROTARY WHEEL.
Select a year (or none).
Press ROTARY WHEEL to begin playback.
17
Table of Contents
Index
New Music
Select to compose a running order composed of the most recently played tracks during a set amount of time. The
most recently played tracks are played first. Settings include 1 day (the default setting), 2 days, 1 week, and 1
month. To play tracks using New Music please follow these steps:
1
2
3
4
5
6
7
Press MENU.
Select Play Music.
Press ROTARY WHEEL.
Select New Music.
Press ROTARY WHEEL.
Select a set amount of time.
Press ROTARY WHEEL to begin playback.
Playlist
To play tracks from playlists created in Rio Music Manager please follow these steps:
Rio Eigen
1
2
3
4
5
6
7
Press MENU.
Select Play Music.
Press ROTARY WHEEL.
Select Playlist.
Press ROTARY WHEEL.
Select a playlist.
Press ROTARY WHEEL to begin playback.
18
Table of Contents
Chapter 5
Index
Advanced Features
:: Advanced Features
Advanced features of the Rio Eigen include:
Rio Eigen
Equalizer
Bookmarks
Stopwatch
Settings
About
19
Table of Contents
Index
:: Equalizer
Custom
Custom mode allows the player’s equalizer settings to be adjusted according to personal preferences.
1
2
3
4
5
6
7
Press MENU.
Select Equalizer.
Press ROTARY WHEEL.
Select Custom.
Press ROTARY WHEEL.
Adjust 5-band equalizer. Move the RioStick left or right to navigate between
frequencies. Move the RioStick up or down to boost or reduce the Gain of the
frequency.
Press RIOSTICK to set the Custom equalizer setting and return to player
mode.
Normal
Select the Normal equalizer option to apply no equalizer adjustments to audio content on the Rio Eigen.
Rio Eigen
1
2
3
4
5
Press MENU.
Select Equalizer.
Press ROTARY WHEEL.
Select Normal.
Press ROTARY WHEEL to set the Normal equalizer option and return to Player mode.
20
Table of Contents
Index
Rock
Select the Rock equalizer option to change the sound of tracks according to the Rock preset settings and return to
Player mode.
1
2
3
4
5
Press MENU.
Select Equalizer.
Press ROTARY WHEEL.
Select Rock.
Press ROTARY WHEEL to set the Rock equalizer option.
Jazz
Select the Jazz equalizer option to change the sound of tracks according to the Jazz preset settings and return to
Player mode.
1
2
3
4
5
Press MENU.
Select Equalizer.
Press ROTARY WHEEL.
Select Jazz.
Press ROTARY WHEEL to set the Jazz equalizer option.
Classical
Select the Classical equalizer option to change the sound of tracks according to the Classical preset settings and
return to Player mode.
Rio Eigen
1
2
3
4
5
Press MENU.
Select Equalizer.
Press ROTARY WHEEL.
Select Classical.
Press ROTARY WHEEL to set the Classical equalizer option.
21
Table of Contents
Index
Pop
Select the Pop equalizer option to change the sound of tracks according to the Pop preset settings and return to
Player mode.
1
2
3
4
5
Press MENU.
Select Equalizer.
Press ROTARY WHEEL.
Select Pop.
Press ROTARY WHEEL to set the Pop equalizer option.
Trance
Select the Trance equalizer option to change the sound of tracks according to the Trance preset settings and
return to Player mode.
Rio Eigen
1
2
3
4
5
Press MENU.
Select Equalizer.
Press ROTARY WHEEL.
Select Trance.
Press ROTARY WHEEL to set the Trance equalizer option.
22
Table of Contents
Index
:: Bookmarks
Bookmarks store specific player settings, including the current running order, the current track, the current time
position of the track, the repeat setting, and the shuffle setting. Users can save these settings in a bookmark and
restore them whenever they use the player. Bookmarks are great for:
•
•
•
Placing digital bookmarks in digital audio books or other extended length tracks.
Maintaining positions in long term running orders.
Sharing your player with others without losing personal settings.
1
2
3
4
5
Press MENU.
Select Bookmarks.
Press ROTARY WHEEL.
Select a Bookmark option.
Press ROTARY WHEEL.
Rio Eigen
Bookmark options include:
•
Set
Press ROTARY WHEEL to set a bookmark.
•
Select
Use the ROTARY WHEEL to select a bookmark. Press the ROTARY WHEEL to restore the selected bookmark.
•
Delete
Use the ROTARY WHEEL to select a bookmark. Press the ROTARY WHEEL to delete the selected bookmark.
• The Rio Eigen automatically saves user settings when it is turned off. These settings are automatically
restored when the Rio Eigen is turned on. Settings saved automatically are not saved as a bookmarks.
23
Table of Contents
Index
:: Stopwatch
Use the stopwatch to keep track of time-sensitive events while listening to music.
1
2
3
Press MENU.
Select Stopwatch.
Press ROTARY WHEEL.
Lap statistics are displayed at the bottom of the Stopwatch screen. When a new
lap is set the difference, either faster (-) or slower (+) between new lap times and
the average laptime, is displayed for a few moments.
When in Stopwatch mode, the controls work in the following ways:
•
MENU
Press to return to the Main Menu.
Average Lap
Time
Rio Eigen
• Pressing MENU and using other player functions will not turn the timer
off. The timer will continue to run until the RioStick is moved into the Up
position (PLAY/PAUSE) while in Stopwatch mode.
•
RIOSTICK (Press)
Press to set a lap time. Press and hold to return to single lap display. Multiple
laps and lap averages will be lost.
•
RIOSTICK (Up)
Press to start and stop the timer.
•
RIOSTICK (Down)
Press to reset timer.
Lap Difference
24
Table of Contents
Index
:: Settings
Rio Eigen settings include:
Rio Eigen
Playback
Power
Resume
Display
Time
Language
Lock Setup
25
Table of Contents
Index
Playback
Various playback settings can be set to modify the way the Rio Eigen plays tracks. Tracks can be shuffled at
random and/or repeated continuously.
1
2
3
4
5
6
7
Press MENU.
Select Settings.
Press ROTARY WHEEL.
Select Playback.
Press ROTARY WHEEL.
Adjust Shuffle and Repeat settings.
Press RIOSTICK to apply settings return to Player mode.
Plackback options include:
•
Shuffle
Set selected tracks to play in standard or random order. Settings include Off (the default setting) and On.
• Repeat
Rio Eigen
Set selected tracks to repeat playback of all tracks or the current track. Settings include Off (the default
setting), All, and One.
26
Table of Contents
Index
Power
By adjusting the Power settings, the player can conserve energy and extend the amount of playback time during
each battery charge.
1
2
3
4
5
6
7
Press MENU.
Select Settings.
Press ROTARY WHEEL.
Select Power.
Press ROTARY WHEEL.
Select Pwr Save options.
Press RIOSTICK to apply settings and return to Player mode.
Power options include:
Rio Eigen
•
Pwr Save
Set the player to automatically power down after being idle for a set number of minutes. Settings include 1m,
5m (the default setting), 10m, 30m, and Never.
27
Table of Contents
Index
Resume
Use the options in the Resume menu to set the track that the player will play whenever the player restarts.
1
2
3
4
5
6
7
Press MENU.
Select Settings.
Press ROTARY WHEEL.
Select Resume.
Press ROTARY WHEEL.
Adjust Track and Timecode settings.
Press RIOSTICK to apply settings and return to Player mode.
Rio Eigen
Resume options include:
•
Track
Set the player to begin playback of the last track played before shutdown or the first track in the running order
when the player restarts. Settings include Current (the default setting) and First.
•
Timecode
Set the player to begin playback of the last track played at the point the track was at during shutdown or at the
start of the track. Settings include Current (the default setting) and Start.
28
Table of Contents
Index
Display
Use the Display menu to adjust backlight and contrast settings.
1
2
3
4
5
6
7
•
Press MENU.
Select Settings.
Press ROTARY WHEEL.
Select Display.
Press ROTARY WHEEL.
Adjust Backlight and Contrast settings.
Press RIOSTICK to apply settings and return to Player mode.
Backlight
Set the backlight on the player to shut itself off after a set number of seconds. Settings include Off, 2s, 5s,
(the default setting) 10s, 20s, and On. On sets the backlight to remain lit constantly.
• To conserve battery life, the On setting should only be used when the Rio Eigen is connected an AC
adapter.
Rio Eigen
•
Contrast
Move RIOSTICK to control the contrast slider. Use the contrast slider to set how light or dark the images on
the LCD will appear. Setting the contrast too high will result in washed out images. Setting the contrast too
dark will result in images that are too dark to read.
29
Table of Contents
Index
Time
Use the options in the Time menu to set the player’s internal clock.
1
2
3
4
5
6
7
Press MENU.
Select Settings.
Press ROTARY WHEEL.
Select Time.
Press ROTARY WHEEL.
Adjust Set Time, Set Date, or Time/Date Mode settings.
Press RIOSTICK to apply settings and return to Player mode.
Rio Eigen
Time settings include:
•
Set Time
Options include Hour, Minute, and AM / PM.
•
Set Date
Options include Month, Day, and Year.
•
Time/Date Mode
Options include 12 hour (the default setting) and 24-hour time formats and USA (the default setting),
Europe, and Japan date formats.
30
Table of Contents
Index
Language
The Rio Eigen menus can be set to display in one of six languages.
1
2
3
4
5
6
7
Press MENU.
Select Settings.
Press ROTARY WHEEL.
Select Language.
Press ROTARY WHEEL.
Select a Language setting.
Press ROTARY WHEEL.
Language settings include:
•
Rio Eigen
•
English (the default setting)
Set the player display language to English.
Set the player display language to Japanese.
•
Deutsch
Set the player display language to German.
•
Français
Set the player display language to French.
•
Español
Set the player display language to Spanish.
31
Table of Contents
Index
Lock Setup
Use the options in the Lock Setup menu to enable volume and RioStick control when the lock is enabled.
1
2
3
4
5
6
7
Press MENU.
Select Settings.
Press RIOSTICK.
Select Lock Setup.
Press RIOSTICK.
Adjust Lock Volume and RioStick settings.
Press RIOSTICK to apply settings and return to Player mode.
Rio Eigen
Lock Setup settings include:
•
Lock Volume
Options include On (the default setting) and Off. When set to Off, the volume level can be adjusted even when
the Rio Eigen has been locked.
•
RioStick
Options include Lock and /. When set to /, any RioStick movement will be interpreted as the /
control.
32
Table of Contents
Index
:: About
The about screen displays information about the Rio Eigen. Information includes the total amount of space on the
disk, the amount of free space, the number of tracks on the player, and the Firmware version.
1
2
3
4
5
Press MENU.
Select About.
Press ROTARY WHEEL.
Select Player or Storage.
Press ROTARY WHEEL.
Rio Eigen
About options include:
•
Player
Displays firmware version, copyright, and Rio website information.
•
Storage
Displays disk usage graphic bar, disk usage (MB used/MB capacity), total number of tracks, and total number
of playlists.
33
Table of Contents
Chapter 6
Index
Help
:: Troubleshooting
Customer Service Information
The FAQs below will help you solve common issues with your player. If you do not find the answers you need here,
you can contact our Customer Service Department via any of the following methods:
Web:http://www.rioaudio.com/support
Technical Support Telephone:(206) 515-1400
Customer Support Telephone:(800) 468-5846
Rio Eigen
With every Rio product you receive the following support services:
•
Unlimited access to the Rio web-based technical information resources, available 24 hours a day every day at
http://www.rioaudio.com/support. Here you will find FAQ files, product updates, and other useful information.
•
Unlimited e-mail support for the duration of your Rio product hardware warranty period.
•
Access to the latest software updates and enhancements for Rio products via our website.
34
Table of Contents
Index
Rio Eigen
Frequently Asked Questions
Question
Answer
Why will my Rio Eigen not
power on?
• Confirm the LOCK/UNLOCK switch on the player is set to UNLOCK. The player
will not power on if LOCK/UNLOCK is in the LOCK position. Switch LOCK/
UNLOCK to the UNLOCK position and press POWER to turn the Rio Eigen on. If
the Eigen still does not power on they battery may be dead.
What type of files can I
play with the Rio Eigen?
• You can play MP3 and WMA audio files on the Rio Eigen.
Can I add MP3 and WMA
files to the player at the
same time?
• Yes. You can play MP3 and WMA audio content. They can be mixed together.
What are the differences
between MP3 and WMA
files?
• WMA files are generally half as large as comparable sounding MP3 files. Because
WMA uses smaller file sizes, you can store more music in less space on CDs, hard
drives, or the Rio Eigen. The WMA format is exclusive to Windows-based
computers.
What is the maximum
number of tracks I can
put on the Rio player?
• The number of tracks you can store on the player depends on bitrate of the files
stored. The About menu lists the total amount of space, the amount of free
space, and the number of tracks on the Rio player.
Bitrate
Approximate amount of space required per
minute of audio content
64 kbps
96 kbps
128 kbps
164 kbps
192 kbps
0.5 MB
0.75 MB
1 MB
1.25 MB
1.75 MB
35
Rio Eigen
Table of Contents
Index
What kind of batteries can
I use with the Rio Eigen?
• The Rio Eigen uses non-removable rechargable lithium-ion batteries.
Will the Rio Eigen play
Variable Bitrate (VBR)
files?
• Yes. Because there are many standards for VBR files, it cannot be guaranteed
that every encoding software package will properly function with the Rio Eigen.
VBR files that do not comply to standards may lack track time, fast forward, and/
or rewind capabilities.
Where is the battery
indicator on the Rio
Eigen?
• The battery indicator on the Rio Eigen is located in the top-right corner of the
display. The segments in the battery icon show the remaining battery power. The
illumination of all segments indicates a fully charged battery. Non-illuminated
segments indicate a run down battery. The battery indicator blinks when less
than 20% of the charge on the battery remains.
Can I replace the battery
in my Rio Eigen?
• No.
The drive stops spinning
during playback. Is this
normal?
• Yes. It is normal for the drive to stop spinning during playback. Stopping the
drive is part of the player’s battery life management system. When the drive is
stopped, the Rio Eigen conserves power and plays tracks from a memory buffer.
Can I charge the Rio
Eigen using the USB
cable?
• No. The USB connection will power the Rio Eigen but will not charge it. The AC
adapter must be used to charge the Rio Eigen. At extremely low battery levels a
USB connection will not be able to power the Rio Eigen.
36
Table of Contents
What should I do if the
display permanently locks
up, does not display, or
displays UPGRADER?
Index
• If you cannot read the display, the player firmware may be corrupted. Corrupted
firmware may be caused by a failed firmware update. If the player’s firmware
becomes corrupted for any reason, follow these steps to start the player in
Recovery Mode and proceed with the firmware update.
1
2
Reset the player by inserting a pin or needle into the RESET HOLE next to the
DC IN port.
Press POWER. The player should power on as normal.
If the player continues to lock up or does not display properly:
1
2
3
Why won’t the Rio Eigen
play secure, dated, or
other DRM (digital rights
management) encoded
files?
Reset the player by inserting a pin or needle into the RESET HOLE next to the
DC IN port.
Press and hold MENU + POWER until UPGRADER is displayed on the screen.
Connect the Rio Eigen player to the computer using the USB cable.
Proceed with the Firmware upgrade.
• DRM files may not work properly if the Rio Eigen’ internal clock is no longer
accurate. This can happen if the rechargable batteries lose all charge for any
period of time. Make sure the batteries are fully charged, then follow these steps:
1
2
Connect the Rio Eigen to the computer using the USB cable.
Connect to the secure service where the DRM encoded files came from.
The Rio Eigen’ clock should reset.
Rio Eigen
DRM files should now play correctly.
37
Table of Contents
Can I upgrade the
firmware on the Rio
Eigen?
Index
• Yes. If available, firmware for your Rio can be downloaded from the Rio Audio
website.
Note: Quit all applications before running the firmware update. While running the
firmware update, do not close the program, turn off the player, or unplug the USB
cable.
1
2
3
Downloading the update
Click on the following link: Firmware Upgrade.
Click on the link to the Rio Eigen.
Locate UPDATES and click Firmware.
Select and download the latest software. Download the software that is specific
to the operating system you use on your PC:
*.exe (Windows)
*.hqx (Mac)
*.zip (Windows; must use WinZip to open)
*.txt (All operating systems—a text file including update information and
instructions.)
1
2
Installing the update (PC)
Connect the player to your computer with the USB cable.
Turn the player on.
Waiting will display on the player screen.
Rio Eigen
3
Double-click the file that you downloaded from the Rio website.
The update should take approximately 30 seconds to load.
38
Table of Contents
Index
:: Glossary of Digital Audio Terms
Bass
Bass is the particular low-range area of the sound spectrum where low musical notes and sounds are located.
Increasing the bass value will make the low vocals and drums more prominent in your music. You can select the
amount of bass in your music by selecting various Equalizer options.
Bitrate
Bitrate denotes the number of bits per second used by a digital music file. The size and quality of a compressed
digital audio file is determined by the bitrate used when encoding the file. Generally, the higher the bitrate used
the higher the sound quality and the larger the file size. For example, a bitrate of 96kbps (96,000 bits per second)
is generally thought of as “CD quality” for WMA audio files, and takes up about 0.75 megabytes (MB) per minute of
music. At a 64kbps bitrate, the sound quality of WMA is similar to that of an FM radio signal, but approximately two
minutes of music will fit in 1MB of space.
Codec
Depending on the context and kind of technology involved, codec can be defined as a compressed digital audio file
format (like MP3, WMA, etc.), a “coding/decoding” chip used to translate between digital and analog transmissions
(used in modems), or a compression/decompression algorithm. Codecs compress audio data into a file, often for
efficient transmission over a network, and then decode it for playback. While all the codecs perform similar
compression of digital audio, there are differences in the technology.
The Rio Eigen supports the following digital audio codecs:
•
•
MP3
WMA
Firmware
Firmware is the read-only software that is installed on the player. Like software it can be updated, but unlike
software, it can never be deleted from the player.
Rio Eigen
Gain
Gain is a measurement of the amplitude of frequency ranges. Gain adjustments boost or reduce frequencies to
provide a more desirable audio output.
39
Table of Contents
Index
ID3 Tag
The ID3 tag is the part of the encoded MP3 or WMA file that contains information about the digital music file such
as song title, artist, album title, encoding bitrate, track time duration, and so on. ID3 tag information is displayed
on the Album/Artist/Track title line on the player’s LCD.
MP3
MP3 is short for Moving Pictures Experts Group Audio Layer 3. MP3 is the most well known compressed digital
audio file format. This format allows for near “CD quality” sound, but at a fraction of the size of normal audio files.
MP3 conversion of an audio track from CD-ROM can reduce the file size by approximately a 12:1 ratio with virtually
no perceptible loss in quality. MP3 compression removes the redundant and irrelevant parts of a sound signal that
the human ear doesn't hear. This digital sound encoding and compression process was developed by the
Fraunhofer Institute for Integrated Circuits and Thomson Multimedia.
Rip and Encode
Rip and encode refers to the process of extracting audio from a music CD (ripping) and encoding it into a
compressed digital audio format like MP3 or WMA.
Synchronize
Rio Music Manager can automatically (or manually) delete old content, transfer new audio content, and keep the
content on your Rio Eigen fresh and dynamic. Rio Music Manager must be open for synchronization to occur.
Treble
Treble notes occupy the higher portion of the sound spectrum. Increasing the treble value will raise the levels of
the high sounds in your music files. You can select the amount of treble in your music by selecting various
Equalizer options.
VBR
Variable Bitrate (VBR) encoding converts tracks at a variable rate, using higher bitrate encoding for complex
portions and lower bitrate encoding for pauses in songs.
Rio Eigen
WMA
Windows Media Audio (WMA) is a compressed audio format created by Microsoft as an alternative to MP3. The
WMA codec offers greater file compression than the MP3 codec, enabling storage of more digital audio tracks in the
same amount of space when compared to MP3s at the same level of quality.
40
Table of Contents
Index
:: Limited Warranty and Software License
Warranty
Digital Networks North America, Inc. warrants that your product will be free from defects in materials and
workmanship for a period of ninety (90) days from the date of original retail purchase. Digital Networks North
America, Inc. warrants refurbished products, marked and sold as such, for thirty (30) days from the original
purchase date. This warranty is extended to the original end user purchaser only and is not assignable or
transferable to any other party.
If you discover a defect covered by this warranty, Digital Networks North America, Inc. will repair or replace the
product at our sole discretion using new or remanufactured product or components. Digital Networks North
America, Inc.'s liability is limited solely to the repair or replacement of the defective product. If Digital Networks
North America, Inc. cannot reasonably repair or replace the defective product then Digital Networks North
America, Inc. may, at its sole discretion, refund the current suggested retail price for the product. Digital Networks
North America, Inc. warrants any replaced or repaired product for a period of thirty (30) days from shipment, or
through the end of the original warranty period, whichever is longer.
Warranty Service
Rio Eigen
To obtain service under this warranty, you must contact a Digital Networks North America, Inc. Customer Care
Center within the applicable warranty period to receive a warranty service authorization. You will be required to
provide a dated original proof of purchase. Products shipped to Digital Networks North America, Inc. must be
shipped postage-paid and packaged appropriately for safe shipment. Digital Networks North America, Inc. is not
responsible for products received without a warranty service authorization and may be rejected. Repaired or
replacement products will be shipped to you at Digital Networks North America, Inc.'s expense. All products or
parts that are replaced become the property of Digital Networks North America, Inc.
41
Table of Contents
Index
Scope of and Limitation on Warranty
Rio Eigen
This warranty does not cover damage caused by abuse, misuse, unauthorized attempts to open, modify, or repair
the product, moisture, extreme heat or cold, corrosive environments, shipping, or high voltage surges from
external sources such as power line, telephone line, or connected equipment. This warranty does not cover wear
and tear on covers, housing or wiring. This warranty also does not apply to any product with an altered or defaced
serial number. Digital Networks North America, Inc.'s liability is limited to the repair or replacement of this
product. In no event will Digital Networks North America, Inc. be liable for any amount greater than the currently
suggested retail price of this product. We will not be liable to you or anyone else for any damages that result from
the failure of this product or from the breach of any express or implied warranties. These include damage to other
equipment, lost data, lost profits, or any consequential, incidental, or punitive damages. This written warranty
represents the entire warranty agreement between Digital Networks North America, Inc. and you. This warranty is
given in lieu of all other warranties, express or implied, including without limitation implied warranties of
merchantability and fitness for a particular purpose. This warranty is limited to the term specified above. No
warranties, either express or implied, will apply after this period. This warranty may not be altered in any way
other than in writing by an officer of Digital Networks North America, Inc. This warranty gives you specific legal
rights and you may also have other rights, which vary, from state to state. Some states limit what warranties may
be excluded as well as how long an implied warranty lasts, so the above limitation may not apply to you.
42
Table of Contents
Index
:: FCC and Industry Canada Compliance
Federal Communications Commission (FCC)
This device complies with Part 15 of the FCC Rules. Operation is subject to the following two conditions:
1
2
This device may not cause harmful interference, and
This device must accept any interference received, including interference that may cause undesired operation.
This equipment has been tested and found to comply with the limits for a Class B digital device, pursuant to Part
15 of the FCC Rules. These limits are designed to provide reasonable protection against harmful interference in a
residential installation. This equipment generates, uses and can radiate radio frequency energy and, if not installed
and used in accordance with the instructions, may cause harmful interference to radio communications. However,
there is no guarantee that interference will not occur in a particular installation. If this equipment does cause
harmful interference to radio or television reception, which can be determined by turning the equipment off and
on, the user is encouraged to try to correct the interference by one or more of the following measures:
•
Reorient or relocate the receiving antenna.
•
Increase the separation between the equipment and receiver.
•
Connect the equipment into an outlet on a circuit different from that to which the receiver is connected.
•
Consult the dealer or an experienced radio/TV technician for help.
Industry Canada
Rio Eigen
This Class B digital apparatus complies with Canadian ICES-003.
Cet appareil numérique de la classe B est conforme à la norme NMB-003 du Canada.
43
Table of Contents
Index
:: Safety
Warning
TO REDUCE THE CHANCE OF SHOCK OR INJURY, DO NOT USE or OPERATE THIS DEVICE IN OR NEAR WATER OR
WET LOCATIONS.
CAUTION
Rio Eigen
RISK OF EXPLOSION, DAMAGE OR BATTERY LEAKAGE IS POSSIBLE IF BATTERY IS REPLACED INCORRECTLY OR
BY AN INCORRECT TYPE. NEVER ATTEMPT TO CHARGE A NON-RECHARGEABLE ALKALINE BATTERY. DISPOSE OF
USED BATTERIES ACCORDING TO INSTRUCTIONS OR LOCAL LAWS. Use of headphones while operating a vehicle
is not recommended and is unlawful in some states and areas. Be careful and attentive while driving. Stop
operation of the player if you find it disruptive or distracting while operating any type of equipment.
Listening to audio at full power over extended periods of time can be damaging to the hearing of the user.
44
Table of Contents
Index
Index
Symbols
+/- 2
5-band equalizer 20
Contrast 29
Customer Service
Information 34
A
About 33
AC Power Adapter 6
Accessories 8
Advanced Features 19
Album 16
Artist 16
D
Date View 5
DC IN 3
Display 29
Rio Eigen
B
Backlight 29
Basic Operations 11
Bass
definition 39
Battery
Indicator 6
Installation 36
Bitrate
definition 39
Bookmarks 23
Button and controls 14
C
Codec
definition 39
MP3 40
WMA 40
Connections 6
E
Earphones 7
Encoding 12
Equalizer 20
F
Firmware 39
Forward 2, 14
Frequently Asked
Questions 35
G
Genre 17
Getting Started 1
Glossary 39
H
Help 34
I
ID3 Tag
definition 40
L
Language 31
Liquid Crystal Display
LCD 4
Lock Setup 32
M
MP3 40
N
New Music 18
P
Package contents ii
Play All 16
Play/Pause 2, 14
Playback 26
Playlist 18
Power button 2
Power settings 27
R
Resume 28
Reverse 2, 14
Rio Music Manager 10
Ripping and Encoding 40
S
Safety information 44
Settings 25
Stop 2, 14
Stopwatch 24
T
Technical Support 34
Time 30
Time Code View 5
Track 17
Track Format View 5
Transferring tracks
Rio Music Manager
Treble
13
definition 40
Troubleshooting 34
U
USB 7
V
Variable bitrate (VBR) 40
Volume +/- 2, 14
W
Warranty 41
WMA 40
Y
Year 17
45
2600 San Tomas Expy.
Santa Clara, CA 95051-0953
USA