1
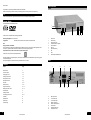
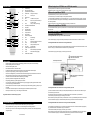
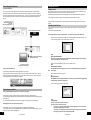
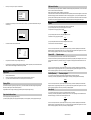
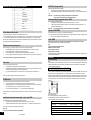
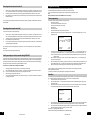
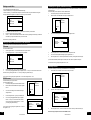
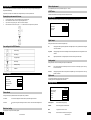
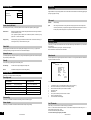
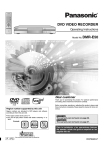
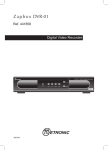
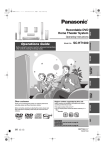
GB
DVD Recorder
Model 50550/HTDVDRE 31
Guarantee Certificate
DVD Recorder
Model 50550/HTDVDRE 31
valid only together with receipt
If you wish to make use of the guarantee, please
contact our service hotline first. You must do this if
you wish to avoid paying shipping/postage charges!
Many thanks.
3 years guarantee
Falls Sie diese Bedienungsanleitung in
englischer oder türkischer Sprache benötigen,
kontaktieren Sie unsere Service-Hotline.
If you require these instructions in English or
Turkish, please contact our service hotline.
Si vous souhaitez recevoir le présent mode
d’emploi en anglais ou en turc, contactez notre
assistance téléphonique.
GB
L&S after-sales services
24
Unit 1A,1B Learoyd Road
New Romney
Kent, TN28 8XU
Telephone : 0870 442 8226
Email : [email protected]
Owner´s Manual
www.ls-electronic.de
www.ls-electronic.de
1
Dear Customer,
Congratulations on purchasing the MASTEC DVD Recorder model 50550.
Please read the operating instructions carefully to avoid damaging the device and to prevent it from malfunctioning.
Device overview
Front
CE
The device is labelled with the CE symbol and therefore conforms to the respective European standards.
Formate / Medien
Use CDs and DVDs that are labelled as follows:
COMPACT
1
2
DIGITAL AUDIO
The device is also compatible with the following formats/media:
4 3
Recording and playback DVD + R DVD + RW
Only playback
DVD Video, Audio CD, DVD-R, CD-R, CD-RW, VCD, SVCD, MP3 CD
The device is set to regional code 2 (see Specialist Terms):
1
2
3
4
5
6
7
8
9
10
DVD films are divided up into separate regions in order to prevent the latest films in the United States or Japan from being played
on European DVD players.
When purchasing DVD films, please make sure they are labelled with "All" or "Code 2".
Back
Note:
Playing recordable CDs and DVDs
Due to the differences in quality amongst CD/DVD blanks and differences in the way various burner software applications make
recordings, it is possible that some burned CDs and DVDs cannot be read or played by the device.
If this situation arises, this does not mean there is a problem with the player.
5
6
7
8
9
10
Switch on/off
Start recording
Set the signal source
Audio/video RCA input (CAM 1)
Channel selection
DVD tray
Open/close DVD tray
Play
Stop
Search/skip forwards/backwards
Contents
Subject
Page
Remote control
4
Connection options
5-6
Getting ready for use
7-8
Installing for the first time
7-8
DVD playback functions
8-9
DVD special functions
9 - 11
Recording
11 - 14
Manual recording
11 - 12
Programmed recording
13 - 14
Managing DVD disc content
14 - 16
Protecting DVDs
17
Finalising a DVD+R
17
User settings (system menu)
18 - 21
Installation
21
Specialist terms
22
Specifications
22
Troubleshooting
23
11
11
12
13
14
15
16
17
18
12
14
13
15
17
16
18
Mains power cable
TV tuner aerial input
TV tuner aerial output
SCART input (EXT 2)
SCART input/output (EXT 1)
S-Video output
Audio/video RCA output
Coaxial digital output
2
3
www.ls-electronic.de
www.ls-electronic.de
Remote control
19
What advantage does a DVD offer over a VHS video cassette
19
20
21
22
23
24
25
26
21
20
22
23
24
25
27
26
30
29
28
27
28
29
30
31
32
33
34
35
36
37
38
39
40
41
42
43
44
31
32
34
33
38
37
35
36
39
40
41
42
44
43
Power/standby
Menu navigation buttons
Open/close DVD compartment
Select button
Change menu settings
Ok
Confirm input
Monitor mode
Disc
The DVD menu is opened
Return
Return to the previous menu step in
the case of VCDs
Clear
Clear your last input (timer prg)
Search/skip forwards/backwards
Stop button
Play/pause button
Numerical buttons
Change channels
Start recording
Select recording mode
Edit
Edit recordings
Timer
Open menu
T/C
Select title or chapter from the menu
Zoom
Zoom into the picture
Step
View picture frame-by-frame
Play mode
Playback option
System Open/close system menu
Angle
Select camera angle (some DVDs)
Audio
Select audio track (language)
Subtitle Select subtitles
The quality of DVDs is more than twice as good as that of VHS cassettes.
Regardless of how often you play a DVD, it will never suffer a loss in quality.
What are the capabilities of DVD+R
Compared to DVD+RW, you can only record once onto a DVD+R.
If it is not finalised, you can continue recording onto it using the DVD Recorder.
You can also delete recorded titles but you cannot overwrite them, i.e. you cannot record new titles over old ones. This type of
disc must be finalised before it can be played on other DVD players. The DVD Recorder can read DVD+Rs/RWs even without
them first being finalised.
After a disc is finalised, you cannot use the DVD Recorder to record any more data onto it.
What are the capabilities of DVD+RW
You can rewrite data onto this type of disc up to 1000 times. You can overwrite titles and record new titles onto DVD+RWs as
often as you like.
Device connection options
Connecting the DVD Recorder
Connecting the DVD Recorder to your aerial or cable-TV connection
Connect the aerial input (12) using an aerial cable (not included) to the house's aerial connection or cable-TV connection.
Connecting the DVD Recorder to the television set using a SCART cable
Use a SCART cable (see Specialist Terms) to connect the DVD Recorder to your television set. Use the SCART cable to connect
the EXT 1 socket (15) on the DVD Recorder to a SCART socket on your television set.
You will achieve a very high picture quality if you use this type of connection.
Aerial cable from the cable-TV connection
or the house's external aerial
Safety notices
•
•
•
•
•
•
•
•
•
•
•
•
•
•
Aerial output to the television
Read the operating instructions carefully to avoid damaging the device and to prevent it from malfunctioning.
Keep the operating instructions in a safe place.
Observe the following safety notices.
Place the DVD Recorder on a flat, stable surface.
Protect the DVD Recorder against excessive moisture, heat from radiant heaters and direct sunlight.
Never place burning objects (e.g. candles, tea lights) on top of the device.
Devices can be damaged if they are connected to the mains electrical supply during a thunderstorm. For this reason,
always disconnect the power plug from the mains power socket during a thunderstorm.
The device must not be used if the electrical cable shows signs of damage.
Dispose of spent batteries at appropriate refuse collection points.
Keep packaging materials (e.g. plastic bags) away from children.
You can disconnect the device from the electrical power supply by unplugging the power plug. Please make sure that
the mains power plug is accessible at all times.
Never subject the device to moisture or splashes, and never place any vessels containing liquids (e.g. vases) on top of
the system.
There must be sufficient free space in front of the DVD player so that the DVD compartment can open.
Never open the device’s housing – there is a danger of electrical shock.
The guarantee becomes void if the housing is opened.
Care and maintenance
•
•
•
SCART connection EXT 1 to the SCART input
of your television set
Connecting the DVD Recorder to the television set using an S-Video (Y/C) cable
If you have a television set with an S-Video (Y/C) socket (see Specialist Terms), which is also known as an SVHS socket, you
can also use this type of connection.
Use an S-Video cable to connect the socket (16) of the DVD Recorder to the S-Video socket of your television set.
You will achieve a good picture quality if you use this type of connection.
Please note that only a video signal is carried by an S-Video cable. For sound, you will additionally need to use an RCA cable to
connect the audio RCA outputs (17) of the DVD Recorder (red, white) to your television set or stereo sound system.
Connecting the DVD Recorder to the television set using a video RCA cable (CVBS)
Pull the mains power plug out of the electrical socket before cleaning or servicing the device.
Clean the DVD Recorder only using a moist cloth. Chemical detergents could damage the device.
Clean CDs using a soft, lint-free cloth. Detergents can damage CDs. Only label CDs on their label side (printed side)
using a soft felt pen.
4
www.ls-electronic.de
If your television has a video RCA input, you can also use this to make the connection. Connect the video RCA output (yellow)
(17) of the DVD Recorder to the video RCA input of your television set.
You will achieve a standard picture quality if you use this type of connection.
Please note that only a video signal is carried by the video cable. For sound, you will additionally need to use an RCA cable to
connect the audio RCA outputs (17) of the DVD Recorder (red, white) to your television set or stereo sound system.
www.ls-electronic.de
5
Getting ready for use
Remote control
Connecting peripheral devices
To the SCART socket Ext. 2
You can connect a video recorder, satellite receiver or a DVD player to the second SCART socket of the DVD Recorder.
You will then be able to record from these devices or simply make these devices start playing if you select the corresponding
channel on the DVD Recorder (here EXT 2) by pressing the channel + / - buttons (5). If you then press the monitor button (24),
the video signal will be sent from EXT 2 to EXT 1 and you will see the picture from the peripheral device displayed on your
television.
Open the battery compartment on the reverse side of the remote control by gently pressing down on the marked spot on the
battery compartment cover and then sliding the cover open in the direction of the arrow.
Insert two UM4 type-AAA batteries and make sure that the polarity is correct as indicated inside the battery compartment.
Connect the device to a 230V/50 Hz supply socket using the permanently attached mains power cable.
Switch on the device using the Power button (1). Switch channels on your television set so that it uses the input of the DVD
Recorder.
SCART connection from Ext 2
to DVD, SAT,
video recorder peripheral devices
Installing for the first time
VCR, SAT, DVD player peripheral devices
A menu will appear on the television screen when you switch on the Recorder for the first time. You can set the main system
settings here.
Follow the instructions provided on-screen.
Select the appropriate items using the navigation buttons 56 (20) and then confirm your choice with OK (23).
•
In the first menu, set the language for the on-screen menu of the DVD Recorder. Use the navigation buttons 56(20)
to make your selection and then confirm your choice with the OK button (23).
Menu language
English
Espanol
Francais
Portuges
Italiano
Press OK to continie
NOTE
WHAT IS AN ON-SCREEN MENU
The on-screen menu (OSD) simplifies operation of the DVD Recorder. All the settings that you can change are
provided in your language on your television screen.
SCART connection (Ext 1 DVD Recorder)
with SCART input of the TV
Signal can be sent from the
peripheral devices to the television
•
To the front video/audio RCA inputs
DVD
The front RCA inputs are well suited for connecting such devices as a video camera.
Use a suitable cable to connect your camera to the Cam1 connection (4) of the DVD Recorder. Use the channel +/- buttons to
select the appropriate channel (in this case CAM 1). If you have connected a television set to EXT 1, press the monitor button
so that the picture from the camera is displayed on the television.
Now set the audio language (dubbing language). Confirm your selection with OK.
NOTE
WHAT IS AN AUDIO LANGUAGE
Generally, DVDs include various languages. So here you can set the default language in which you want the
to start playing.
•
Set the subtitles that you want. Confirm with OK.
Note
WHAT ARE SUBTITLES
Generally, DVDs offer various languages as subtitles. This is where you can choose the default language setting
for subtitles that you might want to have displayed.
•
You can set the TV display mode here. Confirm with OK.
TV shape
Connecting audio devices
Analog receiver with Dolby Pro Logic decoder or a normal stereo sound system
Use an RCA cable to connect your stereo sound system to the analog audio output (17) (red and white jacks).
If you are operating the DVD Recorder with just a stereo sound system, set the analog output to stereo in the audio settings section
of the system menu.
If you have connected the DVD Recorder to a Dolby Surround system, set the analog output to the surround setting.
Dolby Digital system, AV receiver, digital 2-channel amplifier
To enjoy digital 5.1 sound, connect your Dolby Digital system to the digital output of the DVD Recorder.
Use a single RCA cable to connect the coaxial digital output (18) of the DVD Recorder to the coaxial digital input of your system.
Configure your system to use the coaxial digital input.
6
www.ls-electronic.de
4:3 letter box
4:3 panscan
16:9
Press OK to continue
NOTE
TV DISPLAY MODE
If you have a 16:9 television, select the 16:9 setting.
If you have a normal 4:3 television, then select:
•
4:3 letter box, i.e. in the case of 16:9 programmes, the picture is displayed in 16:9 and you see black
bars at the top and bottom edges of the screen.
•
4:3 Pan Scan, i.e. 16:9 programmes are increased to full-screen size, though in doing so the left and
right edges of the picture are cut off. Not supported by all DVDs.
www.ls-electronic.de
7
•
Now set your country for TV reception. Confirm with OK.
Skip/search function
You can use the skip function to skip forwards or backwards to individual chapters (see Specialist Terms). You can use the search
function to start a forwards or backwards search.
Briefly press the skip/search buttons (10/28RC) to change chapters.
Press and hold down the forwards or backwards skip/search buttons (10/28RC) until a mode window appears on-screen and the
Recorder starts playing forwards or backwards at four times the normal playing speed. If you now press the skip/search button
again, the speed increases to eight times the normal speed. If you press it a third time, it increases to 32 times the normal speed.
To pause the search, press the play/pause button (8). To resume normal playback, press the play/pause button again.
If you have
connected
the aerial
Press OK to continue
•
The device asks you whether you have an aerial or cable-TV connection. If yes, start the automatic search using the
OK button (23).
Special functions
Repeat
You can use the repeat function to repeat individual titles, chapters or the whole DVD.
If you press the play mode button (40), "Chapter" appears on the TV screen.
The chapter that is currently playing will be repeated.
Chapter
Search for TV channel
If you press the play mode button twice, "Title" appears on the TV screen.
The title that is currently playing will be repeated.
Title
Please wait
•
If you press the repeat button three times, "Repeat" will appear on the TV screen.
The entire contents of the DVD will be repeated.
The device searches for all receivable channels.
Repeat
Installation
Time/Date
Time
Year
Month
Date
00:00
2003
00
00
To exit press
SYSTEM MENU
•
Finally, set the date and time using the navigation buttons (20).
•
Finish configuring your settings by pressing the system button (41). After the configuration process, the Recorder switches
itself off in order to store and apply the information that you entered.
To cancel one of the special functions, press the stop button or press the play mode button repeatedly until the little window
disappears from the top right-hand edge of the screen. If you press the stop button, playback will be stopped. You can use the
resume function (see page 20) to return to the point at which you stopped playback.
Repeat A-B
Repeat a scene
You can use the Repeat A-B function to define a section of film and then repeat this section.
At the start of the scene that you want to repeat press the play mode button (40) repeatedly until A-B appears on the TV screen.
At the end of the selected scene, press the OK button (23). "A-B" appears in the display and the selected section will now be
repeated.
A-B
DVD playback functions
Preparation
1.
2.
3.
To cancel one of the special functions, press the stop button or press the play mode button repeatedly until the little window
disappears from the top right-hand edge of the screen. If you press the stop button, playback will be stopped. You can use the
resume function (see page 20) to return to the point at which you stopped playback.
Shuffle (Random)
Switch on the DVD Recorder.
Switch on your television and select the television input that the DVD Recorder is connected to.
If you have connected the DVD Recorder to a hi-fi sound system, then switch this on too.
Playing DVDs
Open the DVD compartment by pressing the open button (7), and insert a DVD/CD with its label side uppermost (printed side).
Press the open button again to close the DVD compartment.
Original DVDs will cause the player to start playing automatically, otherwise press the play button (8).
Stop function/freeze-frame
You can stop playback by pressing the stop button (9).
If you want to pause playback, press the play/pause button (8/30RC). To resume playback, press the play/pause button again.
Random playback
You can use this function to activate random playback for individual chapters or individual music tracks.
Press the play mode button (40) repeatedly until "Shuffle" appears in the display. Random playback starts immediately.
Shuffle
To cancel one of the special functions, press the stop button or press the play mode button repeatedly until the little window
disappears from the top right-hand edge of the screen. If you press the stop button, playback will be stopped. You can use the
resume function (see page 20) to return to the point at which you stopped playback.
Scan (Intro)
You can use this function to play a 10-second intro of individual chapters or music tracks.
Press the play mode button (40) repeatedly until "SCAN" appears on the TV screen. Depending on the inserted DVD/CD, the
Recorder starts playing a 10-second intro of individual chapters or tracks.
Scan
To cancel one of the special functions, press the stop button or press the play mode button repeatedly until the little window
disappears from the top right-hand edge of the screen. If you press the stop button, playback will be stopped. You can use the
resume function (see page 20) to return to the point at which you stopped playback.
8
9
www.ls-electronic.de
www.ls-electronic.de
Additional special functions during DVD playback
SUBTITLE (selecting subtitles)
Audio language
Most DVDs contain subtitles in various languages.
1.
During playback, press the SUB TITLE button (44); the selection menu appears on the TV screen.
2.
To select subtitles that are available on the DVD, press the navigation buttons 34 or press the subtitle button several
times.
Please note:
The number and type of subtitles available depends on the particular DVD.
You can close the menu window by pressing the system button (41).
Subtitle language
Selecting dubbing language/audio format - AUDIO
Camera angle
Most DVDs contain several dubbing languages.
1.
During playback, press the AUDIO button (43); the selection menu appears on the TV screen.
2.
To select a film language that is available on the DVD or a certain audio format, press the navigation buttons 34 or
press the audio button several times.
Please note:
The range of language/audio options available depends on the individual DVD.
System
Title/track
Chapter/index
Zoom
Sound
Time input
Opening the DVD MENU
Direct chapter or title selection
If you press the T/C button (37), a selection window will appear on the TV screen.
A "T" for title is highlighted in white. You can now use the navigation buttons 34 (20) to select a title or use the navigation buttons
56 to switch to "C" for Chapter and then select a chapter either using the navigation buttons 34 or by entering a number
directly using the numerical buttons (31) To quickly switch to the chapter/title that you want, press the OK button (23). The system
switches over automatically after approximately 3 seconds.
Selecting a scene by entering a time
Whilst a disc is playing, you can enter a certain point in time and then jump directly to this position.
1.
Whilst the DVD is playing, press the system button (41) to make the selection menu appear on the TV screen.
2.
Press the navigation button 6 repeatedly until you get to the time symbol.
3.
Press the navigation button 4, the picture is paused and the elapsed playing time is displayed.
4.
You can now use the numerical buttons to enter the point in time that you want to jump to. Confirm your input with OK.
You can close the selection menu by pressing the system button (41).
Slow motion
You can slow down playback using this function.
1.
During playback, press the play/pause button (8) to pause playback.
2.
Press and hold down the forwards or backwards skip/search button (10/28RC) until the menu window opens on-screen.
The Recorder starts playing slowly at 1/8 of the normal playing speed.
3.
If you press the skip/search button again, the speed is set to 1/4. If pressed a third time, the speed is set to 1/2.
To return to the normal playing speed, press the play/pause button twice.
ZOOM function
You can use the zoom function to pause the picture and zoom in on the screen content.
1.
During playback, press the zoom button (38) to make a menu window appear on the TV screen.
2.
Use the navigation buttons 34 (20) to set the magnification factor; the picture is paused. After you have selected the
factor, press the OK button (23); a cursor appears in the centre of the TV screen.
3.
You can now use the navigation buttons 3456 to move around within the enlarged image.
Cancel the zoom function by pressing the play/pause button (30). You can close the menu window again by pressing the system
button (41).
Angle function (select the camera angle) - only for a few DVDs
A few DVDs include scenes that were filmed from different camera positions.
1.
During playback, press the ANGLE button (42); the selection menu appears on the TV screen.
2.
To select the individual camera positions, press the navigation buttons 34 or press the angle button several times.
You can close the menu window by pressing the system button (41).
Please note:
The range of options available depends on the particular DVD.
10
Most DVDs have their own menu where you can make various settings changes.
You can open the DVD menu by pressing the DISC button (25). You can navigate in the DVD menu using the navigation buttons
3456 (20). To confirm a selected item, press the OK button (23).
Video CD/MP3
Video CD (Super Video CD) - Please note that not all the playback functions are available in the case of VCDs.
Insert a video CD into the drive. The device starts playing automatically.
MP3
Supports the following formats: ISO 9660, Joliet
Maximum: 99 directories, 999 tracks
Supported sample rate: 44.1 kHz
Supported bitrate: up to 256 kbps
Insert an MP3-CD into the drive. Start playback using the play button; stop playback using the stop button. Change tracks using
the forwards/backwards skip buttons.
Recording
Manual recording
Note
This function allows you to start recording instantly and spontaneously, e.g. to record television programmes that are already being
broadcast. Please make sure that you use a DVD+R or DVD+RW blank for the recording. Please take note of the particular
properties of DVD+Rs and DVD+RWs.
ONLY RECORD ONTO DVD+R and DVD+RW!!
Preparation
If you have inserted a recordable DVD (DVD+R, DVD+RW), the DVD Recorder will display a TITLE INDEX of the contents of the
DVD on the TV screen. Use the navigation buttons 56 (20) to select a title that you want to overwrite (only in the case of
DVD+RWs) or select the EMPTY title window. The empty title window always represents the free space on a DVD at the end of
titles that have already been recorded. The EMPTY title window displays how much space is still available on the DVD for each
particular recording mode. In the case of DVD+R, a new recording is always automatically started at the end of all the other
recordings.
Robert 1
00:29:59 • M1
Tue12/02/2003
Empty title
02:28:01
Select the recording quality
Set the recording quality using the recording mode button (34).
The higher the recording quality the more storage capacity is required.
The following recording options are available to you.
Recording MODE
Recording duration
HQ (High Quality)
very high recording quality
60 min. on a 4.7 GB DVD blank
SP (Standard Play)
high recording quality
120 min. on a 4.7 GB DVD blank
LP (Long Play)
S-VHS picture quality
180 min. on a 4.7 GB DVD blank
EP (Extended Play)
better than VHS picture quality
240 min. on a 4.7 GB DVD blank
EP+ (Extended Play plus) VHS picture quality
www.ls-electronic.de
360 min. on a 4.7 GB DVD blank
www.ls-electronic.de
11
Recording without automatic switch-off
1.
2.
3.
Use the channel +/- buttons (5/32RC) to select the channel that you want to record from. For example, EXT 2 to record
from a connected SAT receiver or a TV channel location to record television programmes from the cable-TV connection.
If necessary, press the monitor button (24) to view the signal that the DVD Recorder is receiving on the TV screen.
Press the REC button (33) to start recording. The Recorder's display shows the remaining time for the space that is still
available on the DVD.
You can stop recording by pressing the stop button (29). "Menu UPDT" appears in the display; an INDEX window is inserted for
the recorded title.
Recording with automatic switch-off
You can set a switch-off time for the instant recording.
1.
2.
3.
4.
Use the channel +/- buttons (5/32RC) to select the channel that you want to record from. For example, EXT 2 to record
from a connected SAT RECEIVER or a channel location to record television programmes from the cable-TV connection.
If necessary, press the monitor button (24) to view the signal that the DVD Recorder is receiving on the TV screen.
Press the REC button (33) to start recording.
You can adjust the recording duration in 30-minute steps by pressing the Rec button several times. The device switches
off automatically after this time elapses.
The recording time can be cleared by pressing the clear button (27); it can also be changed at any time by pressing the REC
button again.
You can stop recording by pressing the stop button (29).
Programmed recording
You can use programmed recording to start recording at some later point in time.
The DVD Recorder switches to the programmed channel number and starts recording.
You can use the DVD Recorder to pre-programme up to 6 different timer recordings within a month.
Note:
Make sure that the date and time of the DVD Recorder are set correctly.
Timer programming
The Recorder needs the following information for timer programming:
•
The date of the recording
•
The channel number of the station or the AV source
•
The starting and finishing time of the recording
•
VPS/PDC on/off
•
The recording quality
1.
Press the timer button (36) to open the timer menu window.
2.
Select the timer programming function using the navigation buttons 56 and press the navigation button 4 to enter
programming mode.
Timer
Timer programming
VPS
Recording
Date Program Start PDC End Mode
01
ARD 20:15
21:30 HQ
Mon-Fri/Weekly
press SELECT
3.
Adding recordings to a title (assemble editing) DVD+RW
To store
Press OK
You can move the marker in programming mode using the navigation buttons 3456 (20). The date is marked - you
can change it using the navigation buttons 56 or by entering the date directly using the numerical buttons (31). You
can also use the select button (22) here to choose whether the recording should take place once, every week or from
Monday to Friday.
Move the marker onto the program number 4 and enter it using the navigation buttons 56 or by directly entering it
using the numerical buttons (31).
Next, set the starting time of the recording - proceed in the same way as you did when entering the previous data. If you
press the SELECT button (22), you can also switch VPS recording on/off for the starting time (see Specialist Terms).
Now set the stopping time for the recording and use the select button (22) to set the recording quality.
You have the option of adding an additional recording to a title that has already been recorded. The new recording is added as a
chapter to the recording. The data is overwritten from this point onwards; the recording quality in which the already existing title
was recorded is used for the new recording too. Titles that follow on from the current title can also be overwritten, depending on
the length of the recording and the remaining space still available on the DVD.
This function is only available when recording onto a DVD+RW.
4.
1.
2.
from.
3.
4.
Confirm the settings you have entered with the OK button (23) and close the menu by pressing the timer button.
Switch the device to standby mode.
If the recording is carried out correctly, timer appears in the display of the DVD Recorder.
Start playing the title up to the point at which you want to start the new recording.
Press the play/pause button (30) and use the channel +/- button (32) to select the channel which you want to record
You can monitor the picture that you want to record by pressing the monitor button.
Start recording by pressing the REC button (33).
You can activate the automatic switch-off function (see previous point) or you can stop the recording at the required time
by pressing the stop button.
5.
6.
ShowView
The ShowView program system simplifies entering the television programme details. You do not need to enter the starting/stopping
time - all that is required is the ShowView number, which can be found in most TV programme guides.
1.
Press the timer button (36) to open the timer menu.
2.
Use the navigation buttons 56 to select the ShowView System item, and start ShowView programming by pressing
the navigation button 4.
3.
Now enter the ShowView number of the programme that you want to record. Use the select button to choose whether
the recording should take place once, every week or from Monday to Friday. Confirm with OK.
Timer
ShowView-system
ShowView-number
----------------Mon-Fri/Weekly
press SELECT
To store
Press OK
4.
Enter the channel from which you want to record. You only need to enter this once for each station. The DVD Recorder
then automatically assigns the ShowView numbers to the appropriate channel. Confirm your selection with OK.
5.
The channel number and the starting and stopping time of the TV programme then appear in the display. Check the data,
select the recording mode (quality) and confirm your selection with OK.
Close the menu by pressing the timer button (36).
Switch the device to standby mode. TIMER appears in the Recorder's display.
12
13
www.ls-electronic.de
www.ls-electronic.de
Changing or deleting programmed recordings (timer)
Favourite scene selection (scene memory)
If you want to delete an already programmed recording or you want to change the starting time of a programmed recording, you
can do so in the timer list.
1.
Press the timer button (36) to open the timer menu.
2.
Use the navigation buttons 56 to select the timer list menu item and open it by pressing the navigation button 4.
This function allows you to adapt the DVD to your preferences. You can set additional chapter markers or delete them and you
can hide chapters (e.g. chapters containing commercials).
T
1
C
1
Favorite Scene Selection
Timer
Timer list
VPS
Recording
Date Program Start PDC
End Mode
01
ARD 20:15 *
21:30 HQ
------:---:-- --
Insert marker
Current chapter
Delete marker
Delete all markers
Total recording time 01:15
To change
press >
Press OK
visible
Exit: press FSS
To exit
press TIMER
Insert chapter markers
3.
4.
5.
Use the navigation buttons 56 to select the programmed item that you want to change or delete.
Press the navigation button 4 to display the selected programmed item.
Now use the navigation buttons 3456 to change certain details of the programmed item or delete the programmed
item entirely by pressing the clear button (27). Confirm your settings or your decision to delete by pressing the OK button
(23).
During playback, open the favourite scene selection menu by pressing the edit button (35). The menu appears on the TV screen.
2.
Use the navigation buttons 56 to select the marker menu item.
3.
As soon as playback reaches the point at which you want to set the marker (e.g. you can use the search/skip function
to go to that position), press the OK button (23). "Marker inserted" appears on the TV screen.
Exit the function by pressing the edit button.
Automatic recordings from a satellite receiver
If you have a satellite receiver that is equipped with timer programming and is capable of activating other devices via the SCART
cable, you can use this function. Please observe the operating instructions for your satellite receiver.
Activate automatic sat recording in the system menu.
1.
2.
3.
4.
5.
6.
7.
Press the system button (41) to open the selection menu.
Move the marker onto the user symbol using the navigation button 5.
Use the navigation button 4 to open the user menu. Now continue moving the marker using the navigation button 4
onto the cassette symbol in order to access the recording settings.
Open the recording settings menu by pressing the navigation button 6 and then move the marker onto the SAT recording
menu item.
Use the navigation buttons 34 to activate or deactivate the SAT recording. Confirm your settings using the OK button
(23). You can close the menu by pressing the system button.
Program your satellite receiver (please follow the operating instructions for your satellite receiver).
Switch the DVD Recorder to standby.
Managing DVD disc content
General
The following information is created automatically if a recording is made onto DVD.
Robert 1
00:29:59 • M1
Di12/02/2003
Leerer Titel
02:28:01
Hiding chapters
Initially all the chapter are visible. You can, however, hide individual chapters (such as those containing commercials) or make
them visible again. During editing, hidden chapters are displayed dimmed.
1.
During playback, open the favourite scene selection menu by pressing the edit button (35). The menu appears on the
TV screen.
2.
Use the navigation buttons 56 to select the "current chapter" menu item.
3.
Use the 4 button to hide or reveal the chapter.
Exit the function by pressing the edit button.
Clearing the chapter marker
Within a title you can clear individual chapter markers or all the chapter markers.
1.
Whilst playing the relevant chapter, press the edit button (35).
2.
Use the navigation buttons 56 to select the "delete current chapter" menu item or "delete all markers". Confirm your
selection with OK.
3.
The device asks you again whether you are sure you want to clear the chapter markers. If yes, confirm again by pressing
the OK button.
Playing whole titles despite individual hidden chapters
You have hidden individual chapters in a title (film) but still want to play the entire title.
1.
Go to the index menu of the DVD. Use the 56 buttons to select the title that you want to play.
2.
Press the 4 button to open the menu for that title.
3.
Use the56 buttons to select the play whole title menu item and confirm with OK. The title starts playing.
Exit the function by pressing the edit button.
•
•
•
•
•
A name for the recording - if no station name is transmitted, the channel is used as the name for the recording
Length of the recording
Recording mode (quality)
Date of the recording
Index picture for the disc menu
The recording is automatically divided into individual chapters (see Specialist Terms) - that is if the automatic chapter function
has been activated in the system in the recording settings section. Later, you can edit the individual chapters and set extra chapter
markers if you like.
You can also hide individual chapters, for instance, in order to hide commercial breaks.
15
14
www.ls-electronic.de
www.ls-electronic.de
Deleting recorded titles
Protecting a DVD against unintentional recording
You can delete individual recorded titles from a disc.
In the case of DVD+RWs, you can simply overwrite the deleted title again.
In the case of DVD+Rs, you can delete a title but the space on the DVD+R will then no longer be available for making other
recordings. Deleted title then appears in the index menu and this entry cannot be overwritten.
To protect important recordings against unintentional deletion, you can write-protect the entire DVD. It is not possible to protect
individual recordings.
Insert the DVD that you want to protect. Go to the disc INDEX of a DVD.
1.
Press the stop button (29). The first title on the DVD is marked.
2.
Move the marker onto the DVD INFO screen using the navigation button 5.
Settings for the title Robert 1
Name
Play whole title
Delete this title
Spain1
00:42:40 used
Tue12/02/2003
Robert 1
AL
DVD playback
x
1.
2.
3.
Go to the index menu of the DVD. Use the 56 buttons to select the title that you want to delete.
Press the 4 button to open the menu for that title.
Use the 56 buttons to select the "delete this title" menu item and confirm by pressing the OK button (23). The Recorder
asks whether you really want to delete the title. If yes, confirm with OK.
3.
You can access the settings for the inserted DVD using the navigation button 4.
Settings for title Spain1
Exit the function by pressing the edit button.
Disc name
Write protected
Delete disc
Entering a name for a recorded title or for the whole DVD
You can enter a title name for each recorded title as well as a name for the DVD.
Spain
Unprotected
Title name
Go to the disc INDEX of a DVD.
1.
Use the navigation buttons 56 to select the title that you want to give a name to.
2.
Press the navigation button 4 to open the settings for the selected title.
4.
5.
6.
Einstellungen für Titel Robert 1
Name
Play whole title
Delete this title
Spain
Use the navigation button 6 to move the marker onto the "Write protection" item.
You can access the write protection settings using the navigation button 4.
Use the navigation button 6 to select the "protected" item and confirm your setting with the OK button (23).
If you want to deactivate write protection again at some later point in time, select the "unprotected" item again.
You can close the menu by pressing the navigation button 3 once.
Finalising a DVD+R
3.
Use the navigation button 4to go to the name of the particular title.
4.
You can change the highlighted letters using the navigation buttons 56 and you can move from one letter to the next
within the name using the navigation buttons 34. Confirm your settings using the OK button (23).
This function is necessary if you want to play a recorded DVD+R in a normal DVD player.
1.
Go to the index menu of a DVD+R. Go to the disc menu using the 5button.
Spain1
00:42:40 used
Tue12/02/2003
You can close the menu by pressing the navigation button 3 once and the navigation button 4 once.
DVD disc name
AL
Insert the DVD that you want to give a name to.
Go to the disc INDEX of a DVD.
1.
Press the stop button (29). The first title on the DVD is marked.
2.
Move the marker onto the DVD INFO screen using the navigation
button 5.
3.
You can access the settings for the inserted DVD using the
navigation button 4.
4.
5.
Press the navigation button 4 again to go to the DVD name.
You can change the highlighted letters using the navigation
buttons 56 and you can move from one letter to the next
within the name using the navigation buttons 34. Confirm
your settings using the OK button (23).
DVD playback
x
Spain1
00:42:40 used
Tue12/02/2003
AL
2.
DVD playback
x
Press the 4 button to open the disc menu.
Settings for title Spain1
You can close the menu by pressing the navigation button 3 once and
the navigation 4 once.
Disc name
Write protected
Delete disc
Spain
Unprotected
Settings for title Spain1
Disc name
Write protected
Delete disc
Spain
Unprotected
3.
Use the navigation buttons 4 to select the "Finalise disc" menu item. Confirm your selection with OK (23).
Now it will no longer be possible to record onto the DVD+R or edit it.
16
www.ls-electronic.de
www.ls-electronic.de
17
The system menu
Picture displacement
You can use the system menu to access various submenus in which you can do such things as configure the DVD player or
change DVD-related settings.
You can displace the picture to suit your television using the 34 buttons.
The yellow line in the system menu indicates which navigation buttons you can use at a particular time.
The device is set to RGB. To connect using the S-Video socket, select S-Video.
Opening the system menu for the user
Audio settings
1.
2.
3.
4.
Depending on which audio connections you are using, you can configure the settings for them in this menu.
Press the system button (41). The vertical selection menu for the DVD opens.
Move the white marker onto the user icon using the navigation button 5.
Open the user menu by pressing the 4 button. The user menu bar opens.
Move the marker in the user menu using the 3456 buttons. Take note of the symbols on the yellow line.
SCART video
Audio
Digital output
All
Analog output
Stereo
Night mode
Off
Digital output
Settings for the devices that are connected to the digital output.
User settings for the DVD Recorder
Picture settings
All
Dolby Digital and DTS signals are supplied at the coaxial digital output for use by amplifiers/receivers with digital
multi-channel decoders.
Only PCM
Dolby Digital signals are converted to PCM signals for receivers/amplifiers that do not have digital multi-channel
decoders.
OFF
Digital output deactivated - for analog amplifiers connected to the analog RCA audio outputs.
Audio settings
Language settings
Analog output
Extra settings
Settings for devices connected to the analog audio output of the DVD Recorder.
Recording settings
Stereo
If the connected device does not have Dolby Surround or Tru Surround - use this setting if you are connecting
the device to a television.
Surround
Dolby Digital signals are mixed into a Dolby Surround compatible signal - use if a Dolby Surround or Pro Logic
decoder is connected.
Installation
Picture settings
Night mode
Picture
Picture format
16:9
Black level settings
Off
Language settings
Vertical displacement
SCART video
The night mode optimises the audio dynamics at low volume levels.
This setting only works for Dolby Digital audio on DVD video.
RGB
Language
Dubbing language
English
Picture format
Audio recording
Language 1
Subtitles
English
The signal that is output by the DVD Recorder can be adjusted to suit your television.
Menu
English
Country
Miscellaneous
4:3 Letterbox
For a wide-screen display with black bars at the top and bottom edges of the screen.
4:3 Panscan
For a picture covering the entire height of the screen, however, in this case the two side edges are cut
off.
Black level setting
18
For adjusting the colour dynamics for NTSC playback.
www.ls-electronic.de
Audio playback
Select the DVD dubbing language
Subtitles
Select the language for activated subtitles
Menu
Language of the on-screen menus
Country
Select the location where the device is being used
www.ls-electronic.de
19
Disc settings menu
Introduction
What is a DVD
“Digital Versatile Disc” is a high-density optical disc which can store video and sound that has been recorded using digital signals
providing a high quality of recording.
Disc functions
Access check
Enter code
Automatic resume
On
Filter mode
Access check (child lock)
Standard
Normal recording
Sport
When using the LP, EP and EP+ recording modes to record sports programmes or other recordings which
contain very fast movements, you might see some slight picture dropouts when fast movements occur due to
the lower quality of these recording levels. The sports filter mode lessens their occurrence.
When accessing for the first time, you must enter a password. You must confirm the new password by entering it again.
Protection level
DVDs that are protected with the child lock are assigned different levels of access rights. Select the l
evel that is suitable for your child.
Level 1 - highest security level for children, Level 8 - lowest level of protection, for instance, for young
people, Level -- - Child lock is deactivated.
Change country
The laws protecting young people are different in different countries. It is therefore necessary for you
to enter again the country in which the device is being used.
Status field
During DVD playback, information about the current operating status is displayed on the TV screen, e.g. for playback, fastforwarding and rewinding, recording and the counter. You can deactivate these displays.
Installation
Auto. prog. search
This is where you can start a new automatic station search if the search failed during the initial installation or if you want to search
for new channels.
Activate the automatic search by pressing the 4 button; the search begins.
Please note that all the channels stored so far will be deleted.
Automatic resume
If you interrupt playback by pressing the stop button or by opening the DVD compartment, playback will be resumed from precisely
the point at which you last interrupted it.
Standby
Manual search
In some exceptional cases, it might not be possible to find some TV stations. You can configure these stations or coded stations
using the manual station search mode.
You can save energy by switching off the clock in standby mode.
Save electricity
The clock time will no longer be displayed in standby mode.
Normal
The Recorder's display shows the clock time during standby.
Installation
Manual search
Channel/Frequency CH
Enter/Search
01
Station number
01
Station name
ARD
Decoder
Off
TV system
PAL-BG
NICAM
On
Fine tuning
0
To store
press OK
Recording settings
This is where you can change the default recording settings.
Recording mode
Recording MODE
Recording duration
You can move the marker in the search menu using the 3456 buttons.
1.
2.
3.
4.
5.
6.
7.
8.
HQ (High Quality)
SP (Standard Play)
LP (Long Play)
very high recording quality
high recording quality
S-VHS picture quality
60 min. on a 4.7 GB DVD blank
120 min. on a 4.7 GB DVD blank
180 min. on a 4.7 GB DVD blank
EP (Extended Play)
better than VHS picture quality
240 min. on a 4.7 GB DVD blank
EP+ (Extended Play plus) VHS picture quality
CH
360 min. on a 4.7 GB DVD blank
Sat recording
In manual search mode, you can choose between entering a channel or a frequency.
Use the numerical buttons (31) to enter the channel or the frequency directly.
Enter the channel number where you want to store the new station.
Enter a station name.
Select decoder.
The TV system for Germany is PAL BG; for France it is Secam.
Nicam is not supported in Germany.
Fine tune the station if it deviates slightly.
This is where you can activate or deactivate the sat recording function as described on page 14.
Autom. chapter
Sort TV channels
This is where you can activate or deactivate the automatic creation of chapters during recording.
20
www.ls-electronic.de
This is where you can sort the found TV channels according to your preferences.
Use the 56 buttons to select a station and mark it with the 4 button. Select the new position for the station using the 3456
buttons and insert it again using the 3 button.
To store the new station order, press the OK button.
You can close the menu by pressing the system button.
www.ls-electronic.de
21
Time / date
Troubleshooting
This is where you can set the time and date on the Recorder.
All the settings are configured using the navigation buttons 3456.
The menu indicates which navigation buttons can be used and when.
•
•
Problem
Cause
Specialist terms
The device does not react
when you press a button. "15
TV ON2" appears in the
display.
•
Device in initial installation mode: Switch on the television set and then switch to the socket of the
DVD Recorder. The language selection menu should then appear. Now read the "Installing for the first
time" section in the "Getting ready for use" chapter.
The device does not react
when you press a button
•
•
No mains power supply: Check the mains power supply
Programmed recording (timer) is currently running: If necessary, cancel the programmed recording
(timer) by pressing the STANDBY button.
Technical fault: Unplug the mains power plug for 30 seconds and then plug it back in again.
If that does not help, you can reset the DVD Recorder to its original state (factory default settings).
DVD
“Digital Versatile Disc” is a high-density optical disc which can store video and sound that has been recorded
using digital signals providing a high quality of recording.
Chapter
Every title on a DVD is made up of a series of numbered sections (“chapters”). This enables you to quickly
access parts of the film simply by entering the chapter number.
If a problem arises, please check the following table first.
If the problem cannot be solved, please contact our service hotline
•
Regional code
DVDs and DVD players are allocated various regional codes. Each DVD player that is assigned regional code
2 can only play DVDs that are also assigned regional code 2.
This function allows the filmmakers to precisely control where and when a new film is released in the world.
For example, this is supposed to prevent a film, which has been released in the United States six months earlier
than in Germany, from being played in Germany.
Reset the device to the factory
default settings
•
Caution:
All data stored in memory (channels, clock time, TIMER) will be reset (deleted).
1.
Unplug the mains power plug from the mains socket.
2.
Press and hold down the STANDBY/ON button on the device and plug the mains power
plug back into the mains socket.
3.
As soon as the "15 TV ON2" display appears, let go of the STANDBY/ON button. All data
stored in memory (channels, clock time, TIMER) will be reset (deleted).
Now read the "Installing for the first time" section in the "Getting ready for use" chapter.
RGB
The 3 colours red, green and blue are sent straight to the television via the SCART cable.
If your television is capable of processing these signals, you will obtain the best picture quality using this type
of connection. To find out whether your device can process RGB signals, please read the operating instructions
that came with your television set or ask your television dealer.
The remote control does not
work:
•
Remote control was not pointed at the device: Does "o(((" appear in the display every time you press
a button? If this indicator lights up, this means that the DVD Recorder is receiving the signal.
Technical fault: Remove the batteries, wait for approx. 10 seconds and then put them back in.
Weak batteries: replace the batteries.
SCART cable
S-Video
The SCART cable (also known as the AV cable) provides the highest quality connection with the DVD Recorder
since it also carries the separate colour signals RGB (red, green, blue). If possible, use SCART connections
to connect your television, DVD Recorder and peripheral devices.
This type of connection (also known as SVHS) provides a good picture quality since brightness and colour are
carried separately. An S-Video cable only carries the video signal. Therefore, if you have chosen to use the SVideo connection, you must additionally connect the audio-out sockets of the DVD Recorder to your television
or stereo sound system.
Title
If two or more films are recorded on a DVD, each of these titles is given a number (1, 2, etc.).
VPS/PDC
A VPS/PDC signal is broadcast by TV stations when a programme begins. It is used to start the Recorder. If
the VPS/PDC function is activated, the Recorder will only start a programmed recording when the TV programme
actually begins.
Note:
Not all stations broadcast a VPS signal. If you program a recording with the VPS signal function activated but
the TV station does not broadcast this signal, the Recorder will not start recording.
•
•
The DVD Recorder does not
play
•
•
•
•
•
•
•
I cannot play (Super) VideoCDs
•
It is possible that this (Super) Video-CD contains a menu and the "PBC" function is deactivated. This
is indicated by "PBC OFF" in the status field. To activate the function, proceed as follows:
1.
Whilst a (Super) Video-CD is inserted, press the SYSTEM MENU button.
2.
Use the 3 or 4 button to select the " " symbol.
3.
Use the CH-6 or CH+5 button to select the "Functions" line and then confirm your choice
by pressing the X button.
4.
In the "PBC" line, use the CH-6 or CH+5 button to select "On".
5.
Confirm your selection with the OK button and exit using the SYSTEM MENU button.
Poor quality playback from the
DVD Recorder (distorted
picture/distorted sound)
•
•
•
Television set is not set up correctly.
Disc is dirty: Clean the disc.
Sometimes slight picture distortion occurs. This is not the result of a problem with your device.
Recording is not possible
•
•
TV station not stored or selected incorrectly: Check the stored TV stations.
Disc is write-protected against making a recording: Deactivate write-protection or change the disc. In
the "Manual recording" chapter, please read the section entitled "Protecting a DVD against unintentional
recording"
A DVD+R that has already been finalised is inserted: Change the disc.
•
Specifications
Voltage supply:
Device
Remote control
Playable media:
Recordable media:
DVD, DVD+R, DVD+RW, DVD-R, CD, CD-R, CD-RW
DVD+R, DVD+RW
Video format:
MPEG 2/MPEG 1
No recording on the disc: Change the disc.
Wrong type of disc inserted. Only the following types of disc can be played: DVD Video, (Super) Video
CD, DVD+R(W), Audio CD, MP3 CDs.
Disc is dirty: Clean the disc.
Wrong regional code: The regional code of the DVD and of the DVD Recorder must match one another.
Child lock activated: Read the chapter entitled "Access check (child lock)"
The channel number (on the television) that is assigned to the DVD Recorder was selected or configured
incorrectly: Select the correct channel number on the television.
Cable connection between the television set and the DVD Recorder is interrupted: Check the connecting
cable.
Programmed recording does
not work
•
•
•
•
•
Clock/date is not set correctly: Check the clock/date.
Recording (timer block) is programmed incorrectly: Check the programmed recording (timer block).
A locked disc is inserted: Deactivate the lock for the disc.
A DVD+R that has already been finalised is inserted: Change the disc.
"VPS/PDC" is activated but "VPS/PDC time" is incorrect: Enter the "VPS/PDC time" accurate down
to the minute. Check the aerial.
After a "programmed recording
using the ShowView system",
the wrong TV station was
decoded (recorded)
•
1.
2.
3.
4.
230 V/50 Hz
2 micro UM-4 batteries of type "AAA"
5.
This product includes technologies that are protected by copyrights (various US patents and further copyrights of
Macrovision Corporation and other owners).
22
Use of these technologies must be authorised by Macrovision Corporation; furthermore, their use is only intended for
the home environment and restricted applications.
Other utilisation is only possible after obtaining authorization from Macrovision Corporation.
Making copies of the construction and dismantling is prohibited.
www.ls-electronic.de
Enter the ShowView programming number for the required TV station.
Confirm with the OK button.
In the "Prog." input field, check the displayed channel number or station description.
If this does not match the TV station that you want, select the input field and change the
channel number / station description.
Confirm with the OK button.
Picture/sound interference
during television reception
•
The picture is distorted or in
black & white during playback
•
•
The TV system of the disc does not comply with the TV system of your television set (PAL/NTSC).
The recording can only be made in colour if the TV station or the connected peripheral device also
supplies colour information. Black & white signals without colour information cannot be recorded.
No audio available at the digital
output
•
Check whether the sound settings are correct for the selected connections and connected devices.
A DVD+RW disc cannot be
played on certain DVD players
•
If a recording is very short, a DVD player might not be able to detect its presence: Please observe
the following "minimum recording times": Recording quality "HQ": 5 minutes, "SP": 10 minutes, "LP":
15 minutes, "EP": 20 minutes, "EP+": 30 minutes
Some DVD players are not capable of playing DVD+RW recordings.
•
•
For playback via the internal TV receiver (tuner) (MONITOR button), set the recording mode to "HQ"
using the REC MODE button. This will ensure the best picture quality possible.
Have someone check your aerial system.
www.ls-electronic.de
23