1
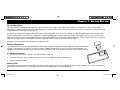
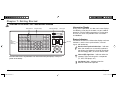
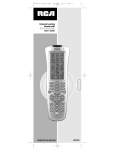
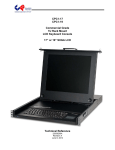
Universal learning remote
with LCD touchscreen and integrated atomic clock
LIGHT
ON/OFF
MACRO
SETUP/SHIFT
VOL
CH
MUTE
+
-
BACK
GUIDE
INFO
OK
MENU
CLEAR
Model ARR1540
User’s Guide
ARR1540 IB.indd 1
11/16/04 5:54:54 PM
Table of Contents
Chapter 1: Getting Started
So the Story Goes... ............................3
Battery Information .............................3
Installing the Batteries .....................3
Battery Saver .................................3
Overview of the ARR1540 Touchscreen
Remote ..........................................4
Information Display ..............................4
Status Indicators ................................4
Keys on the Remote Control .................5
Hard Keys......................................5
Virtual Keys ...................................6
LCD Touchscreen Keypad .................6
Chapter 2: Programming
Component Keys .................................7
Using the Component Keys ...............7
Component Key Tips ............................7
Component Mode Screens ...................8
Using the Auxiliary Keys ...................9
Setting up the Remote .......................10
Programming the Remote ..............11
Direct Entry Method (Code Setup) ...12
Code Search Method .....................13
Key Labels ........................................14
Changing Key Labels......................14
Editing Key Labels .........................15
Resetting All Key Labels .................16
Learning Keys ...................................17
Learning Tips ...............................17
Learning New Keys ......................18
Deleting All Learned Keys for a
Specific Component ....................20
Macros ............................................21
Programming Macros ...................21
Running a Macro ..........................23
Deleting a Macro ..........................24
Reviewing Macro Names................25
Setting the Time and Temperature ......26
Setting the Remote to Control the
Transport Keys of your Component ..33
Setting How Long the LCD
Touchscreen is Displayed ................34
Setting How Long the Backlight
Stays On.......................................35
Clearing All Remote Functions ............36
Reviewing How Much Learning
Memory Has Been Used .................37
Chapter 4: Additional Information
Troubleshooting ................................38
Helpline............................................40
Limited Warranty ..............................40
Chapter 3: Features
Setting an Event Timer ......................28
Deleting an Event Timer .....................29
Setting the TV Sleep Timer .................30
Setting the Beep Tone ........................31
Setting the Remote to Control the
Volume of your Component ............31
2
ARR1540 IB.indd 2
11/16/04 5:54:56 PM
Chapter1:
1:Getting
GettingStarted
Started
Chapter
So the Story Goes...
With the Acoustic Research brand, we strive to bring the latest technology to your home. But it doesn’t just stop there...after all, what good is
technology if it doesn’t enhance your life? Take charge of your home entertainment center and eliminate the clutter of unnecessary remotes with the
Acoustic Research ARR1540 remote control.
It’s about time. Remote technology makes life easier and more enjoyable, which is why this remote has been designed to give you total command
of your home theater—at the press of a single key. Its sophisticated design and latest LCD touchscreen technology make it easy to customize and
allow you to control up to 15 compatible components of the most popular brands of home theater equipment. And it simplifies how you manage your
entertainment options with learning features and an integrated atomic clock that will always be accurate.
Simply put, this remote lets you take the time to enjoy your life.
Battery Information
Your ARR1540 Universal Learning Remote with Touchscreen requires 2 AA batteries (sold separately). When the batteries
are low, a “low battery” icon appears on the LCD screen. Replace the batteries at this time. Every time the batteries are
replaced, the non-volatile memory retains everything you've programmed, so you never have to worry about losing anything.
Installing the Batteries
1. Turn the unit over, push on the tab and slide the battery cover up.
2. Insert the batteries, matching them to the (+) and (-) marks inside the battery compartment.
3. Replace the battery cover.
Battery Saver
Your remote control conserves battery power by automatically turning off if any key is pressed for more than 60 seconds. This saves the batteries
should your remote get stuck in a place where the keys remain depressed for an extended period.
Chapter 1
ARR1540 IB.indd 3
Illustrations contained in this document are for representation only.
3
11/16/04 5:54:57 PM
Chapter 1: Getting Started
Overview of the ARR1540 Touchscreen Remote
Information Display
Status indicators
LIGHT key (Backlight)
Information display
LIGHT
MACRO
1
LCD
touchscreen
keypad
(virtual keys)
MACRO
MACRO
VCR
DVD
2
3
TV
MACRO
MACRO
MACRO
4
VIDEO1
5
VIDEO2
5
SAT/CBL
MACRO
MACRO
MACRO
7
AUX1
8
AUX2
DVD
VCR2
9
INDEX+
ASPECT
SEEK+
MACRO
ON/OFF
MACRO
SETUP/SHIFT
VOL
INDEX–
DVD MENU
SEEK–
CD
TV
INPUT
0
TUNER
ENTER
AM/FM
ZOOM
CHSLECT
SPEED
AUDIO
TEST
PIP
REPLAY
DISCSEL
PIPSWAP
SKIP
RANDOM
PIPCTRL
JUMP
SHUFFLE
FAV
LIVE TV
EJECT
SLEEP
PROGRAM
DSP MODE
TRACK–
PRESET–
TUNE+
SAT
DVD
CABLE
TRACK+
AUD
PRESET+
AUX AMP
CD TUNER
DVR
HD
TUNER
OK
TUNE–
DELAY
VCR
EXIT
AUD2
AUX
AUX AMP
CD TUNER
TV
VCR DVD
SAT CBL
TV.VCR
SUBTITLE
ANTENNA
During normal operation, this dot matrix area displays
the following: time/day of the week, current mode of
operation, and the indoor temperature. During setup
and use, this area also provides other instructions
and feedback.
Indicator light
CH
MUTE
Status Indicators
+
-
Hard keys
BACK
GUIDE
INFO
AUX2
DVR
STB
AUDIO
OK
MENU
CLEAR
This illustration shows the placement of all the touchscreen (virtual) keys as they are
preset at the factory.
Located to the left of the information display are three
indicators: atomic clock synchronization, infrared
signal, and low battery.
Atomic clock synchronization icon – Indicates
when the remote has successfully received a
signal from the National Institute of Standards
and Technology (NIST) to set the atomic clock.
Infrared (IR) signal icon – Indicates when the
remote is communicating with a component
(TV, VCR, DVD player, etc.).
Low battery icon – Indicates when the
batteries need to be replaced.
4
ARR1540 IB.indd 4
Chapter 1
11/16/04 5:54:57 PM
Chapter 1: Getting Started
Keys on the Remote Control
Hard Keys
The rubber keys on the right side of the remote bring up the Setup menu
and operate the features you use most — like changing channels and
adjusting the volume. We’ll refer to these keys as “hard keys” throughout
this user’s guide.
(Listed in alphabetical order)
INFO — Displays on-screen information for a compatible component.
LIGHT — Turns the touchscreen backlight on and off.
MACRO — Used together with virtual macro keys to string together a
series of commands with a single keypress.
MENU — Displays the setup menus for compatible components. This key
is different than the SETUP/SHIFT hard key, which is used in setting up
the remote.
MUTE — Mutes the volume for a compatible TV or audio receiver.
Arrow keys — Select menu items for compatible components. These keys
can also be used to set up the remote, like the LCD touchscreen arrow
keys.
OK — Selects menu items for compatible componets. This key can also be
used to set up the remote, like the LCD touchscreen OK key.
BACK — Allows you to go to the previous channel you selected.
ON/OFF — Turns on and off a compatible component (TV, VCR, DVD
player, etc.)
CH (Channel) up and down keys — Go to the next or previous channel on a
compatible component. Also scroll through some menu items.
CLEAR — Clears menu items or menus for compatible components.
GUIDE — Displays the on-screen program listing for compatible
components (if available).
Indicator light — Lights up when any hard key or virtual key is pressed,
flashes four times to indicate an error condition, or lights up to signal
atomic clock synchronization.
Chapter 1
ARR1540 IB.indd 5
SETUP — Allows you to enter the remote control’s Setup menu and scroll
through the options in most menus. Press and hold the SETUP key to
bring up the Setup menu.
SHIFT — Allows you to toggle through the components using the aux keys.
Also brings up the LCD touchscreen if it has timed out.
VOL (Volume) + /– keys — Increase or decrease the volume for a
compatible TV or audio receiver.
5
11/16/04 5:54:58 PM
Chapter 1: Getting Started
Virtual Keys
The keys on the left side of the remote in the touchscreen area are used for setting up your remote control, programming your components, and
for operating the more advanced functions of your components. For example, changing video input channels on your TV. We’ll refer to these keys as
“virtual keys” or touchscreen keys throughout this user’s guide.
LCD Touchscreen Keypad
The LCD touchscreen keypad consists of 40 virtual keys for programming the remote and using your components. The touchscreen area remains
blank when the remote is not in use; and only the time/date and indoor temperature are displayed. Press the touchscreen keypad to activate it. You
can also use the SETUP/SHIFT hard key.
When the touchscreen is activated, it displays the last active component mode (TV, VCR, DVD, etc.) screen. For example, if you were using the
remote in the TV mode the last time you used it, the TV mode screen would appear again. The remote remains in the last mode you used until you
press another component key.
Note: If the touchscreen is inactive for more than 10 seconds, it turns off to conserve battery power. You can change the LCD On Time located in the
Setup menu.
6
ARR1540 IB.indd 6
Chapter 1
11/16/04 5:54:58 PM
Chapter2:
2:Programming
Programming
Chapter
Component keys
LIGHT
MACRO
1
VCR
MACRO
4
MACRO
MACRO
DVD
2
3
TV
MACRO
MACRO
5
6
5
VIDEO1
VIDEO2
SAT/CBL
MACRO
MACRO
MACRO
TRACK–
9
INDEX–
DVD MENU
SEEK–
INDEX+
ASPECT
SEEK+
0
AM/FM
ZOOM
CHSLECT
SPEED
AUDIO
TEST
OK
ENTER
PIPSWAP
SKIP
RANDOM
PIPCTRL
JUMP
SHUFFLE
FAV
LIVE TV
EJECT
EJECT
SLEEP
PROGRAM
DSP MODE
TUNE–
7
8
AUX1
AUX2
CD
MACRO
INPUT
TUNER
PIP
REPLAY
DISCSEL
11:30 AM TUE
DVD
76.5F
PRESET–
TUNE+
DVD
DVD
VCR2
VCR
VCR
SAT
SAT
DVD
CABLE
TRACK+
AUD
AUD
PRESET+
AUX AMP
AMP
CD TUNER
DVR
DVR
HD
TUNER
AUD2
AUD2
AUX AMP
CD TUNER
TUNER
DELAY
TV
EXIT
TV.VCR
SUBTITLE
SUBTITLE
ANTENNA
AUX
AUX
TV
TV
VCR DVD
SAT CBL
Using the Component Keys
ON/OFF
MACRO
SETUP/SHIFT
VOL
CH
MUTE
+
-
BACK
GUIDE
INFO
AUX2
AUX2
DVR
STB
AUDIO
AUDIO
OK
MENU
The DVD component mode.
Component Keys
This remote control has the ability to control up to 15 components. There are seven dedicated
virtual component modes (TV, DVD, SAT, etc.), five components for the AUX (auxiliary) key and three
components for the AUX2 key. For example, you might have three components programmed to be
controlled by the AUX key. To toggle through the available components for that key, you would press
SETUP/SHIFT until you get to the component you want to control (there is a 5-second timeout).
CLEAR
When a component key is pressed, the corresponding mode screen is displayed (TV, DVR, DVD
player, etc.). If the component key isn't programmed, the default mode screen displays. Only the keys
used for the component you have selected are displayed. For example, in TV mode, you'd see volume
and channel keys, but you wouldn't see play, stop or fast forward/reverse keys.
Component Key Tips
The seven dedicated component keys control a single component for each key. For example, the SAT key can be programmed to control either a satellite
receiver or cable box, but not both.
The AUX and AUX2 keys can be programmed for multiple components; which is convenient if you have several TVs or VCRs, for example. The AUX key
is programmable for a maximum of 5 components at a time (TV, VCR, DVD player, satellite, cable box), and the AUX2 key can program 3 components
(DVR, set-top box, audio receiver).
The AUD (audio) and AUD 2 keys each have an AUX label for programming audio components. These are used for an audio mini system or A/V receiver.
Don't confuse these with the actual AUX component keys.
Chapter 2
ARR1540 IB.indd 7
Illustrations contained in this document are for representation only.
7
11/16/04 5:54:59 PM
Chapter 2: Programming
Component Mode Screens
Here are some of the screens that appear when you press the key for the component you have programmed. For example, the TV mode screen
shows TV functions.
1
2
4
5
6
7
8
9
INPUT
0
ENTER
PIPSWAP
PIPCTRL
PIP
11:30 AM TUE
TV
76.5F
3
DVD
VCR
AUD
ASPECT
TV
SAT
DVR
AMP
AUD2
1
5
6
7
8
9
DVD MENU
INPUT
0
ENTER
ZOOM
TUNER
FAV
3
4
5
6
7
8
9
INPUT
0
ENTER
INDEX+
AUD
REPLAY
EJECT
AUDIO
TRACK–
DVD
TRACK+
TV
2
4
5
6
AUD
DVR
7
8
9
INPUT
0
ENTER
AUX
TV
TUNER
TV.VCR
AUX2
11:30 AM TUE
SAT
76.5F
3
SAT
AUD2
EJECT
1
VCR
AMP
SPEED
VIDEO1
VIDEO2
SAT/CBL
AUX1
AUX2
CD
11:30 AM TUE
AUDIO AMP
76.5F
TV
VCR
SAT
AUD
DVR
AMP
AUD2
AUX
AUX
TV
TV
TUNER
TUNER
AUX2
AUX2
AUDIO
AUDIO
DVD
TV
VCR
SAT
AUD
DVR
AUX
TV
1
AUX2
2
3
4
5
6
7
8
9
INPUT
0
ENTER
SKIP
JUMP
TUNER
REPLAY
11:30 AM TUE
DVR
76.5F
DVD
TV
VCR
SAT
AUD
DVR
AMP
AUD2
AUX
TV
TUNER
LIVE TV
AUDIO
Satellite receiver mode screen
DVD
Audio amplifier mode screen
AUD2
FAV
TV
DVR
AMP
AUDIO
VCR mode screen
SUBTITLE
DVD
SAT
AMP
AUD2
VCR
DVD player mode screen
11:30 AM TUE
VCR
76.5F
INDEX–
AUDIO
VCR
TV
TUNER
TV mode screen
2
ASPECT
DVD
AUX2
SLEEP
ANTENNA
1
11:30 AM TUE
DVD
76.5F
3
4
AUX
TV
2
AUX2
AUDIO
DVR mode screen
These screens show all keys available. The actual keys displayed depend on the code for your component.
8
ARR1540 IB.indd 8
Chapter 2
11/16/04 5:54:59 PM
Chapter 2: Programming
DIGIT
TV
VCR
DVD
DVR
1
2
3
4
5
6
7
8
9
0
1
2
3
4
5
6
7
8
9
0
1
2
3
4
5
6
7
8
9
0
SETUP
INSTANT REPLAY
TOP MENU
ANGLE
TITLE
ZOOM
OPEN/CLOSE
1
2
3
4
5
6
7
8
9
0
SAT/
CBL
1
2
3
4
5
6
7
8
9
0
AUD
AMP
VCR
DVD
TV
VIDEO 1
VIDEO 2
SAT/CBL
AUX1
AUX2
CD
TUNER
AUD
TUNER
1
2
3
4
5
6
7
8
9
0
AUD AUX
CD
VCR / 1
DVD / 2
TV / 3
VIDEO1 / 4
VIDEO2 / 5
SAT/CBL / 6
AUX1 / 7
AUX2 / 8
CD / 9
TUNER / 0
1
2
3
4
5
6
7
8
9
0
Using the Auxiliary Keys
When using the AUX keys after they have been
programmed, press the SETUP/SHIFT key then press
the desired AUX key repeatly to scroll through your
programmed component modes. For example, press
SETUP/SHIFT then AUX or AUX2 until VCR appears. After
5 seconds, SHIFT will timeout, so you’ll need to press it
again to toggle the AUX modes again.
This chart shows how the touchscreen digit keys function when the
remote is in its respective mode and you are attempting to control
compatible components.
The digit keys to the left indicate what key you would press for each
component mode. For example, to bring up the setup menu in DVD
mode for a compatible DVD player, you would press the number 1 key.
Similarly, the AUD AMP (Audio amp) column designates how to change
the input channel for that device, etc.
Chapter 2
ARR1540 IB.indd 9
9
11/16/04 5:55:00 PM
Chapter 2: Programming
1
2
Code Setup
TV
1000
3
4
5
6
7
8
9
DVD
TV
VCR
SAT
AUD
DVR
AMP
AUD2
0
TEST
AUX
TV
Setting up the Remote
The Setup menu is the main menu system of the remote and where you program the remote to
control all your components and set up the advanced features, such as macros, timers, and key
labels.
To display the Setup menu, press and hold the SETUP/SHIFT key until Entering Setup Mode appears.
Press and release the SETUP/SHIFT key or CH +/– keys to toggle through the available menus.
TUNER
AUX2
EXIT
AUDIO
Code Setup, the first screen of the Setup
menu.
The Setup menu has two submenus you'll want to get familiar with: More Options and System Info
Options. These menus allow you to customize your remote even more, including setting how long
the LCD touchscreen is displayed, time and temperature settings, and resetting the remote to the
factory defaults. Both submenus are described in the next few chapters.
You can exit the Setup menu in three ways:
Go to More
Options?
System Info
Options?
OK
•
Press the EXIT key on any of the screens. Then press the OK key to confirm.
•
Scroll to Exit Setup Menu? in the menus using the SETUP/SHIFT or CH +/– keys, then press the
OK key to confirm.
•
Let the menu timeout by not pressing any keys (your settings will not be saved, however).
OK
EXIT
EXIT
The two submenus of the Setup menu, Go to More
Options and System Info Options.
(continued on next page)
10
ARR1540 IB.indd 10
Chapter 2
11/16/04 5:55:00 PM
Chapter 2: Programming
Below are the options in the Setup menu:
•
Code Setup
•
Define New Macro
•
Code Search
•
Setup an Event Timer
•
Key Labels
•
Go to More Options?
•
Learn New Keys
•
Exit Setup?
Programming the Remote
This remote can operate a variety of brands of components. In order for your remote to control your components, you need to program it for each
component. This enables the remote to communicate with your components. Each component has its own “language,” and by programming the remote,
you tell the remote to “speak the same language” as your components.
There are two methods of programming the remote: Direct Entry and Code Search. Most components can be programmed in one of these ways. Try
them in the order listed.
In order to control combo units, like TV/VCRs, TV/DVDs, or TV/VCR/DVDs, you must program the corresponding component keys separately. For
example, to control the DVD part of the unit, you need to program the DVD key; for the TV part, you need to program the TV key. There is a specific
section in the Code List for combo units. The codes in this section should be tried first, using Direct Code Entry on the TV and DVD (or VCR) keys. If this
is unsuccessful, follow the normal programming methods for the TV, DVD, or VCR keys.
While programming your remote, you may want to extend the LCD touchscreen display time (see the “Setting How Long the LCD Touchscreen is
Displayed” section).
Chapter 2
ARR1540 IB.indd 11
11
11/16/04 5:55:01 PM
Chapter 2: Programming
1
2
3
4
5
6
7
8
9
0
Code Setup
TV
1000
Direct Entry Method (Code Setup)
DVD
TV
VCR
SAT
This programming method allows you to enter codes for your component brand directly, which is the
quickest way to program your remote. The codes can be found on the enclosed Code List sheet.
AUD
DVR
1. Manually turn on the component you want to control (TV, VCR, DVD, PVR/DVR, etc.).
AMP
AUD2
TEST
AUX
TV
TUNER
AUX2
EXIT
AUDIO
2. Press and hold the SETUP/SHIFT key until Entering Setup Mode appears briefly. Then Code Setup
appears.
3. Press the component key on the touchscreen for the component you want to program (TV,
VCR, SAT, etc.). For AUX and AUX2, press and release the AUX or AUX2 key until the desired
component appears in the display.
4. Enter the four-digit code for your component brand from the corresponding Code Lists on the
enclosed sheet. If your brand has more than one code listed, begin with the first code. When
a valid code from the list is entered, Success appears. For an invalid code entry, Invalid Code
appears.
The remote automatically tests the code to verify it is valid.
5. If invalid code appears or your component does not respond, try the next code in the list,
repeating steps 4-5. If no other codes exist for your brand, try the Code Search method.
6. Repeat steps 1-5 for any other components you want the remote to operate.
7. When finished, press EXIT. Then press OK to exit the Setup menu.
12
ARR1540 IB.indd 12
Chapter 2
11/16/04 5:55:01 PM
Chapter 2: Programming
Code Search
TV
1000
DVD
TV
VCR
SAT
AUD
DVR
AMP
AUD2
OK
AUX
TV
TUNER
AUX2
EXIT
AUDIO
Tip: You can also use the CH+/– keys to scroll
forward or backward through the Setup
menus.
Note: The Code Search starts from the currently
stored code under that mode. For example, if the
component Code List contains 100 codes and the
currently stored code is 1050, the Code Search
starts from 1051 and continues to 1100 before
looping back to 1000 and finishing at 1050. This
speeds up the process of finding the correct code
for your component, since you may discover that
some codes can turn your component on and off
but are not able to control its other functions.
Chapter 2
ARR1540 IB.indd 13
Code Search Method
If the component you want to control does not respond to any of the codes you have entered using
Code Setup (direct entry), you can search the entire Code List for a code that will control your
component. A particular component might not be listed in the Code List or might be listed under a
different brand, so this would be a more comprehensive search.
1. Manually turn on the component you want to control (TV, VCR, DVD, PVR/DVR, etc.).
2. Press and hold the SETUP/SHIFT key until Entering Setup Mode appears briefly. Then Code Setup
appears.
3. Press and release SETUP/SHIFT or the CH +/– keys until Code Search appears, then press
the component key on the touchscreen for the component you want to program (TV, VCR, SAT,
etc.). For AUX and AUX2, press and release the AUX or AUX2 key until the desired component
appears in the display.
4. Point the remote at the component you want to program, and press the ON/OFF key. Searching
appears... and the remote begins searching all the available codes for your component. This may
take several minutes. The code being tested appears on the touchscreen.
To speed up Code Search, press the up and down arrow keys at one-second intervals. If your
component responds to the command, and the next code is tried before you have a chance to
press OK, you can backtrack through the Code List by pressing the down arrow key. You can
change the direction to forward once again by pressing the up arrow key.
5. Once the component turns off, press OK to save the code.
6. When finished, press EXIT. Then press OK again to exit the Setup menu.
13
11/16/04 5:55:02 PM
Chapter 2: Programming
Key Labels
Select Mode
DVD
Key Labels
TV
VCR
SAT
AUD
DVR
AMP
AUD2
AUX
TV
Changing Key Labels
With your remote, you have the ability to customize the virtual key labels to meet your needs,
changing them to match the functions on your components' remote controls. Use this feature only
after you have finished programming the remote to operate all your components. You can select from
multiple preset key labels or choose to show only the key frame or hide the key completely.
TUNER
AUX2
EXIT
AUDIO
1. Press and hold the SETUP/SHIFT key until Entering Setup Mode appears.
2. Press and release SETUP/SHIFT until Key Labels Select Mode appears, then press the
component key on the touchscreen for the set of keys you want to change. Select Key appears.
Tip: You can also use the CH+/– keys to scroll forward or backward through the Setup menus.
3. Press and release the touchscreen key you want to change until the desired preset label appears.
4. To change other key labels, repeat step 3.
5. Press SETUP/SHIFT to save your changes. Save Changes? appears. Press OK. Changes saved
appears.
6. To choose another component key set to change, press the component key for the set and
repeat steps 3-5.
7. When finished, press EXIT. Then press OK to exit the Setup menu.
To cancel at any time, press the GO BACK key. No Changes Made appears.
14
ARR1540 IB.indd 14
Chapter 2
11/16/04 5:55:02 PM
Chapter 2: Programming
Editing Key Labels
You can also name your key labels to match the learned keys from your original remote or give any key a customized name when the key is pressed. Your
customized key name is displayed in the information display under the component mode you are currently using (TV, VCR, etc) when you press it.
1. Press and hold the SETUP/SHIFT key until Entering Setup Mode appears.
2. Press and release SETUP/SHIFT until Key Labels Select Mode appears, then press the component key on the touchscreen for the set of keys you
want to change. Select Key appears.
Tip: You can also use the CH+/– keys to scroll forward or backward through the Setup menus.
3. Press and hold the key on the touchscreen you want to change until Key Name? appears. The default key name is shown.
4. Use the up and down arrow keys to choose the first letter, and the left and right arrows to move to the next letter.
5. When finished naming the label, press OK. Save Changes? appears. Press OK again. Changes saved appears.
6. To rename other keys for the same component mode, repeat steps 3-5.
7. Press SETUP/SHIFT to save your changes. Save Changes? appears. Press OK. Changes saved appears.
8. To choose another component key set to change, press the component key for the set and repeat steps 3-7.
9. When finished, press EXIT. Then press OK to exit the Setup menu.
To cancel at any time, press the GO BACK or EXIT key. No Changes Made appears.
Note: A key will only be displayed if it is supported by the code of your component or is a learned key.
Chapter 2
ARR1540 IB.indd 15
15
11/16/04 5:55:02 PM
Chapter 2: Programming
Resetting All Key Labels
You can reset all key labels for all modes back to the factory defaults with this feature.
1. Press and hold the SETUP/SHIFT key until Entering Setup Mode appears.
2. Press and release SETUP/SHIFT until Go to More Options appears, then press OK. System Info Options? appears.
Tip: You can also use the CH+/– keys to scroll forward or backward through the Setup menus.
3. Press and release SETUP/SHIFT until Clear All Key Labels appears, then press OK.
4. Clear All Key Labels? Pls Confirm appears. Press OK to confirm. All key labels reset to the factory defaults.
5. When finished, press EXIT. Then press OK to exit the Setup menu.
To cancel at any time, press EXIT. No Changes To Key Labels appears.
16
ARR1540 IB.indd 16
Chapter 2
11/16/04 5:55:03 PM
Chapter 2: Programming
Learning Keys
Learning Tips
Before transferring commands from your original remote to the ARR1540, check out these useful tips on Learning.
1. Make sure you are using fresh batteries in both the ARR1540 and your original remote(s).
2. Point the top of the original remote at the bottom of the ARR1540 so the IR LED on the original
remote is in line with the ARR1540's Learn sensor.
3. The distance between the two remotes should be approximately 2-3 inches.
4. To ensure that your units are compatible and to increase your familiarity with the Learning
process, you may want to experiment by learning two or three keys initially. Then, clear all learned
keys before learning all the desired functions from your original remote (see page 20).
5. Incandescent or low-energy light can cause interference with the infrared transmissions between
the remotes (how the remotes communicate to each other). When using the Learning function,
keep the remotes at least three feet away from such light sources.
Learn sensor
6. When learning a key, do not release the key on your original remote until Learning Success appears on the touchscreen, which takes approximately
2-3 seconds. Until this occurs, Learning New Key... appears.
7. If there is a problem during the Learning process, Learning Error appears.
8. All Learned keys are saved automatically.
9. When the memory is full, Learning Memory Full appears and the indicator light flashes for two seconds. It isn't possible to learn any additional keys
without first clearing all learning memory (see page 20).
Chapter 2
ARR1540 IB.indd 17
17
11/16/04 5:55:03 PM
Chapter 2: Programming
Learn New
Keys
Select Mode
DVD
Learning New Keys
TV
VCR
SAT
AUD
DVR
AMP
AUD2
AUX
TV
TUNER
Your remote has the ability to learn and store commands from your original remote(s) under the
mode(s) of your choice. You can learn 400 keys total.
Codes from the Code Lists include basic functionality for each component the remote operates. Once
you have programmed the remote to control your component, you can customize your remote to
include certain functions from your original remote(s) that the codes may not cover. This allows you to
transfer most functionality from existing remotes to your ARR1540 remote.
AUX2
EXIT
AUDIO
1. Gather all the remotes that you want to learn and have them all lined up on a flat surface before
going into the Learn New Keys mode.
2. Point the top of the first remote at the bottom of the ARR1540 so the IR LED on that remote is
in line with the ARR1540's Learn sensor. The remotes should be positioned 2-3 inches apart.
Tip: If you want to learn from a universal remote, you must press the component key on that remote
to select the desired mode before proceeding with Learning. For example, pressing the VCR key on
your original universal remote will allow your ARR1540 to learn from that component mode.
4. Press and hold the SETUP/SHIFT key until Entering Setup Mode appears.
Tip: You can also use the CH+/– keys to scroll forward or backward through the Setup menus.
5. Press and release SETUP/SHIFT until Learn New Keys Select Mode appears, then press the
component key on the touchscreen for the set of keys you want to learn. Select Key appears.
Learn sensor
18
ARR1540 IB.indd 18
6. Press the touchscreen key or hard key you want to learn to. Learning New Key... appears.
Chapter 2
11/16/04 5:55:04 PM
Chapter 2: Programming
Note: You can't learn any commands under the SETUP/SHIFT, MACRO, LIGHT or any component keys on the touchscreen.
7. Press and hold the original remote key you want to transfer to the ARR1540 until Learning Success appears. This process can take 2-3 seconds to
complete. Do not move the remotes during the learning process.
8. Release the original remote key. If there is a problem during the Learning process, Learning Error appears. If this happens, try adjusting the distance
between the remotes slightly and repeat steps 6-7.
9. Key Name? appears, allowing you the option to change the name. Use the up and down arrow keys to choose the first letter, and the left and right
arrows to move to the next letter.
10. When finished naming the key, press OK on the touchscreen. Save Changes? appears. Press OK again. Changes saved appears.
11. Repeat steps 6-10 for other keys to be learned.
12. When all the original remote commands have been learned, press SETUP/SHIFT to save the changes. Learning Completed appears.
13. To learn from other remotes, press the component key you want to learn to and repeat steps 6-12.
14. When finished, press EXIT. Then press OK to exit the Setup menu.
If Learning Memory Full appears when you try to learn a new key, you need to clear the learned memory before you can learn new keys.
•
To clear all learned keys when Clear All Learning Memory appears, press the OK key on the touchscreen. Clearing All Learned Memory appears. All
learned keys for all components are cleared.
•
To clear only a specific set of learned keys for a component, see the Deleting All Learned Keys for a Specific Component section on page 20.
•
To exit without clearing any learned keys, press EXIT. Remember, you won’t be able to learn additional keys.
Chapter 2
ARR1540 IB.indd 19
19
11/16/04 5:55:04 PM
Chapter 2: Programming
Clear
Learning
For Device
Deleting All Learned Keys for a Specific Component
DVD
You can delete all learned keys for a specific component with this feature.
VCR
SAT
DVR
AUX
Note: If no learned keys have been programmed, this option doesn't appear in the Setup menu.
1. Press and hold the SETUP/SHIFT key until Entering Setup Mode appears.
TV
AUX2
EXIT
AUDIO
2. Press and release SETUP/SHIFT until Go to More Options appears, then press the OK key.
System Info Options? appears.
Tip: You can also use the CH+/– keys to scroll forward or backward through the Setup menus.
3. Press and release SETUP/SHIFT until Clear Learning For Device appears, then press the
component key on the touchscreen for the learned keys you want to delete. Clr TV (VCR, DVD,
etc.) Learning? Pls Confirm appears.
4. Press OK to confirm. TV Learning Cleared appears.
5. To delete additional learned keys, select another component and repeat step 4.
6. When finished, press EXIT twice. Then press OK to exit the Setup menu.
To cancel at any time, press EXIT. No Learning Cleared appears.
20
ARR1540 IB.indd 20
Chapter 2
11/16/04 5:55:04 PM
Chapter 2: Programming
MACRO
MACRO
MACRO
1
2
3
MACRO
MACRO
MACRO
4
5
6
MACRO
MACRO
MACRO
8
9
7
Macros
Define New
Macro
Programming Macros
Any sequence of commands that you regularly perform can be programmed as a macro and
reduced to a single key press. A total of 25 commands can be stored under each of the 10
available macro keys.
MACRO
0
You can even add delays between Learned commands. This might be necessary if a component
needs time to warm up before turning on, for example.
EXIT
Here’s an example of a macro and what the
remote would do when running it:
1. Turn on the TV and tune it to channel 3.
2. Turn on the satellite receiver and tune it to
channel 57.
3. Turn on the VCR and start recording.
The sequence of commands you want a macro to execute must be programmed in correct
sequential order. Also, you cannot program a macro within a macro or link macros together.
1. Press and hold the SETUP/SHIFT key until Entering Setup Mode appears.
2. Press and release SETUP/SHIFT until Define New Macro appears, then press the macro key on
the touchscreen you want to program. Select Macro# (1-10, etc.) Mode appears.
Tip: You can also use the CH+/– keys to scroll forward or backward through the Setup menus.
3. Press the component key for the first component you want to program (TV, VCR. etc.). Select
Macro# Keys appears.
4. Press the key you want to add to the macro. Key Stored in Macro# appears. Remember, if you
want to change to a different component, press the component key before adding the command
key. For example: TV, INPUT, DVD, PLAY.
(continued on next page)
Chapter 2
ARR1540 IB.indd 21
21
11/16/04 5:55:05 PM
Chapter 2: Programming
5. To add additional commands, repeat steps 3-4.
6. Press SETUP/SHIFT to save the macro. Save Macro #? appears.
You now have 4 options:
• To save, press OK on the touchscreen. Macro # Saved appears. Then Change Macro # Name? appears, allowing you to change the name.
• To add a delay between the commands, press DELAY on the touchscreen. Key Delay appears. Use the up and down arrows on the touchscreen
to adjust the desired delay, and press OK to go to the next command. The default is .5 seconds between each key press. Save Delay Changes
appears after the last key press. Press OK to confirm. Macro # Saved appears. Then Change Macro # Name? appears, allowing you to change
the name.
• To test the macro, point the remote at your components and press TEST on the touchscreen. Macro # Running... appears. After the macro
runs, press OK on the touchscreen. Macro # Saved appears. Then Change Macro # Name? appears, allowing you to change the name.
7. You may now change the name or keep it the same.
• To change the name, press OK. Macro # Name? appears. Use the up and down arrow keys to choose the first letter, and the left and right
arrows to move to the next letter. When finished naming the macro, press OK. Save Changes? appears. Press OK again. Changes saved
appears.
• To keep the same name, press EXIT. Macro # Name Not Changed appears.
22
ARR1540 IB.indd 22
Chapter 2
11/16/04 5:55:05 PM
Chapter 2: Programming
8. To program other macros, press the macro key on the touchscreen you want to program, and repeat steps 3-7.
9. When finished, press EXIT. Then press OK to exit the Setup menu.
To cancel at any time, press EXIT. Macro # Not Saved appears.
Tip: You may want to replace an existing macro with a new one, instead of deleting it. To overwrite a macro, choose the macro you want in step 2
above. Overwrite Macro # (1, 2, etc) appears. Press OK to delete the macro. Then choose the macro again to reprogram it.
MACRO
2
Macro 2
Running ...
Running a Macro
Note: You need to have a macro programmed to use this feature (see Programming Macros).
1. Press the MACRO hard key. Choose Macro or Sleep Timer appears.
2. Press the macro key on the touchscreen you want to run. Macro # (0-9, etc) Running appears.
Chapter 2
ARR1540 IB.indd 23
23
11/16/04 5:55:06 PM
Chapter 2: Programming
MACRO
MACRO
MACRO
1
2
3
Deleting a Macro
Clear Macro
Select One
Notes: Any event timers associated to the macro are also deleted with this function.
If no Macros have been programmed, this option doesn't appear in the Setup menu.
1. Press and hold the SETUP/SHIFT key until Entering Setup Mode appears.
2. Press and release SETUP/SHIFT until Go to More Options appears, then press the OK key.
System Info Options? appears.
EXIT
Tip: You can also use the CH+/– keys to scroll forward or backward through the Setup menus.
3. Press and release SETUP/SHIFT until Clear Macro Select One appears, then press the Macro
key on the touchscreen you want to delete. Clear M# (M2, M3, etc) Pls Confirm appears for the
macro number you have selected.
4. Press OK to confirm. Macro# cleared appears.
5. To delete additional macros, select another macro and repeat step 4.
6. When finished, press EXIT twice. Then press OK again to exit the Setup menu.
To cancel at any time, press EXIT. No Macros Cleared appears.
24
ARR1540 IB.indd 24
Chapter 2
11/16/04 5:55:06 PM
Chapter 2: Programming
MACRO
MACRO
MACRO
1
2
3
Reviewing Macro Names
Macro Names
Pick Macro
This feature shows you what your macros are named, which is especially convenient if you have
programmed multiple macros.
Note: If no macro keys have been programmed, this option doesn't appear in the Setup menu.
1. Press and hold the SETUP/SHIFT key until Entering Setup Mode appears.
EXIT
2. Press and release SETUP/SHIFT until Go to More Options appears, then press the OK key.
System Info Options? appears.
Tip: You can also use the CH+/– keys to scroll forward or backward through the Setup menus.
3. Press OK. Learning Memory Used appears.
4. Press and release SETUP/SHIFT until Macro Names Pick Macro appears.
5. Press the macro key number for the one you want to see. The name of the macro appears.
6. To review other macro names, select another macro key.
7. When finished, press EXIT three times. Then press OK to exit the Setup menu.
Chapter 2
ARR1540 IB.indd 25
25
11/16/04 5:55:06 PM
Chapter 2: Programming
Setting the Time and Temperature
Time and
Temperature
Settings?
This feature allows you to set the time, date, and inside temperature (including synchronizing the
atomic clock). Keep in mind that this must be set correctly before Event Timers can be programmed.
The atomic clock in the ARR1540 provides extremely accurate timekeeping by synchronizing the
current time with the atomic radio signal generated from Colorado. The LCD touchscreen is blank
and the indicator light is on when the remote is receiving the information. You never have to reset
this clock once you have selected the settings in the Time and Temperature Options.
OK
EXIT
Tip: You can scroll faster if you press and
hold the arrow keys.
Note: You must select your settings in the Time and Temperature Options before the Atomic Clock
provides accurate timekeeping.
1. Press and hold the SETUP/SHIFT key until Entering Setup Mode appears.
2. Press and release SETUP/SHIFT until Go to More Options appears, then press the OK key.
System Info Options? appears.
Tip: You can also use the CH+/– keys to scroll forward or backward through the Setup menus.
3. Press and release SETUP/SHIFT until Time and Temperature Settings? appears, then press OK.
Temperature Units appears.
4. Press the arrow keys to set the desired units (Fahrenheit: F or Celsius: C).
5. Press OK to confirm. Time Format appears.
6. Press the arrow keys to set the desired format (12 hour or 24 hour).
7. Press OK to confirm. Daylight Savings appears.
26
ARR1540 IB.indd 26
Chapter 2
11/16/04 5:55:07 PM
Chapter 2: Programming
8. Press the arrow keys to set the desired setting (Yes or No).
9. Press OK to confirm. Time Zone appears.
10. Press the arrow keys to set the desired time zone (Eastern, Pacific, Mountain, or Central).
11. Press OK to confirm. Current Year appears.
12. Press the arrow keys to set the year.
13. Press OK to confirm. Current Month appears.
14. Press the arrow keys to set the month.
15. Press OK to confirm. Current Day of Month appears.
16. Press the arrow keys to set the day.
17. Press OK to confirm. Current Hour appears.
18. Press the arrow keys to set the hour. For AM/PM, repeatedly scroll through the hour settings until you reach the desired setting.
19. Press OK to confirm. Current Minute appears.
20. Press the arrow keys to set the minute.
21. Press OK to confirm. Retrieve RCC signal? appears, asking if you want to synchronize the time.
22. If you want the remote to find the Radio Controlled Clock signal automatically, press OK. This may take up to ten minutes. The display is blank during
this time and the indicator light is on. This is normal.
23. When finished, press EXIT twice. Then press OK to exit the Setup menu.
To cancel at any time, press SETUP/SHIFT.
Chapter 2
ARR1540 IB.indd 27
27
11/16/04 5:55:07 PM
Chapter
Chapter3:
3:Features
Features
1
2
3
4
5
6
Setting an Event Timer
Setup an
Event Timer
EXIT
Note: You must set the time and day before you
set an event timer (see page 26). Also, at least
one macro must be programmed to set an event
timer.
Tip: You can also use the CH+/– keys to scroll
forward or backward through the Setup menus.
28
ARR1540 IB.indd 28
The Event Timer lets you program your remote to turn a component (TV, VCR, AUDIO, etc.) on or off
at the preprogrammed time using a macro. For example, you can program your remote to control
audio equipment to turn music on, program your TV as a Sleep Timer to turn off at a certain time,
or program your VCR to turn on and record. Up to 6 timer events can be set. After setting up your
Event Timer, be sure to leave the remote pointed at the component(s) you have programmed it to
control. They will have to be in the remote’s line-of-sight in order for this feature to work.
1. Press and hold the SETUP/SHIFT key until Entering Setup Mode appears.
2. Press and release SETUP/SHIFT until Setup an Event Timer appears, then press the event timer
key on the touchscreen you want to set up. Pick Macro for Timer # (1, 2 etc.) appears.
3. Press the macro key on the touchscreen you want to add. Set Start Timer Hour appears.
4. Use the arrow keys to set the hour, and press OK. Set Start Timer Min appears.
5. Use the arrow keys to set the minutes, and press OK. Timer Frequency appears.
6. Use the arrow keys to set how often you want the event to happen (One Time, Every Day, and
Weekly). Then press OK.
• If you choose One Time or Weekly, Day of Week? appears. Use the arrow keys to choose the
day of week, then press OK. Timer Setup Complete appears.
7. To set additional timers, select another timer and repeat steps 3-6.
8. When finished, press EXIT. Then press OK to exit the Setup menu. A “T ” appears in the
information display, indicating a timer is set.
To cancel at any time, press EXIT. Timer Setup Canceled appears.
To overwrite a timer with a new event, choose the timer you want in step 2 above. Overwrite Timer #
(1, 2, etc) appears. Press OK to confirm. Timer # Deleted appears.
Illustrations contained in this document are for representation only.
Chapter 3
11/16/04 5:55:07 PM
Chapter 3: Features
1
2
3
Deleting an Event Timer
Clear
Event Timer
Select One
Note: If no macros have been programmed, this option doesn't appear in the Setup menu.
1. Press and hold the SETUP/SHIFT key until Entering Setup Mode appears.
2. Press and release SETUP/SHIFT until Go to More Options appears, then press the OK key on the
touchscreen. System Info Options? appears
Tip: You can also use the CH+/– keys to scroll forward or backward through the Setup menus..
EXIT
3. Press and release SETUP/SHIFT or the CH +/– keys until Clear Event Timer Select One appears,
then press the event timer key on the touchscreen you want to delete. Clear Timer # (1,2 etc) Pls
Confirm appears for the timer number you have selected.
4. Press OK to confirm. Timer# cleared appears.
5. To delete additional timers, select another timer and repeat step 4.
6. When finished, press EXIT twice. Then press OK to exit the Setup menu.
To cancel at any time, press EXIT. No Timers Cleared appears.
Chapter 3
ARR1540 IB.indd 29
29
11/16/04 5:55:08 PM
Chapter 3: Features
MACRO
MACRO
MACRO
1
2
3
Setting the TV Sleep Timer
Choose
Macro Or
Sleep Timer
You can set the remote to turn your TV off at a specific time. Once programmed, you can continue
using the remote control without affecting the Sleep Timer if you don’t press the ON•OFF key while in
the TV mode; this cancels the Sleep Timer. The default sleep timer setting is 5 minutes, and can be
set up to 60 minutes.
1. Press and release the MACRO hard key located to the right of the touchscreen. Choose Macro
or Sleep Timer appears.
SLEEP
EXIT
2. Press the SLEEP key on the touchscreen. Set TV Sleep Timer appears.
3. Press the arrow keys on the touchscreen to set the desired time (from 5 to 60 minutes, in 5minute increments).
Set TV
Sleep Timer
05 Min
4. Press OK to confirm. Sleep Timer Setup Complete appears and the setting is saved.
Note: To cancel at any time, press EXIT. Sleep Timer Setup Canceled appears.
To cancel the TV sleep timer once it has been set up, press and release the ON•OFF key while the
remote is in the TV mode.
OK
EXIT
30
ARR1540 IB.indd 30
Chapter 3
11/16/04 5:55:08 PM
Chapter 3: Features
Setting the Beep Tone
Set Beep
Off > On
Your remote beeps whenever a key is pressed to acknowledge the keypress. You can turn this feature
on or off. The default setting is On.
1. Press and hold the SETUP/SHIFT key until Entering Setup Mode appears.
2. Press and release SETUP/SHIFT until Go to More Options appears, then press the OK key.
System Info Options? appears.
OK
EXIT
Tip: You can also use the CH+/– keys to scroll forward or backward through the Setup menus.
3. Press and release SETUP/SHIFT until Set Beep appears, then use the arrow keys to turn the
beep on or off. Press OK to save the setting. Beep Setting Saved appears.
4. When finished, press EXIT twice. Then press OK to exit the Setup menu. or C
Volume
Punch-Thru
From?
Setting the Remote to Control the Volume of your Component
DVD
VCR
SAT
This feature allows your remote to control the volume of a component (or punch-thru), regardless of
the mode. For example, you can adjust the volume while in DVD mode without having to first press
the TV key. The default is set to punch-thru to TV.
DVR
1. Press and hold the SETUP/SHIFT key until Entering Setup Mode appears.
AUX
OK
VCR
AUX2
EXIT
Chapter 3
ARR1540 IB.indd 31
DVR
2. Press and release SETUP/SHIFT until Go to More Options appears, then press the OK key.
System Info Options? appears.
31
11/16/04 5:55:09 PM
Chapter 3: Features
Tip: You can also use the CH+/– keys to scroll forward or backward through the Setup menus.
3. Press and release SETUP/SHIFT until Volume Punch-Thru From? appears, then press the component key on the touchscreen for the component
the volume will come from. For example, if you want the volume keys to work in DVD mode, you would press DVD.
4. Press OK to confirm. Volume Punch-Thru To? appears.
5. Press the key on the touchscreen for the component you want to control the volume. For example, if you want your audio receiver to control the
volume, you would press AUD. Volume Settings Saved appears.
6. To add additional component punch-thrus, select another component and repeat steps 4-5.
7. When finished, press EXIT twice. Then press OK again to exit the Setup menu.
To cancel at any time, press EXIT.
32
ARR1540 IB.indd 32
Chapter 3
11/16/04 5:55:09 PM
Chapter 3: Features
Setting the Remote to Control the Transport Keys of your Component
Transport
Punch-Thru
Off > On
This feature allows your remote to control the transport keys (Reverse, Play, Forward, Stop, and
Pause) of the last component you used (DVD player, DVR, or VCR), regardless of the mode. For
example, you can fast forward a DVD while in TV mode without having to first press the DVD key. The
default is set to on and to punch-thru to DVD.
1. Press and hold the SETUP/SHIFT key until Entering Setup Mode appears.
OK
EXIT
2. Press and release SETUP/SHIFT until Go to More Options appears, then press the OK key.
System Info Options? appears.
Tip: You can also use the CH+/– keys to scroll forward or backward through the Setup menus.
3. Press and release SETUP/SHIFT until Transport Punch-Thru appears, then use the arrow keys to
turn punch-thru on or off. Press OK to save the setting. Transport Punch-thru Saved appears.
4. When finished, press EXIT twice. Then press OK to exit the Setup menu.
Chapter 3
ARR1540 IB.indd 33
33
11/16/04 5:55:09 PM
Chapter 3: Features
Setting How Long the LCD Touchscreen is Displayed
LCD On Time
10 Sec
You can change the amount of time the LCD displays before timing out, which is especially convenient
while programming the remote. The default setting is 10 seconds.
Tip: Setting this feature for a 10-second delay maximizes battery life. If you changed the LCD On Time
to 90 seconds when setting it up, you may want to reset the time back to 10 seconds once you're
finished with setup.
OK
EXIT
1. Press and hold the SETUP/SHIFT key until Entering Setup Mode appears.
2. Press and release SETUP/SHIFT until Go to More Options appears, then press the OK key.
System Info Options? appears.
Tip: You can also use the CH+/– keys to scroll forward or backward through the Setup menus.
3. Press and release SETUP/SHIFT until LCD On Time appears, then press the arrow keys to set
the desired time (from 10 to 90 seconds, in 10-second increments).
4. Press OK to confirm. LCD On Time Saved appears and the setting is saved.
5. When finished, press EXIT twice. Then press OK to exit the Setup menu.
To cancel at any time, press EXIT.
Note: The LCD On Time can't be shorter than the Backlight On Time (see page 35).
34
ARR1540 IB.indd 34
Chapter 3
11/16/04 5:55:10 PM
Chapter 3: Features
Setting How Long the Backlight Stays On
Backlight
On Time
10 Sec
You can change the amount of time the touchscreen lights up when you press the LIGHT key. The
default setting is 10 seconds.
1. Press and hold the SETUP/SHIFT key until Entering Setup Mode appears.
2. Press and release SETUP/SHIFT until Go to More Options appears, then press the OK key.
System Info Options? appears.
OK
EXIT
Tip: You can also use the CH+/– keys to scroll forward or backward through the Setup menus.
3. Press and release SETUP/SHIFT until Backlight On Time appears, then press the arrow keys to
set the desired time (from 10 to 90 seconds, in 10-second increments).
4. Press OK to confirm. Backlight On Time Saved appears and the setting is saved.
5. When finished, press EXIT twice. Then press OK to exit the Setup menu.
Note: The Backlight On Time can't be greater than the LCD display time.
To cancel at any time, press EXIT.
Chapter 3
ARR1540 IB.indd 35
35
11/16/04 5:55:10 PM
Chapter 3: Features
Clearing All Remote Functions
Clear All
Remote
Functions
This feature completely resets the remote to its factory default settings, and is convenient if you want
a fresh start instead of deleting your settings. It clears all customer-programmed codes, Learned
commands, macros, and events, and resets all key labels.
1. Press and hold the SETUP/SHIFT key until Entering Setup Mode appears.
OK
2. Press and release SETUP/SHIFT until Go to More Options appears, then press the OK key.
System Info Options? appears.
EXIT
Tip: You can also use the CH+/– keys to scroll forward or backward through the Setup menus.
3. Press and release SETUP/SHIFT until Clear All Remote Functions appears, then press OK.
4. Clear All Functions? Pls Confirm appears. Press OK to confirm. All settings reset to the factory
defaults.
To cancel at any time, press EXIT. No Functions Cleared appears.
36
ARR1540 IB.indd 36
Chapter 3
11/16/04 5:55:10 PM
Chapter 3: Features
Reviewing How Much Learning Memory Has Been Used
Learning
Memory
Used: 20%
This feature allows you to see how much memory your learned keys have used.
1. Press and hold the SETUP/SHIFT key until Entering Setup Mode appears.
2. Press and release SETUP/SHIFT until Go to More Options appears, then press the OK key.
System Info Options? appears.
Tip: You can also use the CH+/– keys to scroll forward or backward through the Setup menus.
EXIT
3. Press OK. Learning Memory Used appears, with the approximate percentage of how much
memory has been used by the learned keys.
4. When finished, press EXIT three times. Then press OK to exit the Setup menu.
Chapter 3
ARR1540 IB.indd 37
37
11/16/04 5:55:11 PM
Chapter4:
4:Additional
AdditionalInformation
Information
Chapter
Troubleshooting
Most problems you encounter with your product can be corrected by consulting the following troubleshooting list.
The touchscreen does not show anything when you touch it or when you press the SETUP/SHIFT or LIGHT keys.
• Replace the batteries.
• Check to make sure the batteries are properly installed.
The remote does not operate your audio or video components.
• Make sure the remote is in the correct mode for the component you are attempting to control (TV, VCR, DVD, etc.)
• Make sure the remote is pointed at the IR sensor of the component you are trying to operate.
• Operate the remote control at a distance of no more than 20 feet from the component.
• Remove any obstacles between the remote and your components. If your component is in a glass cabinet, the doors might obstruct the remote
control from operating the component. Open the doors.
• You might need to reset the remote to the factory defaults (see “Clearing All Remote Functions” on page 36). Keep in mind, this clears all customerprogrammed codes, learned commands, macros, events, and resets all key labels.
• Try another code from the code list or the code search method. There is a possibility that a code may be partially compatible. You may want to try
other codes for more functionality and test the remote again.
38
ARR1540 IB.indd 38
Illustrations contained in this document are for representation only.
Chapter 4
11/16/04 5:55:11 PM
Chapter 4: Additional Information
You have problems programming the remote to control a TV/VCR, TV/DVD, or TV/VCR/DVD combination unit.
• Try the VCR or DVD code for your brand. Some combination units, however, may require both a TV and a VCR or DVD code for full operation. To do
this, program the TV code under the TV key and the VCR or DVD under the VCR or DVD key. Similarly, for a TV/VCR/DVD unit, program the TV,
VCR, and DVD keys separately.
Macro, Sleep Timer, or Event Timer won’t run.
• Check that the remote is pointed at the component(s) you have programmed it to control. They have to be in the remote’s line-of-sight in order for
these features to work. Also, you can’t set up an event timer if no macros have been defined.
The LCD touchscreen times out too quickly.
• Adjust the LCD ON Time setting to give you more time before the display times out. See page 34.
I can’t change the AUX keys to the component I want to control.
• Once the AUX keys are programmed, you need to press the SETUP/SHIFT button then press the desired AUX or AUX2 key repeatedly to scroll
through your programmed components. The SETUP/SHIFT key times out after 5 seconds.
The light indicator is on but the LCD touchscreen is blank.
• The remote is attempting to synchronize the current time with the atomic clock radio signal generated from Colorado (usually between 3-6 AM). This
is normal. If you want to abort this process, press the SETUP/SHIFT key.
Chapter 4
ARR1540 IB.indd 39
39
11/16/04 5:55:11 PM
Helpline
If you need additional assistance, please call the Helpline at 1-800-276-0509.
Limited Warranty
Thomson Inc. warrants that, for 90 days from date of purchase, it will replace
this product if found to be defective in materials or workmanship. Return it
postage paid to the Product Exchange Center, 11721 Alameda Ave., Socorro,
TX 79927 for prompt, no-charge replacement with a current equivalent. This
replacement is Thomson Inc.’s sole obligation under this warranty. Thomson Inc.
will not be responsible for any incidental or consequential damages or for any loss
arising in connection with the use or inability to use this product. Some states
do not allow the exclusion or limitation of incidental or consequential damages,
so the above limitation or exclusion may not apply to you. This warranty excludes
defects or damage due to misuse, abuse, or neglect. This warranty gives you
specific legal rights, and you may also have other rights, which vary from state to
state.
Specifications and features are subject to change without notice. Product may
vary from that shown. Logos are registered trademarks of their respective
companies.
Product Exchange Center
11721 Alameda Ave.
Socorro, TX 79927
www.acoustic-research.com
ARR1540 IB.indd 40
Thomson Inc.
10330 North Meridian Street
Indianapolis, IN 46290
© 2004 Thomson Inc.
Trademark(s) Registered
Marca(s) Registrada(s)
ARR1540 NA IB REVA
11/16/04 5:55:12 PM