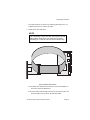
1
Proprietary Notice and
Disclaimer
Unless otherwise noted, this document and the information herein disclosed are
proprietary to the Manufacturer. Any person or entity to whom this document is
furnished or who otherwise has possession thereof, by acceptance agrees that it will not
be copied or reproduced in whole or in part, or used in any manner except to meet the
purposes for which it was delivered.
The information in this document is subject to change without notice, and should not be
construed as a commitment by The Manufacturer. Although The Manufacturer will make
every effort to inform users of substantive errors, The Manufacturer disclaims all liability
for any loss or damage resulting from the use of this document or any hardware or
software described herein, including without limitation contingent, special, or incidental
liability.
TCIC and CardTalk are trademarks of Databook Incorporated. Card Reader is a
trademark of the Manufacturer . PC and AT are trademarks of IBM Corporation. MSDOS, MS-Windows and Flash File System are trademarks of Microsoft Corporation. MSystems is a copyright of M-Systems. SunDisk is a trademark of SunDisk. All other
product names are trademarks or registered trademarks of their respective owners.
Copyright © 1994 by:
All rights reserved
Life Support System Application
Disclaimer
The Manufacturer’s products may not be used as critical components in life support
devices or systems without the written consent of an officer of the manufacturer. As used
herein, life support devices or systems are devices or systems which (a) are intended for
surgical implant in the body, or (b) support or sustain life, and whose failure to perform,
when properly used in accordance with instructions provided in the labeling, can
reasonably be expected to result in a significant injury to the user. A critical component
is any component in a life support device or system whose failure to perform can be
reasonably expected to cause the failure of the life support device or system or to affect
its safety or effectiveness.
Software License Agreement
Read this agreement before opening the software. Once you have removed the software
from its envelope, you have accepted the agreement.
PC-250, PC-260, and PC-300 User’s Guide
Page 1
Introduction
Usage Rights
Your rights, with respect to the Software, are non exclusive. The software may only be
used by one user, on one computer at a time. The software may be transferred to another
computer, as long as it is only used by one user at a time. The Software and its
documentation may not be copied or distributed to others. You may not create, modify,
alter, adapt, merge, decompile, or reverse-engineer the Software, and you may not
remove or obscure Databook, or other included copyright or trademark notices.
Term of License
This Agreement is effective until terminated. Terminate the Agreement by destroying the
Software, documentation and all backup copies.
Backup Copies
You may make backup copies of the Software. The copyright notice(s) must be included
on each backup copy.
Copyrights
The Software accompanying this manual is protected by United States copyright law.
The Software documentation is copyrighted. You may only copy the Software and the
Software documentation for backup or to load the Software onto your computer as part
of program execution.
Title to Software and Confidentiality
The Software and all copies thereof are proprietary to Databook and title thereto remains
in Databook. All applicable rights to patents, copyrights, trademarks and trade secrets in
the Software are and shall remain in Databook.
You may not sell, transfer, publish, or otherwise make available any software or copies
thereof to others. You acknowledge that the Software is a trade secret of Databook. You
agree to secure and protect each program, software product and copies thereof in a
manner consistent with the maintenance of Databook’s rights therein and to take
appropriate action by instruction or agreement within your organization to satisfy your
obligations hereunder. Violation of these provisions shall be a basis for immediate
termination of this license. Termination of the license shall be in addition to and not in
lieu of any other legal or equitable remedies available to Databook.
Limited Warranty
SOFTWARE IS PROVIDED “AS IS” WITHOUT WARRANTY OF ANY KIND,
EITHER EXPRESS OR IMPLIED, INCLUDING BUT NOT LIMITED TO THE
IMPLIED WARRANTIES OF MERCHANTABILITY OR FITNESS FOR A
Page 2
Introduction
PARTICULAR PURPOSE. THE ENTIRE RISK AS TO THE QUALITY AND
PERFORMANCE OF THE LICENSED PROGRAM IS WITH YOU.
The Manufacturer does not warrant that the functions contained in the Software will
meet your requirements or that the operation of the Software will be uninterrupted or
error-free.
However, The Manufacturer warrants the diskette(s) on which the Software is furnished
to be free from defects under normal use for a period of ninety (90) days from the date of
delivery as evidenced by a copy of your paid invoice or sales receipt.
If the diskette(s) fail due to neglect, accident, or abuse, The Manufacturer shall not be
liable to replace the diskette(s) under this Limited Warranty.
The Manufacturer’s entire liability and your exclusive remedy for a diskette not meeting
The Manufacturer’s Limited Warranty will be the replacement of such diskette which is
returned to The Manufacturer or to an authorized dealer with a copy of your paid invoice.
In no event will The Manufacturer be liable for any damages, including any lost profits,
or other incidental or consequential damages arising out of the use or performance of the
Software, even if The Manufacturer or an authorized dealer has been advised of the
possibility of such damages.
You agree that The Manufacturer’s liability arising out of contract, negligence, strict
liability in tort or in warranty shall not exceed any amounts paid by you for the Software.
This Limited Warranty gives you specific legal rights. You may have additional rights,
depending on the state in which you live. Some states do not allow the exclusion of
incidental or consequential damages, or the limitation on how long an implied warranty
lasts, so some provisions of this Limited Warranty may not apply to you.
You acknowledge that you have read this Agreement and understand it, and agree to be
bound by its terms, and further agree that it is the complete and exclusive statement of
the Agreement, which supersedes and merges all prior proposals, understandings and
other agreements, oral and written, between the parties to this Agreement. This
Agreement may not be modified or altered except by a written instrument duly executed
by both parties.
This agreement and performance hereunder shall be governed by and construed in
accordance with the laws of the State of California.
The waiver or failure of either party to exercise in any respect any right provided for
herein shall not be deemed a waiver of any further right hereunder.
No action, regardless of form, arising out of this Agreement may be brought by you more
than two (2) years after the cause of action has arisen.
The Manufacturer shall have the right to collect form you any reasonable expenses
incurred in enforcing this Agreement, including attorney’s fees.
If any of the provisions, or portions thereof, of this Agreement are invalid under any
applicable statute or rule of law, such invalidity shall not affect the validity of the
balance of this Agreement, and such provisions or portions thereof are to the extent of
their invalidity to be deemed omitted form this Agreement.
PC-250, PC-260, and PC-300 User’s Guide
Page 3
Introduction
Table of Contents
QUICK START ..........................................................................................6
Assumptions........................................................................................6
Requirements ......................................................................................6
Unpacking and Registering ................................................................7
Tools ...................................................................................................7
Install the Card Reader ......................................................................8
Install the Software.............................................................................9
What to Do Next .................................................................................9
CHAPTER 1 .......................................................................................11
INTRODUCTION ......................................................................................11
The Card Reader ..............................................................................11
System Requirements ........................................................................13
Package Contents .............................................................................13
This Guide ........................................................................................15
PC Cards ..........................................................................................16
CHAPTER 2 .......................................................................................21
INSTALLING THE HARDWARE ................................................................21
Preparation ......................................................................................21
Disassemble the Computer ...............................................................22
Discharge Static Electricity..............................................................23
Set the Switches and Install the Board .............................................24
Install the Card Socket Module ........................................................27
Identifying the Sockets......................................................................32
What to Do Next ...............................................................................33
CHAPTER 3 .......................................................................................35
INSTALLING THE SOFTWARE ..................................................................35
Page 4
Introduction
Run INSTALL ...................................................................................36
Verify the Installation.......................................................................46
CardTalk Files .................................................................................48
Installing the CardTalk Control Panel.............................................50
Using PC Cards ...............................................................................51
CHAPTER 4 .......................................................................................53
CARDS THAT REQUIRE ONLY CARDTALK.SYS..................................53
Fax/Modem Cards............................................................................53
ATA Devices .....................................................................................56
Memory Cards..................................................................................58
CHAPTER 5 .......................................................................................63
USING THE CARDTALK CONTROL PANEL ..............................................63
Opening the CardTalk Control Panel ..............................................63
Getting Help .....................................................................................64
Viewing Card Information ...............................................................64
Configuring a Memory or Hard Disk Card......................................66
Copying Files ...................................................................................72
Configuring the CardTalk Control Panel ........................................74
CHAPTER 6 .......................................................................................76
TROUBLESHOOTING ..............................................................................76
Initialization Problems.....................................................................76
Warning Beeps .................................................................................80
Error Messages ................................................................................82
PC-250, PC-260, and PC-300 User’s Guide
Page 5
Introduction
Quick Start
This preface is designed to help experienced users get going quickly. It
summarizes what you need to do to install the Card Reader in your
computer.
WARNING
Assumptions
If you’re not sure about the assumptions in this
Quick Start or would like illustrations to assist you
with the installation process, refer to Chapter 2,
Installing the Hardware.
Assumptions
These procedures assume:
• the default I/O address of 240h will not conflict with any other
devices installed in your system (such as a sound card)
• your computer has a spare internal power cable
Requirements
• IBM compatible computer with a minimum 386Sx processor
• an empty 16-bit ISA bus slot running at approximately 8 Mhz
• an empty drive bay
• at least 1 Mbyte of RAM and 500 Kbytes of free disk space
• DOS 3.2 or later
• Windows 3.1 (or later) or Windows for Workgroups 3.1 (or later)
Page 6
Introduction
Unpacking and Registering
1. Make sure you have the following components:
• Warranty card
• Manual (this document)
• a Card Socket Module
• an ISA bus board
• CARDTALK diskette
• two flat-ribbon cables
• a power splitter cable
• Quick Read sheet
2. If items are missing or damaged, contact The Manufacturer
immediately at the address or phone number in Chapter 6,
Troubleshooting.
3. Locate the serial number and board revision numbers on the ISA
Bus Board.
4. Locate the software version number on the software diskette.
5. At the end of Chapter 6, Troubleshooting, write the serial number,
board revision number and software version number in the spaces
provided.
Tools
To install the unit in your computer, you may need
• a Phillips head screwdriver
• a flat-head screwdriver
• special tools to open your computer
PC-250, PC-260, and PC-300 User’s Guide
Page 7
Introduction
Install the Card Reader
Prepare the Card Socket Module
1. Read the License Agreement.
2. Turn the computer's power off, leave the power cord plugged in to
ground the unit, and remove its cover.
3. If the bay you’re using is a 5.25” bay, install the rails and side
brackets on the Card Socket Module (optional equipment).
Install the Card Socket Module
WARNING
Avoid Crossed Ribbon Cables
To alleviate confusion, the ribbon cable is
constructed so that the ends that are tied together
should be connected to the drive module. The loose
end of the ribbon cable should be connected to the
ISA card. Both ends are keyed accordingly to enable
only one correct way to connect them.
1. Touch a bare metal portion of your PC's chassis to discharge static
electrical buildup before you remove the ISA bus board and Card
Socket from their protective covers.
2. Connect the ends of the ribbon cables labeled DRIVE to their
respective connectors on the Card Socket Module.
3. Install the Card Socket Module in the PC drive bay and attach it to
the chassis with at least three screws. Two screws must connect
metal to metal for grounding purposes.
4. Connect a spare device power cable to the card socket module. You
may need to use the enclosed splitter.
Page 8
Introduction
Install the ISA Bus Board
1. Connect the ends of the ribbon cables labeled CARD to their
respective connectors on the ISA Bus Board.
2. Install the ISA bus board in the PC.
3. Check all connections. See the illustrations in Chapter 2, Installing
the Hardware.
4. Replace the computer’s cover and verify that the system boots and
operates normally.
Install the Software
1. Write protect the installation diskette.
2. Type a:\install from the DOS prompt and follow the instructions on
the screen.
3. Restart the system for the changes made to the CONFIG.SYS and
AUTOEXEC.BAT files to take effect.
You are ready to use your Card Reader.
What to Do Next
The installation and operation of most types of memory, ATA and
communication I/O cards is fully automatic under MS-DOS and
MS-Windows. Once you’ve installed CardTalk you can use these cards
without further installation procedures.
Additional Drivers
Certain I/O cards, such as the following cards, may require their own
drivers:
• LAN
• SCSI
• other specialized card types
PC-250, PC-260, and PC-300 User’s Guide
Page 9
Introduction
Refer to the manual that came with the card for additional installation
procedures and to Chapter 6, Cards that Require Additional Drivers,
for specific tips.
Card and Socket Services Software
WARNING
Card and Socket Services Software
Some PC Card vendors may include Card and
Socket Services software with their cards. Do not
replace the Card and Socket Services software with
any other manufacturer’s Card and Socket Services
drivers. The Manufacturer cannot support your Card
Reader with another manufacturer’s drivers.
CardTalk Control Panel
If you’re using a PC Card for data storage, such as an ATA hard disk, a
Flash or SRAM card, you can use the CardTalk Control Panel to:
• format
• partition
• copy files
The CardTalk Control Panel is an MS-Windows application that
prepares all types of memory and disk drive cards. It also provides a
display of the I/O card configuration, such as COM port numbers and
the drive letter. Refer to Chapter 5, Using the CardTalk Control Panel,
for more information.
DOS Utilities
CardTalk comes with a set of DOS utilities called the TC Utilities that
you can use to prepare memory cards.
Page 10
Introduction
1
Introduction
Personal Computer Memory Card International Association (PCMCIA)
PC Cards have gained wide acceptance on portable computers because
of their small size, flexibility and interchangeability. Now desktop
computers can benefit from these same capabilities.
Typical applications for PC Cards include exchanging data between
devices, as well as temporarily adding a fax/modem, network, SCSI
port, sound card or removable disk to the computer. Data exchange is
not limited to computers. Any device, such as an electronic piano
keyboard, can exchange data with the computer as long as the device
supports the PCMCIA standard. New cards are being developed all the
time.
This chapter:
• Introduces the Card Reader
• Defines system requirements
• Lists what comes in the box
• Introduces this guide
• Discusses how PC Cards work
PC-250, PC-260, and PC-300 User’s Guide
Page 11
Introduction
The Card Reader
Compatibility
The Card Reader Card Socket Modules accommodate:
• Any card that complies with the PCMCIA 2.01 or 2.10, including
cards provided with Card Services client drivers
• PCMCIA type I, II or III PC Cards
• Memory cards including SRAM and Flash cards (with optional
Flash File System)
• I/O cards including communication, network, SCSI, sound and
others
• ATA devices including rotating disk drives and solid-state ATA
cards
• One Time Programmable (OTP) read-only memory cards
Features
The Card Reader provide:
• The ability to insert and remove PC Cards while the computer is on
with fully automatic card recognition and initialization
• INTEL ExCA™ verified hardware and software for maximum
compatibility
• CardTalk Control Panel™, a Windows-based application for
managing PC Cards
of all types
• An annunciator that beeps to indicate the status of the card
(recognized, not recognized)
• Drive bay units that are easily configured for 3.5” or 5.25”
mounting (with 5.25” mounting kit)
• Standard PC/AT ISA bus interface
• Simple, automated software installation on most PCs
Page 12
Introduction
System Requirements
Your IBM-compatible computer must have:
• A minimum 386SX processor.
• MS-DOS 3.2 or later, and MS-Windows 3.1 for the CardTalk
Control Panel.
• One empty 16-bit ISA bus slot.
• At least 1 MByte of RAM (2 Mbytes for the Windows CardTalk
Control Panel).
• 1 MByte of free hard disk space.
• 3.5” open drive bay in the personal computer case.
Package Contents
As soon as you unpack the box, make sure you have all the necessary
components. The illustration shows what comes with a Card Reader.
If any of these items are missing or damaged, contact your dealer
immediately.
Card Reader Components
¶ Two flat ribbon cables
· Power splitter cable with standard disk drive power connector
¸ An ISA Bus Board
¹ Card Socket Module
Note: The PC-260 Card Reader includes only an ISA Bus Board.
Your package also includes :
• A 3.5 inch floppy diskette containing the DOS Card and Socket
Services software and other miscellaneous files.
• Release notes describing changes since publication of this guide, if
any
PC-250, PC-260, and PC-300 User’s Guide
Page 13
Introduction
This Guide
This guide introduces PCMCIA PC Cards, explains how to install the
Card Reader hardware and software, provides tips for using specific
types of PC Cards, and explains how to resolve problems.
Contents
In addition to this chapter, the guide contains the following chapters:
Chapter 2
Installing the Hardware explains how to install the
Card Reader in your computer.
Chapter 3
Installing the Software explains how to install
PCMCIA’s drivers, Flash file system drivers and
Windows graphical user interface, the CardTalk
Control Panel.
Chapter 4
Cards that Require Only CardTalk explains how to use
fax/modem cards, ATA devices and memory cards. The
CardTalk drivers fully support these cards.
Chapter 5
Using the CardTalk Control Panel describes the
CardTalk Control Panel and explains how to use it with
PC Cards.
Chapter 6
Troubleshooting provides procedures to follow when
you’re working on a problem.
Page 14
Introduction
Conventions
This manual uses the following conventions:
Italics
serve two functions: In cross references, they
identify the names of sections and chapters
within this guide. In syntax statements, they
identify place holders that require you to supply
a value.
For example:
“tcformat -type flash drive:”
Bold
This typeface
The italics indicate you must replace drive with a
value, in this case the drive letter of the socket
that contains the Flash card.
identifies components called out in the
accompanying illustration and the names of the
keys on the computer keyboard.
identifies text you see on the screen.
For example: tcxcopy *.dat e:
PC Cards
The Personal Computer Memory Card International Association
(PCMCIA) is a group of companies who have come together to develop
a common industry standard for the credit-card sized cards used in
portable and desktop computers. These cards are known as “PC Cards.”
This section introduces some of the terms used throughout the manual
to describe how these cards work.
Software Components
The software that manages the PCMCIA interface consists of four
components:
• Socket Services (TMB250.SYS)
• Card Services (CTALKCS.EXE)
• Super Client driver (CARDTALK.SYS)
• PCMCIA Card Services client drivers (files supplied by card mfg.)
PC-250, PC-260, and PC-300 User’s Guide
Page 15
Introduction
Socket Services
Socket Services is a BIOS-level program that controls the PCMCIA
controller chip on the ISA Bus Board, and should be the only software
to interact directly with the socket. This driver conforms to the
PCMCIA Socket Services 2.10 specification. The name of the driver is
TMB250.SYS.
TMB250.SYS is loaded in the CONFIG.SYS file.
Card Services
The Card Services driver (CTALKCS.EXE) provides a standardized set
of higher-level functions for operating all the PCMCIA sockets in the
system. It manages the communication for the client drivers including
the Super Client driver and the other drivers that manage specific cards.
The main jobs of the Card Services driver are to:
• Manage a pool of resources to be assigned to individual cards at the
request of the card’s client driver.
• Issue commands to Socket Services to control the PCMCIA sockets
and cards.
• Provide a standardized interface that is available to the client drivers
and enablers supplied by card manufacturers.
Together, Card and Socket Services software identifies how many
PCMCIA sockets the computer has and assigns resources to the sockets
based on the requirements of each card. Card and Socket Services
software also detects the insertion or removal of a PC Card while the
computer is on.
Super Client Driver
A “Super Client” is a client driver that knows how to control a wide
variety of PC Cards. Super Client driver, CARDTALK.SYS, supports
the following cards:
• SRAM memory cards
• Flash memory cards
• Fax/modem cards and serial cards
• ATA rotating disk drives and solid-state devices.
Page 16
Introduction
For most PC Cards, the Socket Services driver, Card Services driver
and the Super Client driver are all that is necessary for proper
operation. There are some cards, such as LAN and SCSI cards that
require a user-installed PCMCIA Card Services client driver and/or
Card Services enabler.
PCMCIA Card Services Client Drivers
A client driver is a program that comes from the manufacturer of the PC
Card specifically to support the operation of the card. The purpose of
this program is to manage the unique functions of the card. For
example, the client driver for a network controls the flow of data
between the PC and the network. The client driver for a network card
manages information flow between the PC and the network.
Enablers
An enabler is a program that runs once to configure a PC Card and
socket. Enablers are often used in conjunction with LAN, SCSI or other
device driver software.
Card Information Structure (CIS)
Each card carries identity information stored in the on-card CIS. If a PC
Card follows the PCMCIA standard for storing the CIS, a properly
configured computer or Card Reader that conforms to the PCMCIA
standard can automatically identify, install and operate a PC Card.
CIS information includes the card type, functional capabilities (for
example, Ethernet LAN or 10 Mbyte Flash memory), manufacturer and
part number. Usually, the CIS is stored permanently on the card. The
CIS may be stored in attribute memory, common memory or both.
If a memory card does not supply all the required information, a user
can create the CIS and store it on the card. The CardTalk Control Panel
lets you configure and operate a wide range of memory cards by
selecting the card from a list, if automatic card recognition fails.
Terminology
In addition to the PCMCIA terms introduced in the last section, this
manual uses the following terms.
Fax/modem
This term refers to data modem cards and
cards that combine both data transmission
PC-250, PC-260, and PC-300 User’s Guide
Page 17
Introduction
and fax capability. Some cards may also
include voice capabilities.
CardTalk
This term refers to the complete package of
drivers, utility programs and the memory
card data file (TMB250.SYS,
CTALKCS.EXE, CARDTALK.SYS,
CARDTALK.386 and CARDINFO.DBK),
and to CTALKID.EXE, which is a program
that displays the configuration of a card. The
CardTalk package also includes the TC
utility programs for card preparation using
MS-DOS.
See the section titled CardTalk Files in
Chapter 3, Installing the Software, for a
complete list of all software components.
CardTalk Control Panel This term refers to the Windows interface
that allows you to manage memory and ATA
device cards.
The glossary includes more terms found in this book.
Page 18
Installing the Hardware
This chapter provides detailed steps for installing the Card Reader and
configuring its options. Refer to your computer owner’s manual for an
explanation of how to remove the cover of the computer and install
expansion boards.
Preparation
Before you install the Card Reader, take a moment to prepare the
computer and the tools you will need.
Read the License Agreement and Register
1. Read the License Agreement at the beginning of this manual.
2. Locate the serial number on the ISA Bus Board and the software
version number on the CardTalk distribution diskette.
3. Fill in the registration card including the serial number and version
of software.
4. Mail the Registration card to The Manufacturer.
By mailing in your Registration Card, you become eligible for
telephone technical support, access to The Manufacturer’s Bulletin
Board System (BBS), new product and upgrade announcements,
and application notes as they become available.
Prepare Tools
You may need:
• A long nose pliers to change the jumper setting
• A Phillips head and/or a flat head screwdriver to install the ISA Bus
Board and the Card Socket Module
PC-250, PC-260, and PC-300 User’s Guide
Page 19
Installing the Hardware
• A flat head screwdriver to mount the rails, if you’ll be using a 5.25”
bay (Check with your PC dealer for a 5.25” mounting kit).
If your computer uses specialized screws and connectors, you may need
special tools to disassemble it. Refer to your computer owner’s manual.
Disassemble the Computer
Before you can install the board in your computer, you need to
determine if there will be an address conflict with any other device in
your computer.
1. Turn the computer and all peripheral devices off.
2. Unplug the computer power cord from the wall receptacle.
3. Remove the computer’s cover. Refer to your computer owner’s
manual for instructions.
WARNING
Conflicts
Make sure each board in your system has its own
unique address. If a conflict exists, your system will
hang.
4. Examine all other expansion boards in your PC and determine the
I/O address each uses. Refer to the manual that came with each
board for help. The default I/O base address for the Card Reader is
240h. If another device is already using this address you will have to
change the address used by the Card Reader, or change the address
used by the other device.
Page 20
Installing the Hardware
Locating a 16-Bit Slot
5. Find a free 16-bit slot on the motherboard and remove the metal
bracket.
Discharge Static Electricity
CAUTION
Static Electricity Warning
Always discharge electricity before handling the ISA
Bus Board, Card Socket Module(s) or when inserting
a PC Card into a socket. To discharge static
electricity, touch a grounded metal object. The
computer must be plugged in but not turned on (to
be grounded) before you touch its chassis to
discharge static electricity.
The Card Reader uses low-power components and is sensitive to static
discharge while you’re installing them in the computer. Just before
handling the components, touch a bare metal portion of your PC's
chassis. This discharges any potential static buildup that might damage
the board’s components.
PC-250, PC-260, and PC-300 User’s Guide
Page 21
Installing the Hardware
Set the Switches or Jumpers and
Install the Board
Every board installed in your computer must have a unique address for
transferring information to and from the board. If the ISA Bus Board is
the only expansion board in your PC, or if there are no I/O address
conflicts with other boards, you don’t need to change the switch setting
and may skip to Install the Card Socket Module.
B
A
Depending on the configuration, you will either have to set the switch
block or Jumper block to configure the ISA card. This will either
consist of setting the banks of switches or jumpers. They are located
on the ISA Bus Board. Switches 5, 6, and 7 control the I/O address,
while jumpers J300-305 control the I/O address configuation depending
on the ISA card.
In most cases, you won't need to change the factory setting. The
following illustration show the factory setting for Card Reader card
model.
The following illustration identify the switch block location on the ISA
board.
Card Reader Switch Block Location
1. Locate the switch block on the ISA Bus Board.
Page 22
Installing the Hardware
2. The default I/O port address that the Card Reader is shipped with is
set to 240h. To change the I/O port address, refer to the DIP Switch
Setting table on the next page for other possible selections.
3. Choose an address and locate the switches on the board that
corresponds to this I/O address.
4. If you changed the switch from the default of 240h, write the new
I/O base address on the space provided on the next page.
5. Install the ISA Bus Board into the ISA bus expansion slot.
DIP Switch / Jumper Settings
Figure 1-1a I/O Address Switch Selection
I/O Address
Switch 7
Switch 6
Switch 5
200
ON
ON
ON
220
ON
ON
OFF
240
ON
OFF
ON
260
ON
OFF
OFF
300
OFF
ON
ON
320
OFF
ON
OFF
340
OFF
OFF
ON
360
OFF
OFF
OFF
Table 1-1b I/O Address Jumper Selection
JB300
JB301
JB302
JB303
Port
100
2-3
2-3
2-3
2-3
110
1-2
2-3
2-3
2-3
120
2-3
1-2
2-3
2-3
130
1-2
1-2
2-3
2-3
140
2-3
2-3
1-2
2-3
150
1-2
2-3
1-2
2-3
160
2-3
1-2
1-2
2-3
170
1-2
1-2
1-2
2-3
200
2-3
2-3
2-3
2-3
PC-250, PC-260, and PC-300 User’s Guide
JB304
JB305
1-2
1-2
1-2
1-2
1-2
1-2
1-2
1-2
2-3
2-3
2-3
2-3
2-3
2-3
2-3
2-3
2-3
1-2
Page 23
Installing the Hardware
210
1-2
2-3
220
2-3
1-2
230
1-2
1-2
240*
2-3
2-3
250
1-2
2-3
260
2-3
1-2
270
1-2
1-2
300
2-3
2-3
310
1-2
2-3
320
2-3
1-2
330
1-2
1-2
340
2-3
2-3
350
1-2
2-3
360
2-3
1-2
370
1-2
1-2
*=factory default setting
2-3
2-3
2-3
1-2
1-2
1-2
1-2
2-3
2-3
2-3
2-3
1-2
1-2
1-2
2-3
2-3
2-3
2-3
2-3
2-3
2-3
2-3
2-3
2-3
2-3
2-3
2-3
2-3
2-3
1-2
2-3
2-3
2-3
2-3
2-3
2-3
2-3
1-2
1-2
1-2
1-2
1-2
1-2
1-2
1-2
1-2
1-2
1-2
1-2
1-2
1-2
1-2
1-2
1-2
1-2
1-2
1-2
1-2
1-2
1-2
NOTE
NEW I/O BASE ADDRESS: _______________
You will need this information when you install the
software.
Page 24
Installing the Hardware
Install the Card Socket Module
The Card Socket Module of the Card Reader comes ready to install into
a 3.5” drive bay in your computer. This section explains how install the
module in a 3.5” drive bay and how to mount the Card Socket Module
in a 3.5” drive bay.
If you wish to install the Card Reader in a 5.25” bay, you must contact
your dealer about obtaining a conversion kit.
Connecting the Ribbon Cables to the Card Socket Module
NOTE
Inserting the Module First
On some systems it may be convenient to insert the
module into the drive bay from the front of the
computer before connecting the cables.
PC-250, PC-260, and PC-300 User’s Guide
Page 25
Installing the Hardware
1. lign the red stripe and connector key on the cable whose end is
labeled DRIVE with pin 1 on the Card Socket Module connector
labeled DRIVE, and connect the cable.
2. Align the red stripe on the cable whose end is labeled DRIVE with
pin 1 on the Card Socket Module connector labeled DRIVE, and
connect the cable.
3. Install the Card Socket Module, including the connected ribbon
cables, into the PC drive bay. Exactly how to install the module in
the bay depends on your computer. Refer to your computer owner’s
manual or ask your dealer for assistance.
4. Attach the unit to the chassis with as many screws as will fit. You
need at least three for stability.
WARNING
Grounding the Module
Two of the screws must connect the metal of the
module and the metal of the bracket (if attached) to
the metal of the chassis. This grounds the unit so
that if your body is carrying a static electrical charge
when you insert a PC Card, the unit will be able to
discharge the static electricity without damaging its
components.
Page 26
Installing the Hardware
Connect the Internal Power Cable
Connecting the Power Cable
1. If available, connect an unused power cable to the Card Socket
Module and continue with the section titled Install the Board.
2. If no power cable is available in your PC, unplug the power cable
from one of the system’s internal devices.
3. Plug the end of the power cable you unplugged from the other
device into the female end of the splitter cable.
4. Plug one male end of the splitter into the Card Reader and the other
male end into the device from which you removed the power cable.
PC-250, PC-260, and PC-300 User’s Guide
Page 27
Installing the Hardware
Install the Board
WARNING
Avoid Crossed Cables
B
A
Do not cross the cables. The cable ends labeled ISA
Card must be connected to the respective
connectors labeled ISA Card. The cable ends
labeled Drive must be connected to the respective
connectors labeled Drive.
Connecting the Ribbon Cables to the ISA Bus Board
1. Align the red stripe on the cable whose end is labeled ISA Card
with pin 1 of the board connector labeled ISA Card, and connect
the cable.
2. Align the red stripe on the cable whose end is labeled Drive with
pin 1 of the board connector labeled Drive, and connect the cable.
Page 28
Installing the Hardware
The cables must not be twisted. The following drawing shows, in a
simplified form, how to connect the cables.
3. Double check all connections.
NOTE
The connectors on the ISA card are keyed to the flat
ribbon cable. Make sure you check the red stripe
indicating Pin 1 with the correct card connector key.
Correct Cable Connections
• One ribbon cable should connect from the Card Socket Module to
the socket on the ISA Bus Board.
• The other ribbon cable should connect from the socket on the Card
Socket Module to the socket on the ISA Bus Board.
PC-250, PC-260, and PC-300 User’s Guide
Page 29
Installing the Hardware
• The power cable should connect to the Card Socket Module
(either using an available power connector or the splitter).
• If you used the splitter, make sure both the Card Socket Module
and original device have power.
• Make sure that you have reassembled and connected any other
system components you may have disconnected.
• Make sure you have filled in your name and address and the serial
number of your unit on the registration card and mailed the card
to The Manufacturer.
4. Carefully tuck in the cables, reassemble the computer and replace
the cover.
Identifying the Sockets
To configure your Card Reader you need to know the socket number
for each socket.
The following table shows the socket numbers for the Card Reader.
Model
Card Reader
Page 30
Location
upper socket
lower socket
Socket #
2
1
Installing the Hardware
What to Do Next
The next step is to install the software. Chapter 3, Installing the
Software, explains how to install the CardTalk drivers and the CardTalk
Control Panel.
If your PC Card is a memory card, fax/modem or ATA device, refer to
Chapter 4, Cards that Require Only CardTalk, for information on how
to use the card.
If your PC Card comes with its own driver, follow the installation
instructions in the owner’s manual that came with the card. Refer
Chapter 6, Cards that Require Additional Drivers, for more information
installing and operating PC Cards with PCMCIA Card Services
enablers and client drivers.
WARNING
Card and Socket Services
If a PC Card comes with its own Card and Socket
Services software, DO NOT INSTALL THIS
SOFTWARE. Use Card and Socket Services. If you
install another manufacturer’s Card and Socket
Services software, The Manufacturer cannot support
the installation.
PC-250, PC-260, and PC-300 User’s Guide
Page 31
3
Installing the Software
This chapter explains how to install the CardTalk drivers and the
CardTalk Control Panel on your system. It describes the CardTalk files
and lists the device driver lines the installation program changes in your
configuration files.
The CardTalk software installation is completely automated using the
INSTALL program.
CAUTION
Use INSTALL at the MS-DOS Prompt
Do not install CardTalk from a DOS window within
Windows. Exit Windows before installing CardTalk.
Windows must not be running during the installation.
INSTALL asks several questions about how you want to install
CardTalk and then automatically decompresses and copies the needed
files to your hard disk. INSTALL can automatically modify your
configuration files (CONFIG.SYS and AUTOEXEC.BAT) if you
choose, so the necessary files are loaded into memory each time you
start your computer.
If you already have CardTalk on your system, follow the procedures in
this chapter to upgrade the software.
CAUTION
Compressed Files
The CardTalk files on the installation diskette are
compressed. You must use the INSTALL program to
copy them to your hard disk.
PC-250, PC-260, and PC-300 User’s Guide
Page 33
Installing the Software
Run INSTALL
1. Set the write-protect tab on the distribution diskette.
2. Insert the distribution diskette into a 3.5” diskette drive.
3. At the MS-DOS system prompt, type:
drive:install
and press Enter.
NOTE
drive : identifies the floppy drive that contains the
installation diskette
INSTALL displays:
One moment please, checking hardware . . .
while it locates and identifies the Card Reader installed in your
system. This may take a minute or two.
4. At any screen, press the key named on the screen to continue with
the installation or press Esc to quit installation.
After displaying the title screen, INSTALL asks whether you wish
to perform an Express or Custom Installation. An express
installation requires that you install the hardware before you install
the software and that the hardware be configured correctly.
5. To select an express installation, press Enter. If you know you need
to change any of the default settings, press ↓ to move the highlight
to Custom and press Enter.
Express Installation
An express installation uses the default settings and automatically
updates your configuration files. The following is a typical default list:
The Card Reader with Microsoft’s Flash File System.
Destination directory C:\CARDTALK
The drive is installed at I/O address 240.
Page 34
Installing the Software
The Card Insertion Annunciator is active.
Modem cards will appear as the next available COM port.
The user selectable I/O window is 300 - 31F.
The user selectable memory window is D000 - D7FF.*
ATA drives will use address 170.
* Card Services uses this memory window for a client driver that
requires a memory window.
To accept the default settings, press Enter and continue with the
section titled Modify the Configuration Files.
To change any of the settings, press ↓ to move the highlight to Reselect
Install Options, press Enter and continue with the next section.
Custom Installation
This section documents the options you can set through custom
installation. The discussions appear in the order you would configure
them.
Choosing the Drive and Directory
INSTALL prompts you to define the drive that will contain the
CardTalk software.
Press ↑ and ↓ to select the drive. When you’ve selected the drive, press
Enter.
WARNING
Removable Drives
Do not install CardTalk on a removable drive.
INSTALL displays the default subdirectory name: \CARDTALK.
To accept the default, press Enter. To use a different subdirectory,
backspace to erase the default name, type a new name and press Enter.
INSTALL creates the requested subdirectory if it does not exist.
The rest of this guide uses \CARDTALK to identify the subdirectory
containing the software. If you installed the CardTalk files in a different
directory, make a note of the directory name in this guide.
PC-250, PC-260, and PC-300 User’s Guide
Page 35
Installing the Software
Selecting the Type of Card Reader
The next screen asks you to confirm the model of the Card Reader you
installed. INSTALL identifies the model number and highlights it for
you.
Press Enter to confirm the model number.
Selecting the I/O Base Address
The next screen prompts you for the Card Reader I/O base address and
displays the
default (240h).
WARNING
Switch Setting Compatibility
If you changed the switch setting, you must define
the I/O base address here. If the switch setting and
the software fail to match the Card Reader will not
work.
To accept the default I/O base address, press Enter. If you changed the
switch setting, enter the I/O base address between 200 and 360 at the
Enter Controller's Address: prompt and
press Enter.
If you wrote down the new I/O base address when you changed the,
refer to Chapter 2, Installing the Hardware, to confirm the new address
number.
Setting the ATA I/O Address
INSTALL asks if you wish to change the default I/O address used by
ATA (IDE disk) cards.
To accept the 170 default, press Enter. To change the address, enter a
different number between 100 and 200 at the Enter ATA Address:
prompt, and press Enter. The address must end in zero (0).
Page 36
Installing the Software
NOTE
ATA Compatibility
If your I/O Controller in your system is capable of
configuring multiple IDE(AT) drives, then you must
change the default ATA address to something other
than 170 (preferably to 160).
Adding Microsoft Flash File System
INSTALL asks if you want to add the Microsoft Flash (FFS2) card
driver.
To omit the driver, highlight WITHOUT Microsoft Flash File System
(FFS2) and press Enter. To include the FFS2 driver, highlight WITH
Microsoft Flash File System (FFS2) and press Enter.
NOTE:
Needed Drivers
Add the driver only if you plan to use a Flash card
with Microsoft’s Flash file system (FFS2). FFS2
allows you to delete and edit files on a Flash card.
Solid State ATA cards do not require this driver.
FAT/Flash “TCXCOPY” formatted cards also do not
require FFS2.
Enabling the Annunciator
INSTALL describes the sounds CardTalk can produce when you insert
a PC Card. This capability is called the Card Insertion Annunciator.
INSTALL asks if you wish to enable the annunciator.
This feature causes the computer to output an audible “beep” through
the system speaker when you insert a PC Card. If the card requires only
CARDTALK.SYS, one beep means CardTalk recognizes the card. The
card is ready to use. Two or more beeps may indicate an error
condition. Refer to Chapter 6, Troubleshooting for more information on
what the beeps mean. Cards that require additional drivers may beep or
PC-250, PC-260, and PC-300 User’s Guide
Page 37
Installing the Software
sound other audio signals. Enabling the annunciator will help you
monitor what is going on when you insert and remove PC Cards. We
highly recommend it. To enable the annunciator, highlight Card
Insertion Annunciator and press Enter. To disable the annunciator,
highlight Card Insertion Annunciator Not Active and press Enter.
To configure CardTalk for serial or network cards, continue reading. If
you don’t plan to use fax/modem, serial or LAN cards, go to the section
titled Completing Installation.
Selecting a Serial Port
INSTALL displays a list of the currently unused serial communications
(COM) ports and asks you to choose between two methods CardTalk
uses to assign a COM port to a PC fax/modem or serial card: automatic
(Auto) or a specific port (COMx). If you choose Auto, CardTalk
assigns the next available port when you insert the card. If you choose a
specific COM port, that port must be available when you insert the card
for communications to work.
NOTE
COM Port
When you’ve selected Auto, CardTalk assigns an
available COM port to the socket. Make sure the
COM port used by your communications software is
the same one CardTalk assigned.
If you assign a specific COM port, CardTalk always attempts to use that
port when you insert a PC fax/modem card or serial card.
Selecting a specific COM port also lets you select an Interrupt Request
(IRQ) channel. Serial devices use interrupts to get the attention of the
computer when there is output going to or input coming from the
device.
Follow these steps to select fax/modem COM port:
1. To accept automatic port assignment, highlight Auto, press Enter.
To always assign one of the listed ports, highlight its COM port
name and press Enter.
Page 38
Installing the Software
If you selected a specific COM port, INSTALL asks you to select an
IRQ number.
2. To accept the default IRQ for the COM port, press Enter.
To change the IRQ, type an IRQ number and press Enter. The
following is a list of the common IRQ assignments:
IRQ
Common use
3
COM2 and COM4
4
COM1 and COM3
5
LPT2: and traditionally used by network cards
7
LPT1:
9
10
NOTE
COMPORTS
If you are using a VESA Video Card capable of 32
bit access, the COM4 address may not be available
for use.
3. INSTALL lists the available serial communication ports for your
system and ask if you wish to select a port for a PC fax/modem card.
If you have four serial devices currently installed, you must
disconnect one of them before you can select a fax/modem port.
4. To continue installation without configuring to handle a network PC
Card, highlight Don't select an I/O, Memory Window and press
Enter and continue with the section titled Completing Installation.
PC-250, PC-260, and PC-300 User’s Guide
Page 39
Installing the Software
PC Cards that Require a Specific I/O and Memory
Window
Follow these steps to reserve I/O and memory addresses for I/O cards,
such as a network card:
1. When INSTALL asks if you wish to select I/O and memory
windows, highlight Select an I/O and Memory Window and press
Enter.
2. INSTALL asks you to enter the I/O base address for the card.
Consult the PC Card documentation for the manufacturer’s
suggested address ranges.
To accept the default starting address of 300h, press Enter. To
request a different address, type a hexadecimal number between 100
and 3FF at the Enter the I/O Window's Starting Address: prompt
and press Enter.
NOTE
Avoid Conflicting Addresses
The I/O and memory address ranges you select
must not conflict or overlap with addresses used by
other devices in your system.
3. INSTALL asks you to enter the ending I/O address.
Accept the default ending I/O address of 31F if you accepted the
default starting address and press Enter. If you entered another
starting address, enter a higher ending address at the Enter the I/O
Window's Ending Address: prompt (the maximum size of the
window is 40h, for example, 300-33F) and press Enter.
4. INSTALL asks you to enter the starting memory address for the
memory window.
Page 40
Installing the Software
NOTE
Segment Address
These are the high-order 16 bits of the 20-bit
address, the segment address in x86 terms.
To accept the default starting memory address D000, press Enter.
To request a different address, type a hexadecimal number between
C000 and E000 at the Enter the Memory Window's Starting
Address: prompt and press Enter.
5. INSTALL displays:
Enter the Memory Window’s Ending Address.
Accept the default ending memory address of DFFF if you accepted
the default starting address by pressing Enter. If you entered
another starting address, enter a higher ending address between
CFFF and EFFF at the Enter the Memory Window's Ending
Address: prompt and press Enter.
6. INSTALL advises you to manually exclude the memory range you
defined if you are using a memory manager other than EMM386,
386MAX or QEMM386. Refer to your memory manager
documentation for instructions.
Press any key to continue with the installation.
Completing Installation
INSTALL displays a list of the settings you have selected and gives you
a chance to change any of them. The following is a sample custom
installation listing:
The Card Reader with Microsoft’s Flash File System.
Destination directory C:\PCMCIA.
The drive is installed at I/O address 340.
The Card Insertion Annunciator is inactive.
Modem cards will appear as COM4 using IRQ9.
The user selectable I/O window is 320 - 32F.
The user selectable memory window is D000 - D7FF.
ATA drives will use address 180.
PC-250, PC-260, and PC-300 User’s Guide
Page 41
Installing the Software
To complete the installation, highlight Continue Installation and press
Enter. To change any of the settings, highlight Reselect Install Options
and press Enter.
INSTALL displays the name of each file and the action it is taking to
install it on your system.
Modify the Configuration Files
Regardless of whether you chose an Express or Custom Installation,
INSTALL can update your AUTOEXEC.BAT and CONFIG.SYS files
for you. Before beginning the updates, INSTALL makes a copy of both
files and saves them in the \CARDTALK directory.
If you choose to update your AUTOEXEC.BAT and CONFIG.SYS
files yourself, you must make sure to add the correct device lines with
their options. In most cases, you should have INSTALL update your
configuration files automatically for you.
NOTE
Multiple Configurations
If you’re using the multiple configurations feature of
MS-DOS 6.0 in your CONFIG.SYS file, you should
verify the changes before restarting your system.
1. INSTALL requests permission to change your AUTOEXEC.BAT
file.
To approve the changes, type Y. To make the changes manually,
type N.
INSTALL modifies the PATH statement to include the CardTalk
subdirectory, advises you whether or not it is making a change and
lists the changed lines.
If a PATH statement somewhere else in the system sets the PATH,
you’ll also need to add the CardTalk subdirectory to this statement.
If you don’t, you’ll have to change directories to use the TC utilities
and MEMCARD.EXE, or type the entire directory path for each
command.
2. INSTALL requests permission to change your CONFIG.SYS file.
Page 42
Installing the Software
To approve the changes, type Y. To make the changes manually,
type N.
3. INSTALL displays the lines it is adding to your CONFIG.SYS file:
Device driver line
Discussion
\CARDTALK\TMB250.SYS
This Socket Services driver is
required.
\CARDTALK\CTALKCS.EXE
This Card Services driver is
required.
\CARDTALK\CARDTALK.SYS
This Super Client driver is
required.
\CARDTALK\MS-FLASH.SYS
This Flash File System driver is
optional
4. Press any key to complete the installation.
5. After installing the software, you must restart your system for
changes in your configuration to become effective.
You can manually modify the configuration of the drivers by editing the
configuration files yourself.
NOTE
Restoring Your Previous Configuration
INSTALL also tells you how to remove the CardTalk
drivers and restore your previous configuration, if an
error occurs and you want to start again.
Verify the Installation
When you restart the system, the CardTalk briefly displays a number of
messages. This section explains how to run CTALKID to to verify that
each socket is working properly.
PC-250, PC-260, and PC-300 User’s Guide
Page 43
Installing the Software
Observe the Messages
At least the first time you start the computer with CardTalk installed,
and any time you are experiencing problems, pay attention to the
following messages:
Socket Services installing for port 240h
Databook CardTalk Socket Services BIOS V3.xx 4/22/94
Compliant with Intel ExCA Release 1.50 and PCMCIA Release 2.10
Copyright (C) Databook Incorporated 1990-1994. All Rights
Reserved.
TMB-250 2-Socket PCMCIA PC Card Reader/Writer
Performing Self Test...passed
Pay special attention to the result of the self test. If the self test fails,
Card Services, CardTalk and the client drivers will not load. Refer to
Chapter 6, Troubleshooting, for assistance.
As the boot process continues, the card services driver displays
messages similar to the following:
Page 44
Installing the Software
Databook CardTalk Card Services Driver V3.xx 4/22/94
Compliant with Intel ExCA Release 1.50 and PCMCIA Release 2.10
Portions Copyright (c) 1992-1994 by Ventura Micro and Award Software
Inc.
Copyright (c) 1980-1994 Databook Incorporated All Rights
Reserved.
Card Services installed successfully
Databook CardTalk Card Services Driver V3.xx 4/22/94
Copyright (c) Databook Incorporated 1990-1994. All Rights
Reserved.
Installed Socket 1 as MS-DOS drive D:.
Installed Socket 2 as MS-DOS drive E:.
In the above example, the system’s previous configuration uses drives
A through C and CardTalk assigns one drive letter to each socket.
NOTE
Drive Letters
The drive letters displayed (in this case, D and E),
are the ones you will use to access PC Cards
(memory and ATA devices) in sockets 1 and 2
respectively.
Confirm Each Socket is Working
To confirm that each slot is working properly, at the DOS prompt enter
the following:
CTALKID
The CTALKID program displays a list of the drivers, what file loaded
them into memory and their location on your system. The following is a
typical listing:
PC-250, PC-260, and PC-300 User’s Guide
Page 45
Installing the Software
Software detection:
Socket Services:
Release 2.xx Version 3.xx
For 2-Socket PCMCIA Card Reader
Loaded by line 11 of CONFIG.SYS from
C:\CARDTALK\TMB250.SYS
Command tail: /io:240
Card Services:
Release 2.xx Version 3.xx
Loaded by line 12 of CONFIG.SYS from
C:\CARDTALK\CTALKCS.EXE
CardTalk:
Version 3.xx
Loaded by line 13 of CONFIG.SYS from
C:\CARDTALK\CARDTALK.SYS
Hardware detection:
1 Controller found
etc.
If CTALKID displays an error message or does not display a similar
message for each socket, refer to Chapter 6, Troubleshooting.
Page 46
Installing the Software
CardTalk Files
File
TMB250.SYS
Description
PCMCIA Socket Services driver.
CTALKCS.EXE
PCMCIA Card Services driver.
CARDTALK.SYS
Super Client device driver.
CARDTALK.386
The Vxd driver for Microsoft Windows 3.1
operating in 386 enhanced mode.
CARDINFO.DBK
A text file that contains parts of the card
information structures to allow CardTalk to
support memory cards with an incomplete
CIS.
CARDTALK.EXE
A Windows application that displays I/O card
configuration information, and manages ATA
and memory cards (provides format and copy
utilities).
CARDTALK.GFE
An auxiliary program required by
CARDTALK.EXE.
TCINIT.EXE
An MS-DOS utility for writing Card
Information Structures (CIS) to memory cards.
TCFORMAT.EXE
An MS-DOS utility for formatting memory
cards.
TCXCOPY.EXE
An MS-DOS utility for copying MS-DOS files
to Flash memory cards.
TCERASE.EXE
An MS-DOS utility for erasing memory cards.
TCREAD.EXE
An MS-DOS utility for reading memory cards
as binary files.
TCPROG.EXE
An MS-DOS utility for programming memory
cards as binary files.
PC-250, PC-260, and PC-300 User’s Guide
Page 47
Installing the Software
TCUTIL.TXT
An MS-DOS text file that contains detailed
information about using the TC utilities.
MS-DOS users should print this file. It
contains more detail than does this manual.
README.1ST
A text file that contains information not
available when this manual was published.
MS-FLASH.SYS
Microsoft Flash File System version 2.0
(FFS2) driver.
Installing the CardTalk Control
Panel
In addition to installing the CardTalk drivers, the installation program
installs the CardTalk Control Panel graphical user interface for
Windows and edits your Windows .INI files so that when you load
Windows you will see the “CardTalk 3.1” group window with the
Control Panel icon in it.
CAUTION
INSTALL at the MS-DOS Prompt
Do not install CardTalk from a DOS box within
Windows. Exit Windows before installing CardTalk.
The CardTalk program identifies PC Cards and allows you to configure
memory and Flash file cards and to copy files between your system and
these cards. By adding CardTalk to your Windows StartUp group, the
CardTalk Control Panel is always available when you insert or remove
PC Cards.
To move the CardTalk Control Panel to your Windows StartUp group
(or any other group), follow these steps:
1. Load Windows and arrange the program groups so that both the
CardTalk group and your StartUp group are visible.
2. Drag the CardTalk icon from the CardTalk group to the StartUp
program group.
Page 48
Installing the Software
The next time you load Windows, the CardTalk Control Panel will
load automatically.
Using PC Cards
At system startup the Super Client and user-installed client drivers
register with Card Services. The client drivers tell Card Services which
cards they control. The Super Client driver works with a wide variety
of cards. Each client driver is designed to work with a particular card,
and controls that card exclusively.
Inserting a Card
Before you insert a card into the socket, touch a grounded piece of
metal, such as the computer chassis to discharge static electricity.
CAUTION
Avoid Electrostatic Discharge
Always touch the metal chassis of the computer
before you insert a PC Card. The Card Reader has
been tested to withstand electrostatic discharge, but
static can damage or stress a computer’s
components even when it does not make the
computer fail.
When a card is inserted into the socket, Card and Socket Services
signals the CardTalk Super Client driver (CARDTALK.SYS). When
this happens, CARDTALK.SYS:
1. Turns power on to the card and interrogates the Card Information
Structure to determine the card type.
2. If a Card Services client driver has been installed for the card, it
gets control of the card. If not, CARDTALK.SYS tales control.
3. CARDTALK.SYS or the client driver initializes the socket and card
and prepares the card to perform its particular operation. If the
Super Client driver has control, the computer beeps once to indicate
it recognized and installed the card. If you hear more than one beep,
refer to Chapter 6, Troubleshooting, for more information.
PC-250, PC-260, and PC-300 User’s Guide
Page 49
Installing the Software
4. If the client driver has control the computer may or may not beep or
make other audible sounds. Refer to the documentation that came
with the card to identify the sounds it makes.
Applications Software
A client driver may have its own application software interface. For
example, the user interface program and network device drivers for a
network card typically come from the manufacturer of the network
software.
Cards that require only the Super Client driver may or may not come
with their own software. The CardTalk Control Panel automates the
management of memory and ATA cards. Refer to Chapter 5, Using the
CardTalk Control Panel, for information.
Other cards that require only the Super Client driver work with standard
MS-DOS commands. Fax/Modem cards work with commercial
communications software packages.
The software for your card depends on the type of card and its purpose.
Refer to the card owner’s manual for more information.
Removing a Card
Upon removal of a PC Card, Card Services notifies the client driver that
the card has been removed. At this point, the client driver prevents
operations that would result in system failure.
When you insert the PC Card again, the client driver re-initializes the
card.
Page 50
4
Cards that Require Only
CARDTALK.SYS
The Super Client driver, CARDTALK.SYS controls the interface
between the computer and any PC Card you insert in a PCMCIA
socket. The cards described in this chapter work with CardTalk and the
drivers provided on the distribution diskette without requiring
additional software. These include:
• Fax/modem cards
• Special serial port cards
• ATA devices (rotating media, solid-state cards, such as SunDisk
cards and other solid-state ATA PC Cards)
• SRAM and Flash memory cards
• Read-only memory (ROM) cards
Other PC Cards may require software that is usually provided by the
manufacturer of the card. Chapter 5, Cards that Require Additional
Drivers, discusses using these cards.
Fax/Modem Cards
Originally designed to add communications capability to portable
computers, PC fax/modem cards are also being used with desktop
computers. For example, with a Card Reader installed, you can share a
single fax/modem card between your portable and desktop computers.
The Card Reader has its own speaker, which connect to the speaker
output of the fax/modem card.
This section discusses the operation of PC fax/modem cards when used
with CardTalk in both the MS-DOS and Windows environments.
PC-250, PC-260, and PC-300 User’s Guide
Page 51
Cards that Require Only CARDTALK.SYS4
Fax/Modems Supported
The Card Reader is designed to support all fax/modem cards that
adhere to the PCMCIA specifications, version 2.10. Any operating
limitations depend on your computer’s configuration. The number of
already assigned serial ports, the assigned interrupt request (IRQ)
channels and your operating environment (MS-DOS or Windows)
affect how you configure a PC fax/modem card.
For a list of the fax/modem cards The Manufacturer has tested, see the
README.1ST file on the diskette. Other fax/modem cards that comply
with the PCMCIA 2.10 standard also work.
HINT
Determining if a Card is Supported
If you insert a fax/modem card and the computer
beeps once, CARDTALK.SYS supports the card.
Assigning the Serial (COM) Port
When you insert a fax/modem card, CardTalk scans the system and, if
you selected Automatic for the COM port assignment when you
installed CardTalk, CardTalk assigns the next available COM port to
the fax/modem. For example, if COM1 and COM2 are already
assigned, CardTalk uses COM3 for the fax/modem card. If this causes
problems in your system, refer to Chapter 6, Troubleshooting.
During installation you have the option of selecting a specific COM
port and IRQ for CardTalk to always assign when you insert a PC
fax/modem card. Refer to the Selecting Serial Ports section in Chapter
3 for information about selecting a COM port during installation.
To change the COM port after you’ve installed the software, modify the
CARDTALK.SYS line in your CONFIG.SYS file.
Setting the COM Port Under MS-DOS
You set the COM port and define the communications parameters (baud
rate, etc.) within the communications software program. Make sure that
you choose the same port you chose when you installed CardTalk.
To change the COM port you must modify the CARDTALK.SYS line
in your CONFIG.SYS file as well as change the COM port in your
communications software.
Page 52
Cards that Require Only CARDTALK.SYS
Fax/Modem Support under Windows
This section documents two aspects of using a fax/modem under
Window 3.1: using the CARDTALK.386 driver and setting the COM
port.
CARDTALK.386
The CARDTALK.386 file provides software communications support
for 386 Enhanced Mode. Windows automatically loads this file when
Windows starts. CARDTALK.386 must reside in the same directory as
CARDTALK.SYS.
Setting the COM Port
Follow these steps to set the COM port in Windows:
1. Double-click on the Windows Control Panel (located in the Main
Program Group).
2. Double-click on the Ports icon.
3. Click on the COM port icon you wish to use.
4. Click on the Settings... button to change communications
parameters.
5. Click on the Advanced button.
6. Set the address and IRQ.
When setting the COM port in Windows, make sure you choose the
same COM port you chose when you installed CardTalk. Refer to your
Windows documentation for what the settings mean and how to use the
Advanced... button.
To change the COM port you must modify the CARDTALK.SYS line
in your CONFIG.SYS file as well as change the COM port in the
Windows Control Panel.
When to Insert the Fax/Modem
You can insert the fax/modem when you start the computer, before you
load your communications program or when the system is ready to
transmit. If you load your communications software and attempt to
initialize the fax/modem without the fax/modem in the slot,
PC-250, PC-260, and PC-300 User’s Guide
Page 53
Cards that Require Only CARDTALK.SYS4
CARDTALK.SYS displays a blue screen (if you have a color monitor
or LCD) with a message, and waits for you to insert the card. Insert the
card and choose Retry.
It is not necessary to remove the fax/modem when you finish a
communications session if you plan to use it in a later session.
Verifying Installation
To verify that the fax/modem is working properly, follow these steps:
1. Load your communications software program.
2. Set the COM port.
3. Go into terminal mode and enter AT.
The fax/modem should display (return) OK.
4. Enter ATH1 and listen for the dial tone.
5. Enter ATH to turn the dial tone off.
If you have further problems, refer to the owner’s manual for your
communications software and to Chapter 6, Troubleshooting.
ATA Devices
The two major classes of ATA (sometimes referred to as IDE) interface
devices are solid-state Type II cards and rotating Type III drives. Both
appear as disk drives to the system.
Supported Devices
CardTalk supports these ATA devices:
• Solid-state ATA, such as the SunDisk series SDP and SDPL cards,
Seagate, AT&T, Intel and other cards.
Certain older solid state ATA Flash cards, such as the Grid GE or
SunDisk SD series cards are not PCMCIA-compatible and will not
work with CARDTALK.SYS.
• PCMCIA/ATA rotating hard disk drives whose I/O card interfaces
are PCMCIA compatible. Examples include Maxtor, MiniStore,
IBM, Integral, Calluna, Western Digital and others.
Page 54
Cards that Require Only CARDTALK.SYS
A few hard drives were shipped, which look like PCMCIA hard
drives but are “first generation” and are not PCMCIA compatible.
These drives will not operate. Contact the drive manufacturer.
Refer to the README.1ST file for additional card types.
Device Limitations
The Card Reader slots accommodate all PCMCIA TYPE I and Type II
devices (5mm thick), ATA Type III devices (10.5mm thick), and Type
III Plus devices.
Solid State ATA Flash Cards
Solid state ATA Flash cards are designed by the manufacturer to
behave like a hard disk drive. They do not require specialized software
to read the data stored on them and write data to them. With a solid
state ATA Flash card, such as a SunDisk, you can use the same
MS-DOS commands you would use with any hard disk drive.
If you plan to use a solid state ATA Flash card to exchange data with
another system, make sure the other system supports solid state ATA
Flash cards. Also, other systems may require an ATA driver to be
installed. Contact the system’s manufacturer if you experience
difficulties.
Hard Disk Drives
Rotating hard disk drives require significantly more power than do
solid-state PC Cards. The sockets in the Card Reader are compatible
with all PCMCIA compatible ATA hard disk drives.
The CardTalk Control Panel and all standard MS-DOS commands work
with all ATA devices.
Formatting ATA Devices
To format a new ATA device (solid-state card or hard disk drive) use
the CardTalk Control Panel or the MS-DOS FORMAT command.
Refer to Chapter 5, Using the CardTalk Control Panel.
PC-250, PC-260, and PC-300 User’s Guide
Page 55
Cards that Require Only CARDTALK.SYS4
NOTE
Start Delay
After you insert an ATA device and wait for the
beep, the system often requires a start delay of
several seconds before you can access the drive.
The system is free to execute other programs, but
an access to the ATA device during this period
causes the system to pause until the delay has
elapsed. A single audible tone indicates the system
has recognized the device.
Memory Cards
A PC memory card is a storage device that functions much like a
diskette. Once you’ve formatted the card, you can access it directly
using standard MS-DOS commands and Windows File Manager.
FAT/Flash formatted cards require the CardTalk Control Panel or
TCXCOPY utility to copy files.
The CardTalk Control Panel, a Windows application, provides all the
options you need to prepare PC memory (SRAM and Flash) cards for
operation with the standard MS-DOS commands and with Windows.
This section explains how to use the CardTalk Control Panel to prepare
a memory card and copy files.
The most commonly used software for modifying these types of cards is
TC Utilities. The TC Utilities are a set of MS-DOS commands
provided by Databook. Memory cards prepared using the Control Panel
or the TC Utilities can be used under MS-DOS or Windows.
Memory Cards Supported
The README.1ST file on the distribution diskette lists all the memory
cards currently supported. If your card is not listed, it may work by
using the -size and -type options.
Memory Cards and File Systems
Formatting a PC memory card consists of applying a particular file
system to it. There are several file systems CardTalk Control Panel can
Page 56
Cards that Require Only CARDTALK.SYS
apply. The file system to use depends on the type of card and how you
expect to use it.
The supported file systems are:
This is a standard MS-DOS file system used
File Allocation
for managing diskettes and hard disks. The
Table (FAT)
CardTalk Control Panel or the TC Utility
TCFORMAT places a FAT on SRAM cards
or on Flash memory cards. MS-DOS requires
a FAT file system to boot from a PC memory
card.
This is a Microsoft standard that provides the
Flash File System
version 2.0 (FFS2) most flexible structure for Flash cards. FFS2
uses a linked-list of blocks. Internally, each
block is of variable length, with identifying
information in the header portion of the block.
MS-DOS commands work except for
FORMAT and CHKDSK.
FAT/Flash
This is a special FAT for Flash cards. A card
formatted with a Flash FAT appears to be a
read-only SRAM card to a notebook computer
PC. Some notebooks can boot from cards
formatted this way. Refer to your computer
owner’s manual to determine if you can use
this feature.
You can use MS-DOS commands on a Flash
card configured with a FAT, except as
follows:
• You cannot delete files from or edit files
stored on a Flash FAT formatted card. To
delete or change any file on the card you
must erase the entire card and copy the
files back to the card.
• You must use the CardTalk Control Panel
or the TC Utilities program
TCXCOPY.EXE to copy files to the card.
• The MS-DOS DEL command does not
work.
• The MS-DOS CHKDSK command does
not work.
PC-250, PC-260, and PC-300 User’s Guide
Page 57
Cards that Require Only CARDTALK.SYS4
•
True Flash File
System
(TFFS)Error!
Reference source
not found. Error!
Reference source
not found.
The MS-DOS DIR command always
shows 0 bytes free instead of the actual
free space.
M-Systems provides a Card Services client
driver that allows you to store files on a Flash
card as if the card contained standard
read/write media. TFFS uses blocks of fixedlength data that are indexed with a table.
Chapter 6, Cards that Require Additional
Drivers, explains how to use the True Flash
File System. You must use the M-Systems
utilities to prepare and copy to a card
formatted with TFFS.
SRAM Cards
An SRAM card is a memory storage device that requires a battery to
maintain the data stored on it. CardTalk treats SRAM cards as though
they were standard diskettes.
Refer Chapter 5, Using the CardTalk Control Panel, for information on
how to initialize cards and copy files.
Flash Cards
A Flash card is a memory storage device that does not require a battery
to retain its data.
Flash memory cards change and erase data differently than do SRAM
cards. These special characteristics make it difficult to use them with
the MS-DOS FAT file system, since MS-DOS expects the Flash card to
behave like a standard disk that is able to erase and rewrite data at any
time. To overcome this difficulty, several Flash File Systems have been
created. These systems provide MS-DOS with what seems like a
standard disk and allows you to copy and delete files without any
special procedures.
Three of the most commonly used Flash File Systems are:
• M-Systems True Flash File System (TFFS)
• SystemSoft/Microsoft Flash File System v2.00 (SS\MS FFS)
• Microsoft Flash File System v2.0 (FFS2)
Page 58
Cards that Require Only CARDTALK.SYS
Databook supplies the FFS2 driver, MS-FLASH.SYS with CardTalk.
Since no other drivers are required to format a Flash card with FFS2,
this section discusses this Flash file system.
TFFS comes with an M-Systems driver and utilities. Since TFFS
requires an additional driver that is not supplied by The Manufacturer,
the discussion of Flash cards formatted with TFFS is in Chapter 6,
Cards that Require Additional Drivers. Information on the SS\MS FFS
is also in Chapter 6, Cards that Require Additional Drivers.
Formatting Cards with FFS2
You may format Flash cards using the CardTalk Control Panel or TC
utilities. For more information on using the CardTalk Control Panel to
format cards refer to Chapter 5, Using the CardTalk Control Panel.
Microsoft Flash File System v2.0 includes the MEMCARD.EXE
program for partitioning and formatting Flash cards.
NOTE
Using Another File System
You don’t have to use FFS2 formatting to use Flash
cards. If you do not plan to use FFS2, you may
delete MS-FLASH.SYS from the \CARDTALK
directory and remove (or “rem out”) the lines that
load them from the CONFIG.SYS file. This saves
considerable memory.
Using a Card Formatted with a Microsoft FFS2
Microsoft Flash File System v2.0 (FFS2) is a formatting scheme that
treats a Flash memory card as if it were a standard read/write storage
device, such as a disk.
If you select Microsoft FFS2 during the installation program, the
program copies the FFS2 driver to the \CARDTALK directory, and
adds the MS-FLASH.SYS driver to your CONFIG.SYS file.
Although MS-FLASH is not a client driver, it performs similar
functions, and must be loaded after CARDTALK.SYS in your
CONFIG.SYS file.
PC-250, PC-260, and PC-300 User’s Guide
Page 59
Cards that Require Only CARDTALK.SYS4
Deleting Files from an FFS2-Formatted Flash Card
You can delete individual files from a Flash card that has been
configured with a FFS2 file system. Use the MS-DOS DEL command
to delete individual files. The system reclaims the memory the deleted
files occupied.
Memory Cards and Other Programs
Databook’s software supports MEMCARD.EXE, Microsoft’s
configuration and maintenance program for Flash memory cards that
are formatted with Flash File System version 2.0 (FFS2).
Page 60
5
Using the CardTalk Control Panel
This chapter explains how to use the CardTalk Control Panel, the utility
that runs under Windows. The discussion assumes you are familiar with
Windows 3.1 and know how to use its features.
INSTALL places the CardTalk control panel icon in your StartUp
group and opens it each time you start Windows.
The CardTalk Control Panel Icon
Opening the CardTalk Control
Panel
To use the CardTalk Control Panel, follow these steps:
1. Start Windows. Assuming the CardTalk icon is in your StartUp
window, CardTalk displays a welcome message.
If the CardTalk icon is in another window, double-click it to start
the CardTalk Control Panel. By default, the Control Panel
minimizes to an icon when it starts.
2. Insert the card into the socket and wait for the beep. If, the CardTalk
Control Panel is minimized, double-click to restore the main
window. If you enable pop-up notification, the CardTalk Control
Panel automatically opens the main window when you insert a card.
PC-250, PC-260, and PC-300 User’s Guide
Page 61
Using the CardTalk Control Panel
The CardTalk Control Panel Main Window
The CardTalk Control Panel window displays a button for each socket
in your Card Reader.
• The legend on the button identifies the socket number, type of card
(if one is installed), and provides information about the card, such
as its driver letter (for memory and hard disk cards) or the COM
port number (for fax/modem cards).
• The icon on the button changes for each type of card.
• The message at the bottom of the window identifies the purpose of
the portion of the window to which you are pointing.
The remainder of this chapter explains the individual windows and how
to perform various operations using the CardTalk Control Panel.
Getting Help
To view instructions while using the Control Panel, choose one of the
items in the Help menu.
Viewing Card Information
To view information:
1. If you have not already done so, insert a card.
2. Choose the appropriate socket button. The CardTalk Control Panel
displays a Summary Information dialog box similar to the following.
Page 62
Using the CardTalk Control Panel
A Summary Information Dialog Box
The choices available on the Summary Information window depend on
the type of card as described in the following sections.
I/O Cards
If you are viewing information about any card other than a memory or
hard disk card, this window shows how the card is configured. For
example, if the card is a fax/modem card, the Summary Information
window reports the COM port, address and IRQ. If the card is a
network card, the window reports network-related information.
To change the way an I/O card is configured, you must change the
driver options in your CONFIG.SYS file.
Memory and Hard Disk Cards
If you are viewing information about a memory or hard disk card, you
have the following options.
Configure
displays the Configure dialog box. You use this
dialog box to define or change the card's
configuration, including partitioning and formatting
the card. Continue with the next section.
Cancel
closes the information dialog box and returns to the
CardTalk Control Panel main window.
PC-250, PC-260, and PC-300 User’s Guide
Page 63
Using the CardTalk Control Panel
Configuring a Memory or Hard
Disk Card
When you insert a memory or hard disk card, the CardTalk device
drivers cause the system to beep once if they recognize the card. The
drivers cause the system to beep twice, when they do not recognize the
card. If this happens, you can provide the missing information.
1. If you have not already done so, insert the PC memory or hard disk
card into the socket.
2. Double-click the socket button to open the Summary Information
dialog box.
3. Choose the Configure button. The CardTalk Control Panel displays
the Configure Card dialog box. The following is a Configure dialog
box for an ATA Card.
A Configure Dialog Box
The following sections explain each element of this dialog box.
Page 64
Using the CardTalk Control Panel
The Why? Button
If the configuration you’ve defined cannot be applied, the Why? button
appears at the top of the Configure dialog box. Choose this button for
an explanation of which parameters have not been specified or are
invalid for this card.
Current Configuration Box
The Current Configuration box displays information based on the
current Card Information Structure (CIS) for the card, if one exists.
The list box in the lower right corner of the Current Configuration box
lists the partitions.
New Configuration Box
The options you select from the list boxes on the left appear in the New
Configuration box.
List Boxes on the Left
The list boxes on the left list the settings for each option.
Manufacturer
This box lists card manufacturers.
Model/Part Number This box lists the model number or part number
of the card based on the chosen manufacturer.
Bootable
Checking this box tells the CardTalk Control
Panel to copy the system files to the card. The
presence of these files allows you to start a
computer from the PC Card. You will have to
copy additional files to complete the process of
creating a bootable card. The process to follow
depends on the card type and how you intend to
use it.
NOTE
Bootable Partitions and Compression
Bootable FAT partitions are usually 0.5M in size and
must not be compressed. The custom partitions
option allows you to have an uncompressed
bootable partition and a compressed partition for
other files.
PC-250, PC-260, and PC-300 User’s Guide
Page 65
Using the CardTalk Control Panel
Make Like
Compatible With
This box lists the usual formatting options
available for PC memory and hard disk cards. It
also includes the Custom Partition... option. To
create multiple partitions or a select a special
format, refer to the Custom Partitioning a
Memory or Hard Disk Card section in this
chapter.
This box lists the card format or standard with
which the data on the PC Card complies. The
default is PCMCIA.
This option allows you to create cards that are
compatible with pre-PCMCIA or non-PCMCIA
compliant computers.
Apply Now
WARNING
Partitioning and Reformatting Destroys Data
Partitioning and formatting destroys any data on the
card. If you wish to save any data, copy files from
the card to another drive before selecting Apply
Now.
Choose Cancel to return to the CardTalk Control Panel main window.
Choose Apply Now to partition and format the card based on the
choices you've made in the Make Like list box. The CardTalk Control
Panel displays a screen showing the progress during formatting.
Custom Partitioning a Memory or Hard Disk Card
You may format a memory or hard disk card with more than one
partition. Once formatted, you access each partition using its drive
letter. You can copy files between partitions and other drives using
Windows File Manager, the MS-DOS COPY command or the CardTalk
Control Panel. In the case of FAT/Flash formatted cards, you must use
the CardTalk Control Panel or the DOS program, TCXCOPY, to copy
files.
Page 66
Using the CardTalk Control Panel
Prepare the Socket(s)
By default, the CARDTALK.SYS driver assigns one drive letter to each
socket when it loads during system startup. If you watch carefully,
you’ll see the message(s) that confirm the letter for each socket when
you start the computer.
If a memory or hard disk card has more than one partition, each
partition requires its own drive letter. The default configuration of the
Card Reader ignores all but the first partition on the card.
To configure the Card Reader’s sockets for multiple partitions, you
must change the CARDTALK.SYS /n option. For example, the
following device driver line in a CONFIG.SYS file would configure the
Card Reader so that each socket will recognize up to two partitions per
card:
DEVICE=C:\CARDTALK\CARDTALK.SYS /N:4
See the section titled Partitions, Drive Letters and Drive Access later in
this chapter for a more complete discussion of socket and drive letter
assignment.
Prepare the Card(s)
Follow these steps to prepare a card with more than one partition:
1. If you have not already done so, insert a memory or hard disk card,
choose the card socket button and choose the Configure button.
2.
Choose Custom Partitions... from the Make Like list box. The
CardTalk Control Panel displays the Custom Partition Editor
dialog box.
3.
Type the number of partitions in the Number of Partitions text box
and press the tab key. The CardTalk Control Panel displays
information for each partition between the large selection arrows.
PC-250, PC-260, and PC-300 User’s Guide
Page 67
Using the CardTalk Control Panel
Specifying Two Partitions in the Custom Partition Editor
4.
Select a partition by clicking on the large arrows or by typing the
partition number in the Partition Number text box.
5.
Select the File System for the selected partition using the File
System list box.
6.
Define the size of the partition using the Partition Size text box.
Your choices are:
xx.xK
7.
assigns the partition in kilobytes, where xx.x is a decimal
number with one decimal place.
xx.xM assigns the partition in megabytes where xx.x, x is a
decimal number with one decimal place.
ALL
assigns all available space to the current partition
Select Bootable if the partition is to contain system files. The
Bootable option is only valid for the first partition.
8.
To have the CardTalk Control Panel automatically assign all the
remaining space to the selected partition, select Auto Size.
9.
The CardTalk Control Panel displays the remaining Space
Available on the card after deducting the Partition Size you
selected.
Page 68
Using the CardTalk Control Panel
NOTES
Bootable Partitions
This option is only available for the first partition on
a card.
Bootable FAT partitions are usually 0.5M in size and
must not be compressed. The custom partitions
option allows you to have an uncompressed
bootable partition and compressed partition(s) for
other files.
Card Reader cannot boot from an ATA or memory
card.
10. Repeat steps 4 through 6 for each partition.
11. When your selections are complete, choose OK. The CardTalk
Control Panel displays the Configure dialog box.
12. To exit without changing the card’s partitions, choose Cancel.
13. Choose Apply Now. The CardTalk Control Panel partitions and
formats the memory or hard disk card.
Partitions, Drive Letters and Drive Access
CardTalk can recognize up to eight partitions per socket. To use cards
with multiple partitions requires two configuration steps:
1. You must configure the socket for multiple logical drive letters.
This involves updating the CARDTALK.SYS device driver line in
the CONFIG.SYS file with the /N option. You may also need to
change the LASTDRIVE = setting in CONFIG.SYS. Reboot the
system for these changes to take effect. Refer to the Prepare the
Socket(s) section earlier in this for more information.
2. You must format the card for multiple partitions. You can format
multiple partitions before changing the /n option, but you won’t be
able to access the added partitions until you change the /n option.
The system assigns a drive letter to each partition based on the socket
into which you insert the card.
PC-250, PC-260, and PC-300 User’s Guide
Page 69
Using the CardTalk Control Panel
For example, if you configure all both Card Reader sockets for two
partitions, the system would assign the four drive letters from E to H as
follows:
Socket
1
2
Location
Drive letters
bottom
top
E and F
G and H
If you insert a two-partition card into socket 1, the first partition would
be drive E and the second drive F. If you remove the card from socket 1
and insert it into socket 2, the first partition would be drive G and the
second drive H.
If a socket is configured for only one partition, and you insert a dualpartition card, the system will be able to access only the first partition.
If a socket is configured for two partitions and you insert a singlepartition card, the software accesses the partition using the first drive
letter assigned to the socket. In the example above the drive letters
would be E or G.
Verifying the Configuration
How to verify that you've configured a memory or hard disk card
properly depends on the card. For example, to verify the integrity of an
ATA drive, run SCANDISK or another third-party utility such as
Norton Disk Doctor.
Copying Files
The CardTalk Control Panel can copy files to and from a card, internal
disk drive, another partition or another card. Unlike File Manager or the
MS-DOS copy utilities, the CardTalk Control Panel handles all types of
partitions and cards.
1. Choose Copy Files... from the Utilities menu of the CardTalk
Control Panel. The CardTalk Control Panel displays the Copy Files
dialog box.
Page 70
Using the CardTalk Control Panel
The Copy Files Dialog Box
2.
Select the Source and Target Drive letters from the drop-down list
boxes.
3.
Select the Source and Target Directories from the directory boxes.
4.
You may use the standard MS-DOS wildcards to display files in
the File Name list. Click the Show Hidden Files check box to have
the CardTalk Control Panel display the hidden as well as the
normally visible file names.
5.
Select the file you wish to copy from the File Name list box or type
it in the text box. To copy multiple files, press Ctrl while selecting
the file name.
6.
Choose OK or press Enter to copy the files. Choose Cancel to
return to the CardTalk Control Panel main window without
copying the file(s).
PC-250, PC-260, and PC-300 User’s Guide
Page 71
Using the CardTalk Control Panel
7.
Choose Cancel when you have finished copying files.
Configuring the CardTalk Control
Panel
When you choose Options from the Edit menu, the CardTalk Control
Panel displays the Application Options dialog box.
The Application Options Window
This dialog box allows you to set the options discussed in the following
sections.
Popup Notification
These options determine when the Control Panel pops up to notify you
of PC Card events.
Disable
turns off popup notification of PC Card events.
This means the CardTalk Control Panel will not
appear when you remove or insert a card.
If you choose Disable, you can disable the Start
Minimized option.
Card Insertion causes the software to activate the CardTalk
Control Panel display when you insert a PC Card.
Card
causes the software to activate the CardTalk
Insertion/Rem
Control Panel display when you insert or remove a
ovalP
PC Card.
Page 72
Using the CardTalk Control Panel
Start Minimized
This checkbox configures the software so that when the CardTalk
Control Panel starts, it immediately minimizes itself it to an icon. This
is the default.
Display Help Bar Text
This checkbox turns on the Help bar text at the bottom of the CardTalk
Control Panel dialog boxes.
Choose OK to save the options and return to the CardTalk Control
Panel or choose Cancel to return to the CardTalk Control Panel without
saving the selected options.
PC-250, PC-260, and PC-300 User’s Guide
Page 73
6
Troubleshooting
This chapter begins with problems that may occur when loading the
PCMCIA drivers and describes the use of the CTALKID program to
diagnose these problems. It continues with general troubleshooting
comments and observations about problems that occur with specific
types of PC Cards. The chapter concludes with a discussion of the most
common error messages and how to contact The Manufacturer for help.
Read through the entire chapter for hints that may help you. Additional
error message descriptions are available on The Manufacturer’s
Bulletin Board System (BBS).
Initialization Problems
This section documents problems that can occur while the drivers are
loading. The types of problems are listed in order based on the
initialization procedure. In addition to reading this discussion, refer to
Chapter 3, Installing the Software.
These problems can occur when you install the Card Reader for the
first time or when you add a new ISA device to your computer later on.
Self Test Failed
The system displays this message immediately after booting and while
loading Socket Services:
Databook Socket Services Vx.x[release date]
Copyright (C) Databook Incorporated 1990-1994
TMB-250 PCMCIA PC Card Reader/Writer
Performing Self Test...failed
where is x.x and release date identify the version and the date it
shipped. Note the version number. You will need this number if you
call The Manufacturer’s Technical Support.
PC-250, PC-260, and PC-300 User’s Guide
Page 74
Index
The “Performing Self Test...failed” message indicates one of the
following problems and possible solutions:
Problem
Solution
Run CTALKID. (See the Run
An addressing conflict between
CTALKID section later in this
the TMB250.SYS Card Socket
Module address and another I/O- chapter for how to use this utility.)
addressed component of the
CTALKID displays the jumper
system has occurred.
address set on the ISA Bus Board.
or
If necessary, find an unused I/O
address.
The I/O address set you during
software installation does not
match the jumper configuration.
Turn the computer off, open the
chassis, remove the ISA Bus
Board, and change the jumper
setting.
Reassemble the computer, turn the
power on and modify the
TMB250.SYS /IO option by
editing your CONFIG.SYS file to
read:
TMB250.SYS /IO:nnn
where:
nnn is the I/O base address of the
switch setting.
Once you’ve modified the
CONFIG.SYS file, restart the
computer for the change to take
effect.
The product is malfunctioning.
If, after running CTALKID and
verifying the jumper setting the
configuration still will not pass
the self test, call The
Manufacturer Technical Support.
PC-250, PC-260, and PC-300 User’s Guide
Page 75
Index
Socket Services Not Databook or Version 2.10
Installation Aborted
This message appears when Card Services is loading and it cannot find
the proper Socket Services driver already loaded. Databook Card
Services must be run with Databook Socket Services, version 3.xx. This
version is compliant with PCMCIA release 2.10.
Card Services Not Installed
This message appears if the self test failed. Make sure all driver files
are where they belong and are loaded into memory before you try again.
Refer to Chapter 3, Installing the Software, for more information.
Error in Command Tail
While CARDTALK.SYS is loading, you may receive this message
(after it displays the driver version and copyright notice):
Error in command tail: text from CONFIG.SYS
where text from CONFIG.SYS is the CARDTALK.SYS line from your
CONFIG.SYS file.
This message indicates an error in the options found in the
CARDTALK.SYS line. The driver has not loaded and neither have any
PCMCIA drivers that came after it in the CONFIG.SYS file. Correct
the line in your CONFIG.SYS file and restart the system. This problem
is usually caused by a typographic error such as a forward slash (/)
typed as a backward slash (\) or a spelling error.
No Socket Services BIOS Sockets Found
You may receive this message after CARDTALK.SYS (the Super
Client driver) displays the driver version and copyright notice:
Databook CardTalk Device Driver Vx.x
Copyright (C) Databook Incorporated 1990-94. All rights reserved.
No Socket Services BIOS Sockets found.
where x.x is the version of software.
Page 76
Index
This message indicates one of the following problems and possible
solutions:
Problem
Solution
The self test failed.
Refer to the Self Test Failed
section before you call The
Manufacturer’s Technical
Support.
The Card Reader is not
Install the ISA Bus Board and
installed.
restart the system. Watch the
responses the drivers give
carefully.
You’re using a third-party’s Card Remove all other Socket
Services drivers from your
and Socket Services software
system and try again.
that conflicts with Card and
Socket Services software.
Drive Assignment Conflicts
MS-DOS keeps track of all drive letters in the system. CardTalk
determines the last MS-DOS drive letter and assigns the Card Reader’s
socket(s) to the next available letter(s) in socket order. This works as
long as all drives in the system are MS-DOS drives. If, however, you
are connected to a network (such as a Novell network) or have a drive
(such as a SCSI or CD-ROM drive) that uses drive letters not accounted
for by MS-DOS, the letter(s) assigned to the Card Reader’s socket(s)
may conflict with the non-MS-DOS drives. The conflict occurs at the
time MS-DOS loads the Super Client driver, CARDTALK.SYS from
the CONFIG.SYS file.
PC-250, PC-260, and PC-300 User’s Guide
Page 77
Index
NOTE
Multiple Drive Letters
If you specified the CARDTALK.SYS /N:number
option in your CONFIG.SYS file, CardTalk may
assign multiple drive letters to each socket. See the
section titled Partitions, Drive Letters and Drive
Access in Chapter 5, Using the CardTalk Control
Panel.
You may need to include a LASTDRIVE= command
line in your CONFIG.SYS file.
These drive assignment conflicts can be further complicated if your
MS-DOS drive is compressed using a compression utility. For example,
if your drive C is a single-partition compressed drive, the DoubleSpace
host drive defaults to E. Your next available drive, which will be used
by CardTalk, is F. If drive F is required by another function, such as a
network, you may not be able to access either the network or the Card
Reader socket once you load the CardTalk driver.
Warning Beeps
By default, the installation program enables the CardTalk annunciator.
The annunciator provides feedback through the system speaker. One
beep means CARDTALK.SYS recognizes the card as a properly
initialized card.
The following list documents the warning beeps:
Page 78
Index
two beeps
three
beeps
CARDTALK.SYS does not recognize the card and
assumes it is an uninitialized memory card. If the card
is a memory card, the card may be unformatted. To
format the card, use the CardTalk Control Panel or, for
DOS users, the TC utilities.
The following cards cause two beeps during normal
insertion:
SCSI
Network cards
Sound cards
any card requiring a Card Services client driver or
enabler.
This is because CardTalk cannot configure these cards
without the third party software, which must be
installed separately and/or run by you.
CARDTALK.SYS recognizes the card, but
initialization has failed. This is usually because some
system resource necessary to support the card is not
available. For example, no COM ports are available
(MS-DOS already has four COM ports assigned).
PC-250, PC-260, and PC-300 User’s Guide
Page 79
Index
Error Messages
The following list of error messages are displayed by the CardTalk
Control Panel and TC utilities.
Message
Resolution
You are attempting to load one
A CardTalk driver has already
of the CARDTALK files twice.
been installed.
Check your CONFIG.SYS file.
You may have two lines that
load CARDTALK.SYS or
another CardTalk file.
An error occurred while
Allocation of device geometry
programming a memory card.
structure failed.
You may have specified the
wrong card, the card may have a
bad CIS, or it may have failed in
some other way.
A failure occurred while Card
Can’t access file.
and Socket Services software
was accessing a file on a memory
card. Retry the operation. It may
be necessary to reboot the
system, or, if the card data has
somehow been damaged, to
reformat the card.
Remove other applications from
Can’t create a card object for
memory, particularly TSRs. If
this socket. May be out of
you’re in Windows, minimize
memory!
open windows or exit Windows
and load it again.
Minimize open windows or exit
Can’t display this dialog
Windows and load it again.
window. You may be low on
memory.
Page 80
Index
Message
Can’t find file.
Can’t find system files.
Can’t format card.
Can’t make dir.
Can’t make subdir.
Can’t read boot block.
Can’t read FAT.
Resolution
A failure occurred while Card
and Socket Services software
was accessing a file. Retry the
operation. It may be necessary to
reboot the system, or, if the card
data has somehow been
damaged, to reformat the card.
The formatter cannot create a
system disk because it cannot
find the required files to copy to
the disk. Reinstall CardTalk and
try again. This may have to do
with the default drive selection
during the format operation.
The card cannot be formatted
because the wrong card has been
specified, the card is defective,
there is a configuration problem
or there has been a hardware
failure. Verify that the overall
installation was successful and
correct using the CTALKID
program.
TCXCOPY cannot create a
directory or subdirectory as
needed. The card may be full, or
have failed.
See “Can’t make dir” above.
The formatting program cannot
access the boot record on the
system’s default drive. Check
which drive you are logged into
when running the format utility.
See “Can’t read boot block”
above.
PC-250, PC-260, and PC-300 User’s Guide
Page 81
Index
Message
Can’t write boot block.
Can’t write directory.
Can’t write FAT.
Can’t write root dir.
Can’t write subdir.
Cannot open filename.
Card is write-protected.
CardTalk driver version for
socket number must be at
least V2.20.15 or V.3.01.
CardTalk must be first Card
Services client.
CARDTALK.DBK version must
be at least V2.0.15 or V3.01.
Page 82
Resolution
There is a problem formatting
the card, it may be full, its data
corrupted or defective, or you
may have specified the wrong
card.
See “Can’t write boot block”
above
See “Can’t write boot block”
above
See “Can’t write boot block”
above
See “Can’t write boot block”
above
The copy utility could not access
the file filename. It may be
inaccessible due tits DOS file
attributes. Make sure that you
can access the file, then retry the
operation.
Remove write protection and try
again.
The version check has
determined that the version of
CARDTALK.SYS being used
for the socket identified by
number is older than V2.20 or
V3.01. Contact Databook to
receive an upgrade.
The Super Client driver,
CARDTALK.SYS, must be the
first client driver in the
CONFIG.SYS file. See the
Chapter 6, Cards that Require
Additional Drivers.
Contact The Manufacturer to
receive an upgrade.
Index
Could not erase card.
Could not program byte.
Databook Card Services not
installed.
Error erasing card.
Error in command tail.
Error writing card.
File already exists.
File doesn’t exist.
This may indicate that the wrong
card model number has been
specified, a configuration
problem, a card failure or a
hardware failure. As a first step,
verify the installation with
CTALKID.
This often indicates a defective
or failed memory card.
Refer to the section in this
chapter titled Initialization
Problems.
See “Could not erase card”
above. Also, this message
frequently indicates a defective
or failed memory card.
Refer to the section in this
chapter titled Initialization
Problems.
This often indicates a defective
card, particularly if the card has
operated correctly in the past.
Otherwise, see above error
messages related to card data
writes.
An attempt was made to copy a
file into a directory containing a
file of the same name. When
using TCXCOPY or the
CardTalk Control Panel to
format Flash/FAT cards, the only
way to erase a file is to erase the
entire card. A file cannot be
overwritten; so you must either
erase or chose another name.
A reference was made to a
filename that could not be
located in the specified path.
PC-250, PC-260, and PC-300 User’s Guide
Page 83
Index
First card services client
already registered.
Flash card programming
algorithm not supported.
Flash card programming this
card not supported.
The Super Client driver must be
the first Card Services client
driver loaded, and it must be
loaded only once.
CardTalk does not support the
Flash card identified by Flash
card.
CardTalk does not support the
Flash card identified by Flash
card.
Getdevparam failed -- probably
wrong DOS version.
You may be using an older
version of MS-DOS, or you may
have a mismatch among the
revision levels of the CardTalk
software components.
Insufficient disk space.
The file copier cannot copy the
files because the target disk or
card does not have enough space
to hold the files.
Put a card in the socket.
No card in drive.
No room on card.
No room on disk.
No socket Services BIOS
sockets found.
Page 84
Delete files from the card to
make room and copy the file(s)
again. In the case of a FAT/Flash
formatted card, you may have to
erase and reprogram the card. In
the case of an FFS1 formatted
card, even when files are erased,
the space is not reclaimed as it is
with FFS2, so you may have to
erase the card to recover the
space.
Delete files from the card to
make room and copy the file(s)
again.
Refer to the section in this
chapter titled Initialization
Problems.
Index
Out of memory processing
filename.
Possible out of memory
problem just occurred in
function/method name.
Possible out of memory
problem just occurred.
Root directory full.
Shutdown error: error.
Startup error: error.
There are no installed sockets
found in this computer.
CardTalk ran out of memory
while processing the file
identified by filename.
Remove other applications from
memory. If you’re in Windows,
minimize open windows or exit
Windows and load it again.
A memory problem has occurred
involving the function identified
by name.
Remove other applications from
memory. If you’re in Windows,
minimize open windows or exit
Windows and load it again.
Remove other applications from
memory. If you’re in Windows,
minimize open windows or exit
Windows and load it again.
You have exceeded the number
of files allowed in the root
directory. Delete files from the
root directory, or copy the files
to another directory.
Make a note of the error number
(identified by error) and call
technical support for assistance.
Make a note of the error number
(identified by error) and call
technical support for assistance.
During startup, the Socket
Services driver found no
PCMCIA sockets. Check cable
connections, including power.
Check the I/O base address for a
conflict with another device.
Fully seat the ISA Bus Board.
PC-250, PC-260, and PC-300 User’s Guide
Page 85