1
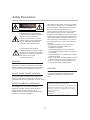
USER MANUAL
LD42VM6E
LD47VM6E
Contents
Safety Precautions
Important Safety Instructions
Accessory List
1
2
4
Overview of TV
Front Panel Description
5
Back Panel Description
6
Disassemble the bottom terminal cover
8
Disassemble the side cover
9
Assemble the wall mount
10
Remote Control Overview (All Functions Except Teletext)
11
Remote Control Overview (Teletext Functions)
12
Remote Control Operation
13
Basic Operation(TV)
14-18
Menu Operation
Menu Description
19
Picture Menu
20
Sound Menu
20
Channel Menu
Window Menu
Setting Menu
21
24
25
DRE Menu
28
PIP/PBP
29
Teletext
30
Section of DTV
Preparation
Connection
31
Switching On
31
Contents
Remote Control
Menu
32
33
Setting
System Setting
34
Channel Setting
39
41
43
Channel List
Favorite List
Common Interface
Using EPG
Digital Teletext
44
45
46
Troubleshooting And Maintenance
Troubleshooting
47
Maintenance
47
Display Mode
Specifications(TV/DTV)
48
49
Safety Precautions
This equipment generates, uses and can radiate
radio frequency energy and, if not installed and
used in accordance with the instruction manual,
may cause harmful interference to radio
communications.However, there is no guarantee
that interference will not occur in a particular
installation. If this equipment does cause harmful
interference to radio or television reception, which
can be determined by turning the equipment off
and on, the user is encouraged to try to correct
the interference by one or more of the following
measures:
!Reorient or relocate the receiving antenna.
!Increase the separation between the
equipment and receiver.
!Connect the equipment into an outlet on a
circuit different from that to which the receiver
is connected.
!Consult the dealer or an experienced radio/TV
technician for help.
!When in use, there must be a distance at least
5cm between the TV and some object front or
back of it, at least 5cm between the TV and
some object leftward or rightward of it.
CAUTION
RISK OF ELECTRIC SHOCK
DO NOT OPEN
The lightning flash with arrowhead
symbol within an equilateral triangle is
intended to alert the user to the
presence of uninsulated "dangerous
voltage" within the unit's cabinet that
may be of sufficient magnitude to
constitute a risk of electric shock.
The exclamation point within an
equilateral triangle is intended to alert
the user to the presence of important
operating and maintenance (servicing)
instructions in the manual
accompanying the unit.
WARNING:
To prevent fire or electric shock, do not expose the
unit to rain or moisture. never attempt to open the
cabinet, dangerous high voltages are present in the
unit. refer servicing to qualified service personnel.
CAUTION:
DO NOT PLACE TO WET LOCATION
Apparatus shall not be exposed to dripping or
splashing with water, and do not place objects
filled with liquids on the apparatus, such as vases.
Do not attempt to modify this product in any
way without written authorization from Amoi
Unauthorized modification, warranty will be
void.
NOTE TO CABLE/TV INSTALLER:
RECORD YOUR MODEL NUMBER
(Do this now, while it is convenient)
This equipment has been tested and found to
comply CE regulation standard. These limits are
designed to provide reasonable protection
against harmful interference when the equipment is
operated in a residential installation.
The model and serial number of your Machine are
located on the back of the TV cabinet. For your
future convenience, we suggest that you record
these numbers here:
MODEL NO._____________________
SERIAL NO._____________________
-1-
Important Safety Instructions
12.Use only with the cart, stand, tripod, bracket,
or table specified by the manufacturer, or sold
with the apparatus. When a cart is used, please
take caution when moving the cart to avoid injury
from tip-cover.
1.Read These Instructions
All the safety and operating instructions should be
read before the product is operated.
2.Keep These Instructions
The safety and operating instructions should be
retained for future reference.
3.Adhered to all warning
All warnings on the product and in the operating
instructions should be adhered to.
4.Follow All Instructions
All operating and use instructions should be
followed.
13.Unplug this apparatus during lightning or
unused for a long period of time.
5.Do not use this product near water
Do not use this product near water for example,
near a bathtub, wash bowl, kitchen sink, or laundry
tub; in a wet basement; or near a swimming pool;
and the like.
14.Refer all servicing to qualified service
personnel. Servicing is required when the
apparatus has been damaged in any way, such
as power-supply cord or plug is damaged, liquid
has been spilled or objects have fallen into the
apparatus, the apparatus has been exposed to
rain or moisture, does not operate normally, or
has been dropped.
6.Clean only with dry cloth
Unplug this product from the wall outlet before
cleaning. Do not use liquid cleaners or aerosol
cleaners. Use dry cloth for cleaning.
7.Do not block any ventilation openings. Install in
accordance with the manufacturer instructions.
15.This product should be operated only from the
type of power source indicated on the marking
label. If you are not sure of the type of power
supply to your home, consult your product dealer
or local power company.
8.Do not install near any heat sources such as
radiators, heat register, stoves, or other apparatus
(including amplifiers) that produce heat
9. Do not defeat the safety purpose of the polarized
or grounding-type plug. A polarized plug has two
blades ,one blade is wider than the other. A
grounding type plug has two blades and third
grounding prong. The wide blade or the third prong
are provided for your safety. If the provided plug
does not fit into your outlet, consult an electrician for
replacement of the obsolete outlet.
16.Protective Attachment Plug
The product is equipped with an attachment plug
having overload protection. This is a safety
feature. See Instruction Manual for replacement
or resetting of protective device. If replacement of
the plug is required, be sure the service
technician has used a replacement plug specified
by the manufacturer that has the same overload
protection as the original plug.
10.Protect the power cord from being walked on or
pinched particularly at plugs, convenience
receptacles, and the point where they exit from the
apparatus.
17.Power Lines
An outside antenna system should not be located
in the vicinity of overhead power lines or other
electric light or power circuits, or where it can fall
into such power lines or circuits. When installing
an outside antenna system, extreme care should
be taken to keep from touching such power lines
or circuits as contact with them might be fatal.
11.Only use attachments and accessories specified
by the manufacturer.
-2-
Important Safety Instructions
18.Overloading
Do not overload wall outlets, extension cords, or
integral convenience receptacles as this can result
in a risk of fire or electric shock.
24.Please make sure the product is near enough
To the electrical outlet to make it easy of operation.
25.The product shall be connected to a mains
socket outlet with a protective earthing connection.
19.Object and Liquid Entry
Never push objects of any kind into this product
through openings as they may touch dangerous
voltage points or short-out parts that could result in
a fire or electric shock. Never spill any kind of liquid
on the product.
Screen Burn
A characteristic of Plasma and LCD TV Panels is
that displaying the same image for a long period of
time may cause a permanent after-image to remain
on the screen. This is called screen burn. Most
pictures shown on your TV will be constantly
moving and fill the screen.
Examples of images that you need to watch out for
are as follows (this is not an all-inclusive list):
1. Black Bars: If black bars appear at the left/right
or top/bottom of the screen it is recommended to
change the format so that the picture fills the entire
screen.
2. TV Channel Logos: e.g. Shopping channel logos
and pricing displays - especially if they are bright
and stationary. Moving or low-contrast graphics are
less likely to cause ageing of the screen.
3. PIP and Multipip: Do not view for long periods of
time using the PIP or Multipip functions.
4. Time Displays
5. Teletext: Do not view a stationary page for long
periods of time.
6. TV/DVD Menus: e.g. Listings of DVD disk
content.
7. Pause Mode: Do not leave the screen in pause
mode for long periods of time, e.g. When watching
DVDs or videos.
Note: Viewing any of the above phenomenon for a
long time may cause the Screen burn. To prevent it,
please reduce contrast and brightness of the image
while viewing. One burn-in occurs, after-image
will remain on the screen.
20.Replacement Parts
When replacement parts are required, be sure the
service technician has used replacement parts
specified by the manufacturer or have the same
characteristics as the original part. Unauthorized
substitutions may result in fire, electric shock, or
other hazards.
21.Safety Check
Upon completion of any service or repairs to this
product, ask the service technician to perform
safety checks to determine that the product is in
proper operating condition.
22.Wall or Ceiling Mounting
The product should be mounted to a wall or ceiling
only as recommended by the manufacturer. Any
mounting of the product should follow the
manufacturer instructions, and should use a
mounting accessory recommended by the
manufacturer.
23.Outdoor Antenna Grounding
If an outside antenna or cable system is connected
to the product, be sure the antenna or cable
system is grounded so as to provide some
protection against voltage surges and built-up static
charges. Article 810 of the National Electrical Code,
ANSI/NFPA 70, provides information with regard to
proper grounding of the mast and supporting
structure, grounding of the lead-in wire to an
antenna discharge unit, size of grounding
conductors, location of antenna discharge unit,
connection to grounding electrodes, and
requirements for the grounding electrode. See
figure below.
-3-
Accessory List
SUB
SOURCE
PIP/PBP
DRE
GUIDE
FAV
INFO
DTV/TV
DTV
Quick Start
SUBTI
Power Cord (×1)
User’s manual CD (×1)
and Quick Start(×1)
TLE
AUDIO
TEXT
TV/RA
DIO
"AAA" size battery (×2)
Remote Control (×1)
Note: Please use the power cord which includes the ground wire.
This TV set shall be connected to a main socket outlet with a protective grounded AC
power outlet.
Where to place the TV
1 . Selecting where to place the TV
2. Handling the TV
2 inches
(5 cm)
or more
(Picture A)
(Picture B)
Note:
• Select a place without direct sunlight but good ventilation . ( Picture A)
• Do not remove the stand from the display unless using a proper wall mount.
• Keep enough space above and behind the TV. ( Picture B)
• The TV is heavy, make sure to move it carefully.
-4-
Front Panel Description
SOURCE
MENU
CH+/-
VOL+/-
POWER
-5-
Back Panel Description
Back Panel of model: LD42VM6E
Picture 3
28
27
Picture 1
26
25
Picture 3
Picture 2
24
23
22
21
20
Picture 1
1
2
3
4
5
6
8
7
9
10
11
Picture 2
13
12
14
15
16
17
18
1
SERVICE ONLY(A)
15
2
OPTICAL OUT
16
3
COAXIAL OUT
17
SERVICE ONLY(D)
4
HDMI 1 IN
18
COMMON INTERFACE
5
HDMI 2 IN
19
POWER
6
COMPONENT IN
20
POWER SWITCH
7
COMPONENT AUDIO IN
21
HDMI 3 IN
8
AV CVBS OUT
22
HDMI 4 IN
9
AV AUDIO OUT
23
HEADPHONE
10
VGA AUDIO IN
24
S-VIDEO IN
VGA IN
25
AUDIO IN-L/R
12
EXT 1
26
VIDEO IN
13
EXT 2
27
USB
14
ANALOG ANTENNA IN
28
USB
11
-6-
DIGITAL ANTENNA IN
DIGITAL ANTENNA OUT
19
Back Panel Description
Back Panel of model: LD47VM6E
Picture 2
28
27
26
25
24
23
Picture 2
Picture 1
22
21
20
6
7
8
9
10
11
12
3
2
1
Picture 1
13
14
15
17
16
4
18
19
1
EXT 1
15
VGA AUDIO IN
2
EXT 2
16
VGA IN
3
ANALOG ANTENNA IN
17
DIGITAL ANTENNA IN
4
COMMON INTERFACE
18
DIGITAL ANTENNA OUT
5
POWER
19
SERVICE ONLY(D)
6
SERVICE ONLY(A)
20
POWER SWITCH
7
OPTICAL OUT
21
HDMI 3 IN
8
COAXIAL OUT
22
HDMI 4 IN
HDMI 1 IN
23
HEADPHONE
HDMI 2 IN
24
S-VIDEO IN
COMPONENT IN
25
AUDIO IN-L/R
12
COMPONENT AUDIO IN
26
VIDEO IN
13
AV CVBS OUT
27
USB
28
USB
9
10
11
14
AV AUDIO OUT
-7-
5
Disassemble the bottom terminal cover
To disassemble the bottom terminal cover, do as follows:
①
②
1. Slide the two slip hooks to unlock position in the direction of the arrowheads.
2. Pull down the terminal cover in the direction of the arrow until the top middle buckle disconnects.
③
3. Remove the terminal cover horizontally.
-8-
Disassemble the side cover
Follow the steps given below to disassemble the side cover:
①
1: Press down the two snap hooks to unhook them. See ①.
2: Hold on to step 1 and then lift up the side cover in the direction of the arrowheads marked with ②.
②
3: Take off the side cover. See picture 2 for the rear view without the side cover off.
-9-
Assemble the wall mount
Only those wall mounts whose bearing capacity exceeds 150KG with a hole distance of
400(H)*200(V) and with not less than 4 M6 holes are applicable to this LCD TV.
Before getting started with the wall mount, you need to firstly disassemble the stand by
following the steps below.
①
②
1. Uninstall the bottom terminal cover.
2. Place the machine face down on a flat table with soft cushion.
3. Disconnect all connectors from the machine.
4. Unscrew the four screws locking the stand, and remove the stand.(See picture 1)
③
5. Reconnect all connectors that were disconnected in step 2.
6. Cushion the four wall mount screw holes on the rear cover with two pads each.(You can find 8 cushion
pads in the accessories)
7. Now you can start to assemble the wall mount following instructions in the wall mount user guide.
8. Lock the wall mount bracket onto the rear cover of the machine using proper screws, making sure the
screwed depth is no less than 10mm and no more than 15mm.
9.Assemble the terminal cover onto the machine. The signal line can be fetched out either from the top or
bottom opening.
-10-
Remote Control Overview (All Functions Except Teletext)
Power button
Sub source
Last source
SUB
SOURCE
Main source
Mute
To freeze current image
Aspect
Video on/off
PIP/PBP
PIP/PBP
DRE
GUIDE
FAV
INFO
DTV/TV
Display status
To set sleep time
Switch DTV/TV mode
Enable DRE
Channel list
Stereo / Mono sound selection
Numerical buttons
Last channel
Digital TV menu
DTV
Volume up/down
Next/previous channel
Enter OSD setup mode
Page up and down
Fast forward/Fast back
Direction bottons
Enter
Stop
9 pictures
Play/Pause
EXIT
Previous/Next
Function
SUB
T IT L
E
AUDIO
TE XT
T V /R
-11-
A D IO
Remote Control Overview (Teletext Functions)
SUB
SOURCE
PIP/PBP
DRE
GUIDE
FAV
INFO
DTV/TV
DTV
Teletext PageUp
Teletext Index
Teletext PageDown
Teletext SubPage Up
Teletext SubPage Down
Teletext SubPage
Teletext Size
Teletext Display/Mix
Teletext Reveal
Colour Buttons
Teletext Hold
SUB
T IT L
E
AUDIO
TE XT
T V /R
-12-
A D IO
Remote Control Operation
Remote control direction
Batteries Installation
Point the remote control at the remote control sensor.
Pull the battery cover
downward in the
direction shown by the
arrow and remove it.
2
1
30
30
Insert the batteries
with correct polarities.
SUB
SOURCE
PIP/PBP
DRE
GUIDE
FAV
INFO
DTV/TV
DTV
SUBT
ITLE
AUDIO
TEXT
TV/RA
DIO
Replace the battery
rear cover.
Make sure there are no
objects between the
remote control and its
sensor.
Don't place the remote control
near a heater or in a damp
place. A strong impact on
remote control may damage it.
-13-
Signal from the remote con trol may be disturbed by sun
light or other strong light. In
this case, darken the room.
Basic Operation
Power on / Power off
1. Plug the power cable into the power socket. Make sure the output voltage and frequency of the power
is consistent with this machine.
2. Turn on the main power switch on left side of the TV, then the red light on the front will glow, and
the TV comes into standby mode. Press "POWER" button on remote control , or the "POWER" button
on the right side of the TV ,
the TV will be turned on, and the indicator turns green.
3. Press "POWER" button again to turn off the TV, then the TV will enter standby mode,
and the indicator changes from green to red. Press the main power switch to turn off the TV.
Note: Please remove the plug if the TV is going to be out of use for a long time.
Initial Auto Installation
When you turn on the TV for the first time after purchasing, the initial auto installation
will be displayed. This feature will enable you to automatically set the teletext language,
sound system and search channels step by step.
Note: The initial auto installation functions only on first start up. You can also change these settings
by pressing the "MENU" button.
a
This menu will be dislayed when the TV is switched on for the
first time.
Press "Next" button to choose "Next" to start it.
Or press "Cancel" to quit the Initial Auto Installation.
Note:
Using colour buttons on remote control to set the Installation:
The red button means "Cancel" or "No".
The green button means "Next" or "Yes".
The yellow button means "Back".
b
Setting the OSD language
Press "
" buttons to select your preferred setting, then
press “OK” button to confirm the setting.
Press "Next" button to confirm and go to next menu, or
press "Cancel" button to quit.
Initial Auto Installation
Welcome!
Cancel
OSD Language
English
Nederlands
Dansk
Português
Svenska
Norsk
Suomi
Magyar
Deutsch
Čeština
Fran ais
Polski
Espa ol
Русский
Cancel
c
Setting the teletext language
Press "
" buttons to select your preferred setting.
Press "OK" button to confirm the setting and press "Next"
to go to next menu, or press "Back" button to go back to
previous menu.
Next
Teletext Language
Western Europe
Eastern Europe
Russian
Arabic
Cancel
-14-
Next
Next
Back
Button Instruction
d
Setting sound system
Press "
" buttons to select the appropriate sound system .
For example, for U.K select "I". T hen press "OK" button to
confirm the setting and press "Next" button to go to next menu,
or press "Back" button to go back to previous menu.
Sound System
B/G
I
D/K
L
L’
Cancel
e
Channel Preset
Press "Yes" button to start the auto search.
Press "Back" button for go back to previous menu.
Press "No" button to quit. The auto search will take a few
minutes.
Channel Preset
Do you want to search channel automatically?
No
f
Auto Search
Press "EXIT" button to stop the auto search, but it is not
recommended to stop it during the search process. After
the auto searching finished, the TV will display the first
channel found during the search process. To arrange these
channels into your preferred order, please refer to " Exchange
Channel " in User Manual.
Back
Next
Back
Yes
Auto Search
Current Channel
0
92.75 MHZ
Button Instruction
Sound Off
● Press this button to mute audio. Press it again to resume.
Volume Adjust
● Press "VOL+/VOL-" buttons to increase or decrease
Volume
the speaker volume.
50
Note: It is the same way to increase and decrease the earphone volume when earphone
is connected.
Close Video
VIDEO OFF
● Press this button to enjoy music without video, and again to resume.
-15-
Button Instruction
Channel Shift
● In TV mode, press "CH+" button to select next channel, and press "CH-" button to
select previous channel.
● Press this button to switch between current and last channel.
Direct Select
● To select a one-digit channel: Press from 0-9 to directly input your desired channel
number.
● To select a two-digit channel: Press from 1-9 to input the first digit and from 0-9 to
input the second digit.
Display Status
DISPLAY
● Press "DISPLAY" button to display information of the current source.
Last Source
LAST
SOURCE
● Press "LAST SOURCE" button to switch between the last signal source and the current one.
For example, when the signal source is TV, and the last source was AV, press this button to
switch between AV and TV.
Note: This function is invalid in PIP/PBP mode.
Sub Source
SUB
SOURCE
● Press "SUB SOURCE" button to select the source of sub window in PIP/PBP mode.
ASPECT
ASPECT
● Press "ASPECT" button to display "Aspect Ratio"
window:
● Press "ASPECT" button to select your favourite mode.
-16-
Aspect Ratio
Standard
Button Instruction
DRE
DRE
●
Press " DRE " button to enter the DRE setting menu
as follows.
DRE
Off
Freeze Image
FREEZE
●
Press "FREEZE" button to freeze the current image .
P ress it again to exit the freeze mode.
Note: This function is invalid in PIP/PBP mode.
Sleep Timer Set Up
SLEEP
●
Press "SLEEP" button to set the sleeping clock as
follows.
●
Press "SLEEP" button to set the sleep time.
Sleep Timer
PIP/PBP
PIP/PBP
●
Press "PIP/PBP" button to display PIP or PBP mode.
Note: Please refer to page 29 for PIP or PBP mode setting.
Stereo/Mono Sound
●
The options of Dual setting in single picture is as follows:
In the nicam TV
broadcasts
In the TV mode of A2
TV broadcasts
●
Source
Options
A stereo signal
Mono
Nicam stereo
A bilingual signal
Mono
Nicam Dual_A
Nicam Dual_B
A monaural signal
Mono
Nicam Mono
A stereo signal
Mono
Stereo
A bilingual signal
Dual_A
Dual_B
A monaural signal
Mono
The default setting of " Dual " is " Mono " if no signal.
Note: "Dual" setting is invalid in PIP/PBP mode.
-17-
Off
Button Instruction
Browse The Channel List
LIST
●
Press "LIST" button to display Channel list.
●
Use direction buttons to select specific channel.
Use "
" and "
" buttons to switch the
listing pages. Press the "EXIT" button to quit.
●
Press "OK" button to browse the channels you
Channel List
0
5
------
1 C01
6
------
2
------
7
------
3
------
8
------
4
------
9
------
------
have selected.
Rename Channel
LIST
●
●
You can rename the channel when you are browsing
the channel list.
Press "LIST" button to display Channel list.
Channel List
0
5
------
1 C01
6
------
2
------
7
------
3
------
8
------
4
------
9
------
------
Use direction buttons to select specific channel and
press "OK" button to confirm.
Then press "OK" button again, and the Rename
Channel window will display on the screen as below.
BBC
Note:
Press "▲/▼/◄/►" and "OK" buttons on the remote
control to select the character .
Press the Red button to delete the last character .
Press the Green button to save .
Press "MENU" or "EXIT" button to get back.
Select viewing source
Please press the "SOURCE" button, then use numerical buttons directly to select
source item, or use the direction buttons to select source.
Note:
Please make sure the connection for your choice is available .
Scart Auto Playback Function:
Select Source
1
TV
2
AV
3
EXT1
4
EXT2
5
S-Video
6
Component
7
VGA
8
HDMI1
9
HDMI2
0
HDMI3
HDMI4
1. Support the Auto Playback between TV and EXT sources.
USB
2. When signal is lost , the searching preference: EXT1,EXT2,TV.
DTV
For example:
1. If you connect EXT 1 when you are watching program signal from EXT 2, the TV
will display signal from EXT 1 automatically.
2.If you disconnect EXT 1 when you are watching program from it (or turn off the signal source from
EXT 1), and there are no signals from EXT 2, the TV will play TV source automatically.
-18-
Menu Operation
Menu Description
If you want to adjust the display settings, please follow the instruction below.
Press the "MENU" button to browse the Picture Menu, Sound Menu, Channel Menu,
Window Menu, Setting Menu, DRE Menu in turn. Press "EXIT" to exit.
Picture
Sound
Window
Channel
Picture Mode
Brightness
Contrast
Colour
Tint
Sharpness
Setting
DRE
Picture
Sound
User
50
75
50
25
10
Picture Menu
Picture
Sound
Channel
Window
Setting
Picture
DRE
Sound
Channel
Channel
Window
Setting
Picture
DRE
Sound
Window
Channel
English
Aspect ratio
OSD Background
Opaque
PIP Position
OSD Position
Center
H Position
0
Western Europe
V Position
0
Phase
0
Frequency
0
Sound Source
Setting
DRE
B/G
12
Off
OSD Language
Teletext Language
Window
Channel Menu
DRE Menu
Sound
DRE
0
+4
0
Sound System
Current Channel
Skip Channel
Rename Channel
Exchange Channel
Auto Search
MEMC Demo
Picture
Setting
User
Off
High
Sound
Menu
Optimize
DRE
Window
Channel
Sound Mode
Simulated Stereo
BBE
Bass
Treble
Balance
Main Window
CVBS
EXT2
Setting
Menu
Top Left
Window Menu
-19-
Setting
Full Screen
DRE
Menu Operation
Picture Menu
1
2
3
4
You can adjust the Picture to get your desired picture effect.
Press the "MENU" button to enter Picture menu.
Press "
" buttons to select "Picture Mode".
Picture Sound Channel Window
Press "
" buttons to pop out the small window
Picture Mode
as below. (PictureA)
Brightness
50
Press "
" buttons to adjust the "Picture mode".
Contrast
75
Colour
Tint
Setting
DRE
User
50
25
Only i n "User" mode, you can adjust Brightness, Contrast,
Sharpness
10
Colour, Tint, and Sharpness.
A: Press " / " buttons to select "Brightness/ Contrast /Colour
/ Tint / Sharpness". The small window as below will pop out.
Picture Mode
Standard
(Picture B)
B: Press " / " buttons to change the setting.
(Picture A)
C: You can press " / " buttons to adjust "Brightness/ Contrast/
Colour / Tint / Sharpness" in the small window.
50
Brightness
D: Press "EXIT" button to quit.
Note:
(Picture B)
1. "Colour/ Tint" are not adjustable when the input source is VGA.
2. "Tint/Sharpness” are not adjustable when the input source is HDMI.
3. IN "TV/AV/S-Video/EXT1/EXT2", "Tint" is adjustable only when the signal system is NTSC.
4 . Under the HDMI, and when the input signal is RGB, "colour/Sharpness” is not available.
Sound Menu
You can use this function to get the perfect audio effect.
1
2
3
Press "MENU" button to select "Sound" menu.
Press "
" buttons to select sub items.
Press "
" buttons to change the setting.
Press " EXIT " button to quit.
Picture
Sound
Channel
Sound Mode
Simulated Stereo
BBE
Bass
Treble
Balance
Window
Setting
User
Off
High
0
+4
Sound Mode:
0
Press "
" buttons to change the sound mode .
(Five options: Standard/Soft/Music/Cinema/User)
In " User " mode, you can adjust " Simulated Stereo / BBE /Bass/Treble/Balance''.
" buttons to select " Simulated Stereo / BBE /Bass/Treble/Balance''.
Press "
" buttons to change the setting.
Press "
Press " EXIT " button to quit.
Simulated Stereo :
Press "
" buttons to switch Simulated Stereo ON/OFF.
Simulated stereo: Change mono sound effect to stereo sound effect.
BBE Setting :
Press "
" buttons to change the BBE setting.
BBE feature is designed to make the sound more balanced, full, and clear. This technology is
able to adaptively correct the sound distortion resulting from every cause inside the system,
thereby the original voice is retrieved as accurate as possible.
-20-
DRE
Menu Operation
Channel Menu
Sound System
1
2
3
4
Press "MENU" button to select "Channel " menu.
Press "
" buttons to select " Sound System'' .
Press "
" buttons and choose the suitable system for
local TV signal.
Press ''EXIT'' button to exit.
Picture
Sound
Channel
Window
Sound System
Current Channel
Skip Channel
Rename Channel
Exchange Channel
Auto Search
Setting
DRE
BG
12
Off
Skip Channel
1
2
3
4
5
If you'd like to skip a channel automatically when you browse programs by pressing
"CH+/CH-" button, please use this function.
Press the "MENU" button to select " Channel '' menu .
Press the ‘'
'' buttons to select " Current Channel ".
Picture Sound Channel Window Setting
Press the ‘'
'' buttons to select the number of the channels
Sound System
BG
to be skipped.
Current Channel
12
Skip Channel
Off
Press the " " button to select ''Skip Channel'' item.
Rename Channel
Press the "
'' buttons to set ''On '’ on the ''Skip Channel''
Exchange Channel
Auto Search
item Then, the channel will be hidden when you select channel
with "CH+/CH-". If you want to cancel it, please set ''Off '' on
the "Skip Channel" item.
You can skip one channel or many channels at the same time, but you can still browse all
channels by using ''LIST'' button when ''Skip Channel'' is on.
DRE
Rename Channel
You can rename the channel when you are browsing the
channel list.
Picture
1
2
3
4
Press "MENU" button to select "Channel " menu.
Press "
" buttons to select " Rename Channel " .
Press " " button to enter this menu. (Picture A)
Press "EXIT" button to exit.
Sound
Channel
Sound System
Current Channel
Skip Channel
Rename Channel
Exchange Channel
Auto Search
Window
Setting
BG
1
Off
Note:
Press "▲/▼/◄/►" and "OK" buttons on the remote control to
select the character. Press the red button to delete the last
character. Press the green button to save. Press "MENU" or
"EXIT" button to exit.
(Picture A)
-21-
DRE
Menu Operation
Exchange Channel
If you'd like to exchange the current channel with another channel, please refer to
"Exchange Channel ".
1
Press "MENU" button to select "Channel" menu.
2
Press "
3
Press "
4
Input the Channel Exchange number (the maximum
number is 99), then press " OK " button to save your
setting. Then the two channel are exchanged.
Press "EXIT" button to exit "Channel Exchange" mode.
" buttons to select " Exchange Channel " .
Picture
" button to enter this menu.
For example:
If you want to exchange channel 12 with channel 1, move
to channel 12 at first. Input "1" with the numerical buttons
in "Channel Exchange" window. Press "OK” button to
confirm.
Sound
Channel
Window
Sound System
Current Channel
Skip Channel
Rename Channel
Exchange Channel
Auto Search
Setting
DRE
BG
12
Off
Exchange Channel
12
1
Current Channel
Exchange channel
Auto Search
You can set TV program list with "Auto Search" function quickly.
1
Press "MENU" button to select "Channel" menu.
2
Press "
" buttons to select "Auto Search".
Picture
Sound
Channel
Window
Sound System
Current Channel
Skip Channel
Rename Channel
Exchange Channel
Auto Search
3
Press" " button to enter "Auto Search", the TV will
search channels automatically.
All channels will be saved once searching finished.
In the course of "Auto search", if you want to
cancel "Auto search", press "EXIT".
Setting
DRE
BG
12
Off
Auto Search
Current Channel
0
074.750 MHZ
Note:
Actually it is not necessary to operate "Auto Searching function" after the "Initial Auto Installation
". If the TV still can not display all channels, you can use this function to start the channels search
again.
-22-
Menu Operation
Manual Search
You can also set program list again one by one by "Manual Search" function.
1
Press " MENU " button to select "Channel" menu .
2
Press "
" buttons to select "Manual Search".
Picture
Sound
Channel
Window
Current Channel
Skip Channel
Rename Channel
Exchange Channel
Auto Search
Manual Search
3
4
5
Press " " button to enter "Manual Search".
Press " / " buttons to search channels.
When a channel is found, the searching process will
stop.
The channel will be saved with current channel number.
If the program is not your expected one, please press
" / " buttons to continue the searching.
Press "EXIT" button to quit.
Setting
DRE
12
Off
Manual Search
Current Channel
12
900.250 MHZ
Fine Tune
"Fine Tune" helps you adjust the image and sound quality of specific program.
1
Press "MENU" button to select "Channel" menu.
2
Press "
" buttons to select "Fine Tune".
Picture
Sound
Channel
Window
Skip Channel
Rename Channel
Exchange Channel
Auto Search
Manual Search
Fine Tune
3
4
5
Press " " button to enter "Fine Tune".
Press "
" to get satisfying effect .
Press "EXIT" button to quit.
Setting
DRE
Off
Fine Tune
Current Channel
12
000.250 MHZ
-23-
Menu Operation
Window Menu
Aspect
You can adjust the aspect to meet your requirement.
Press "MENU" button to select "Window" menu.
Press "
" buttons to select " Aspect ratio " .
Press "
" buttons to change the setting.
Picture
Sound
Window
Channel
Aspect ratio
PIP Position
Note: you can aslo set the image mode via " Aspect "
button on the remote control ,please rrefer to page 16.
DRE
Setting
Full Screen
Top Left
H Position
0
V Position
0
Phase
0
Frenquency
0
VGA Window
This function is only valid in VGA mode.
Press "MENU" button to select "Window" mode.
Press "
" buttons to select "H Position/V Position/
Frequency/Phase/Auto Adjust".
Press "
" buttons to change the setting.
Picture
Sound
Window
Channel
Aspect ratio
Setting
DRE
Full Screen
PIP Position
Top Left
H Position
0
V Position
0
Phase
0
Frequency
0
H Position: Press "
" buttons to move the image left or right.
V Position: Press "
" buttons to move the image up or down.
Frequency: Press "
" buttons to adjust the horizontal frequency of the image.
Phase: Press "
" buttons to adjust the image phase.
Window
Auto adjust: Press " " button to verify the H Position/V Position/Phase Frequency automatically
in " Full Screen " mode .
Note:
For other setting of Window menu, please refer to "PIP" on Page 29.
-24-
Menu Operation
Setting Menu
OSD Language
Press "MENU" button to select "Setting" menu.
Press "
" buttons to select '' OSD Language ''.
Press "
" buttons to change the setting.
Picture
Sound
Channel
Window
English
OSD Background
Opaque
Center
OSD Position
Teletext Language
Sound Source
DRE
Setting
OSD Language
Western Europe
Main Window
CVBS
EXT2
OSD Background
1
Press "MENU" button to select "Setting" menu.
2
Press "
3
Press "
" buttons to select "OSD Background".
" buttons to change the setting.
Picture
Sound
Channel
Window
Setting
OSD Language
English
OSD Background
Opaque
OSD Position
Teletext Language
Sound Source
DRE
Center
Western Europe
Main Window
CVBS
EXT2
OSD Position
1
Press "MENU" button to select "Setting" menu.
2
Press "
" buttons to select "OSD Position" .
3
Press "
" buttons to change the setting.
Picture
Sound
Channel
Window
Setting
OSD Language
English
OSD Background
Opaque
OSD Position
Teletext Language
Sound Source
DRE
Center
Western Europe
Main Window
CVBS
EXT2
Teletext Language
1
Press "MENU" button to select "Setting" menu.
2
Press "
3
Press "
" buttons to select "Teletext Language " .
" buttons to change the setting.
Picture
Sound
Channel
Setting
English
OSD Background
Opaque
OSD Position
Teletext Language
Sound Source
EXT2
-25-
Window
OSD Language
DRE
Center
Western Europe
Main Window
CVBS
Menu Operation
Sound Source
Press "MENU" button to select "Setting" menu.
Press "
" buttons to select ''Sound Source''.
Press "
" buttons to change the setting.
Picture
Sound
Channel
Window
Setting
OSD Language
English
OSD Background
Opaque
OSD Position
Teletext Language
Sound Source
DRE
Center
Western Europe
Main Window
CVBS
EXT2
EXT2
In this function, you can choose the internal source of EXT2.
Press "MENU" button to select "Setting" menu.
Press "
" buttons to select "EXT2”.
Press "
" buttons to change the setting.
Picture
Sound
Channel
OSD Background
Window
Sound Source
DRE
Center
OSD Position
Teletext Language
Setting
Opaque
Western Europe
Main Window
CVBS
EXT2
On
Blue Screen
Blue Screen
Press "MENU" button to select "Setting" menu.
Press "
" buttons to select "Blue Screen".
Press "
Picture
Sound
Channel
OSD Background
" buttons to change the setting.
OSD Position
Blue Screen
If you set the "Blue Screen" mode "On", a blue screen will be
displayed automatically when there is no TV signal. If you
switch the "Blue Screen" mode to "Off", the screen will display
noisy picture.
Teletext Language
Sound Source
Window
Setting
DRE
Opaque
Center
Western Europe
Main Window
CVBS
EXT2
On
Blue Screen
Sleep Timer
Press " MENU " button to select " Setting " menu.
Press "
Press "
/
" buttons to select " Sleep Timer " .
" buttons to change the setting.
You can select off/10/20/30/60/90/120/180/240 minutes.
For example: The current time is 8:25.If you set the timer
of 30 minutes, the TV will switch to standby mode in 8:55
automatically.
-26-
Picture
Sound
Channel
Sound Source
EXT2
Blue Screen
Sleep Timer
Colour Temperature
Backlight
Window
Setting
Main Window
CVBS
On
Off
DRE
Menu Operation
Colour Temperature
1
Press "MENU" button to select "Setting" menu.
2
Press "
3
" buttons to select "C olour Temperature " .
Press "
" buttons to change the setting.
Picture
Sound
Window
Channel
Sound Source
EXT2
Blue Screen
Sleep Timer
Colour Temperature
Backlight
Setting
DRE
Western Europe
Main Window
CVBS
On
In "User " mode , you can adjust "Red/Green/Blue".
Press "
" buttons to select "Red/Green/Blue".
Press "
" buttons to change the setting.
Picture
Press "EXIT " button to quit.
Sound
Window
Channel
Colour Temperature
Setting
DRE
User
Red
155
Green
133
Blue
133
Backlight
Press "MENU" button to select "Setting" menu.
Press "
" buttons to select "Backlight".
Press "
" buttons to change the setting.
Picture
Sound
Window
Channel
Sound Source
EXT2
Blue Screen
Sleep Timer
Colour Temperature
Backlight
Picture
Sound
Channel
Window
Backlight
User
-27-
Setting
DRE
Western Europe
Main Window
CVBS
On
Setting
User
1
DRE
Menu Operation
DRE Menu
DRE
1
Press "MENU" button to select "DRE" menu.
2
Press "
" buttons to select " DRE''.
3
Press "
" buttons to change the setting.
Picture
Sound
Channel
Window
Setting
DRE
Optimize
DRE
MEMC Demo
DEMC Demo
1
Press "MENU" button to select "DRE " menu.
2
Press "
3
Press " " button to enter "MEMC Demo" mode.
Press "EXIT" button to quit.
4
" buttons to select " MEMC Demo" .
Picture
Sound
Channel
Setting
Optimize
DRE
MEMC Demo
Off
-28-
Window
MEMC Demo
On
DRE
PIP
PIP means picture in picture. TV set can display a sub window on the screen, which displays another
program.
PIP
Press ''PIP/PBP'' button once to display the following
picture.
Sub window
Main window
Select Sub Source
Press ''SUB SOURCE'' button to display the ''Sub Source'' Menu.
Use the direction button to select sub source from the two options,
then press ''OK'' button to confirm.
Or use the numerical button to select the corresponding source .
Select Sub Source
TV
AV
Select Main Source
Please refer to page 18 for the operation.
In PIP / PBP mode , the main window can display component / VGA / HDMI only .
PIP Position Adjust
Press "PIP/PBP" button to enter "PIP" Mode.
Press ''MENU'' button to select ''Window'' Mode.
Press "
" buttons to select " PIP Position " .
Press "
" buttons to set the Sub window's position on screen.
Picture
Window
Channel
Sound
Aspect ratio
Setting
DRE
Full Screen
PIP Position
Top Left
H Position
0
V Position
0
Phase
0
Frenquency
0
PBP
PBP means picture beside picture, enjoy two images on the screen at
the same time.
In PIP mode, press ''PIP/PBP'' button to display the following picture.
Main window
Sub window
Select Sub Source
Press "SUB SOURCE" button to display the ''Sub Source'' Menu.
Use the direction button to select sub source from the two options,
then press "OK" button to confirm.
Or use the numerical button to select the corresponding source.
-29-
Select Sub Source
TV
AV
Teletext
Teletext is an information system broadcast by certain channels which can be consulted like a
newspaper. It also offers access to subtitles for viewers with hearing problems or who are
not familiar with the transmission language (cable networks, satellite channels, etc.).
Teletext Language Selection.
The default Teletext Language is Western Europe. If the Teletext language is not Western Europe in
your region, please kindly change the language according to the instruction in Page25.
TXT/MIX
TXT/MIX
Press the TXT/Mix button to activate the Teletext mode.
Press it again to enter mix mode, exit it for third press.
FUNCTION
SIZE
Repeatedly pressing the SIZE button doubles the character size in the following order:
Upper half of the page-> Lower half of the page-> Return to normal size.
REVEAL
Press the button once to reveal hidden information (solutions to puzzles, riddles, etc).
This button is applicable only to teletext page with puzzles, riddles, etc.)
SUBPAGE---Viewing of subpage.
Pressing the subpage button to enter the subpage mode. You can use subpage up/subpage down to
displayed subpage.
Press SUBPAGE button again to exit.
COLOUR BUTTONS
Red, green, yellow and blue fields are shown at the bottom of the screen.
HOLD
Press the button once to hold page and the second time to release holding of page.
NUMBER(0-9)
Selecting a page by numeric buttons directly
You can select a page by numeric buttons directly in TXT/MIX mode.
PAGE DOWN/UP
OK
Use these direction buttons to page up/down.
INDEX PAGE
OK
Use the "OK" button to get the index page.
Notes:
The buttons for Teletext function are invalid when menu display. You can activate the teletext
function buttons by pressing the "TXT/MIX" button.
-30-
Preparation
DTV
Antenna(Aerial) Connection
For viewing both analog and digital broadcasts.
75 ohm Round Cable
(not supplied)
For viewing only digital broadcasts, you do not need to connect the antenna
cable (supplied).
Switching On
1. Turn on your TV Set.
Welcome
2 . Select the "DTV" input in the Source Menu or press
the "DTV" button at any time to display the digital
terrestrial television program. It needs a few seconds
to startup. Because this is the first time that the DTV is
used, there is no channel stored in the TV and a
Welcome menu will be displayed on the screen.
English
Language Settings
Channel Search
Move
Start
Adjust
E
Exit
Press " / " buttons to select Language Settings item, then press " / " button to set the OSD Language.
Press " / " buttons to select Channel Search item, then press "OK" button to process automatically
searching.
Press "EXIT” button to exit.
-31-
Remote Control
DTV
1.DTV/TV: Press this button to shift DTV/TV mode.
2.INFO: Press this button to show the information banner.
3. GUIDE: Press this button to display the electronic programmer
SUB
SOURCE
guide (EPG) menu.
PIP/PBP
DRE
4. FAV:
DTV/TV
1
4
2
3
INFO
GUIDE
5
FAV
Press this button to enter FAV menu, if there is no DTV menu
on the screen.
Press this button continuously to choose different programs,
6
7
such as News, Movie, MTV, Finance, etc.
5. LIST: Press this button to display the channel list.
6. 0-9NUMBER:
DTV
9
8
Press these buttons to change channel.
In DTV menu, press these buttons to input numbers.
10
7. LAST: Press this button to return to the previous channel
which you were watching just now.
8 . VOL+/VOL-: Press these buttons to increase or decrease
the volume.
9. CH+/CH-: Press these buttons to change channel.
11
10. DTV MENU: Press this button to display the DTV main menu.
11. EXIT: Press this button to exit the menu.
12. RED/GREEN/YELLOW/BLUE: These buttons for Digital
12
13
14
SUB
T IT LE
AUDIO
TEX T
T V /R
A D IO
15
16
Teletext function ,for more information please refer to Digital
Teletext.
13. SUBTITLE:Press this button to choose a language.
If there are two or more languages in a program, you can
choose one of them. Notice: This function is relative to the
program you watch. Press this button to display language
circularly in dynamic text.
14. AUDIO: Press this button to switch the audio language,
such as English, French, German, Danish, Spanish, Dutch,
Portuguese, Swedish, Finish, Norwegian Czech, Polish,
Hungarian, Russian .
Notice : This function is relative to the program you are watching.
Press this button to display language circularly in dynamic text.
15. TV/RADIO: Press this button to switch between digital radio
and digital TV.
16. TEXT: Press this button to enter or exit digital teletext function.
-32-
Menu
DTV
You can change the setting of menu such as System setting, Channel setting, Channel List, Favorite
List, Common Interface, as you desired.
Press "DTV MENU" in the remote control to display DTV menu. Press it continuously to switch menus.
For the detailed operation, please refer to System Setting, Channel Setting, Channel List, Favorite
List, Common Interface stated below.
Channel Setting
System Setting
Channel Search
Sort Channel
Time Setting
Language Setting
Parental Setting
Restore Default
System Info
Move
Move
Sub Menu <DTV Menu>Returen
Sub Menu <DTV Menu>Returen
Channel Setting
System Setting
Channel List
Channel List
Booking List
Move
Sub Menu <DTV Menu>Returen
Channel List
Common Interface
Favorites List
Fav Group: News
Slot
Teachers’ TV
Toonami
Empty
Sub Menu
<DTV Menu>Return
Move
Popup Menu <DTV Menu>Returen
Favorite List
Common Interface
Note: Only when inserting Cl module, Cl module information can dispaly
-33-
System Setting
DTV
Time Setting
In System Setting menu, press "
/
" to choose Time Setting, and then press "
" to enter next menu.
System Setting
Time Setting
Time Zone
Banner Time Setting
Time Zone Setting
In Time Setting menu, choose "Time Zone " , and then press " / " to change
Time Zone setting. You can set time zone according to the time zone you belong to.
Press " " to enter option menu. (Picture a-1-1)
Press " / " to choose time zone.
Press "DTV MENU" to return.
Press "EXIT" to exit.
Time Zone
GMT+8
Picture a-1-1
Notice: This setting is valid when there is no information of time zone in the program.
Banner Time Setting
In Time Setting submenu, choose "Banner Time Setting", and then press "
Display Time setting.
Press " " to enter option menu. (Picture a-1-2)
Press " / " to choose Banner Time Setting.
Press "DTV MENU" to return.
Press "EXIT " to exit.
/
" to enter
Display Time
3S
Picture a-1-2
-34-
System Setting
DTV
Language Setting
In System Setting menu, press "
menu to continue setting.
/
" to choose Language Setting, and then press "
" to enter next
System Setting
Language Setting
Menu
Audio
Subtitle
Teletext
Menu
In Language Setting submenu, press "
/
" to choose one language to be the language of menu.
Press " " to enter option menu.(Picture a-2-1)
Press " / " to choose the language of menu you need.
Press "DTV MENU" to return.
Press "EXIT” to exit.
Menu
English
Audio
English
Subtitle
English
Teletext
English
Picture a-2-1
Audio
In Language Setting submenu, press "
/
" to choose one language to be the language of audio.
Press " " to enter option menu.(Picture a-2-2)
Press " / " to choose the language of audio you need.
Press "DTV MENU" to return.
Press "EXIT" to exit.
Menu
English
Audio
English
Subtitle
English
Teletext
English
Picture a-2-2
Notice: This function is relative to the program you play.
-35-
System Setting
DTV
Subtitle
In Language Setting submenu, press "
/
" to choose one language to be the language of subtitle .
Press " " to enter option menu.(Picture a-2-3)
Press " / " to choose the language of subtitle you need.
Press "DTV MENU" to return.
Press "EXIT" to exit.
Menu
English
Audio
English
Subtitle
English
Teletext
English
Picture a-2-3
Teletext
In Language Setting submenu, press "
/
" to choose one language to be the language of teletext.
Press " " to enter option menu.(Picture a-2-4)
Press " / " to choose the language of teletext you need.
Press "DTV MENU" to return.
Press "EXIT" to exit.
Menu
English
Audio
English
Subtitle
English
Teletext
English
Picture a-2-4
Parental Setting
In System Setting menu, press " / " to choose Parental Setting, and then press "
password input box will be displayed on the screen. (Picture a-3-1)
Input your password of six numbers. (0-9)
Press "OK" to enter "Parental Control" menu. (Picture a-3-2)
Press "DTV MENU" to return.
Press "EXIT" to exit.
" button. The
Pin Code
******
Picture a-3-1
Notice: Default password of parental control is "888888".
Press " / " to choose items to set.
Press " " to confirm your choices.
Change Pin Code
Censorship
Press "DTV MENU" to return.
Press "EXIT " to exit.
Clear Channels
Picture a-3-2
-36-
System Setting
DTV
Parental Setting
Change Pin Code
Choose "Change Pin Code", you can change password. (Picture a-3-3)
Press number "0-9" to input current password, and then
press " " to enter next item.
Press number "0-9" to input new password, press " " to enter
next item and input new password again.
The password is successfully reset, if two new password input
are exactly the same. Otherwise, you need to re-input new
password.
Press "OK" to confirm.
Press "EXIT " to exit.
Old Pin Code
New Pin Code
Enter Again
Picture a-3-3
Censor Ship
Choose "Censor Ship" to set Parental Rating of DTV. If the rating of program(part of program) is higher
than the one of DTV, DTV will lock the program then(no image and sound), and the password input box
will emerge. At this moment, input the correct password and you can watch program.
Press " " to enter option menu.( Picture a-3-4)
Press " / " to choose items to set.
Press "DTV MENU" to return.
Press "EXIT" to exit.
Censorship
16
Picture a-3-4
Clear Channels
Choose "Clear Channels", you can clear all the channels.( Picture a-3-5)
Press "OK" to confirm your choice.
Press "DTV MENU" to return.
Press "EXIT" to exit.
Clear Channels
Clear the channels?
OK
Confirm
<DTV Menu>Return
Picture a-3-5
-37-
System Setting
DTV
Restore Default
Choose "Restore Default", you can clear all the channels.( Picture a-4-1)
Press " " to activate "Restore Default" box. (Picture a-4-1)
Press "OK" to confirm restoring default.
Press "DTV MENU" to return.
Press "EXIT" to exit.
Restore Default
Are you sure?
OK
Confirm
<DTV Menu>Return
Picture a-4-1
Through this item, you can delete all the user's setting and restore default.
Notice: The programs of Channel List will be deleted, and the DTV will startup automatically.
System Info
Choose "System Info", you can check the system information.(Picture a-5-1)
Press " " to check the "System Info" . (Picture a-5-1)
Press "DTV MENU" to return.
Press "EXIT" to exit.
System Info
<DTV Menu>Return
Picture a-5-1
-38-
Channel Setting
DTV
Channel Search
In Channel Setting menu, press " /
(Picture b-1-1)
" to choose Channel Search, and press "
" to enter next menu.
Channel Setting
Channel Search
In "Channel Search" menu, you can set Search Type, Channel NO., Save Encrypted, Update Mode and
so on. The password input box will be displayed on the screen. (Picture b-1-1)
Press " " to enter option menu.( Picture b-1-2)
Press " / " to choose items to set.
Press "DTV MENU" to return.
Press "EXIT" to exit.
Pin Code
******
Picture b-1-1
Auto
Search Type
Channel NO.
Save Encrypted
Update Mode
Yes
Replace
Start
Move
Sdjust
<DTV Menu>Returen
Picture b-1-2
Search Type: Press "
/
" to choose items to set. You can choose manual search or automatic search.
Channel NO. : When choose manual search, you can input channel number in this item. If choose
automatic search, you can not carry out such setting.
Save Encrypted: Press " / " to choose items to set. You can set the searched encrypted programs
to be saved or unsaved.
Update Mode: Press " / " to choose items to set. You can add searched programs to original
programs or replace them.
For example:
The channel number of original program is 21, and the channel number of new program is 22. When
choose "Replace", only save the program of channel 22. When choose "Add", save programs of both
channel 21 and 22.
Press "
/
" to choose "Start", press "OK" to begin searching, press "EXIT" to exit.
-39-
Channel Setting
DTV
Sort Channel
In Channel Setting menu, press "
/
" to choose Sort Channel, and press "
" to enter next menu.
Channel Setting
Sort Channel
In "Sort Channel" menu, you can sort ascending or descending the saved programs according to the name.
Descending sort is to sort programs by initials of their names alphabetically from Z to A. Ascending sort
is to sort programs by initials of their names alphabetically from A to Z.
Press " / " to choose Name Up/Name Down/Default.
(Picture b-2-1)
Press "OK" to confirm your choice.
Press "DTV MENU" to return.
Press "EXIT " to exit.
Name Up
Name Down
Default
Move
OK
Confirm
<DTV Menu>Returen
Picture b-2-1
-40-
Channel List
DTV
Channel List
Channel List
Channel List
In main menu, press "
item.
" to enter picture c-1-1 as below. You can manage your program list through this
Press " / " buttons to choose the channel.
Press " " button to enter. (Picture c-1-2)
Press "TV/RADIO" to choose the program list of TV and RADIO.
When choose the desired program, press "OK" button
to play.
Press "EXIT " to exit Channel List.
Channel List TV
1.FASHION
BandWidth
7M
Quality
0%
Frequency
212499
Strength
0%
TV/RA TV-Radio
Move <DTV Menu>Returen
PopUp Menu
Picture c-1-1
Press " " to choose Delete/Move.
Press "OK" to confirm your choice.
Press "EXIT " to exit.
Delete
Move
Picture c-1-2
Delete
User can choose "Delete" to delete your needless channels.
Press "OK" to confirm your choice. (Picture c-1-3)
Press "EXIT" to exit.
Delete Confirm
Delete the service?
OK
Confirm
<DTV Menu>Return
Picture c-1-3
Move
Choose "Move", you can realign the sequence of your selected programs.
Press " " to enter channel moving menu. (Picture c-1-4)
Press number button to input the channel number to be moved.
Press "OK" to confirm so as to move channel to the channel
number you set.
Press "EXIT" to exit.
Move to
1
Picture c-1-4
Notice: The input channel number must be included in the channel list, or it will be regarded as invalid
input.
-41-
Channel List
DTV
Booking List
In Channel List menu, press " /
( Picture a-5-1)
" to choose Booking List, and then press "
" to enter next menu.
Channel List
Booking List
You can arrange programs scheduled to play in several days.
Press "EXIT " to exit.
Press " / " key to choose the item to set.
Press " / " key to set the item.
Booking List
ID
No Items
1
Start Time
2000.0.0 0:00
Duration
0
Type
Playback
<DTV Menu>Returen
Move
Picture c-2-1
Press " / " to choose items to set.
Press " / " to choose items to set.
Press "DTV MENU" to return.
Press "EXIT" to exit.
Event List
Event Id
Service OK
Event type
Star Time
Star date
Duration
Status
Move
1
ONCE
00:00
HH:MM
00/00/2000
DD/MM/YYYY
0
Minutes
OFF
Adjust
<DTV Menu>Returen
Picture c-2-2
Event Id: You can set the serial number of programs to be booked. And maximum 15 IDs can be preset.
Service: You can set channels of programs to be booked. Press "OK" to choose in all channels.
After choosing Service, you can book programs of different periods of time through setting Start
Time and Start data.
Event type: You can set the book way of programs to be booked.
Start Time: You can set broadcasting time of programs to be booked.( hour/minute)
Start Date : You can set broadcasting date of programs to be booked. (day/month/year)
Duration: You can set set broadcasting duration of programs to be booked.
Status: Choose ON to confirm booking. Choose OFF to delete a booked program.
NOTE: User must add booked programs to the list of booked programs. If there is no booked
programs, the list will display no channels.
-42-
Favorite List
DTV
Favorite List
This menu setting is convenient for you to manage your favorite channels. It can display names of channels,
and can be sorted as you like.(Picture d-1-1)
Press "FAV" to switch circularly News, Movie, MTV, Finance, Other.
Press "
" to enter option menu. (Picture d-1-2)
Press "EXIT " to exit.
Favorites List
Fav Group: News
Teachers’ TV
Toonami
Move
Popup Menu <DTV Menu>Next
Picture d-1-1
Press " / " to choose Add or Delete.
Press "OK" to confirm your choice.
Press "DTV MENU" to return.
Press "EXIT " to exit.
Teachers’ TV
Add
Toonami
Delete
Picture d-1-2
Add
Press " / " to choose channels you like.
Press "OK" to add channels to favorite list.
Press "DTV MENU" to return.
Press "EXIT " to exit.
Teachers’ TV
Teachers’ TV
Toonami
Toonami
ARTE
LCP
France5
Notice: Channel with
is the favorite channel.
Picture d-2-1
Delete
Press "OK" to confirm your choice.
Press "DTV MENU" to return.
Press "EXIT" to exit.
Confirmation
Delete the channel?
OK
Confirm
<DTV Menu>Return
Picture d-2-2
-43-
Common Interface
DTV
Common Interface
A single DVB Common Interface (CI) will be implemented to allow adoption of a Conditional Access (CA)
system by means of a plug-in CA module.
Scrambled Broadcasting service can be routed via the CA system.
If the CA system on the CI module requires a smart- card reader, this reader shall be part of the CI module.
ANALOG IN COMMON INTERFACE
L
AUDIO
COMPONENTIN(HDTV/DVD)
- R
YPb/Cb -
Pr/Cr
-
Insert CI card
When the compatible CA card is inserted, you can view the programme without any operations.
When the compatible card is not inserted, select the program which needs the compatible CA card,
and the sign or encrypt will be shown in information banner (Fig. as follows), no image and no voice a few
seconds later.
T
I
TTX
STEREO
12:40
004 BBC World
Sport Today
BBC News
English
12:30-12:45
12:45-13:00
Signal Quality
50%
Insert the compatible CA card, you can view the programme.
In MENU, choose Common Interface to view information of CA card.
Press " " to enter sub menu.( Picture e-1-1)
Press "DTV MENU" to return.
Press "EXIT" to exit.
Common Interface
Slot
Empty
Sub Menu
<DTV Menu>Next
Picture e-1-1
NOTE: 1 . To view paid TV broadcasting, you need to make a contract with a service provider.
2 . The CI Module and the CA Card are neither supplied nor optional accessories.
3 . Please refer to the instruction of CI Module for the connection of CI Module and CA Card.
4 . Please don't insert or pull CA Card when powered on.
5. Please don’t operate the remote controller before the initializing of CI module is finished
6 . Make sure the direction of CI Module, it couldn't be opposite.
-44-
Using EPG
DTV
The EPG screen displays a list of the stored channels along with information on what programmes are
being broadcast.
You may press "GUIDE" button on the remote control to enter EPG mode,
and then press "GOLD" button to enter full screen EPG mode.
This item displays current and next program for every channel
EPG submenu displays information of playing programs in saved channels.
1. Press " / " to browse the coming programme
in different hours of current channel.
2. Press " / " to browse the broacdacasting
programme of other channels.
3. Then press "OK" button to choose the channel.
4. Press "INFO" button to check the expand information of
current channel.
5. Press the yellow button to enter full screen EPG mode.
Press "
" to select desired channel or program.
Press "OK" to enter schedule menu.
Press "EXIT " to exit.
Press " / " to choose set. Please refer to P8 for detailed
operation.
Press "OK" to confirm your choice.
Press "EXIT " to exit.
Channel schedule
ListBox 0
ListBox 1
Time
Play
I
Detail
EPG
04,04,2006
Channel schedule
22:00-22:25 BBC Ten O’Clock News
National and international news, with
reports from BBC correspondents
worldwide, [S]
SERVICE NAME
BBC ONE
BBC TWO
BBC THREE
BBC NEWS 24
BBCI
CBBC Channel
Channel
20:30
Holby City
It’s Not Ea
The Real H
BBC News
Reading...
Reading...
21:30
21:00
Dalalel And Pascoe
22:00
BBC Ten
Don’t Mess With Miss Thin Ice
Little Brita Two Pints East Ender
BBC Ten
BBC News
Program Event
OK Booking
E EXIT
Event List
Event Id
Service OK
Event type
Star Time
Star date
Duration
Status
Move
-45-
OK
Channel
1
ONCE
00:00
HH:MM
00/00/2000
DD/MM/YYYY
0
Minutes
OFF
Adjust
<DTV Menu>Returen
Digital Teletext
1.Press the TEXT button to activate the Teletext mode. Press again to view the TV program
with teletext page. You can return to normal viewing by press the TEXT button for the third time.
2.The red, green, yellow, blue buttons in the bottom of Teletext interface are guide buttons. Press "OK"
button to pick function menu, for example:
3.When function button is emerged, if press red button to lock this page, it will not be renewed. Press red
button again to return to normal state.
4. When function button is emerged, if press green button, the hidden information will be displayed.
(solutions to puzzles, riddles, etc). This button is applicable only to teletext page with puzzles, riddles,
etc. The image will disappear in 6 seconds.
5.Repeatedly pressing the yellow button doubles the character size in the following order:
Upper half of the page-> Lower half of the page-> Return to normal size.
6.Press blue button to return to searching page.
7.Press "
/
" direction buttons to page up/down.
8.If there are sub-pages in the screen, press "
/
" to switch sub-pages.
9.You can select a page by numerical buttons directly in TEXT mode.
10. You can use guide buttons.Press red, green, yellow, blue buttons to turn pages.
-46-
Troubleshooting And Maintenance
Troubleshooting
Please read this user's manual before using the TV set. If you have any troubles in using this
TV set, try to solve it by the suggestions mentioned below. If you can not remove the trouble
after adopting corresponding suggestions, please contact the A moi service center or dealer
authorized by us. For your own safety, please do not open the cover and repair it by yourself,
or it may cause further damage, electric shock or fire.
Q : There is no sound but picture is normal.
Check and make sure the volume is not mute or turn down.
Q : There is no picture or sound.
1. Ensure that the power cord is well connected and the power switch is on .
2. Ensure t he contrast and the brightness are adjusted properly.
Q : Picture is black and white or colourless.
Adjust the colour setup and check whether the broadcast system selection is correct.
Q : Picture is blurred or there is snowflake or nois.
1. Adjust direction and position of the right antenna.
2. The antenna is damaged or broken.
Q : Sound and picture has disturbed .
Check whether the TV set is very near to other electrical appliance. If so, remove it away.
Q : Picture is not stable and rolling in VGA mode.
1. Check whether the display frequencies and bandwidth of VGA or video source are compatible
format with the TV.
2. Check the display setup of control panel in computer. If the setup is incorrect, change it by
computer programming tools.
Q : Screen displays to check signal cords.
1. Check whether the signal cords are connected to VGA or video source.
2. Check whether VGA or video source is work.
Q : Remote control is insensitive or does not work.
1. Check whether the batteries of the remote control are powerful and well conductive.
2. Direct the remote control to the IR sensor of the TV.
3. Check whether there are some obstacles between the remote control and IR sensor.
Maintenance
Care for your TV
Careful and regular cleaning can extend the life of the TV.
Be sure to turn the power off and remove the plug before you begin any cleaning.
Screen Cleaning
1. Wet a soft cloth in a mixture of lukewarm water and a little fabric softener or dish washing detergent.
Wring the cloth until it is almost dry, and then use it to wipe the screen.
2. Make sure not to put excess water on the screen, let it air-dry before you turn on the TV.
Cabinet Cleaning
1. Use a soft cloth with a mild soap solution to wipe the cabinet.
2. Let the cabinet air-dry before turning the TV on.
Extended Absence
If the TV is not in use for a long period of time (such as a vacation), please remove the plug to protect
against possible damage from lightning or power surges. If you use an antenna, you may also need to
disconnect it from the back of the TV before leaving.
-47-
Display Mode
Both screen position and size will vary depending on the type of VGA monitor and its resolution.
The table below shows all of the display modes that are supported:
VGA:
Resolution
Horizontal Frequency
(KHz)
Vertical Frequency
(Hz)
640X480
31.5
60
640X480
37.9
72
640X480
37 . 5
75
640X480
43 . 3
85
800X600
35.1
56
800X600
37.9
60
800X600
46.9
75
1024X768
48.4
60
1024X768
56.5
70
1024X768
60.0
75
1152X864
67.5
75
1280X960
60 . 0
60
1280X1024
64 . 0
60
1280X1024
80.0
75
Sync Polarity
(H/V)
The interlace mode is not supported.
YPbPr/ YCbCr :
480i
480P
576i
576P
720P
1080i
1080P
576i
576P
720P
1080i
1080P
HDMI:
480i
480P
The set might operate abnormally if a non-standard video format is selected.
-48-
Specifications
TV
LD42VM6E
MODEL
Power Supply
LD47VM6E
Input: AC 100-240V 50Hz/60Hz
Input: AC 100-240V 50Hz/60Hz
Standby: < 1W
Standby: < 1W
250W
300W
Audio System
BG/DK/I /L/L’
BG/DK/I /L/L’
TV System
PAL, SECAM, NTSC
PAL, SECAM, NTSC
Sync: H/V Separate,
TTL, P. or N.
Sync: H/V Separate,
TTL, P. or N.
Video Signal: 0.7Vp-p, 75ohm
Video Signal: 0.7Vp-p, 75ohm
Audio in: RCA JACK (L&R),
0.5Vrms (-9dB)
Audio in: RCA JACK (L&R),
0.5Vrms (-9dB)
Frequency Response:
80Hz-15KHz (at-3dB)
Frequency Response:
80Hz-15KHz (at-3dB)
Earphone out:
Max.10mW Output
(Φ3.5mmStereo Jack,32Ω)
Earphone out:
Max.10mW Output
(Φ3.5mmStereo Jack,32Ω)
Operating Temperature:
5℃ -40℃
Operating Temperature:
5℃ -40℃
Operating Humidity:
10%-80% Relative Humidity
Operating Humidity:
10%-80% Relative Humidity
Power
Consumption
VGA
Audio
Environmental
Considerations
Resolution:
1920 × 1080 Pixels
Specification
of Monitor
Display Colour : 16.7M colours
Display Colour : 16.7M colours
Aspect Ratio: 16:9
Aspect Ratio: 16:9
Pixel pitch: 0. 4845(H)× 0. 4548(V)
Pixel pitch: 0.5415(H)×0.5415(V)
Lamp Life : >=50000H
Lamp Life : >=50000H
Unit Dimension(Without stand):
1057(H) × 738(W) ×136(D)mm
Unit Dimension(Without stand):
1144(H) × 784(W) ×146(D)mm
Size
Weight
Resolution:
1920 × 1080 Pixels
Unit dimension:
1057(H) × 811(W)× 372(D) mm
Unit dimension:
1144(H) × 850(W)× 372(D) mm
Please refer to the carton for weight information.
DTV
Channel Range
21~68
Input Level
-60~-20 dBm
Input Impedance
75 Ω
Channel Bandwidth
8M
Demodulator Mode
COFDM: 2K&8K
Interactive digital broadcast
Services: MHEG-5
Video Decoder : MPEG-2 MP@ML
Video Decoder
Resolving Power(Max): 720×576
Audio Decoder
Decompression: MPEG Layer I&II
Decompression
MPEG Layer I&II
NOTE: Specifications are subject to change without notice. Weight and dimensions are approximate.
-49-
This symbol on the product or in the instructions means that your
electrical and electronic equipment should be disposed at the end
of life separately from your household waste.
There are separate collection systems for recycling in the EU.
For more information, please contact the local authority or your
retailer where you purchased the product.
AMOI ELECTRONICS CO., LTD.
45 TIYU RD, XIAMEN, FUJIAN 361012, CHINA
Http: // www.amoi.com