1
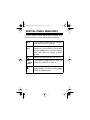
22-178.fm Page 1 Friday, August 6, 1999 11:38 AM
Cat. No. 22-178
OWNER’S MANUAL
Please read before using this equipment.
Auto-Ranging LCD
Digital Multimeter
22-178.fm Page 2 Friday, August 6, 1999 11:38 AM
CAUTION
RISK OF ELECTRIC SHOCK.
DO NOT OPEN.
!
CAUTION: TO REDUCE THE RISK OF
ELECTRIC SHOCK, DO NOT REMOVE
COVER OR BACK. NO USER-SERVICEABLE PARTS INSIDE. REFER SERVICING TO QUALIFIED PERSONNEL.
This symbol is intended to alert you to the presence of uninsulated dangerous voltage within the product’s enclosure
that might be of sufficient magnitude to constitute a risk of
electric shock. Do not open the product’s case.
!
This symbol is intended to inform you that important operating and maintenance instructions are included in the literature accompanying this product.
© 1996 Tandy Corporation.
All Rights Reserved.
RadioShack is a trademark used by Tandy Corporation.
2
22-178.fm Page 3 Friday, August 6, 1999 11:38 AM
FEATURES
Your RadioShack Auto-Ranging LCD Digital Multimeter
is a portable 33/4-digit, compact multimeter that is ideal
for field, lab, shop, bench, and home applications. Here
are some features that make your new digital multimeter
a real pro.
Latest IC and Display Technology — ensures reliability, accuracy, stability, and ease of operation.
Auto Power Shut-Off — helps conserve battery power
by sounding a beep then turning off if you do not change
any settings for 10 minutes.
Auto-Ranging with Manual-Ranging Override — automatically selects a range when you measure voltages, resistance, or current. You can also manually set the range
when measuring values you know are within a certain
range.
Bar-Graph Display — lets you quickly identify nulls,
peaks, and trends.
High-Speed Sampling — updates the bar graph display
12 times each second.
Expanded Current Ranges — allow measurements in
microampere ranges.
3
22-178.fm Page 4 Friday, August 6, 1999 11:38 AM
Data Hold Function — holds the display so you can see
the reading even after you disconnect the probes.
Overload and Transient Protection — helps protect the
meter from overvoltage in most ranges.
Continuity Buzzer Function — lets you quickly hear if
there is continuity in a cable or between two points.
Diode Check Function — lets you safely check semiconductors for open, shorted, or normal junctions.
Auto-Polarity Operation — protects your meter and
gives valid measurements even when you connect the
leads in reverse polarity.
Low-Battery Indicator — shows when you need to replace the batteries.
Fold-Out Stand — lets you adjust the meter’s position
for the best visibility on a flat surface.
Protective Holster — protects the meter from damage
and lets you hang the meter on a wall.
Note: Your multimeter requires two AA batteries (not
supplied).
4
22-178.fm Page 5 Friday, August 6, 1999 11:38 AM
CONTENTS
A Word About Safety .................................................. 6
Specifications ............................................................. 8
Special Panel Markings ............................................ 12
Preparation ................................................................
Installing Batteries ................................................
Using Test Leads ..................................................
Using Alligator Clips .............................................
Using the Stand and Holster ................................
13
13
14
15
16
Using the Meter .........................................................
Taking Accurate Measurements ...........................
Automatic Power Off ............................................
Manually Setting the Range .................................
Holding a Measurement .......................................
Using the Bar Graph .............................................
17
18
19
20
20
21
Making Measurements .............................................
Measuring DC/AC Voltage ...................................
Measuring an AC Voltage Riding
on a DC Source Bias ............................................
Measuring Three-Phase AC Voltage ............
Measuring DC/AC Current ...................................
Measuring Resistance ..........................................
Checking Continuity .............................................
Checking Diodes ..................................................
22
22
24
25
26
28
29
30
Maintenance .............................................................. 32
Fuse Replacement ............................................... 33
5
22-178.fm Page 6 Friday, August 6, 1999 11:38 AM
A WORD ABOUT SAFETY
We have taken every precaution in designing this meter
to ensure that it is as safe as we can make it. But, safe
operation depends on you, the operator. We recommend
that you follow these simple safety rules:
• Never apply voltages to the meter that exceed the
limits given in the specifications. Never apply more
than 1000V DC or 750V RMS AC between input
jacks or ground.
• Use extreme caution when working with voltages
above 100V. Always disconnect power from the circuit you are measuring before you connect test leads
to high-voltage points.
• Never connect to a source of voltage when you
select diode check, resistance measurement, continuity, or one of the current measurement functions.
• Always discharge filter capacitors in the power supply of the circuit under test before you attach test
leads.
• Always turn off power and disconnect the test leads
before you replace the batteries or fuse.
• Never operate the meter unless the back cover is in
place and fully closed.
6
22-178.fm Page 7 Friday, August 6, 1999 11:38 AM
• Because many AC/DC sets have a potentially hot
chassis, be sure the top of your workbench and the
floor underneath it are made of non-conductive materials.
• The multimeter is fully calibrated and tested. Under
normal use, no further adjustment should be necessary. If the meter requires repair, do not try to adjust it
yourself. Take it to your nearest RadioShack store.
Service by unauthorized personnel voids the warranty.
WARNING: USE EXTREME CAUTION IN USE OF THIS
DEVICE. IMPROPER USE OF THIS DEVICE CAN RESULT IN INJURY OR DEATH. FOLLOW ALL SAFEGUARDS SUGGESTED IN THIS OWNER’S MANUAL IN
ADDITION TO NORMAL SAFETY PRECAUTIONS IN
DEALING WITH ELECTRICAL CIRCUITS. DO NOT
USE THIS DEVICE IF YOU ARE UNFAMILIAR WITH
ELECTRICAL CIRCUITS AND TESTING PROCEDURES. NOT FOR COMMERCIAL OR INDUSTRIAL
USE.
7
22-178.fm Page 8 Friday, August 6, 1999 11:38 AM
SPECIFICATIONS
Display .................................... LCD 33/4-digits maximum,
3200 count resolution
Bar Graph ................................................... 33 segments
(100 counts of resolution/segment
sampled 12 times/second)
RANGES AND ACCURACY
DC Volts
300 mV–3 V ........................................ ±0.5% of reading,
±0.2% of full scale, ±1 in last digit
30–300 V ............................................. ±1.0% of reading,
±0.2% of full scale, ±1 in last digit
1000 V ................................................. ±1.0% of reading,
±0.2% of full scale, ±1 in last digit
(Maximum Measurement: 1000 Volts)
AC Volts
3–30–300 V ......................................... ±1.2% of reading,
±0.5% of full scale, ±1 in last digit
750 V ................................................... ±1.2% of reading,
±0.5% of full scale, ±1 in last digit
(Maximum Measurement: 750 Volts RMS)
8
22-178.fm Page 9 Friday, August 6, 1999 11:38 AM
DC Current
300 mA/30 mA .................................... ±1.0% of reading,
±0.2% of full scale, ±1 in last digit
3000 mA/300 mA ..................................... ±1.5% of reading,
±0.2% of full scale, ±1 in last digit
20 A .................................................... ±4.0% of reading,
±0.2% of full scale, ±2 in last digit
(Maximum Measurement: 20 A)
Measurement must be done within 30 seconds after 20 A
input.
AC Current
300–3000 mA–30–300 mA .................. ±2.0% of reading,
±0.5% of full scale, ±1 in last digit
(Maximum Measurement: 300 mA)
20 A .................................................... ±4.0% of reading,
±0.5% of full scale, ±2 in last digit
Measurement must be done within 30 seconds after 20 A
input.
9
22-178.fm Page 10 Friday, August 6, 1999 11:38 AM
Resistance
300 ohms–3–30–300 kohms ............... ±1.0% of reading,
±0.2% of full scale, ±1 in last digit
3 M ohms ............................................ ±2.0% of reading,
±0.2% of full scale, ±1 in last digit
30 M ohms ..................................................±3.5% of reading,
±0.5% of full scale, ±1 in last digit
Range ......... Full auto-range or manual-range control for
voltage and resistance measurements. Semi-auto and
manual range for current measurements.
Polarity ..................... Automatic, Minus sign for negative
polarity
Input Impedance ....................... 10 Megohm (DCV/ACV),
More than 100 Megohm on 300 mV DC
Continuity Function ................. Continuity buzzer sounds
at less than about 20 ohms
Low Battery Indicator ...................
appears when
battery voltage drops below operating voltage
10
22-178.fm Page 11 Friday, August 6, 1999 11:38 AM
Overrange Indication ............. OL. (overload)
appears on the display to indicate that the measurement
exceeds the absolute maximum reading. Use care in
DC1000V, AC 750 V, and DC/AC 20 A ranges, as
exceeding the maximum limits of these ranges can damage the meter and prevent an overrange indication.
Operating Temperature .................................32 to 122×F
(0 to 50×C)
Storage Temperature ....................................–4 to 140×F
(–20 to 60×C)
Power Source ...................................... Two AA batteries
Power Consumption ............................... 5 mW (Typical)
Dimensions (WHD) .....................31/16 × 61/2 × 13/8 Inches
(78 × 165 × 35 mm)
Weight ..................................................... 12.3 oz (348 g)
Included Accessories..... Safety test lead with attachable
alligator clip, holster, fuse (0.5A/250V)
11
22-178.fm Page 12 Friday, August 6, 1999 11:38 AM
SPECIAL PANEL MARKINGS
For your safety, we have added special markings to the
panel to remind you of the measurement limitations.
20 A
The maximum current that you can measure at this terminal is 20 amps.
MAX
1KV
To avoid electrical shock or instrument
damage, do not connect the common input
terminal (COM jack) to any source of more
than 1000 Volts with respect to earth/
ground.
!
MAX
1000V
~750V
Refer to complete operating instructions.
The maximum voltage that this meter can
measure is 1000V DC or 750V AC.
Be extra careful when making high-voltage
measurements; DO NOT TOUCH TERMINALS OR PROBE ENDS.
12
22-178.fm Page 13 Friday, August 6, 1999 11:38 AM
PREPARATION
INSTALLING BATTERIES
Your meter requires two AA batteries for power. We recommend alkaline batteries, such as RadioShack Cat. No.
23-557.
1. Turn off the power and disconnect the test leads.
2. Remove the meter from the holster.
(illustration
of removal
from holster)
3. Use a Phillips screwdriver to remove the screw that
secures the back cover, then lift off the cover.
(illustration)
4. Install the batteries as indicated by the polarity symbols (+ and –) marked in the battery compartment.
5. Replace the cover and secure it with the screw.
13
22-178.fm Page 14 Friday, August 6, 1999 11:38 AM
6. Replace the meter in the holster.
When
appears on the right side of the display, replace the batteries.
Warnings:
• To avoid electrical shock, disconnect both test leads
from any equipment before you remove the batteries.
• Do not operate the meter until you replace the batteries and close the back cover.
Caution: Never leave weak or dead batteries in the
meter. Even leak-proof types can leak and damage the
meter.
When you are not going to use the meter for a few
weeks, remove the batteries.
USING TEST LEADS
Use only the same type of test leads supplied with the
meter. These test leads are rated for 1200 volts. You can
order replacement leads from your local RadioShack
store.
14
22-178.fm Page 15 Friday, August 6, 1999 11:38 AM
Caution: Although these test leads are rated for 1200
volts, the maximum rating of this meter is 1000 volts DC/
750 volts RMS AC. Do not try to measure any voltage
greater than 1000 volts DC/750 volts RMS AC.
USING ALLIGATOR CLIPS
Alligator clips are supplied to allow you to keep your
hands free while making measurements. To attach the alligator clips to the test leads, screw the red clip to the red
test lead’s tip and the black clip to the black test lead’s
tip.
(illustration)
15
22-178.fm Page 16 Friday, August 6, 1999 11:38 AM
USING THE STAND AND HOLSTER
The fold-out stand lets you place the meter upright on a
flat surface for easier viewing.
(illus of meter
w/stand and
hanging)
The holster lets you hang the meter on a wall, hold the
test leads, and protect the meter from damage if you drop
it.
16
22-178.fm Page 17 Friday, August 6, 1999 11:38 AM
USING THE METER
Before you use the meter the first time to make a measurement, follow these steps to confirm correct operation
and to familiarize yourself with the meter’s operation.
(illus showing
all controls)
1. Press POWER to turn on the meter. All the display
elements briefly appear.
2. Set the selector to
V.
3. Press RANGE to set the meter to the manual range
selection mode. RH (Range Hold) appears on the display. Press RANGE again. The decimal point shifts
each time you press RANGE. See “Manually Setting
the Range” on Page 20.
4. Use the selector to switch between the meter’s functions and familiarize yourself with the displays.
17
22-178.fm Page 18 Friday, August 6, 1999 11:38 AM
Notes:
• See the unit of measure on the display to distinguish
the range. For example, the meter displays mV in the
300 mV range and V in the 300 V range. Also, note
the position of the decimal. For example, if the display shows .000V, the meter is set to measure less
than 1 volt. If the display shows 000V, the meter is
set to measure up to 1000 volts.
• The display might show a phantom reading in some
DC and AC voltage ranges when the test leads are
not connected to a circuit. This is normal. The high
input sensitivity produces a wandering effect. When
you connect the test leads to a circuit, a real measurement appears.
TAKING ACCURATE
MEASUREMENTS
For the most accurate reading, the temperature should
be between 65×F and 83×F (18×C and 28×C) (80% relative humidity maximum).
18
22-178.fm Page 19 Friday, August 6, 1999 11:38 AM
Connect the red lead to the V•W• •mA•mA• terminal
and the black lead to the COM terminal. All connections
except 20 A measurements are made at these terminals.
Caution: When OL. (overload) appears on the display,
the value you are measuring exceeds the meter’s maximum range. This is a normal display when you measure
resistance and do not have the leads connected to a
component. If you are measuring voltage or current, immediately disconnect the probes from the circuit.
AUTOMATIC POWER OFF
Your meter conserves power by sounding a warning tone
and automatically turning off about 10 minutes after the
last time you changed settings (even if you are making
measurements). To turn the meter back on, press
RANGE or DATA-H.
(illustration)
19
22-178.fm Page 20 Friday, August 6, 1999 11:38 AM
MANUALLY SETTING THE RANGE
When you measure voltages or resistance, your meter
can automatically select a measuring range. When you
measure current, the meter automatically selects a range
within the limits of the selector’s setting. While this feature is convenient, it might be faster to manually set the
range when measuring values that you know are within a
certain range.
To switch to manual-range control, press RANGE. RH
(Range Hold) appears on the display and the meter holds
the range at its current setting. Repeatedly press RANGE
to change the measuring range.
To set the meter back to auto-range control, press and
hold RANGE for about 1 second. RH disappears from the
display and the meter automatically selects the range
that gives the best reading.
HOLDING A MEASUREMENT
Press DATA-H (data hold) to hold all indications on the
display. DH appears on the display and the measured
value stays on the display even if you remove the probes
from the circuit, but the range controls do not work.
20
22-178.fm Page 21 Friday, August 6, 1999 11:38 AM
To cancel data hold, press DATA-H again or move the selector.
USING THE BAR GRAPH
The meter also indicates all the measurements on the
bar graph at the bottom of the display. The bar graph’s
length increases and decreases with the measured value. You can easily observe changes in measurements by
watching the bar graph.
Example: If the meter measures 12V in the 300V range,
the display shows:
(illustration)
21
22-178.fm Page 22 Friday, August 6, 1999 11:38 AM
MAKING MEASUREMENTS
MEASURING DC/AC VOLTAGE
Caution: The maximum input limit for voltage measurement is 1000V DC and 750V AC (RMS). If you try to measure a DC voltage above 1000 volts or an AC voltage
above 750 volts RMS, you can damage your meter.
When you connect the meter to a voltage higher than the
maximum rating, all the digits on the display blink. Disconnect the probes immediately.
Follow these steps to measure DC or AC voltage.
1. Set the selector to
voltages.
V for DC voltages or ~V for AC
When you measure DC voltages,
appears on the
display. When you measure AC voltages, ~ appears
on the display.
2. Plug the red test lead into the V•W• •mA•mA•
and the black test lead into the COM jack.
jack
3. Connect the probes to the circuit you want to test.
When you measure DC voltages, the minus sign
appears if you connected the black lead to a point in
the circuit that has a higher voltage potential than
where you connected the red lead.
22
22-178.fm Page 23 Friday, August 6, 1999 11:38 AM
Hint: When you use the meter to probe for a voltage
in a high-voltage circuit, we recommend you do not
try to position both probes at once. Instead, use one
of the supplied insulated alligator clips to clamp one
lead to the circuit’s neutral or ground lead (usually a
bare, green, or white lead in AC wiring circuits). Then
probe for voltages with the other probe. This helps
prevent you from accidentally touching a hot wire,
since you need only concentrate on one test probe.
Warning: Never clamp onto a hot wire (usually red,
black, or blue in AC wiring circuits). If you do so and
then touch the other probe connected to the meter,
you could receive an electric shock.
4. The meter automatically moves to the range that
gives the best reading. If you selected manual range
control, press RANGE to change the range.
23
22-178.fm Page 24 Friday, August 6, 1999 11:38 AM
MEASURING AN AC VOLTAGE
RIDING ON A DC SOURCE BIAS
(illustration)
To measure an AC voltage superimposed on a DC voltage source bias, you must first measure the DC and AC
voltages separately, then compute the peak voltage using the formula:
AC voltage
Peak voltage = DC voltage + ——————
.707
1. To measure the DC voltage, set the selector to
The display shows the DC voltage.
.
2. To measure the AC voltage, set the selector to
The display shows the AC voltage.
.
Caution: Never try to measure any circuit over 1000 V
peak with respect to earth/ground.
24
22-178.fm Page 25 Friday, August 6, 1999 11:38 AM
Measuring Three-Phase AC Voltage
We designed this meter primarily to measure household
AC voltages. It is not intended for commercial or industrial use. Please note the following about 3-phase, line-toline voltages.
Warnings:
• Because of the dangers inherent in measuring threephase circuits, do not use this meter for such applications. The actual voltage can be greater than the circuit’s rated line-to-ground voltage.
• To determine the line-to-line voltage, multiply the
rated line-to-ground voltage by 1.732 (the square
root of 3).
For example, if the rated line-to-ground voltage is
640 volts, the line-to-line voltage is 640 × 1.732
=1108 Volts AC.
This voltage exceeds the meter’s rating and you
should not connect the meter to this circuit.
25
22-178.fm Page 26 Friday, August 6, 1999 11:38 AM
MEASURING DC/AC CURRENT
To measure current, you must break the circuit and connect the leads to two circuit connection points. The connection must be in series with the circuit under test. Use
the supplied alligator clips for this connection. The maximum input limit for DC/AC current measurement is 20 A.
Warning: Measuring high current (in the DC/AC 20 A
range) can cause the meter’s internal components to become dangerously hot. Make measurements within 30
seconds after 20 A input and allow the meter to cool for
15 minutes between such measurements.
1. Set the selector to 320/3200 µA, 32/320 mA, or 20 A.
Cautions:
• If you do not know the amount of current in the circuit you are measuring, always set the selector to
20 A and connect the red test lead to the 20 A jack.
• NEVER CONNECT THE TEST LEADS ACROSS
A VOLTAGE SOURCE while the selector is set to
a current-measuring position. Doing so blows the
fuse in the meter or damages the circuit under test.
2. Press
so ~ appears on the display if you
are measuring AC current, or
appears if you are
measuring DC current.
26
22-178.fm Page 27 Friday, August 6, 1999 11:38 AM
3. Plug the black test lead into the COM jack and the red
test lead into the appropriate jack.
4. Remove power from the circuit under test and discharge all capacitors.
5. Break the circuit at the appropriate point.
6. Connect the probes in series with the circuit.
7. Apply power and read the current.
If the measured current’s polarity is negative, a minus
sign appears before the value.
If you are using the 20A jack and setting, and the
measurement is less than 320 mA, remove power
from the circuit, move the red test lead to the
V•W• •mA•mA• jack, set the selector to 32/320 mA ,
and apply power to the circuit.
If you are using the 32/320 mA jack and setting, and
the measurement is less than 3.2 mA, move the red
test lead to the V•W• •mA•mA• jack, set the selector to 320/3200 mA, and apply power to the circuit.
Note: If the meter does not show a reading, check
the fuses (see “Fuse Replacement” on Page 33).
27
22-178.fm Page 28 Friday, August 6, 1999 11:38 AM
MEASURING RESISTANCE
The resistance-measuring circuit compares the voltage
gained through a known resistance (internal) with the
voltage developed across an unknown resistance.
1. Remove all power from the circuit under test and discharge all capacitors.
2. Set the selector to W.
Caution: NEVER CONNECT THE PROBES TO A
SOURCE OF VOLTAGE while the selector is set to
W.
Note: With no resistance connected across the test
leads (resistance infinite), OL. (overload) appears on
the display when you set the selector to W. This is
normal.
3. Plug the red test lead into the V•W• •mA•mA•
and the black lead into the COM jack.
jack
4. Connect the probes across the circuit or component
you want to measure.
5. The meter automatically moves to the proper range.
If you select manual range control, press RANGE to
change the range.
28
22-178.fm Page 29 Friday, August 6, 1999 11:38 AM
Caution: The meter has a circuit to protect the resistance
range from over-voltage (450 volts RMS AC, 1 minute).
However, to prevent accidentally exceeding the protection circuit’s rating and to ensure a correct measurement,
NEVER CONNECT THE PROBES TO A SOURCE OF
VOLTAGE when you set the selector to W.
Notes:
• When you short the test leads, the meter displays a
small value (less than 0.7 ohms). This is due to the
meter’s and test lead’s internal resistance. You might
need to take note of this value and subtract it from
the measured value when you measure a very small
resistance.
• For resistance of about 1 megohm and above, the
display might take a few seconds to stabilize. This is
normal for high-resistance readings.
CHECKING CONTINUITY
This measurement helps you check electrical circuits,
such as house wiring or a speaker cable, for short or
open circuits.
1. Set the selector to
sets to 320 ohms.
. The range automatically
29
22-178.fm Page 30 Friday, August 6, 1999 11:38 AM
2. Press
so
appears on the display.
Caution: NEVER CONNECT THE PROBES TO A
SOURCE OF VOLTAGE while the selector is set to
.
3. Plug the red test lead into the V•W• •mA•mA•
and the black test lead into the COM jack.
jack
4. Connect the probes to the circuit you want to check.
5. If the circuit resistance is less than about 20 ohms,
the buzzer sounds, indicating there is a short. The
display shows the actual circuit resistance.
CHECKING DIODES
This measurement lets you check diodes, transistors,
and other semiconductors for opens, shorts, and normal
operation.
1. Set the selector to
.
2. Press
so
appears on the display. The
meter automatically sets the range to 3 V.
Caution: NEVER CONNECT THE TEST LEADS TO
A SOURCE OF VOLTAGE when you set the selector
to
.
30
22-178.fm Page 31 Friday, August 6, 1999 11:38 AM
3. Plug the red test lead into the V•W• •mA•mA•
and the black lead into the COM jack.
jack
4. Remove power from the circuit under test and discharge all capacitors.
5. Connect the probes to the semiconductor device you
want to check and note the meter reading.
6. Reverse the probes and note the second reading.
7. Judge the semiconductor device as follows:
If one reading shows some value and the other is
OL., the device is good.
If both values are OL., the device is open.
If both values are very small or zero, the device is
shorted.
Note: The value indicated on the display during the diode
check is the forward voltage.
(illustrations)
31
22-178.fm Page 32 Friday, August 6, 1999 11:38 AM
MAINTENANCE
Your RadioShack Auto-Ranging LCD Digital Multimeter
is an example of superior design and craftsmanship. The
following suggestions will help you care for the meter so
that you can enjoy it for years.
• Keep the meter dry. If it gets wet, wipe it dry immediately. Liquids can contain minerals that can corrode
the electronic circuits.
• Use and store the meter only in normal temperature
environments. Temperature extremes can shorten
the life of electronic devices and distort or melt plastic
parts.
• Handle the meter gently and carefully. Dropping it
can damage the circuit boards and case and can
cause the meter to work improperly.
• Wipe the meter with a damp cloth occasionally to
keep it looking new. Do not use harsh chemicals,
cleaning solvents, or strong detergents to clean the
meter.
• Use only fresh batteries of the required size and type.
Always remove old or weak batteries. They can leak
chemicals that destroy electronic circuits.
32
22-178.fm Page 33 Friday, August 6, 1999 11:38 AM
Modifying or tampering with your meter’s internal components can cause a malfunction and might invalidate the
meter’s warranty. If your meter is not performing as it
should, take it to your local RadioShack store for assistance.
FUSE REPLACEMENT
WARNING: TO AVOID ELECTRIC SHOCK, DISCONNECT THE TEST PROBES BEFORE REMOVING THE
BATTERIES OR FUSES. REPLACE ONLY WITH THE
SAME TYPE OF BATTERIES OR FUSE. THIS INSTRUMENT CONTAINS NO OTHER USER SERVICEABLE
PARTS. SERVICE SHOULD BE PERFORMED ONLY
BY QUALIFIED PERSONNEL.
CAUTION: For continued protection against fire, replace
the fuse on the V•W• •mA•mA• terminal with a 0.5 A,
250 V fuse (Cat. No. 270-1047) and replace the fuse on
the 20 A terminal with a 20 A, 250 V fuse (Cat. No. 2701041).
Note:
The
V•W•
•mA•mA•
fuse on your digital multimeter’s
terminal is a special size and type. We
have included one spare fuse in your meter, located in
the lower part of the battery/fuse compartment.
33
22-178.fm Page 34 Friday, August 6, 1999 11:38 AM
Follow these steps to replace any blown fuse.
1. Turn off the power and disconnect the test leads.
2. Remove the screw securing the back case and lift off
the back cover.
3. Remove the blown fuse.
4. Replace the fuse with the spare fuse or a new fuse of
the same rating.
5. Replace the back cover and secure it with the screw.
WARNING: DO NOT OPERATE YOUR METER UNTIL
THE BATTERY/FUSE COVER IS IN PLACE AND FULLY CLOSED.
(illustration)
34
22-178.fm Page 35 Friday, August 6, 1999 11:38 AM
NOTES
35
22-178.fm Page 36 Friday, August 6, 1999 11:38 AM
RadioShack Limited Warranty
This product is warranted against defects for 90 days from date of purchase from RadioShack company-owned stores and authorized
RadioShack franchisees and dealers. Within this period, we will repair
it without charge for parts and labor. Simply bring your RadioShack
sales slip as proof of purchase date to any RadioShack store. Warranty does not cover transportation costs. Nor does it cover a product
subjected to misuse or accidental damage.
EXCEPT AS PROVIDED HEREIN, RadioShack MAKES NO
EXPRESS WARRANTIES AND ANY IMPLIED WARRANTIES ARE
LIMITED IN DURATION TO THE DURATION OF THE WRITTEN LIMITED WARRANTIES CONTAINED HEREIN. Some states do not permit limitation or exclusion of implied warranties; therefore, the
aforesaid limitation(s) or exclusion(s) may not apply to the purchaser.
This warranty gives you specific legal rights and you may also have other rights
which vary from state to state.
We Service What We Sell
10/95
RadioShack
A Division of Tandy Corporation
Fort Worth, Texas 76102
8A6
Printed in Korea