1
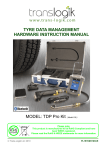
Portable Printer
PP-55
User’s Manual
115 A Tsarigradsko shosse Blvd, Sofia 1784, BULGARIA
tel: +359 (2) 974 00 55; fax: +359 (2) 974 11 00;
e-mail: [email protected]; www.datecs.bg
Contents
Technical Data .............................................................................. 2
Getting Started.............................................................................. 3
About Your PP-55 ......................................................................... 4
Charging Battery.......................................................................... 5
Printer Status & Operating Modes................................................ 6
Loading Paper............................................................................... 7
Running Self-test.......................................................................... 8
Compatible Mobile Device.......................................................... 9
Compatible products: ................................................ 9
Attaching Mobile Device............................................................ 10
Installing PrintSuite onto PC ..................................................... 12
Palm OS Devices ........................................................................ 16
Loading Device Software (PalmOS) ......................... 17
Loading Device Manually (PalmOS) ....................... 18
Software Compatibility (PalmOS)..........................19
Print Manager (PalmOS).......................................... 20
Verify Printer Connected (PalmOS)......................... 21
Configuration (PalmOS)............................................ 22
General Settings (PalmOS)...................................... 23
Printer Setup (PalmOS)............................................. 24
Printing (PalmOS).................................................... 25
Date Book (PalmOS) ................................................. 26
Address Book (PalmOS) ......................................... 27
Memo Pad (PalmOS) ............................................... 28
To-Do List (PalmOS) ................................................. 29
Fonts (PalmOS)............................................................30
Logos (PalmOS)...........................................................31
Other Options (PalmOS) ........................................... 32
1 DATECS Ltd.
www.datecs.bg
PP-55 User’s Manual Version 2.05
Contents
Logo Manager (Windows) ......................................... 33
Font Manager (Windows) .......................................... 34
Developing Solution (for Palm)................................. 35
Pocket PC Devices....................................................................... 36
Loading Device Software (PocketPC) ............... 37
Software Compatibility (PocketPC)........................ 40
Verify Printer Connected (PocketPC).................... 41
PrintManager (PocketPC).....,................................... 43
PrintManager Features (PocketPC)........................... 44
Screen Capture (PocketPC)...................................... 45
Barcode Printing (PocketPC)..................................... 47
Magnetic Card Reader(PocketPC)............................ 49
Barcode Reader (PocketPC)....................................... 50
Document Printing (PocketPC).................................. 51
Developing Solution (PocketPC).............................. 53
BlackBerry OS Devices............................................................... 54
Loading Device Software (BlackBerry).................... 55
Software Compatibility (BlackBerry) ...................... 58
Printing Contacts (BlackBerry)............................... 59
Printing Messages (BlackBerry)............................... 60
BlackBerryMail Options (BlackBerry)................... 62
Developing Solution (BlackBerry)....................... 63
Magnetic Card Reader.............................................................. 64
Barcode Reader.......................................................................... 65
Smart Card Reader......................................................................66
Installing Developer Tools.......................................................... 67
Troubleshooting ....................................................................... 69
Contact Information................................................................... 70
1 DATECS Ltd.
www.datecs.bg
PP-55 User’s Manual Version 2.05
Technical Data
Printing method:
Printing speed:
Dot density:
Resident fonts:
Loadable fonts:
Printing columns:
Logo Registration:
Memory:
Resident Barcodes:
Communications:
Magnetic Card Reader:
1D Barcode Reader:
Power supply:
Battery capacity:
Environment:
Reliability:
Dimensions:
Weight:
Thermal paper:
Line thermal dot printing
50 mm per second
8 dot/mm, 203 dpi - Horizontal and Vertical
A - 12 x 24
B - 9 x 16
C - 12 x 24
D - 9 x 16
Font A, C - 32 columns
Font B, D - 42 columns
1 Black & White BMP format ( 1-bit per pixel)
Size: 384 x 240
RAM 1Mbit
EAN13, EAN8, UPCA, UPCE, Code39,
Code93, Code128, Interleave 2 of 5,
Codebar, PDF417
Serial RS232, Optional 2 x USB Master/Slave
3 track head, ISO7811
Symbol Linear Image Scanner
AC adapter - 9V @ 1000 mA
Rechargeable Lithium Ion battery 7.4V @ 2000 mAh
~ 4 Rolls (Alpha-numeric data)
Operating temp. -10°C to 45°C @ 10 to 90 % RH
Storage temp. -25°C to 70°C @ 10 to 90 % RH
50 Million pulses
50 km
L - 195 mm, H - 50 mm, W - 87 mm
390 grams including battery and paper roll
Roll 57.5 ± 0.5 mm wide
40 mm O (~ 80 feet)
Thickness 0.06 ~ 0.10 mm
1 DATECS Ltd.
www.datecs.bg
PP-55 User’s Manual Version 2.05
Page 2
Getting Started
The DATECS PP-55 allows you to print information from your PDA or
Smartphone. This Getting Started Manual provides you with a short list of
tasks to get your PP-55 up and running. For more in depth explanation, consult the full user’s manual on the enclosed CD ROM or : http://www.datecs.bg
Quick Start:
Where to find
more information
Steps
What to do
Purpose
1
Charge the PP-55
rechargeable battery pack
as recommended in this
manual.
The Lithium Ion battery pack
should be fully charged before
used to ensure long battery life.
Charging Battery,
in User’s manual.
2
Install Print Software onto
PDA and Desktop.
Different device types such as
Palm, PocketPC, and
BlackBerry require different
software to run the PP-55.
Installing PrintSuite,
in User’s manual
3
Load PP-55 print media
(Thermal Paper)
PP-55 requires Thermal paper
for printing.
Loading Paper,
in User’s manual.
1 DATECS Ltd.
www.datecs.bg
PP-55 User’s Manual Version 2.05
Page 3
About Your PP-55
Paper cover
PP-55 Overall View
Battery cover
Control Panel
ON/OFF LED
indicator
ON/OFF
and Paper Feed
button
Serial / USB Port
Device carrier
Battery
charge LED
indicator
Adapter inlet
Battery recharge
NOTE: With a fully charged battery, PP-55 can print out
more than 5000 inches of
(alpha numeric) data.
To recharge the battery, plug AC/DC
adapter supplied with printer and
charge until the red battery charge
indicator turns to green.
Prolonged periods of storage can
cause a drop in the power of the
printer’s rechargeable battery!
Adapter inlet
1 DATECS Ltd.
www.datecs.bg
PP-55 User’s Manual Version 2.05
Page 4
Charging Battery
Charging PP-55:
The PP-55 uses a Lithium Ion rechargeable battery pack. Before first use,
the PP-55 battery pack should be charged for at least 4 hours.
To prevent electrical damage to the printer and/or battery pack, please use
approved AC/DC adapter only.
AC Adapter
Adapter inlet
Charging PP-55 & PDA:
The PP-55 has a built-in charging circuit to enable the charging of PDA
device while in the PP-55’s cradle. PDA charging only occurs when the
external AC/DC adaptor is connected to PP-55 adapter inlet.
Solid RED = charging
Solid GREEN = fully charged (~4 hrs.)
1 DATECS Ltd.
www.datecs.bg
PP-55 User’s Manual Version 2.05
Page 5
Printer Status & Operating Modes
The PP-55 uses LEDs to indicate various conditions of operation. This
may be charging, printing, out of paper or error conditions. The following
explains these conditions and LED indication.
Charging LED
ON/OFF Led
Feed Button
Printer Status
Solid GREEN = Battery at full charge
Battery Charging LED
Solid RED = Battery charging
Solid GREEN = Power ON
Solid RED = Low battery
ON/OFF LED
Slow Blinking = High temperature error
Fast Blinking = Printer out of paper
The PP-55’s paper feed switch/button is used for entering various printer
modes. These modes can be used to assist developers in debugging problems related to programming and communication. The following explain
how to access the various operating modes.
Operation Modes
Short Push
N/A
Paper feed
1 - beep Self-test
2 - beeps Hex dump
Push and Hold - release
after the number of
3 - beeps Reserved – For factory use only
beeps
4 - beeps Reserved – For factory use only
5 - beeps Reserved – For factory use only
Note: Care must be taken when entering operating modes to prevent the
clearing of factory preset configuration information.
1 DATECS Ltd.
www.datecs.bg
PP-55 User’s Manual Version 2.05
Page 6
Loading Paper
The PP-55 uses a drop-and-load design making paper loading easy and
trouble free. To load paper, simply remove the paper cover and drop in the new
roll as shown in the steps below.
Make sure that the paper is placed in the printer as shown in step 2 below.
1
3
Open paper cover holder with both fingers
and remove the remaining part of the old
paper roll.
Press with both fingers to click cover
of shell in place.
2
4
Place the paper
roll and cover in
position.
Make sure that the paper is fed
out from the printer at a right
angle If not pull paper vertically by hand.
90°
WR
G
ON
RONG
W
1 DATECS Ltd.
www.datecs.bg
PP-55 User’s Manual Version 2.05
RIGHT
Page 7
Running Self-test
The PP-55 has a built-in test pattern that shows the printer's current configuration as well as the various resident printer fonts. The self-test can also be
used as a troubleshooting tool to determine printing problems or battery
level. The steps below show how the self-test is activated.
Step #1: Make sure the On-line LED is OFF
before performing step #2.
Step #2: Press and hold the paper feed button in for
one beep. Release the feed button after the
first beep. The printer should start printing
the internal test pattern
Resident font sizes
Number of characters per line
Text formatting
Resident character set
Resident barcode symbols
Printer's Configuration
1 DATECS Ltd.
www.datecs.bg
PP-55 User’s Manual Version 2.05
Page 8
Compatible Mobile Device
The PP-55 portable thermal printer is designed specifically for use with the
world’s most popular PDA devices.
The PP-55 can be used in a variety of applications where hardcopy printouts are required.
End Users –
for printing Emails, HTML pages, Graphics files,
Clipboard data, text only files, Screen Captures, and
more.
Manufacturers – for shipping & receiving goods, date and time printing,
inventory control and W.I.P. management.
Distributors –
for marking prices, sales receipts, route deliveries.
POS –
for mobile sales receipts and credit card verifications in
POS application.
The following is a list of devices that the PP-55 currently supports.
Compatible products:
No
1
2
3
4
5
6
7
8
9
10
11
12
13
14
15
16
17
PDA Device
Operation System
(OS)
Tungsten C, W
Palm
Tungsten T, T2, T3, Zire 71 Palm
Tungsten T5, E2
Palm
Zire 21
Palm
Zire 31
Palm
Palm 500
Palm
Palm V
Palm
Tungsten E
Palm
Zire 72
Palm
Treo 180, 270, 300, 600
Palm
Kyocera 7135
Palm
HP iPAQ 38XX, 39XX,
PocketPC
41XX, 51XX, 54XX, 55XX,
22XX, 19XX, rz1710
HP iPAQ 2410
PocketPC
Samsung i700
PocketPC
iMATE/XDAII
PocketPC
RIM 957, 5810, 6200,
BlackBerry
6510, 6700, 7700
RIM 7200, 7510
BlackBerry
Device Type
(for attachment)
Device Type #3
Device Type #3
Device Type #7
Device Type #6
Device Type #5
Device Type #4
Device Type #2
Device Type #1
Device Type #1
Device Type #1
Device Type #1
Device Type #1
Device Type
Device Type
Device Type
Device Type
#1
#3
#1
#1
Device Type #5
Devices are added constantly. For updates on supported device,
visit our web site at http://www.datecs.bg
1 DATECS Ltd.
www.datecs.bg
PP-55 User’s Manual Version 2.05
Page 9
Attaching Mobile Devices
The PP-55 has several versions designed to be used with specific devices.
See section on compatible products to make sure your device will work
with the PP-55.
Care must be taken to ensure that the PP-55 cradle connector and PDA
connector are not accidentally damaged. The figures below show how to
attach the different device to the printer and how to remove the device
from the printer.
Place:
Device Type #1
Take off:
Place:
Device Type #2
Take off:
Place:
Device Type #3
Take off:
1 DATECS Ltd.
www.datecs.bg
PP-55 User’s Manual Version 2.05
Page 10
Attaching Mobile Device
Place:
Place:
Device Type #4
Take off:
Device Type #5
Take off:
Place:
Device Type #6
Take off:
Place:
Device Type #7
Take off:
Although the PP-55 cradle is designed to hold the device
in place, this does not prevent the device from accidentally slipping out if the printer is held in the position below.
1 DATECS Ltd.
www.datecs.bg
PP-55 User’s Manual Version 2.05
Page 11
Installing PrintSuite onto PC
The PP-55 comes with software package used for printing from your handheld device. Also included in the software package are Printer Driver and
SDKs (Software Development Kits) for several IDE (Integrated
Development Environment).
The installation program "PrintSuite.EXE" can be found on the CD that is
supplied with the PP-55 or at our developer web site at:
http://pda.datecs.bg
The PP-55 software package must be installed onto the PC before it can
be loaded onto a specific device. The steps below will help you to install
the software package.
Step 1: Using the Windows [RUN] command, select the
"PrintSuite.exe" file located on the CD-ROM provided with
the PP-55 printer.
Step 2: Click on the [Open] command option to proceed with the
installation.
1 DATECS Ltd.
www.datecs.bg
PP-55 User’s Manual Version 2.05
Page 12
Installing PrintSuite onto PC
Step 3: Click [Next] to continue the installation process.
Step 4: Leaving the default destination folder is recommended as
loading of software onto device will require locating
program files installed here.
Click [Next] to continue the installation process.
1 DATECS Ltd.
www.datecs.bg
PP-55 User’s Manual Version 2.05
Page 13
Installing PrintSuite onto PC
Step 5: Check the components you want to install onto your PC
and PDA device.
For PocketPC device, the "PrintManager for PocketPC
(WinCE)" component should have a check in the box on
the left.
Click [Next] to continue the installation process.
1 DATECS Ltd.
www.datecs.bg
PP-55 User’s Manual Version 2.05
Page 14
Installing PrintSuite onto PC
Step 6: For Palm users only, check all components that will be
loaded onto your Palm device.
For Palm users only, select the "User" name of a device to
load the selected components onto.
If you are using a PocketPC or BlackBerry device, no items
should be checked.
Click [OK] to complete the installation process.
The PP-55 software package should now be installed onto
your PC. For loading printing software onto your device, see
sections "Loading Device Software" for (Palm OS),
(PocketPC OS), or (Blackberry OS) for details.
1 DATECS Ltd.
www.datecs.bg
PP-55 User’s Manual Version 2.05
Page 15
PalmOS Devices
Devices compatible with the PP-55 are categorized by OS "Operating
System" running on the device itself. For example the devices below all use
some version of Palm OS. Therefore, the PP-55 printing tools and SDKs for
Palm OS will run on these devices. However, not all Palm devices are supported by PP-55 Hardware or Software.
Please refer to the section "Compatible Mobile Device" and verify that your
device is currently supported by the PP-55.
These are a few of the Palm OS devices currently supported.
Tungsten | C
Kyocera 7135
Tungsten | T
Tungsten | W
Treo 300
Treo 600
Devices are added continuously. For updates on supported device,
visit our web site at: www.datecs.bg
1 DATECS Ltd.
www.datecs.bg
PP-55 User’s Manual Version 2.05
Page 16
Loading Device Software
(PalmOS)
The PP-55 comes with software package used for printing data from applications running on your handheld device. The PDA printing software must
be installed onto your PC using the steps in the previous section.
The following *.prc programs need to be installed on your Palm OS handheld. The remaining (2) programs with *.exe extension is Windows based
and runs on your PC. All files should have already been installed onto your
PC as explained in the previous section "Installing Software onto PC".
The following is a description of these files and the file names:
File Name
DPSDKLib.prc
DatecsPrint.prc
ScreenPad.prc
LogoManager.exe
FontManager.exe
Description
Shared Library (Must be loaded)
Print Manager Application
Drawing application
Graphics conversion program
Font editing program
Where to Load
PDA
PDA
PDA
PC
PC
Installing the files onto your PDA device requires using Hot Sync and the
Install Tool program supplied with your PDA.
Your PDA Hot Sync and Install Tool program must be installed before continuing.
Loading Device:
1. Perform steps in previous section "Installing Software onto PC".
2. Place device into hot sync cradle.
3. Press hot sync button to begin sync process.
If for some reason the steps above failed to load the PRCs onto your device,
follow the steps in "Loading Device Manually:" section to load PRCs manually.
1 DATECS Ltd.
www.datecs.bg
PP-55 User’s Manual Version 2.05
Page 17
Loading Device Manually
(PalmOS)
Loading Device Manually:
a.
b.
c.
d.
Start the [Install Tool] program.
Add *.prc files to load onto device.
Place device into hot sync cradle.
Press hot sync button to begin sync process.
1 DATECS Ltd.
www.datecs.bg
PP-55 User’s Manual Version 2.05
Page 18
Software Compatibility
(PalmOS)
There are four (4) possible methods to print using the PP-55 software package. As shown in the diagram below, data or images from many PALM OS
applications (black box) can be printed using one of the DATECS Print
Manager or Palm Printer SDK printing tools (grey box).
The printing method used depends on the type of data being printed "Text or
Graphics" as well as the application's design.
For example, applications such as Address and Memo do not have printing
capabilities built-into the application itself "No print option in menu".
Therefore, the DATECS Print Manager is used to extract and print data from
these applications.
Data Book, Address, ToDo,
Memo, Text messages, Fonts, Logos, Bar
codes, various printer tests
Applications developed with print options
using PP-55 SDKs.
DATECS
Print Manager
DATECS
Palm Printer
SDKs
PP-55 printer
Note:
Because of the PP-55 printing software package limitations, not all
PALM OS applications are supported by the Datecs PrintSuite printing applications.
1 DATECS Ltd.
www.datecs.bg
PP-55 User’s Manual Version 2.05
Page 19
Print Manager
(PalmOS)
After installing the software package on to your PDA, open the Print
Manager to setup the printer and general print settings.
The following is a step-by-step process of configuring Print Manager.
Step #1: Open the category list in the upper
right to display the list of categories
as shown in the figure on the right.
Select [Datecs] category option to
display the Print Manager
application that have been
installed onto the device.
Step #2: Open the [Datecs Print] application
by tapping on its Icon as shown in
the figure on the right.
1 DATECS Ltd.
www.datecs.bg
PP-55 User’s Manual Version 2.05
Page 20
Verify Printer Connected
(PalmOS)
After installing the software package on to your PDA, do a quick check to
determine if the printer is charged and PDA is securely in the PP-55
cradle.
The following will help you to determine these conditions.
Case #1: Open the Print Manager so that
the screen on the right is displayed.
Note that the [PDA] battery option
indicates a FULL charge which
means the PDA is OK.
The same is true for the [Printer]
option. The PP-55 was detected
and is ready for printing.
Case #2:Open the Print Manager so that the
screen on the right is displayed.
Note that the [Printer] battery option
indicates a LOW or N/A charge
which means either the PDA is not
securely in the PP-55's cradle or the
PP-55's battery needs to be
charged.
1 DATECS Ltd.
www.datecs.bg
PP-55 User’s Manual Version 2.05
Page 21
Configuration
(PalmOS)
After launching the Print Manager
application, the screen will be
displayed as shown in the figure
on the right.
Step #1: Tap on the [Options] menu
drop-down list as shown in the
figure on the right.
Step #2: Tap on the [General Settings] menu
option as shown in the figure on
the right.
Note: The changes made here only need to be made once unless a device
hard reset occurs or Print Manager is reinstalled.
1 DATECS Ltd.
www.datecs.bg
PP-55 User’s Manual Version 2.05
Page 22
General Settings
(PalmOS)
After selecting the General Settings
menu option the screen on the right
will be displayed.
Select the printing options to be
added to your printed receipts.
Note:
Options selected here, only applies
to printing from Print Manager.
Applications written to use the
PP-55 printer must implement their
own receipt formatting options.
Setting Up Headers & Footers:
Step #1: Tap on the [View] option to display
the Header edit screen as shown
in the figure on the right.
Step #2: Type in your header and select any
text formatting options as shown in
the figure on the right.
Step #3: Tap on the [Preview] options to see
what your header will look like.
Step #4: Tap on the [Done] options to exit
and save your header and footer.
1 DATECS Ltd.
www.datecs.bg
PP-55 User’s Manual Version 2.05
Page 23
Printer Setup
(PalmOS)
The Printer Setup options is used
to setup Print Manager so that it
can communicate with the printer.
Select the [Printer Setup] option
to display the the setup screen
in the figure below.
Step #1: The following should be set for
PP-55:
Printer Model: Datecs PP-55
Connection: Serial
Serial Speed: 115200 BPS
Set other options if necessary.
Step #2: Tap [Done] to save any changes
made.
1 DATECS Ltd.
www.datecs.bg
PP-55 User’s Manual Version 2.05
Page 24
Printing
(Palm OS)
Print Manager can print information from standard Palm applications such
as Date Book, Address, ToDo, and Memo applications.
Opions: Print Manager can print information
from the standard Palm applications
shown in the figure on the right.
Print Manager also let you load
custom Fonts created by Font
Manager and Logos created by
Logo Manager.
See section on Font / Logo
Manager for Details.
Options: The Others option displays the
screen on the right.
See section on Other Options for
details on using the available
functions from this screen.
1 DATECS Ltd.
www.datecs.bg
PP-55 User’s Manual Version 2.05
Page 25
Date Book
(PalmOS)
The Date Book option lets you view and print date book entries. The following is a step-by-step process of viewing and printing.
Step #1: Tap the Date Book option icon
shown in the figure on the right.
Step #2: Enter the [From and To] dates for
list display range.
Tap the [View] option to display
date book entries.
Step #3: The screen on the right is displayed
if there are entries in date book
database that exist between the
[From and To] date entered in the
previous screen.
Tap [Done] return to the previous
sceen.
Step #4: To print the list, tap on the [Print]
option.
1 DATECS Ltd.
www.datecs.bg
PP-55 User’s Manual Version 2.05
Page 26
Address Book
(PalmOS)
The Address option lets you view and print address book entries. The following is a step-by-step process of viewing and printing.
Step #1: Tap the Address option icon shown
in the figure on the right.
Step #2: Select the address to view or print
as shown in the figure on the right.
Step #3: Tap on the [View] option to view the
Details of the selected address.
Step #4: Tap on the [Print] option to print the
details of the selected address.
1 DATECS Ltd.
www.datecs.bg
PP-55 User’s Manual Version 2.05
Page 27
Memo Pad
(PalmOS)
The Memo Pad option lets you view and print memo pad entries. The following is a step-by-step process of viewing and printing.
Step #1: Tap the Memo Pad option icon
shown in the figure on the right.
Step #2: Select the memo entry to view or
print as shown in the figure on the
right.
Step #3: Tap on the [View] option to view the
Details of the selected memo.
Step #4: Tap on the [Print] option to print the
details of the selected memo.
1 DATECS Ltd.
www.datecs.bg
PP-55 User’s Manual Version 2.05
Page 28
To-Do List
(PalmOS)
The To-Do List option lets you view and print To-Do list entries. The following is a step-by-step process of viewing and printing.
Step #1: Tap the To-Do List option icon
shown in the figure on the right.
Step #2: Select the [All or Uncompleted]
entry to view or print as shown in
the figure on the right.
Step #3: Tap on the [View] option to view the
Details of the list of To-Do items.
Step #4: Tap on the [Print] option to print the
details of the To-Do list.
1 DATECS Ltd.
www.datecs.bg
PP-55 User’s Manual Version 2.05
Page 29
Fonts
(PalmOS)
The Font option is a tool for loading new fonts into the PP-55 printer as
well as editing existing fonts.
Step #1: Tap the Font option as shown in
the Figure on the right.
Note: If no font name is listed, you
can load the fonts supplied on
the CD ROM using Hot Sync tool.
Select the font to be loaded into the
PP-55 then tap on the [Load] option.
Notes:
The PP-55 comes preloaded from
the factory with two fonts.
Western Font - the most widely
used in Latin characters.
National Font - where the
characters of a selected national
alphabet can be loaded and edited.
Entirely new characters and
symbols can be created using the
[Edit] command option.
This function is very useful for
creating customized fonts to prevent
counterfeiting of secure documents.
Only by careful inspection through
magnifying Lenses can the
difference be determined.
1 DATECS Ltd.
www.datecs.bg
PP-55 User’s Manual Version 2.05
Page 30
Logos
(PalmOS)
The Logo option is used for loading logos into the PP-55 flash memory.
(see Logo Manager section for creating and formatting logos).
Step #1: Tap the Logo option shown on the
right.
Note: If no logo name is listed, you
must transfer the logo you
created onto the device using
the Hot Sync tool.
Select the logo to be loaded into
the PP-55 then tap on the [Load]
option.
Printing Logo
Step #2: After the logo has been loaded in to
the PP-55, refer back to the section
[General Settings] to set the print
logo Option.
Check the [Print logo] option box
then return to the main screen.
The logo will now be printed when
printing from within Print Manager.
1 DATECS Ltd.
www.datecs.bg
PP-55 User’s Manual Version 2.05
Page 31
Other Options
(PalmOS)
The Others option let you use the barcodes scanner, magnetic card reader, and run various print test. The following is a description of the various
options.
Scan:
Scans barcode
(PP-55MS / BC only)
Scan Barcode:
Scans barcode
(PP-55MS / BC only)
MSR - Read Tracks:
Reads card raw data
(PP-55MS only)
MSR- Read Payment:
Reads card information
(PP-55MS only)
Print Clip:
Prints clipboard data.
Print Mail:
Prints email items.
Short Test:
Prints short test with battery level,
head Temperature, serial port
speed, printer serial number and
firmware version.
Long Test:
Prints information from short test
with additional information such as
supported fonts, resident barcodes,
stored logo.
Bar Types:
Prints all resident barcodes.
Bar Modes:
Prints barcodes showing the various
Formatting options such as rotation
HRI position and HRI font size.
1 DATECS Ltd.
www.datecs.bg
PP-55 User’s Manual Version 2.05
Page 32
Logo Manager
(Windows)
Logo Manager (for Windows) is a DATECS Windows software utility that
helps you create and format PC BMP graphics files into PALM OS format.
Using Hot Sync tool, logo files are then transferred on to the PDA for use
with the PP-55 printer.
Logo Specifications: Image Size - 384 x 240 pixels (dots)
File Format - PC BMP (Black & White) or monochrome
After creating and saving your logo files, open the DATECS Logo Manager
as shown below.
Using the [Browse] command
option locate your logo file. Logo
Manager automatically assigns
an output file name.
Next click on the [Save]
command option to convert the
BMP file to PALM OS compatible
file format with the extension
PDB.
Using your Hot Sync tool,
transfer the logo file "*.pdb" on
to your PDA.
See Font Manager (Logos)
for details on loading the new
logo file into PP-55.
1 DATECS Ltd.
www.datecs.bg
PP-55 User’s Manual Version 2.05
Page 33
Font Manager
(Windows)
Font Manager "FontManager.exe" is a DATECS Windows software utility
that helps you create and format PC font files into PP-55 format. Using Hot
Sync, font files are then transferred onto the PDA for use with the PP-55
printer.
Using the [Open] command
option locate an existing file or
using the [New] command option
create a new font file.
After creating or editing an
existing font file, click on the
[Save] command option to
convert the font file to a PP-55
compatible file format with the
extension PDB.
Using your Hot Sync tool,
transfer the font file "*.pdb" onto
your PDA.
See Font Manager (Fonts) for
details on loading the new font
file into PP-55
1 DATECS Ltd.
www.datecs.bg
PP-55 User’s Manual Version 2.05
Page 34
Developing Solution
(PalmOS)
Integrating the PP-55 into your Palm solution requires the use of the
PalmOS SDK for PP-55. The SDK incorporates API specific to developing
application using the integrated Card reader, Barcode reader as well as
incorporating Graphics, Barcode and Text printing capability of the PP-55.
The table below shows the SDKs currently available for Palm OS devices.
SDKs
Shared Library
Satellite Forms
AppForge
NS Basic
PocketStudio
Language
C++
Basic
Basic
Basic
Pascal
IDE
CodeWarrior - Metrowerks
Satellite Forms - Pumatech
AppForge - AppForge
NS Basic - NSB Corporation
PocketStudio - WinSoft Ltd.
The figure below shows the relationship of these SDKs. Note that library
extensions require the root library be installed on the device along with
extensions.
For details on using the different SDK, see section "Installing Developer
Tools" and refer to the SDK's Help files located in the SDK's subdirectory.
For the latest PP-55 SDK's, visit our developer web site at:
http://pda.datecs.bg
1 DATECS Ltd.
www.datecs.bg
PP-55 User’s Manual Version 2.05
Page 35
PocketPC Devices
Devices compatible with the PP-55 are categorized by OS "Operating
System" running on the device itself. For example the devices below all
use some version of Pocket PC OS. Therefore, the PP-55 printing tools
and SDKs for Pocket PC OS will run on these devices. However, not all
Pocket PC devices are supported by PP-55 Hardware or Software.
Please refer to the section "Compatible Mobile Device" and verify that your
device is currently supported by the PP-55.
These are a few of the Pocket PC OS devices currently supported.
iPAQ 4100
iPAQ 5500
iPAQ 5100
iPAQ 2200
iPAQ 5400
Samsung i700
Devices are added continuously. For updates on supported
device, visit our web site at http://www.datecs.bg
1 DATECS Ltd.
www.datecs.bg
PP-55 User’s Manual Version 2.05
Page 36
Loading Device Software
(PocketPC)
The PP-55 comes with the PocketPC PrintManager used for printing documents created by applications running on your PocketPC device.
PrintManager is first installed onto your PC using the steps in the section
"Installing Software onto PC".
Refer to the section "Installing Software onto PC" if you have not already
installed the PrintSuite onto your computer.
Installing PrintManager:
Installing PrintManager on your Pocket PC device requires performing two
separate steps as explained below.
Step #1: Before PrintManager can be installed onto you Pocket PC device,
the files must first be extracted. This will require the use of
Windows File Explorer for locating installation files and running
the file extraction program.
Step #2: Requires that your device ActiveSync program is already installed
onto your PC and there are no problems synchronizing with the
device. The Add/Remove Program tool is then used to install the
PrintManager onto your PocketPC device.
Before proceeding to extracting and installing the PrintManager files, be
sure to install the above mentioned ActiveSync program. If they have not
already been installed please refer to your device documentation and
install it before proceeding.
1 DATECS Ltd.
www.datecs.bg
PP-55 User’s Manual Version 2.05
Page 37
Loading Device Software
(Pocket PC)
Installing Pocket PC device files:
Step1:
Click on the Windows [Start] menu then [Run] command.
Browse to the C:\Program Files\ Datecs\PrintSuite folder as
shown in the figure below.
Note that this is the default folder used in the "Installing Software onto PC"
section. If you changed the default folder during the installation, you must
navigate to that folder's location.
Step2:
Click on the CE folder then select the Setup.exe file as shown in
the figure below. The click on the [Ok] command option to begin
the installation process.
1 DATECS Ltd.
www.datecs.bg
PP-55 User’s Manual Version 2.05
Page 38
Loading Device Software
(Pocket PC)
Be sure that your Pocket PC device is placed in its cradle and ready for
syncing before clicking on the [OK] command button.
Step3: Click on the [OK] command option to finish the installation
process.
1 DATECS Ltd.
www.datecs.bg
PP-55 User’s Manual Version 2.05
Page 39
Software Compatibility
(PocketPC)
There are four (4) possible methods to print to the PP-55 printer. As shown
in the diagram below, data or images compatible with the PocketPC OS
applications (black box) can be printed using PP-55 PrintManager's built-in
features, from PP-55 applications written using the PP-55 Driver/SDK
(gray box), or directly to the PP-55 using applications written with serial
port drivers.
The printing method used depends on the type of data being printed "Text
or Graphics" as well as the application's design.
For example, applications such as Pocket Word and Web Browser do not
have printing capabilities built-into the application it self "No print option in
menu". Therefore, the PP-55 PrintManager is used to open and print data
from the different file formats.
Pocket Word,
Pocket Excel,
HTLM, txt,
BMP
Full graphics
screen of any
PocketPC
application
Applications
developed
with serial
port driver.
Applications
developed with
print options
using
PP-55 SDKs.
PP-55
Print
Manager
Print
Manager
Clipboard
Direct
Connect
PP-55
Pocket PC
Printer SDK
PP-55 / PP-55MS printer
Note:
Because of the PP-55 printing software package limitations, not
all PocketPC application file format are supported.
1 DATECS Ltd.
www.datecs.bg
PP-55 User’s Manual Version 2.05
Page 40
Verify Printer Connected
(Pocket PC)
After installing the PrintManager onto your device, do a quick check to
determine if the PrintManager and PP-55 is software connected.
The following steps will help you to determine these conditions.
Step #1: Open the Print Manager as shown
in figure on the right. Open the
[Start] menu then scroll down the
list for [PrintManager].
Step #2: To verify if the PP-55 and
PrintManager is connected,
Select the [Other] menu option
located at the bottom left of the
screen.
Next, select the [Printer Settings]
menu option as shown in the
figure on the right.
1 DATECS Ltd.
www.datecs.bg
PP-55 User’s Manual Version 2.05
Page 41
Verify Printer Connected
(PocketPC)
Before proceeding to verify if the PP-55 and PrintManager is connected, it
is important to note that Step #3 requires setting the COM port communication speed. The PP-55 factory default is set to 115200 bps. Be sure to
select this communication speed.
Step #3: Notice that the battery voltage and
head temperature boxes are empty.
This is because the Print Manager
is not software connected to
the PP-55.
Set the Printer to [PP-55] and
COM port to [COM1: 115200]
as this is the default port settings.
Tap on the [Connect] button to
connect Print Manager to printer.
Step #4: Notice that the voltage and head
temperature boxes are now filled.
This indicates the current level of
the PP-55 rechargeable battery
and current head tempreture of
the print head.
This also indicates a connection
between PrintManager and the
PP-55.
Note:
If your results are not similar to the example above, check to see
if the PDA is properly seated in the PP-55's cradle. If you haven't
charged the printer's rechargeable batteries, its recommended
that the battery be charged as directed.
1 DATECS Ltd.
www.datecs.bg
PP-55 User’s Manual Version 2.05
Page 42
PrintManager
(PocketPC)
The PP-55 PocketPC PrintManager can print information in files created
by Email application, Pocket Word, Text Editor, Graphics files, as well as
Html documents. The following is an overview of the PP-55 PrintManager
and its printing capabilities:
Starting Print Manager:
Open the Start menu as shown on
the right.
Tap on the Print Manager icon to
start the PP-55 Print Manager
application.
Document Printing Options:
Pocket Word or Text files
Html pages
Raster and Graphics files
E-mail data
Clipboard data
1 DATECS Ltd.
www.datecs.bg
PP-55 User’s Manual Version 2.05
Page 43
PrintManager Features
(PocketPC)
Before proceeding to print sample documents, there are a host of
enhanced features that PrintManager provides. The following is an
overview of the PP-55 PrintManager enhanced features:
Text Formatting:
Text formatting enables you to set the
printing characteristics of a
document.
To access the text formatting
options, select [Text Formatting]
menu option as shown on the
right.
Text Formatting Options:
Any changes made in text
formatting is saved until new
entries are made. Resetting the
PDA does not change the current
settings.
Default or Downloadable Fonts
User defined margins
Text formatting
Tab stops
1 DATECS Ltd.
www.datecs.bg
PP-55 User’s Manual Version 2.05
Page 44
Screen Capture
(PocketPC)
Screen printing is a process of capturing currently displayed screen onto
the clipboard. Once the image is on the clipboard, the image can then be
printed using the PP-55 or pasted into a document provided that the application has pasting capability. The following is a step-by-step process of
printing screen captures stored on the clipboard.
Step #1: Enabling Screen Capture
Run PP-55 Print Manager.
Tap on the [Other] menu option
at the bottom left of the screen.
Tap on the [Screen Capture] menu
option as shown on in the figure on
the right.
Step #2: Configuring Screen Capture
Select the button to be used for
capturing the screen onto the
clipboard. In the example on the
right, “Button 1" is used.
Tap on the [Activate] menu option
botton to enable screen capturing.
Screen Capture is now set and will
remain set as long as [X Cancel]
option is not selected.
1 DATECS Ltd.
www.datecs.bg
PP-55 User’s Manual Version 2.05
Page 45
Screen Capture
(PocketPC)
Step #3: Capturing a Screen
Display the screen to be captured.
The example on the right shows the
program folder screen.
Press on the capture key [assigned
in Print Manager] for capturing the
screen.
A beep sound will indicate that
screen capture has completed.
Step #4: Printing Screen Capture
Navigate back to the PP-55
PrintManager as shown on the
right.
Select "Clipboard picture" from the
“Select and print clipboard data"
option as shown on the right.
1 DATECS Ltd.
www.datecs.bg
PP-55 User’s Manual Version 2.05
Page 46
Barcode Printing
(PocketPC)
The following is a step-by-step process of printing Barcodes. The barcodes
supported by the PP-55 is listed below with data length and data type.
Bar-code type
UPC-A
UPC-E
JAN13 (EAN)
JAN 8 (EAN)
CODE 39
ITF
CODABAR (NW-7)
CODE 128
CODE 93
Data Length
11
11
12
7
-
Data Type
Numbers
Numbers
Numbers
Numbers
Alphanumeric
Numbers
Alphanumeric
128 ASCII
Alphanumeric
Step #1: Opening Print Barcode
Run PP-55 Print Manager.
Tap on the [Other] menu option
at the bottom left of the screen.
Tap on the [Print Barcode] menu
Option
1 DATECS Ltd.
www.datecs.bg
PP-55 User’s Manual Version 2.05
Page 47
Barcode Printing
(PocketPC)
Step #2: Barcode Printing
Select barcode type to print.
Enter the data for the barcode.
Set the Width and Height of the
barcode.
Set the size and position of the
readable text.
Tap on the [Print it] command to
print barcode.
1 DATECS Ltd.
www.datecs.bg
PP-55 User’s Manual Version 2.05
Page 48
Magnetic Card Reader
(PocketPC)
The following is a step-by-step process of reading data using the magnetic
card reader feature of the PP-55MS.
Step #1: Open Magnetic Card Reader
Run PP-55 Print Manager.
Tap on the [Other] menu option
at the bottom left of the screen.
Tap on the [Magstripe Card Reader]
menu Option.
Step #2: Reading Card Data
Select the tracks to read.
Tap on the [Read card data]
command option to start reading.
Note: The card reader LED will turn
On when the PP-55 is ready.
Swipe the card when the PP-55
card reader LED indicates ready.
Developer Notes:
Integrating the magnetic reader feature into an application
requires the use of the PP-55 SDK's. For detailed information on
integrating the card reader feature, refer to the section
"Developing Solutions (for PocketPC)".
1 DATECS Ltd.
www.datecs.bg
PP-55 User’s Manual Version 2.05
Page 49
Barcode Reader
(PocketPC)
The following is a step-by-step process using the built-in barcode reader of
the PP-55MS BC.
Step #1: Open Barcode Reader
Run PP-55 Print Manager.
Tap on the [Other] menu option at
the bottom left of the screen.
Tap on the [Barcode Reader]
menu Option.
Step #2: Reading Barcodes
Check to see if the symbol type
is enabled.
Tap on the [Read Barcode]
command option to start reading
barcode.
The barcode data read is
displayed here.
Developer Notes:
Integrating the barcode reader feature into an application requires
the use of the PP-55 SDK's. For detailed information on integrat
ing the card reader feature, refer to the section "Developing
Solutions (for PocketPC)".
1 DATECS Ltd.
www.datecs.bg
PP-55 User’s Manual Version 2.05
Page 50
Document Printing
(PocketPC)
The following is a step-by-step process of printing a *.psw document created using Microsoft Pocket Word.
Step #1: Select Pocket Word file:
Create a new document using
Pocket Word and save it.
The new file is saved with the
*.psw file extension.
Open the PP-55 Print Manager.
Under "Choose to print Pocket
Word file", choose the file you
created as shown on the right.
Step #2: Displaying file contents:
Once a document is selected,
Print Manager displays the
contents of the document as
shown on the right.
Tap on the [OK] command option in
the upper right corner of the screen
to display the Print screen.
1 DATECS Ltd.
www.datecs.bg
PP-55 User’s Manual Version 2.05
Page 51
Document Printing
(PocketPC)
Step #3: Printing the document:
Printer must be set to
"PP55".
Port must be set to
"COM1: 115200".
Orientation can be set to your
preference.
Tap on the [OK] command option
to start printing.
Note: Tapping on the [X Cancel]
command option exits printing.
Pocket Word document print results:
1 DATECS Ltd.
www.datecs.bg
PP-55 User’s Manual Version 2.05
Page 52
Developing Solution
(PocketPC)
Integrating the PP-55 into your Pocket PC solution requires the use of the
Pocket PC OS SDK for PP-55. The SDK incorporates API specific to
developing application using the integrated Card reader and Barcode reader as well as incorporating Graphics, Barcode and Text printing capability
of the PP-55.
The table below shows the SDKs currently available for Pocket PC
devices.
SDKs
VB CF.Net
Embedded VB
Embedded VC
Appforge
Language
Basic
Basic
C++
Basic
IDE
Visual Studio .Net - Microsoft
eVB - Microsoft
eVC - Microsoft
Appforge - Appforge
The figure below shows the relationship of these SDKs. Note that library
extensions require the root library/driver be installed on the device.
For details on using the different SDK, see section "Installing Developer
Tools" and refer to the SDKs (SDK_Help.html) file located in the SDK's
subdirectory.
For the latest PP-55 SDK's, visit our developer web site at:
http://pda.datecs.bg
1 DATECS Ltd.
www.datecs.bg
PP-55 User’s Manual Version 2.05
Page 53
BlackBerry OS Devices
Devices compatible with the PP-55 are categorized by OS "Operating
System" running on the device it self. For example the devices below all
use some version of the BlackBerry OS. Therefore, the PP-55 printing
tools and SDKs for BlackBerry OS will run on these devices. However, not
all BlackBerry devices are supported by PP-55 Hardware or Software.
Please refer to the section "Compatible Mobile Device" and verify that your
device is currently supported by the PP-55.
These are a few of the BlackBerry OS devices currently supported.
957
6700
5810
7200
6510
7510
Devices are added continuously. For updates on supported
device, visit our web site at http://www.datecs.bg
1 DATECS Ltd.
www.datecs.bg
PP-55 User’s Manual Version 2.05
Page 54
Loading Device Software (BlackBerry)
The PP-55 comes with a application used for printing messages from your
BlackBerry device. The BlackBerryMail applications (for Java devices) and
the DatecsPrint application (for C++ devices) are first installed onto your
PC using the steps in the section "Installing Software onto PC".
Refer to the section "Installing Software onto PC" if you have not already
installed the PrintSuite onto your computer.
Installing BlackBerryMail Application:
Installing BlackBerryMail on your BlackBerry device requires the use of the
BlackBerry Desktop Manager program. The Desktop Manager program
comes with your BlackBerry device. Before proceeding verify that the
steps below have been completed.
Step #1: Refer to the section "Installing Software onto PC" if you have
not already installed the PrintSuite onto your computer. Follow
the installation instructions to extract the PrintSuites onto your
computer.
Step #2: Requires that BlackBerry Desktop Manager program is already
installed onto your PC. Verify that Desktop Manager is installed
and can connect to your BlackBerry device. and there are no
problems synchronizing with the device.
If the above steps are completed, continue to the next section to
begin the installation of mail print application onto your device.
1 DATECS Ltd.
www.datecs.bg
PP-55 User’s Manual Version 2.05
Page 55
Loading Device Software
(BlackBerry)
Installing BlackBerry device files:
Step1:
Run the BlackBerry Desktop Manager application as shown
below.
Step2:
Click on the "Application Loader" icon to launch the application
loader wizard as shown below.
Step3:
Click on the [Add] command option in the application loader
wizard to open the file open window as shown of following page.
1 DATECS Ltd.
www.datecs.bg
PP-55 User’s Manual Version 2.05
Page 56
Loading Device Software
Step4:
(BlackBerry)
Locate the BlackBerryMail.alx or DatecsPrint.alx installation file
as shown in the figure below and click on the [Open] command
option to complete the installation of the mail application onto
the BlackBerry device.
Note that this is the default folder used in the "Installing Software onto PC"
section. If you changed the default folder during the installation, you must
navigate to that folder's location.
1 DATECS Ltd.
www.datecs.bg
PP-55 User’s Manual Version 2.05
Page 57
Software Compatibility
(BlackBerry)
As shown in the diagram below, data can be printed from the Datecs mail
application as well as other applications written using the PP-55 SDKs or
from applications written to send data directly to the printer.
BlackBerry
Mail Printing
Application
Applications
developed
with
BlackBerry
C++
Applications
developed
with serial
port driver.
Applications
developed with
BlackBerry
Java
JED
Datecs
BlackBerry
Mail App.
PP-55
BlackBerry
Printer C++
SDK
Direct
Connect
PP-55
BlackBerry
Printer Java
SDK
PP-55 / PP-55MS printer
Note: Because of the PP-55 printing software package limitations, not all
BlackBerry application file format are supported.
1 DATECS Ltd.
www.datecs.bg
PP-55 User’s Manual Version 2.05
Page 58
Printing Contacts
(BlackBerry)
The DatecsPrint application (for older C++ OS devices) can print contacts
from BlackBerry Address book application. The following is a step-by-step
process of contact printing.
Step #1: To open the DatecsPrint application,
scroll through the Icons using the
trackwheel as shown in figure on
the right.
Click the trackwheel or press on the
[Enter] key to open the application.
Step #2: Scroll down using the trackwheel
and select [Print Address Book]
option as shown in figure on the
right.
Click the trackwheel or press on
the [Enter] key to open the
contacts list screen.
Step #3: Scroll down the list and select the
contact to print by highlighting the
contact.
Click on the trackwheel or [Enter]
key to start printing.
1 DATECS Ltd.
www.datecs.bg
PP-55 User’s Manual Version 2.05
Page 59
Printing Messages
(BlackBerry)
The DatecsPrint application can also print message from BlackBerry message application. The following is a step-by-step process of message printing.
Step #1: To open the DatecsPrint application,
scroll through the Icons using the
trackwheel as shown in figure on
the right.
Click the trackwheel or press on the
[Enter] key to open the application.
Step #2: Scroll down using the trackwheel
and select [Print Messages] option
as shown in figure on the right.
Click the trackwheel or press on the
[Enter] key to open the message list
screen.
Step #3: Scroll down the list and select the
message to print by highlighting the
message.
Click on the trackwheel or [Enter]
key to start printing.
1 DATECS Ltd.
www.datecs.bg
PP-55 User’s Manual Version 2.05
Page 60
Printing Messages
(BlackBerry)
The BlackBerryMail application can print message from the newer
BlackBerry devices with Java OS. The following is a step-by-step process
of message printing.
Step #1: To open the BlackBerryMail
application, scroll through the Icons
using the track-wheel as shown in
figure on the right.
Click the trackwheel or press on the
[Enter] key to open the application.
Step #2: Scroll down using the trackwheel
and select [SENT] option as shown
in figure on the right.
Click on the trackwheel or press the
[Enter] key to display the available
messages to print.
Step #3: Scroll down using the trackwheel
and select the message to print as
shown in figure on the right.
Step #4: Click on the trackwheel to display
menu options and select [Print
Message] to start printing as shown
on the right.
1 DATECS Ltd.
www.datecs.bg
PP-55 User’s Manual Version 2.05
Page 61
BlackBerryMail Options
(BlackBerry)
The BlackBerryMail application for newer BlackBerry devices with Java OS
can be configured to print messages. The following is a step-by-step
process of message printing.
Step #1: To open the BlackBerryMail
application, scroll through the Icons
using the track-wheel as shown in
figure on the right.
Click the trackwheel or press on the
[Enter] key to open the application.
Step #2: Scroll down using the trackwheel
and select [Settings] option as
shown in figure on the right.
Click on the trackwheel or press
the [Enter] key to display the
Control Panel screen.
Step #3: Select the Print Options to enable
As shown on the right.
Click on the trackwheel to display
the [Change Option] menu
command as shown on the right.
Step #4: Scroll down using the trackwheel
and select Mail Options option to
enable as shown in figure on the
right.
Scroll down to [Close] to save
settings.
1 DATECS Ltd.
www.datecs.bg
PP-55 User’s Manual Version 2.05
Page 62
Developing Solution
(BlackBerry)
Integrating the PP-55 into your BlackBerry solution requires the use of the
BlackBerry OS SDK for PP-55. The SDK incorporates API specific to
developing application using the integrated Card reader and Barcode
reader as well as incorporating Graphics, Barcode and Text printing
capability of the PP-55.
The table below shows the SDKs currently available for BlackBerry
devices.
SDKs
BlackBerry C++
BlackBerry Java
BlackBerry Java
Language
C++
Java
Java
IDE
Visual Studio 6.0 - Microsoft
BlackBerry Java JDE 3.2.1 - RIM
BlackBerry Java JDE 3.7 - RIM
For details on using the different SDK, see section "Installing Developer
Tools" and refer to the SDK's (SDK_Help.html) file located in the SDK's
subdirectory.
For the latest PP-55 SDK's, visit our developer web site at:
http://pda.datecs.bg
1 DATECS Ltd.
www.datecs.bg
PP-55 User’s Manual Version 2.05
Page 63
Magnetic Card Reader
(MS Version)
The PP-55MS has a built-in magnetic card reader. The card reader
incorporates a (3)-track magnetic read head requiring a single swipe to
read field data from all three tracks.
Magnetic Card Reader
Reader Activation
(Indicator)
The magnetic read head faces towards the PDA cradle. When placing the
card into the reader, the magnetic strip must be facing away from the
PDA’s cradle as show in the figure below. Keep the edge of the card flat
on the inner base of the reader to ensure that the magnetic strip passes
over the read head evenly.
Magnetic surface
(Direction)
Developer Notes:
Integrating the magnetic card reader feature into an application requires
the use of the PP-55 SDK’s. For detailed information on integrating the
card reader feature, refer to the User’s Manual for your specific device
type.
1 DATECS Ltd.
www.datecs.bg
PP-55 User’s Manual Version 2.05
Page 64
Barcode Reader
(BC Version)
The PP-55 BC offers a version with built-in barcode reader. The barcode
reader incorporates a linear image scan head and is capable of reading
1D barcodes.
Barcode Reader
The effective reading distance of the PP-55 barcode reader is approximately 10 cm. To scan a barcode, position the read head as close to the
barcode label as possible. Activate the scanner then slowly pull back the
unit increasing the distance between the barcode and read head until the
barcode has been read by the scanner.
Effective Reading
Distance (~10 cm)
Developer Notes:
Integrating the barcode reader feature into an application requires the use
of the PP-55 SDK’s. For detailed information on integrating the barcode
reader feature, refer to the User’s Manual for your specific device type.
1 DATECS Ltd.
www.datecs.bg
PP-55 User’s Manual Version 2.05
Page 65
Smart Card Reader
(SC Version)
The PP-55 offers a version (factory option) with built-in smart card reader.
The PP-55 SC supports smart cards that conform to ISO 7816-1/2/3. It
reads and writes all microcontroller cards.
Developer Notes:
Integrating the Smart Card
reader feature into an application requires the use of
the SCR SDK’s. For detailed
information on integrating
the barcode reader feature,
refer to the User’s Manual
for your specific device type.
1 DATECS Ltd.
www.datecs.bg
PP-55 User’s Manual Version 2.05
Page 66
Installing Developer Tools
The PP-55 comes with developer tools used for integrating printing into
your mobile application. The installation program "PPDevelop.EXE" can be
found on the CD that is supplied with the PP-55. The steps below will help
you to install the developer tools.
Step 1: Using the Windows [RUN] command, select the "PPDevelop.exe"
file located on the CD-ROM provided with the PP-55 printer as
shown below.
Step 2: Click on the [Next] command button to continue.
1 DATECS Ltd.
www.datecs.bg
PP-55 User’s Manual Version 2.05
Page 67
Installing Developer Tools
Step 3: Click on the [Next] command button to finish the installation.
Note:
For the latest developer tools and PrintSutes, visit our developer
web site at http://pda.datecs.bg for the latest updates.
1 DATECS Ltd.
www.datecs.bg
PP-55 User’s Manual Version 2.05
Page 68
Troubleshooting
If you’re having a printing problem refer to the table below for possible
causes.
Item
1
Problem
Paper feeds after issuing a
print job but no printed text
visible on paper.
Possible Cause
Thermal media is specially coated on outside of roll.
Remove paper roll and reload properly. See section
“Loading Paper” for details on loading paper.
Paper cover not installed properly. See section
“Loading Paper” for details on replacing paper cover.
Printer out of paper.
2
On-line LED blinks fast
continuously.
3
Text and/or graphics are
printed very light.
4
Palm Device –
Verify Control Panel configuration set to PP-55 and
PrintManager Printer icon
115200 BPS. See section “Control Panel” for details on
battery shows low or no
voltage but PP-55 battery is changing configuration.
fully charged.
5
Strange characters are
printed when printing.
Serial communication speed (Baud Rate) not same
as PDA.
6
On-line LED always
solid RED
Battery voltage low. See section on charging
battery pack.
7
Printer stops responding to
print and paper feed
commands.
Remove battery for 5 seconds and
reconnect battery.
Paper not properly loaded. See section “Loading
Paper” for details on loading paper.
Battery level low. Recharge battery pack.
1 DATECS Ltd.
www.datecs.bg
PP-55 User’s Manual Version 2.05
Thermal media not imaging correctly. Verify that you
are using the recommended thermal media.
Page 69
Contact Information
Headquarters:
DATECS Ltd.
1784 Sofia, Bulgaria
115A Tsarigradsko shosse
tel.: +359 2 974 00 55
fax: +359 2 974 11 00
http://www.datecs.bg
e-mail: [email protected]
1 DATECS Ltd.
www.datecs.bg
PP-55 User’s Manual Version 2.05
Page 70
THE INFORMATION IN THIS DOCUMENT CANNOT BE REPRODUCED IN ANY
MECHANICAL, ELECTRICAL OR ELECTRONIC WAY AND UNDER ANY
CIRCUMSTANCES WITHOUT THE WRITTEN CONSENT FROM DATECS LTD.
VERSION 2.05 / 2005