1
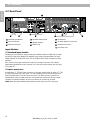
Bose® Model 2150 Commercial Power Amplifier Installer’s Guide Guía de instalación Notice d’installation Ch 1 M 2150 Ch 2 Commercial Power Amplifier Clip -6dB -12dB -20dB Signal Power ∞ 0dB Thermal Protect Ready On Off ∞ 0dB Network Standby June 21, 2002 AM264080_00_V.pdf Bose Corporation English 1.0 Safety Information Warning To reduce the risk of fire or electric shock, do not expose the unit to rain or moisture. CAUTION RISK OF ELECTRICAL SHOCK DO NOT OPEN CAUTION: TO REDUCE THE RISK OF ELECTRIC SHOCK, DO NOT REMOVE COVER (OR BACK). NO USER-SERVICEABLE PARTS INSIDE. REFER SERVICING TO QUALIFIED PERSONNEL. These CAUTION marks are located on the back of the Model 2150 commercial power amplifier. The lightning flash with arrowhead symbol, within an equilateral triangle, is intended to alert the user to the presence of uninsulated dangerous voltage within the system enclosure that may be of sufficient magnitude to constitute a risk of electric shock. The exclamation point within an equilateral triangle, as marked on the system, is intended to alert the user to the presence of important operating and maintenance instructions in this owner’s guide. Important Safety Instructions 1. 2. 3. 4. 5. 6. 7. 8. 9. 10. 11. 12. 13. 14. 15. Read and follow these instructions. Heed all warnings – on the product and in the owner’s guide. Do not use this apparatus near water or moisture. Clean only with a dry cloth. Do not block any ventilation openings. Install in accordance with the manufacturer’s instructions – To ensure reliable operation of the product and to protect it from overheating, put the product in a position and location that will not interfere with its proper ventilation. Do not install near any heat sources, such as radiators, heat registers, stoves, or other apparatus (including amplifiers) that produce heat. Do not defeat the safety purpose of the grounding-type plug. A grounding-type plug has two blades and a third grounding prong. The third prong is provided for your safety. If the provided plug does not fit in your outlet, consult an electrician for replacement of the outlet. Protect the power cord from being walked on or pinched, particularly at plugs, convenience receptacles, and the point where they exit from the apparatus. Only use attachments/accessories specified by the manufacturer. Use only with a cart, stand, tripod, bracket or table specified by the manufacturer or sold with the apparatus. When a cart is used, use caution when moving the cart/apparatus combination to avoid injury from tip-over. Refer all servicing to qualified service personnel. Servicing is required when the apparatus has been damaged in any way: such as power supply cord or plug is damaged; liquid has been spilled or objects have fallen into the apparatus; the apparatus has been exposed to rain or moisture, does not operate normally, or has been dropped – Do not attempt to service this product yourself. Opening or removing covers may expose you to dangerous voltages or other hazards. Please call Bose® to be referred to an authorized service center near you. To prevent risk of fire or electric shock, avoid overloading wall outlets, extension cords, or integral convenience receptacles. Do not let objects or liquids enter the product – as they may touch dangerous voltage points or short-out parts that could result in a fire or electric shock. See product enclosure back for safety related markings. No naked flame sources, such as lighted candles, should be placed on the apparatus. 2 AM264080_00_V.pdf • June 21, 2002 Contents English Where to find... Español 1.0 Safety Information ..................................................................................................... 2 2.0 Before You Begin....................................................................................................... 4 2.1 Unpacking the amplifier ....................................................................................... 4 2.2 The Bose® Model 2150 commercial power amplifier .......................................... 4 3.0 Using The Amplifier ................................................................................................... 5 3.1 Using the Model 2150 commercial power amplifier .......................................... 5 3.2 Location and general precautions ....................................................................... 5 3.3 Mechanical considerations .................................................................................. 5 3.3.1 Rear support .............................................................................................. 5 3.4 Thermal considerations ....................................................................................... 6 3.5 AC power considerations .................................................................................... 6 3.6 Magnetic leakage considerations ........................................................................ 6 4.0 Operation .................................................................................................................. 7 4.1 Front panel .......................................................................................................... 7 4.2 Rear panel ......................................................................................................... 10 5.0 Installation ................................................................................................................ 19 5.1 Installing Bose EQ cards ................................................................................... 19 5.2 Input wiring ........................................................................................................ 23 5.2.1 Balanced operation ................................................................................ 23 5.2.2 Unbalanced operation ............................................................................ 24 5.3 Output wiring ..................................................................................................... 27 5.3.1 Polarity .................................................................................................... 27 5.3.2 STEREO/MONO and Dual Mono ............................................................ 27 5.3.3 STEREO/MONO switch .......................................................................... 28 5.3.4 EQ BI-AMP/FULL-RANGE switch .......................................................... 28 5.3.5 Stereo operation ..................................................................................... 29 5.3.6 Bridged Mono ......................................................................................... 30 5.3.7 Parallel Mono .......................................................................................... 31 6.0 Troubleshooting ....................................................................................................... 32 Appendix A: Features, Warranty, Service ....................................................................... 33 Appendix B: Specifications ............................................................................................. 35 Bose Corporation ................................................................................... inside back cover Français Please read this installer’s guide The Model 2150 commercial power amplifier is carefully engineered to provide superior sound quality. This guide will help you set up and operate your system properly. Record your serial number here Model 2150 commercial power amplifier: __________________________________________ Date of purchase _______________________ Retailer’s name _______________________ For ease in obtaining service, we recommend that you keep your purchase receipt, or a copy of the receipt, in this owner’s guide. 3 AM264080_00_V.pdf • June 21, 2002 English 2.0 Before You Begin Thank you for purchasing a new Bose® commercial power amplifier. It is backed by stateof-the-art engineering and manufacturing techniques to bring you the best in quality craftsmanship and reliable performance. The instructions presented in this installer’s guide are written for professionals who are familiar with the installation and operation of the equipment. If you are not, contact an authorized Bose Professional Products dealer. 2.1 Unpacking the amplifier Carefully unpack your amplifier. Keep the original carton and packing materials for possible future use. Check for any visible signs of damage. If the amplifier appears damaged, do not use it. Notify Bose Product Support or your authorized Bose Professional Products dealer. 2.2 The Bose Model 2150 commercial power amplifier The Bose Model 2150 commercial power amplifier is specially designed for commercial sound applications. Its rugged construction and low profile allow the amplifier to sustain heavy use with reliability and space-saving economy. Accurate sound and ample power make this amplifier ideal for critical listening applications. The Model 2150 amplifier is rated at 150 watts per channel into 4Ω, 8Ω, 25V, 35V, 50V, 70V or 100V. In bridged mono operation, it is rated at 300 watts. Sophisticated protection circuits have been designed into the amplifier to protect your system from unexpected faults. They also help protect the amplifier from excessive temperature, continuous current limiting, and shorted outputs. The balanced inputs of the amplifier use a high quality, high common-mode rejection differential amplifier for exceptional hum and noise rejection. In addition, the Model 2150 amplifier is equipped with an input module to allow for separate equalization of each channel (provided the correct equalization card is installed). Equalization cards (EQ cards) are available for all Bose professional loudspeakers requiring active equalization. A sample setup might involve one Model 2150 amplifier driving two channels of 402® loudspeakers in stereo mode. A second Model 2150 could be added to drive a 502B® module. Alternatively, just one amplifier could be used to drive the 402 loudspeakers on one channel and the 502B module on the other channel. Many configurations are possible using the four loudspeakers above. This flexibility can be achieved by installing the EQ cards for the desired setup. 4 AM264080_00_V.pdf • June 21, 2002 3.0 Using The Amplifiers 3.1 Using the Bose Model 2150 commercial power amplifier ® English Once you have installed and wired the amplifier, follow these tips to get the most from it: • Verify that all switches (STEREO/MONO, CLIPPING LIMITER, EQ BI-AMP/FULL RANGE AND LEVEL DEFEAT) are set to the mode you want. • Turn down the amplifier controls when you power up the system for the first time. Then advance them slowly, one at a time, to verify that each channel is operating correctly. • Set input level controls high enough to allow the preceding device to drive the amplifier to full output. Usually, this is wide open (fully clockwise). • Write down the settings, either on paper or self-stick dots, and attach to the front of the amplifier. • In bi-amplified (multi-amp) systems, start with the low frequency amps turned down or off. Check each frequency range from highest to lowest to make sure each loudspeaker component is operating correctly. 3.2 General precautions Caution: Place the unit where it will be protected from heat and allow adequate ventilation. Place it away from direct heat sources, such as heating vents and radiators. Make sure the air can circulate freely behind, beside, and above the unit. 3.3 Mechanical considerations The amplifier requires two 3.5" (8.9 mm) rack space units with a 16" (40.6 cm) inside depth (including the rear supports). When mounting, use four screws with washers to prevent marring the front panel. Neoprene rubber washers are a good choice because they grip the screw head and prevent the screws from backing out from vibration or during transportation. 3.3.1 Rear support Caution: If either unit is rack mounted and the rack is transported, you must mechanically support the rear of the amplifier. You can place a shelf across the rear of the amplifier or use brackets in such a way as to support the rear of the unit. 5 AM264080_00_V.pdf • June 21, 2002 English 3.0 Using The Amplifiers 3.4 Thermal considerations When the amplifier is used freestanding, no thermal considerations are necessary other than keeping sufficient ventilation around the unit. Bose® Model 2150 amplifiers may be stacked directly on top of each other without spacer panels. If a Model 2150 amplifier is used with other amplifiers, be sure the heat output from the amplifier does not interfere with the adequate ventilation of the others. If the unit is rack mounted, allow for adequate ventilation exits in front of and behind the amplifier. When several amplifiers are mounted together in a rack, you may need to provide air inlets and a fan from the outside of the rack. CAUTION: Do not allow the chassis to exceed the maximum operating temperature of 50˚ C. Be aware of conditions in an enclosed rack that may increase the temperature above room ambient conditions. 3.5 AC power considerations Be sure to plug your amplifier into an outlet capable of supplying the correct voltage specified for your model. Check to be sure the circuit can provide enough current to allow full-power operation of all the amplifiers in your system. The power plug serves as the main disconnect device and should always be easily accessible after installation. The current demand of a power amplifier varies depending on the impedance of the load, the output level of the amplifier, and the crest factor and duty cycle of the program material. For example, consider typical conditions during rock music reproduction, with both channels driven into 4 ohms until musical peaks are just below clipping. Under these conditions, the Bose Model 2150 amplifier requires an average of 4.2 amps for 120V versions (2.2 amps for 220-240V versions). 3.6 Magnetic leakage considerations You can mount the Model 2150 amplifier without concern for magnetic flux leakage. However, it is not a good idea to mount any power amplifier near a microphone input transformer or magnetic storage media. 6 AM264080_00_V.pdf • June 21, 2002 4.0 Operation Ch 1 English 4.1 Front Panel M 2150 Ch 2 Commercial Power Amplifier Clip -6dB -12dB -20dB Signal Power ° On Thermal Protect Ready 0dB Off ° Network 0dB Standby 2 3 1 1 Level Controls 4 Network Activity Indicator 2 Status Indicators 5 Standby Indicator 3 Level Indicators 6 Power Switch 4 5 6 7 7 Removable Rack Ears 1. Level controls Independent level controls are provided for Channel 1 and Channel 2. When each level control is set fully clockwise the channel operates at maximum gain. Turning the controls counterclockwise attenuates the output signal. Each level control adjusts incrementally in steps of ±2.5dB. The level knobs can be removed to prevent tampering with the amplifier volume. Once the amplifier level is set, remove the knobs. Gently pull the knobs straight off and store them in a safe place for future use. The controls can then be replaced with the supplied plastic covers. See Figure 1 below. Ch 1 M 2150 Ch 2 Commercial Power Amplifier Clip -6dB -12dB -20dB Signal Figure 1 Level control knobs can be removed and covered Power ∞ On Thermal Protect Ready 0dB Ch 1 Off ∞ 0dB Network Standby M 2150 Ch 2 Commercial Power Amplifier Clip -6dB -12dB -20dB Signal Power ∞ 0dB Thermal Protect Ready On Off ∞ 0dB Network Standby 7 AM264080_00_V.pdf • June 21, 2002 4.0 Operation English 4.1 Front Panel (Cont.) Ch 1 M 2150 Ch 2 Commercial Power Amplifier Clip -6dB -12dB -20dB Signal Power ° 0dB Thermal Protect Ready On Off ° Network 0dB Standby 2 3 1 1 Level Controls 4 Network Activity Indicator 2 Status Indicators 5 Standby Indicator 3 Level Indicators 6 Power Switch 4 5 6 7 Removable Rack Ears 2. Level indicators Figure 2 Ch 1 Ch 2 Level indicators Clip -6dB -12dB -20dB Signal The level indicators (see Figure 2) for each channel reflect the gain of each output stage. The following LEDs light up when the signal reaches each respective threshold: • CLIP – red light indicates the signal is clipping (0dB) • -6dB – yellow light indicates the signal is at -6dB below clip • -12dB – green light indicates the signal is at -12dB below clip • -20dB – green light indicates the signal is at -20dB below clip • SIGNAL – green light indicates the signal is at -40dB below clip It is common to operate the amplifier so that the CLIP (red) LED illuminates at the loudest point. If the CLIP LED remains on for an extended length of time or clipping is audible, then the level should be reduced on the channel(s). 3. Status indicators Figure 3 Thermal Protect Ready Status indicators Status indicators are visible for the following (See Figure 3): THERMAL – A red light indicates when the amplifier temperature has exceeded its working limits. When the THERMAL LED illuminates, both channels of the amplifier will become muted. The amplifier will shut down and reset itself when conditions return to a safe operating temperature. 8 AM264080_00_V.pdf • June 21, 2002 7 4.0 Operation Ch 1 English 4.1 Front Panel (Cont.) M 2150 Ch 2 Commercial Power Amplifier Clip -6dB -12dB -20dB Signal Power ° 0dB Thermal Protect Ready On Off ° Network 0dB Standby 2 3 1 1 Level Controls 4 Network Activity Indicator 2 Status Indicators 5 Standby Indicator 3 Level Indicators 6 Power Switch 4 5 6 7 7 Removable Rack Ears 3. Status indicators (cont.) PROTECT – A yellow light indicates if there is: 1. An over or under voltage condition 2. An over current condition 3. A short circuit Any of these conditions will immediately mute both channels on the amplifier. Check all connections and level settings. The amplifier will automatically shut down and reset itself when conditions return to a safe operating temperature. READY – A green light indicates that the amplifier is on. 4. Network activity indicator In the future a network compatible input card will be available for the amplifiers. When this card is installed, the network LED will flash yellow when the amplifier is receiving network information. 5. Standby indicator The LED illuminates yellow when the amplifier is set to STANDBY (standby). 6. Power switch The power switch has three positions (ON/OFF/STANDBY). When on, the READY indicators illuminate green. When off (middle position), no power reaches the unit and the sequencing function is not active. When set to STANDBY, the AC mains is connected to the standby circuit. The circuit awaits a 12V DC current to be supplied to the amplifier. When the DC current is detected, a triac allows the AC mains to be connected to the power supply, turning the amplifier on. Note: Standby and Sequencing modes are activated at the amplifier only when using the standard input module. See Section 4.3.1 for additional information regarding the sequence feature. 7. Removable rack ears Caution: If you shelf-mount the amplifier, the rack ears can be removed. Once removed, replace the screws that fastened the rack ears to the chassis. This will maintain the structural integrity of the chassis. 9 AM264080_00_V.pdf • June 21, 2002 4.2 Rear Panel 9 Use Class 2 Wiring 70V 50V 100V 35V 25V 8 4 Com 70V 50V CH 1 100V 35V 25V 8 CH 2 4 AVIS RISQUE DE CHOC ELECTRIQUE NE PAS OUVRIR CE CARTER, RESERVE AU PERSONNEL AUTORISE. Com CAUTION RISK OF ELECTRICAL SHOCK DO NOT OPEN COVER, AUTHORIZED PERSONNEL ONLY. WARNING ® IN FX ON CLIP ON HP 120 Hz IN FX ON CLIP ON HP 120 Hz RISK OF HAZARDOUS ENERGY! MAKE PROPER SPEAKER CONNECTIONS. SEE OPERATING MANUAL BEFORE USING. CH 2 SEQUENCE REMOTE LEVEL CH 1 SND RCV FX CH 1 MADE IN U.S.A. OF DOMESTIC AND FOREIGN COMPONENTS. RECV SEND RECV + PUSH + + 2 1 1 3 CH2 3 CH2 EQ. OUT CH1 + PN# 1234567 8 7 2 CH1 4 6 10 INPUT CH 1 SEQUENCE EQUALIZATION ON 1 3 J20018292 + SEND RECEIVE PUSH COM CH2 CH1 +5V D.O.M.: Model 2150 BOSE CORPORATION FRAMINGHAM, MA 01701-9168 U.S.A. SEND ENERGIE ELECTRIQUE DANGEREU SE. VOIR LANOTICE DE FONCTIONNEMENT. 2 FX CH 2 SERIAL No.: INPUT IMPEDANCE 25K OHMS EACH LEG TO GROUND (TOTAL 50K OHMS BALANCED) AVERTISSEMENT INPUT CH 2 OUT OFF OFF 80 Hz 120VAC, 4.6A max. 60 Hz 600W For bridged operation. Consult user manual. WARNING TO REDUCE THE RISK OF FIRE OR ELECTRICAL SHOCK DO NOT EXPOSE THIS EQUIPMENT TO RAIN OR MOISTURE This device complies with part 15 of the FCC rules. Operation is subject to the following conditions: (1) This device may not cause harmful interference and (2) this device must accept any interference received, including interference which may cause undesired operation. Complies with Canadian ICES-003 Class A specifications. OUT OFF OFF 80 Hz English 4.0 Operation 5 2 3 1 Standard Input Module 4 Equalizer Present LEDs 7 Dip Switches 2 Input Connectors 5 Speaker Outputs 8 AC Power Sequence Connector 3 EQ Out Connectors 6 Effects Loop 9 Remote Level Control 10 IEC Power Cord Input Modules 1. Standard input module Through the use of the Bose® input module (the standard module provided with the amplifier) and EQ cards, Bose Model 2150 amplifier can provide active equalization for Bose Model 8, Model 32, Model 32SE, 402®, 502®A, 502B and 802® Series II professional loudspeakers. Each channel of the input module has its own EQ card input connector, which allows independent equalization for each channel. For a view of the input module, refer to Figure 31 on page 28. 2. Input connectors A combination 1⁄4" TRS/XLR input connector on the input module allows for either a 1⁄4" TRS (Tip-Ring-Sleeve) input or a XLR input. The input module quick-connect terminal block is wired in parallel with the TRS/XLR input connector. This allows for easy connection of stripped wires to the provided connector. Two parallel input connectors allow for simple connection of parallel amplifiers. Only one connection per channel can be used. Note: When using the standard input module in mono mode, use CH 2 input only. 10 AM264080_00_V.pdf • June 21, 2002 1 4.0 Operation English 4.2 Rear panel (cont.) 9 Use Class 2 Wiring 70V 50V 100V 35V 25V 8 4 Com 70V 50V CH 1 100V 35V 25V 8 CH 2 4 AVIS RISQUE DE CHOC ELECTRIQUE NE PAS OUVRIR CE CARTER, RESERVE AU PERSONNEL AUTORISE. Com CAUTION RISK OF ELECTRICAL SHOCK DO NOT OPEN COVER, AUTHORIZED PERSONNEL ONLY. WARNING WARNING TO REDUCE THE RISK OF FIRE OR ELECTRICAL SHOCK DO NOT EXPOSE THIS EQUIPMENT TO RAIN OR MOISTURE SEQUENCE REMOTE LEVEL CH 1 SND RCV FX CH 1 MADE IN U.S.A. OF DOMESTIC AND FOREIGN COMPONENTS. RECV SEND RECV + PUSH + + 2 CH1 1 1 3 CH2 3 CH2 EQ. OUT CH1 PN# 1234567 8 7 2 + 4 6 10 INPUT CH 1 SEQUENCE EQUALIZATION ON 1 3 J20018292 + SEND RECEIVE PUSH COM CH2 CH1 +5V D.O.M.: Model 2150 BOSE CORPORATION FRAMINGHAM, MA 01701-9168 U.S.A. SEND ENERGIE ELECTRIQUE DANGEREU SE. VOIR LANOTICE DE FONCTIONNEMENT. 2 FX CH 2 SERIAL No.: INPUT IMPEDANCE 25K OHMS EACH LEG TO GROUND (TOTAL 50K OHMS BALANCED) AVERTISSEMENT INPUT CH 2 OUT OFF OFF 80 Hz CH 2 OUT OFF OFF 80 Hz ® RISK OF HAZARDOUS ENERGY! MAKE PROPER SPEAKER CONNECTIONS. SEE OPERATING MANUAL BEFORE USING. IN FX ON CLIP ON HP 120 Hz IN FX ON CLIP ON HP 120 Hz This device complies with part 15 of the FCC rules. Operation is subject to the following conditions: (1) This device may not cause harmful interference and (2) this device must accept any interference received, including interference which may cause undesired operation. Complies with Canadian ICES-003 Class A specifications. 120VAC, 4.6A max. 60 Hz 600W For bridged operation. Consult user manual. 5 2 3 1 Standard Input Module 4 Equalizer Present LEDs 7 Dip Switches 2 Input Connectors 5 Speaker Outputs 8 AC Power Sequence Connector 3 EQ Out Connectors 6 Effects Loop 9 Remote Level Control 1 10 IEC Power Cord 3. EQ out connectors A 1⁄4" TRS output connector provides access to an equalized line level output signal for each channel. If equalizer cards are installed, this signal has passed through the internal equalizer, but has not passed through the amplifier itself. (For additional information on EQ cards, see Input Modules on page 10.) This is helpful if several devices are going to be driving similar Bose® loudspeakers (402® loudspeakers, for example) with the same source signal. With EQ cards installed in the Model 2150 amplifier, the EQ OUT (output) of the amplifier can be connected to the line level inputs of additional devices driving the same type of Bose loudspeakers (e.g. 402 loudspeakers). Be sure to use EQ cards that correspond to the type of loudspeakers. 4. Equalizer present LEDs When you install an equalizer card, the corresponding LED illuminates to indicate the presence of the card. Each channel can utilize a different card. For example, the Bose Model 2150 commercial power amplifier can have both a 402® and a 502®B equalizer card installed. When you install a 502B card in either card position, it automatically selects the high frequency output of the other card. When a system uses two or more amplifiers, and you are using a 502B module, use the EQ BI-AMP/FULL RANGE switch to run in the bi-amp mode. Note: When EQ cards are installed, the input module recognizes the cards and switches to the equalizer circuitry. If no cards are installed, the input module bypasses the equalizer circuitry and no LED will illuminate. 11 AM264080_00_V.pdf • June 21, 2002 4.2 Rear panel (cont.) Use Class 2 Wiring 70V 50V For bridged operation. Consult user manual. 100V 35V 25V 8 4 Com 70V 50V CH 1 100V 35V 25V 8 CH 2 4 AVIS RISQUE DE CHOC ELECTRIQUE NE PAS OUVRIR CE CARTER, RESERVE AU PERSONNEL AUTORISE. 9 Com CAUTION RISK OF ELECTRICAL SHOCK DO NOT OPEN COVER, AUTHORIZED PERSONNEL ONLY. WARNING WARNING TO REDUCE THE RISK OF FIRE OR ELECTRICAL SHOCK DO NOT EXPOSE THIS EQUIPMENT TO RAIN OR MOISTURE ® SEQUENCE SND RCV MADE IN U.S.A. OF DOMESTIC AND FOREIGN COMPONENTS. RECV + + 2 1 1 3 CH2 3 CH2 CH1 EQ. OUT + PN# 1234567 8 4 6 10 2 CH1 3 J20018292 FX CH 1 SEND RECV + PUSH INPUT CH 1 SEQUENCE EQUALIZATION ON 1 COM CH2 CH1 +5V + SEND RECEIVE PUSH 2 D.O.M.: Model 2150 BOSE CORPORATION FRAMINGHAM, MA 01701-9168 U.S.A. SEND ENERGIE ELECTRIQUE DANGEREU SE. VOIR LANOTICE DE FONCTIONNEMENT. INPUT CH 2 FX CH 2 SERIAL No.: INPUT IMPEDANCE 25K OHMS EACH LEG TO GROUND (TOTAL 50K OHMS BALANCED) AVERTISSEMENT REMOTE LEVEL CH 1 OUT OFF OFF 80 Hz CH 2 OUT OFF OFF 80 Hz 120VAC, 4.6A max. 60 Hz 600W RISK OF HAZARDOUS ENERGY! MAKE PROPER SPEAKER CONNECTIONS. SEE OPERATING MANUAL BEFORE USING. IN FX ON CLIP ON HP 120 Hz IN FX ON CLIP ON HP 120 Hz This device complies with part 15 of the FCC rules. Operation is subject to the following conditions: (1) This device may not cause harmful interference and (2) this device must accept any interference received, including interference which may cause undesired operation. Complies with Canadian ICES-003 Class A specifications. 7 5 3 2 1 1 Standard Input Module 4 Equalizer Present LEDs 7 Dip Switches 2 Input Connectors 5 Speaker Outputs 8 AC Power Sequence Connector 3 EQ Out Connectors 6 Effects Loop 9 Remote Level Control 10 IEC Power Cord 5. Speaker outputs Barrier block speaker outputs on each channel accommodate independent connections for 4Ω, 8Ω, 25V, 35V, 50V, 70V, and 100V. The COM tap is the negative connection (–) and the positive wire (+) connects to the desired load. 6. Effects loop Independent serial effects (FX) Loops per channel allow you to add additional processing. The FX Loop is unbalanced and can accommodate levels up to +20dBu. 7. Dip switches Figure 4 IN FX ON CLIP ON HP 120 Hz IN FX ON CLIP ON HP 120 Hz Dip Switches CH 1 OUT OFF OFF 80 Hz CH 2 OUT OFF OFF 80 Hz Each channel has dip switches for Clip Limiter, High-Pass Filter and FX Loop. Figure 5 Signal Path 120H HPF Signal Effects Input Module Electronic Switch Electronic Switch Electronic Switch VCA Section 80 Hz HPF Signal to Amp Output Stage CLIP ON HP ON 120 Hz HP OFF 80 Hz INFX CLIP OFF Master Level, Remote Level Send Always Hot! Control Voltage Input Configuration Dip Switch Effects Receive OUT FX English 4.0 Operation 12 AM264080_00_V.pdf • June 21, 2002 4.0 Operation 4.2 Rear panel (cont.) Use Class 2 Wiring 70V 50V 100V 35V 25V 8 4 Com 70V 50V CH 1 100V 35V 25V 8 4 CH 2 Com AVIS RISQUE DE CHOC ELECTRIQUE NE PAS OUVRIR CE CARTER, RESERVE AU PERSONNEL AUTORISE. WARNING IN FX ON CLIP ON HP 120 Hz IN FX ON CLIP ON HP 120 Hz RISK OF HAZARDOUS ENERGY! MAKE PROPER SPEAKER CONNECTIONS. SEE OPERATING MANUAL BEFORE USING. SEQUENCE REMOTE LEVEL CH 1 + SEND MADE IN U.S.A. OF DOMESTIC AND FOREIGN COMPONENTS. RECV SEND RECV + PUSH + + 2 1 1 1 3 CH2 3 CH2 EQ. OUT CH1 + PN# 1234567 8 7 2 CH1 4 6 10 INPUT CH 1 SEQUENCE EQUALIZATION ON 3 J20018292 FX CH 1 RECEIVE PUSH COM CH2 CH1 +5V D.O.M.: Model 2150 BOSE CORPORATION FRAMINGHAM, MA 01701-9168 U.S.A. SEND ENERGIE ELECTRIQUE DANGEREU SE. VOIR LANOTICE DE FONCTIONNEMENT. 2 SND RCV FX CH 2 SERIAL No.: INPUT IMPEDANCE 25K OHMS EACH LEG TO GROUND (TOTAL 50K OHMS BALANCED) AVERTISSEMENT INPUT CH 2 OUT OFF OFF 80 Hz CH 2 OUT OFF OFF 80 Hz ® For bridged operation. Consult user manual. WARNING TO REDUCE THE RISK OF FIRE OR ELECTRICAL SHOCK DO NOT EXPOSE THIS EQUIPMENT TO RAIN OR MOISTURE This device complies with part 15 of the FCC rules. Operation is subject to the following conditions: (1) This device may not cause harmful interference and (2) this device must accept any interference received, including interference which may cause undesired operation. Complies with Canadian ICES-003 Class A specifications. 120VAC, 4.6A max. 60 Hz 600W English CAUTION RISK OF ELECTRICAL SHOCK DO NOT OPEN COVER, AUTHORIZED PERSONNEL ONLY. 9 5 2 3 1 Standard Input Module 4 Equalizer Present LEDs 7 Dip Switches 2 Input Connectors 5 Speaker Outputs 8 AC Power Sequence Connector 3 EQ Out Connectors 6 Effects Loop 9 Remote Level Control 1 10 IEC Power Cord FX Loop in/out Engages or bypasses the FX loop. ON (on) allows signals to pass through the FX loop. OFF (off) closes the loop internally. A four-pin barrier block connector is provided on each channel. The FX loop can be used to send and receive unbalanced signals from outboard signal processing equipment such as EQs, Delays, Limiters, etc. To activate the FX loop, set the dip switch to the ON position. The send pins (+ and –) are always active and can be used to daisy chain the signal from one amp to another amp via the receiving amplifier’s normal input. The return pins are activated by the FX dip switch. Clip limiter Select between ON and OFF. When set to ON, the clip limiter will engage when the output stage exceeds 0 dB, preventing output stage clipping. When set to OFF, there is no clip limiter in the signal chain. High-pass filter on/off Selects whether the high-pass filter is ON or OFF. When set to ON, the high-pass filter will default to the selection made on the 80Hz/120Hz dip switch. When set to OFF, there is no high-pass filter in the the signal chain. 120Hz/80Hz (12dB/octave high-pass filter) Selects the frequency for the high-pass filter. Selectable between 120Hz and 80Hz. 13 AM264080_00_V.pdf • June 21, 2002 English 4.0 Operation 8. AC Power sequence connector A three-pin Euro style terminal and mating connector are supplied with each amplifier to allow the amplifier to be sequenced on or off remotely. This allows multiple amplifiers to be powered on or off locally by using the first amplifier as the on/off master. These terminals are located on the rear panel of the amplifier and are labeled SEQUENCE. The three terminals are from left to right and labeled ground, SND, and RCV (see Figure 6). The sequence feature can be used to turn on or off one or more Bose® amplifiers. When used with more than one amplifier the sequence feature will turn the amplifiers on or off sequentially at about 0.5 second intervals. This will prevent a large turn-on surge through the AC mains supply that could possibly cause disruption of the flow of current through the AC mains. Figure 6 SEQUENCE Sequence connectors SND RCV Turning a single amplifier on or off: Connect the positive side of a 12 to 15 VDC supply to the RCV terminal of the SEQUENCE connector. Connect the ground side of the 12 to 15 VDC supply to the GROUND terminal of the sequence connector. The amplifier will remain on as long as the DC voltage is present. The amplifier will turn off when the DC voltage is interrupted by opening the circuit at the SEQUENCE connectors. If a switch is used to control the SEQUENCE circuit, it should be a SPST (single pole single throw) type. A control device such as a contact closure contained within a system such as Creston®, AMX® or Panja® can also be used to remotely control the power of the amplifier. The contact closure must be a latching type and not a momentary contact closure. Turning multiple amplifiers on or off: Starting with the first amplifier in the sequence to be turned on, connect the positive 12 to 15 VDC to the RCV terminal. Next, connect a wire from the SND terminal of the first amplifier to the RCV terminal of the next amplifier to be turned on. Continue in this manner until all amplifiers in the sequence are connected. If the amplifiers are mounted together in a rack where the chassis grounds are connected through common connection via the metal rack rail or by a common AC ground, no other connections should be required (see Figure 7). If this is not the case, simply connect all of the chassis ground terminals together (see Figure 8). Figure 7 SEQUENCE Connections by common AC ground or via the metal rack SND RCV 12-15 VDC Supply SEQUENCE SND RCV SEQUENCE SND RCV 14 AM264080_00_V.pdf • June 21, 2002 4.0 Operation English 8. AC power sequence connector (cont.) Figure 8 SEQUENCE Connect all the chassis ground terminals together SND RCV 12-15 VDC Supply SEQUENCE SND RCV SEQUENCE SND RCV To remotely begin the sequencing function, close the circuit and supply the DC voltage to the RCV receive pin on the first amplifier. The subsequent amplifiers should turn on at 0.5 second intervals. Note: The front panel power switch should be in the STANDBY position on all of the amplifiers in this group. When the DC voltage is interrupted, the amplifiers will then turn off. If there are signal processing and input source devices in the system, they should be turned on before the amplifiers are sequenced on, and these same devices should be powered down after the amplifiers are sequenced off. This will avoid large transient thumps being passed to the loudspeakers attached to the system. When using multiple amplifiers that utilize the SEQUENCE feature of the Bose® 2150, and you would like to power them on, but remote operation is not required, you do not need the DC Voltage to activate the SEQUENCE function. Simply connect the SND send terminal of the first amplifier to the RCV receive terminal of the next amplifier and so on (see Figure 9). The front panel power switch of the first amplifier will activate the SEQUENCE function when switched to the ON position. All other front panel power switches should be in the STANDBY position for the SEQUENCE function to operate properly. Again, if the amplifiers are mounted together in a rack where the chassis grounds are connected together through common connection via the metal rack rail or by a common AC ground, no other connections should be required. If this is not the case, simply connect all of the chassis ground terminals together. Figure 9 SEQUENCE Ground test procedure SND RCV SEQUENCE SND RCV SEQUENCE SND RCV 15 AM264080_00_V.pdf • June 21, 2002 4.0 Operation English 8. AC power sequence connector (cont.) When mounting the amplifiers in a common rack, you should verify if the amplifiers’ chassis are sharing a common ground via the rack rails. To do this use a Digital Multi-Meter DMM to measure the DC resistance between the rack rail and the chassis ground of each unit. Set the DMM to measure DC resistance. Connect one probe to the rack rail and the other to the chassis ground terminal on the SEQUENCE terminal of the Bose® 2150. If the DC resistance is greater than 0.2 ohms we recommend that you connect the chassis ground terminals of the sequence connector together in a daisy chain as in Figure 8. Repeat this for each Bose 2150 in the rack. You do not have to daisy chain the chassis grounds together if there is less than a 0.2 ohm resistance from the rail to the chassis ground of each unit. Let the rack rail be your chassis ground path. Using other amplifiers in the power sequence: The Bose Models 1600 VI and 1800 VI can be used together with the Bose Model 2150 in a sequenced configuration. However, as the sequence terminal on the Bose® Model 1600 VI and 1800 VI has no chassis ground connector, whenever this manual references the chassis ground connector, you should replace it with some reliable ground connection point on the amplifier chassis, such as a screw that is used in fastening the chassis parts together. A good example would be the screws that retain the Bose input modules to the amplifier chassis. All other connections would be exactly as described in this discussion of sequencing hook-up procedures. Note: For operation details regarding the Bose Model 1600 VI and the 1800 VI, please consult the respective user guides provided with those amplifiers. 16 AM264080_00_V.pdf • June 21, 2002 4.0 Operation 4.2 Rear panel (cont.) Use Class 2 Wiring 70V 50V 100V 35V 25V 8 4 Com 70V 50V CH 1 100V 35V 25V 8 4 CH 2 Com AVIS RISQUE DE CHOC ELECTRIQUE NE PAS OUVRIR CE CARTER, RESERVE AU PERSONNEL AUTORISE. WARNING IN FX ON CLIP ON HP 120 Hz IN FX ON CLIP ON HP 120 Hz RISK OF HAZARDOUS ENERGY! MAKE PROPER SPEAKER CONNECTIONS. SEE OPERATING MANUAL BEFORE USING. SEQUENCE REMOTE LEVEL CH 1 + SEND MADE IN U.S.A. OF DOMESTIC AND FOREIGN COMPONENTS. RECV SEND RECV + PUSH + + 2 1 1 1 3 CH2 3 CH2 EQ. OUT CH1 + PN# 1234567 8 7 2 CH1 4 6 10 INPUT CH 1 SEQUENCE EQUALIZATION ON 3 J20018292 FX CH 1 RECEIVE PUSH COM CH2 CH1 +5V D.O.M.: Model 2150 BOSE CORPORATION FRAMINGHAM, MA 01701-9168 U.S.A. SEND ENERGIE ELECTRIQUE DANGEREU SE. VOIR LANOTICE DE FONCTIONNEMENT. 2 SND RCV FX CH 2 SERIAL No.: INPUT IMPEDANCE 25K OHMS EACH LEG TO GROUND (TOTAL 50K OHMS BALANCED) AVERTISSEMENT INPUT CH 2 OUT OFF OFF 80 Hz CH 2 OUT OFF OFF 80 Hz ® For bridged operation. Consult user manual. WARNING TO REDUCE THE RISK OF FIRE OR ELECTRICAL SHOCK DO NOT EXPOSE THIS EQUIPMENT TO RAIN OR MOISTURE This device complies with part 15 of the FCC rules. Operation is subject to the following conditions: (1) This device may not cause harmful interference and (2) this device must accept any interference received, including interference which may cause undesired operation. Complies with Canadian ICES-003 Class A specifications. 120VAC, 4.6A max. 60 Hz 600W English CAUTION RISK OF ELECTRICAL SHOCK DO NOT OPEN COVER, AUTHORIZED PERSONNEL ONLY. 9 5 2 3 1 Standard Input Module 4 Equalizer Present LEDs 7 Dip Switches 2 Input Connectors 5 Speaker Outputs 8 AC Power Sequence Connector 3 EQ Out Connectors 6 Effects Loop 9 Remote Level Control 1 10 IEC Power Cord 9. REMOTE LEVEL (remote level) control Use a 1k to 10k potentiometer, preferably with a reverse log taper. Identify the terminal of the pot to which the wiper is connected when the knob is set to the fully clockwise position. Connect this terminal to the RTN (ground return) terminal of the REMOTE LEVEL input plug. Connect the center terminal of the pot to the CH1 (or CH2) control voltage terminal of the REMOTE LEVEL input plug. The two channels are independently controlled by the voltages applied to the CH1 and CH2 terminals. Both control inputs can be connected together and driven off the wiper of one pot. Connect the remaining terminal of the pot to the +5V terminal of the REMOTE LEVEL input plug. This connection will set the control voltage to 0 with the knob fully clockwise (maximum level), 5V with the knob fully counterclockwise (minimum level). Inside the amplifier, a 0V control voltage corresponds to 0dB added attenuation (that is, added to the attenuation already set by the front panel level control for that channel). A 5V control voltage corresponds to 100dB added attenuation. The control voltage effect is “dB linear”: a 2.5V control voltage input will add 50dB of attenuation: the control characteristic is -1dB per 50mV. REMOTE LEVEL control wiring recommendations For best results, use 24AWG (or larger) control wiring, especially for the +5V and RTN connections. Since 24AWG wire has DC resistance of 25mW per foot, using 1000 feet of 24AWG (total loop resistance of 50W) to make connection to a 5kW potentiometer will result in a 1% voltage drop. This will cause a reduction in the control voltage range. This voltage drop increases as more current is carried by the +5V and RTN conductors; for example, when the 5V line is used to light a remote LED indicating that the amp is ON. In the example given above, an additional 10mA load on the +5V and RTN conductors will cause 10% reduction in control voltage range, yielding lower maximum level and higher minimum level. Within reason, conductor capacitance is not a problem since the control voltages are averaged in the amplifier and any additional RC delay will not be noticeable. Note: Do not connect the RTN conductor to a ground reference at the remote control location. Ground potential differences will drive currents through the RTN line and cause unpredictable REMOTE LEVEL control performance. 17 AM264080_00_V.pdf • June 21, 2002 4.2 Rear panel (cont.) 70V 50V 35V 100V 25V 8 4 Com 70V 50V 35V 25V 8 Com For bridged operation. Consult user manual. WARNING WARNING TO REDUCE THE RISK OF FIRE OR ELECTRICAL SHOCK DO NOT EXPOSE THIS EQUIPMENT TO RAIN OR MOISTURE SEQUENCE CH 2 SEND ENERGIE ELECTRIQUE DANGEREU SE. VOIR LANOTICE DE FONCTIONNEMENT. OUT OFF OFF 80 Hz + SEND 2 RECV SEND RECV + MADE IN U.S.A. OF DOMESTIC AND FOREIGN COMPONENTS. + + INPUT CH 1 SEQUENCE EQUALIZATION ON 1 2 1 CH1 3 D.O.M.: Model 2150 BOSE CORPORATION FRAMINGHAM, MA 01701-9168 U.S.A. PUSH INPUT CH 2 2 J20018292 FX CH 2 RECEIVE PUSH COM CH2 CH1 +5V SND RCV FX CH 1 SERIAL No.: Single remote volume control of Channels 1 and 2 INPUT IMPEDANCE 25K OHMS EACH LEG TO GROUND (TOTAL 50K OHMS BALANCED) AVERTISSEMENT REMOTE LEVEL CH 1 OUT OFF OFF 80 Hz ® RISK OF HAZARDOUS ENERGY! MAKE PROPER SPEAKER CONNECTIONS. SEE OPERATING MANUAL BEFORE USING. IN FX ON CLIP ON HP 120 Hz IN FX ON CLIP ON HP 120 Hz This device complies with part 15 of the FCC rules. Operation is subject to the following conditions: (1) This device may not cause harmful interference and (2) this device must accept any interference received, including interference which may cause undesired operation. Complies with Canadian ICES-003 Class A specifications. 120VAC, 4.6A max. 60 Hz 600W Figure 10 Use Class 2 Wiring CH 1 100V CH 2 AVIS RISQUE DE CHOC ELECTRIQUE NE PAS OUVRIR CE CARTER, RESERVE AU PERSONNEL AUTORISE. 4 CAUTION RISK OF ELECTRICAL SHOCK DO NOT OPEN COVER, AUTHORIZED PERSONNEL ONLY. 1 3 CH2 3 CH2 CH1 EQ. OUT + PN# 1234567 Ch 1 and 2 COM Return/+5V Ch 1 and Ch 2 100V 70V 50V 35V 25V 8 4 Com 100V 50V 35V 25V 8 Com For bridged operation. Consult user manual. WARNING WARNING TO REDUCE THE RISK OF FIRE OR ELECTRICAL SHOCK DO NOT EXPOSE THIS EQUIPMENT TO RAIN OR MOISTURE SEQUENCE RECV SEND RECV + + + 2 INPUT CH 1 SEQUENCE EQUALIZATION ON 1 2 CH1 3 + MADE IN U.S.A. OF DOMESTIC AND FOREIGN COMPONENTS. PUSH INPUT CH 2 2 SEND BOSE CORPORATION FRAMINGHAM, MA 01701-9168 U.S.A. RECEIVE PUSH J20018292 FX CH 2 D.O.M.: Model 2150 SEND ENERGIE ELECTRIQUE DANGEREU SE. VOIR LANOTICE DE FONCTIONNEMENT. COM CH2 CH1 +5V SND RCV FX CH 1 SERIAL No.: Remote volume control of Channel 1 INPUT IMPEDANCE 25K OHMS EACH LEG TO GROUND (TOTAL 50K OHMS BALANCED) AVERTISSEMENT REMOTE LEVEL CH 1 OUT OFF OFF 80 Hz CH 2 OUT OFF OFF 80 Hz ® RISK OF HAZARDOUS ENERGY! MAKE PROPER SPEAKER CONNECTIONS. SEE OPERATING MANUAL BEFORE USING. IN FX ON CLIP ON HP 120 Hz IN FX ON CLIP ON HP 120 Hz This device complies with part 15 of the FCC rules. Operation is subject to the following conditions: (1) This device may not cause harmful interference and (2) this device must accept any interference received, including interference which may cause undesired operation. Complies with Canadian ICES-003 Class A specifications. 120VAC, 4.6A max. 60 Hz 600W Figure 11 Use Class 2 Wiring CH 1 70V CH 2 AVIS RISQUE DE CHOC ELECTRIQUE NE PAS OUVRIR CE CARTER, RESERVE AU PERSONNEL AUTORISE. 4 CAUTION RISK OF ELECTRICAL SHOCK DO NOT OPEN COVER, AUTHORIZED PERSONNEL ONLY. 1 1 3 CH2 3 CH2 CH1 EQ. OUT + PN# 1234567 Ch 1 COM Return/+5V Ch 1 100V 70V 50V 8 35V 25V 4 Com 100V 70V For bridged operation. Consult user manual. WARNING WARNING TO REDUCE THE RISK OF FIRE OR ELECTRICAL SHOCK DO NOT EXPOSE THIS EQUIPMENT TO RAIN OR MOISTURE ® Model 2150 RISK OF HAZARDOUS ENERGY! MAKE PROPER SPEAKER CONNECTIONS. SEE OPERATING MANUAL BEFORE USING. IN FX ON CLIP ON HP 120 Hz IN FX ON CLIP ON HP 120 Hz This device complies with part 15 of the FCC rules. Operation is subject to the following conditions: (1) This device may not cause harmful interference and (2) this device must accept any interference received, including interference which may cause undesired operation. Complies with Canadian ICES-003 Class A specifications. CH 2 SEQUENCE MADE IN U.S.A. OF DOMESTIC AND FOREIGN COMPONENTS. INPUT CH 2 + SEND RECV + PUSH RECV SEND + + 2 INPUT CH 1 SEQUENCE EQUALIZATION ON 1 2 CH1 3 J20018292 FX CH 2 RECEIVE PUSH COM CH2 CH1 +5V D.O.M.: BOSE CORPORATION FRAMINGHAM, MA 01701-9168 U.S.A. SEND ENERGIE ELECTRIQUE DANGEREU SE. VOIR LANOTICE DE FONCTIONNEMENT. 2 SND RCV FX CH 1 SERIAL No.: Independent control of Channel 1 and Channel 2 INPUT IMPEDANCE 25K OHMS EACH LEG TO GROUND (TOTAL 50K OHMS BALANCED) AVERTISSEMENT REMOTE LEVEL CH 1 OUT OFF OFF 80 Hz 120VAC, 4.6A max. 60 Hz 600W Figure 12 Use Class 2 Wiring CH 1 50V 35V 8 Com 25V CH 2 AVIS RISQUE DE CHOC ELECTRIQUE NE PAS OUVRIR CE CARTER, RESERVE AU PERSONNEL AUTORISE. 4 CAUTION RISK OF ELECTRICAL SHOCK DO NOT OPEN COVER, AUTHORIZED PERSONNEL ONLY. OUT OFF OFF 80 Hz English 4.0 Operation 1 1 3 CH2 3 CH2 EQ. OUT CH1 + PN# 1234567 Ch 2 COM Ch 1 COM Return/+5V Ch 2 Zone 1 Ch 1 Zone 2 10. Power Insert the power cord into a properly configured A/C power mains. 18 AM264080_00_V.pdf • June 21, 2002 5.0 Installation English 5.1 Installing Bose® EQ Cards If your Bose loudspeakers require active equalization, follow these steps to install them in the Model 2150: 1. Turn the power switch to the OFF position. Figure 13 Ch 1 Turning the power switch off M 2150 Ch 2 Commercial Power Amplifier Clip -6dB -12dB -20dB Signal Power ∞ On Thermal Protect Ready 0dB Off ∞ Network 0dB Standby 2. Remove all input card connections to the amplifier. Then, disconnect the power cord from the wall outlet and the amplifier. Figure 14 70V 8Ω 50V 35V 25V For bridged operation. Consult user manual. 100V 70V Com 4Ω 100V Com 8Ω 4Ω Use Class 2 Wiring CH 1 50V 35V AVIS RISQUE DE CHOC ELECTRIQUE NE PAS OUVRIR CE CARTER, RESERVE AU PERSONNEL AUTORISE. 25V CH 2 CAUTION RISK OF ELECTRICAL SHOCK DO NOT OPEN COVER, AUTHORIZED PERSONNEL ONLY. WARNING IN FX ON CLIP ON HP 120 Hz IN FX ON CLIP ON HP 120 Hz SEND ENERGIE ELECTRIQUE DANGEREU SE. VOIR LANOTICE DE FONCTIONNEMENT. CH 1 INPUT CH 2 + RECV + + 2 INPUT CH 1 SEQUENCE EQUALIZATION ON 1 2 CH1 3 J20018292 FX CH 2 SEND RECV MADE IN U.S.A. OF DOMESTIC AND FOREIGN COMPONENTS. PUSH COM CH2 CH1 +5V + SEND BOSE CORPORATION FRAMINGHAM, MA 01701-9168 U.S.A. RECEIVE PUSH 2 SND RCV D.O.M.: Model 2150 INPUT IMPEDANCE 25K OHMS EACH LEG TO GROUND (TOTAL 50K OHMS BALANCED) AVERTISSEMENT REMOTE LEVEL FX CH 1 SERIAL No.: ® RISK OF HAZARDOUS ENERGY! MAKE PROPER SPEAKER CONNECTIONS. SEE OPERATING MANUAL BEFORE USING. SEQUENCE OUT OFF OFF 80 Hz CH 2 OUT OFF OFF 80 Hz 120VAC, 4.6A max. 60 Hz 600W Removing card connections and disconnecting the power WARNING TO REDUCE THE RISK OF FIRE OR ELECTRICAL SHOCK DO NOT EXPOSE THIS EQUIPMENT TO RAIN OR MOISTURE This device complies with part 15 of the FCC rules. Operation is subject to the following conditions: (1) This device may not cause harmful interference and (2) this device must accept any interference received, including interference which may cause undesired operation. Complies with Canadian ICES-003 Class A specifications. 1 1 3 CH2 3 CH2 EQ. OUT CH1 + PN# 1234567 3. Remove the input card screws. Figure 15 70V 50V 35V 25V 8Ω 100V 4Ω 70V Com 50V 35V 25V 8Ω Com CH 1 100V CH 2 AVIS RISQUE DE CHOC ELECTRIQUE NE PAS OUVRIR CE CARTER, RESERVE AU PERSONNEL AUTORISE. 4Ω CAUTION RISK OF ELECTRICAL SHOCK DO NOT OPEN COVER, AUTHORIZED PERSONNEL ONLY. WARNING IN FX ON CLIP ON HP 120 Hz IN FX ON CLIP ON HP 120 Hz RISK OF HAZARDOUS ENERGY! MAKE PROPER SPEAKER CONNECTIONS. SEE OPERATING MANUAL BEFORE USING. SEQUENCE REMOTE LEVEL CH 1 RECEIVE RECEIVE PUSH PUSH PUSH PUSH INPUT CH 22 INPUT CH + MADE IN U.S.A. OF DOMESTIC AND FOREIGN COMPONENTS. RECV SEND RECV + + 2 2 1 1 CH1 CH1 + +2 2 1 1 SEND INPUT CH 11 INPUT CH SEQUENCE SEQUENCE EQUALIZATION EQUALIZATION ONON 1 1 3 3 J20018292 FX CH 2 D.O.M.: Model 2150 BOSE CORPORATION FRAMINGHAM, MA 01701-9168 U.S.A. SEND SEND ENERGIE ELECTRIQUE DANGEREU SE. VOIR LANOTICE DE FONCTIONNEMENT. COM CH2 CH1 +5V SND RCV FX CH 1 SERIAL No.: INPUT IMPEDANCE 25K OHMS EACH LEG TOTO GROUND (TOTAL 50K OHMS BALANCED) INPUT IMPEDANCE 25K OHMS EACH LEG GROUND (TOTAL 50K OHMS BALANCED) AVERTISSEMENT 2 2 OUT OFF OFF 80 Hz CH 2 OUT OFF OFF 80 Hz 120VAC, 4.6A max. 60 Hz 600W For bridged operation. Consult user manual. WARNING TO REDUCE THE RISK OF FIRE OR ELECTRICAL SHOCK DO NOT EXPOSE THIS EQUIPMENT TO RAIN OR MOISTURE This device complies with part 15 of the FCC rules. Operation is subject to the following conditions: (1) This device may not cause harmful interference and (2) this device must accept any interference received, including interference which may cause undesired operation. Complies with Canadian ICES-003 Class A specifications. ® Removing screws Use Class 2 Wiring 3 3 CH2 CH2 3 3 CH2 OUT CH2 EQ.EQ. OUT CH1 CH1 + PN# 1234567 4. Remove the input card and disconnect the ribbon cable. Figure 16 Use Class 2 Wiring 70V 100V 50V 35V 25V 8Ω 4Ω Com 100V 70V CH 2 50V 35V 8Ω Com 25V CH 1 AVIS RISQUE DE CHOC ELECTRIQUE NE PAS OUVRIR CE CARTER, RESERVE AU PERSONNEL AUTORISE. 4Ω CAUTION RISK OF ELECTRICAL SHOCK DO NOT OPEN COVER, AUTHORIZED PERSONNEL ONLY. WARNING ® Model 2150 1800 SERIES V PROFESSIONAL AMPLIFIER ON CLIP 120 Hz ON HP IN FX ON CLIP 120 Hz ON HP IN FX SEQUENCE REMOTE LEVEL SEND RECV COM CH1 CH2 +5V CH 2 FX CH 1 SERIAL No.: DOM RISK OF HAZARDOUS ENERGY! MAKE PROPER SPEAKER CONNECTIONS. SEE OPERATING MANUAL BEFORE USING. OFF 80 Hz OFF OUT CH 1 OFF 80 Hz OFF OUT 120VAC, 4.6A max. 60 Hz 600W For bridged operation. Consult user manual. WARNING TO REDUCE THE RISK OF FIRE OR ELECTRICAL SHOCK DO NOT EXPOSE THIS EQUIPMENT TO RAIN OR MOISTURE This device complies with part 15 of the FCC rules. Operation is subject to the following conditions: (1) This device may not cause harmful interference and (2) this device must accept any interference received, including interference which may cause undesired operation. Complies with Canadian ICES-003 Class A specifications. Remove card and disconnect ribbon cable AVERTISSEMENT ENERGIE ELECTRIQUE DANGEREU SE. VOIR LANOTICE DE FONCTIONNEMENT. J20018292 FX CH 2 D.O.M.: BOSE CORPORATION FRAMINGHAM, MA 01701-9168 U.S.A. MADE IN U.S.A. OF DOMESTIC AND FOREIGN COMPONENTS. SEND RECV + + RECV SEND + + PN# 1234567 INPUT IMPEDANCE 25K OHMS EACH LEG TO GROUND (TOTAL 50K OHMS BALANCED) SEND RECEIVE PUSH PUSH INPUT CH 2 2 2 1 3 2 CH1 3 + INPUT CH 1 SEQUENCE EQUALIZATION ON 1 1 3 CH2 CH2 EQ. OUT CH1 19 AM264080_00_V.pdf • June 21, 2002 English 5.0 Installation 5.1 Installing Bose® EQ Cards (cont.) If your Bose loudspeakers require active equalization, follow these steps to install them in the Model 2150: 5. Install EQ card into the desired channel. Note: If you are using the amplifier in dual mono or bridged mono mode, you must install the equalizer card in Channel 2. Figure 17 Installing the EQ card EQUALIZER CARD 502B 6. Place included label on input card. Figure 18 MPEDANCE 25K OHMS EACH LEG TO GROUND (TOTAL 50K OHMS BALANCED) SEND RECEIVE PUSH INPUT CH 2 Attaching labels INPUT CH 1 SEQUENCE EQUALIZATION ON 2 1 CH1 3 CH2 CH2 EQ. OUT CH1 502A E Q CARD M8 EQ CARD 502B E Q CARD M32 EQ CARD 9702 H F 802 EQ CARD 9702 M F 7. Set the EQ BI-AMP/FULL RANGE switch and the STEREO/MONO switch. See sections 5.3.3 and 5.3.4 for additional details regarding these features. Figure 19 Setting the switches EQUALIZER CARD 502B BO SE ® FR EE SP AC E ® 6 BU SI NE SS Ins tal lat ion MU SI C an d Ow ne SY ST EM r’s Gu ide 20 AM264080_00_V.pdf • June 21, 2002 5.0 Installation English 5.1 Installing Bose® EQ Cards (cont.) If your Bose loudspeakers require active equalization, follow these steps to install them in the Model 2150: 8. Reconnect the ribbon cable. Figure 20 Reconnecting ribbon cables Use Class 2 Wiring For bridged operation. Consult user manual. 1800 SERIES V PROFESSIONAL AMPLIFIER WARNING DOM RISK OF HAZARDOUS ENERGY! MAKE PROPER SPEAKER CONNECTIONS. SEE OPERATING MANUAL BEFORE USING. INPUT IMPEDANCE 25K OHMS EACH LEG TO GROUND (TOTAL 50K OHMS BALANCED) AVERTISSEMENT SEND ENERGIE ELECTRIQUE DANGEREU SE. VOIR LANOTICE DE FONCTIONNEMENT. PUSH INPUT CH 2 2 + 2 RECV INPUT CH 1 SEQUENCE EQUALIZATION ON 1 2 CH1 3 J20018292 + RECEIVE PUSH 1 1 3 CH2 3 CH2 CH1 EQ. OUT + PN# 1234567 INPUT IMPEDANCE 25K OHMS EACH LEG TO GROUND (TOTAL 50K OHMS BALANCED) SEND RECEIVE PUSH PUSH INPUT CH 2 2 2 2 1 CH1 3 + INPUT CH 1 SEQUENCE EQUALIZATION ON 1 1 3 CH2 3 CH2 CH1 EQ. OUT 9. Install the input card. Figure 21 Use Class 2 Wiring 70V Installing the input card For bridged operation. Consult user manual. 100V 8Ω Com 50V 35V 25V 4Ω CH 1 DOM WARNING RISK OF HAZARDOUS ENERGY! MAKE PROPER SPEAKER CONNECTIONS. SEE OPERATING MANUAL BEFORE USING. QUENCE REMOTE LEVEL ND RCV COM CH2 CH1 +5V INPUT IMPEDANCE 25K OHMS EACH LEG TO GROUND (TOTAL 50K OHMS BALANCED) AVERTISSEMENT SEND ENERGIE ELECTRIQUE DANGEREU SE. VOIR LANOTICE DE FONCTIONNEMENT. PUSH PUSH INPUT CH 2 2 + + + 2 + 2 CH1 1 RECV INPUT CH 1 SEQUENCE EQUALIZATION ON 1 3 J20018292 FX CH 2 SEND RECEIVE 1 3 CH2 3 CH2 CH1 EQ. OUT + PN# 1234567 INPUT IMPEDANCE 25K OHMS EACH LEG TO GROUND (TOTAL 50K OHMS BALANCED) SEND RECEIVE PUSH PUSH INPUT CH 2 2 2 2 CH1 3 + INPUT CH 1 SEQUENCE EQUALIZATION ON 1 1 1 3 CH2 3 CH2 CH1 EQ. OUT 10. Reconnect input card screws. Figure 22 Reconnecting the screws Use Class 2 Wiring For bridged operation. Consult user manual. WARNING RISK OF HAZARDOUS ENERGY! MAKE PROPER SPEAKER CONNECTIONS. SEE OPERATING MANUAL BEFORE USING. INPUT IMPEDANCE 25K OHMS EACH LEG TO GROUND (TOTAL 50K OHMS BALANCED) AVERTISSEMENT SEND ENERGIE ELECTRIQUE DANGEREU SE. VOIR LANOTICE DE FONCTIONNEMENT. PUSH INPUT CH 2 2 + CV 2 1 2 CH1 1 3 INPUT CH 1 SEQUENCE EQUALIZATION ON 3 J20018292 + RECEIVE PUSH 1 3 CH2 CH2 EQ. OUT CH1 + PN# 1234567 21 AM264080_00_V.pdf • June 21, 2002 5.1 Installing Bose® EQ Cards (cont.) If your Bose loudspeakers require active equalization, follow these steps to install them in the Model 2150: 11. Connect all input connections to the amplifier, and line cord to the wall. Figure 23 70V 50V 35V 25V 8Ω 100V 70V 4Ω 50V Com 35V 25V 8Ω Use Class 2 Wiring CH 1 100V 4Ω AVIS RISQUE DE CHOC ELECTRIQUE NE PAS OUVRIR CE CARTER, RESERVE AU PERSONNEL AUTORISE. Com CH 2 CAUTION RISK OF ELECTRICAL SHOCK DO NOT OPEN COVER, AUTHORIZED PERSONNEL ONLY. WARNING 120VAC, 4.6A max. 60 Hz 600W ® For bridged operation. Consult user manual. IN FX ON CLIP ON HP 120 Hz IN FX ON CLIP ON HP 120 Hz RISK OF HAZARDOUS ENERGY! MAKE PROPER SPEAKER CONNECTIONS. SEE OPERATING MANUAL BEFORE USING. INPUT IMPEDANCE 25K OHMS EACH LEG TO GROUND (TOTAL 50K OHMS BALANCED) AVERTISSEMENT SEND ENERGIE ELECTRIQUE DANGEREU SE. VOIR LANOTICE DE FONCTIONNEMENT. INPUT CH 2 SEND RECV + MADE IN U.S.A. OF DOMESTIC AND FOREIGN COMPONENTS. + RECV SEND + 2 2 CH1 1 3 INPUT CH 1 SEQUENCE EQUALIZATION ON 1 3 J20018292 + BOSE CORPORATION FRAMINGHAM, MA 01701-9168 U.S.A. PUSH COM CH2 CH1 +5V FX CH 2 RECEIVE PUSH 2 SND RCV FX CH 1 SERIAL No.: REMOTE LEVEL CH 1 OUT OFF OFF 80 Hz CH 2 SEQUENCE D.O.M.: Model 2150 Connect all inputs and power cord WARNING TO REDUCE THE RISK OF FIRE OR ELECTRICAL SHOCK DO NOT EXPOSE THIS EQUIPMENT TO RAIN OR MOISTURE This device complies with part 15 of the FCC rules. Operation is subject to the following conditions: (1) This device may not cause harmful interference and (2) this device must accept any interference received, including interference which may cause undesired operation. Complies with Canadian ICES-003 Class A specifications. OUT OFF OFF 80 Hz English 5.0 Installation 1 3 CH2 CH2 EQ. OUT CH1 + PN# 1234567 Figure 24 Turn the amplifier on Ch 1 M 2150 Ch 2 Commercial Power Amplifier Clip -6dB -12dB -20dB Signal Power ∞ 0dB Thermal Protect Ready On Off ∞ 0dB Network Standby 22 AM264080_00_V.pdf • June 21, 2002 5.0 Installation English 5.2 Input wiring You can use 1⁄4" phone jacks, XLR connectors, or quick connect terminal block connectors for the input signal with either unbalanced 2-conductor or balanced 3-conductor cables. Use shielded coaxial cable to conduct the signal from the source (mixer, equalizer, CD player) to the amplifier. 5.2.1 Balanced operation For the 1⁄4" phone jack, use a 3-conductor TRS 1⁄4" phone plug. The tip of the plug carries the + (hot, non-inverting) side of the signal. The ring carries the – (low, inverting) side of the signal. The sleeve is ground (see Figure 25). Figure 25 Use Class 2 Wiring For bridged operation. Consult user manual. 1⁄4" phone jack balanced input connection WARNING RISK OF HAZARDOUS ENERGY! MAKE PROPER SPEAKER CONNECTIONS. SEE OPERATING MANUAL BEFORE USING. INPUT IMPEDANCE 25K OHMS EACH LEG TO GROUND (TOTAL 50K OHMS BALANCED) AVERTISSEMENT SEND ENERGIE ELECTRIQUE DANGEREU SE. VOIR LANOTICE DE FONCTIONNEMENT. PUSH INPUT CH 2 2 2 2 CH1 3 + INPUT CH 1 SEQUENCE EQUALIZATION ON 1 J20018292 RECV RECEIVE PUSH 1 1 3 CH2 3 CH2 CH1 EQ. OUT PN# 1234567 Tip + Tip + Sleeve (shield) Sleeve (shield) Ring - Ring - From Channel 1 From Channel 2 For the XLR jack, use a male XLR connector. Pin 2 carries the + (hot, non-inverting) side of the signal. Pin 3 carries the – (low, inverting) side of the signal. Pin 1 is ground (see Figure 26). Figure 26 Use Class 2 Wiring For bridged operation. Consult user manual. XLR balanced input connection WARNING RISK OF HAZARDOUS ENERGY! MAKE PROPER SPEAKER CONNECTIONS. SEE OPERATING MANUAL BEFORE USING. INPUT IMPEDANCE 25K OHMS EACH LEG TO GROUND (TOTAL 50K OHMS BALANCED) AVERTISSEMENT SEND ENERGIE ELECTRIQUE DANGEREU SE. VOIR LANOTICE DE FONCTIONNEMENT. PUSH INPUT CH 2 2 J20018292 2 INPUT CH 1 SEQUENCE EQUALIZATION ON 1 2 CH1 3 + RECV RECEIVE PUSH 1 1 3 CH2 3 CH2 EQ. OUT CH1 PN# 1234567 GND(shield) From Channel 2 GND(shield) From Channel 1 23 AM264080_00_V.pdf • June 21, 2002 5.0 Installation English 5.2.1 Balanced operation (cont.) For the quick connect terminal block, use the female connector provided. Pin 3 carries the + (hot, non-inverting) side of the signal. Pin 2 carries the – (low, inverting) side of the signal. Pin 1 is ground (see Figure 27). When using the standard input module for either amplifier, you can reverse the polarity of the balanced inputs by changing four jumpers located on the input board, just behind the input connectors. Figure 27 Use Class 2 Wiring For bridged operation. Consult user manual. Quick connect terminal block balanced input connection WARNING RISK OF HAZARDOUS ENERGY! MAKE PROPER SPEAKER CONNECTIONS. SEE OPERATING MANUAL BEFORE USING. INPUT IMPEDANCE 25K OHMS EACH LEG TO GROUND (TOTAL 50K OHMS BALANCED) AVERTISSEMENT SEND ENERGIE ELECTRIQUE DANGEREU SE. VOIR LANOTICE DE FONCTIONNEMENT. RECEIVE PUSH PUSH INPUT CH 2 2 1 J20018292 + 2 2 1 CH1 3 RECV INPUT CH 1 SEQUENCE EQUALIZATION ON 1 3 CH2 3 CH2 CH1 EQ. OUT PN# 1234567 GND(shield) GND(shield) 5.2.2 Unbalanced operation For the 1⁄4" phone jack, use a 2-conductor (tip-sleeve) 1⁄4" phone plug. The tip of the plug carries the signal and the sleeve is ground. The ring connection in the jack is automatically grounded by the sleeve (see Figure 28). Figure 28 Use Class 2 Wiring For bridged operation. Consult user manual. 1⁄ " phone jack unbalanced 4 input connection WARNING RISK OF HAZARDOUS ENERGY! MAKE PROPER SPEAKER CONNECTIONS. SEE OPERATING MANUAL BEFORE USING. INPUT IMPEDANCE 25K OHMS EACH LEG TO GROUND (TOTAL 50K OHMS BALANCED) AVERTISSEMENT SEND ENERGIE ELECTRIQUE DANGEREU SE. VOIR LANOTICE DE FONCTIONNEMENT. PUSH INPUT CH 2 2 J20018292 2 INPUT CH 1 SEQUENCE EQUALIZATION ON 1 2 CH1 3 + RECV RECEIVE PUSH 1 1 3 CH2 3 CH2 EQ. OUT CH1 PN# 1234567 Tip + Tip + Sleeve (shield) From Channel 2 Sleeve (shield) From Channel 1 24 AM264080_00_V.pdf • June 21, 2002 5.0 Installation English 5.2.2 Unbalanced operation (cont.) For the XLR connector, pin 2 carries the + (hot, non-inverting) side of the signal, and pin 1 is ground. To reference the input differential amplifier for the correct gain, short pin 3 to pin 1 (see Figure 29). Figure 29 Use Class 2 Wiring For bridged operation. Consult user manual. 1 ⁄4" XLR unbalanced input connection WARNING RISK OF HAZARDOUS ENERGY! MAKE PROPER SPEAKER CONNECTIONS. SEE OPERATING MANUAL BEFORE USING. INPUT IMPEDANCE 25K OHMS EACH LEG TO GROUND (TOTAL 50K OHMS BALANCED) AVERTISSEMENT SEND ENERGIE ELECTRIQUE DANGEREU SE. VOIR LANOTICE DE FONCTIONNEMENT. PUSH INPUT CH 2 2 J20018292 2 INPUT CH 1 SEQUENCE EQUALIZATION ON 1 2 CH1 3 + RECV RECEIVE PUSH 1 1 3 CH2 3 CH2 EQ. OUT CH1 PN# 1234567 GND(shield) From Channel 2 GND(shield) From Channel 1 25 AM264080_00_V.pdf • June 21, 2002 5.0 Installation English 5.2.2 Unbalanced operation (cont.) For the quick connect terminal block, pin 3 carries the + (hot, non-inverting) side of the signal, and pin 1 is ground. Short pin 2 to pin 1 in order to reference the input differential amplifier for the correct gain (see Figure 30). Note: The gain remains the same whether the input is balanced or unbalanced. However, if you make an unbalanced connection with a balanced source, there will be a -6dB gain loss. Figure 30 Use Class 2 Wiring For bridged operation. Consult user manual. Quick connect terminal block unbalanced input connection WARNING RISK OF HAZARDOUS ENERGY! MAKE PROPER SPEAKER CONNECTIONS. SEE OPERATING MANUAL BEFORE USING. INPUT IMPEDANCE 25K OHMS EACH LEG TO GROUND (TOTAL 50K OHMS BALANCED) AVERTISSEMENT SEND ENERGIE ELECTRIQUE DANGEREU SE. VOIR LANOTICE DE FONCTIONNEMENT. PUSH INPUT CH 2 2 J20018292 2 2 CH1 1 3 INPUT CH 1 SEQUENCE EQUALIZATION ON 1 3 + RECV RECEIVE PUSH 1 3 CH2 CH2 EQ. OUT CH1 PN# 1234567 GND(shield) GND(shield) 26 AM264080_00_V.pdf • June 21, 2002 5.0 Installation English 5.3 Output wiring The Model 2150 speaker outputs on the amplifiers can accommodate wire from 20 gauge up to 12. We recommend that you do not use speaker wire smaller than 20 gauge. You must use Class I (NEC) wiring. The greater the distance between the amplifier and the speakers, the larger the diameter the wire should be. This will minimize power losses across the wire and improve damping of the speaker. Wire thickness specifications (gauges) get larger as the wire gets thinner. A 14gauge wire is thicker than 18-gauge wire. Using the following chart as a guide for low-impedence operation (4Ω, 8Ω): Wire Length Gauge of Wire Up to 10' 20 gauge 10' to 15' 18 gauge 15' to 25' 16 gauge 25' to 40' 14 gauge 40' to 60' 12 gauge Use the following as a guide for high-impedence operation (25V, 35V, 50V, 70V, 100V): Wire Length Gauge of Wire Up to 250' 18 gauge 250' to 500' 16 gauge Caution: Be sure all the fine strands of the wire are twisted together and contained within the connector. If even one strand is loose and can touch the adjacent terminal, a short circuit may result. 5.3.1 Polarity In order to have correct phasing between loudspeakers, you must connect them with consistent polarity. While incorrect phasing will do no physical harm, it will diminish your bass response. It is important that each speaker is connected to the amplifier as positive (+) to positive (+) and negative (–) to negative (–). 5.3.2 STEREO/MONO and DUAL/MONO operation The STEREO/MONO switch is located on the input board behind slot #2 of the standard input module (see Figure 31). For dual-mono operation, move the STEREO/MONO switch all the way to the left to the DUAL/MONO setting. Connect the input signal to CH 2 input (CH 1 input becomes disabled). Connect the speakers to the speaker outputs on the amplifier just as for normal stereo operation. Both speaker outputs will carry the signal connected to the CH 2 input. Note: When changing settings, always disconnect the power cord. 27 AM264080_00_V.pdf • June 21, 2002 English 5.0 Installation 5.3 Output wiring (cont.) 5.3.3 Stereo/Mono switch This switch selects between NORMAL STEREO (normal stereo), DUAL MONO (dual mono), or BRIDGED MONO (bridged mono) operation. It is located on the motherboard of the input module. For NORMAL STEREO operation, use CH 1 and CH 2 inputs. For DUAL MONO or BRIDGED MONO operation, use CH 2 input only. See the section on bridged operation for more information. Figure 31 Use Class 2 Wiring For bridged operation. Consult user manual. WARNING RISK OF HAZARDOUS ENERGY! MAKE PROPER SPEAKER CONNECTIONS. SEE OPERATING MANUAL BEFORE USING. Stereo/Mono switch AVERTISSEMENT ENERGIE ELECTRIQUE DANGEREU SE. VOIR LANOTICE DE FONCTIONNEMENT. J20018292 RECV NORMAL DIAL MODE STEREO/MONO SWITCH PN# 1234567 BRIDGE EQ BI-AMP FULL RANGE SWITCH EQUALIZER FOR CHANNEL 1 EQUALIZER FOR CHANNEL 2 INPUT IMPEDANCE 25K OHMS EACH LEG TO GROUND (TOTAL 50K OHMS BALANCED) SEND RECEIVE PUSH PUSH INPUT CH 2 2 2 2 CH1 3 + INPUT CH 1 SEQUENCE EQUALIZATION ON 1 1 1 3 CH2 3 CH2 CH1 EQ. OUT 5.3.4 EQ BI-AMP/FULL RANGE switch This feature allows the same equalizer card to be used for full range output and bi-amp output. This switch is located on the motherboard of the input module. The module must be removed to access this switch. To select the high frequency output from both equalizer cards, engage this switch (HF ONLY position). This feature is useful when configuring two or more amplifiers and a 502®B module. Figure 32 Use Class 2 Wiring For bridged operation. Consult user manual. WARNING RISK OF HAZARDOUS ENERGY! MAKE PROPER SPEAKER CONNECTIONS. SEE OPERATING MANUAL BEFORE USING. EQ BI-AMP/FULL RANGE switch AVERTISSEMENT ENERGIE ELECTRIQUE DANGEREU SE. VOIR LANOTICE DE FONCTIONNEMENT. J20018292 RECV NORMAL DIAL MODE STEREO/MONO SWITCH PN# 1234567 BRIDGE EQUALIZER FOR CHANNEL 1 EQ BI-AMP FULL RANGE SWITCH EQUALIZER FOR CHANNEL 2 INPUT IMPEDANCE 25K OHMS EACH LEG TO GROUND (TOTAL 50K OHMS BALANCED) SEND RECEIVE PUSH PUSH INPUT CH 2 2 2 1 3 2 CH1 3 + INPUT CH 1 SEQUENCE EQUALIZATION ON 1 1 3 CH2 CH2 EQ. OUT CH1 28 AM264080_00_V.pdf • June 21, 2002 5.0 Installation 5.3.5 Stereo operation English The STEREO/MONO switch is located behind slot #2 of the standard input module (see Figure 31). For stereo operation move the STEREO/MONO switch to the middle position. Connect your stereo input signal to CH 1 and CH 2 inputs. Note: This is the default setting on the input card. Output wiring: Connect the positive (+) to the desired setting on CH 1 (4Ω, 8Ω, 25V, 35V, 50V, 70V, 100V); then connect the negative (-) to the Common (COM). Next, connect the positive (+) to the desired setting on CH 2 (4Ω, 8Ω, 25V, 35V, 50V, 70V, 100V); then connect the negative (-) to the Common (COM). Figure 33 Stereo operation 70V 50V 35V 100V 25V 8Ω 4Ω Com 70V 50V 35V Use Class 2 Wiring CH 1 100V 8Ω Com 25V CH 2 AVIS RISQUE DE CHOC ELECTRIQUE NE PAS OUVRIR CE CARTER, RESERVE AU PERSONNEL AUTORISE. 4Ω CAUTION RISK OF ELECTRICAL SHOCK DO NOT OPEN COVER, AUTHORIZED PERSONNEL ONLY. WARNING SEQUENCE MADE IN U.S.A. OF DOMESTIC AND FOREIGN COMPONENTS. SEND ENERGIE ELECTRIQUE DANGEREU SE. VOIR LANOTICE DE FONCTIONNEMENT. RECV + + 1 J20018292 RECV SEND + 2 1 3 2 CH1 3 + SEND PUSH INPUT CH 1 SEQUENCE EQUALIZATION ON COM CH2 CH1 +5V FX CH 2 RECEIVE PUSH 2 SND RCV D.O.M.: BOSE CORPORATION FRAMINGHAM, MA 01701-9168 U.S.A. INPUT IMPEDANCE 25K OHMS EACH LEG TO GROUND (TOTAL 50K OHMS BALANCED) AVERTISSEMENT INPUT CH 2 FX CH 1 SERIAL No.: REMOTE LEVEL CH 1 OUT OFF OFF 80 Hz CH 2 OUT OFF OFF 80 Hz ® Model 2150 RISK OF HAZARDOUS ENERGY! MAKE PROPER SPEAKER CONNECTIONS. SEE OPERATING MANUAL BEFORE USING. IN FX ON CLIP ON HP 120 Hz IN FX ON CLIP ON HP 120 Hz This device complies with part 15 of the FCC rules. Operation is subject to the following conditions: (1) This device may not cause harmful interference and (2) this device must accept any interference received, including interference which may cause undesired operation. Complies with Canadian ICES-003 Class A specifications. 120VAC, 4.6A max. 60 Hz 600W For bridged operation. Consult user manual. WARNING TO REDUCE THE RISK OF FIRE OR ELECTRICAL SHOCK DO NOT EXPOSE THIS EQUIPMENT TO RAIN OR MOISTURE 1 3 CH2 CH2 EQ. OUT CH1 + PN# 1234567 29 5.0 Installation The STEREO/MONO switch is located behind slot #2 of the standard input module (see Figure 31). For bridged mono operation, move the STEREO/MONO switch all the way to the right to the BRIDGED setting. Connect the input signal to CH 2 input (CH 1 input becomes disabled). Outputs: Jumper the Commons (COM) on both CH 1 and CH 2. Next, connect the negative (–) to the desired setting CH 1 output and positive (+) to the same setting on the CH 2 output. When connected in this way, each channel “sees” half the impedance of the speaker connected between them. Note: Be sure to set both input level controls to exactly the same setting for equal power distribution per channel. In high-impedance bridged mono operation, the amplifier will yield the following results: Channel 1 Channel 2 Bridged Operation 25V 35V 50V 70V 100V 25V 35V 50V 70V 100V 50V 70V 100V 140V 200V + + + + + = = = = = Figure 34 70V line + 35V - 35V High impedance operation at 70V Jumper 70V 50V For bridged operation. Consult user manual. 100V 8 35V 4 Com 25V 70V 100V 8 Use Class 2 Wiring CH 1 50V 4 Com 35V CH 2 AVIS RISQUE DE CHOC ELECTRIQUE NE PAS OUVRIR CE CARTER, RESERVE AU PERSONNEL AUTORISE. 25V CAUTION RISK OF ELECTRICAL SHOCK DO NOT OPEN COVER, AUTHORIZED PERSONNEL ONLY. WARNING WARNING TO REDUCE THE RISK OF FIRE OR ELECTRICAL SHOCK DO NOT EXPOSE THIS EQUIPMENT TO RAIN OR MOISTURE ® SEQUENCE CH 2 OUT OFF OFF 80 Hz 2 + 2 RECV SEND RECV + MADE IN U.S.A. OF DOMESTIC AND FOREIGN COMPONENTS. 1 + + 2 CH1 3 J20018292 FX CH 2 SEND BOSE CORPORATION FRAMINGHAM, MA 01701-9168 U.S.A. PUSH INPUT CH 1 SEQUENCE EQUALIZATION ON COM CH2 CH1 +5V SND RCV RECEIVE PUSH INPUT CH 2 FX CH 1 SERIAL No.: SEND ENERGIE ELECTRIQUE DANGEREU SE. VOIR LANOTICE DE FONCTIONNEMENT. D.O.M.: Model 2150 INPUT IMPEDANCE 25K OHMS EACH LEG TO GROUND (TOTAL 50K OHMS BALANCED) AVERTISSEMENT REMOTE LEVEL CH 1 OUT OFF OFF 80 Hz 120VAC, 4.6A max. 60 Hz 600W RISK OF HAZARDOUS ENERGY! MAKE PROPER SPEAKER CONNECTIONS. SEE OPERATING MANUAL BEFORE USING. IN FX ON CLIP ON HP 120 Hz IN FX ON CLIP ON HP 120 Hz This device complies with part 15 of the FCC rules. Operation is subject to the following conditions: (1) This device may not cause harmful interference and (2) this device must accept any interference received, including interference which may cause undesired operation. Complies with Canadian ICES-003 Class A specifications. 1 1 3 CH2 3 CH2 CH1 EQ. OUT + PN# 1234567 In low impedance bridged mono operation, the amplifier will yield the following results: Channel 1 Channel 2 Bridged Operation 4Ω 8Ω 4Ω 8Ω 8Ω 16Ω + + = = Figure 35 8Ω line + 4Ω - 4Ω Low impedance operation at 8Ω Jumper Use Class 2 Wiring 70V 100V 50V 35V 8 4 Com 25V 70V 100V CH 1 50V 35V 8 Com 25V CH 2 AVIS RISQUE DE CHOC ELECTRIQUE NE PAS OUVRIR CE CARTER, RESERVE AU PERSONNEL AUTORISE. 4 CAUTION RISK OF ELECTRICAL SHOCK DO NOT OPEN COVER, AUTHORIZED PERSONNEL ONLY. WARNING ® Model 2150 IN FX ON CLIP ON HP 120 Hz IN FX ON CLIP ON HP 120 Hz CH 2 REMOTE LEVEL CH 1 SEND ENERGIE ELECTRIQUE DANGEREU SE. VOIR LANOTICE DE FONCTIONNEMENT. SND RCV RECV + + RECV SEND + 2 1 3 + PN# 1234567 2 CH1 3 J20018292 + SEND PUSH INPUT CH 1 SEQUENCE EQUALIZATION ON 1 COM CH2 CH1 +5V FX CH 2 RECEIVE PUSH INPUT CH 2 D.O.M.: MADE IN U.S.A. OF DOMESTIC AND FOREIGN COMPONENTS. INPUT IMPEDANCE 25K OHMS EACH LEG TO GROUND (TOTAL 50K OHMS BALANCED) AVERTISSEMENT 2 FX CH 1 SERIAL No.: BOSE CORPORATION FRAMINGHAM, MA 01701-9168 U.S.A. 30 RISK OF HAZARDOUS ENERGY! MAKE PROPER SPEAKER CONNECTIONS. SEE OPERATING MANUAL BEFORE USING. SEQUENCE OUT OFF OFF 80 Hz 120VAC, 4.6A max. 60 Hz 600W For bridged operation. Consult user manual. WARNING TO REDUCE THE RISK OF FIRE OR ELECTRICAL SHOCK DO NOT EXPOSE THIS EQUIPMENT TO RAIN OR MOISTURE This device complies with part 15 of the FCC rules. Operation is subject to the following conditions: (1) This device may not cause harmful interference and (2) this device must accept any interference received, including interference which may cause undesired operation. Complies with Canadian ICES-003 Class A specifications. OUT OFF OFF 80 Hz English 5.3.6 Bridged mono operation CH2 CH2 EQ. OUT 1 3 CH1 5.0 Installation 5.3.7 Parallel mono English Parallel mono operation is useful when running sustained high levels in a single load or when driving a low impedance load. For instructions, contact Bose® or your authorized Bose Professional Products dealer. 31 English 6.0 Troubleshooting Troubleshooting Problem No sound, no power (Usually indicates a power supply problem, either in the power line or the amplifier’s power supply.) Power on, low output or no output (Usually signal-source, bad cable or partial output short circuit related.) Cause or Solution • • • • • • • • Check amplifier. Power off, then turn on. Linecord disconnected. Poor fit between the plug and AC receptacle. Try another receptacle. Power off at AC receptacle. Check with tester or lamp. Blown amplifier fuse. Replace fuse. No source playing. Faulty connection between mixer and amplifier. Open thermal breaker in the power transformer. Allow amplifier to cool and the breaker will reset itself. • Input level controls set too low. Reset. • Check to see if problem is at the source. Move the input connections to another amplifier you know is working. • Be sure that there are no small strands of wire touching similar strands coming from the other wire in the cable. • Make sure the speakers are functioning correctly. • If you are using bridged-mono mode, make sure the stereo/mono switch is set correctly. • Use a voltmeter to determine if the power line voltage is dropping excessively when the amplifier is driven hard. • Disconnect equipment in the FX loop to be sure that the equipment is not faulty. • Check remote volume control. Playback mixed with hum • Check or replace the connecting cables. • Make sure that each screw terminal connection is tight. • Signal cables may have been routed too closely to AC cables, power transformers, motors, or other EMI inducing device. • Connect another source to the power amplifier inputs. If the hum stops, the problem lies with the original source component. Distortion • Check input level controls. If set too low, the preceding piece of equipment may not have sufficient output to overcome the loss. • Check speaker connections and verify that all screw connections are tight and that there are no stray strands of wire to cause short circuits. • Verify that the total load impedance presented to the amplifier is within the limits described in this manual for the mode of operation selected. (Usually caused by excessive loss in the input controls when the mixer/equalizer/crossover does not produce enough output. Also caused by over-driving that results in output clipping, or current limiting caused by excessively low load impedances.) Unnatural sound (Some parts of the frequency band do not sound balanced with the rest of the band.) Care 32 • Check the EQ cards. Verify that the EQ card corresponds to the model speaker being used and that the EQ card is installed in the proper channel. Verify that the speakers are connected to the same channel that the corresponding EQ card is installed in. • Speakers may be out of phase. • Wipe the front panel and chassis with a soft, dry cloth. • For stubborn spots, use a mild dish soap or detergent sparingly applied to a soft cloth. • Don’t use alcohol, ammonia, or other strong solvents. Appendix A: Features, Warranty, Service English Warranty period Bose® warrants the Model 2150 commercial power amplifier with a five-year, transferable, limited warranty. For more information, please read the warranty card. Service If you experience problems with your Model 2150 commercial power amplifier, contact your authorized Bose Professional Products dealer. The dealer will verify any defects and arrange for service. Please complete the owner’s registration card included with this guide. Return it to Bose within ten days of purchase. 33 Appendix B: Specifications Specifications for Bose Model 2150 Commercial Power Amplifier English ® Power Output Continuous average output power, both channels driven: 150W per channel into 4Ω at 1kHz with 0.5% or less THD 150W per channel into 8Ω at 1kHz with 0.5% or less THD 150W per channel at 100V into a 67Ω load at 1kHz with 0.5% or less THD 150W per channel at 70V into a 33Ω load at 1kHz with 0.5% or less THD Bridged mono operation: 300W at 8Ω with 0.5% or less THD 300W at 16Ω with 0.5% or less THD 300W at 100V into a 33Ω load at 1kHz with 0.5% or less THD 300W at 70V into a 16Ω load at 1kHz with 0.5% or less THD Power consumption: 60W or less at idle, no input, maximum gain 125W with musical program at 1⁄8 rated power 250W with musical program at 1⁄3 rated power Power requirements: 485W @ 4Ω with a sinewave test tone, rated continuous power at maximum gain 500W @ 8Ω with a sinewave test tone, rated continuous power at maximum gain 525W @ 70V with a sinewave test tone, rated continuous power at maximum gain 525W @ 100V with a sinewave test tone, rated continuous power at maximum gain Net weight 35 lbs. ( 15.9 kg) Shipping weight 38 lbs. ( 17.2 kg) Output configurations Audio output transformer taps per channel: 100V, 70V, 50V, 35V, 25V, 8Ω, 4Ω Dynamic headroom 1.2 dB Full power bandwidth 30Hz to 20kHz @ 0.5% THD Frequency response 30Hz to 20kHz (-3dB) Channel separation >80dB @ 1kHz Input impedance 50kΩ balanced; 25kΩ unbalanced Sensitivity 0.775V for rated power @ 1kHz Maximum input + 20dBu (7.75 V) 34 Appendix B: Specifications Specifications for Bose Model 2150 Commercial Power Amplifier (cont.) ® English IM distortion 0.2% THD <0.5% rated power, <0.2% 1/8 rated power Signal - to - noise ratio >95dB A-weighted below full power bandwidth CMRR >80dB @ 1kHz Power requirements USA/Canada: 120V ~ 50/60 Hz, 600W International: 220-240V ~ 50/60 Hz, 600W Japan: 100V ~ 50/60 Hz, 600W Fusing/protection Mains internally fused. Amplifier thermal and short circuit protection Display 19 LED indicators per channel 1 amber NETWORK, 1 amber STANDBY, 2 green READY, 2 red THERMAL, 1 red PROTECT, 2 amber SIGNAL, 2 green -20dB, 2 green -12dB, 2 yellow -6dB, 2 red CLIP Size (H x W x D) 3.5"H x 19"W x 16"D (8,9cmH x 48,3cmW x 40,1cmD) 35 36 English Bose Corporation Bose Corporation Bose Corporation ©2002 Bose Corporation, The Mountain, Framingham MA 01701-9168 USA 264080 AM Rev.00 JN20950