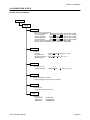
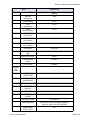
1
Operator Manual For printer model: GY412 PN: 9001246(B) Read this manual before using this product. Keep this document available for future reference. www.satoamerica.com SATO America, Inc. 10350A Nations Ford Road Charlotte, NC 28273 Main Phone: (704) 644.1650 Technical Support: (704) 644.1660 Technical Support Fax: (704) 644.1661 E-Mail: [email protected] [email protected] www.satoamerica.com © Copyright 2011 SATO America, Inc. All rights reserved. Reproduction in any manner of all or part of this document is prohibited. The content of this document may be changed without prior notice. Great care has been taken in the preparation of this document. If any problems, mistakes, or omissions are found, please contact your SATO reseller or technical support center. FCC Statement The printer complies with the requirements in Part 15 of FCC Rules for a Class B Computing Device. Operating the printer in a residential area may cause unacceptable interference to radio and TV reception. If the interference is unacceptable, you can reposition the equipment, which may improve reception. Safety Precautions Safety Precautions Please read the following information carefully before installing and using the printer. Pictographic Symbols This instruction manual and the printer labels use a variety of pictographic symbols to facilitate safe and correct use of the printer and to prevent injury to others and property damage. The symbols and meanings for them are given below. Be sure to understand these symbols well before reading the main text. Warning Caution Ignoring the instructions marked by this symbol and erroneously operating the printer could result in death or serious injury. Ignoring the instructions marked by this symbol and erroneously operating the printer could result in injury or property damage. Example Pictographs The pictograph means “Caution is required.” A specific warning symbol is contained inside this pictograph (The symbol at left is for electric shock). The pictograph means “Should not be done.” What is specifically prohibited is contained in or near the pictograph (The symbol at left means “Disassembly prohibited”). The pictograph means “Must be done.” What is specifically to be done is contained in the pictograph (The symbol at left means “Unplug the power cord from the outlet”). Warning Do not set on an unstable area • Do not set on an unstable area, such as a wobbly table or slanted area or an area subject to strong vibration. If the printer falls off or topples over, it could injure someone. Do not place containers full of water or other liquid on the printer • Do not place flower vases, cups, or other containers holding liquids, such as water or chemicals, or small metal objects near the printer. If they are spilled and get inside the printer, immediately turn off the power switch, unplug the power cord from the outlet, and contact your SATO reseller or technical support center. Using the printer in this condition could cause a fire or electric shock. Do not put objects inside the printer • Do not insert or drop in metal or burnable objects inside the printer’s openings (cable outlets, etc.). If foreign objects do get inside the printer, immediately turn off the power switch, unplug the power cord from the outlet, and contact your SATO reseller or technical support center. Using the printer in this condition could cause a fire or electric shock. Do not use other than the specified voltage • Do not use other than the specified Always ground the connections • Always connect the printer’s ground wire to a ground. Not grounding the ground wire could result in electric shock. Handling of the power cord • Do not damage, break, or modify the power cord. Also, do not place heavy objects on the power cord, heat it, or pull it because doing so could damage the power cord and cause a fire or electric shock. • If the power cord becomes damaged (core is exposed, wires broken, etc.), contact your SATO reseller or technical support center. Using the power cord in this condition could cause a fire or electric shock. • Do not modify, excessively bend, twist, or pull the power cord. Using the power cord in such a condition could cause a fire or electric shock. When the printer has been dropped or broken • If the printer is dropped or broken, immediately turn off the power switch, unplug the power cord from the outlet, and contact your SATO reseller or technical support center. Using the printer in this condition could cause a fire or electric shock. Do not use the printer when something is abnormal about it • Continuing to use the printer in the event something is abnormal about it, such as smoke or unusual smells coming from it, could result in fire or electric shock. Immediately turn off the power switch, unplug the power cord from the outlet, and contact your SATO reseller or technical support center for repairs. It is dangerous for the customer to try to repair it, so absolutely do not attempt repairs on your own. Do not disassemble the printer • Do not disassemble or modify the printer. Doing so could result in fire or electric shock. Ask your SATO reseller or technical support center to conduct internal inspections, adjustments, and repairs. Regarding the cutter • Do not touch the cutter with your hands or do not put something into the cutter. Doing so could result in an injury. Using the head cleaning fluid • Use of flame or heat around the head cleaning fluid is prohibited. Absolutely do not heat it or subject it to flames. • Keep the fluid out of reach of children to prevent them from accidentally drinking it. If the fluid is drunk, immediately consult with a physician. voltage. Doing so could result in fire or electric shock. GY412 Operator Manual Page i Safety Precautions Caution Do not place in areas with high Power cord humidity • Keep the power cord away from • Do not place the printer in areas hot devices. Getting the power with high humidity or where concord close to hot devices could densation forms. If condensacause the cord’s covering to tion forms, immediately turn off melt and cause a fire or electrithe power switch and do not use cal shock. the printer until it dries. Using • When unplugging the power the printer while condensation is cord from the outlet, be sure to on it could result in electric hold it by the plug. Pulling it by shock. the cord could expose or break Carrying the Printer the cord wires and cause a fire • When moving the printer, or electric shock. always unplug the power cord • The power cord set that comes from the outlet and check to with the printer is especially make sure all external wires are made for this printer. Do not use disconnected before moving it. it with any other electrical Moving the printer with the wires devices. still connected could damage Top cover the cords or connecting wires • Be careful not to get your finand result in a fire or electrical gers pinched when opening or shock. closing the top cover. Also be • Do not carry the printer with careful the top cover does not paper loaded in it. The paper slip off and drop. could fall out and cause an Print head injury. • The print head is hot after print• When setting the printer on the ing. Be careful not to get burned floor or a stand, make sure not when replacing paper or cleanto get your fingers or hands ing immediately after printing. pinched under the printer feet. • Touching the edge of the print Power supply head immediately after printing • Do not operate the power could result in injury. Use causwitch or plug in/unplug the tion when replacing the label or power cord with wet hands. when cleaning the print head. Doing so could result in electric You should not replace the print shock. head without having received the proper training. Page ii Loading paper • When loading roll paper, be careful not to get your fingers pinched between the paper roll and the supply unit. When not using the printer for a long time • When not using the printer for a long time, unplug the power cord from the outlet to maintain safety. During maintenance and cleaning • When maintaining and cleaning the printer, unplug the power cord from the outlet to maintain safety. GY412 Operator Manual Safety Precautions Precautions for Installation and Handling Printer operation can be affected by the printer environment. Refer to the following instructions for installation and handling of the printer. Select a Safe Location Place the printer on a surface that is flat and level. If the surface is not flat and level, this may result in poor print quality. This may also cause malfunction and shorten the life span of the printer. Do not place the printer on a location that produces vibration. Do not carry the printer when the roll label is set. Vibrating the printer may cause malfunction and shorten the life span of the printer. Do not place the printer in a location subject to water or oil. Do not place the printer in a location where it will be splashed with water or oil. Water or oil in the printer may cause a fire, electric shock, or malfunction. Avoid dust. Dust build up may result in poor print quality. This may cause not only malfunction but also shorten the life span of the printer. Keep out of direct sunlight. Keep the printer out of high temperature and humidity. Avoid locations subject to extreme or rapid changes in temperature or humidity. This printer has a built-in optical sensor. Exposure to direct sunlight will make the sensor less responsive and may cause the label to be sensed incorrectly. Close the top cover when printing. Power Supply This printer requires an AC power supply. Be sure to connect the printer to an AC power supply via the supplied AC power cord. Failure to do so may result in malfunction. Connect the power cord to a grounded power outlet. Provide a stable source of electricity to the printer. Do not share the power outlets with other appliances such as a heater and refrigerator requiring a measurable amount of power. Also, avoid using the power outlet near where such appliances are plugged into. This may cause voltage reduction and malfunction. Make sure that the printer is plugged into a grounded power outlet. GY412 Operator Manual Page iii Safety Precautions Page iv GY412 Operator Manual Table of Contents Table of Contents Introduction .................................................................................................................... 1-1 1.1 Features of the Printer........................................................................................................ 1.2 Unpacking .......................................................................................................................... 1.3 Parts Identification.............................................................................................................. 1.4 Operator Panel ................................................................................................................... 1-1 1-2 1-3 1-6 Installation ...................................................................................................................... 2-1 2.1 Site Location....................................................................................................................... 2-2 2.2 Media Selection.................................................................................................................. 2-2 2.3 Loading Labels ................................................................................................................... 2-3 2.4 Connections ....................................................................................................................... 2-5 2.5 Turning Off/On LCD Backlight.......................................................................................... 2-13 Operation and Configuration ........................................................................................ 3-1 3.1 Operator Panel ................................................................................................................... 3-2 3.2 Operating Modes................................................................................................................ 3-8 3.3 LCD Message Details....................................................................................................... 3-26 3.4 Default setting .................................................................................................................. 3-99 3.4 LCD Display Language .................................................................................................. 3-103 Troubleshooting............................................................................................................. 4-1 4.1 Error signal troubleshooting ............................................................................................... 4-2 4.2 Error Message When Detecting Command Error............................................................... 4-6 4.3 Error Messages .................................................................................................................. 4-8 4.4 Troubleshooting table....................................................................................................... 4-10 4.5 Interface troubleshooting.................................................................................................. 4-12 4.6 Test print troubleshooting................................................................................................. 4-13 Cleaning and Maintenance............................................................................................ 5-1 5.1 Cleaning The Print Head, Platen, and Rollers.................................................................... 5-2 5.2 How To Clean The Printer (Cleaning Kit) ........................................................................... 5-2 General Specifications .................................................................................................. 6-1 6.1 Printer Basic Specifications................................................................................................ 6-1 6.2 Optional Accessories Specifications ................................................................................ 6-13 Interface Specifications................................................................................................. 7-1 7.1 Interface types.................................................................................................................... 7.2 Interface ............................................................................................................................. 7.3 RS-232C Serial Interface ................................................................................................... 7.4 Universal Serial Bus (USB) Interface ................................................................................. 7.5 Local Area Network (LAN) Ethernet ................................................................................... 7-1 7-2 7-3 7-5 7-7 Appendix......................................................................................................................... 8-1 8.1 Cutter and Printer Motion ................................................................................................... 8.1 Cutter and Printer Motion (cont’d) ...................................................................................... 8.2 Offset Position Adjustment ................................................................................................. 8.3 Head Check Motion............................................................................................................ GY412 Operator Manual 8-2 8-3 8-7 8-9 Page 1 Table of Contents 8.4 Auto Label Feed ............................................................................................................... 8.5 Head Position (Up and Down).......................................................................................... 8.6 Reverse Eject Motion ....................................................................................................... 8.7 Segmented Printing.......................................................................................................... 8.8 Print Speed and Label Size.............................................................................................. 8.9 Label Saving Function...................................................................................................... 8.10 Print Operation Sequence .............................................................................................. Page 2 8-11 8-12 8-14 8-15 8-17 8-18 8-19 GY412 Operator Manual Section 1: Introduction INTRODUCTION 1 Thank you for your investment in this SATO printer product. This Operator Manual contains the basic information about the installation, setup, configuration, operation, and maintenance of the printer. A total of eight topics are covered herein, and they are organized as follows: Section 1: Introduction Section 2: Installation Section 3: Operation and Configuration Section 4: Troubleshooting Section 5: Cleaning and Maintenance Section 6: Basic Specifications Section 7: Interface Specifications Section 8: Appendix It is recommended that you read carefully and become familiar with each section before installing and maintaining the printer. Refer to the Table Of Contents at the front of this manual to search for the relevant information needed. All page numbers in this manual consist of a section number followed by the page number within the stated section. This section assists you in unpacking the printer from the shipping container. You will also be guided through a familiarization tour of the main parts and controls. The following information is provided: • • • Features of the printer Unpacking Parts Identification 1.1 FEATURES OF THE PRINTER The GY412 printer is a direct thermal printer that simultaneously prints on both sides of a label; the printer has two thermal print heads. The thermal label media is coated on each side using thermal technology. The SATO GY412 printer uses only fanfold media. With a print speed of up to 10 ips (25 mm/sec), print area up to 4.09 inches wide by 11.8 inches long (104 mm wide by 300 mm long), the GY412 is an economical printer with numerous features, making it suitable for a wide range of applications. The applications include transportation and logistics, e-commerce forms, shipping labels, financial, and more. GY412 Operator Manual Page 1-1 Section 1: Introduction 1.1 FEATURES OF THE PRINTER, CONT’D The key features of the GY412 are: • • • • • • • • • • • • • High print resolution (305 dpi) Operational benefits - It can reduce the risk of mismatching packing slip Easy label loading Power switch located on front of printer Easy operation Operating modes: Continuous, Tear-off, Cutter, or Print-Cut. Easy to open or close the thermal print heads Easy to clean print heads and print roller Lower cost - eliminates the need for additional printers Environment-friendly: Depending upon the application, the media and application can use a single liner, reducing waste Interface options: RS232C, USB 2.0, LAN (10/100 BaseT) 16 MB SDRAM, 16 MB Flash ROM, SD card slot Label cutter 1.2 UNPACKING When unpacking the printer, take note of the following: 1. The box should stay right-side up. Lift the printer out of the box carefully. 2. Remove all the packaging from the printer. 3. Remove the accessory items from their protective containers. 4. Set the printer on a solid, flat surface. Inspect the shipping container and printer for any sign of damage that may have occurred during shipping. Please note that SATO shall hold no liability of any damage of any kind sustained during shipping of the product. Notes • • If the printer has been stored in the cold, allow it to reach room temperature before turning it on. Please do not discard the original packaging box and cushioning material after installing the printer. They may be needed in future, if the printer needs to be shipped for repairs. 1.2.1 Included Accessories If there are any accessories missing, contact your SATO reseller or technical support center. After unpacking the printer, verify that you have the following materials: • • Global warranty Power cable Page 1-2 GY412 Operator Manual Section 1: Introduction 1.3 PARTS IDENTIFICATION Front side of the printer Cover opening button Operator panel Consists of LCD for displaying messages, nine operation buttons, and two LEDs for indicating printer status. Top cover Power on/off switch Turns power on or off. “ | ” is on “Ⴜ” is off. Label discharge outlet Discharges the printed label. Upper print head Upper platen roller Label length detection sensor Feed roller Lower print head Lower platen roller GY412 Operator Manual Page 1-3 Section 1: Introduction Back side of the printer Feed Roller Label guide lock lever Label feed entrance LAN interface Label guide USB interface RS-232C interface Left side of the printer SD card slot Page 1-4 GY412 Operator Manual Section 1: Introduction Right side of the printer AC input connector Connect the power cord to the printer here and plug its opposite end into the appropriate power receptacle. GY412 Operator Manual Page 1-5 Section 1: Introduction 1.4 OPERATOR PANEL Icons, instructions, and error messages are displayed here. Display panel Displays icons, instructions and error messages. STATUS LED ERROR LED Green: The printer is in operation. OFF: The printer operation is paused. Red light turns on or blinks when an error has occurred. ENTER button Registers set contents. LINE button Acts as the print start/stop toggle button. Acts as the data transmission ON/OFF toggle button. Arrow buttons Moves the cursor and enters the numeric value in various modes. Page 1-6 FEED button FUNCTION button CANCEL button Returns to the mode selection screen. Cancels print data. Returns to the previous screen. Feeds the label. Press once to feed one blank label. When the label is not at the right position after setting the label, press the LINE button to go offline, and then, press the FEED button to automatically adjust the label position to its top of form position. GY412 Operator Manual Section 2: Installation INSTALLATION 2 This section assists you in installing consumable media in the printer, as well as adjustment instructions, and installing other optional attachment units. The following information is provided: • • • • • 2.1 Site Location 2.2 Media Selection 2.3 Loading Labels 2.4 Connections 2.5 Turning Off/On LCD Backlight GY412 Operator Manual Page 2-1 Section 2: Installation 2.1 SITE LOCATION Consider the following when setting up the printer: •Place the printer on a solid flat surface with adequate space. Make sure there is enough space above the printer to provide clearance for the top cover to swing open. •Place it away from hazardous materials or dusty environments. •Place it within operational distance of the host computer, within interface cable specifications. 2.2 MEDIA SELECTION The size and type of the labels to be printed should have been taken into consideration before printer purchase. Ideally, the media width will be equal to, or just narrower than, the print head. Using media that does not cover the print head will allow the platen roller to tread on it and wear it out. The media edge will also wear a groove in the platen roller, which can affect print quality. Note: For optimal print performance and durability, please use SATO-certified label and supplies on this printer. Using supplies not tested and approved for use by SATO can result in unnecessary wear and damage to vital parts of the printer, and it may void the warranty. To find the specifications for the media, refer to the Basic Specifications chapter of this manual. This printer can print only on fan-folded media. The printer uses sensors to detect I-marks or gaps on the media in order to precisely position the print content. The sensors are: • • I-mark sensor (Reflective type) Gap sensor (Transmissive type) Page 2-2 GY412 Operator Manual Section 2: Installation 2.3 LOADING LABELS Opening the top cover The top cover, or platen, of the printer opens so that you can access the print heads or make some adjustments. WARNING • Make sure that the cover rests firmly so that it will not fall forward and injure your hands. 1. On the top surface of the printer, press down on one or both of the semi-circular blue buttons to open the top cover. Figure 2-5, Opening the top cover Note: • We recommend that you set the printer for either the I-mark sensor or the gap sensor before you load labels. GY412 Operator Manual Page 2-3 Section 2: Installation 2.3 LOADING LABELS, CONT’D Warnings • When replacing media, bear in mind that the print heads and their surrounding areas remain hot. Keep your fingers away from these areas to prevent injury. • Avoid touching even the edge of the print head with your bare hands. 1. Switch on power. 2. Position stack of fanfolded label media to the rear of the printer. 3. Insert the leading edge of the fanfolded label media in the label feed entrance at the top rear of the printer. The printer will automatically feed it. Depending on the sensor type to be used, when you turn on the power, the top of the label or I-mark will be detected and then, the printer will feed the label to the standby position. Figure 2-1, Inserting the media Page 2-4 GY412 Operator Manual Section 2: Installation 2.4 CONNECTIONS 2.4.1 Interface connections Interface options are factory installed. The following interface types are standard: • RS-232-C interface board • LAN interface board • USB interface board Connect interface cable from the printer to the host computer. Use the cable that is compatible with the standard of the interface board as stated in Section 7: Interface Specifications. Make sure the cable is correctly oriented before you insert it. 2.4.2 Main Port and Sub Port Your printer’s interface (RS-232-C, USB, or LAN) can be set to Main Port or Sub Port. When the interface is set to the Main Port, it can receive various SBPL commands and it can execute print operations. You can monitor the printer status through the interface when it is set to Sub Port. You will need to determine which Main Port and which Sub Port your printer will use. Main Port and Sub Port cannot use the same interface at the same time. By assigning the interfaces to the Main Port and Sub Port, you can establish various types of communication. 2.4.2.1 Main Port The Main Port receives the print data mainly. All the SBPL commands can be used for this port. 2.4.2.2 Sub Port The Sub Port monitors the printer status and connects the printer with the external device. For available commands, refer to 3.2 Return Status. 2.4.3 Interface Combination The interface combinations that can be used for Main Port and Sub Port are as follows. o: Settable Main Port RS-232C RS-232C Sub Port USB o LAN o USB LAN o o o o 2.4.4 Attaching Interface Cable This section explains the power cable and interface cable connection procedures. The GY412 interface types are: USB interface: USB B-type connector LAN interface (10/100 BASE) RS-232C interface GY412 Operator Manual Page 2-5 Section 2: Installation 2.4 CONNECTIONS, CONT’D Use one of the figures below to connect the cable for your interface to the printer. USB Figure 2-2, USB interface LAN Figure 2-3, LAN interface Page 2-6 GY412 Operator Manual Section 2: Installation 2.4 CONNECTIONS, CONT’D RS-232C Figure 2-4, RS-232C interface In addition, there is an SD card slot (1 slot) * Eject type. GY412 Operator Manual Page 2-7 Section 2: Installation 2.4 CONNECTIONS, CONT’D 2.4.5 SD Card The SD card is used for uploading and downloading the data (graphics, extended character) and the printer firmware saved in the printer. The following are the folder and file names to be stored (or viewed) when uploading (or downloading). To insert, seat, and remove the SD or Memory Card 1. To insert the SD card, hold it as shown in the figure below. 2. To seat the card in the slot, press it in until it makes a slight clicking sound and it is almost completely inside the printer. When seated and ready to operate, it protrudes a very small amount, approximately 0.125 inch (3.18 mm). 3. To remove the card from the printer, it is best to switch off the printer. Then, with your finger, press the card edge a slight amount to release the card from the slot. The slot will immediately release the card. Page 2-8 GY412 Operator Manual Section 2: Installation 2.4 CONNECTIONS, CONT’D SD Card Folder Architecture SD card route PR42 DATA Data for memory card command Form overlay registration :SBPLXXXX.OVL (XXXX : Reg. No.0001 to 0099) Format registration : SBPLXXXX.FMT (XXXX : Reg. No. 0001 to 0999) Graphic registration : SBPLXXXX.IMG (XXXX : Reg. No. 0001 to 0999) BMP file registration : SBPLXXXX.BMP (XXXX : Reg. No. 0001 to 0999) PCX file registration : SBPLXXXX.PCX (XXXX : Reg. No. 0001 to 0999) Memory card 16x16 Extended character registration : SBPL16.BMF Memory card 24x24 Extended character registration : SBPL24.BMF PROG Firmware Firmware Kanji outline font Kanji font (Ryobi font) SEMBL program : PRG42_XX.BIN (XX : Reg. No. 01 to 09) : Kan1_O.BIN : Kan1_RX.BIN (X : Reg. No. 1 to 9) : SEMBL.BIN FONT Download font / log Download font data : USRFONTX.DAT (X : Reg. No. (1 to 6)) CONF Printer configuration information Printer configuration information file : PRN42.INI RAS Rasterized font No corresponding files for GY412 LOG Maintenance Receive buffer STATUS5 log FRAM dump GY412 Operator Manual : RCVBUF.DAT : HISTSTS5.DAT : FRAMDMP.DAT Page 2-9 Section 2: Installation 2.4 CONNECTIONS, CONT’D When using the SD card In the folder architecture, the folders under [PR42] can be created by formatting the SD card in Memory Card Mode. • Be sure to format the SD card in Memory Card Mode. If you are formatting the SD card by Windows or other methods, you may not be able to save or view the data anymore. • Attempting to download or upload the data without formatting the SD card properly will cause a preliminary error to occur. Do not change file and folder names under the folder [PR42]. Inside the folders [PROG] and [FONT], if you save files other than released (or uploaded) firmware and font files, the printer motion after download may be unstable. Be sure to not save any files unless they are released (or uploaded). Do not remove the SD card while the printer is accessing the data in the SD card. Doing so may result in data corruption. When you save the data to the SD card by using the save-related commands, its file creation date will be the firmware release date. 2.4.6 Connecting the power cable and turning on power This section explains the power cable connection procedures. After installing the printer, connect the power cord as shown below. Page 2-10 GY412 Operator Manual Section 2: Installation 2.4 CONNECTIONS, CONT’D CAUTION • • The power cord set supplied with this printer is only for use with this printer. Do not use it for other electrical products. Do not operate the POWER button or plug in/unplug the power cord with wet hands or wet fingers. Doing so could result in electric shock. 1. To connect the power cord to the printer, be sure to confirm the correct orientation of the plug. Plug the power cord into the printer. Use your other hand to secure the printer when connecting the power cord. 2. A three-prong power cord is provided. If your power socket has three contacts, the third one is connected to the ground for safety. If your power outlet has two slots, use a three-prong to two-prong adapter. 3. Press the power switch to the direction of [ | ]. ON OFF GY412 Operator Manual Page 2-11 Section 2: Installation 2.4 CONNECTIONS, CONT’D 2.4.7 Turning Off the Power CAUTION • Do not operate the POWER button or plug in/unplug the power cord with wet hands. Doing so could result in electric shock. 1. Ensure that the printer is in OFFLINE mode before you turn off the power. If the printer is in ONLINE mode, press the LINE button to go OFFLINE. 2. After an [OFFLINE] message is displayed on the LCD screen, press the power switch toward [ o ]. ON OFF Page 2-12 GY412 Operator Manual Section 2: Installation 2.5 TURNING OFF/ON LCD BACKLIGHT This function is designed to reduce power consumption by turning off the LCD backlight when the printer is not operated for a specified period of time. The time required for turning of the LCD backlight can be specified on the window for the LCD POWER SAVING MODE SETTING. The standard or default number of minutes is 5. This is set at the factory. To keep the LCD backlight constantly on, set the number of minutes to 00. This disables this Power Saving Mode. Only the LCD backlight goes off, and the message displayed on the LCD remains. To adjust the LCD screen brightness in Normal Mode To turn LCD backlight Off 1. In Normal Mode (ONLINE or OFFLINE), HEX Dump Mode, or SEMBL Mode, go to this setting screen to adjust the minutes range to any number between zero and15 minutes. Notes • • Only the LCD backlight goes off; the message displayed on the LCD remains. The LCD backlight is turned off in the following conditions and when the time specified has gone by. Print data (ESC+A through ESC+Z) command has not been received by the printer’s interfaces. It is okay if the printer interface receives Status Return Request and Cancel Request of any protocol, for improper data. Printer is not in Download Mode. No key or button input. Printer is not in an error condition. Printer is neither printing nor feeding. To turn LCD backlight On While the backlight is Off, you can turn the backlight On again by trying one of the following methods. • • • • Print data has been received from any interface in the printer. However this is not true if a Status Request Return has been received, or if a Cancel Request of a protocol is received, for improper data. No key or button input. Printer error such as Head Open has occurred. Printing operation is started. Pressing any button while the LCD backlight is Off will turn the LCD backlight On. (If you press the LINE button in ONLINE Mode while the LCD backlight is Off, the printer does not go OFFLINE.) GY412 Operator Manual Page 2-13 Section 2: Installation This page is intentionally left blank. Page 2-14 GY412 Operator Manual Section 3: Operation and Configuration OPERATION AND CONFIGURATION 3 Before using the printer, it is best to read this manual thoroughly. Otherwise, you may disturb default settings on which the instructional procedures in this manual are based. Most of the printer’s settings are controlled via standard SBPL commands or by using the provided SATO Utilities Tool application. Some printer settings may be manually configured via the POWER, and FEED/LINE buttons and/or via the potentiometers located on the main PCB. Remove the covers in order to access the potentiometers when you need to adjust something. All of the printer’s buttons, and potentiometers are used either singularly, or together, to perform configuration activities. The instructions to these operations are described in this section. There are DIP switches on the Main PCB. However, they are reserved for a function enhancement, and they are not usable. GY412 Operator Manual Page 3-1 Section 3: Operation and Configuration 3.1 OPERATOR PANEL Icons, instructions, and error messages are displayed on the Operator Panel on the top of the printer. Display panel Displays icons, instructions and error messages. STATUS LED ERROR LED Green: The printer is in operation. OFF: The printer operation is paused. Red light turns on or blinks when an error has occurred. ENTER button Registers set contents. LINE button Acts as the print start/stop toggle button. Acts as the data transmission ON/OFF toggle button. Arrow buttons Moves the cursor and enters the numeric value in various modes. FEED button FUNCTION button CANCEL button Returns to the mode selection screen. Cancels print data. Returns to the previous screen. Feeds the label. Press once to feed one blank label. When the label is not at the right position after setting the label, press the LINE button to go offline, and then, press the FEED button to automatically adjust the label position to its top of form position. LCD This Liquid Crystal Display is a 128 dot x 64 dot graphic display. This screen displays various messages. Up to five icons and two lines of alphanumeric text can appear on the LCD display to indicate the current printer status. The same area can also display two lines of alphanumeric text during various setting modes. STATUS LED Green light is on when ONLINE. Light is off when OFFLINE or when there is an error. Green light blinks when detecting buffer near full. Power saving function (LCD backlight is OFF): Light blinks at 2-second intervals. ERROR LED This light is red solid or blinking when it detects a printer error. Page 3-2 GY412 Operator Manual Section 3: Operation and Configuration POWER SWITCH (on the printer’s front panel) Turns the printer ON or OFF. LINE button This button toggles between ONLINE and OFFLINE modes. ENTER button Confirms the setting value in configuration modes. CANCEL button Goes back to the previous setting when in configuration modes. FEED button Feeds the paper. Arrow buttons Move the cursor and they enter the setting value when in configuration modes. FUNCTION button Goes back to the menu screen when the printer is in configuration modes. GY412 Operator Manual Page 3-3 Section 3: Operation and Configuration 3.1 OPERATOR PANEL (cont’d) What you see on the Operator Panel LCD Generally, the printer operates via the Normal mode, which consists of: • The ONLINE mode or state • The OFFLINE mode or state Pressing the LINE button toggles the printer between the ONLINE state and the OFFLINE state. ONLINE Mode When the printer is ONLINE, the following activities will be possible: • The printer is ready to receive print data from the computer or other connected devices • The printer is ready to start printing The number displayed on the bottom line of the LCD panel shows the media quantity status. As soon as a print job is received, the display on the bottom left will indicate the number of labels to be printed. When the label job begins to print, this display will indicate the remaining number (countdown) of labels to be printed. The total printed quantity since power up will be indicated at the bottom right of display. Display Normal Mode ONLINE state Onscreen message Operation button The message, ONLINE, indicates that the printer is ONLINE. The printer can receive data and print labels. Ongoing print operation will be temporarily paused. Total print quantity is displayed at the lower right of the screen, and this counter will count down. Button LINE Description Goes to the OFFLINE screen. Ongoing print operation will temporarily pause when you press the LINE button. Makes the LCD display lighter. or ← Makes the LCD display darker. or → OFFLINE Mode When the printer is ONLINE, pressing the LINE button once will cause the printer to go OFFLINE. Any printing job will be PAUSED once the printer is brought OFFLINE. When the printer is OFFLINE, the activities for ONLINE mode are no longer possible. Page 3-4 GY412 Operator Manual Section 3: Operation and Configuration User Mode example Display User Mode Onscreen message The printer is in User Mode. The name of the setting item varies depending on which setting screen you have selected. This screen allows the user to adjust a base point for printing on the upper surface. You can operate only the buttons shown in the bottom right corner of the screen. These are the arrow buttons ( Operation button Button ). Description Up and Down Arrow buttons Enters the setting value. (Move the cursor to + and - for its switch over.) Ongoing print operation will temporarily pause when you press the LINE button. Left and Right Arrow buttons Moves the cursor. ENTER Saves the setting and goes to the PITCH OFFSET LOWER HEAD screen. CANCEL Goes to the PRINT DARKNES LOWER HEAD screen without saving the setting. FUNCTION Goes to the ONLINE MODE screen without saving the setting. List of Icons Mode Display icons Icon Icon Description of Manual Conventions → In this manual, either one of these indicates the right arrow button. ← In this manual, either one of these indicates the left arrow button. ↓ In this manual, either one of these indicates the down arrow button. ↑ In this manual, either one of these indicates the up arrow button. No Icon Description 1 The printer is ONLINE. 2 The printer is OFFLINE. GY412 Operator Manual Page 3-5 Section 3: Operation and Configuration No Icon Description 3 The printer is in Test Print Mode or HEX Dump Print Mode. 4 The printer is in SEMBL Mode. 5 The printer is in Download Mode. Mode selection icons No Icon Description 1 The printer enters Normal Mode. 2 The printer enters User Mode. 3 The printer enters Interface Mode. 4 The printer enters SEMBL Mode. 5 The printer enters Advanced Mode. 6 The printer enters HEX Dump Print Mode. 7 The printer enters Memory Card Mode. Page 3-6 GY412 Operator Manual Section 3: Operation and Configuration 3.1 Operator Panel (cont’d) Error message icons No Icon Description 1 Detection of paper end. 2 Detection of sensor error. 3 Mismatched print data and paper size. 4 Detection of cover open. 5 Detection of print head burnout. 6 Detection of connection error. 7 Size of received data exceeds size of receiving buffer. 8 Detection of item No. error or BCC error. 9 Detection of cutter error. 10 1) Write failure to main ROM. 2) Detection of Kanji ROM error 11 Detection of command error when command error display is enabled. 12 1) Memory access failure. 2) Memory space is exhausted. 13 Detection of error other than listed above. 14 Error number corresponding to error message. Warning message icons No Icon Description 1 Detection of command error. 2 Detection of receive buffer near full. 3 There is a problem with the print head. 4 Separation printing is enabled. GY412 Operator Manual Page 3-7 Section 3: Operation and Configuration 3.2 OPERATING MODES You can set the printer to operate in any of the following modes: 1. NORMAL mode (including ONLINE/OFFLINE modes) 2. TEST PRINT mode • • • • Pitch Position Upper Pitch Position Lower Offset Position Darkness 3. USER mode 4. INTERFACE mode • • • LAN Interface Setting USB Interface Board Setting RS232-C Interface Board Setting 5. SEMBL mode 6. ADVANCED mode 7. HEX Dump mode 8. MEMORY CARD mode 9. DEFAULT SETTING mode 10.SERVICE mode • Various settings 11.DOWNLOAD mode Page 3-8 GY412 Operator Manual Section 3: Operation and Configuration 3.2 OPERATING MODES (cont’d) Normal Mode The following flow chart provides a clear summary of each of the modes and its access method. VER ONLINE PAUSE QTY: QTY: IOFFLINE QTY: ONLINE MODE PITCH POSITION UPPER mm USER MODE INTERFACE MODE SEMBL MODE ADVANCED MODE HEX DUMP MODE MEMORY CARD MODE CANCEL PRINT JOB NONO YES GY412 Operator Manual CANCEL PRINT JOB COMPLETED Page 3-9 Section 3: Operation and Configuration 3.2 OPERATING MODES (cont’d) Normal Mode, continued TEST PRINT CONFIGURATION BARCODE DEFAULT MODE PRINTER SETTING ALT. PROTOCOL PRINTER SETTING MAINTENANCE MODE SERVICE MODE FACTORY MODE SERVICE MODE SENSOR LEVEL SETTING COUNTER CLEAR NONE ALL INTERFACE SELECT INTERFACE SD CARD INTERFACE SELECT INTERFACE SD CARD Page 3-10 GY412 Operator Manual Section 3: Operation and Configuration 3.2 OPERATING MODES (cont’d) Test Print Mode OFFLINE GY412 Operator Manual OFFLINE Page 3-11 Section 3: Operation and Configuration 3.2 OPERATING MODES (cont’d) User Mode ONLINE Mode Page 3-12 ONLINE Mode GY412 Operator Manual Section 3: Operation and Configuration 3.2 OPERATING MODES (cont’d) Interface Mode ONLINE Mode ONLINE Mode GY412 Operator Manual Page 3-13 Section 3: Operation and Configuration 3.2 OPERATING MODES (cont’d) LAN Interface Setting ONLINE Mode INTERFACE Mode ONLINE Mode To INTERFACE Mode Page 3-14 GY412 Operator Manual Section 3: Operation and Configuration 3.2 OPERATING MODES (cont’d) USB Interface Board Setting To ONLINE Mode From INTERFACE Mode To INTERFACE Mode GY412 Operator Manual Page 3-15 Section 3: Operation and Configuration 3.2 OPERATING MODES (cont’d) RS-232-C Interface Board Setting To ONLINE Mode From INTERFACE Mode To INTERFACE Mode Page 3-16 GY412 Operator Manual Section 3: Operation and Configuration 3.2 OPERATING MODES (cont’d) SEMBL Mode START PROGRAM NONE OFFLINE ONLINE QTY: GY412 Operator Manual QTY: Page 3-17 Section 3: Operation and Configuration 3.2 OPERATING MODES (cont’d) Advanced Mode To ONLINE Mode Page 3-18 To ONLINE Mode GY412 Operator Manual Section 3: Operation and Configuration 3.2 OPERATING MODES (cont’d) HEX Dump Mode To ONLINE Mode From ONLINE Mode Goes to NORMAL Mode after Hex Dump print of data (single item) in receive buffer. GY412 Operator Manual Page 3-19 Section 3: Operation and Configuration 3.2 OPERATING MODES (cont’d) Memory Card Mode “NO” + [ENTER] “NO” + [ENTER] Page 3-20 GY412 Operator Manual Section 3: Operation and Configuration 3.2 OPERATING MODES (cont’d) Test Print Mode TEST PRINT MODE CONFIGURATION BARCODE HEAD CHECK MEMORY FONT FACTORY TEST PRINT SIZE SMALL LARGE PITCH POSITION UPPER mm PITCH POSITION LOWER OFFSET POSITION ENTER > PRINT ENTER > PRINT ENTER > PRINT DARKNESS mm ENTER > PRINT TEST PRINT ENTER > STOP GY412 Operator Manual Page 3-21 Section 3: Operation and Configuration 3.2 OPERATING MODES (cont’d) Default Setting Mode DEFAULT MODE ALT. PROTOCOL DEFAULT DEFAULT PRINTER SETTING ALT. PROTOCOL YES YES DEFAULT SETTING COMPLETED PLEASE POWER OFF Page 3-22 GY412 Operator Manual Section 3: Operation and Configuration 3.2 OPERATING MODES (cont’d) Service Mode Sensor Adjustment Screen GY412 Operator Manual Page 3-23 Section 3: Operation and Configuration 3.2 OPERATING MODES (cont’d) Various Settings SERVICE Mode Page 3-24 SERVICE Mode GY412 Operator Manual Section 3: Operation and Configuration 3.2 OPERATING MODES (cont’d) Download Mode PROGRAM DOWNLOAD COMPLETED GY412 Operator Manual Page 3-25 Section 3: Operation and Configuration 3.3 LCD MESSAGE DETAILS 3.3.1 Normal Mode 3.3.1.1 Online Display Normal Mode Online state Onscreen message ONLINE QTY:000000 Operation button Button LINE Page 3-26 The message, ONLINE, indicates that the printer is ONLINE. The printer can receive data and print labels. Ongoing print operation will be temporarily paused. Total print quantity is displayed at the lower right of the screen, and this counter will count down. Description Goes to the OFFLINE screen. Ongoing print operation will temporarily pause when you press the LINE button. ← Makes the LCD display lighter. → Makes the LCD display darker. GY412 Operator Manual Section 3: Operation and Configuration 3.3 LCD MESSAGE DETAILS (cont’d) 3.3.1.2 Offline Display Normal Mode Offline state Onscreen message The message indicates that the printer is ONLINE. Paused print operation will be resumed. Press LINE to go to the [ONLINE] screen. Press ENTER to go to the [ONLINE MODE] screen. Press CANCEL to go to the [CANCEL PRINT JOB] screen. Press FUNCTION to go to the [ONLINE MODE] screen. Press ↓ to go to the adjustment screen. OFFLINE QTY:000000 Operation button Button Description LINE Goes to the ONLINE screen. ENTER Goes to the [ONLINE MODE] screen. CANCEL Goes to the [CANCEL PRINT JOB] screen. FUNCTION Goes to the [ONLINE MODE] screen. ↓ Goes to the adjustment screen. ← Makes the LCD display lighter. → Makes the LCD display darker. Availability of buttons (o = Available, x = Not available) Status LINE ENTER FEED CANCEL FUNCTION ONLINE o x x x x ONLINE (Qty ≠ 0) o x o o x OFFLINE (Qty = 0) o o o o o In NORMAL Mode, available buttons change, depending upon the status. GY412 Operator Manual Page 3-27 Section 3: Operation and Configuration 3.3 LCD MESSAGE DETAILS (cont’d) 3.3.1.3 Online Mode Display Normal Mode - Mode menu - Online Mode Onscreen message This is a mode selection screen. Use arrow keys to select one of the seven modes listed below and press ENTER. • Online mode • User mode • Interface mode • Memory card mode • SEMBL mode • Advanced mode • HEX Dump mode ONLINE MODE Operation button Button Description ENTER Goes to the mode you selected. →, ←, ↓, ↑ Moves the cursor. FUNCTION Goes to the OFFLINE screen. CANCEL Goes to the OFFLINE screen. 3.3.1.4 Print Cancellation Display Normal Mode - Cancellation of print job Onscreen message CANCEL PRINT JOB YES NO Operation button Button →, ← ENTER CANCEL Page 3-28 This clears all the received print data. Use the arrow keys to move the cursor and press ENTER. YES: Clears the received print data and goes ONLINE. NO: Goes OFFLINE without clearing the print data. The default setting is NO. Description Moves the cursor. YES: Clears the received print data and goes ONLINE. NO: Goes OFFLINE without clearing the print data. Goes to the OFFLINE screen without clearing the print data. GY412 Operator Manual Section 3: Operation and Configuration 3.3 LCD MESSAGE DETAILS (cont’d) Display Normal Mode - Cancellation of print job Onscreen message CANCEL PRINT JOB YES NO This message appears when the print data is cleared completely. Goes to the OFFLINE screen after displaying this message about 3 seconds. 3.3.1.5 Adjustment Screen Display Adjustment screen - Adjustment of print start position on the upper surface Onscreen message PITCH POSITION UPPER +0.00 mm Operation button Button ↓, ↑ ENTER GY412 Operator Manual This adjusts the print position on the upper surface. Use the arrow buttons to change setting value and press ENTER. The setting value can be adjusted by ±0.25 mm regardless of print density. The setting range is ±3.75 mm and the default setting is +0.00 mm. Description Enters setting value by ±0.25 mm. Saves the setting and goes to the OFFSET POSITION screen. CANCEL Goes to the OFFLINE screen without saving the setting. FUNCTION Goes to the OFFLINE screen without saving the setting. Page 3-29 Section 3: Operation and Configuration 3.3 LCD MESSAGE DETAILS (cont’d) Display Adjustment screen - Adjustment of print start position on the lower surface Onscreen message PITCH POSITION LOWER +0.00 mm Operation button Button ↓, ↑ ENTER Display Enters setting value by ±0.25 mm. Saves the setting and goes to the OFFSET POSITION screen. Goes to the OFFLINE screen without saving the setting. FUNCTION Goes to the OFFLINE screen without saving the setting. Adjustment screen - Adjustment of offset (cut/tear-off) position OFFSET POSITION +0.00 mm Button ↓, ↑ ENTER Page 3-30 Description CANCEL Onscreen message Operation button This adjusts the print position on the lower surface. Use the arrow buttons to change setting value and press ENTER. The setting value can be adjusted by ±0.25 mm regardless of print density. The setting range is ±3.75 mm and the default setting is +0.00 mm. This adjusts the offset (cut/tear) position. Use the arrow buttons to change setting value and press ENTER. The setting value can be adjusted by ±0.25 mm regardless of print density. The setting range is ±3.75 mm and the default setting is +0.00 mm. Description Enters setting value by ±0.25 mm. Saves the setting and goes to the Darkness screen. CANCEL Goes to the OFFLINE screen without saving the setting. FUNCTION Goes to the OFFLINE screen without saving the setting. GY412 Operator Manual Section 3: Operation and Configuration 3.3 LCD MESSAGE DETAILS (cont’d) Display Adjustment screen - Darkness setting Onscreen message DARKNESS 50 Operation button This adjusts print darkness. Use the arrow buttons to change the setting value and press ENTER. The setting range is from 00 to 99 and the default setting is 50. Button Description ↓, ↑ Enters setting value. ENTER Saves the setting and goes to the PITCH POSITION screen. CANCEL Goes to the OFFLINE screen without saving the setting. FUNCTION Goes to the OFFLINE screen without saving the setting. 3.3.1.6 User Mode Display User Mode - Password entry Onscreen message PASSWORD 0000 Operation button Button Description ↓, ↑ Enters password. →, ← Moves the cursor. ENTER GY412 Operator Manual This enters the password. Use the up and down arrow buttons to change setting value and press ENTER. Use the left and right arrow buttons to move the cursor. Enter the password set in Service Mode. This message is displayed only when SET PASSWORD is set to ON in Service Mode. Verifies the entered password. Goes to the PRINT SPEED screen after verifying the password. CANCEL Goes to the ONLINE MODE screen. FUNCTION Goes to the ONLINE MODE screen. Page 3-31 Section 3: Operation and Configuration 3.3 LCD MESSAGE DETAILS (cont’d) Display User Mode - VR setting Onscreen message OFFSET VOLUME PITCH +0.00 +0.00 OFFSET +25 mm DARKNESS 50 Operation button Button ENTER Goes to the PRINT SPEED screen. Goes to the SERVICE MODE screen. FUNCTION Goes to the SERVICE MODE screen. User Mode - Print speed setting Onscreen message PRINT SPEED 06 IPS Button ↓, ↑ ENTER CANCEL FUNCTION Page 3-32 Description CANCEL Display Operation button This screen indicates the VR setting values on the main PCB. It displays the following adjustment values. PITCH: It shows the value of print offset volume on both upper and lower surfaces. OFFSET: This shows the value of print offset volume on both upper and lower surfaces. DARKNESS: This shows the value of darkness volume. This sets print speed. Use the up and down arrow buttons to change setting value and press ENTER. The default value is 06 IPS. Description Enters setting value. Saves the setting and goes to the PRINT DARKNESS UPPER HEAD screen. Goes to the OFFSET VOLUME screen without saving the setting. Goes to the ONLINE MODE screen without saving the setting. GY412 Operator Manual Section 3: Operation and Configuration 3.3 LCD MESSAGE DETAILS (cont’d) Display User Mode - Print darkness setting of upper head Onscreen message PRINT DARKNESS 1 2 3 4 5 Operation button Button →, ← ENTER Display Moves the cursor. This saves the setting and goes to the PRINT DARKNESS LOWER HEAD screen. Goes to the PRINT SPEED screen without saving the setting. FUNCTION Goes to the ONLINE MODE screen without saving the setting. User Mode - Print darkness setting of lower head PRINT DARKNESS 1 2 3 4 5 This sets the print darkness on the lower surface of the paper. Use the left and right arrow buttons to move the cursor and press ENTER. The number 1 is the lightest and 5 is the darkest color. The default setting is 3. Button →, ← ENTER GY412 Operator Manual Description CANCEL Onscreen message Operation button This sets the print darkness on the upper surface of the paper. Use the left and right arrow buttons to move the cursor and press ENTER. The number 1 is the lightest and 5 is the darkest color. The default setting is 3. Description Moves the cursor. This saves the setting and goes to the PITCH OFFSET UPPER HEAD screen. CANCEL Goes to the PRINT DARKNESS UPPER HEAD screen without saving the setting. FUNCTION Goes to the ONLINE MODE screen without saving the setting. Page 3-33 Section 3: Operation and Configuration 3.3 LCD MESSAGE DETAILS (cont’d) Display User Mode - Adjustment of base point for printing on the upper surface Onscreen message PITCH OFFSET UPPER HEAD V:+0000 H:+0000 Operation button Button ↓, ↑ →, ← Page 3-34 This coordinates the base point for printing on the upper surface. Use the up and down arrow buttons to change setting value and press ENTER. Use the left and right arrow buttons to move the cursor, and to select an input item. V is the vertical print position and H is the horizontal print position. You can set this by 1 dot, and the default setting is V:+0000 H:+0000, regardless of print density. Setting range: V: ±0 to 1200, H: ±0 to 1200. Description Enters setting value. Move the cursor to + and - for its switch over. Moves the cursor. ENTER Saves the setting, and goes to the PITCH OFFSET LOWER HEAD screen. CANCEL Goes to the PRINT DARKNESS LOWER HEAD screen without saving the setting. FUNCTION Goes to the ONLINE MODE screen, without saving the setting. GY412 Operator Manual Section 3: Operation and Configuration 3.3 LCD MESSAGE DETAILS (cont’d) Display Normal Mode - Adjustment of base point for printing on the lower surface Onscreen message PITCH OFFSET LOWER HEAD V:+0000 H:+0000 Operation button Button ↓, ↑ →, ← ENTER CANCEL FUNCTION GY412 Operator Manual This coordinates the base point for printing on the lower surface. Use the up and down arrow buttons to change setting value and press ENTER. Use the left and right arrow buttons to move the cursor, and to select an input item. V is the vertical print position and H is the horizontal print position. You can set this by 1 dot, and the default setting is V:+0000 H:+0000, regardless of print density. Setting range: V: ±0 to 1200, H: ±0 to 1200. Description Enters setting value. Move the cursor to + and - for its switch over. Moves the cursor. Saves the setting, and goes to the CUTTER OFFSET screen. Goes to the PITCH OFFSET UPPER HEAD screen without saving the setting. Goes to the ONLINE MODE screen, without saving the setting. Page 3-35 Section 3: Operation and Configuration 3.3 LCD MESSAGE DETAILS (cont’d) Display User Mode - Adjustment of cut position Onscreen message CUTTER OFFSET +0000 dot Operation button Button ↓, ↑ →, ← ENTER CANCEL FUNCTION Page 3-36 This adjusts the base point for paper cutting. Use ↑ and ↓ keys to change setting value and press ENTER. Use ← and → keys to move the cursor and select an input item. Can be set by 1 dot. The default setting is “+0000 dot” regardless of print density. Setting range: ±0 to 0045 Description Enters setting value. Move the cursor to + and - for its switch over. Moves the cursor. Saves the setting, and goes to the ZERO SLASH screen. Goes to the PITCH OFFSET LOWER HEAD screen without saving the setting. Goes to the ONLINE MODE screen, without saving the setting. GY412 Operator Manual Section 3: Operation and Configuration 3.3 LCD MESSAGE DETAILS (cont’d) Display User Mode - Zero slash setting Onscreen message ZERO SLASH YES Operation button NO Button →, ← ENTER CANCEL FUNCTION GY412 Operator Manual This enables or disables zero slash setting. Use the left and right arrow buttons to move the cursor, and then press ENTER. YES: (0) will be accompanied by a slash. NO: No slash will appear. The default setting is NO. Description Moves the cursor. Saves the setting, and goes to the CHARACTER CODE screen. Goes to the CUTTER OFFSET screen without saving the setting. Goes to the ONLINE MODE screen, without saving the setting. Page 3-37 Section 3: Operation and Configuration 3.3 LCD MESSAGE DETAILS (cont’d) Display User Mode - Character pitch setting Onscreen message CHARACTER PITCH PROPORTIONAL FIXED Operation button Button →, ← ENTER Page 3-38 Enabling or disabling proportional pitch. Use ← and → keys to move the cursor and press ENTER. "PROPORTIONAL" : Data will be printed without character spacing. "FIXED" : Data will be printed with fixed character spacing. The default setting is "FIXED". Description Moves the cursor. Saves the setting, and goes to the ONLINE MODE screen. CANCEL Goes to the CHARACTER CODE screen without saving the setting. FUNCTION Goes to the ONLINE MODE screen, without saving the setting. GY412 Operator Manual Section 3: Operation and Configuration 3.3 LCD MESSAGE DETAILS (cont’d) 3.3.1.7 Interface Mode Display Interface Mode -Password entry Onscreen message PASSWORD 0000 Operation button Button Description ↓, ↑ Enters password. →, ← Moves the cursor. ENTER Verifies the entered password. Goes to the input device setting screen after verifying the password. CANCEL Goes to the ONLINE MODE screen. FUNCTION Goes to the ONLINE MODE screen. Display Interface Mode - Interface board setting Onscreen message INTERFACE SETTING YES Operation button NO Selecting whether or not to change interface board settings. Use ← and → keys to move the cursor and press ENTER. "YES" : Goes to the [INTERFACE PORT] screen. "NO" : Goes to the [ONLINE MODE] screen. The default setting is "NO". Button →, ← ENTER CANCEL FUNCTION GY412 Operator Manual Entering password. Use ↑ and ↓ keys to change setting value and press ENTER. Use ← and → keys to move the cursor. Enter the password set in Service Mode. This message is displayed only when "SET PASSWORD" is set to "ON" in Service Mode. Description Moves the cursor. "YES" : Goes to the [INTERFACE PORT] screen. "NO" : Goes to the [ONLINE MODE] screen. Goes to the input device setting screen. Goes to the [ONLINE MODE] screen. Page 3-39 Section 3: Operation and Configuration 3.3 LCD MESSAGE DETAILS (cont’d) Display Interface Mode - Interface port setting Onscreen message INTERFACE PORT MAIN Operation button SUB NO Button →, ← ENTER CANCEL FUNCTION Display INTERFACE PORT USB RS-232C NO Moves the cursor. "MAIN" : Goes to the [INTERFACE PORT] screen. "SUB" : Goes to the [INTERFACE PORT] screen. Goes to the [INTERFACE SETTING] screen. Goes to the [ONLINE MODE] screen. Selecting interface type. Use ← and → keys to move the cursor and press ENTER. "USB" : Goes to the USB interface setting. "LAN" : Goes to the LAN interface setting. "RS-232C" : Goes to the RS-232C setting. The default setting is "USB". Button ←, → ENTER CANCEL FUNCTION Page 3-40 Description Interface Mode - Interface selection Onscreen message Operation button Selecting communication port type. Use ← and → keys to move the cursor and press ENTER. "MAIN" : Goes to [INTERFACE PORT]. "SUB" : Goes to [INTERFACE PORT]. The default setting is "MAIN". Description Moves the cursor. "USB" : Goes to the USB setting. "LAN" : Goes to the LAN setting. "RS-232C" : Goes to the RS-232C setting. Goes to the input device setting screen. Goes to the [ONLINE MODE] screen. GY412 Operator Manual Section 3: Operation and Configuration 3.3 LCD MESSAGE DETAILS (cont’d) 3.3.1.7.1 LAN Interface Setting Display Interface Mode - IP resolution method Onscreen message IP RESOLUTION METHOD MANUAL DHCP Operation button Button ↓,↑ ←, → ENTER GY412 Operator Manual Selecting IP resolution method. Use ↑ and ↓ keys to move the cursor and press ENTER. The default setting is "DHCP". [Important] Changed setting becomes effective at next power-on. Description Enters setting value. Moves the cursor. "MANUAL" : Saves the setting and goes to the [RARP SETTING] screen. "DHCP" : Saves the setting and goes to the [PORT NUMBER1] screen. CANCEL Goes to the [INTERFACE PORT] screen without saving the setting. FUNCTION Goes to the [ONLINE MODE] screen without saving the setting. Page 3-41 Section 3: Operation and Configuration 3.3 LCD MESSAGE DETAILS (cont’d) Display Interface Mode - RARP setting Onscreen message RARP SETTING ENABLE DISABLE Operation button Button ↓,↑ ←, → ENTER Page 3-42 Enabling and disabling RARP. Use ← and → keys to move the cursor and press ENTER. The default setting is "DISABLE". [Important] Changed setting becomes effective at next power-on. Description Enters setting value. Moves the cursor. "ENABLE" : Saves the setting and goes to the [SUBNET MASK] screen. "DISABLE" : Saves the setting and goes to the [IP ADDRESS] screen. CANCEL Goes to the [IP RESOLUTION METHOD] screen without saving setting value. FUNCTION Goes to the [ONLINE MODE] screen without saving the setting. GY412 Operator Manual Section 3: Operation and Configuration 3.3 LCD MESSAGE DETAILS (cont’d) Display Interface Mode - LAN IP address setting Onscreen message IP ADDRESS 0. 0. 0. 0 Operation button Button ↓,↑ ←, → ENTER GY412 Operator Manual Setting the IP address for LAN and Wireless LAN. Use ↑ and ↓ keys to change setting value and press ENTER. Use ← and → keys to move the cursor to an input item. The default setting is " 0. 0. 0. 0". [Important] Changed setting becomes effective at next power-on. Description Enters setting value. Moves the cursor. Saves the setting and goes to the [SUBNET MASK] screen. CANCEL Goes to the [INTERFACE PORT] screen without saving the setting. FUNCTION Goes to the [ONLINE MODE] screen without saving the setting. Page 3-43 Section 3: Operation and Configuration 3.3 LCD MESSAGE DETAILS (cont’d) Display Interface Mode - LAN subnet mask setting Onscreen message SUBNET MASK 0. 0. 0. 0 Operation button Button ↓,↑ ←, → ENTER Page 3-44 Setting the subnet mask for LAN and Wireless LAN. Use ↑ and ↓ keys to change setting value and press ENTER. Use ← and → keys to move the cursor to an input item. The default setting is " 0. 0. 0. 0". [Important] Changed setting becomes effective at next power-on. Description Enters setting value. Moves the cursor. Saves the setting and goes to the [GATEWAY ADDRESS] screen. CANCEL If “ENABLE” is selected in [RARP SETTING], it goes to the [RARP SETTING] screen without saving the setting. If “DISABLE” is selected in [RARP SETTING], it goes to the [IP ADDRESS] screen without saving the setting. FUNCTION Goes to the [ONLINE MODE] screen without saving the setting. GY412 Operator Manual Section 3: Operation and Configuration 3.3 LCD MESSAGE DETAILS (cont’d) Display Interface Mode - LAN gateway address setting Onscreen message GATEWAY ADDRESS 0. 0. 0. 0 Operation button Button ↓,↑ ←, → ENTER CANCEL FUNCTION GY412 Operator Manual Setting the gateway address for LAN and Wireless LAN. Use ↑ and ↓ keys to change setting value and press ENTER. Use ← and → keys to move the cursor to an input item. The default setting is " 0. 0. 0. 0". [Important] Changed setting becomes effective at next power-on. Description Enters setting value. Moves the cursor. Goes to the [PORT NUMBER1] screen without saving the setting. Goes to the [SUBNET MASK] screen without saving the setting. Goes to the [ONLINE MODE] screen without saving the setting. Page 3-45 Section 3: Operation and Configuration 3.3 LCD MESSAGE DETAILS (cont’d) Display Interface Mode - LAN port number 1 setting Onscreen message PORT NUMBER1 01024 Operation button Button ↓,↑ ←, → ENTER Page 3-46 Setting LAN port number 1. Use ↑ and ↓ keys to change setting value and press ENTER. Use ← and → keys to move the cursor to an input item. The default setting is "01024". Setting range is from "00000" to "65535". [Important] Changed setting becomes effective at next power-on. Note: You cannot assign the number currently used in "PORT NUMBER2” and “PORT NUMBER3”. Description Enters setting value. Moves the cursor. Saves the setting and goes to the [PORT NUMBER2] screen. CANCEL If “MANUAL” is selected in [IP RESOLUTION METHOD], it goes to the [GATEWAY ADDRESS] screen without saving the setting. If “DHCP” is selected in [IP RESOLUTION METHOD], it goes to the [IP RESOLUTION METHOD] screen without saving the setting. FUNCTION Goes to the [ONLINE MODE] screen without saving the setting. GY412 Operator Manual Section 3: Operation and Configuration 3.3 LCD MESSAGE DETAILS (cont’d) Display Interface Mode - LAN port number 2 setting Onscreen message PORT NUMBER2 01025 Operation button Button ↓,↑ ←, → ENTER CANCEL FUNCTION GY412 Operator Manual Setting LAN port number 2. Use ↑ and ↓ keys to change setting value and press ENTER. Use ← and → keys to move the cursor to an input item. The default setting is "01025". Setting range is from "00000" to "65535". [Important] Changed setting becomes effective at next power-on. Note: You cannot assign the number currently used in “PORT NUMBER1” and “PORT NUMBER3”. Description Enters setting value. Moves the cursor. Saves the setting and goes to the [PORT NUMBER3] screen. Goes to the [PORT NUMBER1] screen without saving the setting. Goes to the [ONLINE MODE] screen without saving the setting. Page 3-47 Section 3: Operation and Configuration 3.3 LCD MESSAGE DETAILS (cont’d) Display Interface Mode - LAN port number 3 setting Onscreen message PORT NUMBER3 0 9100 Operation button Button ↓,↑ ←, → ENTER CANCEL FUNCTION Page 3-48 Setting LAN port number 3. Use ↑ and ↓ keys to change setting value and press ENTER. Use ← and → keys to move the cursor to an input item The default setting is "09100". Setting range is from "00000" to "65535". [Important] Changed setting becomes effective at next power-on. You cannot assign the number currently used in “PORT NUMBER1” and “PORT NUBMER2” Description Enters setting value. Moves the cursor. Saves the setting and goes to the [STATUS REPLY TIMING] screen. Goes to the [PORT NUMBER2] without saving the setting. Goes to the [ONLINE MODE] screen without saving the setting. GY412 Operator Manual Section 3: Operation and Configuration 3.3 LCD MESSAGE DETAILS (cont’d) Display Interface Mode - LAN communication protocol setting Onscreen message PROTOCOL Setting communication protocol. Press ENTER. The default setting is “STATUS4”. STATUS4 STATUS5 STATUS3 Operation button Button ↓,↑, ←, → GY412 Operator Manual Description Moves the cursor. ENTER "STATUS4" : Saves the setting and goes to the [STATUS REPLY TIMING] screen. "STATUS5" : Save setting value and goes to the [ITEM NO CHECK] screen. "STATUS3" : Saves the setting and goes to the [ONLINE MODE] screen. CANCEL Goes to the [INTERFACE PORT] screen without saving the setting. FUNCTION Goes to the [ONLINE MODE] screen without saving the setting. Page 3-49 Section 3: Operation and Configuration 3.3 LCD MESSAGE DETAILS (cont’d) Display Interface Mode - Status reply timing setting Onscreen message STATUS REPLY TIMING ENQ Operation button CYCLE Button ←, → ENTER CANCEL FUNCTION Page 3-50 Setting the timing to return the status information to the host computer. Use ← and → keys to move the cursor and press ENTER. "ENQ" : Returns the printer status by receiving the status request (ENQ) from the host computer. "CYCLE" : The printer returns the printer status to the host computer at intervals of 500ms. The default setting is "ENQ". This screen is displayed only when “STATUS4” is selected in [PROTOCOL]. Description Moves the cursor. Saves the setting and goes to the [ONLINE MODE] screen. Goes to the [PORT NUMBER3] screen without saving the setting. Goes to the [ONLINE MODE] screen without saving the setting. GY412 Operator Manual Section 3: Operation and Configuration 3.3 LCD MESSAGE DETAILS (cont’d) Display Interface Mode - Item number check setting Onscreen message ITEM NO CHECK ENABLE DISABLE Operation button Button ←, → GY412 Operator Manual Setting item number check function. Use ← and → keys to move the cursor and press ENTER. "ENABLE" : Item number check function is ON. "DISABLE" : Item number check function is OFF. The default setting is "DISABLE". This screen is displayed only when "STATUS5" is selected in [PROTOCOL]. Refer to the Interface Specifications for this function details. Description Moves the cursor. ENTER Saves the setting and goes to the [BCC CHECK] screen. CANCEL Goes to the [PROTOCOL] screen without saving the setting. FUNCTION Goes to the [ONLINE MODE] screen without saving the setting. Page 3-51 Section 3: Operation and Configuration 3.3 LCD MESSAGE DETAILS (cont’d) Display Interface Mode - BCC check setting Onscreen message BCC CHECK ENABLE DISABLE Operation button Button ←, → ENTER CANCEL FUNCTION Page 3-52 Setting BCC check function. Use ← and → keys to move the cursor and press ENTER. "ENABLE" : BCC check function is ON. "DISABLE" : BCC check function is OFF. The default setting is "DISABLE". This screen is displayed only when "STATUS5" is selected in [PROTOCOL]. Refer to the Interface Specifications for this function details. Description Moves the cursor. Saves the setting and goes to the [ONLINE MODE] screen. Goes to the [ITEM NO CHECK] screen without saving the setting. Goes to the [ONLINE MODE] screen without saving the setting. GY412 Operator Manual Section 3: Operation and Configuration 3.3 LCD MESSAGE DETAILS (cont’d) 3.3.1.7.2 USB Interface Board Setting Display Interface Mode - USB communication protocol setting Onscreen message PROTOCOL Setting communication protocol. Press ENTER. The default setting is “STATUS4”. STATUS4 STATUS5 Operation button Button ←, →, ↓,↑ GY412 Operator Manual Description Moves the cursor. ENTER "STATUS4" : Saves the setting and goes to the [ONLINE MODE] screen. "STATUS5" : Saves the setting and goes to the [ITEM NO CHECK] screen. CANCEL Goes to the [INTERFACE PORT] screen without saving the setting. FUNCTION Goes to the [ONLINE MODE] screen without saving the setting. Page 3-53 Section 3: Operation and Configuration 3.3 LCD MESSAGE DETAILS (cont’d) Display Interface Mode - Item number check setting Onscreen message ITEM NO CHECK ENABLE DISABLE Operation button Button ←, → Page 3-54 Setting item number check function. Use ← and → keys to move the cursor and press ENTER. "ENABLE" : Item number check function is ON. "DISABLE" : Item number check function is OFF. The default setting is "DISABLE". This screen is displayed only when "STATUS5" is selected in [PROTOCOL]. Refer to the Interface Specifications for this function details. Description Moves the cursor. ENTER Saves the setting and goes to the [BCC CHECK] screen. CANCEL Goes to the [PROTOCOL] screen without saving the setting. FUNCTION Goes to the [ONLINE MODE] screen without saving the setting. GY412 Operator Manual Section 3: Operation and Configuration 3.3 LCD MESSAGE DETAILS (cont’d) Display Interface Mode - BCC check setting Onscreen message BCC CHECK ENABLE DISABLE Operation button Button ←, → ENTER CANCEL FUNCTION GY412 Operator Manual Setting BCC check function. Use ← and → keys to move the cursor and press ENTER. "ENABLE" : BCC check function is ON. "DISABLE" : BCC check function is OFF. The default setting is "DISABLE". This screen is displayed only when "STATUS5" is selected in [PROTOCOL]. Refer to the Interface Specifications for this function’s details. Description Moves the cursor. Saves the setting and goes to the [ONLINE MODE] screen. Goes to the [ITEM NO CHECK] screen without saving the setting. Goes to the [ONLINE MODE] screen without saving the setting. Page 3-55 Section 3: Operation and Configuration 3.3 LCD MESSAGE DETAILS (CONT’D) 3.3.1.7.3 RS-232C Interface Board Setting Display Interface Mode - RS-232C communication rate setting Onscreen message BAUDRATE 2400 4800 9600 19200 Setting RS-232C BAUD rate. Use the arrow keys to move the cursor and press ENTER. The default setting is "19200". 38400 57600 115200 Operation button Button ↓,↑, ←, → Page 3-56 Description Moves the cursor. ENTER Saves the setting and goes to the [PARITY BIT] screen. CANCEL Goes to the [INTERFACE PORT] without saving the setting. FUNCTION Goes to the [ONLINE MODE] screen without saving the setting. GY412 Operator Manual Section 3: Operation and Configuration 3.3 LCD MESSAGE DETAILS (cont’d) Display Interface Mode - RS-232C parity bit setting Onscreen message Setting RS-232C parity bit. Use ← and → keys to move the cursor and press ENTER. The default setting is "NONE". [Important] Changed setting becomes effective at next power-on. PARITY BIT NONE ODD EVEN Operation button Button Description ←, → Moves the cursor. ENTER Saves the setting and goes to the [STOP BIT] screen. CANCEL Goes to the [BAUDRATE] screen without saving the setting. FUNCTION Goes to the [ONLINE MODE] screen without saving the setting. Display Interface Mode - RS-232C stop bit setting Onscreen message STOP BIT 1BIT Operation button 2BIT Button ←, → GY412 Operator Manual Setting RS-232C stop bit. Use ← and → keys to move the cursor and press ENTER. The default setting is "1BIT". [Important] Changed setting becomes effective at next power-on. Description Moves the cursor. ENTER Saves the setting and goes to the [CHARACTER BIT] screen. CANCEL Goes to the [PARITY BIT] screen without saving the setting. FUNCTION Goes to the [ONLINE MODE] screen without saving the setting. Page 3-57 Section 3: Operation and Configuration 3.3 LCD MESSAGE DETAILS (cont’d) Display Interface Mode - RS-232C character bit setting Onscreen message CHARACTER BIT 8BIT 7BIT Operation button Button ←, → ENTER CANCEL FUNCTION Display Setting RS-232C character bit. Use ← and → keys to move the cursor and press ENTER. The default setting is "8BIT". [Important] Changed setting becomes effective at next power-on. Description Moves the cursor. Saves the setting and goes to the [PROTOCOL] screen. Goes to the [STOP BIT] screen without saving the setting. Goes to the [ONLINE MODE] screen without saving the setting. Interface Mode - RS-232C communication protocol setting Onscreen message PROTOCOL Setting communication protocol. Press ENTER. The default setting is “STATUS4”. STATUS4 STATUS5 STATUS3 Operation button Button ↓,↑, ←, → Page 3-58 Description Moves the cursor. ENTER "STATUS4" : Saves the setting and goes to the [ONLINE MODE] screen. "STATUS5" : Saves the setting and goes to the [ITEM NO CHECK] screen. "STATUS3" : Saves the setting and goes to the [ONLINE MODE] screen. CANCEL Goes to the [INTERFACE PORT] screen without saving the setting. FUNCTION Goes to the [ONLINE MODE] screen without saving the setting. GY412 Operator Manual Section 3: Operation and Configuration 3.3 LCD MESSAGE DETAILS (cont’d) Display Interface Mode - Item number check setting Onscreen message ITEM NO CHECK ENABLE DISABLE Operation button Button ←, → GY412 Operator Manual Setting item number check function. Use ← and → keys to move the cursor and press ENTER. "ENABLE" : Item number check function is ON. "DISABLE" : Item number check function is OFF. The default setting is "DISABLE". This screen is displayed only when "STATUS5" is selected in [PROTOCOL]. Description Moves the cursor. ENTER Saves the setting and goes to the [BCC CHECK] screen. CANCEL Goes to the [PROTOCOL] screen without saving the setting. FUNCTION Goes to the [ONLINE MODE] screen without saving the setting. Page 3-59 Section 3: Operation and Configuration 3.3 LCD MESSAGE DETAILS (cont’d) Display Interface Mode - BCC check setting Onscreen message BCC CHECK ENABLE DISABLE Operation button Button ←, → ENTER CANCEL FUNCTION Page 3-60 Setting BCC check function. Use ← and → keys to move the cursor and press ENTER. "ENABLE" : BCC check function is ON. "DISABLE" : BCC check function is OFF. The default setting is "DISABLE". This screen is displayed only when "STATUS5" is selected in [PROTOCOL]. Refer to the Interface Specifications for this function details. Description Moves the cursor. Saves the setting and goes to the [ONLINE MODE] screen. Goes to the [ITEM NO CHECK] screen without saving the setting. Goes to the [ONLINE MODE] screen without saving the setting. GY412 Operator Manual Section 3: Operation and Configuration 3.3 LCD MESSAGE DETAILS (cont’d) 3.3.1.8 SEMBL Mode Display SEMBL Mode - Selection of start program Onscreen message START PROGRAM NONE XXXXXXXX.BAS Operation button Button Description ENTER Goes to SEMBL Mode and executes the selected program. ↓, ↑ GY412 Operator Manual Selecting the program to be executed when starting SEMBL Mode. Use ↑ and ↓ keys to move the cursor and press ENTER. "NONE" : Does not specify start program. "XXXXXXXX.BAS" : Specifies start program. The program name registered in the printer memory will be shown in "XXXXXXXX.BAS". The default setting is "NONE". Moves the cursor. FUNCTION Goes to the [ONLINE MODE] screen without saving the setting. CANCEL Goes to the [ONLINE MODE] screen without saving the setting. Page 3-61 Section 3: Operation and Configuration 3.3 LCD MESSAGE DETAILS (cont’d) 3.3.1.9 Advanced Mode Display Interface Mode - Password entry Onscreen message PASSWORD 0000 Operation button Page 3-62 Entering password. Use ↑ and ↓ keys to change setting value and press ENTER. Use ← and → keys to move the cursor. Enter the password set in Service Mode. This message is displayed only when [SET PASSWORD] is set to “ON” in Service Mode. Button Description ↓, ↑ Enters password. ←, → Moves the cursor. ENTER Saves the setting and goes to the [BCC CHECK] screen. CANCEL Goes to the [PROTOCOL] screen without saving the setting. FUNCTION Goes to the [ONLINE MODE] screen without saving the setting. GY412 Operator Manual Section 3: Operation and Configuration 3.3 LCD MESSAGE DETAILS (cont’d) Display Advanced Mode - Darkness range setting on the upper surface Onscreen message DARKNESS RANGE UPPER HEAD A B C D E F Operation button Button ←, → ENTER CANCEL FUNCTION Display DARKNESS RANGE LOWER HEAD A B C D E F Moves the cursor. Saves the setting and goes to the [PRINTER TYPE] screen. Goes to the [DARKNESS RANGE UPPER HEAD] screen without saving the setting. Goes to the [ONLINE MODE] screen without saving the setting. Setting print darkness range. Use ← and → keys to move the cursor and press ENTER. The default setting is “A”. “C”, “D”, “E” and “F” are preliminary parameters. Button ←, → ENTER CANCEL FUNCTION GY412 Operator Manual Description Advanced Mode - Darkness range setting on the lower surface Onscreen message Operation button Setting print darkness range. Use ← and → keys to move the cursor and press ENTER. The default setting is “A”. “C”, “D”, “E” and “F” are preliminary Description Moves the cursor. Saves the setting and goes to the [PRINTER TYPE] screen. Goes to the [DARKNESS RANGE UPPER HEAD] screen without saving the setting. Goes to the [ONLINE MODE] screen without saving the setting. Page 3-63 Section 3: Operation and Configuration 3.3 LCD MESSAGE DETAILS (cont’d) Display Advanced Mode - Print mode setting Onscreen message PRINTER TYPE CONTINUOUS TEAR OFF CUTTER PRINT-CUT Operation button Button ↓, ↑ Description Moves the cursor. ENTER Saves the setting and goes to the [PITCH SENSOR] screen. CANCEL Goes to the [DARKNESS RANGE] screen without saving the setting. FUNCTION Page 3-64 Selecting print mode. Use ↑ and ↓ keys to move the cursor and press ENTER. "CONTINUOUS" : Continuous Mode is selected. "TEAR OFF" : Tear Off Mode is selected. "CUTTER" : Cutter Mode is selected. "PRINT-CUT" : Print-cut Mode is selected. The default setting is "CONTINUOUS.” Goes to the [ONLINE MODE] screen without saving the setting. GY412 Operator Manual Section 3: Operation and Configuration 3.3 LCD MESSAGE DETAILS (cont’d) Display Advanced Mode - Sensor type setting Onscreen message Selecting pitch sensor type. Use ↑ and ↓ keys to move the cursor and press ENTER. "GAP" : GAP sensor is enabled. "I-MARK" : I-Mark sensor is enabled. The default setting is "I-MARK". SENSOR TYPE GAP I-MARK Operation button Button ↓, ↑ Moves the cursor. ENTER CANCEL FUNCTION Display CHECK MEDIA SIZE ENABLE DISABLE Goes to the [PITCH SENSOR] screen without saving the setting. Goes to the [ONLINE MODE] screen without saving the setting. Enabling/Disabling the check function of media size. Use ← and → keys to move the cursor and press ENTER. "ENABLE" : Media size check is ON. "DISABLE" : Media size check is OFF. The default setting is "DISABLE". Button ←, → ENTER GY412 Operator Manual Saves the setting and goes to the [CHECK MEDIA SIZE] screen. Advanced Mode - Media size check setting Onscreen message Operation button Description Description Moves the cursor. Saves the setting and goes to the [COMMAND ERROR DISPLAY] screen. CANCEL Goes to the [SENSOR TYPE] screen without saving the setting. FUNCTION Goes to the [ONLINE MODE] screen without saving the setting. Page 3-65 Section 3: Operation and Configuration 3.3 LCD MESSAGE DETAILS (cont’d) Display Advanced Mode - Command error display setting Onscreen message COMMAND ERROR DISPLAY NO YES Operation button Button ←, → ENTER CANCEL FUNCTION Page 3-66 Enabling/Disabling the display of command error message. Use ← and → keys to move the cursor and press ENTER. The printer motion when detecting a command error is determined. "YES" : Stops the print operation due to command error. "NO" : Displays an icon and continues the print operation. The default setting is "NO". Description Moves the cursor. Saves the setting and goes to the [HEAD CHECK] screen. Goes to the [PTICH SENSOR] screen without saving the setting. Goes to the [ONLINE MODE] screen without saving the setting. GY412 Operator Manual Section 3: Operation and Configuration 3.3 LCD MESSAGE DETAILS (cont’d) Display Advanced Mode - Head check setting Onscreen message HEAD CHECK ENABLE DISABLE Operation button Button ←, → ENTER CANCEL FUNCTION GY412 Operator Manual Enabling/Disabling head check function. Use ← and → keys to move the cursor and press ENTER. "ENABLE" : Head check function is ON. "DISABLE" : Head check function is OFF. The default setting is "ENABLE". Description Moves the cursor. "ENABLE" : Saves the setting and goes to the [HEAD CHECK] screen. "DISABLE" : Saves the setting and goes to the [SELECT LANGUAGE] screen. Goes to the [COMMAND ERROR DISPLAY] screen without saving the setting. Goes to the [ONLINE MODE] screen without saving the setting. Page 3-67 Section 3: Operation and Configuration 3.3 LCD MESSAGE DETAILS (cont’d) Display Advanced Mode - Head check range setting Onscreen message HEAD CHECK NORMAL BARCODE Operation button Button ←, → Page 3-68 Setting head check range. Use ← and → keys to move the cursor and press ENTER. "NORMAL" : Checks the print area. "BARCODE" : Checks the barcode printed area only. The default setting is “NORMAL”. This message is displayed only when [HEAD CHECK] is set to “ENABLE”. Description Moves the cursor. ENTER Saves the setting and goes to the [HEAD CHECK MODE] screen. CANCEL Goes to the [HEAD CHECK] screen without saving the setting. FUNCTION Goes to the [ONLINE MODE] screen without saving the setting. GY412 Operator Manual Section 3: Operation and Configuration 3.3 LCD MESSAGE DETAILS (cont’d) Display Advanced Mode - Head check method setting Onscreen message HEAD CHECK MODE LAST ITEM CHECK PAGE ALL CHECK Operation button Button ↓↑ GY412 Operator Manual Setting the head check range. Use ↑ and ↓ keys to move the cursor and press ENTER. "LAST ITEM" : Performs head check when pausing the print operation in Continuous Mode or when in back feed motion. "CHECK PAGE" : Performs head check based on the count specified in [HEAD CHECK PAGE NO.]. "ALL CHECK" : Performs head check per label. The default setting is “LAST ITEM”. This message is displayed only when [HEAD CHECK] is set to “ENABLE”. Description Moves the cursor. ENTER "ALL CHECK": Saves the setting and goes to the [SELECT LANGUAGE] screen. "LAST ITEM": Saves the setting and goes to the [SELECT LANGUAGE] screen. "CHECK PAGE": Saves the setting and goes to the [HEAD CHECK PAGE NO.] screen. CANCEL Goes to the [HEAD CHECK] screen without saving the setting. FUNCTION Goes to the [ONLINE MODE] screen without saving the setting. Page 3-69 Section 3: Operation and Configuration 3.3 LCD MESSAGE DETAILS (cont’d) Display Advanced Mode - Head check count setting Onscreen message Setting the count of head check. Use ↑ and ↓ keys to change setting value and press ENTER. The setting range is from 0001 to 9999. The default setting is “0001”. HEAD CHECK PAGE NO. 0001 Operation button Button ↓↑ Enters setting value. Saves the setting and goes to the [SELECT LANGUAGE] screen. CANCEL Goes to the [HEAD CHECK MODE] screen without saving the setting. FUNCTION Goes to the [ONLINE MODE] screen without saving the setting. Advanced Mode - Display language setting Onscreen message SELECT LANGUAGE ENGLISH 㡴㦻崭 Selecting the language to be displayed on the LCD screen. Use ↑ and ↓ keys to move the cursor and press ENTER. The default setting is ENGLISH. Button ↓↑ Page 3-70 Description ENTER Display Operation button This message is displayed only when [HEAD CHECK] is set to “ENABLE” and [HEAD CHECK MODE] is set to “CHECK PAGE”. Description Moves the cursor. ENTER Saves the setting and goes to the [PROTOCOL CODE] screen. CANCEL Goes to the [HEAD CHECK] screen without saving the value. FUNCTION Goes to the [ONLINE MODE] screen without saving the setting. GY412 Operator Manual Section 3: Operation and Configuration 3.3 LCD MESSAGE DETAILS (cont’d) Display Advanced Mode - Protocol code setting Onscreen message PROTOCOL CODE STANDARD NON-STANDARD Operation button Button ↓↑ Enters setting value. Saves the setting and goes to the [SEMBL MODE AUTO START] screen. CANCEL Goes to the [PROTOCOL CODE] screen without saving the setting. FUNCTION Goes to the [ONLINE MODE] screen without saving the setting. Advanced Mode - LCD power saving setting Onscreen message LCD POWER SAVING 05 Button ↓↑ GY412 Operator Manual Description ENTER Display Operation button Setting the LCD power saving timer. Use ↑ and ↓ keys to change setting value and press ENTER. The setting range is from 00 to 15. The default setting is “05”. Setting the LCD power saving timer. Use ↑ and ↓ keys to change setting value and press ENTER. The setting range is from 00 to 15. The default setting is “05”. Description Enters setting value. ENTER Saves the setting and goes to the [SEMBL MODE AUTO START] screen. CANCEL Goes to the [PROTOCOL CODE] screen without saving the setting. FUNCTION Goes to the [ONLINE MODE] screen without saving the setting. Page 3-71 Section 3: Operation and Configuration 3.3 LCD MESSAGE DETAILS (cont’d) Display Advanced Mode - SEMBL automatic start setting Onscreen message SEMBL MODE AUTO START YES NO Operation button Button →, ← Page 3-72 The printer automatically starts in SEMBL Mode after turning on the power. Use ← and → keys to move the cursor and press ENTER. “YES” : Activates SEMBL Mode after turning on the power. “NO” : Normal startup. The default setting is “NO”. Description Moves the cursor. ENTER "YES": Saves the setting and goes to the [START PROGRAM]. "NO": Goes to the [ONLINE MODE] screen without saving the setting. CANCEL Goes to the [PROTOCOL CODE] screen without saving the setting. FUNCTION Goes to the [ONLINE MODE] screen without saving the setting. GY412 Operator Manual Section 3: Operation and Configuration 3.3 LCD MESSAGE DETAILS (cont’d) Display Advanced Mode - Selection of SEMBL start program Onscreen message START PROGRAM XXXXXXXX.BAS Operation button Button ↓, ↑ ENTER GY412 Operator Manual Selecting the program to be executed when starting SEMBL Mode automatically. Use ↑ and ↓ keys to move the cursor and press ENTER. Use ↑ and ↓ keys to move the cursor and press ENTER. "NONE" : Does not specify start program. "XXXXXXXX.BAS" : Specifies start program. The program name registered in the printer will be shown in "XXXXXXXX.BAS". The default setting is “NONE”. This message is displayed only when [SEMBL MODE AUTO START] is set to “YES”. Description Selects the program names registered in the printer. Saves the setting and goes to the [ONLINE MODE] screen. CANCEL Goes to the [SEMBL MODE AUTO START] without saving the setting. FUNCTION Goes to the [ONLINE MODE] screen without saving the setting. Page 3-73 Section 3: Operation and Configuration 3.3 LCD MESSAGE DETAILS (cont’d) 3.3.1.10 HEX Dump Mode Display HEX Dump Mode - Password entry Onscreen message PASSWORD 0000 Operation button Button Enters password. →, ← Moves the cursor. Verifies the entered password. Goes to the [SELECT DUMP DATA] screen after verifying the password. CANCEL Goes to the [ONLINE MODE] screen. FUNCTION Goes to the [ONLINE MODE] screen. Display HEX Dump Mode - Selection of dump data Onscreen message SELECT DUMP DATA RECEIVE DATA RECEIVE BUFFER Selecting the data for dump printing. Use ↑ and ↓ keys to move the cursor and press ENTER. “RECEIVE DATA” : Prints the received data. “RECEIVE BUFFER” : Prints the received print data(1 item). You cannot select “RECEIVE BUFFER” when there is no receive data available. The screen when entering HEX Dump Mode is the same as that of Normal Mode except one icon Button ↓, ↑ ENTER Page 3-74 Description ↓, ↑ ENTER Operation button Entering password. Use ↑ and ↓ keys to change setting value and press ENTER. Use ← and → keys to move the cursor. Enter the password set in Service Mode. This message is displayed only when [SET PASSWORD] is set to “ON” in Service Mode. Description Moves the cursor. Goes to HEX Dump Mode. CANCEL Goes to the [ONLINE MODE] screen. FUNCTION Goes to the [ONLINE MODE] screen. GY412 Operator Manual Section 3: Operation and Configuration 3.3 LCD MESSAGE DETAILS (cont’d) 3.3.1.11 Memory Card Mode Display Memory Card Mode - Password entry Onscreen message PASSWORD 0000 Operation button Button Description ↓↑ Enters password. →, ← Moves the cursor. ENTER Verifies the entered password. Goes to the [ONLINE MODE] screen after verifying the password. CANCEL Goes to the [ONLINE MODE] screen. FUNCTION Goes to the [ONLINE MODE] screen. Display Memory Card Mode - Formatting SD card Onscreen message SD CARD FORMAT YES Operation button NO Selecting whether or not to format the SD card. Use ← and → keys to move the cursor and press ENTER. "YES" : Formats the SD card. "NO" : Does not format the SD card. The default setting is "NO". Button ←, → ENTER GY412 Operator Manual Enters password. Use ↑ and ↓ keys to change setting value and press ENTER. Use ← and → keys to move the cursor. Enter the password set in Service Mode. This message is displayed only when [SET PASSWORD] is set to “ON” in Service Mode. Description Moves the cursor. "YES": Goes to the [SD CARD FORMAT REALLY?] screen. "NO" : Goes to the [ONLINE MODE] screen. Goes to the [ONLINE MODE] screen. CANCEL Goes to the [ONLINE MODE] screen. FUNCTION Goes to the [ONLINE MODE] screen. Page 3-75 Section 3: Operation and Configuration 3.3 LCD MESSAGE DETAILS (cont’d) Display Memory Card Mode -Confirmation before formatting SD card Onscreen message SD CARD FORMAT YES Operation button NO Button ←, → ENTER Display Description Moves the cursor. Goes to the [ONLINE MODE] screen. "YES": Goes to the [SD CARD FORMAT] screen. "NO": Goes to the [ONLINE MODE] screen. CANCEL Goes to the [ONLINE MODE] screen. FUNCTION Goes to the [ONLINE MODE] screen. Memory Card Mode - SD card formatting in progress Onscreen message FORMATTING... NO Page 3-76 Checking once more before formatting SD card. Use ← and → keys to move the cursor and press ENTER. "YES" : Formats the SD card. "NO" : Does not format the SD card. The default setting is "NO". Formatting the SD card. The gauge on the bottom of the screen shows the formatting progress. After formatting the SD card, [SD CARD FORMAT COMPLETED] will be displayed. GY412 Operator Manual Section 3: Operation and Configuration 3.3 LCD MESSAGE DETAILS (cont’d) Display Memory Card Mode - Completion of SD card formatting Onscreen message SD CARD FORMAT COMPLETED NO Operation button This screen shows the completion of SD card formatting. The buzzer emits 3 beeps when the SD card is formatted. Press ENTER to go to the [ONLINE MODE] screen. Button ENTER Description Goes to the [ONLINE MODE] screen. 3.3.1.12 Test Print Mode Display Test Print Mode - Selection of test print pattern Onscreen message TEST PRINT MODE CONFIGURATION BARCODE MEMORY FONT FACTORY Operation button Button ↓↑ ENTER GY412 Operator Manual Selecting the type of test print. Use ↑ and ↓ keys to move the cursor and press ENTER. "CONFIGURATION " : Prints out the printer configurations. "BARCODE" : Prints out the list of barcodes supported. "HEAD CHECK" : Prints out head check pattern of selected media size. "MEMORY" : Prints out memory status. "FONT" : Prints out the list of fonts supported. "FACTORY" : Prints out factory setting information. Description Moves the cursor. "FONT" or "MEMORY": Goes to the [PITCH POSITION] screen. For other cases, goes to the [TEST PRINT SIZE] screen. Page 3-77 Section 3: Operation and Configuration 3.3 LCD MESSAGE DETAILS (cont’d) Display Onscreen message Test Print Mode - Test print size setting TEST PRINT SIZE SMALL LARGE Operation button Button →, ← ENTER Display Moves the cursor. Selects test print size and goes to the [PITCH POSITION UPPER] screen. Goes to the TEST PRINT MODE screen. FUNCTION Goes to the TEST PRINT MODE screen. Test Print Mode - Adjustment of print position on the upper surface PITCH POSITION UPPER +0.00 ENTER -> PRINT Adjusting the print position on the upper surface. Use ↑ and ↓ keys to change setting value and press ENTER to start test print. The setting value can be adjusted by ±0.25mm regardless of print density. The setting range is ±3.75mm and the default setting is “+0.00”mm. Button ↓, ↑ ←, → ENTER CANCEL FUNCTION Page 3-78 Description CANCEL Onscreen message Operation button Selecting test print size. Use ← and → to move the cursor and press ENTER. "SMALL": Performs test print in 4cm wide. "LARGE": Performs test print in 10cm wide. The initial cursor position is “LARGE”. Description Enters setting value by ±0.25mm. Toggles the screens. Starts test print. Goes to the [TEST PRINT SIZE] screen. Goes to the [TEST PRINT MODE] screen. GY412 Operator Manual Section 3: Operation and Configuration 3.3 LCD MESSAGE DETAILS (cont’d) Display Test Print Mode - Adjustment of print position on the lower surface Onscreen message PITCH POSITION LOWER +0.00 ENTER -> PRINT Operation button Button ↓, ↑ ←, → ENTER CANCEL FUNCTION Display OFFSET POSITION +0.00 mm ENTER -> PRINT Enters setting value by ±0.25mm. Toggles the screens. Starts test print. Goes to the [TEST PRINT SIZE] screen. Goes to the [TEST PRINT MODE] screen. Adjusting offset position. Use ↑ and ↓ keys to change setting value and press ENTER to start test print. The setting value can be adjusted by ±0.25mm regardless of print density. The setting range is ±3.75mm and the default setting is “+0.00”mm. Button ↓, ↑ ←, → ENTER CANCEL FUNCTION GY412 Operator Manual Description Test Print Mode - Adjustment of offset position Onscreen message Operation button Adjusting the print position on the lower surface. Use ↑ and ↓ keys to change setting value and press ENTER to start test print. The setting value can be adjusted by ±0.25mm regardless of print density. The setting range is ±3.75mm and the default setting is “+0.00”mm. Description Enters setting value by ±0.25mm. Toggles the screens. Starts test print. Goes to the [TEST PRINT SIZE] screen. Goes to the [TEST PRINT MODE] screen. Page 3-79 Section 3: Operation and Configuration 3.3 LCD MESSAGE DETAILS (cont’d) Display Test Print Mode - Darkness setting Onscreen message DARKNESS 50 ENTER -> PRINT Operation button Adjusting print darkness. Use ↑ and ↓ keys to change setting value and press ENTER to start test print. The setting value can be adjusted by 1 regardless of print density. The setting range is from 00 to 90. The default setting is “50”. Button ↓, ↑ ←, → ENTER CANCEL FUNCTION Display Description Enters setting value by ±1. Toggles the screens. Starts test print. Goes to the [TEST PRINT SIZE] screen. Goes to the [TEST PRINT MODE] screen. Test Print Mode - Pausing test print Onscreen message This screen shows that test print is in progress. Ongoing test print will be paused temporarily by pressing ENTER. TEST PRINT ENTER -> STOP Operation button Button ENTER Page 3-80 Description Starts/Pauses test print. CANCEL Goes to the [TEST PRINT MODE] screen. FUNCTION Goes to the [TEST PRINT MODE] screen. GY412 Operator Manual Section 3: Operation and Configuration 3.3 LCD MESSAGE DETAILS (cont’d) 3.3.1.13 Default Setting Mode Display Default Setting Mode - Selection of item to be initialized Onscreen message DEFAULT MODE PRINTER ALT. PROTOCOL Operation button Button ↓, ↑ ENTER GY412 Operator Manual Selecting the item to be initialized. Use ↑ and ↓ keys to move the cursor and press ENTER. "PRINTER SETTING": Initializes printer settings. "ALT.PROTOCOL": Initializes protocol code. The default cursor position is "PRINTER SETTING". Description Moves the cursor. "PRINTER SETTING": Goes to the [DEFAULT PRNTER SETTING] screen. "ALT.PROTOCOL": Goes to the [DEFAULT ALT.PROTOCOL] screen. Page 3-81 Section 3: Operation and Configuration 3.3 LCD MESSAGE DETAILS (cont’d) Display Default Setting Mode - Confirmation of printer setting initialization Onscreen message DEFAULT PRINTER YES Operation button NO Button ←, → ENTER Page 3-82 This is a confirmation screen for initializing printer settings. Use ← and → keys to move the cursor and press ENTER. Select "YES" and press ENTER to initialize the printer settings. The initial cursor position is "NO". Description Moves the cursor. "YES": Starts initializing printer settings. "NO": Goes to the [DEFAULT MODE] screen without initializing the printer setting. CANCEL Goes to the [DEFAULT MODE] screen without initializing the printer setting. FUNCTION Goes to the [DEFAULT MODE] screen without initializing the printer setting. GY412 Operator Manual Section 3: Operation and Configuration 3.3 LCD MESSAGE DETAILS (CONT’D) Display Default Setting Mode - Confirmation of protocol code initialization Onscreen message DEFAULT ALT. PROTOCOL YES Operation button NO Button ←, → ENTER GY412 Operator Manual This is a confirmation screen for initializing protocol code. Use ← and → keys to move the cursor and press ENTER. Select "YES" and press ENTER to initialize the protocol code. The initial cursor position is "NO". Description Moves the cursor. "YES": Starts initializing protocol code. "NO": Goes to the [DEFAULT MODE] screen without initializing. CANCEL Goes to the [DEFAULT MODE] screen without initializing. FUNCTION Goes to the [DEFAULT MODE] screen without initializing. Page 3-83 Section 3: Operation and Configuration 3.3 LCD MESSAGE DETAILS (cont’d) Display Default Setting Mode - Completion of initialization Onscreen message DEFAULT SETTING COMPLETED PLEASE POWER OFF This screen shows the completion of initialization. Turn the power OFF after this message is displayed. 3.3.1.14 Maintenance Mode Display Maintenance Mode - Maintenance mode menu Onscreen message MAINTENANCE MODE SERVICE MODE FACTORY MODE Operation button Button ↓, ↑ ENTER Page 3-84 This is the menu screen of Maintenance Mode. Use ↑ and ↓ keys to move the cursor and press ENTER. Select either "SERVICE MODE" or "FACTORY MODE". The initial cursor position is "SERVICE MODE". Description Moves the cursor. Goes to the start screen of selected mode. GY412 Operator Manual Section 3: Operation and Configuration 3.3 LCD MESSAGE DETAILS (CONT’D) 3.3.1.15 Service Mode Display Service Mode - Service mode menu Onscreen message SERVICE MODE SENSOR LEVEL SETTING Operation button Button ↓, ↑ ENTER GY412 Operator Manual This is the menu screen of Service Mode. Use ↑ and ↓ keys to move the cursor and press ENTER. The following adjustments are available. “SENSOR LEVEL” : Adjusts sensor level. “SETTING” : Sets functions. The initial cursor position is "SENSOR LEVEL". Description Moves the cursor. Goes to the start screen of selected item. CANCEL Goes to the [MAINTENANCE MODE] screen. FUNCTION Goes to the [MAINTENANCE MODE] screen. Page 3-85 Section 3: Operation and Configuration 3.3 LCD MESSAGE DETAILS (cont’d) Display Service Mode - Slice level of I-mark sensor Onscreen message SENSOR LEVEL I-MARK SLICE LEVEL 0.0V Operation button Button Description ↓, ↑ Enters slice level value by 0.1. ENTER Goes to the [SERVICE MODE] screen without saving the setting. FUNCTION Goes to the [SERVICE MODE] screen without saving the setting. Service Mode - Slice level of Gap1 sensor Onscreen message SENSOR LEVEL GAP1 SLICE LEVEL 0.0V Button ↓, ↑ ENTER Page 3-86 Saves the setting and goes to the [SENSOR LEVEL GAP1] screen. CANCEL Display Operation button Displaying current I-mark sensor level and automatically calculated slice level. Use ↑ and ↓ keys to enter slice level and press ENTER. The setting range is from 0.0 to 3.2, set by 0.1V. Firmware will set the slice level automatically if setting the slice level to “0.0”. Displaying current GAP1 (center hole) sensor level and automatically calculated slice level. Use ↑ and ↓ keys to enter slice level and press ENTER. The setting range is from 0.0 to 3.2, set by 0.1V. Firmware will set the slice level automatically if setting the slice level to “0.0”. Description Enters slice level value by 0.1. Saves the setting and goes to the [SERVICE MODE] screen. CANCEL Goes to the [SENSOR LEVEL I-MARK] screen without saving the setting. FUNCTION Goes to the [SERVICE MODE] screen without saving the setting. GY412 Operator Manual Section 3: Operation and Configuration 3.3 LCD MESSAGE DETAILS (cont’d) Display Service Mode - VR setting Onscreen message OFFSET VOLUME PITCH +0.00 mm OFFSET +25 mm DARKNESS 50 Operation button Button Goes to the [SET PASSWORD] screen. CANCEL Goes to the [SERVICE MODE] screen. FUNCTION Goes to the [SERVICE MODE] screen. Service Mode - Password setting Onscreen message SET PASSWORD ON OFF Enabling/Disabling password entry when entering each mode. Use ← and → keys to move the cursor and press ENTER. The default setting is "OFF". Button ↓, ↑ Description Moves the cursor. ENTER “ON”: Goes to the [PASSWORD NO] screen. “OFF”: Saves the setting and goes to the [SERVICE MODE] screen. CANCEL Goes to the [OFFSET VOLUME] screen without saving the setting. FUNCTION GY412 Operator Manual Description ENTER Display Operation button This screen indicates the VR setting values on the main PCB. Displaying the following adjustment values. “PITCH” : Shows the value of print offset volume on both upper and lower surfaces. “OFFSET” : Shows the value of cut offset volume. “DARKNESS” : Shows the value of darkness volume. Goes to the [SERVICE MODE] screen without saving the setting. Page 3-87 Section 3: Operation and Configuration 3.3 LCD MESSAGE DETAILS (cont’d) Display Service Mode - Password setting screen Onscreen message PASSWORD NO Setting password to enter each mode. Use ↑ and ↓ keys to change setting value and press ENTER. Use ← and → keys to move the cursor. 0000 Operation button Button ↓, ↑ Enters password ←, → Moves the cursor. ENTER Page 3-88 Description Saves password and goes to the [SERVICE MODE] screen. CANCEL Goes to the [SET PASSWORD] screen without saving password. FUNCTION Goes to the [SERVICE MODE] screen without saving password. GY412 Operator Manual Section 3: Operation and Configuration 3.3 LCD MESSAGE DETAILS (cont’d) 3.3.1.16 Test Print Mode Display Test Print Mode - Adjustment of print position on the upper surface Onscreen message PITCH POSITION UPPER +0.00 ENTER -> PRINT Operation button Button ↓, ↑ ←, → ENTER CANCEL FUNCTION Display PITCH POSITION LOWER +0.00 ENTER -> PRINT Enters setting value by ±0.25mm. Toggles the screens. Starts test print. Goes to the [TEST PRINT SIZE] screen. Goes to the [MAINTENANCE MODE] screen. Adjusting the print position on the upper surface. Use ↑ and ↓ keys to change setting value and press ENTER to start test print. The setting value can be adjusted by ±0.25mm regardless of print density. The setting range is ±3.75mm and the default setting is “+0.00”mm. Button ↓, ↑ ←, → ENTER CANCEL FUNCTION GY412 Operator Manual Description Test Print Mode - Adjustment of print position on the lower surface Onscreen message Operation button Adjusting the print position on the upper surface. Use ↑ and ↓ keys to change setting value and press ENTER to start test print. The setting value can be adjusted by ±0.25mm regardless of print density. The setting range is ±3.75mm and the default setting is “+0.00”mm. Description Enters setting value by ±0.25mm. Toggles the screens. Starts test print. Goes to the [TEST PRINT SIZE] screen. Goes to the [MAINTENANCE MODE] screen. Page 3-89 Section 3: Operation and Configuration 3.3 LCD MESSAGE DETAILS (cont’d) Display Test Print Mode - Adjustment of offset position Onscreen message OFFSET POSITION +0.00 mm ENTER -> PRINT Operation button Button ↓, ↑ ←, → ENTER CANCEL FUNCTION Display DARKNESS 50 ENTER -> PRINT Enters setting value by ±0.25mm. Toggles the screens. Starts test print. Goes to the [TEST PRINT SIZE] screen. Goes to the [MAINTENANCE MODE] screen. Adjusting print darkness. Use ↑ and ↓ keys to change setting value and press ENTER to start test print. The setting value can be adjusted by 1 regardless of print density. The setting range is from 00 to 90. The default setting is “50”. Button ↓, ↑ ←, → ENTER CANCEL FUNCTION Page 3-90 Description Test Print Mode - Darkness setting Onscreen message Operation button Adjusting offset position. Use ↑ and ↓ keys to change setting value and press ENTER to start test print. The setting value can be adjusted by ±0.25mm regardless of print density. The setting range is ±3.75mm and the default setting is “+0.00”mm. Description Enters setting value by ±1. Toggles the screens. Starts test print. Goes to the [TEST PRINT SIZE] screen. Goes to the [MAINTENANCE MODE] screen. GY412 Operator Manual Section 3: Operation and Configuration 3.3 LCD MESSAGE DETAILS (cont’d) Display Test Print Mode - Adjustment of factory test print position on the upper surface Onscreen message F-PITCH POSITION 0.00 ENTER -> PRINT Operation button Button ↓, ↑ ←, → ENTER CANCEL FUNCTION Display Adjusting the factory test print position. Use ↑ and ↓ keys to change setting value and press ENTER to start test print. The setting value can be adjusted by ±0.25mm regardless of print density. The setting range is ±3.75mm and the default setting is “+0.00”mm. Description Enters setting value by ±0.25mm. Toggles the screens. Starts test print. Goes to the [TEST PRINT SIZE] screen. Goes to the [MAINTENANCE MODE] screen. Test Print Mode - Adjustment of factory test print position on the lower surface Onscreen message F-PITCH POSITION 0.00 ENTER -> PRINT Operation button Button ↓, ↑ ←, → ENTER CANCEL FUNCTION GY412 Operator Manual Adjusting the factory test print position. Use ↑ and ↓ keys to change setting value and press ENTER to start test print. The setting value can be adjusted by ±0.25mm regardless of print density. The setting range is ±3.75mm and the default setting is “+0.00”mm. Description Enters setting value by ±0.25mm. Toggles the screens. Starts test print. Goes to the [TEST PRINT SIZE] screen. Goes to the [MAITENANCE MODE] screen. Page 3-91 Section 3: Operation and Configuration 3.3 LCD MESSAGE DETAILS (cont’d) Display Test Print Mode - Pausing test print Onscreen message This screen shows that test print is in progress. Ongoing test print will be paused temporarily by pressing ENTER. TEST PRINT ENTER -> STOP Operation button Button ENTER Page 3-92 Description Starts/Pauses test print. GY412 Operator Manual Section 3: Operation and Configuration 3.3 LCD MESSAGE DETAILS (cont’d) 3.3.1.17 Download Mode Display Download Mode - Selection of downloading method Onscreen message INTERFACE SELECT INTERFACE SD CARD Operation button Button ←, → ENTER Display DOWNLOAD READY GY412 Operator Manual Description Moves the cursor. "INTERFACE": Goes to the [PROGRAM DOWNLOAD READY] screen. "SD CARD": Goes to the [DOWNLOAD SELECT] screen. Download Mode - Waiting to download the data Onscreen message Operation button Selecting one of the following downloading methods. Use ↑ and ↓ keys to move the cursor and press ENTER. "INTERFACE": Downloads the program from the interface. "SD CARD": Downloads the program from the SD card. The initial cursor position is "INTERFACE". Button Waiting to download the data. The following data will be received from the computer and written in the main ROM. (1)Firmware data (2)Font / Logo data (3)Kanji font When the firmware data is received, it goes to the [RECEIVING…] screen. When font, logo or Kanji font is received, it goes to the [FONT DOWNLOAD READY] screen. Description Page 3-93 Section 3: Operation and Configuration 3.3 LCD MESSAGE DETAILS (cont’d) Display Download Mode - Waiting to download the font data Onscreen message FONT DOWNLOAD READY Display Download Mode - Deleting the font data Onscreen message DELETING... Display Deleting the font data. The gauge on the bottom of the screen shows the data deleting status. When the font data is overwritten after deleting the font data, it goes to the [RECEIVING] screen. When deleting the font data, it goes to the [FONT DELETE COMPLETED] screen. Download Mode - Receiving the font data Onscreen message RECEIVING... Page 3-94 Waiting to download the font data. When the font data is newly registered, it goes to the [RECEIVING…] screen. When the font data is overwritten or deleted, it goes to the [DELETING…] screen. Receiving the font data. The gauge on the bottom of the screen shows the font data downloading status. After the font data is received, it goes to the [WRITING…] screen. GY412 Operator Manual Section 3: Operation and Configuration 3.3 LCD MESSAGE DETAILS (cont’d) Display Download Mode - Writing the font data Onscreen message This screen shows that the writing of downloaded font data is in progress. The gauge on the bottom of the screen shows the writing status. After the completion of font data writing, it goes to the [FONT REGISTRY COMPLETED]. After the completion of downloaded data writing, it goes to the [VERIFYING…] screen. WRITING... Display Download Mode - Verifying the downloaded data Onscreen message This screen shows that the verification of downloaded data is in progress. The gauge on the bottom of the screen shows the verification status. After the downloaded data is verified, it goes to the [PROGRAM DOWNLOAD COMPLETED] screen. VERIFYING... Display Download Mode - Download completed Onscreen message Operation button PROGRAM DOWNLOAD COMPLETED This screen shows the completion of download. The buzzer emits 3 beeps when the download is completed. Press ENTER to go to the [DOWNLOAD READY] screen. Button Description ENTER GY412 Operator Manual Goes to the [DOWNLOAD READY] screen. Page 3-95 Section 3: Operation and Configuration 3.3 LCD MESSAGE DETAILS (CONT’D) Display Download Mode - Font data registration completed Onscreen message FONT REGISTRY COMPLETED Display Download Mode - Font data deletion completed Onscreen message FONT DELETE COMPLETED Display DOWNLOAD SELECT FIRMWARE KANJI FONT CONFIG ALL Selecting one of the following downloading methods. Use ↑ and ↓ keys to move the cursor and press ENTER. (1) "FIRMWARE"("FIRMWARE", "KANJI FONT" or "KANJI OUTLINE FONT") (2) "KANJI FONT"("KANJI FONT" or "KANJI OUTLINE FONT) (3) "CONFIG" (Printer settings) (4) "ALL" (Downloads in order of (1), (2) and (3)) The initial cursor position is "FIRMWARE". Button ↓, ↑ ENTER CANCEL Page 3-96 This screen shows the completion of font data deletion. The buzzer emits 3 beeps when the font data deletion is completed. Goes to the [DOWNLOAD READY] screen after 3 seconds automatically. Download Mode - Selection of downloading method Onscreen message Operation button This screen shows the completion of font data registration. The buzzer emits 3 beeps when the font data registration is completed. Goes to the [DOWNLOAD READY] screen after 3 seconds automatically. Description Moves the cursor. Goes to the [READING…] screen. Goes to the [INTERFACE SELECT] screen. GY412 Operator Manual Section 3: Operation and Configuration 3.3 LCD MESSAGE DETAILS (cont’d) Display Download Mode - Reading the data Onscreen message READING... Display Download Mode - Writing the data Onscreen message WRITING... Display This screen shows that the writing of downloaded data is in progress. The gauge on the bottom of the screen shows the writing status. Download Mode - Verifying the downloaded data Onscreen message VERIFYING... GY412 Operator Manual This screen shows that the reading of downloaded data. The gauge on the bottom of the screen shows the reading status. This screen shows that the verification of downloaded data and written data is in progress. The gauge on the bottom of the screen shows the verification status. Note that this screen does not appear when downloading "CONFIG". When downloading the data continuously, it goes to the [READING…] screen. When the download is completed, it goes to the [PROGRAM DOWNLOAD COMPLETED] screen. Page 3-97 Section 3: Operation and Configuration 3.3 LCD MESSAGE DETAILS (cont’d) Display Download Mode - Download completed Onscreen message READING... Operation button Button ENTER Page 3-98 This screen shows the completion of program download. The buzzer emits 3 beeps when the program download is completed. Press ENTER to go to the [DOWNLOAD READY] screen. Description Goes to the [DOWNLOAD READY] screen. GY412 Operator Manual Section 3: Operation and Configuration 3.4 DEFAULT SETTING 3.4.1 Default Setting Items Items to be initialized may differ by clearing method (o: Corresponding items) GY412 Operator Manual Page 3-99 Section 3: Operation and Configuration 3.4 DEFAULT SETTING (CONT’D) 3.4.1 List of Default Values Item Default Value GY412 TEST PRINT MODE PITCH POSITION, UPPER 0 PITCH POSITION, LOWER 0 OFFSET POSITION 0 DARKNESS 50 PRINT SPEED 06 IPS PRINT DARKNESS, UPPER HEAD 3 PRINT DARKNESS, LOWER HEAD 3 PITCH OFFSET, UPPER HEAD V:+0000 H:+0000 PITCH OFFSET, LOWER HEAD V:+0000 H:+0000 ZERO SLASH NO CHARACTER CODE JIS KANJI FONT GOTHIC CHARACTER PITCH FIXED RS-232C Baud rate 19200 bps RS-232C Parity bit NONE RS-232C Stop bit 1 BIT USER MODE INTERFACE MODE Page 3-100 GY412 Operator Manual Section 3: Operation and Configuration Item Default Value GY412 RS-232C Character bit 8 BIT LAN IP address 0.0.0.0 LAN Subnet mask 0.0.0.0 LAN Gateway address 0.0.0.0 LAN Port number1 1024 LAN Port number2 1025 LAN Port number3 9100 PROTOCOL STATUS4 STATUS REPLY TIMING ENQ RECEIVE BUFFER MULTI ITEM NUMBER CHECK DISABLE BCC CHECK DISABLE DARKNESS RANGE UPPER HEAD A DARKNESS RANGE LOWER HEAD A CHECK MEDIA SIZE DISABLE COMMAND ERROR DISPLAY NO HEAD CHECK ENABLE SELECT LANGUAGE ENGLISH PROTOCOL CODE STANDARD NON-STANDARD STX=7Bh, ETX=7Dh, ESC=EEh, ENQ=40h, CAN=21h, NULL=00h, OFFLINE=5Dh SEMBL MODE AUTO START NO ADVANC ED MODE GY412 Operator Manual Page 3-101 Section 3: Operation and Configuration Item Default Value GY412 SERVICE MODE Page 3-102 SENSOR LEVEL IMARK Auto setting SENSOR LEVEL GAP1 Auto setting SET PASSWORD OFF GY412 Operator Manual Section 3: Operation and Configuration 3.4 LCD DISPLAY LANGUAGE 3.4.2 How to Change Display Language Go to the SELECT LANGUAGE screen in the Advanced Mode to select either English or Japanese. The default language setting is English. GY412 Operator Manual Page 3-103 Section 3: Operation and Configuration Page 3-104 GY412 Operator Manual Section 4: Troubleshooting TROUBLESHOOTING 4 If you are unable to produce printouts on the GY412 printer, use this section to make sure the basics have been checked, before deciding you are unable to proceed any further. This section is divided into these parts: • 4.1 Error signal troubleshooting • 4.2 Error Message When Detecting Command Error • 4.3 Error Messages • 4.4 Troubleshooting table • 4.5 Interface Troubleshooting • 4.6 Test Print Troubleshooting GY412 Operator Manual Page 4-1 Section 4: Troubleshooting 4.1 ERROR SIGNAL TROUBLESHOOTING Warning icons will be displayed in the icon display area of the operator panel from the third to the fifth box. Up to three warning icons can be displayed when detecting multiple warning messages simultaneously. The printer will continue issuing the label while it is detecting a warning message. No. LCD Message 1 0$&+,1( (5525 2 )/$6+520 (5525 3 3$5,7<(5525 4 29(5581 (5525 5 )5$0,1* (5525 Page 4-2 LED Buzzer Error Condition Trouble Solution ON LINE: Off ERROR : On 1 long beep Machine error To clear error: Power OFF 1. Defective board 1. Board replacement ON LINE: Off ERROR : On 1 long beep Flash ROM error To clear error: Power OFF 1. Access failure to Flash ROM 2. Exceeding maximum times of writing to Flash ROM. 1. Board replacement ON LINE: Blinks ERROR : On 3 short beeps Overrun error To clear error: Power OFF 1. Improper communication settings 2. Improper cable connection 1. Adjust communication settings 2. Connect cable properly ON LINE: Blinks ERROR : On 3 short beeps Overrun error To clear error: Power OFF 1. Improper communication settings 2. Improper cable connection 1. Adjust communication settings 2. Connect cable properly ON LINE: Blinks ERROR : On 3 short beeps Framing error To clear error: Power OFF 1. Improper communication settings 2. Improper cable connection 1. Adjust communication settings 2. Connect cable properly GY412 Operator Manual Section 4: Troubleshooting No. LCD Message 6 %8))(529(5 7 &29(523(1 8 3$3(5(1' 10 6(1625(5525 GY412 Operator Manual LED Buzzer Error Condition Trouble Solution ON LINE: Blinks ERROR : On 3 short beeps Buffer over To clear error: Power OFF 1. Receiving oversized data for buffer capacity 2. Inappropriate communication 1. Change the host program not to send data exceeding buffer capacity 2. Adjust the host program to correct communication protocol ON LINE: Off ERROR : Blinks 3 short beeps Cover open To clear error: Cover close 1. Cover is not properly locked 2. Cover open sensor failure 1. Lock the head portion 2. Adjust/ Replace head open sensor ON LINE: Off ERROR : Blinks 3 short beeps Paper end To clear error: Head open/close 1. Out of paper 2. Paper is not set properly 1&2. Set paper properly ON LINE: Off ERROR : On 3 short beeps Sensor error To clear error: Head open/close 1. Improper pitch sensor level 2. Improper setting of sensor type 3. Label meandering 1. Adjust pitch sensor level 2. Set the appropriate paper type 3. Clean and adjust paper route Page 4-3 Section 4: Troubleshooting No. LCD Message LED Buzzer Error Condition Trouble Solution 11 ON LINE: Off ERROR : On 1 long beep Error will be detected only when head check is enabled To clear error: Hold down ENTER more than 5 sec. to change head check range or the combination of LINE + ENTER more than 5 sec. to disable head check function. 1. Print head failure 1. Replace print head 12 ON LINE: Off ERROR : Blinks 1 long beep Memory write error To clear error: Power OFF 1. Write failure 1. Check the installation of Flash ROM 2. Board replacement ON LINE: Off ERROR : Blinks 1 long beep Memory full To clear error: Power OFF 1. Not enough memory 1. Delete unnecessary data ON LINE: Off ERROR : On 1 long beep Download data error To clear error: Press ENTER 1. Reception of unauthorized download data 2. No download area available 1. Check download data 2. Check download data size ON LINE: Off ERROR : Blinks 3 short beeps Cutter error To clear error: Press ENTER 1. Jammed at cutter 2. Slit at the cutter portion does not work properly 1. Clean up the cutter assembly. 2. Adjust the belt at cutter part 0(025< 5:(5525 13 0(025<)8// 14 '2:1/2$' '$7$(5525 15 &877(5(5525 Page 4-4 GY412 Operator Manual Section 4: Troubleshooting No. LCD Message 17 LED Buzzer Error Condition Trouble Solution ON LINE: Off ERROR : Blinks 3 short beeps BCC check error To clear error: Press LINE or cancel the job 1. BCC that is added to send data (for 1 item differs. 1. Check send data and communication settings ON LINE: Off ERROR : Blinks 3 short beeps Item NO error To clear error: Press LINE or cancel the job 1. Sequence number of print data (for 1 item is not incrementing by one. *Sequence number 1. Check send data and communication settings ON LINE: Off ERROR : Blinks 3 short beeps Kanji ROM error To clear error: Power OFF 1. Reading improper Kanji data through Kan ROM 1. Download Kanji data 2. Board replacement 25 ON LINE: Off ERROR : Blinks 3 short beeps Media error To clear error: Head open/close 1. Print data exceeds 1. Check print data 2. Change media type 26 ON LINE: Off ERROR : Blinks 3 short beeps Command error To clear error: Press LINE * This screen appears only when command error display setting is enabled in Advanced Mode 1. Detecting improper command or parameter in the print data * Command information of detected error will be shown at the bottom of LCD 1. Check print data %&& (5525 &+(&. 18 ,7(012(5525 21 105 .$1-, (5525 520 COMMAND ERROR Caaa:<bb>:cc GY412 Operator Manual Page 4-5 Section 4: Troubleshooting 4.2 ERROR MESSAGE WHEN DETECTING COMMAND ERROR 4.2.1 Printer Motion when Detecting Command Error When [COMMAND ERROR DISPLAY] is set to “ENABLE” in Advanced Mode, the information of a command in which a command error was detected will be shown at the bottom of the screen, and the print operation will be paused. COMMAND ERROR Caaa:<bb>:cc This error can be cleared by pressing the ONLINE key, but the data in which an error was detected will be dumped and print operation will not be performed. 4.2.2 Position of Error Occurrence The location of command error is shown in “Caaa” where an error is being displayed. The number of ESC commands from ESC+A will be shown in “aaa”. Note that ESC+A is not included in the number of ESC commands, which can be displayed up to 999. If the number of ESC commands exceeds 999, it will be shown as “999”. Example) When a command error is detected by Horizontal Print Position <H>. ---- : [ESC]A C001 : [ESC]V100 C002 : [ESC]H99999 ← Location of command error C003 : [ESC]L0202 C004 : [ESC]X21,ABCDEF C005 : [ESC]Q1 C006 : [ESC]Z In this case, C002 is the location of error. 4.2.3 Error Command Name Command name, in which an error was detected, will be shown in “<bb>” where an error is being displayed. * When it is 1 byte command, it will be left aligned. Page 4-6 GY412 Operator Manual Section 4: Troubleshooting 4.2.4 Error Code Cause of command error will be indicated in code in “cc” where an error being displayed. Error types Code Cause 01 Analyzed improper command 02 Received improper parameter 03 Analyzed improper graphic and external character data 04 Specified memory area (Card slot) is incorrect 05 Number specified by registration command is already taken 06 Outside the registration area 07 Data is not registered 08 Specified print start position is outside the printable area 09 Printing image is outside the printable area (Barcode only) GY412 Operator Manual Page 4-7 Section 4: Troubleshooting 4.3 ERROR MESSAGES Page 4-8 GY412 Operator Manual Section 4: Troubleshooting 4.3 ERROR MESSAGES (cont’d) GY412 Operator Manual Page 4-9 Section 4: Troubleshooting 4.4 TROUBLESHOOTING TABLE TROUBLESHOOTING TABLE NO POWER Printer does not turn on. Power connector is not properly connected. NO LABEL MOVEMENT Media is not set properly. Set media and media guide correctly Incorrect label sensor selected. Set the sensor correctly by printer setting tool. Dirty platen roller. Clean the platen roller. Damaged platen gear. Replace platen roller and gear. INCORRECT LABEL POSITIONING Incorrect label sensor selection. Set the sensor correctly by printer setting tool. Improper sensor adjustment. Adjust sensor sensitivity as required. Data input error. Ensure correct data stream. Incorrect offset settings. Adjust settings as required. NO PRINT MOTION The interface cable is not properly connected. Connect the interface cable. Interface problems. Troubleshoot interface - refer to the next section. Data input error. Ensure correct data stream. Defective main circuit board. Have SATO authorized servicing personnel replace main board. PRINTER CREATES A BLANK LABEL Data input error. Ensure correct data stream. Incorrect label sensor selection. Set the sensor correctly by printer setting tool. Print head is disconnected. Power off the printer and ensure a proper connection. Defective print head. Replace print head as required. Defective main circuit board. Have SATO authorized servicing personnel replace main board. IMAGE VOIDS Dirty print head. Clean print head. Defective print head. Replace print head. Defective main circuit board. Have SATO authorized servicing personnel replace main board. Damaged or worn platen roller. Replace platen roller. Poor label quality. Use higher quality media. Use only SATO-certified media. Page 4-10 GY412 Operator Manual Section 4: Troubleshooting 4.4 TROUBLESHOOTING TABLE (cont’d) TROUBLESHOOTING TABLE LIGHT PRINT IMAGES Low print head darkness. Adjust darkness level setting. Foreign material on print head. Clean print head and platen roller. Excessive print speed. Reduce print speed setting. UNEVEN PRINT DARKNESS Damaged or worn platen roller. Replace platen roller. Dirty print head. Clean print head. Defective print head. Replace print head as required. SMEARED PRINT IMAGES Poor media quality Use higher quality media. Use only SATO-certified media. Foreign material on print head and platen roller Clean print head and platen roller. Foreign material on labels Use higher quality media. Use only SATO-certified media. Excessive print head energy Adjust darkness level setting. Excessive print speed Adjust print speed as required. MEANDERING MEDIA Incorrectly loaded media. Ensure correct loading. Media is not set properly. Set media and media guide correctly. Damaged or worn platen roller. Replace platen roller. GY412 Operator Manual Page 4-11 Section 4: Troubleshooting 4.5 INTERFACE TROUBLESHOOTING This chapter provides a checklist for the various interface types. Locate the checklist relative to the interface used and perform each of the troubleshooting tasks until the problem has been isolated. UNIVERSAL SERIAL BUS (USB) INTERFACE If nothing prints during a test print, verify the device drivers have been successively installed by performing the following: CHK TROUBLESHOOTING STEP Click on Start, Settings, and then Control Panel. Click on System within the new window. Click on the Device Manager tab. Ensure that the View Device By Type is checked. Scroll to SATO-USB Device and ensure that errors do not exist. Reinstall as required. Reboot the PC and the printer. RS232 SERIAL INTERFACE CHK TROUBLESHOOTING STEP Ensure the correct interface module is correctly installed. Run self-test to verify. Ensure the serial cable (Null Modem) meets specifications and is correctly connected at each end. Ensure the serial cable is not defective. Ensure the communication parameters for the baud rate, parity, data bits and stop bits are consistent with those being sent from the host computer. Ensure the printer is receiving information from the computer using the Receive Buffer Hex Dump mode. Refer to that procedure within this manual for instructions. The command stream should be continuous and possess 0Dhex and/or 0Ahex (carriage return and line feed) characters throughout. However, there should not be either located between the start (<ESC>A) and the stop (<ESC>Z) commands. Try another port to isolate the problem. Replace the main circuit board if determined to be the problem. LAN ETHERNET INTERFACE CHK TROUBLESHOOTING STEP Ensure the interface has been correctly configured. Wait two minutes and run self-test to verify. If a test label does not print, there may be a hardware problem. Ensure the cable and its ports are not defective. Ensure that a faulty print server or other protocol related scenarios are not creating a queue setup issue. Systematically perform checks and tests to isolate the cause. If using TCP/IP, ensure that a valid IP address is specified and that all parameters are correct (subnet mask, gateway, etc.). Attempt to PING the IP address assigned to the network interface. If using a repeater or hub, ensure the SQE is turned off. Also ensure the repeater port is not defective by trying the print server on another port. Install the IPX/SPX protocol on a workstation to determine if the network device can be discovered via the MAC address. If able, configure the appropriate protocols and retest connectivity. Use a crossover cable to isolate the printer from the network by connecting from the interface and workstation. Verify that the parameters match on each. Test connectivity. Page 4-12 GY412 Operator Manual Section 4: Troubleshooting 4.6 TEST PRINT TROUBLESHOOTING This chapter provides instruction on special printing to identify and resolve specific print problems. 4.4.1 Hex Dump Allows the operator to determine if there were problems in the downloading of data. The contents of the print buffer can be examined using the Hex Dump Mode. In the left column, each line of data received is numbered. The center column provides the data in hexadecimal format. And in the right column, the same data are provided in the ASCll format. Refer to Section 3: Operation and Configuration for more details to perform this activity. 4.4.2 Test label printing Allows the operator to identify specific problems regarding mechanical performance and setup. The test label is designed to assist in the identification of print problems. Refer to Section 3: Operation and Configuration for more details to perform this activity. GY412 Operator Manual Page 4-13 Section 4: Troubleshooting This page is intentionally left blank Page 4-14 GY412 Operator Manual Section 5: Cleaning and Maintenance CLEANING AND MAINTENANCE 5 This section provides information on user maintenance for the GY412 printer. The following information is covered here: • 5.1 Cleaning The Print Head, Platen, and Rollers • 5.2 How To Clean The Printer (Cleaning Kit) Caution • • • • • When cleaning the print heads, bear in mind that the print heads and their surroundings may be hot. Wait until the printer cools down before proceeding to clean the printer. Be sure to turn off the power before cleaning. The suggested cleaning schedules here are guidelines. If necessary, clean as appropriate, depending on the degree of contamination. Use a cleaning swab, or cotton cloth from an approved cleaning kit, to clean the printer units. Use only soft, lint-free materials for cleaning. Avoid using hard objects for the cleaning process, as they will damage the components. GY412 Operator Manual Page 5-1 Section 5: Cleaning and Maintenance 5.1 CLEANING THE PRINT HEAD, PLATEN, AND ROLLERS The print head not only generates printouts of barcodes, but also graphics and text. To produce optimal prints, it must be kept clean in spite of the dirt and adhesive that constantly accumulate on its print surfaces. Furthermore, dirt can accumulate along the label path, affecting parts such as sensors and guides, and reducing their performance. Therefore, it is important to clean these important components periodically. The printer cleaning kit and cleaning sheets can be purchased from your authorized SATO representative. When to clean with a cleaning kit For the print heads, platen roller, paper sensor, and label guide: clean after using up every other box of media. For other parts: clean after finishing every six boxes of media. 5.2 HOW TO CLEAN THE PRINTER (CLEANING KIT) Follow the instructions supplied with the cleaning kit. Use the items to clean the parts. 1. Before starting, get ready an approved cleaning kit from your SATO representative. Make sure the printer is powered off, and remove the power cable. Instructions for opening the fluid in the swabs are provided on the label on the bag of swabs. 2. Lift the Top Cover. 3. Remove the media. Cleaning the print heads 4. Either use a swab from the cleaning kit, or apply Thermal print head Cleaner to a cotton swab. 5. Locate the top print head, which is mounted under the Top cover. The print head faces downward when the Top cover is closed. It has a green stripe on its exposed surface. 6. Press the end of the dampened swab along the entire width of the print head. 7. Check for any black coloring or adhesive on the swab after cleaning. Discard the dirty swabs. 8. Repeat, if necessary, until the swab is clean after it is pressed over the print head. 9. Locate the lower print head. It faces upward and also has a green stripe. 10.Repeat steps 6 through 8 for the lower print head. Page 5-2 GY412 Operator Manual Section 5: Cleaning and Maintenance 5.2 HOW TO CLEAN THE PRINTER (CLEANING KIT) (cont’d) Cleaning the platen rollers, other rollers, sensors, and label guide 11.Locate the upper platen roller. It is the large black rubber roller on the underside of the top cover with the black thumbwheel. Wet some cotton swabs or cotton cloth with cleaning solution. While rotating the upper platen roller with your fingers, clean the entire roller using one or more cotton swabs. Wipe any dirt or accumulated adhesive off the upper platen roller. 12.Locate the feed roller. It is the smaller, black rubber roller on the underside of the top cover, toward the rear of the printer. While rotating the roller with your fingers, clean the entire roller using one or more swabs. 13.Locate the lower platen roller. It is the larger of the two rollers, and it is close to the front of the printer. Clean this in the same way as you did the other rollers. 14.Locate the lower feed roller. It is the smaller of the two rollers on the underside of the paper path. Repeat the same cleaning steps on this roller, until it no longer makes the swab dirty. GY412 Operator Manual Page 5-3 Section 5: Cleaning and Maintenance 5.2 HOW TO CLEAN THE PRINTER (CLEANING KIT) (cont’d) 15.Locate the I-mark sensor window. It is facing up underneath the paper path, toward the left side of the printer, when you are facing the front of the printer. Using a wet swab, clean the surface of the sensor. 1 2 (1) This is the I-mark sensor window. (2) This is the gap sensor window. 16.Locate the gap sensor window. It is the small, circular window facing up underneath the paper path, in the center of the printer, next to the I-mark sensor window. 17.Partly close the top cover. Locate the label guide on the rear of the printer. Using the same supplies, clean all parts of the label guide. If the label guide is very dirty, or if adhesive is on the guide, you may need to use a soft cotton cloth to clean it. Apply some isopropyl alcohol to the cloth. If necessary, from the rear of the printer, gently insert one end of the cloth in the slot of the label guide, and, with the top cover partly open, with the other hand, grasp the tip of the cloth. Briskly clean the inside surfaces of the guide with a back and forth motion. 18.Repeat the whole cleaning process when it is necessary. The label guide, the platen and other rollers should be cleaned whenever foreign matter, such as dust or adhesive, is present. Page 5-4 GY412 Operator Manual Section 6: Basic Specifications 6 GENERAL SPECIFICATIONS 6.1 PRINTER BASIC SPECIFICATIONS MODEL NAME GY412 PHYSICAL CHARACTERISTICS Width 8.39 in. (213 mm) Height 11.06 in. (281 mm) Depth 11.93 in. (303 mm) The below dimensions apply when you open or close the cover Width 8.39 in. (213 mm) Height 18.07 in. (459 mm) Depth 12.09 in. (307 mm) Weight approximately 26.46 lbs. (12 Kg) ENVIRONMENTAL (EXCLUDING MEDIA) Operating Temperature 32 to 104°F (0 to 40ºC) Not considering consumables Storage Temperature (-5 to 60ºC) Not considering consumables Operating Humidity 30 to 80% RH, Non-condensing Storage Humidity 30 to 90% RH, Non-condensing POWER SPECIFICATIONS Input Voltage Input power voltage: AC100 to 240V±10% Rated voltage: AC100V/AC240V Power Consumption Input voltage requirement: 100V/50Hz At peak: 144W/144VA During standby: 11W/13VA Low-power consumption function Power saving mode: LCD backlight turns off when the key is not pressed, the cover is not opened/closed or the data is not received for a certain period of time. (Set the time by minutes in the range of 0 to 15 minutes) GY412 Operator Manual Page 6-1 Section 6: Basic Specifications 6.1 PRINTER BASIC SPECIFICATIONS (cont’d) PROCESSING CPU 32bit RISC-CPU 133MHz Printer memory / Flash ROM Main memory (Flash ROM): 16MB RAM: 32MB PRINTER LANGUAGE Standard SATO Barcode Printer Language (SBPL) INTERFACES Interface Board Optional communication interface boards (1) USB interface: USB B-type connector (2) LAN interface (10/100BASE) (3) RS-232C interface (4) SD card slot (1 slot) * Eject type PRINT Method Direct Thermal only Print Speed (selectable) 75 to 250mm/sec (Setting value: 75,100,125,150,175,200,225,250) 3 to 10 inch/sec (Setting value: 3,4,5,6,7,8,9,10) * Print speed varies, depending on paper types to be used. Head density (Resolution) 305 dots per inch (12dots/mm ) * Corner edge type Printable Area Max. Length 300mm x Width 104mm (both upper and lower surfaces) SENSING - PAPER LENGTH Sensor Page 6-2 (1) I-mark sensor (Reflective type) (2) GAP sensor (Transmissive type) GY412 Operator Manual Section 6: Basic Specifications 6.1 PRINTER BASIC SPECIFICATIONS (cont’d) I-MARK SENSOR POSITION As seen from back side Perforation The best position to cut is at a little bit below the perforation 0.04 in. (1.0 mm) 0.12 in. (3.0 mm) 0.39 in (10.0 mm) or more 0.12 in (3.0 mm) No pre-print is advised in the feed path of the I-mark. GY412 Operator Manual Page 6-3 Section 6: Basic Specifications 6.1 PRINTER BASIC SPECIFICATIONS (cont’d) GAP SENSOR POSITION I-mark is strongly advised for Gap stock due to two-sided coating opacity. Page 6-4 GY412 Operator Manual Section 6: Basic Specifications 6.1 PRINTER BASIC SPECIFICATIONS (cont’d) GAP SENSOR POSITION, CONTINUED GAP Base position for tear-off Base position for printing 0.06 in. (1.5 mm) GY412 Operator Manual Page 6-5 Section 6: Basic Specifications 6.1 PRINTER BASIC SPECIFICATIONS (cont’d) MEDIA (Be sure to use media manufactured or certified by SATO) Paper Setting Position Paper Thickness Center position Label: 100 to 320 μm Label: 0.003 to 0.012 in. (0.1 to 0.32 mm) Continuous mode Label Pitch: 1.18 to 11.81 in.(Backing liner 1.29 to 11.9 in.) Width: 1.96 to 5.15 in. (Backing liner 2.04 to 5.19 in.) Pitch: 30 to 300 mm (Backing liner 33 to 303 mm) Width: 49 to 129 mm (Backing liner 52 to 132 mm) Tear-off mode Label Pitch: 1.18 to 11.81" (Backing liner 1.29 to 11.9") Width: 1.96 to 5.15 in. (Backing liner 2.04 to 5.19 in.) Pitch: 30 to 300 mm (Backing liner 33 to 303 mm) Width: 49 to 129 mm (Backing liner 52 to 132 mm) Size Cutter mode Label Pitch: 1.18 to 11.81" (Backing liner 1.29 to 11.9") Width: 1.96 to 5.15 in. (Backing liner 2.04 to 5.19 in.) Pitch: 30 to 300 mm (Backing liner 33 to 303 mm) Width: 49 to 129 mm (Backing liner 52 to 132 mm) Label cutting during print operation Label Pitch: 1.18 to 11.81" (Backing liner 1.29 to 11.9") Width: 1.96 to 5.15 in. (Backing liner 2.04 to 5.19 in.) Pitch: 30 to 300 mm (Backing liner 33 to 303 mm) Width: 49 to 129 mm (Backing liner 52 to 132 mm) *Note: The size may be limited by use conditions. Type Direct Thermal fanfold LABEL ISSUING MODES Standard: Continuous mode, Tear -off mode, Cutter mode, and Label Cutting During Print Operation mode COMMAND Page 6-6 SBPL Version 4.6 or higher SEMBL Version 1.0 or higher GY412 Operator Manual Section 6: Basic Specifications 6.1 PRINTER BASIC SPECIFICATIONS (cont’d) STANDARD EMBEDDED FONTS BITMAP FONTS XU 5× 9dot (Alphanumeric, Symbols) XS 17×17dot (Alphanumeric, Symbols) XM 24×24dot (Alphanumeric, Symbols) X2B 48×48dot (Alphanumeric, Symbols) XL 48×48dot (Alphanumeric, Symbols) OCR-A 22×33dot (Alphanumeric, Symbols) OCR-B 30×36dot (Alphanumeric, Symbols) RASTERIZED FONTS CG Times (Alphanumeric, Symbols) CG Triumvirate (Alphanumeric, Symbols) EXTENDED FONT Download font data GY412 Operator Manual Page 6-7 Section 6: Basic Specifications 6.1 PRINTER BASIC SPECIFICATIONS (cont’d) BARCODE UPC-A/UPC-E, JAN/EAN, CODE39, CODE93, CODE128, GS1-128(UCC/EAN128), Customer barcode, CODABAR(NW-7), ITF, Industrial 2of5, Matrix 2of5, UPC add-on barcode, GS1 DataBar Omni-directional, GS1 DataBar Truncated, GS1 DataBar Stacked, GS1 DataBar Stacked Omni-Directional, GS1 DataBar Limited, GS1 DataBar Expanded, GS1 DataBar Expanded Stacked * GS1 DataBar is the new version of RSS. 2D CODE QR code (Ver 8.1 including MicroQR) Security QR code PDF417 (Ver 2.4 including MicroPDF) MAXI code (Ver 3.0) GS1 DataMatrix (ECC200) Ver 2.0 Page 6-8 GY412 Operator Manual Section 6: Basic Specifications 6.1 PRINTER BASIC SPECIFICATIONS (cont’d) ITEM Composite symbol DESCRIPTION EAN-13 Composite(CC-A/CC-B) EAN-8 Composite(CC-A/CC-B) UPC-A Composite(CC-A/CC-B) UPC-E Composite(CC-A/CC-B) GS1 DataBar Composite(CC-A/CC-B) GS1 DataBar Truncated Composite(CC-A/CC-B) GS1 DataBar Stacked Composite(CC-A/CC-B) GS1 DataBar Stacked Omni-Directional Composite(CC-A/CC-B) GS1 DataBar Limited Composite (CC-A/CC-B) GS1 DataBar Expanded Composite (CC-A/CC-B) GS1 DataBar Expanded Stacked Composite(CC-A/CC-B) GS1-128 Composite(CC-A/CC-B/CC-C) Notes: • GS1 DataBar is the new version of RSS. • GS1 128 is the new version of UCC/EAN128. ITEM DESCRIPTION Rotation (Characters/Barcode) Characters: 0º, 90º, 180º, 270º Barcode: Parallel(0°), Parallel 2(180°) Serial 1(90°), Serial 2(270°) ITEM DESCRIPTION Barcode ratio 1:2, 1:3, 2:5 User definable ITEM DESCRIPTION Magnification ratio (Characters/Barcode) Characters: Vertical 1 to 12 times, Horizontal 1 to 12 times Barcode: 1 to 12 times GY412 Operator Manual Page 6-9 Section 6: Basic Specifications 6.1 PRINTER BASIC SPECIFICATIONS (cont’d) ITEM Standard functions DESCRIPTION (1) Status return function (2) Graphic function (3) Sequential number function (4) Form overlay function (5) Custom character registration function (6) Character correction function (7) Black/white inversion function (8) Ruled line function (9) Dump list function (10) Format registration function (11) Outline function (12) Outline modification function (13) Label skip function (14) Zero slash switching function (16) Auto loading function (17) Label saving function (18) Label discharging function * Label saving function: If feeding the first label automatically, the print data will be printed on the first label. To print on the last label, it is necessary to set the label pitch to 40 mm or more in “Continuous Mode” or “Label cutting during print operation”. Label pitch of 190 mm or more is required when back feed motion occurs. ITEM Self-diagnostic function Page 6-10 DESCRIPTION (1) Thermal head burnout check (2) Paper end detection (3) Cover (Thermal head) open detection (4) Test print (5) Cutter error GY412 Operator Manual Section 6: Basic Specifications 6.1 PRINTER BASIC SPECIFICATIONS (cont’d) REGULATORY APPROVALS Package drip test ISTA-2A (No application) Environmental regulations RoHS The RoHS directive restricts the use of six hazardous materials listed below. Hexavalent chromium--------------------------Max. 0.1% Lead and lead compounds--------------------Max. 0.1% Mercury and mercury compounds-----------Max. 0.1% Cadmium and cadmium compounds -------Max. 0.01% Polybrominated biphenyls(PBB)--------------Max. 0.1% Polybrominated diphenyl ethers(PBDE)----Max. 0.1% Noise (EMC) standard US and Canada: FCC15B Class B Safety standards US/Canada MET ITEM DESCRIPTION Wireless standards Wireless LAN (2.45GHz) US/Canada FCC15B / FCC15C OPTIONS (1) Cutter unit - In western hemisphere, the Cutter is standard in each printer (2) SD card ITEM DESCRIPTION LCD Graphic LCD (W 128 dot x H 64 dot) Full screen LED backlight LED (1) STATUS (Green) (2) ERROR (Red) Operation keys Online printer Keys: LINE, FEED, ↑, ↓, ←, →, FUNCTION, ENTER, CANCEL Volume (Potentiometer) (1) VOLUME: Adjusts buzzer volume GY412 Operator Manual Page 6-11 Section 6: Basic Specifications 6.1 PRINTER BASIC SPECIFICATIONS (CONT’D) ITEM CE adjustment Factory adjustment User adjustment LEVEL ADJUSTMENT (1) I-mark sensor level adjustment (2) GAP sensor level adjustment (1) Factory print position adjustment (through LCD screen) (1) Print darkness adjustment (through LCD screen) (2) Print position adjustment (through LCD screen) (3) Cutter and tear-off stop position adjustment (through LCD screen) ITEM Paper length detection sensor Various sensors Other settings Buzzer DESCRIPTION (1) I-mark sensor (Reflective type) (2) GAP sensor (Transmissive type) (1) Cover open sensor (2) Cutter sensor (3) Head up/down sensor Print speed, print darkness, and various offset settings can be configured through the computer using the printer setting tool or can be configured through the printer LCD screen. Built-in buzzer * Buzzer can be ON/OFF by the command specification * Volume control function available (VR setting) Operability (1) Easy label loading (Label feed from the rear upper) (2) Automatic label feed function (3) Power switch located on the front side (4) Easy operation. Vertical motion structure for opening/closing thermal head. (5) Easy cleaning of head and platen roller Toughness Unpackaged product drop impact not acceptable Vibration and drop test of packaged product equivalent to ISTA-2A Durability Platen: 50km guaranteed Thermal head: 30km guaranteed Belt: 50km guaranteed Motor: 20,000 hours guaranteed Standard accessories (1) Quick Guide booklet (2) Thermal head cleaning sheet (3) Power cable (4) Warranty (5) Accessory CD-ROM Page 6-12 GY412 Operator Manual Section 6: Basic Specifications 6.2 OPTIONAL ACCESSORIES SPECIFICATIONS CUTTER SPECIFICATIONS Media Type Complies with the printer specifications * Do not cut on the line of perforation when using perforated labels Pitch: 1.30 in. to 11.93 in. (33 to 303 mm) (Backing paper size) Media Size Width: 2.05 in. to 5.2in. (52 to 132 mm) (Backing paper size) Thickness: 100 to 320 μm (Adhesive side 100 to 260μm) Dimensions Weight GY412 Operator Manual W 7.11 in. x D1.93 in. x H 102.9 in. (W 180.5 mm x D 49.1 mm x H 102.9 mm) 1.5 lbs. (0.7 kg) Page 6-13 Section 6: Basic Specifications This page is intentionally left blank Page 6-14 GY412 Operator Manual Section 7: Interface Specifications INTERFACE SPECIFICATIONS 7 This section presents the interface types and their specifications for the GY412 printers. These specifications include detailed information to assist in the selection of the most appropriate method for the printer to interface with the host. The following information is presented in this section: • 7.1 Interface Types • 7.2 Interface • 7.3 RS-232C Serial Interface • 7.4 Universal Serial Bus (USB) Interface • 7.5 Local Area Network (LAN) Ethernet 7.1 INTERFACE TYPES Caution Never connect or disconnect interface cables (or use a switch box) with power applied to either the host or printer. This may caused damage to the interface circuitry in the printer/ host and is not covered by warranty. The GY412 is equipped with the following interfaces for communicating with the host computer. 1) RS-232C interface 2) LAN interface 3) USB interface GY412 Operator Manual Page 7-1 Section 7: Interface Specifications 7.2 INTERFACE 7.2.1 Main Port and Sub Port By assigning the interfaces to [Main Port] and [Sub Port], the following can be performed. (1) Main port Main port receives the print data mainly. All the SBPL commands can be used for this port. (2) Sub port Sub port monitors the printer status and connects the printer with the external device. As for available commands, refer to [3.2 Return Status]. 7.2.2 Interface Combination The interface combination can be used for main port and sub port as follows. Main Port RS-232C RS-232C Sub Port Page 7-2 USB o LAN o USB LAN o o o o GY412 Operator Manual Section 7: Interface Specifications 7.3 RS-232C SERIAL INTERFACE 7.3.1 Basic Specifications The interface of this printer complies with RS-232C. Enter the interface mode of the printer or use the printer setting tool for setting up. 7.3.2 Basic Specifications of RS-232C Serial Interface This interface complies with the RS-232C standard. Interface connector RS-232C Interface connector Printer side DB-9S or equivalent (Female) Cable side DB-9P or equivalent (Male) Communication settings Use Printer configuration tool to setup. Standard installation is required. GY412 Operator Manual Page 7-3 Section 7: Interface Specifications 7.3 RS-232C SERIAL INTERFACE (cont’d) Communication settings The following items can be set through the interface mode of the printer. Item Protocol Baud rate Data bit strength Setting Range STATUS3 STATUS4 (Protocol for the driver) (* Default value) STATUS5 2400bps, 4800bps 9600bps, 19200bps(* Default value) 38400bps, 57600bps 7 bits, 8 bits (* Default value) Parity bit NONE (* Default value), ODD, EVEN Stop bit 1 bit (* Default value), 2 bits * Ready/Busy and XON/XOFF are not supported in [Protocol]. Synchro system Asynchronous method Maximum receive buffer capacity 2.95 MB 0 MB 2.95 MB Near full occurred Remaining 0.95 MB Near full released Remaining 1.95 MB Code ASCII (7 bits), Graphic (8 bits) Signal level High level Low level Reception method Multi buffer *Single item buffer is not supported. Page 7-4 : +5V to ~+12V : -5V to ~+12V GY412 Operator Manual Section 7: Interface Specifications 7.4 UNIVERSAL SERIAL BUS (USB) INTERFACE 7.4.1 Basic Specifications The USB interface of this printer complies with the USB2.0 standard. 7.4.2 Basic Specifications of USB interface USB Interface connector Series B plug Interface Standard installation Version USB 2.0 Communications (1) Transfer rate: Full speed (12Mbps) (2) Transfer mode: Bulk / Control mode (3) Controller: Compatible with UHCI / OHCI LED None Communication settings The following can be set through the interface mode of the printer. Protocol: Setting range: STATUS4 (Protocol for the driver) (*Default value) STATUS5 Maximum receive buffer capacity 2.95 MB 0 MB 2.95 MB Near full occurred Remaining 0.95 MB Near full released Remaining 1.95 MB GY412 Operator Manual Page 7-5 Section 7: Interface Specifications 7.4 UNIVERSAL SERIAL BUS (USB) INTERFACE (cont’d) 7.4.3 Connector Pin Assignments Pin No. Description 1 VBus 2 -Data(D-) 3 +Data(D+) 4 GND Page 7-6 GY412 Operator Manual Section 7: Interface Specifications 7.5 LOCAL AREA NETWORK (LAN) ETHERNET 7.5.1 Basic Specifications of Onboard LAN LAN interface connector LAN Connector RJ45 Link/Status LED The status LEDs light up when establishing the LINK with Ethernet equipment, or when receiving packets. Communication specifications GY412 Operator Manual LED Color Conditions LINK Green Lights up when establishing the link. SPEED Orange Lights off when recognizing the connection to 10BASE-T Lights up when recognizing the connection to 100BASE-TX Collision Red Lights up when a collision has occurred 10BASE/100BASE auto switching (Recognition by LINK LED) Corresponding protocols: TCP/IP Network layer: ARP, RARP, IP, ICMP Transport layer: TCP, UDP Application layer: LPD, FTP, TELNET, BOOTP, DHCP, HTTP Page 7-7 Section 7: Interface Specifications Communication settings Maximum receive buffer capacity The following items can be set through the interface mode of the printer. Item Setting range Protocol STATUS3 STATUS4 (Cyclic response mode) STATUS4 (ENQ response mode)(*Default value) STATUS5 IP address 0.0.0.0 ~ 255.255.255.255 Subnet mask 0.0.0.0 ~ 255.255.255.255 Gateway address 0.0.0.0 ~ 255.255.255.255 DHCP protocol Enable / Disable RARP protocol Enable / Disable Root password Optional alphanumeric character string (16letter) 2.95 MB 0 MB 2.95 MB Near full occurred Remaining 0.95 MB Near full released Remaining 1.95 MB Page 7-8 GY412 Operator Manual Section 7: Interface Specifications 7.5 LOCAL AREA NETWORK (LAN) ETHERNET (cont’d) 7.5.2 Software Specifications Corresponding Protocol Network layer Session layer Application layer TCP/IP ARP, RARP, IP, ICMP TCP, UDP LPR, FTP, TELNET, BOOTP, DHCP Notes • • Print data can be sent by LPR and FTP of TCP/IP and Socket’s exclusive protocol. Printer status can be obtained by Socket’s exclusive protocol. 7.5.3 TCP/IP Specifications In TCP/IP protocol environment, LPD and FTP are provided for printing. TELNET for the setup of variable, and ARP, RARP and BOOTP/DHCP for the setup of each address are available. In socket connection, monitoring the transmission of print data and the printer status. Note that multiple sessions cannot be established at the same time. WindowsNT, Windows2000 / XP / Server2003 / Vista operation systems support LPD of TCP/IP that enables print operation; however, Windows98 / Me are not configured with LPD. In order to print directly, off-the-shelf printing utility is required. For Windows2000(excluding Advanced Server) / XP / Server2003 (R2 is yet to be verified) / Vista, use the exclusive “Network setting tool” to configure IP address and various settings. 7.5.4 LPD Specifications LPD protocol complies with RFC1179 and handles the list of logical printer name as queue name such as lp, sjis and euc. When sending job by LPR, the sending order of data file and control file within the job will not affect print operation. Queue name lp sjis euc Notes • • • • A job deletion by LPR is not supported. LPD specifications can be used for STATUS4 (Protocol for the driver) only. When using LPD for large quantity printing, a lack of data may occur depending on the Windows specifications. A banner page cannot be printed. GY412 Operator Manual Page 7-9 Section 7: Interface Specifications 7.5 LOCAL AREA NETWORK (LAN) ETHERNET (cont’d) 7.5.5 FTP Specifications FTP protocol complies with RFC959 and handles the list of logical printer name as transfer directory. File transfer to this directory executes printing operation. Note that it is possible to specify ASCII(A), BINARY(I), and TENEX(L8) as transfer modes although mode difference is dependent on the client side. There are three directory names such as lp, sjis and euc. Queue name lp sjis euc Note • A banner page cannot be printed. Page 7-10 GY412 Operator Manual Section 7: Interface Specifications 7.5 LOCAL AREA NETWORK (LAN) ETHERNET (cont’d) 7.5.6 TELNET Specifications TELNET complies with RFC854. This consists of an interactive menu form, and it enables you to change and refer internal setup and to display status. To change the setting details, enter 'root' user name and password at the time of login. Default ROOT password is set to null (line feed only). Each printer model name will appear in [Model Name]. For the detailed settings of [1:Setup TCP/IP], refer to [7.4.8 Setting/Displayed Items]. 7.5.7 Setting/Displayed Items The following table shows the section that can be set up and referred to, and the list of variables. TCP/IP related settings Variable name Setting range Initial value (Factory default) IP address 0.0.0.0 ~ 255.255.255.255 0.0.0.0 (Obtained externally) Subnet mask 0.0.0.0 ~ 255.255.255.255 0.0.0.0 (Derived from IP address) Gateway address 0.0.0.0 ~ 255.255.255.255 0.0.0.0 (Invalid) RARP protocol ENABLE/DISABLE ENABLE DHCP protocol ENABLE/DISABLE ENABLE Keep alive time 30 ~ 300 180 seconds Socket cancel Normal / compatible Normal ROOT password Up to 16 optional alphanumeric character string NULL (No password) GY412 Operator Manual Page 7-11 Section 7: Interface Specifications 7.5 LOCAL AREA NETWORK (LAN) ETHERNET (cont’d) 7.5.8 Socket Connection In the socket server of TCP/IP, use Port1024 for receiving print data and Port1025 for returning printer status. (Variables can be used for the port number). Note that each socket cannot establish multiple sessions at the same time. LPR and FTP can be used for sending print data other than socket connection. When LPR or FTP is used, you cannot connect to Port1024. 1) Printing by 2-port connection/Socket (STATUS4-Protocol for the driver) Print data Port1024 Host Return data Port1025 Printer 2) Printing by 1-port connection/Socket (STATUS3 and STATUS5 return Host Print data, Return data Printer Port1024 3) Printing by LPR and FTP Print data LPR, FTP Host Return data Printer Port1025 Page 7-12 GY412 Operator Manual Section 7: Interface Specifications 7.5 LOCAL AREA NETWORK (LAN) ETHERNET (cont’d) 7.5.9 Connection and Disconnection of Session The following is the procedure for connection and disconnection of Port1024 (for print main port) and Port1025 (for status return) in socket server function. 1) Print main port (Port1024), Status return port (Port1025) 7.5.10 Printer Status 7.5.10.1 Mode There are three types of modes for status return in the LAN interface. 1. 2-port connection / Cyclic response mode (Protocol for the driver) Using Port1024 for print main port, and Port1025 for status return. The printer outputs the printer status at regular cycles. Also, receiving the status request command outputs the latest printer status. GY412 Operator Manual Page 7-13 Section 7: Interface Specifications 7.5 LOCAL AREA NETWORK (LAN) ETHERNET (cont’d) 2. 2-port connection / ENQ response mode (Protocol for the driver) Using Port1024 for print main port, and Port1025 for status return. The status request command received from the host computer outputs the printer status. 3. 1-port connection / ENQ response mode (STATUS3 / STATUS5 protocol) Using Port1024 for both print main port and status return port. The print request command received from the host computer outputs ACK. The status request command received from the host computer outputs the printer status. (When STATUS3 is in use, labels cannot be issued by printer driver. Also, printer setting tool is not available for issuing labels.) 7.5.10.2 Protocols 1. 2-port connection / Cyclic response mode (Protocol for the driver) The printer returns the status at 500ms to 1000ms intervals. When the status request command (ENQ 05H) is received from the host computer, the latest printer status data is returned. Page 7-14 GY412 Operator Manual Section 7: Interface Specifications 7.5 LOCAL AREA NETWORK (LAN) ETHERNET (cont’d) 2. 2-port connection / ENQ response mode (Protocol for the driver). After receiving the status request command (ENQ:05H) from the host computer, the latest printer status is returned. GY412 Operator Manual Page 7-15 Section 7: Interface Specifications 7.5 LOCAL AREA NETWORK (LAN) ETHERNET (cont’d) 3. 1-port connection / ENQ response mode (STATUS3 / STATUS5 protocol). The print request command received from the host computer outputs ACK. The status request command (ENQ:05H) received from the host computer outputs the printer status. Page 7-16 GY412 Operator Manual Section 7: Interface Specifications 7.5 LOCAL AREA NETWORK (LAN) ETHERNET (cont’d) Notes For On-board LAN Interface 1. For the Onboard LAN interface settings, refer to the GY412 Printer Interface Setup Quick Guide, and to the network setting tool instructions on the SATO America, Inc. Internet site: http://www.satoamerica.com 2. When opening and closing the print main port (Port1024) and the status port (Port1025), wait for 150ms and 200ms from the closing to the opening of the port to avoid a double connection. If the connect request [CONNECT] is sent to the port already connected (Port1024, Port 1025), that request will be rejected (Socket CLOSE). 3. Inserting and removing the LAN cable while the computer is connected may result in a communication failure. Do not insert and remove the LAN cable while starting up the printer. Doing so may result in a communication failure. Please restart the printer to recover from this error. GY412 Operator Manual Page 7-17 Section 7: Interface Specifications This page is intentionally left blank. Page 7-18 GY412 Operator Manual Section 8: Appendix APPENDIX 8 The following information is provided: • 8.1 Cutter and Printer Motion • 8.2 Offset Position Adjustment • 8.3 Head Check Motion • 8.4 Auto Label Feed • 8.5 Head Position (Up and Down) • 8.6 Reverse Eject Motion • 8.7 Segmented Printing • 8.8 Print Speed and Label Size • 8.9 Label Saving Function • 8.10 Print Operation Sequence GY412 Operator Manual Page 8-1 Section 8: Appendix 8.1 CUTTER AND PRINTER MOTION The cutter should only be installed by SATO qualified servicing personnel. 8.1.1 Cutter Specifications Print speed: Complies with the printer specifications (3 to 10 inch/sec) Paper type: Complies with the printer specifications • Do not cut on the line of perforation when using the perforated labels Paper size: Width: W52 to W132 mm (Backing paper size) Pitch: P33 to P303 mm (Backing paper size) Thickness: 100 to 320 μm (Adhesive side 100 to 260μm) Cutter unit maker: OYANE RIKI MFG. CO., LTD. Unit type: ORC-FSRB6-2 Unit structure: Swing-type Self-diagnostic function Detection of cutter motion error Dimensions: W180.5 mm x D49.1 mm x H102.9 mm Weight: 1.2 kg Guaranteed cutter life: 200,000 cuts Other: Remove the front and side covers to install the cutter unit. Replace the original guide bracket with the cutter unit. • A screwdriver is required. • Connect the connector after removing the side cover. Page 8-2 GY412 Operator Manual Section 8: Appendix 8.1 CUTTER AND PRINTER MOTION (cont’d) 8.1.2 Sensor position Tear-off Cutter 3.73 in. (94.8mm) 2.28 in. (57.8mm) Upper ₙ⌃ኒዙኻወኵአኦ thermal head (Top) Head width (*) Printable width (*) 2.35 in. (59.8 mm) Label feed direction Lower thermal head (Bottom) GY412 Operator Manual Page 8-3 Section 8: Appendix 8.1 CUTTER AND PRINTER MOTION (cont’d) * Head width and printable width (see illustration on previous page) Head density Head width Printable width 12 dots / mm 4.41 inches / 112.0 mm 4.09 inches / 104.0 mm 1.52 in. (38.7 mm) 1.44 in. (36.7 mm) I-mark GAP Paper end sensor (GAP) I-mark Maximum 2.58 in. (65.5 mm) Minimum 1.02 in. (25.8mm) Label Guide Page 8-4 Label Guide GY412 Operator Manual Section 8: Appendix 8.1 CUTTER AND PRINTER MOTION (cont’d) 8.1.3 Print operation sequence The following print modes are selectable through [ADVANCED MODE] on the operation panel. Refer to Section 3, Operation and Configuration, for more details. P R IN T E R TYPE C O N T IN U O U S TEAR OFF C UTTER P R IN T - C U T 8.1.4 Base Reference Position The print reference position differs by the print mode and the label pitch sensor. 8.1.4.1 Continuous Mode The base position for printing in continuous mode is shown below. GAP Base position for printing Label feed direction I-mark Base position for printing For the I-mark sensor, the top of label is the base position for printing. For the GAP sensor, the top of label is the base position for printing. GY412 Operator Manual Page 8-5 Section 8: Appendix 8.1 CUTTER AND PRINTER MOTION (cont’d) 8.1.4.2 Tear-off Mode The base position for printing and manual cutting in tear-off mode is shown below. GAP GAP Label feed direction Label feed direction I-mark I-mark Base position for Base position for tear-off tear-off Base position for Base position for tear-off tear-off Base position for Base position for printing printing 1.5mm 1.5mm Base position for Base position for printing printing For the I-mark sensor, the top of label is the base position for tear-off. For the GAP sensor, 1.5mm before the base position for printing is the tear-off position. 8.1.4.3 Cutter Mode The base position for printing and cutting in cutter mode is shown below. I-mark GAP Base position for cutting 1.5mm Base position for cutting Base position for printing Base position for printing For the I-mark sensor, the top of label is the base position for cutting. For the GAP sensor, 1.5mm before the base position for printing is the cutting position. Page 8-6 GY412 Operator Manual Section 8: Appendix 8.2 OFFSET POSITION ADJUSTMENT 8.2.1 Adjustment of Base Position for Printing Adjustments LCD setting for F-PITCH POSITION Operation panel PITCH POSITION +3.75mm to -3.75mm * See [TEST PRINT] in Factory Mode of the Configuration and Operation section. LCD setting for PITCH POSITION Operation panel Operation panel PITCH POSITION +3.75mm to -3.75mm Label stop position (print position) is adjustable within the range of +7.5mm to -7.5mm due to the above settings on the LCD screen. Base position for printing (head position) Label feed direction “+” adjustment No adjustment “-“ adjustment +7.5mm -7.5mm Note: The above base position for printing will be the stop position when the GAP sensor is selected. GY412 Operator Manual Page 8-7 Section 8: Appendix 8.2 OFFSET POSITION ADJUSTMENT (cont’d) 8.2.2 Adjustment of Stop Position in Cutter and Tear-off Modes Adjustments LCD setting for stop position in cutter and tear-off modes Operation panel OFFSET POSITION +3.75mm to -3.75mm Label stop position for the cutter and tear-off modes are adjustable within the range of +3.75mm to -3.75mm due to the above settings on LCD screen. Adjustment of cut position Cut position Label feed direction “+”adjustment No adjustment “-“ adjustment +3.75mm -3.75mm Notes: • The above cut position will be the stop position when the GAP sensor is selected. • Tear-off position is adjustable in the same manner. Page 8-8 GY412 Operator Manual Section 8: Appendix 8.3 HEAD CHECK MOTION There are three ways to perform head check through [ADVANCED MODE]. Refer to Section 3, Operation and Configuration, for more details. 8.3.1 Last Item When “LAST ITEM” is selected in [HEAD CHECK MODE], head check will be performed after the last item is printed and the printer is paused. In the cutter mode - a label will be cut after printing and fed backward - head check will be performed while feeding a label backward. If there is no more print data for lower surface, the item printed at the last second will be the last item. For example, Send two items *1 (3 labels in each item) in continuous mode. Head check will be performed for the third label in the second item. *1 Print method: One side indicates the print data for upper surface. Double side indicates the print data is ready for both upper and lower surfaces as a set. Note: • When selecting “LAST ITEM” in [HEAD CHECK MODE] and printing a large number of labels continuously, the printer will not detect print head burnout as an error. However, this will be detected as an error in head check after completing the print job. 8.3.2 All Check When “ALL CHECK” is selected in [HEAD CHECK MODE], head check will be performed after completing the print job. When the subsequent print data is available, backfeed motion will occur before starting the next print job. For example, Send two items *1 (3 labels in each item) in continuous mode. Head check will be performed per label and the printer will feed the label backward before starting the next print job. In this case, head check will be performed six times. *1 Print method: One side indicates the print data for upper surface. Double side indicates the print data is ready for both upper and lower surfaces as a set. Notes: • When “PRINT-CUT” is selected in [PRINTER TYPE], head check will be performed per label. If not cutting the labels, the printer will feed each label backward. • In continuous or tear-off mode, head check will be performed per label. Therefore, the printer will feed each label backward after completing the print job. 8.3.3 Check Page When “CHECK PAGE” is selected in [HEAD CHECK MODE], label quantity for head check can be set. When the specified number of labels is printed, head check will performed. When the subsequent print data is available, backfeed motion will occur before starting the next print job. For example, The specified number of labels is 2. Send two items *1 (3 labels in each item) in continuous mode. GY412 Operator Manual Page 8-9 Section 8: Appendix 8.3 HEAD CHECK MOTION (cont’d) Head check will be performed after printing the second label in the first item *1, after printing the first label in the second item and after printing the third label in the second item. Then, the printer will feed the label backward before starting the next print job. In this case, head check will be performed three times. *1 Print method: One side indicates the print data for upper surface. Double side indicates the print data is ready for both upper and lower surfaces as a set. Notes: • When selecting “CHECK PAGE” and specifying the number of labels for two or less, head check pattern will be the same as that of “ALL CHECK”. • The head check will not be performed if the number of labels in the last item is smaller than the specified number of labels. Page 8-10 GY412 Operator Manual Section 8: Appendix 8.4 AUTO LABEL FEED When the printer runs out of label completely, the thermal head and the roller will be lifted up for loading the label from the rear side of the printer. After loading the label, close the platen and adjust the label position. Depending on the sensor type to be used, the top of label or I-mark will be detected and then, the label will be fed to the standby position. Label feed speed for auto paper feed is fixed at 3 inch/sec. Upper head Lower head Pitch sensor No label Up Down Up Load the label, close the platen and adjust the label position Down Up Feed the label backward to the pitch sensor position and detect the top of label or I-mark Down Up Feed the label to the standby position and complete the auto label Down Note: • The above is the base position when the I-mark sensor is selected. GY412 Operator Manual Page 8-11 Section 8: Appendix 8.5 HEAD POSITION (UP AND DOWN) If you are inserting the label while no label is set, the printer will adjust the print position and match the top of label with the print standby position automatically. Close the lower head assembly only when feeding the label. For the print operation, close the lower head assembly first, and then feed the label before closing the upper head assembly. Print operation after auto feed / Print operation with backfeed motion Upper head Lower head Pitch sensor No label Up Down Up Close the lower head Down Up The upper head starts to close after printing some labels Down Up Close the upper head before the print start position of the upper surface comes to the head position. If the print start position is adjusted, the print job will start. ཱ Down Page 8-12 GY412 Operator Manual Section 8: Appendix 8.5 HEAD POSITION (UP AND DOWN) (cont’d) Label feed motion after auto feed Upper head Lower head Pitch sensor No label Up Down Up Close the lower head Down Up Feed the label. The upper head left opened. ཱ ི Down GY412 Operator Manual Page 8-13 Section 8: Appendix 8.6 REVERSE EJECT MOTION The GY412 printer has the reverse eject function to achieve better operability. Pressing the [↑] key in OFFLINE state will execute the reverse eject motion. The head assembly will be lifted up and the label will be fed backward in the reverse eject motion. When the label is off the platen completely, “no label error” will occur and the printer stops. Notes: • If a sensor malfunction occurs during the reverse eject motion or if the printer cannot detect the top of label, the printer will feed the label for 650mm and generate a sensor error. Upper head Lower head Paper end sensor Standby Up ཱ ི Down Start of reverse eject motion Up Close the lower head ཱ ི Down Up Feed the label backward Down Up No label error occurs because the label is not at the sensor position. In this case, the platen is lifted up for loading the label. Down Page 8-14 GY412 Operator Manual Section 8: Appendix 8.7 SEGMENTED PRINTING The GY412 printer has two thermal heads which enable double sided printing. If the line with high print ratio is used at the same time, the electric current will exceed its specified range and this may result in power supply failure. Since the segmented printing solves the above problem, the peak current will be within the specified power supply range. 8.7.1 Segmented Printing Motion The printer analyzes the print data. If the line with high print ratio is within the data and if it exceeds the specified print ratio, the following motions will occur. 1. If there is a condition for segmented printing within the item, the print speed will be forcibly changed to 5 inch/sec for executing the segmented printing. When the print speed is less than or equal to 5 inch/sec, the segmented printing will occur without changing the print speed. In that case, the segmented printing will be effective to the end of corresponding item. 2. If there are conditions for segmented printing within the target item and its consecutive item, the segmented printing will be valid for the consecutive item. 8.7.2 Segmented Printing Conditions When the printer analyzes the print data in the conditions below, the segmented printing will be executed. 1. Conditions within the item The maximum value of pitch offset for upper and lower surfaces is ±7.5mm. If executing the pitch offset, the base position for print for upper and lower surfaces will be the maximum range of ±15.0mm. The print ratio will be calculated based on the base position for print (lower surface) ±15.0mm. When the total print ratio (upper and lower surfaces) becomes 132% or more, the segmented printing will occur. The line to be checked Distance between thermal heads Feed direction Check target line Max. offset (15.0mm) Max. offset (15.0mm) Upper surface Lower surface GY412 Operator Manual Page 8-15 Section 8: Appendix 8.7 SEGMENTED PRINTING (cont’d) 2. Conditions between the items The print line for upper and lower surfaces located between the items changes depending on the label pitch; therefore, the print line distance cannot be fixed. Calculate the range in which the print data for upper surface may overlap with the one for lower surface. If the previous item still remains, the target line for this item will be detected and checked. Then the maximum offset distance will be added to calculate the range. The segmented printing will occur when the total print ratio of base position for printing becomes 133% or more. When printing the same item more than once, this item will be judged whether the segmented printing is required or not according to the specified number of prints. Up to 3-reprint per data is allowed. As for sequential number, every print will be judged for the segmented printing. Print start Max. offset distance (15.0mm) Check target line Max. offset distance (15.0mm) Feed direction Distance between thermal heads Print completion Print start The line to be checked Print completion Upper surface Lower surface 8.7.3 Note • Print speed will be forcibly changed in the layout with high print ratio and this will cause backfeed motion. Page 8-16 GY412 Operator Manual Section 8: Appendix 8.8 PRINT SPEED AND LABEL SIZE Minimum pitch size of label differs by print speed. For more details, refer to the Media section of Section 6, Basic Specifications, of this manual. Notes: • • Minimum pitch size of label differs by the optional setting like the cutter unit. The label will not stop at the correct position and the print position will be misaligned if using the media with a pitch smaller than the minimum pitch size. GY412 Operator Manual Page 8-17 Section 8: Appendix 8.9 LABEL SAVING FUNCTION The GY412 printer has a label saving function. 1. Printing from the top of label If it is possible to set the sensor type to the label top and to read the label position, the printer will feed the label automatically and adjust the label position. If having a problem reading the I-mark at the start or the top of label, the print may not start from the top of label because the label position cannot be set correctly. The GAP sensor detects the edge of label. The I-mark sensor recognizes the I-mark; therefore, the I-mark and the label edge must be 2mm or more. 2. Printing to the end of label When the label pitch is 40mm or more, the printer will print the data to the end of label in continuous mode and print-cut mode. Note that this function is invalid in cutter mode. Page 8-18 GY412 Operator Manual Section 8: Appendix 8.10 PRINT OPERATION SEQUENCE 8.10.1 Continuous Mode (Head check disabled) (1) Motion Label feed direction Upper head Lower head Pitch sensor Standby Up ཱ Down Up The upper head is up. The lower head is down. Backfeed motion starts. ཱ Down Up Backfeed to pitch sensor position. Down Up The upper head is down. The lower head is up. Start feeding the label and printing from the lower surface of the first label. ཱ Down Up The lower surface of the first label is printed. When the second label is fed while printing the upper surface of the first label, the print on the lower surface of the second label will start. ཱ ི Down Finished double sided print of the first label. Up ཱ ི Down Finished double sided print of the second label. Up ཱ ི ཱི Down [Notes] The above is the base position when the I-mark sensor is selected. GY412 Operator Manual Page 8-19 Section 8: Appendix 8.10 PRINT OPERATION SEQUENCE (cont’d) (2) Timing chart Power ON Label feed Upper head motion Lower head motion Label cut Upper/Lower heads check Printer motion Backfeed Prints the 1st label (Lower) Prints the 2nd label (Lower) Prints the 1st label (Upper) Prints the 2nd label (Upper) Page 8-20 GY412 Operator Manual Section 8: Appendix 8.10 PRINT OPERATION SEQUENCE (cont’d) 8.10.2 Continuous Mode (Head check enabled) (1) Motion Label feed direction Upper head Lower head Pitch sensor Standby Up ཱ Down Up The upper head is up. The lower head is down. Backfeed motion stars. ཱ Down Up Backfeed to pitch sensor position Down Up The upper head is down. The lower head is up. Start feeding the label and printing from the lower surface of the first label. ཱ Down The lower surface of the first label is printed. Even if the second label is fed while printing the upper surface of the first label, the print on the lower surface of the second label will not occur. Up ཱ ི Down Head check Finished double sided print of the first label. Check upper and lower heads Up ཱ ི Down Finished head check. The upper head is up. The lower head is down. Backfeed motion starts. Position adjustment at the top of the second label. Up ཱ Down [Notes] The above is the base position when the I-mark sensor is selected. GY412 Operator Manual Page 8-21 Section 8: Appendix 8.10 PRINT OPERATION SEQUENCE (cont’d) (2) Timing chart Power ON Label feed Upper head motion Lower head motion Label cut Upper/Lower heads check Printer motion Backfeed Backfeed Prints the 1st label (Lower) Page 8-22 Prints the 1st label (Upper) Prints the 2nd label (Lower) GY412 Operator Manual Section 8: Appendix 8.10 PRINT OPERATION SEQUENCE (cont’d) 8.10.3 Tear-off Mode (Head check disabled) Label feed direction (1) Motion Tear-off position Upper head Lower head Pitch sensor Standby Up ཱ ི Down Up The upper head is up. The lower head is down. Backfeed motion starts. ཱ Down Up Backfeed to pitch sensor position Down Up The upper head is down. The lower head is up. Start feeding the label and printing from the lower surface of the first label. ཱ Down Up The lower surface of the first label is printed. When the second label is fed while printing the upper surface of the first label, the print on the lower surface of the second label will start. ཱ ི Down Finished double sided print of the first label. The printing of the second label starts. Up ཱ ི ཱི Down After finishing double sided print of the second label, the label is fed to tear-off position. ཱ Up ི ཱི ུ Down When the next data is ready; The upper head is up. The lower head is down. Backfeed motion starts. Position adjustment at the top of the third label. Up ི ཱི Down Notes: • The above is the base position when the I-mark sensor is selected. • The print data for two labels will be sent. GY412 Operator Manual Page 8-23 Section 8: Appendix 8.10 PRINT OPERATION SEQUENCE (cont’d) (2) Timing chart Power ON Label feed Upper head motion Lower head motion Label cut Upper/Lower heads check Printer motion Backfeed Prints the 1st label (Lower) Prints the 2nd label (Lower) st Prints the 1 label (Upper) Prints the 2nd label (Upper) Label feed to tear-off position Backfeed Prints the 3rd label (Lower) Waits for print data Page 8-24 GY412 Operator Manual Section 8: Appendix 8.10 PRINT OPERATION SEQUENCE (cont’d) 8.10.4 Tear-off Mode (Head check enabled) Label feed direction (1) Motion Tear-off position Upper head Lower head Pitch sensor Standby Up ཱ ི Down Up The upper head is up. The lower head is down. Backfeed motion starts. ཱ Down Backfeed to pitch sensor position Up Down Up The upper head is down. The lower head is up. Start feeding the label and printing from the lower surface of the first label. ཱ Down Up The lower surface of the first label is printed. When the second label is fed while printing the upper surface of the first label, the print on the lower surface of the second label will start. ཱ ི Down Finished double sided print of the first label. The printing of the second label starts. Up ཱ ི ཱི Down After finishing double sided print of the second label, the label is fed to tear-off position for head check. ཱ Head check Up ི ཱི ུ Down When the next data is ready; The upper head is up. The lower head is down. Backfeed motion starts. Position adjustment at the top of the third label. Up ི ཱི Down Notes • The above is the base position when the I-mark sensor is selected. • The print data for two labels will be sent. After printing two labels, execution of head check will be specified. GY412 Operator Manual Page 8-25 Section 8: Appendix 8.10 PRINT OPERATION SEQUENCE (cont’d) (2) Timing chart Power ON Label feed Upper head motion Lower head motion Label cut Upper/Lower heads check Printer motion Prints the 2nd label (Lower) Backfeed Prints the 1st label (Lower) Prints the 2nd label (Upper) Label feed to tear-off position Backfeed Prints the 3rd label (Lower) Waits for print data Prints the 1st label (Upper) Note: • Send the print data for 2 labels. After printing these labels, specify head check. Page 8-26 GY412 Operator Manual Section 8: Appendix 8.10 PRINT OPERATION SEQUENCE (cont’d) 8.10.5 Cutter Mode (Head check disabled) (1) Motion Label feed direction Cut position Upper head Lower head Pitch sensor Standby Up ཱ ི Down Up The upper head is up. The lower head is down. Backfeed motion starts. ཱ Down Up Backfeed to pitch sensor position Down Up The upper head is down. The lower head is up. Start feeding the label and printing from the lower surface of the first label. ཱ Down Up The lower surface of the first label is printed. When the second label is fed while printing the upper surface of the first label, the print on the lower surface of the second label will not start. ཱ ི Down After finishing double sided print of the first label, the label is fed to cut position. Up ཱ ི ཱི Down Label cut Up ཱ ི ཱི Down When the next data is ready; The upper head is up. The lower head is down. Backfeed motion starts. Position adjustment at the top of the second label. Up ཱ ི Down Notes: • The above is the base position when the I-mark sensor is selected. GY412 Operator Manual Page 8-27 Section 8: Appendix 8.10 PRINT OPERATION SEQUENCE (cont’d) (2) Timing chart Power ON Label feed Upper head motion Lower head motion Label cut Upper/Lower heads check Printer motion Backfeed Prints the 1st label (Lower) Prints the 2nd label (Lower) Prints the 1st label (Upper) Prints the 2nd label (Upper) Page 8-28 GY412 Operator Manual Section 8: Appendix 8.10 PRINT OPERATION SEQUENCE (cont’d) 8.10.6 Cutter Mode (Head check enabled) (1) Motion Label feed direction Cut position Upper head Lower head Pitch sensor Standby Up ཱ ི Down Up The upper head is up. The lower head is down. Backfeed motion starts. ཱ Down Up Backfeed to pitch sensor position. Down Up The upper head is down. The lower head is up. Start feeding the label and printing from the lower surface of the first label. ཱ Down Up The lower surface of the first label is printed. When the second label is fed while printing the upper surface of the first label, the print on the lower surface of the second label will not start. ཱ ི Down After finishing double sided print of the first label, the label is fed to cut position. Up ཱ ི ཱི Down Label cut Up ཱ ི ཱི Down Head check Up Head check after label cut. ཱ ི ④ Down Note: • The above is the base position when the I-mark sensor is selected. GY412 Operator Manual Page 8-29 Section 8: Appendix 8.10 PRINT OPERATION SEQUENCE (cont’d) The upper head is up. The lower head is down. Backfeed motion starts. Position adjustment at the top of print position. Up ཱ ི Down Note: • The above is the base position when the I-mark sensor is selected. • (2) Timing chart Power ON Label feed Upper head motion Lower head motion Label cut Upper/Lower heads check Printer motion Page 8-30 Backfeed Prints the 1st label (Lower) Prints the 1st label (Upper) Label feed to cut position Backfeed Prints the 2nd label (Lower) GY412 Operator Manual Section 8: Appendix 8.10 PRINT OPERATION SEQUENCE (cont’d) 8.10.7 Print-Cut Mode (Head check disabled) (1) Motion Label feed direction Cut position Upper head Lower head Pitch sensor Standby Up ཱ ི Down The upper head is up. The lower head is down. Backfeed motion starts. Up ཱ Down Up Backfeed to pitch sensor position Down Up The upper head is down. The lower head is up. Start feeding the label and printing from the lower surface of the first label. ཱ Down Up The lower surface of the first label is printed. When the second label is fed while printing the upper surface of the first label, the print on the lower surface of the second label will start. ཱ ི Down Stop printing if the end of the first label comes to cut position. Up ཱ ི ཱི Down Cut the first label. Up ཱ ི ཱི Down Start printing the second label. Up ཱ ི ཱི Down Notes: • The above is the base position when the I-mark sensor is selected. • Send the print data for two labels. GY412 Operator Manual Page 8-31 Section 8: Appendix 8.10 PRINT OPERATION SEQUENCE (cont’d) Cut position Upper head Lower head Pitch sensor Finished double sided print of the second label. Up ཱ ི ཱི ུ Down Up Label feed to cut position ཱ ི ཱི ུ Down Cut the second label Up ཱ ི ཱི ུ Down Backfeed motion Up ི ཱི ུ Down Standby Up ི Down Notes: • In the above diagram, 1 label = print data length. • Send the print data for two labels. (2) Timing chart Power ON Label feed Upper head motion Lower head motion Label cut Upper/Lower heads check Printer motion Page 8-32 Backfeed Prints the 1st label (Lower) Prints the 2nd label (Lower) Prints the 1st label (Upper) Prints the 2nd label (Upper) Label feed to cut position Backfeed GY412 Operator Manual Section 8: Appendix 8.10 PRINT OPERATION SEQUENCE (cont’d) 8.10.8 Print-Cut Mode (Head check enabled) Label feed direction (1) Motion Cut position Upper head Lower head Pitch sensor Standby Up ཱ ི Down Up The upper head is up. The lower head is down. Backfeed motion starts. ཱ Down Up Backfeed to pitch sensor position Down Up The upper head is down. The lower head is up. Start feeding the label and printing from the lower surface of the first label. ཱ Down Up The lower surface of the first label is printed. When the second label is fed while printing the upper surface of the first label, the print on the lower surface of the second label will start. ཱ ི Down Stop printing if the end of the first label comes to cut position Up ཱ ི ཱི Down Cut the first label Up ཱ ི ཱི Down Start printing the second label Up ཱ ི ཱི Down Notes: • The above is the base position when the I-mark is selected. • Send the print data for two labels. Head check is specified for the last item. GY412 Operator Manual Page 8-33 Section 8: Appendix 8.10 PRINT OPERATION SEQUENCE (cont’d) Cut position Upper head Lower head Pitch sensor Finished the print of the second label Up ཱ ི ཱི ུ Down Up Feed to cut position ཱ ི ཱི ུ Down Cut the second label Up ཱ ི ཱི ུ Down Head check Up Head check is executed during backfeed motion ི ཱི ུ Down Waiting Up ི Down Notes: • In the above diagram, 1 label = print data length. • Send the print data for two labels. Head check is specified for the last item. (2) Timing chart Power ON Label feed Upper head motion Lower head motion Label cut Upper/Lower heads check Printer motion Backfeed Prints the 1st label (Lower) Prints the 2nd label (Lower) Prints the 1st label (Upper) Prints the 2nd label (Upper) Label feed to cut position Backfeed Page 8-34 GY412 Operator Manual Extensive contact information of worldwide SATO operations can be found on the Internet at www.satoworldwide.com