1
MICROBIAL SYSTEMATICS MBIO 3470 LAB MANUAL 2014 Lab manual is available as a pdf file on the lab website. 2 MBIO 3470 MICROBIAL SYSTEMATICS SCHEDULE DATE 2014 WEEK EXPERIMENT/PROCEDURE Jan 15 1 Lab Introduction and Standard Operations Procedure (SOP) and BIOSAFETY QUIZ (15 min) - must pass to continue lab. [Not responsible for linked information in lab manual.] Streak plate technique accessed. Lab 1 Enterobacteriaceae: Biochemical Identification -unknown and known bacteria identification Jan 22 2 Lab 2 Enterobacteriaceae: Selective and Differential media -unknown bacteria identification Jan 29 3 Lab 3 Enterobacteriaceae: API 20E rapid identification -unknown bacterium identification Feb 5 4 Lab 4 Enterobacteriaceae: Isolation, Identification and Antibiotic Testing -isolation and screening continued Feb 12 5 Lab 5 Gram positive cocci: Micrococcaceae and Streptoccoccaceae -unknown bacteria identification - identification tests performed in lab to assist identification Feb 19 6 SPRING BREAK Feb 26 7 Lab 4 Enterobacteriaceae: Isolation, Identification and Antibiotic Testing -MacConkey and T-soy plates, data sheet checked in lab if not already checked -API bacterium identification -Antibiotic characterization of bacterium Mar 5 8 Lab 6 Pseudomonadaceae -unknown bacterium identification Mar 19 10 LAST DAY FOR LAB CLEAN-UP and REMOVAL OF LAB COATS. If group number, initials or names found on anything, marks will be subtracted from the final lab mark. Apr 2 12 LAB EXAM DUE DATES Lab # Report Due Date Lab 1 Jan 29 Lab 2 Feb 5 Lab 3 Feb 12 Lab 5 Feb 26 Lab 4 Mar 12 Lab 6 Mar 19 Other due dates/comments Feb 26-screening data sheet checked in lab or beforehand 3 MBIO 3470 TABLE OF CONTENTS Lab # Title/Description Page ______________________________________________________________________________ SCHEDULE 2 GENERAL INSTRUCTIONS 4 LAB STANDARD OPERATIONS PROCEDURE 9 PUBLIC HEALTH AGENCY OF CANADA LABORATORY BIOSAFETY GUIDELINES 12 LABORATORY BIOSAFETY GUIDE 13 WHMIS 1 Introduction and Enterobacteriaceae: Biochemical Identification Biosafety Cabinet Operation Part I: Bacteria culture preparation Part II: Enterobacteriaceae: Biochemical Identification Unknown report write up 2 Enterobacteriaceae: Selective and Differential media 3 Enterobacteriaceae: API 20E rapid identification 4 Enterobacteriaceae: Isolation, Identification, and Antibiotic Testing 5 Gram positive cocci: Micrococcaceae and Streptoccoccaceae 6 Pseudomonadaceae: API 20NE rapid identification 14 17 APPENDIX Phase Contrast Microscope Operation Basic Differential Identification Tests Cellular Morphology Colony Characteristics Gram Stain KOH string test Motility General media Biochemical Differential Identification Tests Carbohydrate Fermentation Catalase Citrate Utilization Cytochrome Oxidase Decarboxylases Esculin Hydrolysis Gelatin Liquefaction Hemolytic Reaction Hydrogen Sulfide Production (TSI slant) Indole Methyl Red Nitrate Reduction Oxidative-Fermentative Test Phenylalanine Deaminase Urease Production Voges-Proskauer Sample Lab Exam 27 32 42 51 55 63 67 67 68 68 69 70 71 72 72 73 74 75 76 76 77 78 81 81 81 82 82 83 84 4 GENERAL INSTRUCTIONS Lab Instructor:Dr. L. Cameron Office: 414B Buller TAs: Scheduled lab time: Jennifer Tanner Other times: Aneil Moya Torres, Elizabeth Hughes, Fraser Ferens Lab Location: 302 Buller Bldg. WEBSITE: http://umanitoba.ca/science/micro300400labs/ OR via University of Manitoba Department of Microbiology webpage select Undergraduate programs left column, select Laboratory Information from drop down menu, Information available at the website: reference links, changes/corrections, additional information, data, marks REGULATIONS 1. Lab attendance is compulsory. 2. Read Standard Operations Procedure (SOP). Before starting the lab you must pass a SOP quiz - before permitted to continue the lab. 3. Bring a permanent marker to lab, lab coat used only in this lab, garbage bag for lab coat storage. No backpacks or outwear - storage cubbies in hall. 4. Students work individually. 5. Lab starts at 2:30 pm in room 302 Buller and possibly 304 Buller. 6. Emails: subject must contain course number and subject, e.g. 3470 lab 1 report. If no subject given, email is deleted. Emails replies occur only during working hours. Email must include student name. If you have a lot of questions, please come to see me. Effective Sept 1, 2013 all email communication must be via an official University of Manitoba email account, see details at University governing documents website, Electron Communication With Students. Staff are not permitted to reply to emails sent from email accounts other than an official University of Manitoba email account. EVALUATION 1. The lab is worth 25% of the final course mark. Lab reports and SOP quiz............................................... 10% Lab exam......................................................................... 15% Lab technique mark.......................................................... up to 2% of final lab mark may be subtracted if lab conduct and performance is shown to be poor. This includes final discarding of all cultures and strict adherence to SOPS. It is imperative that you following correct handling of bacteria. 2. Students must pass the lab to complete the course (12.5/25%). 3. Lab reports are to be handed in as stated in schedule by 4:30 pm of that day. ONLY hand in lab reports through slotted filing cabinet drawer located on the 300 level of Buller bldg. in the hallway across from room 302 entrance. Instructor and demonstrators do not accept lab reports. If handing in lab late, 10% of mark will be subtracted for each class day late. Marked lab reports will be returned to students the next week. A late report will not be accepted after one week past due date. If applicable, also hand in data, release forms, assignments through slot of filing cabinet. Data may be emailed. All reports, 5 4. 5. 6. 7. 8. 9. assignments, and quizzes not collected by the student are destroyed six months after end of term via confidential shredding. Individual lab report total mark may vary (stated on lab report) depending on the complexity and length of the report. All report and quiz values are totalled and brought to maximum 10%. Lab report marks are final unless an obvious error in addition of marks has been made. However, if a student feels they have a legitimate complaint, please direct attention to lab instructor. All reports, assignments, and quizzes not collected by the student are destroyed four months after end of term via confidential shredding. The lab exam will be held during normal lab time, starting at 2:30 pm (refer to schedule for date). The lab exam is 1.5 h. 1-2 weeks prior to exam date the exam schedule is posted on lab door. Approximately two weeks prior to the lab exam, a brief outline of lab exam format and information content will be available on the lab website including lab exam location. You must notify the lab instructor no later than two school days after the missed lab. A Doctor’s certificate is required for a missed lab exam. All deferrals will write the lab exam at a scheduled time set by the instructor. Failure to comply will result in a zero on your lab exam. Plagiarism (copying another student’s lab report (present or previous year) or copying published literature without citing is a violation of University regulations. Refer to the STUDENT DISCIPLINE BY-LAW in your student handbook (rule book) for action taken for plagiarism. LAB REPORT PRESENTATION [Before handing in your report review report to ensure that all information is included. 1. All reports must have an Honesty Declaration attached - available as a pdf file on lab website. 2. All reports must be typed and stapled left hand corner. No binders. 10% of the mark will be subtracted for part of report not typed. If handwriting noted acceptable in a particular question, use pen not pencil. Diagrams may be drawn in pencil but label in pen. 3. On the front page of the report state (does not need to be a separate page) – not required if on lab format: Course name and number Experiment number and Title Student Name Date Indicate unknown identification on front cover (if unknown identification report) 4. Number pages. 6 5. Must use lab report formats (Word and or Excel) available on lab website. Lab report information is to be presented exactly as requested for each lab report. No binders. Stapled left hand corner. 6. The lab report is to be done as an individual effort. Each student is required to hand in lab reports. Marks will be subtracted for duplication in reports. 7. Cite reference in text of lab report and record full reference at end of lab report. When should you cite and reference? The following is a good definition of plagiarism that explains when you should cite a reference. “The unacknowledged use of another person’s work, in the form of original ideas, strategies, and research, as well as another person’s writing, in the form of sentences, phases and innovative terminology.” (Spatt1, 1983, p.438) This is done by using bracketed reference number that you used when listing references at end of lab report or by bracketing first authors name and date. Quote text unless you paraphrase completely in your own words. But remember, quotes should only be a small part of your work. If you are using the name year system, list the references alphabetically. Some examples are as follows (McMillan2 1997): Binder V. Hendriksen C, Kreiner S. 1985. Prognosis in Crohn’s disease - - based on results from regional patient group from county of Copenhagen. Gut 26:146-50. Danforth DN, editor. 1982. Obstetrics and gynecology. 4th ed. Philadelphia: Harper and Row. 1316 p. Petter JJ. 1965. The lemurs of Madagascar. In: DeVore I, editor. Primate behavior: field studies of monkeys and apes. New York: Holt, Rinehart and Winston. p 2920319. If journal article assessed on the internet, site as journal. However, if available only on the web, reference as follows: Kingsolver JC, Srygley RB. Experimental analyses of body size, flight and survival in pierid butterflies. Evol. Ecol. Res. [serial online] 2000;2:593-612. Available from: Colgate University online catalog. Accessed 2000 Oct 3. 8. Personal or Professional Electronic sources2: Cite in-text by putting the following in parentheses, author’s last name or file name (if no author’s name is available) and publication date or the date of access (if no publication date is available). At the end of report list: author or organization, publication date or date last revised, title of Web site,URL site, and the date accessed. Cameron, L. MBIO 4440 Systems Microbiology Lab Information http://umanitoba.ca/faculties/science/microbiology/staff/cameron/60_344.htm Accessed 2012, April 17. 1 2 Spatt, B. (1983). Writing from Sources. New York: St. Martin’s Press. McMillan V.E. 1997. Writing Papers in the Biological Sciences. 2nd ed. Boston: Bedford Books: 1997. 197 p. and McMillan, V.E. 2001. Writing Papers in the Biological Sciences. 3rd ed. Boston: Bedford Books. 123 p. 7 9. Table presentation (if table format is not available on website) • Table number and title (legend) presented above the table body. • Number tables using Arabic numbers, even if only one table in a report. • Include enough information in title to completely describe table, eliminating the necessity to search elsewhere in the lab report to understand information presented in table. Table title starts with an incomplete sentence. Additional complete sentences may be included to adequately describe the table, e.g. number of days of colony growth and temperature, media type, microorganism source (this also applies to figures). • If abbreviations are used in table, indicate what abbreviations mean as a footnote. Other footnotes may be required to clarify material in the table. • Like information should be in columns making it easier to view the table. • Data in columns is listed under the centre of each heading. Align decimal points and dashes. If a number value is less than 1 always include zero before the decimal. • Column or Row headings should be complete and self explanatory. A heading is a separate entity from the title. It cannot be assumed information given in the title is adequate for a heading. The unit of measurement should only be included in the heading, not in column data. If a unit is given in the heading it is not required in the body of the table. • Group related column headings under larger headings. If information is the same for each column or row do not include but treat as a footnote. Make the table as concise as possible but include all necessary information. For example, when presenting a table of bacteria colony characteristics it is important to state media type, incubation time and temperature as colony characteristics vary depending on these conditions somewhere in the table. Tables should be properly set up with a straight edge or all columns aligned 10. Bacteria Nomenclature Guidelines 3 The bacterium’s name consists both of the genus and species and possibly the subspecies. The genus name starts with uppercase letter. The species and subspecies start with lowercase letter, for example, Aermonas hydrophila anaerogenes. Never refer to a bacterium by the species name alone. • Bacterial names are written in italics or underlined (if handwritten). • The first time a bacterium’s name is referred to in your lab report you must write the full name. After that you may abbreviate the genus name by using the first letter (capitalized and italicized). If your report contains two or more genera that start with the same letter it is best to spell out the complete name of each genus to eliminate confusion. To eliminate some of the confusion, some genera may be abbreviated with the first two or more letters but this is not common practice, for example, Sal. cholerae for Salmonella cholerae 3 McMillan, V. E. 1997. Writing Papers in the Biological Sciences. Boston: Bedford Books. p 146-148. 8 • • • • • whereas Shigella boydii is abbreviated as S. boydii. If the bacterium’s name also contains a subspecies both the genus and the species may be abbreviated, Aermonas hydrophila anaerogenes as A. h. anaerogenes (this is not standard nomenclature). E. coli is an exception to this rule. Since Escherichia coli has been extensively used in research, it is simply referred to as E. coli for the complete scientific name. The bacterium’s name should not be preceded by an article. The bacterium’s name is never written in plural form. Bacterial groups above the level of the genus are capitalized but not italicized, for example, Enterobacteriaceae. The ending of some scientific bacterium’s name is occasionally changed to form a group common name. For example, pseudomonads, is not capitalized or italicized. The collective abbreviation for species is as follows: one species: Salmonella sp. more than one species: Salmonella spp. MBIO 3470 Supplies and Equipment •Microscopes: Microscopes are stored in cupboards in the lab. Each student is responsible for handling of the microscope. Microscopes must be returned to the cupboard after use. Clean objective lens with 2-propanol. Make sure the light is always turned off after using microscope. Return microscope to cupboard. Refer to appendix for microscope handling. •Supplies/Media/Reagents/Stains: Perishable media is stored in lab cold boxes. Stains, reagents and hanging drop slides (do not discard - wash and return to container) location given in introductory lecture. •Student's cultures (broth and agar plates): Keep in labelled Petri plate containers when storing or incubating. If you put masking tape on containers, the masking tape must be removed when returning to supply container box. Never write on plastic containers •Incubators: 28oC and 37oC incubators located in lab. 9 LAB STANDARD OPERATIONS PROCEDURE (SOP) -in compliance with handling of Level II microorganisms. Warning: Many of bacteria used in the MBIO 3470 Systematic’s lab are opportunistic pathogenic bacteria (level II biohazard). This means an immune compromised student may be at risk. Take extreme care following exactly the standard operations procedures. Familiarize yourself with all symptoms in biological MSDS information available in MSDS binder in the lab and online at http://www.phac-aspc.gc.ca/msds-ftss/ Consult your doctor if you have concerns. MBIO 3470 students must pass the Standard Operations Procedure and Biosafety Cabinet Quiz before starting the lab. Personal safety: •You must wear a buttoned lab coat. Lab coat must stay in the lab (store in a plastic bag labelled with your full name). Your MBIO 3470 lab coat cannot be worn in any other lab. Your lab coat may only be taken home for washing. Laundry instructions: wash separately from other clothes with detergent and bleach. When taking lab coat home for washing, carry in plastic bag separate from all other personal effects, i.e. not in your back pack. •You must wear disposable gloves when handling level 2 biohazard organisms. Disposable gloves should be pulled over lab coat sleeve opening (almost impossible but give it a try). Remove gloves using finger of opposite hand to peel off other glove by inserting at wrist, rolling off glove. Repeat with other hand. •No personal effects (this includes outer clothing and back packs) are permitted in the lab, only lab notebook, pen and permanent ink marker. There are cupboards available in the hall across from the lab for outer clothing and backpacks. Cupboards may be locked but locks must be removed after using. Please do not leave any of your belongs on the hallway floor. •Jewellery: Large rings that may pierce disposable gloves are not permitted. Bracelets or watches with dangling chains are not permitted. Dangling necklaces are not permitted. •Long hair must be tied back. Keep your hands away from your hair and face. •Wash hands with antibacterial soap (SWISH) which contains three main surfactants, sodium dodecyl sulfate (SDS) anionic, cocodiethanolamide and cocoamidobetaine. Before leaving the lab wash your hands thoroughly with SWISH for 30 seconds. Use the hands free sinks to wash your hands (in the MBIO3470 lab the sinks have a heat sensor that detects your hands). Do not put your hands on your face or anything in your mouth (eg. pen) while in the lab. Protect hands with gloves (available in lab) and eyes with glasses when handling level II Biohazard microorganisms and when needed. •No eating or drinking in the lab. •All transfer and manipulation of bacteria is done in Biosafety cabinet (sterile environment). Bunsen burners are only for slide fixing. •Never mouth pipette. Always use a pro-pipette with a pipette, Pasteur pipette or Pipetman. •Cover any cuts with a bandage (if necessary, available in the first aid kit). • Students must wear shoes with closed toes and heels. •When handling Pseudomonads wear glasses not contacts. •If any minor injury occurs, you must report to your TA. •Computer use in the lab: REMOVE GLOVES AND WASH HANDS BEFORE using computer. 10 Lab environment: •Signage (WHIP, Workplace Hazardous Information Plaque) on lab entrance stating biohazard level, lab clothing that must be worn, contact person, entrance requirements (MBIO 3470 students and teaching staff only), Biohazard level, etc. •Posted valid biosafety permit. • Hard copy of all biological MSDS used in the lab. •Lab door must be closed at all times when lab is being used. •A student cannot be in the lab unless supervised by a teaching assistant. Lab is locked at all other times. •Only students presently taking MBIO 3470 and trained workers are permitted in room 302 -305 Buller (Term 2). •Wash bench area before and after working in the lab with BDD (Backdown Detergent Disinfectant, Decon Laboratories, Inc.) containing nonyl phenoxy polyethoxy ethanol, alkyl-aryl ammonium chloride and ethyl benzyl ammonium chlorides effective as a disinfectant, bactericide, virucide, fungicide and mildewstat. This helps prevent contamination of your notebook and pens. Even if you wash your hands when you leave, your pen or book could be contaminated. See Biosafety Cabinet section for surface cleaning. •First aid kit present in lab (located at Safety Station (safety sink area). •Know location of exits, fire extinguisher, eye wash, full body shower, and first aid kit. All located in the lab. • Know how to operate equipment before use. DO NOT use equipment unless you know exactly how to operate the equipment. The TA is always available to assist. •Leave your bench and biosafety cabinet area clean. All equipment and supplies should be returned to original location. •Never wear gloves when using the lab computer. REMOVE gloves and WASH hands before using the computer •Class II, Type A2 Biosafety Cabinet Operation – see lab 1 introduction for information. Disposal: •All biohazard disposable containers must be labelled with a biohazard label. After autoclaving the biohazard label is removed. •All biohazards must be autoclaved. Biohazards include any surface that has come in contact with bacteria. The autoclave is monitored monthly to ensure all biohazardous are destroyed using EZTest Biological Indicator (Bacillus stearothermophilus spores). The Biological Indicator is attached to a string and placed in the centre of the biohazard discard before autoclaving. After autoclaving the EZTest vial is removed, the inner vial crushed and incubated overnight at 55oC to ensure that the spores have been killed. Growth is easily detected by indicator, yellow for growth and purple for no growth. A positive control EZTest vial is also incubated. •Individual bags from plastic lined buckets are carefully removed and placed in a larger autoclave bag (labelled biohazard), top closed for transport in the hallway to the autoclave room. The bag is place in a large tray on the autoclave trolley. The bag is opened to ensure all biohazardous material is destroyed. The Petri plate container waste is treated in a similar fashion. After autoclaving, the biohazard sticker is removed. If the waste is from the Petri plate container (no pointy items), the bag is placed in a black plastic bag and tied ready for removal by the caretaker. If the waste is from the plastic line bucket (pointy items), the bag is placed in a corrugated cardboard box pre-labelled as broken glass, taped shut for disposing by caretaker. •Bacteria cultures: All bacteria cultures must be autoclaved. Place broth cultures on discard trolley after removing markings and masking tape. Trays are in a large plastic container on the trolley. When the trolley is transported to the autoclave room a lid placed over the plastic container containing the tubes and snapped shut (leak proof). 11 •Petri plate containers: All cultures agar plates must be autoclave. Discard culture plates in large plastic lined Petri plate containers. Discard non-sharp biologically contaminated items in the Petri plate container; culture Petri plates, bacterial contaminated paper towels and disposable gloves. •Bench Plastic lined bucket 4: Plastic waste container lined with a clear plastic bag located on your bench or in the biological safety cabinet. All items except Petri Plates and disposable gloves. That is, any ‘pointy’ item must be disposed in plastic lined bucket located at workbench area or BSC (not Petri Plate container), this includes pipetman tips, disposable 1 ml and 10 ml pipettes, sticks, toothpicks, slides, Pasteur pipettes, broken glassware, brittle plastic objects, metal objects (not needles or blades), API and antibiotic strips,etc. •Glassware (unbroken): Remove tape and pen markings (use alcohol) from glassware before placing on discard trolley. Used glassware that has not contained bacteria should be rinsed and placed on the discard trolley. Rinsed test tubes (no biological contact) should be placed in tray provided on the discard trolley. •Biohazard sharps disposal: Dispose of all sharps (needles, syringe tops, razors, scalpel blades) in specified container. Dispose of syringe with needle attached - do not take apart. Do not replace the needle cap before disposing (high frequency of accidents occur when replacing cap). Sharp’s containers are autoclaved before disposing. You must dispose of the syringe top in the biohazard sharps container even if not used for biologicals as it is a perceived hazard by the general public. Not used in the MBIO3470 lab. •Basic Wastebin: only non-biological non-pointy items, e.g. paper towels used to dry your hands. •Biological Spills: Get assistance from your TA. The TA will get assistance from the lab supervisor. Restrict student access to immediate area. Allow aerosol to settle, up to 30 min (Warning Tape and goggles in lab spill kit). Must wear disposable gloves, lab coat buttoned and protective goggles. Put a stack of paper towels on top of spill; pour BDD disinfectant around and over. Do not press down. Collect soaked paper towels and put in Petri plate container. If spill includes broken glass or any sharp item put in plastic lined bucket or larger autoclave bag provided by the TA. Disinfect all contaminated materials. •Chemical hazardous material: Read the MSDS information available in lab or online at http://ccinfoweb.ccohs.ca/msds/search.html. In the MBIO3470 lab the SpotTestTM Oxidase Reagent which contains tetramethyl-ρ-phenylenediamine dihydrochloride and SpotTest™ Kovacs Indole Reagent which contains isoamyl alcohol, ρ-dimethylaminobenzaldehyde (DMABA) and concentrated HCl are organic solvents that must be disposed in a sealable puncture proof organic solvent container labelled SpotTest Waste container. The container is disposed of through the university environmental health and safety office. Never discard in plastic lined buckets since they are going to be autoclaved. SOLVENTS CANNOT BE AUTOCLAVED. Use extreme care with flammable solvents. Alcohol should never be positioned within 40 cm of flame. Handle caustic (acids and bases) solutions with care. Never discard an acid or base greater than one molar down the sink. Discard in labelled glass containers provided. These materials are disposed of through the university safety office. If a caustic solution is less than 1 M, empty in sink while running lots of water. When handling stains or reagents, wear disposable gloves as the majority of stains or reagents contain hazardous material. 4 due to the multi-use nature of the teaching lab, all ‘pointy’ items will be treated the same as similar items contaminated with microorganisms. 12 PUBLIC HEALTH AGENCY OF CANADA LABORATORY BIOSAFETY GUIDELINES Required Operational Practices for Laboratories handling of infectious materials. 1. Standard Operation Procedures Manual, procedures followed, continually updated. 2. Personnel must receive training. 3. No eating, drinking or smoking. No storage of personal effects in lab. No wearing of jewellery. 4. No oral pipetting permitted. 5. Long hair must be tied back. 6. Lab entry is restricted to authorized personnel. 7. Lab doors must be shut to hallways. 8. Cuts, wounds, scratches and grazes must be covered with waterproof bandages. 9. Labs must be kept clean and tidy. Storage of materials not pertinent to lab works is not permitted. 10. Buttoned lab coat must be worn by all persons in the lab. Lab clothing must not be worn outside of the lab or stored with street clothing. 11. Eye and face protection must be worn for procedures involving possible risk to face. 12.. Protective clothing must be decontaminated before laundering if a suspected contamination has occurred (autoclaved). 13. Use of needles, syringes and other sharp objects should be strictly limited. Needles should not be bent, sheared, recapped or removed from syringe. Must be promptly placed in sharps container. 14. Wash hands after removing gloves. 15. Must decontaminate work surface before and after working. Work surface must be nonpermeable. 16. Contaminated materials and equipment must be decontaminated or labelled with a biohazard sticker before leaving the lab. 17. Autoclaves must be regularly monitored using a biological indicator to ensure killing of biohazard. 18. All contaminated materials must be decontaminated before disposal or reuse. Autoclave room must meet level 2 containment requirements. 19. Disinfectants against biohazard agent must be available at all times. 20. Leak-proof containers must be used for transporting, handling or storing biohazardous materials. 21. Spills, accidents or exposures to infectious agents must be immediately reported to lab supervisor, written records must be maintained and results of incident investigation used for continuing education. 22. Effect rodent and insect control program must be maintained. Containment Level 2 1. SOP must be followed to prevent release of infectious agents. 2. Biological Safety Cabinet (BSC) must be used for procedures that may produce infectious agent aerosols or when handling large volumes or concentrated cultures. A risk assessment must be performed in conjunction with safety office (for UM it is EHSO, Environmental and Health Safety Office) to determine the need of BSC. 3. Signage (WHIP, workplace hazardous information plaque) must be posted outside the lab. This includes entry restrictions and contact information. 4. Entry must be restricted to lab staff, maintenance staff and others (students) on official business. 5. All people working in the containment area must be trained and follow SOP. 13 6. Emergency procedures for spill clean-up, BSC failure, fire, animal escape and other emergencies must be written, easily accessible and followed. A record of people entering the lab during an emergency must be maintained. LABORATORY BIOSAFETY GUIDE UM EHSO Biosafety Guide: http://www.umanitoba.ca/admin/human_resources/ehso/media/BiosafetyGuideMarch05.pdf Both level 1 risk microorganisms and level 2 risk microorganisms are used in this lab. Treat all environmentally isolated microorganisms as if they were level 2 risk microorganisms. Follow standard operations procedure, SOP (see above). Microorganism risk level is available in lab Biosafety Manual. The University of Manitoba Biosafety Guide (Feb 2000) and Health Canada Laboratory Biosafety Guidelines booklets are available in your lab. Biosafety information is also available at the Health Canada websites: Canadian Biosafety Standards and Guidelines: http://canadianbiosafetystandards.collaboration.gc.ca/ MSDS (infectious agents): http://www.phac-aspc.gc.ca/msds-ftss/index-eng.php Material Safety Data Sheet - Infectious Substance has 9 sections: Infectious agent, health hazard, dissemination, viability, medical, laboratory hazards, recommended precautions, handling information and miscellaneous information. There is no listing of level 1 agents in the guidelines or MSDS pamphlets Risk group 1 bacteria are low individual and community risk and are unlikely to cause disease in healthy workers. Risk group 2 bacteria category of human pathogens that are moderate individual health risk and low community risk. Bacteria in this group are able to cause serious disease in humans but are unlikely to so as effective treatment and preventative measures (trained lab workers) are available. Risk of spreading of disease caused by risk 2 bacteria is low. 14 WHMIS The Workplace Hazardous Materials Information System (WHMIS) is a system for safe management of hazardous materials. WHMIS is legislated by both the federal and provincial governments. Review WHMIS workshop information specific to the Microbiology Department online at http://www.umanitoba.ca/faculties/science/microbiology/WHMISworkshop.htm. Undergraduate students, even though considered workers, do not need to take the quiz. Under WHMIS legislation, laboratories are considered to be a workplace, and students are workers. By law, all workers must be familiar with the basic elements of the WHMIS system. The WHMIS program includes: 1. Cautionary labels on containers of controlled products. Consumer products, explosives, cosmetics, drugs and foods, radioactive materials, and pest control products are regulated separately, under different legislation. 2.Provision of a Material Safety Data Sheet (MSDS) for each controlled product 3.A worker education program 1. A. SUPPLIER LABELS Controlled products must have a label of prescribed design which includes the following information: PRODUCT IDENTIFIER - trade name or chemical name SUPPLIER IDENTIFIER - supplier's name and address MSDS REFERENCE - usually, "See MSDS supplied" HAZARD SYMBOL - (see illustration on next page) RISK PHRASES - describes nature of hazards PRECAUTIONARY MEASURES FIRST AID MEASURES B. WORKPLACE LABELS All material dispensed in a workplace container must be labelled with the Product Name, Precautionary Measures (simplified) and Reference to Availability of MSDS. 2. MSDS Material Safety Data Sheets (MSDS) are available for each lab. Refer to binder located in each lab. Also main binders are located in the Microbiology preparation room, 307/309 Buller. MSDS are also available on the internet. The MSDS will provide: relevant technical information on the substance, chemical hazard data, control measures, accident prevention information, handling, storage and disposal procedures, and emergency procedures to follow in the event of an accident. 3. SAFETY The Laboratory Supervisor will provide information on the location and use of safety equipment, and emergency procedures. 15 16 17 LAB 1 INTRODUCTION AND ENTEROBACTERIACEAE: Biochemical Identification CLASS II, TYPE A2 BIOSAFETY CABINET OPERATION Labconco Purifier® CELL Logic Room 302-304 supplied with 7 two person Purifier cell logic biological safety cabinets. Introduction The biosafety cabinet is designed to protect you and the environment from exposure to biohazards and to protect samples from contamination during experiment (Figure A). A biosafety cabinet ensures that all biohazard aerosols do not escape into the environment. Inside the cabinet work area there is laminar airflow which moves in a single direction downward with uniform velocity. The Downflow Velocity must be ~16 feet per minute (0.08 m/s). The laminar airflow traps any aerosol generated in the cabinet work area and moves it to the HEPA filters. Air is also drawn in from the front of the cabinet and goes down the front grille. This directional airflow (curtain of air) also plays a key role in biosafety cabinet performance making it difficult for aerosols to escape out of the work area at the front of the cabinet. The HEPA filter is made of a thin sheet of borosilicate microfibers that is pleated to increase surface area and framed. The Purifier Cell logic biosafety cabinets remove particles 0.3 micron at 99.99% efficiency. The motor/blower is responsible for the air movement in the BSC, pulling air into the front and re-circulates it internally. The motor is set to deliver a consistent positive air pressure in the work area regardless of the HEPA filter remaining life. It is essential that the grilles, front and back, not be blocked to optimize cabinet containment and performance. 18 Information Centre Panel and Logic Touchpad1 Inside the work area is a LCD information centre panel (figure 1) – frequently check to ensure operating. The Upper Status area should say OK. Ask TA for assistance if one of the following messages are displayed: Blower Off, please wait (need 3 min wait time after blower turned on); Night-Smart (shown for 1 min after sash is closed, turns off); Sash is too high, Airflow Alert (most likely due to blockage of grille or exhaust filter outlet); System Error (motor and display circuit board are not communicating). The centre Data Area displays status of filter. The bottom Icon Area shows icons for features that have been selected – should be fluorescent light and either normal or night smart blower. Refer to figure 2 for all possible icons. The UV light only works when the sash is closed. Logic Touchpad (this section is only for TA if required) Blower button starts/stops blower and overrides Night-Smart™ or Smart-Start™ operation. If Night-Smart selected, closing the sash slows the blower to idle maintaining air sterility until opening the sash to correct position which returns to normal blower. Light turns light on/off. If in Smart mode automatically turns on/off with open/closed. UV light button turns on (closed sash)/off. If in Smart mode, automatically turns on/off when closed/open. Timer Button sets timer. Mute/OK button mutes 5 min unless system error alarm. It is also used to select OK when in menu mode. Menu Button toggles between display and menu modes – returns to previous menu modes. Select button ▲ and ▼ moves up and down to select when in menu mode. Sliding Sash and Start if Sash Closed2 The bottom of the clear sash in front of work area must be set at the correct position (mark at 22.9 cm opening). If raised, an alarm will go off. Return sash to correct position resetting the alarm, stops. If the sash is closed, raise to set position turns BSC on. If smart mode, the blower will start, UV shut off (if set) and 1 2 Diagrams are from User’s Manual Labconco Corporation. Diagram User’s Manual Labconco Corporation. 19 fluorescent light turn on. If manual mode, turn on blower and fluorescent light. Allow cabinet to run 3-5 min before using or until ICD information centre panel must show OK. Student Operation of Biosafety Cabinet (BSC). MBIO3470 BSC procedures: All procedure that involves direct handling of MBIO 3470 cultures must be done in BSC (aerosol generating): removal of broth culture cap, inoculation of ID tests, addition of chemicals to ID tests, streaking agar plates, put bacteria on a slide ,etc. 1. Do not press any of the buttons on logic touchpad – the BSC cabinet has been set for you. 2. Put the sash at the set mark or check that the sash is set at the set mark (UV light cannot come on). Check the information centre panel – should say OK (after 3-5 min), have ___ filter remaining, fluorescent light icon and blower icon present. 3. Organize all the supplies ahead of time on student bench. There are only 7 BSC (2 students/BSC), spend as little time as possible working in the BSC. 4. Must be wearing buttoned lab coat, disposable gloves, closed toed shoes. No dangly jewelry and if applicable, hair tied back. Lab coat sleeves should cover your clothing. Ideally gloves over lab coat sleeves but most likely impossible. 5. Clean the work surface with bench cleaning solution, BDD. Discard paper towels in basic garbage can. 6. Cautions: Never use a burner in a BSC. Do not place anything on air intake/exhaust grilles including your hands and arms. 7. Check that a biohazard waste container is in the BSC. Waste container available for all biohazard discards except Petri plate cultures, disposable gloves and BBD paper towels. Petri plates and disposable gloves go in the plastic lined Petri plate container. Paper towel used to clean with BDD go in general waste bin. 8. Work as far into the BSC as comfortable with good ergonomics. Follow general SOP procedures. 9. Place assembled supplies required in cabinet work area (never cluttered or overloaded) – at least 10 cm from inside of sash. Place supplies directionally across from sterile to unsterile (biohazard waste container). Minimize movement of contaminated materials. Keep all discarded contaminated material to the rear of the work area. 10. Once lab work starts inside cabinet move hands slowly laterally keeping your hands and arms inside the front access opening. 11. Surface disinfect all items in contact with contaminated materials before removing from cabinet workspace. All open containers or trays should be covered before removing from cabinet. 12. Leave waste container in BSC. When the waste container is removed by prep room staff to be autoclaved it is first covered or closed. 13. Put on clean gloves to disinfect BSC interior surface while the blower is operational. Discard paper towels in basic garbage cans. Discard gloves in culture plate waste container. 14. Wait 3-5 minutes before the next student uses the BSC (the Information Centre Panel must say OK). This will purge airborne contaminants from the work area. 15. If you are the last student using the BSC close sash – puts BSC in sleep mode. Bench work procedures that are non-aerosol generating (not done in BSC): fixing smear & staining slides, reading ID tests that do not require additions to Petri plate or ID test tubes, reading of ID test after addition of reagents, recording colony characteristics, organization of supplies to work in BSC, etc. 20 OUTLINE •Lab introduction talk. •15 min BIOSAFETY quiz - Must pass before continuing the lab. Quiz format is mainly short answer, true/false and select correct answer. If a student fails, the next week they will be asked to leave the lab until they can pass a subsequent comprehensive oral test. Mark does not change. The second test is only for admittance to the lab. There will be no opportunity to catch up on work missed. For the quiz you are responsible for (refer to table of contents): Lab Standard Operations Procedure (SOP) (linked information not required) Public Health Agency of Canada Laboratory Biosafety Guidelines & Laboratory Biosafety Guide (linked information not required) Student Operation of Biosafety Cabinet (Lab 1 Introduction) •Streak plate technique assessment. (Lab 1 procedure) PROCEDURE Week 1 FOR ALL LABS, use sterile sticks for streaking and inoculation of cultures, do not use disposable loops. Use sterile disposable loops only for transferring liquid to slide for microscope examination. Prepare all supplies required before going to Biosafety Cabinet (BSC). Assessment of Streak Plate Technique to obtain isolated colonies from a mixed culture. 1. Collect a mixed culture from the front bench, return culture to rack when finished - do not discard. 2. Label two MacConkey agar plates. Using sterile sticks, not loops, streak each MacConkey agar plate for single colonies. Once set up in the BSC mix the culture tube well by rolling back and forth in the palms of your gloved hands. Remove cap of culture tube, insert sterile stick in culture, replace cap and streak agar plate (figure 1). Remove cover of Petri plate holding lid downward. Using the first sterile transfer stick, cover ~1/4 plate agar surface with a back and forth movement of the stick containing the culture. Discard first stick in appropriate container. Using a second sterile transfer stick lightly streak once across initial streaks and onto new surface as shown in figure 1. Lift stick. Lightly streak not touching original streak. Repeat this last step as many times as possible, covering the entire surface of the agar plate with streaks. As you streak to fill the plate, try to streak lighter as you go. Discard stick. 3. Hand in plates to tray provided on bench. NO TAPE. NO CONTAINERS. Place upside down in the tray. 4. Plates will be incubated at 37oC overnight by the TA. Streak plate technique will be accessed on the ability to obtained at least 5 single colonies of each bacterium in the mixed culture on one of the plates. Plates will also be assessed for labelling - label plates, in small writing on the underside around the outside edge. Include, your name in full both first and 21 last name (no initials), plate number (1 or 2), plate type, date, bacteria culture name, “Mixed Culture”. Also streak plates will be assessed for aseptic technique. ENTEROBACTERIACEAE: Biochemical Identification Part I: Bacteria culture preparation Day 1 1. Choose unknown bacterium. RECORD IDENTIFICATION CODE. Sign unknown sheet. Remember to put unknown number or identification code on lab report. 2. Streak two T-soy plates to check for purity and isolation of a single colony (do in BSC). In all subsequent procedures whenever asked to streak (implied streak for single colonies unless otherwise stated. 3. Incubate one unknown culture plate in the 28oC incubator and the other in the 37oC incubator. 4. Do not discard original unknown, store in a plastic container in the 4oC Student Cold Box labelled on masking tape with your complete name until you have your marked report returned. Then discard, storage space is limited. Day 2 . . . 5. Day 2 or as soon as discernible colony growth appear on streak plate you may proceed to the next step. Enterobacteriaceae are fast growing, an overnight culture is usually best. Remember to check for purity on the streak plate. If the culture is not pure, re-streak original culture (there may be a problem with your technique). If the culture is still contaminated, do not proceed any further - consult TA or instructor. The problem may be the original culture. 6. If your culture is pure, continue. a) Use a single colony to inoculate a T-soy broth and incubate at optimum temperature until good growth (for most Enterobacteriaceae T-soy overnight culture is best). Use this T-soy broth for any test requiring growth in T-soy broth such as Gram stain and microscope examination. (Do in BSC.) b) Inoculate identification tests directly from single colonies on T-soy streak plate using a sterile stick unless otherwise stated. When inoculating biochemical tests use several single colonies from T-soy streak plate. (Do in BSC.) c) Re-streak a single colony onto a fresh T-soy plate. Incubate at optimum temperature. After growth, use this plate for the catalase test. (Do in BSC.) d) Do not discard original streak plate(s); store at 4oC. Comments: (i) Culture preparation is similar for all systematic labs. Refer to this section for all your labs. Variations may occur but they will be detailed in lab experiment. (ii) You need to work around the weekend. Check incubation time for all tests and make sure you do not need to read the test result during the weekend. Streak plate of pure culture may be stored at 4oC until ready to inoculate identification tests. (iii) Use uninoculated tubes as control to compare your test results. 22 (iv) DO NOT inoculate biochemical tests from original culture. (v) If you are quite certain that you have identified your unknown bacterium, but one or two tests do not agree. This is expected as some tests just do not give expected results for a particular bacterial species strain but overall results will correctly identify the bacterium. Part II: Enterobacteriaceae: Biochemical Identification The family Enterobacteriaceae5 are gram negative facultatively anaerobic rods. All Enterobacteriaceae are catalase positive, nitrate reduction positive and produce acid from glucose (ferment glucose). In this lab you will use traditional ‘test tube’ biochemical tests to identify an Enterobacteriaceae to the species level. 1. 2. 3. Each student will work with an unknown Enterobacteriaceae. Follow basic procedure (Part I: Bacteria culture preparation) for culture preparation. Use the following identification scheme to identify Enterobacteriaceae. Remember all test procedures are detailed in systematics lab manual appendix. Do all of the following tests. Screening Tests cellular morphology (only shape) gram stain catalase cytochrome oxidase (record as negative, test not available for this lab) nitrate reduction carbohydrate fermentation - glucose Basic Differential Identification Tests colony characteristics (from original pure streak plate) motility (optimum temperature) Biochemical Differential Identification Tests (Majority of reactions should be reported after 48 hours at optimum temperature, which is most likely 37oC. Some reactions take longer, eg. gelatin.) methyl red Voges-Proskauer gelatin liquefaction carbohydratefermentation - lactose, sucrose, arabinose, esculin, sorbitol, inositol urease production citrate decarboxylases (Falkow)a - lysine, arginine, ornithine, control phenylalanine H2S from TSI indole a Make sure you understand what is a positive test color (purple). Control must be yellow for this test to be valid. All Enterobacteriaceae are able to grow in this medium. If you do not get a yellow color produced in the control tube you need to repeat all carboxylase tests. 5 Buchanan, R E, Gibbons, N E, editors. 1974 Gram-negative facultatively anaerobic rods, Family I. Enterobacteriaceae. In: Bergey's Manual of determinate bacteriology, 8th edition. Baltimore: Williams & Wilkins. p.291-340. AND Holt, JG, Krieg, NR, Sneath, PHA, Staley, JT, Williams, ST. 1994. Facultatively anaerobic gramnegative bacteria. In: Bergey’s Manual of Determinative Bacteriology, 9th edition. Baltimore: Williams & Wilkins. p.175-289. 23 Report Table 1 for Data Collection. Table 1. Biochemical identification of an unknown Enterobacteriaceae. Bacterium unknown code/number: ____________ Screening Tests Test Description of test results cellular morphology (shape) gram stain catalase cytochrome oxidase N/A (assume negative) nitrate reduction glucose fermentation Therefore based on screening test results this organism belongs to the family: Interpretation +, (+), +/- or N/A - Basic Differential Identification Tests Test Description of test results colony characteristics: size (mm), form, elevation, margin, texture/consistency, surface incubation time: ____ incubation temperature: _____ motility (optimum temperature) Interpretation + or N/A Biochemical Differntial Identification Tests Test methyl red Voges-Proskauer gelatin liquefaction lactose fermentation sucrose fermentation arabinose fermentation esculin fermentation sorbitol fermentation inositol fermentation urease production citrate utilization control decarboxylase lysine decarboxylase arginine decarboxylase ornithine decarboxyase phenylalanine H2S from TSI indole Description of test results Interpretation +, (+), +/- or - N/A description of test result (color change, etc) interpretation - record as either negative or positive, use notation + or -. Footnote that + = positive and - = negative. If you are unable to determine if positive or negative, record as +/-. For example, if you got an orange color while a positive is red and a negative is yellow, record this as +/-. Or it just may be a slow positive, record slow positive as (+). NOT PHYSIOLOGY – BE CONCISE N/A = not applicable NOTE: for screening test – if test differs from expected, include both the result you obtained and the expected result 24 LAB 1 REPORT Must use report formats (Word and Excel) available on lab website. Open and save before typing requested information. -Read basic lab report instructions under general instructions. -Read bacteria nomenclature information in general instructions of lab manual. -Remember to underline all bacterial names or if typed use italics. -INDICATE BACTERIUM UNKNOWN CODE on front cover. Data Presentation and Analysis 5 5 1. Record all requested information in lab 1 Table 1. Biochemical identification of an unknown Enterobacteriaceae available on lab website in Word format. First save file, open in Word and enter requested information. If your screening tests (only) do not agree with expected, state what you got and also state the expected result. BE CONCISE - the finished table must fit on one page. 2. Report numerical data sheet available as a Excel spreadsheet on lab website. The spread sheet has been set to automatically give you the total numerical value for each bacterium. Follow numerical analysis guidelines to identification unknown Enterobacteriaceae to species level. 1. For every identification test that agrees, assign value of 1.0. 2. For every identification test that disagrees, assign a value of -1.0. 3. For every identification test recorded in identification table as d or (d) assign a value of 0.5. 4. If you cannot determine if your test result is positive or negative assign a value of 0.5. However, make every attempt to state negative or positive or this may cause incorrect identification. 5. If the test is N/A (not applicable), do not consider this test in your calculation. a) Summarize your unknown Enterobacteriaceae results in the top row of the Excel spreadsheet, i.e. +, - . b) Record numerical values (1, -1 or 0.5) for the top 3 bacteria choices in the Excel spreadsheet provided. c) For each of the three bacterium selected record a total numerical value in column provided. This should be automatic as the column has been set to add if you have entered the values correctly. For example, for one of the top three selected bacterium you have 13 (1.0), 2(0.5) and 2(-1.0). The total numerical value is 12. d) Conclude by stating for unknown number/ID ________the name of your unknown bacterium (first choice) is ________________. Then state the second choice is __________________. If identical numbers for identification of first choice, record all first choice bacteria. This is an unlikely situation. It is best to discuss problem with TA or lab instructor. If identical numbers for identification of second choice, again list all bacteria. __ 10 25 Table1 . Biochemical Characteristics of selected members of Enterobacteriaceae. Genera arabinose esculin inositol lactose sorbitol sucrose citrate MR VP ADC gelatin H2S indole LDC ODC urease phenyl-alanine motility Escherichia coli + d - + + d - + - d - - + + + - - + Edwardsiella tarda - - - - - - - + - - - + + + + - - + Citrobacter freundii + d - + + d + + - d - + - - d (+) - + Citrobacter intermedius biotype a + d - + + d + + - d - - + - d (+) - + Citrobacter intermedius biotype b + d - + + d + + - d - - + - d (+) - + Salmonella subgenus I + - d - + - + + - + - + - + + - - + Salmonella subgenus II + - d - + - + + - + (+) + - + + - - + Salmonella subgenus III + - d + + - + + - + (+) + - + + - - + Salmonella subgenus IV + - d - + - + + - + (+) + - + + - - + Shigella dysenteriae - - - - - - - + - - - - d - d - - - Shigella flexneri d - - - - - - + - - - - d - d - - - Shigella boydii + - - - d - - + - - - - d - d - - - Shigella sonnei + - - (+) - (+) - + - - - - - - d - - - Klebsiella pneumoniae + + + + + + + - + - - - - d - + - - Klebsiella ozaenae + (+) + (+) + + - + - - - - - d - - - - Klebsiella rhinoscleromatis + d + - + + d + - - (d) - d d - d - - Enterobacter cloacae + - - + + + + - + + (+) - - - + (d) - + Enterobacter aerogenes + + d + + + + - + - (+) - - + + (d) - + Hafnia alvei + - - - - - + - + - - - - + + - - + Serratia marcescens - - d - + + + - + - + - - + + - - + Proteus vulgaris - d - - - + - + d - + + + d - + + + Proteus mirabilis - d - - - (+) d + d - + + - d + + + + Yersinia pestis + + - - d - - + - - - + - d - - - - Yersinia pseudotuberculosis + + - - - - - + - - - - - d - + - - Yersinia enterocolitica + + + + d d + + Reference Bergey’s Manual 8th edition Table 8.2, Bergey’s Manual 9th edition Table 5.2, & API20E Table 2-8. ODC, ornthine decarboxylase; LDC, lysine decarboxylase; ADC, arginine (arginine decarboxylase) -, negative reaction; +, positive reaction; (+) slow positive; d, varies for different strains 26 Table2 . Lab 1 Enterobacteriaceae: Biochemical Identification. Report Data Sheet -Record numerical values in the appropriate cells. Record total numerical value. Record bacteria choices at bottom of sheet. Genera arabinose esculin inositol lactose sorbitol sucrose citrate MR VP ADC gelatin H2S indole LDC ODC urease phenylalanine Your unknown bacterium resultsa Escherichia coli Edwardsiella tarda Citrobacter freundii Citrobacter intermedius biotype a Citrobacter intermedius biotype b Salmonella subgenus I Salmonella subgenus II Salmonella subgenus III Salmonella subgenus IV Shigella dysenteriae Shigella flexneri Shigella boydii Shigella sonnei Klebsiella pneumoniae Klebsiella ozaenae Klebsiella rhinoscleromatis Enterobacter cloacae Enterobacter aerogenes Hafnia alvei Serratia marcescens Proteus vulgaris Proteus mirabilis Yersinia pestis Yersinia pseudotuberculosis Yersinia enterocolitica ODC, ornthine decarboxylase; LDC, lysine decarboxylase; ADC, arginine (arginine decarboxylase) Agree = +1.0, disagree = -1.0, d or (d) = +0.5, +/- = +0.5. a record as + (positive), - (negative), +/- (cannot determine) For unknown number __________ the bacterium (first choice) is ____________________. The second choice is _____________________________. motility TOTAL NUMERICAL VALUE NA 27 LAB 2 ENTEROBACTERIACEAE: Selective and Differential Media In a clinical lab, seldom is a specimen a pure culture. Selective differential media have been developed to isolate and differentiate members of the family, Enterobacteriaceae. Selective media is defined as media that preferentially isolates a particular group of bacteria. This is usually accomplished by including inhibitors or suppressors of other bacterial groups in the media. Solid agar plates are used in order to isolate pure colonies. In addition, selective media are usually differential media. This means that the media contain indicators that can differentiate between different members of a group. The following is a list of the selective differential media used in this lab to isolate pure cultures from a mixture of Enterobacteriaceae. Selective Differential Media MacConkey agar Eosin methylene blue (EMB) agar Endo agar (light sensitive - keep in the dark) Highly Selective Differential Media Salmonella-Shigella (SS) agar Hektoen enteric (HE) agar Refer to tables at end of this lab for media composition, selective and differential ingredients, reaction results and interpretation of each selective differential media. The object of this lab is to (1) rapidly screen a mixed Enterobacteriaceae culture using selective differential media, (2) isolate pure cultures, and (3) tentatively identify genera present. Normally biochemical identification tests are required to confirm identification. As this lab is concerned with the three objectives stated above, further biochemical tests are unnecessary. PROCEDURE EDIT PROCEDURE SUCH THAT STREAK FROM PLATE TO PLATE Week 2 1. Unknowns are chosen from the following genera ONLY: Serratia, Citrobacter, Proteus, Escherichia, Enterobacter. 2. Each student will receive one unknown consisting of a mixed culture (2 of the genera listed above together). Mix culture just before streaking. The two unknown cultures are mixed just prior to lab to ensure the survival of both Enterobacteriaceae. It is important that you get well isolated colonies the first try. Most often, once the two cultures are mixed, one culture becomes dominant in a very short time. 3. Directly streak the original mixed unknown broth culture on MacConkey, EMB, Endo, SS, and HE agar plates for single colony isolation. Remember to streak the plate lightly to ensure lots of single colonies. DO NOT subculture in T-soy broth. 4. Incubate for 24 hours (only if necessary, 48 hours as may take 2 days for H2S production to occur) at 37oC. Select a plate that has two distinct colony types (not all plates will have two discernible colony types). Re-streak a single colony of each type on T-soy agar and inoculate each into T-soy broth. Incubate overnight at 37oC. Check to make sure each plate is pure. Store both plates and broths in 4oC student incubator until Monday. 28 Notes: (i) If you are having problems, it is advisable to streak second plates directly from single colony instead of growing up in broth first. (ii) Often the colour or sheen produced by the bacteria disappears (breaks down) with time (incubating too long or storage in cold box). Read results of plates when requested. 5. Using the T-soy broth culture of each type (pure colony) streak each plate type as illustrated below. Use only one plate of each media type; MacConkey, EMB, Endo, SS, and HE. Incubate for 24 to 48 hours at 37oC. Some unknown bacteria may need to be incubated for 48 hours before differentiation is possible. Record required information as requested in lab report section. If growth is completely inhibited, on SS and HE plates restreak with a heavy inoculum increasing the initial streak area. You need to do this to allow you to describe the colony color. Some growth will occur in the heavily inoculated area even if the bacterium is inhibited on these plates. 6. For comparison known streak plates of each bacterium on each selective differential plate will be available in the lab (stored in 4oC student cold box) next week Tuesday and Wednesday only. Recording results when the plates are fresh is important. When you make your unknown identification compare your results to known plate recorded information. This will “really” help you. You may compare directly to plates but remember the known plates will be getting old by that time. Remember to return plates to student cold box (upside down in tray). Please do not put in supply cold box as want to keep bacteria free. 29 LAB 2 REPORT Must use report format (Word) available on lab website. Open and save before typing the requested information.. Lab 2 Enterobacteriaceae: Selective and Differential Media Date: Student Name: Unknown Identification: Table 1. The use of selective and differential media to tentative identify bacteria to the genus level in a mixed Enterobacteriaceae culture. Incubation temperature: Incubation time: Enterobacteriaceae Selective Colony color. Lactose H2S production* Differential Record if color is fermentation* (+ or -) Agar due to a sheen. (+++, + or -) Bacterium 1 MAC NA Name: EMB NA Endo NA SS HE Bacteria 2 Name: MAC NA EMB NA Endo NA SS HE MAC, MacConkey; EMB, Eosin methylene blue; SS, Salmolla-Shigella; HE, Hektoen enteric NA = not applicable * Lactose fermentation or H2 production: +++ = strong positive (not all differential plates differentiate between strong lactose and lactose fermentation, if cannot differentiate just put +; strong does not apply to H2S), + = positive & - = negative (Mark allocation: 4 marks for each bacteria data and 1 mark for each bacterium name; total of 10 marks) 30 Table 1a: Selective Differential Media for Tentative Identification of Enterobacteriaceae Selection of Enterobacteriaceae and related enteric gram-negative bacteria. Medium and Components Function of Selective and Differential Ingredients Colony Color Analysis MacConkey agar peptone poly peptone lactose bile salts sodium chloride agar neutral red crystal violet distilled water pH 7.1 Bile salts and crystal violet inhibit the growth of gram positive bacteria and fastidious gram negative bacteria. Lactose sole carbohydrate source for fermented acid production. Neutral red indicator dye that is red below pH 6.8 to detect lactose fermenting bacteria. Red or pink colonies lactose fermenters Colorless or transparent colonies non-lactose fermenters Eosin methylene blue agar peptone lactose potassium phosphate agar eosin y methylene blue distilled water pH 7.2 Lactose sole carbohydrate source for fermented acid production. Aniline dyes (eosin and methylene blue) (1) inhibit gram positive and fastidious gram negative bacteria. (2) combine to form a precipitate at acid pH, therefore indication of acid production from lactose. Endo agar potassium phosphate peptone agar lactose sodium sulfite basic fuchsin distilled water pH 7. Sodium sulfite and basic fuchsin (decolorized by sodium sulfite) inhibit the growth of gram positive bacteria. Lactose sole carbohydrate source for fermented acid production. Red color production by lactose fermenters is due to an acetaldehyde intermediate product which is fixed by sodium sulfite and acid production. Green-black colonies strong lactose with green metallic sheen. fermenters (eg. E. coli) Purple colonies, distinct from medium color. Caution: may be similar to media. lactose fermenters (eg. Enterobacter) Transparent colonies, the same color as the medium. non-lactose fermenters (eg. Proteus, Serratia) Pink, rose red to dark red colonies lactose fermenters (eg. Citrobacter, Enterobacter) dark red colonies that produce a gold metallic sheen strong lactose fermenters (eg. E. coli) Translucent or colorless colonies, the same color as the medium. non-lactose fermenters (eg. Proteus, Serratia) * Enterobacter is difficult to identify on EMB agar as purple color is only slightly deeper than medium. If you are not sure incubate a T-soy plate of unknown bacterium at room temperature. If there is no swarming, it is tentatively Enterbacter, not Proteus. 31 Table 1b: Selective Differential Media for Tentative Identification of Enterobacteriaceae Selection of Enterobacteriaceae and related enteric gram-negative bacteria. Medium and Components Function of Selective and Differential Ingredients Reaction Interpretation Salmonella-Shigella (SS) agar beef extract peptone lactose bile salts (high) sodium citrate sodium thiosulfate ferric citrate agar neutral red brillant green distilled water pH 7.4 High Bile salts inhibit the growth of gram positive bacteria and many gram negative bacteria including coliforms (eg. Escherichia). Lactose sole carbohydrate source for fermented acid production. Sodium thiosulfate source of sulfur Ferric citrate forms a precipitate with H2S gas to detect H2S production neutral red indicator dye that is red below pH 6.8 to detect lactose fermenting bacteria. pink rose or red colonies Some inhibition of growth is possible. lactose fermenters that can grow. No H2S gas production. Transparent colonies the same color as medium with black centres non-lactose fermenters, with H2S gas production; black centre. Transparent colonies the same color as medium. non-lactose fermenters, with no H2S gas production Hektoen enteric (HE) agar peptone yeast extract bile salts lactose sucrose salicin sodium chloride sodium thiosulfate ferric ammonium citrate acid fuchsin thymol blue agar distilled water pH 7.6 High Bile salts inhibit the growth of gram positive bacteria and many gram negative bacteria including coliforms. Lactose (also sucrose) carbohydrate source for fermented acid production. Sodium thiosulfate source of sulfur Ferric ammonium citrate forms a precipitate with H2S gas to detect H2S production acid fuchsin and thymol blue indicator dyes that act together to produce an orange color at acid pH to detect lactose fermenting bacteria. Bright orange, or salmon pink colonies. Moderate growth inhibition. moderate to strong lactose fermenters No H2S gas production Yellow (pale orange) Non-lactose fermenter. Color due to sucrose or salicin fermentation. No H2S gas production. colorless to green non-lactose fermenters. No H2S gas production. Mustard green colonies with black centres. non-lactose fermenter with H2S gas production Blue - green colonies same as medium. non-lactose fermenters No H2S gas production. 32 LAB 3 ENTEROBACTERIACEAE: API 20E Rapid Identification The methods that you have been using so far to identify bacteria are very time consuming, and therefore not appropriate when results are needed quickly (clinical analysis). Manufacturers have designed a number of simple "test strips" consisting of standard differential identification tests, for example, API-20E, Micro-ID, and Pathotec. The identification systems generate a number based upon the results (-/+). A summary of chemical and physical principles of the API 20E tests are presented in Table I (API 20E technical manual). The number generated corresponds to a particular organism that can be looked up on a chart or a computer data bank. In this lab, you will use the API-20E test strip and conjunction with APIWEB online database. Principle of API numerical identification5 The 21 biochemical tests that compose the API test (20 tests + oxidase test) are divided into groups of three indicated by heavy vertical lines on result sheet. A value of zero is assigned for all negative results. Values are assigned for positive test results depending on order in each group of three; first place has a value of 1, second place has a value of 2 and third place has a value of 4. This gives you a 7 digit numerical PROFILE NUMBER (API number) for your bacterium. The API data base is composed of the percentage of positive reactions for each ‘taxon test’6. A test is considered negative if #25% positive reactions. A test is considered positive if $75% positive reactions. Test with % positive reactions between 25-75% may be variable and usually do not appear against an identification. See tables at the end of this lab and example printout of API identification. The identification is based on how closely the frequency of occurrence of your bacteria (taxa) numerical profile (combination of positive and negative results) matches other numerical profiles of the same bacteria (% id) and of the typical (numerical profile that best represents that bacterium) bacteria (T) in the data base. If applicable, the identification printout also includes tests against give for significant taxa, and next taxon. Referring to example printout of API 20 E identification, Serrratia marcescens has tests against, URE 25% and RHA 1%. For Serratia marcescens, urea should be negative but this profile number, 5317731, shows (boldface) it is positive, therefore test against Serratia marcescens. Likewise for RHA 1%, it should be negative for Serratia marcescens but it is positive, 5317731, therefore test against Serratia marcescens. When looking at the next taxon listed, Serratia liquefaciens, there are again both URE 25% and RHA 1% tests against in addition to ARA 97%. ARA should be positive, but the profile number is 5317731, showing ARA as negative for identification of Serratia liquefaciens. Quality of Identification It is derived from the %id (or sum of the % id) and T index (or the average of the T indexes) of the selected taxon (or taxa), i.e. bacteria. The taxa are sorted by decreasing value of the %id. 6 Biomerieux Technical brochure and Biochemical Information 03/2004 http://www.biomerieux.com 33 Identification % id* T* Excellent $99.9 $0.75 Very good $99.0 $0.5 Good $90.0 $0.25 Acceptable $80 $0 Doubtful %id and T given, but a taxon with several tests against the identification is present among those selected (significant taxa). Unacceptable Not given, not close to any taxa in database The identification has low discrimination if 2, 3 or 4 taxa belonging to different genera have been selected. The identification is not reliable if the sum of the %id of taxa selected is less than 80%. The above table is a guideline when recording results of unknown bacteria use the quality of identification. PROCEDURE (18-24 hour) Week 3 Each student will receive one unknown and an API 20E strip. Label API strip with your name and unknown number and store at 4oC until ready to use. Day1 (Wednesday) 1. After receiving unknown, streak two T-soy plates to verify purity and to obtain individual colonies. Incubate plates overnight at 37oC. Verify that you have a pure culture. Day 2 (Thursday) 2. After 18 to 24 hours perform a catalase test using one of your plates. Discard after test. Use the 2nd T-soy plate to transfer a single colony to T-soy broth and incubate 18 to 24 hours at 37oC. Again using the 2nd plate, transfer eight well-isolated colonies to tube containing 5 ml sterile saline (0.85% NaCl) to give a heavy bacterial suspension. Vigorously mix. This is the saline culture used to inoculate the API strip. Store T-soy culture plate at 4oC. Comment: Some unknown bacterium are extremely mobile, it may not be possible to get isolated colonies. After checking that you culture is pure, continue the requested procedure. Just estimate the amount of bacteria that corresponds to eight isolated colonies. 3. Preparation of API Strip: JUST BEFORE INOCULATING THE API STRIP set up incubation tray and lid. Dispense 5 ml (approximately) sterile distilled water into the incubation tray. Shake back and forth to distribute the water into the honeycomb wells. This provides a humid atmosphere during incubation at 37oC. Record your 34 identification ID and name on the elongated end flap of the bottom incubation tray. Place the API strip in the incubation tray. 4. Inoculation of API Strip: The API strip contains 20 microtubules, each of which consists of a tube and a cupule section. Refer to illustration. Use a sterile Pasteur pipette to add the bacterial suspension, tilt the API incubation tray and place the Pasteur pipette tip against the side of the cupule (load carefully to prevent bubble formation). Fill both the TUBE and CUPULE section of the CIT, VP, and GEL tubes. Fill the tube section of the remainder. After inoculation, completely fill the cupule section of the ADH, LDC, ODC, H2S, and URE microtubes with sterile mineral oil to create an anaerobic environment. 5. Incubation of API Strip: After inoculation, place the plastic lid on the tray. Place the complete unit inside a zip-lock bag and seal. Incubate the strip for 18-24 hours at 37oC take care transporting and handling inoculated API strip. Day3 (Friday) 6. After growth use the broth culture to do a Gram stain and determine cellular morphology. Store broth culture at 4oC. Record oxidase test as negative. 7. After incubation of API 20E strip add the following reagents to the requested microtubes. Make sure reagent comes into contact with solution in microtube. Test Addition TDA Add 1 drop 10% ferric chloride (immediate) to TDA microtube VP Add 1 drop of 6% α-naphthol, then 1 drop of 40% potassium hydroxide (read after 2 min and up to10 min) to VP microtube Add 1 drop of Kovac's reagent* (SpotTestTM Indole Reagent) to IND microtube. Must be done last or 2nd last. Do not replace cover before reading. *also called James reagent IND PROBLEMS...if you encounter any problems with API strip, you have a chance to repeat procedure using streak plate or broth stored at 4oC. Monday (Day 5) streak a fresh plate either directly from stored plate or broth. Tuesday (Day 6), set up and inoculate API 20E strip. Wednesday (Day 7), add required chemicals and record API results. This is permitted only if absolutely required as API strips are expensive. Take every precaution to prevent your strip from drying out by placing in sealed zip-lock bag when incubating. 8. Record results immediately. The strip cannot be stored, as chemicals added will change results. Record as + or -. If you cannot decide if a test is positive or negative refer to Color check screen on Apiweb site and chart in your lab manual. If still undecided, 35 enter you best guess and check your results for a valid identification. Remember for a positive VP must be darker than Color Check screen shows for a positive result. Data Collection api 20 Sheet (more available linked on lab website) – not for lab report. 9. After reading discard API strip in Petri plate container or plastic lined bucket on you work bench. Caution: When using the COMPUTER IN THE LAB FIRST REMOVE GLOVES AND WASH HANDS. The TA will monitor you. 10. . a) Use apiweb™ (internet licence) to identify your unknown Enterobacteriaceae. Computer is available in lab. The TA will login into website for you. b) Select API strip type, for this lab API 20 E (or new test if already in this window). The cursor defaults to first number (make sure you know how to determine each number -see lab introduction. Enter API 20E profile number. On this page there is also useful pictorial information with respect to positive and negative test colors - select Color check. One concern with the color check is the VP positive results showing as barely any brown – really a negative test result. c) Select confirm. Identification data is shown. d) Select PRINTOUT to bring up printable window and print. MUST PRINT FROM PRINTOUT WHICH INCLUDES API STRIP RESULT SHEET. If starting new test identification, select new test. If need to edit, select 36 11. Opposite is an example of an apiweb™ identification result printout as requested in lab report. 12. Below is an examples of api 20 E data sheet filled out as requested in lab report. 37 Table 2a. Chemical and Physical Principles of the API 20E Identification Tests for 18 to 24 hours (apiweb has a color check for negative and positive results on their lab website) TUBE CHEMICAL/PHYSICAL PRINCIPLES [Reactive ingredient is underlined] RESULTS Positive Negative ONPG Hydrolysis of ONPG (colorless) by betagalactosidase releases orthonitrophenol (yellow). IPTG (isopropylthiogalactopyranoside) induces the lac operon. Any shade of yellow Colorless ADH Arginine dihydrolase transforms arginine into ornithine, ammonium and CO2. This causes a pH rise in the acid-buffered medium and a change in the indicator from yellow to red. pink-red Yellow/orange LDC Lysine decarboxylase transforms lysine into a basic primary amine, cadaverine. This amine causes a pH rise in the acid-buffered medium and changes the indicator from yellow to red. red Yellow/orange ODC Ornithine decarboxylase transforms ornithine into a basic primary amine, putrescine. This amine causes a pH rise in the acid-buffered medium and changes the indicator from yellow to red. red/orange yellow CIT Sodium citrate is the sole carbon source. Citrate utilization results in a pH rise and changes the indicator from green to blue. blue-green/blue -read in the aerobic cupule area. pale green/yellow -read in the aerobic cupule area. H2S Hydrogen sulfide is produced from sodium thiosulfate. The H2S reacts with iron salts to produce a black precipitate. colorless /greyish black deposit/thin black line around the tube bottom. URE Urease releases ammonia from urea. Ammonia causes the pH to rise and changes the indicator from yellow to red. red/orange TDA Trytophan deaminase forms indolepyruvic acid from tryptophan. Indolepyruvic acid produces a brownish-red color in the presence of ferric chloride. Add 1 drop 10% Ferric chloride - immediate reddish brown yellow yellow 38 Table 2b. Chemical and Physical Principles of the API 20E Identification Tests for 18 to 24 hours TUBE CHEMICAL/PHYSICAL PRINCIPLES [Reactive ingredient is underlined] RESULTS Metabolism of tryptophan results in the formation of indole. Kovac’s reagent forms a colored complex (pink to red) with indole. Add 1drop SpotTest Indole Reagent immediate Acetoin, an intermediary glucose metabolite, is produced from sodium pyruvate and indicated by the formation of a colored complex. Creatine intensifies the color when tests are positive. 1 drop of 6% α-naphthol, then 1 drop of 40% potassium hydroxide - read between 2 and 10 min. pink/red brown colorless GEL Liquification of Kohn’s charcoal impregnated gelatin by gelatinase releases a black pigment which diffuses throughout the tube. diffusion of black pigment no diffusion GLU MAN INO SOR RHA SAC MEL AMY ARA Utilization (fermentation/oxidation) of the carbohydrate results in acid formation. Acid produces a drop in pH and changes the indicator from blue to yellow. Respective reactive ingredients; glucose, mannitol, inositol, sorbitol, rhamnose, sucrose, melibiose, amygdalin, and (L+) arabinose. Fermentation (Enterobacteriaceae) Read reaction from bottom of tube to the top. Yellow color at bottom of tube only is a weak or delayed positive reaction. Oxidation (not Enterobacteriaceae) Read reaction from top of tube to the bottom. Yellow color in upper portion of the tube and blue on the bottom. yellow (glucose may be grey or greenishyellow) blue/ blue-green OX cytochrome oxidase - see appendix for details see appendix see appendix IND VP Positive pink Negative colorless/pale green/yellow 39 LAB 3 REPORT Must use report format (Word) available on lab website. Date: Student Name: Unknown Identification (number or code): Bacterium: 4 1. Record requested identification tests results in the following table. Table 1. API 20 E Identification Test Results for Enterobacteriaceace. TUBE COLOR* RESULT TUBE ONPG GEL ADH GLU LDC MAN ODC INO CIT SOR H2S RHA URE SAC TDA MEL IND AMY VP ARA COLOR* RESULT *state exact color, no other details are required with the exception of gelatin (state degree of diffusion) 4 2. a) In the following API 20 E data sheet record all 21 test results in circles provided as + or and API profile number in ovoid circles provided. Refer to example sheet. For this question hand written in pen is acceptable. 40 b) Record requested information in the following table. Table 2. Bacterium additional identification test results. Characteristic Test result (record as + or – except for shape) cellular morphology (shape) Gram stain Catalase Motility 2 __ 10 3. Attach apiweb™ identification result printout. Must use printout, not screen printed, to include record of positive and negative results. 41 42 LAB 4 ENTEROBACTERIACEAE: Isolation, Identification and Antibiotic Testing The objective of this lab is to use the techniques learned in this lab to identify an Enterobacteriaceae from the environment and most likely demonstrate that this is a difficult task. API manual test system is used to identify the bacterium and antimicrobial susceptibility will be determined using (ATB G-5) strip which contains 21 antibiotics. The first and last pair of cupules are controls. Some antibiotics are added at two different concentrations, lowercase c, the lower concentration, and uppercase C, the higher concentration. Other antibiotics are added at only one concentration. PROCEDURE Note: The following procedure is a continuous process. If a weekend interrupts the process, just put the streak plate at 4oC over the weekend and continue the process on Monday. Remember to keep a T-soy streak plate of your bacterial isolate at 4oC. CAUTION: Use good microbiological procedures as you are working with an unknown Enterobacteriaceae. Handle you bacterium isolate with extreme care. You must assume any organism isolated from the environment is a Level 2 Biohazard. Follow all SOP procedures. Remember to keep your hands away from your face. Wear disposable gloves. Week 4 continued week 5 YOU MAY START THE LAB ANY SCHEDULED TIME ON WEDNESDAY (not before). However, this is dependent on availability of supplies in lab. 1. Select the areas you want to sample. Possible Enterobacteriaceae sources: soil (make sure it is not sterile potting soil), home, washroom, pet faeces, fruit and vegetables (dependent on how well they are washed and water used), grains, chicken, etc. Be creative in your selection of source but remember you are isolating an Enterobacteriaceae. Either use a dry swab to swab moist surface or first dip swab into a tube of sterile saline and then swab the selected area. If you are doing this at home, tap water is fine. Then, swab the surface of a MacConkey plate. It is important that sample is moist. THE ONLY PLACE THAT YOU CAN DISCARD THE SWABS IS IN THE BENCH PLASTIC LINED BUCKETS IN THE 3470 LAB. Carry out the procedure four times using a different area. If you are not successful, repeat. It is quite reassuring how free our immediate environment is with respect to Enterobacteriaceae. 2. Incubate at 37oC. If collecting samples outside of the building, just leave the plates at room temperature until you come to University the next day, then put in the 37oC incubator. Incubate for a maximum of 2 days. However, do not allow the plates to become overgrown as you want isolated colonies. Store MacConkey plates at 4oC, do not discard as you may have to select another isolated colony. Note: If growth takes longer than two days, it is not an Enterobacteriaceae. 3. Select 3 to 5 isolated colonies from the MacConkey plates (any combination). On the bottom of the MacConkey plate circle colonies picked. Streak each colony on a T-soy 43 plate and inoculate a T-soy broth. If you do not have any appropriate isolated colonies, pick from an area that has a possible Enteric and streak for single colonies. Incubate at 37oC overnight. (If necessary, re-streak on T-soy to ensure a pure culture.) Store plates at 4oC (both MacConkey and T-soy plates marked week 7) - do not discard as required for marking. Hints: (i) When selecting a possible Enteric, use information learned so far in this lab. Do not forget to consider basic colony characteristics of enterics. (ii) If growth has not occurred overnight, there is no point continuing with that particular bacterium. Most likely a waste of your time. (iii) Best to work with 5 colonies now, rather than scrambling to find possible Enterobacteriaceae close to the time the report is due. Actually saves you time. 4. To proceed culture must grow rapidly overnight. Do a gram stain/KOH string test for each broth. You need two Gram negative bacteria to continue. For two gram negative bacteria record colony characteristics and observe cellular morphology. If more than two gram negative bacteria, do not discard, store at 4oC just in case the none of the bacteria you selected to continue meet Enterobacteriaceae criteria. 5. Streak two gram negative rod shaped bacteria broths on T-soy plates. Also inoculate a nitrate broth and an oxidative-fermentative test. Incubate overnight at 37oC. Next day check catalase, oxidase activity, nitrate reduction test and oxidative-fermentative test. Record results. Note: The oxidative-fermentative test must demonstrate fermentation. The organism you have isolated is not an Enterobacteriaceae if the oxidative-fermentation test is oxidative. 6. Record your test results in the following table. Confirm that you have isolated an Enterobacteriaceae (all screening tests MUST match expected Enterobacteriaceae results). You only need ONE Enterobacteriaceae to proceed to API 20E and ATB G(-) 5 testing. Discuss results with TAs or instructor if you have lots of problems. Week 7 or before: Must have the following data sheet and culture plates checked by the instructor, sometime before lab or during Week 7 scheduled lab. 44 (available as a Word document on the lab website) Lab 4: Enterobacteriaceae Isolation Data Sheet This table must be completed before scheduled lab for API 20E and antibiotic strip inoculation. See lab schedule. Student Name: _____________________________ 2-5 initial MacConkey plates (2 colonies circled) 1-2 T-soy streak plates (for single colonies of bacterium 1 and/or 2) Characteristics Results Expected bacterium 1 bacterium 2 source NA gram stain - cellular morphology rod colony characteristics (T-soy) (1-2 days at either 28oC or 37oC) cream color 2-5 mm round, entire raise butyrous or mucoid MacConkey colony color red or translucent Characteristics Results - test results (color, etc)/interpretation (+ or -) Minimum of one set of results required. Expected nitrate broth red, + oxidative-fermentative test fermentative* in 12 days catalase bubbles, + oxidase no color , - bacterium 1 bacterium 2 Bacterium selected: ___________________ Is your bacterium acceptable for API 20E analysis? ______________ Only one of the two bacteria needs to completely comply with the expected results. If no bacteria are acceptable, start over selecting two more colonies from MacConkey plates or from another student’s MacConkey plates. Best to discuss this with instructor or TA. - = negative reaction, + = positive reaction *both open and closed (mineral oil) tubes yellow 45 Week 7 Before proceeding your bacterium must pass all screening tests for Enterobacteriaceae, especially the oxidative-fermentative test. It must be fermentative. 1. Day before lab: Streak plate your tentative Enterobacteriaceae on T-soy agar. Incubate at 37oC overnight. 2. Original MacConkey plates, T-soy streak plate(s) of Enterobacteriaceae and isolation data sheet checked in lab (marks subtracted from lab report if not checked). Do not proceed to the next steps until your results are checked and given the go ahead by the instructor. CONTINUE WITH ONLY ONE BACTERIUM. 3. API analysis Carry out an API 20E analysis of your pure culture. Record results (+ or -) on API data sheet (hand written acceptable). Identify the bacterium using apiweb API 20E. See lab 3 for instructions. MUST PRINT FROM PRINTOUT WHICH INCLUDES API STRIP RESULT SHEET. Remember when using the COMPUTER IN THE LAB, first REMOVE GLOVES AND WASH HANDS. The TA will monitor you. 4. Antimicrobial susceptibility test a) In the BSC add 100 µl 0.1% MgSO4 and 100 µl 0.25% CaCl2 using P100 to 6 ml ATB medium prior to inoculation with colonies [use P100]. Mix. Transfer 2 colonies to 6 ml ATB medium. Mix to obtain a homogeneous solution. The final concentration of the bacterium should be 2 x 10⁵ bacteria/ml. b) Remove the ATB-G5 antibiotic strip from the packaging. Record your name, bacteria’s name and date on the elongated flap of the strip. c) Using a sterile Pasteur pipette, fill each cupule to 2 mm from the top edge. If you completely fill the cupule, you will not have enough culture. d) Place a lid on the strip, place in ZIP-locked plastic bag and incubate for 18-24 hours at 37oC. Remember; do not put the strip next to the fan in the incubator. e) Record antibiotic test results on result sheet (go to pdf of lab manual on lab website and printout antibiotic test result sheet to enter data for lab report). This is done by filling in circles by antibiotic or control (located both at the top and the bottom) if growth is present. Leave circles empty if growth less than control. Interpret results and record the antibiotic results in space provided as R/I/S. Be sure to include source and bacterium name on sheet. Also footnote what indicates growth (filled in circle) and no growth (clear). Remember to define abbreviations (R/I//S). After reading antibiotic results, discard test strip in Petri plate container. Notes: (i) The first and last pair of cupules (represented as circles on data sheet) are controls. (ii) Some antibiotics are added at two different concentrations, lowercase c, the lower concentration, and uppercase C, the higher concentration. Other antibiotics are added at only one concentration this permits two different antibiotics to be used side by side, eg. TIC and TZP. (iii) The test is invalid if there is no growth in both control cupules. A reading of C+,c- is nonsense data for that particular antibiotic - record as invalid. (iv) Any growth weaker than the control should be considered negative. If growth only occurs in the periphery of the cupule, this is a negative result. Show growth by filling in the appropriate circles. (iii) R = resistant, I = intermediate and S = sensitive. You can only have an intermediate result if the antibiotic is present at two concentrations. 46 47 ATB G(-) 5 Abbreviations Explanation a Abbreviation Antibiotic/Antibiotic mixture Antibiotic group or Actiona AMO amoxicillin AMC amoxicillin-clavulanic.acidb semi-synthetic penicillins (inhibit bacteria cell wall synthesis) PIC piperacillin TZP piperacillin + tazobactamc TIC ticarcillin TCC ticarcillin-clavulanic.acidb CFT cephalothin 1st generationd CXT cefoxitin 2nd generation CTX cefotaxim 3rd generation CAZ cefoperazone 3rd generation FEP cefepim 4th generation CXM cefuroxim 2nd generation MERO meropenem carbapenems IMI imipenem CA1 ceftazidime 1 3rd generation TSU cotrimoxazol (trimethoprim and sulfamethoxazole) combination inhibits DNA synthesis of tetrahydrofolic acid and dihydrofolic acid TOB tobramycin aminoglycoside AKN amikacin GEN gentamicin NET netilmicin CIP ciprofloxacin cephalosporins (inhibit bacteria cell wall peptidoglycan and murein synthesis) cephalosporin inhibits DNA synthesis does not include added components clavulanic.acid - non competitive inhibitor of penicillinase when combined with antibiotic c tazobactam - β-lactamase inhibitor preventing breakdown of piperacillin d cephalosporin classification Note: an e may or may not be added to the end of the antibiotic name b 48 LAB 4 REPORT Must use report format (Word) available on lab website. Open and save before entering the requested information. Report must be typed unless otherwise stated. Date: Student Name: Isolated Bacterium Name: Bacterium source: 3 1. Record requested information in the following table. Completed table fit on one page. Table 1. Enterobacteriaceae environmental isolation information. Characteristics Results Expected bacterium 1 bacterium 2 source NA gram stain - cellular morphology rod colony characteristics (T-soy) (1-2 days at either 28oC or 37oC) ecru 2-5 mm round, entire raise butyrous or mucoid MacConkey colony color red or translucent Record test results as + or – Describe test results only if differ from expected. Minimum of one set of results required. Characteristics Expected nitrate broth oxidative-fermentative test bacterium 1 red, + fermentative* in 1-2 days catalase bubbles, + oxidase no color , - Bacterium selected: ___________________ Is your bacterium acceptable for API 20E analysis? ______________ - = negative reaction, + = positive reaction *both open and closed (mineral oil) tubes yellow bacterium 2 49 3 2. Attach a copy of apiweb™ identification result printout (includes api 20E cupule data sheet). 2.5 3. a) Completely label and fill out the following ATB G- Antibiotic sensitivity test result sheet. Record bacteria name and source at the top. Include necessary footnotes. Sheet completed in pen acceptable. See procedure and procedure notes to help you completely label and fill out sheet. Bacterium name: Source: 50 1 b) Analyse your ATB G-antibiotic results (select any two antibiotics where your bacterium demonstrates resistance) as requested in the following table. If cephalosporin, indicate generation. # Susceptibility test results 1 Resistance Antibiotic nameb Mode of action of antibiotic. 2a Resistance a If your bacterium shows only one antibiotic resistance just state #2 is not applicable. b include chemical if present 0.5 c) State whether your isolated bacterium would be a clinical threat. Yes if high resistance to wide variety of antibiotics and or combined antibiotics and or $2nd generation cephalosporins). Circle or underline one: __ 10 YES or NO 51 LAB 5 Gram Positive Cocci: MICROCOCCACEAE and STREPTOCOCCACEAE Gram positive cocci (group 17)8 is a diverse group of bacteria. All are gram positive cocci and the majority are non-motile. There are three groups based on oxygen tension; strict aerobes, facultative anaerobes and strict anaerobe. Cell arrangement and the presence of catalase are two main features used to separate genera. In this lab, we will study selected species from the genera Staphylococcus and Streptococcus. Identification to genera Staphylococcus Streptococcus shape cocci cocci gram stain gram-positive gram-positive motility - - oxygen tension facultative anaerobe facultative anaerobe cell arrangement single, pairs, clusters or tetrads pairs, chains catalase + - 5% NaCl + - acid from glucose fermentation + + growth at 37oC + + Identification to species Staphylococcus. aureusb Staphylococcus epidermidis Streptococcus pyogenes Streptococcus agalactiae colony pigmentation white/cream/yellow white/cream/yellow white/cream/yellow white/cream/yellow Staphytect Plus - coagulase, Protein A, agglutination no agglutination no agglutination no agglutination β hemolysis (red blood cells) -b - + -c nitrate reduction + + - - capsular polysaccharides + = positive or growth; - = negative d = 21-79% are positive a - = rarely motile; b assume subspecies aureus β hemolysis = clear, colorless zone around colony b The majority of Staphylococcus aureus strains are α-hemolytic. β-hemolytic strains of Staphylococcus aureus do exist but the majority of human isolates are not β-hemolytic. When determining β-hemolysis make sure you check only single colonies. c Some strains of Streptococcus agalactiae are β-hemolytic, but not the strain handed out in the 3470 lab. 8 Holt, J.G., Krieg, N.R., Sneath, P.H.A., Staley, J.T., & S.T. Williams. 1994. Group 17 Gram-Positive Cocci. Bergey’s manual of determinative bacteriology, 9th ed. Philadelphia: The Williams and Wilkins Company. p 527-558. 52 Staphytect Plus Dry Spot Identification Test The diagnostic test, Staphytect Plus, differentiates Staphylococcus aureus strains, which contains coagulase, Protein A and certain capsular polysaccharides, from other staphylococci. These three characteristics of Staphylococcus aureus are assayed to ensure an accurate diagnosis. Staphytect Plus uses blue latex particles coated with porcine fibrogen and rabbit IgG including specific polyclonal antibodies raised against capsular polysaccharides of S. aureus. The reagent is dried onto the reaction card. When colonies of S. aureus are resuspended in saline and mixed on the reagent card there is rapid agglutination due to (a) coagulase ability to clump fibrogen, (b) Protein A ability to bind the Fc portion of IgG and (c) specific antibodies to capsular polysaccharide. All three reactions must take place to obtain agglutination. Staphylococcus epidermidis does not contain either coagulase or Protein A. PROCEDURE This procedure must be completed this week as next week is mid-term break. Week 5 1. Each student should take one unknown already streaked on T-soy agar that has been incubated for two days at 37oC. Since you are given a freshly streaked T-soy plate many of the identification tests may be performed today. 2. Record colony pigmentation. Microscopically examine the culture to determine cell shape and arrangement. Staphylococci never forms chains while all Streptococci form chains. Perform the catalase test. 3. Next perform both a Staphytect Plus test. Must be done the day of the lab or in then next 24 hours. 4. Additional identification tests that must be performed this week: gram stain, motility, catalase, acid from glucose, nitrate reduction, growth in 5% NaCl nutrient broth, βhemolysis. Streak blood agar plate directly from a SINGLE COLONY on the T-soy plate. Hemolysis results must be read from a single colony. 53 Staphytect Plus diagnostic test procedure a) Using a Pasteur pipette add 2 -3 drops of sterile saline to the small rings at the bottom of oval for both the test (your bacteria) and the control. Make sure the saline does not yet mix with the dried latex reagent. It is important that both the control and test be done at the same time to allow comparison. b) CONTROL Move and mix the control saline into the dry Control Latex spots until completely suspended and spread to cover the reaction area. c) TEST Using a sterile disposable loop, pick up approximately 5 colonies (more if very small) and carefully mix into test saline until a smooth suspension. Move the suspension into the dry Test Latex spots until completely suspended and spread to cover the reaction area. d) Pick up and rock the card for 20 seconds. Observe if agglutination occurs. Agglutination of blue latex (+) should show deeper blue particles in the mixture while negative result is no agglutination showing a smooth blue suspension. If agglutination occurs after 20 sec, this is a positive result. e) After recording results dispose of reagent card in plastic lined beaker on your bench top or in the BSC. 54 LAB 5 REPORT Must use report format (Word) available on lab website. Open and save before typing the requested information. Report must be typed and fitted to one page. Date: Student Name: 5 1. Record unknown Staplylococcus or Streptococcus identification data in the following table. Table 1. Test results for the identification of an unknown Staplylococcus or Streptococcus to the species level. Identification test Test result interpretation N/A shape gram stain motility cell arrangement NA catalase 5% NaCl acid from glucose colony pigmentationb N/A Staphytect Plus coagulase, Protein A, capsular polysaccharides β hemolysisa (red blood cells) nitrate reduction The unknown bacterium ______________ is ___________________________. identification code name test result = what you see, eg. color, bubbles, clearing (lysis) of red blood cells around, etc. interpretation = most often +, positive or -, negative a β hemolysis is complete lysis of red blood cells around the colony not α-hemolysis which is partial lysis with greening of red blood cells around the colony. Check only single colonies for hemolysis. b growth at 37o for two days __ 5 55 LAB 6 PSEUDOMONADACEAE The family Pseudomonadaceae are gram negative aerobic rods and cocci. All members are motile. Metabolism is respiratory, never fermentative. Strict aerobes. Catalase positive, and oxidase usually positive. For this lab all unknowns are from the genus Pseudomonas that can be identified using API 20 NE strips, most of clinical significance. API 20 NE strip is used to identify non-fastidious, non-enteric gram negative rods such as Pseudomonas. The strip consists of 8 biochemical identification tests and 12 assimilation tests. The principle of identification is the same as the API 20 E strip (see lab 3). The biochemical tests are inoculated with a saline bacterial suspension. The suspension reconstitutes the biochemical test media that either produces a color (if positive) upon bacterial metabolism or after addition of reagent. The assimilation tests are inoculated with bacteria suspended in supplied API AUX medium9 which may (positive) or may not support grow of bacterium depending on bacteria taxa. PROCEDURE Week 8 Remember to work around the weekend, the API 20 NE strip must be read on two consecutive days. API 20 NE strips are expensive, please take care. Possible Experiment Plan. Streak plates Day of Lab. Do all tests possible before the weekend. Store streak plate at 4oC over the weekend. Monday, inoculate the API 20 NE strip. Tuesday and Wednesday read API results. 1. Each student will receive one unknown from the genus Pseudomonas. Streak for purity and isolated colonies on two T-soy agar plate. Incubate at 28oC overnight (may take two days). Must be good colony growth. Store one streak plate at 4oC for API 20 NE. Use one T-soy streaked plate to perform OX cytochrome oxidase test (SpotTest™ oxidase reagent) and catalase test (3% H2O2). Discard after use. Also inoculate a T-soy broth for shape, Gram stain, and motility determination. Determine motility microscopically, do not use motility test medium for motility as Pseudomonas is a strict aerobe. *Ideally. 2. The day of the lab collect a strip, incubation tray (top and bottom), and white capped tube of API AUX medium from the TA. Place all in a Zip-lock bag. Label bag with your name, Place in Petri plate container and store at 4oC. 3. API 20 NE strip set up: Use fresh overnight streak plate to inoculate the API 20 NE strip Like previous API setup add 5 ml sterile distilled water to the bottom of the tray. Tilt to spread water into wells. Record your name and unknown identification on tray tab. Remove strip from foil and place in tray. 4. API 20 NE strip inoculation (use Pasteur pipettes): 9 API AUX medium: 2 g ammonium sulfate, 6.24 g monosodium sulfate, 1.5 g potassium chloride, 10.5 ml vitamin solution, 10 ml trace elements, 1.5 g agar, distilled water to 1 liter. Final pH 7.0-7.2. 56 You need two bacterial suspensions to inoculate the strip, saline and API AUX medium. (i) First prepare a saline suspension of your bacteria suspending ~5 colonies in 2 ml saline. Inoculate tests NO3 to PNG inclusive with saline suspension in tube only, not the cupule. Tilt the strip when adding suspension to tube to help prevent bubble formation. (ii) The API AUX medium supplied by the BioMerieux Company (only one/strip) comes in a glass ampule, open with care. There is a plastic cap. Grip vial and place your thumb on the angled top. Push away from you to break the top of the ampule. The broken top in held in the plastic cap. Remove cap to add 2 drops (~200 μl) of bacteria saline solution. Shake to suspend bacteria. Fill the tubes and cupules of tests |GLU| to |PAC| with API AUX medium suspension. (iii) Add sterile mineral oil to GLU, ADH and URE cupules. There must be a flat or slightly convex meniscus. Remember to add to GLU tube that is underlined not boxed. (iv) Cover tray securely and place in a zip-locked bag. Incubate at 28oC for 22-24 hours. 5. Record all spontaneous results and interpretation (+ or -) on data sheet for 24 h. See API 20 NE result interpretation table. This excludes tubes that require reagents added, NO3 (presence of NO2 or N2) and TRP. After adding the following reagents to these tubes record color and interpretation (+ or - ) on API 20 NE data sheet (24 h). TRP Add 1 drop of Kovac's reagent (SpotTestTM Indole Reagent) to TRP microtube. Must be done last or 2nd last. Do not replace cover before reading. NO2 Add 1 drop each of Reagent A (sulfanilic acid) and Reagent B (α-naphthylamine) to NO3 tube, make sure it comes in contact with bacteria suspension. Wait 5 min. Record result. NO2 and N2 must be done last or 2nd last. Do not replace cover before reading. N2 If the nitrate test is negative after 5 min, add a small spatula of Zn granules to NO3 tube. Do not replace the cover before reading. 6. Do not discard API 20 NE strip yet. Use apiweb based licence to determine bacteria using 24 h results. REMEMBER to remove gloves and wash hands before using the computer. Same procedure as previous only this time select API 20 NE. Again use Color check on apiweb site to assist you with determining positive and negative test results. Print the printout identification sheet and label as 24 hours. If results valid after 24 h (printout indicates whether or not an additional 24 h incubation are required), you are done, discard strip. 7. If the results screen states ‘not valid before 48 h’, you need to incubate for a further 24 h. Using a Pasteur pipet, remove1 contents of NO3 and TRP wells. Discard in solvent hazardous waste container. Replace API 20 NE cover securely, place in zip-locked bag and return to centre part of 28oC incubator for a further 22-24 h. Again record all results in the 48 hour section of API 20NE data sheet, excluding NO2, N2 and TRP results - just record the 24 h results again. After final reading discard API strip in plastic lined container (bench top). Again use apiweb to identify bacterium and print printout. Label as 48 hours. 1 When incubating the additional 24 hours test results may change independent of bacterium if added chemicals not removed. 57 Table 3. API 20 NE result interpretation. TUBE Active Ingredient/Reaction RESULTS Negative NO3 reduction of potassium nitrate (NO3) to nitrite (NO2) Positive Reagent A and B/within5 min colorless reduction of potassium nitrate (NO3) all the way to nitrogen gas (N2) pink-red Zn/within 5 min pink TRP Metabolism of tryptophan results in the formation of indole. colorless SpotText Indole Reagent-immediate colorless/pale green/yellow pink GLU fermentation of D-glucose blue to green yellow ADH Arginine dihydrolase transforms L-arginine into ornithine, ammonium and CO2. This causes a pH rise in the acid-buffered medium and a change in the indicator from yellow to pink. yellow orange/pink/red URE Urease releases ammonia from urea. Urea causes the pH to rise and changes the indicator from yellow to red. yellow orange/pink/red ESC β-glucosidase hydrolysis of esclulin to produce esculetin which reacts with ferric citrate to produce a dark brown complex. yellow brown/black pigment GEL Protease hydrolysis of gelatin (impregnated with black pigment). no pigment diffusion any diffusion of black pigment PNG Presence of β-galactosidase. Detected by the hydrolysis of 4nitrophenyl-β-D-galactopyranoside - converted to a yellow product. colorless yellow |GLU| |ARA| |MNE| |MAN| |NAG| |MAL| |GNT| |CAP| |ADI| |MLT| |CIT| |PAC| metabolism of D-glucose metabolism of L-arabinose metabolism of D-mannose metabolism of D-mannitol metabolism of N-acetyl-glucosamine metabolism of D-maltose metabolism of potassium gluconate metabolism of capric acid metabolism of adipic acid metabolism of malic acid metabolism of trisodium citrate metabolism of phenylacetic acid transparent transparent transparent transparent transparent transparent transparent transparent transparent transparent transparent transparent opaque opaque opaque opaque opaque opaque opaque opaque opaque opaque opaque opaque OX cytochrome oxidase (see lab manual appendix) If the color is not exactly as described in the table but is close to either positive or negative, record as such. However, if the color is mid-way between a positive and a negative record as ?. Use no more than 2 ?s in your biochemical results as the API system will not identify your bacterium. The assimilation/metabolism test cupules are backed by two red strips to facilitate reading of test result. You cannot use ?s for metabolism tests, either there is growth or there isn’t! 58 Table listing possible organisms that can be identified using API 20 NE strip. For each test the expected percentage of positive reactions are given. Greater than 75% is + and less than 25% is negative. (API 20 NE manual. BioMerieux 2003/10) 59 60 Sample DATA: 61 LAB 6 REPORT Must use report format (Word) available on lab website. Open and save before entering the requested information. Report must be typed unless otherwise stated. Student Name: Unknown Identification Code: Unknown Bacterium Name: 4 1. a) Record requested information in the following table. Table 1. Preliminary Screening Test Results for unknown Pseudomonas. Cellular shape Gram stain* Catalase* Motility* * record as + or b) Complete API 20 NE data sheet below. Record + and - test results for 24 h and 48 h (if applicable) - 24 h results in circle above cupule and 48 h results in space below contained with dashed line. Record API profile number(s) in ovoid spaces provided (both 24 h and 48 h if applicable). Handwritten in pen is acceptable. No other information is required here. Note: As NO2 and N2 results are considered for NO3 reduction, respectively +|NA and -|+ are both positive results for NO3 reduction. 62 3 2. Record all requested information in the following table. Table 2. API 20 NE Biochemical Test Results for unknown Pseudomonas. COLOR* RESULT (Incubation time: _____________ ) TUBE NO3 NO2 N2 TRP GLU ADH URE ESC GEL PNG OX** *state exact color, no other details are required except for GEL, record as clear or black without or with diffusion. ** Cytochrome oxidase test (see appendix for protocol) 3 __ 10 3. Include a copy of apiweb identification result printout for 24 h and 48 h (if applicable). Label appropriate printout with time, 24 h or 48 h (handwritten in pen).Printed sheet must be printout to include all required information (includes cupule data information). 63 APPENDIX PHASE CONTRAST LIGHT MICROSCOPE OPERATION for ECLIPSE E10010 with SLIDE PHASE CONDENSER Light waves go through viable bacteria almost unchanged. As a consequence unstained bacteria are very difficult to observe using a bright field light microscope. The phase contrast microscope has a phase plate in the objective lens (Ph3 DL x100 1.25 oil immersion) and a matching Ph 4 or Ph3 condenser making viable cells visible by both retarding light waves and reducing amplitude of waves. This increases the contrast between the cell and the background. The phase contrast objective lens used in this lab is a dark phase; the bacteria appear dark in a bright field. The type of phase chosen depends on the type of material being observed. In our case, the DL phase objective is best suited for viable cells (bacteria) which differ little in refractive index from the background. Procedure Note: when recording the magnification of microscope view, remember the eye piece lens is x10. 1. 2. 3. 4. 5. 6. 7. 8 Prepare a slide. For the oil immersion objective all viable cell slides require a cover slip. Only stained slides do not require a cover slip. If viewing viable cells, it is best to place the cells inside a permanent pen circle to facilitate focusing the microscope. Turn on the light (less intense for lower magnification and higher intensity for the phase contrast oil immersion lens). The light switch is located on the left side of the microscope with a separate brightness control knob. Place the slide on the stage and swing the 20x objective into position. Push the slide condenser to blank position (whiteout). The coarse adjustment knob is only located on the left side of the microscope. While looking at the stage (not in the microscope eyepieces) raise the stage as high as possible using the coarse adjustment knob turning away from you. The highest position of the stage does not come into contact with the 20x objective. Focus on black circle line by lowering the coarse knob, turning towards you. Fine focus on line. Adjust the interpupillary distance (distance between eyepiece tubes) to fit your eyes. Adjust the condenser level to as high as possible (lever down) for viable microorganisms (Phase). May need to lower for brightfield if stained cells. Place 1 to 2 drops of oil on coverslip (vial cells). Swing phase contrast oil immersion objective (Ph3 DL 1.25 x100) into position. Push the slide condenser to Ph3 or Ph4. Use the metal lever on the front of the slide condenser, to adjust the opening of the aperture. For the new Eclipse E100 microscope the setting is predetermined - just set to whatever is the magnification of the objective you are using. The aperture diaphragm should not be used to control brightness, use the light intensity knob for brightness. The aperture diaphragm controls the numerical aperture of the illumination (ideally 70% to 80% of objective numerical aperture (100x /1.25). 10 Nikon Microscope Eclipse E100 instruction manual. Nikon Corporation. 2009. 64 9. Adjust the diopters, located at base of each eyepiece to suit your eyes. Holding the top of each eye piece turn clockwise until it stops (standard setting) -lowest setting of each eye piece. First focus on specimen in the usual manner using both eyes and focus knobs. Next focus one eye at a time with respective eyepiece diopter not the focus knobs (turning top of eyepiece counter clockwise, ie., raises eye piece).With the two diopter system, the microscope is parfocal (all objectives in focus at the same time) for all users regardless of the individual’s eyes. Note: ideally the diopter is adjusted after first focusing with the 40x objective and returning to 20x objective to adjust each eyepiece diopter. As only two objectives on your microscope adjust diopters using only the Ph3 DL 1.25 x100 objective. 10. Slight adjustment of the condenser knob may be necessary to fine focus. Usually the condenser knob is turned up for best phase (viable cells) view. Remove slide. Clean microscope objective lense with 2-propanol and turn off light. Replace plastic cover. Return the microscope to shelf. 11. Hints: a. Use a permanent marker circle on slide to put bacteria in and to focus. b. To initially find the approximate height of the stage, put the oil immersion objective into position and slide in position raise the stage with the coarse focus knob until slide or coverslip is 1 or 2 mm from objective. Then follow above procedure. c. It is not always necessary to focus using the lower magnification objective first. Once you become familiar with the phase contrast microscope, it should become easy to focus and set up your microscope using the oil immersion lens. d. Bacteria cannot be viewed using the X20 objective, you need to use the oil immersion lens (X1000 total magnification). Eyepiece magnification is always X10. d. Whenever you move the stage up, always look at the stage, never through the eyepiece. Turning of coarse focus knob towards you lowers the stage, do this while observing specimen. The Phase contrast microscopes are located on shelves. It is the student’s responsibility to remove the microscope for use and replace when finished. Always carry the microscope with two hands, one holding arm and other under base. If you have difficulty using the microscope, get help, either the TAs or lab instructor. If a light is burned out or the microscope does not 65 work, leave the microscope on top of one of the side benches or the center bench with a note stating problem. TIPS for x1000 Ph4 phase contrast setting: • if you do not use enough oil, a poor microscopic view will occur • fully rack up the condenser for viewing viable cells • set the diopters to match your eyes • light turned up to maximum for viewing viable cells • use a pen marking to focus on Trouble Shooting: No light – check that that cord is fitted tight to the microscope. Blurred focus – check condenser fit up tight facing front, check that the blue filter (if present) is level in holder, check that the light casing is fitted correctly in base. 66 67 BASIC DIFFERENTIAL IDENTIFICATION TESTS Note: If you require a review of basic microbiology procedures please refer to your second year Microbiology lab manual. CELLULAR MORPHOLOGY Microscopically observe and record size (relative only - small, medium, large), shape and arrangement of a fresh sample culture. Refer to the Systematics MBIO 3470 Reference File for details on phase-contrast microscope, wet mount preparation, etc. Excerpted from lab textbook; Understanding Microbes: A laboratory textbook for microbiology, by G. William Clause, W. H. Freeman and Co., New York (1988). COLONY CHARACTERISTICS Briefly outline colony characteristics; color, size (mm) unless puntiform, form, elevation, margin, texture/consistency, and surface qualities (Wall, M. 2001. Introductory Microbiology lab manual. Department of Microbiology, University of Manitoba) State temperature and time of incubation. 68 GRAM STAIN Introduction: One of the most important and widely used procedures for differentially characterizing bacteria is the gram stain. Bacteria are divided into two groups, based on whether they retain or lose the 'primary stain' (crystal violet) after mordanting with iodine, treatment with alcohol and counter staining with safranin. Gram positive coccoid artifacts may be present in your stained sample. This is an artifact present in the safranin strain, not a contaminant in your bacteria sample. Procedure: 1. Prepare a smear of bacteria (from a culture not more than 24 hours old) on a slide. Air dry. Fix the smear by passing over the pilot flame. Stain the smear with 3 to 5 drops of crystal violet solution for 1 min. Wash with water for a few seconds. 2. Apply 3 to 5 drops of Gram’s iodine solution and let sit for 1 min. Wash slide with water. 3. Decolorize with 3 to 5 drops of alcohol-acetone until free color has been washed off (approximately 5-15 sec). Wash slide with water and blot dry. 4. Counter stain smear for 10 sec with 3 to 5 drops of safranin. Wash slide and blot dry. 5. To view a stained cell, use the oil immersion objective and set the slide condenser to the blank side (empty hole for brightfield microscopy). 6. Confirm results by doing the KOH string test (procedure follows). Interpretation: Those organisms that retain the crystal violet appear dark blue, purple or violet and are designated gram positive; those that lose the crystal violet and are subsequently stained by the 'counter-stain' (safranin) appear red and are designated gram negative. 11 KOH STRING TEST: Confirmation of Gram stain Introduction: Dilute alkali solutions (3% KOH) lysis gram negative cell walls while the cell walls of gram positive bacteria are not disrupted. When gram negative bacteria are lysed (5 to 60 seconds) the DNA is released causing the mixture to become viscous (1). Procedure: 1. Place a drop of 3% KOH on a glass slide. 2. Using a loop remove a visible amount of fresh bacteria from a colony(s) on a T-soy agar plate. 3. Stir bacteria into KOH. Mix continuously in a 1 to 2 cm area on the glass slide for a maximum of 1 minute. 4. Frequently raise the loop 1 cm off surface to test if the mixture is becoming viscous and has the ability to “string out”. Interpretation: Gram negative: Mixture becomes viscous and “strings out”. Gram positive: After 1 minute the mixture is not viscous and does not string out. 11 Powers, E.M. (1995) Efficacy of the Ryu Nonstaining KOH technique for rapidly determining Gram reactions of food-borne and waterborne bacteria and yeasts. In Applied and Environmental Microbiology. 61:3756-3758. 69 MOTILITY Bacterial motility may vary with temperature. A. Semisolid agar Introduction: For bacteria that grow rapidly (eg. Enterobacteriaceae), deep tubes containing semisolid agar (0.4%) are most commonly used to check for motility. Tetrazolium salt is added to aid visualization of bacteria motility. The tetrazolium salts (colorless) is converted to an insoluble red formazan by the reducing bacteria. This motility method cannot be used by fastidious bacteria (slow growing bacteria) as tetrazolium inhibits their growth. Media: Motility test medium (Edwards and Ewing) Bacto Tryptose 10 g NaCl 5g Bacto Agar 5g 2,3,5-triphenyl tetrazolium chloride 0.05 g Distilled water to 1 liter Final pH = 7.2 Procedure: Inoculate deep tubes with a single stab, using a stick, to almost the bottom of the tube (do not touch the stick to the bottom of the tube). It is important that the stick is inserted straight into the agar and drawn straight out the same line. If the stick is pulled to one side while drawing the needle out of the agar, it will appear that the organism is motile. Culture incubated 28oC and/or 37oC just until good growth. Interpretation: Macroscopic examination of medium for diffuse zone of growth flaring out from the line of inoculation indicates motility. State temperature of observations. B. Direct Microscope observation Introduction: In order for a bacterial culture to show motility, (1) it must be flagellated, (2) must be young and actively growing in the correct culture conditions, and (3) treated gently such that the cells retain their flagella. Procedure: Observe motility using a drop of fresh bacterial culture (culture incubated 28oC and/or 37oC just until good growth). Use either a hanging drop slide or ordinary slide with the phase contrast oil immersion objective. Interpretation: A. Purposeful movement of bacteria (not brownian movement). 70 GENERAL MEDIA T-soy (tryptic soy) agar: 15 g. Bacto tryptone, 5 g. Bacto soytone, 5 g NaCl, 15 g. Bacto agar in 1l iter distilled water. pH6.8 ATB medium: Mueller Hinton broth (300 g. infusion of beef, 17.5 g acidaseTM peptone, 1.5 g starch), 0.05 g CaCl2*, 0.02 g MgSO4*, 1.5 g agar in a final volume 1 liter distilled water. * added separately T-soy medium is a complex medium that allows growth of wide range bacteria as rich in basic requirements, energy, carbon, nitrogen, trace minerals, and vitamins. Tryptone enzymatic (trypsin) digestion of casein mainly N source but also small source of carbon. Soytone - pancreatic digest of soybean meal. Supplies complex nutrients nitrogen, carbon, energy, minerals, trace metals and vitamins. NaCl - sodium mineral source ATB medium is a standardized complex medium specifically designed for antimicrobial susceptibility test. Magnesium and calcium are essential minerals. Added separately after autoclaving to prevent precipitation during autoclaving with peptone and infusion of beef. Peptone, digested protein - mainly nitrogen source but carbon is present. Infusion of beef supplies all nutrients - nitrogen, carbon, energy, minerals, trace metals and vitamins. 71 BIOCHEMICAL DIFFERENTIAL IDENTIFICATION TESTS Many of the following tests are excerpted directly from the textbook, Color Atlas and Textbook of Diagnostic Microbiology, 2nd edition (1983) by Koneman EW, Allen, SD, Dowell, Jr Vr, and HM Sommers, JB Lippincott company, New York. 1. The majority of the biochemical tests are performed at optimum growth temperature of the bacterium. 2. The incubation time stated in tests are for rapidly growing bacteria. The majority of identification tests should be reported after 48 hours at 37oC for Enterobacteriaceae. If bacteria are slow growers, the biochemical growth time will increase. CARBOHYDRATE FERMENTATION Introduction: The ability of bacteria to ferment sugars, such as glucose, lactose, sucrose, inositol, etc. is an important characteristic for species identification. The metabolism of glucose is used as a screening test for Enterobacteriaceae as all members ferment glucose. Principle: The standard broth medium contains basal medium, 1% sugar and bromocresol purple (yellow at pH = 5.2 and purple at pH = 7.0). The medium has a pH slightly above 7.0 and is therefore purple due to the presence of bromocresol purple. If there is acid production from the fermentation of the sugar the medium will turn yellow due to presence of bromocresol purple. The term fermentation is used somewhat loosely in this lab as we follow the fermentation of a particular sugar by acid production which does not necessarily mean oxidativereduction metabolism under anaerobic conditions with an organic substrate serving as the final electron acceptor (definition of fermentation), as other pathways and possibly oxygen may be involved. Procedure: Inoculate a carbohydrate broth medium with pure bacterial culture (from streak Tsoy plate). Incubate at optimum temperature for 2-4 days (this depends on the growth rate of the bacteria). Some carbohydrate broth tubes also contain Durham vials to detect the presence of gas production. Interpretation: Color change from purple to yellow indicates utilization of carbohydrates. Presence of air bubble in Durham vial indicates gas production during fermentation of sugar. Note: The TSI slant can also be used to study carbohydrate metabolism. Three carbohydrates are included in the medium; sucrose, glucose, and lactose. Refer to H2S production section for details. Frequently there is not a complete positive reaction. If the Durham vial turns yellow or partially yellow and the remainder of the tube remains purple, there is little acid production. This result should be considered as (+) slow positive or negative. If possible when analyzing data, put the least importance on this result. 72 CATALASE Introduction: The catalase test is used to screen bacteria suspected of belonging to the family Enterobacteriaceae, as all members of this family are positive. However, most aerobic and facultatively anaerobic bacteria (not streptococci) possess catalase activity. Principle: Chemically, catalase is a hemoprotein, similar in structure to hemoglobin, except that the four iron atoms in the molecule are in the oxidized (Fe4+) rather than the reduced (Fe2+) state. Organisms demonstrating catalase activity have the ability to oxidize hydrogen peroxide to water and oxygen. The chemical equation is CATALASE 2H2O2 -----------------------> 2H2O + O2 Procedure: Test the catalase activity by adding one drop of 3% H2O2 on an isolated colony. The catalase test should be performed on colonies that are no older than 24 h, since the enzyme is present only in viable cultures and false negatives may occur in older cultures. Interpretation: Rapid appearance and sustained production of gas bubbles or effervescence constitutes a positive test. Since some bacteria may possess enzymes other than catalase that can decompose hydrogen peroxide, a few tiny bubbles forming after 20 to 30 seconds is not considered a positive test. CITRATE UTILIZATION Introduction: Sodium citrate is a salt of citric acid, a simple organic compound found as one of the metabolites in the tricarboxylic acid cycle (Krebs cycle). Some bacteria can obtain energy in a manner other than the fermentation of carbohydrates by utilizing citrate as the sole source of carbon. The measurement of this characteristic is important in the identification of many members of the Enterobacteriaceae. Any medium used to detect citrate utilization by test bacteria must be devoid of protein and carbohydrates as source of carbon. Principle: Citrate utilization by a test bacterium is detected in citrate medium by the production of alkaline by-products. The medium contains sodium citrate as the sole source of carbon and ammonium phosphate as the sole source of nitrogen. Bacteria that utilize citrate as a carbon source can also obtain nitrogen from ammonium phosphate with the production of ammonia leading to alkalinization of the medium with the conversion of ammonia (NH3+) to ammonium hydroxide (NH4OH). Bromothymol blue, yellow below pH 6.0 and blue above pH 7.6, is the indicator. Media and reagents: Simmons citrate medium, pH 6.9 Procedure: Inoculate a citrate slant with a pure culture of the test organism. Incubate at optimum temperature for 48 hours. 73 Interpretation: A positive test is represented by the development of a deep blue color anywhere along the slant within 48 hours, indicating that the test organism has been able to utilize the citrate contained in the medium, with production of alkaline products. A positive test may also be read without a blue color if there is visible colony growth along the inoculation streak line. A positive interpretation from reading the streak line can be confirmed by incubating the tube for an additional 24 hours, when a blue color usually develops. A negative test result is either no growth or inhibited growth with no color change. CYTOCHROME OXIDASE Introduction: The cytochromes are iron-containing hemoproteins that act as the last link in the chain of aerobic respiration by transferring electrons (hydrogen) to oxygen, with the formation of water. The cytochrome system is found in aerobic, microaerophilic, and some facultatively anaerobic organisms, so the oxidase test is important in identifying organisms that either lack the enzyme or are obligate anaerobes. The test is most helpful in screening colonies suspected of being one of the Enterobacteriaceae (all negative) and in identifying colonies suspected of belonging to other genera such as Pseudomonas. Principle: In the systematic's lab, the cytochrome oxidase test utilizes the SpotTestTM OXIDASE REAGENT based on Kovac’s reagent N, N, N’, N -tetramethyl-ρ-phenylenediamine dihydrochloride. In the reduced state the dye is colorless; however, in the presence of cytochrome oxidase and atmospheric oxygen, ρ-phenylenediamine is oxidized, forming indolphenol blue. Ascorbic acid (0.2%) has been added to the reagent as a reducing agent to decrease auto-oxidation of the reagent and increase stability. Media and reagents: SpotTestTM OXIDASE REAGENT: 10 g N, N, N’, N -tetramethyl-ρ-phenylenediamine dihydrochloride and 2 g ascrobic acid per liter distilled water. Stored in the dark at room temperature as the reaction area of the slide is light sensitive (protect from light). Supplied in dropper type disposable dispenser. Vial contains approximately 0.75 ml reagent. Procedure: 1. Streak plate a T-soy plate of your bacterium for single colonies. Incubate at optimum temperature until good growth just appears. 2. If available, use an open vial of SpotTestTM OXIDASE REAGENT. 3. If no open vial is available, open a new vial. Holding the dispenser upright and with the tip pointing in an outward direction, squeeze gently to crush the glass ampule inside the dispenser. When using reagent, invert and squeeze slightly to dispense the reagent on a per drop basis. 4. Using a well separated colony on T-soy agar, add 2-3 drops of SpotTestTM OXIDASE REAGENT directly to the colony to be tested. 4. Examine the reaction area for the immediate appearance (within the first 20 seconds) of purple to black around edge of drop. 74 5. Return the vial to the cupboard. If the vial is not empty, stand the vial upright in the cupboard. If the vial is empty discard in container provided in the cupboard. Interpretation: Positive reaction: immediate appearance (within the first 20 seconds) of purple to black around edge of drop. Negative reaction: bacterium produces no color change or only a change to light grey within 20 second time period. Disregard all color changes after 20 seconds. Note: colonies in contact with oxidase reagent are no longer viable DECARBOXYLASES Introduction: Decarboxylase are a group of substrate-specific enzymes that are capable of attacking the carboxyl (COOH) portion of amino acids, forming alkaline-reacting amines. This reaction, known as decarboxylation, forms carbon dioxide as a second product. Each decarboxylase enzyme is specific for an amino acid. Lysine, ornithine, and arginine are routinely tested in the identification of the Enterobacteriaceae. The specific amine products are as follows: decarboxylase Lysine ---------------> Cadaverine + CO2 decarboxylase Ornithine -------------------> Putrescine + CO2 decarboxylase Arginine ----------------> putrescine + urea + CO2 Principle: Decarboxylase medium is the base most commonly used for determining the decarboxylase capabilities of the Enterobacteriaceae. The amino acid to be tested is added to the decarboxylase base prior to inoculation with the test organism. A control tube, consisting of only the base without the amino acid, must also be inoculated in parallel. Both tubes are anaerobically incubated and overlaid with mineral oil. During the initial stages of incubation, both tubes turn yellow owing to the fermentation (acid production) of the small amount of glucose in the medium. If the amino acid is decarboxylated, alkaline amines are formed and the medium reverts to original color. 75 Media and reagents: Decarboxylase medium base (Falkow used for Enterobacteriaceae and Pseudomonas) peptone 5g yeast extract 3g dextrose 1g bromocresol purple 0.0 2 g distilled water to 1 liter Final pH = 6.8 Amino acid: 0.5% L form of amino acid. Procedure: Inoculate the test amino acid and control decarboxylase tube with test organism (through the mineral oil layer into medium). Prior to use, the broth tubes are stored at 4oC. Incubate at optimum temperature for 2 days. Interpretation: Falkow: The original color of the medium is purple. Conversion of the control tube to a yellow color indicates that the organism is viable and that the pH of medium has been lowered sufficiently to change the color of the indicator. IF THE CONTROL TUBE DOES NOT CHANGE COLOR THE TEST RESULTS FOR THE AMINO ACIDS ARE NOT VALID. As this indicates that the bacteria is unable to grow in this medium, assuming that the tube was inoculated with adequate number of bacteria. A blue yellow color is considered negative for test amino acid. If the amino acid tube reverts back to purple, this indicates a positive test due to the release of amine from the decarboxylase reaction. ESCULIN HYDROLYSIS Introduction: Esculin hydrolysis is used to characterize gram-negative rods and anaerobic bacteria. Principle: Esculin is a coumarin derivative that belongs to the class of compounds known as glycosides. Hydrolysis of esculin produces glucose and the aglycone esculetin in an appropriate medium. Esculetin reacts with ferric citrate to form a dark brown complex which diffuses into the medium. Media and reagents: Esculin slant nutrient broth esculin ferric citrate agar distilled water 4g 0.05 g .25 g 7.5 g to 500 ml Procedure: Inoculate an esculin slant with test bacteria. Incubate at optimum temperature for 2 or more days depending on growth rate of test bacteria to reduce the chance of false negative. Interpretation: A positive test is read by observing the browning or blackening of the slant around the bacterial growth. 76 GELATIN LIQUEFACTION Introduction: Gelatin is a complex derivative of animal collagen that has poor nutritive value and is used in culture media to test the ability of organisms to produce gelatinase. Principle: Gelatinases are proteolytic enzymes capable of hydrolysing gelatin so that its ability to form a gel is lost. Bacteria that secrete gelatinase can be detected by observing the liquefaction of culture media or matrixes (charcoal) containing gelatin, following inoculation of the test organism and incubation for the appropriate period of time. Media and reagents: Procedure 1: nutrient gelatin medium beef extract peptone gelatin distilled water final pH = 6.8 3g 5g 120 g to 1 liter Procedure 1: Gelatin tubes are stored at 4oC (gelatin changes from a gel to a liquid at 28oC). Remove gelatin tubes just prior to use. Using an sterile stick scrape several colonies from T-soy plate and stab the gelatin deep to a depth 2 mm from bottom of tube. Set up an control tube to be run along with the bacterium being tested. Incubate at optimum temperature for 3 to 7 days. Interpretation 1: Check after three days. Place both tubes (test bacterium and control) at 4oC for 1 hour. Tilt the tubes to see if liquefaction has occurred. Compare the test bacterium with the control. HEMOLYTIC REACTION Introduction and principle: β-hemolysis - A clear, colorless zone surrounds the colonies – should be able to see through the medium. There is complete lysis of the red blood cells. (note: α-hemolysis -the colony is surrounded by a zone of intact but lighter colored erythrocytes that may have a greenish color – cannot see through the medium. This appearance is generally due to the action of peroxide produced by the bacteria. Do not mistake α-hemolysis for β-hemolysis.) Media and reagents: 5% blood agar plates with trypticase-soy base Procedure: Streak a blood agar plate with test organism in order to obtain isolated colonies. May streak directly from single colony on T-soy plate to blood agar plate. Incubate at optimum temperature for 48 hours. Observe a SINGLE COLONY for the presence of β-hemolysis. Results must be from a single colony. 77 HYDROGEN SULFIDE PRODUCTION Introduction: The ability of certain bacteria to liberate sulfur in the form of H2S from sulfur containing compounds is an important characteristic for identification. Principle: H2S can be detected in a test system if the medium contains a source of sulfur (sodium thiosulfate, peptone containing cysteine and methionine), an H2S indicator (ferrous sulfate), the indicator phenol red and basal medium that supports the growth of the bacteria. The sequence of steps leading to the production and detection of H2S in a test system is thought to be as follows, (1) release of sulfide from cysteine or thiosulfate by bacterial enzymes, (2) coupling of sulfide with hydrogen to form H2S and (3) detection of the H2S by heavy metal salts, such as iron in the form of an insoluble heavy metal-sulfide, a black precipitate. Acid production by the test organism is necessary for blackening to occur as hydrogen ions are required for the production of H2S. TSI (triple sugar iron) medium contains ten times more lactose and sucrose than glucose. Therefore if bacteria metabolize only glucose, acid accumulates only in the butt (yellow) where there are anaerobic conditions. Acids do not accumulate in the slant due to oxidative breakdown of acids and neutralization of acids by alkaline products of peptone (red). Media and reagents: TSI agar slant. Procedure: Inoculate the TSI slant by stabbing the butt and drawing the stick over the surface of the slope. Incubate 18 to 24 hours or good growth is apparent at optimum temperature. Interpretation: reaction interpretation ____________________________________________________________________________ Acid deep (yellow)/alkaline slant (red) glucose fermented, lactose and/or sucrose not fermented Acid deep (yellow)/acid slant (yellow) lactose and/or sucrose fermented Alkaline deep and slant (all red) glucose, sucrose, and lactose not fermented Deep split or displaced gas production Deep blackened H2S production 78 INDOLE Introduction: Indole, a benzyl pyrrole, is one of the metabolic degradation products of the amino acid tryptophan. Bacteria that possess the enzyme tryptophanase are capable of hydrolysing and deaminating tryptophan with the production of indole, pyruvic acid, and ammonia. Indole production is an important characteristic in the identification of many species of microorganisms, being particularly useful in separating Escherichia coli (positive) from members of the Klebsiella-Enterobacter-Hafnia-Serratia group (mostly negative). Principle: The indole test is based on the formation of a red to red-violet qunoidal compound at an acid pH when indole reacts with aldehyde group of ρ-dimethylaminobenzyaldehyde. Reagents: Broth (1% tryptophan) peptone or trypticase NaCl distilled water SpotTest™ Kovacs Indole Reagent: isoamyl alcohol ρ-dimethylaminobenzaldehyde (DMABA) concentrated HCl 2g 0.5 g to 100 ml 150 ml 10 g 50 ml Note: Take extreme care when handling indole reagent - do not inhale or allow contact with the skin. Keep away from bunsen burner as vapors are heavier than air, thus sinking and travelling could result in explosion when in contact with open flame. Procedure: 1. Inoculate indole medium (tryptophan broth) with test bacterium and incubate at optimum temperature for 48 hours. 2. If available, use an open vial of SpotTestTM Kovac Indole Spot Test Reagent 3. If no open vial is available, open a new vial. Holding the dispenser upright and with the tip pointing in an outward direction, squeeze gently to crush the glass ampule inside the dispenser. When using reagent, invert and squeeze slightly to dispense the reagent on a per drop basis. 4. After growth, add 4 to 5 drops of SpotTest™ Indole Reagent (Kovacs) down the inner wall of the tube. 5. Return the vial to the cupboard. If the vial is not empty, stand the vial upright in the cupboard. If the vial is empty discard in beaker provided in the cupboard. Interpretation: Positive reaction: The development of a bright fuchsia red color at the interface of the reagent and the broth within 3 minutes after adding the reagent. Negative reaction: There is no change in the color of the medium; the color of medium plus reagent. Note: A variable level may be seen in a few organisms due to marginal levels of tryptophan deaminase. 79 METHYL RED (MR) Introduction: Methyl red is a pH indicator with a range between 6 (yellow) and 4.4 (red). The pH at which methyl red detects acid is considerably lower than the pH for other indicators used in bacteriologic culture media. Thus, in order to produce a color change, the test organism must produce large quantities of acid from the carbohydrate substrate being used. Principle: The methyl red test is a quantitative test for acid production, requiring positive organisms to produce strong acids (lactic, acetic, formic) from glucose through the mixed acid fermentation pathway. Many species of the Enterobacteriaceae may produce strong acids that can be detected by methyl red indicator during the initial phases of incubation, only organisms that can maintain this low pH after prolonged incubation (48 to 72 hours), overcoming the pH buffering system of the medium, can be called methyl red positive. Media and reagents: The media used is the methyl-red Voges-Proskauer (MR/VP) broth, as formulated by Clark and Lubs. This medium also serves for the performance of the VogesProskauer test. MR/VP broth (final pH = 6.9) polypeptone 7g glucose 5g dipotassium phosphate 5g distilled water to 1 liter Methyl red pH indicator methyl red, 0.1 g in 300 ml of 95% ethanol distilled water, 200 ml Procedure: Inoculate the MR/VP broth with a pure culture of test organism. Incubate broth at optimum temperature for 48 to 72 hours (depends on the growth rate of the bacterium). At the end of this time, add 5 drops of methyl red reagent directly to the broth. Interpretation: The development of a stable red color in the surface area of the medium indicates sufficient acid production to lower the pH to 4.4 and constitutes a positive test. Since other organisms may produce lesser quantities of acid from the test substrate, an intermediate orange color between yellow and red may develop. This does not indicate a positive test. 80 NITRATE REDUCTION Introduction: The capability of an organism to reduce nitrate to nitrites is an important characteristic used in the identification and species differentiation of many groups of microorganisms. All Enterobacteriaceae except certain biotypes of Enterobacter agglomerans and Erwinia demonstrate nitrate reduction. Principle: Organisms demonstrating nitrate reaction have the capability of extracting oxygen from nitrates to form nitrites and other reduced products. The chemical equation is NO3- + 2e- -------> NO2 + H2O The presence of nitrites in the test medium is detected by the additon of α-naphthylamine and sulfanilic acid, with the formation of a red diazonium dye, ρ-sulfobenzene-azo-α-naphthylamine. Media and reagents: Nitrate broth Reagent A - 8 g sulfanilic acid, 300 ml glacial acetic acid, distilled water to 1 liter. Reagent B - 5 g α-naphthylamine, 5 N acetic acid to 1 liter. Procedure: Inoculate the medium with test organism and incubate at optimum temperature for 18-24 hours. At the end of the incubation period add several drops of each, adding first reagent A then reagent B. Interpretation: The development of a red color within 5 min after adding the test reagents indicates the presence of nitrites and represents a positive reaction for nitrate reduction. If no color develops after adding the test reagents, this may indicate either that nitrates have not been reduced (a true negative reaction), or that they have been reduced to products other than nitrites, such as ammonia, molecular nitrogen (denitrification), nitric oxide (NO), or nitrous oxide (N2O), and hydroxylamine. When obtaining a negative reaction it is necessary to add a small quantity of zinc dust to each reaction. Zinc ions reduce nitrates to nitrites, and the development of a red color after adding zinc dust indicates the presence of residual nitrates and confirms a true negative reaction. If there is no color change after the addition of Zn dust, it is a positive test for nitrate reduction indicating the reduction of nitrate beyond nitrite. 81 OXIDATIVE-FERMENTATIVE TEST (Hugh and Leifson) Introduction: Saccharolytic microorganisms degrade glucose either fermentatively or oxidatively. The end products of fermentation are relatively strong mixed acid that can be detected in a conventional fermentation test medium. However, the acids formed in oxidative degradation of glucose are extremely weak, and the more sensitive oxidative-fermentation medium of Hugh and Leifson (OF medium) is required for detection. Principle: The OF medium of Hugh and Leifson differs from carbohydrate fermentation media as follows; concentration of peptone is decreased, the concentration of carbohydrate is increased, and the concentration of agar is semisolid in nature. The lower protein-to-carbohydrate ratio reduces the formation of alkaline amines that can neutralize the small quantities of weak acids that may form from oxidative metabolism. The relatively larger amount of carbohydrate serves to increase the amount of acid that can potentially be formed. The semisolid consistency of the agar permits acids that form on the surface of the agar to permeate throughout the medium, making interpretation of the pH shift of the indicator easier to visualize. Motility can also be observed in this medium. Media and reagents: OF Medium of Hugh and Leifson peptone glucose bromothymol blue agar NaCl dipotassium phosphate distilled water final pH = 7.1 2g 10 g 0.03 g 2.5 g 5g 0.3 g to 1 liter Procedure: Inoculate two tubes of OF medium with the unknown organism, using a stick, stabbing the medium 1 or 2 times halfway to the bottom of the tube. Cover one tube of the pair with a 1 cm layer of sterile mineral oil. Incubate both tubes at optimum temperature and examine daily for several days. Note: for Pseudomonas identification place OF tubes in a boiling water bath for 10 min, remove and let cool to room temperature before inoculation (place in water to cool quickly). This ensures anaerobic conditions in lower part of the tube. Make sure you use a heavy inoculum to inoculate OF tubes with Pseudomonas. If there is only slight yellowing at the top of the oil overlayed tube, this is NOT a fermentative reaction but diffusion of oxygen through the mineral oil. Interpretation: Acid production is detected in the medium by the appearance of a yellow color. In the case of oxidative organisms, color production may be first noted near the surface of the medium. Following are the reaction patterns: Open Tube Covered Tube Metabolism ________________________________________________________________ Acid (yellow) Alkaline (green) Oxidative Acid (yellow) Acid (yellow) Fermentative Alkaline (green/blue) Alkaline (green/blue) Nonsaccharolytic For slower growing species, incubation for three days or longer may be required to detect positive reactions. 82 PHENYLALANINE DEAMINASE Introduction: Phenylalanine is an amino acid that upon deamination forms a keto acid, phenylpyruvic acid. Of the Enterobacteriacaeae, only members of Proteus possess the deaminase enzyme necessary for this conversion. Principle: The phenylalanine test depends upon the detection of phenylpyruvic acid in the test medium after growth of the test organism. The test is positive if a visible green color develops upon addition of a solution of 10% ferric chloride. Media and reagents: The phenylalanine agar is poured as a slant. Yeast extract serves as the carbon and nitrogen (phenylalanine) source. Procedure: Inoculate the agar slant with pure culture of test organism. After incubation at optimum temperature for 18 to 24 hours, add 4 or 5 drops of the ferric chloride reagent directly to the surface of the agar. As the reagent is added, the tube should be rotated to dislodge the surface colonies. Interpretation: The immediate appearance of an intense green color indicates the presence of phenylpyruvic acid and a positive test. UREASE Principle: Urea is a diamide of carbonic acid. Urease is an enzyme possessed by many species of microorganisms that can hydrolyse urea with the release of ammonia and carbon dioxide. The ammonia reacts in solution to form ammonium carbonate, resulting in alkalinization and an increase in the medium pH. Media and reagents: Christensen's Urea Agar peptone 1g glucose 1g NaCl monopotassium phosphate urea phenol red agar distilled water final pH = 6.8 5g 2g 20 g 0.012 g 15 g to 1 liter Procedure: Inoculate the Christensen's urea slant with a pure culture of test organism. Incubate at optimum temperature for 18 to 24 hours. Interpretation: Organisms that hydrolyse urea may rapidly produce positive reaction within 1 to 2 hours; less active species may require 3 or more days. Rapid urea splitters (Proteus species) - deep pink color throughout medium Slow urea splitters (Klebsiella species) - deep pink color initially in slant only, gradually converting the entire tube No urea hydrolysis - medium remains original yellow color 83 VOGES-PROSKAUER TEST Introduction: Two microbiologists working at the beginning of the 20th century first observed the red color reaction produced by appropriate culture -media after treatment with potassium hydroxide. It was later discovered that the active product in the medium formed by bacterial metabolism is acetyl-methyl carbinol, a product of the butylene glycol pathway. Principle: Pyruvic acid, the pivotal compound formed in the fermentative degradation of glucose, is further metabolized through a number of metabolic pathways, depending upon the enzyme systems possessed by different bacteria. One such pathway results in the production of acetoin (acetyl-methyl carbinol), a neutral-reacting end product. Organisms such as members of Klebsiella-Enterobacter-Hafnia-Serratia group produce acetoin as the chief end product of glucose metabolism and form less quantities of mixed acids. In the presence of atmospheric oxygen and 40% potassium hydroxide, acetoin is converted to diacetyl, and α-naphthol serves as a catalyst to bring out a red color complex. Media and reagents: The medium is the MR/VP broth. Reagents: α-naphthol (5% in absolute alcohol), KOH (40% in distilled water). Procedure: Inoculate a tube of MR/VP broth with a pure culture of the test organism. Incubate for 24 h at optimum temperature or until good growth. Add 6 drops (0.6 ml) of 5% α-naphthol, followed by 2 drops (0.2 ml) of 40% KOH. KOH must be added last. If KOH is added first a false positive may be obtained. Shake the tube vigorously to expose the medium to atmospheric oxygen and allow the tube to remain undisturbed for 5 to 15 min. The tube can be rested at an angle to increase the surface area of the media (greater exposure to atmospheric oxygen). Repeat test with uninoculated control. Interpretation: A positive test is represented by the development of a pink color by15 minutes after the addition of the reagents, indicating the presence of diacetyl, the oxidative product of acetoin. The test should not be read after standing for over 15 min because negative VP cultures may produce a copperlike color, potentially resulting in a false-positive test. 84 FINAL LAB EXAM: Microbiology MBIO 3470 DATE: Sample lab exam PAGE: 1 of 3 INSTRUCTOR: Dr. L. Cameron STUDENT NAME: ____________________ MICROBIAL SYSTEMATICS TIME: 2 h STUDENT NUMBER: ________________ WRITE EXAM IN PEN ONLY. BRIEFLY ANSWER ALL QUESTIONS IN SPACE PROVIDED ONLY POINT FORM IS ACCEPTABLE. Spaces of example exam have been compressed to shorten exam for reference file. All necessary IDENTIFICATION TABLE SUPPLIED. RETURN TABLES WITH EXAM. Exam is longer than given to present a wide range of possible questions. 5 1. Identify the following facultative anaerobic bacterium using the supplied Lab 1 identification table and the following identification test results. State ONLY bacterial name. NOTE: identification test results: negative test results represented as - and positive test results represented as +. gram stain shape catalase cytochrome oxidase glucose fermentation nitrate reduction phenylalanine arginine decarboxylase ornithine decarboxylase arabinose gelatin hydrolysis urease rod + + + + + + + The bacterium is 5 . 2. The unknown bacterium is a gram negative facultative anaerobic rod. The following identification test results were recorded. Interpret results as positive or negative, and state name of bacterium. Identification Test Test results gram stain red rods catalase production of gas bubbles cytochrome oxidase no color change nitrate reduction immediate red color glucose fermentation yellow medium arabinose yellow medium lysine decarboxylase yellow lactose purple inositol purple citrate no growth MR red H2S from TSI blacking of tube deep The bacterium is: CONTINUED ON PAGE 2 Interpretation 85 FINAL LAB EXAM: Microbiology MBIO 3470 DATE: April 3, 1996 2 of 3 INSTRUCTOR: Dr. L. Cameron STUDENT NAME: ______________________ MICROBIAL SYSTEMATICS TIME: 2 h STUDENT NUMBER: __________________ 3 3. (a) The general procedure for unknown bacteria determination is to inoculate biochemical tests with colonies of unknown bacterium. Name agar medium? Explain why this medium is used. (b) What is the principle of the Staphylase Test? (c) Interpret the following result for Streptococcus pyogenes colony growth on 5% blood agar plates with trypticase-soy base. A clear, colorless zone surrounding the colony. 5 4. Interpret API 20E color results as + or - , and state API 20E profile number. Order of test same as API strip and table. Table 1. API 20E Identification Test Results for an Enterobacteriaceace. TUBE Color ONPG Interpretation TUBE Color yellow GEL solid black particle ADH yellow GLU greenish yellow LDC red MAN yellow ODC red INO blue CIT yellow/green SOR blue H2S greyish RHA yellow URE yellow SAC blue TDA yellow MEL blue IND yellow AMY blue VP colorless ARA + is positive test result and - is negative test result. Interpretation yellow The API 20 profile number is: ______________________________. 6 5. Record requested information in the following table API 20E Test Test demonstrates (principle) (Include chemical(s) added if applicable) CIT VP IND CONTINUED ON PAGE 3 Positive test result (color only required) 86 FINAL LAB EXAM: Microbiology MBIO 3470 MICROBIAL SYSTEMATICS DATE: April 3, 1996 PAGE: 3 of 3 TIME: 2 h INSTRUCTOR: Dr. L. Cameron STUDENT NAME: __________________ STUDENT NUMBER: __________________ 6 6. What identification test (media/chemicals added) may be performed to show the following bacterial characteristic? Include appearance of positive/negative test results. BACTERIAL CHARACTERISTIC IDENTIFICATION TESTMEDIA/CHEMICAL(S) ADDED APPEARANCE OF POSITIVE/NEGATIVE TEST RESULT (a) denitrification (b) phenylpyruvic acid production (c) cytochrome oxidase activity 3 7. Explain the function of the following reagents with reference to the systematic’s lab? REAGENT FUNCTION (a) basic fuchsin and sodium sulfide in Endo agar plates (b) methylene blue (c) bile salts 3 8. You are given a mixed culture of bacteria believed to contain E. coli and Salmonella. Briefly outline an experiment to isolate pure cultures of each bacterium. State two media that can be used to separate these bacteria and explain why you are able to separate these two cultures with reference to components in the media. 4 9. What is the principle of the following identification tests used in the microbial systematics lab? IDENTIFICATION TEST PRINCIPLE UREASE LYSINE DECARBOXYLASE CONTINUED ON PAGE 4 87 FINAL LAB EXAM: Microbiology MBIO 3470 MICROBIAL SYSTEMATICS DATE: April 3, 1996 PAGE: 4 of 4 TIME: 2 h INSTRUCTOR: Dr. L. Cameron STUDENT NAME: ______________________ STUDENT NUMBER: __________________ 1 10. 6 a) API 20 NE often is read at both 24 hours and 48 hours after incubation at 28oC. Explain why. b) Record requested information in the following table API 20 NE Test Test demonstrates (principle) (Include chemical(s) added if applicable) Positive test result PNG ARA PAC 5 11. With respect to the following APIWEB printout, answer the following questions. a) State name of bacteria with good identification ___________________________ b) Define % ID. c) Define T. d) Explain what tests against means with specific referenceo taxon Ralstonia pickettii. e) Give the API 20 NE profile number for excellent identification of Pseudomonas putida (no tests against). ______________________ f) Other Profile Numbers (1140457, 1142457, 1143455) would also give only one test against (NO3 3%) for Pseudomonas putida. Explain why. Be specific to identification tests. 1 12. Determine the total numerical value for Proteus vulgaris assuming all test results are as expected except inositol and sorbitol which give positive test results. Analysis method used for classical biochemical tests. Refer to table provided for expected results.
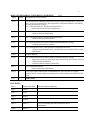


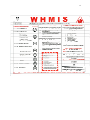
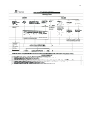

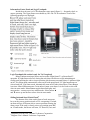
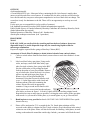
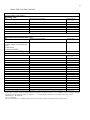

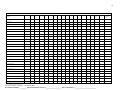

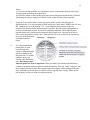
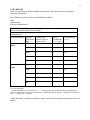
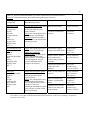
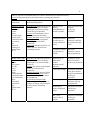
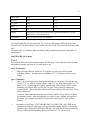
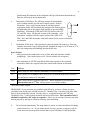
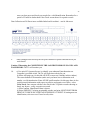
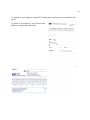
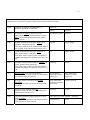
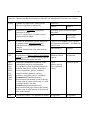
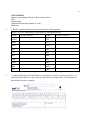
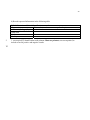
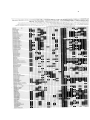
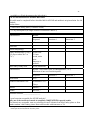


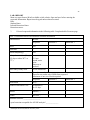
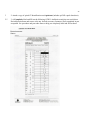
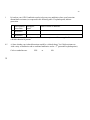
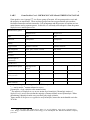
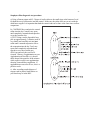
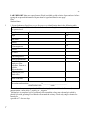
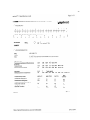
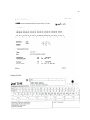
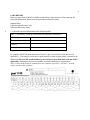
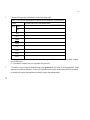
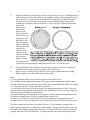
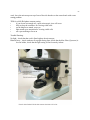

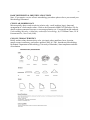


![Staphaurex Plus [FR]](http://vs1.manualzilla.com/store/data/006472887_1-5cff28b2b3d49e172c161e8389b68f76-150x150.png)