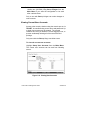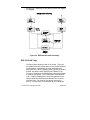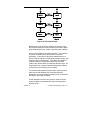
1
VERTICAL HORIZON VH-2402-L3 FAST ETHERNET SWITCH MANAGEMENT GUIDE 9033691-01 ii VH-2402-L3 Management Guide Notice Only qualified personnel should perform installation procedures. NOTICE Enterasys Networks reserves the right to make changes in specifications and other information contained in this document without prior notice. The reader should in all cases consult Enterasys Networks to determine whether any such changes have been made. The hardware, firmware, or software described in this manual is subject to change without notice. IN NO EVENT SHALL ENTERASYS NETWORKS BE LIABLE FOR ANY INCIDENTAL, INDIRECT, SPECIAL, OR CONSEQUENTIAL DAMAGES WHATSOEVER (INCLUDING BUT NOT LIMITED TO LOST PROFITS) ARISING OUT OF OR RELATED TO THIS DOCUMENT, WEB SITE, OR THE INFORMATION CONTAINED IN THEM, EVEN IF ENTERASYS NETWORKS HAS BEEN ADVISED OF, KNEW OF, OR SHOULD HAVE KNOWN OF, THE POSSIBILITY OF SUCH DAMAGES. Enterasys Networks, Inc. 500 Spaulding Turnpike Portsmouth, NH 03801 2002 Enterasys Networks, Inc.0 All Rights Reserved Printed in the United States of America Order Number: 9033691 March 2002 LANVIEW is a registered trademark of Enterasys Networks. ENTERASYS NETWORKS, NETSIGHT, MATRIX, WEBVIEW, and any logos associated therewith, are trademarks of Enterasys Networks. SPECTRUM is a registered trademark of Aprisma Management Technologies, Inc. All other product names mentioned in this manual may be trademarks or registered trademarks of their respective companies. 9033691-01 VH-2402-L3 Management Guide iii Table of Contents Before You Start.................................................................... 1 General Deployment Strategy............................................... 1 VLAN Layout ......................................................................... 2 Assigning IP Interface Addresses and Subnet Masks to VLANs ................................................................................... 3 Defining Static Routes........................................................... 3 Connecting to the Switch ...................................................... 4 Console Usage Conventions................................................. 4 First Time Connecting To The Switch................................... 5 Creating User Accounts ........................................................ 7 User Accounts Management................................................. 8 Root, User+ and Normal User Privileges .............................. 9 Loading Factory Defaults .................................................... 11 Logging Onto The Switch Console ..................................... 12 Updating or Deleting User Accounts................................... 13 Viewing Current User Accounts .......................................... 14 Deleting a User Account ..................................................... 15 Basic Setup ......................................................................... 16 Switch Information............................................................... 16 Configuring the Switch’s IP Address................................... 17 Remote Management Setup ............................................... 20 Setting Up Trap Receivers .................................................. 21 Configure Ports ................................................................... 23 Serial Port Settings ............................................................. 24 Switch Operation Mode....................................................... 26 Changing the Switch Operation Mode ................................ 27 Menu Changes with Switch Operating Mode...................... 28 Screen Hierarchy ................................................................ 30 Layer 2 Switch Settings....................................................... 33 Advanced Setup.................................................................. 34 Configuring VLANs.............................................................. 34 VLANs by Switch Operating Mode...................................... 34 Setting Up IP Interfaces ...................................................... 43 Multicasting ......................................................................... 47 Layer 2 Multicast Setup....................................................... 47 IGMP Snooping Settings..................................................... 48 IEEE 802.1Q Multicast Forwarding..................................... 49 Static Router Port Settings.................................................. 51 iv VH-2402-L3 Management Guide Notice Layer 3 Multicasting.............................................................53 Setup IP Multicast................................................................54 Multicast Interface Configuration .........................................54 IGMP Interface Configuration ..............................................56 DVMRP................................................................................59 PIM-DM................................................................................61 Port Mirroring .......................................................................64 Priority..................................................................................66 Filtering ................................................................................67 Layer 2 Filtering ...................................................................67 Layer 3 (IP Routing) Filtering...............................................69 Forwarding...........................................................................70 Layer 2 Forwarding..............................................................70 IP Forwarding ......................................................................72 Static ARP ...........................................................................73 Spanning Tree .....................................................................74 Switch Spanning Tree Settings ...........................................74 STP Group Confugration .....................................................76 Port Trunking .......................................................................79 Switch Utilities......................................................................82 Layer 2 Switch Utilities ........................................................82 Updating Firmware ..............................................................82 Downloading a Configuration File........................................83 Uploading a Settings File.....................................................84 Uploading a History Log File ...............................................85 Testing Connectivity with Ping.............................................86 Layer 3 Utilities ....................................................................86 BOOTP/DHCP Relay...........................................................86 DNS Relay ...........................................................................89 Network Monitoring..............................................................91 Layer 2 Network Monitoring.................................................91 Port Utilization......................................................................92 Port Error Statistics..............................................................93 Port Packet Analysis Table..................................................96 MAC Address Forwarding Table .........................................98 GVRP Status Table .............................................................99 Browse Router Port ...........................................................100 IGMP Snooping Table .......................................................101 Layer 3 Network Monitoring...............................................103 IP Address Forwarding Table ............................................104 Routing Table ....................................................................104 ARP Table .........................................................................105 IP Multicast Forwarding Table ...........................................106 IGMP Group Table ............................................................107 9033691-01 VH-2402-L3 Management Guide v DVMRP Routing Table...................................................... 108 Load Factory Defaults ....................................................... 108 Reboot............................................................................... 110 SNMP ................................................................................ 112 Authentication ................................................................... 112 Traps ................................................................................. 113 MIBs .................................................................................. 114 Packet Forwarding ............................................................ 115 MAC Address Aging Time................................................. 115 Filtering.............................................................................. 116 Spanning Tree................................................................... 117 Bridge Protocol Data Units................................................ 119 Creating a Stable STP Topology ...................................... 120 STP Port States ................................................................ 121 User-Changeable STA Parameters .................................. 123 Illustration of STP.............................................................. 124 Port Trunking..................................................................... 126 VLANs ............................................................................... 128 Notes About VLANs on the VH-2402-L3........................... 128 IEEE 802.1Q VLANs ......................................................... 129 802.1Q VLAN Packet Forwarding..................................... 129 802.1Q VLAN Tags ........................................................... 130 Port VLAN ID..................................................................... 132 Tagging and Untagging..................................................... 133 Ingress Filtering................................................................. 134 VLANs in Layer 2 Only Mode............................................ 135 Layer 3-Based VLANs....................................................... 135 IP Addressing and Subnetting .......................................... 136 Definitions.......................................................................... 136 IP Addresses..................................................................... 136 Address Classes ............................................................... 138 Subnet Masking ................................................................ 139 Calculating the Number of Subnets and Nodes................ 140 Classless InterDomain Routing – CIDR............................ 141 Setting up IP Interfaces..................................................... 143 Layer 3-Based VLANs....................................................... 145 Internet Protocols .............................................................. 145 Protocol Layering .............................................................. 145 Layer 1 .............................................................................. 148 Layer 2 .............................................................................. 148 Layer 3 .............................................................................. 148 Layer 4 .............................................................................. 149 Layer 7 .............................................................................. 149 vi VH-2402-L3 Management Guide Notice TCP/IP ...............................................................................150 Packet Headers .................................................................151 TCP....................................................................................151 IP .......................................................................................153 Ethernet .............................................................................154 TCP and UDP Well-Known Ports ......................................155 UDP and ICMP ..................................................................157 The Domain Name System ...............................................158 Mapping .............................................................................159 Domain Names to Addresses............................................159 Domain Name Resolution..................................................159 DHCP Servers ...................................................................160 IP Routing ..........................................................................161 Packet Fragmentation and Reassembly............................162 ARP ...................................................................................163 Multicasting........................................................................163 Multicast Groups................................................................164 Internet Group Management Protocol (IGMP) ..................165 IGMP Versions 1 and 2 .....................................................166 Multicast Routing Algorithms .............................................168 Flooding .............................................................................168 Multicast Spanning Trees ..................................................169 Reverse Path Broadcasting (RPB) ....................................169 Reverse Path Multicasting (RPM) .....................................170 Multicast Routing Protocols ...............................................171 Distance Vector Multicast Routing Protocol (DVMRP)......171 Routing Protocols ..............................................................173 Protocol-Independent Multicast – Dense Mode ................173 Routing Information Protocol (RIP)....................................173 RIP Version 1 Message Format ........................................175 RIP 1 Message ..................................................................176 RIP 1 Route Interpretation.................................................177 RIP Version 2 Extensions..................................................177 RIP2 Message Format.......................................................177 Spanning Tree Protocol Failure.........................................179 Full/Half Duplex Mismatch.................................................180 Unidirectional Link .............................................................181 Packet Corruption ..............................................................182 Resource Errors.................................................................182 Identifying a Data Loop......................................................183 Avoiding Trouble................................................................183 9033691-01 VH-2402-L3 Management Guide vii 1. Configuring the Switch Using the Console Interface The VH-2402-L3 supports a console management interface that allows the user to connect to the switch’s management agent via a serial port and a terminal or a computer running a terminal emulation program. The console can also be used over the network using the TCP/IP TELNET protocol. The console program can be used to configure the switch to use an SNMP-based network management software over the network. This chapter describes how to use the console interface to access the switch, change its settings, and monitor its operation. Switch configuration settings that are saved to non-volatile RAM using Save Changes from the Main Menu are retained in the switch’s memory, and are reloaded when the switch is rebooted. Before You Start The VH-2402-L3 supports a wide array of functions and gives great flexibility and increased network performance by eliminating the routing bottleneck between the WAN and the intranet. Its function in a network can be thought of as a new generation of wire-speed router that performs routing functions in hardware, rather than in software. General Deployment Strategy The VH-2402-L3 has many automatic features to detect the network topology and adapt to changes in this topology, but it is recommended that a network scheme be developed and entered statically into the VH-2402-L3. 9033691-01 VH-2402-L3 Management Guide 1 1. Determine how the network would be best segmented. This is probably done using VLANs in an existing layer 2 switched network. 2. Develop an IP addressing scheme. This involves allocating a block of IP addresses to each network segment. Each network subnet is then assigned a network address and a subnet mask. 3. Determine which network resources must be shared by the subnets. Shared resources may be connected directly to the Layer 3 switch, if need be. Static routes to each of the shared resources should be determined. 4. Determine how each subnet will communicate with the WAN or Internet. Again, static routes should be determined and default gateways identified. 5. Develop a security scheme. Some subnets on the network need more security or should be isolated from the other subnets. IP or MAC filtering can be used. Also, one or more VLANs on the Layer 3 switch can be configured without an IP subnet – in which case, these VLANs will function as a layer 2 VLAN and would require an external router to connect to the rest of the network. 6. Develop a policy scheme. Some subnets will have a greater need for multicasting bandwidth, for example. A policy is a mechanism to alter the normal packet forwarding in a network device, and can be used to intelligently allocate bandwidth to time-critical applications such as the integration of voice, video, and data on the network. 7. Develop a redundancy scheme. Planning redundant links and routes to critical network resources can save valuable time in the case of a link or device failure. The VH-2402L3’s Spanning Tree function can be used to block the redundant link until it is needed. VLAN Layout VLANs on the VH-2402-L3 have more functions than on a traditional layer 2 switch, and must therefore be laid-out and 2 VH-2402-L3 Management Guide 9033691-01 configured with a bit more care. Layer 3 VLANs (VLANs that have an IP interface assigned to them) can be thought of as network links – not just as a collection of associated end users. Further, Layer 3 VLANs are assigned an IP interface address and subnet mask to enable IP routing between them. IEEE 802.1Q VLANs must be configured on the switch before they can be assigned IP interface addresses or subnet masks. Further, the static VLAN configuration is specified on a per port basis. On the VH-2402-L3, a VLAN can consist of end-nodes – just like a traditional layer 2 switch, but a VLAN can also consist of a subnetwork defined by an IP interface address and a subnet mask. The IP subnets for the network must be determined first, and the VLANs configured on the switch to accommodate the IP subnets. Finally, the IP subnets can be assigned to the VLANs. Assigning IP Interface Addresses and Subnet Masks to VLANs The VH-2402-L3 allows the assignment of IP subnets to individual VLANs. Any VLAN configured on the switch that is not assigned an IP subnet, will behave as a layer 2 VLAN and will not be capable of IP routing – even if the switch is in IP Routing mode. Developing an IP addressing scheme is a complex subject, but it is sufficient here to mention that the total number of anticipated end nodes – for each Layer 3 VLAN – must be accommodated with an unique IP address. It should be noted that the switch regards a VLAN with an IP interface address and corresponding subnet mask assigned as an IP subnet in IP Routing mode. Defining Static Routes Routes between the IP interfaces and a default gateway or other router with a WAN connection should be determined beforehand and entered into the static/default routing table on the VH-2402-L3. 9033691-01 VH-2402-L3 Management Guide 3 Connecting to the Switch The console interface is used by connecting the Switch to a VT100-compatible terminal or a computer running an ordinary terminal emulator program (e.g., the Hyper Terminal program included with the Windows operating system) using an RS-232C serial cable. Your terminal parameters will need to be set to: • VT-100/ANSI compatible • 9,600 baud • 8 data bits • No parity • One stop bit • No flow control You can also access the same functions over a TELNET interface. Once you have set an IP address for your Switch, you can use a TELNET program (in VT-100 compatible terminal mode) to access and control the Switch. All of the screens are identical, whether accessed from the console port or from a TELNET interface. Console Usage Conventions The console interface makes use of the following conventions: 1. Items in <angle brackets> can be toggled between several choices using the space bar. 2. Items in [square brackets]can be changed by typing in a new value. You can use the backspace and delete keys to erase characters behind and in front of the cursor. 3. The up and down arrow keys, the left and right arrow keys, the tab key and the backspace key, can be used to move between selected items. 4 VH-2402-L3 Management Guide 9033691-01 4. Items in UPPERCASE are commands. Moving the selection to a command and pressing Enter will execute that command, e.g. APPLY, etc. The APPLY command makes the configuration active for the current session only. If the switch is rebooted, the unsaved changes will be lost and the last configuration saved to Non-Volatile RAM will be loaded into the switch. Use Save Changes from the main menu to enter the current configuration into the switch’s Non-volatile RAM. First Time Connecting To The Switch The Switch supports user-based security that can allow you to prevent unauthorized users from accessing the Switch or changing its settings. This section explains how to log onto the Switch. The passwords used to access the Switch are casesensitive; therefore, “S” is not the same as “s.” When you first connect to the Switch, you will be presented with the first login screen (shown below). Press Ctrl+R to refresh the screen. This command can be used at any time to force the console program in the switch to refresh the console screen. 9033691-01 VH-2402-L3 Management Guide 5 Figure 1-1. Initial Console Screen The factory default Username is “admin”, there is no factory default password. Enter “admin” for the Username and leave the Password field blank to access the console initially. 6 VH-2402-L3 Management Guide 9033691-01 Enter the factory default username (“admin”) and leave the Password field blank. Press Enter and Access will be given to the main menu, as shown below: Figure 1-2. Main Menu The first user automatically gets Root privileges (See Table 1-1). It is recommended to create at least one Root-level user for the Switch. Creating User Accounts To create a new user account, highlight Setup User Accounts from the Main Menu and press Enter: 9033691-01 VH-2402-L3 Management Guide 7 Figure 1-3. Main Menu Figure 1-4. Setup User Accounts Menu User Accounts Management From the Main Menu, highlight Setup User Accounts and press Enter, then the Setup User Accounts menu appears. 1. Toggle the Action:< > field to <Add> using the space bar. This will allow the addition of a new user. The other options are <Delete> - this allows the deletion of a user entry, and <Update> - this allows for changes to be made to an existing user entry. 2. Enter the new user name, assign an initial password, and then confirm the new password. Determine whether 8 VH-2402-L3 Management Guide 9033691-01 the new user should have <Root>, <User+>, or <User> privileges. The space bar toggles between the three options. 3. Highlight APPLY and press enter to make the user addition effective. 4. Press Esc. to return to the previous screen or Ctrl+T to go to the root screen. 5. APPLY makes changes to the switch configuration for the current session only. All permanent changes must be entered into non-volatile ram using the Save Changes command on the Main Menu. Root, User+ and Normal User Privileges There are three levels of user privileges: Root and User+, and User. Switch Configuration Management Privilege Configuration Yes Read Only Read Only Network Monitoring Yes Read Only Read Only Community Strings and Trap Stations Yes Read Only Read Only Update Firmware and Configuration Files Yes No No System Utilities Yes Ping only Ping only Factory Reset Yes No No Reboot Switch Yes Yes No Root User+ User User Accounts Management Add/Update/Delete User Accounts Yes No No View User Accounts Yes No No Table 1-1. Root, User+, and User Privileges 9033691-01 VH-2402-L3 Management Guide 9 Saving Changes Selecting APPLY from a console menu makes the configuration effective for the current session only. The configuration data will be lost if the switch is restarted. To make the configuration effective after a switch restart, select Save Changes to enter the configuration into non-volatile (NV-RAM). The VH-2402-L3 has two levels of memory; normal RAM and non-volatile or NV-RAM. Configuration changes are made effective by highlighting Apply and pressing Enter. When this is done, the settings will be immediately applied to the switching software in RAM, and will immediately take effect. Some settings, though, require you to restart the switch before they will take effect. Restarting the switch erases all settings in RAM and reloads the stored settings from the NVRAM. Thus, it is necessary to save all setting changes to NV-RAM before rebooting the switch. Figure 1-5. Main Menu 10 VH-2402-L3 Management Guide 9033691-01 To retain any configuration changes permanently, highlight Save Changes from the main menu. The following screen will appear to verify that your new settings have been saved to NV-RAM: Figure 1-6. Save Changes Confirmation Screen Once the switch configuration settings have been saved to NV-RAM, they become the default settings for the switch. These settings will be used every time the switch is rebooted. Loading Factory Defaults Loading the factory defaults returns the switch’s configuration to the factory default values. This will clear all settings and restore them to their initial values listed in the Appendix. Figure 1-7. Main Menu 9033691-01 VH-2402-L3 Management Guide 11 Highlight Reboot from the Main Menu and press Enter. Figure 1-8. System Reboot Menu To execute a factory reset, highlight either Reboot & Load Factory Default Configuration or Reboot & Load Factory Default Configuration Except IP Address and press enter. A confirmation screen will appear. Highlight Yes and press Enter to reset the switch’s NV-RAM to the factory default settings. This will erase any User Accounts (and all other configuration settings) you may have entered and return the switch to the state it was in when it was purchased. Logging Onto The Switch Console To log in once you have created a registered user, from the Login screen: 1. Type in your username and press Enter. 2. Type in your password and press Enter. 3. The main menu screen will be displayed based on your access level or privilege. 12 VH-2402-L3 Management Guide 9033691-01 Updating or Deleting User Accounts To update or delete a user password: Choose Setup User Accounts from the Main Menu. The following Setup User Accounts menu appears: Figure 1-9. User Accounts Management menu 1. Toggle the Action:<Add> field using the space bar to choose Add, Update, or Delete. 2. Type in the Username for the user account you wish to change and enter the Old Password for that user account. 3. You can now modify the password or the privilege level for this user account. 4. If the password is to be changed, type in the New Password you have chosen, and press enter. Type in the same new password in the following field to verify that you have not mistyped it. 5. If the privilege level is to be changed, toggle the Access Level:<Root> field until the appropriate level is displayed – Root, User+ or User. 6. Highlight APPLY and press enter to make the change effective. 9033691-01 VH-2402-L3 Management Guide 13 7. You must enter the configuration changes into the nonvolatile ram (NV-RAM) using Save Changes from the Main Menu if you want the configuration to be used after a switch reboot. Only a user with Root privileges can make changes to user accounts. Viewing Current User Accounts Access to the console, whether using the console port or via TELNET, is controlled using a user name and password. Up to eight user accounts can be created. The console interface will not let you delete the current logged-in user, to prevent accidentally deleting all of the users with Root privilege. Only users with the Root privilege can delete users. To view the current user accounts: Highlight Setup User Accounts from the Main Menu. The current user accounts can be read from following screen: Figure 1-10. Viewing User Accounts 14 VH-2402-L3 Management Guide 9033691-01 Deleting a User Account To delete a user account: Figure 1-11. Deleting User Accounts 1. Toggle the Action:<Add> field to Delete. 2. Enter the Username and Old Password for the account you want to delete. You must enter the password for the account to be able to delete it. 3. Highlight APPLY and press Enter to make the deletion of the selected user take effect. 4. You must enter the configuration changes into the nonvolatile ram (NV-RAM) using Save Changes from the Main Menu if you want the configuration to be used after a switch reboot. Only users with Root privileges can delete user accounts. 9033691-01 VH-2402-L3 Management Guide 15 Setting Up The Switch Basic Setup This section will help prepare the Switch user by describing the Switch Information, IP Setup, Remote Management Setup, Configure Ports, Serial Port Settings and Switch Settings menus. Figure 1-12. Main Menu – Switch Information Switch Information Highlight Switch Information from the Main Menu and press Enter: 16 VH-2402-L3 Management Guide 9033691-01 Figure 1-13. Switch Information Menu The Switch Information shows the operation mode of switch (Layer 3 or Layer 2), which (if any) external modules are installed, and the switch’s MAC Address (assigned by the factory and unchangeable). In addition, the Boot PROM and Firmware Version numbers are shown. This information is helpful to keep track of PROM and Firmware updates and to obtain the switch’s MAC address for entry into another network device’s address table – if necessary. You can also enter the name of the System, its location, and the name and telephone number of the System Administrator. It is recommended that the person responsible for the maintenance of the network system that this Layer 3 switch is installed on be listed here. Configuring the Switch’s IP Address The BOOTP and DHCP Server options for assigning the switch an IP address and subnet mask are only available when the switch is in Layer 2 Only mode. The IP Routing mode requires a manual entry of the IP address and subnet mask. The Switch needs to have an IP address assigned to it so that an In-Band network management system (for example, the WebView or TELNET) client can find it on the network. 9033691-01 VH-2402-L3 Management Guide 17 The IP Setup screen allows you to change the settings for the Ethernet interface used for in-band communication. The fields listed under the Current Switch IP Settings heading are those that are currently being used by the switch. Those fields listed under the Restart Settings heading are those which will be used after the APPLY button is selected. To set the switch’s IP address: Highlight IP Setup from the main menu and press Enter. Figure 1-14. IP Setup Menu The switch’s factory default IP address is 10.90.90.90 with a subnet mask of 255.0.0.0 and a default gateway of 0.0.0.0. To manually assign the switch’s IP address, subnet mask, and default gateway address: Highlight the IP Address:[10.90.90.90] field and enter the appropriate IP address. Highlight the Subnet Mask:[255.0.0.0] field and enter the appropriate subnet mask. If you want to access the switch from a different subnet from the one it is installed on, highlight the Default 18 VH-2402-L3 Management Guide 9033691-01 Gateway:[0.0.0.0] field and enter the IP address of the gateway. If you will manage the switch from the subnet on which it is installed, you can leave the default address in this field. To use the BOOTP/DHCP protocols to assign the switch an IP address, subnet mask, and default gateway address: Toggle the Get IP From: <Manual> field using the space bar to choose from Manual, BOOTP, or DHCP. This selects how the switch will be assigned an IP address on the next reboot (or startup). The Get IP From: <Manual> options are: • BOOTP - The switch will send out a BOOTP broadcast request when it is powered up. The BOOTP protocol allows IP addresses, network masks, and default gateways to be assigned by a central BOOTP server. If this option is set, the Switch will first look for a BOOTP server to provide it with this information before using the default or previously entered settings. • DHCP – The switch will send out a DHCP broadcast request when it is powered up. The DHCP protocol allows IP addresses, network masks, and default gateways to be assigned by a DHCP server. If this option is set, the switch will first look for a DHCP server to provide it with this information before using the default or previously entered settings. • Manual – Allows the entry of an IP address, Subnet Mask, and a Default Gateway for the switch. These fields should be of the form xxx.xxx.xxx.xxx, where each xxx is a number (represented in decimal form) between 0 and 255. This address should be a unique address on the network assigned for use by the Network Administrator. The fields which require entries under this option are as follows: 9033691-01 Subnet Mask – A Bitmask that determines the extent of the subnet that the Switch is on. Should be of the form xxx.xxx.xxx.xxx, where each xxx is VH-2402-L3 Management Guide 19 a number (represented in decimal) between 0 and 255. The value should be 255.0.0.0 for a Class A network, 255.255.0.0 for a Class B network, and 255.255.255.0 for a Class C network, but custom subnet masks are allowed. • Default Gateway - IP address that determines where packets with a destination address outside the current subnet should be sent. This is usually the address of a router or a host acting as an IP gateway. If your network is not part of an intranet, or you do not want the Switch to be accessible outside your local network, you can leave this field unchanged. The Management VID:[ALL] field allows the entry of a VLAN ID (VID) from which a management station (a computer) will be allowed to manage the switch using TCP/IP (in-band, or over the network). Management stations that are on VLANs other than the one entered in the Management VID:[ALL] field will not be able to manage the switch in-band unless their IP addresses are entered in the Management Station IP Addresses: field. Any VID that has been configured on the switch can be entered in this field. Remote Management Setup Some settings must be entered to allow the switch to be managed from an SNMP-based Network Management System such as SNMP v1 or to be able to access the Switch using the TELNET protocol or the WEB-based Manager. Please see the next chapter for Web-based network management information. To setup the switch for remote management: Highlight Remote Management Setup from the main menu. The following screen appears: 20 VH-2402-L3 Management Guide 9033691-01 Figure 1-15. Remote Management Setup Menu Management stations are computers on the network that will be used to manage the switch. You can limit the number of possible management stations by entering up to three IP addresses in the Management Station IP Settings: field. If the three IP Address:[0.0.0.0] fields contain all zeros (“0”), then any station with any IP address can access the switch to manage and configure it. If there is one or more IP addresses entered in the IP Address:[0.0.0.0] field, then only stations with the IP addresses entered will be allowed to access the switch to manage or configure it. Setting Up Trap Receivers This allows the switch to send traps (messages about errors, etc.) to management stations on the network. Highlight Setup Trap Receivers and press enter. The trap recipients can be setup from the following screen: 9033691-01 VH-2402-L3 Management Guide 21 Figure 1-16. Setup Trap Recipients Menu The IP Address field is the IP address of a management station (a computer) that is configured to receive the SNMP traps from the switch. The SNMP Community String is similar to a password in that stations that do not know the correct string cannot receive or request SNMP information from the switch. The Status field can be toggled between Enabled and Disabled to enable or disable the receipt of SNMP traps by the listed management stations. 22 VH-2402-L3 Management Guide 9033691-01 Configure Ports Highlight Configure Ports from the main menu and press enter: Figure 1-17. Configure Ports Screen Toggle the View Ports:<1 to 12 > field, using the space bar, to view the configuration of either ports 1 through 12 or ports 13 through 24. To configure an specific port, toggle the Configure Port:[ ] field until the appropriate port number appears. Toggle the State:<Enabled> field to either Enable or Disable a given port. Toggle the Speed/Duplex:<Auto> field to either select the speed and duplex/half-duplex state of the port. Auto – autonegotiation between 10 and 100 Mbps devices, full- or halfduplex. The Auto setting allows the port to automatically determine the fastest settings the device the port is connected to can handle, and then to use those settings. The other options are 100M/Full, 100M/Half, 10M/Full, 10M/Half. There is no automatic adjustment of port settings with any option other than Auto. 9033691-01 VH-2402-L3 Management Guide 23 Serial Port Settings The Serial Port Settings screen allows the configuration of the switch’s serial port and out-of-band TCP/IP communications using SLIP. Highlight Serial Port Settings and press enter. Figure 1-18. Serial Port Settings Screen Toggle the Serial port setting:<Console> field to select either the Console or SLIP protocol. The following fields can then be set: Console Settings Parameter Description Baud Rate Displays the serial bit rate used to communicate with a management station. The console baud rate is 9600 bits per second. Data bits Displays the number of bits that make up a word when communicating with the management station. The console interface 24 VH-2402-L3 Management Guide 9033691-01 uses 8 data bits. Stop bits Displays the number of bits used to indicate that a word has been completely transmitted. The console interface uses 1 stop bit. Auto-Logout This sets the time the interface can be idle before the switch automatically logs-out the user. The options are 2 mins, 5 mins, 10 mins, 15 mins, or Never. SLIP Settings Parameter Description Baud Rate Sets the serial bit rate that will be used to communicate the next time the Switch is restarted. Applies only when the serial port is being used for out-of-band (SLIP) management; it does not apply when the port is used for the console port. Available speeds are 9600, 19,200 and 38,400 bits per second. The default setting is 9600. Interface Name This allows for the naming of the SLIP interface for easy reference. Local IP Address This is an IP address assigned to the serial port when it is used for SLIP communications. Remote IP Address This is the IP address of the management station that will use the SLIP protocol to communicate with the switch. MTU Maximum Transfer Unit – this specifies the maximum packet size in bytes. Can be toggled between 1006 and 1500. 9033691-01 VH-2402-L3 Management Guide 25 Switch Operation Mode Putting the switch in IP Routing mode does not – by itself – enable IP routing. The switch must be configured to use IP interfaces before it is capable of IP routing. The switch can operate in one of two modes: 1. Layer 2 Only, Support IEEE 802.1Q VLANs: the switching process is based upon the source and destination MAC addresses only. 802.1Q VLANs are supported and the switch is considered as a VLANtag aware device. 2. IP Routing, Support IEEE 802.1Q VLANs: the switching process is based upon the IP source and destination addresses, if present. If the IP addresses are not present, the switching process is based upon the MAC addresses (as in Layer 2 above). 802.1Q VLANs are supported and the switch is considered as a VLAN-tag aware device. The switch must be rebooted when changing the operation mode before the new operation mode can take effect. 26 VH-2402-L3 Management Guide 9033691-01 Changing the Switch Operation Mode To change the switch’s operating mode: Highlight Switch Settings on the main menu and press enter. Figure 1-19. Switch Settings Screen Highlight Switch Operation Mode on the Switch Settings menu and press enter. Figure 1-20. Switch Operation Mode Screen 9033691-01 VH-2402-L3 Management Guide 27 The field Select switch operation mode:< > can be toggled using the space bar to one of the two switch operation modes: Layer 2 Only, Support IEEE 802.1Q VLANs and IP Routing, Support IEEE 802.1Q VLANs. To make a change in the operation mode of the switch effective, highlight APPLY and press enter. Figure 1-21. Change Mode Confirmation Screen Type y and press Enter. The switch will then save the changes made during the current session and reboot. The switch must be rebooted to change the operation mode. Menu Changes with Switch Operating Mode Once the switch is configured for IP Routing (Layer 3 Switching), and rebooted, the Main Menu adds some functions compared to the Layer 2 Only mode. These functions are reflected in additional configuration menus, and the addition of the Layer 3 IP Networking entry. All of the console menus are listed, in order, in the Screen Hierarchy below. 28 VH-2402-L3 Management Guide 9033691-01 Figure 1-22. Main Menu – Layer 2 Switching Mode Figure 1-23. Main Menu – Layer 3 IP Routing Mode 9033691-01 VH-2402-L3 Management Guide 29 Screen Hierarchy The contents of the Console Interface are arranged following the structure shown in the table below. The table is arranged starting with the name of the entry on the Main Menu. The sub menus start with the name of the first menu, followed by the name of any sub-menus. The sub-menu names are indented. Some menus are available only when the switch is in IP Routing mode. These menus are shown in bold. Main Menu Entry Sub-Menus Switch Information Switch Information IP Setup IP Setup Remote Management Setup Remote Management Setup Switch Settings Switch Settings Switch Operation Mode Layer 2 Switch Settings Configure Ports Configure Ports Setup User Accounts Setup User Accounts Serial Port Settings Serial Port Settings Utilities Utilities Upgrade Firmware from TFTP Server Download Configuration File from TFTP Server Upload Configuration File to TFTP Server Save Log to TFTP Server Ping Test 30 VH-2402-L3 Management Guide 9033691-01 Network Monitoring Network Monitoring Menu Port Utilization Port Error Packets Port Packet Analysis Browse MAC Address Table GVRP Browse Router Port IGMP Snooping Switch History Save Changes Save Changes Confirmation Screen (no sub-menus) Reboot Reboot Reboot Save Configuration & Reboot Reboot & Load Factory Default Configuration Reboot & Load Factory Default Configuration Except IP Address Logout System Logout (no sub-menus) Spanning Tree Configure Spanning Tree STP Group Configuration STP Port Settings Forwarding Forwarding Menu Setup Static Unicast MAC Forwarding Setup Static IP Routes Setup Static ARP Entries 9033691-01 VH-2402-L3 Management Guide 31 Filtering Filtering Menu Setup MAC Address Filter Setup IP Address Filter Priority Setup MAC Address Priority Mirroring Mirroring Menu Target Port Selection Port Mirroring Settings Multicasting Multicasting Menu IGMP Snooping (Layer 2 Only) Set up IEEE 802.1Q Multicasting Forwarding IP Multicasting Settings Multicast Interface Configuration IGMP Interface Configuration IGMP Static Member Configuration DVMRP Interface Configuration PIM-DM Interface Configuration Static Router Port Settings VLANs VLAN Menu Edit 802.1Q VLANs Configure 802.1Q Port Settings Port Trunking Port Trunking Layer 3 IP Networking Setup Layer 3 – IP Networking Setup IP Interface Setup RIP Configuration 32 VH-2402-L3 Management Guide 9033691-01 Layer 2 Switch Settings To access the Layer 2 Switch Settings menu, highlight Switch Settings from the Main Menu. Then highlight Layer 2 Switch Settings on the Switch Settings menu and press Enter: Figure 1-24. Layer 2 Switch Settings Menu The following fields can then be set: Parameter Switch GVRP :<Disabled> Description Allows the Group VLAN Registration Protocol (GVRP) to be globally Enabled or Disabled on the switch. Upper Threshold for Master Ports: [128]Kpps This is the number of thousands Broadcast/Multicast packets per second received by the switch – on one of the Master Ports – that will trigger the switch’s reaction to a Broadcast/Multicast storm. Upper Threshold for Module Ports: [128]Kpps This is the number of thousands Broadcast/Multicast packets per second received by the switch – on one of the module ports – that will trigger the 9033691-01 VH-2402-L3 Management Guide 33 switch’s reaction to a Broadcast/Multicast storm. Broadcast Storm Mode:<Disabled> This field can be toggled between Enabled and Disabled using the space bar. This enables or disables, globally, the switch’s reaction to Broadcast storms, triggered at the threshold set above. Multicast Storm Mode:<Disabled> This field can be toggled between Enabled and Disabled using the space bar. This enables or disables, globally, the switch’s reaction to Multicast storms, triggered at the threshold set above. Advanced Setup Changing switch operation mode setting changes some of the menus and configuration options for the Advanced Setup of the switch. The configuration data, however, is saved when the switch’s operating mode is changed. Configuring VLANs The switch allows the assignment of an IP interface to each VLAN, in IP Routing mode. The VLANs must be configured prior to setting up the IP interfaces. VLANs by Switch Operating Mode To create a new 802.1Q VLAN: The VLAN menu adds an entry to edit the VLAN definitions and to configure the port settings for IEEE 802.1Q VLAN 34 VH-2402-L3 Management Guide 9033691-01 support. Highlight VLANs from the Main Menu and press enter. Figure 1-25. VLAN Menu To create an 802.1Q VLAN, highlight Edit 802.1Q VLANs and press enter: Figure 1-26. Edit 802.1Q VLANs Menu Parameter Action: 9033691-01 Description This field can be toggled using the space VH-2402-L3 Management Guide 35 <Add/Modify> bar between Add/Modify and Delete. Add/Modify allows for the creation of a new VLAN or for changes to an existing VLAN. Delete allows for the deletion of an existing VLAN from the switch. VID# Allows the entry of the VLAN ID (VID) of an existing VLAN. VLANs can be identified by either the VID or the VLAN name. VLAN Name: Allows the entry of the name of an existing VLAN. VLANs can be identified by either the VID or the VLAN name. Membership (E/F/-): Allows an individual port to be specified as an Egress, Forbidden, or Non-member of a VLAN. E Egress Member - specifies the port as being a static member of the VLAN. Egress Member Ports are ports that will be transmitting traffic for the VLAN. These ports can be either tagged or untagged. F Forbidden Non-Member - specifies the port as not being a member of the VLAN and that the port is forbidden from becoming a member of the VLAN dynamically. - Non-Member - specifies the port as not being a member of the VLAN, but the port can become a member of the VLAN dynamically. Tagging (U/T): Allows an individual port to be specified as either Tagging or Untagging. U Untagging - specifies the port as an Untagging member of the VLAN. When an untagged packet is transmitted by the port, the packet header remains 36 VH-2402-L3 Management Guide 9033691-01 unchanged. When a tagged packet exits the port, the tag is stripped and the packet is changed to an untagged packet. Tagging - specifies the port as a Tagging member of the VLAN. When an untagged packet is transmitted by the port, the packet header is changed to include the 32-bit tag associated with the PVID (Port VLAN Identifier – see below). When a tagged packet exits the port, the packet header is unchanged. T To create an 802.1Q VLAN, toggle the Action: <Add/Modify> field to Add/Modify using the space bar. Enter a VLAN ID number in the VID#[ ] field and a name for the new VLAN in the VLAN Name:[ ] field. Choose which ports will be members of the new VLAN and enter their membership status in the Membership (E/F/-): [ ][ ][ ] field. The status indicators of the individual ports can be entered directly from the keyboard or toggled using the space bar. Moving between the status indicators of the individual ports is accomplished using the arrow keys. To set the 802.1Q VLAN membership status of a port: To enter the 802.1Q VLAN status for a port, highlight the first field of Membership (E/F/-): [ ][ ][ ]. Each port’s 802.1Q VLAN membership can be set individually by highlighting the port’s entry using the arrow keys, and then toggling between E, F, or – using the space bar. Next, determine which of the ports that are members of the new VLAN will be Tagged or Untagged ports. To set a port as either a Tagged or an Untagged port: Highlight the first field of Tagging (U/T):[ ][ ][ ] field. Each port’s state can be set by highlighting the port’s entry using the arrow keys and then toggling between U or T using the space bar. 9033691-01 VH-2402-L3 Management Guide 37 If the port is attached to a device that is not IEEE 802.1Q VLAN compliant (VLAN-tag unaware), then the port should be set to U – Untagged. If the port is attached to a device that is IEEE 802.1Q VLAN compliant, (VLAN-tag aware), then the port should be set to T – Tagged. Press APPLY to make the additions/deletions effective for the current session. To make enter the IP Interfaces into Non-volatile RAM, highlight Save Changes from the Main Menu and press enter. In the following example screen, the VLAN “evilJulius” - VID# 2 – has been added. Ports 1, 2,12, 14, 17, 25, and 26 are Egress ports (static members of “evilJulius”. Ports 5,6, and 7 are Forbidden ports (non-members and are not allowed to join the VLAN “evilJulius” dynamically.Example 802.1Q VLAN add screen: Figure 1-27. Edit 802.1Q VLANs Menu To configure the member ports of an 802.1Q VLAN: 38 VH-2402-L3 Management Guide 9033691-01 Highlight VLANs from the Main Menu and press Enter. Figure 1-28. VLAN Menu Highlight Configure 802.1Q Port Settings and press enter: Figure 1-29. Configure 802.1Q Port Settings Parameter Description Configure Port from [ ] to [ ] This allows the entry of a contiguous range of port numbers to be configured. PVID#[ ] Port VLAN Identifier – is a classification mechanism that associates a port with a 9033691-01 VH-2402-L3 Management Guide 39 specific VLAN and is used to make forwarding decisions for untagged packets received by the port. For example, if port #2 is assigned a PVID of 3, then all untagged packets received on port #2 will be assigned to VLAN 3. This number is generally the same as the VID# number assigned to the port in the Edit 802.1Q VLANs menu above. Ingress Filter:<Disable> This field can be toggled using the space bar between Enable and Disable. Enable enables the port to compare the VID tag of an incoming packet with the PVID number assigned to the port. If the two are different, the port filters (drops) the packet. Disable disables Ingress filtering. GVRP:<Disable> Group VLAN Registration Protocol (GVRP) – this enables the port to dynamically become a member of a VLAN. Each port can be configured to use an Ingress Filter, to enable or disable GVRP. The ports to be configured in a given session can be identified by either entering a range of port numbers or by entering the PVID#. To configure a port’s 802.1Q VLAN settings: Highlight the Configure Port from [ ] to [ ] field and enter the range of port numbers you want to configure. As an alternative you can use the arrow keys to highlight the PVID#[ ] field and enter the PVID for the VLAN’s member ports you want to configure. Use the arrow keys to highlight the remaining fields and the space bar to toggle between On and Off. To edit an existing 802.1Q VLAN: 40 VH-2402-L3 Management Guide 9033691-01 Highlight VLANs on the main menu and press Enter: Figure 1-30. VLAN Menu To edit an existing 802.1Q VLAN, highlight Edit 802.1Q VLANs and press Enter: Figure 1-31. Edit 802.1Q VLANs Menu To edit an existing 802.1Q VLAN, highlight the Action:<Add/Modify> field and toggle between Add/Modify and Delete. In the Add/Modify mode, both individual entrees to a selected VLAN and entire VLANs can be added. In the Delete mode, entire VLANs can be deleted. VLANs to be edited can be selected by either the VID#[ ] field or the VLAN Name:[ ] fields. Enter either the VID or the VLAN 9033691-01 VH-2402-L3 Management Guide 41 Name for the 802.1Q VLAN you want to edit and press enter. To delete an entire VLAN, toggle the Action:<Add/Modify> field to Delete, enter either the VID or the VLAN Name in the appropriate field and press Enter. Highlight Apply and press Enter. The selected VLAN will be deleted. To enter the change into Non-volatile RAM, select Save Changes from the Main Menu. 802.1Q VLANs are edited by specifying which ports will be Egress Members, Forbidden non-members or non-members. The ports are further set to be either a Tagged or an Untagged port. To edit the 802.1Q VLAN membership of a port: Highlight the first field of Membership (E/F/-): [ ][ ][ ]. Each port’s 802.1Q VLAN membership can be set individually by highlighting the port’s entry using the arrow keys, and then toggling between E, F, or – using the space bar. To edit a port’s Tagged or Untagged status: Highlight the first field of Tagging (U/T):[ ][ ][ ] field. Each port’s state can be set by highlighting the port’s entry using the arrow keys and then toggling between U or T using the space bar. If the port is attached to a device that is not IEEE 802.1Q VLAN compliant (VLAN-tag unaware), then the port should be set to U – Untagged. If the port is attached to a device that is IEEE 802.1Q VLAN compliant, (VLAN-tag aware), then the port should be set to T – Tagged. To configure a port’s 802.1Q VLAN settings: Highlight the Configure Port#[ ] field and enter the port number of the port you want to configure. Use the arrow 42 VH-2402-L3 Management Guide 9033691-01 keys to highlight the PVID#[ ] field and enter the PVID for the port. Use the arrow keys to highlight the remaining fields and the space bar to toggle between Enable and Disable. Setting Up IP Interfaces A VLAN that does not have a corresponding IP interface defined for it, will function as a Layer 2 Only VLAN – regardless of the Switch Operation mode. Each VLAN must be configured prior to setting up the corresponding IP interface. An example is presented below: VLAN Name VID Switch Ports System (default) 1 5, 6, 7, 8, 21, 22, 23, 24 Engineering 2 9, 10, 11, 12 Marketing 3 13, 14, 15, 16 Finance 4 17, 18, 19, 20 Sales 5 1, 2, 3, 4 Backbone 6 25, 26 Table 1-2. VLAN Example – Assigned Ports In this case, 6 IP interfaces are required, so a CIDR notation of 10.32.0.0/11 (or a 11-bit) addressing scheme will work. This addressing scheme will give a subnet mask of 11111111.11100000.00000000.00000000 (binary) or 255.224.0.0 (decimal). Using a 10.xxx.xxx.xxx IP address notation, the above example would give 6 network addresses and 6 subnets. 9033691-01 VH-2402-L3 Management Guide 43 Any IP address from the allowed range of IP addresses for each subnet can be chosen as an IP address for an IP interface on the switch. For this example, we have chosen the next IP address above the network address for the IP interface’s IP address: VLAN Name VID Network Address IP Address System (default) 1 10.32.0.0 10.32.0.1 Engineering 2 10.64.0.0 10.64.0.1 Marketing 3 10.96.0.0 10.96.0.1 Finance 4 10.128.0.0 10.128.0.1 Sales 5 10.160.0.0 10.160.0.1 Backbone 6 10.192.0.0 10.192.0.1 Table 1-3. VLAN Example – Assigned IP Interfaces The 6 IP interfaces, each with an IP address (listed in the table above), and a subnet mask of 255.224.0.0 can be entered into the Setup IP Interface menu. To setup IP Interfaces on the switch: Highlight Layer 3 IP Networking from the Main Menu and press Enter. 44 VH-2402-L3 Management Guide 9033691-01 Figure 1-32. Layer 3 - Main Menu Highlight Layer 3 IP Networking from the Main Menu and press enter. Figure 1-33. Layer 3 – IP Networking Menu Highlight Setup IP Interface and press enter. 9033691-01 VH-2402-L3 Management Guide 45 Figure 1-34. Layer 3 – IP Networking Menu Toggle the Action:<Add/Modify> field to Add/Modify. Choose a name for the interface to be added and enter it in the Interface Name:[ ] field. The IP interface name must be the same as its corresponding VLAN’s name. The corresponding VLAN ID must also be entered in the VID[ ] field. Enter the interface’s IP address and subnet mask in the corresponding fields. Toggle the Active:<yes> field to yes, highlight APPLY and press enter to make the IP interface effective. Use Save Changes from the Main Menu to enter the changes into NV-RAM. Parameter Description Action:<Add/Modify> This field can be toggled using the space bar between Add/Modify and Delete. Add/Modify allows for the creation of a new IP interface or changes to an existing IP interface. Delete allows for the deletion of an existing VLAN from the switch. Interface Name:[ This field allows the entry of a name for the IP interface. The default IP interface is named “System”. IP Address:[ ] ] This field allows the entry of an IP address to be assigned to this IP 46 VH-2402-L3 Management Guide 9033691-01 interface. Subnet Mask:[ ] This field allows the entry of a subnet mask to be applied to this IP interface. Active:<Yes> This field is toggled between Yes and No using the space bar. This entry determines whether the subnet will be active or not. VID:[ ] This field allows the entry of the VLAN ID number for the VLAN the IP interface belongs to. Multicasting Layer 2 Multicast Setup To setup Multicasting on the switch, when the switch is in Layer 2 operating mode, highlight Multicasting from the Main Menu and press Enter. Figure 1-35. Multicasting Menu 9033691-01 VH-2402-L3 Management Guide 47 IGMP Snooping Settings To configure IGMP Snooping, highlight IGMP Snooping Settings from the Multicasting Menu and press Enter. Figure 1-36. IGMP Snooping IGMP Snooping can be globally enabled or disabled from the IGMP Snooping Settings menu. To configure IGMP Snooping: Toggle the Switch IGMP Snooping:<Disabled> field to Enabled. Toggle the Querier State:<Non-Querier> field to the appropriate choice between Non-Querier, V1-Querier, and V2-Querier to determine the version of IGMP that is used in your network. A value between 2 and 255 can be entered for the Robustness Variable (default is 2). The Query Interval:[125 ] can be set between 1 and 65500 seconds (default is 125 seconds). This sets the time between IGMP queries. The Max Response:[10] allows a setting between 1 and 25 seconds (default is 10) and specifies the maximum amount of time allowed before sending a response report. Highlight APPLY and press Enter to make the settings effective. 48 VH-2402-L3 Management Guide 9033691-01 Parameter Description Switch IGMP Snooping:<Disabled> This field can be toggled using the space bar between Disabled and Enabled. This is used to Enable or Disable IGMP Snooping, globally, on the switch. Querier State:<NonQuerier> This field can be toggled between NonQuerier, V1-Querier, and V2-Querier. This is used to specify the IGMP version (1 or 2) that will be used by the IGMP interface when making queries. Robustness Variable:[ 2] A tuning variable to allow for subnetworks that are expected to lose a large number of packets. A value between 2 and 255 can be entered, with larger values being specified for subnetworks that are expected to lose larger numbers of packets. Query Interval:[125 ] Allows the entry of a value between 1 and 65500 seconds, with a default of 125 seconds. This specifies the length of time between sending IGMP queries. Max. Response:[10] Sets the maximum amount of time allowed before sending an IGMP response report. A value between 1 and 25 seconds can be entered, with a default of 10 seconds. IEEE 802.1Q Multicast Forwarding To edit the IEEE802.1 Multicast Forwarding settings, highlight IEEE802.1Q Multicast Forwarding Settings from the Multicasting Menu and press enter. 9033691-01 VH-2402-L3 Management Guide 49 Figure 1-37. Setup IEEE 802.1Q Multicast Forwarding When the switch is in Layer 2 operating mode, IEEE 802.1Q multicast forwarding allows the static entry of multicast MAC addresses, which will be sources of multicast packets, and switch port numbers, to which these multicast packets will be forwarded. The ports that can be chosen as the destination for multicast packets from the above MAC multicast address, are limited to the ports belonging to the VLAN that corresponds to the VID entered in the VID:[2 ] field. Each port of a given VLAN can be configured as an egress member, a forbidden non-member, or as a non-member of the multicast group that will receive multicast packets from the multicast MAC address, by toggling the entry below each port of the VLAN to the appropriate code. Parameter Action:<Add/Modify> Description The field can be toggled between Add/Modify and Delete using the space bar. To add a new entry to the multicast forwarding table, select Add/Modify and enter the VID of the VLAN that will be receiving the multicast packets. Enter the MAC address of the multicast source, and then enter the member ports. 50 VH-2402-L3 Management Guide 9033691-01 Delete allows for the deletion of a previously made entry. Allows the specification of the VLAN ID (VID) of the VLAN the static multicast group member belongs to. VID:[ ] Multicast MAC Address:[ ] Allows the entry of the MAC address of a static multicast group member. (E/F/-): [ ][ ][ ] To set a port’s multicast group membership status, highlight the first field of. Each port’s multicast group membership can be set individually by highlighting the port’s entry using the arrow keys, and then toggling between E, F, or – using the space bar. E Egress Member - specifies the port as being a static member of the multicast group. Egress Member Ports are ports that will be transmitting traffic for the multicast group. F Forbidden Non-Member - specifies the port as not being a member of the multicast group and that the port is forbidden from becoming a member of the multicast group dynamically. - Non-Member - specifies the port as not being a member of the multicast group, but the port can become a member of the multicast group dynamically. Static Router Port Settings A static router port is a port that has a multicast router attached to it. Generally, this router would have a connection to a WAN or to the Internet. Establishing a router port will allow multicast packets coming from the router to be propagated through the network, as well as allowing 9033691-01 VH-2402-L3 Management Guide 51 multicast messages (IGMP) coming from the network to be propagated to the router. A router port has the following behavior: • All IGMP Report packets will be forwarded to the router port. • IGMP queries (from the router port) will be flooded to all ports. • All UDP multicast packets will be forwarded to the router port. Because routers do not send IGMP reports or implement IGMP snooping, a multicast router connected to the router port of the Layer 3 switch would not be able to receive UDP data streams unless the UDP multicast packets were all forwarded to the router port. • A router port will be dynamically configured when IGMP query packets, RIPv2 multicast, DVMRP multicast, PIM-DM multicast packets are detected flowing into a port. To setup a static router port, highlight Static Router Port Settings from the Multicasting Menu and press enter. Figure 1-38. Static Router Port Settings Parameter Description 52 VH-2402-L3 Management Guide 9033691-01 Action:<Add/Modify> This field can be toggled between Add/Modify and Delete using the space bar. To add a port to the static router port table, select Add/Modify and enter the VID of the VLAN the router port will belong to. Delete allows for the deletion of a previously made entry. Router Port (M/-):[ ][ ][ ] Each port can be set individually as a router port by highlighting the port’s entry using the arrow keys, and then toggling between M and – using the space bar. M indicates a port is a member of the static group of router ports. – indicates a port is not a static member. Layer 3 Multicasting When the switch is in IP Routing mode, several functions supporting IP multicasting are added to the Multicasting menu. These additional functions can be configured under the IP Multicasting Settings menu. With the switch in IP Routing mode, highlight Multicasting from the Main Menu and press enter. Figure 1-39. Multicasting Menu 9033691-01 VH-2402-L3 Management Guide 53 Setup IP Multicast To setup IP multicasting on the switch: Highlight IP Multicasting Settings from the Multicast Menu and press Enter. Highlight Multicast Interface Configuration from the Setup Multicast Menu and press Enter. Figure 1-40. Setup IP Multicast Menu Multicast Interface Configuration To configure the multicast interface, highlight Multicast Interface Configuration and press Enter. 54 VH-2402-L3 Management Guide 9033691-01 . Figure 1-41. Multicast Interface Configuration This menu allows the assignment of a multicast routing protocol to an IP interface. The IP interface must have been previously configured on the switch. In addition, IGMP may be enabled or disabled for the selected IP interface. The available multicast protocols are the Protocol Independent Multicast – Dense Mode (PIM-DM), and the Distance-Vector Multicast Routing Protocol (DVMRP). INACT is not a multicast routing protocol. It is used to make a given interface inactive for IP Multicast routing and can still route IP traffic. Parameter Interface Name:[ Status: <Enabled> 9033691-01 Description ] Allows the entry of the name of the IP interface that is to be configured for multicasting. This must be a previously configured IP interface. This field can be toggled between Enabled and Disabled using the space VH-2402-L3 Management Guide 55 bar. This will enable or disable IGMP for the IP interface entered above. Protocol: <INACT> This field can be toggled between Protocol Independent Multicasting – Dense Mode (PIMDM), Distance Vector Multicasting Routing Protocol (DVMRP), and INACT (inactive). INACT is not a multicast routing protocol. It is used to make a given interface inactive for IP Multicast routing yet can still route IP traffic. IGMP Interface Configuration Figure 1-42. IGMP Interface Configuration This menu allows the configuration of IGMP for each IP interface configured on the switch. IGMP can be configured as Version 1 or 2 by toggling the Ver:<2> field. The length of time between queries can be varied by entering a value between 1 and 65,500 seconds in the Query:[125 ] field. The maximum length of time between the receipt of a query and the sending of an IGMP response report can be varied by entering a value in the Max. Response:[10] field. 56 VH-2402-L3 Management Guide 9033691-01 The Robustness Var:[2 ] field allows IGMP to be ‘tuned’ for sub-networks that are expected to lose a lot of packets. A high value (max. 255) for the robustness variable will help compensate for ‘lossy’ sub-networks. A low value (min. 2) should be used for less ‘lossy’ sub-networks. Parameter Description Interface Name:[ ] Allows the entry of the name of the IP interface that is to be configured for IGMP. This must be a previously configured IP interface. Querier State:<V2Querier> Can be toggled between V1-Querier and V2-Querier. This determines the IGMP version (1 or 2) that will be used to interpret IGMP queries on the interface. Robustness Variable:[ 2] A tuning variable to allow for subnetworks that are expected to lose a large number of packets. A value between 2 and 255 can be entered, with larger values being specified for subnetworks that are expected to lose larger numbers of packets. Query Interval:[125 ] Allows the entry of a value between 1 and 65500 seconds, with a default of 125 seconds. This specifies the length of time between sending IGMP queries. Max. Response:[10] Sets the maximum amount of time allowed before sending an IGMP response report. A value between 1 and 25 seconds can be entered, with a default of 10 seconds. IP Address: Displays the IP address corresponding to the IP interface name entered above. 9033691-01 VH-2402-L3 Management Guide 57 Figure 1-43. IGMP Static Member Configuration Parameter Description Action:<Add/Modify> This field can be toggled between Add/Modify and Delete. Add/Modify allows you to enter a new IGMP Static Member into the table, or to modify an existing entry. Delete allows you to delete an existing entry. Interface Name:[ ] Enter the IP Interface name the IGMP Static Member belongs to in this field. IGMP Static Group IP:[ ] Enter the IP address of the IGMP Static Group in this field. Group MAC Address: Displays the MAC address corresponding to the IGMP Static Group IP address entered above. IP Address: Displays the IP address corresponding to the IP interface entered above. State:<Enabled> Can be toggled between Enabled and Disabled. 58 VH-2402-L3 Management Guide 9033691-01 Total Entries: Displays the total number of entries into the switch’s IGMP Static Member table. DVMRP <<Please refer to the product Release Notes before enabling this feature>> To configure DVMRP for an IP interface, highlight DVMRP Interface Configuration from the Setup IP Multicast menu and press Enter. Figure 1-44. DVMRP Interface Configuration This menu allows the Distance-Vector Multicast Routing Protocol to be configured for each IP interface defined on the switch. The Distance Vector Multicast Routing Protocol (DVMRP) is a hop-based method of building multicast delivery trees from multicast sources to all nodes of a network. Because the delivery trees are ‘pruned’ and ‘shortest path’, DVMRP is relatively efficient. Because multicast group membership information is forwarded by a distance-vector algorithm, propagation is slow. DVMRP is optimized for high delay (high latency) relatively low bandwidth networks, and can be considered as a ‘best-effort’ multicasting protocol. 9033691-01 VH-2402-L3 Management Guide 59 DVMRP resembles the Routing Information Protocol (RIP), but is extended for multicast delivery. It relies upon RIP hop counts to calculate ‘shortest paths’ back to the source of a multicast message, but defines a ‘route cost’ to calculate which branches of a multicast delivery tree should be ‘pruned’ – once the delivery tree is established. When a sender initiates a multicast, DVMRP initially assumes that all users on the network will want to receive the multicast message. When an adjacent router receives the message, it checks its unicast routing table to determine the interface that gives the shortest path (lowest cost) back to the source. If the multicast was received over the shortest path, then the adjacent router enters the information into its tables and forwards the message. If the message is not received on the shortest path back to the source, the message is dropped. Route cost is a relative number that is used by DVMRP to calculate which branches of a multicast delivery tree should be ‘pruned’. The ‘cost’ is relative to other costs assigned to other DVMRP routes throughout the network. The higher the route cost, the lower the probability that the current route will be chosen to be an active branch of the multicast delivery tree (not ‘pruned’) – if there is an alternative route. Parameter Interface Name:[ Description ] Allows the entry of the name of the IP interface for which DVMRP is to be configured. This must be a previously defined IP interface. Neighbor Time Out Interval:[35 ] This field allows an entry between 1 and 65,535 seconds and defines the time period for DVMRP will hold Neighbor Router reports before issuing poison route messages. The default is 35 seconds. Route Metric:[1 ] This field allows an entry between 0 and 254 and defines the route cost for the IP 60 VH-2402-L3 Management Guide 9033691-01 interface. The DVMRP route cost is a relative number that represents the real cost of using this route in the construction of a multicast delivery tree. It is similar to, but not defined as, the hop count in RIP. The default cost is 1. State:<Disabled> This field can be toggled between Enabled and Disabled and enables or disables DVMRP for the IP interface. The default is Disabled. IP Address: Displays the IP address corresponding to the IP Interface name entered above. Probe Interval:[10 ] The Probe Interval:[10 ] field allows an entry between 0 and 65,535 seconds and defines the interval between ‘probes’. DVMRP defines an extension to IGMP that allows routers to query other routers to determine if a multicast group is present on an given IP interface or not. The default is 10. Include Unknown Neighbor Report:<Disabled> Allows the L3 switch to accept a DVMRP route report from a non-adjacent neighbor. PIM-DM <<Please refer to the product Release Notes before enabling this feature>> To configure PIMDM for an IP interface: Highlight PIMDM Interface Configuration from the Setup IP Multicast menu and press enter. 9033691-01 VH-2402-L3 Management Guide 61 Figure 1-45. PIM-DM Interface Configuration The Protocol Independent Multicast – Dense Mode (PIMDM) protocol should be used in networks with a low delay (low latency) and high bandwidth as PIM-DM is optimized to guarantee delivery of multicast packets, not to reduce overhead. The PIM-DM multicast routing protocol is assumes that all downstream routers want to receive multicast messages and relies upon explicit prune messages from downstream routers to remove branches from the multicast delivery tree that do not contain multicast group members. PIM-DM has no explicit ‘join’ messages. It relies upon periodic flooding of multicast messages to all interfaces and then either waiting for a timer to expire (the Join/Prune Interval) or for the downstream routers to transmit explicit ‘prune’ messages indicating that there are no multicast members on their respective branches. PIM-DM then removes these branches (‘prunes’ them) from the multicast delivery tree. Because a member of a pruned branch of a multicast delivery tree may want to join a multicast delivery group (at some point in the future), the protocol periodically removes the ‘prune’ information from its database and floods multicast messages to all interfaces on that branch. The interval for removing ‘prune’ information is the Join/Prune Interval. 62 VH-2402-L3 Management Guide 9033691-01 Parameter Interface Name:[ Description ] Allows the entry of the name of the IP interface for which PIM-DM is to be configured. This must be a previously defined IP interface. IP Address Displays the IP address for the IP interface named above. Hello Interval:[30 ] This field allows an entry of between 0 and 9,999 seconds and determines the interval between sending Hello packets to other routers on the network. The Hello messages are used by the router to determine if it is the root router on the delivery tree or not. If the router does not receive a Hello message within the Hello Interval, it will begin transmitting Hello messages to advertise its availability to become the root router. The default is 30 seconds. Join/Prune Interval:[60 ] This field allows an entry of between 0 and 9,999 seconds and determines the interval between transmitting (flooding to all interfaces) multicast messages to downstream routers, and automatically ‘pruning’ a branch from the multicast delivery tree. This interval also determines the time interval the router uses to automatically remove prune information from a branch of a multicast delivery tree and begin to flood multicast messages to all branches of that delivery tree. These two actions are equivalent. The default is 60 seconds. State:<Disabled> This field can be toggled between Enabled and Disabled using the space bar, and is used to enable or disable PIM-DM for the IP interface. The default 9033691-01 VH-2402-L3 Management Guide 63 is Disabled. Port Mirroring To configure a port for port mirroring: Highlight Mirroring from the Main Menu and press enter. Figure 1-46. Mirroring Menu To select the target port, highlight Target Port Selection and press enter. 64 VH-2402-L3 Management Guide 9033691-01 Figure 1-47. Target Port Selection The target port is the port where information will be duplicated and sent for capture and network analysis. This is the port where a network analyzer would be attached to capture packets duplicated from the source port. To select the source port(s) for mirroring, highlight Port Mirroring Settings and press enter. Figure 1-48. Port Mirroring Settings Up to 25 entries can be made to the port mirroring table, but it should be noted that a faster port (a 1000 Mbps Gigabit Ethernet port, for example) should not be mirrored to a slower port (one of the 24 100 Mbps Fast Ethernet port), because many packets will be dropped. Parameter Action:<Add/Modify> 9033691-01 Description This field can be toggled between Add/Modify and Delete using the space bar. Entries can be added, modified or deleted based upon the port number entered in the Source Port [ ] field. VH-2402-L3 Management Guide 65 Source Port [24] Allows the entry of the port number of the port to be mirrored. This port is the source of the packets to be duplicated and forwarded to the Target port. Direction:<Either> This field can be toggled between Either, Ingress and Egress. Ingress mirrors only received packets, while Egress mirrors only transmitted packets. Priority To configure a forwarding priority for a given MAC address, highlight Priority from the main menu and press Enter. Figure 1-49. Setup MAC Address Priority Parameter Description Action:<Add/Modify> This field can be toggled between Add/Modify and Delete using the space bar. VID:[1 ] Allows the entry of the VLAN ID (VID) of the VLAN to which the MAC address 66 VH-2402-L3 Management Guide 9033691-01 below is a member of. ] Allows the entry of the MAC address of the station for which priority queuing is to be specified. Priority Level:<Low> This field can be toggled using the space bar between Low, Med-L (Medium Low), Med-H (Medium High), and High, corresponding to the priority of packets sent to or transmitted from the MAC address entered above. Source/Destination: This field can be toggled using the space bar between Src. (Source), Dst. (Destination), and Either, corresponding to whether the MAC address entered above will be transmitting packets (a source), receiving packets (a destination) or both (either). MAC Address:[ <Src.> Filtering Layer 2 Filtering To enter a MAC address into the filtering table, highlight Filtering from the Main Menu and press enter. Figure 1-50. MAC Address Filter 9033691-01 VH-2402-L3 Management Guide 67 Highlight MAC Address Filter and press enter. Figure 1-51. Setup MAC Address Filter When the switch is in Layer 2 Only operating mode, MAC addresses can be entered into the static filtering table. The switch can be configured to filter packets from this MAC address (a source), or to it (a destination). The switch can also be configured to filter all packets to or from this MAC address (either a source or a destination). Parameter Description Action:<Add/Modify> This field can be toggled between Add/Modify and Delete using the space bar. VID: [ ] Allows the entry of the VLAN ID (VID) of the VLAN to which the MAC address below is a member of. MAC Address:[ ] Source/Destination: <Scr.> Allows the entry of a MAC address to be filtered from the switch. This address must be a unicast MAC address. This field can be toggled using the space bar between Src. (Source), Dst. 68 VH-2402-L3 Management Guide 9033691-01 (Destination), and Either, corresponding to whether the MAC address entered above will be transmitting packets (a source), receiving packets (a destination) or both (either). Layer 3 (IP Routing) Filtering With the switch configured to Layer 3 Operation mode, both MAC and IP addresses can be entered into the filtering table, using there respective entry menus. To enter an address, highlight Filtering from the Main Menu and press enter. Figure 1-52. Filtering Menu – Layer 3 9033691-01 VH-2402-L3 Management Guide 69 Figure 1-53. IP Address Filtering Setup Parameter Description Action:<Add/Modify> This field can be toggled between Add/Modify and Delete using the space bar. IP Address:[ Allows the entry of an IP address to be filtered from the switch. ] Source/Destination: <Scr.> This field can be toggled between Src. (source), Dst. (destination), and Either. The IP address entered into the filtering table can be filtered as a source (packets will not be received from the IP address), as a destination (packets will not be transmitted to the IP address), or as either a source or destination (packets will not be received from or transmitted to the IP address. Forwarding Layer 2 Forwarding To enter a MAC address into the switch’s forwarding table highlight Forwarding from the Main Menu and press enter. 70 VH-2402-L3 Management Guide 9033691-01 Figure 1-54. Forwarding Menu – Layer 2 Highlight MAC Address Forwarding from the Forwarding Menu and press enter. Figure 1-55. Static Unicast MAC Forwarding Setup Parameter Description Action:<Add/Modify> The field can be toggled between Add/Modify and Delete using the space bar. VID:[ ] Allows the entry of the VLAN ID (VID) of the VLAN the MAC address below is a member of. 9033691-01 VH-2402-L3 Management Guide 71 MAC Address:[ Port: [ ] ] Allows the entry of the MAC address of an end station that will be entered into the switch’s static forwarding table. Allows the entry of the port number on which the MAC address entered above resides. IP Forwarding Static/Default Routes With the switch in Layer 3 Operation mode, entries into the switch’s forwarding table can be made using both MAC addresses and IP addresses. Static IP forwarding is accomplished by the entry of an IP address into the Static IP Routing table. Static Address Resolution Protocol (ARP) entrees can also be made from the Forwarding Menu. Highlight Static/Default Routes from the Forwarding menu and press enter. Figure 1-56. Setup Static IP Routes 72 VH-2402-L3 Management Guide 9033691-01 Parameter Description The field can be toggled between Add and Delete using the space bar. Action:<Add > IP Address:[ Subnet Mask:[ Gateway IP:[ Metric:[1 ] Allows the entry of an IP address that will be a static entry into the switch’s IP forwarding table. ] ] ] Allows the entry of a subnet mask corresponding to the IP address above. Allows the entry of an IP address of a default gateway for the IP address above. Allows the entry of a routing protocol metric representing the number of routers between the switch and the IP address above. Static ARP To make a static ARP entry highlight Static ARP from the Forwarding menu and press enter. Figure 1-57. Setup Static ARP Entries 9033691-01 VH-2402-L3 Management Guide 73 Parameter Description Action:<Add/Modify> The field can be toggled between Add and Delete using the space bar. Interface Name:[ The name of the IP interface the ARP entry resides on. IP Address:[ ] The IP address of the ARP entry. ] MAC Address:[ ] The MAC address of the ARP entry. Spanning Tree Switch Spanning Tree Settings To globally configure STP on the switch highlight Spanning Tree on the main menu and press Enter. Figure 1-58. Configure Spanning Tree - Global The Spanning Tree Protocol (STP) operates on two levels: on the switch level, the settings are globally implemented. On the port level, the settings are implemented on a per user-defined Group basis. 74 VH-2402-L3 Management Guide 9033691-01 The factory default setting should cover the majority of installations. It is advisable to keep the default settings as set at the factory; unless, it is absolutely necessary to change them. Parameter Description Status:<Enabled> This field can be toggled between Enabled and Disabled using the space bar. This will enable or disable the Spanning Tree Protocol (STP), globally, for the switch. STP Group:<Default> This field can be toggled using the space bar to select any of the STP groups that have been configured on the switch. Max. Age: [ ] The Max. Age can be set from 6 to 40 seconds. At the end of the Max. Age, if a BPDU has still not been received from the Root Bridge, your Switch will start sending its own BPDU to all other Switches for permission to become the Root Bridge. If it turns out that your Switch has the lowest Bridge Identifier, it will become the Root Bridge. Hello Time:[ ] The Hello Time can be set from 1 to 10 seconds. This is the interval between two transmissions of BPDU packets sent by the Root Bridge to tell all other Switches that it is indeed the Root Bridge. Forward Delay:[ ] The Forward Delay can be from 4 to 30 seconds. This is the time any port on the Switch spends in the listening state while moving from the blocking state to the forwarding state. Priority:[ A Priority for the switch can be set from 0 to 65535. This number is used in the 9033691-01 ] VH-2402-L3 Management Guide 75 voting process between switches on the network to determine which switch will be the root switch. A low number indicates a high priority, and a high probability that this switch will be elected as the root switch. The Hello Time cannot be longer than the Max. Age. Otherwise, a configuration error will occur. Observe the following formulas when setting the above parameters: Max. Age ≤ 2 x (Forward Delay - 1 second) Max. Age ≥ 2 x (Hello Time + 1 second) STP Group Confugration To define which ports will be members of an STP Group, highlight Group Create/Delete and press enter. Figure 1-59. STP Group Configuration Toggle the Action:<Add/Modify> field to Add/Modify. Choose a name for the group and enter it in the Group Name:[ ] field. The group name does not necessarily 76 VH-2402-L3 Management Guide 9033691-01 have to correspond to any name that has been previously entered in the switch’s configuration. 9033691-01 VH-2402-L3 Management Guide 77 Figure 1-60. STP Port Settings Toggle the View Ports:< > field to the range of ports to be configured. The Fast Ethernet ports displayed for configuration in groups of 12 and the two (optional) Gigabit Ethernet ports are displayed together. In addition to setting Spanning Tree parameters for use on the switch level, the VH-2402-L3 allows for the configuration of groups of ports, each port-group of which will have its own spanning tree, and will require some of its own configuration settings. An STP Group will use the switch-level parameters entered above, with the addition of Port Priority and Port Cost. An STP Group spanning tree works in the same way as the switch-level spanning tree, but the root bridge concept is replaced with a root port concept. A root port is a port of the group that is elected on the basis of port priority and port cost, to be the connection to the network for the group. Redundant links will be blocked, just as redundant links are blocked on the switch level. The STP on the switch level blocks redundant links between switches (and similar network devices). The port level STP will block redundant links within an STP Group. 78 VH-2402-L3 Management Guide 9033691-01 It is advisable to define an STP Group to correspond to a VLAN group of ports. Parameter Description View Ports:< Configure Ports:[ to [ ] Port Cost:[ Priority:[ This field can be toggled using the space bar between 1 to 12, 13 to 24, and 2526. This is used to select the range of ports displayed in the console. > ] ] ] Allows the entry of a range of port numbers to be configured. A Port Cost can be set from 1 to 65535. The lower the number, the greater the probability the port will be chosen to forward packets. A Port Priority can be from 0 to 255. The lower the number, the greater the probability the port will be chosen as the Root Port. Port Trunking To configure a port trunking group, highlight Port Trunking on the Main Menu and press Enter. Figure 1-61. Port Trunking Setup 9033691-01 VH-2402-L3 Management Guide 79 Port trunking allows several ports to be grouped together and to act as a single link. This gives a bandwidth that is a multiple of a single link’s bandwidth. Port trunking is most commonly used to link a bandwidth intensive network device or devices – such as a server – to the backbone of a network. The VH-2402-L3 allows the creation of up to 6 port trunking groups, each group consisting of up of up to 8 links (ports). The trunked ports must be contiguous (they must have sequential port numbers) except the two (optional) Gigabit ports – which can only belong to a single port trunking group. A port trunking group may not cross an 8 port boundary, starting with port 1 (a group may not contain ports 8 and 9, for example) and all of the ports in the group must be members of the same VLAN. Further, the trunked ports must all be of the same speed and should be configured as full-duplex. The configuration of the lowest numbered port in the group becomes the configuration for all of the ports in the aggregation group. This port is called the Master Port of the group, and all configuration options – including the VLAN configuration – that can be applied to the Master Port are applied to the entire port trunking group. Load balancing is automatically applied to the ports in the trunked group, and a link failure within the group causes the network traffic to be directed to the remaining links in the group. The Spanning Tree Protocol will treat a port trunking group as a single link, on the switch level. On the port level, the STP will use the port parameters of the Master Port in the calculation of port cost and in determining the state of the port trunking group. If two redundant port trunking groups are configured on the switch, STP will block one entire group – in the same way STP will block a single port that has a redundant link. 80 VH-2402-L3 Management Guide 9033691-01 Parameter Description Group ID:[1] This field can be toggled between any one of the six possible port trunking groups configurable on the switch. Port:[1] The Master port of trunk group. Group Width:[ ] Method:<Disabled> 9033691-01 Allows the entry of the number of contiguous ports that will make up the port trunking group. These ports will be in sequential order from the Master Port. This field can be toggled between Enabled and Disabled. This is used to turn a port trunking group on or off. This is useful for diagnostics, to quickly isolate a bandwidth intensive network device or to have an absolute backup aggregation group that is not under automatic control. VH-2402-L3 Management Guide 81 Switch Utilities Layer 2 Switch Utilities To access the Switch Utilities menu, highlight Utilities from the Main Menu and press enter. Figure 1-62. Switch Utilities Menu Trivial File Transfer Protocol (TFTP) services allow the switch firmware to be upgraded by transferring a new firmware file from a TFTP server to the switch. A configuration file can also be loaded into the switch from a TFTP server, switch settings can be saved to the TFTP server, and a history log can be uploaded from the switch to the TFTP server. Updating Firmware To update the switch’s firmware, highlight Upgrade Firmware from TFTP Server and press enter. 82 VH-2402-L3 Management Guide 9033691-01 Figure 1-63. Upgrade Firmware Enter the IP address of the TFTP server in the Server IP Address:[ ] field. The TFTP server must be on the same IP subnet as the switch. Enter the path and the filename to the firmware file on the TFTP server. Note that in the above example, the firmware file is in the root directory of the C drive of the TFTP server. The TFTP server must be running TFTP server software to perform the file transfer. TFTP server software is a part of many network management software packages – such as NetSight, or can be obtained as a separate program. Highlight APPLY and press enter to record the IP address of the TFTP server. Use Save Changes from the Main Menu to enter the address into NV-RAM Highlight START and press enter to initiate the file transfer. Downloading a Configuration File To download a switch configuration file from a TFTP server, highlight Download Configuration File from TFTP Server and press enter. 9033691-01 VH-2402-L3 Management Guide 83 Figure 1-64. Download Configuration File Enter the IP address of the TFTP server and specify the location of the switch configuration file on the TFTP server. Highlight APPLY and press enter record the IP address of the TFTP server. Use Save Changes from the Main Menu to enter the address into NV-RAM Highlight START and press enter to initiate the file transfer. Uploading a Settings File To upload a settings file to the TFTP server, highlight Upload configuration file to TFTP Server and press enter. 84 VH-2402-L3 Management Guide 9033691-01 Figure 1-65. Upload Setting File Enter the IP address of the TFTP server and the path and filename of the settings file on the TFTP server and press APPLY. Highlight START and press enter to initiate the file transfer. Uploading a History Log File To save a History Log on a TFTP server, highlight Save Log to TFTP Server and press enter. Figure 1-66. Upload Log File 9033691-01 VH-2402-L3 Management Guide 85 Enter the IP address of the TFTP server and the path and filename for the history log on the TFTP server. Highlight APPLY and press enter to make the changes current. Highlight START and press enter to initiate the file transfer. Testing Connectivity with Ping To test the connection with another network device using Ping, highlight Ping Test and press enter. Figure 1-67. Ping Connectivity Test Enter the IP address of the network device to be pinged and the number of test packets to be sent (3 is usually enough). Highlight START and press enter to initiate the ping program. Layer 3 Utilities Layer 3 (IP Routing) switch operation mode adds BOOTP Relay and DNS Relay to the utilities available on the switch. BOOTP/DHCP Relay To enter the IP addresses of BOOTP or DHCP servers (for the BOOTP/DHCP Relay service): 86 VH-2402-L3 Management Guide 9033691-01 Highlight Utilities on the Main Menu and press Enter. Highlight BOOTP/DHCP Relay on the Switch Utilities menu and press Enter. Figure 1-68. BOOTP/DHCP Relay Menu Parameter Description BOOTP/DHCP Relay Status <Disabled> This field can be toggled between Enabled and Disabled using the space bar. It is used to enable or disable the BOOTP/DHCP Relay service on the switch. The default is Disabled. BOOTP HOPS Count Limit [4 ] This field allows an entry between 1 and 16 to define the maximum number of router hops BOOTP messages can be forwarded across. The default hop count is 4. BOOTP/DHCP Relay Time Threshold:[4 ] Allows an entry between 0 and 65535 seconds, and defines the maximum time limit for routing a BOOTP/DHCP packet. If a value of 0 is entered, the switch will not process the value in the seconds field of the BOOTP or DHCP packet. If a nonzero value is entered, the switch will use that value, along with the hop count to 9033691-01 VH-2402-L3 Management Guide 87 determine whether to forward a given BOOTP or DHCP packet. Figure 1-69. BOOTP/DHCP Relay Interface Configuration Parameter Description This field can be toggled between Add and Delete using the space bar. Toggle to Add and enter the subnet name for which BOOTP Relay will be active. Action:<Add> Interface Name:[ ] The interface name of the IP interface on which the BOOTP or DHCP servers reside on. IP Address: Displays the IP address corresponding to the subnet name entered above. BOOTP/DHCP Server:[ ] Allows the entry of IP addresses for up to four BOOTP or DHCP servers. 88 VH-2402-L3 Management Guide 9033691-01 DNS Relay To enter the IP addresses of DNS servers (for the DNS Relay service): Highlight DNS Relay on the Switch Utilities menu and press enter. Figure 1-70. DNS Relay Setup Parameter Description DNSR Status <Disabled> This field can be toggled between Disabled and Enabled using the space bar, and is used to enable or disable the DNS Relay service on the switch. Name Server: [1] [ ] Allows the entry of the IP address of a primary (number 1) and a secondary (number 2) domain name server (DNS). DNSR Cache Status:<Disabled> This can be toggled between Disabled and Enabled. This determines if a DNS cache will be enabled on the switch. DNSR Static Table Lookup This field can be toggled using the space 9033691-01 VH-2402-L3 Management Guide 89 Status:<Disabled> bar between Disabled and Enabled. This determines if the static DNS table will be used or not. To make a static DNS table entry: Highlight Static Table Setting on the DNS Relay menu and press Enter. Figure 1-71. DNS Relay Setup Parameter Description Action:<Add/Edit> The Action:<Add/Edit> field can be toggled between Add/Edit and Delete. Enter the Domain name and its corresponding IP address. Domain Name The domain name of the static DNS table entry. IP Address The IP address of the domain name above. Status:<Enabled> This field can be toggled using the space bar between Enabled and Disabled. 90 VH-2402-L3 Management Guide 9033691-01 Network Monitoring The VH-2402-L3 provides extensive network monitoring capabilities that can be viewed under Network Monitoring from the Main Menu. Network monitoring on the switch is divided into Layer 2 and Layer 3 functions, depending upon which operating mode the switch is in. Layer 2 network monitoring functions are visible on the console when the switch is in Layer 2 Only operating mode. Layer 3 network monitoring functions are added to the console when the switch is in IP Routing operating mode. Layer 2 Network Monitoring Layer 2 network monitoring consists of the following screens or menus: • Port Utilization • Port Error Packets • Port Packet Analysis • Browse MAC Address Table(view the MAC address forwarding table) • GVRP (view the GVRP status table) • Browse Router Port (view the router port status table) • IGMP Snooping • Switch History 9033691-01 VH-2402-L3 Management Guide 91 To display the network data compiled by the switch: Highlight Network Monitoring on the Main Menu and press enter. Figure 1-72. Network Monitoring Menu Port Utilization The Port Utilization screen shows the number of packets transmitted and received per second and calculates the percentage of the total available bandwidth being used on the port (displayed under %Util.). To view the port utilization: Highlight Port Utilization on the Network Monitoring menu and press enter. 92 VH-2402-L3 Management Guide 9033691-01 Figure 1-73. Port Utilization able Parameter Description Port The switch’s port number. Interval:<2 sec> The time between updates received from the switch. Suspend stops the updates. The default is 2 seconds. TX/sec The rate at which the given port is transmitting packets, in packets per second. RX/sec The rate at which the given port is receiving packets, in packets per second. %Util The percentage utilization of the given port’s available bandwidth. Port Error Statistics The Port Error Statistics screen displays the packet errors that the switch can detect and displays the results on a per port basis. 9033691-01 VH-2402-L3 Management Guide 93 To view the error statistics for a port: Highlight Port Error Packets on the Network Monitoring menu and press enter. Figure 1-74. Port Error Packets The Port field can be toggled between Port 1~26 to select which group of ports will be displayed. Enter the port number of the port to be viewed. The Interval:<2 sec> field can be toggled from 2 seconds to 1 minute, or suspend. This sets the interval at which the error statistics are updated. Parameter Description Interval:<2 sec> The interval (in seconds) that the table is updated. The default is 2 seconds. RX Frames Received packets. CRC Error For 10 Mbps ports, the counter records CRC errors (FCS or alignment errors). For 100 Mbps ports, the counter records 94 VH-2402-L3 Management Guide 9033691-01 the sum of CRC errors and code errors (frames received with rxerror signal). Undersize The total number of frames received that were less than 64 octets long (excluding framing bits, but including FCS octets) and were otherwise well formed. Oversize The total number of frames received that were longer than 1518 octets (excluding framing bits, but including FCS octets) and were otherwise well formed. Fragments The total number of frames received that were less that 64 octets in length (excluding framing bits, but including FCS octets) and had either an FCS or an alignment error. Jabber The total number of frames received that were longer than 1518 octets (excluding framing bits, but including FCS octets), and had either an FCS or an alignment error. Drop Pkts The total number of events in which packets were dropped due to a lack of resources. TX Frames Transmitted packets. ExDefer The number of frames for which the first transmission attempt on a particular interface was delayed because the medium was busy CRC Error For 10 Mbps ports, the counter records CRC errors (FCS or alignment errors). For 100 Mbps ports, the counter records the sum of CRC errors and code errors (frames received with rxerror signal). Late Coll. Late Collisions. The number of times that a collision is detected later than 512 9033691-01 VH-2402-L3 Management Guide 95 bit-times into the transmission of a packet. Ex. Coll. Excessive Collisions. The number of frames for which transmission failed due to excessive collisions. Single Coll.* Single Collision Frames. The number of successfully transmitted frames for which transmission is inhibited by more than one collision. Coll. An estimate of the total number of collisions on this network segment. Port Packet Analysis Table The Port Packet Analysis Table displays the size of packets received or transmitted by a given switch port. In addition, statistics on the number and rate of unicast, multicast, and broadcast packets received by the switch are displayed. To view an analysis of packets received or transmitted by a port: Highlight Port Packet Analysis on the Network Monitoring menu and press enter. 96 VH-2402-L3 Management Guide 9033691-01 Figure 1-75. Port Packet Analysis Table Parameter Description Interval:<2 sec> The interval (in seconds) that the table is updated. The default is 2 seconds. Frames The number of packets (or frames) received or transmitted by the switch with the size, in octets, given by the column on the right. Frames/sec The number of packets (or frames) transmitted or received, per second, by the switch. Unicast RX Displays the number of unicast packets received by the switch in total number (Frames) and the rate (Frames/sec). Multicast RX Displays the number of multicast packets received by the switch in total number (Frames) and the rate (Frames/sec). Broadcast RX Displays the number of broadcast packets received by the switch in total number (Frames) and the rate (Frames/sec). 9033691-01 VH-2402-L3 Management Guide 97 RX Bytes Displays the number of bytes (octets) received by the switch in total number (Total), and rate (Total/sec). RX Frames Displays the number of packets (frames) received by the switch in total number (Total), and rate (Total/sec). TX Bytes Displays the number of bytes (octets) transmitted by the switch in total number (Total), and rate (Total/sec). TX Frames Displays the number of packets (frames) transmitted by the switch in total number (Total), and rate (Total/sec). MAC Address Forwarding Table This allows the switch’s dynamic MAC address forwarding table to be viewed. When the switch learns an association between a MAC address and a port number, it makes an entry into its forwarding table. These entries are then used to forward packets through the switch. To view the MAC address forwarding table: Highlight Browse MAC Address Table on the Network Monitoring menu and press enter. 98 VH-2402-L3 Management Guide 9033691-01 Figure 1-76. Browse MAC Address Table The Browse By:<ALL > field can be toggled between ALL, MAC Address, Port, and VLAN. This sets a filter to determine which MAC addresses from the forwarding table are displayed. ALL specifies no filter. To search for a particular MAC address: Toggle the Browse By:<ALL > field to MAC Address. A MAC Address:[000000000000] field will appear. Enter the MAC address in the field and press enter. GVRP Status Table This allows the GVRP status for each of the switch’s ports to be viewed by VLAN. The GVRP status screen displays the ports on the switch that are currently Egress or Untagged ports. To view the GVRP status table: Highlight GVRP Status from the Network Monitoring menu and press enter. 9033691-01 VH-2402-L3 Management Guide 99 Figure 1-77. GVRP Status Table Browse Router Port This displays which of the switch’s ports are currently configured as router ports. A router port configured by a user (using the console or web-based management interfaces) is displayed as a static router port, designated by S. A router port that is dynamically configured by the switch is designated by D. To view the Router Port table: Highlight Browse Router Port from the Network Monitoring menu and press Enter. 100 VH-2402-L3 Management Guide 9033691-01 Figure 1-78 . Browse Router Port The Jump to VID:[1 ] field allows the entry of any VLAN ID (VID) of any VLAN defined on the switch. Enter the VID, highlight GO and press enter. The table will then jump to the VID entered. S signifies a static router port, configured by the user. D signifies a dynamically assigned router port, configured by the switch. IGMP Snooping Table This allows the switch’s IGMP Snooping table to be viewed. IGMP Snooping allows the switch to read the Multicast Group IP address and the corresponding MAC address from IGMP packets that pass through the switch. The ports where the IGMP packets were snooped are displayed, signified with an M. The number of IGMP reports that were snooped are also displayed in the Reports: field. To view the IGMP Snooping table: Highlight IGMP Snooping Status from the Network Monitoring menu and press Enter. 9033691-01 VH-2402-L3 Management Guide 101 Figure 1-79. IGMP Snooping Status Table Switch History Log − This allows the Switch History Log to be viewed. The switch records all traps, in sequence, that identify events on the switch. The time since the last cold start of the switch is also recorded. To view the switch history log: Highlight Switch History from the Network Monitoring menu and press enter. Figure 1-80. Switch History Table 102 VH-2402-L3 Management Guide 9033691-01 Layer 3 Network Monitoring When the switch is in Layer 3 (IP Routing) mode, several items are added to the Network Monitoring menu. The following items are added to the Network Monitoring menu when the switch is in Layer 3 (IP Routing) mode: • Browse IP Address • Routing Table • ARP Table • IP Multicast Forwarding Table • IGMP Group Table • DVMRP Routing Table To view the Network Monitoring menu: Highlight Network Monitoring from the Main Menu and press Enter. Figure 1-81. Network Monitoring Menu – Layer 3 9033691-01 VH-2402-L3 Management Guide 103 IP Address Forwarding Table To view the IP address forwarding table: Highlight Browse IP Address from the Network Monitoring menu and press enter. Figure 1-82. IP Forwarding Table – Layer 3 To display a particular IP address, enter the IP address in the Jump to IP Address:[0.0.0.0] field, highlight GO, and press enter. Routing Table To view the contents of the IP Routing table: Highlight Routing Table on the Network Monitoring menu and press Enter. 104 VH-2402-L3 Management Guide 9033691-01 Figure 1-83. View the IP Routing Table To display a particular Destination IP address, enter either the IP address in the Jump to Destination Address:[0.0.0.0] field, the gateway address in the Gateway:[0.0.0.0] field, or the subnet mask in the Mask:[0.0.0.0] field, highlight GO, and press enter. ARP Table To view the ARP table: Highlight ARP Table on the Network Monitoring menu and press enter. 9033691-01 VH-2402-L3 Management Guide 105 Figure 1-84. View the ARP Table To display a particular IP interface or an IP address, enter either the IP interface name in the Jump to Interface Name:[ ] field or enter the IP address in the IP Address:[0.0.0.0] field, highlight GO, and press enter. IP Multicast Forwarding Table To view the IP multicast forwarding table: Highlight IP Multicast Forwarding Table from the Network Monitoring menu and press enter. Figure 1-85. View the IP Multicast Forwarding Table 106 VH-2402-L3 Management Guide 9033691-01 To display a particular multicast group, enter either the IP address in the Jump to Multicast Group:[0.0.0.0] field, enter the source IP address in the Source IP:[0.0.0.0] field, or the source subnet mask in the Source Mask:[0.0.0.0] field, highlight GO, and press enter. This sets a filter to determine which IP addresses and multicast groups from the table are displayed. To display a particular source IP address, enter either the IP address in the Jump to IP Address:[0.0.0.0] field, or the source subnet mask in the Source Mask:[0.0.0.0] field, highlight GO, and press enter. IGMP Group Table To view the IGMP Group table: Highlight IGMP Group Table from the Network Monitoring menu and press Enter. Figure 1-86. Browse IGMP Group Table To display a particular multicast group, enter either the IP address in the Jump to Interface Name:[ ] field, enter the multicast group IP address in the Multicast Group:[0.0.0.0] field, highlight GO, and press Enter. 9033691-01 VH-2402-L3 Management Guide 107 DVMRP Routing Table To view the DVMRP Routing table: Highlight DVMRP Routing Table from the Network Monitoring menu and press enter. Figure 1-87. Browse DVMRP Routing Table The Jump to Source IP Address:[ ] and Source Mask:[ ] fields allow the entry of an IP address and corresponding subnet mask to search the table for. Highlight GO and press enter and the DVMRP Routing table will be searched for the IP address and subnet mask above. Load Factory Defaults To reset the switch to all factory defaults: Highlight Reboot on the main menu and press enter. 108 VH-2402-L3 Management Guide 9033691-01 Figure 1-88. Reboot Highlight one of the two Load Factory Default Configuration entries and press enter. A confirmation screen will appear. Press Y for Yes and press enter. The factory defaults for the VH-2402-L3 are listed in Appendix D of this manual. 9033691-01 VH-2402-L3 Management Guide 109 Reboot The VH-2402-L3 has several reboot options. To reboot the switch from the console: Highlight Reboot from the Main Menu and press enter. Figure 1-89. Reboot Menu The reboot options are as follows: Reboot simply restarts the switch. Any configuration settings not saved using Save Changes from the Main Menu will be lost. The switch’s configuration will be restored to the last configuration saved in NV-RAM. Save Configuration & Reboot saves the configuration to NV-RAM (identical to using Save Changes) and then restarts the switch. Reboot & Load Factory Default Configuration restarts the switch using the default factory configuration. All configuration data will be lost. This is identical to using Factory Reset and then Reboot. 110 VH-2402-L3 Management Guide 9033691-01 Reboot & Load Factory Default Configuration Except IP Address restarts the switch using the default factory configuration, except the user configured IP address will be retained. All other configuration data will be lost. A confirmation screen will appear: Figure 1-90. System Reboot Confirmation To reboot the switch, in the mode entered above, highlight Yes and press enter. 9033691-01 VH-2402-L3 Management Guide 111 2. Switch Management Concepts SNMP The Simple Network Management Protocol (SNMP) is an OSI layer 7 (the application layer) protocol for remotely monitoring and configuring network devices. SNMP enables network management stations to read and modify the settings of gateways, routers, switches, and other network devices. SNMP can be used to perform many of the same functions as a directly connected console, or can be used within an integrated network management software package such as NetSight. SNMP performs the following functions: • • • Sending and receiving SNMP packets through the IP protocol. Collecting information about the status and current configuration of network devices. Modifying the configuration of network devices. The VH-2402-L3 has a software program called an ‘agent’ that processes SNMP requests, but the user program that makes the requests and collects the responses runs on a management station (a designated computer on the network). The SNMP agent and the user program both use the UDP/IP protocol to exchange packets. Authentication The authentication protocol ensures that both the router SNMP agent and the remote user SNMP application program discard packets from unauthorized users. Authentication is accomplished using ‘community strings’, which function like passwords. The remote user SNMP application and the router SNMP must use the same community string. SNMP community strings of up to 20 112 VH-2402-L3 Management Guide 9033691-01 characters may be entered under the Remote Management Setup menu of the console program. Traps Traps are messages that alert network personnel of events that occur on the Switch. The events can be as serious as a reboot (someone accidentally turned OFF the Switch), or less serious like a port status change. The Switch generates traps and sends them to the trap recipient (or network manager). Trap recipients are special users of the network who are given certain rights and access in overseeing the maintenance of the network. Trap recipients will receive traps sent from the Switch; they must immediately take certain actions to avoid future failure or breakdown of the network. You can also specify which network managers may receive traps from the Switch by entering a list of the IP addresses of authorized network managers. Up to four trap recipient IP addresses, and four corresponding SNMP community strings can be entered. SNMP community strings function like passwords in that the community string entered for a given IP address must be used in the management station software, or a trap will be sent. The following are trap types the switch can send to a trap recipient: • Cold Start This trap signifies that the Switch has been powered up and initialized such that software settings are reconfigured and hardware systems are rebooted. A cold start is different from a factory reset in that configuration settings saved to non-volatile RAM used to reconfigure the switch. • Warm Start This trap signifies that the Switch has been rebooted, however the POST (Power On SelfTest) is skipped. 9033691-01 VH-2402-L3 Management Guide 113 • Authentication Failure This trap signifies that someone has tried to logon to the switch using an invalid SNMP community string. The switch automatically stores the source IP address of the unauthorized user. • Topology Change A Topology Change trap is sent by the Switch when any of its configured ports transitions from the Learning state to the Forwarding state, or from the Forwarding state to the Blocking state. The trap is not sent if a new root trap is sent for the same transition. • Link Change Event This trap is sent whenever the link of a port changes from link up to link down or from link down to link up. • Port Partition This trap is sent whenever the port state enters the partition mode (or automatic partitioning, port disable) when more than thirty-two collisions occur while transmitting at 10Mbps or more than sixty-four collisions occur while transmitting at 100Mbps. • Broadcast\Multicast Storm This trap is sent whenever the port reaches the threshold (in packets per second) set globally for the switch. Counters are maintained for each port, and separate counters are maintained for broadcast and multicast packets. The switch’s default setting is 128 kpps for both broadcast and multicast packets. MIBs Management and counter information are stored in the Switch in the Management Information Base (MIB). The Switch uses the standard MIB-II Management Information Base module. Consequently, values for MIB objects can be retrieved from any SNMP-based network management software. In addition to the standard MIB-II, the Switch also supports its own proprietary enterprise MIB as an extended Management Information Base. These MIBs may also be retrieved by specifying the MIB’s Object-Identity (OID) at the 114 VH-2402-L3 Management Guide 9033691-01 network manager. MIB values can be either read-only or read-write. Read-only MIBs variables can be either constants that are programmed into the Switch, or variables that change while the Switch is in operation. Examples of read-only constants are the number of port and type of ports. Examples of readonly variables are the statistics counters such as the number of errors that have occurred, or how many kilobytes of data have been received and forwarded through a port. Read-write MIBs are variables usually related to usercustomized configurations. Examples of these are the Switch’s IP Address, Spanning Tree Algorithm parameters, and port status. If you use a third-party vendors’ SNMP software to manage the Switch, a diskette listing the Switch’s propriety enterprise MIBs can be obtained by request. If your software provides functions to browse or modify MIBs, you can also get the MIB values and change them (if the MIBs’ attributes permit the write operation). This process however can be quite involved, since you must know the MIB OIDs and retrieve them one by one. Packet Forwarding The Switch enters the relationship between destination MAC or IP addresses and the Ethernet port or gateway router the destination resides on into its forwarding table. This information is then used to forward packets. This reduces the traffic congestion on the network, because packets, instead of being transmitted to all ports, are transmitted to the destination port only. Example: if Port 1 receives a packet destined for a station on Port 2, the Switch transmits that packet through Port 2 only, and transmits nothing through the other ports. This process is referred to as ‘learning’ the network topology. MAC Address Aging Time The Aging Time affects the learning process of the Switch. Dynamic forwarding table entries, which are made up of the 9033691-01 VH-2402-L3 Management Guide 115 source MAC addresses and their associated port numbers, are deleted from the table if they are not accessed within the aging time. The aging time can be from 10 to 1,000,000 seconds with a default value of 300 seconds. A very long aging time can result in dynamic forwarding table entries that are out-of-date or no longer exist. This may cause incorrect packet forwarding decisions by the switch. If the Aging Time is too short however, many entries may be aged out too soon. This will result in a high percentage of received packets whose source addresses cannot be found in the forwarding table, in which case the switch will broadcast the packet to all ports, negating many of the benefits of having a switch. Static forwarding entries are not affected by the aging time. Filtering The switch uses a filtering database to segment the network and control communication between segments. It can also filter packets off the network for intrusion control. Static filtering entries can be made by MAC Address or IP Address filtering. Each port on the switch is a unique collision domain and the switch filters (discards) packets whose destination lies on the same port as where it originated. This keeps local packets from disrupting communications on other parts of the network. For intrusion control, whenever a switch encounters a packet originating from or destined to a MAC address or an IP Address entered into the filter table, the switch will discard the packet. Some filtering is done automatically by the switch: • Dynamic filtering – automatic learning and aging of MAC addresses and their location on the network. 116 VH-2402-L3 Management Guide 9033691-01 Filtering occurs to keep local traffic confined to its segment. • Filtering done by the Spanning Tree Protocol, which can filter packets based on topology, making sure that signal loops don’t occur. • Filtering done for VLAN integrity. Packets from a member of a VLAN (VLAN 2, for example) destined for a device on another VLAN (VLAN 3) will be filtered. Some filtering requires the information into a filtering table: manual entry of • MAC address filtering – the manual entry of specific MAC addresses to be filtered from the network. Packets sent from one manually entered MAC address can be filtered from the network. The entry may be specified as either a source, a destination, or both. • IP address filtering – the manual entry of specific IP addresses to be filtered from the network (switch must be in IP Routing mode). Packets sent from one manually entered IP address to another can be filtered from the network. The entry may specified as either a source, a destination, or both (switch must be in IP Routing mode). Spanning Tree The IEEE 802.1D Spanning Tree Protocol allows for the blocking of links between switches that form loops within the network. When multiple links between switches are detected, a primary link is established. Duplicated links are blocked from use and become standby links. The protocol allows for the duplicate links to be used in the event of a failure of the primary link. Once the Spanning Tree Protocol is configured and enabled, primary links are established and duplicated links are blocked automatically. The reactivation of the blocked links (at the time of a primary link failure) is also accomplished automatically – without operator intervention. 9033691-01 VH-2402-L3 Management Guide 117 The VH-2402-L3 STP allows two levels of spanning trees to be configured. The first level constructs a spanning tree on the links between switches. This is referred to as the Switch or Global level. The second level is on a port group basis. Groups of ports are configured as being members of a spanning tree and the algorithm and protocol are applied to the group of ports. This is referred to as the Port or VLAN level. On the switch level, STP calculates the Bridge Identifier for each switch and then sets the Root Bridge and the Designated Bridges. On the port level, STP sets the Root Port and the Designated Ports. The following are the user-configurable STP parameters for the switch level: Parameter Description Default Value Bridge Identifier A combination of the User-set priority and the switch’s MAC address. The Bridge Identifier consists of two parts: a 16-bit priority and a 48-bit Ethernet MAC address 32768 + MAC Priority A relative priority for each switch – lower numbers give a higher priority and a greater chance of a given switch being elected as the root bridge 32768 Hello Time The length of time between broadcasts of the hello message by the switch 2 seconds Maximum Age Timer Measures the age of a received BPDU for a port and ensures that the BPDU is discarded when its age exceeds the value of the maximum age timer. 20 seconds (Not userconfigurable except by setting priority below) 118 VH-2402-L3 Management Guide 9033691-01 Forward Delay Timer The amount time spent by a port in the learning and listening states waiting for a BPDU that may return the port to the blocking state. 15 seconds Table 2-1. STP Parameters – Switch Level The following are the user-configurable STP parameters for the port or port group level: Variable Description Default Value Port Priority A relative priority for each port – lower numbers give a higher priority and a greater chance of a given port being elected as the root port 128 Port Cost A value used by STP to evaluate paths – STP calculates path costs and selects the path with the minimum cost as the active path. 19 – 100Mbps Fast Ethernet ports 10 – 1000Mbps Gigabit Ethernet ports Table 2-2. STP Parameters – Port Group Level Bridge Protocol Data Units For STP to arrive at a stable network topology, the following information is used: • The unique switch identifier • The path cost to the root associated with each switch port • The port identifier 9033691-01 VH-2402-L3 Management Guide 119 STP communicates between switches on the network using Bridge Protocol Data Units (BPDUs). Each BPDU contains the following information: • The unique identifier of the switch that the transmitting switch currently believes is the root switch • The path cost to the root from the transmitting port • The port identifier of the transmitting port The switch sends BPDUs to communicate and construct the spanning-tree topology. All switches connected to the LAN on which the packet is transmitted will receive the BPDU. BPDUs are not directly forwarded by the switch, but the receiving switch uses the information in the frame to calculate a BPDU, and, if the topology changes, initiates a BPDU transmission. The communication between switches via BPDUs results in the following: • One switch is elected as the root switch • The shortest distance to the root switch is calculated for each switch • A designated switch is selected. This is the switch closest to the root switch through which packets will be forwarded to the root. • A port for each switch is selected. This is the port providing the best path from the switch to the root switch. • Ports included in the STP are selected. Creating a Stable STP Topology If all switches have STP enabled with default settings, the switch with the lowest MAC address in the network will become the root switch. By increasing the priority (lowering the priority number) of the best switch, STP can be forced to select the best switch as the root switch. 120 VH-2402-L3 Management Guide 9033691-01 When STP is enabled using the default parameters, the path between source and destination stations in a switched network might not be ideal. For instance, connecting higherspeed links to a port that has a higher number than the current root port can cause a root-port change. The goal is to make the fastest link the root port. STP Port States The BPDUs take some time to pass through a network. This propagation delay can result in topology changes where a port that transitioned directly from a Blocking state to a Forwarding state could create temporary data loops. Ports must wait for new network topology information to propagate throughout the network before starting to forward packets. They must also wait for the packet lifetime to expire for BPDU packets that were forwarded based on the old topology. The forward delay timer is used to allow the network topology to stabilize after a topology change. In addition, STP specifies a series of states a port must transition through to further ensure that a stable network topology is created after a topology change. Each port on a switch using STP exists is in one of the following five states: • Blocking – the port is blocked from forwarding or receiving packets • Listening – the port is waiting to receive BPDU packets that may tell the port to go back to the blocking state • Learning – the port is adding addresses to its forwarding database, but not yet forwarding packets • Forwarding – the port is forwarding packets • Disabled – the port only responds to network management messages and must return to the blocking state first 9033691-01 VH-2402-L3 Management Guide 121 A port transitions from one state to another as follows: • From initialization (switch boot) to blocking • From blocking to listening or to disabled • From listening to learning or to disabled • From learning to forwarding or to disabled • From forwarding to disabled • From disabled to blocking Figure 2-1. STP Port State Transitions When STP is enabled, every port on every switch in the network goes through the blocking state and then transitions 122 VH-2402-L3 Management Guide 9033691-01 through the states of listening and learning at power up. If properly configured, each port stabilizes to the forwarding or blocking state. No packets (except BPDUs) are forwarded from, or received by, STP enabled ports until the forwarding state is enabled for that port. Default Spanning-Tree Configuration Feature Default Value Enable state STP enabled for all ports Port priority 128 Port cost 19 Bridge Priority 32,768 Table 2-3. Default STP Parameters User-Changeable STA Parameters The factory default setting should cover the majority of installations. However, it is advisable to keep the default settings as set at the factory; unless, it is absolutely necessary. The user changeable parameters in the Switch are as follows: • Priority A Priority for the switch can be set from 0 to 65535. 0 is equal to the highest Priority. • Hello Time The Hello Time can be from 1 to 10 seconds. This is the interval between two transmissions of BPDU packets sent by the Root Bridge to tell all other Switches that it is indeed the Root Bridge. If you set a Hello Time for your Switch, and it is not the Root Bridge, the set Hello Time will be used if and when your Switch becomes the Root Bridge. 9033691-01 VH-2402-L3 Management Guide 123 Note: The Hello Time cannot be longer than the Max. Age. Otherwise, a configuration error will occur. • Max. Age The Max. Age can be from 6 to 40 seconds. At the end of the Max. Age, if a BPDU has still not been received from the Root Bridge, your Switch will start sending its own BPDU to all other Switches for permission to become the Root Bridge. If it turns out that your Switch has the lowest Bridge Identifier, it will become the Root Bridge. • Forward Delay Timer The Forward Delay can be from 4 to 30 seconds. This is the time any port on the Switch spends in the listening state while moving from the blocking state to the forwarding state. Note: Observe the following formulas when setting the above parameters: Max. Age ≤ 2 x (Forward Delay - 1 second) Max. Age ≥ 2 x (Hello Time + 1 second) • Port Priority A Port Priority can be from 0 to 255. The lower the number, the greater the probability the port will be chosen as the Root Port. • Port Cost A Port Cost can be set from 1 to 65535. The lower the number, the greater the probability the port will be chosen to forward packets. Illustration of STP A simple illustration of three Bridges (or three switches) connected in a loop is depicted below. In this example, you can anticipate some major network problems if the STP assistance is not applied. If Bridge A broadcasts a packet to Bridge B, Bridge B will broadcast it to Bridge C, and Bridge C will broadcast it to back to Bridge A ... and so on. The broadcast packet will be passed indefinitely in a loop, potentially causing a network failure. STP can be applied as shown in Figure 2-4. In this example, STP breaks the loop by blocking the connection between Bridge B and C. The decision to block a particular 124 VH-2402-L3 Management Guide 9033691-01 connection is based on the STP calculation of the most current Bridge and Port settings. Now, if Bridge A broadcasts a packet to Bridge C, then Bridge C will drop the packet at port 2 and the broadcast will end there. Setting-up STP using values other than the defaults, can be complex. Therefore, you are advised to keep the default factory settings and STP will automatically assign root bridges/ports and block loop connections. Influencing STP to choose a particular switch as the root bridge using the Priority setting, or influencing STP to choose a particular port to block using the Port Priority and Port Cost settings is, however, relatively straight forward. Figure 2-2. Before Applying the STA Rules In this example, only the default STP values are used. 9033691-01 VH-2402-L3 Management Guide 125 Figure 2-3. After Applying the STA Rules The switch with the lowest Bridge ID (switch C) was elected the root bridge, and the ports were selected to give a high port cost between switches B and C. The two (optional) Gigabit ports (default port cost = 10) on switch A are connected to one (optional) Gigabit port on both switch B and C. The redundant link between switch B and C is deliberately chosen as a 100 Mbps Fast Ethernet link (default port cost = 19). Gigabit ports could be used, but the port cost should be increased from the default to ensure that the link between switch B and switch C is the blocked link. Port Trunking Port trunking is used to combine a number of ports together to make a single high-bandwidth data pipeline. The participating parts are called members of a port trunking group, with one port designated as the master port of the group. Since all members of the port trunking group must be configured to operate in the same manner, the configuration of the master port is applied to all members of the port trunking group. Thus, when configuring the ports in a port trunking group, you only need to configure the master port. 126 VH-2402-L3 Management Guide 9033691-01 The VH-2402-L3 supports 6 port trunking groups, which may include from 2 to 8 switch ports each, except for a Gigabit port trunking group which consists of the 2 (optional) Gigabit Ethernet ports of the front panel. These ports are the two 1000BASE-SX, -LX –TX or GBIC ports contained in a frontpanel mounted module. Port Trunking Group Figure 2-4. Port trunking Group Data transmitted to a specific host (destination address) will always be transmitted over the same port in a trunk group. This allows packets in a data stream to arrive in the same 9033691-01 VH-2402-L3 Management Guide 127 order they were sent. A trunk connection can be made with any other switch that maintains host-to-host data streams over a single trunk port. Switches that use a load-balancing scheme that sends the packets of a host-to-host data stream over multiple trunk ports cannot have a trunk connection with the VH-2402-L3 switch. VLANs A VLAN is a collection of end nodes grouped by logic rather than physical location. End nodes that frequently communicate with each other are assigned to the same VLAN, regardless of where they are located physically on the network. Logically, a VLAN can be equated to a broadcast domain, because broadcast packets are forwarded only to members of the VLAN on which the broadcast was initiated. Notes About VLANs on the VH-2402-L3 1. The VH-2402-L3 supports IEEE 802.1Q VLANs. The port untagging function can be used to remove the 802.1Q tag from packet headers to maintain compatibility with devices that are tag-unaware (that is, network devices that do not support IEEE 802.1Q VLANs or tagging). 2. The switch’s default - in both Layer 2 Only mode and IP Routing mode - is to assign all ports to a single 802.1Q VLAN named DEFAULT_VLAN. 3. The switch allows the assignment of an IP interface to each VLAN, in IP Routing mode. The VLANs must be configured before setting up the IP interfaces 4. A VLAN that is not assigned an IP interface will behave as a layer 2 VLAN – and IP routing, by the switch, will not be possible to this VLAN regardless of the switch’s operating mode. 128 VH-2402-L3 Management Guide 9033691-01 IEEE 802.1Q VLANs Some relevant terms: Tagging - The act of putting 802.1Q VLAN information into the header of a packet. Untagging - The act of stripping 802.1Q VLAN information out of the packet header. Ingress port - A port on a switch where packets are flowing into the switch and VLAN decisions must be made. Egress port - A port on a switch where packets are flowing out of the switch, either to another switch or to an end station, and tagging decisions must be made. IEEE 802.1Q (tagged) VLANs are implemented on the VH2402-L3 Layer 3 switch. 802.1Q VLANs require tagging, which enables the VLANs to span an entire network (assuming all switches on the network are IEEE 802.1Qcompliant). Any port can be configured as either tagging or untagging. The untagging feature of IEEE 802.1Q VLANs allow VLANs to work with legacy switches that don’t recognize VLAN tags in packet headers. The tagging feature allows VLANs to span multiple 802.1Q-compliant switches through a single physical connection and allows Spanning Tree to be enabled on all ports and work normally. 802.1Q VLAN Packet Forwarding Packet forwarding decisions are made based upon the following three types of rules: • Ingress rules – rules relevant to the classification of received frames belonging to a VLAN. • Forwarding rules between ports – decides filter or forward the packet 9033691-01 VH-2402-L3 Management Guide 129 • Egress rules – determines if the packet must be sent tagged or untagged. Figure 2-5. IEEE 802.1Q Packet Forwarding 802.1Q VLAN Tags The figure below shows the 802.1Q VLAN tag. There are four additional octets inserted after the source MAC address. Their presence is indicated by a value of 0x8100 in the EtherType field. When a packet’s EtherType field is equal to 0x8100, the packet carries the IEEE 802.1Q/802.1p tag. The tag is contained in the following two octets and consists of 3 bits or user priority, 1 bit of Canonical Format Identifier (CFI – used for encapsulating Token Ring packets so they can be carried across Ethernet backbones) and 12 bits of VLAN ID (VID). The 3 bits of user priority are used by 802.1p. The VID is the VLAN identifier and is used by the 130 VH-2402-L3 Management Guide 9033691-01 802.1Q standard. Because the VID is 12 bits long, 4094 unique VLANs can be identified. The tag is inserted into the packet header making the entire packet longer by 4 octets. All of the information contained in the packet originally is retained. Figure 2-6. IEEE 802.1Q Tag The EtherType and VLAN ID are inserted after the MAC source address, but before the originial EtherType/Length or Logical Link Control. Because the packet is now a bit longer than it was originally, the Cyclic Redundancy Check (CRC) must be recalculated. 9033691-01 VH-2402-L3 Management Guide 131 Figure 2-7. Adding an IEEE 802.1Q Tag Port VLAN ID Packets that are tagged (are carrying the 802.1Q VID information) can be transmitted from one 802.1Q compliant network device to another with the VLAN information intact. This allows 802.1Q VLANs to span network devices (and indeed, the entire network – if all network devices are 802.1Q compliant). Unfortunately, not all network devices are 802.1Q compliant. These devices are referred to as tag-unaware. 802.1Q devices are referred to as tag-aware. Prior to the adoption 802.1Q VLANs, port-based and MACbased VLANs were in common use. These VLANs relied upon a Port VLAN ID (PVID) to forward packets. A packet received on a given port would be assigned that port’s PVID and then be forwarded to the port that corresponded to the packet’s destination address (found in the switch’s forwarding table). If the PVID of the port that received the packet is different from the PVID of the port that is to transmit the packet, the switch will drop the packet. Within the switch, different PVIDs mean different VLANs. (remember that two VLANs cannot communicate without an external router). So, VLAN identification based upon the PVIDs cannot create VLANs that extend outside a given switch (or switch stack). 132 VH-2402-L3 Management Guide 9033691-01 Every physical port on a switch has a PVID. 802.1Q ports are also assigned a PVID, for use within the switch. If no VLANs are defined on the switch, all ports are then assigned to a default VLAN with a PVID equal to 1. Untagged packets are assigned the PVID of the port on which they were received. Forwarding decisions are based upon this PVID, in so far as VLANs are concerned. Tagged packets are forwarded according to the VID contained within the tag. Tagged packets are also assigned a PVID, but the PVID is not used to make packet forwarding decisions, the VID is. Tag-aware switches must keep a table to relate PVIDs within the switch to VIDs on the network. The switch will compare the VID of a packet to be transmitted to the VID of the port that is to transmit the packet. If the two VIDs are different, the switch will drop the packet. Because of the existence of the PVID for untagged packets and the VID for tagged packets, tag-aware and tag-unaware network devices can coexist on the same network. A switch port can have only one PVID, but can have as many VIDs as the switch has memory in its VLAN table to store them. Because some devices on a network may be tag-unaware, a decision must be made at each port on a tag-aware device before packets are transmitted – should the packet to be transmitted have a tag or not? If the transmitting port is connected to a tag-unaware device, the packet should be untagged. If the transmitting port is connected to a tagaware device, the packet should be tagged. Tagging and Untagging Every port on an 802.1Q compliant switch can be configured as tagging or untagging. Ports with tagging enabled will put the VID number, priority and other VLAN information into the header of all packets that flow into and out of it. If a packet has previously been tagged, the port will not alter the packet, thus keeping the VLAN information intact. The VLAN information in the tag 9033691-01 VH-2402-L3 Management Guide 133 can then be used by other 802.1Q compliant devices on the network to make packet forwarding decisions. Ports with untagging enabled will strip the 802.1Q tag from all packets that flow into and out of those ports. If the packet doesn’t have an 802.1Q VLAN tag, the port will not alter the packet. Thus, all packets received by and forwarded by an untagging port will have no 802.1Q VLAN information. (Remember that the PVID is only used internally within the switch). Untagging is used to send packets from an 802.1Qcompliant network device to a non-compliant network device. Ingress Filtering A port on a switch where packets are flowing into the switch and VLAN decisions must be made is referred to as an ingress port. If ingress filtering is enabled for a port, the switch will examine the VLAN information in the packet header (if present) and decide whether or not to forward the packet. If the packet is tagged with VLAN information, the ingress port will first determine if the ingress port itself is a member of the tagged VLAN. If it is not, the packet will be dropped. If the ingress port is a member of the 802.1Q VLAN, the switch then determines if the destination port is a member of the 802.1Q VLAN. If it is not, the packet is dropped. If the destination port is a member of the 802.1Q VLAN, the packet is forwarded and the destination port transmits it to its attached network segment. If the packet is not tagged with VLAN information, the ingress port will tag the packet with its own PVID as a VID (if the port is a tagging port). The switch then determines if the destination port is a member of the same VLAN (has the same VID) as the ingress port. If it does not, the packet is dropped. If it has the same VID, the packet is forwarded and the destination port transmits it on its attached network segment. This process is referred to as ingress filtering and is used to conserve bandwidth within the switch by dropping packets that are not on the same VLAN as the ingress port at the 134 VH-2402-L3 Management Guide 9033691-01 point of reception. This eliminates the subsequent processing of packets that will just be dropped by the destination port. VLANs in Layer 2 Only Mode The switch initially configures one VLAN, VID = 1, called the DEFAULT_VLAN. The factory default setting assigns all ports on the switch to the DEFAULT_VLAN. Packets cannot cross VLANs if the switch is in Layer 2 Only mode. If a member of one VLAN wants to connect to another VLAN, the link must be through an external router. When the switch is in Layer 2 Only mode, 802.1Q VLANs are supported. If no VLANs are configured on the switch and the switch is in Layer 2 Only mode, then all packets will be forwarded to any destination port. Packets with unknown source addresses will be flooded to all ports. Broadcast and multicast packets will also be flooded to all ports. A VLAN that does not have a corresponding IP interface defined for it, will function as a Layer 2 Only VLAN – regardless of the Switch Operation mode. Layer 3-Based VLANs Layer 3-based VLANs use network-layer addresses (subnet address for TCP/IP) to determine VLAN membership. These VLANs are based on layer 3 information, but this does not constitute a ‘routing’ function. The VH-2402-L3 allows an IP subnet to be configured for each 802.1Q VLAN that exists on the switch. Even though a switch inspects a packet’s IP address to determine VLAN membership, no route calculation is performed, the RIP protocol is not employed, and packets traversing the switch are bridged using the Spanning Tree algorithm. 9033691-01 VH-2402-L3 Management Guide 135 A switch that implements layer 3 (or ‘subnet’) VLANs without performing any routing function between these VLANs is referred to as performing ‘IP Switching’. IP Addressing and Subnetting This section gives basic information needed to configure your Layer 3 switch for IP routing. The information includes how IP addresses are broken down and how subnetting works. You will learn how to assign each interface on the router an IP address with a unique subnet. Definitions • • • • • • • IP Address – the unique number ID assigned to each host or interface on a network. IP addresses have the form xxx.xxx.xxx.xxx. Subnet – a portion of a network sharing a particular network address. Subnet mask – a 32-bit number used to describe which portion of a Network Address refers to the subnet and which portion refers to the host. Subnet masks have the form xxx.xxx.xxx.xxx. Interface – a network connection IP Interface – another name for subnet. Network Address – the resulting 32-bit number from a bitwise logical AND operation performed between an IP address and a subnet mask. Subnet Address – another name for network address. IP Addresses The Internet Protocol (IP) was designed for routing data between network sites. Later, it was adapted for routing between networks (referred to as “subnets”) within a site. The IP defines a way of generating a unique number that can be assigned each network in the internet and each of the computers on each of those networks. This number is called the IP address. 136 VH-2402-L3 Management Guide 9033691-01 IP addresses use a “dotted decimal” notation. Here are some examples of IP addresses written in this format: 1. 2. 3. 210.202.204.205 189.21.241.56 125.87.0.1 This allows IP address to be written in a string of 4 decimal (base 10) numbers. Computers can only understand binary (base 2) numbers, and these binary numbers are usually grouped together in bytes, or eight bits. (A bit is a binary digit – either a “1” or a “0”). The dots (periods) simply make the IP address easier to read. A computer sees an IP address not as four decimal numbers, but as a long string of binary digits (32 binary digits or 32 bits, IP addresses are 32bit addresses). The three IP addresses in the example above, written in binary form are: 1. 2. 3. 11010010.11001010.11001100.11001101 10111101.00010101.11110001.00111000 01111101.01010111.00000000.00000001 The dots are included to make the numbers easier to read. Eight binary bits are called a ‘byte’ or an ‘octet’. An octet can represent any decimal value between ‘0’ (00000000) and ‘255’ (11111111). IP addresses, represented in decimal form, are four numbers whose value is between ‘0’ to ‘255’. The total range of IP addresses are then: Lowest possible IP address Highest possible IP address - 0.0.0.0 255.255.255.255 To convert decimal numbers to 8-bit binary numbers (and vice-versa), you can use the following chart: 9033691-01 VH-2402-L3 Management Guide 137 Binary Octet Digit 27 26 25 24 23 22 21 2 Decimal Equivalent Binary Number 128+64+32+16+8+4+2+1= 255 128 1 64 1 32 1 16 1 8 1 4 1 2 1 1 1 0 Table 2-4. Binary to Decimal Conversion Each digit in an 8-bit binary number (an octet) represents a power of two. The left-most digit represents 2 raised to the 7th power (2x2x2x2x2x2x2=128) while the right-most digit represents 2 raised to the 0th power (any number raised to the 0th power is equal to one, by definition). IP addresses actually consist of two parts, one identifying the network and one identifying the destination (node) within the network. The IP address discussed above is one part and a second number called the Subnet mask is the other part. To make this a bit more confusing, the subnet mask has the same numerical form as an IP address. Address Classes Address classes refer to the range of numbers in the subnet mask. Grouping the subnet masks into classes makes the task of dividing a network into subnets a bit easier. There are 5 address classes. The first 4 bits in the IP address determine which class the IP address falls in. • • • • • Class A addresses begin with 0xxx, or 1 to 126 decimal. Class B addresses begin with 10xx, or 128 to 191 decimal. Class C addresses begin with 110x, or 192 to 223 decimal. Class D addresses begin with 1110, or 224 to 239 decimal. Class E addresses begin with 1111, or 240 to 254 decimal. Addresses beginning with 01111111, or 127 decimal, are reserved. They are used for internal testing on a local machine (called loopback). The address 127.0.0.1 can 138 VH-2402-L3 Management Guide 9033691-01 always be pinged from a local node because it forms a loopback and points back to the same node. Class D addresses are reserved for multicasting. Class E Addresses are reserved for future use. They are not used for node addresses. The part of the IP address that belongs to the network is the part that is ‘hidden’ by the ‘1’s in the subnet mask. This can be seen below: • • • Class A Class B Class C NETWORK.node.node.node NETWORK.NETWORK.node.node NETWORK.NETWORK.NETWORK.node For example, the IP address 10.42.73.210 is a Class A address, so the Network part of the address (called the Network Address) is the first octet (10.x.x.x). The node part of the address is the last three octets (x.42.73.210). To specify the network address for a given IP address, the node part is set to all “0”s. In our example, 10.0.0.0 specifies the network address for 10.42.73.210. When the node part is set to all “1”s, the address specifies a broadcast address. So, 10.255.255.255 is the broadcast address for the network 10.0.0.0. Subnet Masking A subnet mask can be applied to an IP address to identify the network and the node parts of the address. A bitwise logical AND operation between the IP address and the subnet mask results in the Network Address. For example: 00001010.00101010.01001001.11010010 Class A IP address 9033691-01 10.42.73.210 VH-2402-L3 Management Guide 139 11111111.00000000.00000000.00000000 Class A Subnet Mask 255.0.0.0 00001010.00000000.00000000.00000000 Network Address 10.0.0.0 The Default subnet masks are: • • • Class A – 11111111.00000000.00000000.00000000 255.0.0.0 Class B – 11111111.11111111.00000000.00000000 255.255.0.0 Class C – 1111111.11111111.11111111.00000000 255.255.255.0 Additional bits can be added to the default subnet mask for a given Class to further subnet a network. When a bitwise logical AND operation is performed between the subnet mask and the IP address, the result defines the Subnet Address. Some restrictions apply to subnet addresses. Addresses of all “0”s and all “1”s are reserved for the local network (when a host does not know it’s network address) and for all hosts on the network (the broadcast address). This also applies to subnets. A subnet address cannot be all “0”s or all “1”s. A 1-bit subnet mask is also not allowed. Calculating the Number of Subnets and Nodes To calculate the number of subnets and nodes, use the formula (2n – 2) where n = the number of bits in either the subnet mask or the node portion of the IP address. Multiplying the number of subnets by the number of nodes available per subnet gives the total number of nodes for the entire network. Example 00001010.00101010.01001001.11010010 Class A IP address 140 VH-2402-L3 Management Guide 10.42.73.210 9033691-01 11111111.11100000.00000000.00000000 Subnet Mask 255.224.0.0 00001010.00100000.00000000.00000000 Network Address 10.32.0.0 00001010.00101010.11111111.11111111 Broadcast Address 10.32.255.255 This example uses an 11-bit subnet mask. (There are 3 additional bits added to the default Class A subnet mask). So the number of subnets is: 23 – 2 = 8 – 2 = 6 Subnets of all “0”s and all “1”s are not allowed, so 2 subnets are subtracted from the total. The number of bits used in the node part of the address is 24 – 3 = 21 bits, so the total number of nodes is: 221 – 2 = 2,097,152 – 2 = 2,097,150 Multiplying the number of subnets times the number of nodes gives 12,582,900 possible nodes. Note that this is less than the 16,777,214 possible nodes that an unsubnetted class A network would have. Subnetting reduces the number of possible nodes for a given network, but increases the segmentation of the network. Classless InterDomain Routing – CIDR Under CIDR, the subnet mask notation is reduced to a simplified shorthand. Instead of specifying all of the bits of the subnet mask, it is simply listed as the number of contiguous “1”s (bits) in the network portion of the address. Look at the subnet mask of the above example in binary 9033691-01 VH-2402-L3 Management Guide 141 11111111.11100000.00000000.00000000 – and you can see that there are 11 “1”s or 11 bits used to mask the network address from the node address. Written in CIDR notation this becomes: 10.32.0.0/11 # of Bits Subnet Mask 2 3 4 5 6 7 8 9 10 11 12 13 14 15 16 17 18 19 20 21 22 255.192.0.0 255.224.0.0 255.240.0.0 255.248.0.0 255.252.0.0 255.254.0.0 255.255.0.0 255.255.128.0 255.255.192.0 255.255.224.0 255.255.240.0 255.255.248.0 255.255.252.0 255.255.254.0 255.255.255.0 255.255.255.128 255.255.255.192 255.255.255.224 255.255.255.240 255.255.255.248 255.255.255.252 CID R Not atio n /10 /11 /12 /13 /14 /15 /16 /17 /18 /19 /20 /21 /22 /23 /24 /25 /26 /27 /28 /29 /30 # of Subnets # of Hosts Total Hosts 2 6 14 30 62 126 254 510 1022 2046 4094 8190 16382 32766 65534 131070 262142 525286 1048574 2097150 4194302 4194302 2097150 1048574 524286 262142 131070 65534 32766 16382 8190 4094 2046 1022 510 254 126 62 30 14 6 2 8388604 12582900 14680036 15728580 16252804 16514820 16645636 16710660 16742404 16756740 16760836 16756740 16742404 16710660 16645636 16514820 16252804 15728580 14680036 12582900 8388604 Table 2-5. Class A Subnet Masks # of Subnet Mask CIDR Bits Notation 2 255.255.192 /18 3 255.255.224.0 /19 4 255.255.240.0 /20 5 255.255.248.0 /21 6 255.255.252.0 /22 7 255.255.254.0 /23 8 255.255.255.0 /24 9 255.255.255.128 /25 10 255.255.255.192 /26 11 255.255.255.224 /27 12 255.255.255.240 /28 13 255.255.255.248 /29 14 255.255.255.252 /30 142 VH-2402-L3 Management Guide # of Subnets 2 6 14 30 62 126 254 510 1022 2046 4094 8190 16382 # of Hosts 16382 8190 4094 2046 1022 510 254 126 62 30 14 6 2 Total Hosts 32764 49140 57316 61380 63364 64260 64516 64260 63364 61380 57316 49140 32764 9033691-01 Table 2-6. Class B Subnet Masks # of Bits 2 3 4 5 6 Subnet Mask 255.255.255.192 255.255.255.224 255.255.255.240 255.255.255.248 255.255.255.252 CIDR Notation /26 /27 /28 /29 /30 # of Subnets 2 6 14 30 62 # of Hosts 62 30 14 6 2 Total Hosts 124 180 196 180 124 Table 2-7. Class C Subnet Masks Setting up IP Interfaces The Layer 3 switch allows ranges of IP addresses (OSI layer 3) to be assigned to VLANs (OSI layer 2). Each VLAN must be configured prior to setting up the corresponding IP interface. An IP addressing scheme must then be established, and implemented when the IP interfaces are set up on the switch. An example is presented below: VLAN Name VID Switch Ports System (default) 1 5, 6, 7, 8, 21, 22, 23, 24 Engineering 2 9, 10, 11, 12 Marketing 3 13, 14, 15, 16 Finance 4 17, 18, 19, 20 Sales 5 1, 2, 3, 4 Backbone 6 25, 26 Table 2-8. VLAN Example – Assigned Ports 9033691-01 VH-2402-L3 Management Guide 143 In this case, 6 IP interfaces are required, so a CIDR notation of 10.32.0.0/11 (or a 11-bit) addressing scheme will work. This addressing scheme will give a subnet mask of 11111111.11100000.00000000.00000000 (binary) or 255.224.0.0 (decimal). Using a 10.xxx.xxx.xxx IP address notation, the above example would give 6 network addresses and 6 subnets. Any IP address from the allowed range of IP addresses for each subnet can be chosen as an IP address for an IP interface on the switch. For this example, we have chosen the next IP address above the network address: VLAN Name VID Network Address IP Address System (default) 1 10.32.0.0 10.32.0.1 Engineering 2 10.64.0.0 10.64.0.1 Marketing 3 10.96.0.0 10.96.0.1 Finance 4 10.128.0.0 10.128.0.1 Sales 5 10.160.0.0 10.160.0.1 Backbone 6 10.192.0.0 10.192.0.1 Table 2-9. VLAN Example – Assigned IP Addresses The 6 IP interfaces, each with an IP address (listed in the table above), and a subnet mask of 255.224.0.0 can be entered into the Setup IP Interface menu. 144 VH-2402-L3 Management Guide 9033691-01 Layer 3-Based VLANs Layer 3-based VLANs use network-layer addresses (subnet address for TCP/IP) to determine VLAN membership. These VLANs are based on layer 3 information, but this does not constitute a ‘routing’ function. The VH-2402-L3 allows an IP subnet to be configured for each 802.1Q VLAN that exists on the switch. Even though a switch inspects a packet’s IP address to determine VLAN membership, no route calculation is performed, the RIP protocol is not employed, and packets traversing the switch are bridged using the Spanning Tree algorithm. A switch that implements layer 3 (or ‘subnet’) VLANs without performing any routing function between these VLANs is referred to as performing ‘IP Switching’. Internet Protocols This is a brief introduction to the suite of Internet Protocols frequently referred to as TCP/IP. It is intended to give the reader a reasonable understanding of the available facilities and some familiarity with terminology. It is not intended to be a complete description. Protocol Layering The Internet Protocol (IP) divides the tasks necessary to route and forward packets across networks by using a layered approach. Each layer has clearly defined tasks, protocol, and interfaces for communicating with adjacent layers, but the exact way these tasks are accomplished is left to individual software designers. The Open Systems Interconnect (OSI) seven-layer model has been adopted as the reference for the description of modern networking, including the Internet. 9033691-01 VH-2402-L3 Management Guide 145 A diagram of the OSI model is shown below (note that this is not a complete listing of the protocols contained within each layer of the model): Figure 2-8. OSI Seven Layer Network Model Each layer is a distinct set of programs executing a distinct set of protocols designed to accomplish some necessary tasks. They are separated from the other layers within the same system or network, but must communicate and interoperate. This requires very well-defined and well-known methods for transferring messages and data. This is accomplished through the protocol stack. Protocol layering as simply a tool for visualizing the organization of the necessary software and hardware in a network. In this view, Layer 2 represents switching and Layer 3 represents routing. Protocol layering is actually a set of guidelines used in writing programs and designing hardware that delegate network functions and allow the layers to communicate. How these layers communicate within a stack (for example, within a given computer) is left to the operating system programmers. 146 VH-2402-L3 Management Guide 9033691-01 Figure 2-9. The Protocol Stack Between two protocol stacks, members of the same layer are known as peers and communicate by well-known (open and published) protocols. Within a protocol stack, adjacent layers communicate by an internal interface. This interface is usually not publicly documented and is frequently proprietary. It has some of the same characteristics of a protocol and two stacks from the same software vendor may communicate in the same way. Two stacks from different software vendors (or different products from the same vendor) may communicate in completely different ways. As long as peers can communicate and interoperate, this has no impact on the functioning of the network. The communication between layers within a given protocol stack can be both different from a second stack and proprietary, but communication between peers on the same OSI layer is open and consistent. A brief description of the most commonly used functional layers is helpful to understand the scope of how protocol layering works. 9033691-01 VH-2402-L3 Management Guide 147 Layer 1 This is referred to as the physical layer. It handles the electrical connections and signaling required to make a physical link from one point in the network to another. It is on this layer that the unique Media Access Control (MAC) address is defined. Layer 2 This layer, commonly called the switching layer, allows end station addressing and the establishment of connections between them. Layer 2 switching forwards packets based on the unique MAC address of each end station and offers highperformance, dedicated-bandwidth of Fast or Gigibit Ethernet within the network. Layer 2 does not ordinarily extend beyond the intranet. To connect to the Internet usually requires a router and a modem or other device to connect to an Internet Service Provider’s WAN. These are Layer 3 functions. Layer 3 Commonly referred to as the routing layer, this layer provides logical partitioning of networks (subnetting), scalability, security, and Quality of Service (QoS). The backbone of the Internet is built using Layer 3 functions. IP is the premier Layer 3 protocol. IP is itself, only one protocol in the IP protocol suite. More extensive capabilities are found in the other protocols of the IP suite. For example; the Domain Name System (DNS) associates IP addresses with text names, the Dynamic Host Configuration Protocol (DCHP) eases the administration of IP addresses, and routing protocols such as the Routing Information Protocol (RIP), the Open Shortest Path First (OSPF), and the Border Gateway Protocol (BGP) enable Layer 3 devices to direct data traffic to the intended 148 VH-2402-L3 Management Guide 9033691-01 destination. IP security allows for authentication and encryption. IP not only allows for user-to-user communication, but also for transmission from point-tomultipoint (known as IP multicasting). Layer 4 This layer, known as the transport layer, establishes the communication path between user applications and the network infrastructure and defines the method of communicating. TCP and UDP are well-known protocols in the transport layer. TCP is a “connection-oriented” protocol, and requires the establishment of parameters for transmission prior to the exchange of data. Web technology is based on TCP. UDP is “connectionless” and requires no connection setup. This is important for multicast traffic, which cannot tolerate the overhead and latency of TCP. TCP and UDP also differ in the amount of error recovery provided and whether or not it is visible to the user application. Both TCP and UDP are layered on IP, which has minimal error recovery and detection. TCP forces retransmission of data that was lost by the lower layers, UDP does not. Layer 7 This layer, known as the application layer, provides access to either the end user application software such as a database. Users communicate with the application, which in turn delivers data to the transport layer. Applications do not usually communicate directly with lower layers They are written to use a specific communication library, like the popular WinSock library. Software developers must decide what type of transport mechanism is necessary. For example, Web access requires reliable, error-free access and would demand TCP, Multimedia, on the other hand, requires low overhead and latency and commonly uses UDP. 9033691-01 VH-2402-L3 Management Guide 149 TCP/IP The TCP/IP protocol suite is a set of protocols that allow computers to share resources across a network. TCP and IP are only two of the Internet suite of protocols, but they are the best known and it has become common to refer the entire family of Internet protocols as TCP/IP. TCP/IP is a layered set of protocols. An example, such as sending e-mail, can illustrate this. There is first a protocol for sending and receiving e-mail. This protocol defines a set of commands to identify the sender, the recipient, and the content of the e-mail. The e-mail protocol will not handle the actual communication between the two computers, this is done by TCP/IP. TCP/IP handles the actual sending and receiving of the packets that make up the e-mail exchange. TCP makes sure the e-mail commands and messages are received by the appropriate computers. It keeps track of what is sent and what is received, and retransmits any packets that are lost or dropped. TCP also handles the division of large messages into several Ethernet packets, and makes sure these packets are received and reassembled in the correct order. Because these functions are required by a large number of applications, they are grouped into a single protocol, rather than being the part of the specifications for just sending email. TCP is then a library of routines that application software can use when reliable network communications are required. IP is also a library of routines, but with a more general set of functions. IP handles the routing of packets from the source to the destination. This may require the packets to traverse many different networks. IP can route packets through the necessary gateways and provides the functions required for any user on one network to communicate with any user on another connected network. The communication interface between TCP and IP is relatively simple. When IP received a packet, it does not know how this packet is related to others it has sent (or received) or even which connection the packet is part of. IP 150 VH-2402-L3 Management Guide 9033691-01 only knows the address of the source and the destination of the packet, and it makes its best effort to deliver the packet to its destination. The information required for IP to do its job is contained in a series of octets added to the beginning of the packet called headers. A header contains a few octets of data added to the packet by the protocol in order to keep track of it. Other protocols on other network devices can add and extract their own headers to and from packets as they cross networks. This is analogous to putting data into an envelope and sending the envelope to a higher-level protocol, and having the higher-level protocol put the entire envelope into it’s own, larger envelope. This process is referred to as encapsulation. Many levels of encapsulation are required for a packet to cross the Internet. Packet Headers TCP Most data transmissions are much longer that a single packet. The data must then be divided up among a series of packets. These packets must be transmitted, received and then reassembled into the original data. TCP handles these functions. TCP must know how large a packet the network can process. To do this, the TCP protocols at each end of a connection state how large a packet they can handle and the smaller of the two is selected. The TCP header contains at least 20 octets. The source and destination TCP port numbers are the most important fields. These specify the connection between two TCP protocols on two network devices. The header also contains a sequence number that is used to ensure the packets are received in the correct order. The packets are not numbered, but rather the octets the packets 9033691-01 VH-2402-L3 Management Guide 151 contain are. If there are 100 octets of data in each packet, the first packet is numbered 0, the second 100, the third 200, etc. To insure that the data in a packet is received uncorrupted, TCP adds the binary value of all the octets in the packet and writes the sum in the checksum field. The receiving TCP recalculates the checksum and if the numbers are different, the packet is dropped. Figure 2-10. TCP Packet Header When packets have been successfully received, TCP sends an acknowledgement. This is simply a packet that has the acknowledgement number field filled in. An acknowledgement number of 1000 indicates that all of the data up to octet 1000 has been received. If the transmitting TCP does not receive an acknowledgement in a reasonable amount of time, the data is resent. The window field controls the amount of data being sent at any one time. It would require too much time and overhead to acknowledge each packet received. Each end of the TCP connection declares how much data it is able to receive at any one time by writing this number of octets in the window field. 152 VH-2402-L3 Management Guide 9033691-01 The transmitting TCP decrements the number in the window field and when it reaches zero, the transmitting TCP stops sending data. When the receiving TCP can accept more data, it increases the number in the window field. In practice, a single packet can acknowledge the receipt of data and give permission for more data to be sent. IP TCP sends its packets to IP with the source and destination IP addresses. IP is only concerned with these IP addresses. It is not concerned with the contents of the packet or the TCP header. IP finds a route for the packet to get to the other end of the TCP connection. IP adds its own header to the packet to accomplish this. The IP header contains the source and destination addresses, the protocol number, and another checksum. The protocol number tells the receiving IP which protocol to give the packet to. Although most IP traffic uses TCP, other protocols can be used (such as UDP). The checksum is used by the receiving IP in the same way as the TCP checksum. Figure 2-11. IP Packet Header 9033691-01 VH-2402-L3 Management Guide 153 The flags and fragment offset are used to keep track of packets that must be divided among several smaller packets to cross networks for which they are too large. The Time-to-Live (TTL) is the number of gateways the packet is allowed to cross between the source and destination. This number is decremented by one when the packet crosses a gateway and when the TTL reaches zero, the packet is dropped. This helps reduce network traffic if a loop develops. Ethernet Every active Ethernet device has its own Ethernet address (commonly called the MAC address) assigned to it by the manufacturer. Ethernet uses 48 bit addresses. The Ethernet header is 14 octets that include the source and destination MAC address and a type code. There is no relationship between the MAC address of a network node and its IP address. There must be a database of Ethernet addresses and their corresponding IP addresses. Different protocol families can be in use on the same network. The type code field allows each protocol family to have its own entry. A checksum is calculated and when the packet is received, the checksum is recalculated. If the two checksums are different, the packet is dropped. 154 VH-2402-L3 Management Guide 9033691-01 Figure 2-12. Ethernet Packet Header When a packet is received, the headers are removed. The Ethernet Network Interface Card (NIC) removes the Ethernet header and checks the checksum. It then looks at the type code. If the type code is for IP, the packet is given to IP. IP then removes the IP header and looks at its protocol field. If the protocol field is TCP, the packet is sent to TCP. TCP then looks at the sequence number and uses this number and other data from the headers to reassemble the data into the original file. TCP and UDP Well-Known Ports Application protocols run ‘on top of’ TCP/IP. When an application wants to send data or a message, it gives the data to TCP. Because TCP and IP take care of the networking details, the application can look at the network connection as a simple data stream. To transfer a file across a network using the File Transfer Protocol (FTP), a connection must first be established. The computer requesting the file transfer must connect specifically to the FTP server on the computer that has the file. This is accomplished using sockets. A socket is a pair of TCP port numbers used to establish a connection from one 9033691-01 VH-2402-L3 Management Guide 155 computer to another. TCP uses these port numbers to keep track of connections. Specific port numbers are assigned to applications that wait for requests. These port numbers are referred to as ‘well-known’ ports. TCP will open a connection to the FTP server using some random port number, 1234 for example, on the local computer. TCP will specify port 21 for the FTP server. Port 21 is the well-known port number for FTP servers. Note that there are two different FTP programs running in this example – an FTP client that requests the file to be transferred, and an FTP server that sends the file to the FTP client. The FTP server accepts commands from the client, so the FTP client must know how to connect to the server (must know the TCP port number) in order to send commands. The FTP Server can use any TCP port number to send the file, so long as it is sent as part of the connection setup. A TCP connection is then described by a set of four numbers – the IP address and TCP port number for the local computer, and the IP address and TCP port number for the remote computer. The IP address is in the IP header and the TCP port number is in the TCP header. No two TCP connection can have the same set of numbers, but only one number needs to be different. It is possible, for example, for two users to send files to the same destination at the same time. This could give the following connection numbers: Internet addresses TCP ports Connection 1 1234, 21 10.42.73.23, 10.128.12.1 Connection 2 1235, 21 10.42.73.23, 10.128.12.1 The same computers are making the connections, so the IP addresses are the same. Both computers are using the same well-known TCP port for the FTP server. The local FTP clients are using different TCP port numbers. 156 VH-2402-L3 Management Guide 9033691-01 FTP transfers actually involve two different connections. The connection begins by the FTP sending commands to send a particular file. Once the commands are sent, a second connection is opened for the actual data transfer. Although it is possible to send data on the same connection, it is very convenient for the FTP client to be able to continue to send commands (such as ‘stop sending this file’). UDP and ICMP There are many applications that do not require long messages that cannot fit into a single packet. Looking up computer names is an example. Users wanting to make connections to other computers will usually use a name rather than the computer’s IP or MAC address. The user’s computer must be able to determine the remote computer’s address before a connection can be made. A designated computer on the network will contain a database of computer names and their corresponding IP and MAC addresses. The user’s computer will send a query to the name database computer, and the database computer will send a response. Both the query and the response are very short. There is no need to divide the query or response between multiple packets, so the complexity of TCP is not required. If there is no response to the query after a period of time, the query can simply be resent. The User Datagram Protocol (UDP) is designed for communications that do not require division among multiple packets and subsequent reassembly. UDP does not keep track of what is sent. UDP uses port numbers in a way that is directly analogous to TCP. There are well-known UDP port numbers for servers that use UDP. 9033691-01 VH-2402-L3 Management Guide 157 Figure 2-13. Ethernet Packet Header The UDP header is shorter than a TCP header. UDP also uses a checksum to verify that data is received uncorrupted. The Internet Control Message Protocol (ICMP) is also a simplified protocol used for error messages and messages used by TCP/IP. ICMP, like UDP, processes messages that will fit into a single packet. ICMP does not, however use ports because its messages are processed by the network software. The Domain Name System Computer users usually prefer to use text names for computers they may want to open a connection with. Computers themselves, require 32 bit IP addresses. Somewhere, a database of network devices’ text names and their corresponding IP addresses must be maintained. The Domain Name System (DNS) is used to map names to IP addresses throughout the Internet and has been adapted for use within intranets. For two DNS servers to communicate across different subnets, the DNS Relay of the VH-2402-L3 must be used. The DNS servers are identified by IP addresses. 158 VH-2402-L3 Management Guide 9033691-01 Mapping Domain Names to Addresses Name-to-address translation is performed by a program called a Name server. The client program is called a Name resolver. A Name resolver may need to contact several Name servers to translate a name to an address. The Domain Name System (DNS) servers are organized in a somewhat hierarchical fashion. A single server often holds names for a single network, which is connected to a root DNS server – usually maintained by an ISP. Domain Name Resolution The domain name system can be used by contacting the name servers one at a time, or by asking the domain name system to do the complete name translation. The client makes a query containing the name, the type of answer required, and a code specifying whether the domain name system should do the entire name translation, or simply return the address of the next DNS server if the server receiving the query cannot resolve the name. When a DNS server receives a query, it checks to see if the name is in its subdomain. If it is, the server translates the name and appends the answer to the query, and sends it back to the client. If the DNS server cannot translate the name, it determines what type of name resolution the client requested. A complete translation is called recursive resolution and requires the server to contact other DNS servers until the name is resolved. Iterative resolution specifies that if the DNS server cannot supply an answer, it returns the address of the next DNS server the client should contact. Each client must be able to contact at least one DNS server, and each DNS server must be able to contact at least one root server. The address of the machine that supplies domain name service is often supplied by a DCHP or BOOTP server, or can be entered manually and configured into the operating system at startup. 9033691-01 VH-2402-L3 Management Guide 159 DHCP Servers The Dynamic Host Configuration Protocol (DHCP) is used to dynamically assign a TCP/IP network configuration to network devices and computers on the network. It also ensures that IP address conflicts do not occur. IP addresses are assigned from a pool of free addresses. Each IP address assigned has a ‘lease’ and a ‘lease expiration period’. The lease must be periodically renewed. If the lease is expires, the IP address is returned to the pool of available IP addresses. Usually, it is a network policy to assign the same IP address to a given network device or computer each time. If the IP address lease expires, the network device sends a message to the DHCP server requesting a lease renewal. The DHCP server can send an acknowledgement containing a new lease and updated configuration information. If an IP address lease cannot be renewed, the network device or computer sends a request to all local DHCP servers attempting to renew the lease. If the DHCP returns a negative acknowledgement, the network device must release its TCP/IP configuration and reinitialize. When a new TCP/IP configuration is received from a DHCP server, the network device checks for a possible IP address conflict by sending an Address Resolution Protocol (ARP) request that contains its new IP address. 160 VH-2402-L3 Management Guide 9033691-01 For two DHCP servers to communicate across different subnets, the BOOTP/DHCP Relay of the VH2402-L3 must be used. The DHCP servers are identified by IP addresses. IP Routing IP handles the task of determining how packets will get from their source to their destination. This process is referred to as routing. For IP to work, the local system must be attached to a network. It is safe to assume that any system on this network can send packets to any other system, but when packets must cross other networks to reach a destination on a remote network, these packets must be handled by gateways (also called routers). Gateways connect a network with one or more other networks. Gateways can be a computer with two network interfaces or a specialized device with multiple network interfaces. The device is designed to forward packets from one network to another. IP routing is based on the network address of the destination IP address. Each computer has a table of network addresses. For each network address, a corresponding gateway is listed. This is the gateway to use to communicate with that network. The gateway does not have to be directly connected to the remote network, it simply needs to be the first place to go on the way to the remote network. Before a local computer sends a packet, it first determines whether the destination address is on the local network. If it is, the packet can be sent directly to the remote device. If it is not, the local computer looks for the network address of the destination and the corresponding gateway address. The packet is then sent to the gateway leading to the remote network. There is often only one gateway on a network. 9033691-01 VH-2402-L3 Management Guide 161 A single gateway is usually defined as a default gateway, if that gateway connects the local network to a backbone network or to the Internet. This default gateway is also used whenever no specific route is found for a packet, or when there are several gateways on a network. Local computers can use default gateways, but the gateways themselves need a more complete routing table to be able to forward packets correctly. A protocol is required for the gateways to be able to communicate between themselves and to keep their routing tables updated. Packet Fragmentation and Reassembly TCP/IP can be used with many different types of networks, but not all network types can handle the same length packets. When IP is transmitting large files, large packets are much more efficient than small ones. It is preferable to use the largest possible packet size, but still be able to cross networks that require smaller packets. To do this, IP can ‘negotiate’ packet size between the local and remote ends of a connection. When an IP connection is first made, the IPs at both ends of the connection state the largest packet they can handle. The smaller of the two is selected. When a IP connection crosses multiple networks, it is possible that one of the intermediate networks has a smaller packet size limit than the local or remote network. IP is not able to determine the maximum packet size across all of the networks that may make up the route for a connection. IP has, therefore, a method to divide packets into multiple, smaller packets to cross such networks. This division of large packets into smaller packets is referred to as fragmentation. A field in the TCP header indicates that a packet has been fragmented, and other information aids in the reassembly of the packets into the original data. 162 VH-2402-L3 Management Guide 9033691-01 Gateways that connect networks of different packet size limits split the large packets into smaller ones and forward the smaller packets on their attached networks. ARP The Address Resolution Protocol (ARP) determines the MAC address and IP address correspondence for a network device. A local computer will maintain an ARP cache which is a table of MAC addresses and the corresponding IP addresses. Before a connection with another computer is made, the local computer first checks its ARP cache to determine whether the remote computer has an entry. If it does, the local computer reads the remote computer’s MAC address and writes it into the destination field of the packets to be sent. If the remote computer does not have an ARP cache entry, the local computer must send an ARP request and wait for a reply. When the local computer receives the ARP reply packet, the local ARP reads the IP MAC address pair, and then checks the ARP cache for this entry. If there is an entry, it is updated with the new information. If there is no entry, a new entry is made. There are two possible cases when an ARP packet is received by a local computer. First, the local computer is the target of the request. If it is, the local ARP replies by sending its MAC IP address pair back to the requesting system. Second, if the local computer is not the target of the request, the packet is dropped. Multicasting Multicasting is a group of protocols and tools that enable a single source point to send packets to groups of multiple destination points with persistent connections that last for some amount of time. The main advantage to multicasting is a decrease in the network load compared to broadcasting. 9033691-01 VH-2402-L3 Management Guide 163 Multicast Groups Class D IP addresses are assigned to a group of network devices that comprise a multicast group. The four most significant four bits of a Class D address are set to “1110”. The following 28 bits is referred to as the ‘multicast group ID’. Some of the range of Class D addresses are registered with the Internet Assigned Numbers Authority (IANA) for special purposes. For example, the block of multicast addresses ranging from 224.0.0.1 to 224.0.0.225 is reserved for use by routing protocols and some other low-level topology discovery and maintenance protocols. Figure 2-14. Class D Multicast Address Some of the reserved IP multicast addresses are as follows: Address Assignment 224.0.0.0 Base Address (reserved) 224.0.0.1 All Systems on this subnet 224.0.0.2 All Routers on this subnet 224.0.0.3 Unassigned 224.0.0.4 DVMRP Routers 224.0.0.5 OSPF IGP Routers 224.0.0.6 OSPF IGP Designated Routers 224.0.0.7 ST Routers 164 VH-2402-L3 Management Guide 9033691-01 224.0.0.8 ST Hosts 224.0.0.9 All RIP2 Routers 224.0.0.10 All IGRP Routers 224.0.0.11 Mobile Agents 224.0.0.12 DHCP Servers and Relay Agents 224.0.0.13 All PIM Routers 224.0.0.14 RSVP Encapsulation 224.0.0.15 All CBT Routers 224.0.0.16 Designated Sbm 224.0.0.17 All Sbms 224.0.0.18 VRRP 224.0.0.19 Unassigned through 224.0.0.225 224.0.0.21 DVMRP on MOSPF Table 2-10. Reserved Multicast Address Assignment Internet Group Management Protocol (IGMP) End users that want to receive multicast packets must be able to inform nearby routers that they want to become a multicast group member of the group these packets are being sent to. The Internet Group Management Protocol (IGMP) is used by multicast routers to maintain multicast group membership. IGMP is also used to coordinate between multiple multicast routers that may be present on a network by electing one of the multicast routers as the 9033691-01 VH-2402-L3 Management Guide 165 ‘querier’. This router then keep track of the membership of multicast groups that have active members on the network. IGMP is used to determine whether the router should forward multicast packets it receives to the subnetworks it is attached to or not. A multicast router that has received a multicast packet will check to determine if there is at least one member of a multicast group that has requested to receive multicast packets from this source. If there is one member, the packet is forwarded. If there are no members, the packet is dropped. IGMP Versions 1 and 2 Users that want to receive multicast packets need to be able to join and leave multicast groups. This is accomplished using IGMP. Figure 2-15. IGMP Message Format The IGMP Type codes are shown below: Type Meaning 0x11 Membership Query (if Group Address is 0.0.0.0) 0x11 0x16 0x17 0x12 Specific Group Membership Query (if Group Address is Present) Membership Report (version 2) Leave a Group (version 2) Membership Report (version 1) Table 2-11. IGMP Type Codes Multicast routers use IGMP to manage multicast group memberships: 166 VH-2402-L3 Management Guide 9033691-01 • • • • An IGMP “report” is sent by a user’s computer to join a group IGMP version 1 does not have an explicit ‘leave’ message. Group members have an expiration timer, and if this timer expires before a query response is returned, the member is dropped from the group. IGMP version 2 introduces an explicit “leave” report. When a user wants to leave a group, this report is sent to the multicast router (for IGMP version 2). Multicast routers send IGMP queries (to the all-hosts group address: 224.0.0.1) periodically to see whether any group members exist on their subnetworks. If there is no response from a particular group, the router assumes that there are no group members on the network, and multicast packets are not forwarded. The TTL field of query messages is set to 1 so that the queries do not get forwarded to other subnetworks. IGMP version 2 introduces a few extensions to IGMP version 1 such as, the election of a single multicast querier for each network, explicit ‘leave’ reports, and queries that are specific to a particular multicast group. The router with the lowest IP address is elected as the querier. The explicit group leave message is added to decrease latency, and routers can ask for membership reports from a particular multicast group ID. The transition states a host will go through to join or leave a multicast group are shown in the diagram below. 9033691-01 VH-2402-L3 Management Guide 167 Figure 2-16. IGMP State Transitions Multicast Routing Algorithms An algorithm is not a program. An algorithm is a statement of how a problem can be solved. A program is written to implement an algorithm. Multicast packets are delivered by constructing multicast trees where the multicast router is the trunk, the branches are the various subnetworks that may be present, and the leaves are end recipients of the multicast packets. Several algorithms have been developed to construct these trees and to prune branches that have no active mulitcast group members Flooding The simplest algorithm for the delivery of multicast packets is for the multicast router to forward a multicast packet to all interfaces. This is referred to as flooding. An equally simple 168 VH-2402-L3 Management Guide 9033691-01 refinement of flooding is to have the router check to determine if a given multicast packet has been received before (in a certain amount of time). If it has, then the packet does not need to be forwarded at all and can be dropped. If the packet is being received for the first time, it should be flooded to all interface, except the interface on which it was received. This will ensure that all routers on the network will receive at least one copy of the multicast packet. There are some obvious disadvantages to this simple algorithm. Flooding duplicates a lot of packets and uses a lot of network bandwidth. A multicast router must also keep a record of the multicast packets it has received (for a period of time) to determine if a given packet has been previously received. So flooding uses a lot of router memory. Multicast Spanning Trees A multicast delivery tree that spans the entire network with a single active link between routers (or subnetwork) is called a multicast spanning tree. Links (or branches) are chosen such that there is only one active path between any two routers. When a router receives a multicast packet, it forwards the packet on all links except the one on which it was received. This guarantees that all routers in the network will receive a copy of the packet. The only information the router needs to store is whether a link is a part of the spanning tree (leads to a router) or not. Multicast spanning trees do not use group membership information when deciding to forward or drop a given multicast packet. Reverse Path Broadcasting (RPB) The Reverse Path Broadcasting (RPB) algorithm is an enhancement of the multicast spanning tree algorithm. RPB constructs a spanning tree for each multicast source. When the router receives a multicast packet, it then checks to determine if the packet was received on the shortest path back from the router to the source. If the packet was received on the shortest path back to the source, the packet 9033691-01 VH-2402-L3 Management Guide 169 is forwarded on all links except the link on which the packet was received. If the packet was not received on the shortest link back to the source, the packet is dropped. If a link-state routing protocol is in use, RPB on a local router can determine if the path from the source through the local router to an immediately neighboring router. If it is not, the packet will be dropped at the next router and the packet should not be forwarded. If a distance-vector routing protocol is in use, a neighboring router can either advertise its previous hop for the source as part of its routing update messages. This will ‘poisonreverse’ the route (or have the local router prune the branch from the multicast source to the neighboring router because the neighboring router has a better route from the source to the next router or subnetwork). Since multicast packets are forwarded through the shortest route between source and destination, RPB is fast. A given router also does not need information about the entire spanning tree, nor does it need a mechanism to stop the forwarding of packets. RPB does not use multicast group membership information in its forwarding decisions. Reverse Path Multicasting (RPM) Reverse Path Multicasting (RPM) introduces an enhancement to RPB – an explicit method to prune branches of the spanning tree that have on active multicast group members for the source. RPM constructs a tree that spans only subnetworks with multicast group member and routers along the shortest path between the source and the destinations. When a multicast router receives a multicast packet, it is forwarded using the RPB constructed spanning tree. Subsequent routers in the tree that have no active path to another router are referred to as leaf routers. If the multicast packet if forwarded to a leaf router that has no active multicast group members for the source, the leaf router will 170 VH-2402-L3 Management Guide 9033691-01 send a prune message to the previous router. This will remove the leaf router’s branch from the spanning tree, and no more multicast packets (from that source) will be forwarded to it. Prune messages have a TTL equal to one, so they can be sent only one hop (one router) back toward the source. If the previous router receives prune messages from all of its branch and leaf routers, the previous router will then send it’s own prune message back one router toward the multicast source, and the process will repeat. In this way, multicast group membership information can be used to prune the spanning tree between a given multicast source and the corresponding multicast group. Since the membership of any given multicast group can change and the network topology can also change, RPM periodically removes all of the prune information it has gathered from it’s memory, and the entire process repeats. This gives all subsequent routers on the network a chance to receive multicast packets from all multicast sources on the network. It also gives all user’s a chance to join a given multicast group. Multicast Routing Protocols This section contains an overview of two multicast routing protocols – Distance Vector Multicast Routing Protocol (DVMRP), and Protocol Independent Multicast-Dense Mode (PIM-DM). The most commonly used routing protocol (not a multicast routing protocol), the Routing Information Protocol, is discussed in a later section. Distance Vector Multicast Routing Protocol (DVMRP) The Distance Vector Multicast Routing Protocol (DVMRP) was derived from the Routing Information Protocol (RIP) with the introduction of multicast delivery trees constructed from information about the ‘distance’ from the local router back toward the multicast source. DVMRP uses an RPM algorithm to construct its multicast delivery trees. The first multicast packet received by a multicast router using DVMRP is flooded to all interfaces except the one on 9033691-01 VH-2402-L3 Management Guide 171 which the packet was received. Subsequent prune messages are used to prune branches of the delivery tree that are either not on the shortest path back to the multicast source, or that have no active multicast group members. A ‘graft’ message is added that allows a previously pruned branch of the multicast delivery tree to be reactivated. This allows for lower latency when a leaf router adds a new member to a multicast membership group. Graft messages are forwarded one hop (one router) back at a time toward a multicast source until they reach a router that is on an active branch of the multicast delivery tree. If there is more than one multicast router on a network, the one that has the shortest path back to the multicast source is elected to forward multicast packets from that source. All other routers will discard multicast packets from that source. If two multicast routers on a network have the same distance back to a multicast source, the router with the lowest IP address is elected. DVMRP also supports tunnel interfaces, where two multicast routers are connected through a router that cannot process multicast packets. This allows multicast packets to cross networks with routers that are not multicast-aware. 172 VH-2402-L3 Management Guide 9033691-01 Routing Protocols Protocol-Independent Multicast – Dense Mode There are two protocols in Protocol Independent Multicast (PIM), Protocol Independent MulticastDense Mode (PIM-DM) which is used when the multicast destinations are closely spaced, and Protocol Independent Multicast-Sparse Mode (PIMSM) which is used when the multicast destinations are spaced further apart. PIM-DM is most commonly implemented in an intranetwork (LAN) where the distance between users is minimal. Routing Information Protocol (RIP) The Routing Information Protocol is a distance-vector routing protocol. There are two types of network devices running RIP – active and passive. Active devices advertise their routes to others through RIP messages, while passive devices listen to these messages. Both active and passive routers update their routing tables based upon RIP messages that active routers exchange. Only routers can run RIP in the active mode. Every 30 seconds, a router running RIP broadcasts a routing update containing a set of pairs of network addresses and a distance (represented by the number of hops or routers between the advertising router and the remote network). So, the vector is the network address and the distance is measured by the number of routers between the local router and the remote network. RIP measures distance by an integer count of the number of hops from one network to another. A router is one hop from a directly connected network, two hops from a network that can be reached through a router, etc. The more routers between a source and a destination, the greater the RIP distance (or hop count). 9033691-01 VH-2402-L3 Management Guide 173 There are a few rules to the routing table update process that help to improve performance and stability. A router will not replace a route with a newly learned one if the new route has the same hop count (sometimes referred to as ‘cost’). So learned routes are retained until a new route with a lower hop count is learned. When learned routes are entered into the routing table, a timer is started. This timer is restarted every time this route is advertised. If the route is not advertised for a period of time (usually 180 seconds), the route is removed from the routing table. RIP does not have an explicit method to detect routing loops. Many RIP implementations include an authorization mechanism (a password) to prevent a router from learning erroneous routes from unauthorized routers. To maximize stability, the hop count RIP uses to measure distance must have a low maximum value. Infinity (that is, the network is unreachable) is defined as 16 hops. In other words, if a network is more than 16 routers from the source, the local router will consider the network unreachable. RIP can also be slow to converge (to remove inconsistent, unreachable or looped routes from the routing table) because RIP messages propagate relatively slowly through a network. Slow convergence can be solved by using split horizon update, where a router does not propagate information about a route back to the interface on which it was received. This reduces the probability of forming transient routing loops. Hold down can be used to force a router to ignore new route updates for a period of time (usually 60 seconds) after a new route update has been received. This allows all routers on the network to receive the message. A router can ‘poison reverse’ a route by adding an infinite (16) hop count to a route’s advertisement. This is usually used in conjunction with triggered updates, which force a router to send an immediate broadcast when an update of an unreachable network is received. 174 VH-2402-L3 Management Guide 9033691-01 RIP Version 1 Message Format There are two types of RIP messages: routing information messages and information requests. The same format is used by both types. Figure 2-17. RIP v.1 Message Format 9033691-01 VH-2402-L3 Management Guide 175 The COMMAND field specifies an operation according the following table: Command Meaning 1 Request for partial or full routing information 2 Response containing network-distance pairs from sender’s routing table 3 Turn on trace mode (obsolete) 4 Turn off trace mode (obsolete) 5 Reserved for Sun Microsystem’s internal use 9 Update Request 10 Update Response 11 Update Acknowledgement Table 2-12. RIP Command Codes The field VERSION contains the protocol version number (1 in this case), and is used by the receiver to verify which version of RIP the packet was sent from. RIP 1 Message RIP is not limited to TCP/IP. Its address format can support up to 14 octets (when using IP, the remaining 10 octets must be zeros). Other network protocol suites can be specified in the Family of Source Network field (IP has a value of 2). This will determine how the address field is interpreted. RIP specifies that the IP address 0.0.0.0 denotes a default route. The distances, measured in router hops are entered in the Distance to Source Network, and Distance to Destination Network fields. 176 VH-2402-L3 Management Guide 9033691-01 RIP 1 Route Interpretation RIP was designed to be used with classed address schemes, and does not include an explicit subnet mask. An extension to version 1 does allow routers to exchange subnetted addresses, but only if the subnet mask used by the network is the same as the subnet mask used by the address. This means the RIP version 1 cannot be used to propagate classless addresses. Routers running RIP version 1 must send different update messages for each IP interface to which it is connected. Interfaces that use the same subnet mask as the router’s network can contain subnetted routes, other interfaces cannot. The router will then advertise only a single route to the network. RIP Version 2 Extensions RIP version 2 includes an explicit subnet mask entry, so RIP version 2 can be used to propagate variable length subnet addresses or CIDR classless addresses. RIP version 2 also adds an explicit next hop entry, which speeds convergence and helps prevent the formation of routing loops. RIP2 Message Format The message format used with RIP2 is an extension of the RIP1 format: 9033691-01 VH-2402-L3 Management Guide 177 Figure 2-18. RIP Message Format RIP version 2 also adds a 16-bit route tag that is retained and sent with router updates. It can be used to identify the origin of the route. Because the version number in RIP2 occupies the same octet as in RIP1, both versions of the protocols can be used on a given router simultaneously without interference. 178 VH-2402-L3 Management Guide 9033691-01 Appendix A. Troubleshooting STP Spanning Tree Protocol Failure A failure in the STA generally leads to a bridging loop. A bridging loop in an STP environment comes from a port that should be in the blocking state, but is forwarding packets. Figure A-1. STP Loop In this example, B has been elected as the designated bridge and port 2 on C is in the blocking state. The election of B as the designated bridge is determined by the exchange of BPDUs between B and C. B had a better BPDU than C. B continues sending BPDUs advertising its superiority over the other bridges on this LAN. Should C fail to receive these BPDUs for longer than the MAX AGE (default of 20 seconds), it could start to transition its port 2 from the blocking state to the forwarding state. 9033691-01 VH-2402-L3 Management Guide 179 It should be noted: A port must continue to receive BPDUs advertising superior paths to remain in the blocking state. There are a number of circumstances in which the STA can fail – mostly related to the loss of a large number of BPDUs. These situations will cause a port in the blocking state to transition to the forwarding state. Full/Half Duplex Mismatch A mismatch in the duplex state of two ports is a very common configuration error for a point-to-point link. If one port is configured as a full duplex, and the other port is left in auto-negotiation mode, the second port will end up in halfduplex because ports configured as half- or full-duplex do not negotiate. Figure A-2. Full- Half-Duplex Mismatch In the above example, port 1 on B is configured as a fullduplex port and port 1 on A is either configured as a halfduplex port, or left in auto-negotiation mode. Because port 1 on B is configured as a full-duplex port, it does not do the carrier sense when accessing the link. B will then start 180 VH-2402-L3 Management Guide 9033691-01 sending packets even if A is using the link. A will then detect collisions and begin to run the flow control algorithm. If there is enough traffic between B and A, all packets (including BPDUs) will be dropped. If the BPDUs sent from A to B are dropped for longer than the MAX AGE, B will lose its connection to the root (A) and will unblock its connection to C. This will lead to a data loop. Unidirectional Link Unidirectional links can be caused by an undetected failure in one side of a fiber cable, or a problem with a ports transceiver. Any failure that allows a link to remain up while providing one-way communication is very dangerous for STP. Figure A-3. After Applying STP In this example, port 2 on B can receive but not transmit packets. Port 2 on C should be in the blocking state, but since it can no longer receive BPDUs from port 2 on B, it will transition to the forwarding state. If the failure exists at boot, STP will not converge and rebooting the bridges will have no effect. (Note: Rebooting would help temporarily in the previous example). 9033691-01 VH-2402-L3 Management Guide 181 This type of failure is difficult to detect because the Linkstate LEDs for Ethernet links rely on the transmit side of the cable to detect a link. If a unidirectional failure on a link is suspected, it is usually required to go to the console or other management software and look at the packets received and transmitted for the port. A unidirectional port will have many packets transmitted but none received, or vice versa, for example. Packet Corruption Packet corruption can lead to the same type of failure. If a link is experiencing a high rate of physical errors, a large number of consecutive BPDUs can be dropped and a port in the blocking state would transition to the forwarding state. The blocking port would have to have the BPDUs dropped for 50 seconds (at the default settings) and a single BPDU would reset the timer. If the MAX AGE is set too low, this time is reduced. Resource Errors The VH-2402-L3 Layer 3 switch performs its switching and routing functions primarily in hardware, using specialized ASICs. STP is implemented in software and is thus reliant upon the speed of the CPU and other factors to converge. If the CPU is over-utilized, it is possible that BPDUs may not be sent in a timely fashion. STP is generally not very CPU intensive and is given priority over other processes, so this type of error is rare. It can be seen that very low values for the MAX AGE and the FORWARD DELAY can result in an unstable spanning tree. The loss of BPDUs can lead to data loops. The diameter of the network can also cause problems. The default values for STP give a maximum network diameter of about seven. This means that two switches in the network cannot be more than seven hops apart. Part of this diameter restriction is the BPDU age field. As BPDUs are propagated from the root bridge to the leaves of the spanning tree, each bridge increments the age field. When this field is beyond the maximum age, the packet is discarded. For large diameter networks, STP convergence can be very slow. 182 VH-2402-L3 Management Guide 9033691-01 Identifying a Data Loop Broadcast storms have a very similar effect on the network to data loops, but broadcast storm controls in modern switches have (along with subnetting and other network practices) have been very effective in controlling broadcast storms. The best way to determine if a data loop exists is to capture traffic on a saturated link and check if similar packets are seen multiple times. Generally, if all the users of a given domain are having trouble connecting to the network at the same time, a data loop can be suspected. The port utilization data in the switch’s console will give unusually high values in this case. The priority for most cases is to restore connectivity as soon as possible. The simplest remedy is to manually disable all of the ports that provide redundant links. Disabling ports one at a time, and then checking for a restoration of the user’s connectivity will identify the link that is causing the problem, if time allows. Connectivity will be restored immediately after disabling a data loop. Avoiding Trouble Know where the root is located. Although the STP can elect a root bridge, a well-designed network will have an identifiable root for each VLAN. Careful setup of the STP parameters will lead to the selection of this best switch as the root for each VLAN. Redundant links can then be built into the network. STP is well suited to maintaining connectivity in the event of a device failure or removal, but is poorly suited to designing networks. Know which links are redundant. Organize the redundant links and tune the port cost parameter of STP to force those ports to be in the blocking state. For each VLAN, know which ports should be blocking in a stable network. A network diagram that shows each 9033691-01 VH-2402-L3 Management Guide 183 physical loop in the network and which ports break which loops is extremely helpful. Minimize the number of ports in the blocking state. A single blocking port transitioning to the forwarding state at an inappropriate time can cause a large part of a network to fail. Limiting the number of blocked ports help to limit the risk of an inappropriate transition. Figure A-4. STP Network Layout This is a common network design. The switches C and D have redundant links to the backbone switches A and B using trunks. Trunks, by default, carry all the VLAN traffic from VLAN 1 and VLAN 2. So switch C is not only receiving traffic for VLAN 1, but it is also receiving unnecessary broadcast and multicast traffic for VLAN 2. It is also blocking one port for VLAN 2. Thus, there are three redundant paths 184 VH-2402-L3 Management Guide 9033691-01 between switches A and B and two blocked ports per VLAN. This increases the chance of a data loop. Figure A-5. After Applying STP In this example, the VLAN definitions are extended to switches A and B. This gives only a single blocked port per VLAN and allows the removal of all redundant links by removing switch A or B from the network. Impact of Layer 3 Switching. The IP routing operational mode of the VH-2402-L3 Layer 3 switch can accomplish the following: • 9033691-01 Building a forwarding table, and exchanging information with its peers using routing protocols. VH-2402-L3 Management Guide 185 • Receiving packets and forwarding them to the correct interface based upon their destination address With layer 3 switching, there is no performance penalty to introducing a routing hop and creating an additional segment of the network. Figure A-6. Using Layer 3 VLANs Using layer 3 switches and IP routing eliminates the need for STP port blocking because the packets are routed by destination addresses. The link redundancy remains, and relying on the routing protocols gives a faster convergence than with STP. The drawback is that the introduction of layer 3 switching usually requires a new addressing scheme. 186 VH-2402-L3 Management Guide 9033691-01 Appendix B. Brief Review of Bitwise Logical Operations AND The logical AND operation compares 2 bits and if they are both “1”, then the result is “1”, otherwise, the result is “0”. 0 1 0 0 0 1 0 1 OR The logical OR operation compares 2 bits and if either or both bits are “1”, then the result is “1”, otherwise, the result is “0”. 0 1 0 0 0 1 0 1 XOR The logical XOR (exclusive OR) operation compares 2 bits and if exactly one of them is a “1”, then the result is “1”, otherwise the result is “0”. 0 1 0 0 1 1 1 0 NOT 9033691-01 VH-2402-L3 Management Guide 187 The logical NOT operation simply changes the value of a single bit. If it is a “1”, the result is “0”, if it is a “0”, the result is “1”. This operation is carried out on a single bit. 0 1 1 0 188 VH-2402-L3 Management Guide 9033691-01 Appendix C. Technical Specifications General Standards: IEEE 802.3 10BASE-T Ethernet IEEE 802.3u 100BASE-TX Fast Ethernet IEEE 802.3z 1000BASE-SX Gigabit Ethernet IEEE 802.1 P/Q VLAN IEEE 802.3x Full-duplex Flow Control ANSI/IEEE 802.3 Auto-negotiation Protocols: Data Transfer Rates: Ethernet Fast Ethernet Gigabit Ethernet Topology: 9033691-01 CSMA/CD Half-duplex Full-duplex 10 Mbps 20Mbps 100Mbps 200Mbps n/a 2000Mbps Star VH-2402-L3 Management Guide 189 General (Cont’d) Network Cables: 10BASE-T: 100BASE-TX: Fiber Optic: Number of Ports: 2-pair UTP Cat. 3,4,5 (100 m) EIA/TIA- 568 100-ohm STP (100 m) 2-pair UTP Cat. 5 (100 m) EIA/TIA-568 100-ohm STP (100 m) IEC 793-2:1992 Type A1a - 50/125um multimode Type A1b - 62.5/125um multimode Both types use MT-RJ or SC optical connector 24 x 10/100 Mbps Auto-negotiation ports 2 Gigabit Ethernet (optional) Physical and Environmental AC inputs: Power Consumption: DC fans: Operating Temperature: Storage Temperature: Humidity: Dimensions: Weight: EMI: 100 - 240 VAC, 50/60 Hz (internal universal power supply) 40 watts maximum 3 built-in 40 x 40 x10 mm fan 0 to 50 degrees Celsius -25 to 55 degrees Celsius Operating: 5% to 95% RH non-condensing Storage: 0% to 95% RH non-condensing 441 mm x 207 mm x 44 mm (1U), 19 inch rack-mount width 3 kg FCC Class A, CE Class A, VCCI Class A, BSMI Class A, C-Tick Class A FCC Part 15/IECES-003 (Canada), VCCI Class A ITE, EN55022/EN50082-1 or EN%%o24, C-Tick (AS/NZS3548, BSMI (CNS 13438) 190 VH-2402-L3 Management Guide 9033691-01 Physical and Environmental Safety: UL, CSA, CE Mark, TUV/GS UL 1950 & CSA22.2 No 950, IEC 950 (CB), TUV (EN60950) Performance Transmission Method: Store-and-forward RAM Buffer: 16 MB per device Filtering Address Table: 8K MAC address per device Packet Filtering/ Forwarding Rate: Full-wire speed for all connections. 148,800 pps per port (for 100Mbps)1,488,000 pps per port (for 1000Mbps) MAC Address Learning: Forwarding Table Age Time: 9033691-01 Automatic update. Max age:10–9999 seconds. Default = 300. VH-2402-L3 Management Guide 191 Index A AC inputs.............................................190 Administrator...........................................7 Aging Time, definition of....................116 Aging Time, range of ..........................117 APPLY....................................................5 Automatic learning............................117 B Baud Rate ..............................................24 BOOTP protocol....................................19 BOOTP server .......................................19 Bridge Forward Delay.......................125 Bridge Hello Time ................ 77, 78, 124 Bridge Max. Age ......................... 77, 125 Bridge Priority ...................... 77, 78, 124 C Changing your Password .....................13 Configuration.......................................16 Connecting to the Switch VT100-compatible terminal ..............4 1, 4 Console Timeout ...................................25 Create/Modify User Accounts...............13 D Default Gateway....................................20 Dimensions ..........................................190 Dynamic filtering ...............................117 Ingress port ................................130, 135 IP Configuration ................................. 18 L load-balancing .....................................129 log in ..................................................... 12 Logging on .............................................. 5 M MAC address filtering ......................118 MAC Address Learning ......................191 MAC-based VLANs ...........................130 Main Menu ..............................7, 8, 11, 12 Management Information Base (MIB)115 master port...........................................127 Max. Age ................................77, 78, 125 MIB .....................................................115 MIB objects.........................................115 MIB-II .................................................115 MIBs....................................................115 N Network Classes Class A, B, C for Subnet Mask....... 20 NV-RAM............................................... 10 O Operating Temperature .......................190 Out-of-Band/Console Setting menu...... 24 P Egress port .........................................130 Port Priority.................................80, 125 port-based VLANs ..............................130 Power Consumption............................190 F R factory reset ...........................................11 Filtering ...............................................117 Forwarding ..........................................116 RAM...................................................... 10 RAM Buffer ........................................191 refresh..................................................... 5 G S General User ............................................9 Save Changes ..................................... 5 Saving Changes..................................... 10 Screen Hierarchy................................... 30 Setting Up The Switch .......................... 16 Single Coll ............................................ 97 SLIP management ................................. 25 Spanning Tree Algorithm (STA) ........119 Spanning Tree Protocol...................118 Storage Temperature ...........................190 Subnet Mask..........................................19 9033691-01 E H Humidity..............................................190 I IEEE 802.1Q tagging ..........................130 IEEE 802.1Q VLANs..........................130 Illustration of STA...............................125 192 VH-2402-L3 Management Guide Super User ...............................................9 T tagging.................................................130 Tagging ...............................................130 TCP/IP Settings .....................................17 1 terminal emulator ....................................4 terminal parameters .................................4 Third-party vendors’ SNMP software.116 Transmission Methods ........................191 Trap managers .....................................114 Trap Type Authentication Failure...................115 Broadcast Storm ............................115 Cold Start.......................................114 Link Change Event........................115 115 Port Partition..................................115 9033691-01 Topology Change.......................... 115 Warm Start .................................... 114 Traps.................................................... 114 trunk group.......................................... 127 U unauthorized users .................................. 5 untagging ............................................ 130 Untagging ........................................... 130 User Accounts Management................. 13 V View/Delete User Accounts.................. 14 VLAN .................................................. 118 VT100-compatible terminal.................... 4 W Weight ................................................. 190 VH-2402-L3 Management Guide 193