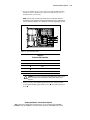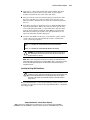
1
ProLiant DL580 Server Setup and Installation Guide Third Edition (May 2001) Part Number 159213-003 Compaq Computer Corporation Compaq Confidential – Need to Know Required Writer: Truly Biggs Project: Compaq ProLiant DL580 Server Setup and Installation Guide Comments: Part Number: 159213-003 File Name: a-frnt.doc Last Saved On: 4/18/01 10:48 AM Notice © 2001 Compaq Computer Corporation Compaq, the Compaq logo, Compaq Insight Manager, ProLiant, ROMPaq, and SmartStart Registered in U.S. Patent and Trademark Office. CarePaq is a trademark of Compaq Information Technologies Group, L.P. in the United States and other countries. Microsoft, MS-DOS, Windows, and Windows NT are trademarks of Microsoft Corporation in the United States and other countries. Intel, Pentium, and Xeon are trademarks of Intel Corporation in the United States and other countries. UNIX is a trademark of The Open Group in the United States and other countries. Other product names mentioned herein may be trademarks of their respective companies. Compaq shall not be liable for technical or editorial errors or omissions contained herein. The information in this document is provided “as is” without warranty of any kind and is subject to change without notice. The warranties for Compaq products are set forth in the express limited warranty statements accompanying such products. Nothing herein should be construed as constituting an additional warranty. Compaq ProLiant DL580 Server Setup and Installation Guide Third Edition (May 2001) Part Number 159213-003 Compaq Confidential – Need to Know Required Writer: Truly Biggs Project: Compaq ProLiant DL580 Server Setup and Installation Guide Comments: Part Number: 159213-003 File Name: a-frnt.doc Last Saved On: 4/18/01 10:48 AM Contents About This Guide Text Conventions.........................................................................................................x Symbols in Text...........................................................................................................x Symbols on Equipment...............................................................................................xi Rack Stability ............................................................................................................xii Getting Help ..............................................................................................................xii Compaq Technical Support ................................................................................xii Compaq Website............................................................................................... xiii Compaq Authorized Reseller............................................................................ xiii Chapter 1 Server Features System Features ....................................................................................................... 1-2 Processors ......................................................................................................... 1-3 Expansion Slots ................................................................................................ 1-3 PCI Hot Plug Capability ................................................................................... 1-4 Hot-Plug System Fans ...................................................................................... 1-4 Media Bays....................................................................................................... 1-8 Power Supply Units .......................................................................................... 1-9 Memory Board Features ........................................................................................ 1-10 Peripheral Board Features...................................................................................... 1-10 SCSI................................................................................................................ 1-11 Video .............................................................................................................. 1-11 ROM............................................................................................................... 1-11 Supported External Interfaces......................................................................... 1-11 Network Interface Controller (NIC) Features........................................................ 1-12 High-Availability Features ............................................................................. 1-12 Serviceability Features ................................................................................... 1-13 Compaq Confidential – Need to Know Required Writer: Truly Biggs Project: Compaq ProLiant DL580 Server Setup and Installation Guide Comments: Part Number: 159213-003 File Name: a-frnt.doc Last Saved On: 4/18/01 10:48 AM iv Compaq ProLiant DL580 Server Setup and Installation Guide Server Features continued Server Management and Configuration Tools ....................................................... 1-13 Compaq SmartStart......................................................................................... 1-13 Compaq Integrated Management Log............................................................. 1-14 Compaq Insight Manager................................................................................ 1-14 Compaq Survey Utility ................................................................................... 1-15 Drive Fault Tolerance ..................................................................................... 1-16 Automatic Server Recovery-2 (ASR-2) .......................................................... 1-16 Compaq System Configuration Utility ........................................................... 1-16 Compaq Operating System Utilities ............................................................... 1-17 Compaq Integrated Remote Console .............................................................. 1-18 Major Hardware Options ....................................................................................... 1-19 Front Panel Components........................................................................................ 1-20 Rear Panel Components ......................................................................................... 1-21 Diagnostics Tools................................................................................................... 1-22 Supported Drive Configurations ............................................................................ 1-22 Maximum SCSI Configuration ....................................................................... 1-22 Maximum Fibre Channel Configuration......................................................... 1-23 Security Features.................................................................................................... 1-23 Software Security............................................................................................ 1-23 Routine Maintenance ............................................................................................. 1-24 Warranties .............................................................................................................. 1-24 Server Registration................................................................................................. 1-24 Chapter 2 Installing Hardware Options Non-Hot-Plug Server Areas ..................................................................................... 2-2 Hot-Plug Server Areas ............................................................................................. 2-2 System Board Components ...................................................................................... 2-3 Installing Non-Hot-Plug Options ............................................................................. 2-4 Preparing to Install Non-Hot-Plug Options....................................................... 2-5 Processors ......................................................................................................... 2-7 System Memory.............................................................................................. 2-12 Peripheral Board Components ........................................................................ 2-17 PCI Non-Hot-Plug Expansion Board .............................................................. 2-18 Remote Insight Lights-Out Edition................................................................. 2-21 Auxiliary Serial Connector ............................................................................. 2-22 Auxiliary SCSI Cable ..................................................................................... 2-23 Installing PCI Hot Plug Options ............................................................................ 2-25 PCI Hot Plug Expansion Boards..................................................................... 2-25 PCI Hot Plug Utilities ..................................................................................... 2-26 Hot-Plug SCSI Hard Drives............................................................................ 2-26 Hot-Plug Power Supplies................................................................................ 2-29 Compaq Confidential – Need to Know Required Writer: Truly Biggs Project: Compaq ProLiant DL580 Server Setup and Installation Guide Comments: Part Number: 159213-003 File Name: a-frnt.doc Last Saved On: 4/18/01 10:48 AM Contents Chapter 3 Integrated Smart Array Controller Features.................................................................................................................... 3-1 External SCSI Connector......................................................................................... 3-2 Array Configuration................................................................................................. 3-2 Chapter 4 Installing the Server Installation Choices ................................................................................................. 4-1 Compaq Optional Installation Service.............................................................. 4-1 Using the Procedures in this Chapter................................................................ 4-1 Rack Warnings and Precautions .............................................................................. 4-3 Server Warnings and Precautions ............................................................................ 4-3 Installation Overview............................................................................................... 4-5 Preparing the Server for Installation ........................................................................ 4-7 Selecting an Optimum Environment................................................................. 4-7 Unpacking the Server ..................................................................................... 4-10 Attaching Rack Mounting Hardware ..................................................................... 4-13 Attaching the Bracket Rail to the Rack Mounting Bracket ............................ 4-14 Using the Rack Template................................................................................ 4-18 Attaching the Rack Mounting Bracket Assemblies to the Rack ..................... 4-20 Attaching Rack Handles ................................................................................. 4-22 Installing the Server in the Rack..................................................................... 4-23 Attaching the Cable Management Arm ................................................................. 4-25 Installing the Extended Cable Management Arm Bracket.............................. 4-25 Attaching the Cable Management Arm .......................................................... 4-26 Cabling the Server ................................................................................................. 4-27 Powering Up the Server......................................................................................... 4-30 Powering Down the Server .................................................................................... 4-31 Chapter 5 Cabling Guidelines Network Interface Controller (NIC) ........................................................................ 5-1 External Connectors................................................................................................. 5-3 SCSI Cabling ........................................................................................................... 5-4 SCSI Ports ........................................................................................................ 5-4 Determining Cabling Needs ............................................................................. 5-5 Internal Cabling with an Integrated Controller or an Additional SCSI Adapter...... 5-6 PCI Hot Plug Cabling .............................................................................................. 5-7 IDE Media Cabling.................................................................................................. 5-7 Power Cabling ......................................................................................................... 5-7 Securing the Power Cord .................................................................................. 5-8 Compaq Confidential – Need to Know Required Writer: Truly Biggs Project: Compaq ProLiant DL580 Server Setup and Installation Guide Comments: Part Number: 159213-003 File Name: a-frnt.doc Last Saved On: 4/18/01 10:48 AM v vi Compaq ProLiant DL580 Server Setup and Installation Guide Chapter 6 PCI Hot Plug Technology PCI Hot Plug Capability .......................................................................................... 6-2 PCI Hot Plug Technology ........................................................................................ 6-3 PCI Hot Plug System ........................................................................................ 6-3 PCI Hot Plug Application ................................................................................. 6-3 PCI Hot Plug Operations .................................................................................. 6-3 PCI Hot Plug Button ......................................................................................... 6-3 PCI Hot Plug LEDs........................................................................................... 6-4 Adding or Replacing PCI Hot Plug Expansion Boards............................................ 6-6 Removing a PCI Hot Plug Expansion Board .................................................... 6-7 Installing a PCI Hot Plug Expansion Board...................................................... 6-9 PCI Hot Plug Application Support......................................................................... 6-10 Novell intraNetWare Configuration Manager Console.......................................... 6-10 Navigating the NCMCON Menus................................................................... 6-10 Performing PCI Hot Plug Actions .................................................................. 6-11 PCI Hot Plug Utility for Windows NT................................................................... 6-13 Performing PCI Hot Plug Actions .................................................................. 6-13 Compaq PCI Hot Plug Utility Messages......................................................... 6-14 Chapter 7 Server Configuration and Utilities SmartStart Features .................................................................................................. 7-1 System ROMPaq Utility ................................................................................... 7-1 Compaq System Configuration Utility ............................................................. 7-2 Launching the SmartStart CD .................................................................................. 7-3 Reapplying ROMPaq ............................................................................................... 7-3 Loading System Configuration Utility..................................................................... 7-4 System Configuration Utility Main Menu ............................................................... 7-5 Main Menu........................................................................................................ 7-5 System Configuration Menu ............................................................................. 7-6 Installing an Operating System ....................................................................... 7-14 Diagnostics and Other Utilities ....................................................................... 7-24 Exit from This Utility...................................................................................... 7-24 Integrated Management Log (IML) ....................................................................... 7-25 Multiple Ways of Viewing the Log ................................................................ 7-25 List of Events .................................................................................................. 7-27 Compaq Confidential – Need to Know Required Writer: Truly Biggs Project: Compaq ProLiant DL580 Server Setup and Installation Guide Comments: Part Number: 159213-003 File Name: a-frnt.doc Last Saved On: 4/18/01 10:48 AM Contents Appendix A Regulatory Compliance Notices Regulatory Compliance Identification Numbers .....................................................A-1 Federal Communications Commission Notice ........................................................A-2 Class A Equipment ...........................................................................................A-2 Class B Equipment ...........................................................................................A-3 Modifications....................................................................................................A-4 Cables ...............................................................................................................A-4 Canadian Notice (Avis Canadien) ...........................................................................A-4 Class A Equipment ...........................................................................................A-4 Class B Equipment ...........................................................................................A-5 Mouse Compliance Statement .................................................................................A-5 European Union Notice ...........................................................................................A-5 Japanese Notice .......................................................................................................A-6 Taiwanese Notice.....................................................................................................A-6 Laser Devices...........................................................................................................A-6 Laser Safety Warnings......................................................................................A-7 Compliance with CDRH Regulations...............................................................A-7 Compliance with International Regulations......................................................A-7 Laser Product Label..........................................................................................A-7 Laser Information .............................................................................................A-8 Battery Replacement Notice ....................................................................................A-8 Power Cords ............................................................................................................A-9 Appendix B Electrostatic Discharge Preventing Electrostatic Damage.............................................................................B-1 Grounding Methods .................................................................................................B-2 Appendix C Troubleshooting When the Server Does Not Start..............................................................................C-1 Normal Power-Up Sequence ............................................................................C-3 Diagnosis Steps........................................................................................................C-3 Problems After Initial Startup..................................................................................C-9 Hot-Plug Fans ........................................................................................................C-11 Front Panel Fan LEDs ....................................................................................C-11 Locating Hot-Plug Fans..................................................................................C-11 Compaq Confidential – Need to Know Required Writer: Truly Biggs Project: Compaq ProLiant DL580 Server Setup and Installation Guide Comments: Part Number: 159213-003 File Name: a-frnt.doc Last Saved On: 4/18/01 10:48 AM vii viii Compaq ProLiant DL580 Server Setup and Installation Guide Appendix D LED Indicators Front Panel LEDs.................................................................................................... D-1 Hot-Plug SCSI Hard Drive LEDs ........................................................................... D-2 Hot-Plug Fan LEDs................................................................................................. D-6 Front Panel Fan LED ....................................................................................... D-6 Hot-Plug Fan LEDs ......................................................................................... D-7 Power Supply LEDs......................................................................................... D-8 PCI Hot Plug LEDs.......................................................................................... D-9 RJ-45 Network Connector LEDs .......................................................................... D-12 Internal Diagnostic Display (IDD)........................................................................ D-13 Interlock Status LED Indicators............................................................................ D-15 Appendix E Switch Settings System Maintenance Switch (SW1).........................................................................E-2 Enabling ROMPaq Disaster Recovery Mode ...................................................E-4 Processor Configuration Switch (SW4) ...................................................................E-5 Processors of 850-MHz Frequency or Higher ..................................................E-6 Service Switch (SW6)..............................................................................................E-6 Appendix F Installing a New Battery Peripheral Board Battery Replacement .................................................................... F-1 Index Compaq Confidential – Need to Know Required Writer: Truly Biggs Project: Compaq ProLiant DL580 Server Setup and Installation Guide Comments: Part Number: 159213-003 File Name: a-frnt.doc Last Saved On: 4/18/01 10:48 AM About This Guide This guide is designed to be used as step-by-step instructions for installing the Compaq ProLiant DL580 server and as a reference for operation, troubleshooting, and future upgrades. WARNING: There is a risk of personal injury from hazardous energy levels. The installation of options and routine maintenance and service of this product must be performed by individuals who are knowledgeable about the procedures, precautions, and hazards associated with equipment containing hazardous energy circuits. Compaq Confidential – Need to Know Required Writer: Truly Biggs Project: Compaq ProLiant DL580 Server Setup and Installation Guide Comments: Part Number: 159213-003 File Name: a-frnt.doc Last Saved On: 4/18/01 10:48 AM x Compaq ProLiant DL580 Server Setup and Installation Guide Text Conventions This document uses the following conventions to distinguish elements of text: Keys Keys appear in boldface. A plus sign (+) between two keys indicates that they should be pressed simultaneously. USER INPUT User input appears in a different typeface and in uppercase. FILENAMES File names appear in uppercase italics. Menu Options, Command Names, Dialog Box Names These elements appear in initial capital letters. COMMANDS, DIRECTORY NAMES, and DRIVE NAMES These elements appear in uppercase. Type When you are instructed to type information, type the information without pressing the Enter key. Enter When you are instructed to enter information, type the information and then press the Enter key. Symbols in Text These symbols may be found in the text of this guide. They have the following meanings. WARNING: Text set off in this manner indicates that failure to follow directions in the warning could result in bodily harm or loss of life. CAUTION: Text set off in this manner indicates that failure to follow directions could result in damage to equipment or loss of information. IMPORTANT: Text set off in this manner presents clarifying information or specific instructions. Compaq Confidential – Need to Know Required Writer: Truly Biggs Project: Compaq ProLiant DL580 Server Setup and Installation Guide Comments: Part Number: 159213-003 File Name: a-frnt.doc Last Saved On: 4/18/01 10:48 AM About This Guide NOTE: Text set off in this manner presents commentary, sidelights, or interesting points of information. Symbols on Equipment These icons may be located on equipment in areas where hazardous conditions may exist. Any surface or area of the equipment marked with these symbols indicates the presence of electrical shock hazards. Enclosed area contains no operator-serviceable parts. WARNING: To reduce the risk of injury from electrical shock hazards, do not open this enclosure. Any RJ-45 receptacle marked with these symbols indicates a Network Interface Connection. WARNING: To reduce the risk of electrical shock, fire, or damage to the equipment, do not plug telephone or telecommunications connectors into this receptacle. Any surface or area of the equipment marked with these symbols indicates the presence of a hot surface or hot component. If this surface is contacted, the potential for injury exists. WARNING: To reduce the risk of injury from a hot component, allow the surface to cool before touching. Power supplies or systems marked with these symbols indicate the equipment is supplied by multiple sources of power. WARNING: To reduce the risk of injury from electrical shock, remove all power cords to completely disconnect power from the system. Compaq Confidential – Need to Know Required Writer: Truly Biggs Project: Compaq ProLiant DL580 Server Setup and Installation Guide Comments: Part Number: 159213-003 File Name: a-frnt.doc Last Saved On: 4/18/01 10:48 AM xi xii Compaq ProLiant DL580 Server Setup and Installation Guide Rack Stability WARNING: To reduce the risk of personal injury or damage to the equipment, be sure that: ■ The leveling jacks are extended to the floor. ■ The full weight of the rack rests on the leveling jacks. ■ The stabilizing feet are attached to the rack if it is a single rack installation. ■ The racks are coupled together in multiple rack installations. ■ Only one component is extended at a time. A rack may become unstable if more than one component is extended for any reason. Getting Help If you have a problem and have exhausted the information in this guide, you can get further information and other help in the following locations. Compaq Technical Support When you contact Compaq technical support, a technical support specialist can help you to diagnose a problem or will guide you to the next step in the warranty process. In North America, call the Compaq Technical Phone Support Center at 1-800-OK-COMPAQ. This service is available 24 hours a day, 7 days a week. Outside North America, call the nearest Compaq Technical Support Phone Center. Telephone numbers for worldwide Technical Support Centers are listed on the Compaq website. Visit the Compaq website: www.compaq.com Be sure to have the following information available before you call Compaq: ■ Technical support registration number (if applicable) ■ Product serial numbers ■ Product model names and numbers ■ Applicable error messages ■ Add-on boards or hardware Compaq Confidential – Need to Know Required Writer: Truly Biggs Project: Compaq ProLiant DL580 Server Setup and Installation Guide Comments: Part Number: 159213-003 File Name: a-frnt.doc Last Saved On: 4/18/01 10:48 AM About This Guide ■ Third-party hardware or software ■ Operating system type and revision level ■ Detailed, specific questions Compaq Website The Compaq website has information on this product as well as the latest drivers and Flash ROM images. You can access the Compaq website by logging on to the Internet: www.compaq.com Compaq Authorized Reseller For the name of your nearest Compaq authorized reseller: ■ In the United States, call 1-800-345-1518. ■ In Canada, call 1-800-263-5868. ■ Elsewhere, see the Compaq website for locations and telephone numbers. Compaq Confidential – Need to Know Required Writer: Truly Biggs Project: Compaq ProLiant DL580 Server Setup and Installation Guide Comments: Part Number: 159213-003 File Name: a-frnt.doc Last Saved On: 4/18/01 10:48 AM xiii Chapter 1 Server Features The Compaq ProLiant DL580 four-way server is housed in a modular, 7-inch rack-mount chassis that combines expandability with efficient and space-saving design. This chapter provides an overview of the Compaq ProLiant DL580 server features and briefly describes high availability, server management, and serviceability features. Figure 1-1. Compaq ProLiant DL580 Server Compaq Confidential – Need to Know Required Writer: Cynthia Dresden Project: Compaq ProLiant DL580 Server Setup and Installation Guide Comments: Part Number: 159213-003 File Name: b-ch1 Server Features.doc Last Saved On: 4/9/01 5:05 PM 1-2 Compaq ProLiant DL580 Server Setup and Installation Guide System Features The Compaq ProLiant DL580 server combines enhanced performance and optimal rack density with maximum availability and manageability. Features include: ■ Intel Pentium III Xeon processor (100-MHz front side bus) with support for up to four processors ■ 64-bit I/O technology (66/33 MHz) ■ Integrated Smart Array Controller ■ PC100 ECC SDRAM ■ Wide Ultra2/Wide Ultra3-ready drive cage ■ Compaq NC 3134 Dual Channel 10/100 MB Network Interface Controller (NIC) card ■ 4U form factor (7 in) Compaq ProLiant DL580 servers are designed with features and options to protect against hardware failure or data errors that can result in downtime or critical data loss. Maximum availability and manageability features include: ■ PCI Hot Plug slots ■ Hot-plug Wide Ultra2 SCSI or Wide Ultra3 SCSI hard drives ■ Hot-plug system fans ■ Hot-plug power supplies and support for optional hot-plug power supplies ■ Error checking and correcting (ECC) SDRAM memory ■ Redundant NIC support ■ Compaq Automatic Server Recovery-2 (ASR-2) ■ Compaq SmartStart ■ Compaq Remote Insight Manager ■ Disk Drive Fault Tolerance ■ Compaq Pre-Failure Warranty on all Compaq hard drives, processors, and memory ■ Compaq Remote Insight Lights-Out Edition management support ■ Support for optional Compaq Smart Array controllers Compaq Confidential – Need to Know Required Writer: Cynthia Dresden Project: Compaq ProLiant DL580 Server Setup and Installation Guide Comments: Part Number: 159213-003 File Name: b-ch1 Server Features.doc Last Saved On: 4/9/01 5:05 PM Server Features ProLiant DL580 serviceability features include: ■ Modular system board design that reduces service and maintenance time ■ Component commonality with other Compaq ProLiant servers that reduces acquisition times for spare parts while increasing availability and ease of use from server to server ■ Improved diagnostics for memory and processor functioning with Internal Diagnostic Display (IDD) ■ Improved cable management Processors Compaq ProLiant DL580 servers include one or more self-terminating 100-MHz front-side bus processors and are capable of supporting up to a total of four processors. For information on buying and installing optional processors, contact your Compaq authorized reseller or visit Compaq online: www.compaq.com/products/servers Expansion Slots There are a total of six PCI expansion slots in ProLiant DL580 to accommodate PCI Hot Plug and non-hot-plug options. The standard Compaq ProLiant DL580 configuration includes: ■ One unpopulated 64-bit 33-MHz non-hot-plug slot (slot 1) ■ Two unpopulated 64-bit 33-MHz PCI Hot Plug slots (slots 2 and 3) ■ One unpopulated 64-bit 66-MHz PCI Hot Plug slot (slot 4) ■ One 64-bit 66-MHz PCI Hot Plug slot populated with a Compaq NC3134 Fast Ethernet NIC Dual Base 10/100 network interface controller (slot 5) The network interface can be upgraded to support 1-GB transmissions with a Compaq NC6132 1000 SX Upgrade Module. Contact your Compaq authorized reseller for additional information. ■ One unpopulated 32-bit 33-MHz non-hot-plug slot (slot 6) Compaq ProLiant DL580 servers also ship with an auxiliary serial connector for added serial device support. Compaq Confidential – Need to Know Required Writer: Cynthia Dresden Project: Compaq ProLiant DL580 Server Setup and Installation Guide Comments: Part Number: 159213-003 File Name: b-ch1 Server Features.doc Last Saved On: 4/9/01 5:05 PM 1-3 1-4 Compaq ProLiant DL580 Server Setup and Installation Guide PCI Hot Plug Capability PCI Hot Plug capability provides the ability to remove and replace, upgrade, and add PCI expansion boards without having to take the server offline. Although any PCI board can be placed into a PCI Hot Plug slot, PCI Hot Plug drivers and operating system support are required to enable PCI Hot Plug capabilities. The PCI Hot Plug push button allows hot access directly at each PCI slot without requiring the PCI Hot Plug utility software. PCI Hot Plug events can be initiated either from the button or from the software utility. For more information about PCI Hot Plug capabilities, refer to the Documentation CD and the Systems Reference CD, both included in the Reference Information pack with your server. Hot-Plug System Fans Compaq ProLiant DL580 servers include hot-plug fans that provide 24 x 7 protection against overheating and heat-related system interruptions. Under normal operating conditions, the system is served by four dual-fan units and stays cool with at least seven fans running. A single fan failure does not affect system performance or slow user access to network applications. When the administrator receives notification from the system that one fan has failed, replacement of the failed component can be completed without disruption to system functioning or unnecessary downtime for network users. Compaq Confidential – Need to Know Required Writer: Cynthia Dresden Project: Compaq ProLiant DL580 Server Setup and Installation Guide Comments: Part Number: 159213-003 File Name: b-ch1 Server Features.doc Last Saved On: 4/9/01 5:05 PM Server Features Locating Hot-Plug Fans There are a total of eight fans mounted as four duplex fan units in the server as shown in the following illustration. Use the fan LED indicators to verify the activity on each unit. 1 2 1 2 3 4 7 8 5 6 3 4 Figure 1-2. Hot-plug fan locations Table 1-1 Hot-Plug Fan Locations Item Component Fan Identifiers Fan Assembly A Fans 1 and 2 Fan Assembly B Fans 3 and 4 Fan Assembly C Fans 5 and 6 Fan Assembly D Fans 7 and 8 Verify the status of the fans by noting the color and activity of the LED light mounted on each fan assembly. Compaq Confidential – Need to Know Required Writer: Cynthia Dresden Project: Compaq ProLiant DL580 Server Setup and Installation Guide Comments: Part Number: 159213-003 File Name: b-ch1 Server Features.doc Last Saved On: 4/9/01 5:05 PM 1-5 1-6 Compaq ProLiant DL580 Server Setup and Installation Guide Front Panel Fan LED Front panel fan LEDs display a color-coded message about the status of the fans. The front panel fan LED is the third LED to the right of the Power On/Standby switch on the front of the server. See Appendix D for additional information about front panel LEDs. The following illustration and table show the location of the fan LED and provide a description of hot-plug fan LED messages. 1 Figure 1-3. Front panel fan LED Table 1-2 Front Panel Fan LED LED Color Description Green All fans are operational. Amber One or more fans have failed. Each hot-plug fan unit has an LED running from the hot-plug fan I/O connector that is visible through the top of the fan unit cover. See the following illustrations and tables for locations of hot-plug fan LEDs within the chassis. Compaq Confidential – Need to Know Required Writer: Cynthia Dresden Project: Compaq ProLiant DL580 Server Setup and Installation Guide Comments: Part Number: 159213-003 File Name: b-ch1 Server Features.doc Last Saved On: 4/9/01 5:05 PM Server Features 1 2 1 2 3 4 7 8 5 6 3 4 Figure 1-4. Internal hot-plug fan LED locations Table 1-3 Internal Hot-Plug Fan LEDs Item Component Fan Assembly A LED Fan Assembly B LED Fan Assembly C LED Fan Assembly D LED Compaq Confidential – Need to Know Required Writer: Cynthia Dresden Project: Compaq ProLiant DL580 Server Setup and Installation Guide Comments: Part Number: 159213-003 File Name: b-ch1 Server Features.doc Last Saved On: 4/9/01 5:05 PM 1-7 1-8 Compaq ProLiant DL580 Server Setup and Installation Guide Figure 1-5. Hot-plug fan assembly LED Table 1-4 Hot-Plug Fan Assembly LED Status LED Indicator Status No light Power is not applied to the fan. Green light Power is applied to the fan and fan is functional. Amber Fan failure. Media Bays Hot-Plug Drive Bay The Compaq ProLiant DL580 server supports one SCSI hard-drive cage that can be populated with up to four 1-inch standard hot-plug Ultra 2 SCSI hard drives, four Ultra 3 SCSI drives, or a combination of the two types. Drives of any storage capacity can be used with ProLiant DL580 servers. Compaq Confidential – Need to Know Required Writer: Cynthia Dresden Project: Compaq ProLiant DL580 Server Setup and Installation Guide Comments: Part Number: 159213-003 File Name: b-ch1 Server Features.doc Last Saved On: 4/9/01 5:05 PM Server Features Power Supply Units Compaq ProLiant DL580 servers ship standard with at least one hot-plug power supply (450 w at 220/110V) and support for an optional, redundant hot-plug power supply to provide system-wide backup power and the ability to balance power demands throughout the system. Advanced power capabilities include: ■ Automatic line-sensing capability that replaces manual voltage selection ■ Power-down management feature that moves the system into Standby mode cleanly and quickly NOTE: System power utilities are provided on the Compaq Support Software for Microsoft Windows NT 4.0 diskettes (NTSSD). For more detailed information, refer to the NTREADME.HLP file on Diskette 1. Future operating system support is planned for later release. System Power Supply Management Guidelines Consider the following energy usage comparisons when you configure your ProLiant DL580 server. Different configurations have specific benefits and shortcomings including: ■ 3.3V-powered PCI expansion boards versus 512 MB of ECC SDRAM memory Each additional 512 MB of memory draws approximately as much current as a single PCI board. ■ 5V-powered PCI expansion boards versus standard SCSI hard drive One PCI card draws as much current as at least two hard drives. ■ 5V-powered PCI expansion boards versus PCI network interface controller (NIC) In general, PCI array controllers draw more current than PCI NICs. NOTE: The following guidelines are general. Use the Power Supply Viewer Utility and option documentation to obtain the most accurate power capacity and assessment of power margin. Compaq Confidential – Need to Know Required Writer: Cynthia Dresden Project: Compaq ProLiant DL580 Server Setup and Installation Guide Comments: Part Number: 159213-003 File Name: b-ch1 Server Features.doc Last Saved On: 4/9/01 5:05 PM 1-9 1-10 Compaq ProLiant DL580 Server Setup and Installation Guide Memory Board Features Compaq ProLiant DL580 servers are shipped with one sixteen-slot memory board populated with a minimum of 512 MB ECC SDRAM. Features include: ■ Error checking and correcting (ECC) memory with single-bit error correction and detection down to a single DIMM. Each bank must be populated with four DIMM modules. Compaq ProLiant DL580 servers allow for multi-bit error detection at the memory bank level. ■ Although DIMM modules must be matched for size, type, and speed within a four-slot bank, the size may vary from bank to bank. Peripheral Board Features Compaq ProLiant DL580 servers feature a peripheral board that includes, as a standard feature, the Integrated Smart Array Controller. The peripheral board also supports system utilities and connectors including: ■ System battery ■ SCSI connectors ■ Interface connectors G Hot-plug keyboard G Mouse G Video G Serial (1 standard, 1 auxiliary) G Parallel Compaq Confidential – Need to Know Required Writer: Cynthia Dresden Project: Compaq ProLiant DL580 Server Setup and Installation Guide Comments: Part Number: 159213-003 File Name: b-ch1 Server Features.doc Last Saved On: 4/9/01 5:05 PM Server Features SCSI ■ Integrated Smart Array Controller ■ SCSI port 1 for internal drive support ■ SCSI port 2 for external tape drive support only (does not support multiLogical Unit Number (LUN) devices) To determine the optional controller boards currently supported for controller duplexing or expanding storage capacity, see Chapter 5, “Cabling Guidelines.” Video ■ Integrated ATI Rage IIC PCI Video Controller provides maximum resolution of 1280 x 1024, 256-color, noninterlaced ■ 4-MB video SDRAM standard ■ Support for SVGA, VGA, and EGA graphics resolution ■ Software upgradeable firmware including diagnostics ■ Options ROMPaq utility used to upgrade ROM ROM Supported External Interfaces ■ External SCSI (supporting tape drives only) ■ Serial (one standard and one auxiliary) ■ Video ■ Parallel ■ Hot-plug keyboard ■ Mouse NOTE: Keyboard and mouse are not included as standard ProLiant DL580 features. Compaq Confidential – Need to Know Required Writer: Cynthia Dresden Project: Compaq ProLiant DL580 Server Setup and Installation Guide Comments: Part Number: 159213-003 File Name: b-ch1 Server Features.doc Last Saved On: 4/9/01 5:05 PM 1-11 1-12 Compaq ProLiant DL580 Server Setup and Installation Guide Network Interface Controller (NIC) Features Compaq ProLiant DL580 servers include a Compaq NC3134 Fast Ethernet 64-bit Dual-Port 10/100 network interface controller (NIC) installed in PCI Hot Plug slot five. Features of the controller include: ■ Two RJ-45 connectors for 10BaseT or 100 TX Ethernet ■ PCI Hot Plug support ■ Adapter Fault Tolerance (AFT) ■ Adaptive Load Balancing (ALB) ■ Fast Etherchannel support ■ Full-duplex Ethernet support for up to 20 or 200 Mb/s aggregate bandwidth per port ■ Support for the optional Compaq NC6132 1000 SX Upgrade Module for an industry-standard upgrade to Gigabit Ethernet ■ Software support for one dual-port, two dual-port, or two single-port redundant NICs For additional information, refer to the user documentation for your NIC or to the SmartStart CD. High-Availability Features Compaq ProLiant DL580 servers provide the following standard features to maximize server availability: ■ PCI Hot Plug expansion slots (4) ■ Hot-plug Wide Ultra2/Wide Ultra3 SCSI drive bays (4) ■ Hot-plug power supply bays (2) ■ Hot-plug system fans (8) mounted as dual-fan assemblies (4) ■ Error Checking and Correcting (ECC) SDRAM memory ■ Redundant NIC support ■ Compaq Remote Insight Lights-Out Management Board support Compaq Confidential – Need to Know Required Writer: Cynthia Dresden Project: Compaq ProLiant DL580 Server Setup and Installation Guide Comments: Part Number: 159213-003 File Name: b-ch1 Server Features.doc Last Saved On: 4/9/01 5:05 PM Server Features Serviceability Features Serviceability features in Compaq ProLiant DL580 servers include: ■ Toolless internal design for easy access to all internal components ■ Modular system board design for reduced service and maintenance time ■ Component commonality with other ProLiant servers for reduced spare parts inventory costs ■ Improved diagnostics with memory and processor Internal Diagnostic Display (IDD) Server Management and Configuration Tools Compaq offers an extensive set of management features and optional tools to support effective server management and configuration including: ■ Compaq SmartStart and Support Software CD ■ Compaq System Configuration Utility ■ Compaq Operating System Utilities ■ Compaq Integrated Management Log ■ Compaq Insight Manager and web-based management features ■ Compaq Integrated Remote Console ■ Compaq Survey Utility ■ Compaq Fault Tolerance ■ Automatic Server Recovery-2 (ASR-2) Compaq SmartStart Compaq SmartStart™ is an intelligent way to configure your Compaq server for top performance with Microsoft, Novell, and SCO system software. SmartStart uses a step-by-step process to configure the server and to load the system software, thereby achieving a well-integrated server that ensures maximum dependability and supportability. The SmartStart and Support Software CD (SmartStart CD) also contains the Compaq System Configuration Utility. Compaq Confidential – Need to Know Required Writer: Cynthia Dresden Project: Compaq ProLiant DL580 Server Setup and Installation Guide Comments: Part Number: 159213-003 File Name: b-ch1 Server Features.doc Last Saved On: 4/9/01 5:05 PM 1-13 1-14 Compaq ProLiant DL580 Server Setup and Installation Guide For additional SmartStart information, refer to the Server Setup and Management pack included in the server shipping box. Compaq Integrated Management Log The Compaq Integrated Management Log (IML) records events and stores them in an easily viewable form. The IML records hundreds of events and then marks each event with a time stamp. For more information regarding the IML, see Chapter 7, “Server Configuration and Utilities.” Compaq Insight Manager Compaq Insight Manager is a systems management tool delivering fault tolerance, performance, and configuration management for Compaq servers and clients. Compaq Insight Manager components include Compaq Insight Manager software running on the management console and operating system-specific Compaq Insight Manager agents running on the server or managed desktop client. Compaq Insight Manager features an easy-to-use graphical interface and includes online documentation and context-sensitive help. Key features include: ■ Forwarding server alert fault conditions ■ Monitoring fault conditions and server performance ■ Controlling server security and configuration ■ Remotely controlling servers ■ Initiating rapid recovery services For information regarding Compaq Insight Manager, refer to the Server Setup and Management pack shipped with your server. Compaq Web-Based Management Compaq web-based management capabilities for Compaq ProLiant DL580 servers allow you to access your managed device list and the Compaq Insight Manager Alarm Log with a web browser, either locally at the management console or from another machine. If you have devices that are running Compaq Insight Manager Agents 4.7 or later, you can also view the device data from most browsers. Compaq Confidential – Need to Know Required Writer: Cynthia Dresden Project: Compaq ProLiant DL580 Server Setup and Installation Guide Comments: Part Number: 159213-003 File Name: b-ch1 Server Features.doc Last Saved On: 4/9/01 5:05 PM Server Features Compaq has added two buttons to the Compaq Insight Manager button bar. One button launches your browser with the device list displayed, and the other button launches your browser with the alarm log displayed. For web-enabled devices (devices running Compaq Insight Manager Agents 4.7 and later), there is a shortcut in the task list for viewing web data. Right-click with a mouse on the device in the Compaq Insight Manager Device List to display a device-specific menu and open the task list, or select View Web Data. This viewing mode automatically launches the default browser and displays data for the selected device. Compaq Survey Utility The Compaq Survey Utility is a serviceability tool available for Windows NT and Novell NetWare that delivers online configuration capture and comparison to maximize server availability. This utility is available on the Compaq Management CD in the SmartStart package or on the Compaq website: www.compaq.com/products/servers Refer to the Compaq Management CD for information about installing and running the Compaq Survey Utility. After you have run the Compaq Survey Utility, you can view the Integrated Management Log by loading the output of the utility (typically called SURVEY.TXT) into a text viewer such as Microsoft Notepad. The event list follows the system slot information. Once you have opened the text file, you can print it using the print feature of the viewer. For more information about using the list of events feature, refer to the Compaq Servers Troubleshooting Guide. Compaq Confidential – Need to Know Required Writer: Cynthia Dresden Project: Compaq ProLiant DL580 Server Setup and Installation Guide Comments: Part Number: 159213-003 File Name: b-ch1 Server Features.doc Last Saved On: 4/9/01 5:05 PM 1-15 1-16 Compaq ProLiant DL580 Server Setup and Installation Guide Drive Fault Tolerance Disk drive fault tolerance in Compaq servers is addressed in detail within the Compaq Server Online Reference Guide on the Documentation CD. Compaq ProLiant DL580 servers are configured with the Integrated Smart Array Controller and support several Redundant Array of Inexpensive Disks (RAID) types including: ■ RAID 0—data striping ■ RAID 1—mirroring ■ RAID 0+1—data striping and mirroring ■ RAID 5—distributed data guarding IMPORTANT: The Integrated Smart Array Controller supports management of internal SCSI hard drives and external tape drives only. Refer to the Compaq Integrated Smart Array Controller User Guide on your Documentation CD for additional information. Automatic Server Recovery-2 (ASR-2) If you experience a critical system failure, Automatic Server Recovery-2 (ASR-2) allows you to restart the server and page a designated system administrator. For more information, refer to the Server Reference Guide on the Documentation CD or to the Compaq Integrated Remote Console (IRC) User Guide. Compaq System Configuration Utility The Compaq System Configuration Utility performs a wide range of configuration activities, including: ■ Configuring I/O expansion boards automatically ■ Resolving resource conflicts G Port addresses G Interrupts (IRQs) ■ Managing system and peripheral hardware installation ■ Upgrading processors Compaq Confidential – Need to Know Required Writer: Cynthia Dresden Project: Compaq ProLiant DL580 Server Setup and Installation Guide Comments: Part Number: 159213-003 File Name: b-ch1 Server Features.doc Last Saved On: 4/9/01 5:05 PM Server Features ■ Managing mass storage devices G Hard drives G External tape drives ■ Storing configuration information in nonvolatile memory ■ Running software and firmware diagnostic tools G INSPECT G Diagnostics (DIAGS) G Drive Array Advanced Diagnostics (DAAD) G ROMPaq G ASR-2 The first time the server is configured, the SmartStart program automatically creates a system partition and installs the configuration utility and other Compaq utilities in that partition. Compaq Operating System Utilities Compaq servers take advantage of several utilities that provide detailed information and offer special capabilities including: ■ Compaq PCI Hot Plug technology ■ Compaq Advanced Network Control ■ Compaq Integrated Management Log Viewer ■ Power Down Manager ■ Compaq Integrated Log Management These utilities are provided on the Compaq Support Software for Microsoft Windows NT 4.0 diskettes (NTSSD). For more detailed information, refer to the Documentation CD and the NTREADME.HLP file on Diskette 1. Upcoming releases include expanded operating system support. Compaq Confidential – Need to Know Required Writer: Cynthia Dresden Project: Compaq ProLiant DL580 Server Setup and Installation Guide Comments: Part Number: 159213-003 File Name: b-ch1 Server Features.doc Last Saved On: 4/9/01 5:05 PM 1-17 1-18 Compaq ProLiant DL580 Server Setup and Installation Guide Compaq Integrated Remote Console You can perform a wide range of configuration activities with the standard Compaq Integrated Remote Console (IRC) and an optional supported modem installed on the Compaq ProLiant DL580 server. Some IRC features include the following: ■ Accessibility via an ANSI terminal ■ Operation that is independent of the operating system ■ Remote server reboot ■ Access to system configuration information ■ Out-of-band communication with dedicated management modem installed in the server For more information about the IRC, refer to the Documentation CD provided with your server. NOTE: An internal modem is required for IRC functionality if the primary serial port is occupied by another device. Install the auxiliary serial port included with your server for additional serial support. Compaq Confidential – Need to Know Required Writer: Cynthia Dresden Project: Compaq ProLiant DL580 Server Setup and Installation Guide Comments: Part Number: 159213-003 File Name: b-ch1 Server Features.doc Last Saved On: 4/9/01 5:05 PM Server Features Major Hardware Options Compaq ProLiant DL580 servers support several server hardware options available from a Compaq authorized reseller or service provider. Hardware option installation instructions are provided with each hardware option kit. For additional information on Compaq servers and options, visit the Compaq website: www.compaq.com/products/servers Compaq ProLiant DL580 server options include: ■ Pentium III Xeon processors ■ Hot-plug Wide Ultra2/Ultra3 SCSI hard drives ■ External storage options ■ Optional controller boards G Smart Array 4200 Controller G Smart Array 3200 Controller G Smart Array 221 Controller G Smart Array 431 Controller G 64-bit/66-MHz Dual Channel Wide Ultra3 SCSI Adapter ■ External storage enclosures (Fibre Channel and SCSI) ■ External tape drives ■ Clustering support ■ Error checking and correcting (ECC) SDRAM memory ■ Redundant hot-plug power supplies ■ Redundant network interface controllers (NICs) ■ Remote Insight Lights-Out Edition ■ Optional Fibre Channel cards Compaq Confidential – Need to Know Required Writer: Cynthia Dresden Project: Compaq ProLiant DL580 Server Setup and Installation Guide Comments: Part Number: 159213-003 File Name: b-ch1 Server Features.doc Last Saved On: 4/9/01 5:05 PM 1-19 1-20 Compaq ProLiant DL580 Server Setup and Installation Guide Front Panel Components Use the following illustration to locate components on the front panel of your Compaq ProLiant DL580 server. 1 2 3 4 5 6 7 8 9 Figure 1-6. Front panel components Table 1-5 Front Panel Components Item Component Power switch Power/interlock LED Memory/processor LED Fan LED Hot-plug power supply 2 (redundant) Hot-plug power supply 1 (primary, populated) CD-ROM drive Diskette drive Hot-plug SCSI hard drive bays (4) Compaq Confidential – Need to Know Required Writer: Cynthia Dresden Project: Compaq ProLiant DL580 Server Setup and Installation Guide Comments: Part Number: 159213-003 File Name: b-ch1 Server Features.doc Last Saved On: 4/9/01 5:05 PM Server Features Rear Panel Components Use the following illustration to locate components on the rear panel of your Compaq ProLiant DL580 server. 2 1 4 3 6 5 4 3 2 1 13 12 11 10 9 8 7 6 5 Figure 1-7. Rear panel components Table 1-6 Rear Panel Components Item Component Auxiliary serial knockout Parallel connector External SCSI connector for tape drive support only (multi-Logical Unit Number (LUN) not supported) PCI Hot Plug expansion slots (4) Non-hot-plug PCI expansion slots (2) NIC card with two RJ-45 connectors Video connector Mouse connector Hot-plug keyboard connector Serial connector A continued Compaq Confidential – Need to Know Required Writer: Cynthia Dresden Project: Compaq ProLiant DL580 Server Setup and Installation Guide Comments: Part Number: 159213-003 File Name: b-ch1 Server Features.doc Last Saved On: 4/9/01 5:05 PM 1-21 1-22 Compaq ProLiant DL580 Server Setup and Installation Guide Table 1-6 Rear Panel Components continued Item Component Hot-plug power supply 1 cord connector (primary) Hot-plug power supply 2 cord connector (redundant) VHDC SCSI knockouts (2) Diagnostics Tools Some of the Compaq software and firmware diagnostics tools include: ■ Power-On Self-Test (POST) ■ Diagnostics (DIAGS) ■ ROMPaq utilities to upgrade flash ROMs ■ Drive Array Advanced Diagnostics (DAAD) For additional information about Compaq diagnostic tools, refer to the Documentation CD with your server. Supported Drive Configurations Standard server configurations can include as many as five Smart Array 4200 Controllers, depending on the installed network operating system. Each Smart Array 4200 Controller can support four Compaq StorageWorks Enclosures (Model 4314R). The Integrated Smart Array Controller, which ships standard on the ProLiant DL580, may be used for support of the internal hot-plug hard drives. Maximum SCSI Configuration A maximum practical SCSI configuration that optimizes storage capacity includes the following: one network interface controller (NIC), the Integrated Smart Array Controller, five Smart Array 4200 controllers, twenty Compaq StorageWorks Enclosures (Model 4314R), and two hundred and eighty-four 36.4-GB hot-pluggable hard disk drives. This configuration yields a total storage capacity of 10.3 TB (10.3 terabytes=10,337 GB). Compaq Confidential – Need to Know Required Writer: Cynthia Dresden Project: Compaq ProLiant DL580 Server Setup and Installation Guide Comments: Part Number: 159213-003 File Name: b-ch1 Server Features.doc Last Saved On: 4/9/01 5:05 PM Server Features Maximum Fibre Channel Configuration A maximum Fibre Channel configuration optimizing performance and storage includes: ■ One network interface controller (NIC) ■ Five fibre channel host adapters ■ Five Compaq StorageWorks FC-AL Switch 8 with 3-port Expansion Modules ■ Fifty Compaq StorageWorks RAID Arrays (RA4000/4100) ■ Six hundred 36.4-GB drives (twelve drives per array) This configuration yields a total external storage capacity of 21.84 TB (21.84 terabytes=21,840 GB). NOTE: The maximum fibre channel configuration described in this section yields a theoretical maximum storage capacity. Security Features For detailed information regarding the security features listed below, refer to the Documentation CD included in the Reference Information pack shipped with your server or visit the Compaq website: www.compaq.com/products/servers Software Security Software security features are established through the Compaq System Configuration Utility and include: ■ Administrator password ■ Configuration lock ■ Power-on password ■ Diskette boot override ■ Diskette write control ■ Diskette boot control ■ Keyboard password Compaq Confidential – Need to Know Required Writer: Cynthia Dresden Project: Compaq ProLiant DL580 Server Setup and Installation Guide Comments: Part Number: 159213-003 File Name: b-ch1 Server Features.doc Last Saved On: 4/9/01 5:05 PM 1-23 1-24 Compaq ProLiant DL580 Server Setup and Installation Guide ■ Remote access password ■ Network saver mode ■ Serial/parallel interface control ■ QuickLock™ ■ Serial interface control ■ NVRAM invalidate Routine Maintenance For information regarding routine maintenance and safety precautions, refer to the Documentation CD included in the Reference Information pack of the shipping box. Warranties For no additional cost, Compaq ProLiant DL580 servers include the following standard warranties: ■ Three-Year Parts, Labor, and On-Site Limited Warranty ■ Next Business Day Warranty ■ Pre-Failure Warranty on processors, memory, hard drives, and power supplies ■ Global Warranty For additional service and support offerings, visit the Compaq website: www.compaq.com/products/servers/support Server Registration Registering your server provides Compaq with valuable information on server installation. This information helps Compaq serve your needs better now and in the future. Visit the Compaq website to register your server: www.compaq.com/register Compaq Confidential – Need to Know Required Writer: Cynthia Dresden Project: Compaq ProLiant DL580 Server Setup and Installation Guide Comments: Part Number: 159213-003 File Name: b-ch1 Server Features.doc Last Saved On: 4/9/01 5:05 PM Chapter 2 Installing Hardware Options This chapter provides step-by-step instructions for installing optional hardware equipment in your Compaq ProLiant DL580 server. For additional instructions, refer to the installation instructions provided in each Compaq server option kit. Refer to the following documents for illustrated guides for installing Compaq option upgrades: ■ Hardware installation and configuration poster included in the server shipping box ■ Color labels attached to user access areas on the server Compaq servers include both hot-plug and non-hot-plug areas and components. With non-hot-plug installations you must shut down all power to the server when installing options, upgrades, or replacements. With hot-plug installations, you can leave your server powered on when installing options, upgrades, or replacements. IMPORTANT: Refer to the information provided with hardware option kits before powering down the server. Before installing certain options, including array controllers, you must back up all system data before powering down the server. It is recommended that you install all non-hot-plug options before completing the server setup and installation process. Installing non-hot-plug hardware after your server is functional requires that you back up data, shut down the server completely, and remove all power cords. Detailed instructions for installing optional components, including storage media, expansion boards, fans, and processors, are also provided in each server option kit. Compaq Confidential – Need to Know Required Writer: Cynthia Dresden Project: Compaq ProLiant DL580 Server Setup and Installation Guide Comments: Part Number: 159213-003 File Name: c-ch2 Installing Hardware Options.doc Last Saved On: 4/9/01 5:07 PM 2-2 Compaq ProLiant DL580 Server Setup and Installation Guide For information about upgrading your Compaq ProLiant DL580 server and obtaining the hot-plug and non-hot-plug options mentioned in this setup and installation guide, contact your Compaq authorized reseller or visit Compaq online: www.compaq.com/products/servers WARNING: To reduce the risk of personal injury or damage to the equipment, Compaq recommends that only trained and qualified personnel install non hot-plug components. In particular, personnel should be trained to deal with products capable of producing hazardous energy levels. Non-Hot-Plug Server Areas ■ System board ■ PCI expansion slots (2) ■ Processor slots (4) ■ Memory board ■ Memory DIMM slots (16) Hot-Plug Server Areas ■ SCSI hard drive bays (4) ■ Power supply bays (2) ■ PCI Hot Plug expansion slots (4) ■ Dual-fan assemblies (4) NOTE: PCI Hot Plug slot 5 is populated with the system network interface controller (NIC) card. Compaq Confidential – Need to Know Required Writer: Cynthia Dresden Project: Compaq ProLiant DL580 Server Setup and Installation Guide Comments: Part Number: 159213-003 File Name: c-ch2 Installing Hardware Options.doc Last Saved On: 4/9/01 5:07 PM Installing Hardware Options 2-3 System Board Components Use the following illustration, along with your server setup poster, to locate system board components including slots, switches, and connectors. Refer to the illustrated labels attached to the inside of the server access panels for additional guidance in locating components. 22 23 24 1 2 21 3 20 19 4 18 5 17 16 15 14 13 12 11 10 9 8 7 6 Figure 2-1. System board components Table 2-1 System Board Components Item Component Memory board slot Processor slot 1 Processor slot 2 Processor slot 3 Processor slot 4 Unpopulated Unpopulated Item Component Diskette slot Unpopulated IDE CD-ROM connector Remote Insight Board connector Unpopulated Unpopulated Power connectors continued Compaq Confidential – Need to Know Required Writer: Cynthia Dresden Project: Compaq ProLiant DL580 Server Setup and Installation Guide Comments: Part Number: 159213-003 File Name: c-ch2 Installing Hardware Options.doc Last Saved On: 4/9/01 5:07 PM 2-4 Compaq ProLiant DL580 Server Setup and Installation Guide Table 2-1 System Board Components continued Item Component Service switch Processor configuration switch (SW4) PCI non-hot-plug expansion slot 1 PCI Hot Plug expansion slot 2 PCI Hot Plug expansion slot 3 Item Component PCI Hot Plug expansion slot 4 PCI Hot Plug connector 5 (reserved for NIC) PCI Hot Plug connector PCI non-hot-plug slot 6 Peripheral board slot NOTE: The optional Remote Insight Lights-Out Edition functions properly only when it is installed in non-hot-plug expansion slot 6 and is connected to the Remote Insight Board four-pin connector on the system board. The connection cable is provided with your option kit. NOTE: For locations of the primary and secondary PCI Hot Plug connectors, refer to the full-color label attached to the top access panel of the server. Installing Non-Hot-Plug Options If you are installing non-hot-plug options before completing the server setup and installation process, it is not necessary to back up stored data or shut down the server completely. However, any time that you power down the server completely, it is important to back up all data stored on the server. At all times, be aware of potential electrical hazards to work as safely as possible. For the most part, installing non-hot-plug components does not require tools or equipment other than the Torx T-15 screwdriver included with your server and screws or the mounting strips provided in each option kit. For information about obtaining Compaq option kits for upgrading your Compaq ProLiant DL580 server, contact a Compaq authorized reseller. Compaq Confidential – Need to Know Required Writer: Cynthia Dresden Project: Compaq ProLiant DL580 Server Setup and Installation Guide Comments: Part Number: 159213-003 File Name: c-ch2 Installing Hardware Options.doc Last Saved On: 4/9/01 5:07 PM Installing Hardware Options WARNING: To reduce the risk of electric shock or damage to the equipment: ■ Disconnect power from the server by unplugging all power cords from either the electrical outlet or the server. ■ Do not disable the power cord grounding plug. The grounding plug is an important safety feature. ■ Plug the power cord into a grounded (earthed) electrical outlet that is easily accessible at all times. WARNING: To reduce the risk of personal injury from hot surfaces, allow the internal system components to cool before touching surface areas. CAUTION: Electrostatic discharge can damage electronic components. Make sure you are properly grounded before beginning any installation procedure. Preparing to Install Non-Hot-Plug Options Before installing a non-hot-plug hardware option: 1. Back up server data. NOTE: In a new Compaq ProLiant DL580 server, it is only necessary to back up data after installation and configuration is complete. 2. Shut down the operating system as directed in the operating system instructions. 3. If the server is on, move the power switch to the Standby position. 4. Verify that the first system LED on the front panel, located nearest the Power On/Standby switch, turns amber and that all fans stop spinning. WARNING: Before removing the top access panel, be sure that the power switch is set in the Standby position and that the power cord is disconnected from the electrical outlet. Compaq Confidential – Need to Know Required Writer: Cynthia Dresden Project: Compaq ProLiant DL580 Server Setup and Installation Guide Comments: Part Number: 159213-003 File Name: c-ch2 Installing Hardware Options.doc Last Saved On: 4/9/01 5:07 PM 2-5 2-6 Compaq ProLiant DL580 Server Setup and Installation Guide IMPORTANT: The system power in the Compaq ProLiant DL580 server does not shut off completely from the front panel Power On/Standby switch. The two positions of the switch function as On and Standby, rather than On and Off. The Standby position removes power from most of the electronics and the drives; however, portions of the power supply and some internal circuitry remains active. To remove all power from the system, it is necessary to disconnect the power cord from the server. In systems with multiple power supplies, disconnect all the power cords to remove power from the system. NOTE: After setting the Power On/Standby switch to Standby, it may take the operating system up to 30 seconds before shutting down the power. 5. Disconnect all power cords once the system shuts down. See Chapter 4, “Installing the Server,” for additional information. 6. Disconnect any other external equipment connected to the computer. Compaq Confidential – Need to Know Required Writer: Cynthia Dresden Project: Compaq ProLiant DL580 Server Setup and Installation Guide Comments: Part Number: 159213-003 File Name: c-ch2 Installing Hardware Options.doc Last Saved On: 4/9/01 5:07 PM Installing Hardware Options Processors Compaq ProLiant DL580 servers ship standard with at least one processor and processor connectors on the server board that accommodate as many as four processors. When more than one processor is installed, both must operate at the same speed and frequency. Compaq ProLiant DL580 servers do not support processor configurations with mixed frequencies. If you install processors of mixed frequencies in your Compaq ProLiant DL580 server, you risk adversely affecting your system performance and nullifying your warranty. Intel Pentium III processors of 850-MHz frequency and higher feature internally locked switch settings that override the processor configuration switch (SW4) on your system board. When installing an 850-MHz or higher processor, you need not change any switch settings on the processor configuration switch (SW4). Refer to the installation documentation that ships with your option kit for detailed information regarding your processors, or contact your Compaq authorized reseller. For additional information about configuring your system for processor upgrades, refer to the system configuration label on the inside of the access panel, or to the Compaq maintenance and service guides for your ProLiant server on the Compaq website: www.compaq.com/support/servers Figure 2-2. Pentium III Xeon processor for Compaq ProLiant DL580 servers Compaq Confidential – Need to Know Required Writer: Cynthia Dresden Project: Compaq ProLiant DL580 Server Setup and Installation Guide Comments: Part Number: 159213-003 File Name: c-ch2 Installing Hardware Options.doc Last Saved On: 4/9/01 5:07 PM 2-7 2-8 Compaq ProLiant DL580 Server Setup and Installation Guide NOTE: In Compaq ProLiant DL580 servers, each Pentium III Xeon processor is keyed to fit into each processor slot one way only. Installing a Processor To install a processor, use the following procedure: 1. Ensure that your server has the latest system BIOS appropriate to the processor that you are installing. To download the latest system ROMPaqä firmware, follow the installation instructions on the Compaq website: www.compaq.com/support/servers 2. Follow the instructions for “Preparing to Install Non-Hot-Plug Options.” 3. Loosen the thumbscrews and center screw on the server front panel . NOTE: Use the Torx T-15 screwdriver provided with your server to loosen the center screw. 4. Slide the top access panel toward the rear of the unit about an inch and then lift the top access panel off the unit . NOTE: Core frequency switch settings are located on the label attached to the underside of the top access panel. Refer to this information for switch settings associated with different processor speeds. 2 1 1 1 Figure 2-3. Removing the top access panel Compaq Confidential – Need to Know Required Writer: Cynthia Dresden Project: Compaq ProLiant DL580 Server Setup and Installation Guide Comments: Part Number: 159213-003 File Name: c-ch2 Installing Hardware Options.doc Last Saved On: 4/9/01 5:07 PM Installing Hardware Options 5. Locate an available processor slot on the system board. The following illustration shows a detailed view of the server with four processors installed on the system board. NOTE: Processor slots are numbered 1 through 4 on the install labels and on the illustrated parts map. By default, Compaq ProLiant DL580 servers are shipped with at least one processor installed in slot 1. Remaining slots may be populated in any order. 4 3 2 1 Figure 2-4. Processor slot locations Table 2-2 Processor Slot Locations Item Component Slot 1 Slot 2 Slot 3 Slot 4 CAUTION: It is necessary to fully loosen the blanking panel retention screw before removing the processor module to avoid possible damage to the processor. 6. Prepare to remove the blanking panel from the selected slot by fully loosening the blanking panel retention screw and opening the ejector levers . Compaq Confidential – Need to Know Required Writer: Cynthia Dresden Project: Compaq ProLiant DL580 Server Setup and Installation Guide Comments: Part Number: 159213-003 File Name: c-ch2 Installing Hardware Options.doc Last Saved On: 4/9/01 5:07 PM 2-9 2-10 Compaq ProLiant DL580 Server Setup and Installation Guide 7. Pull the blank out of its slot and retain it for future use. 2 2 1 3 Figure 2-5. Removing the blanking panel from the processor slot 8. Align the new processor module with the processor slot and push the module into the slot . 9. Press the ejector paddles down at the same time. This motion simultaneously seats the board into the slot and locks the processor into place. 10. When ejectors are seated, complete the installation by pressing the spring-mounted retention screw until it stays down. Continue rotating the retention screw until it is finger-tight. 3 2 2 1 Figure 2-6. Inserting the processor into the processor slot Compaq Confidential – Need to Know Required Writer: Cynthia Dresden Project: Compaq ProLiant DL580 Server Setup and Installation Guide Comments: Part Number: 159213-003 File Name: c-ch2 Installing Hardware Options.doc Last Saved On: 4/9/01 5:07 PM Installing Hardware Options NOTE: Processors are keyed to fit into the connector one way only. 11. Verify that the interlock LEDs indicate normal activity. See Appendix D for additional information about locating and reading LED indicators. CAUTION: If you remove a processor, the processor blanking panel must be reinstalled before powering up the server. Failure to have either a processor or processor blank installed results in an interlock fault. 12. Replace the top access panel. 13. Prepare to mount the server in the rack or return the server to its installed position in the rack. See Chapter 4, “Installing the Server,” for additional information. 14. Reconnect the power cords to the server. 15. Verify that the processor was installed correctly. Check the processor frequency, cache size, and slot location by reviewing the Power-On Self-Test (POST) messages on the system console. Refer to the Integrated Management Log materials on your Documentation CD for additional information. Compaq Confidential – Need to Know Required Writer: Cynthia Dresden Project: Compaq ProLiant DL580 Server Setup and Installation Guide Comments: Part Number: 159213-003 File Name: c-ch2 Installing Hardware Options.doc Last Saved On: 4/9/01 5:07 PM 2-11 2-12 Compaq ProLiant DL580 Server Setup and Installation Guide System Memory You can expand the random access memory in your Compaq ProLiant DL580 server by adding additional DIMM modules. The standard system memory board with 16 DIMM slots supporting a multi-gigabyte capacity is shown in the following illustration. DIMM 1 DIMM 3 DIMM 5 DIMM 2 DIMM 4 Bank 1 Bank 2 Bank 3 Bank 4 DIMM 7 DIMM 9 DIMM 11 DIMM 13 DIMM 6 DIMM 8 DIMM 10 DIMM 12 DIMM 14 DIMM 16 DIMM 15 Figure 2-7. 16-DIMM memory board slot and bank assignments Table 2-3 Memory Expansion Board Components Memory Slots Memory Banks DIMM slots 1 through 4 Bank 1 DIMM slots 5 through 8 Bank 2 DIMM slots 9 through 12 Bank 3 DIMM slots 13 through 16 Bank 4 NOTE: All four slots in a bank must be populated, and paired DIMM modules must be the same size, type, and speed. For additional information, see “Upgrading System Memory” in this chapter. Compaq Confidential – Need to Know Required Writer: Cynthia Dresden Project: Compaq ProLiant DL580 Server Setup and Installation Guide Comments: Part Number: 159213-003 File Name: c-ch2 Installing Hardware Options.doc Last Saved On: 4/9/01 5:07 PM Installing Hardware Options Upgrading System Memory Several requirements must be met when installing additional memory. ■ Use only ECC SDRAM. ■ Remove the memory board before installing additional DIMM modules. ■ Populate the DIMM slots four at a time, filling available slots at the top of the board near the access panel first, and slots at the bottom of the board near the system board last. The memory architecture of Compaq ProLiant DL580 servers incorporates a four-way interleaving design. This type of design requires that four DIMM modules of the same size, type, and speed be installed or removed as a group. In Compaq ProLiant DL580 servers, the four groups containing four DIMM each on the memory board are referred to as banks 1 through 4. ■ Although DIMM modules must be matched for size, type, and speed within a four-slot bank, the size may vary from bank to bank. CAUTION: For best performance, use only Compaq-approved DIMM memory. Using memory modules from other sources may adversely affect data integrity. NOTE: For an illustrated overview of the memory installation procedure, refer to the setup and installation poster included in the shipping box and to the hood label attached to the inside of the system unit access panel of your server. Removing the Memory Board Use the following procedure to remove the memory board prior to adding or replacing DIMM modules: 1. Remove the access panel by performing the instructions described in “Preparing to Install Non-Hot-Plug Options” earlier in this chapter. Compaq Confidential – Need to Know Required Writer: Cynthia Dresden Project: Compaq ProLiant DL580 Server Setup and Installation Guide Comments: Part Number: 159213-003 File Name: c-ch2 Installing Hardware Options.doc Last Saved On: 4/9/01 5:07 PM 2-13 2-14 Compaq ProLiant DL580 Server Setup and Installation Guide 2. On the memory board, squeeze in on the spring-loaded release latches and flip up the retaining flaps . 1 1 2 2 3 Figure 2-8. Removing the standard 16-DIMM memory board 3. Lift the board out of the server . Installing Additional DIMM Modules Before installing additional memory, back up all server data and power down the server as described in the section on “Installing Non-Hot-Plug Options.” 1. Remove the memory board from the system as described in the previous section, “Removing the Memory Board.” CAUTION: Always support the memory expansion board or apply counter pressure while inserting a module. 2. Support the memory board and align the key slots on the bottom edge of each DIMM module with the tabs in the memory slot. 3. Insert each module directly into the slot by pressing the memory module in toward the board with equal pressure on both outer corners until the module is properly seated . When the module is seated properly, the latches snap into place and lock the module into place. Compaq Confidential – Need to Know Required Writer: Cynthia Dresden Project: Compaq ProLiant DL580 Server Setup and Installation Guide Comments: Part Number: 159213-003 File Name: c-ch2 Installing Hardware Options.doc Last Saved On: 4/9/01 5:07 PM Installing Hardware Options 2 2 1 Figure 2-9. Installing and latching a DIMM module 4. Ensure that the new DIMM modules are installed in groups of four to populate all four slots in a bank. The following illustration shows locations of DIMM slots by bank. DIMM 1 DIMM 3 DIMM 5 DIMM 7 DIMM 9 DIMM 11 DIMM 13 Bank 1 Bank 2 Bank 3 Bank 4 DIMM 2 DIMM 4 DIMM 6 DIMM 8 DIMM 10 DIMM 12 DIMM 14 DIMM 16 DIMM 15 Figure 2-10. Locating DIMM slots on a 16-slot memory board CAUTION: Installing non-Compaq-approved DIMMs or DIMMs of different capacities undermines the effectiveness and integrity of the server’s processing memory. Compaq Confidential – Need to Know Required Writer: Cynthia Dresden Project: Compaq ProLiant DL580 Server Setup and Installation Guide Comments: Part Number: 159213-003 File Name: c-ch2 Installing Hardware Options.doc Last Saved On: 4/9/01 5:07 PM 2-15 2-16 Compaq ProLiant DL580 Server Setup and Installation Guide Reinstalling the Memory Board After securely installing the DIMM modules into the memory board, reinstall the memory board in the server by performing the following steps: 1. Align the memory board with the upright grooved supports and slide into place . 2. Press the board evenly into the memory board slot to make firm contact with the board. 3. Press the locking latches into place. down until the lateral release latches snap 1 2 2 Figure 2-11. Installing the memory board 4. Replace the access panel. 5. Reconnect all power cords. 6. Restore power to the server. Compaq Confidential – Need to Know Required Writer: Cynthia Dresden Project: Compaq ProLiant DL580 Server Setup and Installation Guide Comments: Part Number: 159213-003 File Name: c-ch2 Installing Hardware Options.doc Last Saved On: 4/9/01 5:07 PM Installing Hardware Options Peripheral Board Components With the exception of the expansion slots, all of the Compaq ProLiant DL580 server’s data storage and transmission devices are managed through the peripheral board. Use the following illustration to locate components on the peripheral board shipped in your server. 3 4 5 2 6 7 1 8 9 10 11 Figure 2-12. Peripheral board components Table 2-4 Peripheral Board Components Item Component Internal battery Integrated Smart Array Controller SCSI port 1 SCSI port 2 (reserved) Serial connector B (auxiliary) Item Component Parallel connector Video connector Serial connector A Mouse connector Hot-plug keyboard connector External SCSI connector (tape device only, libraries not supported) Compaq Confidential – Need to Know Required Writer: Cynthia Dresden Project: Compaq ProLiant DL580 Server Setup and Installation Guide Comments: Part Number: 159213-003 File Name: c-ch2 Installing Hardware Options.doc Last Saved On: 4/9/01 5:07 PM 2-17 2-18 Compaq ProLiant DL580 Server Setup and Installation Guide PCI Non-Hot-Plug Expansion Board The Compaq ProLiant DL580 server contains six PCI expansion slots, including two PCI non-hot-plug slots. Locating the PCI Expansion Slots The two PCI expansion slots are located directly beneath the PCI access panel. ■ One 32-bit PCI slot (slot 6) ■ One 64-bit PCI slot (slot 1) Installing a Non-Hot-Plug Expansion Board To install an expansion board, refer to one of the following installation sources: ■ For a text and illustration of the procedure, refer to the installation documentation that shipped with the option kit. ■ For an illustrated overview of the procedure, refer either to the Hardware Installation and Configuration poster shipped with your server or to the expansion board installation label located on the inside of the access panel. ■ For a text overview of the procedure, follow the procedure below. Compaq Confidential – Need to Know Required Writer: Cynthia Dresden Project: Compaq ProLiant DL580 Server Setup and Installation Guide Comments: Part Number: 159213-003 File Name: c-ch2 Installing Hardware Options.doc Last Saved On: 4/9/01 5:07 PM Installing Hardware Options Use the following procedure to install an non-hot-plug expansion board in a PCI expansion slot. 1. Follow the procedures for “Preparing to Install Non-Hot-Plug Options” described earlier in this chapter. CAUTION: To reduce the risk of damage to your system or expansion boards, remove all AC power cords before installing or removing PCI expansion boards. With the front panel power switch in the Standby position, auxiliary power is still connected to the PCI expansion slot and may damage the card. 2. Identify the PCI expansion slot you wish to populate. of the expansion slot latch and push the latch out of the chassis. 4. Remove the expansion slot cover or existing expansion board . 3. Press on the top toward the rear 1 3 2 Figure 2-13. Removing an expansion board 5. Align the new expansion board with the groove on its PCI retainer clip opposite the removed expansion slot cover. NOTE: The PCI retainer clip can be locked in the open position to facilitate expansion board removal, but this locking feature is not necessary for expansion board installation. Compaq Confidential – Need to Know Required Writer: Cynthia Dresden Project: Compaq ProLiant DL580 Server Setup and Installation Guide Comments: Part Number: 159213-003 File Name: c-ch2 Installing Hardware Options.doc Last Saved On: 4/9/01 5:07 PM 2-19 2-20 Compaq ProLiant DL580 Server Setup and Installation Guide until the PCI retainer clip snaps closed. 7. Push the expansion slot latch in to secure the board. 6. Insert the expansion board 1 2 Figure 2-14. Inserting and securing an expansion board 8. Configure your cables to the rear panel of your expansion board, and reconnect the power cords. 9. Replace the access panel. 10. Restore power to the server. 11. Run the System Configuration Utility, if needed. Compaq Confidential – Need to Know Required Writer: Cynthia Dresden Project: Compaq ProLiant DL580 Server Setup and Installation Guide Comments: Part Number: 159213-003 File Name: c-ch2 Installing Hardware Options.doc Last Saved On: 4/9/01 5:07 PM Installing Hardware Options Remote Insight Lights-Out Edition Remote Insight Lights-Out Edition is a PCI-based, single-board computer that contains a built-in processor and fully supports keyboard, mouse, and PCI video functions. With the Remote Insight Lights-Out Edition installed in the Compaq ProLiant DL580 server, you can use a standard web browser and Compaq Insight Manager to access and remotely manage your server from any console on the network, regardless of the state of the host operating system. Using a standard web browser launched through Compaq Insight Manager, with the Remote Insight Lights-Out Edition, you can do the following: ■ Remotely access the console of the host server, including all text mode and graphics mode screens with full keyboard and mouse controls ■ Remotely power on, power off, or reboot the host server ■ Remotely boot the host server from a diskette drive installed in a network client ■ Access the Compaq Insight Management Agents on a host server through the Remote Insight Lights-Out Edition ■ Receive alerts from the Remote Insight Lights-Out Edition, regardless of the state of the host server operating system ■ Access advanced troubleshooting features provided by Remote Insight Lights-Out Edition ■ Launch a web browser, use Simple Network Management Protocol (SNMP) alerting, and manage the Remote Insight Lights-Out Edition using Compaq Insight Manager For more detailed information on installing the Remote Insight Lights-Out Edition, refer to the Compaq website: www.compaq.com/manage/15minslideshow/ IMPORTANT: Ensure that you install the Remote Insight Lights-Out Edition in slot 6, the 32-bit expansion slot. Do not install the Remote Insight Lights-Out Edition in a 64-bit slot. Compaq Confidential – Need to Know Required Writer: Cynthia Dresden Project: Compaq ProLiant DL580 Server Setup and Installation Guide Comments: Part Number: 159213-003 File Name: c-ch2 Installing Hardware Options.doc Last Saved On: 4/9/01 5:07 PM 2-21 2-22 Compaq ProLiant DL580 Server Setup and Installation Guide Installing the Remote Insight Lights-Out Edition Use the following procedure to install the Remote Insight Lights-Out Edition: 1. Perform Steps 1 through 7 of “Installing a Non-Hot-Plug Expansion Board” described in the previous section. 2. Connect the four-pin connector on the peripheral board with the four-pin connector on the system board. NOTE: The connector cable is included in the Remote Insight option kit. 1 2 Figure 2-15. Connecting the Remote Insight Lights-Out Edition to the system board 3. Replace the access panel. 4. Refer to the Compaq Remote Insight Lights-Out Edition Installation and User Guide in your option kit for additional configuration and cabling information. 5. Power up the server and run the System Configuration Utility, if needed. Auxiliary Serial Connector You can configure a second serial device to your Compaq ProLiant DL580 server by installing the auxiliary serial connector that ships with your server. Installing the Auxiliary Serial Connector Use the following procedure to install the auxiliary serial connector: Compaq Confidential – Need to Know Required Writer: Cynthia Dresden Project: Compaq ProLiant DL580 Server Setup and Installation Guide Comments: Part Number: 159213-003 File Name: c-ch2 Installing Hardware Options.doc Last Saved On: 4/9/01 5:07 PM Installing Hardware Options 1. Identify the auxiliary serial connector from the parts that shipped with your server. 2. Identify the auxiliary serial knockout available for installing the auxiliary serial connector on the rear of the server. 3. Follow the procedures for “Powering Down the Server” and “Removing the Access Panel” described earlier in this chapter. 4. Remove the retaining screw from the auxiliary serial knockout, and remove the knockout. 5. Place the external serial connector into the rear panel and secure the connector with the two screwlocks that ship with the connector. 6. Connect the internal serial connector to serial port B on the peripheral board. Figure 2-16. Cabling the auxiliary serial connector 7. Replace the access panel. Connect your external serial device to the auxiliary serial connector. 8. Power up your server. 9. Run the System Configuration Utility to enable the auxiliary serial port. Auxiliary SCSI Cable You can configure a second external SCSI device directly to the standard SCSI controller on your peripheral board by purchasing an auxiliary SCSI cable. To install this option from SCSI port 1 to a SCSI blank panel on the rear of your Compaq Confidential – Need to Know Required Writer: Cynthia Dresden Project: Compaq ProLiant DL580 Server Setup and Installation Guide Comments: Part Number: 159213-003 File Name: c-ch2 Installing Hardware Options.doc Last Saved On: 4/9/01 5:07 PM 2-23 2-24 Compaq ProLiant DL580 Server Setup and Installation Guide Compaq ProLiant DL580 server, refer to the documentation that ships with your option kit. Installing this option requires that you not cable your internal drive cage to SCSI port 1 on your peripheral board. IMPORTANT: You can cable the auxiliary SCSI cable to SCSI port 1 only. Cabling the auxiliary SCSI cable to internal SCSI port 2 causes a Power-On Self-Test error and halts system startup. Compaq Confidential – Need to Know Required Writer: Cynthia Dresden Project: Compaq ProLiant DL580 Server Setup and Installation Guide Comments: Part Number: 159213-003 File Name: c-ch2 Installing Hardware Options.doc Last Saved On: 4/9/01 5:07 PM Installing Hardware Options Installing PCI Hot Plug Options ■ PCI Hot Plug expansion boards ■ Hot-plug SCSI drives ■ Hot-plug power supplies NOTE: Port-colored latches or levers on components in these areas signify that they are hot-plug devices. PCI Hot Plug Expansion Boards Compaq ProLiant DL580 servers support PCI Hot Plug technology and include four PCI Hot Plug expansion slots. The following requirements must be met in order for complete PCI Hot Plug capability to exist: ■ PCI Hot Plug system hardware must be installed and available in your server. ■ An operating system with PCI Hot Plug support, such as Windows NT, Windows 2000, NetWare, and SCO UNIX, must be installed. ■ PCI Hot Plug device drivers provided by operating system vendors, the Compaq SmartStart and Support Software CD, and some individual hardware vendors must be installed. WARNING: All three requirements must be met in order for your system to be fully PCI Hot Plug capable. Attempting to perform a hot-plug operation without complete PCI Hot Plug capability will cause an immediate system crash. IMPORTANT: Before adding or removing any PCI Hot Plug devices, be sure to remove power to the slot using the PCI Hot Plug application. Failure to do so can result in critical errors. See “PCI Hot Plug Technology,” and the LED location information in Chapter 6, “PCI Hot Plug Technology.” For guidelines on performing hot-plug operations to add, replace, or upgrade PCI Hot Plug expansion boards, see the instructions in Chapter 6, “PCI Hot Plug Technology.” Compaq Confidential – Need to Know Required Writer: Cynthia Dresden Project: Compaq ProLiant DL580 Server Setup and Installation Guide Comments: Part Number: 159213-003 File Name: c-ch2 Installing Hardware Options.doc Last Saved On: 4/9/01 5:07 PM 2-25 2-26 Compaq ProLiant DL580 Server Setup and Installation Guide PCI Hot Plug Utilities You can use either the PCI Hot Plug button on the server or your operating system PCI Hot Plug utility to control the PCI Hot Plug slots. ■ The PCI Hot Plug button allows for PCI Hot Plug access directly at each PCI slot, which provides PCI Hot Plug control directly at the server without requiring the PCI Hot Plug utility software. ■ You can also use the utility software to replace a card in the hot-plug slot or configure a board that you have already added to the system. The PCI Hot Plug utility software allows you to enable or disable specific slots to the system. Compaq, in partnership with Microsoft, Novell and SCO, has developed PCI Hot Plug software support for each operating system. For more information on the PCI Hot Plug software application, refer to “PCI Hot Plug Important Facts” in the online PCI Hot Plug Administration Guide or in materials on the Documentation CD. Additional information is available in Chapter 7, “Server Configuration and Utilities.” IMPORTANT: OS/2 and Solaris operating systems do not support PCI Hot Plug technologies. Hot-Plug SCSI Hard Drives IMPORTANT: Before adding or removing any hot-plug SCSI drives, place the server in Standby mode. Refer to your operating system instructions for additional instructions. Important Guidelines For Replacing Hot-Plug SCSI Hard Drives When replacing hot-plug hard drives, observe the following guidelines: ■ Never remove a hot-plug drive if the drive’s LED is green. Replace a hot-plug hard drive only when its LED is amber-colored. ■ Never remove more than one drive at a time. When a drive is replaced, the controller uses data from the other drives in the array to reconstruct data on the replacement drive. If more than one drive is removed at a time, the complete data set needed to reconstruct data on replacement drives will not be available. ■ Never remove a working drive when another drive has failed. An amber LED light indicates a drives in failure mode. Permanent data loss occurs if a working drive is removed when replacing a failed drive. Compaq Confidential – Need to Know Required Writer: Cynthia Dresden Project: Compaq ProLiant DL580 Server Setup and Installation Guide Comments: Part Number: 159213-003 File Name: c-ch2 Installing Hardware Options.doc Last Saved On: 4/9/01 5:07 PM Installing Hardware Options ■ Never remove a drive while another drive is being rebuilt. The online LED flashes green when a drive is being rebuilt. A replaced drive should be restored from data stored on the other drives. ■ Never power down or turn off a ProLiant Storage System device while the server controlling it is powered on. This action causes the server Smart Controller to mark the drive as failed and can result in permanent data loss. ■ If an online spare drive is installed, wait for it to finish rebuilding before replacing the failed drive. When a drive fails, the online spare becomes active and begins being rebuilt as a replacement drive. After the online spare has been completely rebuilt (the online LED is solid green), the failed drive should be replaced with a new replacement drive. Do not replace the failed drive with the online spare. ■ A 1786 or other POST error message occurs when the system is turned on after a drive has been replaced while the system is off. When this occurs, you will be prompted to: PRESS <F1> TO BOOT THE SYSTEM AND REBUILD THE REPLACED DRIVE, OR PRESS <F2> TO BOOT THE SYSTEM AND NOT REBUILD THE DRIVE(S). CAUTION: Pressing F2 will cause permanent data loss to the entire logical drive. F2 should be pressed only if all of the drives have been replaced or if complete data loss is desired. NOTE: When a drive configured for fault tolerance is replaced, the replacement drive automatically begins restoring when it is installed. When a drive is in the process of being restored, the online LED flashes green. The LED continues to flash until the drive is completely restored. Installing Hot-Plug SCSI Hard Drives WARNING: There is a risk of personal injury from hazardous energy levels. The installation of options and routine maintenance and service of this product shall be performed by individuals who are knowledgeable about the procedures, precautions, and hazards associated with equipment containing hazardous energy circuits. Hot-plug SCSI hard drives can be installed without powering down the server or backing up system data. To install a hot-plug SCSI hard drive, complete the following procedure: Compaq Confidential – Need to Know Required Writer: Cynthia Dresden Project: Compaq ProLiant DL580 Server Setup and Installation Guide Comments: Part Number: 159213-003 File Name: c-ch2 Installing Hardware Options.doc Last Saved On: 4/9/01 5:07 PM 2-27 2-28 Compaq ProLiant DL580 Server Setup and Installation Guide 1. Locate and remove the blanking panel bay by squeezing the right retaining clip and pulling the blank out of the drive bay . 2 1 Figure 2-17. Removing a blanking panel 2. Insert the hot-plug SCSI hard drive into the empty drive bay and push until seated . 3. Push the drive lever in to lock the drive in place . 1 2 Figure 2-18. Installing a hot-plug SCSI hard drive 4. Place the hot-plug SCSI hard drive online as directed by your operating system instructions. If the drive was replaced, the array controller does an auto-spin up and starts rebuilding the drive. Compaq Confidential – Need to Know Required Writer: Cynthia Dresden Project: Compaq ProLiant DL580 Server Setup and Installation Guide Comments: Part Number: 159213-003 File Name: c-ch2 Installing Hardware Options.doc Last Saved On: 4/9/01 5:07 PM Installing Hardware Options CAUTION: Leaving a SCSI hard drive bay unpopulated interferes with proper airflow. Ensure that there is either a hard drive or a blank installed in each bay. Hot-Plug Power Supplies Locating and Installing Hot-Plug Power Supplies Use the following figure and table to locate the hot-plug power supply to be accessed. IMPORTANT: Whenever power is first applied to a power supply, there is up to a ten-second delay before booting begins. 1 2 Figure 2-19. Hot-plug power supply locations Table 2-5 Hot-Plug Power Supply Locations Item Component Hot-plug power supply 2 (redundant) Hot-plug power supply 1 (primary, populated) IMPORTANT: If you are using only one power supply, it must be installed in power supply bay 1 (primary). Compaq Confidential – Need to Know Required Writer: Cynthia Dresden Project: Compaq ProLiant DL580 Server Setup and Installation Guide Comments: Part Number: 159213-003 File Name: c-ch2 Installing Hardware Options.doc Last Saved On: 4/9/01 5:07 PM 2-29 2-30 Compaq ProLiant DL580 Server Setup and Installation Guide Power Supply LEDs Note the color of the power supply LEDs located on the front of the power supply. A green light indicates power supply activity. 1 2 Figure 2-20. Hot-plug power supply LEDs Table 2-6 Hot-Plug Power Supply LEDs LED Location Indicator Description Green Power supply OK Off Fault Green AC present Off AC not present or faulty Compaq Confidential – Need to Know Required Writer: Cynthia Dresden Project: Compaq ProLiant DL580 Server Setup and Installation Guide Comments: Part Number: 159213-003 File Name: c-ch2 Installing Hardware Options.doc Last Saved On: 4/9/01 5:07 PM Installing Hardware Options Removing a Hot-Plug Power Supply Hot-plug power supplies can be removed without powering down the server or backing up server data. 1. Grasp the power supply handle and pull up on the thumb latch 2. Pull the power supply 2 out of the bay. . 1 1 Figure 2-21. Removing a hot-plug power supply Compaq Confidential – Need to Know Required Writer: Cynthia Dresden Project: Compaq ProLiant DL580 Server Setup and Installation Guide Comments: Part Number: 159213-003 File Name: c-ch2 Installing Hardware Options.doc Last Saved On: 4/9/01 5:07 PM 2-31 Chapter 3 Integrated Smart Array Controller This chapter provides an overview of the Compaq Integrated Smart Array Controller and its functions within the Compaq ProLiant DL580 server. Features The Compaq Integrated Smart Array Controller is a dual-channel Ultra2 SCSI array controller. Both channels support low voltage differential (LVD) SCSI devices. The controller supports the following features: ■ 16-MB total memory with 8-MB read-ahead cache ■ 32-bit PCI bus master interface ■ RAID 0, RAID 0+1, RAID 1, RAID 5, and disk fault tolerance (for internal drives only) ■ Support for up to four internal Wide Ultra2 or Ultra3 SCSI hot-plug hard drives ■ Support for an external tape drive only (RAID 0 only) through the external SCSI connector on the rear panel ■ Easy-to-use Array Configuration Utility ■ Option ROM Configuration for Arrays ■ Performance monitoring, Pre-Failure Notification, and Pre-Failure Warranty through Compaq Insight Manager Compaq Confidential – Need to Know Required Writer: Cynthia Dresden Project: Compaq ProLiant DL580 Server Setup and Installation Guide Comments: Part Number: 159213-003 File Name: d-ch3 Integrated Smart Array Controller.doc Last Saved On: 4/18/01 10:55 AM 3-2 Compaq ProLiant DL580 Server Setup and Installation Guide External SCSI Connector SCSI port 2 controls external SCSI tape devices through a connector on the rear panel of the server. SCSI port 1 is dedicated to controlling the SCSI drives in the internal drive bays. 6 5 4 3 2 1 Figure 3-1. External SCSI connector on the rear panel To use a different Smart Array SCSI controller for managing internal hard drives, refer to the Compaq Integrated Smart Array Controller User Guide for information about installing a Smart Array/SCSI controller interface assemblies. Array Configuration Use the Array Configuration Utility to configure internal server hardware in the way that best suits your needs. CAUTION: Back up all data before migrating a drive from a nonintelligent controller to an intelligent array configuration. Failure to back up data will result in complete loss of data. For additional information about the Integrated Smart Array Controller, refer to the Compaq Integrated Smart Array Controller User Guide. Compaq Confidential – Need to Know Required Writer: Cynthia Dresden Project: Compaq ProLiant DL580 Server Setup and Installation Guide Comments: Part Number: 159213-003 File Name: d-ch3 Integrated Smart Array Controller.doc Last Saved On: 4/18/01 10:55 AM Chapter 4 Installing the Server Installation Choices There are two basic installation choices for your Compaq ProLiant DL580 server. You can use the Compaq optional installation service to install your server, or you can install the server using the procedures in this chapter. Compaq Optional Installation Service You may choose the optional installation service offered by Compaq to install your rack products. The installation service can be customized to meet your specific requirements or can be ordered as a standard Compaq CarePaq™. The basic installation service covers the entire hardware installation, from unpacking the components to connecting to a network and running a test of the system. Hardware installation service is available in all countries where Compaq has a direct or indirect service presence. It may be ordered from an authorized Compaq authorized reseller or, in the United States, by calling Compaq at 1-800-OK-COMPAQ. Using the Procedures in this Chapter This chapter provides information and instructions for installing your Compaq ProLiant DL580 server. The installation sequence includes: ■ Preparing the server for installation ■ Attaching the rack mounting hardware Compaq Confidential – Need to Know Required Writer: Cynthia Dresden Project: Compaq ProLiant DL580 Server Setup and Installation Guide Comments: Part Number: 159213-003 File Name: e-ch4 Installing the Server.doc Last Saved On: 4/5/01 2:26 PM 4-2 Compaq ProLiant DL580 Server Setup and Installation Guide ■ Installing the server into the rack ■ Attaching the cable management arm ■ Cabling the server ■ Powering up the server ■ Powering down the server Installation Resources and Documentation Rack Builder Pro Configuration Tool and Rack Products Documentation resources provide information about rack designs and products. Compaq rack documentation is available to download from the Compaq website: www.compaq.com The Rack Resource CD Kit contains documentation that is fully searchable and covers all aspects of rack installation. To use the kit, you will need to have access to a functioning workstation with a CD-ROM drive. The Rack Resource CD Kit contains the following tools and documentation: ■ Rack Builder Pro Configuration Tool This tool allows you to simulate rack configurations by creating an online version of your installation. Once the simulation is complete, you can print reports that list all required parts and part numbers. Rack Builder Pro provides information that includes: ■ G Graphical preview of properly configured racks G Site planning data, including power requirements, cooling mandates, and physical specifications G Ordering information, including required components, part numbers, and appropriate quantities Installing Rack Products video This information provides a visual overview of operations required for configuring a Compaq rack with rack-mountable components. This video provides key configuration steps such as: G Site planning G Installation of rack servers and rack options G Cabling G Coupling multiple racks together Compaq Confidential – Need to Know Required Writer: Cynthia Dresden Project: Compaq ProLiant DL580 Server Setup and Installation Guide Comments: Part Number: 159213-003 File Name: e-ch4 Installing the Server.doc Last Saved On: 4/5/01 2:26 PM Installing the Server ■ Rack Products Documentation CD This resource information on this CD allows you to view, search, and print documentation for Compaq racks and rack options. It also assists in the setup and optimization of your new Compaq rack to best fit the needs of your environment. Rack Warnings and Precautions WARNING: To reduce the risk of personal injury or damage to the equipment, at least two people are needed to safely unload the rack from the pallet. An empty 42U rack weighs 253 lb (115 kg), is over seven ft (2.1m) tall, and may become unstable when being moved on its casters. Do not stand in front of the rack as it rolls down the ramp from the pallet; handle it from the sides. WARNING: A rack may become unstable if more than one component is extended for any reason. To reduce the risk of personal injury, always be sure that the rack is adequately stabilized before extending a component outside the rack, and extend only one component at a time. WARNING: Before beginning to work on the rack, be sure that the leveling jacks are extended to the floor, that the full weight of the rack rests on the level floor, and that stabilizers are installed or that multiple racks are coupled for stability. Server Warnings and Precautions WARNING: To reduce the risk of personal injury or damage to the equipment, a minimum of two people MUST lift the server into the rack. The server can weigh up to 81 lb (37 kg). If the unit is to be loaded above chest level, a third person MUST assist in aligning the rails while the first two support the unit. WARNING: To reduce the risk of personal injury from hot surfaces, allow the hot-plug drives and internal system components to cool before touching. WARNING: This equipment is designed for connection to a grounded AC outlet. The grounding-type plug is an important safety feature. To avoid risk of electric shock or damage to your equipment, do not disable this feature. Compaq Confidential – Need to Know Required Writer: Cynthia Dresden Project: Compaq ProLiant DL580 Server Setup and Installation Guide Comments: Part Number: 159213-003 File Name: e-ch4 Installing the Server.doc Last Saved On: 4/5/01 2:26 PM 4-3 4-4 Compaq ProLiant DL580 Server Setup and Installation Guide CAUTION: Be sure to plug your power cord into a power outlet that is easily accessible and located as close as possible to the equipment operator. When you need to disconnect power to the equipment, be sure to unplug the power cord from the power outlet. CAUTION: Protect the server from power fluctuations and temporary interruptions with a regulating uninterruptible power supply (UPS). This device protects the hardware from damage caused by power surges and voltage spikes and keeps the system in operation during a power failure. CAUTION: Rack model Compaq ProLiant servers must always be operated with the top access panel secured in place. Proper cooling cannot be achieved while the system unit cover is removed. IMPORTANT: Because of the 100 to 120 VAC electrical rating of each power supply, some local electrical authorities may require either one 15-ampere circuit for each power supply or one 20-ampere circuit for each pair of power supplies. WARNING: Because this product is very heavy, reduce the risk of personal injury or damage to the equipment by performing the following: 37 kg 81 lb ■ Remove the hot-plug power supplies and hard drives to reduce the weight of the product before lifting it. ■ Observe local occupational health and safety requirements and guidelines for manual material handling. ■ Get help to lift and stabilize the product during installation or removal, especially when the product is not fastened to the rails. Compaq Confidential – Need to Know Required Writer: Cynthia Dresden Project: Compaq ProLiant DL580 Server Setup and Installation Guide Comments: Part Number: 159213-003 File Name: e-ch4 Installing the Server.doc Last Saved On: 4/5/01 2:26 PM Installing the Server Installation Overview For the most efficient and effective rack installation, follow the steps summarized below. More detailed instructions follow later in this chapter. ■ Select an appropriate site for your rack and make sure the stabilizer feet are installed. See “Selecting an Optimum Environment” later in this chapter. The Installing Rack Products CD, the Rack Builder Configuration Tool, and the Rack Information Library all have information on how to do this. Information can also be downloaded from the Compaq website: www.compaq.com ■ Unpack the server and rack mounting hardware. See “Unpacking the Server” later in this chapter. ■ Install any server hardware options. See Chapter 2, “Installing Hardware Options,” or refer to the option kits for detailed instructions. To reduce the weight of the server and make it more manageable during rack installation, do not install hot-plug SCSI drives until after rack mounting. Weight can also be reduced by removing hotplug redundant power supplies until the rack installation is complete. ■ Check switches settings for system board, peripheral board, and SCSI IDs. See Appendix E, “Switch Settings.” ■ Attach rack mounting hardware to the rack and to the server. See “Attaching Rack Mounting Hardware” later in this chapter. ■ Slide the server into the rack. See “Installing the Server in the Rack” later in this chapter. ■ Attach the cable management arm to the cable management arm bracket. See “Cabling the Server” later in this chapter. ■ Attach the optional cable support to the back of the rack. The cable support is needed only if you are routing cables from one side of the rack to the other. See “Cabling the Server” later in this chapter. ■ Connect keyboard, mouse, monitor, network, and power cables. See “Cabling the Server” later in this chapter. Compaq Confidential – Need to Know Required Writer: Cynthia Dresden Project: Compaq ProLiant DL580 Server Setup and Installation Guide Comments: Part Number: 159213-003 File Name: e-ch4 Installing the Server.doc Last Saved On: 4/5/01 2:26 PM 4-5 4-6 Compaq ProLiant DL580 Server Setup and Installation Guide ■ Turn on the computer and insert the SmartStart and Support Software CD to configure and manage the server. When the server boots from the SmartStart program, it automatically starts the System Configuration Utility. See “Powering Up the Server” later in this chapter. ■ Register your server by mail or at the Compaq website: www.compaq.com/register Once SmartStart is complete, the server is fully installed and can be configured for your network environment. For complete details on SmartStart, read the installation card included in your package. Compaq Confidential – Need to Know Required Writer: Cynthia Dresden Project: Compaq ProLiant DL580 Server Setup and Installation Guide Comments: Part Number: 159213-003 File Name: e-ch4 Installing the Server.doc Last Saved On: 4/5/01 2:26 PM Installing the Server Preparing the Server for Installation To prepare your Compaq ProLiant DL580 server for installation, complete the following actions: ■ Select an optimum environment ■ Unpack the server Selecting an Optimum Environment When installing your Compaq ProLiant DL580 server in a rack, select a location that meets the following environmental standards. Space Requirements ■ Clearance in the front of the rack should be a minimum of 25 inches for servicing and adequate airflow. ■ Clearance in the back of the rack should be a minimum of 30 inches to allow for servicing and adequate airflow. Power Requirements WARNING: To reduce the risk of personal injury, fire, or damage to the equipment, do not overload the AC supply branch circuit that provides power to the rack. Consult the electrical authority having jurisdiction over your facility wiring and installation requirements. IMPORTANT: Because of the 100 to 120 VAC electrical rating of each power supply, some local electrical authorities may require either one 15-ampere circuit for each power supply or one 20-ampere circuit for each pair of power supplies. ■ The power load needs to be balanced between available AC supply branch circuits. ■ The overall system AC current load must not exceed 80 percent of the branch circuit AC current rating. ■ If power strips are used, the load should not exceed 80 percent of the marked electrical current rating for each power strip. The installation of this equipment shall be in accordance with local and regional electrical regulations governing the installation of Information Technology Equipment by licensed electricians. This equipment is designed to operate in installations covered by the National Electric Code (ANSI/NFPA Compaq Confidential – Need to Know Required Writer: Cynthia Dresden Project: Compaq ProLiant DL580 Server Setup and Installation Guide Comments: Part Number: 159213-003 File Name: e-ch4 Installing the Server.doc Last Saved On: 4/5/01 2:26 PM 4-7 4-8 Compaq ProLiant DL580 Server Setup and Installation Guide 70, 1993) and the code for Protection of Electronic Computer/Data Processing Equipment (NFPA-75, 1992). For electrical power ratings on options, refer to the product’s rating label or the user documentation supplied with that option. Grounding Requirements For proper operation and safety, this equipment must be properly grounded in accordance with NFPA 70-1993, Article 250. All power distribution devices, branch wiring, and receptacles must be “Listed” grounding-type devices. Due to the higher ground leakage currents associated with the equipment, Compaq recommends the use of a Power Distribution Unit (PDU) that provides a supplementary ground conductor. This supplementary ground conductor should be permanently connected to a suitable building ground terminal. IMPORTANT: The use of common power outlet strips for this equipment is not recommended. For proper operation and safety, this equipment must be properly grounded. In the United States, install the equipment in accordance with NFPA 70-1993 (National Electric Code) Article 250, as well as any local and regional building codes. In Canada, the equipment should be installed in accordance with Canadian Standards Association, CSA C22.1, Canadian Electrical Code. In all other countries, the installation should follow any regional or national electrical wiring codes such as the International Electrotechnical Commission (IEC) 364 parts 1 through 7. All power distribution devices used in the installation, including branch wiring and receptacles, should be Listed or Certified ground-type devices. WARNING: To reduce the risk of electric shock due to high leakage currents, a reliable grounded connection (earthed) is essential before connecting the unit to an AC supply. When using power strips for electrical distribution, make sure that ground integrity is maintained for each connection made. Plug each component into a reliably grounded outlet. Compaq Confidential – Need to Know Required Writer: Cynthia Dresden Project: Compaq ProLiant DL580 Server Setup and Installation Guide Comments: Part Number: 159213-003 File Name: e-ch4 Installing the Server.doc Last Saved On: 4/5/01 2:26 PM Installing the Server Temperature Requirements To ensure safe and reliable operation of your equipment, install the system in a well-ventilated, climate-controlled environment. The Compaq Maximum Recommended Ambient Operating Temperature (TMRA) for most server products is 95°F (35°C). This means the temperature in the room where a rack server is located should not exceed this maximum level. The operating temperature inside the rack will always be higher than in the surrounding room. Heat levels depend on the configuration of equipment. Check the Maximum Internal Rack Temperature for each component before installation. Temperatures should not exceed those listed in Table 4-1. Table 4-1 Maximum Internal Rack Temperatures Equipment Maximum Internal Rack Temperature ProLiant rack model servers Compaq rack mounting options Other manufacturers' options 122°F (50°C) 104°F (40°C) Refer to other manufacturers' specifications CAUTION: To reduce the risk of equipment damage when installing third-party options: ■ Make sure that optional equipment does not impede airflow to the server and does not increase the internal rack temperature beyond the Compaq-specified maximum rating. ■ Make sure the optional equipment does not exceed its Manufacturer’s Maximum Recommended Ambient Operating Temperature when installed in the rack. Airflow Requirements The Compaq ProLiant DL580 server draws cool air in through the front door and exhausts warm air out the rear. The front door of the rack must be adequately ventilated to allow ambient room air to enter the cabinet, and the rear door must be ventilated adequately to allow the warm air to escape from the cabinet. In both cases, do not block the ventilation apertures. Compaq Confidential – Need to Know Required Writer: Cynthia Dresden Project: Compaq ProLiant DL580 Server Setup and Installation Guide Comments: Part Number: 159213-003 File Name: e-ch4 Installing the Server.doc Last Saved On: 4/5/01 2:26 PM 4-9 4-10 Compaq ProLiant DL580 Server Setup and Installation Guide CAUTION: If a third-party rack is used, observe the following minimum requirements to ensure adequate airflow and to prevent damage to the equipment: ■ Front and rear doors: If your server rack includes closing front and rear doors, you must allow 830 square inches of holes evenly distributed from top to bottom to permit adequate airflow. ■ Side: The clearance between the installed module and the side panels of the rack must be a minimum of 2.75 inches. ■ Rear: The clearance between the back of the rack and the wall must be a minimum of 30 inches, and the equipment must operate without a rear door. CAUTION: If all of the vertical space in the rack is not filled by components, the gaps left cause a change in airflow through the rack and across the components. These gaps need to be covered with blanking panels. Unpacking the Server Unpack the server box and locate the materials and documentation necessary to install your rack-mount server. Your Compaq ProLiant DL580 server includes all parts and materials required for rack mounting. Contents of the rack model server box include: ■ Compaq ProLiant DL580 server ■ Assorted cables ■ Rack mounting hardware kit ■ Hardware documentation, reference information, and software products Rack Mounting Hardware Kit Before mounting your Compaq ProLiant DL580 server in the rack, ensure that your rack model server box contains the mounting hardware shown in the following illustration. Compaq Confidential – Need to Know Required Writer: Cynthia Dresden Project: Compaq ProLiant DL580 Server Setup and Installation Guide Comments: Part Number: 159213-003 File Name: e-ch4 Installing the Server.doc Last Saved On: 4/5/01 2:26 PM Installing the Server 1 2 3 4 5 8 6 7 Figure 4-1. Rack mounting hardware included with the server Table 4-2 Rack Mounting Hardware Item Component One pair 26-inch slide rail assemblies Rack mounting brackets Cable management arm bracket Cable management arm continued Compaq Confidential – Need to Know Required Writer: Cynthia Dresden Project: Compaq ProLiant DL580 Server Setup and Installation Guide Comments: Part Number: 159213-003 File Name: e-ch4 Installing the Server.doc Last Saved On: 4/5/01 2:26 PM 4-11 4-12 Compaq ProLiant DL580 Server Setup and Installation Guide Table 4-2 Rack Mounting Hardware continued Item Component Bag of screws Cable management arm screw-retaining plate Cable management arm screw-retaining plate washer Rack template Documentation, Reference Information, and Software Products Before installing your Compaq ProLiant DL580 server, ensure that your server box contains the following documentation, reference information, and CDs: ■ Documentation CD G Compaq ProLiant Setup and Installation Guide G Integrated Remote Console Guide G Troubleshooting Guide G PCI Hot Plug Animation G PCI Hot Plug Help Information ■ Quick Hardware Installation Poster ■ SmartStart and Support Software CD Compaq Confidential – Need to Know Required Writer: Cynthia Dresden Project: Compaq ProLiant DL580 Server Setup and Installation Guide Comments: Part Number: 159213-003 File Name: e-ch4 Installing the Server.doc Last Saved On: 4/5/01 2:26 PM Installing the Server Additional Tools and Materials In addition to these supplied items, you may need: ■ Torx T-15 screwdriver ■ Phillips screwdriver ■ Cage nut fitting tool ■ Pencil ■ Optional components Attaching Rack Mounting Hardware Each pair of rack mounting brackets, with attached slide rail assemblies, supports one rack model server. Figure 4-2. Rack mounting brackets with alignment tabs identifying front flanges Each slide rail assembly consists of an outer bracket rail and an inner server rail. These pieces are attached separately: the bracket rails attach to the rack mounting brackets, and the server rails attach to the sides of the server chassis. Compaq Confidential – Need to Know Required Writer: Cynthia Dresden Project: Compaq ProLiant DL580 Server Setup and Installation Guide Comments: Part Number: 159213-003 File Name: e-ch4 Installing the Server.doc Last Saved On: 4/5/01 2:26 PM 4-13 4-14 Compaq ProLiant DL580 Server Setup and Installation Guide Figure 4-3. Slide rail assembly with outer bracket rail and inner server rail IMPORTANT: To make the installation of the rack mounting bracket easier, attach the outer bracket rail to the rack mounting bracket before attaching the mounting bracket assembly to the rack. In this way, the joined rack mounting bracket and outer bracket rail can be fastened to the rack as one assembly. Attaching the Bracket Rail to the Rack Mounting Bracket IMPORTANT: Read all eight steps before you begin. Use the following procedure to attach the outer bracket rail to the rack mounting bracket: 1. Unpack the hardware mounting kit. Place the two-piece slide rail assembly (outer bracket rail and inner server rail) and fasteners on a flat surface along with the mounting brackets and fasteners that came with the rack. 2. Extend the server rail from the bracket slide rail until the server rail release latch clicks. Holding down the latch, slip this piece out of each bracket rail. Compaq Confidential – Need to Know Required Writer: Cynthia Dresden Project: Compaq ProLiant DL580 Server Setup and Installation Guide Comments: Part Number: 159213-003 File Name: e-ch4 Installing the Server.doc Last Saved On: 4/5/01 2:26 PM Installing the Server Figure 4-4. Removing the server rail from the bracket rail 3. Set aside the server rails. You will attach them to the rack server chassis later in the section, “Attaching Server Rails to the Server.” Figure 4-5. Separated bracket rail with inner sliding piece (top) and server rail (bottom) 4. The bracket rail consists of a fixed outer rail that screws to the rack mounting bracket and an inner slide on a steel ball bearing movement. This inner slide does not detach. Compaq Confidential – Need to Know Required Writer: Cynthia Dresden Project: Compaq ProLiant DL580 Server Setup and Installation Guide Comments: Part Number: 159213-003 File Name: e-ch4 Installing the Server.doc Last Saved On: 4/5/01 2:26 PM 4-15 4-16 Compaq ProLiant DL580 Server Setup and Installation Guide Figure 4-6. Bracket rail with inner slide 5. Identify the front of the rack mounting bracket and the bracket rail: the front of the rack mounting bracket has alignment tabs on its flange and the front of the bracket rail allows the inner slide to move forward on ball bearings. 6. Lay the bracket rail inside of the rack mounting bracket, with the front of both pieces oriented in the same direction. Align the front screw hole in the rack mounting bracket and the bracket rail. 7. Extend the inner slide from the front of the bracket rail. With this piece extended, you will see three screw holes aligned in the rack mounting bracket and the bracket rail . These are the two exposed screw holes near the back end of the bracket rail and the front screw hole that is accessible through a slot in the inner slide. 8. Fasten the bracket rail to the rack mounting bracket with three 8-32 x 1/4-inch slotted screws. (Do not use nuts or washers with the screws.) See step of the Figure 4-7. 9. Adjust the inner slide to access two additional screw holes (one at a time) through the slotted opening in the inner slide. Use two more 8-32 x 1/4-inch slotted screws to fasten the bracket rail to the rack mounting bracket. See steps and of the following figure. Compaq Confidential – Need to Know Required Writer: Cynthia Dresden Project: Compaq ProLiant DL580 Server Setup and Installation Guide Comments: Part Number: 159213-003 File Name: e-ch4 Installing the Server.doc Last Saved On: 4/5/01 2:26 PM Installing the Server The following figure shows insertion of the screws into the appropriate holes. Markings on the template identify the mounting holes for the 26-inch slides used in Compaq racks. 1 2 3 Figure 4-7. Attaching the bracket rail to the rack mounting bracket 10. You will use a total of five 8-32 x 1/4-inch slotted screws to fasten the bracket rail to the rack mounting bracket. When all five screws are fastened, the rack mounting bracket and bracket rail form a mounting bracket slide assembly that you will attach to the rack. 11. Replace the server rail that you removed from the assembly in step 2 by aligning it with the front of the rack mounting bracket and sliding it forward until you hear a click. Press the latch in and continue to slide the server rail all the way through the bracket assembly until it stops. Compaq Confidential – Need to Know Required Writer: Cynthia Dresden Project: Compaq ProLiant DL580 Server Setup and Installation Guide Comments: Part Number: 159213-003 File Name: e-ch4 Installing the Server.doc Last Saved On: 4/5/01 2:26 PM 4-17 4-18 Compaq ProLiant DL580 Server Setup and Installation Guide Figure 4-8. Replacing the server rail in the bracket rail 12. Repeat Steps 5 through 9 with the other bracket rail and rack mounting bracket. You now have a pair of mounting bracket slide assemblies to be attached to the rack. Using the Rack Template WARNING: To reduce the risk of personal injury or damage to the equipment, be sure the rack leveling feet are extended to the floor and support the full weight of the rack. Each rack must be level and stable. Racks that are not coupled together require the installation of stabilizers. This must be done before you perform any work on the rack. View the Rack Video Training CD for more information on leveling feet and stabilizers. Marking Fastener Positions on the Rack with the Template The rack template provided with your server offers an easy and reliable way to properly position it in the rack. Using the template, you can identify the proper attachment points for the rack mounting bracket assemblies, the cage nuts for the faceplate thumb screws, and the top of the server. Use the tick marks on the rack side rails to ensure level installation. Refer to the illustrations and instructions printed on the template. IMPORTANT: Determine the server's place in the rack before you start installing the mounting bracket assemblies. For proper placement of the server in the rack, refer to the Rack Builder report you printed when you planned your rack configuration. Always mount the heaviest item on the bottom of the rack and work from the bottom up. Compaq Confidential – Need to Know Required Writer: Cynthia Dresden Project: Compaq ProLiant DL580 Server Setup and Installation Guide Comments: Part Number: 159213-003 File Name: e-ch4 Installing the Server.doc Last Saved On: 4/5/01 2:26 PM Installing the Server Use the following procedure to mark screw hole locations for the rack mounting bracket assemblies and fastener positions for the cage nuts: 1. Identify the front side of the template. IMPORTANT: The template is two-sided (front and back) and printed with arrows that show you where the screws are inserted, both for the mounting bracket assemblies and for the thumb screws that secure the server's faceplate to the front of the rack. Align the template carefully with the holes on the rack to determine the exact placement of the screws. 2. Starting at the bottom of the rack or at the top of a previously mounted component, measure the screw hole locations for the rack mounting bracket assemblies. Pencil-mark the locations on the outside of the rack. Do this on both the front and the back. Be sure to follow the template alignment instructions, and keep the sides squared up with the sides of the rack. Measured markings on the rack’s vertical rails will help you maintain the proper alignment. Figure 4-9. Marking the rack with the template 3. When you mark the position of the mounting bracket screws, also mark the position on the front of the rack for the cage nuts. These are the two slots marked “C” on the template. The cage nuts will hold the thumbscrews through the server's faceplate. 4. After marking the front of the rack, move to the rear of the rack. Flip the template over and repeat Step 2 and Step 3 to mark the back rails. Open the rear door to access them. 5. On the back, also mark the rail to show the top of the template. This will help you align the template for the next component. Compaq Confidential – Need to Know Required Writer: Cynthia Dresden Project: Compaq ProLiant DL580 Server Setup and Installation Guide Comments: Part Number: 159213-003 File Name: e-ch4 Installing the Server.doc Last Saved On: 4/5/01 2:26 PM 4-19 4-20 Compaq ProLiant DL580 Server Setup and Installation Guide Inserting Cage Nuts into the Rack Frame After marking the faster positions on both front and back of the rack, use the fitting tool to insert cage nuts on the inside of the rails at the marked locations. The cage nuts and fitting tool are included in the hardware kit supplied with the rack. Use the following procedure to insert each cage nut into the rack frame: 1. Position the cage nut on the inside of the rail. 2. Hook one of the lips of the cage nut through the square rail perforation. 3. Insert the tip of the fitting tool through the other side of the perforation and hook the opposite lip of the cage nut. Figure 4-10. Inserting cage nuts 4. Using the fitting tool as a lever, pry the cage nut into position. 5. Repeat Step 1 through Step 4 for each cage nut. Attaching the Rack Mounting Bracket Assemblies to the Rack Use the following procedure to attach each rack mounting bracket assembly to the rack: 1. Using the pencil marks from the template, carefully align the rack mounting bracket assembly with the rear rail of the rack. 2. Using the tabs, insert the rear end of the rack mounting bracket assembly into the rear rail of the rack. Compaq Confidential – Need to Know Required Writer: Cynthia Dresden Project: Compaq ProLiant DL580 Server Setup and Installation Guide Comments: Part Number: 159213-003 File Name: e-ch4 Installing the Server.doc Last Saved On: 4/5/01 2:26 PM Installing the Server 3. Secure the rack mounting bracket using two M6 x 12mm Phillips-head screws. CZR4-012.eps Figure 4-11. Back of mounting bracket assembly installed 4. Using the pencil marks, attach the rack mounting bracket assembly to the front rail of the rack using one M6 x 12mm Phillips-head screw in the top hole of the bracket. Do not use washers. IMPORTANT: ■ Place one screw in the top hole of the bracket. ■ The tabs on the front of the rack mounting bracket help to align it with the front of the rack frame. Compaq Confidential – Need to Know Required Writer: Cynthia Dresden Project: Compaq ProLiant DL580 Server Setup and Installation Guide Comments: Part Number: 159213-003 File Name: e-ch4 Installing the Server.doc Last Saved On: 4/5/01 2:26 PM 4-21 4-22 Compaq ProLiant DL580 Server Setup and Installation Guide Figure 4-12. Attaching rack mounting bracket assembly to the front of the rack 5. To install the second rack mounting bracket assembly, repeat Step 1 through Step 4. 6. After attaching both of the rack mounting bracket assemblies to the rack, prepare the server for mounting. Attaching Rack Handles The rack installation hardware provided with your server includes rack handles that help you load the server into the rack. Use the following procedure to install rack handles with your server. 1. Align the rack-mounting handles along the rack-side edges of the server. NOTE: Use the handle markings on the sides of the chassis to align the rack-mounting handles. 2. Use the screws provided with the rack-mounting hardware to attach the handles to the sides of the server. Compaq Confidential – Need to Know Required Writer: Cynthia Dresden Project: Compaq ProLiant DL580 Server Setup and Installation Guide Comments: Part Number: 159213-003 File Name: e-ch4 Installing the Server.doc Last Saved On: 4/5/01 2:26 PM Installing the Server Figure 4-13. Attaching rack-mounting handles to the server Installing the Server in the Rack When the handles are securely in place, prepare to install the server in the rack. WARNING: To reduce the risk of personal injury or damage to the equipment, a minimum of two people MUST lift the server into the rack. The server may weigh up to 81 lb (37 kg). If the unit will be loaded at a height above chest level, a third person MUST align the rails while the other two support the unit. IMPORTANT: To reduce the weight of the server and make it more manageable, do not install drives until you have loaded the server into the rack. 1. Pull the slide rails forward from the mounting brackets to the fully extended position. 2. Set the rack handles on the extended slide rails. WARNING: To reduce the risk of personal injury or damage to the equipment, a minimum of two people must lift the server onto the slide rails. A Compaq ProLiant DL580 server can weigh up to 81 lb (37 kg). 3. Align the server screw holes with the slide-rail screw holes. Compaq Confidential – Need to Know Required Writer: Cynthia Dresden Project: Compaq ProLiant DL580 Server Setup and Installation Guide Comments: Part Number: 159213-003 File Name: e-ch4 Installing the Server.doc Last Saved On: 4/5/01 2:26 PM 4-23 4-24 Compaq ProLiant DL580 Server Setup and Installation Guide Figure 4-14. Loading the server with handles into the rack 4. Attach the server to the slide rails with three screws on each side. Begin with the back screw hole, and then adjust the inner slide rail and server together to access the other screw holes through the slotted opening in the inner slide. 5. Remove the handles from the server. IMPORTANT: You may have to apply pressure when initially sliding the server into the rack. However, after the first installation, the ball bearings in the slide will move easily. 6. Slide the server into the rack. WARNING: To reduce the risk of personal injury, use caution when pressing the server rail release latches and sliding the server into the rack. The slide rails can pinch your fingertips. 7. Press the server rail release latch on either side of the server, and continue to slide the server into the rack. IMPORTANT: When servicing the server, fully extend the server until the latches lock. To return the server to the rack, press the latches and slide the server into the rack. 8. Secure the server faceplate to the front of the rack by screwing the thumbscrews into the cage nuts. 9. Tighten the thumbscrews before you close the rack door to prevent the door from hitting protruding thumbscrews. Compaq Confidential – Need to Know Required Writer: Cynthia Dresden Project: Compaq ProLiant DL580 Server Setup and Installation Guide Comments: Part Number: 159213-003 File Name: e-ch4 Installing the Server.doc Last Saved On: 4/5/01 2:26 PM Installing the Server Attaching the Cable Management Arm After the server is mounted in the rack, begin installing hardware for cable management. Rack mounting hardware provided with your server includes a cable management arm, fasteners, hinges, and screws. The cable management arm attaches to the server's cable management arm bracket and to the rear frame of the rack. All cables to and from the server are tied to this arm. The two hinges allow the cable management arm with attached cables to swing out of the way when you need to access the rear of the server. Use the following procedures to install the extended cable management arm bracket and to attach the cable management arm. Installing the Extended Cable Management Arm Bracket The extended cable management arm bracket fastens to the rear of the rack server's chassis. The bracket provides an attachment point for the cable management arm from the server to the rear frame of the rack. Attach the extended cable management arm bracket to the back of the server with two 6-32 x 312 Torx screws. NOTE: Attach cable management hardware after the server is mounted into the rack. Figure 4-15. Attaching the extended cable management arm bracket to the server Compaq Confidential – Need to Know Required Writer: Cynthia Dresden Project: Compaq ProLiant DL580 Server Setup and Installation Guide Comments: Part Number: 159213-003 File Name: e-ch4 Installing the Server.doc Last Saved On: 4/5/01 2:26 PM 4-25 4-26 Compaq ProLiant DL580 Server Setup and Installation Guide Attaching the Cable Management Arm After installing the extended cable management arm bracket, use the following procedure to attach the cable management arm. 1. For easier handling, first slide the server into the rack. Next attach the cable management arm to the cable management arm bracket. If you attach the arm before loading the server in the rack, the arm may swing around and interfere with the loading process. 2. After you have loaded the server into the rack, align the arm to the bracket. Attach the back end of the cable management arm to the server's cable management arm bracket using two M6 x 12mm Phillips screws. NOTE: Install cable management features after the server is mounted into the rack. Figure 4-16. Attaching the cable management arm to the cable management arm bracket 3. Align the other end of the cable management arm on the outside of the rear frame rail of the rack with the rack. Align the cable management arm screw-retaining plate on the inside of the rack frame rail. Attach the cable management arm screw-retaining plate and washer to the rack. Compaq Confidential – Need to Know Required Writer: Cynthia Dresden Project: Compaq ProLiant DL580 Server Setup and Installation Guide Comments: Part Number: 159213-003 File Name: e-ch4 Installing the Server.doc Last Saved On: 4/5/01 2:26 PM Installing the Server Figure 4-17. Attaching the cable management arm screw-retaining plate 4. Attach the cable management arm to the retaining plate on the rear frame rail of the rack with two 10-32 x 5/8-inch Phillips-head screws. Figure 4-18. Attaching the cable management arm to the rear brace of the rack Cabling the Server After installing the server in the rack and attaching the cable management arm, use the following procedure to cable the server: 1. Connect power cords and peripheral devices such as the keyboard, mouse, and monitor. Compaq Confidential – Need to Know Required Writer: Cynthia Dresden Project: Compaq ProLiant DL580 Server Setup and Installation Guide Comments: Part Number: 159213-003 File Name: e-ch4 Installing the Server.doc Last Saved On: 4/5/01 2:26 PM 4-27 4-28 Compaq ProLiant DL580 Server Setup and Installation Guide 2. Tie-wrap the AC cord to the plastic loop provided on the power supply to prevent the cord from being accidentally disengaged. 2 1 Figure 4-19. Securing the AC power cord with tie-wrap Table 4-3 Power Cord Connections Item Component Primary power supply cord connector Redundant power supply cord connector WARNING: To reduce the risk of electric shock or damage to the equipment: ■ Install the power supply before connecting the power cord to the power supply. ■ Unplug the power cord before removing the power supply from the server. ■ If the system has multiple power supplies, disconnect power from the system by unplugging all power cords from the power supplies. ■ Do not disable the power cord grounding plug. The grounding plug is an important safety feature. ■ Plug the power cord into a grounded (earthed) electrical outlet that is easily accessible at all times. Compaq Confidential – Need to Know Required Writer: Cynthia Dresden Project: Compaq ProLiant DL580 Server Setup and Installation Guide Comments: Part Number: 159213-003 File Name: e-ch4 Installing the Server.doc Last Saved On: 4/5/01 2:26 PM Installing the Server WARNING: Do not place anything on power cord(s) or cables. Arrange them so that no one may accidentally step on or trip over them. Do not pull on a cord or cable. When unplugging from the electrical outlet, grasp the cord by the plug. WARNING: To reduce the risk of electric shock or fire, do not plug telecommunications/telephone connectors into the Network Interface Card (NIC) receptacles. 3. If you install a switch box in the rack, route the CPU-to-switch-box cables to the switch box. 4. Bundle all of the cables, including the power cables, and tie them to the cable management arm. Figure 4-20. Routing and securing the cables 5. Extend the bundled cables down the rack’s cable channel. Compaq Confidential – Need to Know Required Writer: Cynthia Dresden Project: Compaq ProLiant DL580 Server Setup and Installation Guide Comments: Part Number: 159213-003 File Name: e-ch4 Installing the Server.doc Last Saved On: 4/5/01 2:26 PM 4-29 4-30 Compaq ProLiant DL580 Server Setup and Installation Guide Powering Up the Server After completing all of the installation procedures described above, you are ready to configure your Compaq ProLiant DL580 server as a stand-alone or network device. After ensuring that all connections are secure and that the rack is stable, press the Power On/Standby switch to power up the server for the first time. IMPORTANT: Whenever power is first applied to a power supply, there is up to a ten second delay before booting begins. When the system is first powered on, the system ROM and hardware components in default configurations provide a platform ready for system initialization. Without further adjustment, the system can run diagnostics and other software applications needed for SmartStart and System Configuration programs. SmartStart utilities use this initial information to assist in installing your operating system and optional system features. If you insert a System Configuration, Diagnostics, or SmartStart and Support Software CD in the CD-ROM drive prior to powering on the server, the system ROM will boot to that utility. If the system ROM does not detect one of those CDs, you will be prompted for your intended operating system. The system will restart if any operating system-dependent configurations have changed with the new operating system selection. If the selected operating system-dependent configurations are the same as the current configurations, the system will start normally. If you enter a wrong choice, you can change your operating system selection on subsequent restarts. Compaq Confidential – Need to Know Required Writer: Cynthia Dresden Project: Compaq ProLiant DL580 Server Setup and Installation Guide Comments: Part Number: 159213-003 File Name: e-ch4 Installing the Server.doc Last Saved On: 4/5/01 2:26 PM Installing the Server Powering Down the Server The system power in the Compaq ProLiant DL580 server does not shut off completely with the front panel Power On/Standby switch. The two positions of the switch function as on and standby, rather than on and off. The standby position removes power from most of the electronics and the drives, but portions of the power supply and some internal circuitry remain active. To remove all power from the system, you must disconnect all power cords from the server using the following procedure: WARNING: To reduce the risk of electric shock or damage to the equipment, disconnect power from the server by unplugging all power cords from either the electrical outlet or the server. NOTE: Windows NT users may use the Compaq Power Down Manager to power down your server. For information, refer to the NTREADME.HLP file on diskette 1 of the NTSSD. 1. Press the Power On/Standby switch to standby mode. 2. Verify that the system LED on the front panel, located near the Power On/Standby switch, turns off and that all fans stop spinning. 3. Disconnect all power cords from the server to disable all power to the server. The server is now powered down. Compaq Confidential – Need to Know Required Writer: Cynthia Dresden Project: Compaq ProLiant DL580 Server Setup and Installation Guide Comments: Part Number: 159213-003 File Name: e-ch4 Installing the Server.doc Last Saved On: 4/5/01 2:26 PM 4-31 Chapter 5 Cabling Guidelines This chapter discusses connections and cabling considerations for the Compaq ProLiant DL580 server. Use the connector and cabling examples as a guide for cabling the following components: ■ Network interface controller (NIC) ■ External connectors ■ SCSI cabling ■ PCI Hot Plug cabling ■ IDE media cabling ■ Power cabling Network Interface Controller (NIC) Compaq ProLiant DL580 servers feature an NC3134 Fast Ethernet NIC 64-PCI Dual Base 10/100 network interface card. You can also upgrade your NIC to take advantage of gigabit transmission speeds by installing the optional Compaq NC6132 1000 SX Upgrade Module. Contact your Compaq authorized reseller for purchasing information. Connect a single network cable to each port of the NIC: ■ For 100BASE-TX, your network cable must be Category 5 twisted-pair wiring. If you plan to run the NIC at 100 Mbps, it must be connected to a 100Base-TX hub or switch (not a 100Base-T4 hub). Compaq Confidential – Need to Know Required Writer: Cynthia Dresden Project: Compaq ProLiant DL580 Server Setup and Installation Guide Comments: Part Number: 159213-003 File Name: f-ch5 Cabling Guidelines.doc Last Saved On: 4/5/01 2:00 PM 5-2 Compaq ProLiant DL580 Server Setup and Installation Guide ■ For 10Base-T, your network cable must be Category 3, 4, or 5 twisted-pair wiring. If you want to use this NIC in a residential environment, you must use a Category 5 cable. Figure 5-1. Connecting the network interface WARNING: To reduce the risk of electric shock or fire, do not plug telecommunications/telephone connectors into the NIC receptacle. CAUTION: Remove the terminator plug from the second RJ-45 connector when using the dual-port capabilities. Compaq Confidential – Need to Know Required Writer: Cynthia Dresden Project: Compaq ProLiant DL580 Server Setup and Installation Guide Comments: Part Number: 159213-003 File Name: f-ch5 Cabling Guidelines.doc Last Saved On: 4/5/01 2:00 PM Cabling Guidelines External Connectors External connectors to peripheral devices and other network options are shown in the following figure. 2 1 4 3 6 5 4 3 2 1 13 12 11 10 9 8 7 6 5 Figure 5-2. External connectors on the rear of the server Table 5-1 Rear Panel Connectors Item Component Auxiliary serial knockout Parallel connector SCSI connector (support for external tape drives only) PCI Hot Plug expansion slots (4) PCI non-hot-plug expansion board slots (2) Network interface controller (NIC) RJ-45 connectors Video connector Mouse connector Hot-plug keyboard connector continued Compaq Confidential – Need to Know Required Writer: Cynthia Dresden Project: Compaq ProLiant DL580 Server Setup and Installation Guide Comments: Part Number: 159213-003 File Name: f-ch5 Cabling Guidelines.doc Last Saved On: 4/5/01 2:00 PM 5-3 5-4 Compaq ProLiant DL580 Server Setup and Installation Guide Table 5-1 Rear Panel Connectors continued Item Component Serial connector Primary hot-plug power cord connector Secondary hot-plug power cord connector VHDC SCSI knockouts SCSI Cabling Compaq ProLiant DL580 servers include one active internal SCSI port, one reserved internal SCSI port, and one active external SCSI connector. A maximum of five optional Wide Ultra SCSI adapters may be added for an expanded range of SCSI configurations. SCSI Ports The Compaq ProLiant DL580 server includes two SCSI ports located on the peripheral board. SCSI port 1 supports the Wide Ultra2/Ultra3 SCSI hard drive cage. SCSI port 2 supports storage tape drives connected through the external SCSI connector on the rear panel of the server. SCSI devices interact with the Integrated Smart Array Controller installed on the peripheral card. A standard cabling configuration includes a connection from port 1 to an internal SCSI drive cage and connection from external port 2 to an external tape drive device. For additional external cabling options, there are two VHDC SCSI knockouts, or access holes, located on the rear panel of the server. In the standard configuration, both access holes are covered with safety panels. Remove the panels before installing additional SCSI connectors. Compaq Confidential – Need to Know Required Writer: Cynthia Dresden Project: Compaq ProLiant DL580 Server Setup and Installation Guide Comments: Part Number: 159213-003 File Name: f-ch5 Cabling Guidelines.doc Last Saved On: 4/5/01 2:00 PM Cabling Guidelines Figure 5-3. Standard cabling configuration from SCSI port 1 to the hot-plug SCSI hard drive cage Determining Cabling Needs To determine the SCSI cables needed for your application: 1. Locate cabling supplies and determine your additional internal cabling needs based on the types and numbers of SCSI components you plan to install. NOTE: Your Compaq ProLiant DL580 server includes all SCSI cables required for connecting the SCSI devices shipped with your factory-built server. Compaq SCSI option kits also contain all required installation hardware. For information on obtaining additional server connectors and supplies, contact your Compaq authorized reseller. 2. Locate your SCSI hardware devices. Devices include hard drives, array controllers, and storage devices. 3. Follow the interconnect instructions provided with SCSI devices or located on the Documentation CD. For the latest information on SCSI adapters, Smart Array controllers, alternative shipping configurations, and upgrade options available for the Compaq ProLiant DL580 server, visit the Compaq website: www.compaq.com/products/servers Compaq Confidential – Need to Know Required Writer: Cynthia Dresden Project: Compaq ProLiant DL580 Server Setup and Installation Guide Comments: Part Number: 159213-003 File Name: f-ch5 Cabling Guidelines.doc Last Saved On: 4/5/01 2:00 PM 5-5 5-6 Compaq ProLiant DL580 Server Setup and Installation Guide Internal Cabling with an Integrated Controller or an Additional SCSI Adapter IMPORTANT: Do not leave unterminated cables connected to an internal SCSI port. Proper SCSI bus termination requires that each connector is either connected to a SCSI device with an appropriate cable or is unpopulated and capped with a safety cover. Do not remove the safety cover from any unused SCSI ports except to connect the port to an installed SCSI device. Additional SCSI adapters and array controllers can be installed in available PCI expansion slots. Contact your Compaq authorized reseller for information about controller availability and ordering guidelines. Use the information provided in the following table as a guide for determining the correct type of cable for each additional SCSI controller you plan to install. Table 5-2 Internal SCSI Cabling Controller Cabling Hot-Plug Drive Cage for Wide Ultra2/Ultra3 Hard Drives Integrated Smart Array Controller No additional cables are required. The Integrated Smart Array Controller is a factory standard feature in Compaq ProLiant DL580 servers. Smart Array 221 Controller Connect a 68-pin point-to-point SCSI cable from the controller to the hot-plug drive cage. Smart Array 3200 Controller Smart Array 4200 Controller Smart Array 431 Controller for Wide Ultra2/Ultra3 hard drive support 64-bit Dual Channel Wide Ultra2 SCSI adapter Connect a 68-pin point-to-point SCSI cable from controller SCSI port 1 to the hot-plug drive cage. Note: Refer to the user documentation provided with your array controller option kit for additional setup and configuration information. For additional information about array controllers, hot-plug SCSI hard drives, internal and external cabling requirements, and other resources for your Compaq ProLiant DL580 server, search the Compaq website: www.compaq.com/products/servers Compaq Confidential – Need to Know Required Writer: Cynthia Dresden Project: Compaq ProLiant DL580 Server Setup and Installation Guide Comments: Part Number: 159213-003 File Name: f-ch5 Cabling Guidelines.doc Last Saved On: 4/5/01 2:00 PM Cabling Guidelines PCI Hot Plug Cabling Compaq ProLiant DL580 servers support PCI Hot Plug technologies. Instructions for ensuring that your system is PCI Hot Plug capable are provided in Chapter 6, “PCI Hot Plug Technology.” Your server includes four PCI expansion slots that are hot-pluggable and two PCI expansion slots that are non-hot-pluggable. As you begin to install expansion boards, and before configuring and powering up the server for the first time, allow some slack in cables that are used to connect PCI Hot Plug expansion boards to system board or other connectors. Excessively tight cabling configurations can interfere with hot-plug operations that are performed while the server is active. IMPORTANT: Remember that the cable from any expansion board cannot be safely removed if the slot for that board has not been powered down by either the PCI Hot Plug button or the operating system. IDE Media Cabling Compaq ProLiant DL580 servers include an integrated IDE controller to control the high-speed, low-profile IDE CD-ROM drive. No additional cabling is required. Power Cabling WARNING: Before removing the top access panel, make sure that the server is powered down or in Standby mode, and that all power connections are disconnected from the server. The system power in Compaq ProLiant DL580 servers does not completely shut off from the front panel Power On/Standby switch. The two positions of the switch function as On and Standby modes, rather than as On and Off modes. The Standby position cuts power from most of the electronics and the drives while portions of the power supply and some internal circuitry remain active. Consequently, to remove all power from the system, it is necessary to disconnect all power cords from the server in order to remove power completely from the system. Compaq Confidential – Need to Know Required Writer: Cynthia Dresden Project: Compaq ProLiant DL580 Server Setup and Installation Guide Comments: Part Number: 159213-003 File Name: f-ch5 Cabling Guidelines.doc Last Saved On: 4/5/01 2:00 PM 5-7 5-8 Compaq ProLiant DL580 Server Setup and Installation Guide WARNING: To reduce the risk of electric shock or damage to the equipment: ■ If the system has multiple power supplies, disconnect power from the system by unplugging all power cords from the power supplies ■ Do not disable the power cord grounding plug. The grounding plug is an important safety feature. ■ Plug the power cord into a grounded (earthed) electrical outlet that is easily accessible at all times. Securing the Power Cord Plug in the power cord. Tie-wrap the AC power cord to the plastic loop provided on the power supply. Leave an eight-inch service loop for the plug to prevent the plug from being disengaged accidentally. Refer to rack installation information for additional cable management guidelines. Figure 5-4. Securing the AC power cord with tie-wrap Compaq Confidential – Need to Know Required Writer: Cynthia Dresden Project: Compaq ProLiant DL580 Server Setup and Installation Guide Comments: Part Number: 159213-003 File Name: f-ch5 Cabling Guidelines.doc Last Saved On: 4/5/01 2:00 PM Chapter 6 PCI Hot Plug Technology This chapter provides a brief discussion of PCI Hot Plug technology. For more detailed information, refer to the online PCI Hot Plug Administration Guide and the PCI Hot Plug animation provided on the Documentation CD. Compaq ProLiant DL580 servers support PCI Hot Plug capabilities. This technology works with the operating system to provide the capacity for performing hardware operations while the server is active. ■ Hot replacement of adapters Replace a failed adapter with an identical adapter without powering down the server. ■ Hot addition of adapters Install new PCI expansion boards in previously empty slots without powering down the server. ■ Hot upgrade of adapters Replace an adapter with a different adapter without powering down the server. Compaq Confidential – Need to Know Required Writer: Cynthia Dresden Project: Compaq ProLiant DL580 Server Setup and Installation Guide Comments: Part Number: 159213-003 File Name: g-ch6 Hot-Plug Technology.doc Last Saved On: 4/5/01 2:01 PM 6-2 Compaq ProLiant DL580 Server Setup and Installation Guide PCI Hot Plug Capability PCI Hot Plug devices can be both hot-plug and non-hot-plug compatible, although most components are usually identified as either one or the other. In fact, all system components are said to be either hot-plug aware or non-hot-plug aware. The following requirements must be met in order for complete PCI Hot Plug capability to exist: ■ PCI Hot Plug system hardware must be installed and available in your server. ■ An operating system with PCI Hot Plug support must be installed. Operating systems with full PCI Hot Plug support include Microsoft Windows NT and Windows 2000, Novell NetWare, and SCO UNIX. ■ PCI Hot Plug device drivers must be installed. Device drivers can be provided by operating system vendors, the Compaq SmartStart and Support Software CD, or individual hardware vendors. WARNING: All three hot-plug requirements must be met in order for your system to be fully PCI Hot Plug capable. Attempting to perform a PCI Hot Plug operation without complete PCI Hot Plug capability will cause an immediate system crash. IMPORTANT: Before adding or removing any PCI Hot Plug devices, be sure to remove power to the slot using the PCI Hot Plug application. Failure to do so can result in critical errors. Read the PCI Hot Plug LED activity indicators next to each expansion slot to identify the status of each slot. With PCI Hot Plug capabilities, it is possible to remove and replace PCI adapters without powering down the server. There is, however, a proper way to manage removal and replacement. See the illustration and table in the section on PCI Hot Plug LEDs later in this chapter for additional information. Plan the SCSI configuration before installing a SCSI controller board. Consult the following sources of information when planning the SCSI installation. ■ Documentation provided with the SCSI drives for installation information and controller configuration. ■ Information about the compatibility of SCSI controllers with SCSI drives in the Compaq ProLiant DL580 from the Compaq website: www.compaq.com/products/servers ■ Information about SCSI cabling in Chapter 5, “Cabling Guidelines.” ■ Information about using the Compaq System Configuration Utility to set up a SCSI drive array in Chapter 7, “Server Configuration and Utilities.” Compaq Confidential – Need to Know Required Writer: Cynthia Dresden Project: Compaq ProLiant DL580 Server Setup and Installation Guide Comments: Part Number: 159213-003 File Name: g-ch6 Hot-Plug Technology.doc Last Saved On: 4/5/01 2:01 PM PCI Hot Plug Technology PCI Hot Plug Technology PCI Hot Plug System A PCI Hot Plug enabled system requires that the appropriate system hardware, operating system, and device driver support all be enabled. An existing adapter board should be hot-plug capable as long as it complies with the established PCI specifications and has hot-plug device driver support. If any of the three required components are not enabled, the system is still fully functional, though not hot-plug capable. PCI Hot Plug Application The PCI Hot Plug application is the control panel of the PCI Hot Plug architecture. It allows control of the PCI Hot Plug slots while enabling configuration of the hot-plug options. Through the PCI Hot Plug application, you can indicate that you want to replace a board in the hot-pluggable slot or configure a board that you have already added to the system. This software also allows you to enable or disable specific slots in the system, and it is responsible for reporting the status of all boards in the system, especially those in a degraded state. PCI Hot Plug Operations PCI Hot Plug technology provides the ability to remove and replace, upgrade, and add PCI expansion boards without powering down the server. Any PCI board can be placed in a PCI Hot Plug slot. PCI Hot Plug device drivers and operating system support, however, are required to enable the PCI Hot Plug feature. PCI Hot Plug Button The PCI Hot Plug button provides PCI Hot Plug access directly at each PCI slot and PCI Hot Plug control of each slot without requiring the use of PCI Hot Plug utility software. The PCI Hot Plug button allows you to cancel an action by pressing the button again within five seconds. Compaq Confidential – Need to Know Required Writer: Cynthia Dresden Project: Compaq ProLiant DL580 Server Setup and Installation Guide Comments: Part Number: 159213-003 File Name: g-ch6 Hot-Plug Technology.doc Last Saved On: 4/5/01 2:01 PM 6-3 6-4 Compaq ProLiant DL580 Server Setup and Installation Guide PCI Hot Plug LEDs The PCI Hot Plug LEDs at each expansion slot provide a visual reference of the status of each board slot. The LEDs are viewed from the rear of the server or by opening the PCI Hot Plug access door on the top panel. The following figure and table illustrate the appropriate slot conditions and status for each of the two LEDs. 1 2 Figure 6-1. PCI Hot Plug button LEDs Table 6-1 PCI Hot Plug Button LEDs Item Component Power LED (green) Activity LED (amber) Compaq Confidential – Need to Know Required Writer: Cynthia Dresden Project: Compaq ProLiant DL580 Server Setup and Installation Guide Comments: Part Number: 159213-003 File Name: g-ch6 Hot-Plug Technology.doc Last Saved On: 4/5/01 2:01 PM PCI Hot Plug Technology Table 6-2 PCI Hot Plug LED Status Indicators LED Green Amber Green Amber Green Amber Green Amber Power Status OK to Open Slot Status On No Power is currently applied to the slot. Do NOT open the slot release lever. The slot is functioning normally. No Power is currently applied to this slot, but the slot needs ATTENTION for possible problems with the slot, board, or driver. Do NOT open the slot release lever. Follow these steps: Off On On Flashing On Through the PCI Hot Plug application, turn power Off to the slot (the green LED turns Off). 2. Open the slot release lever (the amber LED turns Off). 3. Remove or replace the board. 4. Connect the cables to the PCI board. 5. Close the slot release lever. 6. Return power to the slot through the PCI Hot Plug application (the green LED turns On). No Power slot is being turned Off or On, which may take several minutes. There may be a problem with the slot, the PCI board, or the driver. DO NOT open the slot release lever until the green LED is completely Off. No Power to this slot is turned Off, but this slot needs ATTENTION. There may be a problem with the slot, board, or driver. On Off 1. 1. Open the slot release lever (the amber LED turns Off). 2. Remove or replace the board. 3. Connect the cables to the PCI board. 4. Close the slot release lever. 5. Return power to the slot through the PCI Hot Plug application (the green LED turns On). Compaq Confidential – Need to Know Required Writer: Cynthia Dresden Project: Compaq ProLiant DL580 Server Setup and Installation Guide Comments: Part Number: 159213-003 File Name: g-ch6 Hot-Plug Technology.doc Last Saved On: 4/5/01 2:01 PM 6-5 6-6 Compaq ProLiant DL580 Server Setup and Installation Guide Table 6-2 PCI Hot Plug LED Status Indicators continued LED Green Amber Power Status OK to Open Slot Status Off Yes The power to the slot is Off. If you need to replace the card in this slot, follow these steps: Off 1. Open the slot release lever. 2. Remove or replace the board. 3. Connect the cables to the PCI board. 4. Close the slot release lever. 5. Return power to the slot through the PCI Hot Plug application (the green LED turns On). Adding or Replacing PCI Hot Plug Expansion Boards WARNING: The hot-plug access door provides access to hazardous energy circuits. To reduce the risk of injury or damage to the equipment from hazardous energy, the door should remain locked during normal operation. The server may also be installed in a controlled access location and serviced only by qualified personnel. WARNING: To reduce the risk of personal injury from hazardous energy or of damage to the equipment when working on energized servers with precautions: ■ Remove all watches, rings, and any other loose fitting jewelry. ■ Avoid the use of conductive tools inside the server that could bridge live parts. The I/O expansion slots are located on the system board directly beneath the top access panel and can be reached without having to power down the server using the PCI Hot Plug access door. Compaq Confidential – Need to Know Required Writer: Cynthia Dresden Project: Compaq ProLiant DL580 Server Setup and Installation Guide Comments: Part Number: 159213-003 File Name: g-ch6 Hot-Plug Technology.doc Last Saved On: 4/5/01 2:01 PM PCI Hot Plug Technology Removing a PCI Hot Plug Expansion Board WARNING: Reduce the risk of personal injury from hot surfaces by allowing all internal system components to cool before working with them. To remove a PCI expansion board, complete the following procedure: 1. Unlock and open the PCI Hot Plug access door. Figure 6-2. Opening the PCI Hot Plug access door 2. Verify the status of the LEDs indicating component activity. 3. If the green PCI Hot Plug slot LED is on, power down the slot by using the slot PCI Hot Plug button or the PCI Hot Plug utility application. 4. Wait until the power (green) LED should be off. is off. The activity (amber) LED NOTE: To cancel a hot-plug action, press the PCI Hot Plug button again within five seconds. Compaq Confidential – Need to Know Required Writer: Cynthia Dresden Project: Compaq ProLiant DL580 Server Setup and Installation Guide Comments: Part Number: 159213-003 File Name: g-ch6 Hot-Plug Technology.doc Last Saved On: 4/5/01 2:01 PM 6-7 6-8 Compaq ProLiant DL580 Server Setup and Installation Guide 1 2 3 Figure 6-3. PCI Hot Plug button and LED indicators CAUTION: DO NOT open the slot release lever unless the green LED indicator is off. Releasing the lever before power is off can cause a complete loss of system power and data. 5. Press the top of the appropriate expansion slot release lever the lever toward the rear of the expansion slot . and roll 6. Hold the board at each end, release the retaining clip, and carefully rock the board back and forth until the connectors pull free from the slot. 7. Remove the PCI expansion board from the slot. 1 3 2 Figure 6-4. Removing the PCI Hot Plug expansion board Compaq Confidential – Need to Know Required Writer: Cynthia Dresden Project: Compaq ProLiant DL580 Server Setup and Installation Guide Comments: Part Number: 159213-003 File Name: g-ch6 Hot-Plug Technology.doc Last Saved On: 4/5/01 2:01 PM PCI Hot Plug Technology Installing a PCI Hot Plug Expansion Board IMPORTANT: Do not scrape the PCI Hot Plug expansion board against any other component. 1. Install the same type of PCI expansion board into the same expansion slot, pushing firmly until it is seated securely . 2. Close the expansion slot release lever from the rear of the unit to secure the board and secure the rear retaining clip. Ensure that the lever latches into the closed position . 1 2 Figure 6-5. Installing a PCI expansion board 3. Connect the expansion board to system board connectors as needed. NOTE: Leave enough slack in the cable between the system board and the expansion board so that you can add or remove other components without disturbing boards already installed. 4. Activate power to the slot through the PCI Hot Plug software application or press the PCI Hot Plug button above the slot. 5. Verify the slot status by checking the green LED and amber LED. The green LED flashes during the power-up transition and stays on when power-up is complete. 6. Close the PCI Hot Plug access door. 7. Reconfigure the server, if needed, to install drivers or other software components. See Chapter 7, “Server Configuration and Utilities,” for additional information. Compaq Confidential – Need to Know Required Writer: Cynthia Dresden Project: Compaq ProLiant DL580 Server Setup and Installation Guide Comments: Part Number: 159213-003 File Name: g-ch6 Hot-Plug Technology.doc Last Saved On: 4/5/01 2:01 PM 6-9 6-10 Compaq ProLiant DL580 Server Setup and Installation Guide NOTE: Refer to documentation included with expansion board kits for additional installation instructions. PCI Hot Plug Application Support In partnership with Microsoft and Novell, Compaq has developed software support implementations for each company’s operating system. SCO support will be available soon; check for availability on the Compaq website: www.compaq.com Compaq is promoting standardization with these operating system software leaders to ensure the broad availability of PCI Hot Plug technology. However, each operating system supplier is responsible for its own implementation of the software, including the interface. Novell intraNetWare Configuration Manager Console The Novell intraNetWare Configuration Manager Console (NCMCON) user interface allows you to view status information on PCI slots and control features, such as removing and replacing PCI Hot Plug adapters all from one focal point. Navigating the NCMCON Menus The NCMCON interface constantly retrieves and displays the status of all of the slots. If there are any errors, the appropriate error message is displayed. To navigate through these menus, follow these guidelines. ■ From the Main menu, use the arrow keys to move up and down the list of slots. The current line is highlighted. ■ Press Enter to go to the Slot Options menu. Use the arrow keys to highlight the correct option and press Enter to select that option. By pressing Enter when a non-hot-plug slot is highlighted, the Slot Detail screen is displayed. ■ At any point if you want to return to the Main menu, press the ESC button. ■ Press F1 for online help. Compaq Confidential – Need to Know Required Writer: Cynthia Dresden Project: Compaq ProLiant DL580 Server Setup and Installation Guide Comments: Part Number: 159213-003 File Name: g-ch6 Hot-Plug Technology.doc Last Saved On: 4/5/01 2:01 PM PCI Hot Plug Technology Performing PCI Hot Plug Actions The Compaq PCI Hot Plug and the intraNetWarePCI Hot Plug application work together to allow the following PCI Hot Plug actions: ■ Hot removal of adapters You can manually shut down and permanently remove an adapter, regardless of whether it is working or has failed. ■ Hot replacement of adapters This allows you to replace a failed adapter with an identical adapter. This command applies power to and configures the slot. ■ View slot detail information This allows you to view detailed information about each PCI slot. Viewing Slot Detail Information 1. From the Main menu, highlight the slot and adapter information to be viewed. Press Enter. 2. Select Slot Detail Information from the Slot Options menu. Removing an Adapter 1. From the Main menu, highlight the slot and adapter to be removed. 2. Press Enter to go to the Slot Options menu. 3. Use the arrow keys to highlight Remove Adapter and press Enter. NCMCON then processes the remove request. Once the slot has a status of POWERED Off and the green LED is no longer lit, you can physically remove the adapter by opening the slot release lever and taking the adapter out of the slot. NCMCON updates the status of the slot. Replacing an Adapter Use the following steps to remove an adapter in a Novell intraNetWare environment: 1. Use the Remove command to remove the adapter from the slot. See “Removing an Adapter.” 2. You can now physically replace the failed adapter by putting the new adapter in the slot and closing the slot release lever. Compaq Confidential – Need to Know Required Writer: Cynthia Dresden Project: Compaq ProLiant DL580 Server Setup and Installation Guide Comments: Part Number: 159213-003 File Name: g-ch6 Hot-Plug Technology.doc Last Saved On: 4/5/01 2:01 PM 6-11 6-12 Compaq ProLiant DL580 Server Setup and Installation Guide 3. Once the new adapter is detected, NCMCON automatically asks if you want to configure and apply power to the slot. If you answer yes, power is applied to the slot, the green LED is lit, and the status of the slot on the console changes to Ready. If you answer no, the console status does not change. 4. Press Enter to go to the Slot Options menu. 5. Use the arrow keys to highlight Replace Adapter and press Enter. NCMCON processes the replace request. Novell intraNetWare Operating System Messages Adapter Not Same – Adapter is not the same as the adapter being replaced. PCI Hot Plug replacement cannot continue. Card Functioning – Adapter in slot is currently functioning. Add/Replace is ignored. Driver in Use – Adapter is currently in use. Do you wish to force removal? Driver Loaded – Driver for adapter is currently loaded. Unload driver and select again. General Failure – Could not perform action because of system failure. No Hot-Plug Driver – PCI Hot Plug driver is not responding. Check to make sure that the appropriate hot-plug driver is loaded. Remove Not Supt – Remove action is not supported for the adapter/slot. Switch Open – Slot cannot be initialized because the switch is open. Close the switch and try Add/Replace again. Unknown Slot – Add/Remove performed on an unknown slot. Try the command again. Replace Load Driver – Adapter successfully replaced. Please load driver at this time. Refer to the online PCI Hot Plug Administration Guide for more information on troubleshooting and error messages. Compaq Confidential – Need to Know Required Writer: Cynthia Dresden Project: Compaq ProLiant DL580 Server Setup and Installation Guide Comments: Part Number: 159213-003 File Name: g-ch6 Hot-Plug Technology.doc Last Saved On: 4/5/01 2:01 PM PCI Hot Plug Technology PCI Hot Plug Utility for Windows NT The Compaq PCI Hot Plug Utility for Windows NT allows you to view the status of the PCI Hot Plug slots and to initiate actions such as replacing a failed card. The Windows NT PCI Hot Plug utility screen is divided into three sections: ■ Top This area allows you to connect to a remote computer by typing the machine name in the combo box, selecting a machine from the combo box, or using the Browse button to bring up a selection dialog. The Refresh button refreshes the PCI Hot Plug information for the current machine. ■ Middle The list control displays information about the PCI Hot Plug slots on the current machine: LEDs, location, board name, and the status of the slot and board. The columns can be sorted and resized, and some can be hidden. Hidden commands are accessible by right-clicking the mouse on a column header. ■ Bottom The filter drop-down list box can be used to define the slots shown: the power button toggles the power to the currently selected slot; the Help button brings up the standard Help Finder dialog; and the Exit button exits the utility. Performing PCI Hot Plug Actions The Compaq PCI Hot Plug Utility and the Compaq Remote Control service, in conjunction with Windows NT, allow the following actions: ■ Connecting to a remote machine ■ Hot replacement of adaptors At startup, the utility attempts to connect to the local machine. The utility can talk to any remote machine that is running the Compaq Remote Control service. Compaq Confidential – Need to Know Required Writer: Cynthia Dresden Project: Compaq ProLiant DL580 Server Setup and Installation Guide Comments: Part Number: 159213-003 File Name: g-ch6 Hot-Plug Technology.doc Last Saved On: 4/5/01 2:01 PM 6-13 6-14 Compaq ProLiant DL580 Server Setup and Installation Guide Connecting to a Remote Machine Select the remote machine to which you want to connect by any of the following methods: ■ Type the name of the machine in the combo box and press Enter. ■ Select one of the ten most recently connected machines from the dropdown list. ■ Click the Browse button to bring up a machine selection dialog box. Replacing an Adapter 1. In the PCI Hot Plug utility, turn the power off for the required slot by selecting it and clicking the power button. 2. On the server, disconnect the cables if necessary, open the slot release lever, and remove the card. 3. Put in the new card, attach the appropriate cables, and close the lever. 4. In the PCI Hot Plug utility, turn the power on for the slot by selecting it and clicking the power button. Compaq PCI Hot Plug Utility Messages The requested machine is not running the Compaq Remote Control service. You cannot connect to the specified machine because it is not running the Compaq Remote Control service. You do not have an account on the requested machine. You cannot connect to the specified server because you do not have an access account on that machine. This machine does not have any PCI Hot Plug slots. The machine is running the service but there are no PCI Hot Plug slots to view. The service on the machine has shut down or has become unavailable. The service on the machine you are viewing has shut down or has become unavailable. Compaq Confidential – Need to Know Required Writer: Cynthia Dresden Project: Compaq ProLiant DL580 Server Setup and Installation Guide Comments: Part Number: 159213-003 File Name: g-ch6 Hot-Plug Technology.doc Last Saved On: 4/5/01 2:01 PM Chapter 7 Server Configuration and Utilities This chapter describes the software tools that Compaq provides on your SmartStart and Support Software CD (SmartStart CD) to assist you in configuring and managing your Compaq ProLiant DL580 server. SmartStart Features Compaq SmartStart provides intelligent tools for configuring your server and loading system software to achieve a well-integrated server with optimal dependability and supportability. The SmartStart CD includes ■ Compaq System ROMPaq Utility ■ Compaq System Configuration Utility, including baseline files for the Compaq Integrated Management Log (IML) System ROMPaq Utility The System ROMPaq utility allows you to re-establish the factory default settings for the firmware that shipped with your server. You can download new versions of system or storage ROMPaqs as they become available by registering your server with Compaq. Updated ROMPaqs are available to download from the Compaq website: www.compaq.com/products/servers Compaq Confidential – Need to Know Required Writer: Cynthia Dresden Project: Compaq ProLiant DL580 Server Setup and Installation Guide Comments: Part Number: 159213-003 File Name: h-ch7 Server Configuration and Utilities.doc Last Saved On: 4/5/01 2:48 PM 7-2 Compaq ProLiant DL580 Server Setup and Installation Guide Compaq System Configuration Utility Compaq System Configuration Utilities offer a wide range of configuration activities, including: ■ Configuring switch and jumper settings ■ Resolving resource conflicts ■ G Memory G Port addresses G Interrupt requests (IRQs) Managing the installation of mass storage devices G Hard drives G Tape drives G Diskette drives ■ Setting and storing power-on features like date and time ■ Storing configuration information in nonvolatile memory ■ Optimizing your operating system ■ Performing system diagnostic with TEST, INSPECT, and other utilities Option Configuration Files The System Configuration Utility uses option configuration (.CFG) files to configure the server. These files contain: ■ IRQs ■ Software installation guidelines ■ PCI board resource requirements The .CFG files for Compaq servers reside on System Configuration diskettes or on the SmartStart CD. Compaq Confidential – Need to Know Required Writer: Cynthia Dresden Project: Compaq ProLiant DL580 Server Setup and Installation Guide Comments: Part Number: 159213-003 File Name: h-ch7 Server Configuration and Utilities.doc Last Saved On: 4/5/01 2:48 PM Server Configuration and Utilities Resolving Resource Conflicts Normally, when you add a PCI expansion board, the system detects this change as soon as you power up the server. The system ROM reads the PCI board identifier and compares it with the current configuration information stored in nonvolatile memory. The system ROM automatically configures your PCI boards and no further work is required However, in cases when the system requires you to choose configuration options, a Power-On Self-Test (POST) message directs you to run the System Configuration Utility to change your automatic default settings. When you run System Configuration Utilities, the system reads the .CFG files to identify resource conflicts.. When the system identifies a conflict, it rechecks all the expansion board specifications to determine if it can change the settings for any existing board and automatically resolve the conflict between the two boards. If conflicts cannot be resolved automatically, System Configuration Utility directs you through a manual troubleshooting process. Launching the SmartStart CD For detailed instructions on how to use the SmartStart CD, refer to the Server Setup and Management pack included in the shipping box with your server. With the server running, install the SmartStart CD: 1. Insert the CD into the CD-ROM drive, handling the CD from its edges rather than on the flat surfaces. 2. The CD automatically launches the setup program and begins installing system utilities. The activity indicator on the front of the CD-ROM drive turns green. When the system utilities have been installed, the main menu display on your system monitor is displayed. Select either the ROMPaq or System Configuration Utility. Reapplying ROMPaq In Compaq ProLiant DL580 servers, the system ROM is automatically configured after any memory or processor changes. To re-apply your default system ROM using ROMPaq, open the SmartStart folder on the SmartStart CD, select ROMPaq from the launch menu, and follow the Compaq Confidential – Need to Know Required Writer: Cynthia Dresden Project: Compaq ProLiant DL580 Server Setup and Installation Guide Comments: Part Number: 159213-003 File Name: h-ch7 Server Configuration and Utilities.doc Last Saved On: 4/5/01 2:48 PM 7-3 7-4 Compaq ProLiant DL580 Server Setup and Installation Guide instructions provided. This reversion to the default ROM overwrites all previous ROM settings. Loading System Configuration Utility For instructions on how to launch Compaq System Configuration Utility from the SmartStart CD, refer to the your SmartStart installation poster. At first, SmartStart automatically creates a system partition and installs the System Configuration Utility and other Compaq utilities into that partition. You can work with the utilities immediately from your local drives. IMPORTANT: Do not confuse the Compaq System Utility partition with system partitions created by your operating system. When you use Compaq System Configuration Utility to reconfigure or troubleshoot, make sure that the SmartStart CD is available. 1. With the server running, place the SmartStart CD into the CD-ROM drive. 2. Press Ctrl+Alt+Del to restart the server with the SmartStart disk in the CD-ROM drive. 3. When you see the POST test screen, press F10 when the following prompt is displayed at the top right of the screen: Press “F10” key to load System Partition Utility IMPORTANT: The text at the top right of the screen is displayed for only two seconds. If you do not press F10 during this time, you must restart the server and start again. Compaq Confidential – Need to Know Required Writer: Cynthia Dresden Project: Compaq ProLiant DL580 Server Setup and Installation Guide Comments: Part Number: 159213-003 File Name: h-ch7 Server Configuration and Utilities.doc Last Saved On: 4/5/01 2:48 PM Server Configuration and Utilities System Configuration Utility Main Menu Use the System Configuration Utility main menu to set power-on features and perform a range of system configuration tasks. Main Menu Main menu options include: ■ System configuration ■ Operating system installation ■ Diagnostics and utilities ■ Exit System Configuration This option provides a step-by-step guide through the configuration process and allows you to access individual configuration utilities when you: ■ Add, replace, or remove expansion boards ■ Resolve hardware resource conflicts ■ Add a diskette or hard drive Operating System Installation Use the full operating system installation option to: ■ Install one of the operating systems provided on the SmartStart CD ■ Install an operating system by another vendor Diagnostics and Utilities Use diagnostics to test and inspect your system. Exit Select Exit to restart your server. Compaq Confidential – Need to Know Required Writer: Cynthia Dresden Project: Compaq ProLiant DL580 Server Setup and Installation Guide Comments: Part Number: 159213-003 File Name: h-ch7 Server Configuration and Utilities.doc Last Saved On: 4/5/01 2:48 PM 7-5 7-6 Compaq ProLiant DL580 Server Setup and Installation Guide System Configuration Menu Select System Configuration from the main menu and choose among the following options in the system configuration menu: ■ Configure hardware ■ Power-on defaults ■ System partition ■ Configuration backup Configure Hardware Select this option to set configuration preferences manually. The first screen offers the following five configuration options: ■ Important System Configuration Information Select this option to read an overview of the configuration process. ■ Add or Remove Boards When you add or remove a PCI board, the system ROM automatically configures the boards at startup. If a manual configuration selection is needed, a POST message directs you to run the System Configuration Utility. The System Configuration Utility can be used to change the default settings provided by the system ROM. Similarly, when you add or remove a PCI board or memory board, the system ROM automatically reconfigures the server at startup. ■ View or Edit Details Select this option to view and make manual configuration changes. IMPORTANT: When you manually edit configuration settings, make sure to examine all required switches. ■ Examine Required Switches Find the switch and jumper settings for the appropriate board and adjust to match the settings displayed on the screen. ■ Save and Exit Select this step to save the configuration update and exit the system configuration menu. Compaq Confidential – Need to Know Required Writer: Cynthia Dresden Project: Compaq ProLiant DL580 Server Setup and Installation Guide Comments: Part Number: 159213-003 File Name: h-ch7 Server Configuration and Utilities.doc Last Saved On: 4/5/01 2:48 PM Server Configuration and Utilities Power-On Defaults You can change the default time, date, and number lock settings of your system by selecting the Power-On Defaults option from the System Configuration Utility main menu. ■ Set the default beginning date MM-DD-YYYY ■ Set the default beginning time HH:MM:SS ■ Set the default status for your numeric keypad ( ) OFF (*) ON * This step activates the numeric keypad when the server’s On/Standby switch is set to the On position. System Partition Selecting the System Partition option from the System Configuration menu allows you to copy and delete .CFG files and to create, upgrade, or delete a system partition on the hard drive for the utilities. The following menu options are available: ■ Create system partition ■ Upgrade system partition ■ Delete system partition ■ Copy files ■ Delete files Compaq Confidential – Need to Know Required Writer: Cynthia Dresden Project: Compaq ProLiant DL580 Server Setup and Installation Guide Comments: Part Number: 159213-003 File Name: h-ch7 Server Configuration and Utilities.doc Last Saved On: 4/5/01 2:48 PM 7-7 7-8 Compaq ProLiant DL580 Server Setup and Installation Guide Creating and Verifying a System Partition If you used SmartStart to configure your server and install your operating system, SmartStart automatically performed this procedure for you. IMPORTANT: Use this procedure only if the operating system was not installed on the server and you wish to create a system partition. 1. Launch the SmartStart CD as previously described in this chapter. IMPORTANT: The system partition requires: ■ 32-mb of disk space at the beginning of a hard drive ■ One unused entry in the start record. SmartStart prompts you to overwrite an existing DOS partition on the hard drive. 2. If the system is configured and hard drive space is available for the system partition, leave the SmartStart CD in the CD-ROM drive until the following process is complete: SmartStart automatically creates the partition and copies the Compaq Utilities from the SmartStart CD to the partition. This process requires two restarts, and is complete when the SmartStart CD main menu is displayed. 3. If the system is not configured, leave the SmartStart CD in the CD-ROM drive until the following process is complete: a. Select the second or third button on the first SmartStart screen to configure the system automatically. b. Wait for the system to start and save the configuration. The SmartStart CD creates the system partition and copies the Compaq Utilities to it. This process requires two restarts. Leave the SmartStart CD in the CD-ROM drive until the process finishes. The process is complete when the SmartStart CD main menu is displayed. 4. Verify that the system partition exists by performing the following procedure: a. Remove any media from the CD-ROM drive and the diskette drive b. Restart the system by pressing Ctrl+Alt+Del or by turning the server off and then on again. c. Press F10 when the following prompt is displayed: Press “F10" key for System Partition Utility Compaq Confidential – Need to Know Required Writer: Cynthia Dresden Project: Compaq ProLiant DL580 Server Setup and Installation Guide Comments: Part Number: 159213-003 File Name: h-ch7 Server Configuration and Utilities.doc Last Saved On: 4/5/01 2:48 PM Server Configuration and Utilities IMPORTANT: The text is displayed for only two seconds. If you do not press F10 within the two seconds, you must start the server again. d. If a system partition exists, the server powers up to the partition. If the partition does not exist, the message displayed indicates that no system partition exists. Upgrading the System Partition To upgrade the system partition, use the following procedure: 1. Launch the SmartStart CD as previously described in this chapter. 2. When the main menu appears, select the System Configuration Utility, then the System Configuration menu, the System Partition option, and finally the Upgrade System Partition option. 3. Select to the utilities you wish to upgrade. SmartStart copies the new utilities from the CD to your system partition. Deleting a System Partition To delete a partition, use the following procedure: 1. Insert the SmartStart CD in the CD-ROM drive and turn on the server. 2. Select the System Configuration option from the System Configuration Utility menu. 3. Select the System Partition option and then the Delete a System Partition option. The System Configuration Utility then displays the partitions available for deletion, along with the following commands: ■ Press Space to mark partitions for deletion. ■ Press Esc to cancel the operation. ■ Press Enter to execute the deletion routine. 4. Respond to the confirmation screen to reboot the system. Copying Files To copy files, use the following procedure: 1. Insert the SmartStart CD in the CD-ROM drive and turn on the server. Compaq Confidential – Need to Know Required Writer: Cynthia Dresden Project: Compaq ProLiant DL580 Server Setup and Installation Guide Comments: Part Number: 159213-003 File Name: h-ch7 Server Configuration and Utilities.doc Last Saved On: 4/5/01 2:48 PM 7-9 7-10 Compaq ProLiant DL580 Server Setup and Installation Guide 2. Select the System Configuration option from the System Configuration Utility menu. 3. Select the System Partition option and then the Copying Files option. The System Configuration Utility then displays the available configuration files with the following commands: G Press Space to mark files for copying. G Press F7 to choose from among the available source directories. G Press Esc to cancel the operation. G Press Enter to execute the copy routine. 4. Select a destination drive after you execute the copy routine, and press Enter. 5. Respond to the confirmation screen to reboot the system. Deleting Files To delete files, use the following procedure: 1. Insert the SmartStart CD in the CD-ROM drive and turn on the server. 2. Select the System Configuration option from the System Configuration Utility menu. 3. Select the System Partition option and then the Deleting Files option. The System Configuration Utility then displays the available configuration files with the following commands: G Press Space to mark files for deletion. G Press F7 to choose from among the available directories. G Press Esc to cancel the operation. G Press Enter to execute the deletion routine. 4. Respond to the confirmation screen by choosing one of the following options: G Press Enter to execute the deletion routine. G Press Esc to cancel the operation. 5. Reboot the system. Compaq Confidential – Need to Know Required Writer: Cynthia Dresden Project: Compaq ProLiant DL580 Server Setup and Installation Guide Comments: Part Number: 159213-003 File Name: h-ch7 Server Configuration and Utilities.doc Last Saved On: 4/5/01 2:48 PM Server Configuration and Utilities Configuration Backup The Configuration Backup option from the System Configuration menu allows you to ■ Create a backup of the system configuration ■ Restore the system configuration from the backup Backing Up to a System Configuration Saving and exiting from the System Configuration Utility generates a history of the configuration. The System Configuration Utility maintains three versions of the system configuration files: the current configuration and the two previous configurations, in both binary (.SCI) and text (.CHL) file formats. ■ The .SCI files can restore a previous configuration using the System Configuration menu and the Restore System Configuration option from a .SCI File submenu. ■ The .CHL files are text-based files displaying information stored in the corresponding .SCI file. Compaq Confidential – Need to Know Required Writer: Cynthia Dresden Project: Compaq ProLiant DL580 Server Setup and Installation Guide Comments: Part Number: 159213-003 File Name: h-ch7 Server Configuration and Utilities.doc Last Saved On: 4/5/01 2:48 PM 7-11 7-12 Compaq ProLiant DL580 Server Setup and Installation Guide The following table describes each of the .SCI and .CHL files maintained by your System Configuration Utility. Table 7-1 System Configuration History Log Files Filename Description SYSTEM.SCI Current configuration information SYSTEM1.SCI Previous configuration information SYSTEM2.SCI Previous configuration information (oldest) SYSTEM.CHL Textual representation of SYSTEM.SCI file SYSTEM1.CHL Textual representation of SYSTEM1.SCI file SYSTEM2.CHL Textual representation of SYSTEM2.SCI file (oldest) IMPORTANT: Insufficient disk space for the System Configuration History Log causes the System Configuration Utility to delete log files, starting with the oldest files (SYSTEM2.SCI and SYSTEM2.CHL). The System Configuration Utility continues to delete these files until enough disk space is available for the current configuration backup and history files. Restoring a System Configuration To restore a system configuration, use the following procedure: 1. Insert the SmartStart CD in the CD-ROM drive and turn on the server. 2. Select the System Configuration option from the System Configuration Utility menu. 3. Select the Configuration Backup option from the System Configuration menu. The System Configuration Utility then displays the available .SCI files with the following commands: G Press F7 to choose the .SCI file you wish to restore from among your available directories. G Press Esc to cancel the operation. G Press Enter to restore the configuration you have chosen. Compaq Confidential – Need to Know Required Writer: Cynthia Dresden Project: Compaq ProLiant DL580 Server Setup and Installation Guide Comments: Part Number: 159213-003 File Name: h-ch7 Server Configuration and Utilities.doc Last Saved On: 4/5/01 2:48 PM Server Configuration and Utilities If you choose to execute the restoration, the System Configuration Utility will restore the configuration settings you chose and advise you when the restoration is complete. 4. Select from the following options: G Save the configuration and reboot the system. G Review and modify your configuration settings. 5. Reboot the system. Compaq Confidential – Need to Know Required Writer: Cynthia Dresden Project: Compaq ProLiant DL580 Server Setup and Installation Guide Comments: Part Number: 159213-003 File Name: h-ch7 Server Configuration and Utilities.doc Last Saved On: 4/5/01 2:48 PM 7-13 7-14 Compaq ProLiant DL580 Server Setup and Installation Guide Installing an Operating System Compaq ProLiant DL580 servers support the following operating systems (OS): ■ Novell NetWare 4.2 and 5.1 ■ Microsoft Windows NT 4.0 ■ Microsoft Windows 2000 Server and Advanced Server ■ SCO OpenServer 5.04 and 5.05 ■ SCO UnixWare 7.1 ■ IBM OS/2 Warp Server 4.0 and Warp Server Advanced 4.0 ■ Sun Solaris 2.6 for Intel Platforms and Sun Solaris 7 for Intel Platforms Use the SmartStart CD to assist with installing the operating system with vendor supplied media. Select the Assisted Installation option after starting the SmartStart CD. Drivers are located on the SmartStart CD. IMPORTANT: Always check README FIRST or HELP files on the SmartStart CD. If present, these files may contain information about important software updates. Novell NetWare Device Drivers from Compaq To operate NetWare, your Compaq ProLiant DL580 server must maintain certain device drivers, located on the SmartStart CD shipped with the server. If you use SmartStart to install the operating system, these drivers are installed automatically. Otherwise, you can use SmartStart to create Support Software for Novell Products (NSSD) diskettes to support a manual installation of Novell products. To perform the manual installation of the Novell NetWare Device Drivers, or installation without SmartStart, execute the following procedure: 1. Launch the SmartStart CD as described previously in this chapter. 2. Launch manual the operating system configuration: a. Select the System Configuration Utility. b. Select the Operating System Installation option from the System Configuration Utility main menu. 3. Follow the instructions provided for the operating system you are installing. Compaq Confidential – Need to Know Required Writer: Cynthia Dresden Project: Compaq ProLiant DL580 Server Setup and Installation Guide Comments: Part Number: 159213-003 File Name: h-ch7 Server Configuration and Utilities.doc Last Saved On: 4/5/01 2:48 PM Server Configuration and Utilities Microsoft Windows Device Drivers from Compaq To support Microsoft Windows NT 4.0 and Windows 2000 operating systems, Compaq provides drivers on the SmartStart CD, some of which are contained within the Windows NT retail product. Drivers on the Support Software Diskettes (SSD) may be newer versions and may include new functionality and problem fixes. For more information on the drivers, run the README.BAT file in the root directory of the SSD for Windows NT. This file loads the WinHelp file NTREADME.HLP. If you use SmartStart to install your operating system, these drivers install automatically. Otherwise, you can use SmartStart to create the Windows NT SSDs from Compaq to support a manual installation of Windows NT. Manual Installation for Windows NT To perform the manual installation of the Microsoft Windows NT Device Drivers (that is, without SmartStart), execute the following procedure: 1. Launch the SmartStart CD as described previously in this chapter. 2. Launch manual operating system configuration: a. Select the System Configuration Utility. b. Select the Operating System Installation option from the System Configuration Utility main menu. 3. Follow the instructions provided for the operating system you are installing. Compaq Confidential – Need to Know Required Writer: Cynthia Dresden Project: Compaq ProLiant DL580 Server Setup and Installation Guide Comments: Part Number: 159213-003 File Name: h-ch7 Server Configuration and Utilities.doc Last Saved On: 4/5/01 2:48 PM 7-15 7-16 Compaq ProLiant DL580 Server Setup and Installation Guide Installing Windows NT 4.0 with Compaq 64-Bit Dual Channel Wide Ultra2/Ultra3 SCSI Adapters IMPORTANT: Use the following procedure when you power up the server from the Microsoft Windows NT 4.0 CD and install your operating system on the Compaq ProLiant DL580 server with a 64-bit Dual Channel Wide-Ultra2/Ultra3 SCSI Adapter The Microsoft Windows NT 4.0 CD does not contain the required drivers for proper installation on a server using this controller. The preferred method for installing Windows NT 4.0 on Compaq Servers is to use the Assisted Install Path provided with the SmartStart CD, although you may use the following method to manually install the operating system: 1. Create the Compaq Support Software for Microsoft Windows NT 4.0: a. Start the server from the SmartStart CD. b. Select Create Support Software from the SmartStart main menu. c. Follow the instructions on the screen to create the Microsoft Windows NT SSD. 2. Create the Windows NT start diskettes. a. Insert the Microsoft Windows NT CD into a system running DOS system, Windows NT, Windows 95, or Windows 98. b. From the I386 directory on the CD, execute the following commands as required: ■ Under DOS execute: WINNT /OX ■ Under Windows 95/98 execute: WINNT /OX ■ Under Windows NT execute: WINNT32 /OX NOTE: Create the Microsoft Windows NT SSDs in reverse order with disk 3 first and disk 1 last. 3. Install the Windows NT Operating System. a. Start the server from the Microsoft NT 4.0 Setup Start Diskette. b. Press F5 at the first blue text screen. Windows NT setup is displayed in the upper left corner, no other text is displayed. c. The following message is displayed after approximately 30 seconds: Compaq Confidential – Need to Know Required Writer: Cynthia Dresden Project: Compaq ProLiant DL580 Server Setup and Installation Guide Comments: Part Number: 159213-003 File Name: h-ch7 Server Configuration and Utilities.doc Last Saved On: 4/5/01 2:48 PM Server Configuration and Utilities Setup could not determine the type of computer you have, or you have chosen to manually specify the computer type. Select the computer from the following list, or select “Other” if you have a device support disk provided by your computer manufacturer. NOTE: If you do not get this screen, but are prompted for Windows NT Setup disk 2, press F3 twice to exit and try again. d. Select Other. e. When prompted for a manufacturer-supplied hardware support disk, insert the Compaq Server Support for Microsoft Windows NT 4.0 and press Enter. f. Select the appropriate Compaq HAL for your server (SystemPro Multiprocessor, MPS Multiprocessor, or Uniprocessor). g. Insert the Compaq Server Support for Microsoft Windows NT 4.0, Disk 2 into the diskette drive and press Enter. You have now completed the installation of the Compaq HAL. h. When prompted, insert the Windows NT Server Setup, Disk 2. i. Select Express Setup as the installation method. j. When prompted, insert the Windows NT Server Setup, Disk 3. k. When Setup prompts that the CD-ROM drive has been found, press S to specify additional devices. l. Select Other. m. When prompted, insert a disk provided by the hardware manufacturer and press Enter. n. Insert the Compaq Server Support for Microsoft Windows NT 4.0 into the diskette drive and press Enter. o. Select Compaq 32-bit SCSI-2 Controllers for Windows NT 4.0 and press Enter. The screen that lists recognized mass storage devices is displayed. p. Press Enter to continue, or press S to specify additional storage devices, such as Compaq Drive Array. q. Follow the remaining Windows NT Server Setup instruction screens to complete your installation of Windows NT Server. Installing the Microsoft Windows NT 4.0 Operating System 1. Start the server from the created start diskette labeled Windows NT 4.0—Disk 1. Compaq Confidential – Need to Know Required Writer: Cynthia Dresden Project: Compaq ProLiant DL580 Server Setup and Installation Guide Comments: Part Number: 159213-003 File Name: h-ch7 Server Configuration and Utilities.doc Last Saved On: 4/5/01 2:48 PM 7-17 7-18 Compaq ProLiant DL580 Server Setup and Installation Guide 2. Follow the instructions on the screen, until you reach the step to detect mass storage devices. 3. To skip mass storage device detection, select S for Skip detection. 4. When prompted to specify additional SCSI adapters or array controllers, select S for Specify Additional Devices. 5. Select Other. 6. When prompted to provide a driver for the new device, insert the Windows NT SSD, Disk 2 and press Enter. 7. Select the embedded array controller driver for Microsoft Windows NT 4.0 and press Enter. The Windows NT 4.0 Setup program copies the driver that supports the Compaq Integrated Smart Array Controller. 8. Select S for Specify Additional Devices. 9. Select IDE CD-ROM (Atapi 1.2)/PCI IDE Controller and press Enter. 10. When prompted to provide a driver for the new device, insert the Windows NT Server Setup-Disk 3 and press Enter. 11. Continue with the normal operating system installation. Compaq Confidential – Need to Know Required Writer: Cynthia Dresden Project: Compaq ProLiant DL580 Server Setup and Installation Guide Comments: Part Number: 159213-003 File Name: h-ch7 Server Configuration and Utilities.doc Last Saved On: 4/5/01 2:48 PM Server Configuration and Utilities Installing Microsoft Windows 2000 SmartStart software supports installation of the Microsoft Windows 2000. You can perform either a manual or assisted SmartStart installation. There are two options for installing Windows 2000 on your server with Compaq SmartStart: ■ SmartStart-assisted installation This procedure takes you through a complete a SmartStart interview process that collects system and configuration information needed to install and configure Windows 2000 automatically. In addition, SmartStart installs all appropriate drivers and utilities for the devices configured with your server. ■ SmartStart manual-path installation In this procedure, SmartStart supplies device drivers and basic system information. If your server uses the Integrated Smart Array Controller and you choose to do a manual-path installation, you must create device driver diskettes in order to load appropriate drivers. IMPORTANT: For procedures to configure external storage devices, please refer to the documentation shipped with your storage device or refer to the Compaq web site: www.compaq.com Before You Begin IMPORTANT: Use these instructions only with Compaq ProLiant DL580 servers. For other server-specific guidelines for loading Microsoft Windows 2000, search the Compaq website: www.compaq.com/partners/microsoft/windows2000 The firmware and ROMs in your Compaq ProLiant DL580 server are up-to-date and provide full support for all versions of the operating systems discussed in this guide. If you need to update firmware or option ROMs over the lifetime of your server, search and download Compaq Support Paqs and SoftPaq™ files from the Compaq website: www.compaq.com/support/files Compaq Confidential – Need to Know Required Writer: Cynthia Dresden Project: Compaq ProLiant DL580 Server Setup and Installation Guide Comments: Part Number: 159213-003 File Name: h-ch7 Server Configuration and Utilities.doc Last Saved On: 4/5/01 2:48 PM 7-19 7-20 Compaq ProLiant DL580 Server Setup and Installation Guide SmartStart Assisted-Path Installation for Windows 2000 IMPORTANT: The SmartStart assisted-path installation can only be used when the server uses an installed array controller. The SmartStart CD provides assistance for installing and configuring Microsoft Window 2000 as your operating system. 1. Place the SmartStart CD into the CD-ROM drive and power on your server. 2. At the first SmartStart selection screen, select the assisted install option. IMPORTANT: With SmartStart-assisted installation, you may select a boot partition size of no less than 2 GB and up to 4 GB. If you need to create a larger boot partition, select the SmartStart manual installation option. NOTE: Fibre Channel array controllers are not eligible as boot devices. 3. Provide system and configuration information when prompted by the SmartStart interview process. The information you enter during the SmartStart setup interview installs and configures Windows 2000 for your server automatically. NOTE: If you wish to use Dynamic Disk capability in Windows 2000, leave at least 4 MB of disk space unpartitioned. 4. When you have completed the interview, select the installation path for Microsoft Windows 2000. 5. Select Server or Advanced Server installation when prompted. Refer to your Windows 2000 user license for additional information. 6. Insert the Microsoft Windows 2000 software CD when prompted. IMPORTANT: The assisted installation of Windows 2000 uses typical network settings by default and does not provide a clear choice for selecting custom settings. If you need to configure your network using custom settings, use the Back button in the setup utility when you first encounter a network setup screen to return to the screen that allows you to select the option for Custom Settings. 7. Restart your server when prompted to complete the installation. Compaq Confidential – Need to Know Required Writer: Cynthia Dresden Project: Compaq ProLiant DL580 Server Setup and Installation Guide Comments: Part Number: 159213-003 File Name: h-ch7 Server Configuration and Utilities.doc Last Saved On: 4/5/01 2:48 PM Server Configuration and Utilities NOTE: For additional information about using the SmartStart-assisted installation for Microsoft Windows 2000, refer to white papers and other support resources available on the Compaq website: www.compaq.com/partners/microsoft/windows2000 SmartStart Manual-Path Installation for Windows 2000 The manual-path installation method requires these steps: ■ Create the Compaq Support Software for Microsoft Windows 2000 ■ Install the Windows 2000 operating system For more information on device drivers, run the README.BAT file in the root directory of the Software and Support CD for Windows 2000 to read the WinHelp file NTREADME.HLP. NOTE: Fibre Channel array controllers are not eligible as boot devices. SmartStart Manual Installation for Windows 2000 1. Place the SmartStart CD into the CD-ROM drive and power up the server. 2. Insert the Microsoft Windows 2000 software CD when prompted. 3. At the first screen you see during startup, press the F6 key to enter manual mode. You have only a few seconds to press the F6 key before the installation process continues. 4. When prompted, choose to create a new partition with at least 2 GB of free space. 5. Select Microsoft Windows 2000 install, either Server or Advanced Server options. Refer to your user license for additional information. 6. Install device drivers from the diskette when prompted. 7. Follow the directions on screen to install and configure Windows 2000 for your server. 8. Restart your server when prompted. Installation of Microsoft Windows 2000 is now complete. Compaq Confidential – Need to Know Required Writer: Cynthia Dresden Project: Compaq ProLiant DL580 Server Setup and Installation Guide Comments: Part Number: 159213-003 File Name: h-ch7 Server Configuration and Utilities.doc Last Saved On: 4/5/01 2:48 PM 7-21 7-22 Compaq ProLiant DL580 Server Setup and Installation Guide SCO OpenServer and SCO UnixWare Device Drivers from Compaq To support the SCO OpenServer or SCO UnixWare operating systems, your Compaq ProLiant DL580 server must have certain device drivers, located on the SmartStart CD shipped with your server. The following features require the installation of these device drivers: ■ Compaq Ethernet Token Ring Adapter ■ Automatic Server Recovery (ASR-2) ■ Compaq ProLiant Storage System If you use SmartStart to install your operating system, these drivers are installed automatically. Otherwise, you can use SmartStart to create UNIX Extended Feature Supplemental (EFS) diskettes from Compaq to support a manual installation of UNIX. If you do not want SmartStart to configure the server, use the following procedure: 1. Launch the SmartStart CD as previously described in this chapter. 2. Launch manual operating system configuration: a. Select the System Configuration Utility. b. Select the Operating System Installation option from the System Configuration Utility main menu. 3. Follow the instructions provided for the operating system you are installing. 4. When prompted, create the EFS diskettes. IBM OS/2 Device Drivers from Compaq To support the following operating systems, your Compaq ProLiant DL580 server must maintain certain device drivers, located on the SmartStart CD shipped with your server. ■ IBM OS/2 Warp Server 4.0 ■ IBM OS/2 Warp Server 4.0 SMP ■ IBM OS/2 Warp ■ IBM OS/2 Warp Connect 3.0 ■ IBM OS/2 2.x Compaq Confidential – Need to Know Required Writer: Cynthia Dresden Project: Compaq ProLiant DL580 Server Setup and Installation Guide Comments: Part Number: 159213-003 File Name: h-ch7 Server Configuration and Utilities.doc Last Saved On: 4/5/01 2:48 PM Server Configuration and Utilities For more information on these drivers, run the README.COM file in the root directory of the IBM OS/2 SSD from Compaq. If you use SmartStart to install your operating system, these drivers install automatically. Otherwise, you can use SmartStart to create an IBM OS/2 Support Software Diskette (SSD) from Compaq to support a manual installation of IBM OS/2. If you do not want SmartStart to configure the server, follow this procedure: 1. Launch the SmartStart CD as previously described in this chapter. 2. Launch manual operating system configuration: a. Select the System Configuration Utility. b. Select the Operating System Installation option from the System Configuration Utility main menu. 3. Follow the instructions provided for the operating system you are installing. Sun Solaris Intel Platform Edition Device Drivers for Compaq To operate with Sun Solaris Intel Platform Edition 2.6 and 7, your Compaq ProLiant DL580 server must maintain certain device drivers. You can access the drivers and installation procedures for Solaris 2.6 at the Sun website: www.soldc.sun.com/support/drivers/ For Solaris 7, the drivers are included with the operating system. ■ The cnft driver is required for the Texas Instruments TLAN-based Compaq NICs. ■ The iprb driver is required for the Intel-based Compaq NICs. You can access the Gigabit Ethernet NIC driver and installation procedures for Solaris 2.6 and 7 at the Intel website: www.support.intel.com/support/network/adapter/1000/ Compaq Confidential – Need to Know Required Writer: Cynthia Dresden Project: Compaq ProLiant DL580 Server Setup and Installation Guide Comments: Part Number: 159213-003 File Name: h-ch7 Server Configuration and Utilities.doc Last Saved On: 4/5/01 2:48 PM 7-23 7-24 Compaq ProLiant DL580 Server Setup and Installation Guide Diagnostics and Other Utilities Selecting the Diagnostics and Utilities feature from the System Configuration Utility menu prompts the system to test, inspect, upgrade, and diagnose the server. The Compaq ProLiant DL580 server maintains the diagnostics and other utilities in the system partition on the hard drive, and accesses these utilities when a system configuration error is detected during the POST. After configuring the server, run the INSPECT Utility to obtain detailed information about the server’s hardware configuration. For instructions on using the Diagnostics Utility and other Compaq utilities, refer to the Compaq website: www.compaq.com Exit from This Utility To exit from the System Configuration Utility, select Exit from the main menu. Restart the server if you are prompted to do so. Compaq Confidential – Need to Know Required Writer: Cynthia Dresden Project: Compaq ProLiant DL580 Server Setup and Installation Guide Comments: Part Number: 159213-003 File Name: h-ch7 Server Configuration and Utilities.doc Last Saved On: 4/5/01 2:48 PM Server Configuration and Utilities Integrated Management Log (IML) The Integrated Management Log (IML) records system events and stores them in an easily viewable form. In contrast to the 16-event capacity of the critical and correctable error logs, the IML records hundreds of events. In addition, the IML time stamp for each recorded event features one-minute granularity, as opposed to the one-hour granularity of previous logs. Events listed in the IML are categorized as one of four event severity levels: ■ Status—indicates that the message is informational only ■ Repaired—indicates that corrective action has been taken ■ Caution—indicates a nonfatal error condition ■ Critical—indicates a component failure The Integrated Management Log requires Compaq-specific device drivers. For instructions on installing the appropriate drivers, see “Installing an Operating System,” earlier in this chapter. Multiple Ways of Viewing the Log You can view an event in the IML in several ways: ■ From within Compaq Insight Manager ■ From within Compaq Survey Utility ■ Using the IML Management Utility, an operating system-specific program located on the SmartStart CD. Compaq Insight Manager Compaq Insight Manager is a server management tool that provides in-depth fault, configuration, and performance monitoring of hundreds of Compaq servers from a single management console. Monitored system parameters describe the status of all key server components. The ability to view events occurring to these components allows you to take immediate action. You can view and print the event list from within Compaq Insight Manager by following the instructions below. You can also mark a critical or caution event as repaired after the affected component has been replaced; for example, if a Compaq Confidential – Need to Know Required Writer: Cynthia Dresden Project: Compaq ProLiant DL580 Server Setup and Installation Guide Comments: Part Number: 159213-003 File Name: h-ch7 Server Configuration and Utilities.doc Last Saved On: 4/5/01 2:48 PM 7-25 7-26 Compaq ProLiant DL580 Server Setup and Installation Guide failed fan has been replaced. You can lower the severity of the event by marking it as repaired. Viewing the Event List To view the list, follow the instructions below: 1. Select the appropriate server from Compaq Insight Manager. 2. Select View Device Data. The selected server is displayed with buttons around its perimeter. 3. Select Recovery. 4. Select Integrated Management Log. NOTE: You can only view the list from the Recovery/Integrated Management screen. To print the list, follow the instructions in the next procedure. 5. If a failed component has been replaced, select the event from the list; then, select Mark Repaired. Printing the Event List To print the list, follow the instructions below. NOTE: You can only view the list from the Recovery/Integrated Management Log screen as described above. 1. Select the appropriate server from the Compaq Insight Manager. 2. The selected server is displayed with buttons around its perimeter. 3. Select Configuration. 4. Select Recovery. 5. Select Print. Compaq Confidential – Need to Know Required Writer: Cynthia Dresden Project: Compaq ProLiant DL580 Server Setup and Installation Guide Comments: Part Number: 159213-003 File Name: h-ch7 Server Configuration and Utilities.doc Last Saved On: 4/5/01 2:48 PM Server Configuration and Utilities Compaq Survey Utility The Compaq Survey Utility for Windows NT and Novell NetWare is a serviceability tool that delivers online configuration capture and comparison to maximize server availability. It is available on the Compaq Management CD in the Server Setup and Management package, or it is available on the Compaq website: www.compaq.com Refer to the Compaq Management CD for information on installing and running the Survey Utility. After you have run the Survey Utility, you can view the Integrated Management Log by loading the output of the utility, typically named SURVEY.TXT, into a text viewer such as Microsoft Notepad. The event list follows the system slot information. Once you have opened the text file, you can print it using the print feature of the viewer. List of Events The event list displays the affected components and the associated error messages. Though the same basic information is displayed, the format of the list may be different, depending on how you are viewing it, from within Compaq Insight Manager, or from within the Compaq Survey Utility. The table in this section identifies the event types, or affected components, and associated event messages. Table 7-2 Event Messages Event Type Event Message Machine Environment Fan failure System Fan Failure (Fan X, Location) Fan inserted System Fan Inserted (Fan X, Location) Fan removed System Fan Removed (Fan X, Location) Fans not redundant System Fans Not Redundant Overheat condition System Overheating (Zone X, Location) Compaq Confidential – Need to Know Required Writer: Cynthia Dresden Project: Compaq ProLiant DL580 Server Setup and Installation Guide Comments: Part Number: 159213-003 File Name: h-ch7 Server Configuration and Utilities.doc Last Saved On: 4/5/01 2:48 PM 7-27 7-28 Compaq ProLiant DL580 Server Setup and Installation Guide Main Memory Correctable error threshold exceeded Corrected Memory Error threshold passed (Slot X, Memory Module X) Corrected Memory Error threshold passed (System Memory) Corrected Memory Error threshold passed (Memory Module unknown) Uncorrectable error Uncorrectable Memory Error (Slot X, Memory Module X) Uncorrectable Memory Error (System Memory) Uncorrectable Memory Error (Module unknown) Processor Correctable error threshold exceeded Processor Correctable Error Threshold passed (Slot X, Socket X) Uncorrectable error Processor Uncorrectable internal error (Slot X, Socket X) Host bus error Unrecoverable Host Bus Data Parity Error Unrecoverable Host Bus Address Parity Error PCI Bus Error PCI Bus Error (Slot X, Bus X, Device X, Function X) POST Error POST Error: Error message continued Compaq Confidential – Need to Know Required Writer: Cynthia Dresden Project: Compaq ProLiant DL580 Server Setup and Installation Guide Comments: Part Number: 159213-003 File Name: h-ch7 Server Configuration and Utilities.doc Last Saved On: 4/5/01 2:48 PM Server Configuration and Utilities Table 7-2 Event Messages continued Event Type Event Message Power Subsystem Power supply failure System Power Supply Failure (Power Supply X) Power supply inserted System Power Supply Inserted (Power Supply X) Power supply removed System Power Supply Removed (Power Supply X) Power supply not redundant System Power Supplies Not Redundant System configuration battery low Real-Time Clock Battery Failing Power module Failure A CPU Power Module (System Board, Socket X) A CPU Power Module (Slot X, Socket X) Power modules not redundant System Power Modules Not Redundant AC voltage problem System AC Power Problem (Power Supply X) Power AC overload System AC Power Overload (Power Supply X) Automatic Server Recovery ASR reset detected ASR Lockup Detected: Cause System lockup ASR reset limit detected Operating System System crash Blue Screen Trap: Cause [Windows NT] Kernel Panic: Cause [UNIX] Abnormal Program Termination: Cause [NetWare] Automatic operating system shutdown Automatic Operating System Shutdown Initiated Due to Fan Failure Automatic Operating System Shutdown Initiated Due to Overheat Condition Fatal Exception (Number X, Cause) Compaq Confidential – Need to Know Required Writer: Cynthia Dresden Project: Compaq ProLiant DL580 Server Setup and Installation Guide Comments: Part Number: 159213-003 File Name: h-ch7 Server Configuration and Utilities.doc Last Saved On: 4/5/01 2:48 PM 7-29 Appendix A Regulatory Compliance Notices Regulatory Compliance Identification Numbers For the purpose of regulatory compliance certifications and identification, your Compaq ProLiant DL580 server is assigned a Compaq series number. The Compaq series number for this product is Series ES1015. The Compaq ProLiant DL580 server series number can be found on the product label, along with the required approval markings and information. When requesting certification information for this product, always refer to this series number. This series number should not be confused with the marketing name or model number for your Compaq ProLiant DL580 server. Compaq Confidential – Need to Know Required Writer: Cynthia Dresden Project: Compaq ProLiant DL580 Server Setup and Installation Guide Comments: Part Number: 159213-003 File Name: i-appa Regulatory Compliance Notices.doc Last Saved On: 4/5/01 2:35 PM A-2 Compaq ProLiant DL580 Server Setup and Installation Guide Federal Communications Commission Notice Part 15 of the Federal Communications Commission (FCC) Rules and Regulations has established Radio Frequency (RF) emission limits to provide an interference-free radio frequency spectrum. Many electronic devices, including computers, generate RF energy incidental to their intended function and are, therefore, covered by these rules. These rules place computers and related peripheral devices into two classes, A and B, depending upon their intended installation. Class A devices are those that may reasonably be expected to be installed in a business or commercial environment. Class B devices, including personal computers, are those that may reasonably be expected to be installed in a residential environment. The FCC requires devices in both classes to bear a label indicating the interference potential of the device as well as additional operating instructions for the user. The rating label on the device shows which class (A or B) the equipment falls into. Class B devices have an FCC logo or FCC ID on the label. Class A devices do not have an FCC logo or FCC ID on the label. Once the class of the device is determined, see the following corresponding statement. Class A Equipment This equipment has been tested and found to comply with the limits for a Class A digital device, pursuant to Part 15 of the FCC Rules. These limits are designed to provide reasonable protection against harmful interference when the equipment is operated in a commercial environment. This equipment generates, uses, and can radiate radio frequency energy and, if not installed and used in accordance with the instructions, may cause harmful interference to radio communications. Operation of this equipment in a residential area is likely to cause harmful interference, in which case the user will be required to correct the interference at personal expense. Compaq Confidential – Need to Know Required Writer: Cynthia Dresden Project: Compaq ProLiant DL580 Server Setup and Installation Guide Comments: Part Number: 159213-003 File Name: i-appa Regulatory Compliance Notices.doc Last Saved On: 4/5/01 2:35 PM Regulatory Compliance Notices Class B Equipment This equipment has been tested and found to comply with the limits for a Class B digital device, pursuant to Part 15 of the FCC Rules. These limits are designed to provide reasonable protection against harmful interference in a residential installation. This equipment generates, uses, and can radiate radio frequency energy and, if not installed and used in accordance with the instructions, may cause harmful interference to radio communications. However, there is no guarantee that interference will not occur in a particular installation. If this equipment does cause harmful interference to radio or television reception, which can be determined by turning the equipment off and on, the user is encouraged to try to correct the interference by one or more of the following measures: ■ Reorient or relocate the receiving antenna. ■ Increase the separation between the equipment and receiver. ■ Connect the equipment into an outlet on a circuit different from that to which the receiver is connected. ■ Consult the dealer or an experienced radio or television technician for help. Declaration of Conformity for Products Marked with the FCC Logo—United States Only This device complies with Part 15 of the FCC Rules. Operation is subject to the following two conditions: (1) this device may not cause harmful interference, and (2) this device must accept any interference received, including interference that may cause undesired operation. Compaq Confidential – Need to Know Required Writer: Cynthia Dresden Project: Compaq ProLiant DL580 Server Setup and Installation Guide Comments: Part Number: 159213-003 File Name: i-appa Regulatory Compliance Notices.doc Last Saved On: 4/5/01 2:35 PM A-3 A-4 Compaq ProLiant DL580 Server Setup and Installation Guide For questions regarding your product, contact: Compaq Computer Corporation P. O. Box 692000, Mail Stop 530113 Houston, Texas 77269-2000 or call 1-800-652-6672 (1-800-OK COMPAQ). (For continuous quality improvement, calls may be recorded or monitored.) For questions regarding this FCC declaration, contact: Compaq Computer Corporation P. O. Box 692000, Mail Stop 510101 Houston, Texas 77269-2000 or call 281-514-3333. To identify this product, refer to the part, series, or model number found on the product. Modifications The FCC requires the user to be notified that any changes or modifications made to this device that are not expressly approved by Compaq Computer Corporation may void the user's authority to operate the equipment. Cables Connections to this device must be made with shielded cables with metallic RFI/EMI connector hoods in order to maintain compliance with FCC Rules and Regulations. Canadian Notice (Avis Canadien) Class A Equipment This Class A digital apparatus meets all requirements of the Canadian Interference-Causing Equipment Regulations. Cet appareil numérique de la classe A respecte toutes les exigences du Règlement sur le matériel brouilleur du Canada. Compaq Confidential – Need to Know Required Writer: Cynthia Dresden Project: Compaq ProLiant DL580 Server Setup and Installation Guide Comments: Part Number: 159213-003 File Name: i-appa Regulatory Compliance Notices.doc Last Saved On: 4/5/01 2:35 PM Regulatory Compliance Notices Class B Equipment This Class B digital apparatus meets all requirements of the Canadian Interference-Causing Equipment Regulations. Cet appareil numérique de la classe B respecte toutes les exigences du Règlement sur le matériel brouilleur du Canada. Mouse Compliance Statement This device complies with Part 15 of the FCC Rules. Operation is subject to the following two conditions: (1) this device may not cause harmful interference, and (2) this device must accept any interference received, including interference that may cause undesired operation. European Union Notice Products with the CE Marking comply with both the EMC Directive (89/336/EEC) and the Low Voltage Directive (73/23/EEC) issued by the Commission of the European Community. Compliance with these directives implies conformity to the following European Norms (in brackets are the equivalent international standards): ■ EN55022 (CISPR 22)—Electromagnetic Interference ■ EN50082-1 (IEC801-2, IEC801-3, IEC801-4)—Electromagnetic Immunity ■ EN60950 (IEC950)—Product Safety Compaq Confidential – Need to Know Required Writer: Cynthia Dresden Project: Compaq ProLiant DL580 Server Setup and Installation Guide Comments: Part Number: 159213-003 File Name: i-appa Regulatory Compliance Notices.doc Last Saved On: 4/5/01 2:35 PM A-5 A-6 Compaq ProLiant DL580 Server Setup and Installation Guide Japanese Notice Taiwanese Notice Laser Devices All Compaq systems equipped with a laser device comply with safety standards, including International Electrotechnical Commission (IEC) 825. With specific regard to the laser, the equipment complies with laser product performance standards set by government agencies as a Class 1 laser product. The product does not emit hazardous light; the beam is totally enclosed during all modes of customer operation and maintenance. Compaq Confidential – Need to Know Required Writer: Cynthia Dresden Project: Compaq ProLiant DL580 Server Setup and Installation Guide Comments: Part Number: 159213-003 File Name: i-appa Regulatory Compliance Notices.doc Last Saved On: 4/5/01 2:35 PM Regulatory Compliance Notices Laser Safety Warnings WARNING: To reduce the risk of exposure to hazardous radiation: ■ Do not try to open the laser device enclosure. There are no user-serviceable components inside. ■ Do not operate controls, make adjustments, or perform procedures to the laser device other than those specified herein. ■ Allow only Compaq authorized service technicians to repair the laser device. Compliance with CDRH Regulations The Center for Devices and Radiological Health (CDRH) of the U.S. Food and Drug Administration implemented regulations for laser products on August 2, 1976. These regulations apply to laser products manufactured from August 1, 1976. Compliance is mandatory for products marketed in the United States. Compliance with International Regulations All Compaq systems equipped with laser devices comply with appropriate safety standards including IEC 825. Laser Product Label The following label or equivalent is located on the surface of the Compaq supplied laser device. This label indicates that the product is classified as a CLASS 1 LASER PRODUCT. This label appears on a laser device installed in your product. Compaq Confidential – Need to Know Required Writer: Cynthia Dresden Project: Compaq ProLiant DL580 Server Setup and Installation Guide Comments: Part Number: 159213-003 File Name: i-appa Regulatory Compliance Notices.doc Last Saved On: 4/5/01 2:35 PM A-7 A-8 Compaq ProLiant DL580 Server Setup and Installation Guide Laser Information Laser Type Semiconductor GaAIAs Wave Length 780 nm +/- 35 nm Divergence Angle 53.5 degrees +/- 0.5 degrees Output Power Less than 0.2 mW or 10,869 W·m-2 sr-1 Polarization Circular 0.25 Numerical Aperture 0.45 inches +/- 0.04 inches Battery Replacement Notice Your computer is provided with an internal Lithium battery or battery pack. There is a danger of explosion and risk of personal injury if the battery is incorrectly replaced or mistreated. Replacement is to be done by a Compaq authorized service provider using the Compaq spare designated for this product. For more information about battery replacement or proper disposal, contact your Compaq authorized reseller or your authorized service provider. WARNING: Your computer contains an internal Lithium Manganese Dioxide, a Vanadium Pentoxide, or an alkaline battery pack. There is risk of fire and burns if the battery pack is not handled properly. To reduce the risk of personal injury, ■ Do not attempt to recharge the battery. ■ Do not expose to temperatures higher than 60°C. ■ Do not disassemble, crush, puncture, short external contacts, or dispose of in fire or water. ■ Replace only with the Compaq spare parts designated for this product. Batteries, battery packs, and accumulators should not be disposed of together with the general household waste. To forward them to recycling or proper disposal, please use the public collection system or return them to Compaq, your authorized Compaq authorized service technicians, or their agents. Compaq Confidential – Need to Know Required Writer: Cynthia Dresden Project: Compaq ProLiant DL580 Server Setup and Installation Guide Comments: Part Number: 159213-003 File Name: i-appa Regulatory Compliance Notices.doc Last Saved On: 4/5/01 2:35 PM Regulatory Compliance Notices Power Cords The power cord set included in your server meets the requirements for use in the country where you purchased your server. If you need to use this server in another country, you should purchase a power cord that is approved for use in that country. The power cord must be rated for the product and for the voltage and current marked on the product's electrical ratings label. The voltage and current rating of the cord should be greater than the voltage and current rating marked on the product. In addition, the diameter of the wire must be a minimum of 1.00 mm² or 18AWG, and the length of the cord must be between 6 feet (1.8 m) and 12 feet (3.6 m). If you have questions about the type of power cord to use, contact your Compaq authorized service provider. Route power cords so that they will not be walked on, or pinched by, items placed upon them or against them. Pay particular attention to the plug, electrical outlet, and the point where the cords exit from the product. Compaq Confidential – Need to Know Required Writer: Cynthia Dresden Project: Compaq ProLiant DL580 Server Setup and Installation Guide Comments: Part Number: 159213-003 File Name: i-appa Regulatory Compliance Notices.doc Last Saved On: 4/5/01 2:35 PM A-9 Appendix B Electrostatic Discharge To prevent damaging the system, be aware of the precautions you need to follow when setting up the system or handling parts. A discharge of static electricity from a finger or other conductor may damage system boards or other static-sensitive devices. This type of damage may reduce the life expectancy of the device. Preventing Electrostatic Damage To prevent electrostatic damage, observe the following precautions: ■ Avoid hand contact by transporting and storing products in static-safe containers. ■ Keep electrostatic-sensitive parts in their containers until they arrive at static-free workstations. ■ Place parts on a grounded surface before removing them from their containers. ■ Avoid touching pins, leads, or circuitry. ■ Always be properly grounded when touching a static-sensitive component or assembly. Compaq Confidential – Need to Know Required Writer: Cynthia Dresden Project: Compaq ProLiant DL580 Server Setup and Installation Guide Comments: Part Number: 159213-003 File Name: j-appb Electrostatic Discharge.doc Last Saved On: 4/5/01 2:36 PM B-2 Compaq ProLiant DL580 Server Setup and Installation Guide Grounding Methods There are several methods for grounding. Use one or more of the following methods when handling or installing electrostatic-sensitive parts: ■ Use a wrist strap connected by a ground cord to a grounded workstation or computer chassis. Wrist straps are flexible straps with a minimum of 1 megohm ± 10 percent resistance in the ground cords. To provide proper ground, wear the strap snug against the skin. ■ Use heel straps, toe straps, or boot straps at standing workstations. Wear the straps on both feet when standing on conductive floors or dissipating floor mats. ■ Use conductive field service tools. ■ Use a portable field service kit with a folding static-dissipating work mat. If you do not have any of the suggested equipment for proper grounding, have a Compaq authorized reseller install the part. NOTE: For more information on static electricity or for assistance with product installation, contact your Compaq authorized reseller. Compaq Confidential – Need to Know Required Writer: Cynthia Dresden Project: Compaq ProLiant DL580 Server Setup and Installation Guide Comments: Part Number: 159213-003 File Name: j-appb Electrostatic Discharge.doc Last Saved On: 4/5/01 2:36 PM Appendix C Troubleshooting This chapter provides step-by-step instructions and guidelines for where to go for help for the most common problems encountered during the initial Power-On Self-Test (POST). The POST procedure must run each time you power up your server and before the server can load the operating system and run software applications. When the Server Does Not Start Troubleshoot startup problems with the following steps: 1. Verify that the server and monitor are plugged into a working outlet. 2. Ensure that the power source is working properly. G Use the Power On/Standby LED to monitor the power status. See Appendix D for the locations of system status LEDs. G Ensure that the Power On/Standby switch was pressed firmly. G Refer to the “Power Source” section in the Compaq Servers Troubleshooting Guide for details on other checkpoints. 3. Ensure that all power supplies are working properly. G Use the power supply diagnostic LEDs to check the status of each installed power source. See “Power Supply LEDs” in Appendix D of this guide for LED locations and status messages. G Refer to the “Power Source” section in the Compaq Servers Troubleshooting Guide for additional information. Compaq Confidential – Need to Know Required Writer: Cynthia Dresden Project: Compaq ProLiant DL580 Server Setup and Installation Guide Comments: Troubleshooting information by Susana Weinstein Salazar Part Number: 159213-003 File Name: k-appc Troubleshooting.doc Last Saved On: 4/5/01 2:37 PM C-2 Compaq ProLiant DL580 Server Setup and Installation Guide 4. If the system does not complete the POST procedure or start loading an operating system, refer to the “General Loose Connections” section in the Compaq Servers Troubleshooting Guide. 5. If the server is power cycling, verify that the Automatic Server Recovery-2 (ASR-2) utility has restarted the system in response to another problem. In the Compaq Servers Troubleshooting Guide, refer to sections on the Automatic Server Recovery-2 (ASR-2). Also refer to the “System Short” section in the same guide. NOTE: ASR-2 can be enabled to restart your server and automatically load the operating system. If a critical error occurs, ASR-2 logs the error in the Integrated Management Log (IML) and restarts the server. The system ROM pages the designated administrator and executes the normal restart process. 6. Restart the server. Use the following “Normal Power-up Sequence” section in this guide to verify that your system is powering up properly. If the troubleshooting measures executed so far do not solve the problem, continue to the procedures in the following section, “Diagnosis Steps.” Compaq Confidential – Need to Know Required Writer: Cynthia Dresden Project: Compaq ProLiant DL580 Server Setup and Installation Guide Comments: Troubleshooting information by Susana Weinstein Salazar Part Number: 159213-003 File Name: k-appc Troubleshooting.doc Last Saved On: 4/5/01 2:37 PM Troubleshooting C-3 Normal Power-Up Sequence The following sequence of events occurs when a system meeting the minimal hardware requirements is powered up under normal operating conditions. 1. The front panel Power On/Standby LED turns from amber (standby) to green (on). 2. All fans power up and start running. 3. Components power up in the following sequence: a. System initialization b. PCI auto-configuration c. Video initialization d. Memory test e. Memory initialization f. Processor initialization g. Power supply checking h. System event checking i. Diskette drive initialization j. CD-ROM initialization k. SCSI device initialization l. Additional IDE device initialization 4. The operating system launches. Diagnosis Steps If your server does not power up, or powers up but does not complete the POST procedure, answer the questions in the following table to determine appropriate actions based on the symptoms observed. Based on the answers you give, you will be directed to the corresponding troubleshooting table in the section immediately following. Each table outlines possible reasons for the problem, options available to assist in diagnosis, possible solutions available, and references to other sources of information. Compaq Confidential – Need to Know Required Writer: Cynthia Dresden Project: Compaq ProLiant DL580 Server Setup and Installation Guide Comments: Troubleshooting information by Susana Weinstein Salazar Part Number: 159213-003 File Name: k-appc Troubleshooting.doc Last Saved On: 4/5/01 2:37 PM C-4 Compaq ProLiant DL580 Server Setup and Installation Guide Table C-1 Diagnosis Steps Question Action Question 1: Are any front panel system status LEDs on? If no, go to Table C-2. Question 2: Is the Power On/Standby status LED green or amber? If amber and on, go to Table C-3. If yes, continue to Question 2. If amber and blinking, continue to Question 3. If green, continue to Question 4. Question 3: Is the amber Power On/Standby LED blinking? If yes, go to Table C-4. Question 4: Does the server have video? If no, go to Table C-5. If yes, video is available for diagnosis. Determine the next action by observing POST progress and error messages. Refer to “POST Error Messages” in the Compaq Servers Troubleshooting Guide for a complete description of each POST error message. Question 5: Is the memory/processor status LED blinking amber? If yes, go to Table C-6. WARNING: To reduce the risk of electric shock or damage to the equipment: ■ Do not disable the power cord grounding plug. The grounding plug is an important safety feature. ■ Plug the power cord into a grounded (earthed) electrical outlet that is easily accessible at all times. ■ Install the power supply before connecting the power cord to the power supply. ■ Unplug the power cord before removing the power supply from the server. ■ If the system has multiple power supplies, disconnect power from the system by unplugging all power cords from the power supplies. Compaq Confidential – Need to Know Required Writer: Cynthia Dresden Project: Compaq ProLiant DL580 Server Setup and Installation Guide Comments: Troubleshooting information by Susana Weinstein Salazar Part Number: 159213-003 File Name: k-appc Troubleshooting.doc Last Saved On: 4/5/01 2:37 PM Troubleshooting C-5 CAUTION: Opening the access panel for an extended period of time when the server is on interferes with proper airflow and will cause a temperature violation. It is appropriate to open the server access panel briefly during server operation to view the internal diagnostic LEDs during problem diagnosis or to replace a redundant hot-plug power supply or hot-plug fan. If you feel that you will need to keep the access panel open for an extended period of time, prior to opening the unit: 1. Close all applications. 2. Bring down the operating system. 3. Press the Power On/Standby switch to place the server in standby mode. Table C-2 No LED Indicators on the Front Panel Are On See “Front Panel LEDs” in Appendix D for a complete description of these LEDs. Possible Reasons Next Steps 1. 1. No AC power. Check power supply installation and look for missing or bent pins on a power supply. Try reseating the power supplies. 2. Power supply problem exists. Check power supply diagnostic LEDs on the front of the power supply. The power supply may not be inserted correctly, may have bent connector pins, or may have failed. 2. Verify that the power switch connector is properly plugged into the backplane. 3. There is a broken connection between the system and backplane. 3. Check the power switch cable for bent pins. Try reconnecting the power switch cable. Refer to “Power Problems” in the Compaq Servers Troubleshooting Guide for further options. Compaq Confidential – Need to Know Required Writer: Cynthia Dresden Project: Compaq ProLiant DL580 Server Setup and Installation Guide Comments: Troubleshooting information by Susana Weinstein Salazar Part Number: 159213-003 File Name: k-appc Troubleshooting.doc Last Saved On: 4/5/01 2:37 PM C-6 Compaq ProLiant DL580 Server Setup and Installation Guide Table C-3 Power On/Standby Status LED is Amber See “Front Panel LEDs” in Appendix D Possible Reasons Next Steps 1. Power switch was not fully depressed on initial power-up. 1. Try pressing the power switch until it is fully depressed. Press firmly. 2. Power switch cable may not be connected properly to the backplane. 2. Try reconnecting the power switch cable to the backplane. 3. Power supply problem exists. The power supply may have bent connector pins, or it may have failed. 3. Check power supply insertion and look for missing or bent pins on a power supply. 4. There is a broken connection between the system and backplane via the power cables. 4. Reconnect any loose cables. Refer to “Power Problems” in the Compaq Servers Troubleshooting Guide for further options. Table C-4 Power On/Standby Status LED is Amber and Blinking Possible Reasons Next Steps 1. An interlock problem may exist, caused by improper seating of the memory board, a processor, the peripheral board, or the power supply backplane board. 1. Check for an interlock problem. Refer to “Interlock Status LED Indicators” in Appendix D. 2. There is an overheating condition. 2. Power down the server, remove the AC power cord, and let the unit cool down. Compaq Confidential – Need to Know Required Writer: Cynthia Dresden Project: Compaq ProLiant DL580 Server Setup and Installation Guide Comments: Troubleshooting information by Susana Weinstein Salazar Part Number: 159213-003 File Name: k-appc Troubleshooting.doc Last Saved On: 4/5/01 2:37 PM Troubleshooting C-7 Table C-5 Server Does Not Have Video See “Front Panel LEDs” in Appendix D. Possible Reasons Next Steps 1. Video may not be connected properly. 1. 2. Memory is not present, not correctly seated, or has failed. Verify the video connections. Refer to “Video Problems” in the Compaq Servers Troubleshooting Guide. 3. Processor is not present, has failed, or is not seated correctly. 2. Is the memory status LED blinking (amber)? If the memory status LED is blinking, there is a problem with the memory. Continue to Table C-5 for further troubleshooting steps. -OrIf the memory status LED is not blinking, continue to Step 3. 3. Are there audible indicators, such as a series of beeps? A series of beeps will be the audible signal indicating the presence of a Power-On Self-Test (POST) error message. Refer to “POST Error Messages” in the Compaq Servers Troubleshooting Guide for a complete description of each beep sequence and the corresponding error message. Contact a Compaq authorized service provider. IMPORTANT: Use only the 100-MHz front-side bus Pentium III Xeon processors with green heat sinks. Processor heat sinks are color-coded to aid in differentiation of the correct Pentium III processor. If the wrong processor is installed, the server may not start properly. Compaq Confidential – Need to Know Required Writer: Cynthia Dresden Project: Compaq ProLiant DL580 Server Setup and Installation Guide Comments: Troubleshooting information by Susana Weinstein Salazar Part Number: 159213-003 File Name: k-appc Troubleshooting.doc Last Saved On: 4/5/01 2:37 PM C-8 Compaq ProLiant DL580 Server Setup and Installation Guide Table C-6 Memory/Processor Status LED is Blinking Amber See “Front Panel LEDs” in Appendix D. Possible Reasons Next Steps Memory is not present or is not seated properly. 1. Place the server in standby mode by pressing the Power On/Standby switch. 2. Remove the access panel. 3. Verify that your server adheres to minimum hardware configuration standards. Are at least two memory modules installed? Are these components seated properly? 4. Reseat all memory modules. See “System Memory” in Chapter 2 for complete instructions. Memory has failed. 5. Restart the server. 1. If the LED indicator is blinking amber, check the Internal Diagnostic Display (IDD) on the peripheral board to identify the failed memory module. 2. Replace the indicated failed memory module indicated and restart the server. 3. Continue this process until the memory status LED is no longer illuminated. See “Internal Diagnostic Display (IDD)” in Appendix D for detailed information on the memory/processor LED. Refer to “Properly Seating Devices” in the Compaq Servers Troubleshooting Guide. Compaq Confidential – Need to Know Required Writer: Cynthia Dresden Project: Compaq ProLiant DL580 Server Setup and Installation Guide Comments: Troubleshooting information by Susana Weinstein Salazar Part Number: 159213-003 File Name: k-appc Troubleshooting.doc Last Saved On: 4/5/01 2:37 PM Troubleshooting C-9 Problems After Initial Startup Once the server has passed the Power-On Self-Test, you may still encounter errors including the inability to load your operating system. Use the following table to troubleshoot server installation problems that occur after the initial boot. Refer to “Software Problems” in the Compaq Servers Troubleshooting Guide for more information. Table C-7 Installation Problems Problem Possible Cause Possible Solution System cannot load SmartStart. SmartStart requirements were not performed. Check the SmartStart Release notes provided on the SmartStart Online Reference Information, located on the SmartStart CD. IDE cable is not connected to CD-ROM. Check the cable between the system board and CD-ROM to ensure proper connection. Insufficient memory available. A rare "Insufficient Memory" message may display the FIRST time that SmartStart is initiated on certain unconfigured systems. Simply cold-start the machine with the SmartStart CD inserted in the CD-ROM drive to correct the problem. Existing software is causing a conflict. Run the Compaq System Erase Utility*. Read the caution below and refer to the instructions in the Compaq Servers Troubleshooting Guide. Error occurs during installation. Follow the error information provided. If it is necessary to reinstall, run the Compaq System Erase Utility*. Refer to the instructions in the Compaq Servers Troubleshooting Guide. CMOS is not cleared. Follow the error information provided. If it is necessary to reinstall, run the Compaq System Erase Utility*. Refer to the instructions in the Compaq Servers Troubleshooting Guide. SmartStart fails during installation. *CAUTION: The Compaq System Erase Utility causes loss of all configuration information, as well as loss of existing data on all connected hard drives. Please read “Running the Compaq System Erase Utility” and the associated warning in the Compaq Servers Troubleshooting Guide before performing this operation. continued Compaq Confidential – Need to Know Required Writer: Cynthia Dresden Project: Compaq ProLiant DL580 Server Setup and Installation Guide Comments: Troubleshooting information by Susana Weinstein Salazar Part Number: 159213-003 File Name: k-appc Troubleshooting.doc Last Saved On: 4/5/01 2:37 PM C-10 Compaq ProLiant DL580 Server Setup and Installation Guide Table C-7 Installation Problems continued Problem Possible Cause Possible Solution Server cannot load operating system. Required operating system step was missed. 1. Note the phase at which the operating system failed. 2. Remove any loaded operating system. 3. Refer to your operating system documentation. 4. Install the operating system again. 1. Refer to your operating system documentation and to the SmartStart Release Notes, located on the SmartStart CD. 2. Use the server setup utility to troubleshoot installation failure. Problem encountered with the hardware that was added to the system. 1. Refer to the documentation provided with the hardware. 2. Run the server setup utility to determine whether drives are properly attached to the primary boot controller. See Chapter 5 for instructions on correct SCSI cabling configurations for your server. Problem encountered with hardware added to a new configure-to-order system. Complete the factory-installed operating system software installation prior to adding new hardware to the system. Installation problem occurred. Be sure you are following the instructions provided in the Factory-Installed Operating System Software Installation Guide. Remove the new hardware and complete the software installation. Reinstall the new hardware. Refer to the Compaq Servers Troubleshooting Guide for: ■ Information required for diagnosing software problems and for contacting Compaq support technicians. ■ Instructions on how to upgrade your operating system and its drivers. The guide also tells you which recovery options are available and offers advice on minimizing downtime. Compaq Confidential – Need to Know Required Writer: Cynthia Dresden Project: Compaq ProLiant DL580 Server Setup and Installation Guide Comments: Troubleshooting information by Susana Weinstein Salazar Part Number: 159213-003 File Name: k-appc Troubleshooting.doc Last Saved On: 4/5/01 2:37 PM Troubleshooting C-11 Hot-Plug Fans The eight fans in Compaq ProLiant DL580 servers comprise a nonredundant cooling system. This system is functional with as few as seven fans. With fewer than seven fans running, the server will automatically shut down until the missing fans are replaced. When a single fan experiences failure, the administrator will receive automatic notification of the failure. At this point, fan replacement can be done as a hot-plug or non-hot-plug procedure. The following instructions provide general fan information and guidance for performing a hot-plug fan replacement. Non-hot-plug replacement follows the same procedure after the system is powered down and all power cords are removed. Front Panel Fan LEDs Determine the fan status by noting the color of the front panel fan LED. The front panel fan LED is the third LED to the left of the Power On/Standby switch on the front of the server. See Appendix D for more information about front panel LEDs. The following table provides descriptions of hot-plug fan LED color codes. Table C-8 Front Panel Fan LED LED Color Description Green All fans are operational. Amber/blinking One or more fans have failed. Locating Hot-Plug Fans There are a total of eight fans mounted as four duplex fan units in the server. See the section on installing processors in Chapter 2, “Installing Hardware Options,” for additional information about your fan configuration. The following illustrations show fan and fan LED locations. Use the fan LED indicators to verify the status of each dual-fan assembly. Compaq Confidential – Need to Know Required Writer: Cynthia Dresden Project: Compaq ProLiant DL580 Server Setup and Installation Guide Comments: Troubleshooting information by Susana Weinstein Salazar Part Number: 159213-003 File Name: k-appc Troubleshooting.doc Last Saved On: 4/5/01 2:37 PM C-12 Compaq ProLiant DL580 Server Setup and Installation Guide 1 2 1 2 3 4 7 8 5 6 3 4 Figure C-1. Hot-plug fan locations Table C-9 Hot-Plug Fan Locations Item Component Fan Identifiers Fan Assembly A Fans 1 and 2 Fan Assembly B Fans 3 and 4 Fan Assembly C Fans 5 and 6 Fan Assembly D Fans 7 and 8 Verify the status of the fans by noting the LED activity at each fan location. Compaq Confidential – Need to Know Required Writer: Cynthia Dresden Project: Compaq ProLiant DL580 Server Setup and Installation Guide Comments: Troubleshooting information by Susana Weinstein Salazar Part Number: 159213-003 File Name: k-appc Troubleshooting.doc Last Saved On: 4/5/01 2:37 PM Troubleshooting 1 C-13 2 1 2 3 4 7 8 5 6 3 4 Figure C-2. Hot-plug fan LED locations Table C-10 Hot-Plug Fan LEDs Item Component Fan Assembly A LED Fan Assembly B LED Fan Assembly C LED Fan Assembly D LED Table C-11 Hot-Plug Fan LED Status LED Indicator Status No light Power is not applied to the fan. Green light Power is applied to the fan and fan is functional. Amber/blinking light Fan failure. Compaq Confidential – Need to Know Required Writer: Cynthia Dresden Project: Compaq ProLiant DL580 Server Setup and Installation Guide Comments: Troubleshooting information by Susana Weinstein Salazar Part Number: 159213-003 File Name: k-appc Troubleshooting.doc Last Saved On: 4/5/01 2:37 PM C-14 Compaq ProLiant DL580 Server Setup and Installation Guide Removing Hot-Plug Fans WARNING: To reduce the risk of personal injury from hazardous energy or damage to the equipment when working on active servers: ■ Remove all watches, rings, and any other loose fitting jewelry. ■ Avoid the use of conductive tools inside the server that could bridge live parts. Hot-plug fans can be removed without powering down the server or backing up server data. 1. Loosen the thumbscrew at the top and center of the fan 2. Lift the hot-plug fan out of the fan cage . . 1 2 Figure C-3. Removing a hot-plug fan Compaq Confidential – Need to Know Required Writer: Cynthia Dresden Project: Compaq ProLiant DL580 Server Setup and Installation Guide Comments: Troubleshooting information by Susana Weinstein Salazar Part Number: 159213-003 File Name: k-appc Troubleshooting.doc Last Saved On: 4/5/01 2:37 PM Troubleshooting C-15 Installing a Hot-Plug Fan This procedure can be used after the server is powered down or during live activity. To ensure safety, is recommended that hot-plug fans be replaced when the server is powered down. 1. Lower the new hot-plug fan into the fan bracket until it is seated securely in the hot-plug fan slot on the system board. 2. Finger-tighten the thumbscrew until the fan is secured . 2 1 Figure C-4. Installing a hot-plug fan 3. Replace the top access panel and power up or continue normal server operations. Compaq Confidential – Need to Know Required Writer: Cynthia Dresden Project: Compaq ProLiant DL580 Server Setup and Installation Guide Comments: Troubleshooting information by Susana Weinstein Salazar Part Number: 159213-003 File Name: k-appc Troubleshooting.doc Last Saved On: 4/5/01 2:37 PM Appendix D LED Indicators Compaq ProLiant DL580 servers contain a number of LED indicators that provide a visual reference to the status of various server components. Use this appendix as a quick reference for recognizing LED locations and status indications and meanings. Front Panel LEDs The front panel has three LEDs located near the power switch. These LEDs indicate the internal status of the server. The following figure and table show each LED location. Compaq Confidential – Need to Know Required Writer: Cynthia Dresden Project: Compaq ProLiant DL580 Server Setup and Installation Guide Comments: Part Number: 159213-003 File Name: l-appd LED Indicators.doc Last Saved On: 4/5/01 2:37 PM D-2 Compaq ProLiant DL580 Server Setup and Installation Guide 1 3 2 Figure D-1. Front panel LEDs Table D-1 Front Panel LEDs LED Description Indicator Status Power/Interlock Green Amber Amber/blinking On Standby Interlock or shutdown Off Off Memory/Processor Green Amber/blinking OK Memory or processor failure Fans Green Amber/blinking OK Fan failure Hot-Plug SCSI Hard Drive LEDs The hard drive LED indicators, located on each physical drive, are visible on the front of the server or external storage unit. They provide activity, online, and fault status for each corresponding drive when configured as part of an array and attached to a powered-on controller. Their behavior may vary depending on the status of other drives in the array. Compaq Confidential – Need to Know Required Writer: Cynthia Dresden Project: Compaq ProLiant DL580 Server Setup and Installation Guide Comments: Part Number: 159213-003 File Name: l-appd LED Indicators.doc Last Saved On: 4/5/01 2:37 PM LED Indicators This section provides the following information about hard drive LEDs: ■ An illustration of each LED location ■ A table of the possible LED combinations and what each combination means CAUTION: Read “Hot-Plug Drive Replacement Guidelines” in the Compaq Servers Troubleshooting Guide before removing a hard drive For additional information on troubleshooting hard drive problems, refer to “Hard Drive Problems” and “SCSI Device Problems” in the Compaq Servers Troubleshooting Guide. Use the following illustration and table to assist in analyzing the functional status of hot-plug hard drives managed through the Compaq Integrated Smart Array Controller. 1 2 3 Figure D-2. Hard drive LED indicators Compaq Confidential – Need to Know Required Writer: Cynthia Dresden Project: Compaq ProLiant DL580 Server Setup and Installation Guide Comments: Part Number: 159213-003 File Name: l-appd LED Indicators.doc Last Saved On: 4/5/01 2:37 PM D-3 D-4 Compaq ProLiant DL580 Server Setup and Installation Guide Table D-2 Hard Drive LED Indicator Status Combinations Activity Online Fault On Off Off Means Do not remove the drive. Removing a drive during this process will cause data loss. The drive is being accessed and is not configured as part of an array. On Flashing Off Do not remove the drive. Removing a drive during this process will cause data loss. The drive is rebuilding or undergoing capacity expansion. Flashing Flashing Flashing Do not remove the drive. Removing a drive during this process will cause data loss. The drive is part of an array being selected by the Array Configuration Utility. -OrThe Options ROMPaq is upgrading the drive. Off Off Off OK to replace the drive online if a predictive failure alert is received (see the following section for details), and the drive is attached to an array controller. The drive is not configured as part of an array. -OrIf this drive is part of an array, then a powered-on controller is not accessing the drive. -OrThe drive is configured as an online spare. continued Compaq Confidential – Need to Know Required Writer: Cynthia Dresden Project: Compaq ProLiant DL580 Server Setup and Installation Guide Comments: Part Number: 159213-003 File Name: l-appd LED Indicators.doc Last Saved On: 4/5/01 2:37 PM LED Indicators Table D-2 Hard Drive LED Indicator Status Combinations continued Activity Online Fault Means Off Off On OK to replace the drive online. The drive has failed and has been placed off-line. Off On Off OK to replace the drive online if a predictive failure alert is received (see the following section for details), provided that the array is configured for fault tolerance and all other drives in the array are online. The drive is online and configured as part of an array. On or flashing On Off OK to replace the drive online if a predictive failure alert is received (see the following section for details), provided that the array is configured for fault tolerance and all other drives in the array are online. The drive is online and being accessed. Compaq Confidential – Need to Know Required Writer: Cynthia Dresden Project: Compaq ProLiant DL580 Server Setup and Installation Guide Comments: Part Number: 159213-003 File Name: l-appd LED Indicators.doc Last Saved On: 4/5/01 2:37 PM D-5 D-6 Compaq ProLiant DL580 Server Setup and Installation Guide Hot-Plug Fan LEDs In Compaq ProLiant DL580 servers, the eight hot-plug system fans are installed as dual-fan assemblies. Each assembly is monitored by an LED attached to the system board and read from the light see at the top of the assembly inside the chassis. These LEDs indicate whether or not each dual-fan unit is active. There is also an LED indicating overall status of hot-plug system fans on the front panel of the server. See “Front Panel LEDs” for a comprehensive guide to monitoring system fan activity by understanding messages on the front panel fan LED. Front Panel Fan LED The front panel fan LED is the third LED from the left of the Power On/Standby switch on the front of the server. Determine fan status by noting the color of the front panel fan LED. The following table defines the status colors. Table D-3 Front Panel Fan LED LED Status Description Amber/blinking One or more fans have failed Off Fans OK Compaq Confidential – Need to Know Required Writer: Cynthia Dresden Project: Compaq ProLiant DL580 Server Setup and Installation Guide Comments: Part Number: 159213-003 File Name: l-appd LED Indicators.doc Last Saved On: 4/5/01 2:37 PM LED Indicators Hot-Plug Fan LEDs The hot-plug fan LED provides a visual reference for the status of each fan. View the LED by opening the primary hot-plug door on the access panel. Verify the status of the fans by noting the color of the LED at the fan location. Figure D-3. Hot-plug fan assembly LED location Use the following table to determine the status of the hot-plug fan LED. Table D-4 Hot-Plug Fan LED Status LED Indication Status Off Power is not applied to the fan Green Power is applied to the fan and the fan is functional Amber Fan failure Compaq Confidential – Need to Know Required Writer: Cynthia Dresden Project: Compaq ProLiant DL580 Server Setup and Installation Guide Comments: Part Number: 159213-003 File Name: l-appd LED Indicators.doc Last Saved On: 4/5/01 2:37 PM D-7 D-8 Compaq ProLiant DL580 Server Setup and Installation Guide Power Supply LEDs Determine the power supply status by noting the color of the LED on the power supply unit. The following table defines the status colors. 1 2 Figure D-4. Power supply LEDs Table D-5 Hot-Plug Power Supply LEDs LED Location Indicator Description Green Power supply OK Off Fault Green AC present Off AC not present or faulty Compaq Confidential – Need to Know Required Writer: Cynthia Dresden Project: Compaq ProLiant DL580 Server Setup and Installation Guide Comments: Part Number: 159213-003 File Name: l-appd LED Indicators.doc Last Saved On: 4/5/01 2:37 PM LED Indicators PCI Hot Plug LEDs The PCI Hot Plug LEDs at each expansion slot provide a visual reference of the status of each board slot. The LEDs are viewed from the rear of the server or by opening the PCI Hot Plug access door on the top panel. The following figure and table illustrate the appropriate slot conditions and status for each of the two LEDs. 1 2 Figure D-5. PCI Hot Plug button LEDs Table D-6 PCI Hot Plug Button LEDs Item Component Power LED (green) Activity LED (amber) Compaq Confidential – Need to Know Required Writer: Cynthia Dresden Project: Compaq ProLiant DL580 Server Setup and Installation Guide Comments: Part Number: 159213-003 File Name: l-appd LED Indicators.doc Last Saved On: 4/5/01 2:37 PM D-9 D-10 Compaq ProLiant DL580 Server Setup and Installation Guide Table D-7 PCI Hot Plug LED Status Indicators LED Green Amber Green Amber Power Status OK to Open Slot Status On No Power is currently applied to the slot. Do NOT open the slot release lever. The slot is functioning normally. No Power is currently applied to this slot, but the slot needs ATTENTION for possible problems with the slot, board, or driver. Do NOT open the slot release lever. Follow these steps: Off On On 1. Through the PCI Hot Plug application, turn power Off to the slot (the green LED turns Off). 2. Open the slot release lever (the amber LED turns Off). 3. Remove or replace the board. 4. Connect the cables to the PCI board. 5. Close the slot release lever. 6. Return power to the slot through the PCI Hot Plug application (the green LED turns On). Green Amber Green Amber Flashing No Power slot is being turned Off or On, which may take several minutes. There may be a problem with the slot, the PCI board, or the driver. DO NOT open the slot release lever until the green LED is completely Off. No Power to this slot is turned Off, but this slot needs ATTENTION. There may be a problem with the slot, board, or driver. On Off On 1. Open the slot release lever (the amber LED turns Off). 2. Remove or replace the board. 3. Connect the cables to the PCI board. 4. Close the slot release lever. 5. Return power to the slot through the PCI Hot Plug application (the green LED turns On). continued Compaq Confidential – Need to Know Required Writer: Cynthia Dresden Project: Compaq ProLiant DL580 Server Setup and Installation Guide Comments: Part Number: 159213-003 File Name: l-appd LED Indicators.doc Last Saved On: 4/5/01 2:37 PM LED Indicators Table D-7 PCI Hot Plug LED Status Indicators continued LED Green Amber Power Status OK to Open Slot Status Off Yes The power to the slot is Off. If you need to replace the card in this slot, follow these steps: Off 1. Open the slot release lever. 2. Remove or replace the board. 3. Connect the cables to the PCI board. 4. Close the slot release lever. 5. Return power to the slot through the PCI Hot Plug application (the green LED turns On). 1 2 3 Figure D-6. PCI Hot Plug button and LEDs (interior view) Table D-8 PCI Hot Plug Button and LEDs Item Component PCI Hot Plug power indicator PCI Hot Plug activity indicator PCI Hot Plug button Compaq Confidential – Need to Know Required Writer: Cynthia Dresden Project: Compaq ProLiant DL580 Server Setup and Installation Guide Comments: Part Number: 159213-003 File Name: l-appd LED Indicators.doc Last Saved On: 4/5/01 2:37 PM D-11 D-12 Compaq ProLiant DL580 Server Setup and Installation Guide RJ-45 Network Connector LEDs A 1 2 L Figure D-7. RJ-45 network connector LEDs Table D-9 RJ-45 Network Connector Status LED LED Status Description Link Off No network link On Linked to network Off No network activity On or Flashing Network activity Activity Compaq Confidential – Need to Know Required Writer: Cynthia Dresden Project: Compaq ProLiant DL580 Server Setup and Installation Guide Comments: Part Number: 159213-003 File Name: l-appd LED Indicators.doc Last Saved On: 4/5/01 2:37 PM LED Indicators Internal Diagnostic Display (IDD) The IDD indicates the failure of a memory module or processor. It displays a two-digit alphanumeric code that corresponds to a specific memory module or processor. For an understanding of IDD status indicators, see the following table. CAUTION: Opening the access panel for an extended period of time when the server is on interferes with proper airflow and will cause a temperature violation. It is appropriate to open the server access panel briefly during server operation to view the Internal Diagnostic Display (IDD) during problem diagnosis or to replace a redundant hot-plug power supply or hot-plug fan. If you feel that you will need to keep the access panel open for an extended period of time, prior to opening the unit: 1. Close all applications. 2. Bring down the operating system. 3. Press the Power On/Standby switch to place the server in standby mode. Figure D-8. Internal Diagnostic Display (IDD) Compaq Confidential – Need to Know Required Writer: Cynthia Dresden Project: Compaq ProLiant DL580 Server Setup and Installation Guide Comments: Part Number: 159213-003 File Name: l-appd LED Indicators.doc Last Saved On: 4/5/01 2:37 PM D-13 D-14 Compaq ProLiant DL580 Server Setup and Installation Guide Table D-10 Internal Diagnostic Display (IDD) Status Messages Status Means 00 No failure detected 01 Memory module 01 failure 02 Memory module 02 failure 03 Memory module 03 failure 04 Memory module 04 failure 05 Memory module 05 failure 06 Memory module 06 failure 07 Memory module 07 failure 08 Memory module 08 failure 09 Memory module 09 failure 10 Memory module 10 failure 11 Memory module 11 failure 12 Memory module 12 failure 13 Memory module 13 failure 14 Memory module 14 failure 15 Memory module 15 failure 16 Memory module 16 failure P1 Processor 1 failure P2 Processor 2 failure P3 Processor 3 failure P4 Processor 4 failure Compaq Confidential – Need to Know Required Writer: Cynthia Dresden Project: Compaq ProLiant DL580 Server Setup and Installation Guide Comments: Part Number: 159213-003 File Name: l-appd LED Indicators.doc Last Saved On: 4/5/01 2:37 PM LED Indicators Interlock Status LED Indicators Improperly seated components in the interlock chain will cause the LED associated with the fault origination point to illuminate on the system board. The following illustration and table identify the location of the interlock LED indicators and the point of the hardware connection fault. IMPORTANT: Compaq ProLiant DL580 servers are not equipped with chassis door or access panel interlocks. 7 IL 6 6 IL 5 5 IL 4 4 IL 3 3 IL 2 IL 1 2 IL 0 1 Figure D-9. Interlock LED indicators on the system board Table D-11 Interlock LED Indicators Fault of Interlock Error Memory board On On On On On On On Processor 1 Off On On On On On On Processor 2 Off Off On On On On On Processor 3 Off Off Off On On On On continued Compaq Confidential – Need to Know Required Writer: Cynthia Dresden Project: Compaq ProLiant DL580 Server Setup and Installation Guide Comments: Part Number: 159213-003 File Name: l-appd LED Indicators.doc Last Saved On: 4/5/01 2:37 PM D-15 D-16 Compaq ProLiant DL580 Server Setup and Installation Guide Table D-11 Interlock LED Indicators continued Fault of Interlock Error Processor 4 Off Off Off Off On On On Peripheral board Off Off Off Off Off On On Power supply backplane board Off Off Off Off Off Off On No interlock error Off Off Off Off Off Off Off Note: Reseat the indicated device and restart the server. Compaq Confidential – Need to Know Required Writer: Cynthia Dresden Project: Compaq ProLiant DL580 Server Setup and Installation Guide Comments: Part Number: 159213-003 File Name: l-appd LED Indicators.doc Last Saved On: 4/5/01 2:37 PM Appendix E Switch Settings When a component is added, removed, or not functioning properly, check the server switch settings. In some cases, the switch settings must be reconfigured manually in order for the server to recognize changes. If the switch configurations are incorrect, the system may not work properly and may display error messages. Setting and verifying the system board switches is an important part of the overall troubleshooting process. Compaq ProLiant DL580 servers have three switch banks: ■ SW1—a six-position system maintenance switch on the peripheral board ■ SW4—a four-position processor configuration switch on the system board ■ SW6—a four-position service switch on the system board This chapter provides figures and tables to show the locations, positions, functions, and settings for each of these switches. Compaq Confidential – Need to Know Required Writer: Cynthia Dresden Project: Compaq ProLiant DL580 Server Setup and Installation Guide Comments: Troubleshooting information by Susana Weinstein Salazar Part Number: 159213-003 File Name: m-appe Switch Settings.doc Last Saved On: 4/5/01 2:38 PM E-2 Compaq ProLiant DL580 Server Setup and Installation Guide System Maintenance Switch (SW1) The system maintenance switch (SW1): ■ Disables the embedded video in the system ■ Designates rack-mount or tower configurations ■ Enables or disables the diskette boot option ■ Enables or disables power-on password protection ■ Clears all configuration information from nonvolatile RAM ■ Prevents system nonvolatile RAM from accepting configuration changes ■ Prepares the server to accept ROMPaq disaster recovery operations off on 1 2 3 4 5 6 Figure E-1. System maintenance switch (SW1) Compaq Confidential – Need to Know Required Writer: Cynthia Dresden Project: Compaq ProLiant DL580 Server Setup and Installation Guide Comments: Troubleshooting information by Susana Weinstein Salazar Part Number: 159213-003 File Name: m-appe Switch Settings.doc Last Saved On: 4/5/01 2:38 PM Switch Settings E-3 Table E-1 System Maintenance Switch (SW1) Position Default 1 Off Function Description Settings Video disable override Used when ROM does not detect an installed video card. Open (off) ROM will auto-detect an optional video card. If no optional card is detected, on-board video is enabled. Closed (on) On-board is disabled. 2 Off Lock configuration Enables or disables configuration changes in nonvolatile RAM (NVRAM). Open (off) Configuration can be changed. Closed (on) Configuration is locked and cannot be changed. 3 On 4 Off Reserved Diskette boot override Enables or disables booting from diskette drive. Both settings allow you the ability to read from and write to the diskette after the system completes the boot sequence. 5 Off Password disable Enables or disables password protection. Open (off) Diskette drive boot is controlled by the configuration. Closed (on) Diskette drive will boot regardless of the configuration. Open (off) Power-on password is enabled. Closed (on) Power-on password is disabled. continued Compaq Confidential – Need to Know Required Writer: Cynthia Dresden Project: Compaq ProLiant DL580 Server Setup and Installation Guide Comments: Troubleshooting information by Susana Weinstein Salazar Part Number: 159213-003 File Name: m-appe Switch Settings.doc Last Saved On: 4/5/01 2:38 PM E-4 Compaq ProLiant DL580 Server Setup and Installation Guide Table E-1 System Maintenance Switch (SW1) continued Position Default 6 Off Function Description Settings Maintenance Invalidates nonvolatile RAM (NVRAM) configuration information. Open (off) NVRAM is valid. Closed (on) NVRAM is invalid, and configuration is lost. CAUTION: When maintenance mode is turned on (the maintenance switch is set to On/Closed) and the system is powered up, nonvolatile RAM (NVRAM) configuration is invalidated. Enabling ROMPaq Disaster Recovery Mode A corrupted system ROM requires you to recreate the ROM BIOS by using the ROM flash utility. This can be accomplished only when the system is in disaster recovery mode. Set configuration switches 1, 4, 5, and 6 on the system maintenance switch block to On to enable disaster mode. IMPORTANT: Before enabling ROMPaq disaster recovery mode, refer to the Compaq Servers Troubleshooting Guide for complete instructions on disaster recovery. Compaq Confidential – Need to Know Required Writer: Cynthia Dresden Project: Compaq ProLiant DL580 Server Setup and Installation Guide Comments: Troubleshooting information by Susana Weinstein Salazar Part Number: 159213-003 File Name: m-appe Switch Settings.doc Last Saved On: 4/5/01 2:38 PM Switch Settings E-5 Processor Configuration Switch (SW4) This switch is used to select the front-side bus-to-processor ratio. Factory default settings are provided to match the speed of your installed Pentium III Xeon processor. on 1 2 3 4 Figure E-2. Processor configuration switch (SW4) Table E-2 Processor Configuration Switch (SW4) Processor/Front-side Bus Speed Position 1 Position 2 Position 3 Position 4 Reset On On On On 700/100 On Off On Off Reset Off Off Off Off Note: All supported processor core frequency settings are listed above. All other combinations are reserved. Refer to your processor upgrade kit documentation for correct upgrade switch settings. Note: All processor speeds listed above may or may not be available for your server. Compaq Confidential – Need to Know Required Writer: Cynthia Dresden Project: Compaq ProLiant DL580 Server Setup and Installation Guide Comments: Troubleshooting information by Susana Weinstein Salazar Part Number: 159213-003 File Name: m-appe Switch Settings.doc Last Saved On: 4/5/01 2:38 PM E-6 Compaq ProLiant DL580 Server Setup and Installation Guide Processors of 850-MHz Frequency or Higher Intel Pentium III processors of 850-MHz frequency and higher feature internally locked switch settings that override the processor configuration switch (SW4) on your system board. When installing an 850-MHz or higher processor, you need not change any switch settings on the processor configuration switch (SW4). Service Switch (SW6) The service switch is used by Compaq authorized service providers during the course of service or repair, and should not be changed for any reason. CAUTION: Improper use of this switch can damage system components. Do not change this switch from the indicated default settings. The service switch is used only during the course of service or repair by Compaq authorized service providers. 1 2 3 4 on Figure E-3. Service switch (SW6) Compaq Confidential – Need to Know Required Writer: Cynthia Dresden Project: Compaq ProLiant DL580 Server Setup and Installation Guide Comments: Troubleshooting information by Susana Weinstein Salazar Part Number: 159213-003 File Name: m-appe Switch Settings.doc Last Saved On: 4/5/01 2:38 PM Switch Settings E-7 Table E-3 Service Switch (SW6) Position Default Description 1 Off Reserved 2 Off Reserved 3 Off Reserved 4 On Reserved Compaq Confidential – Need to Know Required Writer: Cynthia Dresden Project: Compaq ProLiant DL580 Server Setup and Installation Guide Comments: Troubleshooting information by Susana Weinstein Salazar Part Number: 159213-003 File Name: m-appe Switch Settings.doc Last Saved On: 4/5/01 2:38 PM Appendix F Installing a New Battery Compaq ProLiant DL580 servers have memory devices that require a battery to retain stored information. Peripheral Board Battery Replacement When your server no longer automatically displays the correct date and time, you may need to replace the battery that provides power to the real-time clock. Under normal use, battery life is usually about five to 10 years. Use a Compaq 540-milliampere lithium, 3-volt replacement battery (P/N 179322-xxx). WARNING: To reduce the risk of electric shock or damage to the equipment: ■ Do not disable the power cord grounding plug. The grounding plug is an important safety feature. ■ Plug the power cord into a grounded (earthed) electrical outlet that is easily accessible at all times. ■ Disconnect power from the server or other product by unplugging the power cord from either the electrical outlet or the server or other product. Compaq Confidential – Need to Know Required Writer: Cynthia Dresden Project: Compaq ProLiant DL580 Server Setup and Installation Guide Comments: Part Number: 159213-003 File Name: n-appf Installing a New Battery.doc Last Saved On: 4/5/01 2:38 PM F-2 Compaq ProLiant DL580 Server Setup and Installation Guide Use the following procedure to install a new battery: 1. If the server is on, power it down. See Chapter 2, “Installing Hardware Options.” 2. Remove the server from the rack. a. Remove the power supplies from the server. b. Loosen the thumbscrews securing the server to the rack and pull the server out until it locks in the fully extended position. c. Press the component rail release latches inward. d. Lift the server from the rack. 3. Remove the access panel and the peripheral board. See “Installing a Processor” and “Installing a Non-Hot-Plug Expansion Board” in Chapter 2, “Installing Hardware Options.” 4. Locate the battery holder on the peripheral board. Figure F-1. Battery location on the peripheral board Compaq Confidential – Need to Know Required Writer: Cynthia Dresden Project: Compaq ProLiant DL580 Server Setup and Installation Guide Comments: Part Number: 159213-003 File Name: n-appf Installing a New Battery.doc Last Saved On: 4/5/01 2:38 PM Installing a New Battery 5. Remove the existing battery. Figure F-2. Removing a battery 6. Insert the new battery. Figure F-3. Installing a new battery 7. Replace the peripheral board and the access panel. Compaq Confidential – Need to Know Required Writer: Cynthia Dresden Project: Compaq ProLiant DL580 Server Setup and Installation Guide Comments: Part Number: 159213-003 File Name: n-appf Installing a New Battery.doc Last Saved On: 4/5/01 2:38 PM F-3 F-4 Compaq ProLiant DL580 Server Setup and Installation Guide 8. Replace your server into the rack. For additional rack information, see the instructions in Chapter 4, “Installing the Server.” 9. Replace the power supplies, and reconnect the power cord and peripheral devices. See “Cabling the Server” in Chapter 4, “Installing the Server.” 10. Power up the server. See “Powering Up the Server” in Chapter 4, “Installing the Server.” 11. Run the System Configuration Utility to reconfigure the system with the new battery. See Chapter 7, “Server Configuration and Utilities.” Compaq Confidential – Need to Know Required Writer: Cynthia Dresden Project: Compaq ProLiant DL580 Server Setup and Installation Guide Comments: Part Number: 159213-003 File Name: n-appf Installing a New Battery.doc Last Saved On: 4/5/01 2:38 PM Index A AC voltage problem 7-29 AC supply circuits 4-7 access panel warning C-5, D-13 accumulators A-8 administrator password 1-23 airflow requirements 4-9 airflow warning C-5, D-13 alarm, log displayed 1-15 alert fault conditions 1-14 aligning rack handles 4-22 screw holes 4-23 ANSI terminal 1-18 Array Configuration Utility 3-1, 3-2 array controllers Dual Channel Wide Ultra3 SCSI Adaptor 1-19 Smart Array 221 Controller 1-19 Smart Array 3200 Controller 1-19 Smart Array 4200 Controller 1-19 Smart Array 431 Controller 1-19 arrays Compaq Drive 7-17 Integrated Smart Array Controller 5-4 ASR-2 See Automatic Server Recovery-2 (ASR-2) attaching bracket rail 4-14, 4-17 cable management arm 4-26 rack handles 4-22 rack mounting bracket 4-20 server rails 4-13 slide rail assembly 4-13 audible indicators C-7 authorized reseller See Compaq authorized reseller auto line sensing 1-9 auto-detection video E-2, E-3 Automatic Server Recovery-2 (ASR-2) 1-16, 1-17, 7-22 auxiliary serial connector cabling 2-23 installing 2-22 requirements 2-24 auxiliary serial knockout 1-21 B backup configuration 7-11 history files 7-12 batteries disposal A-8 failure message 7-29 Compaq Confidential – Need to Know Required Writer: BiggsT Project: ProLiant DL580 Server Setup and Installation Guide Comments: Part Number: 159213-003 File Name: x-index.doc Last Saved On: 4/18/01 1:31 PM 2 ProLiant DL580 Server Setup and Installation Guide life F-1 low 7-29 part number F-1 recycling or disposal A-8 replacement A-8, F-1 specifications F-1 battery installing F-1 locating 2-17 beep codes C-7 boot diskette configuration switches E-2, E-3 boot from diskette drive E-2, E-3 boot sequence settings E-2, E-3 bracket, cable management arm 4-25 buses host, errors 7-28 buttons browse, Windows NT 6-13 PCI Hot Plug 1-4, 2-26, 6-7 power 1-20 power, Windows NT 6-13 C cable management arm bracket 4-25 cable management arm bracket 4-11 cables auxiliary SCSI 2-23 channel 4-29 determining needs 5-5 FCC compliance statement A-4 rack 4-27 routing 4-29 shielded A-4 cabling guidelines 5-1 network interface controller (NIC) 5-1 PCI Hot Plug 5-7 Remote Insight Lights-Out Edition 2-4 SCSI 5-4 cage nuts for rack model server 4-20 Canadian notice A-4 CD-ROM 1-20, 5-7 connector 2-3 locating 2-3 CD-ROM drive detecting 7-17 CDs Compaq Management 7-27 SmartStart and Support Software 7-1 CE marking A-5 CFG files 7-2 chassis features 1-2 CHL files 7-12 Class 1 laser product A-6 Class A regulations A-4 Class B regulations A-5 clustering support 1-19 CMOS diagnosing problems C-9 Compaq address for FCC questions A-4 for product questions A-4 authorized service provider 1-19 Ethernet Token Ring Adapter 7-22 Integrated Management Log (IML) 1-14 ProLiant Storage System 7-22 series number A-1 telephone number for FCC questions A-4 for product questions A-4 website 1-19, 1-24 Compaq authorized reseller xiii, 4-1 Compaq CarePaq 4-1 Compaq Drive Array 7-17 Compaq Insight Manager 1-14, 3-1 Compaq Confidential – Need to Know Required Writer: BiggsT Project: ProLiant DL580 Server Setup and Installation Guide Comments: Part Number: 159213-003 File Name: x-index.doc Last Saved On: 4/18/01 1:31 PM Index alarm log 1-14 features 1-14 information 1-14 overview 1-14 Compaq Integrated Management Log (IML) 1-17 Compaq Integrated Smart Array Controller features 3-1 Compaq Integrated Smart Array Controller User Guide 3-2 Compaq Management CD 7-27 Compaq NC6132 1000 SX Upgrade Module 1-3 Compaq Optional Installation Service 4-1 Compaq ProLiant Storage System 1-22 Compaq Remote Control Service 6-13 Compaq Remote Insight Manager 1-2 Compaq StorageWorks Enclosures (Model 4314R) 1-22 Compaq Survey Utility 1-15 functions 7-27 output file 7-27 Compaq System Configuration Utility F-4 Compaq System Erase Utility caution C-9 uses C-9 warning C-9 Compaq website xiii components front panel 1-20, 1-21 configuration .CFG files 7-3 access to 1-18 activities 7-2 and management of server 1-13 array utility 3-2 backup 7-11 changes 7-6 fibre channel 1-23 hardware menu 7-6 History Log Files 7-11 lock settings E-2, E-3 maximum SCSI 1-22 online 7-27 PCI boards 7-3, 7-6 restoring 7-11 using .CFG files 7-2 SmartStart 7-1 Configuration History Log (CHL), required disk space 7-12 configuration lock 1-23 Configuration Manager Console (NCMCON) 6-10 configuration switches E-2 850-MHz processor override E-6 boot diskette E-2, E-3 invalidate NVRAM E-2, E-4 maintenance E-2, E-3, E-4 set password protection E-2, E-3 SW1 E-1, E-2 SW4 E-1 SW6 E-1 system E-2, E-3, E-4 validate NVRAM E-2, E-3, E-4 configuring I/O expansion boards 1-16 connector auxiliary serial 1-21, 2-23 external 5-3 external SCSI 1-11 hot-plug keyboard 1-11, 5-3 mouse 1-11, 1-21, 5-3 NIC 1-21, 5-3 parallel 1-11, 1-21, 5-3 power cord 1-22 primary hot-plug power cord 5-4 redundant hot-plug power cord 1-22, 5-4 SCSI 1-21, 5-3, 5-4 serial 1-11, 1-21 Compaq Confidential – Need to Know Required Writer: BiggsT Project: ProLiant DL580 Server Setup and Installation Guide Comments: Part Number: 159213-003 File Name: x-index.doc Last Saved On: 4/18/01 1:31 PM 3 4 ProLiant DL580 Server Setup and Installation Guide serial A 5-3 video 1-11, 1-21, 5-4 controllers 1-22 SCSI 5-4 copying the system partition 7-9 cord ground B-2 power A-9 critical and correctable error logs 7-25 current rating A-9 D DAAD 1-17, 1-22. See Drive Array Advanced Diagnostics (DAAD) data loss 2-27 data loss warning C-5, C-9, D-13 data stripping 1-16 declaration of conformity A-3 default configuration 4-30 default switch settings E-2 deleting files with System Partition 7-10 system partition 7-9 device drivers Gigabit Ethernet NIC 7-23 IBM OS/2 7-23 loading 7-14 manual installation IBM OS/2 7-23 Microsoft Windows 2000 7-19 Microsoft Windows NT 7-15 Novell NetWare 7-14 SCO 7-22 Microsoft Windows 2000 7-19 Microsoft Windows NT 7-15 Novell NetWare 7-14 required for IML 7-25 SCO OpenServer and UnixWare 7-22 Sun Solaris 7-23 diagnosing problems CMOS C-9 configure-to-order systems C-10 installation C-9, C-10 memory C-3, C-7 new hardware C-10 power C-1, C-3, C-5, C-6 power cycling C-2 processors C-3, C-7 SmartStart C-9, C-10 startup C-1–C-10 steps to take C-1–C-10 system short C-2 video C-7 diagnostics 1-22, 7-5 ASR-2 1-17 DAAD 1-22 default configuration 4-30 DIAGS 1-22 overview 1-17 POST 1-22 tools 1-22 DIAGS See diagnostics. See Diagnostics (DIAGS) DIMM memory 1-19 DIMMs installing 2-14 DIP switches configuration E-2 default E-4 diskette drive boot override E-3 lock configuration E-3 maintenance E-4 NVRAM E-4 password disable E-3 SW1 E-3 system board E-2 video disable override E-3 disconnecting power supplies 4-28 disk controller See Compaq Integrated Smart Array Controller disk drive 1-20 disk fault tolerance 3-1 diskette Compaq Confidential – Need to Know Required Writer: BiggsT Project: ProLiant DL580 Server Setup and Installation Guide Comments: Part Number: 159213-003 File Name: x-index.doc Last Saved On: 4/18/01 1:31 PM Index boot control 1-23 drive control 1-23 power-on password 1-23 write control 1-23 diskette disk drive 1-20 diskette drive locating 2-3 diskettes installation, for Microsoft Windows NT 7-16 UNIX Extended Feature Supplemental (EFS) 7-22 disposal, battery A-8 dissipating floor mats B-2 distributed data guarding 1-16 Documentation CD 1-16 diagnostics 1-22 IRC information 1-18 maintenance 1-24 security 1-23 DOS partition 7-8 Drive Array Advanced Diagnostics (DAAD) 1-17, 1-22 drive bays 1-8 E ECC memory See error checking and correcting (ECC) memory electrical rating 4-7 electrical shock warning C-4 electromagnetic immunity A-5 interference A-5 electrostatic discharge B-1–B-2 prevention measures B-1 embedded video disable E-2 equipment Class A A-2 Class B A-3 Erase Utility See Compaq System Erase Utility error checking and correcting (ECC) memory 1-10, 1-19 errors host bus 7-28 messages 7-27 processor 7-28 system configuration 7-24 Etherchannel 1-12 Ethernet duplex support 1-12 Gigabit Ethernet upgrade 1-12 Ethernet Token Ring Adapter 7-22 European union notice A-5 event list 7-27 types 7-27 viewing 7-26 event messages 7-27 Automatic Server Recovery 7-29 fans 7-27 memory 7-28 operating system 7-29 PCI bus 7-28 POST errors 7-28 power subsystems 7-29 processors 7-28 expansion boards hot-plug 1-21, 5-3 installing non-hot-plug 2-18 locating 1-21, 5-3 non-hot-plug 1-21, 5-3 overview 6-1 Remote Insight Lights-Out Edition 1-19 expansion connectors locating 2-4 expansion slots 1-3 cover 2-19 general 1-3 latch 2-19 locating non-hot-plug 2-18 non-hot-plug 1-3 PCI Hot Plug 1-3 external connectors 5-3 external interfaces, supported 1-11 Compaq Confidential – Need to Know Required Writer: BiggsT Project: ProLiant DL580 Server Setup and Installation Guide Comments: Part Number: 159213-003 File Name: x-index.doc Last Saved On: 4/18/01 1:31 PM 5 external LEDs hard drive activity status D-3 hard drive fault status D-3 hard drive online status D-3 hard drive status D-3 external SCSI 1-11 external storage enclosures 1-19 external tape drive 1-19, 3-1 F failure batteries 7-29 fans 7-27 power supplies 7-29 failure condition recovery ROMPaq disaster recovery E-4 fans 1-4 event messages 7-27 LED 1-5, 1-20, D-7 LEDs D-2 fans LEDs C-12 fault tolerance 1-16, 2-27 FCC See Federal Communications Commission (FCC) features memory board 1-10 PCI Hot Plug 6-3 peripheral board 1-10 serviceability 1-3 Federal Communications Commission (FCC) compliance notice Class A A-2 Class B A-3 declaration of conformity A-3 notice A-2 requirements A-4 rules A-2, A-3 fibre channel configuration 1-23 files .CFG 7-2 .CHL 7-12 .SCI 7-11 firmware 1-11 fitting tool for cage nuts 4-20 front panel LEDs D-1, D-2, D-6 fan D-6, D-8 front panel fan LEDs C-11 G getting help xii grounding methods B-2 grounding requirements 4-8 guidelines system power supplies management 1-9 H handles rack, attaching 4-22 hard drive activity LED defined D-4, D-5 illustration D-3 location D-3 hard drive fault LED defined D-4, D-5 illustration D-3 location D-3 hard drive LEDs D-3, D-4, D-5 activity D-4, D-5 defined D-4, D-5 fault D-4, D-5 illustration D-3 location D-3 online D-4, D-5 hard drive online LED defined D-4, D-5 illustration D-3 location D-3 hard drives 1-8 array diagnostics 1-22 configuration 1-22 installing 2-27 LEDs defined D-4, D-5 status D-4, D-5 Compaq Confidential – Need to Know Required Writer: BiggsT Project: ProLiant DL580 Server Setup and Installation Guide Comments: Part Number: 159213-003 File Name: x-index.doc Last Saved On: 4/18/01 1:31 PM Index hardware configuration menu 7-6 resource conflicts 7-5 troubleshooting problems after adding C-10 hardware installation and configuration poster 2-1 hardware options 1-19 overview 1-19 heel straps B-2 help additional sources xii Compaq website xiii Compq authorized resellers, telephone numbers xiii technical support telephone numbers xii History Log Files, configuration 7-11 host bus error 7-28 hot-plug fan LED D-7 fans 2-2 hard drives 1-19, 2-2 internal bays 1-8 keyboard 1-21 NIC 2-2 power supplies 1-9, 2-2 power supply 1-20 redundant fans 1-4 SCSI hard drive LEDs D-2 Wide Ultra2 SCSI hard drives 1-8 hot-plug fans 1-4, 1-5 hot-plug hard drive LEDs See LEDs. See hard drive LEDs hot-plug keyboard 1-11 connector 1-11, 5-3 password 1-23 hot-plug power supply installing 2-29 LEDs 2-30 hot-plug power supply 2 cord connector 1-22 http://www.compaq.com xiii I I/O expansion boards configuring 1-16 I/O expansion slots locating 6-6 IBM OS/2, device drivers 7-23 icons symbols on equipment xi IDD 1-13. See Internal Diagnostic Display (IDD) IDE CD-ROM 5-7. See CD-ROM illustrations system interlock LEDs D-15 IML See Compaq Integrated Management Log (IML) overview 1-14 Insight Manager printing event list 7-26 viewing events 7-26 IML 7-25 INSPECT utility 7-24 installation assisted option 7-14 mounting bracket assembly for rack server 4-20 operating system problem C-10 overview 4-5 SmartStart errors C-9 SmartStart failure C-9 tools needed for rack model server 4-13 installation service 4-1 installing battery F-1, F-3 configuration utility 1-17 DIMMs 2-14 expansion boards 2-20 hot-plug fan C-15 hot-plug power supplies 2-29 hot-plug SCSI hard drives 2-27 memory 2-14 memory board 2-16 Compaq Confidential – Need to Know Required Writer: BiggsT Project: ProLiant DL580 Server Setup and Installation Guide Comments: Part Number: 159213-003 File Name: x-index.doc Last Saved On: 4/18/01 1:31 PM 7 8 ProLiant DL580 Server Setup and Installation Guide non-hot-plug expansion board 2-18 preparations for non-hot-plug 2-5 processor 2-7, 2-8 rack products CD set 4-3 server in the rack 4-23 switch box 4-29 insufficient memory message during install C-9 Integrated Management Log (IML) 7-25 Management Utility 7-25 required device drivers 7-25 Integrated Remote Console (IRC) features 1-18 Integrated Smart Array Controller 1-2, 1-11, 1-22 cabling 5-5 locating 2-17 RAID support 1-16 integrated video disable E-3 Intel-based Compaq NICs 7-23 interface parallel control 1-24 serial control 1-24 interfaces, supported external 1-11 interference, electromagnetic A-5 interlock LEDs See system interlock LEDs Internal Diagnostic Display (IDD) 1-3, 1-13, D-13 internal drive bays 1-8 international regulations A-7 interrupt, hardware 7-3 interrupts 1-16 intraNetWare, PCI Hot Plug actions 6-11 IRQs See Interrupts (IRQs) J Japanese notice A-6 jumpers and switch settings adjusting 7-6 K keyboard See hot-plug keyboard knockouts auxiliary serial 1-21 VHDC SCSI 1-22 L label installing DIMM 2-13 label, laser A-7 laser Class 1 product A-6 compliance A-7 device regulatory compliance notice A-6 information A-8 product label A-7 regulations, CDRH A-7 type A-8 LEDs fans 1-5, C-12, D-2, D-7 front panel 1-20, D-1, D-6, D-8 front panel fan 1-20, C-11 hard drive D-3, D-4, D-5 hard drive activity D-4, D-5 hard drive fault D-4, D-5 hard drive online D-4, D-5 hot-plug fans D-7 hot-plug hard drive D-3, D-4, D-5 hot-plug power supply 2-30 locating 1-20 memory/processor 1-20 online 2-27 PCI Hot Plug 6-4, 6-7, D-9 power supply 2-30, D-2, D-6, D-8 power/interlock 1-20 powering down 4-31 RJ-45 network connector status D-12 system power D-2 lifting the server 4-23 Compaq Confidential – Need to Know Required Writer: BiggsT Project: ProLiant DL580 Server Setup and Installation Guide Comments: Part Number: 159213-003 File Name: x-index.doc Last Saved On: 4/18/01 1:31 PM Index lithium battery A-8 lithium manganese dioxide warning A-8 load balancing 1-12 locating external SCSI connector 3-2 hot-plug fans 1-5, C-12 hot-plug power supplies 2-29 lockup, system 7-29 logs alarm 1-15 M maintenance 1-24 maintenance switch E-2, E-4 management console 7-25 system power supplies 1-9 web-based 1-14 marking rack with template 4-18 mass storage device 7-18 Maximum Recommended Ambient Operating Temperature 4-9 media bays 1-8 memory diagnosing problems C-3, C-7 ECC 1-10 error 7-28 installation order 2-13 installing 2-14 insufficient during install C-9 nonvolatile 1-17, 7-3 type 1-2 memory board features 1-10 installing 2-16 locating 2-3 removing 2-13 memory/processor LED 1-20 messages Adapter Not Same 6-12 Card Functioning 6-12 Driver in Use 6-12 Driver Loaded 6-12 No Hot-Plug Driver 6-12 PCI Hot Plug 6-12 PCI Hot Plug, The requested machine is not running the Compaq Remote Control service 6-14 PCI Hot Plug, The service on the machine has shut down or has become unavailable 6-14 PCI Hot Plug, You do not have an account on the requested machine 6-14 PCI Hot Plug,This machine does not have any PCI Hot Plug slots 6-14 Remove Not Supt 6-12 Replace Load Driver 6-12 Switch Open 6-12 Unknown Slot 6-12 messages, PCI Hot Plug General Failure 6-12 Microsoft Windows 2000 PCI Hot Plug support 2-25, 6-2 Microsoft Windows 2000 Server device drivers 7-15 Microsoft Windows NT device drivers 7-15 manual installation 7-15 PCI Hot Plug support 2-25, 6-2 start diskettes 7-16 Microsoft Windows NT 4.0 1-9 installing 7-18 mirroring 1-16 modem 1-18 modifications, FCC compliance statement A-4 mounting bracket for rack server 4-14 mouse 1-11 connector 1-21, 5-3 FCC compliance statement A-5 Compaq Confidential – Need to Know Required Writer: BiggsT Project: ProLiant DL580 Server Setup and Installation Guide Comments: Part Number: 159213-003 File Name: x-index.doc Last Saved On: 4/18/01 1:31 PM 9 10 ProLiant DL580 Server Setup and Installation Guide N NCMCON See Configuration Manager Console (NCMCON) NetWare PCI Hot Plug support 2-25, 6-2 network saver mode 1-24 network cables 5-2 network interface controller (NIC) 1-2, 1-12, 1-19, 5-1 locating 1-21 optional 1-3 NIC 1-12. See network interface controller (NIC) locating 5-3 non-hot-plug locating 2-2 nonvolatile memory 1-17 notice Canadian A-4 European union A-5 Japanese A-6 Taiwanese A-6 Novell NetWare device drivers 7-14 installing 7-14 manual installation 7-14 NVRAM E-2, E-3 O on-board video disable E-2, E-3 online configuration 7-27 operating system support for intraNetWare 6-10 operating systems automatic shutdown 7-29 crash 7-29 IBM OS/2 7-23 installation assistance 7-14 installation problems C-10 installing 7-9–7-23 IBM OS/2 7-23 Microsoft Windows NT 3.51 7-16 Microsoft Windows NT 4.0 7-18 Novell NetWare 7-14 SCO OpenServer 7-22 SCO UnixWare 7-22 Sun Solaris 2.6 7-23 Sun Solaris 7 7-23 Microsoft Windows 2000 Server 7-15 Microsoft Windows NT 7-15 Novell NetWare 7-14 SCO OpenServer 7-22 SCO UnixWare 7-22 Sun Solaris 7-23 types supported 7-14 options processor 1-3 out-of-band communication 1-18 overview expansion boards 6-1 hardware options 1-19 IML 1-14 PCI Hot Plug 6-1 rack installation 4-5 P parallel connector 1-11, 1-21, 5-3 parallel interface control 1-24 partition differences 7-4 DOS 7-8 system 7-7 creating 7-8 differences 7-4 required disk space 7-8 verifying 7-8 partition, system copying 7-9 deleting 7-9 files, deleting 7-10 restoring system configuration 7-12 upgrading 7-9 Compaq Confidential – Need to Know Required Writer: BiggsT Project: ProLiant DL580 Server Setup and Installation Guide Comments: Part Number: 159213-003 File Name: x-index.doc Last Saved On: 4/18/01 1:31 PM Index password protection configuration switches E-2, E-3 passwords administrator 1-23 hot-plug keyboard 1-23 power-on 1-23 remote access 1-24 PCI bus error 7-28 PCI Hot Plug 1-2, 1-4, 2-2 accessing slots 6-2 Administration Guide 6-1 application 6-3 button 1-4, 6-3, 6-4, D-9 cabling 5-7 error messages 6-12 install warning 2-25 installing 2-25, 6-2 intraNetWare 6-11 LEDs 6-4, 6-5, D-9, D-10 locating slots 2-4 messages 6-12 NIC 1-12 operating system support 6-10 operations 6-3 OS support 6-10 overview 6-1 removing 2-25, 6-2 removing an adapter, intraNetWare 6-11 replacing an adapter, intraNetWare 6-11 requirements 6-2 requirements for support 2-25 slots 1-3 support 2-25, 6-2 support for Windows NT 6-13 system 6-3 system requirements 6-2 utility software 1-4 viewing slot detail information 6-11 Windows NT actions 6-13 Windows NT messages 6-14 Windows NT utility 6-13 PCI Hot Plug Administration Guide 6-12 PCI Hot Plug button cancelling an action 6-7 PCI retainer clip 2-19 Pentium III Xeon processor installing 2-8 Pentium III Xeon processors 1-19 peripheral board 1-10 locating 2-17 locating array controller 5-4 locating SCSI ports 5-4 port addresses 1-16 ports locating 5-4 SCSI 5-4 POST See Power-On Self-Test (POST) POST messages audible indicators C-7 beep codes C-7 power cord A-9 current rating A-9 placement A-9 set A-9 tie-wrapping 4-28 voltage rating A-9 power cord connections 4-28 power cords securing 5-8 Power Down Manager 4-31 power margin 1-9 Power On/Standby switch C-5, D-13 warning C-5, D-13 when to push switch C-5, D-13 power problems diagnosis C-1, C-3, C-5, C-6 power requirements 4-7 power supplies connectors 2-3 failure 7-29 LEDs D-2, D-6 front panel D-8 removing 4-4 Compaq Confidential – Need to Know Required Writer: BiggsT Project: ProLiant DL580 Server Setup and Installation Guide Comments: Part Number: 159213-003 File Name: x-index.doc Last Saved On: 4/18/01 1:31 PM 11 12 ProLiant DL580 Server Setup and Installation Guide power supply 1-9 electrical rating 4-7 hot-plug 1-9 locating 2-29 power supply 1 2-29 power supply 2 2-29 power supply LEDs 2-30 Power Supply Viewer Utility 1-9 power switch 1-20 power/interlock LED 1-20 power-down management 1-9 powering down 4-31 LEDs 4-31 powering up 4-30 power-on sequence C-3 Power-On Self-Test (POST) 1-22, 7-4, 7-24 error 2-24 sequence C-3 when to complete C-1 primary hot-plug power cord connector 5-4 problems CMOS C-9 how to diagnose C-4, C-5, C-6, C-7, C-8, C-9, C-10 installation C-9, C-10 new hardware added C-10 power C-1, C-3, C-5, C-6 power cycling C-2 SmartStart C-9, C-10 startup C-1, C-2, C-3, C-5, C-6, C-7, C-8 system short C-2 video C-7 procedures configuring hardware 7-6 creating system partition 7-8 installing the SmartStart CD 7-3 removing the memory board 2-13 starting the System Configuration Utility 7-4 verifying the system partition 7-8 viewing the IML 7-25 processor 1-3 850-MHz internal locking feature E-6 processor slots locating 2-9 numbered 2-9 populating 2-9 processor switch locating 2-4 processors diagnosing problems C-3, C-7 error 7-28 features 1-2 locating 2-3 product safety A-5 Q QuickLock 1-24 R rack airflow 4-7, 4-9 cable management arm bracket 4-25 front clearance 4-7 inserting cage nuts 4-20 installing mounting bracket 4-20 rear clearance 4-7 slide rail assembly 4-14 stability warning 4-3 temperature requirements for 4-9 tools needed for installation 4-13 weight warning 4-3 Rack Builder Configuration Tool 4-2 Compaq Confidential – Need to Know Required Writer: BiggsT Project: ProLiant DL580 Server Setup and Installation Guide Comments: Part Number: 159213-003 File Name: x-index.doc Last Saved On: 4/18/01 1:31 PM rack handles aligning 4-22 attaching 4-22 removing 4-24 supporting the server 4-23 rack installation 4-1 overview 4-5 rack mounting brackets 4-11 hardware 4-11, 4-25 template 4-12 tools 4-13 Rack Resource CD Kit 4-2 RAID See Redundant Array of Inexpensive Disks (RAID) rail release latches pinching fingertips 4-24 using 4-24 rapid recovery services 1-14 recharge warning A-8 recycling, battery A-8 redundant power supply 2-29 Redundant Array of Inexpensive Disks (RAID) 1-16, 3-1 redundant hot-plug power cord connector 1-22, 5-4 power supplies 1-19 registering server 1-24 regulations Class A A-2 Class B A-3 regulatory compliance, identification number A-1 remote access Remote Insight Lights-Out Edition 2-21 Remote Insight Lights-Out Edition 1-19, 2-21 connector 2-3 expansion slot, 32-bit 2-21 functions 2-21 remote servers 1-14 removable media 1-20 removing battery F-3 hot-plug fan C-14 hot-plug power supplies 2-31 hot-plug SCSI hard drives 2-26 rack handles 4-24 server rail from bracket rail 4-15 requirements airflow 4-7, 4-9 front clearance 4-7 grounding 4-8 health and safety 4-4 optimum environment 4-7 power 4-7 rear clearance 4-7 temperature 4-9 resource conflicts diagnosing 7-3 resolving 7-3 resources, factory-installed software problems C-10 restoring system configuration with System Partition 7-12 RFI/EMI connector hoods A-4 RJ-45 receptacle xi ROM 1-11, 4-30 ROMPaq 1-11, 1-17, 1-22, 7-4 ROMPaq disaster recovery E-4 routing cables 4-29 S safety product A-5 SCI files 7-11 SCO device drivers 7-22 manual installation 7-22 SCO UNIX PCI Hot Plug support 2-25, 6-2 screw-retaining plate 4-12, 4-27 SCSI cabling 5-4 configuration 1-22, 6-2 controllers 5-4 Compaq Confidential – Need to Know Required Writer: BiggsT Project: ProLiant DL580 Server Setup and Installation Guide Comments: Part Number: 159213-003 File Name: x-index.doc Last Saved On: 4/18/01 1:31 PM 14 ProLiant DL580 Server Setup and Installation Guide external 1-11 installing hard drives 2-27 knockouts 1-22 ports 5-4 storage 1-22 storage capacity 1-22 support 1-11 SCSI connector 1-21, 5-3 SCSI drive configuration 1-22 SCSI hard drives guidelines for replacement 2-26 installing 2-27 locating 1-20 SCSI ports 3-2 securing cables 4-29 security 1-14 software 1-23 serial connector 1-11, 1-21, 5-3 serial interface control 1-24 series number A-1 server automatic recovery 7-22 availability 7-27 configuration with SmartStart 7-1 electrical rating notice 4-4 electrical warning 4-3 features high-availability 1-12 heat warning 4-3 installation, standard 4-1 installing in the rack 4-23 management and configuration 1-13 management tool 7-25 power backup notice 4-4 power cord notice 4-4 rack mounting bracket 4-14 rack slide rail assembly 4-14 reboot, remote 1-18 recovery, automatic 7-22 Setup and Management 7-27 weight 4-4 weight warning 4-3 server keeps rebooting, diagnosing problems C-2 server labels 2-1 server management IML 1-14 server performance 1-14 server registration 1-24 Server Setup and Management pack 1-14 serviceability tool 7-27 settings boot sequence E-2, E-3 configuration lock E-2, E-3 configuration switches E-2 default E-4 default configuration 4-30 diskette drive boot override E-3 lock configuration E-3 maintenance E-4 NVRAM E-4 password disable E-3 video disable override E-3 setup and installation poster installing DIMM 2-13 shielded cables A-4 shutdown, operating system 7-29 slide rail assemblies 4-11, 4-13 slide rail assembly 4-14 sliding the server into the rack 4-24 slots expansion 1-3 cover 2-19 latch 2-19 locating 2-18 PCI Hot Plug, accessing 6-2 Smart Array 4200 Controller 1-22 SmartStart creating system partition 7-8 device drivers IBM OS/2 7-23 Microsoft Windows 2000 Server 7-15 Microsoft Windows NT 7-15 Compaq Confidential – Need to Know Required Writer: BiggsT Project: ProLiant DL580 Server Setup and Installation Guide Comments: Part Number: 159213-003 File Name: x-index.doc Last Saved On: 4/18/01 1:31 PM Index Novell NetWare 7-14 SCO OpenServer 7-22 SCO UnixWare 7-22 diagnosing installation failure C-9 installation failure C-9 installation problems C-9 memory problems C-9 starting from System Configuration Utility 4-6 SmartStart CD 7-1 installing operating systems 7-5 loading device drivers 7-14 software Compaq Insight Manager 1-14 security 1-23 software installation guidelines 7-2 software, PCI Hot Plug utility 1-4 standby 4-31 Standby mode how to enter C-5, D-13 switch C-5, D-13 warning C-5, D-13 when to use C-5, D-13 standby switch position 5-7 start up sequence C-3 startup problem diagnosis C-1, C-3, C-5, C-6 static electricity B-1 static-dissipating work mat B-2 static-sensitive devices B-1 status hard drives D-4, D-5 storage device 1-22, 7-17, 7-18 straps heel B-2 toe B-2 wrist B-2 Sun Solaris device drivers 7-23 Intel Platform 7-23 Support Software Diskettes (SSD) 7-15 Survey Utility viewing IML 7-25 SW1 switch E-1, E-2 locating E-2 settings E-3 SW4 switch E-1, E-5 locating E-5 settings E-5 SW6 switch E-1, E-6 locating E-6 settings E-7 switch and jumper settings adjusting 7-6 settings, information 7-2 switch settings default E-2, E-4 diskette drive boot override E-3 lock configuration E-3 maintenance E-4 NVRAM E-4 password disable E-3 video disable override E-3 switches 4-5 On/Standby 4-31 power 1-20 symbols in text x symbols on equipment xi system configuration access to 1-18 error 7-24 option 7-5 creating partition 7-8 high availability features 1-2 lockup 7-29 partition 7-7, 7-8 creating 7-8 differences 7-4 utilities 7-4 verifying 7-8 power, LED D-2 system board battery replacement F-1 components 2-3 Compaq Confidential – Need to Know Required Writer: BiggsT Project: ProLiant DL580 Server Setup and Installation Guide Comments: Part Number: 159213-003 File Name: x-index.doc Last Saved On: 4/18/01 1:31 PM 15 16 ProLiant DL580 Server Setup and Installation Guide DIP switches E-2 illustration 2-3 safety B-1 System Configuration Utility 7-2 configuration backup 7-11 Configuration History Files 7-11 configuring hardware 7-6 configuring PCI boards 7-6 exit 7-24 functions 7-2 options 7-6 partitions 7-7 POST message 7-3 restoring configuration 7-11 server management 1-16 SmartStart 1-13 starting 7-4 starting SmartStart from 4-6 System Erase Utility See Compaq System Erase Utility system features 1-2 system interlock LEDs function D-15 identifying interlock fault D-15 illustrated D-15 locating D-15 system partition 7-6, 7-7 copying 7-9 creation of 1-17 deleting 7-9 files, deleting 7-10 restoring system configuration 7-12 upgrading 7-9 system power supplies management guidelines 1-9 T tables rack internal temperature maximums 4-9 Taiwanese notice A-6 tape drive 1-19 technical support xii telephone numbers xiii for FCC questions A-4 for product questions A-4 temperature operating maximums 4-9 temperature for rack 4-9 template marking the rack 4-18 rack mounting 4-12 terabytes 1-22, 1-23 Texas Instruments TLAN-based Compaq NICs 7-23 text conventions x TMRA 4-9 toe straps B-2 Token Ring Adapter 7-22 tools conductive B-2 fitting tool for cage nuts 4-20 for rack model server installation 4-13 Torx T-15 screwdriver 2-4 troubleshooting CMOS problems C-9 installation problems C-9, C-10 memory problems C-3, C-7 new hardware problems C-10 PCI Hot Plug Administration Guide 6-12 power cycling C-2 power problems C-1, C-3, C-5, C-6 processor problems C-3, C-7 server keeps rebooting C-2 SmartStart problems C-9, C-10 startup problems C-1, C-3, C-5, C-6 steps to take C-1–C-10 system short C-2 video problems C-7 Compaq Confidential – Need to Know Required Writer: BiggsT Project: ProLiant DL580 Server Setup and Installation Guide Comments: Part Number: 159213-003 File Name: x-index.doc Last Saved On: 4/18/01 1:31 PM Index U UNIX Extended Feature Supplemental (EFS) diskettes 7-22 upgrades flash ROMs 1-22 upgrading system partition 7-9 utilities Array Configuration 3-2 ASR-2 1-17 configuration 1-16 DAAD 1-17 diagnostics 7-24 DIAGS 1-17 INSPECT, running after configuration 7-24 management, for IML 7-25 PCI Hot Plug 1-4 Power Supply Viewer 1-9 power-down management 1-9 survey 1-15 System Configuration 4-6 V vanadium pentoxide warning A-8 VHDC SCSI knockouts 1-22 video 1-11 auto-detection E-2, E-3 connector 5-4 controller 1-11 diagnosing problems C-7 embedded E-2 enable on-board E-2 integrated E-3 switch settings E-3 video connector 1-21 voltage rating A-9 W Compaq System Erase Utility C-9 data loss C-5, C-9, D-13 electric shock 4-28, C-4 electrical 4-3 electrical shock xi heat 4-3 hot-plug access door 6-6 NIC 5-2 Power On/Standby switch C-5, D-13 power supplies 4-28 rack stability xii, 4-3 removing access panel 5-7 Standby mode C-5, D-13 weight 4-3 warranties Global 1-24 Next Business Day 1-24 Pre-Failure 1-24 three-year 1-24 web browser 1-14 website 1-3, 1-15, 1-24, 5-5 Sun 7-23 weight lifting 4-23 server 4-4 Windows NT PCI Hot Plug actions 6-13 replacing a PCI Hot Plug adapter 6-14 Windows NT 4.0 1-9 Windows NT Utilities power down 4-31 wrist strap B-2 www.compaq.com 4-2 www.compaq.com. xii www.compaq.com/manage/15minsl ideshow/ 2-21 www.compaq.com/products/servers 1-15, 2-2 www.compaq.com/register 4-6 warnings access panel C-5, D-13 airflow C-5, D-13 Compaq Confidential – Need to Know Required Writer: BiggsT Project: ProLiant DL580 Server Setup and Installation Guide Comments: Part Number: 159213-003 File Name: x-index.doc Last Saved On: 4/18/01 1:31 PM 17