1
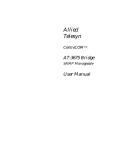
1700_title Page i Monday, March 25, 1996 9:38 AM
Allied Telesyn International
Ethernet Network Adapter
For ISA Bus Computers and IEEE 802.3 Compliant LANs
User Manual
AT-1700T Plus for Twisted Pair Media
AT-1700AT Plus for AUI Port Adapter and Twisted Pair Media
AT-1700BT Plus for Thinnet Coaxial and Twisted Pair Media
AT-1700FT Plus for Fiber Optic and Twisted Pair Media
i
613-10434-00.bk Page ii Monday, March 18, 1996 2:53 PM
AT-1700
Warranty: Your Allied Telesyn International CentreCOM™ Ethernet Network Adapter
has a lifetime warranty. Refer to the warranty card supplied with the product for the
full Warranty Statement.
Trademarks: CentreCOM is a registered trademark of Allied Telesyn International,
Corp. Ethernet is a registered trademark of Xerox Corporation. Novell and NetWare
are registered trademarks of Novell, Inc. Microsoft and MS-DOS are registered
trademarks and LAN Manager and Windows for Workgroups are trademarks of
Microsoft Corporation. UNIX is a registered trademark of UNIX System Laboratories.
3Com is a registered trademark of 3Com. PC-NFS is a trademark of Sun
Microsystems, Inc. PC/TCP is a registered trademark of FTP Software, Inc.
Copyright 1994 Allied Telesyn International, Corp. All rights reserved. No part of this
publication may be reproduced without prior written permission from Allied Telesyn
International, Corp.
Allied Telesyn International, Corp. reserves the right to make changes in
specifications and other information contained in this document without prior written
notice. The information provided herein is subject to change without notice. In no
event shall Allied Telesyn International, Corp. be liable for any incidental, special,
indirect, or consequential damages whatsoever, including but not limited to lost
profits, arising out of or related to this manual or the information contained herein,
even if Allied Telesyn International, Corp. has been advised of, known, or should have
known, the possibility of such damages.
FCC Warning: This equipment has been tested and found to comply with the limits
for a Class A digital device pursuant to Part 15 of the FCC Rules. These limits are
designed to provide reasonable protection against harmful interference when the
equipment is operated in a commercial environment. This equipment generates,
uses, and can radiate radio frequency energy and, if not installed and used in
accordance with this instruction manual, may cause harmful interference to radio
communications. Operation of this equipment in a residential area is likely to cause
harmful interference in which case the user will be required to correct the interference
at his own expense.
All Countries: Install in accordance with Local and National Electrical Code.
Canadian Radiation: This digital apparatus does not exceed the Class A limits for
radio noise emissions from digital apparatus as set out in the radio interface
regulations of the Canadian Department of Communications.
Lé présent appareil numérique n'émet pas de bruits radioélectriques dépassant les
limites applicables aux appareils numériques de le Classe A. Prescrites dans le
réglement sur le brouillage radioélectrique edicté par le ministére des
Communications Du Canada.
ii
613-10434-00.bk Page iii Monday, March 18, 1996 2:53 PM
Contents:
1
2
3
4
5
6
Square One ....................................................................................................
What You Get From Us ..................................................................................
What Else You Need to Connect to the Network ............................................
Where to Read From Here .............................................................................
Networking Overview for the New User/Installer ............................................
The Network Adapter Card .............................................................................
Network Software ...........................................................................................
Configuration ..................................................................................................
A Simplified Hardware/Software Installation Procedure .................................
Two Installation Contexts ...............................................................................
Installing the Adapter Card .............................................................................
Installing the Workstation Software ................................................................
The AT-1700 Network Card ............................................................................
10BASE-T, 10BASE2, 10BASE5 or 10BASE-FL Choices .............................
Auto or Pre-Set Port Selection (BT, AT and FT) ............................................
CardAssistant Software Performs Configuration ............................................
Installation ......................................................................................................
OS/Environment-Specific Installation Information ..........................................
Installing the card ...........................................................................................
Configuring with CardAssistant Software .......................................................
Invoking CardAssistant ...................................................................................
Installing More than One Card ........................................................................
Running CardAssistant in Batch Mode ...........................................................
Reconfiguring a Previously Installed Card ......................................................
Boot ROM Socket ...........................................................................................
Network Adapter Card Drivers ........................................................................
Drivers for Workstations .................................................................................
Drivers for Servers ..........................................................................................
Driver Installation ............................................................................................
General steps for installing a driver ................................................................
Updating a Novell IPX Workstation to ODI .....................................................
Installation note: NDIS for TCP/IP ..................................................................
Support for Multiple Adapter Cards ................................................................
1
1
1
2
3
3
3
4
6
6
7
8
10
11
11
11
12
12
12
14
15
19
19
21
21
22
22
23
24
24
25
27
28
iii
613-10434-00.bk Page iv Monday, March 18, 1996 2:53 PM
AT-1700
7
8
Cabling ...........................................................................................................
Important 10BASE-T Cable Considerations ...................................................
10BASE2 RG58/BNC Cabling ........................................................................
10BASE-FL/FOIRL (Optical Fiber) Connection ..............................................
10BASE5 (AUI) Connection ...........................................................................
Communication Status Indicators ...................................................................
Troubleshooting ..............................................................................................
Identify the Exact Symptoms ..........................................................................
Experiment with Possible Solutions ...............................................................
To correct an I/O resource conflict .................................................................
To determine base I/O address and interrupt .................................................
To replace corrupted network software ..........................................................
Manual/Adapter Card/CardAssistant/Driver Compatibility ..............................
Get Technical Support ....................................................................................
29
29
33
34
35
36
37
37
38
39
41
41
41
41
Figures:
1
2
3
4
5
6
7
8
AT-1700T UTP Port and RJ45 Connector.........................................................
Usable and Unusable 10BASE-T Cable ...........................................................
Pin 1 Orientation on an RJ45 Connector ..........................................................
BNC Receptacle for 10BASE-2 (Shown Terminated) .....................................
Incorrectly Connected BNC for 10BASE-2 .......................................................
ST-Type Connector for 10BASE-FL/FOIRL Medium .......................................
AUI Connector for Thicknet Drop Cable ...........................................................
AUI Connector for Direct Transceiver Connection ...........................................
29
32
32
33
33
34
35
35
Tables:
1
2
3
4
5
6
7
8
iv
I/O Configuration Settings ................................................................................
Batch Mode Parameter Names .........................................................................
Which Driver to Use in a Workstation................................................................
Which Driver to Use in a Server, Bridge, Router or Brouter..............................
Usable and Unusable 10BASE-T Cable ...........................................................
ATI Micro Transceiver Choices ........................................................................
AT-1700 Status Indicators ................................................................................
Some Typical Device Uses of Bus Resources .................................................
17
20
23
23
31
36
36
40
613-10434-00.bk Page 1 Monday, March 18, 1996 2:53 PM
Chapter 1
Square One
What You Get From Us
When opening this ATI product, make sure that the package you
have received is complete and in good condition. The package
should include:
❑ Ethernet network adapter card
❑ CardAssistant diskette
— CardAssistant setup and diagnostic test program
— Network adapter card drivers
— Support files for network software
— readme files
❑ Manual
— CardAssistant quick reference
— Network management summary
— Technical support fax order form
— Warranty/registration cards
What Else You Need to Connect to the Network
You must have an IBM-PC-or-compatible computer with the
following specification:
❑ ISA bus (or EISA bus) computer
❑ Approximately 32K of available RAM for the driver, depending
on the driver installed
1
613-10434-00.bk Page 2 Monday, March 18, 1996 2:53 PM
AT-1700
❑ 512K of available RAM when running ATI CardAssistant
setup/diagnostics software
❑ A free 32-byte block of I/O at 240h, 260h, 280h, 2A0h, 300h,
320h, 340h or 380h
❑ An available interrupt (IRQ 3, 4, 5, 9, 10, 11, 12 or 15)
❑ Compatible workstation operating system and network system
software
In addition to your workstation hardware, you must provide
network administration software like Novell’s NetWare,
Microsoft LAN Manager, Sun PC-NFS or Banyan Vines. You
must also provide the necessary cables, connectors and
terminators.
Where to Read From Here
If you are a first-time network user, and you just need to set up
and connect your PC to the net as a workstation, you should read
Chapters 2 and 3. These chapters are tailored to your needs, and
typically will get you up and running with minimal difficulty.
If you are an experienced network installer, and will be setting
up multi-adaptor workstations with large network bandwidth
requirements, or servers, or some other complex network
configuration, go to Chapter 4. Chapters 4 through 8 will have
the information you need.
2
613-10434-00.bk Page 3 Monday, March 18, 1996 2:53 PM
Chapter 2
Networking Overview for the New
User/Installer
More and more often, non-technical computer users are called on
to install new software and hardware on their computers.
Frequently, the documentation accompanying the hardware/
software assumes the installer is experienced with PC
installations in general, and installation of the manufacturer’s
type of equipment in particular. Often, this is not the case.
To resolve that conflict, this chapter will explain in general terms
what the ATI network adapter card is, what it does, and how it
plays with the rest of the system.
The Network Adapter Card
The network adapter card may be considered to be a “two-sided”
device, that plugs into a vacant card slot inside your computer.
One “side” of the device can talk to your computer, through the
slot it plugs into. The other “side” of the adapter card talks to an
external connector and a network of cables and/or optical fibers
that is in turn connected to other adapter cards, and therefore
other computers.
Network Software
Before you can use this connectivity, you must have software
installed on your personal computer (PC) that can utilize your
network connection. This software may be Novell NetWare,
Microsoft Windows for Workgroups, Sun PC-NFS, Banyan
Vines, or other similar software packages.
3
613-10434-00.bk Page 4 Monday, March 18, 1996 2:53 PM
AT-1700
Your network software also requires some additional software, a
special “interpreter”, which allows your network software to talk
to the particular network adapter card you have installed in your
PC. This interpreter software is called a driver, and a different
driver is required for each network software/network adapter
card combination. ATI has supplied you with drivers for most
common network software. These drivers are on the
CardAssistant diskette, and are selected and installed by the
SETUP17 software on that diskette.
Configuration
One more set of conditions must be satisfied before your adapter
card can use your network; the network adapter card must know
where, within your PC, it is. In the same sense your house uses
an address, a unique house number, and a unique phone number
to interface with the outside world, so does your network
adapter card use unique numbers to describe its logical location
inside your PC.
Only when your network software knows the unique numbers
that describe your adapter card’s location can communications
begin. The numbers will be, literally, one or two addresses and
an interrupt request number (an IRQ). It’s not really necessary
to understand what these numbers mean; it’s only necessary to
verify that they’re unique within your PC. ATI has supplied you
with software to help you define these numbers and establish
their uniqueness.
4
613-10434-00.bk Page 5 Monday, March 18, 1996 2:53 PM
Networking Overview for the New User/Installer
In summary, your networked PC will function properly on the
network if the following are true.
— You have a network adapter card in your PC
— The adapter card has unique address(es) and IRQ
— You have network software installed
— Your adapter card is properly connected to the network
— You have a driver installed for your particular network
software/network adapter card combination
Immediately following this chapter is a simplified installation
procedure which will yield successful installation in a large
percentage of cases.
5
613-10434-00.bk Page 6 Monday, March 18, 1996 2:53 PM
Chapter 3
A Simplified Hardware/Software
Installation Procedure
Two Installation Contexts
Installation of your ATI network adapter card may be performed
within two distinct contexts. In the first context, the installation
conditions are “common”, and the installation is simple and quick.
In the second context, the installation conditions are complex and
may include many differing hardware and software
configurations. In this complex context, it is advisable to have an
installer skilled and knowledgable in network hardware and
software, their permutations and their interactions.
The majority of network hardware/software installations are
within the first context, the installation of one network adapter
card with common software on simply-configured ISA-bus PC
workstations. Within this context, the new installer/user can
usually install, configure and connect the network adapter card
and associated software.
Although usually is the operative word in the previous
statement, and the quick installation does not succeed in every
case, the benefits of installation by available non-technical
personnel are frequently great in terms of lost time.
The following procedure is designed to install your ATI network
adapter card and its associated software on most simple systems.
If you are unable to get your network connection operating with
this quick procedure, you must perform the general-purpose
installation, as described in Chapter 5.
6
613-10434-00.bk Page 7 Monday, March 18, 1996 2:53 PM
A Simplified Hardware/Software Installation
Installing the Adapter Card
Refer to the computer’s manual for information on installing
card-cage accessories.
Warning
High voltages inside the computer present a safety
hazard. Make sure the power is OFF before removing
the cover.
Caution
This LAN adapter card is for use only with IBM AT
or compatible UL listed personal computers that
have installation instructions detailing installation of
card-cage accessories. Installation should be
performed with precautions to prevent damage to
static-sensitive components.
!
Install the AT-1700 interface adapter card in an expansion slot in
your computer, as per the manufacturer’s instructions. Note that
this is a 16-bit (long) card, and will not install in an 8-bit (short)
expansion slot.
If your card has the optical fiber connections, card installation
may be made easier by slipping the protective plastic caps off the
optical connectors.
7
613-10434-00.bk Page 8 Monday, March 18, 1996 2:53 PM
AT-1700
Installing the Workstation Software
1. Turn your computer on.
2. Install the ATI CardAssistant diskette in a floppy disk
drive, typically drive a: or drive b:. If the diskette is in drive
a:, type a:setup17 RETURN . By inference, if the diskette is in
b:, type b:setup17 RETURN . The CardAssistant software
menu will appear on the screen.
3. Type I RETURN to open the Install System Software menu,
and use the ↑ and ↓ keys to highlight the appropriate
workstation driver. For instance, if your network software
is Novell® NetWare®, and your computer is a DOS machine,
you would highlight
NetWare DOS Workstation (ODI).
If your network software is Microsoft LAN Manager, and
your computer is an OS/2 machine, highlight
LAN Manager OS/2 Workstation or Server (OS/2
NDIS).
4. Type RETURN to accept the driver type, RETURN to install the
network software in c:\net on your hard disk, and RETURN
to read the Readme file.
5. Type C RETURN to open the Configure I/O Parameters menu
and F10 to store these values on your adapter card. This
assumes that your adapter card is new, and has never been
installed before, and therefore has the default values in this
menu. These default values are, in order, 300h, 15, UTP 100
Ω, and AUTO SELECT (on BT, AT, and FT). The remaining
values are immaterial to the installation.
6. Type RETURN and ESC to leave the CardAssistant software.
7. Install your Novell, Sun, Microsoft, Banyan, etc. software
according to the manufacturer’s installation procedure.
Connect the network cable to the proper connector on the
network adapter card you just installed in your PC. If your
8
613-10434-00.bk Page 9 Monday, March 18, 1996 2:53 PM
A Simplified Hardware/Software Installation
network software is able to communicate with the network,
you have successfully installed and configured your network
hardware and software.
If you are unable to communicate with the network, or if any of
the previous installation/configuration processes have not been
successful, you must now go to the universal installation in
Chapter 5.
9
613-10434-00.bk Page 10 Monday, March 18, 1996 2:53 PM
Chapter 4
The AT-1700 Network Card
The ATI AT-1700 16-bit Ethernet Adapter Card provides a PC
access to an Ethernet Local Area Network (LAN) for
communicating and sharing computer resources. The AT-1700
offers full compliance with IEEE 802.3 specifications. The card
comes with ATI CardAssistant configuration and diagnostic
software. The CardAssistant diskette also includes the adapter
card drivers you need for networks running Novell® NetWare®
or Microsoft® LAN Manager™ or Windows for Workgroups™
network software. These drivers include:
❑ ODI drivers for use with a workstation on a
Novell NetWare network
❑ NDIS drivers for Microsoft LAN Manager,
Windows or TCP/IP
❑ A packet driver for TCP/IP
❑ IPX, ODI and NDIS drivers for servers.
See the read.me file on the CardAssistant diskette for the
complete list of drivers.
Up to four AT-1700 adapter cards can be installed in a single
server.
10
613-10434-00.bk Page 11 Monday, March 18, 1996 2:53 PM
The AT-1700 Network Card
10BASE-T, 10BASE2, 10BASE5 or 10BASE-FL Choices
The AT-1700T, BT, AT and FT versions all have an RJ45
receptacle for connection to 10BASE-T network segments. The
AT-1700 is compatible with 100 Ω Unshielded Twisted Pair
(UTP) or 100 Ω or 150 Ω Shielded Twisted Pair (STP) wire. The
AT-1700AT supplements the RJ45 with an Attachment Unit
Interface (AUI) to which 10BASE2, 10BASE5 or 10BASE-FL,
an extension of the earlier Fiber Optic Inter-Repeater Link
(FOIRL) specification, may be adapted by adding the
appropriate transceiver. The AT-1700BT has a BNC connector—
in addition to the RJ45—for direct connection, with T-connector
and terminator, to a 10BASE2 Ethernet segment (thin wire
Ethernet or “cheaper net”). The AT-1700FT includes ST-type
transmit and receive connectors for fiber optic media.
Auto or Pre-Set Port Selection (BT, AT and FT)
An auto port-select option configures the AT-1700BT, AT or FT
to sense which of its two ports is connected. In auto mode, the
factory default mode, the card checks to see if the twisted-pair
port is connected. If not, it attempts to use the other port. The
alternative is to pre-set the port selection using the
CardAssistant configuration menu. In pre-set mode, both ports
can remain connected to network segments of different media.
The active port is the one selected in CardAssistant.
CardAssistant Software Performs Configuration
For setting I/O parameters, the CardAssistant configuration
menu displays all parameter choices. Configuring the card for
your PC workstation or server involves choosing menu options
instead of moving hardware jumpers on the card.
11
613-10434-00.bk Page 12 Monday, March 18, 1996 2:53 PM
Chapter 5
Installation
OS/Environment-Specific Installation Information
Accurate and current network hardware and software
installation information changes with every network software
package, protocol stack or operating system. To respond quickly
and accurately to these changes, we have included the latest
installation information in a series of applications- and
OS-specific readme files on the ATI CardAssistant diskette.
The file \README.TOP, on the CardAssistant diskette, contains a
guide to current readme files on that diskette, and is
recommended reading for the installer.
Installing the card
Use the following overview of card installation in conjunction
with your network-software and computer manuals.
Caution
!
12
This LAN adapter card is for use only with IBM AT
or compatible UL listed personal computers that
have installation instructions detailing installation of
card-cage accessories. Installation should be
performed with precautions to prevent damage to
static-sensitive components.
613-10434-00.bk Page 13 Monday, March 18, 1996 2:53 PM
Installation
1. Check system requirements on page 1.
2. Consult instructions for adding peripherals in your
computer’s instruction manual.
3. Check I/O resources used by other peripherals.
TIP: If there is not another network card in the computer, the default I/O
settings are likely to work. Table 8 on page 40 lists some common
conventions for ISA bus I/O.
4. Run CardAssistant configuration program to:
— Check I/O parameter values (base address, IRQ, boot
PROM address) and change as needed
— Load and configure the driver for the network
Installing the card in an ISA or EISA slot
Refer to the computer’s manual for information on installing
card-cage accessories.
Warning
High voltages inside the computer present a safety
hazard. Make sure the power is OFF before removing
the cover.
1. Make sure the computer’s power is turned OFF.
2. Pick the card slot you wish to use. Follow the manufacturer’s
instructions for adding a card.
TIP: When installing the AT-1700FT temporarily remove the shields from
the fiber-optics cable connectors to give the connectors more clearance.
13
613-10434-00.bk Page 14 Monday, March 18, 1996 2:53 PM
AT-1700
Note
The card works in either a 16-bit ISA slot or an EISA
slot. If you are not using an EISA slot, skip step 3.
3. Run your computer’s EISA configuration utility and make a
note of the I/O resources (I/O Address Range and Interrupt)
available for the adapter card. Follow the EISA utility
instructions, and insert the ATI CardAssistant diskette
when the EISA utility asks for the vendor diskette.
The EISA utility asks which I/O resources to reserve for
the adapter card. You can refer to Table 1 on page 17 and
record the settings you choose. Also note these settings on
the Network Management Summary on the back of your
Quick Reference Guide.
Configuring with CardAssistant Software
Instead of hardware jumpers, the AT-1700 uses software
settings to configure the card. The CardAssistant program’s
interactive mode lets you set these I/O parameters from menus
of choices with your keyboard or mouse. The batch mode allows
you to configure the card on a DOS or OS/2 command line. See
“Running CardAssistant in Batch Mode” on page 19.
14
613-10434-00.bk Page 15 Monday, March 18, 1996 2:53 PM
Installation
Note
Launching the CardAssistant program requires that
the card is present. If you have a driver running, you
will not be allowed to open the Diagnostics window
unless you have commented out the driver line in the
batch file (for NetWare) or the
DEVICE=drivername line in config.sys (for an NDIS
driver) and restarted the PC. You may, however,
enter the Configuration window and configure the
adapter card, but the new values do not take effect
until the PC is restarted.
Invoking CardAssistant
1. If you are running CardAssistant from the installation
software diskette, follow steps 2 and 3. If CardAssistant is
installed on your hard disk, skip to step 4.
2. Insert the installation diskette into the appropriate floppy
drive.
3. Type: floppydrive:setup17
where floppydrive is the disk drive containing the
CardAssistant program. Proceed to step 5.
4. CardAssistant is copied onto a hard disk when you install the
driver for the adapter card. Once this is accomplished, you
can type:
path\setup17
where path\ is the optional drive and directory.
5. The main menu comes up and you are ready to select one of
the icons.
15
613-10434-00.bk Page 16 Monday, March 18, 1996 2:53 PM
AT-1700
Working with CardAssistant menus
You can use either the keyboard or mouse to:
❑ Make menu selections
❑ Change parameter settings
❑ Save or cancel your configuration changes
CardAssistant’s main menu presents you with the choice of
configuring the card, running diagnostics or installing a driver.
Pop-up menus list the possible parameter settings, with the
current setting highlighted. The message window under the
menu lists available commands.
To change AT-1700 default settings
Make sure the configuration of the card is compatible with the
host before running diagnostics or attempting to load a driver. If
there are no other interface cards present in the host, the
likelihood of a conflict is slight. In this case, use the Auto
Configure option. If the computer has other peripheral cards
installed, you may need to change one or more I/O settings. To
help avoid conflicts, Table 8 on page 40 lists typical ways that
devices are configured.
TIP: For future reference, use the Network Management Summary on
the back of your Quick Reference Guide to record the configuration
settings that were changed.
1. Invoke CardAssistant if necessary. See “Invoking
CardAssistant” on page 15.
16
613-10434-00.bk Page 17 Monday, March 18, 1996 2:53 PM
Installation
2. Choose “Configure I/O Parameters” or “Auto Configure”
from the main menu. “Configure I/O Parameters” displays
the card’s current settings. “Auto Configure” proposes
settings for you. Check the settings that are proposed, and,
if necessary, select alternate settings from Table 1.
Table 1: I/O Configuration Settings
Parameter
Default
Alternate Settings
Base I/O
Address
300h
240h, 260h, 280h, 2A0h, 320h,
340h, 380h
Interrupt Level
15
3, 4, 5, 9, 10, 11, 12
Boot ROM
Base Address
Disabled
C4000h, C8000h, CC000h,
D0000h, D4000h, D8000h, DC000h
3. You can use the mouse or arrow keys to select the
parameters to be modified.
4. Press ENTER and a pop-up menu displays the choices for the
parameter you have selected.
5. When you have chosen the setting you want, press ENTER .
6. When you are satisfied with the selections for all
parameters, press F10 to accept your changes and leave the
configuration menu.
Note
In order to have the new configuration take effect,
you must cycle power and reboot the computer.
After configuring the I/O parameters, you can either run the
CardAssistant diagnostic software or go on to install the driver.
Driver installation is covered in Chapter 6, “Network Adapter
Card Drivers.”
17
613-10434-00.bk Page 18 Monday, March 18, 1996 2:53 PM
AT-1700
Running Diagnostic Checks
Note
If you have not cycled power and rebooted the
computer since changing the configuration,
diagnostics will run against the old settings.
The CardAssistant diagnostic routines test the board and the
configuration for functional problems or conflicts with other
devices. The routines are:
❑
❑
❑
❑
❑
❑
PC bus interface
On-board RAM
Interrupt test
Internal loopback
MAC address
Boot PROM
You can see if the board passes before connecting the computer
to the network, and then confirm that it still passes after the
network connector is plugged in. This method can help you
isolate any problem.
Checking the AT-1700 configuration
1. Invoke CardAssistant if necessary. See “Invoking
CardAssistant” on page 15.
2. Select the Diagnostics menu. Type: d ENTER .
The diagnostic routines display whether the card passed each
test and report possible causes of any failures.
18
613-10434-00.bk Page 19 Monday, March 18, 1996 2:53 PM
Installation
Note
The drivers must not be loaded when the diagnostics
routines are run, or the diagnostics results will be
inaccurate.
Installing More than One Card
You can install up to four AT-1700 ATI adapter cards in the same
computer. Each requires its own unique I/O resources (I/O port
and IRQ). If more than one card is installed in the host when you
run CardAssistant, the configuration window displays a column
of settings for each. You can tell which column is for which card
by checking the node address. The node address displayed
agrees with the label on the card itself.
Running CardAssistant in Batch Mode
Note
If multiple AT-1700 boards are installed in the same
computer, then interactive mode must be used to
configure the boards.
When you wish to prepare and configure several AT-1700 cards
for users in an assembly-line approach, you can create a batch
(.bat) file that invokes CardAssistant as follows:
setup17 [IOBase] [parameters]
where IOBase is the base hexadecimal I/O address of the adapter
(e.g., 300), and parameters is replaced with the parameters you
wish to modify from their default values. If you intend to use the
default value for a parameter, it may be omitted. Table 2 lists the
parameters that may be set.
19
613-10434-00.bk Page 20 Monday, March 18, 1996 2:53 PM
AT-1700
Parameters may be combined on the command line.
Table 2: Batch Mode Parameter Names
Parameter
Function
/Ix
x = interrupt level1
/UTP
selects the UTP (10BASE-T) port
/Tx
x = cable impedance for UTP connections
/BNC
selects the BNC port
/FIBER
selects the Fiber Optic port
/AUI
selects the AUI port
/AUTO
configures for automatic port selection
/T100
configures for 100 Ω UTP/STP cable
/T150
configures for 150 Ω STP cable
/Bxxxx
enables the boot PROM at address xxxx
/Bdisable
disables the boot PROM
/E
returns the number of AT-1700s installed
NOTE 1. For the range of values, refer to Table 1 on page 17.
Here are sample command lines for differing requirements:
setup17
setup17
0x300 /I15 /UTP /Bc8000 /T100
320h /I5
/Bdisable /Fiber
The /E parameter is used by itself to prompt CardAssistant to
count the number of AT-1700 cards in the computer rather than
bring up the main menu.
20
613-10434-00.bk Page 21 Monday, March 18, 1996 2:53 PM
Installation
Reconfiguring a Previously Installed Card
If the card is working properly but you wish to reconfigure some
of the I/O parameters, see “Configuring with CardAssistant
Software” on page 14. When you launch CardAssistant, the
configuration window shows the current settings for the card(s)
installed.
If the card is not functioning correctly, the problem may be
caused by a configuration that conflicts with other accessories
installed in the workstation or server. In this case, refer to
“Troubleshooting,” Chapter 8.
Boot ROM Socket
The AT-1700 card is shipped with an unpopulated boot ROM
socket. For a diskless workstation, the card needs a boot ROM to
allow it to load the operating system over the network. If a ROM
is installed, the Boot PROM Enable switch must be set in
CardAssistant’s Configuration menu.
Boot ROMs are application-specific. ATI supplies a range of boot
ROMs for different network environments. Contact your ATI
representative for more information.
21
613-10434-00.bk Page 22 Monday, March 18, 1996 2:53 PM
Chapter 6
Network Adapter Card Drivers
Because user network environments are numerous, differing in
network-management software, operating systems, and protocol
stacks, a variety of adapter card drivers is necessary to operate
an adapter card in a majority of environments. An ODI driver for
NetWare running in DOS might be needed, or an NDIS driver
for Windows for Workgroups or for LAN Manager running in
OS/2, or a packet driver for PC/TCP in DOS.
The CardAssistant diskette has adapter card drivers for many
different environments, as well as application-specific readme
files and sample configuration files. Depending on your network,
you will need to install the right driver and possibly merge it
with your network software. Refer to the manuals supplied with
your network software for the procedure for installing an
adapter card driver. ATI maintains application information on
our bulletin boards. See “Get Technical Support” on page 41.
Drivers for Workstations
For installing the card in a workstation, see Table 3.
22
613-10434-00.bk Page 23 Monday, March 18, 1996 2:53 PM
Network Adapter Card Drivers
Table 3: Which Driver to Use in a Workstation
Network Software
Card Driver Path\Filename
NetWare for DOS
NetWare Lite
Windows for Workgroups
LAN Manager 2.x for DOS
\DOS\AT17ODI.COM
\NETWARE.ODI\AT17ODI.COM
\AT1700.DOS
\MSLANMAN.DOS1...AT1700.DOS
LAN Manager 2.x for OS/2
\MSLANMAN.OS21...AT1700.OS2
PC/TCP-compatible TCP/IP \PKTDRV\AT1700.COM
NOTE 1. Driver in subdirectory: DRIVERS\ETHERNET\AT1700
Drivers for Servers
If you are installing the card in a server, bridge, router or
brouter, refer to Table 4.
Table 4: Which Driver to Use in a Server, Bridge, Router or Brouter
Network Software
Card Driver Path \Filename
NetWare v4.0
\NETWARE.40\AT1700.LAN
NetWare v3.11
\NETWARE.386\AT1700.LAN
NetWare v3.1
\NETWARE.386\AT1700.LAN
NetWare v2.2
\xAT1700.OBJ
(x = A, B, C, or D)
NetWare v2.15
\xAT1700.OBJ
(x = A, B, C, or D)
LAN Manager 2.x for DOS
\MSLANMAN.DOS1...AT1700.DOS
LAN Manager 2.x for OS/2
\MSLANMAN.OS2 1...AT1700.OS2
NOTE 1. Driver in subdirectory: DRIVERS\ETHERNET\AT1700
23
613-10434-00.bk Page 24 Monday, March 18, 1996 2:53 PM
AT-1700
Driver Installation
The procedures for installing, binding or merging these drivers
with the network software vary with the operating system type
and version. In general, you install the adapter card driver
during the course of installing the network software. For
detailed instructions, refer to the LAN administration manuals
for your network software.
TIP: Network software manufacturers’ procedures and file structures are
subject to change. This is why the adapter card manual can only provide
general guidelines on installing drivers. Additional, more up-to-date
installation notes may be found in the Read.me file on the CardAssistant
diskette. But for accurate, detailed information on network installation,
your network software manuals are your best source.
General steps for installing a driver
Use the CardAssistant program on the installation diskette to
install the driver.
Note
Network software should not be running on the
computer when CardAssistant is invoked. To make
sure that configuration works properly, comment out
the network filenames in your CONFIG.SYS and
AUTOEXEC.BAT files and then reboot, or boot from a
floppy with no batch files.
1. Insert the diskette into the floppy disk drive and type:
floppydrive:setup17 ENTER
where floppydrive is the disk drive containing the
installation diskette.
2. Select the “Installation” icon on the main menu.
24
613-10434-00.bk Page 25 Monday, March 18, 1996 2:53 PM
Network Adapter Card Drivers
3. Choose the appropriate driver from the menu choices.
Following the instructions on the screen, copy the driver to
a standard directory (for example LAN Manager
customarily uses C:\LANMAN\DRIVERS\ETHERNET for a
server).
The CardAssistant program will create the directory if it
does not already exist. Exit the CardAssistant program.
4. Invoke the LAN utility for installing the network software.
5. Check settings of configuration options and make sure they
match the card configuration (in Chapter 5, “Installation”).
6. Copy network configuration files to the standard directory,
and modify batch files (e.g., AUTOEXEC.BAT and
CONFIG.SYS) to point to the network configuration files
during reboot.
7. Complete the installation of the network software.
Updating a Novell IPX Workstation to ODI
Individual Novell IPX workstations on NetWare systems are
frequently converted to Novell Open Data-Link Interface (ODI)
workstations running on the same system. This conversion is
typically made because Novell no longer supports the IPX
specification, and has replaced it with the ODI specification.
Therefore, changing or updating network adapter hardware or
software on an IPX workstation will probably involve changing
the driver type from IPX to ODI.
Note
The IPX-ODI change in no way impairs the
workstation’s ability to function with your original
NetWare software on the original, unchanged
network.
25
613-10434-00.bk Page 26 Monday, March 18, 1996 2:53 PM
AT-1700
When you install an ATI network adapter card, and invoke the
installation program setup17.exe on the ATI distribution
diskette, all the files you need to effect the ODI installation are
loaded onto your hard drive.
1. Run CardAssistant (setup17.exe) and follow the
instructions for Install System Software, choosing
AT17ODI.COM in the driver install field. CardAssistant, in
its default mode, creates a directory called \NET on the
workstation disk drive, copies NET.CFG, NETX.EXE,
AT17ODI.COM, IPXODI.COM and LSL.COM files to that
directory.
2. While still in CardAssistant, enter the Configure I/O
Parameters window and configure the adapter card port.
Once the card’s port is configured, fill out the LAN
Management Summary inside the front cover of this
manual for future reference.
3. Exit CardAssistant.
4. Open the ASCII file NET.CFG with a text editor and verify
that the following lines are there:
Link Driver AT17ODI
Port xxx
where xxx corresponds to the base I/O address (in hex) in
CardAssistant.
Note
26
The word “Port” must be indented from the left
margin under the Link Driver line by at least one
space or one tab.
613-10434-00.bk Page 27 Monday, March 18, 1996 2:53 PM
Network Adapter Card Drivers
5. The batch file you use to get on the network must contain
these lines in the following order:
LSL
AT17ODI
IPXODI
NETX
login
6. Now reboot the computer to load the new configuration,
and look for the driver's log-on message.
Installation note: NDIS for TCP/IP
AT1700.DOS is the AT-1700 adapter card driver based on the
Network Driver Interface Specification (NDIS) developed by
Microsoft and 3Com. It is used for Microsoft LAN Manager
applications, as well as implementations of Transmission Control
Protocol/Internet Protocol (TCP/IP) such as PC-NFS from Sun
Microsystems.
AT1700.COM conforms to the Packet Driver specification
developed by FTP Software. It can be used for implementations
of TCP/IP such as PC/TCP, concurrent with other protocol
stacks.
Note
Although the ATI drivers support multiple protocol
stacks, it is important to have only one stack of a
given type resident. For example, if you use the public
domain IP protocol driver PROTMAN.SYS, you should
not use another TCP/IP stack concurrently.
More information on installing the NDIS driver and the packet
driver in different environments is available in the readme file on
the CardAssistant diskette.
27
613-10434-00.bk Page 28 Monday, March 18, 1996 2:53 PM
AT-1700
Support for Multiple Adapter Cards
You can have up to four AT-1700 adapter cards in a single
computer (workstation or server). Each needs its own driver
loaded (or the same driver loaded on a re-entrant basis). Consult
your network software documentation for instructions on
binding the drivers.
28
613-10434-00.bk Page 29 Monday, March 18, 1996 2:53 PM
Chapter 7
Cabling
For complete rules of cabling and for information useful in
planning network configurations, see ISO/IEEE Publication
8802-3. The AT-1700T is for use with 10BASE-T segments, using
an 8-wire (4-pair) RJ45 jack for the network cable, shown in
Figure 1.
Figure 1:
AT-1700T UTP Port and RJ45
Connector
Important 10BASE-T Cable Considerations
A serious problem exists concerning identification of modular
cable. There are various grades of voice-quality and data-quality
cables available. These can appear to be similar externally, and
their DC characteristics are also similar, although their AC
characteristics, and therefore high-speed data transmission
characteristics, are radically different.
29
613-10434-00.bk Page 30 Monday, March 18, 1996 2:53 PM
AT-1700
The identification problem is exaggerated by the fact that some
suppliers have sold purportedly data-quality cables
manufactured with voice-quality cabling.
If any voice-quality cabling is used in a 10BASE-T network
system, data movement is slow, collision-prone or non-existent.
To confuse the issue, the LINK indicator on the interface will
usually indicate a valid link in such a case.
For the foregoing reasons, it is absolutely vital that all cabling
used with the 10BASE-T adapter card connections is of level 3, 4,
5 or IBM type 1. As a rule of thumb, if a cable type is flat, it is
typically untwisted, and will cause problems. If a cable is more or
less round in section, it will typically work.
30
613-10434-00.bk Page 31 Monday, March 18, 1996 2:53 PM
Cabling
The six common modular cable specifications and their
applicability to 10BASE-T network use are shown in Table 5,
and cable schematics are shown in Figure 2.
Table 5: Usable and Unusable 10BASE-T Cable
Cable
Level
Cable
Description
AC
Char.
Specification
Twist/
Foot
10BASE-T
OK?
1
Unshielded
untwisted
N/A
CCITT
none
NO!
2
Unshielded
Indv.Twisted Pairs
100 Ω
±30 Ω
RS-232 1BASE5
AT&T PDS
none
NO!
3
Typ. Unshielded
Indv. Twisted
Pairs
100 Ω
±15 Ω
TI, AT&T ISDN
10BASE-T
IBM Type 3
3-5
YES
4
Unshielded
Enhanced Indv.
Twisted Pairs
100 Ω
±30 Ω
EIA, TIA
10BASE-T
NEMA
5-8
YES
5
Shielded
Indv. Twisted
Pairs
100 Ω
±30 Ω
EIA, TIA
10BASE-T
8-10
YES
IBM
Type 1
Shielded
Indv. Twisted
Pairs
150 Ω
PCC FT 1
N/A
YES1
NOTE 1. To use IBM Type 1 cable, the 150 Ω Twisted Pair Type selection must
be made in the CardAssistant Configuration menu.
31
613-10434-00.bk Page 32 Monday, March 18, 1996 2:53 PM
AT-1700
Figure 2: `Usable and Unusable 10BASE-T Cable
1
2
3
4
5
6
7
8
TD+
TDRD+
N/C
N/C
RDN/C
N/C
1
2
3
4
5
6
7
8
TD+
TDRD+
N/C
N/C
RDN/C
N/C
1
1
1. Pair twisted as per level 3, 4 or 5
cable
TD+
TDRD+
N/C
N/C
RDN/C
N/C
1
2
3
4
5
6
7
8
TD+
TDRD+
N/C
N/C
RDN/C
N/C
1
2
3
4
5
6
7
8
This cable will not work for
10BASE-T. Note that 3 and 6 are
twisted, but are not a pair.
Figure 3 shows where to locate pin 1.
Figure 3: Pin 1 Orientation on
an RJ45 Connector
32
Pin 1
613-10434-00.bk Page 33 Monday, March 18, 1996 2:53 PM
Cabling
10BASE2 RG58/BNC Cabling
In addition to an RJ45 connector, the AT-1700BT has a BNC
connector for 10BASE2 standard thin Ethernet RG58 coaxial
cable. The maximum segment length is 185 meters (606 ft.), and
the minimum length between nodes is 0.5 meters (1.64 ft.). The
coaxial cable should be connected to the adapter card via a
T-connector and must be terminated with a 50 Ω BNC
terminator if the computer is at the end of a network segment.
See Figure 4. The connection must not be made as in Figure 5.
Figure 4: BNC Receptacle for
10BASE2 (Shown Terminated)
Figure 5: Incorrectly
Connected BNC for 10BASE2
33
613-10434-00.bk Page 34 Monday, March 18, 1996 2:53 PM
AT-1700
10BASE-FL/FOIRL (Optical Fiber) Connection
The AT-1700FT provides both an RJ45 for 10BASE-T Ethernet
and ST-type transmit and receive connectors for 10BASE-FL or
FOIRL Ethernet network segments. Maximum segment length
is 1000 meters (3279 ft.) for FOIRL and 2000 meters (6558 ft.) for
10BASE-FL. (See Figure 6.)
Warning
Hazardous light emissions may exist in fiber optic
systems. Severe eye damage may result if
precautions are not taken. Never look into a
transmitting fiber optic device, transceiver, repeater,
or cable.
In a 10BASE-FL or FOIRL segment, the cables connect the
transmit receptacle at one end of the segment to the receive
receptacle at the other end and vice versa.
Figure 6: ST-Type
Connector for
10BASE-FL/FOIRL Media
34
613-10434-00.bk Page 35 Monday, March 18, 1996 2:53 PM
Cabling
10BASE5 (AUI) Connection
The AT-1700AT offers both an RJ45 and an AUI port. (See
Figure 7 and Figure 8.)
Figure 7: AUI Connector for
Thicknet Drop Cable
Figure 8: AUI Connector for
Direct Transceiver Connection
In Figure 7, you see a drop cable from a remote transceiver,
typically on a thicknet backbone. In Figure 8, you see the
transceiver installed directly on the AUI port. Installing the
appropriate ATI transceiver from Table 6 on the AUI port allows
you to interface with the medium of your choice.
35
613-10434-00.bk Page 36 Monday, March 18, 1996 2:53 PM
AT-1700
Table 6: ATI Micro Transceiver Choices
Model
Description
AT-MX25F/AT-MX26F
Fiber Optic (FOIRL, 10BASE-FL)
AT-210T/AT-210TS/
AT-MX20T
UTP (10BASE-T)
AT-MX10/AT-MX10S
Thin Ethernet (10BASE2)
If a transceiver is installed, care must be taken with the setting
of the heartbeat/SQE switch. Unless the transceiver is installed
on a device that specifically requests that the heartbeat/SQE
switch be ON, this switch should be set to OFF. Failure to set
the heartbeat/SQE switch correctly will result in degradation or
failure of network communication.
Communication Status Indicators
Table 7 shows the functions of the four status indicators located
above the RJ45 receptacle.
Table 7: AT-1700 Status Indicators
36
LED Color
Label
Indicates
Used by
Green
TX
Transmitting packet
All media
Yellow
RX
Receiving packet
All media
Green
LNK
Valid receive link
signal
10BASE-T
FOIRL
Yellow
COL
Collision detected
All media
613-10434-00.bk Page 37 Monday, March 18, 1996 2:53 PM
Chapter 8
Troubleshooting
A network is a complex combination of hardware and software,
all of which must function for data communication to work.
Problems are most likely to occur when the card is first being
installed or when someone changes something in the network. A
problem could be caused in your computer or in cabling or in
many places elsewhere in the network.
If your computer is supported by a system administrator or
network administrator, this person can often provide the most
help in resolving a problem. ATI dealers also provide technical
support for installation problems. But if one of these local
resources is not successful solving your problem, you can obtain
assistance directly from ATI by fax or by telephone. See Table 9
on page 45 for the nearest office.
Identify the Exact Symptoms
If your computer is unable to communicate across the network,
carefully observe the symptoms. Gather information about the
system and its components, such as device drivers, memory and
extensions (e.g., QEMM), other peripheral cards and the use of
I/O ports and IRQs. Log your interaction with the computer,
noting the conditions, your actions and the responses. Analyzing
this information will help you diagnose the cause of the failure.
The technical support fax order form on page 43 can help you
organize the information you need to begin resolving a problem.
37
613-10434-00.bk Page 38 Monday, March 18, 1996 2:53 PM
AT-1700
Experiment with Possible Solutions
The first rule of troubleshooting is to isolate the problem. As you
experiment, only vary one factor at a time. Substitute known
good equipment and see if the problem persists or is eliminated.
❑ Do not overlook the obvious—make sure the card is seated in
the computer and that the cables and connectors are securely
attached.
❑ If the LINK LED does not light with UTP or fiber media, make
sure the cabling is intact and connected to a functioning
network port.
❑ If the LINK LED lights on a 10BASE-T segment, but data
transfer is slow, collision-prone, or non-existent, verify that
your cable is of level 3, 4, 5 , or IBM type 1 (see Chapter 7,
Important 10BASE-T Cable Considerations). Level 1 and 2
voice-quality cable will not work properly.
If the cable is more or less round in section, you probably have
data grade cable, correctly paired, and no transmission
problems. If, however, the cable appears flat in section (as
“Silver Satin” telephone-type cable) you probably have voicegrade cable and transmission problems. If it looks like
telephone cable, double-check it.
❑ If the computer is on a 10BASE-T segment, make sure the
“wire type” setting in the CardAssistant configuration menu
matches the impedance of the wire. If the computer is on a
10BASE2 segment, make sure the cable is connected with
T-connectors, terminated at the ends with 50Ω terminators,
and grounded in only one place.
❑ If you suspect the network adapter card is not working
properly, disconnect the computer from the network and run
CardAssistant diagnostics after rebooting with no drivers
loaded.
❑ If CardAssistant software does not detect the card, it could
mean a conflict between the card and another device, a card
38
613-10434-00.bk Page 39 Monday, March 18, 1996 2:53 PM
Troubleshooting
failure or a slot failure. You may need to reconfigure the
adapter card or the other device to avoid the conflict.
Only one device in the computer can use each I/O port and
interrupt vector. If two (or more) devices try to share resources,
one or all do not function properly. Table 8 lists common uses of
resources that can cause conflict.
To correct an I/O resource conflict
Warning
High voltages inside the computer present a safety
hazard. Be sure the power is OFF before removing
the cover.
Caution
Only remove the card at a static-free workstation,
with precautions to prevent damage to staticsensitive components.
!
1. Remove the card from the computer according to the
manufacturer’s reference manual.
2. Move the card to another computer. See “Installing the card in
an ISA or EISA slot” on page 13.
3. Invoke CardAssistant (page 15) and run diagnostics again
(page 18).
4. If diagnostics passes, change the adapter card configuration
(page 14), and move the card back to the target computer.
39
613-10434-00.bk Page 40 Monday, March 18, 1996 2:53 PM
AT-1700
5. Update the adapter card driver for the new settings. (See
your network software manual.)
Table 8: Some Typical Device Uses of Bus Resources
This resource... is customarily used for...
Base I/O Address
300h-31Fh
Prototyping board; network adapter card
360h-37Fh
LPT1
380h-39Fh
SDLC; secondary bi-synch interface
RAM Address Space
C0000h-C8000h VGA
IRQ
40
NMI
Parity errors
0
System timer
1
Keyboard
2
Cascade input for second interrupt controller
3
COM2
4
COM1
5
LPT2
6
Disk controller
7
LPT1; data acquisition, voice comm. adapter
8
Real-time clock interrupt
9
EGA/VGA
10
Reserved
11
Reserved
12
Reserved
13
Coprocessor
14
Hard disk controller
15
Reserved
613-10434-00.bk Page 41 Monday, March 18, 1996 2:53 PM
Troubleshooting
To determine base I/O address and interrupt
If the CardAssistant program does not detect the presence of the
card, the address may be in a range that conflicts with another
device on the bus. In this case, the only way to access the card is
to change the base address setting of one device or the other.
Either remove other card-cage peripherals that might have the
same I/O address or move the AT-1700 to another computer.
To replace corrupted network software
1. Temporarily move the files that refer to the adapter card
driver and comment out references in your batch files.
2. Refer to your LAN administration manual for instructions
on how to install your network software.
Manual/Adapter Card/CardAssistant/Driver Compatibility
This manual is intended for use only with the AT-1700
8-interrupt adapter cards with which it was shipped. The manual
will incorrectly reflect the use of earlier adapter cards. Earlier
cards may be identified with information from the file
README.REV on the CardAssistant distribution diskette.
The Version 2.0 CardAssistant software and card drivers
shipped with this manual are backward-compatible with respect
to the AT-1700 adapter card, and will operate correctly with
earlier versions of that card.
Get Technical Support
You can contact the dealer where you bought your AT-1700 for
local assistance. If local help is unable to resolve your problem,
ATI offers technical support via fax or telephone. In North
America, support engineers are available between the hours of
6:30 a.m. and 5 p.m. Pacific time. Please photocopy and complete
the technical support order on the next two pages. Then fax or
41
613-10434-00.bk Page 42 Monday, March 18, 1996 2:53 PM
AT-1700
call the support office for your region. See “Technical Support
Telephone Numbers” on page 45. The voice and fax telephone
numbers for technical support are listed for each regional office.
42
613-10434-00.bk Page 43 Monday, March 18, 1996 2:53 PM
Troubleshooting
Technical Support Fax Order
Name __________________________________________________
Address _____________________ City________________________
Phone ______________________ Fax________________________
Company _______________________________________________
State/Province________________ Zip/Postal Code______________
Computer Characterization
Processor ❐ 286 ❐ 386 ❐ 486 ❐ Pentium (586) Bus ❐ ISA ❐ EISA
Coprocessor ____________ RAM Memory ________________ Megabytes
❐ Chips & Technology ❐ Suntec ❐ VLSI ❐ Headlin ❐ Opti
Chip Set
❐ G2 ❐ Bioteq ❐ Symphony ❐ Paradigm ❐ UMC ❐ Eteq
❐ DFI ❐ Del
❐ Hedaka
❐ IBM ❐ Other______________
BIOS ❐Phoenix ❐Award ❐AMI ❐Other ________Version __________
Ports
LPT1 IRQ ______ COM1 IRQ ________COM3 IRQ _________
LPT2 IRQ ______ COM2 IRQ ________COM4 IRQ _________
Adapter Card ❐ AT-1700T ❐ AT-1700AT ❐ AT-1700BT ❐ AT-1700FT
IRQ ________
Boot ROM:
I/O address ______
❐installed
❐not installed
Adapter Card Driver Filename ______ Size ____ K Timestamp _________
Drive Controller (❐MFM ❐IDE ❐SCSI)
IRQ ____
Manufacturer _______________Model/Rev _____________
Video Display Adapter
IRQ ____
Manufacturer _______________Model/Rev _____________
43
613-10434-00.bk Page 44 Monday, March 18, 1996 2:53 PM
AT-1700
Incident Summary ________________________________________
Conditions (List the steps that led up to the problem.)
_______________________________________________________
Detailed Description ______________________________________
_______________________________________________________
_______________________________________________________
_______________________________________________________
_______________________________________________________
_______________________________________________________
_______________________________________________________
_______________________________________________________
_______________________________________________________
_______________________________________________________
_______________________________________________________
_______________________________________________________
_______________________________________________________
Please also fax printouts of your AUTOEXEC.BAT file and other
batch and configuration files.
44
613-10434-00.bk Page 45 Monday, March 18, 1996 2:53 PM
Troubleshooting
Table 9: Technical Support Telephone Numbers
Asia
Singapore, Taiwan, Thailand, Malaysia, Indonesia, Korea, Hong
Kong, Philippines, China, India
Voice: (+65) 383-2050
Fax: (+65) 383-2079
France
France, Belgium, Luxembourg, Holland, Italy, Spain, Australia,
New Zealand, Greece, Middle East, Africa, South America
Voice: (+33) 1-69-28-16-17
Fax: (+33) 1-69-28-37-49
Germany
Germany, Switzerland, Austria, Eastern Europe
Voice: (+01) 30-83-56-66
Fax: (+49) 30-435-70-650
North America
United States, Canada, Mexico
Voice: 1-800-428-4835
BBS:
Fax: (206) 481-3790
(206) 483-7979
United Kingdom
United Kingdom, Denmark, Norway, Sweden, Finland, Iceland
Voice: (+0) 800-20-40-40
Fax: (+44) 1-865-390-002
45
613-10434-00.bk Page 46 Monday, March 18, 1996 2:53 PM
AT-1700
Hardware Warranty and Software License Agreement
Allied Telesyn International Lifetime Adapter Card Warranty
Allied Telesyn International (ATI) provides a lifetime warranty to the end user that each of its Adapter Card products, and
all components thereof, will be free from defects in materials and workmanship. Any warranty hereunder is extended to the
end user and is not assignable.
This limited warranty will not apply to any Adapter Card that: (a) has been modified or altered by any party other than ATI;
or (b) has been damaged by deviation from the applicable environmental specifications; or (c) has been subject to accident
or misuse.
In the event of a malfunction or other indication of product failure attributable directly to faulty workmanship and / or
material, ATI will, at its option, repair or replace the defective products or components at no additional charge as set forth
herein. Repair or replacement product will be furnished on an exchange basis and will be either reconditioned or new at
the option of ATI. All replacement parts become the property of ATI. This warranty does not include service to repair
damage to the product resulting from accident, disaster, misuse, neglect or modification of the product.
Service under this warranty may be obtained by returning the product to ATI, and only after receiving authorization by ATI
by issuance of a Return Material Authorization (RMA) number, with shipping charges prepaid, in the original shipping
container or like container, and with proof of purchase included with the returned product. The RMA number MUST be
marked clearly visible on the outside of the shipping container. Any material returned without such RMA markings shall be
rejected and returned to sender unopened.
Products will be returned to the purchaser after repair or replacement has been completed and by the carrier and method
of delivery chosen by ATI, shipping paid by ATI. If the purchaser desires some other specific form of conveyance, then the
purchaser shall bear the cost of the return shipment.
THE ABOVE WARRANTY IS THE ONLY WARRANTY MADE BY ATI WITH RESPECT TO ANY OF THE ADAPTER CARD
PRODUCTS. ATI MAKES NO OTHER WARRANTY, EXPRESS OR IMPLIED, INCLUDING ANY IMPLIED WARRANTIES OF
MERCHANTABILITY, FITNESS FOR A PARTICULAR PURPOSE OR NONINFRINGEMENT. ATI DOES NOT WARRANT THAT
THE OPERATION OF ANY SOFTWARE PROVIDED UNDER THIS AGREEMENT WILL BE UNINTERRUPTED OR ERROR-FREE.
Some governments do not allow the exclusion or limitation of incidental or consequential damages for consumer products,
so the above limitation of exclusion may not apply to you.
Allied Telesyn International Adapterkarten Garantie
Allied Telesyn International (ATI) bietet den Endverbrauchern die Lifetime Garantie, daß sämtliche seiner AdapterkartenProdukte und alle dazugchörigen Komponenten frei von Material-und Fabrikationsfehlern sind. Alle im folgenden
aufgeführten Garantien beziehen sich auf den Endverbraucher und sind niht übertragbar.
Diese begrenzte Garantie gilt nicht für solche Adapterkarten, die (a) von einer anderen Seite als von ATI modifiziert oder
verändert wurden; oder (b) durch Abweichungen von den Umgebungsspezifikatiönen beschädigt wurden; oder (c) Unfällen
oder unsachgemäßen Anwendungen ausgesetzt wurden.
Im Falle von Funktionsstorungen oder anderen Anzeichen von Produktmängeln, die direkt auf Herstellungafehler und/oder
Materialfehler zurückzuführen sind, wird ATI die defekten Produkte oder Komponenten nach cigenem Ermessen reparieren
oder ersetzen und zwar ohne zusätzliche Kostenforderung wie im folgenden ausgeführt.
Reparaturen und Ersatzprodukte werden auf Austauschbasis gewährt. Die ausgetauschten Produkte oder Teile sind nach
Ermessen von ATI entweder instandgesetzt oder neu. Alle ersetzten Teile werden Eigentum von ATl. Diese Garantie schließt
keine Reparaturleistungen von Produktschäden ein, die aufgrund von Unfällen, Katastrophen, unsachgemäßem Gebrauch,
Fahrlässigkeit oder Modifizierungen am Produkt entstanden sind.
Um die Servicelestungen dieser Garantie in Anspruch nehmen zu können, müß das Produkt an ATI zurückgesandt werden
und zwar erst nach dem Erhalt einer Retum Material Authorization (RMA) Nummer, die von ATI ausgestellt wird. Die
Versandkosten müssen im voraus bezahlt werden, und die Produkte müssen ordnungsgemäß verpackt und mit einem
Kaufnachweis versehen sein. Die RMA Nummer muß deutlich sichthar auf der Außensete der Verpackung vermerkt sein,
andernfalls wird die Annahme der Sendung verweigert und diese ungeöffnet an den Absender zurückgeschickt.
46
613-10434-00.bk Page 47 Monday, March 18, 1996 2:53 PM
Nach absechlossener Reparatur oder dem vollständigen Ersatz eines Artikels werden die Produkte an den Kunden
zurückgeschickt und zwar einer von ATI gewählten Versandart. Wünscht der Kunde eine besondere Art der Zustellung oder
liegt sein Standort außerhalb von Deutchland, Osterreich, der Schweiz, Polen, Unagarn oder der Tschechoslowakei muß er
selbst für die Kosten der Rücksendung aufkommen.
Ausschließlichkeitserklärung: Die hier genannte Garantie ist die einzige Verpflichtung, die ATI in Bezug auf sämtliche
Adapterkarten-Produkte übernimmt. ATI leistet keinerlei andere Garantien, ausdrücklich oder implizite, einschließlich
jeglicher impliziter Garantien für Absatzfähigkeit, die Eignung für bestimmte Anwendungsbereiche oder die Verletzung
irgendwelcher Patentrechte. ATI garantiert nicht, daß die Anwendung jeglicher Software, die unter dieser Vereinbarung
bereitgestellt wird, ungestört oder fehlerfrei läuft.
Einige Staaten verbieten den Ausschluß oder die Begrenzun von Unfall-oder Folgeschäden für Verbrauchsgüter, so daß
obige Einschtränkungen oder Ausschließungen in diesen Fällen unwirksam bleiben.
Um eine beschleunigte Reparatur zu gewaehrleisten, fuellen Sie bitte die folgenden Zeilen aus, damit die Angaben
verfuegbar sind, wenn eine Garantieleistung der AT GmbH. in Anspruch genommen werden soll.
Garantie de Allied Telesyn International cartes Ethernet PC
Allied Telesyn International (ATI) fournit à chaque utilisateur final des cartes Ethernet PC une garantie à vie.Allied Telesyn
International (ATI) garantit que ces produits et leur composants sont exempts de tout vice apparent ou caché pour la durée
de leur vie. Toutes les garanties ci-dessous s'appliquent à l'utilisateur final et n'est pas cessible.
Cette garantie ne s'appliquera en aucun cas à toute carte: a) qui a été modifiée ou transformée par une autre partie qu'ATI
ou; b) qui a été abîmée par usage impropre ne correspondant pas aux conditions d'utilisation prescriptes ou; c) qui a été
détériorée ou mal utilisée. Dans le cas d'un disfonctionnement ou autre défectuosité dûment onstatée par ATI et affectant
le produit, ATI procédera de son choix, soit à la réparation ou au remplacement gratuit du produit défectueux, ou de ses
composants. Toutes les pièces défectueuses remplacées ou réparées dans le cadre de la présente garantie restent la
propriété d'ATI. La garantie ne couvre pas les remplacements ou réparations des produits résultant des circonstances
suivantes: accidents, sinistres, mauvais usage, défaut d'entretien, usure normale ou résultant de toute modification ou
transformation du produit.
Le service offert au titre de cette garantie sera obtenu en retournant le produit défectueux auprès d'ATI et/ou son distributeur
du matériel concerné et après accord d'ATI donné sous la forme d'un numéro d'autorisation de retour sous garantie. Ce
numéro sera communiqué sous la forme: de Numéro d'Enregistrement de Retour Usine. Le produit devra être retourné dans
son emballage d'origine ou dans un emballage approprié, avec la preuve et la date de l'achat et les frais d'envoi payés par
l'expéditeur. Tout matériel reçu sans un Numéro d'Enregistrement de Retour Usine, sans preuve ni date d'achat, sera
retourné à son expéditeur via ATI ou le distributeur d'origine du produit.
Les produits seront retournés au consommateur après que la réparation ou le remplacement ait été effectué et le mode de
livraison et le transporteur choisi par ATI pour n'importe quelle destination à l'intérieur des USA. Si le client désire un moyen
différent de celui choisi par ATI pour le retour de ses produits ou si il est situé au-delà de la frontière des USA, il devra payer
le côut du retour des produits.
CE QUI PRECEDE CONSTITUE LA SEULE GARANTIE DONNEE PAR ATI POUR TOUTE LA SERIE DE SES CARTES ET EXCLUT
TOUTE AUTRE GARANTIE EXPRESSE OU IMPLICITE, Y COMPRIS TOUTE GARANTIE IMPLICITE DU CARACTERE
ADEQUAT POUR LA COMMERCIALISATION, D'UN USAGE PARTICULIER OU DE NON VIOLATION DE PRIVILEGE DE
BREVET. ATI N'EMET AUCUNE GARANTIE EN CE QUI CONCERNE LA FIABILITE ET L'EXACTITUDE DE FONCTIONNEMENT
DES LOGICIELS FOURNIS.
La réglementation en vigueur de certains pays n'autorise pas l'exclusion ou la limitation des dommages directs ou
secondaires pour des produits de consommation. Dans ce cas, les exclusions citées ci-dessus ne s'appliquent pas.
Software License Agreement
PLEASE READ THIS SOFTWARE LICENSE AGREEMENT COMPLETELY. BY USING THE SOFTWARE, YOU AGREE TO BE
BOUND BY THE TERMS OF THIS LICENSE. IF YOU DO NOT AGREE TO THESE TERMS, PROMPTLY RETURN THE UNUSED
SOFTWARE TO THE PLACE WHERE YOU OBTAINED IT AND YOUR MONEY WILL BE REFUNDED.
1. Definitions. “Software” means software delivered on floppy disk or downloaded over a network from an on-line bulletin
board, and any firmware object programs included or provided for use with Equipment in any machine-readable or
interpreted form; and includes authorized copies and any software or firmware updates. “Equipment” means the Allied
Telesyn International communications hardware products with which Software delivered in firmware is obtained. “Product”
includes Allied Telesyn International Equipment and firmware-based Software in such Equipment.
47
613-10434-00.bk Page 48 Monday, March 18, 1996 2:53 PM
AT-1700
2. License. Allied Telesyn International and its licensors retain ownership of the Software. For Software delivered on floppy
disk, you own the disk on which the Software is recorded. For Software delivered on floppy disk or downloaded from a
bulletin board, you are granted a non-exclusive license to use the Software on a single computer and to make one backup
copy of the Software in machine-readable form. You must reproduce on the backup copy all copyright and other proprietary
legends appearing on the original copy of the Software. For Software delivered in firmware, you are granted a non-exclusive
license to use the Software solely on the Equipment with which it is delivered, or in the case of updates, for which it is
provided.
3. Transfer. You may transfer all of your license rights in the Software, along with any backup copy and all associated
documentation, to another party, provided you give that party a copy of this License and such party reads and agrees to the
terms of this License. Software delivered in firmware may be transferred only when title to the associated Equipment is
transferred to the same party.
4. Restrictions. The Software contains copyrighted material, trade secrets and other proprietary material. You may not
decompile, reverse engineer, disassemble, translate or otherwise reduce the Software to human-perceivable form. You may
not rent, lease, loan, sublicense, disclose, distribute, modify or create derivative works based upon the Software in whole
or in part.
5. Limited Warranty. For Software delivered on disk, Allied Telesyn International warrants that the disk on which the
Software is recorded will be free from defects in materials and workmanship under normal use for ninety (90) days from
the date of purchase. All Software is provided AS IS and without any warranty of any kind, except that for Software delivered
in firmware, Allied Telesyn International warrants that the Software will meet Allied Telesyn International’ published
specification during the warranty period for the associated Equipment.
For purposes of the remainder of this section and section 6, “Allied Telesyn International” includes Allied Telesyn
International and its licensors, if any. For Software delivered on disk, Allied Telesyn International’ entire liability and your
exclusive remedy will be replacement during the warranty period of a disk not meeting the warranty. You may return a
defective disk to Allied Telesyn International. For Software delivered in firmware, Allied Telesyn International’ entire liability
and your exclusive remedy will be, at Allied Telesyn International’ option, the repair or replacement during the warranty
period of a Product not meeting the warranty, or the refund of the price paid for the Product (upon return of the Product).
THESE WARRANTIES ARE IN LIEU OF ALL OTHER WARRANTIES, EXPRESS OR IMPLIED, INCLUDING ANY IMPLIED
WARRANTIES OF MERCHANTABILITY, FITNESS FOR PARTICULAR PURPOSE OR NON-INFRINGEMENT OF THIRD PARTY
RIGHTS. Allied Telesyn International DOES NOT WARRANT THAT THE SOFTWARE OR DOCUMENTATION WILL MEET
YOUR REQUIREMENTS OR BE ERROR FREE OR THAT THE OPERATION OF THE SOFTWARE WILL BE UNINTERRUPTED,
OR THAT DEFECTS IN THE SOFTWARE AND DOCUMENTATION WILL BE CORRECTED. NO WRITTEN OR ORAL information
or ADVICE GIVEN BY Allied Telesyn International OR AN Allied Telesyn International RESELLER or distributor WIll create
ANY WARRANTY or in any way increase the scope of this warranty. This warranty gives you specific legal rights. You may
have other rights that vary from state to state and country to country. SOME STATES DO NOT ALLOW THE EXCLUSION OF
IMPLIED WARRANTIES, SO THE ABOVE EXCLUSION MAY NOT APPLY TO YOU. ANY IMPLIED WARRANTIES ARE LIMITED
IN DURATION TO NINETY (90) DAYS.
6. Limitation on Liability. UNDER NO CIRCUMSTANCES WILL Allied Telesyn International BE LIABLE FOR ANY
INCIDENTAL, SPECIAL OR CONSEQUENTIAL DAMAGES OR FOR LOST PROFITS OR LOST SAVINGS RESULTING FROM
THE USE OF OR INABILITY TO USE THE SOFTWARE OR RELATED DOCUMENTATION, EVEN IF Allied Telesyn International
HAS BEEN INFORMED OF THE POSSIBILITY OF SUCH DAMAGES. Some states do not allow the limitation or exclusion of
liability for incidental or consequential damages, so the above limitation or exclusion may not apply to you.
In no event will Allied Telesyn International’ total liability to you for all damages, losses and causes of action, whether in
contract, tort (including negligence) or otherwise, exceed the amount paid by you for the Software.
7. Export. Export or re-export of Software or any technical data received from Allied Telesyn International, and any direct
product thereof, may be subject to U.S. or other government restrictions. You agree to comply with all applicable
government export regulations.
8. Government End Users. If you are accepting the Software on behalf of any unit or agency of the United States
Government, the following provisions apply. The Government agrees: (i) if the Software is supplied to the Department of
Defense (DoD), the Software is classified as “Commercial Computer Software” and the Government is acquiring only
“restricted rights” in the Software and documentation as that term is defined in Clause 252.227-7013(c)(1) of the DFARs;
and (ii) if the Software is supplied to any other unit or agency of the United States Government, the Government’s rights in
the Software and documentation are defined in Clause 52.227-19(C)(2) of the FAR or, in the case of NASA, in Clause 1852.227-86(d) of the NASA Supplement to the FAR. Contractor/manufacturer is Allied Telesyn International, Inc., 950 Kifer
Road, Sunnyvale, California.
9. Dual Media. If Software is supplied on both 3.5 inch and 5.25 inch disks, then you may use only the disk that is
appropriate for the one computer with which you will use the Software. You may not use, nor permit anyone else to use,
the other disk, except as part of the transfer of all of your rights in the Software.
10. Termination. This License will terminate immediately without notice if you fail to comply with any provision of this
License.
48
613-10434-00.bk Page 49 Monday, March 18, 1996 2:53 PM
11. General. This License will be governed by the laws of the United States and of California, as applied to agreements
entered into by California residents and performed within California. If any Software is to be used outside the United States,
the rights and obligations under this License will not be governed by the United Nations Convention on Contracts for the
International Sale of Goods, the application of which is expressly excluded. If for any reason a court finds any provision of
this License, or any portion thereof, to be unenforceable, that provision will be enforced to the maximum extent permissible,
and the remainder of this License will continue in full force and effect. This License constitutes the entire agreement between
the parties with respect to the Software and related documentation, and supersedes all prior or contemporaneous
understandings or agreements. No amendment or modification of this License will be binding unless in writing and signed
by an officer of Allied Telesyn International.
49
613-10434-00.bk Page 50 Monday, March 18, 1996 2:53 PM
AT-1700
Adapter Card Revision History
50
Revision Description
Date
Added AUI port option
8/93
Converted to high/low interrupt-request (IRQ)
options
8/93
Converted to 8-interrupt (IRQ) selection
1/94
613-10434-00.bk Page 51 Monday, March 18, 1996 2:53 PM
Adapter Card Manual Feedback
We would like you to tell us the type of additional information you would like to see in the
manual. If there are topics you want to be covered in the manual, please photocopy this page,
answer the questions and fax or mail this information. The mailing address is at the bottom
of the page. Your comments are valuable when we plan future revisions of the manual.
On a scale of 1 to 10 (10 being most important), my uses of the manual information are:
CardAssistant Installation _____ CardAssistant Operation _________
Diagnostics _______________
Card I/O Configuration _________
Batch Configuration__________
Troubleshooting______________
Multiple Cards Installation_____
Network Software ____________
Driver Installation____________
Adapter Card Operation ________
Driver Selection ____________
Cabling_____________________
I found the following the most valuable _______________________________
_____________________________________________________________
I would like the following more developed_____________________________
_____________________________________________________________
I would find the manual more useful if________________________________
_____________________________________________________________
Please fax or mail your feedback. Fax to 1-206-487-8880. Or mail to:
Allied Telesyn International Technical Publications Department
19015 North Creek Parkway, Suite 200
Bothell, WA 98011 USA
51