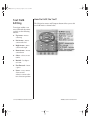
1
iPAQ.book Page 1 Tuesday, April 17, 2001 8:15 AM
Notice
© 2001 Compaq Computer Corporation
COMPAQ and the Compaq logo Registered in U.S. Patent and Trademark Office.
Microsoft and Windows are trademarks of Microsoft Corporation.
All other product names mentioned herein may be trademarks or registered trademarks of their respective
companies.
Compaq shall not be liable for technical or editorial errors or omissions contained herein.
The information in this document is subject to change without notice.
The information in this publication is subject to change without notice and is provided "AS IS" WITHOUT WARRANTY OF ANY KIND. THE ENTIRE RISK ARISING OUT OF THE USE OF THIS
INFORMATION REMAINS WITH RECIPIENT. IN NO EVENT SHALL COMPAQ BE LIABLE FOR
ANY DIRECT, CONSEQUENTIAL, INCIDENTAL, SPECIAL, PUNITIVE OR OTHER DAMAGES
WHATSOEVER (INCLUDING WITHOUT LIMITATION, DAMAGES FOR LOSS OF BUSINESS
PROFITS, BUSINESS INTERRUPTION OR LOSS OF BUSINESS INFORMATION), EVEN IF
COMPAQ HAS BEEN ADVISED OF THE POSSIBILITY OF SUCH DAMAGES. THE FOREGOING
SHALL APPLY REGARDLESS OF THE NEGLIGENCE OR OTHER FAULT OF EITHER PARTY
AND REGARDLESS OF WHETHER SUCH LIABILITY SOUNDS IN CONTRACT, NEGLIGENCE,
TORT, OR ANY OTHER THEORY OF LEGAL LIABILITY, AND NOTWITHSTANDING ANY
FAILURE OF ESSENTIAL PURPOSE OF ANY LIMITED REMEDY.
The limited warranties for Compaq products are exclusively set forth in the documentation accompanying
such products. Nothing herein should be construed as constituting a further or additional warranty.
iPAQ Music Center
First Edition (April 2001)
Part Number 225345-001
iPAQ.book Page 2 Tuesday, April 17, 2001 8:15 AM
iPAQ.book Page i Tuesday, April 17, 2001 8:15 AM
Contents
C
Chapter 1 Introduction . . . . . . . . . . . . . . . . . . . . . . . . . . . . . . . . . . . . . . . . 1-1
Who Should Read this Guide?. . . . . . . . . . . . . . . . . . . . . . . . . . . . . . . . . . 1-2
Symbols Used in This Guide. . . . . . . . . . . . . . . . . . . . . . . . . . . . . . . . . . . . 1-3
Safety Instructions . . . . . . . . . . . . . . . . . . . . . . . . . . . . . . . . . . . . . . . . . . . . 1-3
Where Can I Find More Information? . . . . . . . . . . . . . . . . . . . . . . . . . . . 1-4
Chapter 2 Connecting Your iPAQ Music Center . . . . . . . . . . . . . . . . . . 2-1
iPAQ Music Center Parts List . . . . . . . . . . . . . . . . . . . . . . . . . . . . . . . . . . . 2-2
System Requirements . . . . . . . . . . . . . . . . . . . . . . . . . . . . . . . . . . . . . . . . . 2-3
The iPAQ Music Center . . . . . . . . . . . . . . . . . . . . . . . . . . . . . . . . . . . . . . . . 2-4
Hardware Connections . . . . . . . . . . . . . . . . . . . . . . . . . . . . . . . . . . . . . . . .2-6
Power On . . . . . . . . . . . . . . . . . . . . . . . . . . . . . . . . . . . . . . . . . . . . . . . . . . . . .2-9
Options & Accessories . . . . . . . . . . . . . . . . . . . . . . . . . . . . . . . . . . . . . . . . 2-10
Chapter 3 Your iPAQ Music Center Remote Control . . . . . . . . . . . . . . 3-1
Remote Control Overview. . . . . . . . . . . . . . . . . . . . . . . . . . . . . . . . . . . . . . 3-2
Battery Installation. . . . . . . . . . . . . . . . . . . . . . . . . . . . . . . . . . . . . . . . . . . . 3-2
Number & Text Entry . . . . . . . . . . . . . . . . . . . . . . . . . . . . . . . . . . . . . . . . . . 3-3
Text Field Editing. . . . . . . . . . . . . . . . . . . . . . . . . . . . . . . . . . . . . . . . . . . . . . 3-4
IPAQ
MUSIC CENTER–GETTING STARTED
CONTENTS
I
iPAQ.book Page ii Tuesday, April 17, 2001 8:15 AM
Chapter 4 Setup & Overview . . . . . . . . . . . . . . . . . . . . . . . . . . . . . . . . . . 4-1
Setup . . . . . . . . . . . . . . . . . . . . . . . . . . . . . . . . . . . . . . . . . . . . . . . . . . . . . . . . . 4-2
Players, Guides, and Options Overview . . . . . . . . . . . . . . . . . . . . . . . . .4-4
Chapter 5 Let’s Get Started . . . . . . . . . . . . . . . . . . . . . . . . . . . . . . . . . . . . 5-1
Navigating the Guide Screen . . . . . . . . . . . . . . . . . . . . . . . . . . . . . . . . . . 5-2
Playing a CD . . . . . . . . . . . . . . . . . . . . . . . . . . . . . . . . . . . . . . . . . . . . . . . . . . 5-3
Setting the Play Mode . . . . . . . . . . . . . . . . . . . . . . . . . . . . . . . . . . . . . . . . . 5-4
Recording from a CD . . . . . . . . . . . . . . . . . . . . . . . . . . . . . . . . . . . . . . . . . . 5-6
Listening to Internet Radio . . . . . . . . . . . . . . . . . . . . . . . . . . . . . . . . . . . . 5-9
Chapter 6 Personalizing Your Music Library . . . . . . . . . . . . . . . . . . . . 6-1
Music Groups and Playlists . . . . . . . . . . . . . . . . . . . . . . . . . . . . . . . . . . . .6-2
Editing CD and Track Information. . . . . . . . . . . . . . . . . . . . . . . . . . . . .6-10
Transfer to Portable Device . . . . . . . . . . . . . . . . . . . . . . . . . . . . . . . . . . . 6-12
Chapter 7 Personalizing Internet Radio . . . . . . . . . . . . . . . . . . . . . . . . . 7-1
Radio Mode . . . . . . . . . . . . . . . . . . . . . . . . . . . . . . . . . . . . . . . . . . . . . . . . . . . 7-2
Radio Groups . . . . . . . . . . . . . . . . . . . . . . . . . . . . . . . . . . . . . . . . . . . . . . . . . 7-2
Chapter 8 OpenGlobe . . . . . . . . . . . . . . . . . . . . . . . . . . . . . . . . . . . . . . . . . 8-1
The World of OpenGlobe . . . . . . . . . . . . . . . . . . . . . . . . . . . . . . . . . . . . . . 8-2
Accessing OpenGlobe. . . . . . . . . . . . . . . . . . . . . . . . . . . . . . . . . . . . . . . . . . 8-3
CE-Commerce™ . . . . . . . . . . . . . . . . . . . . . . . . . . . . . . . . . . . . . . . . . . . . . . .8-4
Chapter 9 Home Networking for iPAQ Music Center . . . . . . . . . . . . . 9-1
HPNA . . . . . . . . . . . . . . . . . . . . . . . . . . . . . . . . . . . . . . . . . . . . . . . . . . . . . . . . .9-2
Appendix . . . . . . . . . . . . . . . . . . . . . . . . . . . . . . . . . . . . . . . . . . . . . . . . . . A-1
Set Up Codes . . . . . . . . . . . . . . . . . . . . . . . . . . . . . . . . . . . . . . . . . . . . . . . . . .A-2
CONTENTS
II
IPAQ
MUSIC CENTER–GETTING STARTED
iPAQ.book Page 1 Tuesday, April 17, 2001 8:15 AM
Introduction
In This Chapter
Who Should Read this
Guide?
1-2
Symbols Used in This
Guide
1-3
Safety Instructions
1
Congratulations on the purchase of your new Compaq iPAQ™
Music Center. This revolutionary product combines the
convenience of a CD changer with the ability to store, organize,
and personalize your music collection, as well as listen to Internet
Radio.
This guide will help you:
➜
Set up your iPAQ Music Center.
➜ Get acquainted with its hardware and software features.
1-3
Where Can I Find More
Information?
1-4
Note: Your iPAQ Music Center and remote control may differ slightly from the
hardware depicted in this manual. Illustrations are for demonstration
purposes only and may change as the software is updated.
IPAQ
MUSIC CENTER—GETTING STARTED
INTRODUCTION 1-1
iPAQ.book Page 2 Tuesday, April 17, 2001 8:15 AM
Who Should
Read this
Guide?
Using Your iPAQ Music Center Getting
Started Guide
The iPAQ Music Center is
a new technology, and it is
recommended that you
read the chapters in
sequence.
The page layout enables you to see at a glance how the
information is organized. The left column lists the most important
topics. It explains why the topic is important to you and what the
topic is. This column also contains warnings and useful tips and
tells you about other reference materials.
This easy-to-use guide helps you find the information you want
as quickly as possible.
The right column explains how to perform a procedure. It
contains step-by-step instructions.
Graphics help you visualize the task and validate what you are
doing as you do it. Detailed graphics may span both columns.
1-2 INTRODUCTION
IPAQ
MUSIC CENTER—GETTING STARTED
iPAQ.book Page 3 Tuesday, April 17, 2001 8:15 AM
Symbols Used
in This Guide
Symbol Information Boxes
Throughout this guide,
symbol information boxes
provide important
information.
Did you know ...
Understanding the background
or concept may help you solve a
problem.
Tip
Helpful hints make using your
iPAQ Music Center easier and
faster.
See also ...
Safety
Instructions
Safe Use of Your iPAQ Music Center
➜
➜
Your iPAQ Music Center is
an electrical device. Treat
it with care to avoid
personal injury and
damage to the equipment.
➜
➜
➜
➜
➜
IPAQ
MUSIC CENTER—GETTING STARTED
Another document or another
page in this document has
related information.
Follow all warnings and instructions marked on the product.
Unplug this product from the wall outlet before cleaning. Do
not use liquid cleaners or aerosol cleaners. Use a damp cloth
for cleaning.
Do not use this product near water.
Do not place this product on an unstable cart, stand, or table.
The product may fall, causing serious damage to the product.
Slots and openings in the cabinet and in the back or bottom
are provided for ventilation. To ensure reliable operation of
the product and to protect it from overheating, these openings
must not be blocked or covered. The product should never be
placed near (or over) a radiator or heat register or in a built-in
installation unless proper ventilation is provided.
This product should be operated from the type of power
indicated on the marking label. If you are not sure of the type
of power available, consult your dealer or local power
company.
If an extension cord is used with this product, make sure that
the total ampere rating of the equipment plugged into the
extension cord does not exceed the extension cord ampere
rating. Also, make sure that the total rating of all products
plugged into the wall outlet does not exceed the fuse rating.
INTRODUCTION 1-3
iPAQ.book Page 4 Tuesday, April 17, 2001 8:15 AM
Safety
Instructions
(continued)
➜
Where Can I
Find More
Information?
Accessing More Information
Never insert objects of any kind into this product through
cabinet slots as they may touch dangerous voltage points or
may short out parts that could result in a fire or electric
shocks. Never spill liquid of any kind on the product.
➜ To avoid electric shock, do not open the cover. There are no
user-serviceable parts inside.
➜ Unplug this product from the wall outlet and refer servicing
to qualified service personnel under the following conditions:
• The power cord or plug is damaged or frayed.
• Liquid has been spilled into the product.
• The product has been exposed to rain or water.
• The product does not operate normally when the operating
instructions are followed.
• The product has been dropped or cabinet has been
damaged.
• The product exhibits a distinct change in performance,
indicating a need for service.
You can use your PC to access the following information on the
Compaq Web site:
➜
Information is available in
the printed guides as well
as on the Compaq Web
page. Use the iPAQ Music
Center Getting Started
guide as your first point of
reference and then refer to
the following documents:
➜
➜
➜
➜
Quick Setup Poster
Online Help
Phone# 1-888-302-7358
compaq.com/
ipaqaudio
1-4 INTRODUCTION
➜
➜
➜
➜
➜
The online iPAQ Music Center Getting Started guide
Frequently Asked Questions (FAQs)
Service and Support information
Warranty
Links for purchasing iPAQ Music Center options and
accessories
Other exciting links to products, services, and information
Note: As new features are added, look for updates on Compaq’s Web page
compaq.com/ipaqaudio
IPAQ
MUSIC CENTER—GETTING STARTED
iPAQ.book Page 1 Tuesday, April 17, 2001 8:15 AM
Connecting
Your iPAQ
Music Center
In This Chapter
iPAQ Music Center Parts
List
2-2
2
Connecting your iPAQ Music Center is a simple process.
This chapter helps you get acquainted with the iPAQ Music
Center hardware and provides easy step-by-step instructions for
making the right connections.
System Requirements 2-3
The iPAQ Music Center 2-4
Hardware Connections 2-6
Power On
2-9
Options & Accessories 2-10
IPAQ
MUSIC CENTER—GETTING STARTED
CONNECTING YOUR IPAQ MUSIC CENTER 2-1
iPAQ.book Page 2 Tuesday, April 17, 2001 8:15 AM
iPAQ Music Center
Parts List
Tip
What’s in the Box?
Before connecting the iPAQ Music Center to your home
entertainment system, compare the contents of the box with the
iPAQ Music Center parts list.
In addition to your Warranty and iPAQ Music Center Getting
Started guide, the contents of the box include the following:
It’s a good idea to have the
iPAQ Music Center Quick
Setup Poster handy to help you
make the right connections.
2-2 CONNECTING YOUR IPAQ MUSIC CENTER
1
iPAQ Music Center
6
Stereo cable
2
Two AA batteries
7
Remote control
3
Power Cable
8
Telephone splitter
4
Composite video cable
9
Quick Setup Poster
5
Telephone cable
IPAQ
MUSIC CENTER—GETTING STARTED
iPAQ.book Page 3 Tuesday, April 17, 2001 8:15 AM
System
Requirements
What Do I Need For Setup?
Minimum requirements for the iPAQ Music Center setup include:
➜
Television—a video connection is required for setup. After
setup, the iPAQ Music Center will function without a TV, but
we recommend a TV connection to enhance the experience.
➜
Audio setup—the iPAQ Music Center does not contain
speakers or an amplifier. It must be connected to a stereo
receiver or amplified speakers.
➜
Internet access—the iPAQ Music Center will function with
standard dial-up, cable-based or DSL-based Internet Service
Providers. During guided setup (Chapter 4) make sure you
have the following information handy:
Did you know ...
AOL and Compuserve use a
proprietary method of Internet
connectivity and are not
compatible with your iPAQ
Music Center.
•
•
•
•
Name of your ISP
Dial-up number
Login name
Login password
How to get Help
If you have trouble setting up your iPAQ Music Center or would
like more information, visit the Compaq Web site:
http://www.compaq.com/ipaqaudio
Warranty
Your iPAQ Music Center has a one-year limited warranty. For
further details, please refer to the Warranty Card that came in the
package.
IPAQ
MUSIC CENTER—GETTING STARTED
CONNECTING YOUR IPAQ MUSIC CENTER 2-3
iPAQ.book Page 4 Tuesday, April 17, 2001 8:15 AM
The iPAQ Music
Center
What’s in Front?
The front panel provides access to most iPAQ Music Center
functions. Buttons and their functions are listed below.
The iPAQ Music Center
front panel display allows
you to access your music
library without a TV.
1
Power
8
Previous / Scan Backwards
2
Music mode
9
Next / Scan Forward
3
Radio mode
:
Record
4
Web Sync
;
Guide
5
Open/Close
<
Select and Navigate
6
Play/Pause
=
USB connector
7
Stop
Front Panel Display
The information on the front panel display complements the
information displayed on your TV.
2-4 CONNECTING YOUR IPAQ MUSIC CENTER
IPAQ
MUSIC CENTER—GETTING STARTED
iPAQ.book Page 5 Tuesday, April 17, 2001 8:15 AM
The iPAQ Music
Center
(continued)
IPAQ
MUSIC CENTER—GETTING STARTED
What’s in Back?
Refer to the graphic and table below when connecting your iPAQ
Music Center.
1
Power
8
S-video output
2
Optical digital audio input
(S/PDIF)
9
Composite video output
3
Coax digital audio input
(S/PDIF)
:
USB connectors
4
Analog audio inputs
;
HPNA connector
5
Analog audio outputs
<
S-Link (Control SII)
6
Coax digital audio output
(S/PDIF)
=
Modem
7
Optical digital audio output
(S/PDIF)
CONNECTING YOUR IPAQ MUSIC CENTER 2-5
iPAQ.book Page 6 Tuesday, April 17, 2001 8:15 AM
Hardware
Connections
See also ...
Refer to the Quick Setup Poster
for detailed information about
connections.
Connecting to A/V Receiver and TV or...
1. Connect the Stereo Cable 1 to the iPAQ Music Center audio
output and to an available audio input on your A/V receiver
(such as tape, CD, or auxiliary.)
2. Connect the Composite Video Cable 2 to the iPAQ Music
Center output and to an available video input on your TV.
3. Connect the Power Cable 3 to the iPAQ Music Center and to
a power outlet.
Did you know ...
As features are added, the iPAQ
Music Center will have the
capability to record from other
devices. To do this connect the
cable from receiver output to
iPAQ Music Center input (this
cable is not included).
Note: For best audio performance, use S/PDIF digital audio connections
(either optical or coaxial) instead of analog stereo. For best video
performance, use S-Video connections instead of composite video,
where possible. Digital and S-video cables are not included.
4. Connect the iPAQ Music Center to the Internet (see 2-8).
2-6 CONNECTING YOUR IPAQ MUSIC CENTER
IPAQ
MUSIC CENTER—GETTING STARTED
iPAQ.book Page 7 Tuesday, April 17, 2001 8:15 AM
Hardware
Connections
(continued)
A/V Receiver Connected to TV
1. Connect the Stereo Cable 1 to the iPAQ Music Center audio
output and to an available audio input on your A/V receiver
(such as tape, CD, or auxilary).
2. Connect the Composite Video Cable 2 to the iPAQ Music
Center video output and to the video input of the same
component used in Step 1.
3. Connect the Power Cable 3 to the iPAQ Music Center and to
a power outlet.
4. Connect the iPAQ Music Center to the Internet (see 2-8).
IPAQ
MUSIC CENTER—GETTING STARTED
CONNECTING YOUR IPAQ MUSIC CENTER 2-7
iPAQ.book Page 8 Tuesday, April 17, 2001 8:15 AM
Hardware
Connections
(continued)
Connecting to the Internet
Using the Built-In Modem
1. Connect the Telephone Cable 1 to the modem jack.
2. Connect the other end to a Telephone Wall Jack 2. Use the
included splitter if you want to use a telephone at this
location.
See also ...
If you have a home network
refer to Chapter 9 for more
details.
Note: If a telephone wall jack is not conveniently located near your Music
Center, you may consider using a wireless telephone jack system.
Did you know ...
If you have a broadband
connection to the Internet, you
can use a home network.
HPNA Setup
1. Connect the Telephone Cable 1 (optimal home phoneline
networking performance requires a minimum telephone cable
of 6 feet) to the HPNA network jack on the Music Center.
2. Connect the other end to a Telephone Wall Jack 2. Use the
included splitter if you want to use a telephone at this
location.
2-8 CONNECTING YOUR IPAQ MUSIC CENTER
IPAQ
MUSIC CENTER—GETTING STARTED
iPAQ.book Page 9 Tuesday, April 17, 2001 8:15 AM
Power On
When you turn on your
iPAQ Music Center for the
first time, you are guided
through an initial setup
procedure. This process
ensures your IPAQ Music
Center is optimally
integrated with the rest of
your home entertainment
system.
Powering Up Your iPAQ Music Center N
1. When you plug in your iPAQ Music Center, the red LED on
the front panel will blink. When the unit is ready to be used,
the LED will be solid red.
2. When the LED turns solid red, press the Power button N on
the remote or front panel. The Welcome screen is displayed on
your TV.
3. Turn on your A/V receiver and select the proper input mode
such as CD, tape, or auxiliary.
4. Select the video input on your television that matches the
input you used when connecting the iPAQ Music Center.
IPAQ
MUSIC CENTER—GETTING STARTED
CONNECTING YOUR IPAQ MUSIC CENTER 2-9
iPAQ.book Page 10 Tuesday, April 17, 2001 8:15 AM
Options &
Accessories
What Peripherals Does the iPAQ Music
Center Support?
Your Music Center currently supports the following peripherals:
2-10 CONNECTING YOUR IPAQ MUSIC CENTER
➜
Compaq USB Keyboard Part # 179355-007
➜
Compaq Personal Audio Player PA-1
➜
Belkin USB Ethernet Adapter Model F5U111
➜
Rio 600 Digital Audio Player
➜
IR Keyboard (available on Open Globe web site)
IPAQ
MUSIC CENTER—GETTING STARTED
iPAQ.book Page 1 Tuesday, April 17, 2001 8:15 AM
Your iPAQ Music
Center Remote
Control
In This Chapter
Remote Control
Overview
3
This chapter guides you through the use of your iPAQ Music
Center remote control. The powerful features of the iPAQ remote
control put your music at your fingertips.
3-2
Battery Installation 3-2
Number & Text Entry 3-3
Text Field Editing
IPAQ
3-4
MUSIC CENTER—GETTING STARTED
YOUR IPAQ MUSIC CENTER REMOTE CONTROL 3-1
iPAQ.book Page 2 Tuesday, April 17, 2001 8:15 AM
Remote Control
Overview
Meet the Remote Control
The iPAQ Music Center remote control is as easy to use as a
TV/VCR remote control. Most of the buttons will be familiar.
Tip
*Your Remote Control can be
programmed to operate certain
functions of your TV and stereo
receiver. Refer to the Appendix
at the end of this guide for
remote control setup codes.
Battery
Installation
The iPAQ Music Center
remote control uses two
AA batteries.
1. Open the battery
compartment door 1 on
the back of the remote
control.
2. Place two AA batteries
2 into the compartment
and close the
compartment door.
3-2 YOUR IPAQ MUSIC CENTER REMOTE CONTROL
IPAQ
MUSIC CENTER—GETTING STARTED
iPAQ.book Page 3 Tuesday, April 17, 2001 8:15 AM
Number & Text
Entry
Similar to a cellular phone,
the iPAQ Music Center
remote control can be used
to enter text and/or
numbers in all text fields,
such as those displayed in
the Setup and Edit screens.
How Do I Enter Numbers and Text?
In fields where the system accepts only numbers, the Entry
indicator displays 123. When numbers and letters are accepted,
the Entry indicator displays TEXT.
Enter numbers in a field by pressing the numeric buttons on your
remote control.
The appropriate Entry
mode engages
automatically when a text
field screen is displayed.
Each numbered button is
assigned a group of letters
or special characters.
Note: The 1 key can be used for
additional characters not currently
found on your remote control.
Enter alphanumeric characters in a field by repeatedly pressing a
number until the desired letter is displayed.
IPAQ
MUSIC CENTER—GETTING STARTED
YOUR IPAQ MUSIC CENTER REMOTE CONTROL 3-3
iPAQ.book Page 4 Tuesday, April 17, 2001 8:15 AM
Text Field
Editing
How Do I Edit the Text?
The Navigation arrows and Transport buttons allow you to edit
text field entries as shown below.
To navigate within a text
entry field with the remote
control, use the following
buttons:
➜
Up Arrow—moves
cursor up
➜
Left Arrow—moves
cursor to the left
➜
Right Arrow—move
cursor to the right
➜
Down Arrow—moves
cursor down
➜
Select—select or save
entries
➜
Rewind—backspace
over text.
➜
Fast Forward—insert
a space
➜
Pause—saves current
character and
advances cursor to the
next character position
3-4 YOUR IPAQ MUSIC CENTER REMOTE CONTROL
IPAQ
MUSIC CENTER—GETTING STARTED
iPAQ.book Page 1 Tuesday, April 17, 2001 8:15 AM
Setup &
Overview
In This Chapter
Setup
4-2
4
Now that your iPAQ Music Center is connected, proceed through
guided setup to begin enjoying your system.
This chapter provides step-by-step procedures to help you set up
your iPAQ Music Center and provides an overview of the Player,
Guide, and Options screens.
Players, Guides, and
Options Overview 4-4
IPAQ
MUSIC CENTER—GETTING STARTED
SETUP & OVERVIEW 4-1
iPAQ.book Page 2 Tuesday, April 17, 2001 8:15 AM
Setup
After completing the
initial setup process, you
can modify your system
configuration at any time.
Registering Your iPAQ Music Center
1. The first screen you see is the Welcome Screen. You will be
guided through several setup screens.
2. Enter the requested information using the remote control.
3. Use the navigation arrows to highlight next at the bottom of
the screen and press the Select S button.
4. During the Setup process, you are presented with a series of
screens requesting specific information. This information is
for owner registration and for personalizing.
5. Setup screens follow the configuration below:
6. At the conclusion of the Setup process, your iPAQ Music
Center connects to OpenGlobe™ for registration.
Tip
You can use an IR board or
USB Presario keyboard.
Element
4-2 SETUP & OVERVIEW
What it does
Title
Displays the current setup topic
Body
Area where user input choices are displayed.
Controls
Navigation tools to move through the setup process
Progress
Indicator
Informs user of position in the Setup process.
IPAQ
MUSIC CENTER—GETTING STARTED
iPAQ.book Page 3 Tuesday, April 17, 2001 8:15 AM
Setup
(continued)
When you press the Setup
button T on the remote
control and select an
option from the Setup
menu, you can modify the
specific setting you want
without going through the
entire procedure again.
Modifying the System Setup T
1. Press the Setup T button on the remote control to display
the System Setup screen.
2. Use the navigation arrows to highlight the desired setup
activity.
3. Press the Select S button to continue.
Element
IPAQ
MUSIC CENTER—GETTING STARTED
What it does
adjust screen
position
Optimize settings for clear, readable interface
user settings
Collect basic information for user registration
internet access
Record your Internet settings
radio
Select favorite radio genres
advanced
settings
Customize infrequently used and expert settings
exit
End Setup process (you may return at any time)
SETUP & OVERVIEW 4-3
iPAQ.book Page 4 Tuesday, April 17, 2001 8:15 AM
Players, Guides,
and Options
Overview
To make things simple, the
iPAQ Music Center allows
you to control all Music
mode and Radio mode
functions using only three
types of screens:
➜
PLAYERS—primary
mode of operation for
Music and Radio
➜
GUIDES—find and
organize your music
➜
OPTIONS—create/
edit groups and
playlists as well as
access other features
Player Screen
Player screens let you
listen to a music
selection or radio
station, view tracks
being played, as well as
name, title, and cover
art.
Guide Screen
Guide screens help
you find and organize
music and radio
content.
See also ...
Refer to chapter 6,
Personalizing Your Music
Library for detailed
information about the iPAQ
Music Center Music mode.
4-4 SETUP & OVERVIEW
Options Screens
Options screens help
you organize access to
content. You can also
create, edit, or delete
groups and playlists,
select the play mode,
and transfer to portable
player.
IPAQ
MUSIC CENTER—GETTING STARTED
iPAQ.book Page 1 Tuesday, April 17, 2001 8:15 AM
Let’s Get
Started
In this chapter you will use the pre-loaded music to learn the
basic play functions of your iPAQ Music Center.
In This Chapter
Navigating the Guide
Screen
5-2
Playing a CD
5
Once you are comfortable with the basics, follow the easy
step-by-step instructions to record your CDs and explore the
world of Internet radio.
5-3
Setting the Play Mode 5-4
Recording from a CD
5-6
Listening to Internet
Radio
5-9
IPAQ
MUSIC CENTER—GETTING STARTED
LET’S GET STARTED 5-1
iPAQ.book Page 2 Tuesday, April 17, 2001 8:15 AM
Navigating the
Guide Screen
You can access the Music
Guide screen by pressing
the Guide button E on
the remote or the front
panel of your iPAQ Music
Center.
Selecting and Playing Music I
Music Guide screens are easily navigated with the navigation
arrows.
Use the X and Barrows to move from title to title.
Use the R and G arrows to choose a group.
When you press the Play button, the title starts playing.
Use the navigation arrows
on the remote to highlight
titles on the Music Guide
screen.
Use the Select button to
start playing a title.
Tip
Pressing the Guide
button E will switch you
between the Guide and Player
screens.
5-2 LET’S GET STARTED
Element
What it does
Music Guide
Access music library
Groups/Genre
A collection of titles
Title
A collection of individual tracks
Tracks
Individual songs
IPAQ
MUSIC CENTER—GETTING STARTED
iPAQ.book Page 3 Tuesday, April 17, 2001 8:15 AM
Playing a CD
Tip
Make sure the iPAQ Music
Center has access to the
Internet so your CD can be
identified.
Using the Music Player
When you first insert a music CD, the iPAQ Music Center uses
the Internet to look for information about the CD you are playing.
1. Press the Open/Close ≤ button on the iPAQ Music Center
front panel, and insert a CD.
2. Press the Open/Close ≤ button again to close it. When the
music starts playing, the Music Player screen is displayed.
Note: Until the CD is identified,
the Music Player screen
displays “unknown title
and artist.” Once the CD is
recognized, the
information is stored and
the title, track, and artist
information is displayed.
See also ...
If the online database fails to
recognize your CD, you can
manually enter the
information. Refer to Chapter 6
Edit Tracks and Edit Discs for
more information.
Did you know ...
The iPAQ Music Center can
play and record compressed
music (ie, MP3) music files
stored on a CD that you
created using a PC.
IPAQ
MUSIC CENTER—GETTING STARTED
3. For track times, press the INFO button F. Track times are
displayed.
LET’S GET STARTED 5-3
iPAQ.book Page 4 Tuesday, April 17, 2001 8:15 AM
Setting the Play
Mode
Tip
Use the Shuffle and Repeat
buttons on the remote to
change the play mode quickly.
Accessing the Play Mode Option
As you listen to your music, you may choose to randomly play
songs from a particular CD. The iPAQ Music Center offers six
different play mode settings. To select a Play mode, complete the
following steps:
1. Press the Options button K. The Music Options screen is
displayed.
2. Use the navigation arrows to highlight the Play mode option.
5-4 LET’S GET STARTED
IPAQ
MUSIC CENTER—GETTING STARTED
iPAQ.book Page 5 Tuesday, April 17, 2001 8:15 AM
Setting the Play
Mode
(continued)
Accessing the Play Mode Option (continued)
3. Press the Select button S. The Play Mode screen is
displayed.
The current Play mode is
displayed by pressing the
Info button F on the
remote. You can change
the Play mode at any time.
Play Mode
What it does
normal
Plays current title once, then stops. Tracks are played in
sequential order.
repeat track
Plays current track repeatedly until manually stopped.
repeat title
Plays current title repeatedly until manually stopped.
repeat group
Plays all tracks in currently selected group repeatedly until
manually stopped.
shuffle title
Randomly plays all tracks within currently selected title until
manually stopped.
shuffle group
Randomly plays all tracks within currently selected group until
manually stopped.
4. Use the navigation arrows to highlight the desired Play mode.
5. Press the Select S button.
6. After your play mode selection is made, you are returned to
the previous screen (Guide or Player).
IPAQ
MUSIC CENTER—GETTING STARTED
LET’S GET STARTED 5-5
iPAQ.book Page 6 Tuesday, April 17, 2001 8:15 AM
Recording from
a CD
The iPAQ Music Center
makes recording your
favorite music easy and
fun! You can record all or
part of a CD.
Background Information
Compression technology minimizes the size of a digital audio file
while attempting to retain the fidelity of the original recording.
The file size is minimized by employing perceptual encoding
techniques that retain elements of the original recording
necessary to faithfully reproduce the music, but eliminate all of
the elements not essential to human hearing (hence, the
frequently used term near CD quality).
The bit rate determines the size of the file. A higher bit rate
encodes more information, which makes for a larger file and in
turn a higher fidelity recording. For a smaller file size and a
higher level of compression, a lower bit rate is used. Bit rates are
measured in kilobits per second (kbps) and can range from 96
kbps to 320 kbps, with 128 kbps MP3 being the generally
accepted bit rate for near CD quality.
MP3 is one popular technique of compressing audio files.
5-6 LET’S GET STARTED
IPAQ
MUSIC CENTER—GETTING STARTED
iPAQ.book Page 7 Tuesday, April 17, 2001 8:15 AM
Recording from
a CD
(continued)
Recording from a CD O
1. Insert the CD into the iPAQ Music Center. The CD starts
playing, and the Music Player screen is displayed.
Tip
For a smooth recording
process, make sure the CD is
recognized.
Tip
To quickly record an entire CD,
press the Record button O
twice. To deselect an entire CD,
press the Repeat button.
Note: You can cancel the
recording process at any
time by pressing the Stop
button ∞ .
2. Press the Record button O on the remote, and the Music
Record screen is displayed. All tracks on the CD are marked
to be recorded. The red dot next to the track length indicates
that the CD track is selected for recording.
Did you know ...
When recording from a CD, the
iPAQ Music Center uses a
process called “Fast-Rip” that
first copies tracks to the hard
disk and then compresses the
file later in the background.
IPAQ
MUSIC CENTER—GETTING STARTED
LET’S GET STARTED 5-7
iPAQ.book Page 8 Tuesday, April 17, 2001 8:15 AM
Recording from
a CD
(continued)
At this point it is a good
idea to record several CDs
to your iPAQ Music
Center. In the following
chapters, you will use
these recordings to make
groups and playlists.
Recording from a CD (continued)
3. To remove a track, highlight the track and press the
Select button S.
4. To include a track, highlight an unselected track and press the
Select button S.
5. Press the Record button O again and the Music Record
Progress screen is displayed. When the recording is
complete, you are returned to the Music Guide screen.
See also ...
If the CD you are playing is not
automatically identified or you
want to change the
information, see Chapter 6.
Finding Your Music
Where is my music? After I record a CD, where does it go?
The iPAQ Music Center places every new recording in the ALL
category and the group according to the genre information
retrieved for the CD.
5-8 LET’S GET STARTED
IPAQ
MUSIC CENTER—GETTING STARTED
iPAQ.book Page 9 Tuesday, April 17, 2001 8:15 AM
Listening to
Internet Radio
Did you know ...
The technology which makes
this all possible is called
streaming audio. Streaming
means that you don’t have to
download an audio file before
the music starts to play.
Navigating the Radio Guide a
You can access the iPAQ Music Center Radio Guide by pressing
the Radio button a located on the upper right-hand side of the
remote.
Use the navigation arrows on the remote to highlight stations on
the Radio Guide screen. Press the select button and the station
starts playing.
This list is generated from the preferences you provided during
setup.
See also ...
Refer to Chapter 7,
Personalizing Internet Radio,
for in-depth information about
the Radio Player feature.
IPAQ
MUSIC CENTER—GETTING STARTED
LET’S GET STARTED 5-9
iPAQ.book Page 10 Tuesday, April 17, 2001 8:15 AM
5-10 LET’S GET STARTED
IPAQ
MUSIC CENTER—GETTING STARTED
iPAQ.book Page 1 Tuesday, April 17, 2001 8:15 AM
Personalizing
Your Music
Library
6
With just a few simple steps you can create a personalized, digital
music library that allows you to access your entire collection by
criteria such as artist, genre, and album. You can then set up
groups and playlists quickly and easily.
In This Chapter
Music Groups and
Playlists
6-2
This chapter guides you through the process of creating
personalized groups and playlists.
Editing CD and Track
Information
6-10
Transfer to Portable
Device
IPAQ
6-12
MUSIC CENTER—GETTING STARTED
PERSONALIZING YOUR MUSIC LIBRARY 6-1
iPAQ.book Page 2 Tuesday, April 17, 2001 8:15 AM
Music Groups
and Playlists
The iPAQ Music Center
offers several easy-to-use,
and very powerful tools for
organizing your music:
➜
MUSIC GROUP—a
collection of titles
➜
TITLE—a collection
of individual tracks
created when you
record a CD
➜
PLAYLIST—
collection of
individual tracks
➜
TRACKS—individual
songs
Note: The TEXT indicator is
displayed in the upper right
portion of the text box when the
remote enters text mode.
6-2 PERSONALIZING YOUR MUSIC LIBRARY
Creating a Music Group K
Genre-based groups are automatically set up for new titles with
the information provided by OpenGlobe. The ALL group
contains all the titles and tracks in your collection.
To create a new group:
1. Press the Options
button K on the
remote. The Music
Options screen is
displayed.
2. Use the navigation
arrows to highlight
more..., and press the
Select button S.
3. From the More Music
Options screen,
highlight new group
and press the Select
button S. The
New Group screen is
displayed.
4. Use the alphanumeric
buttons to enter a
name for the new
group in the text box.
IPAQ
MUSIC CENTER—GETTING STARTED
iPAQ.book Page 3 Tuesday, April 17, 2001 8:15 AM
Music Groups
and Playlists
(continued)
Creating a Music Group (continued)
5. Press the Select button S. The Edit Music Group screen is
displayed.
6. Use the navigation arrows to highlight a title to be added and
press the Select button S. A check mark W indicates a
title is selected.
7. When you finish making your selections, press the Record
button O to save.
Finding Your New Group
After I create a new group, where does it go?
The iPAQ Music Center places every new group alphabetically in
the group filter bar.
IPAQ
MUSIC CENTER—GETTING STARTED
PERSONALIZING YOUR MUSIC LIBRARY 6-3
iPAQ.book Page 4 Tuesday, April 17, 2001 8:15 AM
Music Groups
and Playlists
(continued)
The Edit Music Group
screen is displayed when
the edit group option is
first selected so the name
of an existing group can be
modified.
Editing a Music Group
1. In the Music Guide
screen, highlight the
group you want to
edit.
2. Press the Options
button K on the
remote. The Music
Option screen is
displayed.
3. Use the navigation
arrows to highlight more..., and press the Select button S.
4. Use the navigation
arrows to highlight
edit group.
5. Press the Select
button S. The
Edit Group screen is
displayed.
6. Use the alphanumeric
buttons to edit the
group name.
7. Press the Select button S to continue. The Edit Music
Group screen is displayed.
8. Highlight the titles you want to edit. A check mark W
indicates a title is selected.
9. When you finish editing, press the Record
button O to save.
6-4 PERSONALIZING YOUR MUSIC LIBRARY
IPAQ
MUSIC CENTER—GETTING STARTED
iPAQ.book Page 5 Tuesday, April 17, 2001 8:15 AM
Music Groups
and Playlists
(continued)
Note: When you delete a group,
your titles are not deleted from
your iPAQ Music Center.
Delete a Group
1. In the Music Guide
screen, highlight the
group you want to
delete.
2. Press the Options
button K on the
remote. The Music
Options screen is
displayed.
3. Use the navigation
arrows to highlight
more..., and press the
Select button S.
4. Highlight delete
group and press the
Select button S.
the Delete Group
screen is displayed.
5. Press the Record
button O to delete.
6. A confirmation screen
appears. Navigate to the
Delete button.
7. Press Select
button S to delete.
IPAQ
MUSIC CENTER—GETTING STARTED
PERSONALIZING YOUR MUSIC LIBRARY 6-5
iPAQ.book Page 6 Tuesday, April 17, 2001 8:15 AM
Music Groups
and Playlists
(continued)
Creating a Playlist K
To create a playlist:
1. Press the Options
button K and the
Music Options screen
is displayed.
2. Use the navigation
arrows to highlight
new playlist.
3. Press the Select
button S and the
New Playlist screen is
displayed.
4. Use the alphanumeric
buttons to enter a
name for the playlist
into the text box.
5. Press the Select
button S and the
Edit Playlist screen is
displayed.
6. Use the navigation
arrows to highlight a
title, and press the
Select
button S. The
track list is displayed.
7. Press the Select
button S t o add a track to the playlist. A check mark W
indicates a title is selected.
8. When you finish making your selections, press the Record
button O to save.
6-6 PERSONALIZING YOUR MUSIC LIBRARY
IPAQ
MUSIC CENTER—GETTING STARTED
iPAQ.book Page 7 Tuesday, April 17, 2001 8:15 AM
Music Groups
and Playlists
(continued)
Finding Your New Playlist
After I create a new playlist, where does it go?
The iPAQ Music Center places every new playlist alphabetically
in the ALL category and in a group called Playlist.
Editing a Playlist
1. Highlight a playlist
in the Guide screen
filter bar.
2. Use the navigation
arrows to highlight
edit playlist.
3. Press the Select
button S. The
Edit Playlist screen
is displayed.
4. Use the
alphanumeric
buttons to enter a
name for the playlist
into the text box.
5. Press the Select
button S and the
Edit Playlist screen is displayed.
6. Use the navigation arrows to highlight a title, and press the
Select button S. The track list is displayed.
7. Press the Select button S to add a track to the playlist. A
check mark W indicates a title is selected.
8. When you finish making your selections, press the Record
button O to save.
IPAQ
MUSIC CENTER—GETTING STARTED
PERSONALIZING YOUR MUSIC LIBRARY 6-7
iPAQ.book Page 8 Tuesday, April 17, 2001 8:15 AM
Music Groups
and Playlists
(continued)
Note: When you delete a playlist,
your tracks are not deleted from
your iPAQ Music Center.
6-8 PERSONALIZING YOUR MUSIC LIBRARY
Deleting a Playlist
1. Highlight a playlist in
the Guide screen.
2. Press the Options
button K and
highlight delete
playlist from the
Options screen.
3. Press the Select
button S. The
Delete Playlist screen
is displayed.
4. Press the Record
button O to delete.
5. A confirmation
screen appears.
Navigate to the
Delete button.
6. Press the Select
button S to
delete.
IPAQ
MUSIC CENTER—GETTING STARTED
iPAQ.book Page 9 Tuesday, April 17, 2001 8:15 AM
Music Groups
and Playlists
(continued)
Note: When you delete a track,
your tracks are permanently
deleted from your iPAQ Music
Center.
IPAQ
MUSIC CENTER—GETTING STARTED
Deleting a Track
1. Press the Options
button K and
highlight delete
music from the
Options screen.
2. Press the Select
button S. The
Delete Music Info
screen is displayed.
3. Press the Select
button S and the
Delete Music - Select
Tracks screen is
displayed.
4. Highlight the tracks
you want to delete
and press the Select
button S. An “x”
indicates a track is
selected.
5. When you finish
deleting your
selections, press the
Record button O
to delete.
PERSONALIZING YOUR MUSIC LIBRARY 6-9
iPAQ.book Page 10 Tuesday, April 17, 2001 8:15 AM
Editing CD and
Track
Information
The edit disc info feature
allows you to edit title text
information.
6-10 PERSONALIZING YOUR MUSIC LIBRARY
Editing CD Information
1. Press the Options
button K and
highlight edit disc
from the Music
Options screen.
2. Press the Select
button S. The Edit
Disc Info screen is
displayed.
3. Use the alphanumeric
buttons to edit the CD
information.
4. When you finish
editing, press the
Record
button O to save.
IPAQ
MUSIC CENTER—GETTING STARTED
iPAQ.book Page 11 Tuesday, April 17, 2001 8:15 AM
Editing CD and
Track
Information
(continued)
Editing Tracks
1. Press the Options
button K and
highlight edit tracks
from the Music
Options screen.
2. Press the Select
button S and the
Edit Tracks screen is
displayed.
3. Use the navigation
arrows to highlight the
desired track.
4. Press the Select
button S on the
highlighted track to
display a text entry
cursor.
5. Use the alphanumeric
buttons to enter a new
name.
6. When you have finished making your selections, press the
Record button O to save.
IPAQ
MUSIC CENTER—GETTING STARTED
PERSONALIZING YOUR MUSIC LIBRARY 6-11
iPAQ.book Page 12 Tuesday, April 17, 2001 8:15 AM
Transfer to
Portable Device
Tip
Make sure your portable player
says Download before you
begin to make your selections.
6-12 PERSONALIZING YOUR MUSIC LIBRARY
Transfer to Portable
1. Connect the USB cable to an available USB connector on the
iPAQ Music Center.
2. Turn on the portable player.
3. Connect the portable player to the USB cable.
4. The Transfer Music
screen will appear
with the portable
player highlighted on
the first line of the
Guide screen.
5. Press the Select
button S to
display the tracks
currently on the
portable player.
6. To delete tracks, use the navigation arrows to highlight the
tracks to be deleted and press the Select button S. An “X”
indicates the track will be removed.
7. To add tracks, use the
navigation arrows to
highlight the tracks to
be added and press the
Select button S.
An arrow indicates a
track is selected to
add.
8. When you’ve finished
making your
selections, press the
Record button O. The Transfer to portable screen is
displayed.
9. Disconnect the
portable player from
the USB cable.
IPAQ
MUSIC CENTER—GETTING STARTED
iPAQ.book Page 1 Tuesday, April 17, 2001 8:15 AM
Personalizing
Internet
Radio
When it comes to radio broadcasts, think of the Web as the
world’s largest antenna. Every day, thousands of broadcasts called
audio streams are available to you online.
In This Chapter
Radio Mode
7-2
Radio Groups
7-2
IPAQ
MUSIC CENTER—GETTING STARTED
7
In the iPAQ Music Center Radio mode, you can tune in
broadcasts from around the country or around the world. Many
stations are available only over the Internet.
This chapter guides you through the process of finding and
organizing your favorite kinds of Internet radio programming.
PERSONALIZING INTERNET RADIO 7-1
iPAQ.book Page 2 Tuesday, April 17, 2001 8:15 AM
Radio Mode
Tuning In the iPAQ Music Center Radio a
Although there are thousands of radio stations around the world,
most of them only broadcast locally. These stations can now reach
a global audience through the Internet.
Press the Radio button a on the remote, and the Radio Guide
screen is displayed.
Radio Groups
With hundreds of radio
stations now at your
fingertips, you’ll need a
way to organize the
content.
The process for creating
radio groups is similar to
that used to create music
groups.
➜ Name the group
➜ Edit the group
➜
Add/delete stations
7-2 PERSONALIZING INTERNET RADIO
Creating a Radio Group K
Genre-based groups are automatically set up for a new station
with the information provided by OpenGlobe. The ALL group
contains all of the stations in your collection.
1. Press the Options
button K on the
remote. The Radio
Options screen is
displayed.
2. Use the navigation
arrows to highlight
new group.
3. Press the Select
button Sand the
New Group screen is displayed.
IPAQ
MUSIC CENTER—GETTING STARTED
iPAQ.book Page 3 Tuesday, April 17, 2001 8:15 AM
Radio Groups
(continued)
4. Use the alphanumeric
buttons to enter a name
for the new group in the
text box.
5. Press the Select button
S to continue. The
Edit iRadio Group
screen is displayed.
6. Use the navigation arrows to highlight a station to be added
and press the Select button S. A check mark W indicates a
station is selected.
7. When you finish making your selections, press the Record
button O to save.
IPAQ
MUSIC CENTER—GETTING STARTED
PERSONALIZING INTERNET RADIO 7-3
iPAQ.book Page 4 Tuesday, April 17, 2001 8:15 AM
Radio Groups
(continued)
Use the Edit Radio Group
screen to add or delete
stations from your radio
group.
Editing a Radio Group K
1. From the Radio
Guide screen,
highlight the group
you want to edit.
2. Press the Options
button K and the
Radio Options screen
is displayed.
Tip
Pressing the Select
button S on a highlighted
channel toggles between
adding and removing the
station from the group. A
check mark W indicates a
station is included in the group.
3. Use the navigation
arrows to highlight
edit group.
4. Press the Select
button S the Edit
Group screen is
displayed.
5. Use the alphanumeric
buttons to edit the group name.
6. Press the Select button S to continue. The Edit Radio
Group screen is displayed.
7. Highlight the stations you want to include. A check mark W
indicates a station is selected.
8. When you have finished editing, press the Record
button O to save.
7-4 PERSONALIZING INTERNET RADIO
IPAQ
MUSIC CENTER—GETTING STARTED
iPAQ.book Page 5 Tuesday, April 17, 2001 8:15 AM
Radio Groups
(continued)
Delete a Radio Group
1. From the Radio Guide
screen, highlight the
group you want to
delete.
2. Press the Options
button K on the
remote. The Radio
Options screen is
displayed.
3. Highlight delete
group and press the
Select button S.
The Delete Group
screen is displayed.
4. Use the navigation
arrows to highlight a
group to be deleted
and press the Select
button S. A check
mark W indicates a group is selected.
5. When you have finished making your selections, press the
Record button O to delete.
IPAQ
MUSIC CENTER—GETTING STARTED
PERSONALIZING INTERNET RADIO 7-5
iPAQ.book Page 6 Tuesday, April 17, 2001 8:15 AM
Radio Groups
(continued)
Edit Radio Station
1. From the Radio Guide
screen, highlight the
station you want to
edit.
2. Press the Options
button K and
highlight edit station
from the Radio
Options screen.
3. Press the Select
button S. The
Edit Station screen
is displayed.
4. Use the
alphanumeric
buttons to edit the
station name.
5. When you finish
editing, press the
Record button O to save.
7-6 PERSONALIZING INTERNET RADIO
IPAQ
MUSIC CENTER—GETTING STARTED
iPAQ.book Page 1 Tuesday, April 17, 2001 8:15 AM
OpenGlobe
In This Chapter
The World of OpenGlobe 8-2
Accessing OpenGlobe
8-3
CE-Commerce™
8-4
IPAQ
MUSIC CENTER—GETTING STARTED
8
When you registered your iPAQ Music Center, you also created
an account with a free new service to enhance your music and
radio experience called OpenGlobe. Through this service your
iPAQ Music Center personalizes your music by automatically
identifying all the CDs you play in your iPAQ Music Center. You
can add new radio stations to your Internet radio guide as well as
shop for more music securely.
OPENGLOBE 8-1
iPAQ.book Page 2 Tuesday, April 17, 2001 8:15 AM
The World of
OpenGlobe
Through the OpenGlobe
service you will be given
opportunities to get more
of what you already like.
For example, music
recommendations will be
offered for you to
purchase, based on your
taste.
What Can OpenGlobe Do For Me?
OpenGlobe provides a simple way to find the music you want.
After learning your personal musical and radio preferences,
OpenGlobe will:
➜
Provide lists of other CDs currently available by the same
artist, along with recommendations of similar CDs by other
artists.
➜ Create “Artist of the Week” promotions based on your
listening habits.
➜ Provide a simple way to purchase CDs.
➜ Collect Internet radio channels to assist you in expanding
your collection of radio stations.
And that is only the beginning!
Did you know ...
Your iPAQ Music Center will
continue to evolve over time,
adding new features and
services, as they become
available through the
OpenGlobe service—so be sure
to check often.
8-2 OPENGLOBE
Note: In order to use the OpenGlobe service, your iPAQ Music Center must be
connected to a TV. (Please refer to Chapter 2, Connecting Your iPAQ
Music Center, for details on how to connect to your TV.)
IPAQ
MUSIC CENTER—GETTING STARTED
iPAQ.book Page 3 Tuesday, April 17, 2001 8:15 AM
Accessing
OpenGlobe
How Can I Access OpenGlobe? U
There are three ways to access OpenGlobe:
Press the OpenGlobe Shopping Cart button U on your
remote, or on the optional IR keyboard while in any source
and while in either the Guide or Player screens.
➜ Select the Radio Option - Tune Internet Radio Stations.
➜ From any PC on the Internet you can access your OpenGlobe
account. In such cases, you will need to know your USERID
and PASSWORD to access your account.
➜
All navigation is handled
with the navigation arrows
and Select button S on
the remote control or on
the front of the iPAQ
Music Center.
When you choose
OpenGlobe from the iPAQ
Music Center Music mode,
you have easy access to a
variety of related
information about the
music that you are playing.
IPAQ
MUSIC CENTER—GETTING STARTED
Music
Pressing the OpenGlobe button U on your remote while music is
playing exits the player view and displays the “Now Playing”
page within the OpenGlobe Music environment. The audio from
the current title continues to play unless an audio sample is
played.
The OpenGlobe Now Playing screen is displayed.
OPENGLOBE 8-3
iPAQ.book Page 4 Tuesday, April 17, 2001 8:15 AM
CE-Commerce™
What Can I Purchase Through OpenGlobe?
CE-Commerce is the ability for you to do electronic commerce in
the comfort of your home through the iPAQ Music Center. The
CE-Commerce experience is consistent with the usage of your
iPAQ Music Center.
When you press the OpenGlobe button U on the remote while
listening to an artist, you are presented with a list of albums that
are available for you to purchase, securely, right from your iPAQ
Music Center.
Through the OpenGlobe service, you are given opportunities to
get more of what you already like. For example, music related to
the music you listen to will be offered for you to purchase.
8-4 OPENGLOBE
IPAQ
MUSIC CENTER—GETTING STARTED
iPAQ.book Page 1 Tuesday, April 17, 2001 8:15 AM
Home
Networking for
iPAQ Music Center
In This Chapter
HPNA
IPAQ
9-2
MUSIC CENTER—GETTING STARTED
9
A network is a group of computers, printers, and other devices
connected together to enable communication between them. The
devices on a network can be connected in a variety of ways. The
devices on a network can be physically connected by wires or
connected by wireless technology. The iPAQ Music Center now
introduces home networking to familiar home consumer
electronics.
The most common reason for home networking is to share
resources between devices on the network. For example, if your
home has only one printer, every PC in the house can use this
printer, replacing the need to purchase and maintain multiple
printers. With the rise of broadband home Internet access, a
popular reason to set up a home network is to share the high
speed Internet connections that DSL and Cable modems
provide.
HOME NETWORKING FOR IPAQ MUSIC CENTER 9-1
iPAQ.book Page 2 Tuesday, April 17, 2001 8:15 AM
HPNA
Home Phoneline Networking Alliance
One type of wired network is called HPNA (short for Home
Phoneline Networking Alliance, and also known as HomePNA).
This type of wired network uses the same wiring in your home
that your telephones use, while not interfering with normal
telephone operation. This allows you to set up a network
without having to worry about running additional wiring.
HomePNA 2.0, a type of HPNA networking, allows for transfer
speeds of up to 10 Mbps, the same speed as many Ethernet
networks. Your iPAQ Music Center supports HomePNA 2.0 via
the internal HPNA jack.
A communications gateway can be a PC running Internet
sharing software such as Microsoft’s Internet Connection
Sharing (“ICS” is included with Windows 98 second edition,
Windows Me or Windows 2000). The communications gateway
can also be a dedicated device such as Compaq’s Connection
Point. Refer to your ICS or equivalent documentation to set up
your PC or device as a communication gateway. If your PC is
the communications gateway, you may have to set its power
management configuration so that it does not power down
automatically.
Connecting the iPAQ Music Center
See also ...
For more details, see Step 2
(HPNA Setup) in the Quick
Setup Poster.
1. Disconnect the telephone cable (if any) between the modem
jack on the iPAQ Music Center and the telephone wall jack.
2. Connect a telephone cable between the HPNA jack on the
iPAQ Music Center and the telephone wall jack (optimal
home phoneline networking performance requires a
minimum telephone cable of 6 ft.).
Note: “Wireless telephone
jack” products in the
store do NOT work with
HPNA; a physical
telephone cable to the
telephone wall jack is
required.
9-2 HOME NETWORKING FOR IPAQ MUSIC CENTER
IPAQ
MUSIC CENTER—GETTING STARTED
iPAQ.book Page 3 Tuesday, April 17, 2001 8:15 AM
HPNA
(continued)
Note: If running software other
than Windows 98 second edition
or future versions, refer to your PC
networking software to determine
whether to select dyanamic or
static IP addressing.
Did you know ...
As features are added you will
be able to transfer music files
from your PC to you iPAQ
Music Center via Home PNA.
Tip
Setting up the iPAQ Music Center
1. Press the Setup
button T on the
remote control. The
System Setup screen is
displayed.
2. Use the navigation arrows to highlight internet access, and
press the Select button S.
3. From the Internet Service screen select Yes. Hightlight Next
and press the Select button S .
4. Use the navigation
arrows to highlight
Home PNA.
Highlight next and
press the Select
button S.
5. From the Internet
Settings screen select
dynamic.
Your iPAQ Music Center is now configured to access the
Internet using your home network.
Once the iPAQ Music Center is
connected to the home network,
it will no longer connect to the
Internet using its dial-up
modem. Make sure that there is
a PC or other device on your
home network which is acting
as a communications gateway.
IPAQ
MUSIC CENTER—GETTING STARTED
HOME NETWORKING FOR IPAQ MUSIC CENTER 9-3
iPAQ.book Page 4 Tuesday, April 17, 2001 8:15 AM
9-4 HOME NETWORKING FOR IPAQ MUSIC CENTER
IPAQ
MUSIC CENTER—GETTING STARTED
iPAQ.book Page 1 Tuesday, April 17, 2001 8:15 AM
Appendix
In This Appendix
Set Up Codes
A-2
A
Programming your Remote Control
1. Press and hold the
Code Set button
Aon the remote
control for 3 seconds.
The LED will blink
twice.
2. Press the A/V PWR
button and enter the
first 4 digit code for
your brand. The LED
will blink twice to
confirm a valid code
has been
programmed.
Tip
Do not point your remote
control directly towards the
iPAQ Music Center while
setting codes.
IPAQ
MUSIC CENTER—GETTING STARTED
3. Press the A/V PWR button. Your A/V receiver should turn
off. If your A/V receiver does not respond, repeat steps 2-3,
trying each code listed for your brand until you find the
correct one.
4. To program the TV, repeat steps 1-3 but press the TV PWR
button on steps 2 and 3.
A PPENDIX A-1
iPAQ.book Page 2 Tuesday, April 17, 2001 8:15 AM
Set Up Codes for Amplifiers and A/V
Receivers
Set Up Codes
Maufacturer
A-2 APPENDIX
Code
Manufacturer
Code
ADC
0531
Onkyo
0100, 0135, 0380
Adcom
0616
Optimus
0042, 0080, 0177, 0186, 0219,
0300, 0395, 0531, 0670, 0738,
0801, 1023
Aiwa
0121, 0158, 0189, 0405, 0406,
1089, 1405
Panasonic
0039, 0308, 0309, 1518
Akai
0224
Philips
0189, 0269, 0391, 1089, 1189
Bose
0639, 0674
Pioneer
0013, 0080, 0150, 0300, 0531,
0630, 1023
Capetronic
0531
Polk Audio
0189, 0269
Carver
0008, 0042, 0189, 0269, 0360,
1089, 1189
Proscan
1254
Curtis Mathes
0300, 0300
Quasar
0039
Denon
0004, 0160, 0771, 1104, 1160
RCA
0054, 0300, 0346, 0360, 0530,
0531, 1154, 1254
Emerson
0424
Realistic
0395
Fisher
0042, 0219, 0360
Sansui
0189, 0321, 0346, 1089
Garrard
0424, 0463
Sanyo
0219, 0801
GE
0078
Scott
0322
Harman/Kardon
0110, 0189, 0891
Sharp
0186
Inkel
0062
Sherwood
0062, 0491, 0502
JBL
0110
Sony
0158, 0220, 0689, 1058, 1158,
1258
JVC
0074, 0331
Soundesign
0078, 0670
Kenwood
0027, 0042, 0077, 0186, 0313,
0314, 1027, 1313, 1569
Sunfire
0313, 0314, 1313
Koss
0424
Teac
0463
Lexicon
1076
Technics
0039, 0308, 0309, 1308, 1309,
1518
Linn
0189, 0269
Thorens
1189
MCS
0039, 0346
Victor
0074, 0331
Magnavox
0128, 0189, 0269, 0391, 0531,
1089, 1189
Wards
0013, 0054, 0078, 0080, 0158,
0189
Marantz
0039, 0128, 0189, 0269, 0321,
1089, 1189
Yamaha
0176, 0186, 0354, 1176
Nakamichi
0097, 0321, 0347
Zenith
0857
NAD
0320
IPAQ
MUSIC CENTER—GETTING STARTED
iPAQ.book Page 3 Tuesday, April 17, 2001 8:15 AM
Set Up Codes For Television
Set Up Codes
(continued)
TV Maufacturer
AOC
IPAQ
Code
0019, 0030
TV Maufacturer
Denon
Code
0145
Admiral
0093, 0463
Dumont
0017, 001
Aiko
0092
Electroband
0000
Akai
0030
Emerson
0019, 0154, 0178, 0179, 0180,
0236, 0282, 0463
Alaron
0179
Envision
0030
America Action
0180
Fisher
0154
Anam
0180
Fujitsu
0179, 0683
Audiovox
0092, 0180, 0451
Funai
71, 0179, 018001
Baysonic
0180
Futuretech
0180
Belcor
0019
GE
0021, 0047, 0051, 0093, 0178,
0282, 0451, 0747
Bell & Howell
0016, 0154
Gibralter
0017, 0019, 0030
Bradford
0180
GoldStar
0019, 0030, 0056, 0178
Brockwood
0019
Gradiente
0053, 0056
Broksonic
0236, 0463
Grunpy
0179, 0180
CXC
0180
Hallmark
0178
Candle
0030, 0056
Harley Davidson
0179
Carnivale
0030
Harman/Kardon
0054
Carver
0054
Harvard
0180
Celebrity
0000
Hitachi
0016, 0056, 0145
Cineral
0092, 0451
Infinity
0054
Citizen
0030, 0056, 0060, 0092
Inteq
0017
Concerto
0056
JBL
0054
Contec
0180
JCB
0000
Craig
0180
JVC
0053
Crosley
0054
KEC
0180
Crown
0180
KTV
0030, 0180
Curtis Mathes
0016, 0030, 0047, 0051, 0054,
0056, 0060, 0093, 0145, 0154,
0166, 0451, 0747
Kenwood
0019, 0030
Daewoo
0019, 0092, 0451
LXI
0047, 0054, 0154, 0156, 0178,
0747
Daytron
0019
Logik
0016
MUSIC CENTER—GETTING STARTED
A PPENDIX A-3
iPAQ.book Page 4 Tuesday, April 17, 2001 8:15 AM
TV Maufacturer
A-4 APPENDIX
Code
TV Maufacturer
Code
Luxman
0056
Pulsar
0017, 0019
MGA
0019, 0030, 0150, 0178
Quasar
0051, 0165, 0250
MTC
0019, 0030, 0056, 0060
RCA
0019, 0047, 0051, 0090, 0093,
0747
Magnavox
0030, 0054, 0179
Radio Shack
0019, 0030, 0047, 0056, 0154,
0165, 0178, 0180
Majestic
0016
Realistic
0019, 0030, 0056, 0154, 0165,
0178, 0180
Marantz
0030, 0054
Runco
0017, 0030
Matsushita
0250
SSS
0019, 0180
Megatron
145, 0178
Sampo
0030
Memorex
0016, 0056, 0150, 0154, 0178,
0179, 0250,0463
Samsung
0019, 0030, 0056, 0060, 0178
Midland
0017, 0047, 0051, 0747
Sansei
0451
Minutz
0021
Sansui
0463
Mitsubishi
0019, 0093, 0150, 0178
Sanyo
0154
Motorola
0093
Scimitsu
0019
Multitech
0180
Scotch
0178
NAD
0156, 0166, 0178
Scott
0019, 0178, 0179, 0180, 0236
NEC
0019, 0030, 0056
Sears
0047, 0054, 0056, 0154, 0156,
0171, 0178, 0179,
NTC
0092
Semivox
0180
Nikko
0030, 0092, 0178
Semp
0156
Onwa
0180
Sharp
093, 0165
Optimus
0154, 0166, 0250
Shogun
0019
Optonica
0093, 0165
Signature
0016
Orion
0179, 0236, 0463
Sony
0000
Panasonic
0051, 0250
Soundesign
0178, 0179, 0180
Penney
0019, 0021, 0030, 0047, 0051,
0056, 0060, 0156
Squareview
0171
Philco
0019, 0030, 0054, 0145, 0463
Starlite
0180
Philips
0054
Sylvania
0030, 0054
Pilot
0019, 0030
Symphonic
0171
Pioneer
0166
TMK
0056, 0178
Portland
0019, 0092
Tandy
0093
Prism
0510
Technics
0051, 0250
Proscan
0047, 0747
Technol Ace
0179
Proton
0178
Techwood
0051, 0056
IPAQ
MUSIC CENTER—GETTING STARTED
iPAQ.book Page 5 Tuesday, April 17, 2001 8:15 AM
TV Maufacturer
IPAQ
Code
TV Maufacturer
Code
Teknika
0016, 0019, 0054, 0056, 0060,
0092, 0150, 0179
Vidtech
0019, 0178
Telefunken
0056
Wards
0016, 0019, 0021, 0030, 0054,
0056, 0165, 0178, 0179
Toshiba
0060, 0154, 0156
White
Westinghouse
0463
Vector Research
0030
Yamaha
0019, 0030
Victor
0053
Zenith
0016, 0017, 0092, 0463
Vidikron
0054
MUSIC CENTER—GETTING STARTED
A PPENDIX A-5
iPAQ.book Page 6 Tuesday, April 17, 2001 8:15 AM
A-6 APPENDIX
IPAQ
MUSIC CENTER—GETTING STARTED