1
ExtremeWarePxTM Software
Command Reference Guide
Software Version 1.2
Extreme Networks, Inc.
3585 Monroe Street
Santa Clara, California 95051
(888) 257-3000
http://www.extremenetworks.com
Published: December 2002
Part number: 100142-00 Rev 01
©2002 Extreme Networks, Inc. All rights reserved. Extreme Networks and BlackDiamond are registered trademarks of
Extreme Networks, Inc. in the United States and certain other jurisdictions. ExtremeWare, ExtremeWare Vista,
ExtremeWorks, ExtremeAssist, ExtremeAssist1, ExtremeAssist2, PartnerAssist, Extreme Standby Router Protocol, ESRP,
SmartTraps, Alpine, Summit, Summit1, Summit4, Summit4/FX, Summit7i, Summit24, Summit48, Summit Virtual
Chassis, SummitLink, SummitGbX, SummitPx1, SummitRPS and the Extreme Networks logo are trademarks of Extreme
Networks, Inc., which may be registered or pending registration in certain jurisdictions. The Extreme Turbodrive logo is
a service mark of Extreme Networks, which may be registered or pending registration in certain jurisdictions.
SpeciÞcations are subject to change without notice.
NetWare and Novell are registered trademarks of Novell, Inc. Merit is a registered trademark of Merit Network, Inc.
Solaris is a trademark of Sun Microsystems, Inc. F5, BIG/ip, and 3DNS are registered trademarks of F5 Networks, Inc.
see/IT is a trademark of F5 Networks, Inc.
ÒData FellowsÓ, the triangle symbol, and Data Fellows product names and symbols/logos are
trademarks of Data Fellows.
F-Secure SSH is a registered trademark of Data Fellows.
All other registered trademarks, trademarks and service marks are property of their respective owners.
2
Contents
Preface
Chapter 1
Command Reference Overview
Chapter 2
Commands for Managing the Switch
build
18
clear log
20
clear session
21
clear stats
22
cls
23
conÞgure account
24
conÞgure banner
26
conÞgure dns-client add
27
conÞgure dns-client default-domain
28
conÞgure dns-client delete
29
conÞgure gslb
30
conÞgure iparp delete
32
conÞgure log display
33
conÞgure mgmt ipaddress
34
conÞgure mgmt iproute
35
conÞgure port gigabit auto
37
conÞgure snmp add community
38
conÞgure snmp add trapreceiver
40
conÞgure snmp delete community
41
conÞgure snmp delete trapreceiver
42
ExtremeWarePx1 1.2 Command Reference Guide
3
4 - Contents
conÞgure snmp syscontact
43
conÞgure snmp syslocation
44
conÞgure snmp sysname
45
conÞgure ssh2 key
46
conÞgure ssh2 key pregenerated
48
conÞgure syslog
50
conÞgure system-ip
51
create account
53
delete account
55
disable clipaging
56
disable gslb
57
disable log display
58
disable port gigabit
59
disable self-audit
60
disable snmp access
61
disable snmp traps
62
disable ssh2
63
disable syslog
64
disable telnet
65
disable vlan
66
download conÞguration
67
download image
69
enable clipaging
71
enable gslb
72
enable log display
73
enable port gigabit
74
enable self-audit
75
enable snmp access
76
enable snmp traps
77
enable ssh2
78
enable syslog
80
enable telnet
81
enable vlan
82
exit
83
ExtremeWarePx1 1.2 Command Reference Guide
Chapter 3
history
84
load conÞguration
85
logout
86
nslookup
87
ping
88
quit
90
reboot
91
save conÞguration
92
scp2
94
ssh2
96
telnet
98
traceroute
100
unconÞgure gslb
101
unconÞgure mgmt iproute
102
unconÞgure switch
103
upload conÞguration
104
use conÞguration
106
use image
107
Commands for Configuring Servers and Services
conÞgure domain
111
conÞgure domain default
113
conÞgure pattern-rule
115
conÞgure pattern-rule default
117
conÞgure pattern-rule default cookie-name
119
conÞgure server
122
conÞgure server default
125
conÞgure server-group
127
conÞgure server-group add-server
130
conÞgure server-group delete-server
132
conÞgure service L4
134
conÞgure service L7
137
unconÞgure domain
140
unconÞgure pattern-rule
141
ExtremeWarePx1 1.2 Command Reference Guide
Contents - 5
Chapter 4
Chapter 5
6 - Contents
unconÞgure server
142
unconÞgure server-group
143
unconÞgure service
144
Commands for Persistence Modes, and NAT Modes
conÞgure gateway-mode add ipaddress
146
conÞgure gateway-mode delete ipaddress
148
conÞgure nat-mode full
149
conÞgure nat-mode server-only
151
conÞgure proxy-ip
153
conÞgure sticky client-ip timeout
155
conÞgure sticky cookie-id timeout
156
conÞgure sticky session-id timeout
157
conÞgure timeout established-connection
158
conÞgure timeout udp-ßow-persistence
159
disable gateway-mode
160
disable sticky
161
enable gateway-mode
162
enable sticky
163
unconÞgure proxy-ip
164
Commands for Configuring Redundancy
conÞgure default-gateway
169
conÞgure default-gateway delete
170
conÞgure default-gateway switch
171
conÞgure vrrp add master vrid
172
conÞgure vrrp add track-servers-delta
173
conÞgure vrrp add track-vrid
175
conÞgure vrrp add vrid
177
conÞgure vrrp advertisement-interval
178
conÞgure vrrp auto-sync backup
179
conÞgure vrrp auto-sync forcesync
180
conÞgure vrrp auto-sync master
181
conÞgure vrrp change vrid
182
conÞgure vrrp delete track-servers-delta
184
ExtremeWarePx1 1.2 Command Reference Guide
Chapter 6
conÞgure vrrp delete track-vrid
185
conÞgure vrrp delete vrid
187
conÞgure vrrp force-slave
188
conÞgure vrrp preempt|dont-preempt
189
conÞgure vrrp priority
190
conÞgure vrrp serial-failover interval
191
disable vrrp
192
disable vrrp auto-sync
193
disable vrrp serial-failover
194
enable vrrp
195
enable vrrp auto-sync
196
enable vrrp serial-failover
197
unconÞgure vrrp auto-sync backup
198
unconÞgure vrrp auto-sync master
199
Health-Check Commands
conÞgure health-check arp-interval
203
conÞgure health-check fail-after
204
conÞgure health-check interval
205
conÞgure health-check restore-after
206
conÞgure health-check retry-interval
207
conÞgure server slow-start initial-connections
208
conÞgure server slow-start interval
209
conÞgure server-group health-check fail-after
210
conÞgure server-group health-check http
211
conÞgure server-group health-check interval
213
conÞgure server-group health-check ping
214
conÞgure server-group health-check restore-after
215
conÞgure server-group health-check retry-interval
216
conÞgure server-group health-check tcp-open
217
disable health-check
218
disable health-check server-group-name
219
disable server
220
disable server slow-start
222
ExtremeWarePx1 1.2 Command Reference Guide
Contents - 7
Chapter 7
8 - Contents
enable health-check
223
enable health-check server-group-name
224
enable server
225
enable server slow-start
226
Commands for Monitoring the Switch
pxtop
228
show accounts
230
show banner
231
show build
232
show conÞguration
234
show connections details
236
show connections summary
238
show cookie
239
show critical-resources
240
show default-gateway
241
show dns-client
242
show errors
243
show gateway-mode
244
show gateway-mode conÞguration
245
show gslb
246
show gslb conÞguration
247
show health-check
248
show health-check conÞguration
250
show health-check down
251
show health-check summary
252
show icmp
253
show iparp
254
show iproute
256
show log
257
show log conÞguration
258
show nat-mode conÞguration
259
show port
260
show port conÞguration
262
ExtremeWarePx1 1.2 Command Reference Guide
show port details
263
show port gigabit utilization
265
show proxy-ip conÞguration
266
show self-audit
267
show server conÞguration
268
show server details
269
show server down
271
show server summary
272
show server-group
273
show server-group conÞguration
275
show server-group details
276
show server-group summary
278
show service conÞguration
279
show service details
280
show service summary
283
show session
284
show snmp conÞguration
285
show sticky conÞguration
286
show sticky table
287
show switch
289
show system conÞguration
291
show system-ip conÞguration
292
show tech-support
293
show timeout conÞguration
294
show version
295
show vlan conÞguration
296
show vrrp auto-sync
297
show vrrp conÞguration
298
show vrrp details
300
show vrrp gateway-mode details
302
show vrrp serial-failover
304
show vrrp server details
305
show vrrp service details
307
uptime
309
ExtremeWarePx1 1.2 Command Reference Guide
Contents - 9
Index of Commands
10 - Contents
ExtremeWarePx1 1.2 Command Reference Guide
Preface
This preface provides an overview of this guide, describes guide conventions, and lists other
publications that may be useful.
Introduction
This guide provides the complete syntax for all the commands available in the currently-supported
versions of the ExtremeWarePx software running on Px-series application switches from Extreme
Networks.
This guide does not provide feature descriptions, explanations of the technologies, or conÞguration
examples. For information about the various features and technologies supported by the Px-series
application switch switches, see the installation and user guides for that product. This guide
supplements, but does not replace the installation and user guides.
NOTE
If the information in the release notes shipped with your switch differs from the information in this guide,
follow the release notes.
Audience
This guide is intended for use by network administrators who are responsible for installing and setting
up network equipment. It assumes a basic working knowledge of the following:
¥ Local area networks (LANs)
¥ Ethernet concepts
¥ Ethernet switching and bridging concepts
¥ Routing concepts
¥ Internet Protocol (IP) concepts, including connection initiation process
¥ Network Address Translation (NAT)
This guide also assumes that you have read the Px Series Application Switch Installation and User Guide.
ExtremeWarePx1 1.2 Command Reference Guide
11
Preface
Conventions
Table 1 and Table 2 list conventions that are used throughout this guide.
Table 1: Notice Icons
Icon
Notice Type
Alerts you to...
Note
Important features or instructions.
Caution
Risk of personal injury, system damage, or loss of data.
Warning
Risk of severe personal injury.
Table 2: Text Conventions
Convention
Description
Screen displays
This typeface indicates command syntax, or represents information as it appears on the
screen.
User input in
examples
In examples of user interaction with the command-line interface, user input is shown in
boldface.
The words “enter”
and “type”
When you see the word “enter” in this guide, you must type something, and then press
the Return or Enter key. Do not press the Return or Enter key when an instruction
simply says “type.”
[Key] names
Key names are written with brackets, such as [Return] or [Esc].
If you must press two or more keys simultaneously, the key names are linked with a
plus sign (+). Example:
Press [Ctrl]+[Alt]+[Del].
Words in italicized type
Italics emphasize a point or denote new terms at the place where they are defined in
the text.
Related Publications
The publications related to this one are:
¥ ExtremeWare Software User Guide
¥ Px Series Application Switch Installation and ConÞguration Guide
¥ Px Series Application Switch Release Notes
Documentation for Extreme Networks products is available on the World Wide Web at the following
location:
http://www.extremenetworks.com/
12
ExtremeWarePx1 1.2 Command Reference Guide
1
Command Reference Overview
Structure of this Guide
This guide documents each ExtremeWarePx command. Related commands are grouped together and
organized into chapters based on their most common usage. The chapters reßect the organization of the
Px Series Application Switch Installation and ConÞguration Guide. If a speciÞc command is relevant to a
wide variety of functions and could be included in a number of different chapters, we have attempted
to place the command in the most logical chapter. Within each chapter, commands appear in
alphabetical order. You can use the Index of Commands to locate speciÞc commands if they do not
appear where you expect to Þnd them.
For each command, the following information is provided:
¥ Command Syntax: The actual syntax of the command. The syntax conventions (the use of braces or
curly brackets, for example) are deÞned in the section ÒUnderstanding Command SyntaxÓ on
page 14.
¥ Description: A brief (one sentence) summary of what the command does.
¥ Syntax Description: The deÞnition of any keywords and options used in the command.
¥ Default: The defaults, if any, for this command. The default can be the default action of the
command if optional parameters are not provided, or it can be the default state of the switch (such
as for an enable/disable command).
¥ Usage Guidelines: Information to help you use the command. This may include prerequisites,
prohibitions, and related commands, as well as other information.
¥ Example: Examples of the command usage, including output, if relevant.
¥ History: The version of ExtremeWare in which the command was introduced, and version(s) where it
was modiÞed, if appropriate.
¥ Platform Availability: The platforms on which the command is supported.
ExtremeWarePx1 1.2 Command Reference Guide
13
Command Reference Overview
Understanding Command Syntax
In describing command syntax, this manual uses symbols as described in Table 3. These symbols
explain how to enter the command, and you do not type them as part of the command itself.
Table 3: Command Syntax Symbols
Symbol
Description
angle brackets < >
Enclose a variable or value. You must specify the variable or value. Do not type the angle
brackets. For example, in the syntax
configure vlan <name> ipaddress <IP address>
you must supply a VLAN name for <name> and an address for <IP address> when
entering the command.
vertical bar |
Separates mutually exclusive items in a list, only one of which may be entered. Do not type
the vertical bar. The alternatives are generally enclosed in parentheses, square brackets, or
braces, as described below. For example, in the syntax
configure snmp community [read-only | read-write] <string>
you must specify either the read or write community string in the command.
parentheses ( )
Used to group items into a single element (often used with the vertical bar | ). Do not type
the parentheses. For example, in the syntax
reboot {(<date> <time>) | cancel}
you can optionally specify either a particular date and time combination, or the keyword
cancel to cancel a previously scheduled reboot. If you do not specify a parameter, the
command will prompt asking if you want to reboot the switch now.
square brackets [ ]
Enclose a required value or list of required parameters. One or more values or parameters
can be specified. Do not type the square brackets. For example, in the syntax
use image [primary | secondary]
you must specify either the primary or secondary image when entering the command.
braces { }
Enclose an optional value or a list of optional parameters. Do not type the braces. One or
more values or parameters can be specified. For example, in the syntax
reboot {(<date> <time>) | cancel}
you can optionally specify either a particular date and time combination, or the keyword
cancel to cancel a previously scheduled reboot. If you do not specify a parameter, the
command will prompt asking if you want to reboot the switch now.
Using the Command-Line Interface
The command-line interface displays a command prompt when it is ready to accept a command input.
To issue a command:
1 Enter the command name at the command prompt. You can use abbreviated syntax; see
ÒAbbreviated SyntaxÓ on page 16.
2 If the command includes parameters, enter each parameter name and its value, in the appropriate
order.
A parameterÕs value speciÞes how you want the parameter to be set. Values can be numbers, strings,
or addresses, depending on the parameter.
3 After entering the complete command, press [Return] or [Enter].
14
ExtremeWarePx1 1.2 Command Reference Guide
Using the Command-Line Interface
When entering a command at the prompt, ensure that you have the appropriate privilege level. Most
conÞguration commands require you to have the administrator privilege level.
NOTE
Most commands are not executed immediately, but are deferred until you issue the build command.
Exceptions are noted when the commands are described in this manual.
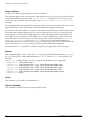
Prompt Text
The text of the command prompt includes the SNMP sysname setting. Initially, this text is the name of
the switch. Following the system name is a colon and a number that indicates the sequential
line/command number. The prompt ends with > if you are logged in with user-level privileges, and
with # if you are logged in with administrative privileges.
NOTE
An asterisk (*) appearing in front of the command-line prompt, indicates that you have outstanding
configuration changes that have not been saved. with the save configuration command.
The following command prompt indicates that the user has administrative privileges and has issue 18
previous commands, including at least one change to the conÞguration that has not been saved:
* SummitPx1:19 #
Line-Editing Keys
Table 4 describes the line-editing keys available when using the command-line interface.
Table 4: Line-Editing Keys
Key(s)
Description
Backspace
Deletes character to left of cursor and shifts remainder of line to left.
Delete or [Ctrl] + D
Deletes character under cursor and shifts remainder of line to left.
[Ctrl] + K
Deletes characters from under cursor to end of line.
Insert
Toggles the insert mode on and off. When insert mode is toggled on, new text is inserted at
the cursor; any existing text following the cursor is shifted to right. When insert mode is
toggled off, new text overwrites any existing text following the cursor.
Left Arrow
Moves cursor to left.
Right Arrow
Moves cursor to right.
Home or [Ctrl] + A
Moves cursor to first character in line.
End or [Ctrl] + E
Moves cursor to last character in line.
[Ctrl] + L
Clears screen and movers cursor to beginning of line.
[Ctrl] + P or
Up Arrow
Displays previous command in command history buffer and places cursor at end of
command.
[Ctrl] + N or
Down Arrow
Displays next command in command history buffer and places cursor at end of command.
[Ctrl] + U
Clears all characters typed from cursor to beginning of line.
[Ctrl] + W
Deletes previous word.
ExtremeWarePx1 1.2 Command Reference Guide
15
Command Reference Overview
Specifying Text Values
When specifying a text values, such as health-check objects, return strings, and URL patterns, it is
recommended that you always use double quotes to delimit the text value. You must use quotes if the
text value includes any non-alphanumeric characters, such as spaces, dashes, or dots.
Abbreviated Syntax
Abbreviated syntax is the shortest unambiguous allowable abbreviation of a command or parameter.
Typically, this is the Þrst three letters of the command. If you do not enter enough letters to allow the
switch to determine which command you mean, the syntax helper will provide a list of the options
based on the portion of the command you have entered; see ÒCommand Completion with Syntax
HelperÓ on page 16.
NOTE
When using abbreviated syntax, you must enter enough characters to make the command unambiguous
and distinguishable to the switch.
Command Completion with Syntax Helper
The command-line interface has a built-in syntax helper. If you are unsure of the complete syntax for a
particular command, enter as much of the command as possible and press [Tab]. The syntax helper
provides a list of options for the remainder of the command, and places the cursor at the end of the
command you have entered so far, ready for the next option.
The syntax helper also provides assistance if you have entered an incorrect command.
Command History
ExtremeWarePx keeps a history of the last 49 commands you entered. You can display a list of these
commands by using the following command:
history
16
ExtremeWarePx1 1.2 Command Reference Guide
2
Commands for Managing the Switch
This chapter describes the following commands:
¥ Commands for creating and managing accounts
¥ Commands for conÞguring VLANs, SNMP, and DNS client servers
¥ Commands for using Secure Shell 2 (SSH2)
¥ Miscellaneous utility command for:
Ñ Checking basic connectivity
Ñ Logging
Ñ ConÞguring a startup banner
Ñ Using the GlobalPx Content Director
ExtremeWarePx1 1.2 Command Reference Guide
17
Commands for Managing the Switch
build
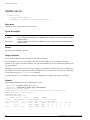
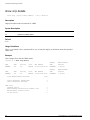
build
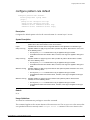
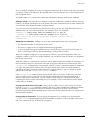
Description
Executes all pending commands issued since the last build.
Syntax Description
This command has no parameters or options.
Default
N/A.
Usage Guidelines
Most commands are not executed immediately, but are deferred until you issue a build command. After
making any conÞguration changes, you must issue the build command to commit those changes.
Example
In this example, the Þrst three commands (numbered 11 through 13) change the SNMP conÞguration.
These changes do not take effect until the build command (number 14) commits them.
SummitPx1:11 #
* SummitPx1:12
* SummitPx1:13
* SummitPx1:14
** Configuring
configure snmp sysName "balancer"
# configure snmp sysLocation "Exodus Colo"
# configure snmp sysContact "Web Admin"
# build
proxy-ip
** Configuring server table
** Configuring server-group table
** Configuring service table
** Updating Health List tables
** Updating self audit parameters.
** Updating Snmp Parameters.
** Gigabit port enabled
** Updating VRRP parameters.
** Updating autosync parameters.
History
This command was available in ExtremeWarePx 1.1.
18
ExtremeWarePx1 1.2 Command Reference Guide
build
Platform Availability
This command is available on the Px-series application switch.
ExtremeWarePx1 1.2 Command Reference Guide
19
Commands for Managing the Switch
clear log
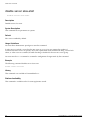
clear log {static}
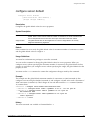
Description
Clears the application-switch internal log.
Syntax Description
static
If static is specified, the critical log messages are also cleared.
Default
N/A.
Usage Guidelines
The application-switch log tracks all conÞguration and fault information pertaining to the device. The
switch maintains 200 messages in its internal log. By default, log entries that are assigned a critical or
warning level remain in the log after a switch reboot. Issuing a clear log command does not remove
these static entries. To remove log entries of all levels (including warning or critical), use the clear log
static command.
Example
This example clears all log messages, including critical and warning log messages, from the application
switchÕs internal log:
SummitPx1:8 # clear log static
History
This command was available in ExtremeWarePx 1.1.
Platform Availability
This command is available on the Px-series application switch.
20
ExtremeWarePx1 1.2 Command Reference Guide
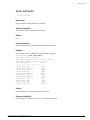
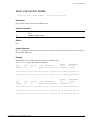
clear session
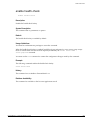
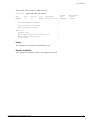
clear session
clear session <number>
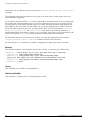
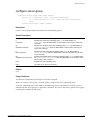
Description
Forces a speciÞc Telnet or ssh session to close.
Syntax Description
number
The number of the session to be closed.
Default
N/A.
Usage Guidelines
You must have administrator privileges to issue this command.
You can issue the show session command to see what sessions are active and Þnd the session number
of the session to close.
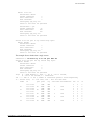
Example
This example display session information to Þnd the number for the Telnet session, then closes that
session.
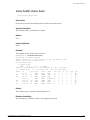
station2:32 # show session
# Time since Login
User
Type
Auth
Location
================================================================================
*
0 02:11:13 0 days 0 yrs
admin
console
local
serial
6 00:00:03 0 days 0 yrs
admin
telnet
local
10.10.10.16
station2:33 # clear session 6
History
This command was available in ExtremeWarePx 1.1.
Platform Availability
This command is available on the Px-series application switch.
ExtremeWarePx1 1.2 Command Reference Guide
21
Commands for Managing the Switch
clear stats
clear stats
Description
Clears all the statistics counters
Syntax Description
This command has no parameters or options.
Default
N/A.
Usage Guidelines
None.
Example
The following command clears all the statistics counters:
clear stats
History
This command was available in ExtremeWarePx 1.1.
Platform Availability
This command is available on the Px-series application switch.
22
ExtremeWarePx1 1.2 Command Reference Guide
cls
cls
cls
Description
Clear the console screen.
Syntax Description
This command has no parameters or options.
Default
N/A.
Usage Guidelines
None.
Example
The following command clears the console screen.
cls
History
This command was available in ExtremeWarePx 1.1.
Platform Availability
This command is available on the Px-series application switch.
ExtremeWarePx1 1.2 Command Reference Guide
23
Commands for Managing the Switch
configure account
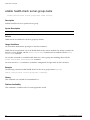
configure account <user account> {encrypted} {<password>}
Description
ConÞgures a user account password.
Syntax Description
user account
An existing user account name.
encrypted
Specifies that the password should be encrypted when the configuration is uploaded to a
file. Should not be used through the command-line interface.
This option is for use only by the switch when generating an ASCII configuration file.
password
A user password, which can be up to 31 characters in length and is case sensitive. If you
omit the password, the switch will prompt for interactive entry of the password.
Default
N/A.
Usage Guidelines
You must create a user account (with the create account command) before you can conÞgure a user
account.
You must have administrator privileges to change passwords for accounts other than your own.
You should not use the encrypted option when you enter a command interactively. This option is used
by the switch when generating an ASCII conÞguration Þle (using the upload configuration command),
and parsing a switch-generated conÞguration Þle (using the download configuration command).
If you do not specify the password on the command line, the switch will prompt you to enter the
password, and will then prompt you to reenter the password to verify that you have entered it correctly.
Your keystrokes are not echoed as you enter and reenter the new password. Assuming you enter the
same password in response to both prompts, the password is changed.
You must use the build command to commit the conÞguration changes made by this command.
Example
The following command deÞnes a new password for the account admin:
SummitPx1:3 # configure account "admin"
password:
Reenter password:
The following command deÞnes a new password, Extreme1, for the account user:
SummitPx1:4 # configure account "user" Extreme1
A conÞguration Þle may contain the following command:
configure account "foo" encrypted "eo2JTd$WKJ2FUOwZzRhCbjFxn2U3/"
24
ExtremeWarePx1 1.2 Command Reference Guide
configure account
History
This command was available in ExtremeWarePx 1.1.
Platform Availability
This command is available on the Px-series application switch.
ExtremeWarePx1 1.2 Command Reference Guide
25
Commands for Managing the Switch
configure banner
configure banner
Description
ConÞgures the banner string that is displayed display after each reboot.
Syntax Description
This command has no parameters or options.
Default
N/A.
Usage Guidelines
You must have administrator privileges to issue this command.
You will be prompted for the banner; at the prompt, type the banner message. You can enter up to 24
lines of up to 79 characters each. For a banner consisting of multiple lines of text, type [Return] to end
one line and begin the next. To terminate banner input, type [Return][Return].
If you want to clear the existing banner without entering a new one, type [Return] when prompted for
the banner.
Example
The following command conÞgures the banner to be Welcome to the switch.
config banner [Return]
Welcome to the switch
History
This command was available in ExtremeWarePx 1.1.
Platform Availability
This command is available on the Px-series application switch.
26
ExtremeWarePx1 1.2 Command Reference Guide
configure dns-client add
configure dns-client add
configure dns-client add <IP address>
Description
Adds a DNS name server to the available server list for the DNS client.
Syntax Description
IP address
The IP address of the DNS name server to be added.
Default
N/A.
Usage Guidelines
You must have administrator privileges to issue this command.
You must use the build command to commit the conÞguration changes made by this command.
Example
The following command speciÞes that the switch use the DNS server 10.1.2.1:
configure dns-client add 10.1.2.1
History
This command was available in ExtremeWarePx 1.1.
Platform Availability
This command is available on the Px-series application switch.
ExtremeWarePx1 1.2 Command Reference Guide
27
Commands for Managing the Switch
configure dns-client default-domain
configure dns-client default-domain <domain_name>
Description
ConÞgures the domain that the DNS client uses if a fully qualiÞed domain name is not entered.
Syntax Description
domain_name
A default domain name.
Default
N/A.
Usage Guidelines
You must have administrator privileges to issue this command.
Sets the DNS client default domain name to the speciÞed domain name. The default domain name will
be used to create a fully qualiÞed host name when a domain name is not speciÞed. For example, if the
default domain name is set to Òfood.comÓ then when a command like Òping dogÓ is entered, the ping
will actually be executed as Òping dog.food.comÓ.
You must use the build command to commit the conÞguration changes made by this command.
Example
The following command conÞgures the default domain name for the server:
configure dns-client default-domain xyz_inc.com
History
This command was available in ExtremeWarePx 1.1.
Platform Availability
This command is available on the Px-series application switch.
28
ExtremeWarePx1 1.2 Command Reference Guide
configure dns-client delete
configure dns-client delete
configure dns-client delete <IP address>
Description
Removes a DNS name server from the available server list for the DNS client.
Syntax Description
IP address
The IP address of the DNS name server to be removed.
Default
N/A.
Usage Guidelines
You must have administrator privileges to issue this command.
You must use the build command to commit the conÞguration changes made by this command.
Example
The following command removes a DNS server from the list:
configure dns-client delete 10.1.2.1
History
This command was available in ExtremeWarePx 1.1.
Platform Availability
This command is available on the Px-series application switch.
ExtremeWarePx1 1.2 Command Reference Guide
29
Commands for Managing the Switch
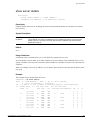
configure gslb
configure gslb ipaddress <IP address> service <string>
Description
ConÞgures a virtual service to be used by the GlobalPx Content Director scheduler.
Syntax Description
IP address
The VIP of the virtual service to be used by the GlobalPx Content Director scheduler.
string
The virtual host name used for this VIP; this virtual host name must also be set the
scheduler.
Default
N/A.
Usage Guidelines
You must have administrator privileges to issue this command.
Extreme Networks GlobalPx Content Directorª is a DNS-based Internet trafÞc-management system.
This system allows you to take advantage of network and server resources regardless of their location
on the Internet or your Intranet. As you add points of presence (POPs, clusters of one or more Px-series
switches) to a network, GlobalPx Content Director monitors server loads and network response
latencies, distributing client requests to the POP that it determines will deliver the best performance.
GlobalPx Content Director improves client access performance and reliability by leveraging dispersed
network resources.
The GlobalPx Content Director transparently directs clients and client DNS servers to the most
appropriate POP to satisfy client requests. Typically, the physically closest POP is the one that gives the
fastest response. However, this is not always the case. The GlobalPx Content Director scheduler routes
requests to the optimal POP. The scheduler is a separate program that runs on a Windows or Solaris
machine. When the scheduler is in use, virtual services are not automatically used by the scheduler. You
must issue this command for any virtual service that you want to be used by the scheduler. You must
also conÞgure the service in the scheduler itself. For more information, see the GlobalPx Content Director
Installation and User Guide.
You must use the build command to commit the conÞguration changes made by this command.
Example
This example conÞgures a virtual service to be used by the scheduler.
SummitPx1::12 # config gslb ip 10.10.45.12 service yosemite.cnd.myhost.com
SummitPx1::13 # enable gslb
SummitPx1::14 # build
History
This command was available in ExtremeWarePx 1.1.
30
ExtremeWarePx1 1.2 Command Reference Guide
configure gslb
Platform Availability
This command is available on the Px-series application switch.
ExtremeWarePx1 1.2 Command Reference Guide
31
Commands for Managing the Switch
configure iparp delete
configure iparp delete <IP address>
Description
Updates a serverÕs entry in the IP Address Resolution Protocol (ARP) table.
Syntax Description
IP address
The IP address of the server.
Default
N/A.
Usage Guidelines
You must have administrator privileges to issue this command.
This command:
1 Removes the MAC address of the speciÞed server from the ARP table.
2 Forces an ARP to the server to Þnd the serverÕs current MAC address.
3 Adds a new entry to the table with the serverÕs IP address and the correct MAC address.
You must use the build command to commit the conÞguration changes made by this command.
Example
The following command updates the ARP entry for the server with IP address 3.4.5.6:
configure iparp delete 3.4.5.6
History
This command was available in ExtremeWarePx 1.1.
Platform Availability
This command is available on the Px-series application switch.
32
ExtremeWarePx1 1.2 Command Reference Guide
configure log display
configure log display
configure log display {fatal | errors | warning | info}
Description
ConÞgures the severity level of log messages that are recorded in the internal log and logged by the
remote syslog host.
Syntax Description
fatal
Log fatal messages only.
errors
Log messages at the error level and higher (non-fatal and fatal error messages)
warning
Log messages at the warning level and higher (warnings, non-fatal error messages, and fatal error
messages)
info
Log messages at the informational level and higher (non-fatal error messages, and fatal error
messages)
This option produces a very large number of messages; it is recommended only while you are
debugging certain problems.
Default
By default, messages at the warning level and higher are logged.
Usage Guidelines
You must have administrator privileges to issue this command.
This command speciÞes the minimum severity level for messages to be logged. Messages at and above
the indicated level are recorded in the internal log. To enable displaying log messages on the console,
use the enable log display command. To enable remote logging, use the enable syslog command and
the configure syslog command.
You must use the build command to commit the conÞguration changes made by this command.
Example
This example enables the display of non-fatal and fatal error messages to the console.
SummitPx1::12 # enable log display
* SummitPx1::12 # configure log display error
* SummitPx1::12 # build
History
This command was available in ExtremeWarePx 1.1.
Platform Availability
This command is available on the Px-series application switch.
ExtremeWarePx1 1.2 Command Reference Guide
33
Commands for Managing the Switch
configure mgmt ipaddress
configure mgmt ipaddress <IP address>
[(/ <mask length>) | (network-mask <netmask>)}
Description
Assigns an IP address to the switchÕs 10/100BT Ethernet management port.
Syntax Description
IP address
IP address for the management port.
mask length
The number of bits set in the subnetwork mask.
netmask
The subnetwork mask.
Default
N/A.
Usage Guidelines
You must have administrator privileges to issue this command.
The 10/100BT Ethernet management port provides dedicated remote access to the application switch
using TCP/IP. It supports Telnet using the command-line interface. The 10/100BT port is designed to be
used as an out-of-band management port only. It does not function as a load balancing port.
If you want to use the management interface, you must issue this command assign the port an IP
address and subnetwork mask. You can specify the subnetwork mask by giving either the number of
bits set in the mask or the mask itself. For example, the following two commands are identical:
configure mgmt ipaddress 10.1.1.10 / 24
configure mgmt ipaddress 10.1.1.10 network-mask 255.255.255.0
The conÞguration of management-port information is executed immediately; you do not need to issue
the build command for this command to take effect.
Example
The following command conÞgures the management port.
configure mgmt ipaddress 10.1.1.10 / 24
History
This command was available in ExtremeWarePx 1.1.
Platform Availability
This command is available on the Px-series application switch.
34
ExtremeWarePx1 1.2 Command Reference Guide
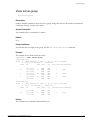
configure mgmt iproute
configure mgmt iproute
configure mgmt iproute
dest-ip <destination IP address>
gateway <gateway IP address>
Description
Installs a host route in the routing table for the switchÕs 10/100BT port.
Syntax Description
destination IP address
The destination IP address.
gateway IP address
The gateway IP address.
Default
N/A.
Usage Guidelines
You must have administrator privileges to issue this command.
The 10/100BT port has a separate routing table. By default, no routes are installed in the routing table.
You must explicitly conÞgure routes using this command. After you conÞgure the IP address for the
management port with the configure mgmt ipaddress command, you can issue this command to install
a host route. You can add as many routes as you need.
This command adds an entry to the routing table indicating that trafÞc for destination IP address
should be directed to gateway IP address.
NOTE
The gateway IP address much be on the management port subnet.
The conÞguration of management-port information is executed immediately; you do not need to issue
the build command for this command to take effect.
Example
This example conÞgures an IP address for the management port and installs two host routes:
station1:4 # config mgmt ipaddress 10.10.10.2 / 24
* station1:5 # config mgmt iproute dest-ip 10.10.10.60 gateway 10.10.10.1
* station1:6 # config mgmt iproute dest-ip 10.10.11.60 gateway 10.10.10.1
History
This command was available in ExtremeWarePx 1.1.
ExtremeWarePx1 1.2 Command Reference Guide
35
Commands for Managing the Switch
Platform Availability
This command is available on the Px-series application switch.
36
ExtremeWarePx1 1.2 Command Reference Guide
configure port gigabit auto
configure port gigabit auto
configure port gigabit auto [on | off]
Description
ConÞgures auto-negotiation on the Gigabit port.
Syntax Description
on
Specifies that auto-negotiation should be enabled.
off
Specifies that auto-negotiation should be disabled.
Default
Auto-negotiation on the Gigabit port is disabled by default.
Usage Guidelines
You must have administrator privileges to issue this command.
You must use the build command to commit the conÞguration changes made by this command.
Example
The following command disables auto-negotiation:
configure port gigabit auto off
The following command enables auto-negotiation:
configure port gigabit auto on
History
This command was available in ExtremeWarePx 1.1.
Platform Availability
This command is available on the Px-series application switch.
ExtremeWarePx1 1.2 Command Reference Guide
37
Commands for Managing the Switch
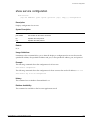
configure snmp add community
configure snmp add community
[readonly | readwrite]
<alphanumeric string>
Description
Adds an SNMP read or read/write community string.
Syntax Description
readonly
Specifies read-only access to the system.
readwrite
Specifies read and write access to the system.
alphanumeric string
The SNMP community string to be added. An SNMP community string can
contain up to 127 characters.
Default
The default read-only community string is public. The default read/write community string is private.
Usage Guidelines
You must have administrator privileges to issue this command.
Community strings provide a simple method of authentication between the application switch and a
remote network manager.
There are two types of community strings on the application switch.
¥ Read community strings provide read-only access to the application switch. The default read-only
community string is public.
¥ Read-write community strings provide read and write access to the application switch. The default
read-write community string is private.
You can conÞgure up to 14 read-only strings and up to 14 read-write strings on the application switch.
This command allows you to add community strings in addition to the two default community strings.
An authorized trap receiver must be conÞgured to use the correct community strings on the switch for
the trap receiver to receive switch-generated traps. You can conÞgure the community string for a trap
receiver with the configure snmp add trapreceiver command.
Changes made by this command are executed immediately and do not require the build command.
Example
The following command adds a read/write community string with the value extreme:
configure snmp add community readwrite "extreme"
History
This command was available in ExtremeWarePx 1.1.
38
ExtremeWarePx1 1.2 Command Reference Guide
configure snmp add community
Platform Availability
This command is available on the Px-series application switch.
ExtremeWarePx1 1.2 Command Reference Guide
39
Commands for Managing the Switch
configure snmp add trapreceiver
configure snmp add trapreceiver <IP address>
{community <community string>}
{port <udp_port>}
Description
Adds a trap receiver to the trap receiver list.
Syntax Description
IP address
The IP address of the SNMP trap receiver to add. The IP address can be
unicast, multicast, or broadcast.
community string
The community string of the trap receiver.
udp_port
A UDP port to which the trap should be sent. Default is 162.
Default
N/A.
Usage Guidelines
You must have administrator privileges to issue this command.
An authorized trap receiver can be one or more network management stations on your network.
Authorized trap receivers must be conÞgured on the switch for the trap receiver to receive
switch-generated traps. The switch sends SNMP traps to all trap receivers.
Changes made by this command are executed immediately and do not require the build command.
Example
The following command adds the IP address 10.101.0.100 as a trap receiver with community string
purple:
configure snmp add trapreceiver 10.101.0.100 community "purple"
The following command adds the IP address 10.101.0.105 as a trap receiver with community string
green, using port 3003:
configure snmp add trapreceiver 10.101.0.105 community "green" port 3003
History
This command was available in ExtremeWarePx 1.1.
Platform Availability
This command is available on the Px-series application switch.
40
ExtremeWarePx1 1.2 Command Reference Guide
configure snmp delete community
configure snmp delete community
configure snmp delete community
[readonly | readwrite]
<alphanumeric string>
Description
Deletes an SNMP read or read/write community string.
Syntax Description
readonly
Specifies read-only access to the system.
readwrite
Specifies read and write access to the system.
alphanumeric string
The SNMP community string to be deleted.
Default
N/A.
Usage Guidelines
You must have administrator privileges to issue this command.
You can use this command to remove a community string that was added with the configure snmp add
community command.
Changes made by this command are executed immediately and do not require the build command.
Example
The following command deletes the read/write community string extreme:
configure snmp delete community readwrite "extreme"
History
This command was available in ExtremeWarePx 1.1.
Platform Availability
This command is available on the Px-series application switch.
ExtremeWarePx1 1.2 Command Reference Guide
41
Commands for Managing the Switch
configure snmp delete trapreceiver
configure snmp delete trapreceiver <IP address>
Description
Deletes a trap receiver from the trap receiver list.
Syntax Description
IP address
The IP address of the SNMP trap receiver to delete.
Default
N/A.
Usage Guidelines
You must have administrator privileges to issue this command.
You can use this command to remove a trap receiver that was added with the configure snmp add
trapreceiver command.
Changes made by this command are executed immediately and do not require the build command.
Example
The following command removes the trap receiver with IP address 10.101.0.100:
configure snmp delete trapreceiver 10.101.0.100
History
This command was available in ExtremeWarePx 1.1.
Platform Availability
This command is available on the Px-series application switch.
42
ExtremeWarePx1 1.2 Command Reference Guide
configure snmp syscontact
configure snmp syscontact
configure snmp syscontact <alphanumeric string>
Description
ConÞgures the name of the system contact.
Syntax Description
alphanumeric string
A system contact name. A maximum of 255 characters is allowed.
Default
N/A.
Usage Guidelines
You must have administrator privileges to issue this command.
The system contact is a text Þeld that enables you to enter the name of the person(s) responsible for
managing the application switch.
Changes made by this command are executed immediately and do not require the build command.
Example
The following command deÞnes Fred Jones as the system contact:
configure snmp syscontact "Fred Jones"
History
This command was available in ExtremeWarePx 1.1.
Platform Availability
This command is available on the Px-series application switch.
ExtremeWarePx1 1.2 Command Reference Guide
43
Commands for Managing the Switch
configure snmp syslocation
configure snmp syslocation <alphanumeric string>
Description
ConÞgures the location of the switch.
Syntax Description
alphanumeric string
The switch location. A maximum of 255 characters is allowed.
Default
N/A.
Usage Guidelines
You must have administrator privileges to issue this command.
Use this command to indicate the location of the switch.
Changes made by this command are executed immediately and do not require the build command.
Example
The following command conÞgures a switch location name on the system:
configure snmp syslocation "Engineering Lab"
History
This command was available in ExtremeWarePx 1.1.
Platform Availability
This command is available on the Px-series application switch.
44
ExtremeWarePx1 1.2 Command Reference Guide
configure snmp sysname
configure snmp sysname
configure snmp sysname <alphanumeric string>
Description
ConÞgures the system name of the application switch.
Syntax Description
alphanumeric string
A device name. A maximum of 32 characters is allowed.
Default
The default system name is the model name of the application switch (for example, SummitPx1).
Usage Guidelines
You must have administrator privileges to issue this command.
You can use this command to change the name of the switch. The system name appears in the prompt for
the command-line interface.
Changes made by this command are executed immediately and do not require the build command.
Example
The following command names the switch:
configure snmp sysname "Engineering-Lab"
History
This command was available in ExtremeWarePx 1.1.
Platform Availability
This command is available on the Px-series application switch.
ExtremeWarePx1 1.2 Command Reference Guide
45
Commands for Managing the Switch
configure ssh2 key
configure ssh2 key
Description
Generates an authentication key for SSH2 sessions from character that you enter interactively.
Syntax Description
This command has no parameters or options.
Default
N/A.
Usage Guidelines
You must have administrator privileges to issue this command.
Before the switch can accept incoming SSH2 sessions, it must have an authentication key. This
command causes the switch to generate its authentication key from a sequence of characters that you
enter.
NOTE
Generating an authentication key takes a long time! The key-generation process cannot be cancelled;
your console may be unavailable for 10 to 40 minutes after you issue this command.
When you issue this command, you will be asked to conÞrm that you want to generate the key in spite
of the delay. If you conÞrm, you will be prompted to enter a random sequence of characters. You type
[Return][Return] to end input.
When the key has been generated, the characters you entered are stored in the conÞguration. You
should save your conÞguration to a Þle with the upload configuration command.
To set the authentication key to a key that was generated previously, use the configure ssh2 key
pregenerated command instead of this command.
Changes made by this command are executed immediately and do not require the build command.
46
ExtremeWarePx1 1.2 Command Reference Guide
configure ssh2 key
Example
This example generates an authentication key.
SummitPx1::3 # config ssh2 key
WARNING: Generating new server host key
This will take from 10-40 minutes and cannot be canceled.
Enter some random characters. End with a newline
MIICWwIBAAKBgQCoH4QkIDU+4zyNXRDE2xrdfQ19vTG3/UR2s1QisbuDI82cbeJ
c5FmT+yOhxlqgKoKKm65YMY9hFqA4Ri7NT6FU62uBxquQsyqey7/M0cI45GyWe/
sw6GtXmIIIT3/SOPmQbPpAdx4DD2S3ZiYGOpCfkDBCumGHn8rGd1lCBRCQIBIwK
gFtETwxL/6XL0Gn/Uj76mY4t8WGD9msxt3OjLaxvHKZGotFC90pUrgRXReb44el
ygWEv8O4MRoUpii0tad0rOhpcIfGU1tCutDwy1J7pxyNisQp/wHwBvV4cNVnWNM
wJRZ1WpRqJ0GYNMRWqqgpwsCAA2bWrU9iYP4X+PwuSlbAkEA0BonV3bG1sJeYqS
7ZAsN/JLh/kkCYy3W2bewz8aEPoIuIK4E9cgJOuxCMbNabHbywH+XogfTnKXFKl
JcLMtQJBAM7RtP7vZ7s45icT4s2463D+GGmnwxfF1UZQSKxe34uQ4WN0OMPexK+
b5v7F0gE0+pwLvM/zSLGtduvK7Lte4UCQQCgiTRKyVePuoNTaQLb1Z50TTLz3XO
VpwTT1tjazFdja70vJyhl1NProFBSOearcbPzlaDcFKqOyQXQMyoGe5fAkEAwwA
8F4RWMCefJ24lhTAuv40RlxY2+ZqAHeU+krSxWtYKpIm5JA1yhAYxkSDqk2x3Qq
7Kneq8Krd1wEoWORtwJAeCLpzVkaLiV9M3kiEZmY87nmSTeRzllI6+go/R1BNsM
Continue? (y/n)y
Stirred in 800 bytes.
Generating 1024-bit dsa key pair
2 Oo..oOo.oOo.
Key generated.
Extreme Networks SSH Key
SummitPx1::3 # build
History
This command was available in ExtremeWarePx 1.1.
Platform Availability
This command is available on the Px-series application switch.
ExtremeWarePx1 1.2 Command Reference Guide
47
Commands for Managing the Switch
configure ssh2 key pregenerated
configure ssh2 key pregenerated
Description
Sets the sessionÕs authentication key for SSH2 sessions to a pregenerated key.
Syntax Description
This command has no parameters or options.
Default
N/A.
Usage Guidelines
You must have administrator privileges to issue this command.
Before the switch can accept incoming SSH2 sessions, it must have an authentication key. This
command set the authentication key to a key that was generated previously.
Typically you do not issue this command interactively. Instead, you generate a key with the configure
ssh2 key command, then issue the upload configuration command to write your conÞguration to a
Þle. The resulting conÞguration Þle contains a configure ssh2 key pregenerated command that
speciÞes the sequence of characters from which the key was generated. When you later load the
conÞguration Þle (using the download configuration command), the configure ssh2 key
pregenerated command is executed.
If you do issue this command interactively, you will be prompted to enter the sequence of characters
from which the key was generated. Typically, you paste in text that you copied from a conÞguration Þle
that you saved after generating the key initially.
Changes made by this command are executed immediately and do not require the build command.
Example
A conÞguration Þle contains the following commands:
#---------------------------------------------------------------# SSH configuration
#---------------------------------------------------------------configure ssh2 key pregenerated
P2/56wAAAgIAAAAmZGwtbW9kcHtzaWdue2RzYS1uaXNDODNoYTF9LGRoe3BsYWlufX0AAAAEbm9uZQAA
AcQAAAHAAAAAAAAABADaeKQS+67eOAhWC9SN0nVaQ87qb1P0PWDWG9LcPi3eYNWMQweZxbYLGkrSDY0b
C2foklDbmLFitL7oqof4ZWkgbFBIpex0Gy1W8CyHKHF2Njp2hIsIWoj+EhYfSYhC9NBWx6UHhXnCftB9
3tvdwCaeUKC6SOZ6t1YTcTpukf6xQwAABAC0biSqDVP8ygZynBjwR4OWhYrUrEaDiNgThIsb4yVo/VWf8GotiY5b
kpZGOIOheNuX78uSMHiI/U9hssvNjzr/X8k/rQb2rbVj+ZP+D30TPLFzrml49zdnzTnZIZhdnVE21Wwz
XcTdP26xGeeKQ2gjWp/Ws0Ob3HCIAdZTR64WsQSvCaKOhAAAKDTTgW8rqrpJjgcPB3YdIwL6cL8dwAA
BADZWUEouEqCnNOS85SCXyUH5SVQxWvkUJgqfoS3XnDrUg5nR0CkNrO1LvM1Gf904v2FxJ3IbBBG+bpmrloYFT
3XAcKWq89e7iDcEToO0vP+Ie9HdX7kR04olYuxHa1eoJrvFYotLnnsSI6DTmKQrRPgHtXKAeXTGCGNiu
iQydg4KHgrGO1QAAAKCJGtuwT9jt9Jo9uUyGoDV9/pHArQ==
48
ExtremeWarePx1 1.2 Command Reference Guide
configure ssh2 key pregenerated
enable ssh2
History
This command was available in ExtremeWarePx 1.1.
Platform Availability
This command is available on the Px-series application switch.
ExtremeWarePx1 1.2 Command Reference Guide
49
Commands for Managing the Switch
configure syslog
configure syslog ipaddress <IP address>
Description
ConÞgures the syslog host address.
Syntax Description
IP address
The IP address of the syslog host.
Default
N/A.
Usage Guidelines
You must have administrator privileges to issue this command.
A log maintained remotely on a syslog host can preserve log messages that would be lost from the
internal log, which contains only the 200 most recent messages.
To enable remote logging, you must issue the enable syslog command.
By default, warnings and more serious messages are logged. To log messages of a different severity
level, use the configure log display command.
You must use the build command to commit the conÞguration changes made by this command.
Example
This example enables logging to a remote syslog host:
SummitPx1::12 # enable syslog
* SummitPx1::13 # configure syslog ipaddress 10.1.1.1
* SummitPx1::13 # build
History
This command was available in ExtremeWarePx 1.1.
Platform Availability
This command is available on the Px-series application switch.
50
ExtremeWarePx1 1.2 Command Reference Guide
configure system-ip
configure system-ip
configure system-ip <IP address>
[(/ <mask length>) | (network-mask <netmask>)]
{vlan <vlan tag number>}
Description
ConÞgures the system IP address.
Syntax Description
IP address
IP address for the switch
mask length
The number of bits set in the network mask.
netmask
The network mask.
vlan tag number
The VLAN tag for the switch.
Default
N/A.
Usage Guidelines
You must have administrator privileges to issue this command.
To conÞgure the switch, you must specify its IP address and network mask. You can specify the
network mask by giving either the number of bits set in the mask or the network mask itself. For
example, the following two commands are identical:
configure system-ip 64.1.1.10 / 24
configure system-ip 64.1.1.10 network-mask 255.255.255.0
You may optionally specify a VLAN for the switch. The Px series application switch supports up to
4,096 VLANs. The system IP and proxy IPs must reside in the same VLAN; VIPs and servers can be on
any VLAN. The application switch identiÞes VLANs with 802.1q VLAN ID numbers rather than names.
If you plan to conÞgure the system VLAN on the application switch, you must enable VLANs on the
conÞguration switch with the enable vlan command before you issue the conÞgure system-ip
command.
For the SummitPx1, before conÞguring the VLAN for the application switch, you must enable VLAN
tagging on the switch port connected to the application switch, and add the VLANs you need to the
port, using the manufacturerÕs instructions.
You must use the build command to commit the conÞguration changes made by this command.
ExtremeWarePx1 1.2 Command Reference Guide
51
Commands for Managing the Switch
Example
This example enables VLANs on the application switch then conÞgures the IP address, network mask,
and system VLAN.
SummitPx1:1 # enable vlan
* SummitPx1:2 # config system-ip 64.1.1.10 / 24 vlan 100
* SummitPx1:3 # build
History
This command was available in ExtremeWarePx 1.1.
Platform Availability
This command is available on the Px-series application switch.
52
ExtremeWarePx1 1.2 Command Reference Guide
create account
create account
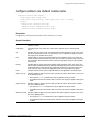
create account [admin | user] <username> {encrypted} {<password>}
Description
Creates a new user account.
Syntax Description
admin
user
Specifies administrator-level privileges for the account. An administrator-level
account can:
•
View and change all switch parameters
•
Add and delete users
•
Change the password associated with any account
Specifies user-level privileges for the account. A user-level account can:
•
View (but not change) all manageable parameters except the user account
database and the SNMP community strings
•
Issue the ping command.
•
Change the password assigned to the account
username
A new user account name, which can be up to 31 characters in length and is
case sensitive.
encrypted
Specifies that the password should be encrypted when the configuration is
uploaded to a file. Should not be used through the command-line interface.
This option is for use only by the switch when generating an ASCII
configuration file.
password
A user password, which can be up to 31 characters in length and is case
sensitive.
Default
By default, the switch is conÞgured with two accounts, admin has administrator-level privileges and
cannot be deleted; user has user-level privileges.
You can use this command to create additional accounts.
You should not use the encrypted option when you enter a command interactively. This option is used
by the switch when generating an ASCII conÞguration Þle (using the upload configuration command),
and parsing a switch-generated conÞguration Þle (using the download configuration command).
Default accounts do not have passwords assigned to them; you can change an accountÕs password with
the configure account command.
Usage Guidelines
You must have administrator privileges to issue this command.
The application switch can have a total of 16 management accounts.
You must have administrator privileges to change passwords for accounts other than your own. User
names and passwords are case-sensitive.
ExtremeWarePx1 1.2 Command Reference Guide
53
Commands for Managing the Switch
If you do not specify the password on the command line, the switch will prompt you to enter the
password, and will then prompt you to reenter the password to verify that you have entered it correctly.
Your keystrokes are not echoed as you enter and reenter the new password. Assuming you enter the
same password in response to both prompts, the password is changed.
You must use the build command to commit the conÞguration changes made by this command.
Example
The following command creates a new account named John2 with administrator privileges:
create account admin "john2"
The conÞguration Þle can contain the following command:
create account admin "chuck" encrypted "eo2JTd$WKJ2FUOwZzRhCbjFxn2U3/"
History
This command was available in ExtremeWarePx 1.1.
Platform Availability
This command is available on the Px-series application switch.
54
ExtremeWarePx1 1.2 Command Reference Guide
delete account
delete account
delete account <username>
Description
Deletes a user account.
Syntax Description
username
The user account to be deleted.
Default
N/A.
Usage Guidelines
You must have administrator privileges to issue this command.
You may not delete the admin account.
You must use the build command to commit the conÞguration changes made by this command.
Example
The following command deletes account john2:
delete account john2
History
This command was available in ExtremeWarePx 1.1.
Platform Availability
This command is available on the Px-series application switch.
ExtremeWarePx1 1.2 Command Reference Guide
55
Commands for Managing the Switch
disable clipaging
disable clipaging
Description
Disables pausing at the end of each show screen.
Syntax Description
This command has no parameters or options.
Default
Command-line interface (CLI) paging is enabled by default.
Usage Guidelines
The command-line interface is designed for use in a VT100 environment. Most show command output
will pause when the display reaches the end of a page. This command disables the pause mechanism
and allows the display to print continuously to the screen.
NOTE
Press [q] and then press [Return] to force a pause when command-line interface paging is disabled.
Example
The follow command disables command-line interface paging and allows you to print continuously to
the screen:
disable clipaging
History
This command was available in ExtremeWarePx 1.1.
Platform Availability
This command is available on the Px-series application switch.
56
ExtremeWarePx1 1.2 Command Reference Guide
disable gslb
disable gslb
disable gslb
Description
Stops the GlobalPx Content Director agent on the Px series application switch.
Syntax Description
This command has no parameters or options.
Default
By default, the GlobalPx Content Director agent does not run.
Usage Guidelines
You must have administrator privileges to issue this command.
Extreme Networks GlobalPx Content Directorª is a DNS-based Internet trafÞc-management system.
This system allows you to take advantage of network and server resources regardless of their location
on the Internet or your Intranet. As you add points of presence (POPs, clusters of one or more Px-series
switches) to a network, GlobalPx Content Director monitors server loads and network response
latencies, distributing client requests to the POP that it determines will deliver the best performance.
GlobalPx Content Director improves client access performance and reliability by leveraging dispersed
network resources. For more information, see the GlobalPx Content Director Installation and User Guide.
You must use the build command to commit the conÞguration changes made by this command.
Example
The following command stops the GlobalPx Content Director agent (which was started by the enable
gslb command.
disable gslb
History
This command was available in ExtremeWarePx 1.1.
Platform Availability
This command is available on the Px-series application switch.
ExtremeWarePx1 1.2 Command Reference Guide
57
Commands for Managing the Switch
disable log display
disable log display
Description
Disables display of log message to the console.
Syntax Description
This command has no parameters or options.
Default
Display of log messages is disabled by default.
Usage Guidelines
You must have administrator privileges to issue this command.
Although log messages are not displayed, they are still recorded in the internal log of the application
switch.
You must use the build command to commit the conÞguration changes made by this command.
Example
This example disables the display log messages to the console.
SummitPx1::12 # disable log display
* SummitPx1::13 # build
History
This command was available in ExtremeWarePx 1.1.
Platform Availability
This command is available on the Px-series application switch.
58
ExtremeWarePx1 1.2 Command Reference Guide
disable port gigabit
disable port gigabit
disable port gigabit
Description
Disables the Gigabit port.
Syntax Description
This command has no parameters or options.
Default
The Gigabit port is disabled by default.
Usage Guidelines
You must have administrator privileges to issue this command.
You must use the build command to commit the conÞguration changes made by this command.
Example
The following command disables the Gigabit port.
disable port gigabit
History
This command was available in ExtremeWarePx 1.1.
Platform Availability
This command is available on the Px-series application switch.
ExtremeWarePx1 1.2 Command Reference Guide
59
Commands for Managing the Switch
disable self-audit
disable self-audit
Description
Disables the internal self-audit.
Syntax Description
This command has no parameters or options.
Default
Internal self-audit is enabled by default.
Usage Guidelines
You must have administrator privileges to issue this command.
Internal self-audit is the internal hardware-check mechanism. To see whether internal self-audit is
enabled, use the show self-audit command.
You must use the build command to commit the conÞguration changes made by this command.
Example
The following command disables internal self-audit:
disable self-audit
History
This command was available in ExtremeWarePx 1.1.
Platform Availability
This command is available on the Px-series application switch.
60
ExtremeWarePx1 1.2 Command Reference Guide
disable snmp access
disable snmp access
disable snmp access
Description
Disables SNMP on the switch.
Syntax Description
This command has no parameters or options.
Default
SNMP access is enabled by default.
Usage Guidelines
You must have administrator privileges to issue this command.
Disabling SNMP access does not affect the SNMP conÞguration (for example, community strings).
However, if you disable SNMP access, you will be unable to access the switch using SNMP.
You must use the build command to commit the conÞguration changes made by this command.
Example
The following command disables SNMP access on the switch:
disable snmp access
History
This command was available in ExtremeWarePx 1.1.
Platform Availability
This command is available on the Px-series application switch.
ExtremeWarePx1 1.2 Command Reference Guide
61
Commands for Managing the Switch
disable snmp traps
disable snmp traps
Description
Prevents SNMP traps from being sent from the switch.
Syntax Description
This command has no parameters or options.
Default
SNMP trap support is enabled by default.
Usage Guidelines
You must have administrator privileges to issue this command.
This command does not clear the SNMP trap receivers that have been conÞgured. The command
prevents SNMP traps from being sent from the switch even if trap receivers are conÞgured.
You must use the build command to commit the conÞguration changes made by this command.
Example
The following command prevents SNMP traps from being sent from the switch to the trap receivers:
disable snmp traps
History
This command was available in ExtremeWarePx 1.1.
Platform Availability
This command is available on the Px-series application switch.
62
ExtremeWarePx1 1.2 Command Reference Guide
disable ssh2
disable ssh2
disable ssh2
Description
Disables incoming SSH2 Telnet sessions.
Syntax Description
This command has no parameters or options.
Default
The SSH2 feature is disabled until you obtain a valid security license. If a valid security license is in
effect, SSH2 is enabled with no access proÞle and uses TCP port number 22.
Usage Guidelines
You must have administrator privileges to issue this command.
SSH2 session options (access proÞle and non-default port setting) are not saved when SSH2 is disabled.
You must use the build command to commit the conÞguration changes made by this command.
Example
The following command disables the SSH2 feature:
disable ssh2
History
This command was available in ExtremeWarePx 1.1.
Platform Availability
This command is available on the Px-series application switch.
ExtremeWarePx1 1.2 Command Reference Guide
63
Commands for Managing the Switch
disable syslog
disable syslog
Description
Disables logging to a remote logging by way of the UNIX syslog host facility.
Syntax Description
This command has no parameters or options.
Default
Remote logging is disabled by default.
Usage Guidelines
You must have administrator privileges to issue this command.
You must use the build command to commit the conÞguration changes made by this command.
Example
This example disables logging to a remote syslog host:
SummitPx1::12 # disable syslog
* SummitPx1::13 # build
History
This command was available in ExtremeWarePx 1.1.
Platform Availability
This command is available on the Px-series application switch. \
64
ExtremeWarePx1 1.2 Command Reference Guide
disable telnet
disable telnet
disable telnet
Description
Disables Telnet services on the switch.
Syntax Description
This command has no parameters or options.
Default
Telnet services are enabled by default.
Usage Guidelines
You must have administrator privileges to issue this command.
You must use the build command to commit the conÞguration changes made by this command.
Example
The following command disables Telnet services on the switch:
disable telnet
History
This command was available in ExtremeWarePx 1.1.
Platform Availability
This command is available on the Px-series application switch.
ExtremeWarePx1 1.2 Command Reference Guide
65
Commands for Managing the Switch
disable vlan
disable vlan
Description
Disables VLANs on the application switch.
Syntax Description
This command has no parameters or options.
Default
On SummitPx1, VLANs are disabled by default.
Usage Guidelines
You must have administrator privileges to issue this command.
You must use the build command to commit the conÞguration changes made by this command.
Example
The following command disables VLANs on the application switch
disable vlan
History
This command was available in ExtremeWarePx 1.1.
Platform Availability
This command is available on the Px-series application switch.
66
ExtremeWarePx1 1.2 Command Reference Guide
download configuration
download configuration
download configuration
[<IP address> | <hostname>]
<filename>
{primary | secondary}
Description
Downloads a previously saved ASCII conÞguration Þle from a speciÞc TFTP server host.
Syntax Description
IP address
The IP address of the TFTP server from which the configuration should be
obtained.
hostname
The host name of the TFTP server from which the configuration should be
obtained.
filename
The path and filename of a saved ASCII configuration.
primary
Specifies that the new configuration should be stored as the primary
configuration.
secondary
Specifies that the new configuration should be stored as the secondary
configuration.
Default
N/A.
Usage Guidelines
You must have administrator privileges to issue this command.
This command does a complete download, resetting the current switch conÞguration and replacing it
with the new downloaded conÞguration. You will be prompted to reboot the switch after the download
is complete.
The switch can store up to two conÞgurations: a primary conÞguration and a secondary conÞguration.
When you download a new conÞguration, you can select into which conÞguration space (primary or
secondary) you want the new conÞguration to be placed. If you do not specify a conÞguration space,
the switch uses the one that was selected with the previous use configuration command. To see which
conÞguration is currently selected, use the show configuration command.
The new conÞguration information is stored in switch runtime memory, and is not retained if the switch
has a power failure. After the switch has rebooted, you should save the conÞguration to the primary or
secondary conÞguration area to retain it through a power cycle. You can include a save command at the
end of the conÞguration Þle to have the save done at the end of the download.
The Þle on the server is assumed to be located relative to the TFTP server base directory. You can
specify a path as part of the Þlename.
Use of the hostname parameter requires that DNS be enabled.
ExtremeWarePx1 1.2 Command Reference Guide
67
Commands for Managing the Switch
Example
The following command clears the current switch conÞguration, and downloads a new full
conÞguration from the tftp server tftphost. It uses the conÞguration from the Þle stdconfigs.txt
residing in the subdirectory configs\archive of the TFTP server base directory on the server:
download configuration tftphost configs\archive\stdconfig.txt primary
History
This command was available in ExtremeWarePx 1.1.
Platform Availability
This command is available on the Px-series application switch.
68
ExtremeWarePx1 1.2 Command Reference Guide
download image
download image
download image
[<IP address> | <hostname>]
<filename>
{primary | secondary}
Description
Downloads a new version of the ExtremeWarePx software image.
Syntax Description
IP address
The IP address of TFTP server from which the image should be obtained.
hostname
The host name of the TFTP server from which the image should be obtained.
filename
The filename of the new image.
primary
Specifies that the new image should be stored as the primary image.
secondary
Specifies that the new image should be stored as the secondary image.
Default
N/A.
Usage Guidelines
You must have administrator privileges to issue this command.
Prior to downloading an image, you must place the new image in a Þle on a TFTP server on your
network. Unless you include a path with the Þlename, this command assumes that the Þle resides in the
same directory as the TFTP server itself.
The switch can store up to two images: a primary image and a secondary image. When you download a
new image, you can select into which image space (primary or secondary) you want the new image to
be placed. If you do not specify an image space, the switch uses the one that was selected with the
previous use image command.
Use of the hostname parameter requires that DNS be enabled.
Example
CAUTION
The following command downloads the switch software image from the TFTP server named
tftphost, from the file named file.ext, to the secondary image store:
download image tftphost ExtremewarePx_ssh_1.2.0b13 primary
History
This command was available in ExtremeWarePx 1.1.
ExtremeWarePx1 1.2 Command Reference Guide
69
Commands for Managing the Switch
Platform Availability
This command is available on the Px-series application switch.
70
ExtremeWarePx1 1.2 Command Reference Guide
enable clipaging
enable clipaging
enable clipaging
Description
Enables the pause mechanism and does not allow the display to print continuously to the screen.
Syntax Description
This command has no parameters or options.
Default
Command-line interface (CLI) paging is enabled by default.
Usage Guidelines
The command-line interface is designed for use in a VT100 environment. Most show command output
will pause when the display reaches the end of a page.
Even if command-line interface paging is enabled, when you use the show tech-support command to
diagnose system technical problems, the command-line interface paging feature is disabled during
execution of that command.
Example
The following command enables command-line interface paging and does not allow the display to print
continuously to the screen:
enable clipaging
History
This command was available in ExtremeWarePx 1.1.
Platform Availability
This command is available on the Px-series application switch.
ExtremeWarePx1 1.2 Command Reference Guide
71
Commands for Managing the Switch
enable gslb
enable gslb
{port <port number>}
Description
Starts the GlobalPx Content Director agent on the Px series application switch.
Syntax Description
port number
The port to be used by the GlobalPx Content Director agent. If no port is specified, the
agent listens on the default port, which is 2103.
Default
By default, the GlobalPx Content Director agent does not run.
Usage Guidelines
You must have administrator privileges to issue this command.
Extreme Networks GlobalPx Content Directorª is a DNS-based Internet trafÞc-management system.
This system allows you to take advantage of network and server resources regardless of their location
on the Internet or your Intranet. As you add points of presence (POPs, clusters of one or more Px-series
switches) to a network, GlobalPx Content Director monitors server loads and network response
latencies, distributing client requests to the POP that it determines will deliver the best performance.
GlobalPx Content Director improves client access performance and reliability by leveraging dispersed
network resources. For more information, see the GlobalPx Content Director Installation and User Guide.
You must use the build command to commit the conÞguration changes made by this command.
Example
This example starts the GlobalPx Content Director agent, listening on the default port (2103).
SummitPx1::12 # enable gslb
* SummitPx1::13 # build
History
This command was available in ExtremeWarePx 1.1.
Platform Availability
This command is available on the Px-series application switch.
72
ExtremeWarePx1 1.2 Command Reference Guide
enable log display
enable log display
enable log display
Description
Enables display of log message to the console.
Syntax Description
This command has no parameters or options.
Default
Display of log messages is disabled by default.
Usage Guidelines
You must have administrator privileges to issue this command.
By default, warnings and more serious messages are logged. To log messages of a different severity
level, use the configure log display command.
You must use the build command to commit the conÞguration changes made by this command.
Example
This example enables the display of non-fatal and fatal error messages to the console.
SummitPx1::12 # enable log display
* SummitPx1::13 # configure log display error
* SummitPx1::14 # build
History
This command was available in ExtremeWarePx 1.1.
Platform Availability
This command is available on the Px-series application switch.
ExtremeWarePx1 1.2 Command Reference Guide
73
Commands for Managing the Switch
enable port gigabit
enable port gigabit
Description
Enables the Gigabit port.
Syntax Description
This command has no parameters or options.
Default
The Gigabit port is disabled by default.
Usage Guidelines
You must have administrator privileges to issue this command.
You will be warned if you attempt to issue the build command when the Gigabit port is disabled.
You must use the build command to commit the conÞguration changes made by this command.
Example
This example enables the Gigabit port, commit changes, and save your conÞguration changes to ßash
memory, so that they are in effect after the next reboot.
SummitPx1:8 # enable port gigabit
SummitPx1:11 # build
SummitPx1:17 # save
Do you want to save to the primary configuration database? (y/n) y
Writing data to Flash...
Saved 16107 bytes to flash.
History
This command was available in ExtremeWarePx 1.1.
Platform Availability
This command is available on the Px-series application switch.
74
ExtremeWarePx1 1.2 Command Reference Guide
enable self-audit
enable self-audit
enable self-audit
Description
Enables the internal self-audit.
Syntax Description
This command has no parameters or options.
Default
Internal self-audit is enabled by default.
Usage Guidelines
You must have administrator privileges to issue this command.
Internal self-audit is the internal hardware-check mechanism. To see whether internal self-audit is
enabled, use the show self-audit command.
You must use the build command to commit the conÞguration changes made by this command.
Example
The following command enables internal self-audit:
enable self-audit
History
This command was available in ExtremeWarePx 1.1.
Platform Availability
This command is available on the Px-series application switch.
ExtremeWarePx1 1.2 Command Reference Guide
75
Commands for Managing the Switch
enable snmp access
enable snmp access
Description
Turns on SNMP support for the switch.
Syntax Description
This command has no parameters or options.
Default
SNMP access is enabled by default.
Usage Guidelines
You must have administrator privileges to issue this command.
To have access to the SNMP agent residing in the switch, at least one VLAN must have an IP address
assigned to it.
Any network manager running SNMP can manage the switch, provided the MIB is installed correctly
on the management station. Each network manager provides its own user interface to the management
facilities.
You must use the build command to commit the conÞguration changes made by this command.
Example
The following command enables SNMP support for the switch:
enable snmp access
History
This command was available in ExtremeWarePx 1.1.
Platform Availability
This command is available on the Px-series application switch.
76
ExtremeWarePx1 1.2 Command Reference Guide
enable snmp traps
enable snmp traps
enable snmp traps
Description
Turns on SNMP trap support.
Syntax Description
This command has no parameters or options.
Default
SNMP trap support is enabled by default.
Usage Guidelines
You must have administrator privileges to issue this command.
An authorized trap receiver can be one or more network management stations on your network. The
switch sends SNMP traps to all trap receivers.
You must use the build command to commit the conÞguration changes made by this command.
Example
The following command enables SNMP trap support on the switch:
enable snmp trap
History
This command was available in ExtremeWarePx 1.1.
Platform Availability
This command is available on the Px-series application switch.
ExtremeWarePx1 1.2 Command Reference Guide
77
Commands for Managing the Switch
enable ssh2
enable ssh2
{port <tcp_port_number>}
Description
Enables incoming SSH2 Telnet sessions.
Syntax Description
port
The TCP port number to be used for SSH2 communication. The default is
port 22.
Default
The SSH2 feature is disabled until you obtain a valid security license. If a valid security license is in
effect, SSH2 is enabled with no access proÞle and uses TCP port number 22.
Usage Guidelines
You must enable SSH2 on the switch before you can connect to it using an external SSH2 client.
Because SSH2 is currently under U.S. export restrictions, you must Þrst obtain a security-enabled
version of the ExtremeWare software from Extreme Networks before you can enable SSH2. The
procedure for obtaining a security-enabled version of the ExtremeWare software is described in the
ExtremeWare Software User Guide.
You must have administrator privileges to issue this command.
NOTE
Using SSH2 requires an authentication key.
Before you issue this command, you should generates an SSH2 authentication key using the configure
ssh2 key command. If an authentication key has not already been conÞgured, the enable ssh2
command will automatically start the dialog for generating an authentication key (which can take up to
40 minutes).
Use the port option to specify a TCP port number other than the default.
You must use the build command to commit the conÞguration changes made by this command.
Example
The following command enables the SSH2 feature, with access allowed based on the access proÞle
management:
enable ssh2 management
78
ExtremeWarePx1 1.2 Command Reference Guide
enable ssh2
History
This command was available in ExtremeWarePx 1.1.
Platform Availability
This command is available on the Px-series application switch.
ExtremeWarePx1 1.2 Command Reference Guide
79
Commands for Managing the Switch
enable syslog
enable syslog
Description
Enables logging to a remote logging by way of the UNIX syslog host facility.
Syntax Description
This command has no parameters or options.
Default
Remote logging is disabled by default.
Usage Guidelines
You must have administrator privileges to issue this command.
In order to enable remote logging, you must do the following:
¥ ConÞgure the syslog host to accept and log messages.
¥ Enable remote logging by using the enable syslog command.
¥ ConÞgure remote logging by using the configure syslog command.
By default, warnings and more serious messages are logged. To log messages of a different severity
level, use the configure log display command.
You must use the build command to commit the conÞguration changes made by this command.
Example
This example enables logging to a remote syslog host:
SummitPx1::12 # enable syslog
* SummitPx1::13 # configure syslog ipaddress 10.1.1.1
* SummitPx1::14 # build
History
This command was available in ExtremeWarePx 1.1.
Platform Availability
This command is available on the Px-series application switch.
80
ExtremeWarePx1 1.2 Command Reference Guide
enable telnet
enable telnet
enable telnet
Description
Enables Telnet access to the switch.
Syntax Description
This command has no parameters or options.
Default
Telnet services are enabled by default.
Usage Guidelines
You must have administrator privileges to issue this command.
You must use the build command to commit the conÞguration changes made by this command.
Example
The following command enables Telnet services on the switch:
enable telnet
History
This command was available in ExtremeWarePx 1.1.
Platform Availability
This command is available on the Px-series application switch.
ExtremeWarePx1 1.2 Command Reference Guide
81
Commands for Managing the Switch
enable vlan
enable vlan
Description
Enables VLANs on the application switch.
Syntax Description
This command has no parameters or options.
Default
On SummitPx1, VLANs are disabled by default.
Usage Guidelines
You must have administrator privileges to issue this command.
You must use the build command to commit the conÞguration changes made by this command.
Example
This example enables VLANs on the application switch then conÞgures the IP address, network mask,
and system VLAN.
SummitPx1:1 # enable vlan
* SummitPx1:2 # config system-ip 64.1.1.10 / 24 vlan 100
* SummitPx1:3 # build
History
This command was available in ExtremeWarePx 1.1.
Platform Availability
This command is available on the Px-series application switch.
82
ExtremeWarePx1 1.2 Command Reference Guide
exit
exit
exit
Description
Logs out of the console.
Syntax Description
This command has no parameters or options.
Default
N/A.
Usage Guidelines
You can also log out with the logout and quit commands.
Example
The following command logs out:
exit
History
This command was available in ExtremeWarePx 1.1.
Platform Availability
This command is available on the Px-series application switch.
ExtremeWarePx1 1.2 Command Reference Guide
83
Commands for Managing the Switch
history
history
Description
Displays a list of the previous 49 commands entered on the switch.
Syntax Description
This command has no parameters or options.
Default
N/A.
Usage Guidelines
ExtremeWarePx ÒremembersÓ the last 49 commands you entered on the switch. Use the history
command to display a list of these commands.
Example
The following command displays the previous 49 commands entered on the switch:
history
History
This command was available in ExtremeWarePx 1.1.
Platform Availability
This command is available on the Px-series application switch.
84
ExtremeWarePx1 1.2 Command Reference Guide
load configuration
load configuration
load configuration
[<IP address> | <hostname>]
<filename>
Description
Loads a previously saved ASCII conÞguration Þle from a speciÞc TFTP server host into the switch's
runtime memory.
Syntax Description
IP address
The IP address of the TFTP server from which the configuration should be obtained.
hostname
The host name of the TFTP server from which the configuration should be obtained.
filename
The path and filename of a saved ASCII configuration.
Default
N/A.
Usage Guidelines
You must have administrator privileges to issue this command.
This command loads the conÞguration from the speciÞed Þle, adding to the current conÞguration.
The Þle on the server is assumed to be located relative to the TFTP server base directory. You can
specify a path as part of the Þlename.
Use of the hostname parameter requires that DNS be enabled.
You must use the build command to commit the conÞguration changes loaded by this command. You
must use the save configuration command to store the new conÞguration in permanent memory.
To download a complete new conÞguration into permanent memory, use the download configuration
command instead of this command.
Example
The following command loads a conÞguration Þle into runtime memory.
load configuration tftphost myDir\myConfig.txt
History
This command was available in ExtremeWarePx 1.1.
Platform Availability
This command is available on the Px-series application switch.
ExtremeWarePx1 1.2 Command Reference Guide
85
Commands for Managing the Switch
logout
logout
Description
Logs out of the console.
Syntax Description
This command has no parameters or options.
Default
N/A.
Usage Guidelines
You can also log out with the exit and quit commands.
Example
The following command logs out:
logout
History
This command was available in ExtremeWarePx 1.1.
Platform Availability
This command is available on the Px-series application switch.
86
ExtremeWarePx1 1.2 Command Reference Guide
nslookup
nslookup
nslookup <hostname>
Description
Displays the IP address of the requested host.
Syntax Description
hostname
A host name.
Default
N/A.
Usage Guidelines
You must have administrator privileges to issue this command.
Example
The following command looks up the IP address of a computer with the name of bigserver.xyz_inc.com:
nslookup bigserver.xyz_inc.com
History
This command was available in ExtremeWarePx 1.1.
Platform Availability
This command is available on the Px-series application switch.
ExtremeWarePx1 1.2 Command Reference Guide
87
Commands for Managing the Switch
ping
ping
{continuous}
[<IP address> | <hostname>]
Description
Enables you to send Internet Control Message Protocol (ICMP) echo messages or to a remote IP device.
Syntax Description
continuous
Specifies that ICMP echo messages are to be sent continuously. This option
can be interrupted by pressing any key.
IP address
The IP address of the host.
hostname
The name of the host.
Default
N/A.
Usage Guidelines
The ping command is used to test for connectivity to a speciÞc host; it is available for both the user and
administrator privilege level.
If a ping request fails, the switch continues to send ping messages until interrupted.
You can press any key to interrupt a ping request.
Use of the hostname parameter requires that DNS be enabled.
Example
This example identiÞes the remote device by its host name; the ping is successful.
SummitPx1:13 # ping www.ExtremeNetworks.com
www.ExtremeNetworks.com is alive
This example causes continuous ICMP echo messages to be sent to a remote host.
SummitPx1:15 # ping continuous www.ExtremeNetworks.com
PING www.ExtremeNetworks.com (10.0.1.236): 56 data bytes
64 bytes from 10.0.1.236: icmp_seq=0. time=0 ms
64 bytes from 10.0.1.236: icmp_seq=1. time=0 ms
64 bytes from 10.0.1.236: icmp_seq=2. time=0 ms
64 bytes from 10.0.1.236: icmp_seq=3. time=0 ms
64 bytes from 10.0.1.236: icmp_seq=4. time=0 ms
64 bytes from 10.0.1.236: icmp_seq=5. time=0 ms
----www.ExtremeNetworks.com PING Statistics---6 packets transmitted, 6 packets received, 0% packet loss
round-trip (ms) min/avg/max = 0/0/0
88
ExtremeWarePx1 1.2 Command Reference Guide
ping
This example identiÞes the remote device by its IP address; the ping fails.
SummitPx1:14 # ping 1.1.1.1
no answer from 1.1.1.1
History
This command was available in ExtremeWarePx 1.1.
Platform Availability
This command is available on the Px-series application switch.
ExtremeWarePx1 1.2 Command Reference Guide
89
Commands for Managing the Switch
quit
quit
Description
Logs out of the console.
Syntax Description
This command has no parameters or options.
Default
N/A.
Usage Guidelines
You can also log out with the exit and logout commands.
Example
The following command logs out:
quit
History
This command was available in ExtremeWarePx 1.1.
Platform Availability
This command is available on the Px-series application switch.
90
ExtremeWarePx1 1.2 Command Reference Guide
reboot
reboot
reboot
Description
Reboots the switch.
Syntax Description
This command has no parameters or options.
Default
N/A.
Usage Guidelines
After downloading a conÞguration with the download configuration command, you need to reboot the
switch for the new conÞguration to take effect.
Example
The following command reboots the switch:
reboot
History
This command was available in ExtremeWarePx 1.1.
Platform Availability
This command is available on the Px-series application switch.
ExtremeWarePx1 1.2 Command Reference Guide
91
Commands for Managing the Switch
save configuration
save configuration [primary | secondary]
Description
Saves the current conÞguration from the switchÕs runtime memory to non-volatile memory.
Syntax Description
primary
Specifies that the configuration should be stored as the primary configuration.
secondary
Specifies that the configuration should be stored as the secondary configuration.
Default
N/A.
Usage Guidelines
You must have administrator privileges to issue this command.
The saved conÞguration takes effect on the next reboot.
If you omit the primary or secondary keyword, the switch uses the one that was selected with the
previous use configuration command. To see which conÞguration is currently selected, use the show
configuration command.
If you have made changes to the conÞguration which have not yet been committed by the build
command, you will be asked whether you want to commit those changes (build) before saving the
conÞguration.
Example
This example saves the current conÞguration to the primary conÞguration database:
SummitPx1:1 # save primary
Writing data to Flash...
Saved 16107 bytes to flash.
This example saves the conÞguration after Þrst committing changes:
* Alpha-Px:3 # save primary
Build configuration before saving (y/n)? y
** Configuring proxy-ip
** Configuring server table
** Configuring server-group table
** Configuring service table
92
ExtremeWarePx1 1.2 Command Reference Guide
save configuration
** Updating Health List tables
** Updating self audit parameters.
** Updating Snmp Parameters.
** Gigabit port enabled
** Updating VRRP parameters.
** Updating autosync parameters.
Writing data to Flash...
Saved 16151 bytes to flash.
History
This command was available in ExtremeWarePx 1.1.
Platform Availability
This command is available on the Px-series application switch.
ExtremeWarePx1 1.2 Command Reference Guide
93
Commands for Managing the Switch
scp2
scp2
{cipher [3des | blowfish]}
{port <port number>}
{debug <debug_level>}
<user>@ [<hostname> | <IP address>] :<remote_file>
[(configuration {incremental} | image [primary | secondary]]
Description
Copies a Þle from a remote system to the switch using SCP2.
Syntax Description
3des
Specifies that the 3des cipher should be used for encryption. This is the
default.
blowfish
Specifies that the blowfish cipher should be used for encryption.
port number
The TCP port number to be used for communicating with the SSH2 client.
Default is port 22.
debug_level
A debug level. Default is 0.
user
A login name for the remote host.
hostname
The name of the remote host.
IP address
The IP address of the remote host.
remote file
The name of the remote file to be copied to the switch.
configuration
Specifies that the copied file is a switch configuration file. It the incremental
option is not specified, it replaces the current switch configuration.
incremental
Specifies that the copied file should be handled like an incremental
configuration download (only the commands in the file are executed).
image
Specifies that the copied file is an software image.
primary
Specifies that the image should be placed in the primary image area.
secondary
Specifies that the image should be placed in the secondary image area.
Default
N/A.
Usage Guidelines
You must have administrator privileges to issue this command.
You must be running a security-enabled version of ExtremeWare 6.2.1 (which is under Export Control)
in order to use the scp2 command.
SSH2 does not need to be enabled on the switch in order to use this command. (SSH2 is enabled by
default if you are running a security-enabled version of ExtremeWare).
This command logs into the remote host as <user> and accesses the Þle <remote_file>. You will be
prompted for a password from the remote host, if required.
94
ExtremeWarePx1 1.2 Command Reference Guide
scp2
Example
The following command copies a conÞguration Þle from the Þle configpart1.save on host system1 to
the switch, replacing the current switch conÞguration:
scp2 admin@system1:configpart1.save configuration
History
This command was available in ExtremeWarePx 1.1.
Platform Availability
This command is available on the Px-series application switch.
ExtremeWarePx1 1.2 Command Reference Guide
95
Commands for Managing the Switch
ssh2
ssh2
{cipher [3des | blowfish]}
{port <port number>}
{compression [on | off]}
{user <username>}
{debug <debug_level>}
{<login_name>@} [<host> | <IP address>]
{<remote command>}
Description
Transmits a command to a remote system using an SSH2 connection.
Syntax Description
3des
Specifies that the 3des cipher should be used for encryption. This is the
default.
blowfish
Specifies that the blowfish cipher should be used for encryption.
port number
The TCP port number to be used for communicating with the SSH2 client.
Default is port 22.
on
Specifies that data is to be compressed.
off
Specifies that compression is not to be used. This is the default.
username
A login name for the remote host, as an alternate to the user@host
parameter.
debug_level
A debug level. Default is 0.
login_name
A login name for the remote host. May be omitted if it is the same as the user
name on the switch.
host
The name of the remote host.
IP address
The IP address of the remote host.
remote command
A command to be passed to the remote system for execution. Remote
commands are not supported on switches. This option is only valid if the
remote system is a system, such as a UNIX workstation, that can accept
remote commands.
Default
N/A.
Usage Guidelines
You must be running a security-enabled version of ExtremeWare 6.2.1 (which is under Export Control)
in order to use the SSH2 client command.
SSH2 does not need to be enabled on the switch in order to use this command. (SSH2 is enabled by
default if you are running a security-enabled version of ExtremeWare).
Typically this command is used to establish a secure session to a remote switch. You will be prompted
for your password. Once you have logged in successfully, all ExtremeWare commands you enter will be
96
ExtremeWarePx1 1.2 Command Reference Guide
ssh2
executed on the remote switch. When you terminate the remote session, commands will then resume
being executed on the original switch.
The remote command option cannot be used with Extreme Networks switches. If you include a remote
command, you will receive an error message.
Example
The following command establishes an SSH2 session on switch engineering1:
ssh2 admin@engineering1
The following command establishes an SSH2 session with the switch summit48i over TCP port 2050
with compression enabled:
ssh2 port 2050 compression on admin@summit48i
History
This command was available in ExtremeWarePx 1.1.
Platform Availability
This command is available on the Px-series application switch.
ExtremeWarePx1 1.2 Command Reference Guide
97
Commands for Managing the Switch
telnet
telnet
[<IP address> | <hostname>]
{<port number>}
Description
Allows you to Telnet from the current command-line interface session to another host.
Syntax Description
IP address
The IP address of the host.
hostname
The name of the host.
port number
A TCP port number. The default port is 23.
Default
N/A.
Usage Guidelines
Only VT100 emulation is supported.
Any workstation with a Telnet facility should be able to communicate with the switch over a TCP/IP
network.
You need to conÞgure the switch IP parameters.
You can press the escape character [Ctrl] + ] (hexadecimal 0x1d) to get out of the Telnet session.
Up to eight active Telnet sessions can access the switch concurrently. If idletimeouts are enabled, the
Telnet connection will time out after 20 minutes of inactivity. If a connection to a Telnet session is lost
inadvertently, the switch terminates the session within two hours.
Before you can start a Telnet session, you need to conÞgure the switch IP parameters. To open a Telnet
connection, you must specify the host IP address or the host name of the device you wish to manage.
Check the user manual supplied with the Telnet facility if you are unsure of how to do this.
Use of the hostname parameter requires that DNS be enabled.
Example
This example conÞgures Telnet communication with a host at IP address 123.45.67.8:
SummitPx1:13 # telnet chein-bsd
Trying 10.0.0.1:23...
Type '^]' to exit.
Connected.
FreeBSD/i386 (chein-bsd.cnd.extremenetworks.c) (ttyq1)
login:
98
ExtremeWarePx1 1.2 Command Reference Guide
telnet
History
This command was available in ExtremeWarePx 1.1.
Platform Availability
This command is available on the Px-series application switch.
ExtremeWarePx1 1.2 Command Reference Guide
99
Commands for Managing the Switch
traceroute
traceroute [<IP address> | <hostname>]
Description
Enables you to trace the routed path between the switch and a destination endstation.
Syntax Description
IP address
The IP address of the destination endstation.
hostname
The host name of the destination endstation.
Default
N/A.
Usage Guidelines
To use the hostname parameter, you must Þrst conÞgure DNS.
Each router along the path is displayed.
Example
The following command enables the traceroute function to a destination of 123.45.67.8:
traceroute 123.45.67.8
History
This command was available in ExtremeWarePx 1.1.
Platform Availability
This command is available on the Px-series application switch.
100
ExtremeWarePx1 1.2 Command Reference Guide
unconfigure gslb
unconfigure gslb
unconfigure gslb ipaddress <IP address> service <string>
Description
Removes a virtual service from use by the GlobalPx Content Director scheduler.
Syntax Description
IP address
The VIP of the virtual service to be removed from use by the GlobalPx Content Director
scheduler.
string
The virtual host name used for the specified VIP; this virtual host name must also be set the
scheduler.
Default
N/A.
Usage Guidelines
You must have administrator privileges to issue this command.
Extreme Networks GlobalPx Content Directorª is a DNS-based Internet trafÞc-management system.
This system allows you to take advantage of network and server resources regardless of their location
on the Internet or your Intranet. As you add points of presence (POPs, clusters of one or more Px-series
switches) to a network, GlobalPx Content Director monitors server loads and network response
latencies, distributing client requests to the POP that it determines will deliver the best performance.
GlobalPx Content Director improves client access performance and reliability by leveraging dispersed
network resources.
The GlobalPx Content Director transparently directs clients and client DNS servers to the most
appropriate POP to satisfy client requests. Typically, the physically closest POP is the one that gives the
fastest response. However, this is not always the case. The GlobalPx Content Director scheduler routes
requests to the optimal POP. The scheduler is a separate program that runs on a Windows or Solaris
machine. When the scheduler is in use, virtual services are not automatically used by the scheduler. You
must issue the configure gslb command for any virtual service that you want to be used by the
scheduler. If you later decide to remove a virtual service from the scheduler, you issue this command.
For more information, see the GlobalPx Content Director Installation and User Guide.
You must use the build command to commit the conÞguration changes made by this command.
Example
This example removes a virtual service from use by the scheduler.
SummitPx1::12 # unconfig gslb ip 10.10.45.12 service yosemite.cnd.myhost.com
SummitPx1::13 # build
History
This command was available in ExtremeWarePx 1.1.
ExtremeWarePx1 1.2 Command Reference Guide
101
Commands for Managing the Switch
unconfigure mgmt iproute
unconfigure mgmt iproute
dest-ip <destination IP address>
gateway <gateway IP address>
Description
Removes a route from the routing table for the switchÕs 10/100BT port.
Syntax Description
destination IP address
The destination IP address.
gateway IP address
The gateway IP address.
Default
N/A.
Usage Guidelines
You must have administrator privileges to issue this command.
The 10/100BT port has a separate routing table. By default, no routes are installed in the routing table;
add routes to the table with the configure mgmt ipaddress command.
This command removes the routing-table entry indicating that trafÞc for destination IP address
should be directed to gateway IP address.
The conÞguration of management-port information is executed immediately; you do not need to issue
the build command for this command to take effect.
Example
This example removes a route:
station1:4 # unconfig mgmt iproute dest-ip 10.10.10.60 gateway 10.10.10.1
History
This command was available in ExtremeWarePx 1.1.
Platform Availability
This command is available on the Px-series application switch.
102
ExtremeWarePx1 1.2 Command Reference Guide
unconfigure switch
unconfigure switch
unconfigure switch {all}
Description
Removes the switch conÞguration, restoring factory defaults.
Syntax Description
all
Specifies that user accounts should be removed.
Default
N/A.
Usage Guidelines
You must have administrator privileges to issue this command.
This command removes the current conÞguration and restores the servers, services and system
conÞguration to factory defaults. If you specify the all keyword, conÞguration of user accounts is also
removed.
The default conÞguration takes effect when you reboot the switch.
Example
This example removes the conÞguration but keeps user accounts.
* station2:7 # unconfig switch
Restore factory defaults (except user accounts) and reboot? (yes or no): y
This example removes the conÞguration including user accounts:
* station2:6 # unconfig switch all
Restore factory defaults and reboot? (yes or no): y
History
This command was available in ExtremeWarePx 1.1.
Platform Availability
This command is available on the Px-series application switch.
ExtremeWarePx1 1.2 Command Reference Guide
103
Commands for Managing the Switch
upload configuration
upload configuration
[<IP address> | <hostname>]
<filename>
{primary | secondary}
Description
Uploads the current conÞguration to a TFTP server on your network.
Syntax Description
IP address
The IP address of the TFTP server.
hostname
The host name of the TFTP server.
filename
A name for the file where the configuration is to be saved.
The filename can be up to 255 characters long, and cannot include any
spaces, commas, quotation marks, or special characters. Unless you include a
path with the filename, this command places the file in the same directory as
the TFTP server itself.
primary
Specifies that the primary configuration should be uploaded.
secondary
Specifies that the secondary configuration should be uploaded.
Default
N/A.
Usage Guidelines
You must have administrator privileges to issue this command.
The uploaded ASCII Þle retains the command-line interface (CLI) format. This allows you to do the
following:
¥ Modify the conÞguration using a text editor, and later download a copy of the Þle (using the
download configuration command) to the same switch, or to one or more different switches.
¥ Send a copy of the conÞguration Þle to Extreme Networks Technical Support for problem-solving
purposes.
Use of the hostname parameter requires that DNS be enabled.
Example
The following command uploads the current primary conÞguration to the Þle configbackup.txt on the
TFTP server named tftphost:
upload configuration tftphost configbackup.txt primary
History
This command was available in ExtremeWarePx 1.1.
104
ExtremeWarePx1 1.2 Command Reference Guide
upload configuration
Platform Availability
This command is available on the Px-series application switch.
ExtremeWarePx1 1.2 Command Reference Guide
105
Commands for Managing the Switch
use configuration
use configuration [primary | secondary]
Description
ConÞgures the switch to use a previously saved conÞguration on the next reboot.
Syntax Description
primary
Specifies the primary saved configuration.
secondary
Specifies the secondary saved configuration.
Default
N/A.
Usage Guidelines
You must have administrator privileges to issue this command.
You can issue the show switch command to see which conÞguration is currently being used.
Example
The following command speciÞes that the next reboot should use the primary saved conÞguration:
use configuration primary
History
This command was available in ExtremeWarePx 1.1.
Platform Availability
This command is available on the Px-series application switch.
106
ExtremeWarePx1 1.2 Command Reference Guide
use image
use image
use image [primary | secondary]
Description
ConÞgures the switch to use a saved image on the next reboot.
Syntax Description
primary
Specifies the primary saved software image.
secondary
Specifies the secondary saved software image.
Default
N/A.
Usage Guidelines
You must have administrator privileges to issue this command.
You can issue the show switch command to see which image is currently being used.
Example
The following command conÞgures the switch to use the primary image on the next reboot:
use image primary
History
This command was available in ExtremeWarePx 1.1.
Platform Availability
This command is available on the Px-series application switch.
ExtremeWarePx1 1.2 Command Reference Guide
107
Commands for Managing the Switch
108
ExtremeWarePx1 1.2 Command Reference Guide
3
Commands for Configuring Servers and
Services
This chapter describes the following commands:
¥ Commands for conÞguring servers
¥ Commands for creating and conÞguring server groups
¥ Commands for creating and conÞguring virtual services
Servers
The real servers are the actual web or application servers that fulÞll the client requests. Typically, one or
more identical real servers run the same application and contain the exact same content. ConÞguring a
server makes a real server available to the switch, assigns the server a unique index, and sets properties
of the server. The switch identiÞes servers by index. For each server index, the switch keeps track of the
IP address and port number of the corresponding real server. Once a server has been conÞgured, it can
be identiÞed in commands either by its index number or by the combination of its IP address and port
number.
The following commands conÞgure servers.
configure server
Configures one or more servers, establishing a correspondence between each
server’s index and the IP address and port number of the corresponding real
server.
configure server default
Configures the global default values for server properties.
unconfigure server
Removes one or more servers from the system.
ExtremeWarePx1 1.2 Command Reference Guide
109
Commands for Configuring Servers and Services
Server Groups
After servers are conÞgured, they must be organized into server groups. The ExtremeWarePx software
selects a server to handle each connection to a particular server group.
The following commands create and conÞgure server groups.
configure server-group
Creates a server group with the specified name and
scheduling policy.
configure server-group add-server
Adds one or more servers to a server group.
configure server-group delete-server
Deletes one or more servers from a server group.
unconfigure server-group
Removes a server group from the system.
Virtual Services
A virtual service is the IP address and port to which clients on the Internet actually connect. The
Px-series application switch supports layer 4 and layer 7 virtual services:
¥ A layer 4 virtual service used one particular server group. Any connection to the service is directed
to one of the servers in that group, based on the scheduling policy of the server group. The trafÞc is
not examined.
¥ A layer 7 virtual service can use a number of different server groups. The switch examines a client
request and applies pattern rules for the service to select a server group based on the domain, URL,
or cookie in the request.
The following commands create and remove virtual services.
configure service L4
Creates a layer 4 virtual service.
configure service L7
Creates a layer 7 virtual service.
unconfigure service
Removes a service from the system.
The following commands conÞgure a layer 7 virtual service.
configure domain
Creates a domain for the current layer 7 service.
configure domain default
Configures the default domain for the current layer 7
service.
configure pattern-rule
Creates a pattern rule for the current domain of the
current layer 7 service.
configure pattern-rule default
Configures the default pattern rule for the current
domain of a current layer 7 service.
configure pattern-rule default cookie-name
Configures the cookie persistence mode for the
current layer 7 service.
unconfigure domain
Removes a domain from the current layer 7 service.
unconfigure pattern-rule
Removes a pattern rule from the current domain of
the current layer 7 service.
110
ExtremeWarePx1 1.2 Command Reference Guide
configure domain
configure domain
configure domain name <name string>
Description
Creates a domain for the current layer 7 service.
Syntax Description
name string
The domain name as specified in a client request, or the special domain name "*" if the
server uses only the URL (and not the domain name) to select a server group.
The name string "*" matches any request with an unspecified domain name, that is, any
request in which the domain name is not present in the HTTP header.
Default
N/A.
Usage Guidelines
You must have administrator privileges to issue this command.
This command applies to the service that was speciÞed in the most recently issued configure service
L7 command. That service is called the current service.
This command establishes the context for subsequent commands that conÞgure pattern rules for the
domain. It is relevant only for a layer 7 service that uses HTTP.
You use this command as follows:
¥ If the current service uses the domain speciÞed in the client request to select a server group, you
must:
a Issue the configure domain command to conÞgure a recognized domain name for the current
service; the domain speciÞed in this command is called the current domain.
b Issue the appropriate commands to conÞgure pattern rules for the current domain.
c If more than one domain name is recognized for the current service, repeat steps a and b for each
additional recognized domain name.
d Issue the configure domain default command to conÞgure a default domain for the current
service.
e Issue the appropriate commands to conÞgure pattern rules for the default domain.
¥ If the current service uses only the URL (and not the domain) to select a server group, you must:
a Issue the configure domain command, specifying the special domain name "*".
b Issue the appropriate commands to conÞgure pattern rules for the current service.
For each conÞgured domain name, including the special domain name "*", you must conÞgure zero or
more non-default pattern rules (with the configure pattern-rule command) and one default pattern
rule (with the configure pattern-rule command).
ExtremeWarePx1 1.2 Command Reference Guide
111
Commands for Configuring Servers and Services
If a layer 7 service was conÞgured with its class parameter set to https, you use the configure domain
default command instead of this command.
You must use the build command to commit the conÞguration changes made by this command.
Example
This example conÞgures domains for a service. Note that the service is conÞgured to recognizes domain
names that begin with or omit the initial Òwww.Ó (for example, www.buystuff.com and buystuff.com).
SummitPx1::12 #
* SummitPx1::13
* SummitPx1::14
* SummitPx1::15
* SummitPx1::16
* SummitPx1::17
* SummitPx1::18
* SummitPx1::19
* SummitPx1::20
* SummitPx1::21
* SummitPx1::22
* SummitPx1::23
config service vip 10.10.31.2 port 8080 proto tcp l7 class http
# config domain name buystuff.com
# config pattern-rule default server-group-name buystuff
# config domain name www.buystuff.com
# config pattern-rule default server-group-name buystuff
# config domain name buythisnow.com
# config pattern-rule default server-group-name buythisnow
# config domain name www.buythisnow.com
# config pattern-rule default server-group-name buythisnow
# config domain default
# config pattern-rule default server-group-name mainpage
# build
History
This command was available in ExtremeWarePx 1.1.
Platform Availability
This command is available on the Px-series application switch.
112
ExtremeWarePx1 1.2 Command Reference Guide
configure domain default
configure domain default
configure domain default
Description
ConÞgures the default domain for the current layer 7 service.
Syntax Description
This command has no parameters or options.
Default
N/A.
Usage Guidelines
You must have administrator privileges to issue this command.
This command applies to the service that was speciÞed in the most recently issued configure service
L7 command. That service is called the current service.
You must conÞgure a default domain for every layer 7 service that does not conÞgure the single special
domain name "*".
This command establishes the context for the subsequent commands that conÞgure pattern rules for the
default domain.
You must conÞgure pattern rules for the default domain:
¥ For a service whose class is https, the default domain must contain only the default pattern rule
(created with the configure pattern-rule default command).
¥ The default domain of other services may contain zero or more non-default pattern rules (created
with the configure pattern-rule command) and must contain one default pattern rule. If the
service uses cookies, you use the configure pattern-rule default cookie-name command to
conÞgure the default pattern rule; otherwise, you use the configure pattern-rule default
command.
You must use the build command to commit the conÞguration changes made by this command.
Example
This example conÞgures two named domains and a default domain for a service. All domains for this
service contain a default pattern rule only.
SummitPx1::12 #
* SummitPx1::13
* SummitPx1::14
* SummitPx1::15
* SummitPx1::16
* SummitPx1::17
* SummitPx1::18
* SummitPx1::19
config service vip 10.10.31.1 port 8080 proto tcp l7 class http
# config domain name mydomain.com
# config pattern-rule default server-group-name group1
# config domain name www.mydomain.com
# config pattern-rule default server-group-name group1
# config domain default
# config pattern-rule default server-group-name mainpage
# build
ExtremeWarePx1 1.2 Command Reference Guide
113
Commands for Configuring Servers and Services
History
This command was available in ExtremeWarePx 1.1.
Platform Availability
This command is available on the Px-series application switch.
114
ExtremeWarePx1 1.2 Command Reference Guide
configure pattern-rule
configure pattern-rule
configure pattern-rule <pattern string>
server-group-name <group name>
[noqos |
(dot1p-to-svr <dot1p-to-svr tag>
dot1p-to-net <dot1p-to-net tag>
diffserv-to-svr <diffserv-to-svr tag>
diffserv-to-net <diffserv-to-net tag>)]
Description
Creates a pattern rule for the current domain of the current layer 7 service.
Syntax Description
pattern string
The pattern to be matched against the URL in the client request.
The pattern string can include a single wildcard character (*), which may be placed before or
after any of the following delimiters:
/ . ? & #
The wildcard matches any string from zero to 32 characters long.
group name
The name of the server group to select if the pattern is matched.
noqos
Indicates that the service does not tag traffic based on the application or transaction type
dot1p-to-svr tag
Specifies whether to apply a tag to the 802.1p header for packets directed to the server; one
of the following values:
dot1p-to-net tag
diffserv-to-svr tag
diffserv-to-net tag
•
The keyword preserve indicates that no tag is applied to this type of traffic.
•
A hexadecimal number from 0x00 to 0x07, inclusive, is the tag to be applied to this type of
traffic.
Specifies whether to apply a tag to the 802.1p header for packets directed to the network;
one of the following values:
•
The keyword preserve indicates that no tag is applied to this type of traffic.
•
A hexadecimal number from 0x00 to 0x07, inclusive, is the tag to be applied to this type of
traffic.
Specifies whether to apply a tag to the DiffServ code point for packets directed to the server;
one of the following values:
•
The keyword preserve indicates that no tag is applied to this type of traffic.
•
A hexadecimal number from 0x00 to 0x3F, inclusive, is the tag to be applied to this type
of traffic.
Specifies whether to apply a tag to the DiffServ code point for packets directed to the
network; one of the following values:
•
The keyword preserve indicates that no tag is applied to this type of traffic.
•
A hexadecimal number from 0x00 to 0x3F, inclusive, is the tag to be applied to this type
of traffic.
Default
N/A.
ExtremeWarePx1 1.2 Command Reference Guide
115
Commands for Configuring Servers and Services
Usage Guidelines
You must have administrator privileges to issue this command.
This command applies to the current domain of the current service. The current service is the service that
was speciÞed in the most recently issued configure service L7 command. The current domain is the
domain that was speciÞed in the most recently issued configure domain or configure domain default
command.
The conÞgured pattern rule speciÞes the server group that the current service should use when a client
request includes the current domain and a URL that matches the speciÞed pattern string.
If you end the command with the noqos keyword, the headers are left unchanged in the incoming trafÞc
that matches the conÞgured pattern rule. If you do not specify this keyword, you can specify tags for
incoming trafÞc. You can specify different tags for two Þelds: the 802.1p header and the DiffServ code
point (DSCP) in the TCP header. For either Þeld, you can specify different tags for trafÞc towards the
server and trafÞc towards the network. You must specify values for all four parameters dot1p-to-svr,
dot1p-to-net, diffserv-to-svr, and diffserv-to-net. If the value of one of these parameters is a
hexadecimal number, that number is used as a tag, overwriting any tag that is used on the trafÞc; if the
value is the keyword preserve, any existing tag in the incoming trafÞc is left unchanged.
You must use the build command to commit the conÞguration changes made by this command.
Example
This example conÞgures a service to use the images server group for Þles with the extensions gif or jpg,
the media server group for Þles with the extensions mov or mp3, and the mydomain server group for all
other Þles.
SummitPx1::14 #
* SummitPx1::15
* SummitPx1::16
* SummitPx1::17
* SummitPx1::18
* SummitPx1::19
* SummitPx1::20
* SummitPx1::21
config service vip 64.1.2.10 port 80 protocol tcp L7 class http
# config domain name *
# config pattern-rule "*.gif" server-group-name images noqos
# config pattern-rule "*.jpg" server-group-name images noqos
# config pattern-rule "*.mov" server-group-name media noqos
# config pattern-rule "*.mp3" server-group-name media noqos
# config pattern-rule default server-group-name mydomain noqos
# build
History
This command was available in ExtremeWarePx 1.1.
Platform Availability
This command is available on the Px-series application switch.
116
ExtremeWarePx1 1.2 Command Reference Guide
configure pattern-rule default
configure pattern-rule default
configure pattern-rule default
server-group-name <group name>
[noqos |
(dot1p-to-svr <dot1p-to-svr tag>
dot1p-to-net <dot1p-to-net tag>
diffserv-to-svr <diffserv-to-svr tag>
diffserv-to-net <diffserv-to-net tag>)]
Description
ConÞgures the default pattern rule for the current domain of a current layer 7 service.
Syntax Description
group name
The name of the server group to select if the URL in the client request does not match any
pattern rule of the current domain of the current service.
noqos
Indicates that the service does not tag traffic based on the application or transaction type
dot1p-to-svr tag
Specifies whether to apply a tag to the 802.1p header for packets directed to the server; one
of the following values:
dot1p-to-net tag
diffserv-to-svr tag
diffserv-to-net tag
•
The keyword preserve indicates that no tag is applied to this type of traffic.
•
A hexadecimal number from 0x00 to 0x07, inclusive, is the tag to be applied to this type of
traffic.
Specifies whether to apply a tag to the 802.1p header for packets directed to the network;
one of the following values:
•
The keyword preserve indicates that no tag is applied to this type of traffic.
•
A hexadecimal number from 0x00 to 0x07, inclusive, is the tag to be applied to this type of
traffic.
Specifies whether to apply a tag to the DiffServ code point for packets directed to the server;
one of the following values:
•
The keyword preserve indicates that no tag is applied to this type of traffic.
•
A hexadecimal number from 0x00 to 0x3F, inclusive, is the tag to be applied to this type
of traffic.
Specifies whether to apply a tag to the DiffServ code point for packets directed to the
network; one of the following values:
•
The keyword preserve indicates that no tag is applied to this type of traffic.
•
A hexadecimal number from 0x00 to 0x3F, inclusive, is the tag to be applied to this type
of traffic.
Default
N/A.
Usage Guidelines
You must have administrator privileges to issue this command.
This command applies to the current domain of the current service. The current service is the service that
was speciÞed in the most recently issued configure service L7 command. The current domain is the
ExtremeWarePx1 1.2 Command Reference Guide
117
Commands for Configuring Servers and Services
domain that was speciÞed in the most recently issued configure domain or configure domain default
command.
The conÞgured pattern rule speciÞes the server group to be used when no other pattern rule in the
current domain is applicable.
If you end the command with the noqos keyword, the headers are left unchanged in the incoming trafÞc
that matches the conÞgured pattern rule. If you do not specify this keyword, you can specify tags for
incoming trafÞc. You can specify different tags for two Þelds: the 802.1p header and the DiffServ code
point (DSCP) in the TCP header. For either Þeld, you can specify different tags for trafÞc towards the
server and trafÞc towards the network. You must specify values for all four parameters dot1p-to-svr,
dot1p-to-net, diffserv-to-svr, and diffserv-to-net. If the value of one of these parameters is a
hexadecimal number, that number is used as a tag, overwriting any tag that is used on the trafÞc; if the
value is the keyword preserve, any existing tag in the incoming trafÞc is left unchanged.
For the default domain of a service that uses cookies, you create the default pattern rule with the
configure pattern-rule default cookie-name command instead of this command.
You must use the build command to commit the conÞguration changes made by this command.
Example
This example conÞgures a default pattern rule for Þles with the gif extension and a default rule.
SummitPx1::12 #
* SummitPx1::13
* SummitPx1::14
dot1p-to-svr
* SummitPx1::15
* SummitPx1::16
config service vip 10.10.31.1 port 8080 proto tcp l7 class http
# config domain name mydomain.com
# config pattern-rule "*.gif" server-group-name group2
0x07 dot1p-to-net 0x07 diffserv-to-srv 0x3f diffserv-to-net 0x3f
# config pattern-rule default server-group-name group1 noqos
# build
History
This command was available in ExtremeWarePx 1.1.
Platform Availability
This command is available on the Px-series application switch.
118
ExtremeWarePx1 1.2 Command Reference Guide
configure pattern-rule default cookie-name
configure pattern-rule default cookie-name
configure pattern-rule default
server-group-name <group name>
cookie-name <cookie string> cookie-type [self | hash | learning]}
[noqos |
(dot1p-to-svr <dot1p-to-svr tag>
dot1p-to-net <dot1p-to-net tag>
diffserv-to-svr <diffserv-to-svr tag>
diffserv-to-net <diffserv-to-net tag>)]
Description
ConÞgures the cookie persistence mode for the current layer 7 service.
Syntax Description
group name
The name of the server group to select whenever a client request for the current service
includes a cookie.
cookie string
The ASCII name of the cookie. The current service responds only to cookies with this
name.
self
Specifies that the current service uses self-identifying cookie persistence mode. In this mode,
the server cookie should contain a unique string of 7 to 15 characters to identify the real IP
web server of the specified server group.
hash
Specifies that the current service uses hashed cookie persistence mode. In this mode, the
cookie contains unique information about the client. The switch computes a hash value from
this information and uses the hash value to select the appropriate server from the specified
server group.
learning
Specifies that the current service uses learned cookie persistence mode. In this mode, the
switch creates a database that stores historical information about each session and uses the
stored information to match the incoming cookie with the previous connection made by the
same client and value to select the appropriate server from the specified server group.
noqos
Indicates that the service does not tag traffic based on the application or transaction type
dot1p-to-svr tag
Specifies whether to apply a tag to the 802.1p header for packets directed to the server; one
of the following values:
dot1p-to-net tag
diffserv-to-svr tag
•
The keyword preserve indicates that no tag is applied to this type of traffic.
•
A hexadecimal number from 0x00 to 0x07, inclusive, is the tag to be applied to this type of
traffic.
Specifies whether to apply a tag to the 802.1p header for packets directed to the network;
one of the following values:
•
The keyword preserve indicates that no tag is applied to this type of traffic.
•
A hexadecimal number from 0x00 to 0x07, inclusive, is the tag to be applied to this type of
traffic.
Specifies whether to apply a tag to the DiffServ code point for packets directed to the server;
one of the following values:
•
The keyword preserve indicates that no tag is applied to this type of traffic.
•
A hexadecimal number from 0x00 to 0x3F, inclusive, is the tag to be applied to this type
of traffic.
ExtremeWarePx1 1.2 Command Reference Guide
119
Commands for Configuring Servers and Services
diffserv-to-net tag
Specifies whether to apply a tag to the DiffServ code point for packets directed to the
network; one of the following values:
•
The keyword preserve indicates that no tag is applied to this type of traffic.
•
A hexadecimal number from 0x00 to 0x3F, inclusive, is the tag to be applied to this type
of traffic.
Default
N/A.
Usage Guidelines
You must have administrator privileges to issue this command.
This command applies to the default domain of the current service. The current service is the service
that was speciÞed in the most recently issued configure service L7 command. The class of the
current service must be http.
The current domain must be the default domain. That is, the configure domain default command
must have been issues after any configure domain command for the current service.
The conÞgured pattern rule speciÞes the server group to be used whenever the service gets a client
request that includes a cookie with the speciÞed nameÑregardless of the domain name or URL
speciÞed in the request. The contents of the cookie is used to select the speciÞc server within the server
group, according to the cookie persistence mode speciÞed by the cookie-type parameter.
If you end the command with the noqos keyword, the headers are left unchanged in the incoming trafÞc
that include cookies. If you do not specify this keyword, you can specify tags for incoming trafÞc. You
can specify different tags for two Þelds: the 802.1p header and the DiffServ code point (DSCP) in the
TCP header. For either Þeld, you can specify different tags for trafÞc towards the server and trafÞc
towards the network. You must specify values for all four parameters dot1p-to-svr, dot1p-to-net,
diffserv-to-svr, and diffserv-to-net. If the value of one of these parameters is a hexadecimal
number, that number is used as a tag, overwriting any tag that is used on the trafÞc; if the value is the
keyword preserve, any existing tag in the incoming trafÞc is left unchanged.
You must use the build command to commit the conÞguration changes made by this command.
Example
This example conÞgures a service to use learned cookie persistence.
SummitPx1::12 #
* SummitPx1::13
* SummitPx1::14
* SummitPx1::15
* SummitPx1::16
"session-id"
* SummitPx1::17
config service vip 10.10.31.1 port 8080 proto tcp l7 class http
# config domain name mydomain.com
# config pattern-rule default server-group-name group1
# config domain name default
# config pattern-rule default server-group-name group1 cookie-name
cookie-type self
# build
History
This command was available in ExtremeWarePx 1.1.
120
ExtremeWarePx1 1.2 Command Reference Guide
configure pattern-rule default cookie-name
Platform Availability
This command is available on the Px-series application switch.
ExtremeWarePx1 1.2 Command Reference Guide
121
Commands for Configuring Servers and Services
configure server
configure server index <index number>
ipaddress <IP address>
port <port number>
{max-connections <max number>}
{weight <weight number>}
{cookie <cookie string>}
configure server index <index number>
ipaddress <IP address> - <IP address>
port <port number>
{max-connections <max number>}
{weight <weight number>}
Description
ConÞgures one or more servers, establishing a correspondence between each serverÕs index and the IP
address and port number of the corresponding real server.
Syntax Description
index number
A unique index number that identifies the server to the switch.
IP address
An actual IP address of a real server. Two IP addresses separated by a hyphen indicate a
range of addresses; the command configures all servers with addresses in the specified
range.
port number
The port the real server uses to answer requests. Real servers can share an IP address,
but the port must be unique for each server.
max number
The maximum number of concurrent connections that the server can handle. After that
number is reached, no more connections are sent to that particular server until some of the
open connections have been close.
If this parameter is not specified, the global default maximum number of connections is used.
weight number
The weight factor to be used for weighted load-balancing algorithms.
If this parameter is not specified, the global default weight is used.
cookie string
An ASCII string between 7 and 15 characters long that uniquely identifies the server. This
string will be used by service pattern rules of cookie-type self.
Default
N/A.
Usage Guidelines
You must have administrator privileges to issue this command.
To conÞgure a server, you must specify:
¥ The index that identiÞes the server to the switch
¥ A unique combination of IP address and port number that identiÞes the real server
122
ExtremeWarePx1 1.2 Command Reference Guide
configure server
You can conÞgure a number of servers at contiguous IP addresses, all of which use the same port. When
you specify a range of IP addresses, the speciÞed index is used for the Þrst server and incremented for
each conÞgured server.
You must use the build command to commit the conÞguration changes made by this command.
Adding a Server. The Þrst time you conÞgure a particular combination of index, IP address, and port
number, you add the speciÞed server to the system. The switch associates the server index with the real
server that has the indicated IP address and port number.
If a given real server has already been added to the system, you may not assign that same server to a
different index. An error will be reported if you attempt to do so. For examples:
SummitPx1::2 # config server index 100 ipaddress 10.1.1.1 port 80
* SummitPx1::3 # config server index 102 ipaddress 10.1.1.1 port 80
ERROR: server ip and port have already been configured in server index 100
Command Failed
Setting Server Properties. Adding a server to the system initializes the serverÕs properties:
¥ The maximum number of connections for the server
¥ The serverÕs weight for use by weighted load-balancing algorithms
¥ A cookie string that uniquely identiÞes the server (relevant only for servers that will be used in a
layer 7 virtual service that uses the self-identifying cookie persistence mode)
When you conÞgure a single server, you can specify values for any of these properties. When you
conÞgure a number of servers in a single command, you can specify values for the Þrst two properties,
but not the cookie string.
When the number of connections to a particular server equals its maximum number of connections, no
more connections are sent to that server until some of its open connections have been closed. If the
configure server command does not specify the value for a serverÕs maximum number of connections
or weight, the global default value is used. The global default value for the maximum number of
connections is initially 10,000; the global default for weight is initially 1. You can change the global
default values with the configure server default command.
If the configure server command does not specify the value for a serverÕs cookie string, and that
server is used in a layer 7 virtual service that uses the self-identifying cookie persistence mode, a
default cookie string is constructed. A serverÕs default cookie string is a 7-character ASCII string
containing the serverÕs index with leading zeros. For example, a server with index 25 has the default
cookie string of "0000025".
Changing the Real Server at an Index. Once you have added a server to the system, if you later
issue the configure server command, specifying the serverÕs index number but a different IP address
and port number, you replace the real server associated with that server index. The real server
previously associated with the speciÞed index is removed from the system (because it no longer has an
associated index number).
Changing Server Properties. You can change the properties of an existing server by issuing the
configure server command, specifying the index number, IP address, and port number of the server,
and a new value for the any of the serverÕs properties.
ExtremeWarePx1 1.2 Command Reference Guide
123
Commands for Configuring Servers and Services
Example
This example creates servers with indexes 3 through 10, all using port 80, with a maximum of 4000
connections, and all with equal weight:
SummitPx1:11 # configure server index 3 ipaddress 10.2.2.2 - 10.2.2.9 port 80
max-connections 4000 weight 1
* SummitPx1:12 # build
History
This form of this command was available in ExtremeWarePx 1.2. A form of the command without the
cookie parameter was available in ExtremeWarePx 1.1.
Platform Availability
This command is available on the Px-series application switch.
124
ExtremeWarePx1 1.2 Command Reference Guide
configure server default
configure server default
configure server default
[(max-connections <max number>) |
(weight <weight number>)]
Description
ConÞgures the global default values for server properties.
Syntax Description
max number
The global default value for the maximum number of concurrent connections a server can
handle. When a server has its maximum number of connections, no more connections are
sent to that particular server until some of its open connections have been closed.
weight number
The global default value for the weight factor for servers. Weight factors are used by
weighted load-balancing algorithms.
Default
If this command is never used, the global default value for maximum number of connections is 10,000
and the global default value for weight is 1.
Usage Guidelines
You must have administrator privileges to issue this command.
You can use this command to change the global default values for server properties. When you
conÞgure servers without specifying the maximum number of connections, the global default for that
property is used. When you conÞgure servers without specifying the weight, the global default for that
property is used.
You must use the build command to commit the conÞguration changes made by this command.
Example
This example sets the global default maximum number of connections to 6,000 (command 8), then
conÞgures 3 servers using this default (command 9), and conÞgures a fourth server with a maximum of
4,000 connections (command 10). These changes do not take effect until the build command (number
11) commits them.
SummitPx1:8 # configure server default max-connections 6000
* SummitPx1:9 # configure server index 3 ipaddress 10.2.2.2 - 10.2.2.4 port 80
* SummitPx1:10 # configure server index 6 ipaddress 10.2.2.5 port 80
max-connections 4000
* SummitPx1:11 # configure server index 7ipaddress 10.2.2.6 port 80
cookie "myserver1"
* SummitPx1:12 # build
History
This form command was available in ExtremeWarePx 1.1.
ExtremeWarePx1 1.2 Command Reference Guide
125
Commands for Configuring Servers and Services
Platform Availability
This command is available on the Px-series application switch.
126
ExtremeWarePx1 1.2 Command Reference Guide
configure server-group
configure server-group
configure server-group name <name string>
policy [rr | round-robin |wrr | weighted-round-robin |
lc | least-connections | wlc | weighted-least-connections |
hash]
{server-last-resort index <index>}
Description
Creates a server group with the speciÞed name and scheduling policy.
Syntax Description
name string
A unique name for the new server group.
rr
round-robin
Specifies the round-robin scheduling policy. (rr is an abbreviation for
round-robin; either the abbreviation or the full policy name may be used in this
command.)
wrr
weighted-round-robin
Specifies the weighted round-robin scheduling policy. (wrr is an abbreviation for
weighted-round-robin; either the abbreviation or the full policy name may be
used in this command
lc
least-connections
Specifies the least-connections scheduling policy. (lc is an abbreviation for
least-connections; either the abbreviation or the full policy name may be used
in this command.)
wlc
weighted-least-connections
Specifies the weighted least-connections scheduling policy. (wlc is an abbreviation
for weighted-least-connections; either the abbreviation or the full policy name
may be used in this command.)
hash
Specifies the hash scheduling policy.
index
The index for the server of last resort.
Default
N/A.
Usage Guidelines
You must have administrator privileges to issue this command.
When you create a server group, you must specify a unique name and a scheduling policy
A serverÕs scheduling policy, also called its load-balancing policy, is the method by which a server is
selected from the server group for a particular connection. Any service that uses a speciÞc server group
uses the policy deÞned for that group.
ExtremeWarePx1 1.2 Command Reference Guide
127
Commands for Configuring Servers and Services
The Px-series application switch supports the following scheduling policies:
Policy
Description
round robin
Distributes clients evenly across the web server group by passing each new connection
request to the next server in line. The first client connection is sent to the first server,
the second to the second server, and so on, until each server has a connection. When
each server has its first connection, the next client connection is sent to the first server,
the next to the second, and so on.
Round robin is the simplest way of balancing web traffic, and is best suited for
environments in which the performance level of all servers is about equal, and all
servers provide the same content.
weighted round robin
Similar to round robin, except that you can apply a weight to each server. For example,
if server A has a weight of two, and server B has a weight of one, server A receives
two connections for each connection given to server B.
Weighted round robin is useful if all servers provide the same content, but some are
faster than others.
least connections
Passes a new connection to the server having the fewest active sessions. It distributes
clients based on the server with fewest connections currently open.
The least connections policy provides the best performance under most conditions.
weighted least
connections
As in weighted round robin, assigns a weight to each server. The weight can be based
on a number of things, including:
•
Processor speed
•
Network connection speed
Connections are distributed using the server with the fewest connections by weight. As
in weighted round robin, weighted least connections can be used if servers have very
different connection-handling capacities.
Weighted least connections has the advantage of not overloading older, slower servers
with too many connections.
hash
Selects a server from the group based on a hash value computed from the client IP
address and the service IP address (VIP).
You may optionally specify a server of last resort for the group. This is a server to which trafÞc is sent if
all the servers in a server-group are down. It could be a server that simply replies to the client with a
"SYSTEM DOWN" message, or a server that can service the request under emergency circumstances
(perhaps a development machine or a system in another geographical location). To specify the server of
last resort, use the optional server-last-resort parameter.
You must use the build command to commit the conÞguration changes made by this command.
Example
This example creates a server group named group1, giving it the weighted least-connections scheduling
policy:
SummitPx1:25 # configure server-group name group1 policy wlc
* SummitPx1:26 # build
This example creates a server group named group2 with round-robin scheduling policy that uses server
with index 9 as its server of last resort:
SummitPx1:27 # configure server-group name group2 policy rr server-last-resort index 9
* SummitPx1:28 # build
128
ExtremeWarePx1 1.2 Command Reference Guide
configure server-group
History
This command was available in ExtremeWarePx 1.1.
Platform Availability
This command is available on the Px-series application switch.
ExtremeWarePx1 1.2 Command Reference Guide
129
Commands for Configuring Servers and Services
configure server-group add-server
configure server-group name <name string> add-server
[(index <index number> {- <index number>}) |
(ipaddress <IP address> {- <IP address>} port <port number>)]
Description
Adds one or more servers to a server group.
Syntax Description
name string
The name of the server group to which the servers should be added.
index number
The unique index number of a server to be added.
IP address
The IP address of a server to be added. The IP address plus the port number uniquely
identify a server.
port number
The port number of the servers to be added. The port number plus the IP address
uniquely identify a server.
Default
N/A.
Usage Guidelines
You must have administrator privileges to issue this command.
After you have created a server group with the configure server-group command and added servers
to the system with the configure server command, you can add the servers to the server group.
You can identify a server to be added either by its index number or by its IP address and port number.
This command allows you to add a number of servers with consecutive index numbers or a number of
servers with consecutive IP addresses, all of which use the same port.
You must use the build command to commit the conÞguration changes made by this command.
Example
This example adds three servers to the system, creates a server group, and adds the three servers to the
server group:
SummitPx1:5 #
* SummitPx1:6
* SummitPx1:7
* SummitPx1:8
configure server index 1 ip 64.1.1.50 - 64.1.1.52 port 80
# configure server-group name group1 policy rr
# configure server-group name group1 add-server index 1 - 3
# build
History
This command was available in ExtremeWarePx 1.1.
130
ExtremeWarePx1 1.2 Command Reference Guide
configure server-group add-server
Platform Availability
This command is available on the Px-series application switch.
ExtremeWarePx1 1.2 Command Reference Guide
131
Commands for Configuring Servers and Services
configure server-group delete-server
configure server-group name <name string> delete-server
[(index <index number> {- <index number>}) |
(ipaddress <IP address> {- <IP address>} port <port number>)]
Description
Deletes one or more servers from a server group.
Syntax Description
name string
The name of the server group from which the servers should be deleted.
index number
The unique index number of a server to be deleted.
IP address
The IP address of a server to be deleted. The IP address plus the port number uniquely
identify a server.
port number
The port number of the servers to be deleted. The port number plus the IP address
uniquely identify a server.
Default
N/A.
Usage Guidelines
You must have administrator privileges to issue this command.
After you have created a server group with the configure server-group command, and added servers
to the group with the configure server-group add-server command, you can delete selected servers
from the server group.
You can identify a server to be deleted either by its index number or by its IP address and port number.
This command allows you to delete a number of servers with consecutive index numbers or a number
of servers with consecutive IP addresses, all of which use the same port.
This command removes each speciÞed server from the named server group, but leaves the server
conÞgured in the system, so that it can be added to a different group. To remove a server from the
system altogether, use the unconfigure server command instead of this command.
You must use the build command to commit the conÞguration changes made by this command.
Example
This example delete the server with index number 2 from the server group named group1.
SummitPx1:7 # configure server-group name group1 delete-server index 2
* SummitPx1:8 # build
History
This command was available in ExtremeWarePx 1.1.
132
ExtremeWarePx1 1.2 Command Reference Guide
configure server-group delete-server
Platform Availability
This command is available on the Px-series application switch.
ExtremeWarePx1 1.2 Command Reference Guide
133
Commands for Configuring Servers and Services
configure service L4
configure service vip <IP address>
{vrid <VRID number>}
{vlan <vlan tag number>}
port <port number>
protocol [tcp | udp]
L4 server-group-name <group name>
[noqos |
(dot1p-to-svr <dot1p-to-svr tag>
dot1p-to-net <dot1p-to-net tag>
diffserv-to-svr <diffserv-to-svr tag>
diffserv-to-net <diffserv-to-net tag>)]
Description
Creates a layer 4 virtual service.
Syntax Description
IP address
The virtual IP address of the service.
VRID number
The VRID of the VRRP class for the service; a number between 1 and 255.
vlan tag number
The VLAN tag for the service.
port number
The port the service uses to answer requests.
tcp
Specifies the TCP protocol.
udp
Specifies the UDP protocol.
group name
The name of the server group for this service.
noqos
Indicates that the service does not tag traffic based on the application or transaction type
dot1p-to-svr tag
Specifies whether to apply a tag to the 802.1p header for packets directed to the server; one
of the following values:
dot1p-to-net tag
diffserv-to-svr tag
diffserv-to-net tag
134
•
The keyword preserve indicates that no tag is applied to this type of traffic.
•
A hexadecimal number from 0x00 to 0x07, inclusive, is the tag to be applied to this type of
traffic.
Specifies whether to apply a tag to the 802.1p header for packets directed to the network;
one of the following values:
•
The keyword preserve indicates that no tag is applied to this type of traffic.
•
A hexadecimal number from 0x00 to 0x07, inclusive, is the tag to be applied to this type of
traffic.
Specifies whether to apply a tag to the DiffServ code point for packets directed to the server;
one of the following values:
•
The keyword preserve indicates that no tag is applied to this type of traffic.
•
A hexadecimal number from 0x00 to 0x3F, inclusive, is the tag to be applied to this type
of traffic.
Specifies whether to apply a tag to the DiffServ code point for packets directed to the
network; one of the following values:
•
The keyword preserve indicates that no tag is applied to this type of traffic.
•
A hexadecimal number from 0x00 to 0x3F, inclusive, is the tag to be applied to this type
of traffic.
ExtremeWarePx1 1.2 Command Reference Guide
configure service L4
Default
N/A.
Usage Guidelines
You must have administrator privileges to issue this command.
To create any virtual service, you must specify the IP address and port to which Internet clients connect
and the protocol (TCP or UDP) to be used. For a layer 4 service, you also specify the server group to be
used for this service. You may optionally specify any of the following:
¥ A virtual router ID (VRID) for the VRRP class for this service
¥ A VLAN for this service
¥ Tags to be applied to packets
If you enable VRRP (with the enable vrrp command):
¥ You must assign every virtual service to a VRRP class. You specify the class for a service with the
vrid parameter.
¥ Every unique VIP must belong to a single VRRP class. Thus, if you use the same VIP for different
services (each with a different combination of port and protocol), all those services must be assigned
the same VRID.
¥ If gateway mode is also enabled, you must ensure sure every server responds to VIPs in a single
VRRP class. That is, all services that use a particular server must be in the same VRRP class.
For more information about VRRP, see Chapter 5; for a description of the commands to gateway mode,
see Chapter 4.
If you end the configure service command with the noqos keyword, the headers in the incoming
trafÞc to this service are left unchanged. If you do not specify this keyword, you can specify tags for
incoming trafÞc. You can specify different tags for two Þelds: the 802.1p header and the DiffServ code
point (DSCP) in the TCP header. For either Þeld, you can specify different tags for trafÞc towards the
server and trafÞc towards the network. You must specify values for all four parameters dot1p-to-svr,
dot1p-to-net, diffserv-to-svr, and diffserv-to-net. If the value of one of these parameters is a
hexadecimal number, that number is used as a tag, overwriting any tag that is used on the trafÞc; if the
value is the keyword preserve, any existing tag in the incoming trafÞc is left unchanged.
You must use the build command to commit the conÞguration changes made by this command.
Example
This example creates a layer 4 service. Clients connect to this service using IP address 64.1.2.10, port 80,
and TCP protocol. The switch directs the connection to one of the servers in the server group named
group1:
SummitPx1:5 # configure server index 1 ip 64.1.1.50 - 64.1.1.52 port 80
* SummitPx1:6 # configure server-group name group1 policy rr
* SummitPx1:7 # configure server-group name group1 add-server index 1 - 3
* SummitPx1:8 # configure service vip 64.1.2.10 port 80 protocol tcp
L4 server-group-name group1 noqos
* SummitPx1:9 # build
ExtremeWarePx1 1.2 Command Reference Guide
135
Commands for Configuring Servers and Services
History
This form of this command was available in ExtremeWarePx 1.2.
Platform Availability
This command is available on the Px-series application switch.
136
ExtremeWarePx1 1.2 Command Reference Guide
configure service L7
configure service L7
configure service vip <IP address>
{vrid <VRID number>}
{vlan <vlan tag number>}
port <port number>
protocol [tcp | udp]
L7 class [http | https]
Description
Creates a layer 7 virtual service.
Syntax Description
IP address
The virtual IP address of the service.
VRID number
The VRID of the VRRP class for the service; a number between 1 and 255.
vlan tag number
The VLAN tag for the service.
port number
The port the service uses to answer requests.
tcp
Specifies the TCP protocol.
udp
Specifies the UDP protocol.
http
Specifies that the service supports regular web traffic.
https
Specifies that the service supports SSL session persistence.
Default
N/A.
Usage Guidelines
You must have administrator privileges to issue this command.
To create any virtual service, you must specify the IP address and port to which Internet clients connect
and the protocol (TCP or UDP) to be used. For a layer 7 service, you also specify the class of application
that the VIP supports, either http for regular web trafÞc, or https for SSL session persistence.
You may optionally specify either of the following:
¥ A virtual router ID (VRID) for the VRRP class for this service
¥ A VLAN for this service
If you enable VRRP (with the enable vrrp command):
¥ You must assign every virtual service to a VRRP class. You specify the class for a service with the
vrid parameter.
¥ Every unique VIP must belong to a single VRRP class. Thus, if you use the same VIP for different
services (each with a different combination of port and protocol), all those services must be assigned
the same VRID.
¥ If gateway mode is also enabled, you must ensure sure every server responds to VIPs in a single
VRRP class. That is, all services that use a particular server must be in the same VRRP class.
ExtremeWarePx1 1.2 Command Reference Guide
137
Commands for Configuring Servers and Services
For more information about VRRP, see Chapter 5; for a description of the commands to gateway mode,
see Chapter 4.
You must use the build command to commit the conÞguration changes made by this command.
After you create a layer 7 virtual service, you must conÞgure domains for the service.
Configuring an HTTP Service. If the class of a service is http, the switch can examine the HTTP
header in a client request and select a server group based on the domain name, URL, or both. In
addition, it can examine any cookie with the client request to identify the server to be used.
You can conÞgure domains for an HTTP service. Each domain is a DNS domain that is used at the
service. If the service uses the domain speciÞed in the client request to select a server group, you must
use the configure domain command to conÞgure each recognized domain name. In addition, you must
use the configure domain default command to conÞgure a default domain.
If the service uses only the URL (and not the domain) to select a server group, you use the configure
domain command to conÞgure a single domain with the special domain name "*".
For each conÞgured domain (including the default), you must conÞgure pattern rules that select a sever
group based on the URL in the client request.
If the service uses cookies to maintain a session between a client and a particular web server, the service
must include a default domain whose default pattern rule is created by configure pattern-rule
default cookie-name command. This default patter rule identiÞes the cookie name to be matched, the
cookie persistence mode used by the service, and the server group to be used for client requests that
include cookies.
Configuring an HTTPS Service. If the class of a service is https, the header is encrypted, so the
switch cannot identify the domain name or URL. To conÞgure an HTTPS service, you must use the
configure domain default command to conÞgure a default domain and the configure pattern-rule
default command to conÞgure a default pattern rule. This pattern rule speciÞes the server group to be
used by the service. SSL session identiÞer persistence is used to maintain a session between a client and
a particular web server.
Example
This example creates an HTTP service that uses only the URL in a client request to select a server group.
SummitPx1:5 # config service vip 64.1.2.12 port 80 protocol tcp L7 class http
* SummitPx1:6 # configure domain name *
...
* SummitPx1:10 # build
This example creates an HTTPS service.
SummitPx1:18 #
* SummitPx1:19
* SummitPx1:20
* SummitPx1:21
config service vip 64.1.2.14 port 80 protocol tcp L7 class https
# config domain default
# config pattern-rule default server-group-name group1
# build
History
This form of this command was available in ExtremeWarePx 1.2.
138
ExtremeWarePx1 1.2 Command Reference Guide
configure service L7
Platform Availability
This command is available on the Px-series application switch.
ExtremeWarePx1 1.2 Command Reference Guide
139
Commands for Configuring Servers and Services
unconfigure domain
unconfigure domain name <name string>
Description
Removes a domain from the current layer 7 service.
Syntax Description
name string
The domain name to be removed.
Default
N/A.
Usage Guidelines
You must have administrator privileges to issue this command.
This command applies to the service that was speciÞed in the most recently issued configure service
L7 command. That service is called the current service. The speciÞed domain name must be one that was
added to the current service with the configure domain command.
You must use the build command to commit the conÞguration changes made by this command.
Example
This example removes a domains from a service. It Þrst sets the context to the correct service, then
unconÞgures the domain.
SummitPx1::47 #
* SummitPx1::48
* SummitPx1::49
* SummitPx1::50
config service vip 10.10.31.2 port 8080 proto tcp l7 class http
# unconfig domain name buythisnow.com
# unconfig domain name www.buythisnow.com
# build
History
This form of the command was available in ExtremeWarePx 1.1.
Platform Availability
This command is available on the Px-series application switch.
140
ExtremeWarePx1 1.2 Command Reference Guide
unconfigure pattern-rule
unconfigure pattern-rule
unconfigure pattern-rule <pattern string>
Description
Removes a pattern rule from the current domain of the current layer 7 service.
Syntax Description
pattern string
The pattern string of the patter rule to be removed.
Default
N/A.
Usage Guidelines
You must have administrator privileges to issue this command.
This command applies to the current domain of the current service. The current service is the service that
was speciÞed in the most recently issued configure service L7 command. The current domain is the
domain that was speciÞed in the most recently issued configure domain or configure domain default
command. The speciÞed pattern string must be the pattern string of a pattern rule that was added to
the current domain of the current service with the configure pattern-rule command.
You must use the build command to commit the conÞguration changes made by this command.
Example
This example removes a pattern rule. It Þrst sets the context to the correct service and domain, then
unconÞgures the rule.
SummitPx1::34 #
* SummitPx1::35
* SummitPx1::36
* SummitPx1::37
config service vip 64.1.2.10 port 80 protocol tcp L7 class http
# config domain name *
# unconfig pattern-rule "*.mp3"
# build
History
This command was available in ExtremeWarePx 1.1.
Platform Availability
This command is available on the Px-series application switch.
ExtremeWarePx1 1.2 Command Reference Guide
141
Commands for Configuring Servers and Services
unconfigure server
unconfigure server
[(index <index number> {- <index number>}) |
(ipaddress <IP address> {- <IP address>} port <port number>)]
Description
Removes one or more servers from the system.
Syntax Description
index number
The unique index number of a server to be removed.
IP address
The IP address of a server to be removed. The IP address plus the port number uniquely
identify a server.
port number
The port number of the servers to be removed. The port number plus the IP address
uniquely identify a server.
Default
N/A.
Usage Guidelines
You must have administrator privileges to issue this command.
You can identify a server to be removed either by its index number or by its IP address and port
number. This command allows you to remove a number of servers with consecutive index numbers or a
number of servers with consecutive IP addresses, all of which use the same port.
To remove a server from a server group but leave it conÞgured in the system so that it can be added to
a different group, use the configure server-group delete-server command instead of this command.
You must use the build command to commit the conÞguration changes made by this command.
Example
This example removes servers with indexes 3 through 5:
SummitPx1:21 # unconfigure server index 3 - 5
* SummitPx1:22 # build
History
This form of the command was available in ExtremeWarePx 1.1.
Platform Availability
This command is available on the Px-series application switch.
142
ExtremeWarePx1 1.2 Command Reference Guide
unconfigure server-group
unconfigure server-group
unconfigure server-group name <name string>
Description
Removes a server group from the system.
Syntax Description
name string
The name of the server group to be deleted.
Default
N/A.
Usage Guidelines
You must have administrator privileges to issue this command.
You must use the build command to commit the conÞguration changes made by this command.
Example
This example removes the server group named group1:
SummitPx1:25 # unconfigure server-group name group1
* SummitPx1:26 # build
History
This command was available in ExtremeWarePx 1.1.
Platform Availability
This command is available on the Px-series application switch.
ExtremeWarePx1 1.2 Command Reference Guide
143
Commands for Configuring Servers and Services
unconfigure service
unconfigure service vip <IP address>
port <port number>
protocol [tcp | udp]
Description
Removes a service from the system.
Syntax Description
IP address
The virtual IP address of the service to be removed.
port number
The port for the service to be removed.
tcp
Specifies the TCP protocol.
udp
Specifies the UDP protocol.
Default
N/A.
Usage Guidelines
You must have administrator privileges to issue this command.
You identify the service to be removed by the IP address and port to which Internet clients connect and
the protocol (TCP or UDP) used by the service.
Removing a layer 7 service with this command also removes all domains and pattern rules that were
conÞgured for the speciÞed service.
You must use the build command to commit the conÞguration changes made by this command.
Example
This example removes the service to which clients connected using IP address 64.1.2.10, port 80, and
TCP protocol.
SummitPx1:8 # unconfigure service vip 64.1.2.10 port 80 protocol tcp
* SummitPx1:9 # build
History
This command was available in ExtremeWarePx 1.1.
Platform Availability
This command is available on the Px-series application switch.
144
ExtremeWarePx1 1.2 Command Reference Guide
4
Commands for Persistence Modes, and
NAT Modes
This chapter describes commands for setting:
¥ Persistence modes
¥ NAT modes
ExtremeWarePx1 1.2 Command Reference Guide
145
Commands for Persistence Modes, and NAT Modes
configure gateway-mode add ipaddress
configure gateway-mode add
ipaddress <IP address>
{vrid <VRID number>}
{vlan <vlan tag number>}
Description
Adds an IP address to be used in gateway mode on the application switch.
Syntax Description
IP address
The IP address of the gateway.
VRID number
The VRID of the VRRP class for the gateway; a number between 1 and 255.
vlan tag number
The VLAN tag for the gateway.
Default
N/A.
Usage Guidelines
You must have administrator privileges to issue this command.
When you conÞgure half-NAT mode, you can also enable gateway mode for the application switch, and
add at least one IP address. Specify an IP address that a serverÕs default gateway can forward to, as if
the application switch were another router. The application switch can then switch the forwarded trafÞc
to another router, even one on another VLAN.
You may optionally specify a virtual router ID (VRID) for the VRRP class for gateway, and a VLAN for
the gateway.
If VRRP is enabled, each VRRP class must have at lease one gateway IP address. A given VRRP class
can have more than one gateway IP address. For more information about VRRP, see Chapter 5.
You must use the build command to commit the conÞguration changes made by this command.
Example
This example enables gateway mode and adds 10.10.10.1 as an IP address that a serverÕs default
gateway can forward to.
SummitPx1::32 # enable gateway-mode
* SummitPx1::33 # configure gateway-mode add ipaddress 10.10.10.1
* SummitPx1::34 # build
History
This command was available in ExtremeWarePx 1.1.
146
ExtremeWarePx1 1.2 Command Reference Guide
configure gateway-mode add ipaddress
Platform Availability
This command is available on the Px-series application switch.
ExtremeWarePx1 1.2 Command Reference Guide
147
Commands for Persistence Modes, and NAT Modes
configure gateway-mode delete ipaddress
configure gateway-mode delete
ipaddress <IP address>
{vlan <vlan tag number>}
Description
Removes an IP address from used in gateway mode on the application switch.
Syntax Description
IP address
The IP address of the gateway.
vlan tag number
The VLAN tag for the gateway.
Default
N/A.
Usage Guidelines
You must have administrator privileges to issue this command.
You must use the build command to commit the conÞguration changes made by this command.
Example
The following command removes 10.10.10.1 from used in gateway mode.
configure gateway-mode delete ipaddress 10.10.10.1
History
This command was available in ExtremeWarePx 1.1.
Platform Availability
This command is available on the Px-series application switch.
148
ExtremeWarePx1 1.2 Command Reference Guide
Commands for Persistence Modes, and NAT Modes
configure nat-mode full
configure nat-mode full
Description
ConÞgures full-NAT mode (full Network Address Translation) on the application switch.
Syntax Description
This command has no parameters.
Default
Full-NAT mode is the default behavior of the application switch.
Usage Guidelines
You must have administrator privileges to issue this command.
In full-NAT mode, the server load balancer translates both the source and destination IP
addressesÑthose of the client and the serverÑbefore sending the request onto the user. For the point of
view of the server fulÞlling the request, it appears as though the client making the request is actually
the server load balancer.
Advantages of full-NAT mode are:
¥ No conÞguration is necessary on the layer 2/3 switch connected to the application switch.
¥ It can be deployed in any network architecture.
¥ Clients can be on the same subnet as the servers.
¥ It allows interoperation with any vendors switch, regardless of support for policy routing.
You must run in full-NAT mode if:
¥ Clients and servers are on the same layer 2 network segment.
¥ The switch connected to the application switch does not support layer 3 policy routing based on
source IP address, port, and protocol.
¥ You do not have access to the layer 3 switch to conÞgure policy based routing.
You must use the build command to commit the conÞguration changes made by this command.
Example
If another NAT mode was in use previously, use the following command to set it back to full:
configure nat-mode full
History
This command was available in ExtremeWarePx 1.1.
149
ExtremeWarePx1 1.2 Command Reference Guide
Commands for Persistence Modes, and NAT Modes
Platform Availability
This command is available on the Px-series application switch.
150
ExtremeWarePx1 1.2 Command Reference Guide
Commands for Persistence Modes, and NAT Modes
configure nat-mode server-only
configure nat-mode server-only
Description
ConÞgures half-NAT mode (server-only Network Address Translation) on the application switch.
Syntax Description
This command has no parameters.
Default
Full-NAT mode is the default behavior of the application switch.
Usage Guidelines
You must have administrator privileges to issue this command.
In half-NAT mode, the application switch only translates the server IP address when dispatching the
client requests to the real server. Half-NAT mode results in the server believing that the request came
from the client, instead of the application switch. Using half-NAT mode, the server sees the real IP
address of the client.
Half-NAT mode must be conÞgured on both the application switch and the attached layer 3 switch.
Policy-based routing allows layer 3 switches to make next-hop forwarding decisions based on
information other than simply the IP destination address of the request.
On an Extreme switch, use the following ExtremeWare commands to conÞgure the policy routes
required for half-NAT:
create source-flow <name> source-ip <server ip> source-port <server-port> protocol tcp
destination any
config source-flow <name> next-hop <SLB VIP>
These policy rules route all trafÞc from the load-balanced port on the server to the application switch. If
other locally-attached networks need to use the facility provided by that port without using the load
balancer, more speciÞc rules need to be written to steer trafÞc directly back to the correct routers.
Advantages of Half-NAT mode are:
¥ Allows the server logs on the real web site to reßect the IP address of the real client making a
request, rather than a proxy address of the application switch.
¥ Allows the use of IP address based security methods such as Unix Netgroups. This is primarily a
concern for enterprise data centers.
NOTE
Half-NAT mode cannot be used if clients and servers are on the same layer 3 network. Policy-based
routing occurs at layer 3 and cannot be applied without crossing a layer 3 network boundary.
You must use the build command to commit the conÞguration changes made by this command.
151
ExtremeWarePx1 1.2 Command Reference Guide
Commands for Persistence Modes, and NAT Modes
Example
The following command conÞgures half-NAT mode on the application switch
configure nat-mode server-only
History
This command was available in ExtremeWarePx 1.1.
Platform Availability
This command is available on the Px-series application switch.
152
ExtremeWarePx1 1.2 Command Reference Guide
Commands for Persistence Modes, and NAT Modes
configure proxy-ip
configure proxy-ip <IP address> {- <IP address>}
Description
Sets a proxy IP address or a range of proxy addresses.
Syntax Description
IP address
A proxy IP address. Two IP addresses separated by a hyphen indicate a range of
addresses; the command configures all addresses in the specified range as proxy IPs.
Default
N/A.
Usage Guidelines
You must have administrator privileges to issue this command.
To function properly in full-NAT mode, the application switch requires that proxy IP addresses be
conÞgured. These proxy addresses are used as the source IP addresses for the outbound connection to
the server. One proxy address must be conÞgured for each 63,000 sessions active at one time. For full
system capacity, you must conÞgure 32 IP addresses.
Proxy-IP addresses do not need to be contiguous. You can use multiple commands to specify different
ranges of IP addresses to use as proxy addresses. The only restriction is that all addresses must be on
the same subnet as the main system IP address.
NOTE
Do not change the proxy IP while the application switch is running.
If VRRP is also enabled, you typically must specify a different proxy IP address for each of the VRRP
peers. The one exception to this requirement is that if you are using automatic synchronization and you
have conÞgured all VRRP classes to track failure of all other VRRP classes, then you may use the same
proxy IP address on the two switches. For additional information about VRRP, see Chapter 5.
You must use the build command to commit the conÞguration changes made by this command. You
must boot the application switch for the new proxy IP information to take effect.
Example
The following command conÞgures 32 consecutive proxy IP addresses.
config proxy-ip 10.1.1.11 - 10.1.1.42
History
This command was available in ExtremeWarePx 1.1.
153
ExtremeWarePx1 1.2 Command Reference Guide
Commands for Persistence Modes, and NAT Modes
Platform Availability
This command is available on the Px-series application switch.
154
ExtremeWarePx1 1.2 Command Reference Guide
Commands for Persistence Modes, and NAT Modes
configure sticky client-ip timeout
configure sticky client-ip timeout
[(<hours> : <minutes> : <seconds>) |
infinity}]
Description
Sets the time after which client-IP entries are deleted from the stickiness table.
Syntax Description
hours
The number of hours in the timeout period; a two-digit number between 00 and 97.
minutes
The number of minutes in the timeout period; a two digit number between 00 and 59.
seconds
The number of seconds in the timeout period; a two digit number between 00 and 59.
infinity
Specifies that client-IP persistence should last forever.
Default
By default, entries are deleted from the stickiness table after 24 hours without use.
Usage Guidelines
You must have administrator privileges to issue this command.
The timer affects both layer 4 and layer 7. Valid values for the timeout period are in the range 00:00:05
(5 seconds) to 97:43:52. You can specify the keyword infinity to indicate that the stickiness should last
forever.
You must use the build command to commit the conÞguration changes made by this command.
Example
This example sets the timeout period for client-IP entries to 2 days (48 hours).
SummitPx1::22 # config sticky client-ip timeout 48:00:00
* SummitPx1::23 # build
History
This command was available in ExtremeWarePx 1.1.
Platform Availability
This command is available on the Px-series application switch.
155
ExtremeWarePx1 1.2 Command Reference Guide
Commands for Persistence Modes, and NAT Modes
configure sticky cookie-id timeout
configure sticky cookie-id timeout
[(<hours> : <minutes> : <seconds>) |
infinity}]
Description
Sets the time after which cookie-ID entries are deleted from the stickiness table.
Syntax Description
hours
The number of hours in the timeout period; a two-digit number between 00 and 97.
minutes
The number of minutes in the timeout period; a two digit number between 00 and 59.
seconds
The number of seconds in the timeout period; a two digit number between 00 and 59.
infinity
Specifies that client-IP persistence should last forever.
Default
By default, entries are deleted from the stickiness table after 30 seconds without use.
Usage Guidelines
You must have administrator privileges to issue this command.
Valid values for the timeout period are in the range 00:00:05 (5 seconds) to 97:43:52. You can specify the
keyword infinity to indicate that the stickiness should last forever.
You must use the build command to commit the conÞguration changes made by this command.
Example
This example sets the timeout period for cookie-ID entries to 1 hour.
SummitPx1::22 # config sticky cookie-id timeout 01:00:00
* SummitPx1::3 # build
History
This command was available in ExtremeWarePx 1.1.
Platform Availability
This command is available on the Px-series application switch.
156
ExtremeWarePx1 1.2 Command Reference Guide
Commands for Persistence Modes, and NAT Modes
configure sticky session-id timeout
configure sticky session-id timeout
[(<hours> : <minutes> : <seconds>) |
infinity}]
Description
Sets the time after which session-ID entries are deleted from the stickiness table.
Syntax Description
hours
The number of hours in the timeout period; a two-digit number between 00 and 97.
minutes
The number of minutes in the timeout period; a two digit number between 00 and 59.
seconds
The number of seconds in the timeout period; a two digit number between 00 and 59.
infinity
Specifies that client-IP persistence should last forever.
Default
By default, entries are deleted from the stickiness table after 30 seconds without use.
Usage Guidelines
You must have administrator privileges to issue this command.
Valid values for the timeout period are in the range 00:00:05 (5 seconds) to 97:43:52. You can specify the
keyword infinity to indicate that the stickiness should last forever.
You must use the build command to commit the conÞguration changes made by this command.
Example
This example sets the timeout period for session-ID entries to 1 hour.
SummitPx1::22 # config sticky session-id timeout 01:00:00
* SummitPx1::3 # build
History
This command was available in ExtremeWarePx 1.1.
Platform Availability
This command is available on the Px-series application switch.
157
ExtremeWarePx1 1.2 Command Reference Guide
Commands for Persistence Modes, and NAT Modes
configure timeout established-connection
configure timeout established-connection <seconds>
Description
Sets the established-connection timeout period.
Syntax Description
seconds
The number of seconds in the established-connection timeout period; a number between 1
and 8000, inclusive.
Default
The default established-connection timeout is 30 seconds.
Usage Guidelines
You must have administrator privileges to issue this command.
This command sets the length of the established-connection timeout period. This timeout period is used
for established TCP or UDP connections. Established connections that have no trafÞc for the speciÞed
time period will be torn down by the application switch. For TCP connections, a new 3-way handshake
is required to restart the connection. A restart of either a TCP or a UDP connection is subject to the
load-balancing policy for the target service and may not be bound to the same server as the original
connection.
You can use this command to adjust the established-connection timeout period for protocols that exhibit
long periods of inactivity; doing so will prevent premature termination of such connections.
You must use the build command to commit the conÞguration changes made by this command.
Example
The following command sets the established-connection timeout to 1 minute (60 seconds).
configure timeout established-connection 60
History
This command was available in ExtremeWarePx 1.1.
Platform Availability
This command is available on the Px-series application switch.
158
ExtremeWarePx1 1.2 Command Reference Guide
Commands for Persistence Modes, and NAT Modes
configure timeout udp-flow-persistence
configure timeout udp-flow-persistence <seconds>
Description
Sets the UDP-ßow-persistence timer.
Syntax Description
seconds
The number of seconds after which an idle UDP flow should be recycled; a number between
1 and 8000, inclusive.
Default
The default value for this timer is 40 seconds.
Usage Guidelines
You must have administrator privileges to issue this command.
The Px-series application switch provides UDP persistence. A UDP ßow is recycled if it is idle for the
time speciÞed by the UDP-ßow-persistence timer.
You must use the build command to commit the conÞguration changes made by this command.
Example
The following command sets the UDP-ßow-persistence timer to 1 minute (60 seconds).
configure timeout udp-flow-persistence 60
History
This command was available in ExtremeWarePx 1.1.
Platform Availability
This command is available on the Px-series application switch.
159
ExtremeWarePx1 1.2 Command Reference Guide
Commands for Persistence Modes, and NAT Modes
disable gateway-mode
disable gateway-mode
Description
Disables gateway mode on the application switch.
Syntax Description
This command has no parameters or options.
Default
Gateway mode is disabled by default.
Usage Guidelines
You must have administrator privileges to issue this command.
You must use the build command to commit the conÞguration changes made by this command.
Example
This example disables gateway mode.
SummitPx1::32 # disable gateway-mode
* SummitPx1::33 # build
History
This command was available in ExtremeWarePx 1.1.
Platform Availability
This command is available on the Px-series application switch.
160
ExtremeWarePx1 1.2 Command Reference Guide
disable sticky
disable sticky
disable sticky
[L4 client-ip |
L7 [all | client-ip | cookie-id | session-id]]
Description
Disables the speciÞed persistence (stickiness) mode.
Syntax Description
L4
Specifies layer 4.
L7
Specifies layer 7.
all
Specifies all persistence modes (client-IP, cookie-ID, and session-ID).
client-ip
Specifies client-IP persistence mode.
cookie-id
Specifies cookie-ID persistence mode.
session-id
Specifies session-ID persistence mode.
Default
By default, no persistence is enabled.
Usage Guidelines
You must have administrator privileges to issue this command.
You must use the build command to commit the conÞguration changes made by this command.
Example
The following command disables layer 4 client-IP persistence mode:
disable sticky L4 client-ip
The following command disables layer 7 session-ID persistence mode:
disable sticky L7 session-id
History
This command was available in ExtremeWarePx 1.1.
Platform Availability
This command is available on the Px-series application switch.
ExtremeWarePx1 1.2 Command Reference Guide
161
Commands for Persistence Modes, and NAT Modes
enable gateway-mode
enable gateway-mode
Description
Enables gateway mode on the application switch.
Syntax Description
This command has no parameters or options.
Default
Gateway mode is disabled by default.
Usage Guidelines
You must have administrator privileges to issue this command.
When you conÞgure half-NAT mode, you can also enable gateway mode for the application switch, and
add at least one IP address (using the configure gateway-mode add ipaddress command).
If VRRP is enabled, you must specify at least one gateway-mode IP address for each active VRRP class
before you enable gateway mode. An active VRRP class is one that contains at least one service. When
you add a gateway-mode IP address with the configure gateway-mode add ipaddress command, you
can specify the VRID of a VRRP class. A given VRRP class can have multiple gateway-mode IP
addresses.
When gateway mode and VRRP are both enabled, you must also make sure every server responds to
VIPs in a single VRRP class. That is, all services that use a particular server must be in the same VRRP
class.
For more information about VRRP, see Chapter 5.
You must use the build command to commit the conÞguration changes made by this command.
Example
This example enables gateway mode and adds 10.10.10.1 as an IP address that a serverÕs default
gateway can forward to.
SummitPx1::32 # enable gateway-mode
* SummitPx1::33 # configure gateway-mode add ipaddress 10.10.10.1
* SummitPx1::34 # build
History
This command was available in ExtremeWarePx 1.1.
Platform Availability
This command is available on the Px-series application switch.
162
ExtremeWarePx1 1.2 Command Reference Guide
enable sticky
enable sticky
enable sticky
[L4 client-ip |
L7 [all | client-ip | cookie-id | session-id]]
Description
Enables the speciÞed persistence (stickiness) mode.
Syntax Description
L4
Specifies layer 4.
L7
Specifies layer 7.
all
Specifies all persistence modes (client-IP, cookie-ID, and session-ID).
client-ip
Specifies client-IP persistence mode.
cookie-id
Specifies cookie-ID persistence mode.
session-id
Specifies session-ID persistence mode.
Default
By default, no persistence is enabled.
Usage Guidelines
You must have administrator privileges to issue this command.
You must use the build command to commit the conÞguration changes made by this command.
Example
The following command enables layer 4 client-IP persistence mode:
enable sticky L4 client-ip
The following command enables layer 7 session-ID persistence mode:
enable sticky L7 session-id
History
This command was available in ExtremeWarePx 1.1.
Platform Availability
This command is available on the Px-series application switch.
ExtremeWarePx1 1.2 Command Reference Guide
163
Commands for Persistence Modes, and NAT Modes
unconfigure proxy-ip
unconfigure proxy-ip <IP address> {- <IP address>}
Description
Removes a proxy IP address or a range of proxy addresses.
Syntax Description
IP address
A proxy IP address. Two IP addresses separated by a hyphen indicate a range of
addresses; the command removes all addresses in the specified range.
Default
N/A.
Usage Guidelines
You must have administrator privileges to issue this command.
NOTE
Do not change the proxy-IP configuration while the application switch is running.
You must use the build command to commit the conÞguration changes made by this command. You
must boot the application switch for the new proxy IP information to take effect.
Example
The following command unconÞgures a proxy IP address.
unconfig proxy-ip 10.1.1.12
History
This command was available in ExtremeWarePx 1.1.
Platform Availability
This command is available on the Px-series application switch.
164
ExtremeWarePx1 1.2 Command Reference Guide
5
Commands for Configuring Redundancy
This chapter describes the following commands:
¥ Commands for using VRRP
¥ Commands for conÞguring a default gateway
VRRP
To reduce downtime, you can deploy two Px-series application switches that provide redundancy using
Virtual Router Redundancy Protocol (VRRP), an industry standard failover mechanism (RFC 2338).
VRRP classes are used to classify virtual services into groups for fail-over. Up to 16 VRRP classes are
allowed. Each VRRP class is identiÞed by a unique virtual router ID (VRID).
When VRRP is enabled:
¥ The same services must be conÞgured on both application switches.
¥ Each service must be assigned to a particular VRRP class.
¥ When you conÞgure a given service on the two switches, you must use the same VRID for the
service on both switches.
Each Px-series application switch in the pair can be in either active or backup state on a particular
VRRP class. The active switch is the one that handles virtual services in that VRRP class. In the event of
failure of the active switch, the backup switch automatically takes over. At any given time, a particular
VIP will be active on one application switch onlyÑthe switch on which the corresponding VRRP class
is active.
The two switches operating in this mode are called VRRP peers.
In the simplest case (called active-passive VRRP), a single VRRP class is used for all services and one
switch is active on that VRRP class while the other switch is the backup. In the more general case
(called active-active VRRP), you conÞgure the switches so that the Þrst switch is active on one set of
VRRP classes and the other switch is active on a different, disjoint sets of VRRP classes.
ExtremeWarePx1 1.2 Command Reference Guide
165
Commands for Configuring Redundancy
VRRP Properties
Each application switch maintains three properties for each conÞgured VRRP class.
¥ The switchÕs priority for that VRRP class
The switch with the higher priority for a given VRRP class is the primary device for that class; the
switch with the lower priority is the secondary device for the class. The primary device will initially
be active for the VRRP class (handling the virtual services in that class); the secondary device will
initially be the backup. If the active switch fails, the backup switch takes over automatically.
The default value for this property is 100; the value can be changed with the configure vrrp
priority command.
The priority 255 is called master priority. Whenever a switch with master priority is available, that
switch handles the VRRP class.
¥ Whether the switch should preempt the active system when it has higher priority for the VRRP class
If a transition occurs because the primary device goes down, this property determines what happens
when the primary device comes back up. This property is relevant only on the primary switch for
the VRRP class and only if that switch does not have master priority. (A switch with master priority
always preempts the active system when it comes back up.)
This property can be set to either preempt or dont-preempt.
Value
Meaning
preempt
When the primary device comes back up, it automatically takes over as active and the
secondary device becomes the backup once again
dont-preempt
The secondary device continues being active after the primary device comes up; the primary
device is then the backup
The default value for this property is dont-preempt; the value can be changed with the configure
vrrp preempt|dont-preempt command.
¥ The frequency of advertisement intervals for the VRRP class
Each switch periodically sends VRRP advertisements to the other switch via the Gigabit port, thus
checking to see whether the other switch is in operation. This property controls the frequency of
these checks; the lower the value, the faster failover occurs when the active switch goes down. The
default value for this property is 1 second. The value can be changed with the configure vrrp
advertisement-interval command.
VRRP Automatic Synchronization
VRRP automatic synchronization (auto-sync) allows you to designate one Px-series application switch
as the master switch and the other as the backup. Automatic synchronization ensures that both switches
have the same conÞguration for servers, server groups, services, domains, and pattern rules.
Synchronization is performed by copying conÞguration from the master switch to the backup switch.
When automatic synchronization is enabled:
¥ If services have already been conÞgured on the master switch, you can issue the configure vrrp
auto-sync forcesync command on the master switch to synchronize the backup switch.
ConÞguration commands for servers, server groups, services, domains, and pattern rules are sent
166
ExtremeWarePx1 1.2 Command Reference Guide
Serial-Cable Failover
from the master to the backup, replacing the corresponding commands on the backup. After all the
commands have been replaced, the conÞguration is saved and the backup switch is rebooted.
¥ Whenever a relevant conÞguration command is issued on the master switch, the command is
automatically send to the backup switch, where it is stored in local memory. When a build
command is issued on the master switch, the backup executes the stored commands in sequence and
issues its own build command. The backup switch does not save the result. If you do not explicitly
issue the save configuration command on the backup switch before the next boot, the
conÞguration is lost.
Serial-Cable Failover
Serial-cable failover provides faster (sub-second) failover between the VRRP peers. When this feature is
enabled, in addition to sending and receiving VRRP advertisements via the Gigabit port, the VRRP
peers also exchange heartbeat messages by using the second serial port on each switch. A null-modem
serial cable is used. If the either switch does not receive heartbeats from its VRRP peer, it initiates a
failover. The failover latency is currently set to approximately one second.
The heartbeat interval property controls the frequency at which the switch sends heartbeat messages.
The lower the value, the faster failover occurs when the active switch goes down. The default value for
this property is 500 millisecond. The value can be changed with the configure vrrp serial-failover
interval command.
If you enable serial-cable failover on one switch and do not enable serial-cable failover on its VRRP
peer, there will be a temporary glitch because all the VRRP classes will attempt to become active on the
switch where serial-cable failover is enabled. This is an install issue when serial-cable failover is Þrst
enabled. The following messages that will be logged when VRRP serial-cable failover is deployed:
00:03:56
0 days:INFO: Enable VRRP serial failover
00:03:56
0 days:INFO: Disable VRRP serial failover
00:03:56
0 days:INFO:VRRP serial cable CTS asserted
00:03:56
0 days:INFO:VRRP serial cable CTS desserted
00:01:43
0 days:WARNING:VRRP serial heartbeats from peer missing!
00:01:55
0 days:WARNING:Received serial cable heartbeat msg when serial failover is
not enabled!"
These messages may be logged whenever you change the conÞguration of VRRP serial-cable failover, or
in response to changes on the serial link that joins the two VRRP peers.
Server-Health Failover
You can conÞgure an application switch so that one of the failover criteria for a VRRP class is the
number of servers in that class that are down (as per health check) on the other switch. To use this
feature for a particular class, you issue the configure vrrp add track-servers-delta command. This
command speciÞes a limit on the difference between the number of servers for that class on the two
switches. The backup switch attempts to become active if sees that many more servers than the other
switch sees.
The limit for each VRRP class must conÞgured the same on both switches.
ExtremeWarePx1 1.2 Command Reference Guide
167
Commands for Configuring Redundancy
For example, suppose that:
¥ VRRP class 201 contains a total of 100 servers.
¥ Switches A and B are VRRP peers.
¥ Both switches sets the track-servers-delta limit for class 201 to 10.
¥ Switch B is active for class 201.
¥ Switch A sees 90 healthy servers
As long as machine B see 81 or more healthy servers, it remains active. If switch B sees 80 or fewer
healthy servers, then the switch A will attempt to preempt switch B and become active for VRRP class
201.
Tracking Failure Between VRRP Classes
By default, each VRRP class will failover independently of the other classes. If desired, you can
conÞgure one VRRP class to track another VRRP class for failover. If the tracked class fails, the tracking
class will also failover. To make one switch a complete standby for the other, you can conÞgure every
classes to failover when any other class fails. You conÞgure tracking between VRRP classes with the
configure vrrp add track-vrid command.
The tracking conÞguration must be the same on both switches.
168
ExtremeWarePx1 1.2 Command Reference Guide
configure default-gateway
configure default-gateway
configure default-gateway {add} <IP address>
Description
Adds the speciÞed IP address as a default gateway.
Syntax Description
IP address
The IP address of the default gateway to be added.
Default
N/A.
Usage Guidelines
You must have administrator privileges to issue this command.
You can have only two default gateways at a time. The Þrst default gateway you conÞgure is used by
default. If you want to use the second default gateway, issue the configure default-gateway switch
command. You can later change back to the Þrst default gateway by issuing the configure
default-gateway switch command again.
You must use the build command to commit the conÞguration changes made by this command.
Example
This example adds a default gateway with the IP address 10.6.2.1.
SummitPx1::12 # configure default-gateway add 10.6.2.1
History
This command was available in ExtremeWarePx 1.1.
Platform Availability
This command is available on the Px-series application switch.
ExtremeWarePx1 1.2 Command Reference Guide
169
Commands for Configuring Redundancy
configure default-gateway delete
configure default-gateway delete <IP address>
Description
Removes the speciÞed IP address as a default gateway.
Syntax Description
IP address
The IP address of the default gateway to be removed.
Default
N/A.
Usage Guidelines
You must have administrator privileges to issue this command.
You must use the build command to commit the conÞguration changes made by this command.
Example
This example removes the default gateway with the IP address 10.6.2.1.
SummitPx1::12 # configure default-gateway delete 10.6.2.1
History
This command was available in ExtremeWarePx 1.1.
Platform Availability
This command is available on the Px-series application switch.
170
ExtremeWarePx1 1.2 Command Reference Guide
configure default-gateway switch
configure default-gateway switch
configure default-gateway switch
Description
Switches from the default gateway currently being used to the other default gateway (assuming that
two default gateways have been conÞgured).
Syntax Description
This command has no parameters or options.
Default
N/A.
Usage Guidelines
You must have administrator privileges to issue this command.
You must use the build command to commit the conÞguration changes made by this command.
Example
The following command switches default gateways.
configure default-gateway switch
History
This command was available in ExtremeWarePx 1.1.
Platform Availability
This command is available on the Px-series application switch.
ExtremeWarePx1 1.2 Command Reference Guide
171
Commands for Configuring Redundancy
configure vrrp add master vrid
configure vrrp add master vrid <VRID number>
Description
Adds a VRRP class to the application switch, giving the switch master priority for this class.
Syntax Description
VRID number
The VRID of the VRRP class to be added; a number between 1 and 255.
Default
N/A.
Usage Guidelines
You must have administrator privileges to issue this command.
A switch can have a total of 16 different VRRP classes.
The new VRRP class is conÞgured to have a priority of 255. ItÕs advertisement interval is 1 second. The
preempt property is irrelevant for the new class because a switch with master priority always preempts
the active switch.
To add a VRRP class with the default priority, use the configure vrrp add vrid command instead of
this command.
You must use the build command to commit the conÞguration changes made by this command.
Example
The following command adds a VRRP class with the VRID 2 and priority 255.
configure vrrp add master vrid 2
History
This command was available in ExtremeWarePx 1.1.
Platform Availability
This command is available on the Px-series application switch.
172
ExtremeWarePx1 1.2 Command Reference Guide
configure vrrp add track-servers-delta
configure vrrp add track-servers-delta
configure vrrp vrid
[<VRID number> | all]
add track-servers-delta <number>
Description
Enables server-health failover for the speciÞed VRRP class(es).
Syntax Description
VRID number
The VRID of the VRRP class; a number between 1 and 255.
all
Specifies all VRRP classes.
number
Limit on the difference between the number of healthy servers of the class that this switch
sees and the number that the active switch sees; the number may not be less than 5.
Default
Server-health failover is disabled by default.
Usage Guidelines
You must have administrator privileges to issue this command.
You can use this command to enable server-health failover for one particular VRRP class or for all
currently conÞgured VRRP classes. For each speciÞed class:
¥ Neither switch should have master priority (255) for the class.
¥ Both switchesÕ preemption behavior for the class must be dont-preempt.
¥ You must conÞgure the same track-servers-delta limit for the class on both switches.
¥ If the speciÞed track-servers-delta limit is higher than the number of servers in the class, the limit
is set to the actual number of servers in the class.
You should not specify too low a number for the track-servers-delta limit. Too low a number may
cause ßappingÑan unstable state in which neither switch is active for a signiÞcant period of time.
You must use the build command to commit the conÞguration changes made by this command.
Example
The following command enables server-health failover for VRRP class 201, setting the
track-servers-delta limit to 10.
configure vrrp vrid 201 add track-servers-delta 10
If class 201 contains a total of 100 servers, this switch is the backup for class 201, and this switch sees 90
healthy servers in class 201, then this switch will attempt to become active for class 201 if its VRRP peer
sees 80 or fewer healthy servers.
ExtremeWarePx1 1.2 Command Reference Guide
173
Commands for Configuring Redundancy
History
This command was available in ExtremeWarePx 1.2.
Platform Availability
This command is available on the Px-series application switch.
174
ExtremeWarePx1 1.2 Command Reference Guide
configure vrrp add track-vrid
configure vrrp add track-vrid
configure vrrp vrid
[<tracking VRID number> | all]
add track-vrid [<tracked VRID number> | all]
Description
Adds failure tracking between the speciÞed VRRP classes.
Syntax Description
tracking VRID number
The VRID of the VRRP class that tracks failure; a number between 1 and 255.
tracked VRID number
The VRID of the VRRP class whose failure is tracked; a number between 1 and 255.
all
Specifies all VRRP classes.
Default
By default, each VRRP class will failover independently of the other classes; that is, no class tracks any
other class.
Usage Guidelines
You must have administrator privileges to issue this command.
You can specify one particular VRRP class or all currently conÞgured VRRP classes as either the
tracking class or the tracked class. For each speciÞed tracked class and each speciÞed tracking class:
¥ Neither switch should have master priority (255) for the class.
¥ Both switchesÕ preemption behavior for the class must be dont-preempt.
NOTE
You must configure the identical tracking behavior on both switches.
You must use the build command to commit the conÞguration changes made by this command.
Example
The following command causes VRRP class 101 to track class 100; if class 100 fails, class 101 should also
failover:
configure vrrp vrid 101 add track-vrid 100
The following command causes VRRP class 101 to track all other classes; if any class besides 101 fails,
class 101 should also failover:
configure vrrp vrid 101 add track-vrid all
The following command causes all classes besides class 100 to track class 100; if class 100 fails, all other
classes should also failover:
configure vrrp vrid all add track-vrid 100
ExtremeWarePx1 1.2 Command Reference Guide
175
Commands for Configuring Redundancy
The following command causes every class to track every other class; if any class fails, all other classes
should also failover:
configure vrrp vrid all add track-vrid all
History
This command was available in ExtremeWarePx 1.2.
Platform Availability
This command is available on the Px-series application switch.
176
ExtremeWarePx1 1.2 Command Reference Guide
configure vrrp add vrid
configure vrrp add vrid
configure vrrp add {backup} vrid <VRID number>
Description
Adds a VRRP class to the application switch.
Syntax Description
VRID number
The VRID of the VRRP class to be added; a number between 1 and 255.
Default
N/A.
Usage Guidelines
You must have administrator privileges to issue this command.
A switch can have a total of 16 different VRRP classes. The new VRRP class is conÞgured to have a
priority of 100. It does not preempt. ItÕs advertisement interval is 1 second.
To add a VRRP class with the master priority, use the configure vrrp add master vrid command
instead of this command.
You must use the build command to commit the conÞguration changes made by this command.
Example
The following command adds a VRRP class with the VRID 1.
configure vrrp add vrid 1
History
This command was available in ExtremeWarePx 1.1.
Platform Availability
This command is available on the Px-series application switch.
ExtremeWarePx1 1.2 Command Reference Guide
177
Commands for Configuring Redundancy
configure vrrp advertisement-interval
configure vrrp vrid
[<VRID number> | all]
advertisement-interval <seconds>
Description
Sets this switchÕs advertisement interval for the speciÞed VRRP class(es).
Syntax Description
VRID number
The VRID of the VRRP class to be configured; a number between 1 and 255.
all
Specifies all VRRP classes.
seconds
The number of seconds in the interval between sending VRRP advertisements to the other
switch.
Default
The default advertisement interval is 1 second.
Usage Guidelines
You must have administrator privileges to issue this command.
The smaller the advertisement interval, the faster this switch takes over when the other switch fails. You
cannot set this property to less than 1 second.
You must use the build command to commit the conÞguration changes made by this command.
Example
The following command sets the switchÕs advertisement interval to 2 seconds for all VRRP classes.
configure vrrp vrid all advertisement-interval 2
History
This form of this command was available in ExtremeWarePx 1.2.
Platform Availability
This command is available on the Px-series application switch.
178
ExtremeWarePx1 1.2 Command Reference Guide
configure vrrp auto-sync backup
configure vrrp auto-sync backup
configure vrrp auto-sync backup partner-ip <IP address>
Description
Sets the IP address for the backup switch for automatic synchronization.
Syntax Description
IP address
The IP address of the other switch.
Default
N/A.
Usage Guidelines
You must have administrator privileges to issue this command.
You issue this command on the master switch for automatic synchronization. This command establishes
the switch as the master switch and identiÞes the corresponding backup switch. You can specify the
system IP address of the backup switch (as set by the configure system-ip command) or the
management IP address (as set by the configure mgmt ipaddress command).
You must use the build command to commit the conÞguration changes made by this command.
Example
The following command establishes the switch as the master switch for automatic synchronization and
identiÞes the backup switch as the switch with IP address 10.2.3.4.
configure vrrp auto-sync backup partner-ip 10.2.3.4
History
This command was available in ExtremeWarePx 1.1.
Platform Availability
This command is available on the Px-series application switch.
ExtremeWarePx1 1.2 Command Reference Guide
179
Commands for Configuring Redundancy
configure vrrp auto-sync forcesync
configure vrrp auto-sync forcesync
Description
Forces automatic synchronization from the master switch to the backup switch.
Syntax Description
This command has no parameters or options.
Default
N/A.
Usage Guidelines
You must have administrator privileges to issue this command.
When automatic synchronization is enabled, you can issue this command on the master switch. The
result is that conÞguration commands for servers, server groups, services, domains, and pattern rules
are sent from this switch to the backup switch that was identiÞed with the configure vrrp auto-sync
backup command. The copied commands replace the corresponding commands on the backup switch.
After all the commands have been replaced, the conÞguration is saved and the backup switch is
rebooted.
If you issue this command on the backup switch, an error is reported.
You must use the build command to commit the conÞguration changes made by this command.
Example
The following command forces automatic synchronization.
configure vrrp auto-sync forcesync
History
This command was available in ExtremeWarePx 1.1.
Platform Availability
This command is available on the Px-series application switch.
180
ExtremeWarePx1 1.2 Command Reference Guide
configure vrrp auto-sync master
configure vrrp auto-sync master
configure vrrp auto-sync master partner-ip <IP address>
Description
Sets the IP address for the master switch for automatic synchronization.
Syntax Description
IP address
The IP address of the other switch.
Default
N/A.
Usage Guidelines
You must have administrator privileges to issue this command.
You issue this command on the backup switch for automatic synchronization. This command establishes
the switch as the backup switch and identiÞes the corresponding master switch. You can specify the
system IP address of the master switch (as set by the configure system-ip command) or the
management IP address (as set by the configure mgmt ipaddress command).
You must use the build command to commit the conÞguration changes made by this command.
Example
The following command establishes the switch as the backup switch for automatic synchronization and
identiÞes the master switch as the switch with IP address 10.4.3.2.
configure vrrp auto-sync backup partner-ip 10.4.3.2
History
This command was available in ExtremeWarePx 1.1.
Platform Availability
This command is available on the Px-series application switch.
ExtremeWarePx1 1.2 Command Reference Guide
181
Commands for Configuring Redundancy
configure vrrp change vrid
configure vrrp change vrid
[<source VRID number> | all]
to <destination VRID number>
Description
Changes the VRRP class for services.
Syntax Description
source VRID number
The VRID of the VRRP class containing the services to be moved; a number
between 1 and 255.
all
Specifies that all services should be moved to the destination VRRP class.
destination VRID number
The VRID for the destination VRRP class to which the services should be moved; a
number between 1 and 255.
Default
N/A.
Usage Guidelines
You must have administrator privileges to issue this command.
This command moves services to a destination VRRP class. You can move just those services in a
particular source VRRP class or all conÞgured services.
¥ If you specify a particular source VRRP class, this command moves all the services in that source
class to the destination class and then deletes the source class.
¥ If you specify the keyword all, this command moves all services to the destination classÑeven
services that were conÞgured with no VRID (because they were conÞgured before VRRP was
enabled). This form of the command deletes all previously existing VRRP classes, except the
destination class.
If the speciÞed destination class does not already exist, this command adds that class as if you had
issued the command:
configure vrrp add vrid <destination VRID number>
You must use the build command to commit the conÞguration changes made by this command.
Example
The following command moves the services in the VRRP class 3 into the VRRP class 4, adding VRRP
class 4 if necessary. It also deletes VRRP class 3.
configure vrrp change vrid 3 to 4
History
This command was available in ExtremeWarePx 1.2.
182
ExtremeWarePx1 1.2 Command Reference Guide
configure vrrp change vrid
Platform Availability
This command is available on the Px-series application switch.
ExtremeWarePx1 1.2 Command Reference Guide
183
Commands for Configuring Redundancy
configure vrrp delete track-servers-delta
configure vrrp vrid
[<VRID number> | all]
delete track-servers-delta
Description
Disables server-health failover for the speciÞed VRRP class(es).
Syntax Description
VRID number
The VRID of the VRRP class; a number between 1 and 255.
all
Specifies all VRRP classes.
Default
Server-health failover is disabled by default.
Usage Guidelines
You must have administrator privileges to issue this command.
You can use this command to disable server-health failover for one particular VRRP class or for all
currently conÞgured VRRP classes.
NOTE
You must configure the identical tracking behavior on both switches.
You must use the build command to commit the conÞguration changes made by this command.
Example
The following command disables server-health failover for VRRP class 201.
configure vrrp vrid 201 delete track-servers-delta
History
This command was available in ExtremeWarePx 1.2.
Platform Availability
This command is available on the Px-series application switch.
184
ExtremeWarePx1 1.2 Command Reference Guide
configure vrrp delete track-vrid
configure vrrp delete track-vrid
configure vrrp vrid
[<tracking VRID number> | all]
delete track-vrid [<tracked VRID number> | all]
Description
Removes failure tracking between the speciÞed VRRP classes.
Syntax Description
tracking VRID number
The VRID of the VRRP class that tracks failure; a number between 1 and 255.
tracked VRID number
The VRID of the VRRP class whose failure is tracked; a number between 1 and 255.
all
Specifies all VRRP classes.
Default
By default, each VRRP class will failover independently of the other classes; that is, no class tracks any
other class.
Usage Guidelines
You must have administrator privileges to issue this command.
NOTE
You must configure the identical tracking behavior on both switches.
You must use the build command to commit the conÞguration changes made by this command.
Example
The following command causes VRRP class 101 to stop tracking class 100:
configure vrrp vrid 101 delete track-vrid 100
The following command causes VRRP class 101 to stop tracking any class that it is currently tracking:
configure vrrp vrid 101 delete track-vrid all
The following command causes any class that is currently tracking class 100 to stop tracking class 100:
configure vrrp vrid all delete track-vrid 100
The following command causes every class to stop track any class that it is currently tracking:
configure vrrp vrid all delete track-vrid all
History
This command was available in ExtremeWarePx 1.2.
ExtremeWarePx1 1.2 Command Reference Guide
185
Commands for Configuring Redundancy
Platform Availability
This command is available on the Px-series application switch.
186
ExtremeWarePx1 1.2 Command Reference Guide
configure vrrp delete vrid
configure vrrp delete vrid
configure vrrp delete vrid
[<VRID number> | all]
Description
Deletes VRRP classes from the application switch.
Syntax Description
VRID number
The VRID of the VRRP class to be deleted; a number between 1 and 255.
all
Specifies that all VRRP classes should be deleted.
Default
N/A.
Usage Guidelines
You must have administrator privileges to issue this command.
You can use this command to delete a particular VRRP class or all currently conÞgured VRRP classes.
You must use the build command to commit the conÞguration changes made by this command.
Example
The following command deletes the VRRP class with the VRID 1.
configure vrrp delete vrid 1
The following command deletes all VRRP classes.
configure vrrp delete all
History
This form of this command was available in ExtremeWarePx 1.2.
Platform Availability
This command is available on the Px-series application switch.
ExtremeWarePx1 1.2 Command Reference Guide
187
Commands for Configuring Redundancy
configure vrrp force-slave
configure vrrp vrid
[<VRID number> | all]
force-slave
Description
Forces the application switch to attempt to become the backup device for the speciÞed VRRP class(es).
Syntax Description
VRID number
The VRID of the VRRP class; a number between 1 and 255.
all
Specifies all VRRP classes.
Default
N/A.
Usage Guidelines
You must have administrator privileges to issue this command.
When the switch is active, you can issue this command to force the switch to become the backup device.
You can make the switch the backup for one particular VRRP class or for all currently conÞgured VRRP
classes. For each speciÞed class, the switchÕs preemption behavior for the class must be dont-preempt.
If this switch is already the backup for a speciÞed class, no addition action is required.
After the switch is made the backup for a speciÞed class, it can become active again following the
normal VRRP behavior. For example, the switch becomes active again if its VRRP peer is unavailable.
Example
The following command forces the switch to attempt to become the backup device for VRRP class 100.
configure vrrp vrid 100 force-slave
History
This command was available in ExtremeWarePx 1.2.
Platform Availability
This command is available on the Px-series application switch.
188
ExtremeWarePx1 1.2 Command Reference Guide
configure vrrp preempt|dont-preempt
configure vrrp preempt|dont-preempt
configure vrrp vrid
[<VRID number> | all]
[preempt | dont-preempt]
Description
ConÞgures the switchÕs preemption behavior for the speciÞed VRRP class(es).
Syntax Description
VRID number
The VRID of the VRRP class to be configured; a number between 1 and 255.
all
Specifies all VRRP classes.
preempt
Specifies that this switch should preempt the secondary switch.
dont-preempt
Specifies that this switch should not preempt the secondary switch.
Default
The default value for this property is dont-preempt.
Usage Guidelines
You must have administrator privileges to issue this command.
This command is relevant only if this switch is the primary device for the speciÞed VRRP class(es), that
is if its priority for those classes is higher than the other switchÕs priority for the classes.
You must use the build command to commit the conÞguration changes made by this command.
Example
The following command causes this switch to preempt the secondary switch for VRRP class 2.
configure vrrp vrid 2 preempt
History
This form of this command was available in ExtremeWarePx 1.2.
Platform Availability
This command is available on the Px-series application switch.
ExtremeWarePx1 1.2 Command Reference Guide
189
Commands for Configuring Redundancy
configure vrrp priority
configure vrrp vrid
[<VRID number> | all]
priority <priority number>
Description
Sets this switchÕs priority for the speciÞed VRRP class(es).
Syntax Description
VRID number
The VRID of the VRRP class whose priority is to be set; a number between 1 and 255.
all
Specifies all VRRP classes.
priority number
The switch’s priority for the specified VRRP class(es); a number in between 1 and 255,
inclusive.
Default
The default priority is 100. A VRRP class added with the configure vrrp add vrid command has the
priority value 100; a class added with the configure vrrp add master vrid command has the priority
value 255.
Usage Guidelines
You must have administrator privileges to issue this command.
The two switches should have different priorities for each VRRP class. The switch with the higher
priority for a given class is the primary device for that class; the switch with the lower priority is the
secondary device for that class.
You must use the build command to commit the conÞguration changes made by this command.
Example
The following command sets the switchÕs priority to 200 for the VRRP class with VRID 1.
configure vrrp vrid 1 priority 200
The following command makes this switch the master device for all VRRP classes by setting the
switchÕs priority to 255 for all classes.
configure vrrp vrid all priority 255
History
This form of this command was available in ExtremeWarePx 1.2.
Platform Availability
This command is available on the Px-series application switch.
190
ExtremeWarePx1 1.2 Command Reference Guide
configure vrrp serial-failover interval
configure vrrp serial-failover interval
configure vrrp serial-failover interval <milliseconds>
Description
ConÞgures the heartbeat interval for VRRP serial-cable failover.
Syntax Description
milliseconds
The number of milliseconds in the interval between sending heartbeat messages to other
switch; a number between 100 and 1000, inclusive.
Default
By default, the heartbeat interval is 500 ms.
Usage Guidelines
You must have administrator privileges to issue this command.
The serial-failover mechanism waits for approximately twice the heartbeat interval before it assumes
that the other switch is dead and initiates failover.
You must use the build command to commit the conÞguration changes made by this command.
Example
The following command sets the heartbeat interval to 200 milliseconds.
configure vrrp serial-failover interval 200
History
This command was available in ExtremeWarePx 1.2.
Platform Availability
This command is available on the Px-series application switch.
ExtremeWarePx1 1.2 Command Reference Guide
191
Commands for Configuring Redundancy
disable vrrp
disable vrrp
Description
Disables VRRP on the application switch.
Syntax Description
This command has no parameters or options.
Default
VRRP is disabled by default.
Usage Guidelines
You must have administrator privileges to issue this command.
If VRRP is enabled on two Px-series application switches and you need to disable VRRP on one switch,
you should Þrst make sure that the other switch is either powered down or off the network. Network
issues may arise if you fail to remove the other switch, because both switches will be active on the same
services or gateway-mode IP addresses.
You must use the build command to commit the conÞguration changes made by this command.
Example
The following command disables VRRP.
disable vrrp
History
This command was available in ExtremeWarePx 1.1.
Platform Availability
This command is available on the Px-series application switch.
192
ExtremeWarePx1 1.2 Command Reference Guide
disable vrrp auto-sync
disable vrrp auto-sync
disable vrrp auto-sync
Description
Disables VRRP automatic synchronization on the application switch.
Syntax Description
This command has no parameters or options.
Default
VRRP automatic synchronization is disabled by default.
Usage Guidelines
You must have administrator privileges to issue this command.
You must use the build command to commit the conÞguration changes made by this command.
Example
This command disables VRRP automatic synchronization.
disable vrrp auto-sync
History
This command was available in ExtremeWarePx 1.1.
Platform Availability
This command is available on the Px-series application switch.
ExtremeWarePx1 1.2 Command Reference Guide
193
Commands for Configuring Redundancy
disable vrrp serial-failover
disable vrrp serial-failover
Description
Disables VRRP serial failover on the application switch.
Syntax Description
This command has no parameters or options.
Default
VRRP serial failover is disabled by default.
Usage Guidelines
You must have administrator privileges to issue this command.
You must use the build command to commit the conÞguration changes made by this command.
Example
This command disables VRRP serial failover.
disable vrrp serial-failover
History
This command was available in ExtremeWarePx 1.2.
Platform Availability
This command is available on the Px-series application switch.
194
ExtremeWarePx1 1.2 Command Reference Guide
enable vrrp
enable vrrp
enable vrrp
Description
Enables VRRP on the application switch.
Syntax Description
This command has no parameters or options.
Default
VRRP is disabled by default.
Usage Guidelines
You must have administrator privileges to issue this command.
Before you enable VRRP on a switch, you must ensure that each conÞgured service has been assigned a
VRID number. You can assign a VRID number to a service when you create it (with the configure
service L4 or configure service L7 command). If you did not initially assign VRID number to
services, you can use the configure vrrp change vrid command to assign a particular VRID number
to all services.
If gateway mode must be enabled, you must specify at least one gateway-mode IP address for each
active VRRP class before you enable gateway mode. An active VRRP class is one that contains at least one
service. When you add a gateway-mode IP address with the configure gateway-mode add ipaddress
command, you can specify the VRID of a VRRP class. A given VRRP class can have multiple
gateway-mode IP addresses.
When gateway mode and VRRP are both enabled, you must also make sure every server responds to
VIPs in a single VRRP class. That is, all services that use a particular server must be in the same VRRP
class.
The commands relevant to gateway mode are described in Chapter 4.
You must use the build command to commit the conÞguration changes made by this command.
Example
This command enables VRRP.
enable vrrp
History
This command was available in ExtremeWarePx 1.1.
Platform Availability
This command is available on the Px-series application switch.
ExtremeWarePx1 1.2 Command Reference Guide
195
Commands for Configuring Redundancy
enable vrrp auto-sync
enable vrrp auto-sync
Description
Enables VRRP automatic synchronization on the application switch.
Syntax Description
This command has no parameters or options.
Default
VRRP automatic synchronization is disabled by default.
Usage Guidelines
You must have administrator privileges to issue this command.
If this switch is to be the master switch, you must issue to configure vrrp auto-sync backup to
identify the corresponding backup switch. If this switch is to be the backup switch, you must issue to
configure vrrp auto-sync master to identify the corresponding master switch.
You must use the build command to commit the conÞguration changes made by this command.
Example
This command enables VRRP automatic synchronization.
enable vrrp auto-sync
History
This command was available in ExtremeWarePx 1.1.
Platform Availability
This command is available on the Px-series application switch.
196
ExtremeWarePx1 1.2 Command Reference Guide
enable vrrp serial-failover
enable vrrp serial-failover
enable vrrp serial-failover
Description
Enables VRRP serial failover on the application switch.
Syntax Description
This command has no parameters or options.
Default
VRRP serial failover is disabled by default.
Usage Guidelines
You must have administrator privileges to issue this command.
You must use the build command to commit the conÞguration changes made by this command.
Example
This command enables VRRP serial failover.
enable vrrp serial-failover
History
This command was available in ExtremeWarePx 1.2.
Platform Availability
This command is available on the Px-series application switch.
ExtremeWarePx1 1.2 Command Reference Guide
197
Commands for Configuring Redundancy
unconfigure vrrp auto-sync backup
unconfigure vrrp auto-sync backup partner-ip <IP address>
Description
UnconÞgures the backup switch for automatic synchronization.
Syntax Description
IP address
The system IP address of the current backup switch, as set by the configure vrrp
auto-sync backup command
Default
N/A.
Usage Guidelines
You must have administrator privileges to issue this command.
You issue this command on the master switch for automatic synchronization. You use this command
when you want to change the switch from being master to being backup.
You must use the build command to commit the conÞguration changes made by this command.
Example
The following command unconÞgures the backup switch with IP address 10.2.3.4.
unconfigure vrrp auto-sync backup partner-ip 10.2.3.4
History
This command was available in ExtremeWarePx 1.2.
Platform Availability
This command is available on the Px-series application switch.
198
ExtremeWarePx1 1.2 Command Reference Guide
unconfigure vrrp auto-sync master
unconfigure vrrp auto-sync master
unconfigure vrrp auto-sync master partner-ip <IP address>
Description
UnconÞgures the master switch for automatic synchronization.
Syntax Description
IP address
The system IP address of the current master switch, as set by the configure vrrp
auto-sync master command
Default
N/A.
Usage Guidelines
You must have administrator privileges to issue this command.
You issue this command on the backup switch for automatic synchronization. You use this command
when you want to change the switch from being backup to being master.
You must use the build command to commit the conÞguration changes made by this command.
Example
The following command unconÞgures the master switch with IP address 10.4.3.2.
unconfigure vrrp auto-sync master partner-ip 10.4.3.2
History
This command was available in ExtremeWarePx 1.2.
Platform Availability
This command is available on the Px-series application switch.
ExtremeWarePx1 1.2 Command Reference Guide
199
Commands for Configuring Redundancy
200
ExtremeWarePx1 1.2 Command Reference Guide
6
Health-Check Commands
This chapter describes commands for conÞguring health checks.
Types of Health Checks
The application switch supports the following types of health checks:
¥ ICMP PingÑUses ICMP Òecho requestÓ to ensures that the host is reachable. In general, this does
not provide any information about application health, but provides the simplest check.
¥ TCP Open ÑOpens a connection to a speciÞed TCP/IP port. Optionally, the application switch can
compare the response sent upon open to a preconÞgured string to further ensure that the application
responded correctly.
¥ HTTPÑ Sends an actual HTTP request to the server, typically a GET request. Optionally, the
application switch can compare the returned page to a preconÞgured string to further ensure that the
application responded correctly.
You conÞgure the type of health check for each server group. The same type of health check is
performed on all servers in a given server group. The server itself always performs ping health checks.
If you conÞgure TCP-open or HTTP checks, those checks will be performed as well.
If health checks are enabled, and you do not speciÞcally conÞgured the type of health check for a
particular server group, that group uses ping health checks by default.
Health Check Properties
The application switch maintains values for four properties that control the health-check procedure:
Property
Meaning
Global
Default Value
interval
Time interval between successful configured health checks
30 seconds
retry-interval
Time interval between rechecks after a failed health check
10 seconds
fail-after
Number of consecutive failed health checks after which a server is removed
from service
2
restore-after
Number of consecutive successful health checks after which a server is
returned to service
2
ExtremeWarePx1 1.2 Command Reference Guide
201
Health-Check Commands
You can change the global default values for these properties. In addition, you conÞgure these
properties for each server group. The same property values are used for all servers in a given server
group.
If health checks are enabled, and you do not speciÞcally conÞgure a particular property for a particular
server group, that group uses the propertyÕs global default value.
If you change the global default value for any property, the new global default will be used by any
server group that did not speciÞcally conÞgure that particular.
If the CPU is swamped by too many health checks or other tasks, the interval and retry-interval times may
be stretched. By design, health checks are randomized. The average interval between two consecutive
health checks is interval; however, any individual check is performed using a minor randomized interval
of interval plus or minus 50%. The actual interval between any particular pair of consecutive health
checks may be as short as interval / 2 or as long as interval * 3 / 2.
Health Check Procedure
The health check procedure:
1 As soon as the system comes up or a server is enabled, a health check is performed on the server. If
it passes, the server goes into service immediately; if not, it remains out of service.
2 As long as the server is in service, the health check is repeated every interval seconds. If the server
passes a health check, it remains in service; if it fails, it is removed from service.
3 If the server fails a health check, it is rechecked after retry-interval seconds.
Ñ If a recheck fails, the recheck is repeated after retry-interval seconds. After fail-after
consecutive failures, the server is removed from service.
Ñ If a recheck succeeds, the recheck is repeated after retry-interval seconds. After restore-after
consecutive successes, the server is put into service.
ARP Checks
In addition to the health check described in the preceding sections, an additional check is performed
automatically for servers on the same network as the application switchÕs system IP. In this situation,
the switch sends periodically sends ARP requests to each server in its network. The switch uses
information in the ARP response when it sends trafÞc to servers on the local network
The global property arp-interval controls the frequency with which ARP checks are performed. This
property is initially set to 5 minutes; that is, an ARP signal is send to a server in the same network as
the system IP every 5 minutesÑin addition to any ping, TCP open, or HTTP health check that is
conÞgured for the sever.
You can change the value of the arp-interval property with the configure health-check arp-interval
command.
202
ExtremeWarePx1 1.2 Command Reference Guide
configure health-check arp-interval
configure health-check arp-interval
configure health-check arp-interval <minutes>
Description
Sets the global arp-interval property.
Syntax Description
minutes
The number of minutes between ARP checks for servers in the same network as the
application switch system IP; a number between 1 and 1000, inclusive.
Default
Initially, the value for the arp-interval property is 5 minutes.
Usage Guidelines
You must have administrator privileges to issue this command.
You must use the build command to commit the conÞguration changes made by this command.
Example
The following command changes the arp-interval property to 10 minutes.
configure health-check arp-interval 10
History
This command was available in ExtremeWarePx 1.1.
Platform Availability
This command is available on the Px-series application switch.
ExtremeWarePx1 1.2 Command Reference Guide
203
Health-Check Commands
configure health-check fail-after
configure health-check fail-after <number>
Description
ConÞgures the global default value for the fail-after property.
Syntax Description
number
The global default value for the number of consecutive failed health checks after which a
server is removed from service.
Default
Initially, the global default value for the fail-after property is 2.
Usage Guidelines
You must have administrator privileges to issue this command.
You must use the build command to commit the conÞguration changes made by this command.
Example
The following command changes the global default value for the fail-after property to 3.
configure health-check fail-after 3
History
This command was available in ExtremeWarePx 1.1.
Platform Availability
This command is available on the Px-series application switch.
204
ExtremeWarePx1 1.2 Command Reference Guide
configure health-check interval
configure health-check interval
configure health-check interval <seconds>
Description
ConÞgures the global default value for the interval property.
Syntax Description
seconds
The global default value for the time interval between successful health checks; a number
between 2 and 255, inclusive.
Default
Initially, the global default value for the interval property is 30 seconds.
Usage Guidelines
You must have administrator privileges to issue this command.
You must use the build command to commit the conÞguration changes made by this command.
Example
The following command changes the global default value for the interval property to 45 seconds.
configure health-check interval 45
History
This command was available in ExtremeWarePx 1.1.
Platform Availability
This command is available on the Px-series application switch.
ExtremeWarePx1 1.2 Command Reference Guide
205
Health-Check Commands
configure health-check restore-after
configure health-check restore-after <number>
Description
ConÞgures the global default value for the restore-after property.
Syntax Description
number
The global default value for the number of consecutive successful health checks after
which a server is returned to service
Default
Initially, the global default value for the restore-after property is 2.
Usage Guidelines
You must have administrator privileges to issue this command.
You must use the build command to commit the conÞguration changes made by this command.
Example
The following command changes the global default value for the restore-after property to 3.
configure health-check restore-after 3
History
This command was available in ExtremeWarePx 1.1.
Platform Availability
This command is available on the Px-series application switch.
206
ExtremeWarePx1 1.2 Command Reference Guide
configure health-check retry-interval
configure health-check retry-interval
configure health-check retry-interval <seconds>
Description
ConÞgures the global default value for the retry-interval property.
Syntax Description
seconds
The global default value for the time interval between rechecks after a failed health check.
Default
Initially, the global default value for the retry-interval property is 10 seconds.
Usage Guidelines
You must have administrator privileges to issue this command.
You must use the build command to commit the conÞguration changes made by this command.
Example
The following command changes the global default value for the retry-interval property to 15
seconds.
configure health-check retry-interval 15
History
This command was available in ExtremeWarePx 1.1.
Platform Availability
This command is available on the Px-series application switch.
ExtremeWarePx1 1.2 Command Reference Guide
207
Health-Check Commands
configure server slow-start initial-connections
configure server slow-start initial-connections <number>
Description
Sets the global initial maximum number of connections to a server.
Syntax Description
number
The initial maximum number of connections to a server; a number between 1 and 100,
inclusive.
Default
The initial maximum defaults to 5 connections.
Usage Guidelines
You must have administrator privileges to issue this command.
The number of connections over time for a particular server are calculated from an initial maximum
number of connections, and an interval. When a server is brought up, connections are limited to the
initial maximum number. After the number of seconds conÞgured for the interval, the maximum
number of connections allowed is doubled.
This command sets the global initial maximum. You set the interval with the configure server
slow-start interval command.
You must use the build command to commit the conÞguration changes made by this command.
Example
The following command sets the global initial maximum number of connections to 10.
configure server slow-start initial-connections 10
History
This command was available in ExtremeWarePx 1.1.
Platform Availability
This command is available on the Px-series application switch.
208
ExtremeWarePx1 1.2 Command Reference Guide
configure server slow-start interval
configure server slow-start interval
configure server slow-start interval <seconds>
Description
Sets the global interval used to adjust the limit for server connections.
Syntax Description
seconds
The global interval between server connections.
Default
The interval defaults to 5 seconds.
Usage Guidelines
You must have administrator privileges to issue this command.
The number of connections over time for a particular server are calculated from an initial maximum
number of connections, and an interval. When a server is brought up, connections are limited to the
initial maximum number. After the number of seconds conÞgured for the interval, the maximum
number of connections allowed is doubled.
This command sets the global interval. You can set the initial maximum number of connections with the
configure server slow-start initial-connections command.
You must use the build command to commit the conÞguration changes made by this command.
Example
The following command sets the global interval to 3 seconds.
configure server slow-start interval 3
History
This command was available in ExtremeWarePx 1.1.
Platform Availability
This command is available on the Px-series application switch.
ExtremeWarePx1 1.2 Command Reference Guide
209
Health-Check Commands
configure server-group health-check fail-after
configure server-group name <name string> health-check
fail-after <number>
Description
ConÞgures the fail-after property for the speciÞed server group.
Syntax Description
name string
The name of the server group for which to configure the property.
number
The number of consecutive failed health checks after which a server in the specified group is
removed from service.
Default
If this command is not issued, the global default value for the fail-after property is used.
Usage Guidelines
You must have administrator privileges to issue this command.
You must use the build command to commit the conÞguration changes made by this command.
Example
The following command sets the fail-after property to 3 for the server group named srvgroup1.
configure server-group name "srvgroup1" health-check fail-after 3
History
This command was available in ExtremeWarePx 1.1.
Platform Availability
This command is available on the Px-series application switch.
210
ExtremeWarePx1 1.2 Command Reference Guide
configure server-group health-check http
configure server-group health-check http
configure server-group name <name string> health-check http
{object <object string> {return <return string>}}
Description
ConÞgures HTTP health checks for the speciÞed server group.
Syntax Description
name string
Name of the server group for which to configure the health-check type.
object string
Name of the object to be retrieved.
return string
String to match in the returned page.
Default
If no health-check type is conÞgured for a server group, that group uses ping health checks by default.
Usage Guidelines
You must have administrator privileges to issue this command.
The object parameter speciÞes the name of the object to be retrieved by an HTTP GET request. You
may also use the return parameter to specify a string to match in the returned page. When the health
check is performed on a server:
1 A connection is opened to the port conÞgured for the server. The health check fails if the connection
cannot be opened.
2 If the object parameter was speciÞed, that the health check requests the speciÞed object. The health
check fails if no object is returned.
3 If the return parameter was speciÞed, the health check examines the Þrst 1000 bytes of returned text
to see if it contains the speciÞed return string; the health check passes if the return string is found.
If the return parameter was not speciÞed, the HTTP response codes are checked. Acceptable HTTP
response codes are 200-299 and 401.
If you omit the object parameter, when the health check is performed on a server:
1 A connection is opened to the port conÞgured for the server. The health check fails if the connection
cannot be opened.
2 The health check sends an HTTP ÒheadÓ request (HEAD / HTTP/1.0\r\n\r\n) to the server. The
HTTP response codes are checked. Acceptable HTTP response codes are 200-299 and 401.
All data requests use HTTP 1.0.
You must use the build command to commit the conÞguration changes made by this command.
ExtremeWarePx1 1.2 Command Reference Guide
211
Health-Check Commands
Example
The following command conÞgures the server group named sg1 to use HTTP GET health checks that
request the object index.html:
configure server-group name "sg1" health-check http object index.html
The following command conÞgures the server group named sg1 to use HTTP GET health checks that
request the object index.html and check for the string "Welcome":
configure server-group name "sg1" health-check object index.html return "Welcome"
The following command conÞgures the server group named extr to use HTTP GET health checks that
do a Òhead /Ó on the server:
configure server-group name "extr" health-check http
History
This command was available in ExtremeWarePx 1.1.
Platform Availability
This command is available on the Px-series application switch.
212
ExtremeWarePx1 1.2 Command Reference Guide
configure server-group health-check interval
configure server-group health-check interval
configure server-group name <name string> health-check
interval <seconds>
Description
ConÞgures the interval property for the speciÞed server group.
Syntax Description
name string
The name of the server group for which to configure the property.
seconds
The time interval between successful health checks for servers in the specified group.
Default
If this command is not issued, the global default value for the interval property is used.
Usage Guidelines
You must have administrator privileges to issue this command.
You must use the build command to commit the conÞguration changes made by this command.
Example
The following command sets the interval property to 45 seconds for the server group named
srvgroup1.
configure server-group name "srvgroup1" health-check interval 45
History
This command was available in ExtremeWarePx 1.1.
Platform Availability
This command is available on the Px-series application switch.
ExtremeWarePx1 1.2 Command Reference Guide
213
Health-Check Commands
configure server-group health-check ping
configure server-group name <name string> health-check ping
Description
ConÞgures ping health checks for the speciÞed server group.
Syntax Description
name string
Name of the server group for which to configure the health-check type.
Default
If no health-check type is conÞgured for a server group, that group uses ping health checks by default.
Usage Guidelines
You must have administrator privileges to issue this command.
You must use the build command to commit the conÞguration changes made by this command.
Example
The following command conÞgures the server group named sg1 to use ping health checks.
configure server-group name "sg1" health-check ping
History
This command was available in ExtremeWarePx 1.1.
Platform Availability
This command is available on the Px-series application switch.
214
ExtremeWarePx1 1.2 Command Reference Guide
configure server-group health-check restore-after
configure server-group health-check restore-after
configure server-group name <name string> health-check
restore-after <number>
Description
ConÞgures the restore-after property for the speciÞed server group.
Syntax Description
name string
The name of the server group for which to configure the property.
number
The number of consecutive successful health checks after which a server in the specified
group is returned to service.
Default
If this command is not issued, the global default value for the restore-after property is used.
Usage Guidelines
You must have administrator privileges to issue this command.
You must use the build command to commit the conÞguration changes made by this command.
Example
The following command sets the restore-after property to 3 for the server group named srvgroup1.
configure server-group name "srvgroup1" health-check restore-after 3
History
This command was available in ExtremeWarePx 1.1.
Platform Availability
This command is available on the Px-series application switch.
ExtremeWarePx1 1.2 Command Reference Guide
215
Health-Check Commands
configure server-group health-check retry-interval
configure server-group name <name string> health-check
retry-interval <seconds>
Description
ConÞgures the retry-interval property for the speciÞed server group.
Syntax Description
name string
The name of the server group for which to configure the property.
seconds
The time interval between rechecks after a failed health check for servers in the specified
group.
Default
If this command is not issued, the global default value for the retry-interval property is used.
Usage Guidelines
You must have administrator privileges to issue this command.
You must use the build command to commit the conÞguration changes made by this command.
Example
The following command sets the retry-interval property to 15 seconds for the server group named
srvgroup1.
configure server-group name "srvgroup1" health-check retry-interval 15
History
This command was available in ExtremeWarePx 1.1.
Platform Availability
This command is available on the Px-series application switch.
216
ExtremeWarePx1 1.2 Command Reference Guide
configure server-group health-check tcp-open
configure server-group health-check tcp-open
configure server-group name <name string> health-check tcp-open
return <return string>
Description
ConÞgures TCP open health checks for the speciÞed server group.
Syntax Description
name string
Name of the server group for which to configure the health-check type.
return string
String to be compared to the response.
Default
If no health-check type is conÞgured for a server group, that group uses ping health checks by default.
Usage Guidelines
You must have administrator privileges to issue this command.
When a TCP open health check is performed on a server:
1 A connection is opened to the port conÞgured for the server. The health check fails if the connection
cannot be opened.
2 If the return parameter was speciÞed, the health check compares the response returned by the open
operation to the speciÞed return string. The health check fails if the return string does not match the
response.
You must use the build command to commit the conÞguration changes made by this command.
Example
The following command conÞgures the server group named sg1 to use TCP open health checks:
configure server-group name "sg1" health-check tcp-open
The following command conÞgures the server group named sg1 to use TCP open health checks, that
check for the return string "HELLO":
configure server-group name "sg1" health-check tcp-open return "HELLO"
History
This command was available in ExtremeWarePx 1.1.
Platform Availability
This command is available on the Px-series application switch.
ExtremeWarePx1 1.2 Command Reference Guide
217
Health-Check Commands
disable health-check
disable health-check
Description
Disables the health-check facility.
Syntax Description
This command has no parameters or options.
Default
The health-check facility is enabled by default.
Usage Guidelines
You must have administrator privileges to issue this command.
When health-check facility is disabled, no health checks are performed.
To disable health checks for a particular server group without disabling the entire health-check facility,
issue the disable health-check server-group-name command.
You must use the build command to commit the conÞguration changes made by this command.
Example
The following command disables the health-check facility.
disable health-check
History
This command was available in ExtremeWarePx 1.1.
Platform Availability
This command is available on the Px-series application switch.
218
ExtremeWarePx1 1.2 Command Reference Guide
disable health-check server-group-name
disable health-check server-group-name
disable health-check server-group-name <name string>
Description
Disables health checks for a speciÞed server group.
Syntax Description
name string
The name of the server group for which health checks are to be disabled.
Default
Health checks are enabled for all server groups by default.
Usage Guidelines
You must have administrator privileges to issue this command.
If you want to disable the entire health-check facility, use the disable health-check command.
You must use the build command to commit the conÞguration changes made by this command.
Example
The following command disables health checks for the server group named svrgroup1.
disable health-check server-group-name "srvgroup1"
History
This command was available in ExtremeWarePx 1.1.
Platform Availability
This command is available on the Px-series application switch.
ExtremeWarePx1 1.2 Command Reference Guide
219
Health-Check Commands
disable server
disable server
[(index <index number>) |
(ipaddress <IP address> {port <port number>})]
Description
Disables a server, forcing the server to be down.
Syntax Description
index number
The unique index number of the server to be disabled.
IP address
The IP address of the server(s) to be disabled. The IP address plus the port number uniquely
identify a server.
port number
The port number of the server to be disabled. The port number plus the IP address uniquely
identify a server.
Default
All servers are enabled by default.
Usage Guidelines
You must have administrator privileges to issue this command.
You can identify a server to be disabled either by its index number or by its IP address and port
number. If you specify only the IP address, this command disables all servers with that IP address (and
any port number).
Disabling a server forces it to be down (for example, for maintenance). While the server is disabled, it is
not used by the Px-series application switch. A disabled server is indicated as Òforced downÓ (FDOWN)
in the output from the show health-check command.
You must use the build command to commit the conÞguration changes made by this command.
Example
This example disables all servers with IP address 5.5.5.5:
* station2:16 # disable server ip 5.5.5.5
* station2:17 # show health server-group name sg20000
Healthcheck is currently enabled
default interval 30 sec timeout 5 sec retry interval 10 sec arp interval 5 min
default fail after 2, restore after 2
12600/12823 ping rx/tx
16451/16622 DNS query rx/tx
5 DOWN 94 UP
4 *UP
2 *DOWN
4 FDOWN
flags: E - check Enabled, D - check Disabled, R - mac is resolved
ra - restore after, fa - fail after, left - secs till next check
index
IP
port
proto
state
check
left run ra
fa
ups
5.5.5.5
ICMP
FDOWN
IDLE
24
-1
2
2
0
20000
5.5.5.5
90
ICMP
FDOWN
IDLE
18
0
2
2
0
220
flg
E
E
ExtremeWarePx1 1.2 Command Reference Guide
disable server
20001
20002
5.5.5.5
5.5.5.5
91
92
ICMP
ICMP
FDOWN
FDOWN
IDLE
IDLE
14
15
0
0
2
2
2
2
0
0
E
E
History
This command was available in ExtremeWarePx 1.1.
Platform Availability
This command is available on the Px-series application switch.
ExtremeWarePx1 1.2 Command Reference Guide
221
Health-Check Commands
disable server slow-start
disable server slow-start
Description
Disables server slow start.
Syntax Description
This command has no parameters or options.
Default
Slow start is enabled by default.
Usage Guidelines
You must have administrator privileges to issue this command.
In order not to overload a server that has just come up, server slow start restricts the number of
connections that the server can process. Slow start is performed when health checks bring a server back
online, or when a server is enabled, if health checking is disabled for that server's server group.
You must use the build command to commit the conÞguration changes made by this command.
Example
The following command disables server slow start.
disable server slow-start
History
This command was available in ExtremeWarePx 1.1.
Platform Availability
This command is available on the Px-series application switch.
222
ExtremeWarePx1 1.2 Command Reference Guide
enable health-check
enable health-check
enable health-check
Description
Enables the health-check facility.
Syntax Description
This command has no parameters or options.
Default
The health-check facility is enabled by default.
Usage Guidelines
You must have administrator privileges to issue this command.
When the health-check facility is enabled, health checks are performed on every server group except
those for which health checks have been explicitly disabled by the disable health-check
server-group-name command.
You must use the build command to commit the conÞguration changes made by this command.
Example
The following command enables the health-check facility.
enable health-check
History
This command was available in ExtremeWarePx 1.1.
Platform Availability
This command is available on the Px-series application switch.
ExtremeWarePx1 1.2 Command Reference Guide
223
Health-Check Commands
enable health-check server-group-name
enable health-check server-group-name <name string>
Description
Enables health checks for a speciÞed server group.
Syntax Description
name string
The name of the server group for which health checks are to be enabled.
Default
Health checks are enabled for all server groups by default.
Usage Guidelines
You must have administrator privileges to issue this command.
Health checks are performed only if the health-check facility itself is enabled. This facility is enabled by
default. It can be disabled with the disable health-check command and re-enabled with the enable
health-check command.
You use this command to re-enable health checks for a server group after disabling them with the
disable health-check server-group-name command.
You must use the build command to commit the conÞguration changes made by this command.
Example
The following command enables health checks for the server group named svrgroup1.
enable health-check server-group-name "srvgroup1"
History
This command was available in ExtremeWarePx 1.1.
Platform Availability
This command is available on the Px-series application switch.
224
ExtremeWarePx1 1.2 Command Reference Guide
enable server
enable server
enable server
[(index <index number>) |
(ipaddress <IP address> {port <port number>})]
Description
Re-enables a server that has been disabled.
Syntax Description
index number
The unique index number of the server to be enabled.
IP address
The IP address of the server(s) to be enabled. The IP address plus the port number uniquely
identify a server.
port number
The port number of the server to be enabled. The port number plus the IP address uniquely
identify a server.
Default
All servers are enabled by default.
Usage Guidelines
You must have administrator privileges to issue this command.
You can identify a server to be enabled either by its index number or by its IP address and port number.
If you specify only the IP address, this command enables all disabled servers with that IP address (and
any port number).
Enabling a server brings the server back into normal use by the Px-series application switch.
You must use the build command to commit the conÞguration changes made by this command.
Example
The following command enables the server with index number 1:
enable server index 1
History
This command was available in ExtremeWarePx 1.1.
Platform Availability
This command is available on the Px-series application switch.
ExtremeWarePx1 1.2 Command Reference Guide
225
Health-Check Commands
enable server slow-start
enable server slow-start
Description
Enables server slow start.
Syntax Description
This command has no parameters or options.
Default
Slow start is enabled by default.
Usage Guidelines
You must have administrator privileges to issue this command.
In order not to overload a server that has just come up, server slow start restricts the number of
connections that the server can process. Slow start is performed when health checks bring a server back
online, or when a server is enabled, if health checking is disabled for that server's server group.
You must use the build command to commit the conÞguration changes made by this command.
Example
The following command enables server slow start.
enable server slow-start
History
This command was available in ExtremeWarePx 1.1.
Platform Availability
This command is available on the Px-series application switch.
226
ExtremeWarePx1 1.2 Command Reference Guide
7
Commands for Monitoring the Switch
This chapter describes the following commands:
¥ Commands that show trafÞc statistics
¥ Commands that show conÞguration details
¥ Commands for managing and troubleshooting operation
ExtremeWarePx1 1.2 Command Reference Guide
227
Commands for Monitoring the Switch
pxtop
pxtop {vip <IP address> {port <port number>}}
Description
Displays real-time information about connections to virtual services.
Syntax Description
IP address
VIP for the service(s) of interest
port number
Port number for the service of interest
Default
N/A.
Usage Guidelines
The screen is updated dynamically to display an overview of the current, peak, and total connections to
virtual services.
Parameters to this command allow you to limit the display to information about services that use the
speciÞed IP address or the speciÞed IP address and port.
Example
The following command displays information about connections to all services:
pxtop
This command produces output like the following:
Service
-----------------------------------10.6.2.20:80
tcp
10.6.2.100:8080
tcp
Domain: default
default
Domain: 10.65.12.100
default
*.gif
10.6.2.101:900
tcp
Domain: default
default
C o n n e c t i o n s
Delta
Current
Peak
Total
Total
---------- ---------- ---------- ---------1009
1009
1009
1009
0
0
0
0
0
0
0
1
0
10
0
0
0
0
0
0
History
This command was available in ExtremeWarePx 1.1.
228
ExtremeWarePx1 1.2 Command Reference Guide
pxtop
Platform Availability
This command is available on the Px-series application switch.
ExtremeWarePx1 1.2 Command Reference Guide
229
Commands for Monitoring the Switch
show accounts
show accounts
Description
Displays user account information for all users on the switch.
Syntax Description
This command has no parameters or options.
Default
N/A.
Usage Guidelines
You must have administrator privileges to issue this command.
This command displays the following information in a tabular format:
¥ User NameÑThe name of the user. This list displays all of the users who have access to the switch.
¥ AccessÑThe SNMP community strings. This may be listed as R/W for read/write or RO for read
only.
¥ Login OKÑThe number of logins that are okay.
¥ FailedÑThe number of failed logins.
Example
This example displays user account information on the switch:
SummitPx1:4 # show
User Name
---------------admin
user
jones
sales
smith
accounts
Access
-----R/W
RO
R/W
RO
R/W
LoginOK
------44
0
3
0
0
Failed
-----1
0
0
0
0
Session
-------
History
This command was available in ExtremeWarePx 1.1.
Platform Availability
This command is available on the Px-series application switch.
230
ExtremeWarePx1 1.2 Command Reference Guide
show banner
show banner
show banner
Description
Displays the user-conÞgured banner string.
Syntax Description
This command has no parameters or options.
Default
N/A.
Usage Guidelines
Use this command to view the banner that was set with the configure banner command. This banner is
displayed before the login prompt.
Example
The following command displays the switch banner:
show banner
History
This command was available in ExtremeWarePx 1.1.
Platform Availability
This command is available on the Px-series application switch.
ExtremeWarePx1 1.2 Command Reference Guide
231
Commands for Monitoring the Switch
show build
show build
Description
Displays the conÞguration that will become effective when the build command is issued.
Syntax Description
This command has no parameters or options.
Default
N/A.
Usage Guidelines
You can use this command after making changes to the conÞguration and before issuing the build
command. The output shows the conÞguration as set by commands that change conÞguration that have
not yet been conÞrmed by the build command.
After you issue the build command, the output from the show build command will be identical to the
output from the show configuration command.
Example
This example illustrates the output from the show build command
* SummitPx1:8 # show build
#################################################################
# SummitPx1 Configuration
# Software Version 1.2.0b4 (fpga 606rd)
#################################################################
#---------------------------------------------------------------# vrrp configuration
#---------------------------------------------------------------disable vrrp
config vrrp serial-failover interval 500
disable vrrp serial-failover
disable vrrp auto-sync
#---------------------------------------------------------------# servers
#---------------------------------------------------------------config server default max-connections 10000
config server default weight 1
config server slow-start initial-connections 5
config server slow-start interval 5
disable server slow-start
config server index 1 ip 10.10.13.1 port 80
config server index 2 ip 10.10.13.2 port 80
...
232
ExtremeWarePx1 1.2 Command Reference Guide
show build
History
This command was available in ExtremeWarePx 1.1.
Platform Availability
This command is available on the Px-series application switch.
ExtremeWarePx1 1.2 Command Reference Guide
233
Commands for Monitoring the Switch
show configuration
show configuration [primary | secondary]
Description
Shows the currently active conÞguration, which may be different from the saved conÞgurations.
Syntax Description
primary
Shows the primary configuration saved in flash memory.
secondary
Shows the secondary configuration saved in flash memory.
Default
N/A.
Usage Guidelines
If the output scrolls off the top of the screen, you can use the enable clipaging command to pause the
display when the output Þlls the screen.
Example
This example illustrates the output from the show configuration command:
* SummitPx1:25 # sh config
#################################################################
# SummitPx1 Configuration
# Software Version 1.1.0b8 (FPGA:511 by build 03/21/02 01:09:31)
#################################################################
#---------------------------------------------------------------# servers
#---------------------------------------------------------------config server default max-connections 10000
config server default weight 1
config server slow-start initial-connections 5
config server slow-start interval 5
disable server slow-start
config server index 1 ip 10.6.8.50 port 8080
config server index 2 ip 10.6.8.51 port 8080
config server index 40 ip 10.6.8.52 port 80
config server index 41 ip 10.6.8.53 port 80
#---------------------------------------------------------------# server-groups
#---------------------------------------------------------------config server-group name web1_layer4 policy rr server-last-resort
index 1
config server-group name web1_layer4 add-server index 1 - 2
config server-group name web2_layer7 policy rr server-last-resort
index 40
config server-group name web2_layer7 add-server index 40 - 41
#---------------------------------------------------------------# service-table
#----------------------------------------------------------------
234
ExtremeWarePx1 1.2 Command Reference Guide
show configuration
config service vip 10.6.36.21 port 2000 protocol tcp l4 server-group-name web1_layer4
config
config
config
config
config
service vip 10.6.36.22 port 3000 protocol tcp l7 class http
domain name default
pattern-rule "default" server-group-name web3_layer7
domain name mydomain.com
pattern-rule "default" server-group-name web2_layer7
History
This command was available in ExtremeWarePx 1.1.
Platform Availability
This command is available on the Px-series application switch.
ExtremeWarePx1 1.2 Command Reference Guide
235
Commands for Monitoring the Switch
show connections details
show connections {vip <IP address> {port <port number>}} details
Description
Displays a list of the open connection.
Syntax Description
IP address
VIP for the service of interest
port number
port number for the service of interest
Default
N/A.
Usage Guidelines
Parameters to this command allow you to limit the display to connections to the speciÞed IP address or
the speciÞed IP address and port.
Example
This example displays all open connections.
SummitPx1:35 # sh conn details
Flags: 4 - Layer 4, 7 - Layer 7, T - TCP, U - UDP
Age is in seconds
State: ESTAB - ESTABLISHED, CLSWT - CLOSE_WAIT
Client IP
and Port
-------------10.5.9.16
43935
Virtual IP
and Port
--------------10.6.2.100
8080
Proxy IP
and Port
--------------10.6.2.15
55142
Server IP
and Port
--------------10.6.3.48
80
10.5.9.16
43939
10.6.2.100
8080
10.6.2.15
55143
10.5.9.16
43940
10.6.2.100
8080
10.5.9.16
43936
10.5.9.16
43941
Flags
----7T
Age
--3
State
----CLSWT
10.6.3.49
80
7T
3
CLSWT
10.6.2.15
55144
10.6.3.50
80
7T
3
CLSWT
10.6.2.100
8080
10.6.2.15
55145
10.6.3.51
80
7T
3
CLSWT
10.6.2.100
8080
10.6.2.15
55146
10.6.3.52
80
7T
3
CLSWT
History
This command was available in ExtremeWarePx 1.1.
236
ExtremeWarePx1 1.2 Command Reference Guide
show connections details
Platform Availability
This command is available on the Px-series application switch.
ExtremeWarePx1 1.2 Command Reference Guide
237
Commands for Monitoring the Switch
show connections summary
show connections summary
Description
Displays the current and total number of connections processed by the application switch.
Syntax Description
This command has no parameters or options.
Default
N/A.
Usage Guidelines
None.
Example
This example shows a summary of the connections to the switch
SummitPx1:32 # sh conn summ
Open layer 4 connections
Total layer 4 connections processed
Peak layer 4 connections
:
:
:
0
0
0
Open layer 7 connections
Total layer 7 connections processed
Peak layer 7 connections
:
:
:
2
0
3
Note: Layer 7 counters might be off by 2 or 3 due to self-audit.
History
This command was available in ExtremeWarePx 1.1.
Platform Availability
This command is available on the Px-series application switch.
238
ExtremeWarePx1 1.2 Command Reference Guide
show cookie
show cookie
show cookie
Description
Displays the conÞgured status of cookie processing.
Syntax Description
This command has no parameters or options.
Default
N/A.
Usage Guidelines
None.
Example
The following command shows the status of cookie processing.
show cookie
History
This command was available in ExtremeWarePx 1.1.
Platform Availability
This command is available on the Px-series application switch.
ExtremeWarePx1 1.2 Command Reference Guide
239
Commands for Monitoring the Switch
show critical-resources
show critical-resources
Description
Displays information about the conÞguration of critical resources.
Syntax Description
This command has no parameters or options.
Default
N/A.
Usage Guidelines
In full-NAT mode (full Network Address Translation), the Px-series application switch must have
sufÞcient proxy IP addresses conÞgured to allow millions of connections going through the switch. This
commands shows how many resources are conÞgured, used, and available.
Example
This example shows the conÞguration of critical resources.
station2:6 # show critical-resources
nat-mode full is configured.
Proxy-ips configured
Proxy-ip connection capacity
Proxy-ip connection usage
Layer 4 connection capacity
Layer 4 connection usage
Layer 7 connection capacity
Layer 7 connection usage
:
:
:
:
:
:
:
3
193536
0
64504
0
129016
0
History
This command was available in ExtremeWarePx 1.1.
Platform Availability
This command is available on the Px-series application switch.
240
ExtremeWarePx1 1.2 Command Reference Guide
show default-gateway
show default-gateway
show default-gateway
Description
Displays the default gateway IP address for the Gigabit Ethernet interface.
Syntax Description
This command has no parameters or options.
Default
N/A.
Usage Guidelines
None.
Example
This example shows information about the default gateway.
SummitPx1:36 # sh default-gateway
Default Gateway 1: 10.6.12.1
Default Gateway 2: Not configured.
Active Gateway
: 10.6.12.1 Mac=[00:e0:2b:df:0b:00] Errs=0, Switches=0
History
This command was available in ExtremeWarePx 1.1.
Platform Availability
This command is available on the Px-series application switch.
ExtremeWarePx1 1.2 Command Reference Guide
241
Commands for Monitoring the Switch
show dns-client
show dns-client
Description
Displays the DNS conÞguration.
Syntax Description
This command has no parameters or options.
Default
N/A.
Usage Guidelines
None.
Example
This example displays the DNS conÞguration:
SummitPx1:5 # show dns-client
Default domain: ExtremeNetworks.com
Number of name servers: 1
Name Server 1: 10.0.0.1
History
This command was available in ExtremeWarePx 1.1.
Platform Availability
This command is available on the Px-series application switch.
242
ExtremeWarePx1 1.2 Command Reference Guide
show errors
show errors
show errors
Description
Displays any system-level errors that have been detected.
Syntax Description
This command has no parameters or options.
Default
N/A.
Usage Guidelines
None.
Example
The following command shows system-level errors:
show errors
History
This command was available in ExtremeWarePx 1.1.
Platform Availability
This command is available on the Px-series application switch.
ExtremeWarePx1 1.2 Command Reference Guide
243
Commands for Monitoring the Switch
show gateway-mode
show gateway-mode
Description
Displays information about gateway-mode IP addresses.
Syntax Description
This command has no parameters or options.
Default
N/A.
Usage Guidelines
None.
Example
This example shows information about gateway-mode IP addresses.
station2:69 # show gateway-mode
gateway-mode is currently disabled
Gateway-mode
Vrid
Ip Address
Vlan
-----------------------------0
10.6.2.200
3757
History
This command was available in ExtremeWarePx 1.1.
Platform Availability
This command is available on the Px-series application switch.
244
ExtremeWarePx1 1.2 Command Reference Guide
show gateway-mode configuration
show gateway-mode configuration
show gateway-mode configuration
Description
Displays current gateway-mode conÞguration.
Syntax Description
This command has no parameters or options.
Default
N/A.
Usage Guidelines
None.
Example
This example shows gateway-mode conÞguration.
station2:70 # show gateway-mode configuration
#---------------------------------------------------------------# gateway-mode configuration
#---------------------------------------------------------------disable gateway-mode
config gateway-mode add ipaddress 10.6.12.200
History
This command was available in ExtremeWarePx 1.1.
Platform Availability
This command is available on the Px-series application switch.
ExtremeWarePx1 1.2 Command Reference Guide
245
Commands for Monitoring the Switch
show gslb
show gslb
Description
Shows activity of the GlobalPx Content Director agent.
Syntax Description
This command has no parameters or options.
Default
N/A.
Usage Guidelines
This command shows whether the GlobalPx Content Director agent is enabled. If the agent is enabled,
the command also shows:
¥ The IP address and port on which the agent is listening
¥ The IP address of the last scheduler (if any) to contact the agent and the time at which the contact
occurred
¥ The IP addresses of all schedulers (if any) that have contacted the agent
¥ The current load
For more information about the agent, see the GlobalPx Content Director Installation and User Guide.
Example
This example shows the activities of the GlobalPx Content Director agent after the agent was started
and before any scheduler contacted the agent.
station2:5 # show gslb
gslb-agent is enabled
listening on IP address 10.10.12.10:2103
History
This command was available in ExtremeWarePx 1.1.
Platform Availability
This command is available on the Px-series application switch.
246
ExtremeWarePx1 1.2 Command Reference Guide
show gslb configuration
show gslb configuration
show gslb configuration
Description
Shows the conÞguration of the GlobalPx Content Director agent.
Syntax Description
This command has no parameters or options.
Default
N/A.
Usage Guidelines
The output from this command shows any enable gslb, disable gslb, or configure gslb that are in
effect.
For more information about the agent, see the GlobalPx Content Director Installation and User Guide.
Example
This example shows the conÞguration of the agent.
SummitPx1:6 # show gslb configuration
#---------------------------------------------------------------# gslb configuration
#---------------------------------------------------------------enable gslb
config gslb ip 10.10.45.12 service yosemite.cnd.extremenetworks.com
History
This command was available in ExtremeWarePx 1.1.
Platform Availability
This command is available on the Px-series application switch.
ExtremeWarePx1 1.2 Command Reference Guide
247
Commands for Monitoring the Switch
show health-check
show health-check
{(server [(index <index number>) | (ipaddress <IP address>)]) |
(server-group name <name string>)}
{details}
Description
Shows detailed information about health checks
Syntax Description
index number
The unique index number of a server for which to display health-check information.
IP address
The IP address of a server for which to display health-check information. The IP address
plus the port number uniquely identify a server. If more than one server has the same IP
address, this command show details about them all.
name string
The name of the server group for which to display health-check information.
Default
N/A.
Usage Guidelines
Parameters to this command allow you to see details for speciÞed servers only. You can request details
for:
¥ The server with the speciÞed index.
¥ All servers with the speciÞed IP address (and any port)
¥ All servers in the speciÞed server group.
Example
This example shows health-check information for all servers. (The table with detailed information for
each server is too wide to Þt in a single line of text. Note that the columns labeled arp and lasterr
appear on a separate line, indented.)
SummitPx1:16 # sh hea det
Healthcheck is currently enabled
default interval 30 sec, retry interval 10 sec, arp interval 5 min
default fail after 2, restore after 2
1732/3038 ping rx/tx
1 checks active
4 DOWN
4 UP
2 *UP
3 *DOWN
flags: E - check Enabled, D - check Disabled, R - mac is resolved
ra - restore after, fa - fail after, left - secs till next check
index delta IP
port proto state check int rty left run ra fa fd flg chng ups
arp
lasterr
253
1.1.1.1
ICMP DOWN IDLE
30 10
4 -2 2 2 -1 RE 14747 0
14803
S_errno_ETIMEDOUT
248
ExtremeWarePx1 1.2 Command Reference Guide
show health-check
100
478
101
1738
1380
102
1926
677
1
2158
1742
2
478
173
1.1.1.1 90 ICMP *DOWN
14803
1.1.1.1 91 ICMP *DOWN
14803
10.6.2.1
ICMP DOWN
14803
S_errno_ETIMEDOUT
10.6.2.1 900 ICMP *DOWN
14803
10.6.3.4
ICMP UP
14803
S_errno_ETIMEDOUT
10.6.3.4 80 ICMP *UP
14803
10.6.3.5
ICMP UP
14803
S_errno_ETIMEDOUT
10.6.3.5 80 ICMP *UP
14803
10.6.3.6
ICMP UP
14803
S_errno_ETIMEDOUT
IDLE
30
10
7
0
2
2
-1 RE
14747 0
IDLE
30
10
28
0
2
2
-1 RE
14747 0
PINGING 30
10
22
-2
2
2
-1 E
14747 0
IDLE
30
10
31
0
2
2
-1 E
14747 0
IDLE
30
10
10
2
2
2
-1 RE
2366 3
IDLE
30
10
35
0
2
2
-1 RE
2366 0
IDLE
30
10
28
2
2
2
-1 RE
2322 3
IDLE
30
10
6
0
2
2
-1 RE
2322 0
IDLE
30
10
1
2
2
2
-1 RE
2360 3
This example shows details about the server with index 2.
SummitPx1:17 # sh health-check server index 2 details
Healthcheck is currently enabled
default interval 30 sec, retry interval 10 sec, arp interval 5 min
default fail after 2, restore after 2
1738/3045 ping rx/tx
4 DOWN
4 UP
2 *UP
3 *DOWN
flags: E - check Enabled, D - check Disabled, R - mac is resolved
ra - restore after, fa - fail after, left - secs till next check
index delta IP
port proto state check int rty left run ra fa fd flg chng ups
arp
lasterr
173 10.6.3.5
ICMP UP
IDLE
30 10
2
2 2 2 -1 RE
2349 3
14829
S_errno_ETIMEDOUT
2
1729 10.6.3.5 80 ICMP *UP
IDLE
30 10 28
0 2 2 -1 RE
2349 0
14829
This example shows details about the servers in the server group named sg1.
SummitPx1:19 # sh health-check server-group name "sg1" details
Healthcheck is currently enabled
default interval 30 sec, retry interval 10 sec, arp interval 5 min
default fail after 2, restore after 2
1755/3064 ping rx/tx
1 checks active
4 DOWN
4 UP
2 *UP
3 *DOWN
flags: E - check Enabled, D - check Disabled, R - mac is resolved
ra - restore after, fa - fail after, left - secs till next check
index delta IP
port proto state check int rty left run ra fa fd
arp
lasterr
1260 10.6.3.4
ICMP UP
IDLE
30 10 20
2 2 2 -1
14896
S_errno_ETIMEDOUT
1
1601 10.6.3.4 80 ICMP *UP
IDLE
30 10 26
0 2 2 -1
14896
885 10.6.3.5
ICMP UP
IDLE
30 10 14
2 2 2 -1
14896
S_errno_ETIMEDOUT
2
1421 10.6.3.5 80 ICMP *UP
IDLE
30 10 23
0 2 2 -1
14896
ExtremeWarePx1 1.2 Command Reference Guide
flg chng
ups
RE
2460 3
RE
2460 0
RE
2416 3
RE
2416 0
249
Commands for Monitoring the Switch
show health-check configuration
show health-check configuration
Description
Shows whether health checks are enabled and the current value for global health-check properties.
Syntax Description
This command has no parameters or options.
Default
N/A.
Usage Guidelines
None.
Example
This example shows the health-check conÞguration.
SummitPx1:11 # sh health-check configuration
#---------------------------------------------------------------# global healthcheck configuration
#---------------------------------------------------------------enable health-check
config health-check interval 30
config health-check retry-interval 10
config health-check fail-after 2
config health-check restore-after 2
config health-check arp-interval 5
History
This command was available in ExtremeWarePx 1.1.
Platform Availability
This command is available on the Px-series application switch.
History
This command was available in ExtremeWarePx 1.1.
Platform Availability
This command is available on the Px-series application switch.
250
ExtremeWarePx1 1.2 Command Reference Guide
show health-check down
show health-check down
show health-check down
Description
Shows the servers that failed health check and that are marked down.
Syntax Description
This command has no parameters or options.
Default
N/A.
Usage Guidelines
None.
Example
This example shows which servers are down.
SummitPx1:15 # sh health-check down
Healthcheck is currently enabled
default interval 30 sec, retry interval 10 sec, arp interval 5 min
default fail after 2, restore after 2
1722/3026 ping rx/tx
1 checks active
4 DOWN
4 UP
2 *UP
3 *DOWN
flags: E - check Enabled, D - check Disabled, R - mac is resolved
ra - restore after, fa - fail after, left - secs till next check
index
IP
port proto
state
check
left run ra
fa
1.1.1.1
ICMP
DOWN
IDLE
1
-2
2
2
100
1.1.1.1
90
ICMP
*DOWN
IDLE
23
0
2
2
101
1.1.1.1
91
ICMP
*DOWN
IDLE
33
0
2
2
10.6.2.1
ICMP
DOWN
PINGING 16
-2
2
2
102
10.6.2.1
900 ICMP
*DOWN
IDLE
3
0
2
2
68
10.6.3.6
53
HTTP
DOWN
IDLE
0
1
2
2
69
10.6.3.7
53
HTTP
DOWN
IDLE
0
1
2
2
ups
0
0
0
0
0
0
0
flg
RE
RE
RE
E
E
RE
RE
History
This command was available in ExtremeWarePx 1.1.
Platform Availability
This command is available on the Px-series application switch.
ExtremeWarePx1 1.2 Command Reference Guide
251
Commands for Monitoring the Switch
show health-check summary
show health-check summary
Description
Displays a brief summary showing whether health check is enabled, the values for global health-check
properties, and how many servers and applications (on speciÞc ports) are up and down.
Syntax Description
This command has no parameters or options.
Default
N/A.
Usage Guidelines
None.
Example
This example shows a health-check summary.
SummitPx1:20 # sh hea summ
Healthcheck is currently enabled
default interval 30 sec, retry interval 10 sec, arp interval 5 min
default fail after 2, restore after 2
1762/3073 ping rx/tx
2 checks active
4 DOWN
4 UP
2 *UP
3 *DOWN
History
This command was available in ExtremeWarePx 1.1.
Platform Availability
This command is available on the Px-series application switch.
252
ExtremeWarePx1 1.2 Command Reference Guide
show icmp
show icmp
show icmp
Description
Shows how many ICMP-type packets have been received.
Syntax Description
This command has no parameters or options.
Default
N/A.
Usage Guidelines
None.
Example
This example shows the number of ICMP packets.
station2:8 # show icmp
Total Received ICMP packets:
ICMP Rx: ICMP checksum error count:
ICMP Echo requests matching VIP, PIP and next-hop:
ICMP Echo requests for CPU:
Tx ICMP response count for VIP, PIP and next-hop:
ICMP response transmit err count:
23337
0
4
7
4
0
History
This command was available in ExtremeWarePx 1.1.
Platform Availability
This command is available on the Px-series application switch.
ExtremeWarePx1 1.2 Command Reference Guide
253
Commands for Monitoring the Switch
show iparp
show iparp
{<IP address> | <hostname>}
Description
Displays the IP Address Resolution Protocol (ARP) table.
Syntax Description
IP address
An IP address to use for filtering the display. Only entries with the specified
IP address are displayed.
hostname
A host name to use for filtering the display. Only entries with the specified
host name are displayed.
Default
Show all entries.
Usage Guidelines
Parameter to this command allow you to Þlter the display by IP address or host name.
Displays the IP ARP table, including:
¥ IP address
¥ MAC address
¥ Aging timer value
¥ VLAN name, VLAN ID and port number
¥ Flags
Example
This example displays the entire IP ARP table:
station2:24 # show iparp
Total Received ARP requests:
ARP requests matching VIP, PIP and next-hop:
ARP requests matching CPU IP address:
Tx ARP response count for VIP, PIP and next-hop:
ARP response transmit err count:
491
6
0
6
0
LINK LEVEL ARP TABLE
destination
gateway
flags
Refcnt
Use
Interface
---------------------------------------------------------------------------10.6.2.1
00:01:30:a2:18:0
405
1
0
fei0
10.6.2.150
00:a0:cc:5a:7f:c0
405
0
816
fei0
10.6.12.1
00:e0:2b:df:0b:0
405
1
487
gig0
----------------------------------------------------------------------------
254
ExtremeWarePx1 1.2 Command Reference Guide
show iparp
show iparp
History
This command was available in ExtremeWarePx 1.1.
Platform Availability
This command is available on the Px-series application switch.
ExtremeWarePx1 1.2 Command Reference Guide
255
Commands for Monitoring the Switch
show iproute
show iproute
Description
Displays the contents of the IP routing table.
Syntax Description
This command has no parameters or options.
Default
N/A.
Usage Guidelines
None.
Example
This example displays detailed information about all IP routing:
station2:157 # sh iproute
ROUTE NET TABLE
destination
gateway
flags
Refcnt
Use
Interface
---------------------------------------------------------------------------0.0.0.0
10.6.12.1
3
3
617782
gig0
10.6.2.0
10.6.2.12
101
0
0
fei0
10.6.12.0
10.6.12.10
101
0
0
gig0
---------------------------------------------------------------------------ROUTE HOST TABLE
destination
gateway
flags
Refcnt
Use
Interface
---------------------------------------------------------------------------10.255.129.4
10.6.2.1
7
0
0
fei0
127.0.0.1
127.0.0.1
5
1
0
lo0
----------------------------------------------------------------------------
History
This command was available in ExtremeWarePx 1.1.
Platform Availability
This command is available on the Px-series application switch.
256
ExtremeWarePx1 1.2 Command Reference Guide
show log
show log
show log {fatal | errors | warning | info}
Description
Displays the current snapshot of the switchÕs internal log.
Syntax Description
fatal
Display fatal messages only.
errors
Display messages at the error level and higher (non-fatal and fatal error
messages)
warning
Display messages at the warning level and higher (warnings, non-fatal error
messages, and fatal error messages)
info
Display messages at the informational level and higher (non-fatal error
messages, and fatal error messages)
Default
N/A.
Usage Guidelines
The switch maintains 200 message in its internal log. You use the show log command to display the
these messages. The option speciÞes the severity level of the messages to be displayed. If no option is
speciÞed, all messages in the internal log are shown.
Example
The following command displays error messages from the log:
show log errors
History
This command was available in ExtremeWarePx 1.1.
Platform Availability
This command is available on the Px-series application switch.
ExtremeWarePx1 1.2 Command Reference Guide
257
Commands for Monitoring the Switch
show log configuration
show log configuration
Description
Shows the conÞguration for the logging facility.
Syntax Description
This command has no parameters or options.
Default
N/A.
Usage Guidelines
None.
Example
The following command displays logging conÞguration:
SummitPx1:10 # show log configuration
config log display warning
enable syslog
config syslog ip 10.10.10.1
History
This command was available in ExtremeWarePx 1.1.
Platform Availability
This command is available on the Px-series application switch.
258
ExtremeWarePx1 1.2 Command Reference Guide
show nat-mode configuration
show nat-mode configuration
show nat-mode configuration
Description
Displays the currently conÞgured NAT mode.
Syntax Description
This command has no parameters or options.
Default
N/A.
Usage Guidelines
None.
Example
The following command shows the NAT mode.
show nat-mode configuration
History
This command was available in ExtremeWarePx 1.1.
Platform Availability
This command is available on the Px-series application switch.
ExtremeWarePx1 1.2 Command Reference Guide
259
Commands for Monitoring the Switch
show port
show port [gigabit | mgmt]
Description
Displays summary information about the speciÞed port.
Syntax Description
gigabit
Specifies the Gigabit Ethernet network interface port.
mgmt
Specifies the front panel 10/100 management port.
Default
N/A.
Usage Guidelines
None.
Example
This example shows summary information for the Gigabit port.
SummitPx1:39 # sh port gig
Port Summary, port 0:
Port State:
enabled
Link is UP
Auto negotiation is done
GPCS mode -- Full duplex mode
Auto negotiation is enabled
Full duplex enabled
Packets Received (RX) : total packets received
705327 Unicast, 11 Broadcast, 6751 Multicast, 0 Errors
Packets Transmitted (TX) : total packets transmitted
818772 Unicast, 4539 Broadcast, 0 Multicast, 0 Errors
This example shows summary information for the management port.
SummitPx1:43 # sh port mgmt
Management Port Summary:
Link is UP
Auto negotiation is done
Operating in 100 Base-T Full duplex mode
Auto negotiation is enabled
History
This command was available in ExtremeWarePx 1.1.
260
ExtremeWarePx1 1.2 Command Reference Guide
show port
Platform Availability
This command is available on the Px-series application switch.
ExtremeWarePx1 1.2 Command Reference Guide
261
Commands for Monitoring the Switch
show port configuration
show port [gigabit | mgmt] configuration
Description
Displays the conÞguration of the speciÞed port.
Syntax Description
gigabit
Specifies the Gigabit Ethernet network interface port.
mgmt
Specifies the front panel 10/100 management port.
Default
N/A.
Usage Guidelines
None.
Example
This example shows the conÞguration of the Gigabit port.
SummitPx1:40 # sh port gig conf
config system-ip 10.6.2.10 / 24
This example shows the conÞguration for of the management port.
SummitPx1:45 # sh port mgmt configuration
config mgmt ipaddress 10.6.2.12 / 24
config mgmt iproute dest-ip 10.10.10.4 gateway 10.6.2.1
History
This command was available in ExtremeWarePx 1.1.
Platform Availability
This command is available on the Px-series application switch.
262
ExtremeWarePx1 1.2 Command Reference Guide
show port details
show port details
show port [gigabit | mgmt] details
Description
Displays packet-level counters and current status of the speciÞed port.
Syntax Description
gigabit
Specifies the Gigabit Ethernet network interface port.
mgmt
Specifies the front panel 10/100 management port.
Default
N/A.
Usage Guidelines
None.
Example
This example shows details about the Gigabit port.
SummitPx1:41 # sh port gig det
Port Details, port 0:
Port State:
enabled
Link error counter: 0
Link is UP
Auto negotiation is done
GPCS mode -- Full duplex mode
Auto negotiation is enabled
Full duplex enabled
Linkpartner is 1000 base-T full duplex capable
Linkpartner is NOT 1000 base-T half duplex capable
TX
TX
TX
TX
Unicast:
Broadcast:
Multicast:
Errors:
818772
4539
0
0
RX
RX
RX
RX
Unicast:
Broadcast:
Multicast:
Errors:
705328
11
6754
0
RX
RX
RX
RX
Short:
Short/CRC:
Long:
Long/CRC:
0
0
0
0
ExtremeWarePx1 1.2 Command Reference Guide
263
Commands for Monitoring the Switch
This example shows details about the management port.
SummitPx1:46 # sh port mgmt details
Management Port Details:
Link is UP
Auto negotiation is done
Operating in 100 Base-T Full duplex mode
Auto negotiation is enabled
Link error counter: 0
Link partner is 100 base-T full duplex capable
Link partner is 100 base-T half duplex capable
Link partner is 10 base-T full duplex capable
Link partner is 10 base-T half duplex capable
Tx good frames:
12948
Tx MAXCOL errors:‘
0
Tx LATECOL errors:
0
Tx underrun errors:
0
Tx lost CRS errors:
0
Tx deferred:
0
Tx single collisions:
0
Tx multiple collisions:
0
Tx total collisions:
0
Rx good frames:
12288
Rx CRC errors:
0
Rx allignment errors:
0
Rx resource errors:
0
Rx overrun errors:
0
Rx collision detect errors:
0
Rx short frame errors:
0
History
This command was available in ExtremeWarePx 1.1.
Platform Availability
This command is available on the Px-series application switch.
264
ExtremeWarePx1 1.2 Command Reference Guide
show port gigabit utilization
show port gigabit utilization
show port gigabit utilization
Description
Displays real-time port utilization information for the Gigabit Ethernet network interface port.
Syntax Description
This command has no parameters or options.
Default
N/A.
Usage Guidelines
The screen is updated dynamically to display packets received and bandwidth. Use the [Spacebar] to
toggle between packet, byte, and bandwidth utilization information.
This status information may be useful for your technical support representative if you have a network
problem.
Example
The following command displays utilization statistics for the Gigabit port.
show port gigabit utilization
History
This command was available in ExtremeWarePx 1.1.
Platform Availability
This command is available on the Px-series application switch.
ExtremeWarePx1 1.2 Command Reference Guide
265
Commands for Monitoring the Switch
show proxy-ip configuration
show proxy-ip configuration
Description
Displays the currently conÞgured proxy IP addresses.
Syntax Description
This command has no parameters or options.
Default
N/A.
Usage Guidelines
None.
Example
The following command shows the proxy IP addresses.
show proxy-ip configuration
History
This command was available in ExtremeWarePx 1.1.
Platform Availability
This command is available on the Px-series application switch.
266
ExtremeWarePx1 1.2 Command Reference Guide
show self-audit
show self-audit
show self-audit
Description
Shows whether internal self-audit is enabled.
Syntax Description
This command has no parameters or options.
Default
N/A.
Usage Guidelines
Internal self-audit is the internal hardware-check mechanism.
Example
This example e shows whether internal self-audit is enabled.
station2:68 # show self-audit
Self Audit state: Enabled.
Self Audit success/failure counts: 4391/0
Self Audit state transition counts:
State transition
count
-----------------------------Client Send SYN
4392
Client Wait SYN/ACK
4392
Client Send ACK
4392
Client Send GET
4392
Client Wait GET/ACK
4392
Server Wait SYN
4392
Server Send SYN/ACK
4391
Server Wait ACK
4391
Server Wait GET
4391
Client Send RST
4391
Server Send RST
4391
History
This command was available in ExtremeWarePx 1.1.
Platform Availability
This command is available on the Px-series application switch.
ExtremeWarePx1 1.2 Command Reference Guide
267
Commands for Monitoring the Switch
show server configuration
show server
[(index <index number> {- <index number>}) |
(ipaddress <IP address> {- <IP address>} port <port number>)]
configuration
Description
Displays server conÞguration.
Syntax Description
index number
The unique index number of a server to be displayed.
IP address
The IP address of a server to be displayed. The IP address plus the port number uniquely
identify a server.
port number
The port number of the servers to be displayed. The port number plus the IP address
uniquely identify a server.
Default
N/A.
Usage Guidelines
Parameter to this command allow you to see conÞgurations for speciÞed servers only.
You can identify a server either by its index number or by its IP address and port number. This
command allows you to specify a number of servers with consecutive index numbers or a number of
servers with consecutive IP addresses, all of which use the same port.
Example
This example displays the conÞguration for the service with index number 3.
SummitPx1:47 # show server index 3 conf
config server index 3 ip 10.6.3.196 port 80
History
This command was available in ExtremeWarePx 1.1.
Platform Availability
This command is available on the Px-series application switch.
268
ExtremeWarePx1 1.2 Command Reference Guide
show server details
show server details
show server
[(index <index number> {- <index number>}) |
(ipaddress <IP address> {- <IP address>})] details
Description
Displays details about servers including the current and maximum number of connections and status
(up or down).
Syntax Description
index number
The unique index number of a server to be displayed.
IP address
The IP address of a server to be displayed. The IP address plus the port number uniquely
identify a server. If more than one server has the same IP address, this command show
details about them all.
Default
N/A.
Usage Guidelines
Parameters to this command allow you to see details for speciÞed servers only.
You can identify a server either by its index number or by its IP address. This command allows you to
specify a number of servers with consecutive index numbers or a number of servers with consecutive IP
addresses.
When you identify servers by IP address, you see details about all servers that use that IP address (and
any port).
Example
This example shows details about all servers.
SummitPx1:3 # sh server details
flags: E - check Enabled, D - down, U - Up, R - mac is resolved,
N - mac is not resolved, F - forced down
run - '>' than or '<' than 0, number of consecutive passed or failed respectively
ra - restore after, fa - fail after, left - secs till next check
index
IP
port proto
flg curr-conns max-connections run ra
12
1
2
3
4
10.6.2.150
10.6.2.150
10.6.3.194
10.6.3.194
10.6.3.195
10.6.3.195
10.6.3.196
10.6.3.196
10.6.3.197
10.6.3.197
ExtremeWarePx1 1.2 Command Reference Guide
80
80
80
80
80
ICMP
HTTP
ICMP
HTTP
ICMP
HTTP
ICMP
HTTP
ICMP
HTTP
URE
URE
URE
URE
URE
URE
URE
URE
URE
URE
5
10000
5
10000
5
10000
5
10000
5
10000
2
2
2
2
2
2
2
2
2
2
2
2
2
2
2
2
2
2
2
2
fa
2
2
2
2
2
2
2
2
2
2
269
Commands for Monitoring the Switch
5
6
7
8
10.6.3.198
10.6.3.198
10.6.3.199
10.6.3.199
10.6.3.200
10.6.3.200
10.6.3.201
10.6.3.201
80
80
80
80
ICMP
HTTP
ICMP
HTTP
ICMP
HTTP
ICMP
HTTP
URE
URE
URE
URE
URE
URE
URE
URE
5
10000
5
10000
5
10000
5
10000
2
2
2
2
2
2
2
2
2
2
2
2
2
2
2
2
2
2
2
2
2
2
2
2
This example shows details about the server with index number 3.
SummitPx1:5 # sh server index 3 det
flags: E - check Enabled, D - down, U - Up, R - mac is resolved,
N - mac is not resolved, F - forced down
run - '>' than or '<' than 0, number of consecutive passed or failed respectively
ra - restore after, fa - fail after, left - secs till next check
index
IP
port proto
flg curr-conns max-connections run ra
3
10.6.3.196
80
HTTP
URE
5
10000
2
2
fa
2
History
This command was available in ExtremeWarePx 1.1.
Platform Availability
This command is available on the Px-series application switch.
270
ExtremeWarePx1 1.2 Command Reference Guide
show server down
show server down
show server down
Description
Shows which servers are failing health check
Syntax Description
This command has no parameters or options.
Default
N/A.
Usage Guidelines
None.
Example
This example shows which servers are down.
SummitPx1:20 # show server down
Healthcheck is currently enabled
default interval 30 sec, retry interval 10 sec, arp interval 5 min
default fail after 2, restore after 2
2165/2180 ping rx/tx
1 DOWN 124 UP
flags: E - check Enabled, D - check Disabled, R - mac is resolved
ra - restore after, fa - fail after, left - secs till next check
index
IP
port
proto
state
check
left
run
1.1.1.1
none
DOWN
IDLE
16
1
ra
2
fa
2
ups
0
flg
RE
History
This command was available in ExtremeWarePx 1.1.
Platform Availability
This command is available on the Px-series application switch.
ExtremeWarePx1 1.2 Command Reference Guide
271
Commands for Monitoring the Switch
show server summary
show server summary
Description
Shows the number of conÞgured servers, how many are up, and how many are down.
Syntax Description
This command has no parameters or options.
Default
N/A.
Usage Guidelines
None.
Example
This example shows the status of servers.
SummitPx1:22 # sh server summ
Number of configured servers: 64,
1 DOWN
63 UP
History
This command was available in ExtremeWarePx 1.1.
Platform Availability
This command is available on the Px-series application switch.
272
ExtremeWarePx1 1.2 Command Reference Guide
show server-group
show server-group
show server-group
Description
Displays detailed information about all server groups, listing their servers, the current and maximum
connections for each, and up/down status.
Syntax Description
This command has no parameters or options.
Default
N/A.
Usage Guidelines
To see details about a single server group, use the show server-group details command.
Example
This example shows details about all servers.
SummitPx1:25
server-group
flags: E N index
12
1
2
# show server-group
sg1:
check Enabled, D - down, U - Up, R - mac is resolved,
mac is not resolved, F - forced down
IP
port proto
flg curr-conns max-connections
10.6.2.150
10.6.2.150
10.6.3.194
10.6.3.194
10.6.3.195
10.6.3.195
10.6.3.196
80
80
80
ICMP
HTTP
ICMP
HTTP
ICMP
HTTP
ICMP
URE
URE
URE
URE
URE
URE
URE
0
10000
0
10000
0
10000
server-group sg2:
flags: E - check Enabled, D - down, U - Up, R - mac is resolved,
N - mac is not resolved, F - forced down
index
IP
port proto
flg curr-conns max-connections
20
10.6.1.205
10.6.1.205
10.6.1.206
80
ICMP
HTTP
ICMP
URE
URE
URE
0
10000
History
This command was available in ExtremeWarePx 1.1.
ExtremeWarePx1 1.2 Command Reference Guide
273
Commands for Monitoring the Switch
Platform Availability
This command is available on the Px-series application switch.
274
ExtremeWarePx1 1.2 Command Reference Guide
show server-group configuration
show server-group configuration
show server-group {name <name string>} configuration
Description
Displays conÞguration for server groups.
Syntax Description
name string
The name of the server group for which configuration should be displayed.
Default
N/A.
Usage Guidelines
The parameter to this command allows you to display conÞguration for a single server group.
Example
This example displays the conÞguration for the server group named sg1.
SummitPx1:25 # sh server-group name sg1 conf
config server-group name sg1 policy rr
config server-group name sg1 add-server index 1 - 12
config server-group name sg1 add-server index 20 - 69
config server-group name sg1 health-check http
History
This command was available in ExtremeWarePx 1.1.
Platform Availability
This command is available on the Px-series application switch.
ExtremeWarePx1 1.2 Command Reference Guide
275
Commands for Monitoring the Switch
show server-group details
show server-group name <name string> details
Description
Displays detailed information about a server groups, listing its servers, current and maximum
connections, and up/down status.
Syntax Description
name string
The name of the server group for which details should be displayed.
Default
N/A.
Usage Guidelines
To see details about all servers, use the show server-group command.
Example
This examples shows details for the server group named sg1.
SummitPx1:27 # sh server-group name sg1 det
flags: E - check Enabled, D - down, U - Up, R - mac is resolved,
N - mac is not resolved, F - forced down
run - '>' than or '<' than 0, number of consecutive passed or failed respectively
ra - restore after, fa - fail after, left - secs till next check
index
IP
port proto
flg curr-conns max-connections run ra
12
1
2
3
4
5
6
7
10.6.2.150
10.6.2.150
10.6.3.194
10.6.3.194
10.6.3.195
10.6.3.195
10.6.3.196
10.6.3.196
10.6.3.197
10.6.3.197
10.6.3.198
10.6.3.198
10.6.3.199
10.6.3.199
10.6.3.200
10.6.3.200
80
80
80
80
80
80
80
80
ICMP
HTTP
ICMP
HTTP
ICMP
HTTP
ICMP
HTTP
ICMP
HTTP
ICMP
HTTP
ICMP
HTTP
ICMP
HTTP
URE
URE
URE
URE
URE
URE
URE
URE
URE
URE
URE
URE
URE
URE
URE
URE
4
10000
5
10000
5
10000
5
10000
5
10000
5
10000
5
10000
5
10000
2
2
2
2
2
2
2
2
2
2
2
2
2
2
2
2
2
2
2
2
2
2
2
2
2
2
2
2
2
2
2
2
fa
2
2
2
2
2
2
2
2
2
2
2
2
2
2
2
2
History
This command was available in ExtremeWarePx 1.1.
276
ExtremeWarePx1 1.2 Command Reference Guide
show server-group details
Platform Availability
This command is available on the Px-series application switch.
ExtremeWarePx1 1.2 Command Reference Guide
277
Commands for Monitoring the Switch
show server-group summary
show server-group summary
Description
Displays the total number of server groups.
Syntax Description
This command has no parameters or options.
Default
N/A.
Usage Guidelines
None.
Example
This examples shows a summary of the server groups.
SummitPx1:29 # sh server-group summ
Total number of server groups: 3
History
This command was available in ExtremeWarePx 1.1.
Platform Availability
This command is available on the Px-series application switch.
278
ExtremeWarePx1 1.2 Command Reference Guide
show service configuration
show service configuration
show service
{vip <IP address> {port <port> {protocol [tcp | udp]}}} configuration
Description
Displays conÞguration for services.
Syntax Description
IP address
VIP for the service of interest
port number
Port number for the service of interest
tcp
Specifies the TCP protocol.
udp
Specifies the UDP protocol.
Default
N/A.
Usage Guidelines
Parameters to this command allow you to limit the display to conÞguration for services that use the
speciÞed IP address, the speciÞed IP address and port, or the speciÞed IP address, port, and protocol.
Example
The following command shows the conÞguration for all services.
show service configuration
The following command shows the conÞguration for those services that use the IP address 10.6.2.20.
show service vip 10.6.2.20 configuration
History
This command was available in ExtremeWarePx 1.1.
Platform Availability
This command is available on the Px-series application switch.
ExtremeWarePx1 1.2 Command Reference Guide
279
Commands for Monitoring the Switch
show service details
show service {vip <IP address> {port <port number>}} details
Description
Displays detailed information about virtual service and their server groups and servers.
Syntax Description
IP address
VIP for the service of interest
port number
Port number for the service of interest
Default
N/A.
Usage Guidelines
This command can give dramatic insight into the distribution of trafÞc across a virtual service.
Parameters to this command allow you to limit the display to details about services that use the
speciÞed IP address or the speciÞed IP address and port.
This command displays the statistics for virtual services and their server groups. For a layer 4 service,
the command shows the server group. For a layer 7 service, the command shows the server group for
each domain and pattern rule.
Information about a server group includes its policy, server of last resort, and current, total, and peak
connections.
If you specify a single service, this command also includes information about the servers.
Example
This examples shows details about all services (one layer 4 service and two layer 7 services).
SummitPx1:45 # sh service details
Service 10.6.2.20 port 80 tcp service layer4
Current connection:
303
Total connections:
2171
Peak concurrent:
311
server-group sg1 policy rr
server of last resort not specified
Service 10.6.2.100 port 8080 tcp service http layer7
Domain: default
Pattern-rule: default
Current connection:
0
Total connections:
0
Peak concurrent:
0
server-group sg2 policy wlc
server of last resort not specified
280
ExtremeWarePx1 1.2 Command Reference Guide
show service details
Domain: 10.6.2.100
Pattern-rule: default
Current connection:
0
Total connections:
0
Peak concurrent:
0
server-group sg2 policy wlc
server of last resort not specified
Pattern-rule: *.gif
Current connection:
50
Total connections:
359
Peak concurrent:
309
server-group sg2 policy wlc
server of last resort not specified
Service 10.6.2.101 port 900 tcp service http layer7
Domain: default
Pattern-rule: default
Current connection:
0
Total connections:
0
Peak concurrent:
0
server-group sg2 policy wlc
server of last resort not specified
This example shows details about a single service.
SummitPx1:47 # sh service vip 10.6.2.100 port 8080 det
Service 10.6.2.100 port 8080 tcp service http layer7
Domain: default
Pattern-rule: default
Current connection:
0
Total connections:
0
Peak concurrent:
0
server-group sg2 policy wlc
server of last resort not specified
flags: E - check Enabled, D - down, U - Up, R - mac is resolved,
N - mac is not resolved, F - forced down
run - '>' than or '<' than 0, number of consecutive passed or failed respectively
ra - restore after, fa - fail after, left - secs till next check
index
IP
port proto
flg curr-conns max-connections run ra
20
21
22
23
24
10.6.3.205
10.6.3.205
10.6.3.206
10.6.3.206
10.6.3.207
10.6.3.207
10.6.3.208
10.6.3.208
10.6.3.209
10.6.3.209
ExtremeWarePx1 1.2 Command Reference Guide
80
80
80
80
80
ICMP
HTTP
ICMP
HTTP
ICMP
HTTP
ICMP
HTTP
ICMP
HTTP
URE
URE
URE
URE
URE
URE
URE
URE
URE
URE
5
10000
5
10000
5
10000
5
10000
5
10000
2
2
2
2
2
2
2
2
2
2
2
2
2
2
2
2
2
2
2
2
fa
2
2
2
2
2
2
2
2
2
2
281
Commands for Monitoring the Switch
History
This command was available in ExtremeWarePx 1.1.
Platform Availability
This command is available on the Px-series application switch.
282
ExtremeWarePx1 1.2 Command Reference Guide
show service summary
show service summary
show service summary
Description
Displays the number of conÞgured layer 4 and layer 7 services.
Syntax Description
This command has no parameters or options.
Default
N/A.
Usage Guidelines
None.
Example
This example shows a summary of the services.
SummitPx1:48 # sh servi summ
Total number of L4 services = 1.
Total number of L7 services = 2.
History
This command was available in ExtremeWarePx 1.1.
Platform Availability
This command is available on the Px-series application switch.
ExtremeWarePx1 1.2 Command Reference Guide
283
Commands for Monitoring the Switch
show session
show session
Description
Show which console, Telnet, and ssh sessions are active.
Syntax Description
This command has no parameters or options.
Default
N/A.
Usage Guidelines
You can issue the clear session command to force a session to be closed.
Example
This example displays the active sessions.
* station2:9 # show session
# Time since Login
User
Type
Auth
Location
================================================================================
*
0 00:05:01 0 days 0 yrs
admin
console
local
serial
6 00:00:05 0 days 0 yrs
admin
telnet
local
10.10.10.16
History
This command was available in ExtremeWarePx 1.1.
Platform Availability
This command is available on the Px-series application switch.
284
ExtremeWarePx1 1.2 Command Reference Guide
show snmp configuration
show snmp configuration
show snmp configuration
Description
Displays the current SNMP conÞguration.
Syntax Description
This command has no parameters or options.
Default
N/A.
Usage Guidelines
None.
Example
This example shows the current SNMP conÞguration:
station2:125 # sh snmp configuration
#---------------------------------------------------------------# SNMP configuration
#---------------------------------------------------------------config snmp sysName "station2"
config snmp add trapreceiver 10.255.172.106 community "public" port 162
enable snmp access
enable snmp traps
History
This command was available in ExtremeWarePx 1.1.
Platform Availability
This command is available on the Px-series application switch.
ExtremeWarePx1 1.2 Command Reference Guide
285
Commands for Monitoring the Switch
show sticky configuration
show sticky configuration
Description
Displays which persistence (stickiness) modes have been conÞgured, and the conÞgured timer values.
Syntax Description
This command has no parameters or options.
Default
N/A.
Usage Guidelines
None.
Example
This example shows the conÞgured stickiness modes.
SummitPx1:5 # show sticky configuration
#---------------------------------------------------------------# stickiness configuration
#---------------------------------------------------------------disable sticky L4 client-ip
disable sticky L7 client-ip
disable sticky L7 cookie-id
disable sticky L7 session-id
config sticky client-ip timeout 24:00:00
config sticky cookie-id timeout 00:00:30
config sticky session-id timeout 00:00:30
History
This command was available in ExtremeWarePx 1.1.
Platform Availability
This command is available on the Px-series application switch.
286
ExtremeWarePx1 1.2 Command Reference Guide
show sticky table
show sticky table
show sticky table
{L4 | (L7 {client-ip}) | (client-ip {<IP address>})}
Description
Shows entries in the persistence (stickiness) table.
Syntax Description
L4
Specifies layer 4 services.
L7
Specifies layer 7 services.
client-ip
Specifies client-IP persistence.
IP address
A particular client IP address.
Default
N/A.
Usage Guidelines
Parameters to this command allow you to limit the display to particular table entries:
Parameters
Displays Table Entries
(none)
All entries
L4
L4 entries
L7
L7 entries
L7 client-ip
L7 entries for client-IP persistence
client-ip
Entries for client-IP persistence (both L4 and L7)
client-ip <IP address>
Entries for client-IP persistence that match the specified IP address
NOTE
This command usually takes 30 to 60 seconds to complete. To interrupt this command, either any of the
keys [q], [Return], or [Esc].
ExtremeWarePx1 1.2 Command Reference Guide
287
Commands for Monitoring the Switch
Example
This example shows the entire persistence table.
SummitPx1:5 # show sticky table
L4 Client-IP stickiness enabled
L7 Client-IP stickiness disabled
L7 Cookie-ID stickiness disabled
L7 Session-ID stickiness disabled
Note:
Values for cookie (CKE) and session (SSL) entries will not be displayed.
Count
Type:Value
Layer:VIP:VPORT
Server IP:PORT
Open Conn
-------------------------------------------------------------------------------1
CIP:3.1.1.101
L4:3.2.20.11:80
3.4.20.11:80
1
History
This command was available in ExtremeWarePx 1.1.
Platform Availability
This command is available on the Px-series application switch.
288
ExtremeWarePx1 1.2 Command Reference Guide
show switch
show switch
show switch
Description
Displays the current version of software loaded in primary and secondary ßash, which image and
conÞguration are currently selected, and other useful information.
Syntax Description
This command has no parameters or options.
Default
N/A.
Usage Guidelines
None.
Example
This example displays information about the switch.
station2:5 # sh switch
sysName:
sysType:
sysLocation:
sysContact:
system IP:
system netmask:
active default gateway:
backup default gateway:
mgmt IP:
mgmt netmask:
system MAC (CPU-1000 MAC):
mgmt MAC (10/100 MAC):
SLB MAC (SLB-1000 MAC):
Uptime:
Software version:
Software image selected:
Software image booted:
Primary Software version:
Secondary Software version:
Configuration selected:
Configuration booted:
Fan status:
Self Audit status:
station2
px1
not yet configured
[email protected], +1 800 998-2408
10.10.12.10
255.255.255.0
10.10.12.1
not yet configured
10.10.2.12
255.255.255.0
00:01:30:f0:40:00
00:01:30:f0:40:02
00:01:30:f0:40:01
0 days 02Hr 42Min 47sec
1.2.3b4
primary
primary
1.2.3b4
fpga 606rd
1.1.1b63
FPGA: 564 by build 9/24/02 14:33:02
primary
primary
all fans are operational
enabled.
History
This command was available in ExtremeWarePx 1.1.
ExtremeWarePx1 1.2 Command Reference Guide
289
Commands for Monitoring the Switch
Platform Availability
This command is available on the Px-series application switch.
290
ExtremeWarePx1 1.2 Command Reference Guide
show system configuration
show system configuration
show system configuration
Description
Shows the current system conÞguration.
Syntax Description
This command has no parameters or options.
Default
N/A.
Usage Guidelines
None.
Example
This example shows the system conÞguration.
SummitPx1:25 # sh system conf
config system-ip 64.1.1.10 / 24
config default-gateway 64.1.1.1
disable vlan
config mgmt ipaddress 10.10.10.10 / 24
enable syslog
config syslog ip 10.10.10.20
config nat-mode full
enable clipaging
disable port gigabit
History
This command was available in ExtremeWarePx 1.1.
Platform Availability
This command is available on the Px-series application switch.
ExtremeWarePx1 1.2 Command Reference Guide
291
Commands for Monitoring the Switch
show system-ip configuration
show system-ip configuration
Description
Displays the IP address of the Gigabit Ethernet interface, along with its net mask.
Syntax Description
This command has no parameters or options.
Default
N/A.
Usage Guidelines
None.
Example
The following command shows the IP address of the Gigabit Ethernet interface.
show system-ip configuration
History
This command was available in ExtremeWarePx 1.1.
Platform Availability
This command is available on the Px-series application switch.
292
ExtremeWarePx1 1.2 Command Reference Guide
show tech-support
show tech-support
show tech-support
Description
Displays the output of various show commands to assist in monitoring and troubleshooting the switch.
Syntax Description
This command has no parameters or options.
Default
N/A.
Usage Guidelines
This command prints conÞguration and internal state registers on the console. This information can be
useful for your technical support representative if you experience a problem.
While this command is executing, command-line interface paging is disabled.
Example
The following command displays the show command output on the switch:
show tech-support
History
This command was available in ExtremeWarePx 1.2.
Platform Availability
This command is available on the Px-series application switch.
ExtremeWarePx1 1.2 Command Reference Guide
293
Commands for Monitoring the Switch
show timeout configuration
show timeout configuration
Description
Displays the TCP/IP timer settings.
Syntax Description
This command has no parameters or options.
Default
N/A.
Usage Guidelines
None.
Example
This example shows the timer settings
SummitPx1:36 # show timeout conf
#---------------------------------------------------------------# timeout timers configuration
#---------------------------------------------------------------config timeout established-connection 90
config timeout idle-connection 90
config timeout data-retransmit first 3
config timeout data-retransmit second 6
config timeout data-retransmit third 12
config timeout data-retransmit abort 12
config timeout syn-retransmit first 3
config timeout syn-retransmit second 5
config timeout syn-retransmit third 12
config timeout syn-retransmit abort 12
config timeout state-progression first 30
config timeout state-progression second 2
config timeout fin-seen 30
config timeout fin-acked 30
config timeout server-reset-delay 2
config timeout udp-flow-persistence 90
History
This command was available in ExtremeWarePx 1.1.
Platform Availability
This command is available on the Px-series application switch.
294
ExtremeWarePx1 1.2 Command Reference Guide
show version
show version
show version
Description
Shows version and serial numbers of the Px-series application switch components and the
ExtremeWarePx software version.
Syntax Description
This command has no parameters or options.
Default
N/A.
Usage Guidelines
None.
Example
The following command shows versions and serial numbers.
show version
History
This command was available in ExtremeWarePx 1.1.
Platform Availability
This command is available on the Px-series application switch.
ExtremeWarePx1 1.2 Command Reference Guide
295
Commands for Monitoring the Switch
show vlan configuration
show vlan configuration
Description
Displays whether VLAN support is enabled or not.
Syntax Description
This command has no parameters or options.
Default
N/A.
Usage Guidelines
None.
Example
The following command shows the VLAN conÞguration.
show vlan configuration
History
This command was available in ExtremeWarePx 1.1.
Platform Availability
This command is available on the Px-series application switch.
296
ExtremeWarePx1 1.2 Command Reference Guide
show vrrp auto-sync
show vrrp auto-sync
show vrrp auto-sync
Description
Shows the conÞguration of VRRP automatic synchronization.
Syntax Description
This command has no parameters or options.
Default
N/A.
Usage Guidelines
None.
Example
This example shows the conÞguration of VRRP automatic synchronization of the backup switch:
SummitPx1:1 # show vrrp auto-sync
Auto-sync configuration info in the configurator:
Auto-sync:
Master Partner IP:
Backup Partner IP:
-----------------MD5 (local config):
MD5 (Master config):
Enabled by VRRP
10.5.6.3 Connected
Not Configured N/A
ca3877d4-26f59373-e5cb599e-d5632fd5
ea621a6a-dd45e2a9-698f857c-2f73b62f
MD5 (Backup config):
History
This command was available in ExtremeWarePx 1.1.
Platform Availability
This command is available on the Px-series application switch.
ExtremeWarePx1 1.2 Command Reference Guide
297
Commands for Monitoring the Switch
show vrrp configuration
show vrrp {vrid [<VRID number> | all]} configuration
Description
Shows the current VRRP conÞguration.
Syntax Description
VRID number
The VRID of the VRRP class for which to show configuration; a number between 1 and 255.
all
Specifies all VRRP classes.
Default
N/A.
Usage Guidelines
The vrid parameter to this command allows you to limit the display to the conÞguration of the
speciÞed VRRP class.
Example
This example shows the complete VRRP conÞguration.
SummitPx1:11 # show vrrp config
#---------------------------------------------------------------# vrrp configuration
#---------------------------------------------------------------enable vrrp
config vrrp serial-failover interval 500
disable vrrp serial-failover
config vrrp auto-sync master partner-ip 10.5.6.3
enable vrrp auto-sync
config
config
config
config
vrrp
vrrp
vrrp
vrrp
add vrid
vrid 100
vrid 100
vrid 100
100
priority 100
dont-preempt
advertisement-interval 1
This example shows the VRRP conÞguration for VRRP class 100:
SummitPx1:12 # show vrrp vrid 100 config
config vrrp add vrid 100
config vrrp vrid 100 priority 100
config vrrp vrid 100 dont-preempt
config vrrp vrid 100 advertisement-interval 1
#-----------------------------------# Tracking configuration for vrid 100
#-----------------------------------config vrrp vrid 102 add track-vrid 100
config vrrp vrid 103 add track-vrid 100
298
ExtremeWarePx1 1.2 Command Reference Guide
show vrrp configuration
config
config
config
config
config
config
config
config
config
config
config
vrrp
vrrp
vrrp
vrrp
vrrp
vrrp
vrrp
vrrp
vrrp
vrrp
vrrp
vrid
vrid
vrid
vrid
vrid
vrid
vrid
vrid
vrid
vrid
vrid
104
106
107
108
109
110
111
112
113
114
115
add
add
add
add
add
add
add
add
add
add
add
track-vrid
track-vrid
track-vrid
track-vrid
track-vrid
track-vrid
track-vrid
track-vrid
track-vrid
track-vrid
track-vrid
100
100
100
100
100
100
100
100
100
100
100
History
This command was available in ExtremeWarePx 1.2.
Platform Availability
This command is available on the Px-series application switch.
ExtremeWarePx1 1.2 Command Reference Guide
299
Commands for Monitoring the Switch
show vrrp details
show vrrp {vrid [<VRID number> | all]} details
Description
Displays detailed status information for VRRP.
Syntax Description
VRID number
The VRID of the VRRP class for which to show details; a number between 1 and 255.
all
Specifies all VRRP classes.
Default
N/A.
Usage Guidelines
The vrid parameter to this command allows you to limit the display to the details about the speciÞed
VRRP class.
Example
This example shows the full VRRP details.
station1:11 # show vrrp details
VRRP
ENABLED
VRID
100
Priority
100
State
BACKUP
MAC Address
00:00:5e:00:01:64
Preempt
Mode
DISABLED
Advertisement
Interval
1 second
VRRP
ENABLED
VRID
101
Priority
100
State
BACKUP
MAC Address
00:00:5e:00:01:65
Preempt
Mode
DISABLED
Advertisement
Interval
1 second
Valid Advertisements Received:
8310
Serial Heartbeats Transmitted:
Serial Heartbeats Received:
0
0
VRRP Stats
Checksum errors:
Advertisements Received with Unknown vrid:
Advertisement interval errors:
IP TTL errors:
300
0
0
0
0
ExtremeWarePx1 1.2 Command Reference Guide
show vrrp details
This example shows details for VRRP class 100:
station2:40 # show vrrp vrid 100 config
VRRP
ENABLED
VRID
100
Priority
100
State
MASTER
MAC Address
00:00:5e:00:01:64
Valid Advertisements Received:
0
Serial Heartbeats Transmitted:
Serial Heartbeats Received:
0
0
VRRP Stats
Checksum errors:
Advertisements Received with Unknown vrid:
Advertisement interval errors:
IP TTL errors:
Preempt
Mode
DISABLED
Advertisement
Interval
1 second
0
0
0
0
History
This command was available in ExtremeWarePx 1.2.
Platform Availability
This command is available on the Px-series application switch.
ExtremeWarePx1 1.2 Command Reference Guide
301
Commands for Monitoring the Switch
show vrrp gateway-mode details
show vrrp {vrid [<VRID number> | all]} gateway-mode details
Description
Shows details about the gateway-mode IP addresses in VRRP classes.
Syntax Description
VRID number
The VRID of the VRRP class for which to show gateway-mode details; a number between 1
and 255.
all
Specifies all VRRP classes.
Default
N/A.
Usage Guidelines
The vrid parameter to this command allows you to limit the display to the details about the
gateway-mode IP addresses in a speciÞed VRRP class.
Example
This example shows details about the gateway-mode IP addresses in all VRRP classes.
station1:11 # show vrrp gateway-mode details
Gateway-mode
Vrid
Ip Address
Vlan
---------------------------100
10.6.6.3
3757
Gateway-mode
Vrid
Ip Address
Vlan
---------------------------101
10.6.6.4
3757
This example shows details about the gateway-mode IP addresses in VRRP class 100.
station1:12 # show vrrp vrid 100 gateway-mode details
Gateway-mode
Vrid
Ip Address
Vlan
---------------------------100
10.6.6.3
3757
History
This command was available in ExtremeWarePx 1.2.
302
ExtremeWarePx1 1.2 Command Reference Guide
show vrrp gateway-mode details
Platform Availability
This command is available on the Px-series application switch.
ExtremeWarePx1 1.2 Command Reference Guide
303
Commands for Monitoring the Switch
show vrrp serial-failover
show vrrp serial-failover
Description
Displays information about VRRP automatic synchronization.
Syntax Description
This command has no parameters or options.
Default
N/A.
Usage Guidelines
None.
Example
This example displays information about serial failover.
SummitPx1:11 # show vrrp serial-failover
Serial cable failover: Disabled
Serial heartbeat interval: 500 milliseconds
History
This command was available in ExtremeWarePx 1.2.
Platform Availability
This command is available on the Px-series application switch.
304
ExtremeWarePx1 1.2 Command Reference Guide
show vrrp server details
show vrrp server details
show vrrp {vrid [<VRID number> | all]} server details
Description
Shows details about servers in the VRRP classes.
Syntax Description
VRID number
The VRID of the VRRP class for which to show server details; a number between 1 and 255.
all
Specifies all VRRP classes.
Default
N/A.
Usage Guidelines
The vrid parameter to this command allows you to limit the display to the details about the servers in
the speciÞed VRRP class.
Example
This example shows details about the servers in all VRRP classes.
SummitPx1:11 # show vrrp server details
Total
Total
Up
Vrid
Servers
Servers
-------------------------112
2
2
113
2
2
114
1
1
115
1
1
Server
Server
Server
Vrid
Index
Ip address
Port
State
-----------------------------------------------112
12
10.6.3.206
80
UP
112
14
10.6.3.208
80
UP
Server
Server
Server
Vrid
Index
Ip address
Port
State
-----------------------------------------------113
1
10.6.3.195
80
UP
113
13
10.6.3.207
80
UP
Server
Server
Server
Vrid
Index
Ip address
Port
State
-----------------------------------------------114
2
10.6.3.196
80
UP
ExtremeWarePx1 1.2 Command Reference Guide
305
Commands for Monitoring the Switch
Server
Server
Server
Vrid
Index
Ip address
Port
State
-----------------------------------------------115
1
10.6.3.195
80
UP
This example shows details about the servers in VRRP class 100.
SummitPx1:11 # show vrrp vrid 100 server details
Total
Total
Up
Vrid
Servers
Servers
-------------------------100
2
2
Server
Server
Server
Vrid
Index
Ip address
Port
State
-----------------------------------------------100
2
10.6.3.196
80
UP
100
4
10.6.3.198
80
UP
History
This command was available in ExtremeWarePx 1.2.
Platform Availability
This command is available on the Px-series application switch.
306
ExtremeWarePx1 1.2 Command Reference Guide
show vrrp service details
show vrrp service details
show vrrp {vrid [<VRID number> | all]} service details
Description
Shows details about services in the VRRP classes.
Syntax Description
VRID number
The VRID of the VRRP class for which to show service details; a number between 1 and
255.
all
Specifies all VRRP classes.
Default
N/A.
Usage Guidelines
The vrid parameter to this command allows you to limit the display to the details about the services in
the speciÞed VRRP class.
Example
This example shows details about the services in all VRRP classes.
SummitPx1:11 # show vrrp service details
VRRP
ENABLED
VRID
100
Priority
100
State
MASTER
MAC Address
00:00:5e:00:01:64
Preempt
Mode
DISABLED
Advertisement
Interval
1 second
config service vip 10.5.6.81 vrid 100 port 80 protocol tcp l4 server-group-name sg2
config service vip 10.5.6.97 vrid 100 port 80 protocol tcp l4 server-group-name sg4
VRRP
ENABLED
VRID
101
Priority
100
State
MASTER
MAC Address
00:00:5e:00:01:65
Preempt
Advertisement
Mode
Interval
DISABLED1 second
config service vip 10.5.6.66 vrid 101 port 80 protocol tcp l4 server-group-name sg1
config service vip 10.5.6.82 vrid 101 port 80 protocol tcp l4 server-group-name sg3
config service vip 10.5.6.98 vrid 101 port 80 protocol tcp l4 server-group-name sg5
ExtremeWarePx1 1.2 Command Reference Guide
307
Commands for Monitoring the Switch
VRRP
ENABLED
VRID
102
Priority
100
State
MASTER
MAC Address
00:00:5e:00:01:66
Preempt
Mode
DISABLED
Advertisement
Interval
1 second
config service vip 10.5.6.67 vrid 102 port 80 protocol tcp l4 server-group-name sg2
config service vip 10.5.6.83 vrid 102 port 80 protocol tcp l4 server-group-name sg4
This example shows details about the services in VRRP class 100.
SummitPx1:11 # show vrrp vrid 100 service details
VRRP
ENABLED
VRID
100
Priority
100
State
MASTER
MAC Address
00:00:5e:00:01:64
Preempt
Mode
DISABLED
Advertisement
Interval
1 second
config service vip 10.5.6.81 vrid 100 port 80 protocol tcp l4 server-group-name sg2
config service vip 10.5.6.97 vrid 100 port 80 protocol tcp l4 server-group-name sg4
History
This command was available in ExtremeWarePx 1.2.
Platform Availability
This command is available on the Px-series application switch.
308
ExtremeWarePx1 1.2 Command Reference Guide
uptime
uptime
uptime
Description
Shows the amount of time the switch has been up
Syntax Description
This command has no parameters or options.
Default
N/A.
Usage Guidelines
This command displays the amount of time that has elapsed since system was last rebooted or powered
on.
Example
This example shows how long the system has been up.
* station2:5 # uptime
Uptime: 0 days 02Hr 41Min 05sec
History
This command was available in ExtremeWarePx 1.1.
Platform Availability
This command is available on the Px-series application switch.
ExtremeWarePx1 1.2 Command Reference Guide
309
Commands for Monitoring the Switch
310
ExtremeWarePx1 1.2 Command Reference Guide
Index of Commands
B
build
18
C
clear log
clear session
clear stats
cls
configure account
configure banner
configure default-gateway
configure default-gateway delete
configure default-gateway switch
configure dns-client add
configure dns-client default-domain
configure dns-client delete
configure domain
configure domain default
configure gateway-mode add ipaddress
configure gateway-mode delete ipaddress
configure gslb
configure health-check arp-interval
configure health-check fail-after
configure health-check interval
configure health-check restore-after
configure health-check retry-interval
configure iparp delete
configure log display
configure mgmt ipaddress
configure mgmt iproute
configure nat-mode full
configure nat-mode server-only
configure pattern-rule
configure pattern-rule default
configure pattern-rule default cookie-name
configure port gigabit auto
configure proxy-ip
configure server
configure server default
ExtremeWarePx1 1.2 Command Reference Guide
20
21
22
23
24
26
169
170
171
27
28
29
111
113
146
148
30
203
204
205
206
207
32
33
34
35
149
151
115
117
119
37
153
122
125
configure server slow-start initial-connections
configure server slow-start interval
configure server-group
configure server-group add-server
configure server-group delete-server
configure server-group health-check fail-after
configure server-group health-check http
configure server-group health-check interval
configure server-group health-check ping
configure server-group health-check restore-after
configure server-group health-check retry-interval
configure server-group health-check tcp-open
configure service L4
configure service L7
configure snmp add community
configure snmp add trapreceiver
configure snmp delete community
configure snmp delete trapreceiver
configure snmp syscontact
configure snmp syslocation
configure snmp sysname
configure ssh2 key
configure ssh2 key pregenerated
configure sticky client-ip timeout
configure sticky cookie-id timeout
configure sticky session-id timeout
configure syslog
configure system-ip
configure timeout established-connection
configure timeout udp-flow-persistence
configure vrrp add master vrid
configure vrrp add track-servers-delta
configure vrrp add track-vrid
configure vrrp add vrid
configure vrrp advertisement-interval
configure vrrp auto-sync backup
configure vrrp auto-sync forcesync
configure vrrp auto-sync master
configure vrrp change vrid
208
209
127
130
132
210
211
213
214
215
216
217
134
137
38
40
41
42
43
44
45
46
48
155
156
157
50
51
158
159
172
173
175
177
178
179
180
181
182
311
configure vrrp delete track-servers-delta
configure vrrp delete track-vrid
configure vrrp delete vrid
configure vrrp force-slave
configure vrrp preempt|dont-preempt
configure vrrp priority
configure vrrp serial-failover interval
create account
184
185
187
188
189
190
191
53
enable vrrp serial-failover
exit
55
56
160
57
218
219
58
59
60
220
222
61
62
63
161
64
65
66
192
193
194
67
69
N
D
delete account
disable clipaging
disable gateway-mode
disable gslb
disable health-check
disable health-check server-group-name
disable log display
disable port gigabit
disable self-audit
disable server
disable server slow-start
disable snmp access
disable snmp traps
disable ssh2
disable sticky
disable syslog
disable telnet
disable vlan
disable vrrp
disable vrrp auto-sync
disable vrrp serial-failover
download configuration
download image
E
enable clipaging
enable gateway-mode
enable gslb
enable health-check
enable health-check server-group-name
enable log display
enable port gigabit
enable self-audit
enable server
enable server slow-start
enable snmp access
enable snmp traps
enable ssh2
enable sticky
enable syslog
enable telnet
enable vlan
enable vrrp
enable vrrp auto-sync
312 - Index of Commands
71
162
72
223
224
73
74
75
225
226
76
77
78
163
80
81
82
195
196
197
83
H
history
84
L
load configuration
logout
85
86
nslookup
87
P
ping
pxtop
88
228
Q
quit
90
R
reboot
91
S
save configuration
scp2
show accounts
show banner
show build
show configuration
show connections details
show connections summary
show cookie
show critical-resources
show default-gateway
show dns-client
show errors
show gateway-mode
show gateway-mode configuration
show gslb
show gslb configuration
show health-check
show health-check configuration
show health-check down
show health-check summary
show icmp
show iparp
show iproute
show log
show log configuration
show nat-mode configuration
show port
show port configuration
92
94
230
231
232
234
236
238
239
240
241
242
243
244
245
246
247
248
250
251
252
253
254
256
257
258
259
260
262
ExtremeWarePx1 1.2 Command Reference Guide
show port details
show port gigabit utilization
show proxy-ip configuration
show self-audit
show server configuration
show server details
show server down
show server summary
show server-group
show server-group configuration
show server-group details
show server-group summary
show service configuration
show service details
show service summary
show session
show snmp configuration
show sticky configuration
show sticky table
show switch
show system configuration
show system-ip configuration
show tech-support
show timeout configuration
show version
show vlan configuration
show vrrp auto-sync
show vrrp configuration
show vrrp details
show vrrp gateway-mode details
show vrrp serial-failover
show vrrp server details
show vrrp service details
ssh2
263
265
266
267
268
269
271
272
273
275
276
278
279
280
283
284
285
286
287
289
291
292
293
294
295
296
297
298
300
302
304
305
307
96
use image
107
T
telnet
traceroute
98
100
U
unconfigure domain
unconfigure gslb
unconfigure mgmt iproute
unconfigure pattern-rule
unconfigure proxy-ip
unconfigure server
unconfigure server-group
unconfigure service
unconfigure switch
unconfigure vrrp auto-sync backup
unconfigure vrrp auto-sync master
upload configuration
uptime
use configuration
ExtremeWarePx1 1.2 Command Reference Guide
140
101
102
141
164
142
143
144
103
198
199
104
309
106
Index of Commands - 313
314 - Index of Commands
ExtremeWarePx1 1.2 Command Reference Guide