1
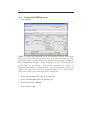
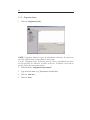
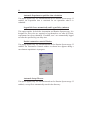
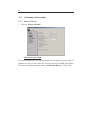
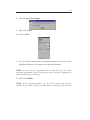
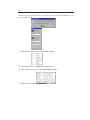
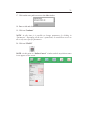
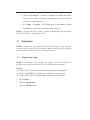
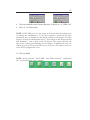
How to set up
ICON-NMR 3.7
TOPSPIN 1.2
2
This manual was written by:
Peter Ziegler
Applications Engineer
Bruker BioSpin Corporation
15 Fortune Drive, Manning Park
Billerica, MA 01821
Phone: (978) 667-9580
Fax: (978) 667-2955
E-mail: [email protected]
Please send comments or suggestions to the author.
Copyright Bruker Instruments Inc.
December 2, 2003
P/N B3182
3
1.
SOFTWARE AND HARDWARE CONFIGURATION . 6
1.1.
Summary of commands ................................................................. 6
1.1.1.
Configuration: ................................................................................................. 6
1.2.
Loading TopSpin ........................................................................... 6
1.3.
Hardware configuration ................................................................ 6
1.4.
Expinstall...................................................................................... 11
1.5.
Compile all au-programs ............................................................. 14
2.
HOW TO SET UP THE PROSOL PARAMETERS......15
2.1.
Summary of commands. .............................................................. 15
2.1.1. Configuration:............................................................................. 15
2.2.
Selection of current probehead.................................................... 15
2.2.1.
2.2.2.
2.2.3.
Current probe equipped with pics ...................................................................15
Current probe not equipped with pics and with probe parameters ...................16
Current probe not equipped with pics and without probe parameters...............16
2.3.
Prosol and TUNE file set up ........................................................ 18
2.4.
Lock file set up ............................................................................. 22
3.
SET UP OF ICON-NMR..................................................26
3.1.
3.1.2.
3.1.3.
3.1.4.
User Manager.............................................................................. 27
Additional Users.............................................................................................38
Originator Items.............................................................................................40
Composite Experiments..................................................................................41
4
3.1.5.
3.2.
Automation window....................................................................................... 42
Automation driver engine ............................................................46
3.2.1.
3.2.2.
3.2.3.
3.2.4.
3.2.5.
3.2.6.
3.2.7.
3.2.8.
Master Switches............................................................................................. 46
Shimming...................................................................................................... 50
Automatic Tune / Matching ........................................................................... 55
Priority .......................................................................................................... 56
Temperature Handling ................................................................................... 57
LC-NMR Options .......................................................................................... 62
Sample Track options .................................................................................... 62
Barcode Printer Routines ............................................................................... 63
3.3.
General options ............................................................................64
3.4.
ICON-NMR Accounting ..............................................................67
4.
ROUTINE SPECTROSCOPY.........................................67
5.
AUTOMATION................................................................73
5.1.
Experiment setup..........................................................................73
5.1.1.
5.1.2.
5.1.3.
5.1.4.
5.1.5.
5.1.6.
5.2.
Sample run....................................................................................83
5.2.1.
5.2.2.
5.2.3.
6.
6.1.
Set up of one single experiment...................................................................... 74
Set up of two single experiments .................................................................... 76
Set up of a composite experiment ................................................................... 77
Set up of two composite experiments.............................................................. 79
Set up of two or more holders with different solvents and experiments ........... 80
Set up of two or more holders with the same solvents and experiments........... 81
Manual Inject/Eject........................................................................................ 83
Sixpack use and NMR case ............................................................................ 86
Standard BACS ............................................................................................. 89
ADDING NEW EXPERIMENTS ....................................................................... 91
Adding a new single experiment ..................................................91
5
6.1.1.
6.1.2.
6.1.3.
6.1.4.
Layout of the new experiment.........................................................................91
Creating the parameter file .............................................................................92
Testing the experiment ...................................................................................92
Adding the new experiment to ICON-NMR....................................................94
6.2.
Adding a new composite experiment........................................... 96
6.2.1. Layout of the new composite experiment .............................................. 97
6.2.2. Creating the new composite experiment ............................................... 97
6.2.3. Adding the new composite experiment to the user experiment list .............. 99
6
1.
1.1.
Software and Hardware configuration
Summary of commands
1.1.1. Configuration:
• 'cf'
spectrometer configuration
1.2.
Loading TopSpin
To load the TopSpin, follow the instructions in the TopSpin installation
manual.
1.3.
Hardware configuration
1. Load in any dataset
2. Type cf
3. Enter the NMR administration password and answer the following
questions:
NOTE: The answers below are an example and are suitable for an AVANCE
DPX300
7
4. Select Configuration for ‘spect’ by clicking on it
5. Click on ‘Edit’
8
6. Click on ‘NEXT>’
7. Enter the RS232 ports for the external devices as shown in the picture
above.
NOTE: Use the default connection listed on the label on the inside of the
console. If a BACS 60 or 120 is used, select the proper RS232 port
(normally tty08) and be sure the power of the BACS is on. The sample
changer will configure the correct number of sample holders. If a SIXPACK,
CASE, MAS or HRMAS sample changer is used, set the BACS port to an
unused port number (for example tty20. After a few seconds a message will
appear that there is no communication to the sample changer and a default
of 60 sample holders is been used. Just click on the ‘OK’ button to continue
with cf. The number of sample holders for different sample changers can be
set in the ICONNMR configuration ( see 4.5.3 Default Number of Sample
Holders).
9
8. Click on ‘NEXT>’
NOTE: If the Powercheck and Cortab have been performed on the system,
enable the peak power check (POWCHK). If the powerckeck has not been
performed do not use this option.
9. Click on ‘NEXT>’
10
10. Click on ‘SAVE’
11. Click on ‘NEXT>’
NOTE: The edsp window should show the connections from the Amplifiers to
the Preamplifiers only. If there are incorrect connections, click on ‘CLEAR
PREAMPLIFIER CONNECTIONS’ and replace with the correct connections.
12. Click on ‘SAVE’
NOTE: The configuration information is displayed on the screen.
13. Click on ‘Print’
11
NOTE: Store the print out of the configuration information with the
installation data.
14. Click on ‘NEXT>’
15. Click on ‘FINISH>’
1.4.
Expinstall
1. Type expinstall
2. Enter the NMR administration password
12
3. Click on ‘NEXT>
4. Select ‘Installation for Spectrometer’
5. Click on ‘NEXT>’
6. Select the system type you need, in this example ‘High Resolution
System’
7. Click on ‘NEXT>’
13
8. Click on ‘NEXT>’
9. Select all items
10. Click on ‘‘NEXT>’
11. Select Default printer and plotter
12. Select Paper format
13. Click on ‘NEXT>’
14. Select ‘DQD’
15. Click on ‘NEXT>’
14
16. Click on ‘Finish’
NOTE: expinstall starts now. This process will take approx. 5 Minutes.
1.5.
Compile all au-programs
1. Type cplbruk all
NOTE: the compiling of all Bruker AU-programs starts now. This process
will take approx. 15 Minutes.
15
2.
How to set up the Prosol Parameters.
2.1.
Summary of commands.
2.1.1. Configuration:
2.2.
•
edhead
set up the probehead table
•
edlock
edit 2HLock file
•
lock
start the lock procedure
•
edprosol setup probehead parameters for all solvents
Selection of current probehead
2.2.1. Current probe equipped with pics
1. Type edhead
NOTE: The new probe is been automatically added to the probehead list.
16
2. Click on ‘Exit’
2.2.2. Current probe not equipped with pics and with probe
parameters
1. Type edhead
2. Select current probehead by clicking on it
3. Click on ‘Define as current probe’
4. Click on ‘Seen’ in the message window
5. Click on Exit'
2.2.3. Current probe not equipped with pics and without probe
parameters
1. Type edhead
2. Select current probehead by clicking on it
3. Click on ‘Define as current probe’
17
4. Click on ‘Yes’
NOTE: On all new probeheads, most parameters are stored in a chip and are
downloaded through the Pics connection. For older probeheads, fill in the
information.
5. Click on ‘Apply’
6. Click on ‘OK’
18
2.3. Prosol and TUNE file set up
1. Type edprosol
NOTE: To follow the instruction below, the transmitter 90 deg. Pulse length
and power levels of the observe nuclei have to be known and entered in the
appropriate fields. If ATP was used to calibrate the probe, those parameters
were automatically entered. If the transmitter 90 deg. Pulse length and
power levels are not known, then use the instructions in Chapter 3,
Optimizing Parameters, to measure them. It is a good practice to use this
chapter to measure the exact pulse length and power levels. Choose only
those nuclei which can be observed on the current probe.
2. Select logical channel ‘F1 + F2’ by clicking on it
3. Select ‘Standard hard pulses’ by clicking on it
4. Select Probe name: ‘current’
5. Select solvents: ‘all’
19
6. Select nucleus: ‘1H’, change and Calculate the following parameters:
Standard parameters for 1H on channel F1 routed to amplifierA2
Tocsy spin lock
Roesy spin lock
cw irradiation
pulse length
35
power level
click on ‘calc’
pulselength
170
Power level
click on ‘calc’
field [Hz]
50
power level
click on ‘calc’
Standard parameters for 1H on channel F2 routed to amplifierA2
90 decoupler
transmitter
pulse length
same as 90 deg.
power level
same as transmitter
pulse length
100
power level
click on ‘calc’
bilev (second cpd)
power level
same as cpd
Tocsy spin lock
pulse length
35
power level
click on ‘calc’
pulselength
170
Power level
click on ‘calc’
field [Hz]
5
power level
click on ‘calc’
field [Hz]
5
Power level
click on ‘calc’
field [Hz]
40
Power level
click on ‘calc’
cpd
Roesy spin lock
cw irradiation
NOE diff. Irradiation
Homo decoupling
20
7. Click on ‘Save’
8. Select nucleus: ‘13C’, change and Calculate the following parameters:
Standard parameters for 13C on channel F2 routed to amplifierA2
90 deg. decoupler
transmitter
cpd
pulse length
same as 90 deg.
power level
same as transmitter
pulse length
63
power level
click on ‘calc’
9. Click on ‘Save’
10. Select nucleus: ‘15N’, change and Calculate the following parameters:
Standard parameters for 15N on channel F2 routed to amplifierA2
90 deg. decoupler
transmitter
cpd
pulse length
same as 90 deg.
power level
same as transmitter
pulse length
150
power level
click on ‘calc’
11. Click on ‘Save’
12. Select nucleus: ‘19F’, change and Calculate the following parameters:
Standard parameters for 19F on channel F2 routed to amplifierA2
90 deg. decoupler
transmitter
cpd
13. Click on ‘Save’
pulse length
same as 90 deg.
power level
same as transmitter
pulse length
100
power level
click on ‘calc’
21
14. Select nucleus: ‘29Si’, change and Calculate the following parameters:
Standard parameters for 29Si on channel F2 routed to amplifierA2
90 deg. decoupler
transmitter
cpd
pulse length
same as 90 deg.
power level
same as transmitter
pulse length
100
power level
click on ‘calc’
15. Click on ‘Save’
16. Select nucleus: ‘31P’, change and Calculate the following parameters:
Standard parameters for 31P on channel F2 routed to amplifierA2
90 deg. decoupler
transmitter
cpd
pulse length
same as 90 deg.
power level
same as transmitter
pulse length
63
power level
click on ‘calc’
17. Select logical channel ‘Global’ by clicking on it
18. Change the following special parameters:
grad. recovery delay
gradients)
0.0005
(only if equipped with
grad. pulse 1
gradients)
1000
(only if equipped with
grad. pulse 2
gradients)
1000
(only if equipped with
trim pulse mlev
2500
trim pulse hsqc
2000
19. Select ‘Standard soft pulses by clicking on it
22
20. Change the following standard soft pulses:
90/270 excitation
180 refocussing
Psh3
Pulses
60000
P. Level
click on ‘calc’
Pulses
60000
P. Level
click on ‘calc’
Pulses
10000
P. Level
click on ‘calc’
21. Click on ‘Save’
22. Click on ‘File’ and select ‘Edit tunefile’
23. Enter the password
24. Make the following changes in the tunefile and save it:
# Shim_name
Maximum_Step_Size Number_of_Iterations
Z
10
2
Z2
10
2
#
Z3
5
2
# The shim method is, to increase one shim value by step-size until the
# measured lock value decreases again. Then the step-size is reduced
# according to the measured values. This is repeated number-of-iteration times.
Z
5
2
Z2
5
2
Z3
5
2
# AUTOSHIM ON Z=4 Z2=2
25. Click on 'SAVE' and enter the password
2.4.
Lock file set up
Sample: 0.1% Ethyl benzene in CDCl3 or any sample in CDCl3
NOTE: This procedure should be performed on a regular basis. (e.g. once a
month)
1. Insert sample into the magnet
23
2. Type lock and select CDCl3
NOTE: The system will enter the lockshift value of CDCl3 and automatically
lock and adjust the lock gain.
3. Press the ‘LOCK ON/OFF’ key on the BSMS panel (light should be off)
4. Center the lock trace within the lock window by changing the field value.
5. write the field value down
6. Press the Lock ON/OFF key to lock (light should be on)
7. Shim for best resolution
8. Press Phase and adjust the phase, write the value down
24
9. Type edlock at the TOPSPIN command line
10. Click on ‘BSMS’
11. Select the first solvent in the list by clicking on it
12. Enter the new field value from step 5
13. Click on
‘copy the value oft the selected parameter to all solvents’
25
14. Click on ‘LOCKPHASE’
15. Select the first solvent in the list by clicking on it
16. Enter the new lock phase value from step 8
17. Click on
‘Save table’
26
3.
Set up of ICON-NMR
1. Type iconnmr
2. Click on Configuration
3. Enter NMR administrations password
NOTE: The ICON-NMR Configuration window appears. The left side of the
window shows a directory tree of the different configuration options.
27
3.1.
User Manager
1. Click on User Manager
3.1.1.1. User Names box
NOTE: when the User Manger is started for the first time, all the LINUX or
28
NT and NMR user names appear in gray and will turn bold when activated.
1. Select a user by clicking on it
NOTE: Hold the Shift- or Ctrl- key to select multiple users.
2. Click on ‘Save’
NOTE: the selected User name(s) are activated, the icon in front of it is
changed and the letters are now bold.
3.1.1.2.
Experiment list box
NOTE: when the User Manager is started for the first time a default list of
experiments is displayed. Below is an example of the contents of the
Experiment List box.
29
Mode
By clicking on the icon, the mode can be changed. The sun icon stands
for “anytime” and the moon for “night time” operation. To make use of
this feature, the Priority and Night/Day switch over has to be enabled
and the switch over time has to be set (see B.4. Priority in this Chapter).
Each user can be setup to have their own customized day and night
time experiments. This way the users may run experiments only at a
specific time
Details
The letter N in front the experiment name stands for Normal which
denotes a single or stand-alone experiment. The parameters for such an
experiment are stored in the “TOPSPINHOME/exp/stan/nmr/par/”
directory under the same name. To add a new user defined Nexperiment and parameter set, see Chapter 7, section 7.2 Adding the
new experiment to ICON-NMR.
The letter C in front of the experiment name stands for Composite
experiment and represents a series of two or more experiments
combined under one name. To add a new C-experiment, see Chapter 7,
section 7.3 adding a new composite experiment.
3.1.1.3.
Data Set Names box
Predefined data set names can be assigned to the different users. The name(s)
can then be chosen from a list during the setup of the experiments in Routine
Spectroscopy and Automation.
1. Click inside the Data Set Name box and an Entry Box window appears
30
2. Click inside the Sample Name field and enter a data set name, or click on
the arrow and select one of the names provided by Bruker
NOTE: the $ sign in front of the provided name indicates that the current
date and or user will be entered into the data set name.
3. Click on the ‘Append’ or ‘Prepend’ button to enter the information into
the Data Set Names box. Use the ‘Modify’ button to make changes to
existing names.
NOTE: to update other users with the same data set names, click on the
‘Update User Files’ button.
3.1.1.4.
Partition Names
Predefined disk partition(s) for data storage can be assigned to different users.
The partition(s) names can be chosen from a list during the experiment set up
within the Automation and Routine Spectroscopy.
NOTE: a default data path: /data/<user name>/nmr is added automatically
to the disk partition name (for Linux e. g. /opt, for Windows e. g. d:).
31
1. Click inside the Partition Names box and an Entry Box window appears.
2. Click inside the Partition Name window and enter the disk partition name
(e.g. /opt or d:)
3. Click on the ‘Append’ or ‘Prepend’ button to add this disk partition
name into the Partition Name box. Use the ‘Modify’ button to change the
disk partition name.
NOTE: to update other users to have the same partition name options, click
on the ‘Update User Files’ button.
3.1.1.5.
User Specific Information box
Information, such as Instrument name, Company, Department, etc. can be
assigned to different users as predefined entries. The user can also enter the
information during the experiment set up within the Automation or Routine
Spectroscopy.
To enter the predefined information, a template of items such as Instrument
name, Company, Department etc. has to be created first. To make a template,
follow the instructions in 3.1.3 Originator Items
1. Click inside the User Specific Information box and an Entry Box window
32
appears
2. Click on the arrow next to the Originator Item field and select an item
3. Click inside the Originator Data field and enter the information
NOTE: If no information is typed into the Originator Data field, then the
user has to enter it during the set up .
4. Click on ‘Modify', ‘Append’ or ‘Prepend’ button to enter this
information into the User Specific Information box
NOTE: to update other users with the same User Specific Information click
on the ‘Update User Files’ button.
5. Click on ‘EXIT’
3.1.1.6.
User Specific Parameters/Commands box
Different users can have access to change specific parameters or execute
specific commands during the experiment set up within Automation or
Routine Spectroscopy. The ‘Parameter Edit’ permission does not have to be
33
enabled, see 3.1.1.11 Permission boxes.
To add parameters and commands to this box, follow the instructions below.
1. Click inside the User Specific/Command box and an Entry Box window
appears
2. Click on the User Specific Parameters/Command field and enter the
parameter or command
3. Click on ‘Modify‘, ‘Append’ or ‘Prepend’ button to enter this
information into the User Specific Parameters/Command box
NOTE: to update other users with the same user
parameters/commands click on the ‘Update User Files’ button.
3.1.1.7.
specific
Spectrum Number Filename box
For Linux, follow the steps below to create the text file:
1. Open a LINUX shell
2. Choose a directory where the text file should reside (e.g. /usr/adm )
3. Type cd /usr/adm
4. Use an editor to create a text file which contains the data set file name
which must start with a letter and end with a number (e.g. sample001)
5. Store the file (e.g. datasetname)
6. Start ICONNMR
34
7. Open User Manger
8. Type /usr/adm/datasetname into the Spectrum Number Filename box
For Windows, follow the steps below
1. Open the Note Pad application
2. Type a data set filename which must start with a letter and end with a
number (e.g. sample001)
3. Click on Save As
4. Select a directory (e.g. C:\Temp)
5. Choose a file name (e.g. datasetname.txt)
6. Start ICONNMR
7. Open User Manger
8. Type C:\Temp\datasetname.txt into the Spectrum Number Filename box
3.1.1.8.
Target E-mail Address box
NOTE: to use this feature, an E-mail software package which can handle file
attachments, has to be installed on the system.
E-mail can send a notification of a completed experiment, sample run or if an
error occurred.
3.1.1.9.
Archiving Directory box
For the purpose of archiving, a copy of a completed experiment after
35
processing can be stored in a specified Directory. This feature can take
advantage of a NFS mounted file system to centralize the data archiving.
3.1.1.10. Umask box
The Umask sets the read/write permissions on data that is generated through
ICON-NMR.
3.1.1.11. Permission boxes
NOTE: When the User Manager is started for the first time, default
permissions are set. Clicking on any of the permission boxes changes the
color of the square in front of the name. No check mark means no permission
and a check mark means permission is granted. Below are the descriptions of
the permission boxes.
Priority
This option applies only for Automation and not for Routine Spectroscopy. If
permission is granted, the user can then activate the Priority and or Night/Day
time buttons in the Automation window.
36
Archiving Data
This option applies for both the Automation and Routine Spectroscopy. If
permission is granted, the user’s data (after processing has been completed) is
copied into a directory whose path is specified in the Archiving Directory box
(see 3.1.1.9).
Supervisor
This option applies for both the Automation and Routine Spectroscopy. If
permission is granted, the user can iconize the ICONNMR windows to access
other programs on the desktop of the operating system.
Essential Originator
This option applies for both the Automation and Routine Spectroscopy. To
use this feature, both the Originator and Essential Originator permissions have
to be enabled. The user must then fill in the originator information (see 3.1.1.5
User Specific Information box, steps 1 through 5) in the title field, for
Automation and in the set up window, for Routine Spectroscopy. The
experiment cannot be submitted unless the originator information is entered.
Manual Lock/Shim
This option applies for both the Automation and Routine Spectroscopy. If
enabled, the user is granted permission to activate the Manual Lock/Shim
feature in the Option menu in the Routine Spectroscopy or Automation
window.
For the run, the user can then choose between manual or automatic locking
and shimming.
Email Notification
This option applies for both the Automation and Routine Spectroscopy.
Permission can be granted to different users to be notified through E-mail
when an experiment or sample is finished. This feature requires an E-mail
address and appropriate software (see 3.1.1.8 Target Email Address).
37
JDX Copy
If enabled, the “JDX Copy Mode” options in the “General Options” menu can
be applied
Parameter Edit
This option applies for both the Automation and Routine Spectroscopy. If
enabled, the user then can change any parameters during the set up of an
experiment (acquisition, processing and plotting).
If disabled, only the User Specific Parameters/Commands are accessible.
Exit (ICON-NMR)
This option applies for both the Automation and Routine Spectroscopy. If
enabled the user is granted permission to exit ICON-NMR and open other
software applications.
If disabled, the NMR Superuser password is required to exit ICONNMR.
Data Set Edit
This option applies for both the Automation and Routine Spectroscopy. If
enabled, the user can type a data set name during the set up of an experiment
or choose one from the predefined names.
If disabled, only the predefined data set names are accessible and the user can
only choose a data set name from the list created in the Data Set Names box
(see 3.1.1.3).
Originator
This option applies for both the Automation and Routine Spectroscopy. If
enabled, the Originator information and the associated User Specific
Information (see 3.1.1.5User Specific Information box) is displayed in the file
name set up box for Routine Spectroscopy and in the title window for
Automation.
38
DataMail
This option applies for both the Automation and Routine Spectroscopy.
Permission can be granted to different users to send the acquired and
processed data by E-mail as a JCAMP file. This feature requires an E-mail
address and software (see 3.1.1.8 Target Email Address) and applies only to
1-D data sets.
Edit Lock/Shim/ATM
This option applies only for the Automation only. If enabled, permission is
granted to users to use the “Automatic Lock Program, Automatic Shim
Program and ATM Control” options in the Automation set up window.
3.1.2. Additional Users
1. Click on Additional Users
NOTE: Additional Users are Spectrometer Users only. They do not have a
user account on the workstation running the spectrometer. They may,
39
however, still perform experiments with ICON-NMR. Data will be stored
using the additional effective user’s id and permission as defined by the field
“Additional user’s Effective User ID” which appears here.
2. Enter the user’s full name into the “Additional User’s Full Name “
window
3. Enter the user’s login ID into the “Additional User’s ID” window
4. Click on ‘Enter new password
5. Type a password into the “Enter new password” window and hit ‘Enter’
6. Type the same password into the “Reenter the new password” window
and hit ‘Enter’
NOTE: All Additional Users may choose to have their own password and, if
necessary, may initialize or reset it once they have logged into ICON-NMR.
(See the ‘Change NMR Users Password’ in the ‘Option’ pull down menu).
40
3.1.3. Originator Items
1. Click on ‘Originator Items’
NOTE: Originator Items are types of information which may be entered in
the Title window when an experiment is being setup.
Use the ‘Originator Item’ pull down menu to select a predefined item from
the list and click on ‘Add new’ to add it to the list. To add on a new item to
the list, follow the instructions below.
2. Click inside the “Originator Item window”
3. Type new item name (e.g. Department) and hit Enter
4. Click on ‘Add new’
5. Click on ‘Save’
41
3.1.4. Composite Experiments
1. Click on ‘Composite Experiments’
NOTE: A composite experiment is a series of two or more experiments
combined under one name. To add a new composite experiment to the
existing list, follow the instructions given in chapter 6.2.3 Adding the new
composite experiment to the user experiment list
42
3.1.5. Automation window
1. Click on “Automation window”
Holder Status Display Style
This option applies only for Automation and not for Routine Spectroscopy.
One of three display modes can be selected:
North American traffic light style
• no lights
= experiment may be set up
•
yellow
= sample submitted, waiting to run
•
green
= experiment in progress
•
red
= experiment done, sample measured
•
lights black
European traffic light style
• green
= experiment aborted or failed
= experiment may be set up
43
•
red & yellow
= sample submitted, waiting to run
•
red
= experiment in progress
•
yellow
= experiment done, sample measured
•
lights black
= experiment aborted or failed
Text only
• Available
= experiment may be set up
•
Queued
= sample submitted, waiting to run
•
Running
= experiment in progress
•
Finished
= experiment done, sample measured
•
Failed
= experiment aborted or failed
Bruker Conform
• Conformity between Bruker’s various Automation Software
programs
Touch Screen / Large Icons Mode
When enabled, the icons in the Automation set up screen are enlarged. This
option is primarily used for touch screen operation such as with the INCA
spectrometer.
Default Number of Sample Holders
This option applies only for Automation and not for Routine Spectroscopy.
The default number of sample holders are set during the Sample changer
configuration “cf” in TOPSPIN main window.
44
Automatic Experiment acquisition time calculation
This option applies only for Automation and not for Routine Spectroscopy. If
enabled, the acquisition time is calculated for an experiment when it is
submitted.
Logout Idle Users automatically and Logout Delay (minutes)
This option applies for both the Automation and Routine Spectroscopy. It is
designed for users who are required to log themselves out after all of their
experiments have been submitted. If enabled, user’s are automatically logged
out after the specified log out delay time.
Enable Automation controls Window
This option applies only for Automation and not for Routine Spectroscopy. If
enabled The Automation Controls window as shown here appears during a
run when an acquisition is in progress.
Automatic Setup File save
This option applies only for Automation and not for Routine Spectroscopy. If
enabled, a set up file is automatically stored in the directory:
45
<TOPSPINHOME>/prog/curdir/changer/inmrchanger. Verification that this
file can be saved permanently, is shown when closing the experiment set up
window in Automation.
Approx overhead time for sample change (secs)
This option applies only for Automation and not for Routine Spectroscopy.
The time entered in Seconds defines how long a sample change takes place
and it is used in calculating the “Expt Time” and “Busy until Times” displayed
in the Automation set up window.
HTML History File
A directory path can be chosen to store the ICON-NMR history file which is
created during an automation run. This file is in HTML format and can be
viewed through an Internet browser as shown below.
46
3.2.
Automation driver engine
3.2.1. Master Switches
1. Click on “Master Switches”
Start run at users login
This option applies only for Automation and not for Routine Spectroscopy. If
enabled, the run will start when the user logs into ICON-NMR Automation.
The current default automation mode (“Automation Driver”) will be used.
47
Default Automation Mode
This option applies only for Automation and not for Routine Spectroscopy.
By clicking on the gray box a list of different automation modes or “drivers”
appears.
The selection of the default mode is primary designed for starting the run at
the users login option. This default selection will be used to start the run at
user log in (if defined) and will appear when a user manually starts an
automation run.
Eject last sample in a queue
This option applies only for Automation and not for Routine Spectroscopy. If
enabled, the last sample will eject after all experiments are completed and if
there are no new samples submitted to the run.
Process Data Sets after Acquisition
This option applies only for Automation and not for Routine Spectroscopy.
By clicking on the gray box, a list of choices appear.
•
Always:
all experiments are processed
•
Never:
no processing done on any of the experiments
48
•
Ask on Startup:
in the Initialize Run Window a check box will
give the option to process the data after acquisition.
Automatic Lock Program
This option applies for both the Automation and Routine Spectroscopy. The
locking procedure in ICONNMR is controlled through the selections, LOCK
or SKIP LOKING. The options can be selected by clicking on the down arrow
button next to it.
Lock only after a solvent change
This option applies only in Automation and the use of a sample changer. It is
primarily for use with BEST NMR accessoriy.
Ignore the TOPSPIN Prosol Parameters
When enabled, ICON-NMR does not execute a pulsesort and therefore
ignores the prosol parameters. This option is primarily used for non standard
pulse programs and instrument configurations.
Never Rotate the Sample
When enabled, all sample are run non spinning. This option applies for both
49
the Automation and Routine Spectroscopy and should be used whenever
sample spinning is not desired (e.g. BBI-, TXI- probes).
Delete temporary datasets after experiment completion
When an experiment is submitted, ICONNMR creates a temporary data set in
the directory /<TOPSPINHOME>/prog/curdir/changer/inmrchanger. This
data set contains all information to run the experiment including any changes
in experimental parameters. The main purpose of using this option is to save
disk space.
!!!WARNING!!!: It is not recommended to use this option when the set up file
has to be saved for repeated use since any parameter changes would be lost.
BEST Mode Settings: Enable BEST Mode
This option applies only for Automation and not for Routine Spectroscopy
and is used only in conjunction with BEST flow injection hardware. After
enabling the BEST NMR mode, it is possible to access the BEST
administration software.
50
3.2.2. Shimming
3.2.2.1.
Shimming controls
1. Click on “Shimming Controls”
Automatic Shim Program
This option applies for both the Automation and Routine Spectroscopy. The
shim routine can be selected by clicking on the down arrow button.
•
TUNESX : Computer shimming using the tunefile created in
edprosol. This file is probehead and solvent dependent. The probe
51
head, all solvent tunefile is stored in the directory :
[TOPSPINHOME]/conf/instr/spect/prosol/[probe ID]
The probe head, solvent tunefile is stored in the directory:
[TOPSPINHOME]/conf/instr/spect/prosol/[solvent.probe ID]
•
TUNE mytunefile: Computer shimming using a personal tunefile
created with edtune. This must have the name “mytunefile” This file
is not probehead or solvent dependent. It is stored in the directory:
[TOPSPINHOME]/exp/stan/nmr/lists/group.
•
GRADSHIM: Shimming using the Gradient shimming method
defined in the TopSpin gradient shimming interface (gradshim). The
iteration control file for gradient shimming is defined in the
setup/automation menu.
•
Skip Shimming: This option skips any shimming
•
ROTATION-OFF; TUNESX; ROTATION-ON: This option will
stop the spinning, shim the sample using TUNESX, and then turn
the spinner back on again.
Shim the Sample
This option applies only for the Automation. Different settings can be selected
by clicking on the window.
52
Shim after this number of samples
This option is activated when the setting in Shim the Sample option is set to
“after a solvent change or N samples” (see figure above) This is primarily used
for BEST NMR.
Always shim after a QNP change
If enabled, this option applies when the nucleus is changed on a QNP (quad
nucleus) probe.
Total time allocated for tune command (minutes)
This option applies for both the Automation and Routine Spectroscopy. The
setting is only active for the Automatic Shim Program “TUNESX”, “TUNE
mytunefile” or “ROTATION-OFF;TUNESX;ROTATION-ON”.
Maximum Shim time (per iteration in minutes)
This option applies for both the Automation and Routine Spectroscopy. The
setting is only active with the Automatic Shim Program set to either
“TUNESX”,
“TUNE
mytunefile”
or
“ROTATIONOFF;TUNESX;ROTATION-ON”.
53
3.2.2.2.
Automatic Shim File Loading
1. Click on “Automatic Shim File Loading”
NOTE: When shimming on the sample is required, it is a good practice to
load a good shim file before locking. This applies for both the Automation
and Routine Spectroscopy. To activate this procedure, follow the steps below.
2. Go to TopSpin
3. Insert a sample into the magnet
NOTE: Use a clean sample of the same type which you do your research on.
Do not use any Standard Test Samples.
4. Lock and shim for best homogeneity
5. Type wsh and store the shim file. Use a short name (e.g. qnp5, bb5 or inv5
etc.)
6. Go back to ICON-NMR configuration and “Automatic Shim File
54
Loading”
7. Activate “Enable Shim file Loading” by clicking inside the small square
8. Select the probehead for which the shim file applies
NOTE: The current probehead has to be selected through edhead (Chapter
2.2). This probehead displayed as default in the “Probe Type to associate
shim files with” window.
9. Click on the folder icon next to the window of “Copy this shim file to all
entries for this Probe”
10. Select the shim file by clicking on it
11. Click on ‘Copy’
NOTE: The shim file has now been copied into all solvents. To load a shim
file only for a specific solvent, click on the folder icon next to the Associated
Shim File window for a specific solvent and select the shim file by clicking on
it.
Use standard shimfiles where available
If desired, solvent / probehead dependent shim files can be created. The shim
files have to be stored with the “wsh” command with the solvent name and the
probe ID as an extension (e.g. CDCl3.07). The files then have to be copied
from:
[TOPSPINHOME]/exp/stan/nmr/lists/bsms
into the corresponding prosol directories:
[TOPSPINHOME]/conf/instr/spect/prosol/[solvent.probe ID]
Once created, the option ‘Use Standard’ button can be used.
Lock -noauto
For some solvents or mixtures of solvents with several strong peaks, the lock
55
program may lock on the wrong one. The Lock –noauto invokes only the
BSMS lock function and not the auto lock function. As a result, the system
will lock on the desired peak as determined by the current
[TOPSPINHOME]/conf/instr/spect/2Hlock file.
3.2.3. Automatic Tune / Matching
1. Click on Automatic Tune / Matching
NOTE: Some of the latest probes are equipped with automatic tuning and
matching capabilities (ATM). The TOPSPIN command atma tunes and
matches the probe automatically according to the NUC settings in the current
data set. To make use of this feature, follow the steps below.
2. Click inside the square next to Enable ATM Optimization
3. Click on Update Experiment List
4. Set the Experiment Dependent ATM Optimization Settings
56
NOTE: for a single experiment, click with the right mouse button when over
a channel setting and choose from a pop up menu “Always”, “Never” or
“after a solvent change”. For multiple selected experiments, choose the
‘Copy’ option.
3.2.4. Priority
1. Click on “Priority”
NOTE: all options in this window apply only for Automation and not for
Routine Spectroscopy. The permission in the User Manager for using the
priority sample handling has to granted.
2. Click inside the square next to “Enable Priority”
3. Set the Priority Sample Handling by clicking on the gray box next to it
•
Wait until current sample completed:
the priority sample is
57
measured after all experiments on the current sample have been
completed.
•
Do Priority Sample immediately: the priority sample is measured
after the current experiment on the current sample is completed.
4. Set the Modes accounted for by clicking on the gray box next to it
•
Priority + Night/Day: the user has full control to use the priority
sample handling and Night/Day time option.
•
Night/Day only: the user has control over Night/Day option only
•
Priority only: the user can only use the priority sample handling
5. Set the Night / Day Switch-over time
NOTE: If samples have to be run during night time, the night beginning and
end times can be set using the 24 hour system. A switch is provided to enable
a nighttime experiment to be run during idle day time hours.
3.2.5. Temperature Handling
NOTE: This Menu is used to set and check the temperature before and after
the sample insertion and is valid only for Standard BACS, Manual Mode and
Sample Track Automation Systems. Define TE as a user specific parameter.
1. Click on “Temperature Handling”
2. Click inside the square next to “Temperature Handling (On/Off)”
58
3.2.5.1.
PRE-INSERTION Set/Check
NOTE: This option is primarily used if samples have to be run at different
temperatures. This would set the probe to a specific temperature, before the
sample is inserted. If all samples in a sample changer run are to be run at the
same temperature setting, then this option is not used and only POST
INSERTION is enabled.
3. Click inside the square next to “PRE INSERTION Set/Check”
4. Click on the arrow next to the “Set & Check Temperature before Sample
Insertion” window and select one of the following options:
59
•
‘according to experiment’s TE Parameter’: if selected, the
temperature value is been taken from the TE parameter
•
‘295K’: if selected, this value can be changed to the desired
temperature.
5. Click on the arrow next to the “Pre-insertion Temperature Set/Check
Routine” window and select one of the following options:
•
‘TESET; TEREADY 60 0.1’: if selected, TESET sets the
temperature while TEREADY has 2 arguments which can be
changed. The first defines the maximum time in seconds to wait for
the temperature to be reached. The second parameter determine the
accuracy of the reached temperature in Degree, may be set between
0.0 – 1.0.
•
‘XAU my_temperature_au_program’: if selected, a user defined
AU
program
can
be
used.
”my_temperature_au_program”
The
name
has
to
be
60
3.2.5.2. POST-INSERTION Set/Check
6. Click inside the square next to “Set & Check Temperature after Sample
Insertion”
7. Click on the arrow next to the “Temperature Setting after Sample
Insertion” window and select one of the following options:
•
according to experiment’s TE Parameter: if selected, the
temperature value is been taken from the TE parameter
•
‘295K’: if selected, this value can be changed to the desired
temperature.
8. Click on the arrow next to the “Post-insertion Temperature Set/Check
Routine” window and select one of the following options:
•
TESET; TEREADY 60 0.1: if selected, TESET sets the
temperature while TEREADY has 2 arguments which can be
changed. The first defines the maximum time in seconds to wait for
the temperature to be reached. The second parameter determine the
61
accuracy of the reached temperature in Degree may be set between
0.0 – 1.0.
•
XAU my_temperature_au_program: if selected, a user defined
AU
program
can
be
used.
”my_temperature_au_program”
9. Click on Save
The
name
has
to
be
62
3.2.6. LC-NMR Options
1. Click on LC-NMR Options
NOTE: For further information see the LCNMR manual available from
HYSTAR LCNMR software.
3.2.7. Sample Track options
1. Click on Sample Track Options
NOTE: For further information see the Sample Track manual.
63
3.2.8. Barcode Printer Routines
1. Click on Barcode Printer Routines
NOTE: This mode provides a truly automatic stand alone Automation
method. For this option to work, a barcode printer connected to the computer
and a barcode reader mounted on the sample changer are required.
User
To select a user the following file has to be first created using a text editor:
[TOPSPINHOME]/conf/instr/users.txt which looks as follows:
1
user1
2
user2
3
user3
Experiment
To select an experiment the barcode.txt has to be first created using the
“edexp”
command
in
TOPSPIN.
This
file
is
stored
in
64
[TOPSPINHOME]/conf/instr/barcode.txt
Solvent
The solvent list can be edited with the TOPSPIN command “edsolv”
3.3.
General options
1. Click on General Options
Archiving Copy User
NOTE: this option is only functional on LINUX systems and not on NT.
One of two choices can be selected, by clicking on the gray box.
• Root User (Needs root NFS access):
•
Normal User:
The user which is logged in and is running
ICONNMR can archive data.
65
Include Originator Information in Title
If enabled, the Originator information is being added to the title and as a
result, printed on the spectrum.
Include Experiment Information in Title
If enabled, the experiment name, solvent, disk drive, user and processing
number are added to the title and as a result, printed on the spectrum.
Experiment Number Automatic Increment
The increment of the experiment number during a setup can be changed.
NOTE: As default on the same sample, the experiment number starts with 10
and is incremented by one for each additional experiment. If the same data
set name is used on different samples during the set up, the experiment
number is incremented by 10 to the nearest multiple of 10.
Flashing Entry Zones
The flashing of the active icons or windows in the setup of sample, especially
in Routine spectroscopy can be turned off when this option is enabled.
ICON Color Palette
By clicking on the gray box, a list of settings to change the appearance of the
Icons in the ICONNMR windows is displayed.
66
Password Checking
By clicking on the gray box, a list of password checking possibilities appear.
Stop the Run after 3 consecutive errors
If enabled the run will stop after 3 consecutive errors
On error, send a notification E-mail to:
If the system is set up to receive and send E-mail an E-mail address can be
typed in to the window next to it and the error message is been sent to that
address.
JDX Copy Mode
There are three choices to select from, when clicking on the window next to it
This mode applies when the JDX Copy permission in the User Manager menu
is enabled.
File naming format
There are several Joyce’s to select from, when clicking on the arrow next to
the window. This mode applies, when the JDX Copy permission in the User
Manager menu is enabled.
67
Create JCAMP_DX file in this directory
Type the path where the JCAMP_DX file has to be stored.
This mode applies, when the JDX Copy permission in the User Manager menu
is enabled.
3.4.
ICON-NMR Accounting
4.
Routine spectroscopy
NOTE: Routine Spectroscopy is designed to help users perform NMR
experiments by following a step by step menu.
68
1. Type iconnmr
2. Click on ‘Routine Spectroscopy’
3. Click on ‘Identify User’
4. Select user
5. Click on ‘OK’
6. Enter the password
7. Click on ‘Inject/Eject’
69
8. Click on ‘Insert New Sample’
9. Insert your sample
10. Click on ‘OK’
11. Type a file name into the Data Set Filename window or select one of the
predefined file names, by clicking on the down arrow button
NOTE: The user may be requested to select a Disk Unit or to fill in the
originator information. Proceed with the next step, when the Command Box
frame becomes red or is blinking.
12. Click on ‘Continue’
NOTE: If the experiment number, e.g. 10, of the current data set name
already exists, a Data Set Report window appears which gives the option to
70
overwrite the existing data set or to increment the experiment number to the
next available one.
13. Click on the arrow next to the Solvent window
14. Select the solvent e.g.CDCl3 by clicking on it
15. Click on the arrow next to the Experiment window
16. Select the experiment e.g. PROTON
71
17. Click on the note pad icon next to the title window
18. Enter a title and click on ‘Set Title’
19. Click on ‘Continue’
NOTE: At this time it is possible to change parameters by clicking in
‘Parameters’. Depending on the user’s permission, he would have access to
all or only user specific parameters.
20. Click on ‘START’
NOTE: At this point an “Online Control” window and the acquisition status
icons appear on the screen.
72
•
FID
Online Control function keys:
display the acquisition window (active after the
acquisition has started)
•
Lock
•
Spectrum view the spectrum
•
Halt
view the lock window
stop the acquisition after the next scan is completed
then start the processing
•
Plot
plot data or additional expansions
•
EXIT
to exit back to the ICON-NMR/Routine window
•
Stop
stop all processes and do not continue
•
Search
open the Portfolio Editor
21. Click on ‘Continue’ in the Online Control function window after all
processing status icons stop flashing
22. Choose one of the options by clicking on it:
•
‘Eject + Terminate’: ejects the sample and logs out the user.
73
•
‘Insert New Sample’: a window to change the sample will appear
and a new file name, solvent and experiment can be selected. The
current user stays logged in.
•
‘Use Same / Continue’: The sample stays in the magnet, (locked
and shimmed) and a new experiment can be selected.
NOTE: It is generally better to keep a sample in the magnet if the instrument
will not be used for a long period of time.
5.
Automation
NOTE: Automation is designed to run experiments using a variety of sample
changers and can also be used in manual sample change operation allowing
greater flexibility than Routine Spectroscopy (Chapt. 5).
5.1.
Experiment setup
NOTE: The following setup examples are simple exercises to demonstrate
the different acquisition methods in ICON-NMR using three samples.
Samples:
~0.3 M in 0.6 ml CDCl3 of a small organic molecule such as Strychnine
~0.3 M in 0.6 ml DMSO of a small organic molecule such as Carvone
~0.3 M in 0.6 ml CDCl3 of a small organic molecule such as Menthol
1. Type iconnmr
2. Click on ‘Automation’
3. Click on ‘Identify User’
74
4. Select user
5. Click on ‘OK’
6. Enter the user’s password
5.1.1. Set up of one single experiment
1. Double click on Holder 1
2. Click inside the Name window and change the name to sample1
NOTE: The experiment number is automatically incremented to the nest
available number if a data set already exists with that name and experiment
number.
3. Click on the arrow next to the Solvent window and select CDCl3 by
clicking on it.
4. Click on the arrow next to the Experiment window and select PROTON
by clicking on it.
NOTE: “PROTON” is a single experiment and is marked with the letter N.
75
5. Click on the small note pad icon to the left of the Orig/Title window and
enter a title
NOTE: Depending on the user’s permissions, parameters of the experiment
can be changed using the following options.
6. ‘All parameters’: click on ‘Parameters’ and choose any of the options.
•
‘User specific parameters’: click on to change the parameters
•
‘Mode of operation’: click on to change mode of operation
76
7. Click on the first line of Holder 1
8. Click on ‘Submit’
NOTE: The user may be requested to select a Disk Unit or to fill in the
originator information before the sample can be submitted.. Proceed to “B.
SAMPLE RUN” to start the automation.
5.1.2. Set up of two single experiments
1. Follow steps 1 through 5 of “5.1.1 Setup of one single experiment”
2. Click on ‘Add’
NOTE: To add one experiment, regardless if it is a single or coposite one, a
“1” should be displayed in the window next to the ‘Add’ button. A new line
opens up containing the same information for the Disk, Name, Solvent and
Orig/Title. The Exp No is incremented by 1.
3. Click on the small button to the right of the Experiment window and
select C13CPD32 by clicking on it
77
4. Click on the first line of Holder 1
5. Click on ‘Submit’
NOTE: The Status traffic lights of the two experiments change to yellow to
indicate the holder is ready to run and the experiment time of each
experiment is calculated. Proceed to “B. SAMPLE RUN” to start the
automation.
5.1.3. Set up of a composite experiment
1. Follow steps 1 through 3 of “5.1.1. Setup of one single experiment”
2. Click on the small button to the right of the Experiment window and
select COSY45SW by clicking on it
78
NOTE: “COSY45SW” is a composite experiment and is marked with the
letter C. A composite experiment contains two or more single experiments. In
this case, the “COSY45SW” is a 2D Homonuclear Correlation experiment
which needs a preparation experiment “PROTON” to prepare the “COSY”
experiment to optimize the 2D parameters. The preparation experiment is
entered automatically into the setup on the present holder. The system will
check if a preparation experiment already exists on the present holder so that
it does not run the experiment twice.
3. Click on the small icon to the left of the Orig/Title window and type a
title
4. Click on the first line of Holder 1
5. Click on ‘Submit’
NOTE: The Status traffic lights of the two experiments change to yellow to
indicate the holder is ready to run and the experiment time of each
experiment is calculated. Proceed to “B. SAMPLE RUN” to start the
automation.
79
5.1.4. Set up of two composite experiments
1. Follow steps 1 through 3 of “ 5.1.1. Setup of one single experiment”
2. Click on the small button to the right of the Experiment window and
select COSY45SW by clicking on it
3. Click on the small icon to the left of the Orig/Title window and type a
title
4. Click on ‘Add’
NOTE: To add one experiment, regardless if it is a single or composite
experiment, a “1” should be displayed in the window next to the ‘Add’
button. A new line opens up which contains the same information for the
Disk, Name, Solvent and Orig/Title. The Exp No is incremented by 1.
5. Click on the small button to the right of the Experiment window and select
HCCOSW by clicking on it
NOTE: “HCCOSW” is a composite experiment like COSY45SW and is
marked with the letter C. It is a 2D Hetero Correlation experiment which
80
needs two 1D-preparation experiments to optimize the 2D parameters in both
dimensions. In this case “PROTON” and “C13DEPT45” are used for the
optimization. Since the “PROTON” experiment already exists, only the
“C13DEPT45” is automatically entered into the setup on the present holder.
6. Click on the first line of Holder 1
7. Click on ‘Submit’
NOTE: The Status traffic lights of the four experiments change to yellow to
indicate the holder is ready to run and the experiment time of each
experiment is calculated. Proceed to “B. SAMPLE RUN” to start the
automation.
5.1.5. Set up of two or more holders with different solvents and
experiments
1. Follow steps 1 through 7 of “5.1.1. Setup of one single experiment”
2. Double click on Holder 2
3. Click inside the Name window and change the name to sample2
4. Click on the small button to the right of the solvent window and select
“DMSO” by clicking on it
5. Click on the small button to the right of the Experiment window and
select “C13CPD32” by clicking on it
6. Click on the small icon to the left of the Orig/Title window and type a
title
81
7. Click on the first line of Holder 2
8. Click on ‘Submit’
NOTE: The Status traffic light changes to yellow to indicate the holder is
ready to run and the experiment time is calculated. Proceed to “B. SAMPLE
RUN” to start the automation.
5.1.6. Set up of two or more holders with the same solvents and
experiments
1. Follow steps 1 through 5 of “5.1.1. Setup of one single experiment”
2. Click on ‘Copy’
NOTE: To copy the setup from one holder into another holder click on the
‘copy’ button. The number displayed in the window next to the ‘Copy’ button
is to how many holders it will copy. For this example use “1”. The next
holder will have the same setup as the previous one except that the Exp No is
incremented to the next number divisible by 10 (e.g. 20), this is the default
configuration. To change the experiment number increment refer to chapter
3.3 "General Options” or if the sample name increment is preferred, select
this option in the sample setup window by clicking on ‘Holder’ and selecting
82
‘increment name’. To edit the new holder, follow the next steps below.
3. Click on the experiment line in holder 2
4. Click on ‘Edit’
5. Click on the small icon to the left of the Orig/Title window and change
the title
NOTE: In addition to the title all other entries can be edited in the new
holder by clicking on Edit. DO NOT CHANGE the Exp No, unless you are
sure the new Exp No does not already exist.
NOTE: If the option to increment the sample name is enabled, then the
sample name is incremented rather then the experiment number.
83
6. Click on the first line of holder 1
7. Press and hold the “Shift” key
8. Click on the first line of holder 2
9. Release the “Shift” key
NOTE: Both holders are now highlighted.
10. Click on ‘Submit’
NOTE: The Status traffic lights on both holders change to yellow to indicate
the holder’s ready to run and the experiment time for each experiment is
calculated. Proceed to “B. SAMPLE RUN” to start the automation.
5.2.
Sample run
5.2.1. Manual Inject/Eject
1. Click on ‘GO’
NOTE: The “Initialize Run” window appears. The default “Automation
mode” displayed is what has been set in the ICON-NMR configuration.
84
2. Click on Automation mode button and select ‘Manual Inject/Eject’
3. Select “1” for First sample
NOTE: ICON-NMR gives you the option to lock and shim the sample prior
to running the automation or, if you have stopped or halted the previous
automation run, to continue on the sample already in the magnet. For that
purpose click on the small button next to “First sample in the magnet (locked
and shimmed)?” and a check mark will appear. The system will skip the
inject/eject, locking and shimming for that sample. In addition the user can
choose to process all acquired data sets or do it later. This option can be set
in the ICON configuration set up.
4. Click on ‘Start’
NOTE: At this point the “ICON-NMR / Auto Online Controls” window and
the “acquisition status icons” appears.
•
FID
Online Control function keys:
display the acquisition window (active after the
85
acquisition has started)
•
Lock
•
Spectrum view the spectrum window
•
Halt
view the lock window
stop the acquisition after the next scan is completed
then start the processing
•
Plot
plot data or additional expansions
•
EXIT
exit back to ICON-NMR/Routine window
•
Stop
stop all processes and the run
•
Search
open the Portfolio Editor
5. Click on ‘OK’
NOTE: The sample lift air will turn on and the “Inject/Eject” window
appears.
6. Insert sample
7. Click on ‘OK’
NOTE: At this point the Automation begins locking, shimming, adjusting the
receiver gain, acquisition and processing. A history box on the bottom of the
“Automation Manager” window shows the detailed information of what tasks
86
have been completed or failed for experiment(s) that have been setup to run
on the sample.
5.2.2. Sixpack use and NMR case
NOTE: If the changer is not installed on top of magnet, remove any samples
from the magnet and then install the sample changer.
1. Turn the the switch on the sixpack/case controller box to OFF position
2. Turn on the sample lift (shim keypad) and remove the sample and leave
the lift air on
!!!WARNING!!!: Be absolutely sure that no sample is in the magnet and the
sample holder is empty before proceeding to the next step.
3. With the sample lift air still on, move the sample holder to the start
position (set the small hole over the shim stack)
4. Turn off the sample lift (from the keypad)
5. Load the samples into the sample holder
6. Turn the switch on the sixpack/case controller box to ON position
7. Click on ‘GO’
NOTE: The “Initialize Run” window appears.
87
8. Click on Automation mode button and select ‘Sixpack use’ or ‘NMR case’
9. Select “1” for First sample
NOTE: ICON-NMR gives you the option to lock and shim the sample prior
to running the automation or, if you have stopped or halted the previous
automation run, to continue on the sample already in the magnet. For that
purpose click on the small button next to “First sample in the magnet (locked
and shimmed)?” and a check mark will appear. The system will skip the
inject/eject, locking and shimming for that sample. In addition the user can
choose to process all acquired data sets or do it later. This option can be set
in the ICON configuration set up.
10. Click on ‘Start’
NOTE: At this point the “ICON-NMR / Auto Online Controls” window and
the “acquisition status icons” appears.
88
NOTE: The Automation begins changing the sample, locking, shimming,
adjusting the receiver gain, acquisition and processing. A history box on the
bottom of the “Automation Manager” window shows the detailed information
of what tasks have been completed or failed for experiment(s) that have been
setup to run on the samples. For a definition of the Online Control function
keys, refer to chapter 5.2.1 Manual – Inject/Eject.
11. Wait until the last sample has finished running and has been ejected
12. Click on ‘STOP’
13. Click on ‘Yes’
14. Turn the switch on the sixpack/case controller box to OFF
15. Remove all samples from the sample holder
89
16. Click on ‘File’ and select ‘Close’
17. Click on ‘No’
NOTE: The Automation window closes and the Identify User icon appears.
At this point the user may exit or a new user may log in to run the
automation.
5.2.3. Standard BACS
1. Insert the samples into the holders
2. Press RESET on the front of the sample changer
3. Click on ‘GO’
NOTE: The “Initialize Run” window appears.
4. Click on Automation mode button and select ‘Standard BACS’
90
5. Select “1” for First sample
NOTE: ICON-NMR gives you the option to lock and shim the sample prior
to running the automation or, if you have stopped or halted the previous
automation run, to continue on the sample already in the magnet. For that
purpose click on the small button next to “First sample in the magnet (locked
and shimmed)?” and a check mark will appear. The system will skip the
inject/eject, locking and shimming for that sample. In addition the user can
choose to process all acquired data sets or do it later. This option can be set
in the ICON configuration set up.
6. Click on ‘Start’
NOTE: At this point the “ICON-NMR / Auto Online Controls” window and
the “acquisition status icons” appears.
NOTE: The Automation begins changing the sample, locking, shimming,
adjusting the receiver gain, acquisition and processing. A history box on the
bottom of the “Automation Manager” window shows the detailed information
of what tasks have been completed or failed for experiment(s) setup to run on
91
the samples. For the definition of Online Control function keys refer to 5.2.1
'Manual – Inject/Eject'.
6.
Adding new experiments
6.1.
Adding a new single experiment
!!!IMPORTANT!!!: Before creating a new experiment for automation make
a layout of how the new experiment should work and how you would like to
present the result. Check the parameter library first to see if the new
experiment already exists. If not, check in the pulse program library for an
existing pulse program and in the au program library for the acquisition and
processing programs to satisfy the plans for the new experiment. If you have
to create a new pulse program or have to write an au program, be sure to
follow to the nomenclature of file names, pulse widths and delay numberings
that Bruker has defined. Any deviation may result in a malfunction of the new
experiment. Always test out the new experiment before you add it to ICONNMR.
6.1.1. Layout of the new experiment
•
Experiment:
attached proton experiment (APT)
•
Parameter file:
C13DEPT135
•
Pulse program:
jmod
•
Au programs:
aunm au_zg
aunmp proc_1d
92
6.1.2. Creating the parameter file
NOTE: In this case the APT experiment does not exist in the parameter set
library and it has to be created. Since the acquisition and processing of APT
is similar to the DEPT135 experiment, the parameter file C13DEPT135 can
be used as a template for creating the new experiment.
1. Type edc and change the following parameters:
•
NAME
= newexp
•
EXPNO
=1
•
PROCNO = 1
2. Click on ‘SAVE’
3. Type rpar C13DEPT135 all
4. Type pulprog jmod
NOTE: The only change necessary in the parameters, is the pulse program.
If desired, number of scans ‘ns’ or relaxation time ‘d1’ may be changed.
5. Type wpar C13APT all
NOTE: The parameter files for C13APT are now stored in the directory
/u/exp/stan/nmr/par and before being added to the experiment list in ICONNMR it should be tested on a sample.
6.1.3. Testing the experiment
Sample: ~0.3 M in 0.6 ml CDCl3 of a small organic molecule such as
Cholesterylacetate
93
1. Type edc and change the following parameters:
•
NAME
= newexp
•
EXPNO
=2
•
PROCNO = 1
2. Click on ‘SAVE’
3. Type rpar C13APT all
4. Type lock and select CDCl3 by clicking on it
5. Wait until the locking process is finished, then shim for best homogeneity
6. Type getprosol
7. Click on ‘SAVE’
8. Type xaua
9. Type xaup
10. Correct the phase by making the CH3 and CH carbons of the same phase
and the CH2 and C carbons of opposite phase. The relative phase is
arbitrary.
94
NOTE: Repeat step 8 through 10 if you want to make changes in the
parameters. Apply the changes in the parameter file C13APT with the wpar
command.
6.1.4. Adding the new experiment to ICON-NMR
1. Type iconnmr
2. Click on ‘System Manager’
3. Click on ‘User Manager’
4. Enter the NMR Super user password
5. Select a “user name” by clicking on it
95
6. In the Experiment List open an entry box by clicking on “C13CPD”
7. Click on the ‘box (down arrow)’ next to the Experiment Name
!!!WARNING!!!: The list of names shown in the pop up window are
parameter files which are stored in the /u/stan/exp/nmr/par directory. Not all
of the files are suitable to run in Automation. Some files require additional
operator input in order to be used as an experiment (e.g. SELCO1H,
NOEDIFF etc.). Other files are not possible to run in ICON-NMR (e.g.
plot135, standard1D etc.).
8. Select “C13APT” by clicking on it
9. Click on the Experiment Comment Text window and enter the following
text:
Attached Proton Test using jmod pulse program
NOTE: The Experiment Type is Normal, indicating a single experiment.
10. Click on ‘Append entry’
NOTE: The new experiment has now been added to the Experiment List. To
add the new experiment to other users, click on ‘Update User Files’ and
96
select the users.
11. Click on ‘EXIT’ (Entry Box)
12. Click on ‘Save’
13. Click on ‘Save’
14. Click on ‘EXIT’
15. Select “File” from the menu bar by clicking on it
16. Select “EXIT” by clicking on it
NOTE: Test the new added experiment for proper operation with Routine
Spectroscopy or Automation.
6.2.
Adding a new composite experiment
!!!IMPORTANT!!!: Before creating a new Composite experiment, make a
layout of how the new experiment should work and how you would like to
present the result. Check the parameter library first to see if the experiments
of interest for the composite already exist. If they don’t, create the
experiment by following the steps in chapter “6.1. ADDING A NEW SINGLE
EXPERIMENT”. Always test the single experiment outside ICON-NMR
according to chapter 6.1.3
97
6.2.1. Layout of the new composite experiment
•
Experiments:
1D-Proton followed by a 2D-COSY45 and a
1D-APT
•
Parameter files:
PROTON, COSY45SW, C13APT
•
Name:
PROCOSAPT
6.2.2. Creating the new composite experiment
1. Type iconnmr
2. Click on the Configuration icon
3. Enter NMR Super user password
4. Click on ‘Composite Experiments
5. Click on ‘Add new’
98
6. Type the following text into the “Add/Modify Name & Comment”
window:
•
Name:
•
Comment: Proton, COSY45, APT
PROCOSAPT
7. Click on the arrow next to the “Experiment Name window”
8. Select “PROTON” from the pop up window by clicking on it
9. Click on ‘Append entry’
10. Click on the arrow next to the “Experiment Name window”
11. Select “COSY45SW” from the pop up window by clicking on it
12. Click on the arrow next to the “F2 Reference” window
13. Select “ PROTON” by clicking on it
14. Click on ‘Append entry’
15. Click on the arrow next to the “Experiment Name window”
16. Select “C13APT” from the pop up window
17. Click on ‘Append entry’
99
18. Click on ‘OK’
NOTE: The new composite experiment has now been added to the Composite
Experiment List in the Composite Experiment Manager. To add this
experiment to the user experiment list, stay in this manager window and
follow the next steps.
6.2.3. Adding the new composite experiment to the user experiment
list
1. Click on the new experiment “PROCOSAPT”
2. Click on ‘Save to’
3. Click on the user that will be allowed to access the new composite
experiment
NOTE: To select multiple users, hold down the Shift or Control key when
selecting them.
4. Click on ‘Save to selected users’
5. Click on ‘Cancel’
6. Click on ‘Save’
7. Click on ‘File’ and select ‘Exit’ by clicking on it
8. Select “File” from the menu bar by clicking on it
100
9. Select “EXIT” by clicking on it
NOTE: Test the new composite experiment for proper operation with Routine
Spectroscopy or Automation.
!!!WARNING!!!: The list of names shown in the pop up window are
parameter files which are stored in the /u/stan/exp/nmr/par directory. Not all
of the files are suitable to run in Automation. Some files require additional
operator input in order to be used as an experiment (e.g. SELCO1H,
NOEDIFF etc.). Other files are not possible to run in ICON-NMR (e.g.
plot135, standard1D etc.)