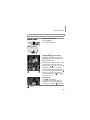
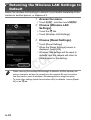
1
Getting Started
Y
P
O
Please refer to the complete user guide included
on the CD-ROM for more detailed information.
• Before use, be sure to read this guide, including the
safety precautions.
• This guide will familiarize you with how to use the camera
correctly.
• Keep the guide handy for future reference.
C
ENGLISH
Package Contents
Before use, make sure the following items are included in the package.
If anything is missing, contact your camera dealer.
ELPH 530 HS
Camera
IXUS 510 HS
ELPH 530 HS
Battery Pack NB-9L
(with terminal cover)
ELPH 320 HS
IXUS 240 HS
Battery Charger
CB-2LB/CB-2LBE
ELPH 320 HS
Battery Pack NB-11L
(with terminal cover)
Interface Cable
IFC-400PCU
Getting Started
IXUS 510 HS
IXUS 240 HS
Battery Charger
CB-2LD/2LDE
C
Y
P
O
DIGITAL CAMERA
Solution Disk
Wrist Strap
WS-DC10
Warranty
Card
• A memory card is not included (p. 3).
About Getting Started (This Guide) and the PDF
Manuals
This guide introduces basic camera operations.
To master more advanced operations and use the included software, refer to
the PDF manuals on the CD-ROM (p. 31).
• Adobe Reader is required to view the PDF manuals.
2
Compatible Memory Cards
The following memory cards (sold separately) can be used, regardless of
capacity.
ELPH 530 HS
IXUS 510 HS
• microSD memory cards*
• microSDHC memory cards*
• microSDXC memory cards*
ELPH 320 HS
•
•
•
•
IXUS 240 HS
SD memory cards*
SDHC memory cards*
SDXC memory cards*
Eye-Fi cards
* Conforms to SD specifications. However, not all memory cards have been verified to
work with the camera.
ELPH 320 HS
IXUS 240 HS
About Eye-Fi Cards
Y
P
O
This product is not guaranteed to support Eye-Fi card functions (including
wireless transfer). In case of an issue with an Eye-Fi card, please check with
the card manufacturer.
Also note that an approval is required to use Eye-Fi cards in many countries
or regions. Without approval, use of the card is not permitted. If it is unclear
whether the card has been approved for use in the area, please check with
the card manufacturer.
C
• Always confirm beforehand that memory cards are supported on other devices
such as card readers and computers (including the current version of your
operating system).
3
Preliminary Notes and Legal
Information
• Take and review some test shots initially to make sure the images were
recorded correctly. Please note that Canon Inc., its subsidiaries and
affiliates, and its distributors are not liable for any consequential damages
arising from any malfunction of a camera or accessory, including memory
cards, that results in the failure of an image to be recorded or to be
recorded in a way that is machine readable.
• Images recorded by the camera are intended for personal use. Refrain from
unauthorized recording that infringes on copyright law, and note that even
for personal use, photography may contravene copyright or other legal rights
at some performances or exhibitions, or in some commercial settings.
• The camera warranty is valid only in the area of purchase. In case of
camera problems while abroad, return to the area of purchase before
contacting a Canon Customer Support Help Desk.
• Although the LCD monitor is produced under extremely high-precision
manufacturing conditions and more than 99.99% of the pixels meet design
specifications, in rare cases some pixels may be defective or may appear
as red or black dots. This does not indicate camera damage or affect
recorded images.
• The LCD monitor may be covered with a thin plastic film for protection
against scratches during shipment. If covered, remove the film before
using the camera.
• When the camera is used over an extended period, it may become warm.
This does not indicate damage.
C
Y
P
O
Table of Contents
Package Contents .................................................................................2
Compatible Memory Cards ....................................................................3
Preliminary Notes and Legal Information...............................................4
Safety Precautions.................................................................................5
Part Names and Conventions in This Guide..........................................8
Touch-Screen Operations....................................................................10
Initial Preparations ...............................................................................11
Trying the Camera Out ........................................................................20
Included Software, PDF Manuals ........................................................25
Accessories .........................................................................................32
Specifications.......................................................................................33
Wireless LAN Guide ..........................................................................w-1
4
EC324_318_GS-EN_01.fm Page 5 Wednesday, March 28, 2012 2:56 PM
Safety Precautions
• Before using the product, please ensure that you read the safety precautions described
below. Always ensure that the product is used correctly.
• The safety precautions noted on the following pages are intended to prevent injuries to
yourself and other persons, or damage to the equipment.
• Be sure to also check the guides included with any separately sold accessories you
use.
Warning
Denotes the possibility of serious injury or death.
• Do not trigger the flash in close proximity to people’s eyes.
Exposure to the intense light produced by the flash could damage eyesight. In particular,
remain at least one meter (39 inches) away from infants when using the flash.
• Store this equipment out of the reach of children and infants.
Strap: Putting the strap around a child’s neck could result in asphyxiation.
•
•
•
•
Use only recommended power sources.
Do not attempt to disassemble, alter or apply heat to the product.
Avoid dropping or subjecting the product to severe impacts.
To avoid the risk of injury, do not touch the interior of the product if it has been
dropped or otherwise damaged.
• Stop using the product immediately if it emits smoke, a strange smell, or
otherwise behaves abnormally.
• Do not use organic solvents such as alcohol, benzine, or thinner to clean the
product.
• Do not let the product come into contact with water (e.g. sea water) or other
liquids.
• Do not allow liquids or foreign objects to enter the camera.
This could result in electrical shock or fire.
If liquids or foreign objects come into contact with the camera interior, immediately turn
the camera off and remove the battery.
If the battery charger becomes wet, unplug it from the outlet and consult your camera
distributor or a Canon Customer Support Help Desk.
C
Y
P
O
• Use only the recommended battery.
• Do not place the battery near or in direct flame.
• Unplug the power cord periodically, and using a dry cloth, wipe away any dust
and dirt that has collected on the plug, the exterior of the power outlet, and the
surrounding area.
• Do not handle the power cord with wet hands.
• Do not use the equipment in a manner that exceeds the rated capacity of the
electrical outlet or wiring accessories. Do not use if the power cord or plug are
damaged, or not fully plugged into the outlet.
• Do not allow dirt or metal objects (such as pins or keys) to contact the terminals
or plug.
The battery may explode or leak, resulting in electrical shock or fire. This could cause
injury and damage the surroundings. In the event that a battery leaks and the battery
electrolyte contacts eyes, mouth, skin or clothing, immediately flush with water.
5
EC324_318_GS-EN_01.fm Page 6 Wednesday, March 28, 2012 2:56 PM
Safety Precautions
• Turn the camera off in places where camera use is prohibited.
The electromagnetic waves emitted by the camera may interfere with the operation of
electronic instruments and other devices. Exercise adequate caution when using the
camera in places where use of electronic devices is restricted, such as inside airplanes
and medical facilities.
• Do not play the supplied CD-ROM(s) in any CD player that does not support data
CD-ROMs.
It is possible to suffer hearing loss from listening with headphones to the loud sounds of
a CD-ROM played on an audio CD player (music player). Additionally, this could damage
the speakers.
Caution
Denotes the possibility of injury.
• When holding the camera by the strap, be careful not to bang it, subject it to
strong impacts or shocks, or let it get caught on other objects.
• Be careful not to bump or push strongly on the lens.
This could lead to injury or damage the camera.
Y
P
O
• When using the flash, be careful not to cover it with your fingers or clothing.
This could result in burns or damage to the flash.
• Avoid using, placing or storing the product in the following places:
- Places subject to strong sunlight
- Places subject to temperatures above 40 °C (104 °F)
- Humid or dusty areas
C
These could cause leakage, overheating or an explosion of the battery, resulting in
electrical shock, fire, burns or other injuries.
High temperatures may cause deformation of the camera or battery charger casing.
• Viewing images on the camera screen for prolonged periods may cause
discomfort.
Caution
Denotes the possibility of damage to the equipment.
• Do not aim the camera at bright light sources (such as the sun on a clear day).
Doing so may damage the image sensor.
• When using the camera on a beach or at a windy location, be careful not to allow
dust or sand to enter the camera.
This may cause the product to malfunction.
• In regular use, small amounts of smoke may be emitted from the flash.
This is due to the high intensity of the flash burning dust and foreign materials stuck to the
front of the unit. Please use a cotton swab to remove dirt, dust or other foreign matter from
the flash to prevent heat build-up and damage to the unit.
6
EC324_318_GS-EN_01.fm Page 7 Wednesday, March 28, 2012 2:56 PM
Safety Precautions
• Remove and store the battery when you are not using the camera.
If the battery is left inside the camera, damage caused by leakage may occur.
• Before you discard the battery, cover the terminals with tape or other insulators.
Contacting other metal materials may lead to fire or explosions.
• Unplug the battery charger from the power outlet after charging is complete, or
when you are not using it.
• Do not place anything, such as cloth, on top of the battery charger while it is
charging.
Leaving the unit plugged in for a long period of time may cause it to overheat and distort,
resulting in fire.
• Do not place the battery near pets.
Pets biting the battery could cause leakage, overheating or explosion, resulting in fire or
damage.
• Do not sit down with the camera in your pocket.
Doing so may cause malfunctions or damage the screen.
• When putting the camera in your bag, ensure that hard objects do not come into
contact with the screen.
• Do not attach any hard objects to the camera.
Doing so may cause malfunctions or damage the screen.
C
Y
P
O
7
Part Names and Conventions in This
Guide
ELPH 530 HS
IXUS 510 HS
Lens
Wireless LAN indicator
Zoom lever
Shooting: i (telephoto) / j (wide
angle)
Playback: k (magnify) / g (index)
Shutter button
Indicator
1 (Playback) button
Power button
Lamp
Flash
C
Microphone
Speaker
Battery cover
DC coupler terminal cover
Tripod socket
Screen (LCD monitor)
Memory card cover
Strap mount
HDMITM terminal
AV OUT (Audio/video output) / DIGITAL
terminal
Y
P
O
• In this guide, icons are used to represent the corresponding camera
buttons and switches on which they appear or which they resemble.
• On-screen text is indicated in brackets.
•
: Important information you should know
•
: Notes and tips for expert camera use
• (p. xx): Pages with related information (in this example, “xx” represents a
page number)
• Instructions in this guide apply to the camera under default settings.
• For convenience, all supported memory cards are simply referred to as
“the memory card”.
8
Part Names and Conventions in This Guide
ELPH 320 HS
IXUS 240 HS
Lens
Speaker
Zoom lever
Shooting: i (telephoto) / j (wide
angle)
Playback: k (magnify) / g (index)
Shutter button
Power button
Mode switch
Flash
Lamp
Microphone
C
Tripod socket
Screen (LCD monitor)
Memory card/battery cover
1 (Playback) button
Indicator
DC coupler cable port
Strap mount
HDMITM terminal
AV OUT (Audio/video output) / DIGITAL
terminal
Wireless LAN indicator
Y
P
O
• The tabs shown above titles indicate whether the function is used for still
images, movies, or both.
Still Images
: Indicates that the function is used when shooting or
viewing still images.
Movies
: Indicates that the function is used when shooting or
viewing movies.
• The following icons are used to indicate functions that differ depending on
the camera model:
ELPH 530 HS
IXUS 510 HS : Functions and precautions for the PowerShot ELPH
530 HS/IXUS 510 HS only.
ELPH 320 HS
IXUS 240 HS : Functions and precautions for the PowerShot ELPH
320 HS/IXUS 240 HS only.
• This guide uses PowerShot ELPH 530 HS/IXUS 510 HS illustrations and
screenshots for all explanations.
9
Touch-Screen Operations
The camera’s touch-screen panel enables intuitive operation simply by
touching or tapping the screen.
Touch
Touch the screen briefly with your
finger.
z This gesture is used to shoot, configure
camera functions, and so on.
Drag
Touch the screen and move your
finger across it.
z This gesture is used in Playback mode to
Y
P
O
switch to the next image, or to change the
magnified image area, among other
operations.
C
• Gestures may not be detected as easily if you apply a screen
protector, because the screen works by detecting finger pressure.
For Easier Touch-Screen Operations
z If you have difficulty operating the camera by
touch, use the stylus attached to the strap.
Do not use pencils, pens, or sharp objects
other than the included stylus to operate the
touch-screen.
To correct any discrepancy between the
position you touch and the position detected,
calibrate the screen (see Camera User
Guide).
10
Initial Preparations
Prepare for shooting as follows.
Attaching the Strap
Attach the strap.
z Thread the end of the strap through the strap
hole ( ), and then pull the other end of the
strap through the loop on the threaded end
( ).
Holding the Camera
ELPH 530 HS
IXUS 510 HS
z Place the strap around your wrist.
z When shooting, hold the camera securely to
Y
P
O
prevent it from moving. Do not rest your
fingers on the flash.
ELPH 320 HS
IXUS 240 HS
C
z Place the strap around your wrist.
z When shooting, keep your arms close to your
body and hold the camera securely to
prevent it from moving. Do not rest your
fingers on the flash.
11
Initial Preparations
Charging the Battery
Before use, charge the battery with the included charger. Be sure to charge
the battery initially, because the camera is not sold with the battery charged.
ELPH 530 HS
IXUS 510 HS
Remove the cover.
Insert the battery.
z After aligning the S marks on the battery and
charger, insert the battery by pushing it in
( ) and down ( ).
ELPH 320 HS
ELPH 530 HS
IXUS 240 HS
IXUS 510 HS
Charge the battery.
z For CB-2LB/CB-2LD: Flip out the plug (
CB-2LB
CB-2LBE
12
)
and plug the charger into a power outlet ( ).
z For CB-2LBE/CB-2LDE: Plug the power
cord into the charger, then plug the other end
into a power outlet.
X The charging lamp turns orange and
charging begins.
X When the charging is finished, the lamp turns
green.
C
Y
P
O
Initial Preparations
ELPH 320 HS
IXUS 240 HS
CB-2LD
CB-2LDE
ELPH 530 HS
IXUS 510 HS
Remove the battery.
z After unplugging the battery charger, remove
Y
P
O
the battery by pushing it in (
ELPH 320 HS
IXUS 240 HS
C
) and up (
).
• To protect the battery and keep it in optimal condition, do not charge
it continuously for more than 24 hours.
• For battery chargers that use a power cord, do not attach the charger
or cord to other objects. Doing so could result in malfunction or
damage to the product.
• For details on charging time and the number of shots and recording time
possible with a fully charged battery, see “Specifications” (p. 33).
13
Initial Preparations
Inserting the Battery and Memory Card
Insert the included battery and a memory card (sold separately).
Note that before using a new memory card (or a memory card formatted in
another device), you should format the memory card with this camera (see
Camera User Guide).
ELPH 530 HS
IXUS 510 HS
Open the battery cover.
z Slide the cover (
) and open it (
).
Insert the battery.
z While pressing the battery lock in the
Y
P
O
direction of the arrow, insert the battery
facing as shown and push it in until it clicks
into the locked position.
z Batteries inserted facing the wrong way
cannot be locked into the correct position.
Always confirm that the battery is facing the
right way and locks when inserted.
Terminals
Battery
Lock
C
Close the battery cover.
z Lower the cover (
) and hold it down as you
slide it until it clicks into the closed position
( ).
Open the memory card cover.
z Slide the cover (
14
) and open it (
).
Initial Preparations
Insert the memory card.
z Insert the memory card facing as shown until
it clicks into the locked position.
z Make sure the memory card is facing the right
way when you insert it. Inserting memory
cards facing the wrong way may damage the
camera.
Label
Close the memory card cover.
z Lower the cover (
) and hold it down as you
slide it until it clicks into the closed position
( ).
Removing the Battery
z Open the cover and press the battery lock in
Y
P
O
the direction of the arrow.
X The battery will pop up.
C
Removing the Memory Card
z Open the cover and push the memory card in
until it clicks, and then slowly release the
memory card.
X The memory card will pop up.
15
Initial Preparations
ELPH 320 HS
IXUS 240 HS
Check the card’s write-protect tab.
z Recording is not possible on memory cards
with a write-protect tab when the tab is in the
locked (downward) position. Slide the tab up
until it clicks into the unlocked position.
Open the memory card/battery
cover.
z Slide the cover (
) and open it (
).
Insert the battery.
z While pressing the battery lock in the
direction of the arrow, insert the battery
facing as shown and push it in until it clicks
into the locked position.
z Batteries inserted facing the wrong way
cannot be locked into the correct position.
Always confirm that the battery is facing the
right way and locks when inserted.
Terminals
Battery
Lock
C
Y
P
O
Insert the memory card.
z Insert the memory card facing as shown until
it clicks into the locked position.
z Make sure the memory card is facing the right
way when you insert it. Inserting memory
cards facing the wrong way may damage the
camera.
Terminals
Close the memory card/battery
cover.
z Lower the cover (
) and hold it down as you
slide it until it clicks into the closed position
( ).
16
Initial Preparations
Removing the Battery and Memory Card
Remove the battery.
z Open the cover and press the battery lock in
the direction of the arrow.
X The battery will pop up.
Remove the memory card.
z Push the memory card in until it clicks, and
then slowly release it.
X The memory card will pop up.
Setting the Date and Time
Y
P
O
A screen for setting the date and time is displayed the first time you turn the
camera on. Be sure to specify the date and time, which is the basis for dates
and times added to your images.
C
Turn the camera on.
z Press the power button.
X The [Date/Time] screen is displayed.
Set the date and time.
z Touch the option to configure, and then touch
op to specify the date and time.
z When finished, touch ^.
Finish the setup process.
z Once the date and time have been set, the
[Date/Time] screen is no longer displayed.
z To turn off the camera, press the power
button.
17
Initial Preparations
• Unless you set the date and time, the [Date/Time] screen will be
displayed each time you turn the camera on. Specify the correct
information.
• To set daylight saving time (1 hour ahead), touch
and choose
in step 2.
Changing the Date and Time
Adjust the date and time as follows.
Access the camera menu.
z Touch H, and then touch n.
C
Y
P
O
Choose [Date/Time].
z Touch the 3 tab.
z Drag up or down across the screen to choose
[Date/Time].
z Touch [Date/Time].
Change the date and time.
z Follow step 2 on p. 17 to adjust the settings.
z Double-touch ^ to close the menu.
• Date/time settings can be retained for about 3 weeks by the camera’s built-in
date/time battery (backup battery) after the battery pack is removed.
• The date/time battery will be charged in about 4 hours once you insert a charged
battery or connect the camera to an AC adapter kit (sold separately, see
Camera User Guide), even if the camera is left off.
• Once the date/time battery is depleted, the [Date/Time] screen will be displayed
when you turn the camera on. Follow the steps on p. 17 to set the date and time.
18
Initial Preparations
Display Language
The display language can be changed as needed.
ELPH 530 HS
IXUS 510 HS
Enter Playback mode.
z Press the 1 button.
ELPH 320 HS
IXUS 240 HS
Y
P
O
Access the setting screen.
z Touch and hold n until the setting
screen is displayed.
C
Set the display language.
z Touch a display language to choose it, and
then touch ^.
X Once the display language has been set, the
setting screen is no longer displayed.
• If there are images on the memory card, touch H in the lower left
to access n.
• You can also change the display language by touching H and then n,
and then choosing [Language ] on the 3 tab.
19
Still Images
Movies
Trying the Camera Out
Follow these instructions to turn the camera on, shoot still images or movies,
and then view them.
Shooting (Smart Auto)
For fully automatic selection of the optimal settings for specific scenes, simply
let the camera determine the subject and shooting conditions.
Turn the camera on.
z Press the power button.
X The startup screen is displayed.
ELPH 530 HS
IXUS 510 HS
Enter Auto mode.
ELPH 530 HS
IXUS 510 HS
, touch qr or quickly drag left or
right on the screen, and then touch
to
choose it.
z To confirm your choice, touch [OK].
z Touch
C
ELPH 320 HS
20
IXUS 240 HS
Y
P
O
ELPH 320 HS
IXUS 240 HS
z Set the mode switch to A.
Trying the Camera Out
z Aim the camera at the subject. As the camera
determines the scene, it will make a slight
clicking noise.
X A scene icon is displayed in the upper left of
the screen and an image stabilization icon in
the upper right.
X Frames displayed around any subjects that
are detected indicate that they are in focus.
X Black bars displayed on the left and right
edges of the screen indicate image areas not
recorded.
Compose the shot.
z To zoom in and enlarge the subject, move the
zoom lever toward i (telephoto), and to
zoom away from the subject, move it toward
j (wide angle).
Y
P
O
Shoot.
Shooting Still Images
Focus.
C
z Press the shutter button lightly, halfway
down. The camera beeps twice after
focusing, and AF frames are displayed to
indicate image areas in focus.
AF Frames
21
Trying the Camera Out
Shoot.
z Press the shutter button all the way down.
z As the camera shoots, a shutter sound is
played, and in low-light conditions, the flash
fires automatically.
z Keep the camera still until the shutter sound
ends.
X Your shot remains displayed on the screen
for about two seconds.
z Even while the shot is displayed, you can
take another shot by pressing the shutter
button again.
Shooting Movies
Start shooting.
Y
P
O
z Touch
Elapsed Time
. The camera beeps once as
recording begins, and [ Rec] is displayed
with the elapsed time.
X The camera switches to full-screen display,
and the portion of your subject shown on the
screen is recorded.
X Frames displayed around any faces that are
detected indicate that they are in focus.
C
Finish shooting.
z Touch
. The camera beeps twice as
recording stops.
X Recording will stop automatically when the
memory card becomes full.
22
Trying the Camera Out
Viewing
After shooting images or movies, you can view them on the screen as follows.
ELPH 530 HS
IXUS 510 HS
Enter Playback mode.
z Press the 1 button.
X Your last shot is displayed.
ELPH 320 HS
IXUS 240 HS
Y
P
O
Browse through your images.
z To view the next image, drag right to left
across the screen, and to view the previous
image, drag left to right.
C
z You can also view the next image by touching
the right edge of the screen (in the area
indicated by frame
at left). In this case, r
is displayed. Similarly, you can view the
previous image by touching the left edge of
the screen (in the area indicated by frame
at left), and in this case, q is displayed.
z Movies are identified by a
icon. To play
movies, go to step 3.
Play movies.
z Touch
to start playback.
z To adjust the volume, quickly drag up or
down across the screen during playback.
is displayed.
X After the movie is finished,
• To switch to Shooting mode from Playback mode, press the shutter button
halfway.
23
Trying the Camera Out
Erasing the Images
You can choose and erase unneeded images one by one. Be careful when
erasing images, because they cannot be recovered.
Choose an image to erase.
z Drag left or right across the screen to choose
an image.
Erase the image.
z Touch H, drag up or down on the
screen, and then touch a to choose it.
C
Y
P
O
z After [Erase?] is displayed, touch [Erase].
X The current image is now erased.
z To cancel erasure, touch [Cancel].
• Images can also be erased by using Touch Actions (see Camera User Guide).
• You can also erase all images at once (see Camera User Guide).
24
Included Software, PDF Manuals
The software and PDF manuals on the included CD-ROM are introduced
below, with instructions for installation, saving images to a computer, and
using the PDF manuals.
Features of the Included Software
After installing the software on the CD-ROM, you can do the following things
on your computer.
ImageBrowser EX
z Import images and change camera settings
z Manage images: view, search, and organize
z Print and edit images
z Update to the latest software version with the auto update function
Auto Update Function
Using the included software, you can update to the latest version, and
download new functions via the Internet (some software excluded). Be sure
to install the software on a computer with an Internet connection so you can
use this function.
Y
P
O
• Internet access is required to use this function, and any ISP account
charges and access fees must be paid separately.
• This function may not be available depending on the camera or
region you live in.
C
PDF Manuals
Installing the software on the CD-ROM will also install the following PDF
manuals on your computer.
Camera User Guide
Once you are familiar with the information in Getting Started, refer to this for a more indepth understanding of camera operation.
ImageBrowser EX User Guide
Refer to this guide when using the included software.
This guide can be referenced from the ImageBrowser EX Help function.
• Depending on the country or region where you purchased your camera, the
ImageBrowser EX User Guide may not be accessible from the Help function. In
such cases, it will either be included on the CD-ROM bundled with your camera,
or you can download the latest version from the Canon website.
25
Included Software, PDF Manuals
System Requirements
The included software can be used on the following computers. Adobe
Reader is required to view the PDF manuals.
Windows
Operating System
Windows 7 SP1
Windows Vista SP2
Windows XP SP3
(Connection via wireless LAN is only supported on Windows 7 SP1)
Computer
Computers running one of the above operating systems
(preinstalled), with an included USB port and Internet connection
Processor
1.6 GHz or higher (still images), Core 2 Duo 2.6 GHz or higher
(movies)
RAM
Windows 7 (64 bit): 2 GB or more
Windows 7 (32 bit), Windows Vista (64 bit, 32 bit):
1 GB or more (still images), 2 GB or more (movies)
Windows XP: 512 MB or more (still images), 2 GB or more (movies)
Interfaces
USB or wireless LAN
Free Hard Disk
Space
440 MB or more*
Display
1024 x 768 resolution or higher
C
Y
P
O
* In Windows XP, Microsoft .NET Framework 3.0 or later (max. 500 MB) must be installed.
Installation may take some time, depending on computer performance.
Macintosh
Operating System
Mac OS X 10.6 (Connection via wireless LAN is only supported on
v10.6.8 and later)
Computer
Computers running one of the above operating systems
(preinstalled), with an included USB port and Internet connection
Processor
Core Duo 1.83 GHz or higher (still images), Core 2 Duo 2.6 GHz or
higher (movies)
RAM
1 GB or more (still images), 2 GB or more (movies)
Interfaces
USB or wireless LAN
Free Hard Disk
Space
550 MB or more
Display
1024 x 768 resolution or higher
• Check the Canon website for the latest system requirements, including
supported OS versions.
26
Included Software, PDF Manuals
Installing the Software and PDF Manuals
Windows 7 and Mac OS X 10.6 are used here for the sake of illustration.
Using the software auto update function, you can update to the latest version
and download new functions via the Internet (some software excluded), so be
sure to install the software on a computer with an Internet connection.
Insert the CD-ROM in the
computer’s CD-ROM drive.
z Insert the included CD-ROM (DIGITAL
CAMERA Solution Disk) (p. 2) in the
computer’s CD-ROM drive.
z On a Macintosh computer, after inserting the
disc, double-click the desktop disc icon to
open it, and then double-click the
icon
displayed.
Y
P
O
Begin the installation.
z Click [Easy Installation] and follow the on-
C
screen instructions to complete the
installation process.
When a message is displayed
prompting you to connect the
camera, connect it to a computer.
27
Included Software, PDF Manuals
ELPH 530 HS
IXUS 510 HS
z With the camera turned off, open the cover
( ). With the smaller plug of the included
interface cable (p. 2) in the orientation
shown, insert the plug fully into the camera
terminal ( ).
ELPH 320 HS
IXUS 240 HS
z Insert the larger plug of the interface cable in
the computer’s USB port. For details about
USB connections on the computer, refer to
the computer user manual.
C
Y
P
O
Install the files.
z Turn the camera on, and follow the on-screen
instructions to complete the installation
process.
X The software will connect to the Internet to
update to the latest version and download
new functions. Installation may take some
time, depending on computer performance
and the Internet connection.
z Click [Finish] or [Restart] on the screen after
installation and remove the CD-ROM when
the desktop is displayed.
z Turn the camera off and disconnect the
cable.
28
Included Software, PDF Manuals
• When not connected to the Internet, there are the following limitations.
- The screen in step 3 will not be displayed.
- Some functions may not be installed.
- The first time you connect the camera to the computer, drivers will be installed,
so it may take a few minutes until camera images are accessible.
• If you have several cameras that were bundled with ImageBrowser EX on the
included CD-ROMs, be sure to use each camera with their included CD-ROM
and follow the on-screen installation instructions for each. Doing so will ensure
that each camera will receive the correct updates and new functions via the auto
update function.
Saving Images to a Computer
Windows 7 and Mac OS X 10.6 are used here for the sake of illustration.
Connect the camera to the
computer.
Y
P
O
z Follow step 3 on p. 27 to connect the camera
to a computer.
Turn the camera on to access
CameraWindow.
C
z Press the 1 button to turn the camera on.
z On a Macintosh computer, CameraWindow is
displayed when a connection is established
between the camera and computer.
z For Windows, follow the steps introduced
below.
z In the screen that displays, click the
link
to modify the program.
29
Included Software, PDF Manuals
z Choose [Downloads Images From Canon
Camera using Canon CameraWindow] and
then click [OK].
z Double click
CameraWindow
.
Y
P
O
Save the images to the computer.
z Click [Import Images from Camera], and then
click [Import Untransferred Images].
X Images are now saved to the Pictures folder
C
on the computer, in separate folders named
by date.
z After images are saved, close CameraWindow,
press the 1 button to turn the camera off, and
unplug the cable.
z For instructions on viewing images on a
computer, refer to the ImageBrowser EX
User Guide.
30
Included Software, PDF Manuals
• In Windows 7, if the screen in step 2 is not displayed, click the
icon in the
taskbar.
• To start CameraWindow in Windows Vista or XP, click [Downloads Images
From Canon Camera using Canon CameraWindow] on the screen displayed
when you turn the camera on in step 2. If CameraWindow is not displayed, click
the [Start] menu and choose [All Programs] X [Canon Utilities] X
[CameraWindow] X [CameraWindow].
• On a Macintosh computer, if CameraWindow is not displayed after step 2, click
the [CameraWindow] icon in the Dock (the bar at the bottom of the desktop).
• Although you can save images to a computer simply by connecting your camera
to the computer without using the included software, the following limitations
apply.
- It may take a few minutes after you connect the camera to the computer until
camera images are accessible.
- Images shot in vertical orientation may be saved in horizontal orientation.
- Image protection settings may be cleared from images saved to a computer.
- Some problems may occur when saving images or image information,
depending on the operating system version, the software in use, or image file
sizes.
- Some functions provided by the included software may not be available, such
as editing movies or returning images to the camera.
Y
P
O
Using the PDF Manuals
C
Use the included CD-ROM to install the PDF manuals, and a shortcut for the
camera manual will be created on the desktop.
Adobe Reader is required to view the PDF manuals.
• It may not be possible to install the software and PDF manuals on computers
that do not meet the system requirements (p. 26). To view the manuals on these
computers, copy the PDF files in the Readme folder on the CD-ROM directly to
a computer capable of using Adobe Reader.
31
Accessories
Included
Accessories
ELPH 530 HS
IXUS 510 HS
Battery Pack NB-9L*1
(with terminal cover)
ELPH 320 HS
IXUS 240 HS
ELPH 530 HS
IXUS 510 HS
Battery Charger
CB-2LB/CB-2LBE*1
ELPH 320 HS
DIGITAL
CAMERA
Solution Disk
IXUS 240 HS
Power
ELPH 530 HS
IXUS 510 HS
Battery Pack
Battery Charger
NB-11L*1
CB-2LD/CB-2LDE*1
(with terminal cover)
AC Adapter Kit
ACK-DC70
ELPH 320 HS
Interface Cable IFC-400PCU*1
IXUS 240 HS
Y
P
O
Memory Card
Card Reader
Cable
AC Adapter Kit
ACK-DC90
Flash Unit
Wrist Strap
WS-DC10
C
Windows/
Macintosh
Computer
HDMI Cable HTC-100
Stereo AV Cable AVC-DC400ST
TV/Video
System
Canon PictBridge-Compatible
Printers
High-Power Flash
HF-DC2*2
*1 Also available for purchase separately.
ELPH 530 HS
IXUS 510 HS
*2 High-Power Flash HF-DC1 also supported.
Use of genuine Canon accessories is recommended.
This product is designed to achieve excellent performance when used with genuine Canon
accessories.
Canon shall not be liable for any damage to this product and/or accidents such as fire, etc.,
caused by the malfunction of non-genuine Canon accessories (e.g., a leakage and/or explosion
of a battery pack). Please note that this warranty does not apply to repairs arising out of the
malfunction of non-genuine Canon accessories, although you may request such repairs on a
chargeable basis.
32
Specifications
ELPH 530 HS
IXUS 510 HS
ELPH 320 HS
IXUS 240 HS
Camera Effective
Pixels
Approx. 10.1 megapixels
Lens Focal Length
12x zoom: 4.0 (W) – 48.0 (T) mm 5x zoom: 4.3 (W) – 21.5 (T) mm
(35mm film equivalent:
(35mm film equivalent:
24 (W) – 120 (T) mm)
28 (W) – 336 (T) mm)
LCD Monitor
3.2 type color TFT LCD
Effective Pixels: Approx. 461,000 pixels
File Formats
Design rule for Camera File system, DPOF (version 1.1) compliant
Data Types
Still Images: Exif 2.3 (JPEG)
Movies: MOV (H.264 video data, Linear PCM (2 channel stereo)
audio data)
Interfaces
Hi-speed USB
HDMI output
Analog audio output (stereo)
Analog video output (NTSC/PAL)
Power
Battery Pack NB-9L
AC Adapter Kit ACK-DC70
C
Y
P
O
Dimensions (Based on 85.8 x 53.5 x 19.8 mm
CIPA Guidelines)
(3.38 x 2.11 x 0.78 in.)
Weight (Based on
CIPA Guidelines)
Approx. 16.1 megapixels
Approx. 163 g (approx. 5.75 oz.;
including batteries and memory
card)
Approx. 142 g (approx. 5.01 oz.;
camera body only)
Battery Pack NB-11L
AC Adapter Kit ACK-DC90
93.5 x 56.8 x 20.8 mm
(3.68 x 2.24 x 0.82 in.)
Approx. 145 g (approx. 5.11 oz.;
including batteries and memory
card)
Approx. 130 g (approx. 4.59 oz.;
camera body only)
33
Specifications
Number of Shots/Recording Time, Playback Time
ELPH 530 HS
IXUS 510 HS
ELPH 320 HS
IXUS 240 HS
Number of Shots
Approx. 190
Approx. 170
Movie Recording Time*1
Approx. 30 minutes
Approx. 30 minutes
Approx. 50 minutes
Approx. 1 hour
Approx. 3 hours
Approx. 3 hours
Continuous
Shooting*2
Playback Time
*1 Time under default camera settings, when normal operations are performed, such as
shooting, pausing, turning the camera on and off, and zooming.
*2 Time available when shooting the maximum movie length (until recording stops
automatically) repeatedly.
• The number of shots that can be taken is based on measurement guidelines of the
Camera & Imaging Products Association (CIPA).
• Under some shooting conditions, the number of shots and recording time may be less
than mentioned above.
• Number of shots/recording time with fully charged batteries.
Y
P
O
Number of 4:3 Shots per Memory Card
ELPH 530 HS
IXUS 510 HS
Resolution (Pixels)
C
Compression
Ratio
No. Shots per Memory Card (Approx.)
4 GB
16 GB
(Large)
799
3217
10M/3648x2736
1257
5061
(Medium 1)
1195
4810
1829
7362
3658
14724
2M/1600x1200
6354
25574
(Small)
13416
53992
20124
80988
6M/2816x2112
(Medium 2)
0.3M/640x480
34
Specifications
ELPH 320 HS
IXUS 240 HS
Resolution (Pixels)
Compression
Ratio
No. Shots per Memory Card (Approx.)
8 GB
32 GB
(Large)
1058
4272
16M/4608x3456
1705
6883
(Medium 1)
1996
8059
3069
12391
8M/3264x2448
(Medium 2)
7442
30040
2M/1600x1200
12927
52176
(Small)
27291
110150
40937
165225
0.3M/640x480
Y
P
O
• These values are measured according to Canon standards and may change depending
on the subject, memory card and camera settings.
• Table values are based on images with a 4:3 aspect ratio. Changing the aspect ratio
(see Camera User Guide) will enable more shots, because less data is used per image
than for 4:3 images. However, with
, 16:9 images have a resolution of 1920 x 1080
pixels, which requires more data than for 4:3 images.
C
35
Specifications
Recording Time per Memory Card
ELPH 530 HS
IXUS 510 HS
Recording Time per Memory Card
Image Quality
ELPH 320 HS
4 GB
16 GB
14 min. 34 sec.
58 min. 40 sec.
20 min. 44 sec.*1
1 hr. 23 min. 29 sec.*2
43 min. 44 sec.
2 hr. 56 min. 3 sec.
IXUS 240 HS
Recording Time per Memory Card
Image Quality
8 GB
32 GB
29 min. 39 sec.
1 hr. 59 min. 43 sec.
42 min. 11 sec.*1
2 hr. 50 min. 19 sec.*2
Y
P
O
1 hr. 28 min. 59 sec.
5 hr. 59 min. 10 sec.
*1 13 min. 35 sec. ( ELPH 530 HS
IXUS 510 HS ), 27 min. 39 sec. ( ELPH 320 HS
IXUS 240 HS ) for
iFrame movies (see Camera User Guide).
*2 54 min. 42 sec. ( ELPH 530 HS
IXUS 510 HS ), 1 hr. 51 min. 37 sec. ( ELPH 320 HS
IXUS 240 HS )
for iFrame movies (see Camera User Guide).
• These values are measured according to Canon standards and may change depending
on the subject, memory card and camera settings.
• Recording will automatically stop when the file size of an individual clip being recorded
reaches 4 GB, or when the recording time reaches approximately 10 minutes (for
or
movies) or approximately 1 hour (for
movies).
• On some memory cards, recording may stop before the maximum clip length has been
reached. Speed Class 6 or higher memory cards are recommended.
C
Flash Range
ELPH 530 HS
IXUS 510 HS
ELPH 320 HS
IXUS 240 HS
Maximum wide angle (j)
50 cm – 2.5 m
(1.6 – 8.2 ft.)
50 cm – 3.5 m
(1.6 – 11 ft.)
Maximum telephoto (i)
1.0 – 1.5 m
(3.3 – 4.9 ft.)
90 cm – 2.0 m
(3.0 – 6.6 ft.)
36
Specifications
Shooting Range
ELPH 530 HS
IXUS 510 HS
Shooting Mode
Focusing Range
A
–
Maximum Wide Angle Maximum Telephoto
(j)
(i)
1 cm (0.4 in.) – infinity 1 m (3.3 ft.) – infinity
5 cm (2.0 in.) – infinity 1 m (3.3 ft.) – infinity
Other modes
ELPH 320 HS
e*
1 – 50 cm
(0.4 in. – 1.6 ft.)
u*
3 m (9.8 ft.) – infinity
–
3 m (9.8 ft.) – infinity
IXUS 240 HS
Shooting Mode
Focusing Range
Maximum Wide Angle Maximum Telephoto
(j)
(i)
A
–
3 cm (1.2 in.) – infinity 90 cm (3.0 ft.) – infinity
Y
P
O
5 cm (2.0 in.) – infinity 90 cm (3.0 ft.) – infinity
3 – 50 cm
(1.2 in. – 1.6 ft.)
e*
Other modes
u*
C
–
3 m (9.8 ft.) – infinity
3 m (9.8 ft.) – infinity
* Not available in some shooting modes.
Continuous Shooting Speed
ELPH 530 HS
IXUS 510 HS
Shooting Mode
G
Continuous Shooting
Mode
Speed
–
Approx. 6.1 shots/sec.
W
Approx. 2.6 shots/sec.
Approx. 0.8 shots/sec.
Approx. 0.8 shots/sec.
ELPH 320 HS
IXUS 240 HS
Shooting Mode
Speed
Approx. 5.2 shots/sec.
G
Approx. 1.9 shots/sec.
37
Specifications
Shutter Speed
ELPH 530 HS
IXUS 510 HS
ELPH 320 HS
IXUS 240 HS
A mode, automatically set range
1 – 1/4000 sec.
1 – 1/2000 sec.
Range in all shooting modes
15 – 1/4000 sec.
15 – 1/2000 sec.
Aperture
ELPH 530 HS
f/number
IXUS 510 HS
f/3.4 – f/6.3 (W), f/5.6 – f/9.0 (T)
ELPH 320 HS
IXUS 240 HS
f/2.7, f/8.0 (W), f/5.9, f/17 (T)
Battery Pack
ELPH 530 HS
IXUS 510 HS
NB-9L
Type
Rechargeable lithium-ion battery
Rated
Voltage
3.5 V DC
Rated
Capacity
870 mAh
Charging
Cycles
Approx. 300
ELPH 320 HS
IXUS 240 HS
NB-11L
Rechargeable lithium-ion battery
Y
P
O
3.6 V DC
680 mAh
C
Operating
0 – 40 °C (32 – 104 °F)
Temperature
Approx. 300
0 – 40 °C (32 – 104 °F)
Dimensions
14.6 x 43.1 x 15.3 mm
(0.57 x 1.70 x 0.60 in.)
34.6 x 40.2 x 5.2 mm
(1.36 x 1.58 x 0.20 in.)
Weight
Approx. 21 g (approx. 0.74 oz.)
Approx. 13 g (approx. 0.46 oz.)
38
Specifications
Battery Charger
ELPH 530 HS
IXUS 510 HS
ELPH 320 HS
CB-2LB/CB-2LBE
Rated Input
100 – 240 V AC (50/60 Hz)
8.5 VA (100 V) – 12 VA (240 V),
0.085 A (100 V) – 0.05 A (240 V)
Rated Output 4.2 V DC, 0.7 A
IXUS 240 HS
CB-2LD/CB-2LDE
100 – 240 V AC (50/60 Hz)
4.2 V DC, 0.41 A
Charging
Time
Approx. 1 hour 50 min. (when using Approx. 2 hours (when using
NB-9L)
NB-11L)
Charge
Indicator
Charging: orange / Fully charged:
green (two-indicator system)
Operating
0 – 40 °C (32 – 104 °F)
Temperature
Dimensions
59.0 x 82.0 x 24.5 mm
(2.32 x 3.23 x 0.96 in.)
Weight
Approx. 73 g (approx. 2.57 oz.)
(CB-2LB)
Approx. 67 g (approx. 2.36 oz.) (CB2LBE, excluding power cord)
C
Charging: orange / Fully charged:
green (two-indicator system)
5 – 40 °C (41 – 104 °F)
85.0 x 57.6 x 24.3 mm
(3.35 x 2.27 x 0.96 in.)
Y
P
O
Approx. 59 g (approx. 2.08 oz.)
(CB-2LD)
Approx. 56 g (approx. 1.98 oz.)
(CB-2LDE, excluding power cord)
• All data is based on tests by Canon.
• Camera specifications or appearance are subject to change without notice.
CAUTION
RISK OF EXPLOSION IF BATTERY IS REPLACED BY AN INCORRECT TYPE.
DISPOSE OF USED BATTERIES ACCORDING TO LOCAL REGULATION.
39
C
40
Y
P
O
Wireless LAN Guide
Y
P
O
• This guide explains how to use the camera to send and
receive images wirelessly. For instructions on how to
operate the camera, and safety precautions, be sure to
read the Camera User Guide.
• This guide will familiarize you with how to use the camera
correctly.
• Keep the guide handy for future reference.
C
English
w-1
What You Can Do With the Wireless
LAN Function
This camera is an approved Wi-Fi®* product. You can wirelessly connect to
and send images to the following Wi-Fi capable devices.
*Wi-Fi is a brand name that indicates interoperability certification of wireless LAN
devices.
C
Video
sharing sites
YouTube
Y
P
O
facebook
twitter
E-mail
Social
networking
services
Connect to Web services
CANON iMAGE GATEWAY is an online photo service available to those
who have purchased this product. If you register for free as a member, you
can use CANON iMAGE GATEWAY to access various Web services, such
as social networking services set on a computer.
w-2
Connect to a
Smartphone
Send images to smartphones
and tablet computers that have
wireless functions. Installation of
a dedicated application on the
smartphone or tablet is required.
See the Canon website for details.
C
Y
P
O
Connect to another
camera
Use the wireless function to send
images between Canon-brand
cameras.
Connect to a Computer
Use the included software to
wirelessly send images from the
camera to a computer.
For details on the included
software, see the ImageBrowser
EX User Guide.
w-3
Countries and Regions Where Wireless
LAN Use is Approved
PowerShot ELPH 530 HS/IXUS 510 HS and PowerShot ELPH 320 HS/
IXUS 240 HS are in compliance (as of January 2012) with the radio signal
regulations of the regions listed below.
PowerShot ELPH 530 HS / PowerShot ELPH 320 HS
Applicable Countries and Regions
Wireless LAN
Specification
Supported
Channels
Canada, United States of America,
Hong Kong/Macao, Japan, Singapore,
Austria, Belgium, Bulgaria, Cyprus, Czech
Republic, Denmark, Estonia, Finland,
France*1, Germany, Greece, Hungary,
Iceland, Ireland, Italy, Latvia, Liechtenstein,
Lithuania, Luxembourg, Malta,
Netherlands, Norway, Poland, Portugal,
Romania, Russia, Slovakia, Slovenia,
Spain, Sweden, Switzerland, England,
Australia, New Zealand
IEEE 802.11 b/g/n*2
1 – 11
IXUS 510 HS / IXUS 240 HS
C
Applicable Countries and Regions
Y
P
O
People’s Republic of China*3, Taiwan,
Hong Kong/Macao, Japan, South Korea,
Singapore, Austria, Belgium, Bulgaria,
Cyprus, Czech Republic, Denmark, Estonia,
Finland, France*1, Germany, Greece,
Hungary, Iceland, Ireland, Italy, Latvia,
Liechtenstein, Lithuania, Luxembourg,
Malta, Netherlands, Norway, Poland,
Portugal, Romania, Russia, Slovakia,
Slovenia, Spain, Sweden, Switzerland,
England, Australia, New Zealand
Wireless LAN
Specification
Supported
Channels
IEEE 802.11 b/g/n*2
1 – 13
*1 Using the wireless function outdoors is prohibited in France.
*2 Only 2.4 GHz band is supported.
*3 Only IXUS 510 HS can be used.
•Use of the wireless LAN function is not approved in countries and regions that are not
listed above.
•Be sure to check the Canon website for the latest information on countries and
regions where wireless LAN use is approved.
w-4
Table of Contents
What You Can Do With the
Wireless LAN Function............... w-2
Countries and Regions Where
Wireless LAN Use is
Approved.................................... w-4
4
Connect to Another
Camera.............................w-23
Adding a Camera...................... w-24
5
Before Using the Camera........w-6
Preparing to Register a
Computer.................................. w-26
Adding a Computer................... w-32
Using CameraWindow
to Transfer Images to a
Computer.................................. w-36
Radio Wave Precautions............ w-6
Wireless LAN Precautions.......... w-6
Security Precautions................... w-7
1
Wireless LAN
Preparations.......................w-9
Using Wireless LAN to Send
Images From the Camera......... w-10
Registering a Camera Nickname (First time only)......................... w-11
2
C
6
Sending Images...............w-41
Y
P
O
Connecting to Web
Services............................w-13
Registering Web Services......... w-14
Adjusting Settings for Using
Web Services From CANON
iMAGE GATEWAY.................... w-15
Connecting to Web Services..... w-17
3
Connect to a
Computer..........................w-25
Connect to a
Smartphone......................w-19
Sending Images Individually..... w-42
Sending Multiple Images.......... w-43
7
Helpful Information..........w-43
Editing Connection
Information................................ w-44
Returning the Wireless LAN
Settings to Default.................... w-48
Troubleshooting........................ w-49
On-Screen Messages............... w-51
Glossary.................................... w-53
Specifications............................ w-54
Index......................................... w-55
Adding a Smartphone............... w-20
w-5
Before Using the Camera
Radio Wave Precautions
• This product incorporates an approved WLAN module. The model
number is PC1735 in the case of PowerShot ELPH 530 HS/IXUS 510 HS , and
PC1739 in the case of PowerShot ELPH 320 HS/IXUS 240 HS (including WLAN
module model WM217).
• Doing any of the following may incur legal penalties:
- Altering or modifying the product
- Removing the certification labels from the product
• According to foreign exchange and foreign trade law regulations, export
permission (or service transaction permission) from the Japanese
government is necessary to export strategic resources or services
(including this product) outside Japan.
• Because this product includes American encryption software, it falls
under U.S. Export Administration Regulations, and cannot be exported to
or brought into a country under U.S. trade embargo.
Y
P
O
Radio Wave Interference Precautions
• This product may receive interference from other devices that emit radio
waves. To avoid interference, be sure to use this product as far away as
possible from such devices, or avoid using the devices at the same time
as this product.
C
Wireless LAN Precautions
• Be sure to make notes of the wireless LAN settings you use.
The wireless LAN settings saved to this product may be erased due to
incorrect operation of the product, the effects of radio waves or static
electricity, accident or malfunction. Be sure to make notes of wireless
LAN settings as a precaution. Please note that Canon accepts no
responsibility for degradation of content, direct or indirect damages or
loss of revenue arising from use of the product.
• When transferring this product to another person, disposing of it, or
sending it for repair, be sure to note the wireless LAN settings and reset
the product to its default settings (erase settings) if necessary.
• Canon will not make compensation for loss or theft of the product.
Canon accepts no responsibility for damages incurred due to
unauthorized access to registered data (image transfer destinations, etc.)
if the product is lost or stolen.
w-6
• Be sure to use the product as directed in this guide.
Be sure to use the wireless LAN function of this product within the
guidelines noted in this guide. Canon accepts no responsibility for
damages or loss even if the function and product are used in ways other
than as described in this guide.
• Do not use the wireless LAN function of this product near medical
equipment or other electronic equipment.
Use of the wireless LAN function near medical equipment or other
electronic equipment may affect operation of those devices.
Security Precautions
Since wireless LAN uses radio waves to transmit signals, tighter security
precautions are necessary than when using a LAN cable.
When using wireless LAN, keep the following points in mind.
• Only use networks you are authorized to use.
This product searches for wireless LAN networks in the vicinity and
displays the results on the screen. Networks you are not authorized to
use (unknown networks) may also be displayed. However, connecting to
or attempting to use those networks could be regarded as unauthorized
access. Be sure to use only networks you are authorized to use, and do
not attempt to connect to other unknown networks.
C
Y
P
O
If security settings have not been properly set, the following problems may
occur.
• Transmission monitoring
Third parties with malicious intent may monitor wireless LAN
transmissions and attempt to acquire the data you are sending.
• Unauthorized network access
Third parties with malicious intent may gain unauthorized access to
the network you are using and steal, modify, or destroy information.
Additionally, you could fall victim to other types of unauthorized access
such as impersonation (where someone assumes an identity to gain
access to unauthorized information) and springboard attacks (where
someone gains unauthorized access to your network as a springboard to
cover their tracks when infiltrating other systems).
w-7
To prevent these types of problems from occurring, be sure to thoroughly
secure your wireless LAN network.
Be sure to use the wireless LAN function of this camera with a proper
understanding of wireless LAN security, and balance risk and convenience
when adjusting security settings.
FCC/IC Notice
Models: PC1739 and PC1735 (including WLAN Module Model WM217,
FCC ID: AZD217)
The available scientific evidence does not show that any health problems
are associated with using low power wireless devices. There is no proof,
however, that these low power wireless devices are absolutely safe. Low
power Wireless devices emit low levels of radio frequency energy (RF) in
the microwave range while being used. Whereas high levels of RF can
produce health effects (by heating tissue), exposure to low-level RF that
does not produce heating effects causes no known adverse health effects.
Many studies of low-level RF exposures have not found any biological
effects. Some studies have suggested that some biological effects might
occur, but such findings have not been con- firmed by additional research.
This model has been tested and found to comply with FCC/IC radiation
exposure limits set forth for an uncontrolled equipment and meets the FCC
radio frequency (RF) Exposure Guidelines in Supplement C to OET65 and
RSS-102 of the IC radio frequency (RF) Exposure rules.
C
Y
P
O
This device complies with Part 15 of FCC Rules and Industry Canada
licence-exempt RSS standard(s). Operation is subject to the following
two conditions: (1) this device may not cause interference, and (2) this
device must accept any interference, including interference that may cause
undesired operation of this device.
This transmitter must not be co-located or operated in conjunction with any
other antenna or transmitter.
Complies with
IDA Standards
DB00671
w-8
1
Wireless LAN Preparations
This chapter explains how to use the camera’s
wireless LAN function to connect to another device,
including all necessary settings.
C
Y
P
O
w-9
Using Wireless LAN to Send Images
From the Camera
Connect the camera and destination wirelessly (image send destination)
Web services
Smartphones
Another camera
Computer
Send/
Import
Connection
Preparations
Registering a camera nickname (p.w-11)
• Installing the
supplied
software*
• Connecting
with the
computer
• Registering
web services
(p.w-14)
• Adjusting
settings for
using web
services from
CANON
iMAGE
GATEWAY
(p.w-15)
(p.w-17)
• Installing the
dedicated
CameraWindow
application
on the
smartphone
C
Y
P
O
• Installing the
supplied
software*
• Connecting
with the
computer
• Preparing to
register a
computer
(p.w-26)
Adding the target device/destination to the camera
(p.w-20)
(p.w-24)
(p.w-32)
Sending images (p.w-39)
Transferring
images to a
computer
(p.w-36)
*Instructions in this guide apply when the software on the included CD-ROM has been
correctly installed. See the Camera User Guide for software installation instructions.
w-10
Registering a Camera Nickname
(First time only)
To start with, register a camera nickname.
This nickname will be displayed on the screen of target devices when
connecting to other devices via wireless LAN.
1 Access the wireless LAN
screen.
the 1 button to turn the camera
on.
●● Touch
.
●●
will be displayed during single-image
display. It will not be displayed in index
display.
●● Press
2 Enter a nickname.
●● Touch
within the frame and then enter a
nickname (up to 16 letters and numbers)
with the displayed keyboard, and then
touch ^.
●● Touch [OK].
C
Y
P
O
• When connecting wirelessly with any device other than a computer, a
memory card must be inserted in the camera. When connecting wirelessly
with a smartphone, images must be stored in the memory card.
• To change the camera’s nickname, choose [Wireless LAN Settings] on the
3 tab, and then choose [Change Device Nickname].
w-11
C
w-12
Y
P
O
2
Connecting to Web Services
This chapter explains how to register various Web
services to your camera.
C
Y
P
O
• A computer is required for Web service settings, starting with CANON
iMAGE GATEWAY.
• For information on countries and regions where CANON iMAGE
GATEWAY is available, visit the Canon website (http://canon.com/cig).
w-13
Registering Web Services
First, sign up for a free CANON iMAGE GATEWAY account.
CANON iMAGE GATEWAY offers various services, such as the ability to
share images in an online photo album. CANON iMAGE GATEWAY also
serves as a bridge site to send images wirelessly to e-mail addresses,
social networking services, and other Web services. Click http://canon.com/
cig, access the appropriate CANON iMAGE GATEWAY site for your country
of residence, and follow the on-screen instructions to register as a member.
You can continue to register other Web services other than CANON iMAGE
GATEWAY to your account. For further details, check the websites for each
web service you want to register.
• An Internet connection is required to access CANON iMAGE GATEWAY
(an Internet browser must be installed on the computer, you must have an
account with an Internet service provider, and an Internet connection must
be established).
• Check CANON iMAGE GATEWAY for browser (Microsoft Internet Explorer,
etc.) settings, conditions and version information when connecting to
CANON iMAGE GATEWAY.
Y
P
O
• Separate ISP connection and access point fees may be applicable.
• Camera-linked information: you can check the image transfer history from
your camera to Web services.
C
• Operation guide: Provides details on how to use CANON iMAGE GATEWAY.
• Library: A timeline of images transferred from the camera will be displayed
as an index.
Camera-linked information Operation guide
w-14
Library
Adjusting Settings for Using Web
Services From CANON iMAGE GATEWAY
Adjust account settings for the Web services you want to use. Because
CameraWindow is used to adjust settings, be sure to install it from the
included CD-ROM beforehand. Installation instructions can be found in
“Included Software, PDF Manuals” in the Camera User Guide.
1 Connect the camera to a
computer with the interface
cable.
●● When
using a Windows computer, you
can connect wirelessly, without using an
interface cable, however settings must be
completed beforehand (p. w-28).
2 Start CameraWindow.
the 1 button to turn the camera
on.
●● For details on how to start
CameraWindow, see “Start
CameraWindow.” (p. w-36).
●● Press
Y
P
O
3 Choose [Set Up Web Services].
C
●● Click
[Set Up Web Services].
4 Login to CANON iMAGE
GATEWAY.
●● Enter
your CANON iMAGE GATEWAY
login name and password, and then click
[Login].
w-15
Adjusting Settings for Using Web Services From CANON iMAGE GATEWAY
5 Set a Web service you want to
use.
●● Follow
the on-screen instructions to
complete settings for Web services you
want to use.
●● Once the Web service settings are
complete, click [Finish] at the bottom of
the window to close it.
6 Apply Web service settings to
the camera.
●● Choose
the name of the Web service you
want to set, and click
in the middle of
the lists.
▶▶ The name of the Web service that will be
saved to the camera will be displayed in
the [Camera] list.
●● Click ▲ or ▼ to change the order of the
Web services that will be displayed in the
camera’s wireless LAN menu.
●● After you finish adjusting settings in the
[Camera] list to your liking, close the
window.
▶▶ Web service settings will be applied to
the camera.
C
Y
P
O
• If CameraWindow is not displayed in step 2, see “Using CameraWindow to
Transfer Images to a Computer” (p. w-36) for details.
• Up to 20 e-mail addresses can be registered to the camera for sending
images as e-mail.
• After logging in to CANON iMAGE GATEWAY the second time in step 4, the
screen in step 6 will be displayed. To change settings for Web services you
use, click [Edit Web Services].
• To add or change Web services, repeat the above procedures starting from
step 1.
w-16
Connecting to Web Services
Connect to Web services registered to the camera.
1 Access the wireless LAN
screen.
●● Touch
.
2 Choose a Web service.
●● Touch
the icon for the Web service you
want to send images to.
●● If you chose e-mail, touch the addresses
you want to send images to in the [Select
Destination] screen.
3 Connect to an access point.
●● Touch
[Add an Access Point].
of detected access points will be
displayed in the [Access Point Connect]
screen.
▶▶ For further instructions, see “Connecting
to a WPS Supported Access Point” (p. w-33) or “Connecting to Access Points
in the List” (p. w-35).
▶▶ For instructions after connecting to an
access point, see “Sending Images” (p. w-39).
Y
P
O
▶▶ A list
C
• When a connection destination is set using the Touch Actions setting, you
can automatically access the function to connect to the last connected
destination from the next time by just dragging on the screen without needing
to perform the connection operation.
See the Camera User Guide for details on Touch Action settings.
w-17
C
w-18
Y
P
O
3
Connect to a Smartphone
This chapter explains how to add wireless LAN
enabled smartphones to your camera’s connection
list.
C
Y
P
O
w-19
Adding a Smartphone
Add a smartphone to your list of devices to connect to via wireless LAN.
Wireless LAN connection to smartphones can be done by ad hoc or
infrastructure modes.
• The connection procedures for connecting to a smartphone here are
explained using ad hoc mode. Refer to “Connecting to Access Points in the
List” (p. w-35) in “Adding a Computer” when connecting via infrastructure
mode.
• Before connecting to a camera via wireless LAN, download and install the
dedicated CameraWindow (free) application on your smartphone. For details on this application (supported smartphones and included
functions), refer to the Canon website.
1 Access the wireless LAN
screen.
●● Touch
.
Y
P
O
2 Choose a smartphone.
●● Touch
C
.
3 Choose [Add a Device].
●● Touch
[Add a Device].
4 Choose ad hoc mode.
●● Touch
w-20
[Ad Hoc] and then [Next].
Adding a Smartphone
5 Use the smartphone to connect
to the network displayed on the
camera screen.
●● Choose
the displayed SSID (network
name) from the smartphone’s Wi-Fi
setting menu.
●● Enter the WEP key displayed on the
camera screen into the password field on
the smartphone.
6 Start CameraWindow on the
smartphone.
▶▶ Once
the smartphone is recognized on
the camera, the device connection screen
will be displayed on the camera.
7 Choose a smartphone to
Y
P
O
connect to.
●● Touch
C
the name of the smartphone you
want to connect to.
8 Adjust the privacy settings.
●● Choose
[Yes] when you want to view
camera images on a smartphone, and
choose [No] when you don’t want the
images to be viewed on a smartphone.
●● Choose [Yes] to use a smartphone to
send images from the camera to the
smartphone.
▶▶ When the smartphone has been added
successfully, the image transfer screen
will be displayed (p. w-39).
w-21
Adding a Smartphone
• Setting the smartphone’s IP address as follows will shorten connection time
when connecting to a smartphone via ad hoc mode.
-IP address: 169.254.0.9
-Subnet mask: 255.255.0.0
• The image quality level for movies that can be sent may differ depending
on the smartphone. Refer to the instruction manual provided with your
smartphone for details.
• To add multiple smartphones, repeat the above procedures starting from
step 1.
• Once a smartphone is added, the smartphone name will be displayed on
the screen in step 3. To connect to a smartphone again, simply choose the
smartphone name from the list.
• To change privacy settings for smartphones added to the list, choose the
smartphone whose settings you want to change from [Edit a Device] in step
3, and then choose [View Settings].
Y
P
O
• When a connection destination is set using the Touch Actions setting, you
can automatically access the function to connect to the last connected
destination from the next time by just dragging on the screen without needing
to perform the connection operation.
See the Camera User Guide for details on Touch Action settings.
C
w-22
4
Connect to Another Camera
This chapter explains how to connect two cameras
via wireless LAN, and how to send images between
them.
C
Y
P
O
w-23
Adding a Camera
Add a camera to your list of devices to connect to via wireless LAN.
Wireless LAN connection to other cameras is done in ad hoc mode.
• Only Canon-brand cameras equipped with a wireless LAN function can be
connected to wirelessly. Even Canon-brand cameras that support Eye-Fi
cards cannot be connected to if they do not have a wireless LAN function.
You cannot connect to PowerShot SD430 DIGITAL ELPH WIRELESS/
DIGITAL IXUS WIRELESS cameras with this camera.
1 Access the wireless LAN
screen.
●● Touch
.
2 Choose a camera.
●● Touch
4.
Y
P
O
3 Choose [Add a Device].
C
●● Touch
[Add a Device].
steps 1 – 3 on the target camera.
▶▶ Camera connection information will be
added when [Start connection on target
camera] is displayed on both camera
screens.
▶▶ When the target camera has been added
successfully, the image transfer screen
will be displayed (p. w-39).
●● Follow
• To add multiple cameras, repeat the above procedures starting from step 1.
• Once a camera is added, the camera name will be displayed on the screen
in step 3. To connect to a camera again, simply choose the camera name
from the list.
• When a connection destination is set using the Touch Actions setting, you
can automatically access the function to connect to the last connected
destination from the next time by just dragging on the screen without needing
to perform the connection operation.
See the Camera User Guide for details on Touch Action settings.
w-24
5
Connect to a Computer
This chapter explains necessary settings for
connecting to a computer, how to register settings on
the camera, and how to use the included software
CameraWindow to wirelessly transfer images to a
computer.
C
Y
P
O
• When connected to a computer, the camera is used to establish the
connection and then the computer (included software CameraWindow) is
used to transfer images.
• For details on the included software, see the ImageBrowser EX User Guide.
w-25
Preparing to Register a Computer
Prepare to register a computer.
Checking the Computer and Wireless LAN
Setup
Computer Requirements
The camera can connect to the following computers via wireless LAN.
Windows
• Windows 7 Service Pack 1
Macintosh
• Macintosh OS X 10.6.8 or later
• Windows 7 Starter and Home Basic editions are not supported.
• Windows 7 N (European version) and KN (South Korean version) require a
separate download and install of Windows Media Feature Pack.
For further details, see the following websites.
http://go.microsoft.com/fwlink/?LinkId=159730
Y
P
O
Required Components for Wireless LAN Use
To use wireless LAN, an access point base unit (wireless LAN router, etc.)
connected to a computer is required.
Additionally, the included software, CameraWindow must be installed.
C
• Be sure to use a wireless LAN base unit that conforms to standards listed
on p. w-4.
• A router is a device that creates a network (LAN) structure for connecting
multiple computers. A router that contains an internal wireless function is
called a wireless (LAN) router.
• This guide will refer to all wireless routers and base stations as “access
points”.
• When unsure of your computer setup, refer to the user manual provided with
the computer.
w-26
Preparing to Register a Computer
Checking Your Wireless LAN Settings
If you are already using a wireless LAN, check the following items and mark
each one on the check sheet.
• If system administrator status is needed to adjust network settings, contact
the system administrator for details.
• These settings are very important for network security. Exercise adequate
caution when changing these settings.
• For instructions on how to check settings, refer to the user guide included
with your access point.
Check sheet
Network name (SSID/ESSID)
The SSID or ESSID for the access point
you use.
C
○ None
○ WEP
○ WPA-PSK (TKIP)
○ WPA-PSK (AES)
○ WPA2-PSK (TKIP)
○ WPA2-PSK (AES)
Y
P
O
Network certificate/data encryption
(encryption method/encryption mode)
The method for encrypting data during
wireless transmission.
Encryption key (network key)
The key used when encrypting data during
wireless transmission.
Key index (sent key)
Network certificate/data encryption is the
set key when using WEP.
○1
○2
○3
○4
• If you use MAC address filtering on your wireless LAN, be sure to enter
the camera’s MAC address to your access point. You can check and select
the MAC address for your camera by choosing the 3 tab, [Wireless LAN
Settings], and then [Check MAC Address].
w-27
Preparing to Register a Computer
• The different types of security are as follows.
-None: Encryption is not used when connecting to an access point.
-WEP: A standard of encryption supported by most wireless LAN devices.
-WPA-PSK (TKIP): An improved WEP standard that uses TKIP encryption.
-WPA-PSK (AES): An improved WEP standard that uses AES encryption.
-WPA2-PSK (TKIP): An improved WPA standard that uses TKIP encryption.
-WPA2-PSK (AES): An improved WPA standard that uses AES encryption.
• AES uses higher security than TKIP.
• There is no difference in security levels between WPA and WPA2.
Computer Settings for Connecting to a
Wireless LAN (Windows only)
When using a Windows computer, wireless LAN connection settings on the
computer are necessary to connect to a camera wirelessly.
Confirm that your computer is connected to a wireless LAN, and then follow
each of the next steps.
Y
P
O
Turning On Media Streaming and Network Discovery
If you activate media streaming, the camera will be able to detect and
search your computer when they are connected wirelessly.
If you activate network discovery, your computer will be able to detect and
search the camera.
C
1 Open the Control Panel window.
●● Click
[Control Panel] from the Start menu.
●● Click
[Network and Internet].
2 Choose [Network and Internet].
3 Choose [Network and Sharing
Center].
●● Click
[Network and Sharing Center].
4 Choose [Change advanced
sharing settings].
●● Click
[Change advanced sharing
settings].
w-28
Preparing to Register a Computer
5 Choose [Choose media
streaming options...].
●● Click
the current profile for [Choose
media streaming options...].
6 Turn on media streaming.
●● Click
[Turn on media streaming].
7 Choose [OK].
●● Click
[OK].
8 Turn on network discovery.
●● Click
the current profile for [Turn on
network discovery].
9 Save the changes.
●● Click
[Save changes].
Y
P
O
10 Close the Control Panel window.
C
w-29
Preparing to Register a Computer
Enabling ICMP Inbound Echo Requests and UPnP
Services
Enabling ICMP (Internet Control Message Protocol) will allow you to check
the network connection status.
Enabling UPnP (Universal Plug & Play) will allow the network to
automatically recognize network devices.
1 Open the Control Panel window.
●● Click
[Control Panel] from the Start menu.
●● Click
[System and Security].
2 Choose [System and Security].
3 Choose [Windows Firewall].
●● Click
[Windows Firewall].
4 Choose [Advanced settings].
Y
P
O
●● Click
[Advanced settings].
5 Choose [Inbound Rules].
●● Click
C
[Inbound Rules].
6 Enable ICMP inbound echo
requests.
●● Choose
[File and Printer Sharing] items
ending in [ICMPv4], and then click
[Enable Rule] on the right side of the
window.
7 Turn on UPnP services.
●● Choose
[Wireless Portable Devices
(UPnP-In)], and then click [Enable Rule]
on the right side of the window.
w-30
Preparing to Register a Computer
8 Close the [Windows Firewall
with Advanced Security]
window.
9 Close the Control Panel window.
• If [Disable Rule] is displayed in steps 6 – 7, the item is already enabled, and
can be left as is.
C
Y
P
O
w-31
Adding a Computer
Add a computer to your list of devices to connect to via wireless LAN.
Infrastructure mode will be used for wireless LAN connection to a computer.
• Be sure to also read the user guide included with your access point.
1 Access the wireless LAN
screen.
●● Touch
.
2 Choose a computer.
●● Touch
.
Y
P
O
3 Choose [Add a Device].
●● Touch
[Add a Device].
of detected access points will be
displayed in the [Access Point Connect]
screen.
▶▶ Proceed to either “Connecting to a WPS
Supported Access Point” or “Connecting
to Access Points in the List”.
▶▶ To manually choose and connect to an
access point, see the
supplemental
explanation column (p. w-35) in
“Connecting to Access Points in the List”.
▶▶ A list
C
• Once a computer is added, the computer name will be displayed on the
screen in step 3. To connect to a computer again, simply choose the
computer name from the list.
• When a connection destination is set using the Touch Actions setting, you
can automatically access the function to connect to the last connected
destination from the next time by just dragging on the screen without needing
to perform the connection operation.
See the Camera User Guide for details on Touch Action settings.
w-32
Adding a Computer
Connecting to a WPS Supported Access Point
WPS (Wi-Fi Protected Setup) is a structure for simplifying settings when
connecting one wireless LAN device to another. You can use either
Push Button Configuration Method or PIN Method for settings on a WPS
supported device.
The push button configuration method is used in the following explanation.
• Refer to the user guide provided with your access point to check if it supports
WPS.
4 Choose [WPS Connection].
●● Touch
[WPS Connection].
Y
P
O
5 Choose [PBC Method].
●● Touch
C
[PBC Method].
6 Press and hold the WPS
connection button on the
access point.
7 Choose [Next].
●● Touch
[Next].
camera will connect to the access
point.
▶▶ A list of computers connected to the
access point will appear in the [Select a
Device] screen.
▶▶ The
w-33
Adding a Computer
8 Choose a computer to connect
to.
●● Touch
the name of the computer you
want to connect to.
▶▶ When using a Macintosh, see “Using
CameraWindow to Transfer Images to a
Computer” (p. w-36).
9 Install drivers (Windows only).
●● On
the computer, click the Start menu
and choose [Control Panel]. Click
[Network and Internet] and then [View
network computers and devices].
●● Choose
the connected camera from
[Other Devices] and then double click the
camera icon.
▶▶ Driver installation will begin.
▶▶ After driver installation is complete, and
the camera and computer connection
is enabled, the AutoPlay screen will be
displayed. Nothing will be displayed on
the camera screen.
▶▶ Proceed to “Using CameraWindow
to Transfer Images to a Computer”
(p. w-36).
C
Y
P
O
• If you chose [PIN Method] in step 5, a PIN code will be displayed on the
screen. Be sure to set this code in the access point. Choose a device in the
[Select a Device] screen. For further details, refer to the user guide included
with your access point.
• To add multiple computers, repeat the above procedures starting from step 1.
• To complete the registration, touch ^ in the upper right of the image transfer
screen that is displayed after connecting to the target computer in step 8,
and then touch [OK] in the confirmation screen.
w-34
Adding a Computer
Connecting to Access Points in the List
4 Choose an access point.
●● Touch
an access point.
5 Enter an encryption key.
●● Touch
inside the frame and a keyboard
will be displayed. Enter the encryption
key and touch [Next].
6 Choose [Auto].
●● Touch
[Auto].
of other connected devices
connected to the access point will appear
in the [Select a Device] screen.
●● Choose the computer to connect to,
following steps 8 – 9 on p. w-34. The
computer is now added to the list.
Y
P
O
▶▶ A list
C
• Up to 16 access points will be displayed. If no access points are detected,
choose [Manual Settings] in step 4 to manually set an access point.
Follow on-screen instructions and enter an SSID, security settings, and an
encryption key.
• [***] is displayed for the encryption key in step 5 when the same access point
is used to connect to another device.
• To add multiple computers, repeat the above procedures starting from step 1.
w-35
Using CameraWindow to Transfer
Images to a Computer
Use the computer (included software CameraWindow) to transfer images
from the camera to the computer.
• For details on how to use CameraWindow, see the ImageBrowser EX User
Guide.
Start CameraWindow
For Windows
1 Enable download of images
from the camera.
●● Click
[Downloads Images From Canon
Camera using Canon CameraWindow].
▶▶ CameraWindow will be displayed.
▶▶ Proceed to “Importing Untransferred
Images to a Computer” (p. w-37) or
“Choosing Images to Import” (p. w-38).
For Macintosh
C
Y
P
O
CameraWindow will be automatically displayed when a wireless connection
is established between the camera and computer.
• If CameraWindow is not displayed when using a Macintosh, click the
CameraWindow icon in the Dock.
w-36
Using CameraWindow to Transfer Images to a Computer
Importing Untransferred Images to a
Computer
Import images to a computer that have not yet been transferred.
1 Import untransferred images.
●● Click
[Import Images from Camera].
[Import Untransferred Images].
▶▶ Images that have not yet been transferred
to a computer will be imported.
●● Click [OK] in the screen that is displayed
after image import is complete.
●● Click
• CameraWindow default settings will save images to the Pictures or My
Pictures folders on a computer. For details on how to change the destination
folders for saved images, see the ImageBrowser EX User Guide.
Y
P
O
• If you click [Import All Images] in step 1, all images on the camera will be
imported.
C
• Movies will take longer to import since the file size is larger than still images.
• To disconnect from the camera, turn off the camera.
w-37
Using CameraWindow to Transfer Images to a Computer
Choosing Images to Import
Choose whichever images you like to import to a computer.
1 Display the image import
screen.
●● Click
●● Click
[Import Images from Camera].
[Select Images to Import].
2 Choose an image.
●● Click
images you want to import.
background of selected images
will turn blue. Click
to deselect the
images, and the background will turn
gray.
▶▶ The
C
Y
P
O
3 Import images.
●● Click
(import).
selected images will be imported to
the computer.
●● Click [OK] in the screen that is displayed
after image import is complete.
▶▶ The
• CameraWindow default settings will save images to the Pictures or My
Pictures folders on a computer. For details on how to change the destination
folders for saved images, see the ImageBrowser EX User Guide.
• Movies will take longer to import since the file size is larger than still images.
• To disconnect from the camera, turn off the camera.
w-38
6
Sending Images
This chapter explains how to use the camera to
send images wirelessly to destinations saved in the
camera.
C
Y
P
O
• When the destination you want to send images to is a social networking
service or e-mail, sent images will be saved to CANON iMAGE GATEWAY
and a link to the album containing the images will be added to the social
networking service or e-mail. When the destination is YouTube, the sent
movie will be uploaded directly to YouTube.
• You can send up to 50 images together with one send operation. You can
send movies together as long as the total recording time is within 2 minutes.
However, if the destination is a Web service, the number of movies and
images that can be sent may be less depending on the Web service. See the
desired Web service for details.
• Depending on the condition of the network you are using, it may take a long
time to send movies. Be sure to keep an eye on the camera battery level.
• When connected to a computer, images are transferred using the computer
(included software CameraWindow) instead of the camera (p. w-36).
w-39
Sending Images Individually
1 Send images individually.
●● Drag
left or right across the screen to
choose an image to send.
●● Choose the resolution setting for the
image you want to send (resize the image
to M2 or S, or keep the image at its
original setting). Touch p or o to choose an option and
complete the setting.
●● Touch [Send this image].
●● When sending movies to YouTube, read
the terms of service that is displayed, and
then touch [I Agree].
▶▶ Image transfer will begin.
▶▶ After the image or movie is sent to the
desired Web service, touch [OK] on the
screen that is displayed to return to the
playback mode screen.
▶▶ After sending images to a camera
or smartphone, [Image sent] will be
displayed, and the display will return to
the image transfer screen.
C
Y
P
O
• Images can only be resized to a smaller resolution setting.
• Movies cannot be resized.
• To disconnect from the camera, touch ^ in the upper right of the screen, and
then touch [OK] in the disconnection confirmation screen.
w-40
Sending Multiple Images
1 Choose [Select and send].
●● Touch
[Select and send].
2 Choose an image.
●● Touch
the image you want to send.
will be displayed on selected images.
Touching the image again will deselect it,
and
will disappear. Drag up or down
on the screen to scroll through displayed
images.
●● After you finish choosing images, touch
[OK].
▶▶
3 Send images.
Y
P
O
●● Choose
the resolution setting for the
images you want to send (resize the
image to M2 or S, or keep the image at
its original setting). Touch p or o to choose an option and
complete the setting.
●● Touch [Send].
●● When sending movies to YouTube, read
the terms of service that is displayed, and
then touch [I Agree].
▶▶ Image transfer will begin.
▶▶ After the image or movie is sent to the
desired Web service, touch [OK] on the
screen that is displayed to return to the
playback mode screen.
▶▶ After sending images to a camera
or smartphone, [Image sent] will be
displayed, and the display will return to
the image transfer screen.
C
w-41
Sending Multiple Images
• If you move the zoom lever twice toward k (magnifying glass) in step 2, the
camera will switch to single image display. You can also drag left or right
across the screen to choose images.
• Images can only be resized to a smaller resolution setting than that chosen
in step 3.
• Movies cannot be resized.
• To disconnect from the camera, touch ^ in the upper right of the screen, and
then touch [OK] in the disconnection confirmation screen.
C
w-42
Y
P
O
7
Helpful Information
This chapter explains how to edit and erase wireless
LAN settings, offers hints when you are unsure of
what to do, and includes a glossary.
C
Y
P
O
w-43
Editing Connection Information
Edit connection information saved to the camera. You can change device
nicknames (display names) that are displayed on the camera, and erase
connection information.
The following explains the procedure when the target device is a computer.
1 Access the wireless LAN
screen.
●● Touch
.
2 Choose a device to edit.
●● Touch
the icon for the device you want
to edit.
3 Choose [Edit a Device].
Y
P
O
●● Touch
C
[Edit a Device].
4 Choose a device to edit.
●● Touch
the device you want to edit.
5 Choose an option to edit.
●● Touch
the option you want to edit.
instructions on how to erase
connection information or changing
nicknames, continue to the next page.
●● For
w-44
Editing Connection Information
• Editable items differ depending on the device or destination.
Web services
Smartphones
Another camera/
computer
•Erase connection information (access points)
•Change nickname that is displayed on the camera
•Change privacy settings for images
•Erase connection information
•Change nickname that is displayed on the camera
•Erase connection information
• Connection information refers to information on how the camera connects to
another device or destination.
Connection information includes connection modes (Ad Hoc, Infrastructure),
and access points (when connected in Infrastructure mode).
If the connection mode or access point differs, connection information will be
treated as separate, even if the connected device or destination is the same.
Erasing Individual Items of Connection
Information
Y
P
O
6 Choose [Select & Delete
C
Connection Info].
●● Touch
[Select & Delete Connection Info].
the target device is a camera,
touch [Erase All Connection Info].
●● When
7 Choose the connection info to
delete.
●● Touch
the connection info you want to
delete.
●● When [(connection info item) Erase?] is
displayed, touch [OK].
▶▶ The selected connection information item
will be erased.
▶▶ If there are other connection information
items in the device, return to step 6.
▶▶ If there are no more connection
information items in the device, return to
step 4.
w-45
Editing Connection Information
• If there are multiple connection information items, the device will not be
erased if a single item is erased.
To erase a device, erase all of the connection information for that device.
• If you erase all information items for a device, the device will also be erased,
and it will not be displayed on the screen in step 4.
• If the deleted device is the final registered device, the screen will return to
the display in step 3.
Erasing All Connection Information
6 Choose [Erase All Connection
Info].
●● Touch
[Erase All Connection Info].
[(device name) Erase?] is
displayed, touch [OK].
▶▶ All connection information for the device
will be erased, and the screen will return
to the display in step 4.
●● When
C
Y
P
O
• If you erase all information items for a device, the device will also be erased,
and it will not be displayed on the screen in step 4.
• If the deleted device is the final registered device, the screen will return to
the display in step 3.
Changing a Device Nickname
You can change the device nickname (display name) that is displayed on
the camera.
6 Choose [Change Device
Nickname].
●● Touch
w-46
[Change Device Nickname].
Editing Connection Information
7 Enter a nickname.
●● Touch
inside the frame and a keyboard
will be displayed. Enter the new
nickname.
●● Touch ^ in the upper right of the screen.
▶▶ The camera will return to the display in
step 4 and the new nickname will be
displayed.
C
Y
P
O
w-47
Returning the Wireless LAN Settings to
Default
Return the wireless LAN settings to default if you transfer ownership of the
camera to another person, or dispose of it.
1 Access the menu.
●● Touch
H, and then touch n.
2 Choose [Wireless LAN
Settings].
●● Touch
●● Touch
the 3 tab.
[Wireless LAN Settings].
3 Choose [Reset Settings].
●● Touch
[Reset Settings].
the [Reset Settings] screen is
displayed, touch [OK].
▶▶ Wireless LAN settings will be reset to
defaults, and the camera will return to
initial screen for this setting.
●● When
C
Y
P
O
• When returning the wireless LAN settings to defaults, all Web services set
using a computer will also be erased from the camera. Be sure to confirm
that you want to reset all wireless LAN settings before using this option.
• To reset other settings (aside from wireless LAN) to defaults, choose [Reset
All] in the 3 tab.
w-48
Troubleshooting
When you are unsure of how to proceed with certain wireless LAN
operations, or experiencing trouble, check the following items for possible
solutions.
is not displayed, and you cannot access the wireless LAN menu.
• You cannot access the wireless LAN menu from a shooting mode. Switch to playback
mode and try again.
•
will not be displayed even in playback mode, when using magnified display
or index display. Switch to single image display and try again.
will also not be
displayed when an image is displayed by specifying search conditions. Cancel the
playback state of the image in image search mode.
•
will not be displayed when the camera is connected to a printer or computer with
a cable. Disconnect the cable.
The camera’s SSID (network name) is not displayed when you try to
connect to a smartphone.
• You are attempting to connect using infrastructure mode. Select ad hoc mode and try
again (p. w-20).
Y
P
O
• Check to make sure your smartphone supports ad hoc mode. If your smartphone
does not support ad hoc mode, connect using infrastructure mode.
Cannot add a device/destination
• A total of 20 items of connection information can be added to the camera. Erase
unneeded connection information from the camera first, and then add new devices/
destinations (p. w-44).
C
• E-mail is the only web service for which multiple accounts can be set. Use
CameraWindow to change the desired Web service (p. w-15).
• To add a smartphone as a device, first install the dedicated application
CameraWindow on your smartphone.
• To add a computer as a device, first install the included software CameraWindow on
the computer.
• Avoid using the camera’s wireless LAN function around microwave ovens, Bluetooth
devices, and other devices that operate on the 2.4 GHz band, as this will weaken
wireless LAN signals.
• When using infrastructure mode, use the camera within a close distance to the
access point, and avoid placing objects or obstructions between the camera and
access point.
• When using ad hoc mode, use the camera within a close distance to the connected
device, and avoid placing objects or obstructions between the camera and device.
w-49
Troubleshooting
Cannot send images
• The destination device has insufficient storage space. Increase the storage space on
the destination device and resend the images.
• Images shot in high-speed burst mode are grouped. Cancel grouping and then send
the images.
• The write-protect tab of the SD/SDHC/SDXC memory card or Eye-Fi card of the
destination camera is set to the locked position. Slide the write-protect tab to the
unlocked position. PowerShot ELPH 320 HS / IXUS 240 HS
Cannot resize images for sending
• Images cannot be resized to be bigger than the resolution setting of their original size.
• Movies cannot be resized.
Images take a long time to send
• Multiple images may take a long time to send. Try resizing the image to M2 or S to
reduce sending time (p. w-39).
• Movies may take a long time to send.
Y
P
O
• Avoid using the camera’s wireless LAN function around microwave ovens, Bluetooth
devices, and other devices that operate on the 2.4 GHz band, as this will weaken
wireless LAN signals.
• When using infrastructure mode, use the camera within a close distance to the
access point, and avoid placing objects or obstructions between the camera and
access point.
C
• When using ad hoc mode, use the camera within a close distance to the connected
device, and avoid placing objects or obstructions between the camera and device.
The wireless connection is disrupted
• Avoid using the camera’s wireless LAN function around microwave ovens, Bluetooth
devices, and other devices that operate on the 2.4 GHz band, as this will weaken
wireless LAN signals.
• When using infrastructure mode, use the camera within a close distance to the
access point, and avoid placing objects or obstructions between the camera and
access point.
• When using ad hoc mode, use the camera within a close distance to the connected
device, and avoid placing objects or obstructions between the camera and device.
• When sending images to a computer from a memory card with a large amount
of images (approximately 1,000), the connection may be disrupted. Import any
necessary images to a computer, and then reduce the number of images on the
memory card by erasing unnecessary images.
Erasing wireless connection information when transferring ownership
of or disposing of the camera.
• Reset the wireless LAN to default settings (p. w-48).
w-50
On-Screen Messages
If an error message is displayed on the camera screen, try one of the
following solutions.
Also refer to “On-Screen Messages” in the Camera User Guide.
Connection failed
• No access points were recognized. Check the access point settings (p. w-27).
• A device could not be found. Turn the camera off and on again, and retry the
connection.
• Check the device you want to connect to and make sure it is ready for connection.
Cannot determine access point
• The WPS button on numerous access points were pressed simultaneously. Try
reconnecting again.
No access points found
• Check to make sure that the access point is turned on.
• When connecting to an access point manually, make sure that you entered the
correct SSID.
Y
P
O
Incorrect wireless LAN encryption key/Incorrect wireless LAN security
settings
• Check the access point security settings (p. w-27).
IP address conflict
C
• Reset the IP address so that it does not conflict with another.
Disconnected/Receiving failed/Sending failed
• The environment you are in may not be suitable for wireless LAN use.
• Avoid using the camera’s wireless LAN function around microwave ovens, Bluetooth
devices, and other devices that operate on the 2.4 GHz band.
• When using infrastructure mode, use the camera within a close distance to the
access point, and avoid placing objects or obstructions between the camera and
access point.
• When using ad hoc mode, use the camera within a close distance to the connected
device, and avoid placing objects or obstructions between the camera and device.
• Check the connected device to make sure it is not experiencing errors.
Sending failed
Memory card error
• If the same error message is displayed even when you have inserted a formatted
memory card facing the correct way, contact a Canon customer support.
w-51
On-Screen Messages
Receiving failed
Insufficient space on card
• There is not enough free space on the memory card to receive images. Erase images
to create space on the memory card, or insert an empty memory card.
Receiving failed
Memory card locked
• The write-protect tab of the SD/SDHC/SDXC memory card or Eye-Fi card of the
camera to receive the images is set to the locked position. Slide the write-protect tab
to the unlocked position. PowerShot ELPH 320 HS / IXUS 240 HS
Receiving failed
Naming error!
• When the highest folder number (999), and the highest image number (9999) have
been reached on the receiving camera, images cannot be received.
Insufficient space on server
• Delete unnecessary images uploaded to CANON iMAGE GATEWAY to create space.
SSL certificate not valid
Connect PC, use supplied
software to make settings again
Y
P
O
• Check to make sure the date/time settings on the camera are correct. After confirming
that the settings are correct, follow the on-screen instructions and reset the settings.
Check network settings
C
• Check to make sure your computer can connect to the Internet with the current
network settings.
w-52
Glossary
Terms related to wireless LAN are explained here. Also refer to the
explanations of terms given in the respective sections of this guide.
• Access point
A device that relays radio wave signals to create a wireless LAN network.
This term also refers to a place where you can connect to the Internet via
wireless LAN.
• Ad hoc mode
A wireless LAN connection method. This method allows two devices to
connect to each other without using an access point.
• Infrastructure mode
A wireless LAN connection method. This mode is used to connect
through an access point.
• Firewall
This is a system that protects computers from electronic viruses, external
unauthorized access, and security threats. This is set in your wireless
LAN router or computer.
• SSID/ESSID
Numbers and letters used to identify a specific existing access point. This
is also called the “access point name” or “network name”.
• Encryption key
This is a key used to encrypt data for transmission to and from an access
point.
• IP address
This is an address used to identify a device within a network.
• MAC address
This is a unique address pre-assigned to a network device. It is also
referred to as a “physical address”.
C
Y
P
O
w-53
Specifications
Only functions related to wireless LAN functions are noted here. See the
Camera User Guide for camera specifications.
Wireless Standard
IEEE802.11b/g/n*
*2.4 GHz band only
Transmission Method
OFDM modulation (IEEE 802.11g/n)
DSSS modulation (IEEE 802.11b)
Connection Method
Infrastructure mode*, Ad hoc mode
*Supports Wi-Fi Protected Setup
Security
Y
P
O
WEP, WPA-PSK (AES/TKIP), WPA2-PSK (AES/TKIP)
C
Trademark Acknowledgments
• Wi-Fi®, Wi-Fi Alliance®, WPA™, WPA2™ and Wi-Fi Protected Setup™
are marks [or registered marks] of the Wi-Fi Alliance.
w-54
Index
A
M
Access point
Manual settings...........................w-35
Number of display items..............w-35
Add target device
Camera.......................................w-24
Computer....................................w-32
Smartphones...............................w-20
Web services...............................w-15
MAC address.....................................w-27
Memory card..................................... w-11
N
Nickname
Camera....................................... w-11
Device.........................................w-48
R
C
Camera
Add target device........................w-24
Nickname.................................... w-11
CameraWindow
Display........................................w-36
Smartphone.................................w-20
CANON iMAGE GATEWAY...............w-14
Settings.......................................w-15
Computer
Add target device........................w-32
Environment................................w-26
Preparation..................................w-26
Connection
Web services...............................w-17
Connection information
Change nickname.......................w-48
Edit..............................................w-46
Erase all......................................w-48
Erase individually........................w-47
C
Return wireless LAN settings to
default................................................w-50
S
Send images.....................................w-41
Maximum number of images
that can be sent together............w-41
Resize...............................w-42, w-43
Send individually.........................w-42
Send multiple images..................w-43
Set Touch Actions................. w-17, w-22, w-24, w-32
Y
P
O
E
Error messages.................................w-53
F
Failure...............................................w-51
I
Import images to a computer.............w-36
Selected images..........................w-38
Untransferred images..................w-37
Smartphones
Add target device........................w-20
CameraWindow...........................w-20
Change Privacy Settings.............w-22
IP Address Settings.....................w-22
Privacy Settings..........................w-21
W
Web services
Add target device........................w-15
Connection..................................w-17
Display order...............................w-16
Maximum number of mail
addresses....................................w-16
Wi-Fi....................................................w-2
Windows
Display CameraWindow..............w-36
Driver...........................................w-34
Settings.......................................w-28
w-55
Wireless LAN
Access point................................w-26
Security.......................................w-28
Settings.......................................w-27
WPS..................................................w-33
PBC Method................................w-33
PIN Method.................................w-34
C
w-56
Y
P
O
MEMO
C
Y
P
O
w-57
USA and Canada only:
The Lithium ion/polymer battery that powers the product is
recyclable.
Please call 1-800-8-BATTERY for information on how to recycle
this battery.
For CA, USA only
Included lithium battery contains Perchlorate Material - special handling may
apply.
See www.dtsc.ca.gov/hazardouswaste/perchlorate/ for details.
Trademark Acknowledgments
• The microSDXC logo is a trademark of SD-3C, LLC.
• The SDXC logo is a trademark of SD-3C, LLC.
• This device incorporates exFAT technology licensed from Microsoft.
Y
P
O
• HDMI, the HDMI logo and High-Definition Multimedia Interface are
trademarks or registered trademarks of HDMI Licensing LLC.
• The iFrame logo and the iFrame symbol are trademarks of Apple Inc.
C
About MPEG-4 Licensing
This product is licensed under AT&T patents for the MPEG-4 standard
and may be used for encoding MPEG-4 compliant video and/or decoding
MPEG-4 compliant video that was encoded only (1) for a personal and
non-commercial purpose or (2) by a video provider licensed under the AT&T
patents to provide MPEG-4 compliant video.
No license is granted or implied for any other use for MPEG-4 standard.
*Notice displayed in English as required.
FCC Notice
(Digital Camera, Model PC1735, PC1739 systems)
This device complies with Part 15 of the FCC Rules. Operation is subject to the following
two conditions;
(1) this device may not cause harmful interference, and
(2) this device must accept any interference received, including interference that may
cause undesired operation.
Note: This equipment has been tested and found to comply with the limits for Class B
digital devices, pursuant to Part 15 of the FCC rules. These limits are designed to
provide reasonable protection against harmful interference in a residential installation.
This equipment generates, uses and can radiate radio frequency energy and, if not
installed and used in accordance with the instructions, may cause harmful interference
to radio communications. However, there is no guarantee that interference will not occur
in a particular installation. If this equipment does cause harmful interference to radio or
television reception, which can be determined by turning the equipment off and on, the
user is encouraged to try to correct the interference by one or more of the following
measures:
• Reorient or relocate the receiving antenna.
• Increase the separation between the equipment and receiver.
• Connect the equipment into an outlet on a circuit different from that to which the
receiver is connected.
• Consult the dealer or an experienced radio/TV technician for help.
C
Y
P
O
The cable with the ferrite core provided with the digital camera must be used with this
equipment in order to comply with Class B limits in Subpart B of Part 15 of the FCC rules.
Do not make any changes or modifications to the equipment unless otherwise specified
in the manual. If such changes or modifications should be made, you could be required
to stop operation of the equipment.
Canon U.S.A., Inc.
One Canon Plaza, Lake Success, NY 11042, U.S.A.
Tel No. (516) 328-5600
Canadian Radio Interference Regulations
This Class B digital apparatus complies with Canadian ICES-003.
To ensure proper operation of this product, use of genuine Canon
accessories is recommended.
EC324_318_GS_02_Cov4.fm Page 42 Wednesday, March 28, 2012 2:23 PM
Battery Charger CB-2LB/CB-2LD
IMPORTANT SAFETY INSTRUCTIONSSAVE THESE INSTRUCTIONS.
DANGER-TO REDUCE THE RISK OF
FIRE OR ELECTRIC SHOCK,
CAREFULLY FOLLOW THESE
INSTRUCTIONS.
For connection to a supply not in the U.S.A., use an attachment plug
adapter of the proper configuration for the power outlet, if needed.
Battery Charger CB-2LBE/CB-2LDE
The adapter can be used with a power supply between 100 and 240 V
AC.
Contact your Canon dealer for information about plug adapter for
overseas use.
For U.S.A. customers only: For areas where 120 V AC power is not
used, you will need a special plug adapter.
For only United States
Use a UL listed, 1.8-3m(6-10ft), Type SPT-2 or NTSPT-2, AWG no.18
power supply cord, rated for 125V 7A, with a non-polarized NEMA
1-15P plug rated for 125V 15A.
C
Y
P
O
Battery Charger CB-2LDE
In normal use, keep the LED side face-up.
Disclaimer
• Reprinting, transmitting, or storing in a retrieval system any part of this
guide without the permission of Canon is prohibited.
• Canon reserves the right to change the contents of this guide at any
time without prior notice.
• Illustrations and screenshots in this guide may differ slightly from the
actual equipment.
• The above items notwithstanding, Canon accepts no liability for
damages due to mistaken operation of the products.
CDP-E463-020
© CANON INC. 2012