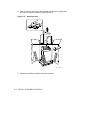
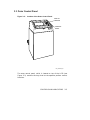
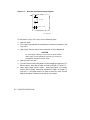
1
LG31 Printer
Installation/Operator’s Manual
Order Number EK-LG31E-IN-002
Digital Equipment Corporation
1st Edition, November 1987
2nd Edition, June 1989
The information in this document is subject to change without notice and should
not be construed as a commitment by Digital Equipment Corporation. Digital
Equipment Corporation assumes no responsibility for any errors that may appear
in this document.
The software described in this document is furnished under a license and may
be used or copied only in accordance with the terms of such license.
No responsibility is assumed for the use or reliability of software on equipment
that is not supplied by Digital Equipment Corporation or its affiliated companies.
© Digital Equipment Corporation. 1989. All rights reserved.
Printed in U.S.A.
The READER’S COMMENTS form on the last page of this document requests
the user’s critical evaluation to assist in preparing future documentation.
The following are trademarks of Digital Equipment Corporation:
DEC
DEC/CMS
DEC/MMS
DECnet
DECsystem–10
DECSYSTEM–20
DECUS
DECwriter
DIBOL
EduSystem
IAS
MASSBUS
PDP
PDT
RSTS
RSX
dt
UNIBUS
VAX
VAXcluster
VMS
VT
This document was prepared using VAX DOCUMENT, Version 1.1
Contents
Preface
xi
Chapter 1 GENERAL INFORMATION
1.1
1.2
1.3
1.4
1.5
1.6
Overview . . . . . . . . . . . . . . . . . . . . . . . . . . . . . . . . . . . . . . . . . . . . 1–1
General Description . . . . . . . . . . . . . . . . . . . . . . . . . . . . . . . . . . . . 1–1
Major Components . . . . . . . . . . . . . . . . . . . . . . . . . . . . . . . . . . . . . 1–2
1.3.1
Control Panels . . . . . . . . . . . . . . . . . . . . . . . . . . . . . . . . . 1–2
1.3.2
Printer Mechanism . . . . . . . . . . . . . . . . . . . . . . . . . . . . . 1–4
1.3.3
Control Electronics . . . . . . . . . . . . . . . . . . . . . . . . . . . . . . 1–4
1.3.4
Serial Interface . . . . . . . . . . . . . . . . . . . . . . . . . . . . . . . . 1–4
1.3.5
Power Supply . . . . . . . . . . . . . . . . . . . . . . . . . . . . . . . . . . 1–4
Printed Circuit Boards . . . . . . . . . . . . . . . . . . . . . . . . . . . . . . . . . . 1–4
Printer Feature Summary . . . . . . . . . . . . . . . . . . . . . . . . . . . . . . . 1–5
Specifications . . . . . . . . . . . . . . . . . . . . . . . . . . . . . . . . . . . . . . . . . 1–6
1.6.1
LG31 Printer Specifications . . . . . . . . . . . . . . . . . . . . . . . 1–6
1.6.2
Resident Fonts . . . . . . . . . . . . . . . . . . . . . . . . . . . . . . . . . 1–8
1.6.3
Recommended Paper Weights . . . . . . . . . . . . . . . . . . . . . 1–8
1.6.4
Print Speeds . . . . . . . . . . . . . . . . . . . . . . . . . . . . . . . . . . 1–9
1.6.5
Resident Character Sets . . . . . . . . . . . . . . . . . . . . . . . . . 1–10
iii
Chapter 2 INSTALLATION AND CHECKOUT
2.1
2.2
2.3
2.4
2.5
2.6
2.7
Overview . . . . . . . . . . . . . . . . . . . . . . . . . . . . . . . . . . . . . . . . . . . . 2–1
Unpacking . . . . . . . . . . . . . . . . . . . . . . . . . . . . . . . . . . . . . . . . . . . 2–2
2.2.1
Inspection . . . . . . . . . . . . . . . . . . . . . . . . . . . . . . . . . . . . 2–2
2.2.2
Unpacking Procedure . . . . . . . . . . . . . . . . . . . . . . . . . . . . 2–3
Installation . . . . . . . . . . . . . . . . . . . . . . . . . . . . . . . . . . . . . . . . . 2–11
2.3.1
Print Ribbon Cartridge . . . . . . . . . . . . . . . . . . . . . . . . . 2–11
Apply Power to the LG31 . . . . . . . . . . . . . . . . . . . . . . . . . . . . . . . 2–12
Powering and Testing the LG31 Printer . . . . . . . . . . . . . . . . . . . . 2–14
Host To LG31 Printer Set-up Procedure . . . . . . . . . . . . . . . . . . . . 2–16
2.6.1
Interface Control Strap Settings . . . . . . . . . . . . . . . . . . 2–16
2.6.2
Serial Interface Settings for VAX/VMS . . . . . . . . . . . . . . 2–16
2.6.3
RSX Settings . . . . . . . . . . . . . . . . . . . . . . . . . . . . . . . . . 2–17
2.6.4
RT-11 Settings . . . . . . . . . . . . . . . . . . . . . . . . . . . . . . . . 2–17
2.6.5
RSTS/E Settings . . . . . . . . . . . . . . . . . . . . . . . . . . . . . . 2–18
Connecting the Host to the LG31 Printer . . . . . . . . . . . . . . . . . . 2–19
Chapter 3 CONTROLS AND INDICATORS
3.1
3.2
3.3
3.4
3.5
3.6
3.7
3.8
Introduction . . . . . . . . . . . . . . . . . . . . . . . . . . . . . . . . . . . . . . . . . . 3–1
Power Switch ON/OFF . . . . . . . . . . . . . . . . . . . . . . . . . . . . . . . . . . 3–1
Outer Control Panel . . . . . . . . . . . . . . . . . . . . . . . . . . . . . . . . . . . . 3–3
3.3.1
Outer Control Panel Components . . . . . . . . . . . . . . . . . . 3–4
3.3.2
Outer Control Panel Keys . . . . . . . . . . . . . . . . . . . . . . . . 3–5
Top Cover Interlock Switch . . . . . . . . . . . . . . . . . . . . . . . . . . . . . . 3–5
Inner Control Panel . . . . . . . . . . . . . . . . . . . . . . . . . . . . . . . . . . . . 3–7
3.5.1
Three-Character LED Display . . . . . . . . . . . . . . . . . . . . 3–10
3.5.2
Audio Alarm . . . . . . . . . . . . . . . . . . . . . . . . . . . . . . . . . . 3–10
3.5.3
Initialization Switch . . . . . . . . . . . . . . . . . . . . . . . . . . . . 3–11
3.5.4
Key Functions . . . . . . . . . . . . . . . . . . . . . . . . . . . . . . . . 3–12
Paper Tension Lever . . . . . . . . . . . . . . . . . . . . . . . . . . . . . . . . . . 3–16
Print Gap Control . . . . . . . . . . . . . . . . . . . . . . . . . . . . . . . . . . . . 3–17
Margin Adjust Knob . . . . . . . . . . . . . . . . . . . . . . . . . . . . . . . . . . . 3–17
iv
Chapter 4 SETTING COMMUNICATIONS AND PRINT
PARAMETERS
4.1
4.2
4.3
4.4
4.5
Introduction . . . . . . . . . . . . . . . . . . . . . . . . . . . . . . . . . . . . . . . . . . 4–1
Interface Control—Host to Printer Interface . . . . . . . . . . . . . . . . . 4–2
Configuration Menu . . . . . . . . . . . . . . . . . . . . . . . . . . . . . . . . . . . . 4–5
4.3.1
Listing the Parameters . . . . . . . . . . . . . . . . . . . . . . . . . . 4–5
4.3.2
Communications Parameters . . . . . . . . . . . . . . . . . . . . . . 4–8
Print Characteristics . . . . . . . . . . . . . . . . . . . . . . . . . . . . . . . . . . 4–14
4.4.1
Font . . . . . . . . . . . . . . . . . . . . . . . . . . . . . . . . . . . . . . . . 4–14
4.4.1.1
Style . . . . . . . . . . . . . . . . . . . . . . . . . . . . . . . . . . 4–16
4.4.1.2
CPI . . . . . . . . . . . . . . . . . . . . . . . . . . . . . . . . . . . 4–17
4.4.1.3
Country (Character Sets) . . . . . . . . . . . . . . . . . . 4–18
4.4.1.4
Mode . . . . . . . . . . . . . . . . . . . . . . . . . . . . . . . . . 4–19
4.4.1.5
Horizontal Expansion . . . . . . . . . . . . . . . . . . . . . 4–20
4.4.1.6
Vertical Expansion . . . . . . . . . . . . . . . . . . . . . . . 4–21
4.4.2
LPI . . . . . . . . . . . . . . . . . . . . . . . . . . . . . . . . . . . . . . . . . 4–22
4.4.3
Forms Control . . . . . . . . . . . . . . . . . . . . . . . . . . . . . . . . 4–22
4.4.4
Margin Settings . . . . . . . . . . . . . . . . . . . . . . . . . . . . . . . 4–24
4.4.5
Horizontal Tab Stops . . . . . . . . . . . . . . . . . . . . . . . . . . . 4–25
4.4.6
Vertical Tab Stops . . . . . . . . . . . . . . . . . . . . . . . . . . . . . 4–26
4.4.7
Printer Control Straps . . . . . . . . . . . . . . . . . . . . . . . . . . 4–26
Function Mode . . . . . . . . . . . . . . . . . . . . . . . . . . . . . . . . . . . . . . . 4–28
4.5.1
Printer Initialization . . . . . . . . . . . . . . . . . . . . . . . . . . . 4–28
4.5.2
Forms Setup . . . . . . . . . . . . . . . . . . . . . . . . . . . . . . . . . 4–31
4.5.2.1
Top Of Form (TOF) . . . . . . . . . . . . . . . . . . . . . . 4–33
4.5.3
Print Adjustment . . . . . . . . . . . . . . . . . . . . . . . . . . . . . . 4–35
4.5.4
Forms Adjustment . . . . . . . . . . . . . . . . . . . . . . . . . . . . . 4–36
4.5.5
Margin Setup . . . . . . . . . . . . . . . . . . . . . . . . . . . . . . . . . 4–38
4.5.6
Reverse Form Feed . . . . . . . . . . . . . . . . . . . . . . . . . . . . 4–40
4.5.7
Buffer Clear . . . . . . . . . . . . . . . . . . . . . . . . . . . . . . . . . . 4–41
v
Chapter 5 PRINTER DIAGNOSTICS
5.1
5.2
5.3
Introduction . . . . . . . . . . . . . . . . . . . . . . . . . . . . . . . . . . . . . . . . . . 5–1
Self-Tests . . . . . . . . . . . . . . . . . . . . . . . . . . . . . . . . . . . . . . . . . . . . 5–1
5.2.1
Power-Up Self-Tests . . . . . . . . . . . . . . . . . . . . . . . . . . . . . 5–1
5.2.2
Printing Self-Test . . . . . . . . . . . . . . . . . . . . . . . . . . . . . . . 5–2
5.2.3
Operational Self-Test . . . . . . . . . . . . . . . . . . . . . . . . . . . . 5–2
5.2.3.1
Print Test Pattern . . . . . . . . . . . . . . . . . . . . . . . . 5–3
Alignment Tests . . . . . . . . . . . . . . . . . . . . . . . . . . . . . . . . . . . . . . . 5–6
Chapter 6 PRINTER OPERATION
6.1
6.2
6.3
6.4
6.5
6.6
6.7
6.8
6.9
Introduction . . . . . . . . . . . . . . . . . . . . . . . . . . . . . . . . . . . . . . . . . . 6–1
Loading Paper . . . . . . . . . . . . . . . . . . . . . . . . . . . . . . . . . . . . . . . . 6–1
Installing/Replacing Ribbon Cartridge . . . . . . . . . . . . . . . . . . . . . . 6–5
Re-Inking Ribbon . . . . . . . . . . . . . . . . . . . . . . . . . . . . . . . . . . . . . . 6–7
Paper Motion . . . . . . . . . . . . . . . . . . . . . . . . . . . . . . . . . . . . . . . . . 6–8
6.5.1
Form Feed . . . . . . . . . . . . . . . . . . . . . . . . . . . . . . . . . . . . 6–8
6.5.2
Line Feed . . . . . . . . . . . . . . . . . . . . . . . . . . . . . . . . . . . . . 6–9
6.5.3
Forward Microstepping . . . . . . . . . . . . . . . . . . . . . . . . . . 6–9
6.5.4
Reverse Microstepping . . . . . . . . . . . . . . . . . . . . . . . . . . . 6–9
6.5.5
Reverse Form Feeds . . . . . . . . . . . . . . . . . . . . . . . . . . . . . 6–9
Aligning Paper . . . . . . . . . . . . . . . . . . . . . . . . . . . . . . . . . . . . . . . . 6–9
Buffer Clear . . . . . . . . . . . . . . . . . . . . . . . . . . . . . . . . . . . . . . . . . 6–10
Low Paper Printing . . . . . . . . . . . . . . . . . . . . . . . . . . . . . . . . . . . 6–10
Hex Dump . . . . . . . . . . . . . . . . . . . . . . . . . . . . . . . . . . . . . . . . . . 6–13
Chapter 7 OPERATOR MAINTENANCE
7.1
7.2
7.3
Introduction . . . . . . . . . . . . . . . . . . . . . . . . . . . . . . . . . . . . . . . . . . 7–1
Operator Troubleshooting . . . . . . . . . . . . . . . . . . . . . . . . . . . . . . . . 7–2
Printer Parameters . . . . . . . . . . . . . . . . . . . . . . . . . . . . . . . . . . . . 7–5
7.3.1
Power-Up Parameters Set . . . . . . . . . . . . . . . . . . . . . . . . 7–6
7.3.2
Power-Up Parameters Retained . . . . . . . . . . . . . . . . . . . . 7–7
7.3.3
Reset State . . . . . . . . . . . . . . . . . . . . . . . . . . . . . . . . . . . . 7–8
vi
Appendix A LED DISPLAY LIST
A.1
List of All Control Panel Readouts . . . . . . . . . . . . . . . . . . . . . . . . A–1
Appendix B PARAMETER SELECTION
Appendix C LG31 COUNTRY KITS
Index
Figures
1–1
2–1
2–2
2–3
2–4
2–5
2–6
2–7
2–8
2–9
2–10
3–1
3–2
3–3
3–4
3–5
3–6
3–7
3–8
3–9
3–10
LG31 Printer . . . . . . . . . . . . . . . . . . . . . . . . . . . . . . . . . .
Cut Straps and Remove . . . . . . . . . . . . . . . . . . . . . . . . . .
Opening Carton . . . . . . . . . . . . . . . . . . . . . . . . . . . . . . . .
Removing Metal Brackets . . . . . . . . . . . . . . . . . . . . . . . .
Positioning Ramps . . . . . . . . . . . . . . . . . . . . . . . . . . . . . .
Removing Printer from Pallet . . . . . . . . . . . . . . . . . . . . .
Top of Lower Front Interior . . . . . . . . . . . . . . . . . . . . . . .
Top View - Shuttle Area . . . . . . . . . . . . . . . . . . . . . . . . . .
Paper Handling Hardware . . . . . . . . . . . . . . . . . . . . . . . .
Power Connection . . . . . . . . . . . . . . . . . . . . . . . . . . . . . .
Cover Interlock Switch . . . . . . . . . . . . . . . . . . . . . . . . . . .
Power Switch . . . . . . . . . . . . . . . . . . . . . . . . . . . . . . . . . .
Location of the Outer Control Panel . . . . . . . . . . . . . . . .
Outer Control Panel . . . . . . . . . . . . . . . . . . . . . . . . . . . . .
Cover Interlock Switch . . . . . . . . . . . . . . . . . . . . . . . . . . .
Location of the Inner Control Panel . . . . . . . . . . . . . . . . .
The Inner Control Panel . . . . . . . . . . . . . . . . . . . . . . . . .
Configuration Menu . . . . . . . . . . . . . . . . . . . . . . . . . . . . .
The Inner Control Panel Showing Display, Audio Alarm,
Initialization Switch . . . . . . . . . . . . . . . . . . . . . . . . . . . . .
Function Mode Key Operations . . . . . . . . . . . . . . . . . . . .
Paper Tension Lever, Print Gap Control, Margin Adjust .
vii
. 1–3
. 2–3
. 2–4
. 2–5
. 2–6
. 2–7
. 2–8
. 2–9
2–10
2–13
2–15
. 3–2
. 3–3
. 3–4
. 3–6
. 3–7
. 3–8
. 3–9
3–11
3–13
3–17
4–1
4–2
4–3
4–4
4–5
4–6
4–7
4–8
4–9
4–10
4–11
4–12
4–13
4–14
4–15
4–16
4–17
4–18
4–19
4–20
4–21
4–22
5–1
6–1
6–2
6–3
6–4
6–5
6–6
6–7
B–1
B–2
Serial Interface Connector . . . . . . . . . . . . . . . . . . . . . . . . . 4–2
Location of the Serial Interface Connector . . . . . . . . . . . . . 4–3
Configuration Menu . . . . . . . . . . . . . . . . . . . . . . . . . . . . . . 4–7
Interface Control Straps . . . . . . . . . . . . . . . . . . . . . . . . . . 4–10
Interface Control Speed . . . . . . . . . . . . . . . . . . . . . . . . . . 4–11
Interface Control Parity . . . . . . . . . . . . . . . . . . . . . . . . . . 4–12
Interface Control Type . . . . . . . . . . . . . . . . . . . . . . . . . . . 4–12
Font Menu . . . . . . . . . . . . . . . . . . . . . . . . . . . . . . . . . . . . 4–15
Font Style . . . . . . . . . . . . . . . . . . . . . . . . . . . . . . . . . . . . 4–16
Font CPI . . . . . . . . . . . . . . . . . . . . . . . . . . . . . . . . . . . . . 4–17
Font Country . . . . . . . . . . . . . . . . . . . . . . . . . . . . . . . . . . 4–18
Font Mode . . . . . . . . . . . . . . . . . . . . . . . . . . . . . . . . . . . . 4–19
Font Horizontal Expansion . . . . . . . . . . . . . . . . . . . . . . . 4–20
Font Vertical Expansion . . . . . . . . . . . . . . . . . . . . . . . . . . 4–21
Lines Per Inch . . . . . . . . . . . . . . . . . . . . . . . . . . . . . . . . . 4–22
Forms Control . . . . . . . . . . . . . . . . . . . . . . . . . . . . . . . . . 4–23
Margin Settings . . . . . . . . . . . . . . . . . . . . . . . . . . . . . . . . 4–24
Horizontal Tab Stops . . . . . . . . . . . . . . . . . . . . . . . . . . . . 4–25
Vertical Tab Stops . . . . . . . . . . . . . . . . . . . . . . . . . . . . . . 4–26
Printer Control Straps — Factory Setting . . . . . . . . . . . . 4–27
Function Mode . . . . . . . . . . . . . . . . . . . . . . . . . . . . . . . . . 4–29
Key (4) Form Size Setup Example . . . . . . . . . . . . . . . . . . 4–33
ASCII Print Test Pattern - Sample Printout . . . . . . . . . . . 5–2
Sprocket Hole Dimensioning Diagram . . . . . . . . . . . . . . . . 6–2
Paper Loading Diagram . . . . . . . . . . . . . . . . . . . . . . . . . . . 6–3
Paper Loading, Lower Tractor . . . . . . . . . . . . . . . . . . . . . . 6–4
Ribbon Cartridge Installation, Paper Gap Adjuster Setting 6–5
Ribbon Cartridge Installation, Holddown and Re-Inker . . . 6–6
Ribbon Cartridge Installation, Ribbon Guide and Striker
Bar . . . . . . . . . . . . . . . . . . . . . . . . . . . . . . . . . . . . . . . . . . . 6–8
Margin Adjust Knob . . . . . . . . . . . . . . . . . . . . . . . . . . . . . 6–10
Configuration Menu with Program Mode Parameters . . . B–2
Function Mode Options . . . . . . . . . . . . . . . . . . . . . . . . . . B–3
viii
Tables
1–1
1–2
1–3
1–4
1–5
2–1
3–1
4–1
4–2
4–3
4–4
4–5
4–6
4–7
4–8
4–9
4–10
5–1
5–2
6–1
7–1
7–2
7–3
7–4
7–5
7–6
LG31 Printed Circuit Boards . . . . . . . . . . . . .
LG31 Printer Specifications . . . . . . . . . . . . . .
Resident Fonts . . . . . . . . . . . . . . . . . . . . . . . .
Recommended Paper Weights . . . . . . . . . . . .
Print Speeds . . . . . . . . . . . . . . . . . . . . . . . . .
Default Characteristics . . . . . . . . . . . . . . . . .
Initial Key Functions . . . . . . . . . . . . . . . . . . .
Pin Assignments . . . . . . . . . . . . . . . . . . . . . .
Serial Interface Strapping Options . . . . . . . .
Initialization Procedure . . . . . . . . . . . . . . . . .
Lock-Up Printer Initialization Procedure . . . .
Forms Setup Procedure . . . . . . . . . . . . . . . . .
Print Review Procedure . . . . . . . . . . . . . . . . .
Forms Adjustment Procedure . . . . . . . . . . . . .
Margin Setup Procedure . . . . . . . . . . . . . . . .
Reverse Form Feed Procedure . . . . . . . . . . . .
Buffer Clear Procedure . . . . . . . . . . . . . . . . .
Print Test and Diagnostic Self-Test Procedure
Diagnostic Fault Codes . . . . . . . . . . . . . . . . .
Low Paper Printing Procedure . . . . . . . . . . . .
Possible Mechanical Problems and Remedies .
Possible Electrical Problems and Remedies . .
Factory Settings . . . . . . . . . . . . . . . . . . . . . . .
Printer Parameters Power-Up Set . . . . . . . . .
Printer Parameters Retained on Power-Up . .
Reset State Default Parameters . . . . . . . . . . .
ix
.
.
.
.
.
.
.
.
.
.
.
.
.
.
.
.
.
.
.
.
.
.
.
.
.
.
.
.
.
.
.
.
.
.
.
.
.
.
.
.
.
.
.
.
.
.
.
.
.
.
.
.
.
.
.
.
.
.
.
.
.
.
.
.
.
.
.
.
.
.
.
.
.
.
.
.
.
.
.
.
.
.
.
.
.
.
.
.
.
.
.
.
.
.
.
.
.
.
.
.
.
.
.
.
.
.
.
.
.
.
.
.
.
.
.
.
.
.
.
.
.
.
.
.
.
.
.
.
.
.
.
.
.
.
.
.
.
.
.
.
.
.
.
.
.
.
.
.
.
.
.
.
.
.
.
.
.
.
.
.
.
.
.
.
.
.
.
.
.
.
.
.
.
.
.
.
.
.
.
.
.
.
.
.
.
.
.
.
.
.
.
.
.
.
.
.
.
.
.
.
.
.
.
.
.
.
.
.
.
.
.
.
.
.
.
.
.
.
.
.
.
.
.
.
.
.
.
.
.
.
.
.
.
.
. 1–5
. 1–6
. 1–8
. 1–8
. 1–9
2–18
3–14
. 4–4
4–13
4–30
4–31
4–32
4–35
4–37
4–38
4–40
4–41
. 5–3
. 5–4
6–11
. 7–2
. 7–4
. 7–6
. 7–7
. 7–7
. 7–9
Preface
Purpose
This manual provides information on the installation and operation
of the LG31 300 LPM Line Matrix Printer. It contains instructions
and procedures to help a user install, power-up, set/load, operate, and
maintain the LG31 printer.
NOTE
The LG31 printer is installed, maintained, and supported by
Digital Equipment Corporation.
Manual Organization
This manual is organized as follows:
•
Chapter 1 General Information—Contains a product overview,
operational/programming features, options, and printer specifications.
•
Chapter 2 Installation and Checkout – Provides step-by-step
instructions for proper unpacking/installation of the LG31 printer
and ac power cord connection.
•
Chapter 3 Controls and Indicators – Describes the LG31 printer
controls and indicators.
xi
•
Chapter 4 Setting Communications and Print Parameters –
Describes the parameters that may be set on the LG31 printer.
•
Chapter 5 Printer Diagnostics – Describes the LG31 self-tests
and alignments test.
•
Chapter 6 Printer Operation – Describes user operation procedures.
•
Chapter 7 Operator Maintenance – Describes operator troubleshooting tools and maintenance procedures.
•
Appendix A LED Display List – Contains a complete list of LG31
printer readouts.
•
Appendix B Parameter Selection – Contains the program mode
parameters and the function mode options.
•
Appendix C LG31 Country Kits – Contains the country kit information.
Related Documentation
This manual is one in a series of documents listed, as follows, describing
the LG31 printer.
Title
Document No.
LG31 Printer Pocket Service Guide
EK-LG31E-PS
LG31 Printer User’s Guide
*
LG31 Printer Installation/Operator’s
Manual
*
LG31 Printer Technical Manual
EK-LG31E-TM
LG31 Printer Illustrated Parts
Breakdown
EK-LG31A-IP
* These two books are ordered as a kit: EK-OLG31-DK.
xii
Conventions
In writing this manual, the following conventions have been adopted for
the mechanical objects listed below
•
Control Panel Keys = Capitalized key legend
Example: OFF LINE
•
LED Three-Character Display = Bracketed three characters including flashing printer mode dots
Example: [.8.8.8]
•
Number Designated Keys = Parenthesis enclosed number designation
Example: (4)
Notes, Cautions, and Warnings
Throughout this manual Notes, Cautions, and Warnings have the following meanings:
NOTE:
The information is important to the understanding of the
process being described.
CAUTION:
The information describes a process that can damage the
equipment or software.
WARNING:
The information describes a process that can harm the user.
Assistance
If you have a problem with the LG31 printer, carry out the following
steps:
1. Confirm that the problem can be repeated by recreating the identical
conditions leading up to the problem. A vital step may have been
overlooked which is causing the problem.
2. Identify the problem using the ‘‘Troubleshooting’’ section in Chapter
7 and the list of LED display messages in Appendix A to determine
if the problem can be resolved in-house. If not, the local Digital
Equipment Corporation Customer Service organization should be
contacted.
xiii
3. If required, report the problem to Digital Equipment Corporation
Customer Service. Consult your service contract for the information
required to process your call.
WARNING
Dangerous voltages exist in the LG31 printer. There are no
internal user serviceable parts. Refer servicing to qualified
service personnel.
FCC Statement (A)
Notice
This equipment generates, uses, and may emit radio frequency energy.
The equipment has been type tested and found to comply with the limits
for a Class A computing device pursuant to Subpart J of Part 15 of
FCC rules, which are designed to provide reasonable protection against
such radio frequency interference. Operation of this equipment in a
residential area may cause interference in which case the user at his own
expense will be required to take whatever measures may be required to
correct the interference.
xiv
Chapter 1
GENERAL INFORMATION
1.1 Overview
This chapter contains an overview of the LG31 300 LPM Line Matrix
Printer (hereafter referred to as the LG31 printer). It includes a brief
description of the printer and listings of the electrical, mechanical, and
operational specifications.
1.2 General Description
The LG31 printer is a line matrix printer incorporating a serial I/O (see
Figure 1–1). The LG31 printer uses fan-folded, tractor-fed paper stock,
and operates at 100-240 volts, 50-60 Hertz (Hz). The printer is primarily
used in data processing and office environments, and can be operated by
non-technical users. The LG31 must be installed by a trained Field
Service engineer. It is maintained and supported by Digital Equipment
Corporation.
The hardware environment for the printer consists of all the electrical
and mechanical interfaces. The electrical interfaces are the host communication port, and the ac power inlet. The mechanical interfaces are
the platen gap, paper thickness adjuster, the paper path/tractors, ribbon
cartridge, and the outer/inner control panels. The printer is compatible
with low to mid-range PDP and VAX systems.
No specialized software is required. For data exchange with the host
computer, the LG31 has an RS-232-C port.
GENERAL INFORMATION 1–1
The firmware resident in the printer interprets and executes commands
(control sequences) sent from the host computer or entered by an operator at the printer’s outer or inner control panels. There are self-test
diagnostics integrated in the printer firmware to verify operational integrity and identify hardware faults.
The printer is capable of printing at a speed of 300 Lines Per Minute
(LPM) in upper case characters, in a data processing font, at 10 Characters Per Inch (CPI), and at 6 Lines Per Inch (LPI). At this speed, a
projected workload of 15-20K pages per month at 50 percent duty cycle
(assuming an eight-hour day) is attainable.
1.3 Major Components
The major components of the LG31 printer are as follows:
•
Control panels
•
Printer mechanism
•
Control electronics
•
Serial interface
•
Power supply
1.3.1 Control Panels
There are two control panels on the LG31 printer: an Outer Control
Panel keypad for common operations, and an Inner Control Panel keypad for more complex printing operations. The inner control panel
has a three-character LED display, which indicates printer status and
operator-correctable faults. The display panel is visible above the outer
control panel through a window in the top cover. An operator can key
in commands (see Chapter 5) on the inner control panel to invoke diagnostic self-tests, modify printer parameters, or initiate specified printer
functions.
Also included is an audio operator-alerting alarm for power-up/fault detection, and an initialization switch, which erases current configuration
settings and restores the printer to factory settings. Refer to Chapter 3
for configuration menu selection/modification, Chapter 4 for programming printer functions, and Chapter 5 for operator-selected keypad functions. Appendix A lists all the display codes.
1–2 GENERAL INFORMATION
Figure 1–1: LG31 Printer
DISPLAY
WINDOW
TOP
ENCLOSURE
OUTER
CONTROL
PANEL
LEFT
COVER
FRONT
DOOR
PAPER
RACK
RIGHT
COVER
PAPER
STACKING
GUIDES
POWER
SWITCH
(CIRCUIT
BREAKER)
REAR
COVER
PAPER
SHELF
RE_UK00220A_89
GENERAL INFORMATION 1–3
Configuration of the printer is accomplished with the use of the control
panel and printed menus. The printer is capable of operating in either
7 or 8 bit modes and with the Digital serial I/O protocol.
1.3.2 Printer Mechanism
The LG31 printer mechanism consists of mechanical and electromechanical hardware. The printer mechanism performs ribbon/paper motion and
translates the binary print data to printed characters on paper by means
of the print shuttle.
1.3.3 Control Electronics
The control electronics of the LG31 printer coordinates the functions and
operations of the serial interface, control panel, and printer mechanism.
1.3.4 Serial Interface
The EIA RS-232-C serial interface provides the bidirectional communications link between the host and the printer. Bidirectional communications allow print data to be sent to the printer and various types of
data (XON/XOFF protocol, status reports, printer identification, and so
on) to be sent to the host from the printer. The ASCII/ISO 7-bit code and
alphanumeric characters are used for information interchange between
the printer and the host (data source).
1.3.5 Power Supply
The LG31 printer’s power supply provides regulated dc power to the
control electronics and printer mechanisms. The ac power is rectified
and regulated to assure reliable printer operation. The power supply
automatically adjusts to ac input voltages in the range of 100 to 240V ac
at 50 to 60 Hz and constantly monitors the dc output voltages.
1.4 Printed Circuit Boards
The LG31 printer printed circuit boards are listed in Table 1–1.
1–4 GENERAL INFORMATION
Table 1–1: LG31 Printed Circuit Boards
Board
Description
Part No.
Location
SCPI
Shuttle Control
Panel Interface
29-26721-00
SHAD
Shuttle Head
Actuator Driver
Shuttle Matrix
Display Panel
Shuttle Matrix
Mother Board
Shuttle Matrix
Image
Hardware
Shuttle Matrix
Imaging
Microprocessor
Shuttle Matrix Motor
Control
Shuttle Matrix Serial
Interface
Shuttle Matrix
System
Microprocessor
Shuttle Power
Supply Discharge
Shuttle Power
Supply Master
Shuttle Power
Supply
Regulator
Shuttle Power
Supply Filter
29-26729-00
On access door between
outer and inner control
panels.
Vertically mounted in
top rear of printer.
On inner control panel.
SMDP
SMMB
SMIH
SMIM
SMMC
SMSI
SMSM
SPSD
SPSM
SPSR
SPSX
29-26720-00
29-27261-01
29-26731-00-00
Inside rear access door
(left side).
In logic card cage (right
side).
29-26730-00
In logic card cage(rightside).
29-26735-00
In logic card cage (right
side).
Piggyback on SMSM.
29-26723-00
29-26733-00
In logic card cage (right
side).
29-26724-00
Inside rear access door
below the capacitor.
In power supply card
cage (left side).
In power supply card
cage (left side).
29-26734-00
29-26732-00
29-26722-00
In ac switch box, rear
of printer, near power
ON/OFF switch.
1.5 Printer Feature Summary
The LG31 printer provides the following features:
•
Bolding
•
Underlining text
•
Single, double-width characters
GENERAL INFORMATION 1–5
•
Single, double, or triple-height characters
•
Autowrap
•
Line feed/new line mode
•
Hex dumping
•
Digital multinational 8-bit character set (U.S. ASCII)
•
National Replacement Character (NRC) sets (see Section 1.6.5).
1.6 Specifications
1.6.1 LG31 Printer Specifications
Table 1–2: LG31 Printer Specifications
Printer Dimensions
Unpacked
Width
Depth
(with Paper Tray)
Height
Net Weight
Packaged
Width
Depth
Height
Weight
Installation Area Requirements
Width
Depth
Electrical
Voltage Range
1–6 GENERAL INFORMATION
737.5 cm (29.0 in)
63.5 cm (25.0 in)
104.1 cm (41.0 in)
123 cm (48.4 in)
131 kg (287 lbs)
77.5 cm (30.5 in)
88.9 cm (35 in)
156.2 cm (61.5 in)
171 kg (376 lbs) (includes 16 kg (35.2 lbs) of
accessories consisting of paper shelf, upper paper
rack, and ribbon cartridge)
137 cm (54 in) (To allow air flow clearance for
printer side vents)
206.5 cm (104 in) (To allow free access to front
and rear paper handling areas, the ON/OFF
switch, and the power cables)
100 to 240 V ac
Table 1–2 (Cont.): LG31 Printer Specifications
NOTE
The printer’s universal power supply automatically
accepts international voltage and frequency variations.
Input Frequency Range
50 Hz to 60 Hz
Harmonic Distortion
5% maximum allowable
Power Rating
Standby
50 W
Printing
400 W
Shuttle Frequency
20 Hz
Dissipated Power
Standby
171 BTU/hr
Printing
1368 BTU/hr
Radio Frequency Interference
Tested/certified to RFI standards FCC 15,
Subpart J, Class A; VDE 0871 Class B
Acoustic Noise
Operating
Altitude
Temperature
Relative humidity
Non-operating
Altitude
Temperature
Relative Humidity
Printing
Line Length
Lines Per Inch (LPI) Spacing
Characters Per Inch (CPI)
Paper Slew
Line Feed
Horizontal Tabs
Vertical Tabs
LNPA 6.7 bels
LPA 55 dBA
2.4 km (0 to 8,000 ft)
10°C to 40°C (50°F to 104°F)
Maximum allowable reduced by factor 1.8°C/1000
m (1°F/1000 ft)
10% to 90% non-condensing with a maximum wet
bulb temperature of 28°C (82.4°F) a minimum
dew point 2°C (35.6°F)
4.9 km (0 to 17,700 ft)
-40°C to 66°C (-40°F to 150.8°F)
Maximum allowable reduced by factor 1.8°C/1000
m (1°F/1000 ft)
5% to 95% non-condensing
33.5 cm (13.2 in)
6, 8, 10
5, 10, 12, 13.3, 15, 16.7 (plus horizontal and
vertical expansion of each)
50.0 cm/sec (20 in/sec)
12.5 msec at 6 lines/inch
198 positions
66 positions
GENERAL INFORMATION 1–7
Table 1–2 (Cont.): LG31 Printer Specifications
Paper/Forms
Paper Width
Form Length
Fan Folds
Paper Weight
Form Thickness
Card Stock
76.2 mm (3 in) to 420.1 mm (16.54 in)
8.4 mm (0.33 in) to 559 mm (22 in)
152 mm (6 in) to 305 mm (12 in)
90 g/m² (24 lbs) for single ply paper
Less than 0.63 mm (0.025 in)
Up to 163 g/m² (100 lbs) can be used
1.6.2 Resident Fonts
Table 1–3: Resident Fonts
Horizontal Pitch (CPI)
Font
5
10
12
13.3
15
16.7
Data processing
NLQ
OCR-A
OCR-B
Yes
Yes
NLQ
NLQ
Yes
Yes
Yes
Yes
Yes
Yes
NLQ
NLQ
Yes
Yes
NLQ
NLQ
Yes
Yes
NLQ
NLQ
Yes
Yes
NLQ
NLQ
‘‘Yes’’ indicates that the horizontal pitch is available in the current font.
‘‘NLQ’’ indicates that when either OCR-A or OCR-B font is selected,
and a horizontal pitch other than 10 CPI is selected, the NLQ font
is substituted automatically. If the horizontal pitch is subsequently
changed to 10 CPI, the printer will return to the selected OCR font.
1.6.3 Recommended Paper Weights
Table 1–4: Recommended Paper Weights
Number of
Parts
Recommended Paper Weight
Carbon Insert Sheet
Weight
1
2, 3 or 4
5 or 6
56 g/m² (15 lbs)
50 g/m² (13.5 lbs)
45 g/m² (12 lbs)
—
19 g/m² (8 lbs)
19 g/m² (8 lbs)
1–8 GENERAL INFORMATION
1.6.4 Print Speeds
Print speeds are quoted in lines per minute (LPM) with the printer set
at 6 LPI, for each available combination of font and horizontal pitch in
characters per inch.
Table 1–5: Print Speeds
Horizontal Pitch (CPI)
Font
5
10
12
13.3
15
16.7
DP Upper-case Only
DP Upper- and Lowercase
300
240
300
240
300
240
300
240
300
240
147
105
NLQ Upper-case Only
NLQ Upper- and Lowercase
82
65
82
65
82
65
82
65
82
65
147
105
OCR-A Upper-case
Only†
OCR-B Upper-case
Only†
–
65
–
–
–
–
–
65
–
–
–
–
†The OCR-A and -B fonts are available in upper-case only.
GENERAL INFORMATION 1–9
1.6.5 Resident Character Sets
The resident character sets are:
Digital Supplemental
U.S. ASCII
ISO Great Britain
Digital Holland
Digital Finland
ISO France
Digital Technical
VT100 Special Graphics
Digital French Canada
ISO Germany
ISO Italy
JIS Roman (Japan)
Digital Norway/Denmark
ISO Spain
Digital Sweden
Digital Switzerland
ISO Norway/Denmark
Digital Portugal
The complete character sets are given in Appendix A of the LG31 User’s
Guide.
1–10 GENERAL INFORMATION
Chapter 2
INSTALLATION AND CHECKOUT
2.1 Overview
This chapter contains the unpacking, checkout and installation procedures for the LG31 printer. This printer must be installedby trained
personell only. Installation time is approximately one hour. The following tasks must be performed before the LG31 printer is operational.
•
Remove all packaging
•
Position the printer
•
Remove all transit items
•
Install the ribbon, paper, and paper rack/tray/guides
•
Install electrical connections (ac power, host interface)
•
Set the host interface parameters (for example, baud rate)
•
Set the printer parameters (for example, autowrap mode)
INSTALLATION AND CHECKOUT 2–1
2.2 Unpacking
2.2.1 Inspection
There are two cartons for each printer:
1. Country Kit carton (OPEN FIRST label) containing:
•
AC power cord (country specific, see Appendix D)
•
100 sheets of fanfold paper
•
BC22D-25 null-modem cable
•
User information (EK-OLG31-DK) which contains:
— LG31 Printer User’s Guide EK-LG31E-UG
— LG31 Printer Installation/Operator’s Manual EK-LG31E-IN
•
Strapped skid-crate containing:
•
LG31 printer
•
Paper rack
•
Paper shelf
•
Paper stacking guides (2)
•
Ribbon cartridge
WARNING
Do not attempt to move the 174 kg (374 lbs) skid-crated
printer alone. Two people are required for unpacking and
installation after the printer has been site-positioned.
Inspect the exterior shipping container for punctures, crushed corners or sides. If any shipping or handling damage is found, notify
the carrier immediately requesting the proper claim forms and procedures. In the event any equipment is missing or in error, notify
the distributor from whom it was purchased.
2–2 INSTALLATION AND CHECKOUT
2.2.2 Unpacking Procedure
Use the following procedure and illustrations when unpacking the LG31
printer. Save the red shipping screws, blocks, and brackets for reshipment.
1. Cut and remove the four shipping straps from shipping pack (see
Figure 2–1).
2. Remove the country kit from the top of the printer carton.
3. Remove the screws holding the two tabs from the side of the carton
using a 7/16" AF Wrench (see Figure 2–1).
Figure 2–1: Cut Straps and Remove
RE_UK00284M_89
INSTALLATION AND CHECKOUT 2–3
4. Open the carton and lift out the package containing the ramps from
the top of the packing material (see Figure 2–2).
Figure 2–2: Opening Carton
RE_UK00960A_89
5. Remove the packing material around the printer.
2–4 INSTALLATION AND CHECKOUT
6. Remove the four metal brackets holding the printer to the wooden
skid using a 9/16" AF Wrench (see Figure 2–3).
Figure 2–3: Removing Metal Brackets
RE_UK00961A_89
7. Open the carton containing the ramps and remove them.
INSTALLATION AND CHECKOUT 2–5
8. Position the ramps as shown in Figure 2–4 and force the teeth into
the top level of the skid.
Figure 2–4: Positioning Ramps
RE_UK00278M_89
Note
Align ramp with one arrow to single arrow on skid and
ramp with two arrows to two arrows on skid.
2–6 INSTALLATION AND CHECKOUT
9. Carefully roll the printer down the ramp (see Figure 2–5).
Figure 2–5: Removing Printer from Pallet
RE_UK00962A_89
10. Pull open printer front door (hinged at left side). Remove printer
accessories paper rack, paper tray, paper guides, and ribbon cartridge
(3 boxes).
INSTALLATION AND CHECKOUT 2–7
11. Using an 8 mm socket wrench, remove four M5 x 30 red hex-head
cap screws, M5 lock washers, and M5 plain washers securing the
shuttle shipping blocks in place. These screws are accessible by the
front door, which allows access to the bottom of the paper handling
assembly (see Figure 2–6). The rear screws are behind the paper
handling assembly, but easily removable by socket wrench.
Figure 2–6: Top of Lower Front Interior
SCREWS, LOCKWASHERS, PLAIN WASHERS
SECURE TO FRONT PAIR OF SHUTTLE
SHIPPING BLOCKS
RE_UK00307A_89
12. Remove the two red rear shipping blocks by reaching up behind the
paper handling assembly and removing the blocks through the front
door.
13. Open printer top cover and shuttle access door (not shown) which is
below the location where the ribbon cartridge will be installed (see
Figure 2–7).
2–8 INSTALLATION AND CHECKOUT
Figure 2–7: Top View - Shuttle Area
M5 CAP SCREWS (RED) SECURING STRIKER BAR SUPPORT DURING SHIPPING
RED SHUTTLE SHIPPING BLOCKS
(REAR PAIR)
SCREW (RED),
LOCKWASHER,
PLAIN WASHER,
& SHIPPING BRKT.
SECURING SHUTTLE
RED SHUTTLE SHIPPING BLOCKS
(FRONT PAIR)
RE_UK00752A_89
14. Remove the two red front shipping blocks through the shuttle access
door. Use a screwdriver to pry the front shipping blocks from under
the shuttle.
15. Remove the sample print out sheet. Retain for future test comparison
(see Section 2.5). It is useful to move tractors to give more room for
instruction 16. Care must be taken to avoid injury.
16. Remove two M5 x 28 red hex-head cap screws and plain washers
securing the striker bar support blocks during shipping by using an
8 mm socket wrench (see Figure 2–7).
17. Remove the M5 x 16 red hex-head cap screw, M5 plain washer,
turn shipping bracket used as shuttle horizontal constraint during
shipping through 90° and slide out (see Figure 2–7).
18. Adjust printer leveling feet, if the printer is not level.
19. Install paper rack on back of printer as shown in Figure 2–8. Secure
four grounding cables to stubs on paper rack. The other end of each
grounding cable is secured inside the printer at the corners of the
paper chute.
INSTALLATION AND CHECKOUT 2–9
20. Secure clip end of static strap to paper tray. The stub end at the
interface connector plate will be connected as shown in Figure 2–8.
21. Install paper stacking guides on paper shelf using thin screw attachments (see Figure 2–8).
Figure 2–8: Paper Handling Hardware
GROUND
CABLE
PAPER
RACK
PAPER
STACKING
GUIDES
PAPER
SHELF
RE_UK00248A_89
2–10 INSTALLATION AND CHECKOUT
2.3 Installation
An installation area of 137 cm wide by 107 cm deep (54 inches wide x 42
inches deep) is required. This provides free access and clearance to the
printer’s rear mounted paper rack, ON/OFF switch, paper tray, ac power
cord, and serial interface cable for operating and maintenance purposes.
A power source of 100 to 240 volts, single phase, 50-60 Hertz (Hz) must
be within 10 feet for connecting the ac power cord. Before inserting the
plug into an ac wall outlet, be certain the ON/OFF power switch located
at rear of the printer is set to OFF (0). The printer power supply is selfadjusting. There is no need to adjust the printer power supply to suit
the mains source when this source is within the specifications.
The proper site environment requirements for LG31 printer installation
are under ‘‘Specifications’’ in Chapter 1. Environmental conditions such
as excessive humidity can cause paper sticking, while low humidity can
cause static build-up.
It is recommended that the leveling feet be adjusted to make the printer
level, if this has not already been done.
The procedure for setting/modifying printer parameters (speed (baud
rate), autowrap, and so on) are described in Chapter 4. Chapter 4
contains initialization, and Chapter 5 contains power-up, and other
operator-implemented procedures. Procedures for loading the paper and
installing the ribbon cartridge are in Chapter 6.
2.3.1 Print Ribbon Cartridge
Refer to Section 6.3 on installing/replacing the print ribbon cartridge.
INSTALLATION AND CHECKOUT 2–11
2.4 Apply Power to the LG31
The LG31 printer contains a universal power supply that works, without
modification or adjustment, with any input in the specified range of
voltage and frequency. To power up the LG31 printer, carry out the
following:
1. Make sure the power switch (see Figure 2–9) is in the OFF position.
2. Take the power cord supplied in the country kit, and plug the female
connector into the back of the LG31 printer (see Figure 2–9).
3. Plug the power cord male connector into the source power outlet.
The LG31 printer is now ready to be switched on.
2–12 INSTALLATION AND CHECKOUT
Figure 2–9: Power Connection
SURGE CAPACITOR
POWER MODULES
HOLD UP
CAPACITOR
SPSR
DC POWER
DISTRIBUTION
CABLE
SPSM
SPSD
AC POWER
SOCKET
LINE
FILTER
AC SWITCH BOX
P2
P1
P3
SPSX
RECTIFIER
ON/OFF SWITCH/
CIRCUIT BREAKER
RE_UK00222A_89
INSTALLATION AND CHECKOUT 2–13
2.5 Powering and Testing the LG31 Printer
LG31 printer testing includes a self-test and a print test. The self-test
is performed:
•
Every time the printer power is switched on.
•
After each print test.
•
During normal operation.
Before turning the power on, load the printer with paper (see Chapter 6,
Section 6.2). To turn the power on and run the print test, perform the
following steps.
1. Turn the LG31 printer on by pressing the top section of the power
switch (see Figure 2–9). The printer performs a series of self-tests
(see Chapter 5, Section 5.2) and when completed, displays [ O F L].
2. Press the (3) ON LINE key if [ O n L] is displayed.
3. Press the (0) TEST CLR key until the LG31 begins to print. The
LG31 will print the test pattern until you press the (0) TEST CLR
key again.
4. Compare the printout from this test with the sample printout supplied with the printer.
5. If the printout is comparable, continue by running a configuration
printout (see Section 4.3.1).
6. If the quality of the printout is unsatisfactory, perform the printer
adjustments in chapter 5 of the Technical Manual.
The configuration menu contains the state of the printer as shipped. You
should print a copy of this menu and retain it for future reference. To
print a copy of the configuration menu, perform the following steps.
NOTE
The factory settings for the printer parameters are contained in
Chapter 7, Section 7.3 (Table 7–3). The setting of parameters at
power-up and at reset are also listed in Chapter 7 (Table 7–4).
1. Make sure the LG31 is in the off-line mode ([ O F L] is displayed).
Press the (3) ON LINE key if [ O n L] is displayed.
2–14 INSTALLATION AND CHECKOUT
Figure 2–10: Cover Interlock Switch
TOP COVER
INTERLOCK
SWITCH
TOP
ENCLOSURE
INTERLOCK
SWITCH
RE_UK00963A_89
2. Open the top cover and pull the interlock switch (see Figure 2–10)
out until it clicks. Do this within two seconds of opening the top
cover.
3. Press the (1) PRG key to enter the initialization mode [P r o] is
displayed. The LG31 will print the configuration menu.
4. Press the (0) TEST CLR key to return to the off-line mode ([ O F L]
is displayed).
INSTALLATION AND CHECKOUT 2–15
When you reach this point, you have verified that the print quality is
acceptable, and have a copy of the configuration of the LG31 as shipped.
The printer is now ready for use.
2.6 Host To LG31 Printer Set-up Procedure
2.6.1 Interface Control Strap Settings
Figure 3-14 of the LG31 PRINTER User’s Guide states that parity is
disabled at interface strap B2. This is the factory setting and the
recommended setting. This means that the serial interface must be setup with no parity.
2.6.2 Serial Interface Settings for VAX/VMS
Before using the printer, the serial interface must be set-up correctly. The
system manager must issue the following commands for the VAX/VMS
operating system.
1.
If the terminal line that will support the LG31 has not been set-up to
support a spooled device then, go to instruction 3, otherwise, issue a DCL
command such as the following:
$ stop/que que_name
where que_name is the name of the queue.
2.
Stop the spooling on the terminal by issuing the DCL command:
$ set dev/nospool txa1:
where txa1 is the name of the terminal in this case.
3.
Set up the terminal line to have the following characteristics as shown
below:
Terminal:
Device_Type:
Owner:
Username:
_TXA1:
Unknown
SYMBIONT_0001
SYSTEM
2–16 INSTALLATION AND CHECKOUT
Input: 9600
Output: 9600
LFfill: 0
CRfill: 0
Width: 300
Page: 66
Parity: None
Terminal Characteristics
Interactive
No Hostsync
Wrap
No Broadcast
No Modem
No Brdcstmbx
Line Editing
No Secure server
No SIXEL
Graphics
No ANSI_CRT
Echo
TTsync
Scope
No Readsync
No Local_echo
No DMA
Overstrike editing
No Disconnect
No Soft
Characters
No Regis
Type_ahead
Lowercase
No Remote
Form
No Autobaud
No Altypeahd
No Fallback
Pasthru
No Printer Port
No Edit_mode
No DEC_CRT
No DEC_CRT2
No Block_mode
No Escape
Tab
Eightbit
Fulldup
No Hangup
Set_speed
No Dialup
No Syspassword
Numeric
Keypad
No Advanced_
video
No DEC_CRT3
This can be accomplished by the DCL command:
$ set term txa1: /pasthru/speed=9600/etc
Note
PASTHRU SHOULD ALWAYS BE SET.
4.
Set the terminal line to support a spooled device by issuing the DCL
command:
$ set dev/spool=(queue_name) txa1:
where queue_name is the name of the queue.
5.
Start the queue by issuing the DCL command:
$ ini/que/start/terminal queue_name/on=txa1:
The LG31 can now be used.
2.6.3 RSX Settings
The terminal characteristic PASTHRU should be set.
2.6.4 RT-11 Settings
A command of the form ASSIGN TT1: LP: should be issued. This
assumes a multi-terminal system. Refer to the RT-11 System User’s
Guide.
INSTALLATION AND CHECKOUT 2–17
2.6.5 RSTS/E Settings
Refer to the RSTS/E System Manuals.
Note
* Indicates that the current setting is not affected by the
terminal type.
Table 2–1: Default Characteristics
Name
Set
Name
Set
ADVANCED_VIDEO
ALTYPEAHD
ANSI_CRT
APPLICATION_KEYPAD/
NUMERIC_KEYPAD
AUTOBAUD
BLOCK_MODE
no
no
no
INSERT/ OVERSTRIKE
INTERACTIVE/ PASSALL
LFFILL
LINE EDITING
*
*
0
*
*
BRDCSTMBX
BROADCAST
CRFILL
DEC_CRT
DEC_CRT2
DIALUP
DISCONNECT
DMA
ECHO
EDIT_MODE
EIGHT_BIT
ESCAPE
FALLBACK
FRAME
FORM
FULLDUP/ HALFDUP
HANGUP
HARDCOPY/ SCOPE
HOSTSYNC
no
no
0
no
no
no
*
*
*
no
yes
*
*
*
yes
*
no
scope
*
LOCAL_ECHO
LOWERCASE/
UPPERCASE
MODEM
PAGE
PARITY
PASTHRU
PRINTER_PORT
READSYNC
REGIS
REMOTE
SECURE_SERVER
SET_SPEED
SIXEL_GRAPHICS
SOFT_CHARACTERS
SPEED
SYSPASSWORD
TAB
TTSYNC
TYPE_AHEAD
WIDTH
WRAP
*
no
no
2–18 INSTALLATION AND CHECKOUT
low
no
66
no
yes
no
*
no
*
*
no
no
no
9600
no
yes
*
*
220
*
2.7 Connecting the Host to the LG31 Printer
The LG31 printer contains an EIA RS-232-C serial 25-pin interface
connector. The cable from the host to the printer is in the country kit.
Connect the cable from the host to the LG31 printer.
INSTALLATION AND CHECKOUT 2–19
Chapter 3
CONTROLS AND INDICATORS
3.1 Introduction
This chapter describes all the operating controls and indicators available
on the LG31 printer.
3.2 Power Switch ON/OFF
The power switch is located on the rear of the LG31 printer (see Figure 3–1). This is a two-position rocker switch/circuit breaker. In the ON
position, top half pressed in, power is applied to the printer.
CONTROLS AND INDICATORS 3–1
Figure 3–1: Power Switch
POWER
SWITCH
(CIRCUIT
BREAKER)
POWER
CABLE
INTERFACE
CABLE
RE_UK00247A_89
3–2 CONTROLS AND INDICATORS
3.3 Outer Control Panel
Figure 3–2: Location of the Outer Control Panel
DISPLAY
WINDOW
CONTROL
PANEL
RE_UK00964A_89
The outer control panel, which is located on top of the LG31 (see
Figure 3–2), contains the keys that let the operator perform routine
functions:
CONTROLS AND INDICATORS 3–3
•
Run the print test and the self-test.
•
Switch the printer between the on-line and off-line modes of operation.
•
Perform form feed operations.
3.3.1 Outer Control Panel Components
The outer control panel (see Figure 3–3) includes:
•
A view window through which you can observe the three-digit display
on the inner control panel.
•
A three-key keypad. The key markings are:
— TEST/CLR
— FORM FEED
— ON LINE
Figure 3–3: Outer Control Panel
FORM
LOADED
READY
TEST
CLR
FORM
FEED
ON
LINE
OUTER CONTROL PANEL
RE_UK00710M_89
3–4 CONTROLS AND INDICATORS
NOTE
There is an audio alarm mounted on the inner control panel,
which sounds when you power up the printer, and each time
you press one of the control panel keys.
3.3.2 Outer Control Panel Keys
The function of the keys on the outer control panel (see Figure 3–3) are:
TEST CLR
When this key is pressed for more than 0.5 seconds in off-line mode, the
LG31 starts the print test (a rolling pattern of all ASCII characters). The
next time you press the TEST CLR key, the LG31 stops the print test
and performs the self-test.
When this key is pressed for less than 0.5 seconds after clearing a fault
or error condition, the LG31 resumes normal operation.
FORM FEED
When this key is pressed the LG31 advances the paper to top of the next
form.
When the LG31 is on-line, the form feed operation is dependent upon
the setting of printer control strap 26.
When the LG31 is off-line, the form feed operation is not dependent upon
the setting of printer control strap 26.
ON LINE
When this key is pressed, the printer toggles from off-line to on-line, the
display changes from [ O F L] to [ O n L].
3.4 Top Cover Interlock Switch
The interlock (see Figure 3–4) is set to on when the top cover is opened,
and in the on position, places the LG31 in standby mode. To override
the interlock, turn the switch off, and pull the switch plunger up to its
highest position.
CONTROLS AND INDICATORS 3–5
Figure 3–4: Cover Interlock Switch
TOP COVER
INTERLOCK
SWITCH
TOP
ENCLOSURE
INTERLOCK
SWITCH
RE_UK00963A_89
3–6 CONTROLS AND INDICATORS
3.5 Inner Control Panel
Figure 3–5: Location of the Inner Control Panel
INNER
CONTROL
PANEL
RE_UK00965A_89
The inner control panel, which is located inside the top cover (see Figure 3–5), contains the keys that let you control all operational functions
of the LG31. These include:
•
Performing the same functions as the outer control panel.
•
Modifying print parameters.
•
Modifying serial interface parameters.
•
Performing diagnostics.
The inner control panel (see Figure 3–6) includes:
•
A three-digit (seven segments each) three-dot display.
•
An audio alarm.
•
An initialization switch.
•
A ten-key keypad; the keypad markings are:
— (0) TEST CLR
— (1) PRG
CONTROLS AND INDICATORS 3–7
— (2) FORM FEED
— (3) ON LINE
— (4) LINE FEED
— (5) CPI LPI
— (6) PAPER REV
— (7) FONT
— (8) SET TOF
— (9) FCT
Figure 3–6: The Inner Control Panel
.
.
.
0
TEST
CLR
PRG
1
2
FORM
FEED
ON
LINE
3
4
LINE
FEED
CPI
LPI
5
6
PAPER
REV
FONT
7
8
SET
TOF
FCT
9
RE_UK00711M_89
In off-line mode, the keys may be regarded as soft pushbuttons and perform the functions indicated by their respective legends. However, once
Program (PRG) mode is entered, the 10 keys are assigned new functions,
which are automatically printed to guide the operator (see Appendix C
for a complete listing). The pushbuttons may also be regarded as soft
pushbuttons in Function (FCT) Select mode (see Appendix C for a complete listing).
All the available selections of print parameters and serial interface
parameters are shown in Figure 3–7.
3–8 CONTROLS AND INDICATORS
Figure 3–7: Configuration Menu
THE PRESENT CONFIGURATION IS: (44A511526 SY - 44A511527 IM)
FIRMWARE REVISION LEVEL V2.3
1. Font:
Style - 44A511527 Dataprocessing
CPI - 10 CPI
Country - US ASCII
Mode - Normal
Horizontal Expansion - X1
Vertical Expansion
- X1
2. LPI - 6 lpi
3. Forms Control (lines):
Form Length
- 66
Top Margin
- 01
Bottom Margin - 66
4. Interface Control:
Interface Type - Serial
Input buffer length 2304
Interface Straps A:
0
1
2
3
12345678901234567890123456789012
00001000000010000000101000001000
Interface Straps B:
0
1
2
3
12345678901234567890123456789012
01000100000000000000000000000000
Speed - 9600
Parity - Even
5. Margin Settings (columns):
Left Margin - None
Right Martin - 132
6. Horizontal Tabs (columns):
009 017 025 033 041 049 057 065 073 081
089 097 105 113 121 129 137 145 153 161
169 177 185 193 201 209 217
7. Vertical Tab stops:
8. Printer Control Straps:
Printer Straps A:
0
1
2
3
12345678901234567890123456789012
00000000000000000000000001110010
Printer Straps B:
0
1
2
3
12345678901234567890123456789012
00000000000000000000000000000000
Press the number ‘0’ to return to normal operation.
To continue modification select (1-8).
CONTROLS AND INDICATORS 3–9
3.5.1 Three-Character LED Display
The three-character/three-dot LED display (see Figure 3–8) is multifunctional and indicates the following.
•
Printer modes, for example:
[ O n L] ON LINE
[ O F L] OFF LINE
[ F c t] FUNCTION
•
Configuration Menu settings, such as top/bottom margins, right/left
margins, Characters Per Inch (CPI), Lines Per Inch (LPI) print
spacing, that are used when changing the printer configuration.
•
Fault codes (see Table 5-2 for a listing of the diagnostic codes) that
are used with the printer self-test at power-up, after printing the test
pattern, and during printer operation.
The three-dot indicators in the three-character LED display are display
illuminated during self-tests. When illuminated, the dots indicate:
Left dot
FCT MODE—Printer is in Function Selection state. Press
(9) FCT key to enter. Display reads [.F n c].
Middle dot
FORM LOADED - Electronic Vertical Format Unit (EVFU)
form table has been downline loaded. See the LG31 Printer
User’s Guide.
Right dot
READY—Illuminated by the signal CTS received from the
host computer (see Chapter 4, Section 4.2).
Refer to Appendix A for a complete listing of display readouts.
3.5.2 Audio Alarm
The audio alarm (see Figure 3–8) located at the top of the Inner Control
Panel momentarily emits a sound at power-up, when a key is pressed,
when a <BEL> code is received in on-line mode, and under any alarm
condition, as follows:
•
When a fault is detected (includes EVFU loading fault).
•
When Paper Low condition is detected.
3–10 CONTROLS AND INDICATORS
Figure 3–8: The Inner Control Panel Showing Display, Audio Alarm,
Initialization Switch
INITIALIZATION
SWITCH
AUDIO
ALARM
DISPLAY
.
.
.
FORM
LOADED
FCT
MODE
READY
0
TEST
CLR
PRG
1
2
FORM
FEED
ON
LINE
3
4
LINE
FEED
CPI
LPI
5
6
PAPER
REV
FONT
7
8
SET
TOF
FCT
9
INNER CONTROL PANEL
RE_UK00709M_89
3.5.3 Initialization Switch
The initialization switch (see Figure 3–8) is a slide switch located at the
top of the inner control panel that lets you initialize the printer after it is
locked up. You can initialize it using the procedure detailed in Chapter 4,
Section 4.5.1. In normal operation, the switch is in the leftmost position.
CONTROLS AND INDICATORS 3–11
3.5.4 Key Functions
The three types of key functions are:
1. Initial key function (ON LINE, TEST CLR, PAPER REV). Refer to
Table 3-1 for list.
2. Function select — Enter by pressing (9) FCT key. In this state, the
left dot on the three-character LED display is illuminated. This state
includes the printer initialization to default configuration, alignment
patterns, top of form adjust, reverse form feed, buffer clear, forms
setup, and margin setup. Return to off-line printer operation from
any of these operations by pressing (0) TEST CLR key. See Figure 3–9 for a map of the function select combinations.
3. Program — Pressing the (1) PRG key causes the current configuration to be printed and places the printer in the programming state.
In the programming state, the keys assume functions represented by
adjacent numbers. See Chapter 4 for additional information.
3–12 CONTROLS AND INDICATORS
PRG
0
RESET TO USERS
MENU PARAMETERS
3
9 INITIALIZE
ON
LINE
FCT
FEED
FORM
TO FACTORY
DEFAULT CONDITIONS
NO CHANGE
RETURN TO OFF LINE
2
TEST
CLR
PRINTER
INITIALIZATION
1/72" FORWARD
1/72" REVERSE
SET
TOP
FCT
FEED
5
FONT 7
REV
6 PAPER
CPI
LPI
FEED
FONT
REV
SET BOTTOM OF FORM
EXIT TO OFF LINE
SET BOTTOM MARGIN
SET TOP MARGIN
CPI
LPI
LINE
FEED
ON
LINE
FEED
FORM
PRG
TEST
CLR
FCT
LINE FEED
AMPLITUDE PATTERN
(continuous)
FORM FEED
4
7 INTERMODULE GAP
(continuous)
VERTICAL TIMING
(continuous)
LINE
FEED
HORIZONTAL TIMING
5
(continuous)
3
SIGNATURE
PATTERN
1 PRINTER
EXIT TO OFF LINE
PRINT ADJUSTMENT
6 PAPER
4
2
0
SET TOP OF FORM
ON
LINE
4 LINE
INCREMENT
LINE COUNT
DECREMENT
LINE COUNT
FEED
FORM
2
3
FEED TO TOP
EXIT TO OFF LINE
TEST
CLR
0
SET TOP OF FORM
REVERSE LINE FEED
ON
LINE
FEED
FORWARD LINE FEED
9
1 FORM
EXIT OFF LINE
FEED TO TOP
ON
LINE 3
FEED
FORM
PRG
TEST
CLR
4 LINE
8
2
0
FORMS SETUP
CONTROL PANEL PUSHBUTTON FUNCTIONS
CPI
LPI
LINE
FEED
ON
LINE
FEED
FORM
PRG
TEST
CLR
8
SET
TOP
FONT 7
REV
5
3
DISPLAY COLUMN
COUNT
DISPLAY LEFT MARGIN
DISPLAY RIGHT MARGIN
PRG
TEST
CLR
REV
6 PAPER
FEED
4 LINE
0
1/72" REVERSE
1/72" FORWARD
TEST PATTERN
EXIT TO OFF LINE
1 PRINT
REV
REV
TEST
CLR
6 PAPER
0
CLEAR
EXIT TO LINE
CLEAR
FONT 7 BUFFER
TEST
CLR
RE_UK00283M_89
REVERSE
FORM FEED
EXIT TO OFF LINE
REVERSE FORM FEED
(FORMS SAVER MODE)
0
FONT 7 BUFFER
6 PAPER
SET DEFAULT MARGINS
(001 & 132 for 10 cpi)
SET RIGHT MARGIN
SET LEFT MARGIN
INCREMENT COLUMN
COUNT (to right)
1 DECREMENT COLUMN
COUNT (to left)
EXIT OFF LINE
MARGIN SETUP
6 PAPER
4
2
0
5
FUNCTION MODE
FORMS ADJUSTMENT
CPI
LPI
9 ENTER
Figure 3–9: Function Mode Key Operations
CONTROLS AND INDICATORS 3–13
Table 3–1: Initial Key Functions
Key
Key Function in
OFF LINE Mode
Key Function
in
ON LINE Mode
(3)
ON LINE
U = ON LINE selected.
Toggles state to on-line mode.
Toggles state to
off-line mode.
(0)
TEST CLR
When pressed for more than 0.5 of a second, a
rolling test pattern is printed in the DP font at 10
CPI. Pressing (0) TEST CLR again stops the test
pattern.
No operation.
(1) PRG
Prints any data in the buffer, then prints current
configuration and enters Programming state. See
Chapter 4.
No operation.
(2)
FORM
FEED
Advances paper to the next top of form setting,
once for each time key is pressed.
If printer strap
16 is set,
functions the
same as off-line.
Otherwise, no
operation.
(4)
LINE
FEED
Advances paper one line based on current LPI
setting. When pressed and held down for one
second, consecutive line feeds are performed at the
rate of approximately three steps per second.
If printer strap
16 is set,
functions the
same as off-line.
Otherwise, no
operation.
(5)
CPI LPI
Alternately displays CPI and LPI each time key
is pressed. Holding key down causes settings
available for the active font to be displayed on a
rotating basis. The setting displayed when the key
is released becomes the active selection.
The CPI/LPI key displays the current submenu that is, only the CPI values for the current font are
displayed.
No operation.
Displays are:
CPI(DP) CPI
(&
NLQ)
CPI
(&
OCRA)
CPI
(&
OCRB)
3–14 CONTROLS AND INDICATORS
LPI
Table 3–1 (Cont.): Initial Key Functions
Key
Key Function
in
ON LINE Mode
Key Function in
OFF LINE Mode
[ 05]
[ 05]
[n05]
[n05]
[ 10]
[ 10]
[OcA]
[Ocb]
[ 12]
[ 12]
[n12]
[n12]
[ 13]
[ 13]
[n13]
[n13]
[06L]
[ 15]
[ 15]
[n15]
[n15]
[08L]
[16E]
[16E]
[16E]
[16E]
[10L]
(6)
PAPER
REV
Moves paper in reverse direction 0.06 mm (1/72
in) each time the key is pressed. When pressed
and held down for one second, consecutive 1/72
inch paper reverse feed steps occur at the rate of
approximately three steps per second. Inoperative
during Low Paper Print mode.
If printer strap
A26 is set,
functions same
as off-line.
Otherwise, no
operation.
(7)
FONT
Displays current font style when pressed. Holding
key down causes available font styles CPI to
be displayed on a rotating basis. The setting
displayed when the key is released becomes the
active selection. When a new font is selected, the
horizontal spacing is initially set to the default
spacing for the particular font. Displays for
standard draft and Near Letter Quality (NLQ)
are displayed only once:
No operation.
[ F o n][ 1 0 ][ 1 2 ][ 1 3 ][ 1 5 ][ 1 6 E]
[ c h r][ n 0 ][ n 2 ][ n 3 ][ n 5 ]
(8)
SET TOF
Set Top of Form to current position of paper.
TOF is calculated upon form length in effect. It
is assumed that the top printable dot row (±3
rows) of the form is aligned with notches in upper
tractors before key is pressed. The form is then
moved forward automatically to place the first line
at the point on the following form.
No operation.
CONTROLS AND INDICATORS 3–15
Table 3–1 (Cont.): Initial Key Functions
Key
(9)
FCT
Key Function
in
ON LINE Mode
Key Function in
OFF LINE Mode
Enters Function Selection state (refer to function
procedures: Printer Initialization, Forms Setup,
and Margin Setup). This key is also used to
achieve Reverse Form Feed as follows: Press key
(9) to enter Function Mode, then press key (6) for
Reverse Form Feed (paper moves back one form
length). Also used by service personnel in aligning
printer.
No operation.
Function Mode Summary
State
Key
INITIALIZATION
FORM SETUP
PRINT REVIEW
FORMS ADJUST
MARGIN SETUP
REVERSE FORM FEED
BUFFER CLEAR
Press
Press
Press
Press
Press
Press
Press
(1)
(2)
(3)
(4)
(5)
(6)
(7)
Refer to Chapter 4 for the above function mode
procedures.
3.6 Paper Tension Lever
The paper tension lever adjusts the pressure that the paper tensioning
fingers apply to the paper (see Figure 3–10). There is a PAPER THICKNESS scale, from 1 to 6, located next to the paper tension lever. The
higher the number (the heavier the paper), the less the tension. A ‘‘1’’ is
equivalent to 15-pound one-part paper. Adjust for the maximum tension
without smearing the print.
3–16 CONTROLS AND INDICATORS
3.7 Print Gap Control
The print gap control is a rotary adjustment that adjusts the distance
between the paper and the print heads (see Figure 3–10). It has a scale
from less than one to more than six, and should be nominally set to the
same point on the scale as the PAPER THICKNESS scale. Adjust this
and the paper tension lever to obtain the best print quality.
Figure 3–10: Paper Tension Lever, Print Gap Control, Margin Adjust
MARGIN
ADJUSTMENT
KNOB
PAPER
THICKNESS
SCALE
UPPER LEFT
PAPER TRACTOR
PAPER GAP
ADJUSTER
PAPER TENSION
ADJUSTMENT
LEVER
RE_UK00966A_89
3.8 Margin Adjust Knob
The margin adjust knob adjusts the horizontal position of the paper in
the printer (see Figure 3–10).
CONTROLS AND INDICATORS 3–17
Chapter 4
SETTING COMMUNICATIONS AND PRINT
PARAMETERS
4.1 Introduction
This chapter defines the user settable parameters of the LG31 printer.
There are two ways for setting parameters in the LG31. Some of the
parameters can be set by either method.
There are eight categories of parameters in the LG31 printer listed in
the configuration menu that are settable when you enter the program
mode:
•
Font - this contains six subcategories
•
Lines Per Inch
•
Forms Control
•
Interface Control - this contains four subcategories
•
Margin Settings
•
Horizontal Tabs
•
Vertical Tab Stops
•
Printer Control Straps
When entering the program mode, you can select one or more of the
categories for modification before exiting back to off-line.
SETTING COMMUNICATIONS AND PRINT PARAMETERS 4–1
There are two parameters and two sets of adjustments that can be made
in the function mode. In the function mode, you can perform operations
in one of the categories, and then you must exit to off-line. You can then
begin the process again to perform operations in another category.
The process for listing the parameters in these categories and making
changes to them is given in the following sections.
4.2 Interface Control—Host to Printer Interface
The LG31 printer contains an EIA RS-232-C 25-pin connector as a serial
interface to the host. The connector is located on the lower back of the
printer (see Figure 4–2). A BC22D-25 cable is supplied to connect the
host to the LG31 printer.
The RS-232-C signals and the associated pins on the interface connector
are given in Table 4–1. The DIGITAL serial protocol is XON/XOFF (for
a description of the XON/XOFF protocol, see the LG31 Printer User’s
Guide EK-LG31E-UG).
Figure 4–1: Serial Interface Connector
13
1
25
14
RE_UK00969A_89
4–2 SETTING COMMUNICATIONS AND PRINT PARAMETERS
Figure 4–2: Location of the Serial Interface Connector
POWER
SWITCH
(CIRCUIT
BREAKER)
POWER
CABLE
INTERFACE
CABLE
RE_UK00247A_89
SETTING COMMUNICATIONS AND PRINT PARAMETERS 4–3
Table 4–1: Pin Assignments
Signal
Direction
Description
AA Chassis
Gnd
–
Frame (Protective) Ground
2
BA (TX)
(See Note 2)
From Printer
Printer transmits coded Ready/Busy
(DC1/DC3) or BREAK status (strap
A5 IN). ETX/ACK — Up to 1500
characters will be accepted. ETX
terminates the string. The printer
sends an ACK to the host when
transmission can resume.
3
BB (RX)
(See Note 1)
To Printer
Printer can receive serial data from
Data Source when ON LINE.
4
CA (RTS)
From Printer
Request to Send. If so strapped (A8
IN), printer is ON LINE when CA is
ON. Straps affect use of CA signal:
A8, A16, A24, A32.
5
CB (CTS)
(See Notes 3
and 4)
To Printer
Clear to Send. Set by printer.
Transmission is not inhibited and
it can operate with the host. Printer
is capable of transmitting if DC1/DC3
or BREAK protocol is used. If Serial
Interface strap B4 is IN, the host may
use CC to inhibit printer transmit.
6
CC (DSR)
(See Note 3)
To Printer
Data Set Ready. When enabled by
serial interface strap B4 IN), the
lead may be used to inhibit printer
transmitting, although it can still
receive data.
7
OV (AB)
–
Printer Signal Ground.
11
SCA-1
From Printer
Secondary Request to Send. Permits
printer status to be reflected in same
manner as CA lead.
19
SCA-2
From Printer
Secondary Request to Send. Same as
pin 11.
Pin
Signal
1
4–4 SETTING COMMUNICATIONS AND PRINT PARAMETERS
Table 4–1 (Cont.): Pin Assignments
Pin
Signal
Signal
Direction
20
CD (DTR)
From Printer
Description
Data Terminal Ready. If so strapped
(A7 IN), data terminal is turned ON
by printer when a positive voltage
level is applied to the pin 20 line, to
indicate printer is ready to accept
data. Straps affect use of CD signal:
A7, A15, A23, A28. See Note 4.
NOTES
1. BB (RX) is the primary data input line. It is the line
that carries the serial data from the data source to the
printer. Data is accepted from this line as long as the
printer is ON LINE, and for one second after the printer
has gone to OFF LINE, to allow for line delays during
satellite communication. A negative level is a mark, and a
positive level is a space. When released, this line should
be in ‘‘Mark’’ condition.
2. When using XON/XOFF, parity must be set to match the
host.
3. CC is strap dependent, CB is not strap dependent. Regardless of how the printer is strapped, the host may always use
CB to inhibit transmit.
4. CB must be positive or the lead open-circuit for DC1/DC3
protocol. For this protocol, CA or CD cannot be tied to CB.
4.3 Configuration Menu
4.3.1 Listing the Parameters
You can get a list of and change all of the user settable parameters
by using the keys on the inner control panel. The nine categories of
parameters are contained in the configuration menu. The subcategories
are listed after you select the category. To get a copy of the configuration
menu, perform the following:
SETTING COMMUNICATIONS AND PRINT PARAMETERS 4–5
1. Turn the printer power on. Open the top cover and pull the interlock
switch plunger up to its highest point. This activates the inner
control panel.
2. When the self-test completes and the display reads [ O F L], press
the (1) PRG key. The LG31 printer will print the configuration menu
(see Figure 4-2).
3. To select a category of parameters, push the key with the category
number shown on the configuration menu. To see the form control
parameters, press (2). The LG31 will print a list of the form control
parameters.
4. To select a parameter, press the key number shown next to the
parameter.
5. To exit from the category back to the program mode, press the (0)
key.
6. Press the (0) key to return to the configuration menu.
7. To return the printer to the off-line mode, press the (0) TEST CLR
key.
4–6 SETTING COMMUNICATIONS AND PRINT PARAMETERS
Figure 4–3: Configuration Menu
THE PRESENT CONFIGURATION IS: (44A511526 SY - 44A511527 IM)
FIRMWARE REVISION LEVEL V2.3
1. Font:
Style - 44A511572 Dataprocessing
CPI - 10 CPI
Country - US ASCII
Mode - Normal
Horizontal Expansion - X1
Vertical Expansion
- X1
2. LPI - 6 lpi
3. Forms Control (lines):
Form Length
- 66
Top Margin
- 01
Bottom Margin - 66
4. Interface Control:
Interface Type - Serial
Input buffer length 2304
Interface Straps A:
0
1
2
3
12345678901234567890123456789012
00001000000010000000101000001000
Interface Straps B:
0
1
2
3
12345678901234567890123456789012
01000100000000000000000000000000
Speed - 9600
Parity - Even
5. Margin Settings (columns):
Left Margin - None
Right Martin - 132
6. Horizontal Tabs (columns):
009 017 025 033 041 049 057 065 073 081
089 097 105 113 121 129 137 145 153 161
169 177 185 193 201 209 217
7. Vertical Tab stops:
8. Printer Control Straps:
Printer Straps A:
0
1
2
3
12345678901234567890123456789012
00000000000000000000010001110010
Printer Straps B:
0
1
2
3
12345678901234567890123456789012
00000000000000000000000000000000
Press the number ‘0’ to return to normal operation.
To continue modification select (1-8).
SETTING COMMUNICATIONS AND PRINT PARAMETERS 4–7
4.3.2 Communications Parameters
Under the Interface Control category in the function mode, there are five
subcategories:
1. Interface type — There is one interface type available (serial).
2. Interface A straps — There are 32 software straps that you can define
as in or out. The straps and the parameters they enable/inhibit are
listed in Table 4-2. The LG31 printer is shipped with four interface
A straps enabled.
When you enter the interface strap A subcategory, the strap number
is displayed in the left two digits (1-32) of the display panel. The
right digit indicates whether the strap is in (i) or out (o). These
straps control the RS-232-C signals.
3. Interface B straps — There are 32 software straps that you can define
as in or out. The straps and the parameters they enable/inhibit are
listed in Table 4-2.
When you enter the interface strap B subcategory, the strap number
is displayed in the left two digits (33-64) of the display. The right
digit indicates whether the strap is in (i) or out (o). These straps
control the response of the LG31 to the host data.
4. Speed (baud rate) — There are nine baud rates to select from.
5. Parity — There are four parity options.
To select the interface control category of parameters (see Figure 4-2):
1. Place the printer off-line ([ O F L] is displayed). If the printer is
on-line ([ O n L] is displayed), press the ON LINE key.
2. Press the PRG key ([ P r o] is displayed). The LG31 printer prints
the configuration menu.
3. Press key (4). The LG31 printer will print the interface control
options available (see Figure 4-3).
4. To change one of the interface straps, press key (2). The printer will
list the options available (see Figure 4-3). The interface straps and
their present condition are listed in the configuration menu.
— Press the (3) key until the number of the desired strap shows in
the first two digits of the display.
4–8 SETTING COMMUNICATIONS AND PRINT PARAMETERS
— Press (1) to enable the strap (an "i" in the third digit on the
display).
— Press (2) to remove the strap (an "o" in the third digit on the
display).
— Press the (0) key and the printer will return to the configuration
menu level ([ P r o] is displayed).
5. Press key (4). The LG31 printer will print the interface control
options available (see Figure 4-3).
6. To change the speed (baud rate), press (4). The printer will list
the available baud rates. The current baud rate is listed in the
configuration menu.
— Press the key which corresponds to the number of the baud rate
in the list. Having selected the baud rate, the printer returns to
the configuration menu ([ P r o] is displayed).
— Press the (0) key, and the printer will return to the configuration
menu level ([ P r o] is displayed).
7. Press key (4). The LG31 printer will print the interface control
options available (see Figure 4-4).
8. To change the parity, press the (5) key. The LG31 printer will list
the parity options (see Figure 4-5).
— Press the key which corresponds to the number of the desired
parity option. Having selected the baud rate, the printer returns
to the configuration menu ([ P r o] is displayed).
— Press the (0) key, and the printer will return to the configuration
menu level ([ P r o] is displayed).
9. Press the (0) key to exit the program mode.
There are no options available for interface type. The response of the
LG31 printer to selecting interface is shown in Figure 4–6.
SETTING COMMUNICATIONS AND PRINT PARAMETERS 4–9
Figure 4–4: Interface Control Straps
Interface Control
0.
1.
2.
3.
4.
5.
Exit
Interface Type
Interface Straps A
Interface Straps B
Speed
Parity
Straps:
0.
1.
2.
3.
4.
Exit
Strap ‘IN’
Strap ‘OUT’
Forward Without change
Reverse Without change
Interface Straps A:
0
1
2
3
12345678901234567890123456789012
00001000000010000000101000000000
Interface Straps B:
0
1
2
3
12345678901234567890123456789012
11000100000000000000000000000000
Press the number ‘0’ to return to normal operation.
To continue modification select (1-8).
4–10 SETTING COMMUNICATIONS AND PRINT PARAMETERS
Figure 4–5: Interface Control Speed
Interface Control
0.
1.
2.
3.
4.
5.
Exit
Interface Type
Interface Straps A
Interface Straps B
Speed
Parity
Speed 0.
1.
2.
3.
4.
5.
6.
7.
8.
9.
Exit
110
300
600
1200
1800
2400
4800
9600
19200
Speed - 9600
Press the number ‘0’ to return to normal operation.
To continue modification select (1-8).
SETTING COMMUNICATIONS AND PRINT PARAMETERS 4–11
Figure 4–6: Interface Control Parity
Interface Control
0.
1.
2.
3.
4.
5.
Exit
Interface Type
Interface Straps A
Interface Straps B
Speed
Parity
Parity 0.
1.
2.
3.
4.
Exit
Even
Odd
Space
Mark
Parity - Even
Press the number ’0’ to return to normal operation.
To continue modification select (1-8).
Note
The space and mark options are available in 7-bit mode only. In
8-bit mode, these options are not selectable and are not printed.
Figure 4–7: Interface Control Type
Interface Control
0.
1.
2.
3.
4.
5.
Exit
Interface Type
Interface Straps A
Interface Straps B
Speed
Parity
Interface Type
0.
1.
Exit
Serial
Interface Type - Serial
Press the number ’0’ to return to normal operation.
To continue modification select (1-8).
4–12 SETTING COMMUNICATIONS AND PRINT PARAMETERS
Table 4–2: Serial Interface Strapping Options
Strap
Number
READ/BUSY
A1
A2
A3
A4
A5
A6
A7
A8
Action When In (In = 1; Out = 0)
CONTROL
Not assigned
Not assigned
Not assigned
Enable READY/BUSY status by means of SCA (pins 11 and 19)
Enable READY/BUSY to cause transmission of XON/XOFF codes
Enable READY/BUSY to cause transmission of a 200 msec
BREAK
Enable READY/BUSY to turn circuit CD (interface pin 20) ON
or OFF
Enable READY/BUSY to turn circuit CA (interface pin 4) ON or
OFF
FAULT CONTROL
A9
Not assigned
A10
Not assigned
A11
Not assigned
A12
Enable NO FAULT/FAULT
19)
A13
Enable NO FAULT/FAULT
codes
A14
Enable NO FAULT/FAULT
BREAK
A15
Enable NO FAULT/FAULT
A16
Enable NO FAULT/FAULT
status by means of SCA (pins 11 and
to cause transmission of XON/XOFF
to cause transmission of a 200 msec
to turn off circuit CD
to turn off circuit CA
SELECT CONTROL
A17
Not assigned
A18
Not assigned
A19
Not assigned
A20
Enable ON LINE/OFF LINE status by means of SCA (pins 11
and 19)
A21
Enable printer in OFF LINE to cause transmission of
XON/XOFF codes
A22
Enable printer in OFF LINE to cause transmission of a 200 msec
BREAK
A23
Enable printer in OFF LINE to turn off circuit CD
A24
Enable printer in OFF LINE to turn off circuit CA
A25
Not assigned
SETTING COMMUNICATIONS AND PRINT PARAMETERS 4–13
Table 4–2 (Cont.): Serial Interface Strapping Options
Strap
Number
Action When In (In = 1; Out = 0)
A26
A27
A28
A29
A30
A31
Enable transmission of an <ACK> on receipt of an <ETX>
Reverse SCA polarity (active state LOW) if SCA is enabled
Reverse DTR polarity (active state LOW) if DTR is enabled
Inhibit received parity check
Enable two stop bits
Enable transmitter
OTHER
A32
B1
B2
B3
B4
B5
B6
B7-B32
Reverse CA polarity (active state LOW) if CA is enabled
Not assigned
No parity bit transmitted/received
Enable auto input buffer expansion
Host may not use CC to inhibit transmit
Replaces underline character with <CR>
Seven and eight bit data accepted
Not assigned
NOTE
The configuration menu prints out strap status in serial interface in two rows A1-A32 and B1-B32. The LED display, however, shows 1 through 64 with 33-64 being equivalent to B1B32.
4.4 Print Characteristics
The rest of the configuration entries control the form and location of the
printed data.
4.4.1 Font
Under the font category in the program mode, there are six subcategories
(see Figure 4–8):
1. Style - the quality/density of the printed characters
2. CPI - Characters Per Inch
3. Country
4. Mode (there are no font enhancements available through the control
panel)
4–14 SETTING COMMUNICATIONS AND PRINT PARAMETERS
5. Horizontal Expansion
6. Vertical Expansion
To select the font category:
1. Place the printer off-line ([ O F L] is displayed). If the printer is
on-line ([ O n L] is displayed), press the ON LINE key.
2. Press the PRG key ([ P r o] is displayed). The LG31 printer will print
the configuration menu.
3. Press the (1) key. The LG31 printer will list the font options (see
Figure 4–8).
4. Press the key with the same number as the desired font option.
5. Follow the procedure in the related section as follows.
There are no mode options available. The response of the LG31 printer
to mode selection is shown in Figure 4–8.
Figure 4–8: Font Menu
FONT:
0.
1.
2.
3.
4.
5.
6.
Exit
Style
CPI
Country
Mode
Horizontal Expansion
Vertical Expansion
SETTING COMMUNICATIONS AND PRINT PARAMETERS 4–15
4.4.1.1 Style
Figure 4–9: Font Style
FONT:
0.
1.
2.
3.
4.
5.
6.
Exit
Style
CPI
Country
Mode
Horizontal Expansion
Vertical Expansion
Style 0.
1.
2.
3.
4.
Exit
44A511367
44A511199
44A511400
44A511400
Dataprocessing
Correspondence
OCR-A
OCR-B
Style - 44A511367 Dataprocessing
Press the number ‘0’ to return to normal operation.
To continue modification select (1-8).
To select the style subcategory of parameters (see Figure 4–9):
1. Place the printer off-line ([ O F L] is displayed). If the printer is
on-line ([ O n L] is displayed), press the ON LINE key.
2. Press the PRG key ([ P r o] is displayed). The LG31 printer will print
the configuration menu.
3. Press the (1) key.
available.
The LG31 will print the list of print styles
4. Press the key with the same number as the desired style ((3) selects
OCR-A).
5. Press the (0) key to return the LG31 printer to off-line operation
([ O F L] is displayed).
4–16 SETTING COMMUNICATIONS AND PRINT PARAMETERS
4.4.1.2 CPI
Figure 4–10: Font CPI
FONT:
0.
1.
2.
3.
4.
5.
6.
Exit
Style
CPI
Country
Mode
Horizontal Expansion
Vertical Expansion
CPI 0.
1.
2.
3.
4.
5.
6.
Exit
5 CPI
10 CPI
12 CPI
13.3 CPI
15 CPI
16.7 CPI
CPI - 10 CPI
Press the number ‘0’ to return to normal operation.
To continue modification select (1-8).
To select the CPI subcategory of parameters (see Figure 4–10):
1. Place the printer off-line ([ O F L] is displayed). If the printer is
on-line ([ O n L] is displayed), press the ON LINE key.
2. Press the PRG key ([ P r o] is displayed). The LG31 printer will print
the configuration menu.
3. Press the (2) key. The LG31 will print the list of CPI available.
4. Press the key with the same number as the desired CPI ((3) selects
12 CPI).
5. Press the (0) key to return the LG31 printer to off-line operation
([ O F L] is displayed).
SETTING COMMUNICATIONS AND PRINT PARAMETERS 4–17
4.4.1.3 Country (Character Sets)
Figure 4–11: Font Country
FONT:
0.
1.
2.
3.
4.
5.
6.
Exit
Style
CPI
Country
Mode
Horizontal Expansion
Vertical Expansion
Country 0.
1.
2.
3.
4.
5.
6.
7.
8.
9.
Exit
US ASCII
Great Britain
DEC Dutch
DEC Finland
France
DEC French (Canada)
Germany
Italy
Continue
Country 0.
1.
2.
3.
4.
5.
6.
7.
Exit
JIS Roman
DEC Norway/Denmark
Spain
DEC Sweden
DEC Swiss
ISO Norway/Denmark
DEC Portuguese
Country - US ASCII
Press the number ‘0’ to return to normal operation.
To continue modification select (1-8).
To select the character set subcategory of parameters (see Figure 4–11):
1. Place the printer off-line ([ O F L] is displayed). If the printer is
on-line ([ O n L] is displayed), press the ON LINE key.
4–18 SETTING COMMUNICATIONS AND PRINT PARAMETERS
2. Press the PRG key ([ P r o] is displayed). The LG31 printer will print
the configuration menu.
3. Press the (3) key. The LG31 will print a list of national replacement
character sets available.
4. Press the key with the same number as the desired set ((3) selects
Digital Dutch).
5. If the desired character set is not in the list, press the (9) key. The
printer will list the rest of the character sets available. Perform step
4.
6. Press the (0) key to return the LG31 printer to off-line operation
([ O F L] is displayed).
4.4.1.4 Mode
Figure 4–12: Font Mode
FONT:
0.
1.
2.
3.
4.
5.
6.
Exit
Style
CPI
Country
Mode
Horizontal Expansion
Vertical Expansion
Mode Cannot change character attributes from the menu
0.
Exit
Mode - Normal
Press the number ‘0’ to return to normal operation.
To continue modification select (1-8).
The character attributes cannot be changed from the configuration menu.
SETTING COMMUNICATIONS AND PRINT PARAMETERS 4–19
4.4.1.5 Horizontal Expansion
Figure 4–13: Font Horizontal Expansion
FONT:
0.
1.
2.
3.
4.
5.
6.
Exit
Style
CPI
Country
Mode
Horizontal Expansion
Vertical Expansion
Horizontal Expansion 0.
1.
2.
Exit
X1
X2
Horizontal Expansion - X1
Press the number ‘0’ to return to normal operation.
To continue modification select (1-8).
To select the horizontal expansion subcategory of parameters (see Figure 4–13):
1. Place the printer off-line ([ O F L] is displayed). If the printer is
on-line ([ O n L] is displayed), press the ON LINE key.
2. Press the PRG key ([ P r o] is displayed). The LG31 printer will print
the configuration menu.
3. Press the (5) key. The LG31 will print the list of horizontal expansions available.
4. Press the key with the same number as the desired expansion ((2)
selects the times two expansion).
5. Press the (0) key to return the LG31 printer to off-line operation
([ O F L] is displayed).
4–20 SETTING COMMUNICATIONS AND PRINT PARAMETERS
4.4.1.6 Vertical Expansion
Figure 4–14: Font Vertical Expansion
FONT:
0.
1.
2.
3.
4.
5.
6.
Exit
Style
CPI
Country
Mode
Horizontal Expansion
Vertical Expansion
Vertical Expansion 0.
1.
2.
3.
Exit
X1
X2
X3
Vertical Expansion - X1
Press the number ‘0’ to return to normal operation.
To continue modification select (1-8).
To select the vertical expansion subcategory of parameters (see Figure 4–14):
1. Place the printer off-line ([ O F L] is displayed). If the printer is
on-line ([ O n L] is displayed), press the ON LINE key.
2. Press the PRG key ([ P r o] is displayed). The LG31 printer will print
the configuration menu.
3. Press the (6) key. The LG31 will print the list of vertical expansions
available.
4. Press the key with the same number as the desired expansion ((3)
selects the times three vertical expansion).
5. Press the (0) key to return the LG31 printer to off-line operation
([ O F L] is displayed).
SETTING COMMUNICATIONS AND PRINT PARAMETERS 4–21
4.4.2 LPI
Figure 4–15: Lines Per Inch
LPI 0.
1.
2.
3.
Exit
6 lpi
8 lpi
10 lpi
LPI - 6 lpi
Press the number ‘0’ to return to normal operation.
To continue modification select (1-8).
To select the LPI subcategory of parameters (see Figure 4–15):
1. Place the printer off-line ([ O F L] is displayed). If the printer is
on-line ([ O n L] is displayed), press the ON LINE key.
2. Press the PRG key ([ P r o] is displayed). The LG31 printer will print
the configuration menu.
3. Press the (2) key. The LG31 printer will list the LPI options (see
Figure 4–15).
4. Press the key with the same number as the desired LPI option ((3)
is 10 lines per inch).
5. Press the (0) key to return the LG31 printer to off-line operation ([
O F L] is displayed).
4.4.3 Forms Control
Setting the forms control (see Figure 4–16) differs from the other printing
characteristic setups in that you normally perform a sequence of settings,
and that the last setting exits back to the configuration menu. There are
two methods for setting the form dimension and position. One is to
select the function mode (see Section 4.5.2), and the other is to select
forms control from the program mode.
4–22 SETTING COMMUNICATIONS AND PRINT PARAMETERS
Figure 4–16: Forms Control
Form Control:
0.
1.
2.
3.
4.
5.
6.
7.
8.
9.
Exit
Form Feed
Line Feed (forward)
Line Feed (reverse)
Set Top of Form
Set Top Margin
Set Bottom Margin
Set Bottom of Form
1/72 inch Paper Forward
1/72 inch Paper Reverse
Forms Control (lines):
Form Length
- 66
Top Margin
- 01
Bottom Margin - 66
Press the number ‘0’ to return to normal operation.
To continue modification select (1-8).
To select the forms control category in the program mode:
1. Place the printer off-line ([ O F L] is displayed). If the printer is
on-line ([ O n L] is displayed), press the ON LINE key.
2. Press the PRG key ([ P r o] is displayed). The LG31 printer will print
the configuration menu.
3. Press the (3) key. The LG31 printer will list the forms control options
(see Figure 4-14).
4. Press and hold the (2) key until the top of the sheet aligns with the
notches in the upper tractors.
5. Press the (4) key to start the line count. The display is [ 0 0 0].
6. Press and hold the (2) key until you reach the desired top margin.
The display reads the number of lines the paper moves forward (9
lines equals 1½ inches).
7. Press the (5) key to set the top margin.
8. Press and hold the (2) key until you reach the desired bottom margin.
The display reads the number of lines the paper moves forward (51
lines equals 8½ inches). The display reads [ 6 0] 9+51.
9. Press the (6) key to set the bottom margin.
SETTING COMMUNICATIONS AND PRINT PARAMETERS 4–23
10. Press and hold the (2) key until you reach the bottom of the form (66
for 11-inch paper).
11. Press the (7) key to set the bottom of the form and to return to the
configuration menu.
12. Press the (0) key to return the LG31 printer to off-line operation
([ O F L] is displayed).
4.4.4 Margin Settings
Figure 4–17: Margin Settings
Margin Settings:
0.
1.
2.
3.
4.
5.
6.
7.
8.
Exit
Advance Left
Advance Right
Set Left Margin
Set Right Margin
Clear Margins
Display Right Margin
Display Left Margin
Display Current Position
Margin Settings (columns):
Left Margin - None
Right Margin - 132
Press the number ‘0’ to return to normal operation.
To continue modification select (1-8).
You can set the margin settings from either the function mode (see
Section 4.5.5) or the program mode, to select the margin settings category
in the program mode:
1. Place the printer off-line ([ O F L] is displayed). If the printer is
on-line ([ O n L] is displayed), press the ON LINE key.
2. Press the PRG key ([ P r o] is displayed). The LG31 printer will print
the configuration menu.
3. Press the (5) key. The LG31 printer will list the margin setting
options (see Figure 4–17).
4. Press the (6) key to display the left margin setting.
4–24 SETTING COMMUNICATIONS AND PRINT PARAMETERS
5. Press the (2) key until the display reads the column number you
want for a left margin.
6. Press the (3) key to set the left margin.
7. Press the (7) key to display the right margin setting.
8. Press the (1) key until the display reads the column number you
want for a right margin.
9. Press the (4) key to set the right margin.
10. Press the (0) key to return to the configuration menu.
11. Press the (0) key to return the LG31 printer to off-line operation
([ O F L] is displayed).
The (5) key sets the margins to the default values, and the (8) key
displays the current column position.
4.4.5 Horizontal Tab Stops
The horizontal tabs cannot be set from the configuration menu. The
response of the LG31 printer to a horizontal tab entry is shown in
Figure 4–18.
Figure 4–18: Horizontal Tab Stops
Horizontal Tab Stops:
Cannot set horizontal tabs from the menu
0.
Exit
Horizontal Tabs (columns):
009
089
169
017
097
177
025
105
185
033
113
193
041
121
201
049
129
209
057
137
217
065
145
073
153
081
161
Press the number ‘0’ to return to normal operation.
To continue modification select (1-8).
SETTING COMMUNICATIONS AND PRINT PARAMETERS 4–25
Figure 4–19: Vertical Tab Stops
9keep)
Vertical Tab Stops:
Cannot set vertical tabs from the menu
0.
Exit
Vertical Tab Stops:
Press the number ‘0’ to return to normal operation.
To continue modification select (1-8).
4.4.6 Vertical Tab Stops
The vertical tab stops cannot be set from the configuration menu. The
response of the LG31 printer to a vertical tab stops entry is shown in
Figure 4–19.
4.4.7 Printer Control Straps
There are 64 printer control straps in the LG31 printer. These straps
control how the LG31 responds when printing data. For a detailed
description of these straps, see Chapter 2, Section 2.2 in the LG31 User’s
Guide (EK-LG31E-UG).
1. Printer Control Straps (A) — There are 32 A software straps that
you can define as in or out. When you enter the interface strap A
sub-category, the strap number is displayed in the left two digits (132) of the display panel. The right digit indicates whether the strap
is in (i) or out (o).
2. Printer Control Straps (B) — There are 32 B software straps that
you can define as in or out. When you enter the interface strap B
sub-category, the strap number is displayed in the left two digits (3364) of the display. The right digit indicates whether the strap is in
(i) or out (o).
To select the printer control category of parameters (see Figure 4–20).
1. Place the printer off-line ([ O F L] is displayed). If the printer is
on-line ([ O n L] is displayed), press the ON LINE key.
2. Press the PRG key ([ P r o] is displayed). The LG31 printer will print
the configuration menu.
4–26 SETTING COMMUNICATIONS AND PRINT PARAMETERS
Figure 4–20: Printer Control Straps — Factory Setting
Printer Control Straps:
0.
1.
2.
Exit
Printer Straps A
Printer Straps B
Straps:
0. Exit
1. Strap ‘IN’
2. Strap ‘OUT’
3. Forward Without Change
4. Reverse Without Change
Printer Control Straps:
Printer Straps A:
0
1
2
3
12345678901234567890123456789012
00000000000000000000100001110010
Printer Straps B:
0
1
2
3
12345678901234567890123456789012
00000000000000000000000000000000
Press the number ‘0’ to return to normal operation.
To continue modification select (1-8).
End of Program Mode
3. Press key (8). The printer will list the options available (see Figure 4–20). The interface straps and their present condition are listed
in the configuration menu.
4. Press the (3) key until the number of the desired strap shows in the
display.
5. Press (1) to enable the strap (an "i" on the display).
6. Press (2) to disable the strap (an "o" on the display).
7. Press the (0) key and the printer will return to the printer control
category.
8. Press the (0) key to return to the configuration menu.
9. Press the (0) key and the LG31 printer will return to off-line operation ([ O F L] is displayed).
SETTING COMMUNICATIONS AND PRINT PARAMETERS 4–27
4.5 Function Mode
In the function mode (see Figure 4–21), you can perform the following:
•
Printer initialization
•
Forms setup
•
Print adjustment
•
Forms adjustment
•
Margin setup
•
Reverse form feed
•
Buffer clear
Unlike operations in the programming mode, you can perform operations
in one of the characteristics for entry into the function mode. A menu
is not available to lead you through the modification process. The
procedures for performing these operations are contained in the following
sections.
4.5.1 Printer Initialization
There are two ways to initialize the LG31 printer:
1. Through the control panel.
2. Through the initialization switch.
It may be necessary to perform the initialization procedure if the printer
becomes locked, or if you want to return to the factory settings. Table
4-3 describes how to use the control panel to initialize the LG31 printer.
Table 4-4 describes how to initialize the printer using the initialization
switch.
4–28 SETTING COMMUNICATIONS AND PRINT PARAMETERS
Figure 4–21: Function Mode
THE PRESENT CONFIGURATION IS: (44A511526 SY - 44A511527 IM)
FIRMWARE REVISION LEVEL V2.3
1. Font:
Style - 44A511527 Dataprocessing
CPI - 10 CPI
Country - US ASCII
Mode - Normal
Horizontal Expansion - X1
Vertical Expansion
- X1
2. LPI - 6 lpi
3. Forms Control (lines):
Form Length
- 66
Top Margin
- 01
Bottom Margin - 66
4. Interface Control:
Interface Type - Serial
Input buffer length 2304
Interface Straps A:
0
1
2
3
12345678901234567890123456789012
00001000000010000000101000001000
Interface Straps B:
0
1
2
3
12345678901234567890123456789012
01000100000000000000000000000000
Speed - 9600
Parity - Even
5. Margin Settings (columns):
Left Margin - None
Right Martin - 132
6. Horizontal Tabs (columns):
009 017 025 033 041 049 057 065 073 081
089 097 105 113 121 129 137 145 153 161
169 177 185 193 201 209 217
7. Vertical Tab stops:
8. Printer Control Straps:
Printer Straps A:
0
1
2
3
12345678901234567890123456789012
00000000000000000000100001110010
Printer Straps B:
0
1
2
3
12345678901234567890123456789012
00000000000000000000000000000000
Press the number ‘0’ to return to normal operation.
To continue modification select (1-8).
SETTING COMMUNICATIONS AND PRINT PARAMETERS 4–29
Table 4–3: Initialization Procedure
Action
Results
Display
Press (3) ON
LINE
Printer set to off-line.
[ O F L]
Press (9) FCT
Printer enters Mode Selection
mode.
[.F n c]
Press (1) PRG
Printer enters Initialization
mode.
[ . s u]
Returns to off-line without any
changes.
[O F L]
(3) ON LINE
Resets the printer parameters to
their respective Reset State.
[.C S U]
[.8.8.8]
[ i P]
[.8.8.8]
[ O F L]
(9) FCT
To initialize printer configuration
to default conditions.
[.IS. U]
[.8.8.8]
[ i P]
[.8.8.8]
[ O F L]
Select one:
Press (0) TEST
CLR
or
NOTE
A user’s configuration menu selections are reset to factory
settings as a result of a defective battery or unintentional
operation of the initialization switch on the inner control panel.
4–30 SETTING COMMUNICATIONS AND PRINT PARAMETERS
Table 4–4: Lock-Up Printer Initialization Procedure
Action
Results
Turn printer power OFF.
Printer disabled.
Slide the printer initialization switch to
its opposite position (Switch located at
top of inner control panel).
Turn printer power ON.
Printer enabled.
When display indicates
[ . S U], press (9) FCT.
Initializes the printer to factory
settings (see Figure 4-2 printout.)
When display indicates [ . S U], slide the
printer initialization switch back to its
original position.
Completes the initialization
procedure.
NOTE
If the switch is not returned to its original position, the [ . S U]
display will reappear at next power-up or self-test procedure.
The procedure can be repeated if necessary.
4.5.2 Forms Setup
Use form setup to establish top and bottom of form and top and bottom
margin settings without causing any printing action to occur. Minimum
form length is one line. Maximum form length is 559 mm (22.0 in). The
Form Setup procedure is shown in Table 4-5.
CAUTION
Although the entire length of the form is available for printing,
top and bottom margins are recommended in order to avoid
printing on paper perforations and print wire snagging.
Prior to pressing key (4) LINE FEED, press any paper motion key to
advance paper as appropriate, and the display will not change. After
pressing key (4) LINE FEED, the display will change to a counter that
will count the line feeds forward as key (2) FORM FEED is pressed or
backwards, as key (3) ON LINE is pressed. However, the paper will not
move again until key (7) FONT LINE FEED is pressed to set bottom of
form. The top of form is actually set when key (4) LINE FEED is pressed.
At this point, the 0.23 cm (1/72 inch) paper control keys (8) SET TOF
and (9) FCT are disabled. Also, key (2) FORM FEED cannot be enabled
because it is being used to increment line feed counts without moving
SETTING COMMUNICATIONS AND PRINT PARAMETERS 4–31
the paper. Pressing the bottom of form key (7) FONT will cause the form
parameters entered to be saved, move the paper to align the top of the
next form with the print line, and exit the Form Setup mode.
Table 4–5: Forms Setup Procedure
Action
Results
Display
Press (3) ON LINE
Printer goes to OFF LINE.
[ O F L]
Press (9) FCT
Printer enters Mode Selection state.
[.F n c]
Press (2) FORM
FEED
Printer enters Form Setup mode.
[ F S U]
At this point, the choices are:
(0) TEST CLR
Exits from Form Setup to OFF LINE,
and feeds to top of next form in
accordance with current length.
[ O F L]
(1) PRG
Form feeds one form length.
[.F S U]
(2) FORM FEED
Forward line feed in accordance with
current LPI setting. If pressed and held
for more than one second, consecutive
line feeds occur at the rate of one each
0.5 of a second.
[.F S U]
(3) ON LINE
Reverse line feed in accordance with
current LPI setting. If pressed and held
down for one second, consecutive paper
reverse line feed steps occur at the rate
of one each 0.5 of a second.
[.F S U]
(4) LINE FEED
Sets top of form.
[0 0 1]
(5) CPI LPI
Sets top margin.
[0 0 4]
(6) PAPER REV
Sets bottom margin.
[0 6 2]
(7) FONT
Sets bottom of form and returns to OFF
LINE.
[0 6 6]
(8) SET TOF
Advances paper 0.23 cm (1/72 inch).
[.F S U]
(9) FCT
Moves paper 0.23 cm (1/72 inch) in
reverse direction.
[.F S U]
4–32 SETTING COMMUNICATIONS AND PRINT PARAMETERS
4.5.2.1 Top Of Form (TOF)
Figure 4–22: Key (4) Form Size Setup Example
Top
of
Form
000
Top
Margin
1 in
006
Sample Form
812 in
Bottom
Margin
057
1 12 in
066
End
of
Form
RE_UK00282M_89
Figure 4–22 shows the same form size when Top Of Form (TOF) is set by
using key (4) LINE FEED while the printer is in the Form Setup mode.
In performing the following TOF set procedure, it is assumed that the
Form Setup mode has already been entered, but key (4) LINE FEED has
not been pressed and that the printer is set for 6 LPI.
Top Of Form (TOF) Set Procedure
1. Press key (2) FORM FEED again, and hold down to move the first
line of the form, even (level) with the print line location. Top of paper
line feeds to desired TOF, even with notches in upper tractor doors.
Display remains [.F S U].
SETTING COMMUNICATIONS AND PRINT PARAMETERS 4–33
2. Press key (4) LINE FEED to set top of form. Display is [ 0 0 0].
3. One-inch top margin is desired at 6 LPI. Press and hold (2) FORM
FEED, count six lines, release pushbutton. Display counts one line
feed per half-second. Final display is [.0 0 6].
4. Press key (5) CPI/LPI to set top margin. Display remains at [.0 0 6].
5. The body of the form is 21.6 cm (8½ inches) or 51 lines. Press and
hold key (2) FORM FEED, count 51 lines (51 + 6 = 57 total), release
pushbutton. Display counts to [.0 5 7] and stops.
6. Press key (6) PAPER REV to set bottom margin. Display remains at
[.0 5 7].
7. Form is 27.9 cm (11 in) or 66 lines. Press and hold key (2) FORM
FEED, count nine lines, release pushbutton. Display is [.0 6 6].
8. Press key (7) FONT to set bottom of form, save form setup, form feed
to first print line of next form, and exit Form Setup. Paper moves
forward to first print line of next form. Display is [ O F L].
During steps 3, 5, or 7 in the above TOF set procedure, if the counter goes
beyond the desired number of lines, press key (3) ON LINE to subtract
excess lines from the display counter.
NOTES
1. When a new supply of forms is needed and the same form is
used, it is only necessary to align the top perforation with
the notches in the paper locking levers (upper tractors) and
press keys (0) TEST CLR and (8) SET TOF to set the top
of form position. The form will move forward to place the
first line of the next form in a printable position. Do not
use key (4) LINE FEED for this purpose. Press key (3) ON
LINE to resume printing.
2. After the form parameters have been entered by pressing
key (7) FONT, changing the vertical pitch will not change
form length. Example: changing from 6 to 8 LPI on a 27.9
cm (11 inches) page will not shorten page to 21.0 cm (8¼
inches) or 66 lines/8 LPI=8¼ inches.
3. See Table 4-6 for procedure to adjust form up or down.
4–34 SETTING COMMUNICATIONS AND PRINT PARAMETERS
4.5.3 Print Adjustment
The Print Adjustment procedure shown in Table 4-6 is used to review the
print by observing several print patterns that may be selected. Except
for the test pattern, printing starts when key is momentarily pressed,
and continues printing until key (9) FCT is momentarily pressed. If key
(9) (FCT) is pressed again before another key, the previous pattern is
repeated. Further information and sample test pattern printouts are in
Chapter 7 of the LG31 Technical Manual.
The print review function permits evaluation of the print alignment for
proper character formation and graphics printing. If the adjustment is
not satisfactory, call Digital.
CAUTION
This print quality adjustment should only be performed by a
qualified technician.
Table 4–6: Print Review Procedure
Action
Results
Display
Press (3) ON LINE
Printer goes to off-line.
[ O F L]
Press (9) FCT
Printer enters Function Selection mode.
[.F n c]
Press (3) ON LINE
Printer enters Alignment mode. Cancels
any existing special print modes.
[.A d j]
At this point, the options are:
(0) TEST CLR
Exits from Adjustment to off-line and
restores previous menu configuration.
[ O F L]
(1) PRG
Prints short segments of the various test
patterns. Print width is governed by
the number of columns in the current
configuration. Software release number,
model number, space for printer serial
number, and date precede the test
pattern printout.
[ . 5 9]
(2) FORM FEED
Executes Form Feed.
[ . 5 9]
(3) ON LINE
Prints amplitude pattern
[.A .PL]
(4) LINE FEED
Executes Line Feed.
[.A .PL]
SETTING COMMUNICATIONS AND PRINT PARAMETERS 4–35
Table 4–6 (Cont.): Print Review Procedure
Action
3
(5) CPI LPI
3
(6) PAPER
(7) FONT3
(8) SET TOF
3
Results
Display
Prints horizontal timing patterns
[.H E P]
Prints vertical timing pattern
[.U E P]
Prints intermodule gap pattern
[ . 9 P]
Prints checkerboard pattern
[.c b P]
3 Indicates a continuous printing pattern. Press key (9) to stop printing. Press key (9)
again to restart the most recently selected pattern.
4.5.4 Forms Adjustment
The Forms Adjustment procedure allows movement of the current form
up or down on the paper after the form parameters are set by TOF Set
procedure, using the Forms Control item 3 in the Configuration Menu
(see Chapter 3).
Moving paper forward causes the current top of form to be displaced
downward on the paper; moving the paper in the reverse direction causes
the form to be moved upward on the paper. The form limits and Top Of
Form using the paper tractor locking lever notch should already have
been set prior to using the Forms Adjustment procedure in Table 4-7.
Adjusting the form locations on the paper does not alter the current
form parameters (margins, length).
4–36 SETTING COMMUNICATIONS AND PRINT PARAMETERS
Table 4–7: Forms Adjustment Procedure
Action
Results
Display
Press (3) ON LINE
Printer goes off-line.
[ O F L]
Press (9) FCT
Printer enters Mode Selection mode.
[.F n c]
Press (4) LINE
FEED
Printer enters Forms Adjustment mode.
[.F A d]
At this point, the choices are:
(0) TEST CLR
Exits from Forms Adjustment to OFF
LINE and feeds to top of next form in
accordance with current length.
[ O F L]
(1) PRG
Prints rotating test pattern (see NOTE).
[.F A d]
(4) LINE FEED
Advances paper 0.23 cm (1/72 inch).
[.F A d]
(6) PAPER REV
Moves paper 0.23 cm (1/72 inch) in
reverse direction.
[.F A d]
NOTE
The pattern begins and continues when key (1) PRG is pressed
and held. The pattern stops when the key (1) PRG is released.
The Forms Adjustment mode is still active after printing the
test pattern.
SETTING COMMUNICATIONS AND PRINT PARAMETERS 4–37
4.5.5 Margin Setup
The Margin Setup procedure shown in Table 4-8 is used to set and display
left and right margins.
Table 4–8: Margin Setup Procedure
Action
Results
Display
Press (3) ON LINE
Printer goes OFF LINE.
[ O F L]
Press (9) FCT
Printer enters Mode Selection mode.
[.F n c]
Press (5) CPI
Printer enters Margin Setup mode.
[.L r S]
At this point, the options are:
(0) TEST CLR
Exits from Margin Setup to OFF LINE.
[ O F L]
(1) PRG
Counts column position to the left.
[.1 3 2]
to
[.0 0 0]
(2) FORM FEED
Counts column position to the right.
[.0 0 0]
to
[.1 3 2]
(3) ON LINE
Sets left margin.
[.0 0 0]
Factory
Setting
(4) LINE FEED
Sets right margin.
[.1 3 2]
Factory
Setting
(5) CPI LPI
Clears margin to default values (000
and 132 for 10 CPI). Also see Margin vs.
Character Pitch procedure below.
[.L r S]
(6) PAPER REV
Displays current right margin.
[.1 3 2]
(7) FONT
Displays current left margin.
[.0 0 0]
(8) SET TOF
Displays current column position.
[.0 0 0]
NOTE
The display examples given for keys (1) through (8) assume the
printer is set for 10 CPI.
4–38 SETTING COMMUNICATIONS AND PRINT PARAMETERS
The following example explains how to select and set desired margins.
NOTE
A counter is used to indicate the current column number
counted from the left margin. The count increments or decrements at the rate of two per second when key (1) PRG or (2)
FORM FEED is held down. The maximum column count is:
66 for 5 CPI
132 for 10 CPI
158 for 12 CPI
176 for 13.3 CPI
198 for 15 CPI
220 for 16.7 CPI
Example (Margin Setup)
1. To move both margins inward five columns while printing at 10 CPI,
press key (7) FONT to display left margin. Display is [.0 0 0].
2. Press and hold key (2) FORM FEED for five column counts and
release. Display increases to [.0 0 5] and stops.
3. Press key (3) ON LINE to set left margin. Display remains at
[.0 0 5].
NOTE
The column displayed is one less than the column in which
printing will begin.
4. Press key (6) PAPER REV to display right margin. Display is
[.1 3 2].
5. Press and hold key (1) PRG for five column counts and release.
Display decreases from 132 to [.1 2 7] and stops.
6. Press key (4) LINE FEED to set right margin. Display remains at
[.1 2 7].
NOTE
The last print column is the one displayed.
7. Press key (0) TEST CLEAR to return to Off Line from Margin Setup.
Display is [ O F L].
Note
In the above example, the print line is 122 columns wide.
Printing is allowable in columns 6 through 127.
SETTING COMMUNICATIONS AND PRINT PARAMETERS 4–39
The left margin specifies the first printable position on a line, while the
right margin specifies the last printable position on a line. The active
position may not be placed outside the left and right margins. The left
margin must be one less than the right margin.
If the active position is less than the left margin, the active position is
set to the left margin.
If Autowrap is enabled and the active position is greater than the right
margin, the next printable character will cause a carriage return/line
feed before this character is printed. If Autowrap is disabled (truncated),
any following characters will be ignored until the cursor is brought to
within the printable area.
These margins are defined as hard margins, since printing is not permitted outside them. The only exception to this rule for vector drawing.
The vector sequence is capable of drawing outside the margins.
When character pitch is changed and the same physical margins are
desired, it is necessary to reset the margins before any data is sent.
Changing the horizontal pitch resets left and right margins to the
printable limits (column 1 and the rightmost position).
4.5.6 Reverse Form Feed
Use the Reverse Form Feed procedure shown in Table 4-9 to back the
paper up one form’s length for every press of the key.
Table 4–9: Reverse Form Feed Procedure
Action
Results
Display
Press (3) ON
LINE
Printer goes to off-line.
[ O F L]
Press (9) FCT
Printer enters Function mode.
[.F n c]
Press (6)
PAPER REV
Printer enters Reverse Form Feed mode.
[.r F F]
At this point, the options are:
(0) TEST CLR
Exits from Reverse Form Feed to off-line.
[ O F L]
(6) PAPER
REV
Turns paper back one form length each
time the key is pressed.
[.r F F]
4–40 SETTING COMMUNICATIONS AND PRINT PARAMETERS
4.5.7 Buffer Clear
Use the Buffer Clear procedure shown in Table 4-10 to clear the contents
in the printer’s buffer.
Table 4–10: Buffer Clear Procedure
Action
Results
Display
Press (3) ON
LINE
Printer goes off-line.
[ O F L]
Press (9) FCT
Printer enters Function mode.
[.F n c]
Press (7)
FONT
Printer enters Buffer Clear mode.
[ O F L]
At this point, the options are:
(0) TEST CLR
Exits from Buffer Clear to off-line.
[ O F L]
(7) FONT
All information in the printer’s buffer is
cleared.
[ C L r]
SETTING COMMUNICATIONS AND PRINT PARAMETERS 4–41
Chapter 5
PRINTER DIAGNOSTICS
5.1 Introduction
This chapter describes the LG31 self-tests and the alignment tests.
5.2 Self-Tests
The printer automatically verifies its operational integrity by performing
the power-up self-tests on power-up. Thereafter, it continually performs
the operational self-tests. In addition to these tests, the operator can
invoke the printing self-tests.
5.2.1 Power-Up Self-Tests
The LG31 printer automatically self-tests upon power-up, and includes
the following diagnostic tests:
•
ROM checksum test to verify all bits of ROM.
•
RAM pattern test to exercise and verify all bits of RAM.
Additionally, further self-test operations can be programmed into the
printer to check internal logic at power-up with detected faults displayed
at the control panel (see the LG31 Printer User’s Guide EK-LG31E-UG).
A list of all messages displayed on the LEDs is contained in Appendix A.
PRINTER DIAGNOSTICS 5–1
5.2.2 Printing Self-Test
The LG31 printer can execute a printing self-test from either the outer
or inner control panel. This test prints the 94 printable characters of
the ASCII character set in the data processing font, at 10 CPI, and 6
LPI. The test is printed in a swirl pattern over the maximum printable
width (see Figure 5–1). Faults are displayed at the control panel. Table
5-1 contains the procedure for an off-line print test. Table 5-2 lists the
diagnostic fault codes.
Figure 5–1: ASCII Print Test Pattern - Sample Printout
!"#$%&’()*+,-./0123456789:;<=>?@ABCDEFGHIJKLMNOPQRSTUVWXYZ[\ ]^
!"#$%&’()*+,-./0123456789:;<=>?@ABCDEFGHIJKLMNOPQRSTUVWXYZ[\ ]^_
"#$%&’()*+,-./0123456789:;<=>?@ABCDEFGHIJKLMNOPQRSTUVWXYZ[\ ]^_‘
#$%&’()*+,-./0123456789:;<=>?@ABCDEFGHIJKLMNOPQRSTUVWXYZ[\ ]^_‘a
$%&’()*+,-./0123456789:;<=>?@ABCDEFGHIJKLMNOPQRSTUVWXYZ[\ ]^_‘ab
%&’()*+,-./0123456789:;<=>?@ABCDEFGHIJKLMNOPQRSTUVWXYZ[\ ]^_‘abc
&’()*+,-./0123456789:;<=>?@ABCDEFGHIJKLMNOPQRSTUVWXYZ[\ ]^_‘abcd
’()*+,-./0123456789:;<=>?@ABCDEFGHIJKLMNOPQRSTUVWXYZ[\ ]^_‘abcde
()*+,-./0123456789:;<=>?@ABCDEFGHIJKLMNOPQRSTUVWXYZ[\ ]^_‘abcdef
5.2.3 Operational Self-Test
The LG31 printer performs operational self-test diagnostics at regular
intervals during normal operation. Any detected faults are displayed on
the control panel.
5–2 PRINTER DIAGNOSTICS
Table 5–1: Print Test and Diagnostic Self-Test Procedure
Action
Result
Press (3) ON LINE
key to put the printer
off-line
Control panel display [ O F L].
Press (0) TEST CLR key
Printer prints test pattern (see Chapter 4, Figure
4-20).
Printing of test pattern ends and printer performs
diagnostic self-test (maximum time: 10 seconds).
This is the same test performed each time power is
applied.
Press (0) TEST CLR key
again
[.8.8.8] is displayed and audio alarm sounds, then
[ i p ] is displayed for several seconds as the selftest is executed. [.8.8.8] is displayed again. If no
faults are found, [ O F L] is displayed. If a fault
is detected, the appropriate fault code is displayed
(refer to Chapter 5, Table 5-2). The first fault
detected is displayed.
Key: [ ] = indicates three-character LED display.
5.2.3.1 Print Test Pattern
The characters printed consist of all printable ASCII characters. They
will be in the last selected (locally or remotely) font style, pitch, and line
length. A sample print test is shown in Figure 5-1.
Table 5-2 contains a list of the diagnostic fault codes and the faults they
indicate. These displays can be initiated at:
•
Power-up
•
Emulation change
•
Following a test pattern
•
Initialization
PRINTER DIAGNOSTICS 5–3
Table 5–2: Diagnostic Fault Codes
Printer Displays
Fault
–
No Fault
[ 0 2 0]
SMSM Lithium Battery (BT1) (see Table 7.2)
[ 0 2 2]
SMIM has insufficient RAM
[ 0 4 X]
SMSM RAM. Display indicates chip number
at fault. For U41, X=1; for U42, X=2, and so
forth.
[ 0 5 0]
SMSM memory failed to switch (U9-U13,
U18-U25, U42)
[ 0 5 5]
SMSM switchable RAM failure (PD4016C-2 in
U11 and U21)
[ 0 6 0]
SMSM 7.5 interrupt failure (Timer at U30 to
CPU at U3 circuit)
[ 0 8 0]
SMSM DMA (includes U37, U38, U42, U43,
U50-U54)
[ I n F]
No operational interface found
[ 4 2 0]
SMIM Lithium Battery (BT1) (see Table 7.2)
[ 4 4 0]
SMIM RAM (U19-U22) circuit chip (2K or 8K)
may be located in sockets U19-U22
[ 4 9 0]
SMMC Shuttle Motor Drive
[ 4 9 1]
SMMC Shuttle Frequency out of range
[ 4 9 2]
SMIH Imaging Hardware failure SMMC, LVT,
Shuttle Motor
[ 4 9 3]
SMMC or SMIH board (no shuttle interrupt)
[ 4 9 4]
No INT signal available to cause paper motion
[ 7 0 0]
SMIM failure (Image Processor)
[ R c X]
SMIM image processor timer chip (8253 in
U13)
5–4 PRINTER DIAGNOSTICS
Table 5–2 (Cont.): Diagnostic Fault Codes
Printer Displays
Fault
[13]
Head test failure (X indicates module number
of bad actuator. 1=left, 2=middle, 3=right)
[14]
SMIM interrupt controller (8259A in U14)
[21]
SMIM ROM (U19-U24, U38-U39) image
processor ROM (Display indicates chip number
at fault)
[ 2 5 ] through [ 3 2 ]
SMIM NVRAM (5517L in U25-U32) (Display
indicates chip number at fault)
[ 5 2 9]
SMSM NVRAM (5517L in U29)
[ 5 3 0]
SMSM timer chip (8253 in U30)
[ 5 3 1]
SMSM Interrupt Controller (8259A in U31)
[ 5 4 7]
SMSM ROM (U47)
[ 5 4 8]
SMSM ROM (U48)
[ 5 4 9]
SMSM ROM (U49)
[ F 0 0]
Data processing 10 CPI font check sum fault.
[ F 0 1]
Data processing 12 CPI.
[ F 0 2]
Data processing 13.3 CPI.
[ F 1 0]
Gothic NLQ 10 CPI.
[ F 1 2]
Gothic NLQ 12 CPI.
[ F 1 3]
Gothic NLQ 13.3 CPI.
[ F]
Gothic NLQ 15 CPI.
[ F 3 0]
Italic NLQ 10 CPI.
[ F 3 1]
Italic NLQ 12 CPI.
[ F 3 2]
Italic NLQ 13.3 CPI.
[ F 8 0]
Bar code.
[ F 9 0]
Oversize characters.
PRINTER DIAGNOSTICS 5–5
Fault Code Key:
Display
Location of Fault
[ 0- - ]
SMSM circuit board
[ 41 - ] through [ 45 - ]
Through [ 45 - ] SMIM circuit boards
[ 49 - ]
SMIH or SMMC circuit boards
[ I- - ]
SMIM board component
[ S- - ]
SMSM board component
[ X- - ]
A range of number as required
[ F 0 0]-[ F A 0]
Font Check Sum Fault Codes Any [ F—] code
display indicates a logic reading problem.
Displays range from [ F 0 0] to [ F A 0]. If
a font check sum fault display occurs after
the installation of new font chips, check
that the new chips are correctly installed.
Otherwise, the fault is not operator-correctable
and Digital should be contacted (see the LG31
Printer User’s Guide for complete code list).
5.3 Alignment Tests
There are a series of printing test patterns that are used for aligning the
printer. While the alignment is to be performed by service personnel,
the test patterns can be printed by all users.
•
Enter the function mode (key (9) FCT).
•
Enter print adjustment (key (3) ON LINE).
•
Press key 1, 3, or 5 through 9 to select a pattern.
•
Press key 0 to exit to local.
5–6 PRINTER DIAGNOSTICS
Chapter 6
PRINTER OPERATION
6.1 Introduction
This chapter provides information on the operation of the LG31 printer
and includes descriptions of the control panels/display, power-up procedure, troubleshooting, and operator-correctable faults.
6.2 Loading Paper
The printer uses edged-punched (sprocket fed) fan-fold paper conforming
to the dimensions shown in Figure 6-1.
PRINTER OPERATION 6–1
Figure 6–1: Sprocket Hole Dimensioning Diagram
0.25 in. (6.35mm)
0.50 in. (12.70mm)
0.156 in. (3.97mm)
RE_UK00279M_89
To load paper in the LG31, carry out the following steps.
1. Open top cover.
2. Turn Paper Gap Adjuster to Load position (maximum clockwise). See
Figure 6-2.
3. Open Paper Tension Adjust lever to position 1 (fully downward).
CAUTION
For initial paper loading, use 377.8 mm (14 7/8 in) wide or
wider paper to avoid possibility of printing on striker bar
and possible damage to actuator wires.
4. Open printer front door.
5. Cut top from box of fan-fold paper to avoid snagging of paper as it is
fed to tractors. Place box of paper on shelf as shown in Figure 6-3.
6. Open upper paper tractor covers. Hand feed paper up through
printer behind paper tensioning adjustment fingers as shown in
Figure 6-3. Load paper evenly on upper tractor pins until the top
edge of the paper is below the notches on the tractors.
6–2 PRINTER OPERATION
Figure 6–2: Paper Loading Diagram
MARGIN
ADJUSTMENT
KNOB
UPPER LEFT
PAPER TRACTOR
PAPER GAP
ADJUSTER
PAPER
THICKNESS
SCALE
PAPER TENSION
ADJUSTMENT
LEVER
RE_UK00966A_89
CAUTION
Do not attempt to move paper manually by turning pulleys
or belts (pin feed de-synchronization/gear damage may result).
7. If necessary, release locking lever on right tractor by flipping lever
upward and slide tractor horizontally to match paper width.
8. Close tractor covers. Slide right tractor slightly to the right to tension
paper. Lock tractor in place. Excessive tension will cause pin hole
deformation and degrade paper stacking.
9. Applying a slight downward tension, load paper on lower tractors as
in steps 6 to 8 for upper tractors (see Figure 6-3).
10. Set Paper Gap Adjuster for paper thickness in use (see step 6 and
CAUTION).
11. Set Paper Tension Adjust lever for approximate paper thickness in
use.
PRINTER OPERATION 6–3
Figure 6–3: Paper Loading, Lower Tractor
TRACTORS
(PAPER DRIVE
MECHANISM)
COOLING
FAN
PAPER
SUPPLY
PAPER LOW
SWITCH
LOWER
TRACTOR
PAPER TENSION
ADJUSTMENT FINGERS
LOWER
TRACTOR
RE_UK00967A_89
6–4 PRINTER OPERATION
6.3 Installing/Replacing Ribbon Cartridge
To install the ribbon cartridge, carry out the following steps:
1. Open printer top access door with the cover interlock switch (located
on the top left of the printer).
2. Raise cover interlock switch to its highest position.
3. Clear the [ c o ] (cover open) error indicator, by pressing the text CLR
push button.
NOTE
In replacing the ribbon cartridge (paper thickness remains
unchanged), note the paper gap adjuster setting for use in
step 7.
4. Turn print gap adjuster clockwise to LOAD position for maximum
opening (see Figure 6-4).
Figure 6–4: Ribbon Cartridge Installation, Paper Gap Adjuster Setting
UPPER LEFT
PAPER TRACTOR
PAPER GAP
ADJUSTER
RE_UK00968A_89
PRINTER OPERATION 6–5
5. If replacing the ribbon cartridge unsnap ribbon cartridge holddown
at left side of ribbon cartridge (see Figure 6-5).
NOTE
The LG31 printer has a ribbon weld sensor that detects
the point where the two ends of the ribbon are welded
together. Printing is temporarily suspended for a few
seconds until the ribbon weld passes a certain point for
printing to resume. If display [ S U S] persists for more
than one minute, it may be caused by a damaged ribbon or
defective ribbon weld detector.
6. Remove the old ribbon cartridge.
7. Turn knurled knob on new ribbon cartridge clockwise to remove any
slack in ribbon (see Figure 6–5). Be sure re-inker is ON (rotated fully
clockwise).
Figure 6–5: Ribbon Cartridge Installation, Holddown and Re-Inker
PLASTIC
RIBBON
GUIDE
STRIKER BAR
PAPER
SHIELD
RIBBON
RIBBON
CARTRIDGE
CARTRIDGE
RETAINING
HOLD DOWN
RE-INKER
LEVER IN
OFF POSITION
RE_UK01414A_89
6–6 PRINTER OPERATION
8. Tilt ribbon cartridge downward to the left and install left side first
(left edge of cartridge will guide ribbon between the ribbon guide and
shield as shown in Figures 6-5 and 6-6). Then lower right side onto
ribbon motor drive shaft. Turn knurled knob a few times to verify
that ribbon is running freely and to remove any remaining slack.
9. Snap ribbon cartridge holddown in place over left side of ribbon
cartridge.
10. Reset print gap adjuster to original setting or to a setting appropriate
to new paper thickness.
11. Close door in printer top enclosure and press the ON LINE push
button.
12. Clear the "Striker Bar Open" [ S b o] fault indicator by pressing the
TEST CLR push button once.
13. Perform a printing self test. Refer to Section 5.2.2.
NOTE
When the printer quality starts fading, turn the re-inker
on (see Section 6.4).
6.4 Re-Inking Ribbon
Turn the ribbon re-inker on when the Ribbon Cartridge is installed. Once
turned on, leave it on for the life of the cartridge. To re-ink the ribbon:
1. Open the top cover.
2. Move the re-inking lever on the ribbon cartridge about one half-turn
clockwise.
3. Close the cover.
PRINTER OPERATION 6–7
Figure 6–6: Ribbon Cartridge Installation, Ribbon Guide and Striker
Bar
RIBBON
GUIDE
STRIKER BAR
RIBBON
RIBBON
CARTRIDGE
RE_UK00970A_89
6.5 Paper Motion
For many paper motion operations, there are four ways to perform the
operation:
1. In off-line mode, when printer control strap A26 is OUT, directly from
the associated keys on the control panel.
2. In off-line mode, when printer control strap A26 is IN, directly from
the associated keys on the control panel.
3. In program mode, from the configuration menu (see Chapter 4).
4. In function mode (see Chapter 4).
The off-line method is given in the following sections.
6.5.1 Form Feed
To perform a form feed operation, place the printer off-line ([ O F L] is
displayed). Press the FORM FEED key.
See Chapter 4, Section 4.4.3 and 4.4.6 for alternate methods.
6–8 PRINTER OPERATION
6.5.2 Line Feed
To perform a line feed operation, place the printer off-line ([ O F L] is
displayed). Press the LINE FEED key.
See Chapter 4, Section 4.4.3 and 4.5.2 for alternate methods.
6.5.3 Forward Microstepping
See Chapter 4, Section 4.4.3 and 4.5.2.
6.5.4 Reverse Microstepping
To perform a reverse microstep operation (1/72 inch increment), place
the printer off-line ([ O F L] is displayed). Press the PAPER REV key.
See Chapter 4, Section 4.4.3 and 4.5.2 for alternate methods.
6.5.5 Reverse Form Feeds
See Chapter 4, Section 4.4.3 and 4.5.6.
6.6 Aligning Paper
There is a fine horizontal adjust on the LG31 printer. this lets you move
the form paper with respect to the printing heads. The adjustment is
shown in Figure 6-7.
PRINTER OPERATION 6–9
Figure 6–7: Margin Adjust Knob
MARGIN
ADJUSTMENT
KNOB
UPPER LEFT
PAPER TRACTOR
PAPER GAP
ADJUSTER
PAPER
THICKNESS
SCALE
PAPER TENSION
ADJUSTMENT
LEVER
RE_UK00966A_89
6.7 Buffer Clear
To clear the buffer, carry out the procedure in Chapter 4, Section 4.5.7.
6.8 Low Paper Printing
The low paper switch is activated when 21.3 cm (8.4 in) of paper remains
in the printer. At this point, a choice may be made to discontinue printing
or enter the Low Paper Print (LPP) mode and continue printing for a
maximum of 21.3 cm (8.4 in). During the LPP mode, the key (6) PAPER
REV is inoperative, but works normally during paper out [ P O ] and
striker bar open [ S b o], so that Top Of Form can be set. The low paper
printing procedure is shown in Table 6-1.
Note
Setting the paper tension adjust lever to 6 (minimum gap) to
increase paper tension will improve printout during low paper
printing.
6–10 PRINTER OPERATION
Table 6–1: Low Paper Printing Procedure
Action
Result
When the low paper switch is activated:
Displayed alternately between
[ L o P] and [ On L ]. Printer
remains on-line.
NOTE
To DISCONTINUE printing, proceed to step indicated by *.
To CONTINUE printing, carry out the following steps.
Press (0) TEST CLR
Displayed alternately between
[ L P P] and [ On L ].
Lines terminated with <LF> will
continue to move paper normally until
bottom of form is reached and LPP mode
is terminated.
Buffered lines are printed and
data transmission continues
to the end of form. When
paper is replenished, printing
continues on the first form
of the new supply with
correct vertical positioning
maintained.
Lines terminated with <CR> (bold print,
underline) will move paper normally
until bottom of form is reached and LPP
mode is terminated.
Receipt of <FF> terminates LPP mode.
Receipt of <VT>, VPR, forward VPA
(see NOTE 1) or EVFU command moves
paper normally until a command is
received, which would move paper
beyond end of form. The LPP mode
is terminated.
Receipt of subscript or superscript
command (ANSI Emulation) will move
paper normally until bottom of form is
reached and LPP mode is terminated.
PRINTER OPERATION 6–11
Table 6–1 (Cont.): Low Paper Printing Procedure
Action
Result
When paper movement causes LPP mode to
be terminated.
Displayed alternately between
[ P o ] and [ O F L]. Printing
ceases. Audio alarm sounds
once (see NOTE 2).
Replenish paper supply. Place perforation
below upper tractor notches and LINE FEED
into position to avoid having to back up into
the perforation skip-over area.
No change.
Press (8) SET TOF, then (0) TEST CLR.
Buffered lines are printed.
Paper moves to first print
position of next form and
printing resumes. Displayed is
[ O F L]. Paper out condition
is cleared.
NOTE
To discontinue printing at LOW PAPER
indication, carry out the following steps:
*Press (3) ON LINE
Press (0) TEST CLR
Display changes to [O F L].
Displayed alternately between
[ L P P] and [ O F L]. Buffered
lines are printed.
Press (0) TEST CLR again.
Displayed alternately
between [ P o ] and [ O
F L]. A paper out condition
exists.
As required, replenish paper supply. Place
perforation below upper tractor notches and
LINE FEED into position to avoid having to
backup into the perforation skip-over area.
No change.
6–12 PRINTER OPERATION
Table 6–1 (Cont.): Low Paper Printing Procedure
Action
Result
Press (8) SET TOF, then (0) TEST CLR.
Buffered lines are printed.
Paper moves to first print
position of next form in
readiness for use. Paper out
condition is cleared. Displayed
is [ O F L].
NOTES
1. A reverse VPA command is converted to a forward line feed.
Continuity of location cannot be maintained for reverse
VPA commands.
2. The serial interface control switches for READY/BUSY
may be enabled to cause the following actions at LPP
termination:
A4 IN, switch SCA to the active state
A5 IN, send XOFF or DC3
A6 IN, send BREAK
6.9 Hex Dump
HEX DUMP printed data is useful primarily to application programmers or customer service representatives as a program debugging or
troubleshooting tool.
To enable HEX DUMP, set the printer control strap A32 IN. Place the
printer on-line.
HEX DUMP causes data received from the host to be printed out in
hexadecimal ASCII form instead of normal printing. A sample is shown
below. The hexadecimal printout is shown on the left side and the
equivalent plain language printout is shown on the same line at the
right side. Exceptions: ASCII control characters below hexadecimal 20
are printed out as periods. <SP> or hexadecimal 20 causes a blank space
in the equivalent print position. Thus the programmer can examine all
program codes and instructions to determine whether any are correct.
For example, in the first line below, we have:
PRINTER OPERATION 6–13
<DC1><DC3><ESC>K<ESC>L<CR><LF><ESC><SP> YZ<CR><LF>.
This is a HEX DUMP example printed at a pitch of 10 CPI in DP font.
While debugging, we may find an error such as <DC2> instead of <DC1>
(12 instead of 11) or a lower case k instead of an upper case K (6B instead
of 4B), and so forth.
In this way, the entire program can be examined for possible errors.
11
48
58
54
49
54
13
49
41
20
50
OD
1B
58
4D
41
49
00
4B
20
50
20
2E
00
1B
41
4C
50
20
00
4C
20
45
49
49
00
0C
48
20
54
4E
00
0D
45
50
43
20
00
1B
58
52
48
44
00
5C
20
49
20
2E
00
20
44
4E
4F
50
00
59
55
54
46
2E
00
5A
4D
45
20
20
00
0D
50
44
31
46
00
0D
20
20
30
4F
00
54
45
41
20
4E
00
...K.L...\ YZ..T
HIS A HEX DUMP E
XAMPLE PRINTED A
T A PITCH OF 10
CPI. IN D.P. FON
T...............
When data transmission is ended and HEX DUMP is no longer needed,
be sure to place the printer in OFF LINE. If any HEX DUMP data
remains in the buffer, this will cause it to be printed out and clear the
buffer. Also, return the printer control strap 32 to its OUT condition.
6–14 PRINTER OPERATION
Chapter 7
OPERATOR MAINTENANCE
7.1 Introduction
The LG31 printer does not require scheduled preventive maintenance.
Operator maintenance consists of the following:
•
Normal cleaning
•
Changing ribbon cartridges
•
Changing paper
The operator should carry out the following maintenance services whenever replacing the ribbon cartridge or as required:
1. Turn power OFF and disconnect the ac power cable from the power
outlet.
2. Remove the ribbon cartridge and wipe away any accumulation of
dust from the ribbon guide striker bar area.
3. Remove paper lint/chaff accumulations inside the printer with a
soft brush or vacuum. The striker bar area and the paper supply
compartment are especially prone to paper dust and dirt build-up.
4. Reinstall or replace the ribbon cartridge, if print legibility is not
acceptable.
5. Clean the outside surfaces with a clean damp cloth (do not use
cleaning solutions). Wipe with a dry cloth to dry the cabinet surfaces.
OPERATOR MAINTENANCE 7–1
7.2 Operator Troubleshooting
Faults related to incorrect paper control or configuration settings are
operator correctable. Check the current configuration and switch settings
for erroneous settings (see Chapter 4 for proper settings). Possible
mechanical, electrical, and EVFU problems and the remedial actions
taken before calling for service, are listed in Tables 7–1 and 7–2.
NOTE
Before calling for service, always perform the initialization
sequence described in Chapter 4. If one of the fault indications
listed in Table 7–1 appear on the display, report this when
calling for service.
WARNING
Dangerous voltages exist in the LG31. There are no internal
user serviceable parts. Refer to qualified service personnel.
Table 7–1: Possible Mechanical Problems and Remedies
Observed Problem
Probable Cause and Remedies
Printer will not print.
Display is [ P o ].
Out of paper. Install paper (if forms, align
paper with notches in top tractors). When
paper is inserted in bottom tractors, paper
out switch is pressed and the fault cleared.
Printer is off-line. Press ON LINE key to
print.
Printer will not print.
Display is [ r c o].
Ribbon cartridge is out. Replace in
accordance with the ‘‘Ribbon Cartridge’’
procedure in Chapter 6.
Printer will not print.
Display is [ S b o].
Striker bar open. Adjust striker bar and
check other settings as noted under ‘‘Load
Paper’’ procedure in Chapter 6.
Printer stalls and printer is
locked up.
Display is [ S d r].
Motor driver interference due to:
Paper jam
Paper gap too small
Turn power OFF, correct problem, and turn
power ON.
7–2 OPERATOR MAINTENANCE
Table 7–1 (Cont.): Possible Mechanical Problems and Remedies
Observed Problem
Probable Cause and Remedies
Light printing.
Ribbon worn; install new ribbon cartridge.
Set paper gap adjuster and/or paper
tension adjust lever for smaller gap.
Ribbon droops on one side during
printing or outer columns of
print missing.
Ribbon cartridge improperly installed.
Check installation by repeating ribbon
cartridge installation procedure in Chapter
6.
Print module too close to paper; reset paper
tension adjust lever to 1 (maximum gap
setting) for thicker paper to prevent drag
(6 setting = minimum gap setting).
Paper does not feed properly.
Paper supply in lower compartment not
aligned properly. Realign. Paper not
loaded properly. Refer to ‘‘Load Paper’’
procedure in Chapter 6.
Elongation of paper pin feed
holes, tractor disengagement
from holes, paper tearing.
Excessive paper tension. Reduce tension by
readjusting paper tension adjust lever to
lower setting (1=maximum/6=minimum).
Weak or absent printing in some
columns, degraded print quality
in one decimeter (4.3 inch) wide
zone of the print area. Display is
[ A c 1], [ A c 2], or [ A c 3].
Defective print actuator module. Call
a service engineer to replace module.
Ensure that ribbon cable connections to
modules are tight. If problem remains and
is localized in the same print zone, the
cable or SHAD board may be defective.
Call for service. The printer may be used,
if light or missing dots can be tolerated.
[ L o P]3
Low Paper
[ L P P]
Low Paper Printing. Permits printing after
Low Paper is detected (see ‘‘Low Paper
Printing’’ procedure in Chapter 6).
3 TEST CLR key must be pressed momentarily after fault is cleared to reset from fault
condition. Audio tone sounds with these flashing fault displays.
OPERATOR MAINTENANCE 7–3
Table 7–2: Possible Electrical Problems and Remedies
Observed Problem
Probable Cause and Remedies
No indication on front
panel when power
switch turned ON.
The power cord is not plugged into wall outlet
or into rear of printer. The wall outlet may be
defective. If it does not operate, call an electrician
to fix outlet.
Some keys are
inoperative.
Printer is in lock-up mode. Check configuration
switch settings; reinitialize printer configuration
(refer to Chapter 4, Section 4.5.1).
Printer does not respond
correctly to front panel
keys.
Invalid configuration causing printer to lock up.
Turn power switch OFF and then back ON. If
problem persists, perform ‘‘Printer Initialization
Procedure’’ in Chapter 4. Selected speed (baud
rate) not compatible with data source. Reset speed
(see Chapter 4). Parity selected is not compatible
with data source. Reset printer parity type (see
Chapter 4).
[ S L o]
Slow printing. This display flashes while the
print rate is reduced by the thermal throttle.
Normally occurs only during high density printing.
No damage occurs, printing continues at reduced
speed. Automatically clears when temperature falls
below throttle threshold and normal printing speed
resumes.
[ S U S]
Suspended print.
1.
After power-up, the first print segment will
be delayed while the ribbon moves a specific
distance.
2.
After power-down, this display will appear
briefly before going blank because low energy
is detected.
3.
Low energy from the power supply will produce
this display.
4.
As the end of the ribbon passes the print wires,
printing is suspended resulting in this display.
7–4 OPERATOR MAINTENANCE
Table 7–2 (Cont.): Possible Electrical Problems and Remedies
Observed Problem
Probable Cause and Remedies
5.
[ 0 2 0]
[ 4 2 0]
This display will be produced by the ribbon
weld detector sensing a damaged ribbon or
defective ribbon weld detector.
Occasionally, usually after transporting, the printer
can lock up with one or both of these codes. Press
the reset twice to clear and then perform the power
up reset sequence detailed in Table 4.4, followed by
the initialization procedure in Table 4.3. If the fault
recurs after power off, the error codes are valid as
in Table 5.2.
7.3 Printer Parameters
The factory settings for the printer are listed in Table 7–3.
NOTE
The following tables refer to ‘‘Control Functions’’, which are
listed in the LG31 Printer User’s Guide EK-LG31E-UG.
OPERATOR MAINTENANCE 7–5
Table 7–3: Factory Settings
Selectable Parameter
Factory Set Condition
Print Status
Horizontal Pitch
Vertical Pitch
Font
Forms Length
Active Position
Top Margin
Bottom Margin
Left Margin
Right Margin
Underlining
Bolding
Italics
Character Expansion
GL Character Set
GR Character Set
G0 Character Set
G1 Character Set
G2 Character Set
G3 Character Set
Autowrap
Line Feed/New Line
Mode
Horizontal tabs
Unsolicited reports
Super/Subscripts
Carriage Return New
Line Mode
Vertical Tabs
Number of data bits
Number of stop bits
Speed (baud rate)
Parity
Off-Line
10 characters per 2.54 cm/in
6 lines per inch
Data Processing
66 lines (11 in/27.94 cm)
Column 1, Line 1
Line 1
Line 66
Column 1
Column 132
Disabled
Disabled
Disabled
Disabled
U.S. ASCII
Digital Supplemental
U.S. ASCII
VT100 Graphic Character Set
Digital Supplemental
U.S. ASCII
Enabled
Set
At every 8 columns (9, 17,..137)
Disabled
Disabled
Reset
Every line (1, 2, ... 66)
8-bit mode
1 stop bit
9600 baud
Disabled
7.3.1 Power-Up Parameters Set
Table 7-4 lists the default conditions upon power-up of the LG31 printer.
7–6 OPERATOR MAINTENANCE
Table 7–4: Printer Parameters Power-Up Set
Selectable Parameter
Power-Up Condition
Print Status
Active Position
Underlining
Bolding
Expansion
Unsolicited Reports
Super/Subscripts
Off Line
Column 1 on current active line
Disabled
Disabled
Disabled
Disabled
Disabled
7.3.2 Power-Up Parameters Retained
Upon power-up of the LG31 printer, the parameters that will be retained
from the previous power-on session are listed in Table 7-5.
Table 7–5: Printer Parameters Retained on Power-Up
Selectable Parameter
Horizontal Pitch
Vertical Pitch
Font
Top of Form
Forms Length
Top and Bottom Margin
Left and Right Margin
Autowrap
Line Feed/New Line
Carriage Return/New Line Mode
Horizontal Tabs
Vertical Tabs
GL Character Set
GR Character Set
G0 Character Set
G1 Character Set
G2 Character Set
G3 Character Set
All Interface Settings
OPERATOR MAINTENANCE 7–7
7.3.3 Reset State
When the LG31 printer receives a reset sequence from the host computer
or the inner control panel (operator’s input), the printer is set to the
default settings (see Table 7-6).
A RESET sequence does not change the following:
•
Any interface settings
•
National Replacement Character (NRC) set
•
Top of Form
The above parameters remain as previously selected, either through
escape sequences or through the inner control panel.
7–8 OPERATOR MAINTENANCE
Table 7–6: Reset State Default Parameters
Selectable
Parameter
Print Status
Horizontal Pitch
Vertical Pitch
Font
Forms Length
Active Position
Top Margin
Bottom Margin
Left Margin
Right Margin
Underlining
Bolding
Italics
Character
Expansion
GL Character Set
GR Character Set
G0 Character Set
G1 Character Set
G2 Character Set
G3 Character Set
Autowrap
Line Feed/New
Line Mode
Horizontal tabs
Unsolicited reports
Super/Subscripts
Carriage Return
New Line Mode
Vertical Tabs
Reset Default Condition
On-line (ready)
10 characters per 2.54 cm/in
6 lines per inch
Data Processing
66 lines (11 inches/27.94 cm)
Column 1 on the current active line (line 1)
Line 1
Line 66
Column 1
Column 132
Disabled
Disabled
Disabled
Disabled
U.S. ASCII or the last NCR if selected
Digital Supplemental
U.S. ASCII or the last NCR if selected
VT100 Graphic Character Set
Digital Supplemental
U.S. ASCII
Enabled
Set
At every 8 columns (9, 17,..137)
Disabled
Disabled
Reset
Every line (1, 2, ... 66)
The following will not change:
All Interface settings
The National Replacement Character Set
Top and bottom margins
Left and right margins
These parameters will remain as previously selected, either by escape sequence
or control panel.
OPERATOR MAINTENANCE 7–9
Appendix A
LED DISPLAY LIST
A.1 List of All Control Panel Readouts
The following is a list of every message indication that may appear
on the LG31 printer LED display to alert the operator to the printer’s
operational status.
LED DISPLAY LIST
Display
Meaning
[ A c X]
Head test or SHAD board (X indicates module number of bad
actuator, 1=left, 2=middle, 3=right).
[.A d j]
Printer enters adjustment mode.
[.A P L]
Amplitude pattern.
[.c b P]
Checkerboard pattern.
[ c h r]
Character.
[ C L r]
Printer enters buffer clear mode.
[ c o]
Cover open
[ C P I]
Characters per inch.
[ C S U]
Customer setup.
LED DISPLAY LIST A–1
[.F A d]
Forms adjustment. The printer is in Forms Adjustment mode.
[.F n c]
Function. The printer has entered the function mode.
[ F o n]
Font.
[.F S U]
Forms setup mode.
[ F 0 0]
Data processing 10 CPI font check sum fault.
[ F 0 1]
Data processing 12 CPI.
[ F 0 2]
Data processing 13.3 CPI.
[ F 1 0]
Gothic NLQ 10 CPI.
[ F 1 2]
Gothic NLQ 12 CPI.
[ F 1 3]
Gothic NLQ 13.3 CPI.
[ F]
Gothic NLQ 15 CPI.
[ F 3 0]
Italic NLQ 10 CPI.
[ F 3 1]
Italic NLQ 12 CPI.
[ F 3 2]
Italic NLQ 13.3 CPI.
[ F 8 0]
Bar code.
[ F 9 0]
Oversize characters.
[.H t P]
Horizontal timing pattern.
[ I n F]
No operational interface found.
[.IS.U]
Initialize printer to default conditions while in initialization
mode.
[ L o P]
Low paper.
[ L P P]
Low paper printing. Permits printing after Low Paper is
detected.
[.L r S]
Margin setup mode.
[ L P I]
Lines per inch.
[ O F L]
Off-line. The printer is off-line.
[ On.L ]
On Line. The printer is on line with a data source.
A–2 LED DISPLAY LIST
[Po]
Paper out. The paper supply has run out.
[ P r o]
Program. The printer is in Program mode.
[ r c o]
Ribbon cartridge out.
[ S b o]
Striker bar open.
[ S d r]
Shuttle motor driver. Shuttle motor driver interference to paper
stuck or paper gap too small.
[ S L o]
Slow printing. This display flashes while the print rate is
reduced by the thermal throttle.
[. S U ]
Printer enters initialization mode.
[ S U S]
Suspended print.
[.S i 9]
Prints short segments of various test patterns or executes a form
feed.
[.U t P]
Vertical timing pattern.
[ 0 2 0]
SMSM Lithium Battery (BT1) (see Table 7.2).
[ 0 2 2]
SMSM has insufficient RAM.
[ 0 4 X]
SMSM RAM, display indicates chip number at fault. For U41,
X=1; for U42, X=2, and so forth.
[ 0 5 0]
SMSM memory failed to switch (U9-U13, U18-U25, U32-U35,
U42).
[ 0 5 5]
SMSM switchable RAM failure (PD4016C-2 in U11 and U21).
[ 0 6 0]
SMSM 7.5 interrupt failure (Timer at U30 to CPU at U3 circuit.
[ 0 8 0]
SMSM IMA (includes U37, U38, U42, U43, U50-U54).
[ 1 0 0]
Missing TOF code in EVFU load sequence.
[ 1 0 2]
Invalid characters in EVFU load sequence.
[ 1 0 3]
EVFU table length exceeded.
[ 1 0 4]
ANSI EVFU load multiple TOFs sensed.
[ 4 2 0]
SMIM Lithium Battery (BT1) (see Table 7.2).
[ 4 4 0]
SMIM RAM (U19-U22) SMIM RAM circuit chip (2K or 8K) may
be located in sockets U19-U22 only.
LED DISPLAY LIST A–3
[ 4 9 0]
SMMC shuttle motor drive.
[ 4 9 1]
SMMC shuttle frequency out of range.
[ 4 9 2]
SMIH imaging hardware failure.
[ 4 9 3]
SMMC or SMIH board (no shuttle interrupt). Check all SMIH
jumper positions.
[ 4 9 4]
No INT signal available to cause paper motion.
[ 5 2 9]
SMSM NVRAM (5517L in U29).
[ 5 3 0]
SMSM timer chip (8253 in U30).
[ 5 3 1]
SMSM interrupt controller (8259A in U31).
[ 5 4 7]
SMSM ROM (U47).
[ 5 4 8]
SMSM ROM (U48-U49).
[ 5 4 9]
SMSM ROM (U48-U49).
[ 7 0 0]
SMIM, SMSM failure (image processor).
[.8.8.8]
Used to test all the LED lights when power is turned ON. Lasts
only a few seconds.
[iP]
Indicates self-test in progress. Lasts for several seconds after
power on sequence.
[ i 9 P]
Intermodule gap return.
[ i 1 3]
SMIM image processor timer chip (8253 in U13).
[ i 1 4]
SMIM interrupt controller (8259A in U14).
[ i 2 1]
SMIM ROM (U19-U24, U38, U39) image processor. ROM
(display indicates chip number at fault).
[ i 2 5]
through
[ i 3 2]
SMIM NVRAM (5517L in U25-U32). Display indicates chip
number at fault).
[05]
through
[ 1 6 E]
When Data Processing font is selected available characters per
inch (CPI).selections using the key (5) CPI LPI.
A–4 LED DISPLAY LIST
[ 0 6 L]
through
[ 1 0 L]
Number of lines per inch (LPI) while selecting from the through
menu.
[ 1 0 i]
through
[ 1 5 i]
CPI in italics while selecting from the menu.
[ n 0 5]
through
[ n 15 ]
CPI in gothic NLQ while selecting from the menu.
[.0 0 0]
through
[ 2 2 0]
Counter used during certain function modes.
[ 0 1 o]
through
[ 3 3 o]
The first two digits indicate the currently selected software
strap. The third digit indicates either ‘‘o’’ for strap out, or ‘‘i’’ for
strap in.
[
[
[
[
[
n 0 5]
O c A]
n 1 2]
n 1 5]
1 6 E]
When OCR-A is selected.
[
[
[
[
[
n 0 5]
O c b]
n 1 2]
n 1 5]
1 6 E]
When OCR-B is selected.
LED DISPLAY LIST A–5
Appendix B
PARAMETER SELECTION
Figure B–1 contains the congfiguration menu with the parameter options
available on the LG31 printer.
Figure B–2 contains the function mode options available on the LG31
printer.
PARAMETER SELECTION B–1
B–2 PARAMETER SELECTION
0. Exit
1. X1
2. X2
Horizontal Expansion
0. Exit
Mode -
0. Exit
1. US ASCII
2. DEC Norway/Denmark
3. Spain
4. DEC Sweden
5. DEC Swiss
6. ISO Norway/Denmark
7. DEC Portuguese
Country -
0. EXIT
1. US ASCII
2. Great Britain
3. DEC Dutch
4. DEC Finland
5. French
6. DEC French (Canada)
7. Germany
8. Italy
9. Continue
Country -
0. Exit
1. 5 CPI
2. 10 CPI
3. 12 CPI
4. 13.3 CPI
5. 15 CPI
6. 16.7
CPI -
0. Exit
1. 44AXXXXXX-DATA PROCESSING
2. CORRESPONDENCE
3. 44AXXXXXX-OCR-A
4. 44AXXXXXX-OCR-B
Style (as applicable)
0. Exit
1. Style
2. CPI
3. Country
4. Mode
5. Horizontal Expansion
6. Vertical Expansion
FONT
0. Exit
1. X1
Parity 0. Exit
1. Even
2. Odd
Vertical Expansion
0. Exit
1. Strap "in"
2. Strap "out"
3. Forward Without Change
4. Reverse Without Change
5. (See Notes 1 and 2)
Speed 0. Exit
1. 110
2. 300
3. 800
4. 1200
5. 1800
6. 2400
7. 4800
8. 9600
9. 19200
Straps
0. Exit
1. Serial
Interface Type -
Interface Control
0. Exit
1. Interface Type
2. Interface Straps A
3. Interface Straps B
4. Speed
5. Parity
Form Control
0. Exit
1. Form Feed
2. Line Feed (Forward)
3. Line Feed (Reverse)
4. Set Top of Form
5. Set Top Margin
6. Set Bottom Margin
7. 1/72 inch Paper (Forward)
8. 1/72 inch Paper (Reverse)
0. Exit
1. 6 Ipi
2. 8 Ipi
3. 10 Ipi
LPI
0. Exit
1. Strap "IN"
2. Strap "OUT"
3. Advance Without Change (See Note 6)
4. Reverse Without Change (See Note 6)
(See Notes 1 and 2)
Straps -
0. Exit
Vertical Tab Stops
0. Exit
Horizontal Tab Stops
0. Exit
1. Advance Left (See Note 6)
2. Advance Right (See Note 6)
3. Set Left Margin
4. Set Right Margin
5. Clear Margin (Default Note 4)
6. Display Left Margin
7. Display Right Margin
8. Display Current Position
Margin Settings
EXAMPLE OF CONFIGURATION MENU
RE_UK00281M_89
NOTES
1. 1-Strap IN. 0-Strap OUT. Serial interface has 64 Straps.
2. Display positions begin in first option position. For example, to modify
strap 8, press control panel button "3" until 8 is displayed, then press
button "1" or "2" as appropriate. The three-digit display is the counter
for strap numbers.
3. When number of selections exceeds eight, the ninth selection is used
to continue menu.
4. Horizontal margin settings at default are columns 001 and 132 at 10 CPI.
5. Display is counter fgor margin or strap. It wraps when maximum
or minimum value is encountered.
6. When a new font is selected, the horizontal spacing is initially set to the
default spacing for the particular font.
7. Space and mark are applicable to 7-bit operation only Menu item 4 strap B1
(display33) must be OUT.
Press the number '0' to return to normal operation
to continue modification select (1.8)
Printer Straps B:
12345678901234567890123456789012
10000000000000000000000000000000
5. Margin Settings (Columns)
Left Margin - None
Right Margin - 132
6. Horizontal Tabs (Columns)
009 017 025 033 041 049 057 065 073 000
089 097 105 113 121 129 137 145 000 000
169 177 185 193 201 209 217
7. Vertical Tab Stops:
8. Printer Control Straps:
Printer Straps A:
0
1
2
3
12345678901234567890123456789012
00000000000000000000000001110010
Interface Straps B:
0
1
2
3
12345678901234567890123456789012
01000100000000000000000000000000
Speed - 9600
Parity - Even
4. Interface Control:
Interface Type - Serial
Input Buffer Length 2304
Interface Straps A:
0
1
2
3
12345678901234567890123456789012
00001000000010000000100000000000
1. Font
Style - 44A511367 Dataprocessing
CPI - 10CPI
Country - US ASCII
Mode - Normal
Horizontal Expansion - X1
Vertical Expension - X1
2. LPI - 6Ipi
3. Forms Control (Lines)
Forms Length - 66
Top Margin - 01
Bottom Margin - 66
THE PRESENT CONFIGURATION IS
(44A511526 SY - 44A511527 (M)
FIRMWARE REVISION LEVEL V2.3
Figure B–1: Configuration Menu with Program Mode Parameters
PRG
0
RESET TO USERS
MENU PARAMETERS
3
9 INITIALIZE
ON
LINE
FCT
FEED
FORM
TO FACTORY
DEFAULT CONDITIONS
NO CHANGE
RETURN TO OFF LINE
2
TEST
CLR
PRINTER
INITIALIZATION
1/72" REVERSE
FCT
FEED
3
5
FONT 7
REV
6 PAPER
CPI
LPI
FEED
FONT
REV
SET BOTTOM OF FORM
EXIT TO OFF LINE
SET BOTTOM MARGIN
SET TOP MARGIN
CPI
LPI
LINE
FEED
ON
LINE
FEED
FORM
PRG
TEST
CLR
FCT
LINE FEED
AMPLITUDE PATTERN
(continuous)
FORM FEED
4
7 INTERMODULE GAP
(continuous)
VERTICAL TIMING
(continuous)
LINE
FEED
HORIZONTAL TIMING
5
(continuous)
3
SIGNATURE
PATTERN
1 PRINTER
EXIT TO OFF LINE
PRINT ADJUSTMENT
6 PAPER
4
2
0
SET TOP OF FORM
INCREMENT
LINE COUNT
DECREMENT
LINE COUNT
ON
LINE
FEED TO TOP
EXIT TO OFF LINE
FEED
FORM
TEST
CLR
4 LINE
2
0
1/72" FORWARD
SET
TOP
SET TOP OF FORM
REVERSE LINE FEED
ON
LINE
FEED
FORWARD LINE FEED
9
1 FORM
EXIT OFF LINE
FEED TO TOP
ON
LINE 3
FEED
FORM
PRG
TEST
CLR
4 LINE
8
2
0
FORMS SETUP
CONTROL PANEL PUSHBUTTON FUNCTIONS
CPI
LPI
LINE
FEED
ON
LINE
FEED
FORM
PRG
TEST
CLR
8
SET
TOP
FONT 7
REV
5
3
DISPLAY COLUMN
COUNT
DISPLAY LEFT MARGIN
DISPLAY RIGHT MARGIN
PRG
TEST
CLR
REV
6 PAPER
FEED
4 LINE
0
1/72" REVERSE
1/72" FORWARD
TEST PATTERN
EXIT TO OFF LINE
1 PRINT
REV
REV
TEST
CLR
6 PAPER
0
CLEAR
EXIT TO LINE
CLEAR
FONT 7 BUFFER
TEST
CLR
RE_UK00283M_89
REVERSE
FORM FEED
EXIT TO OFF LINE
REVERSE FORM FEED
(FORMS SAVER MODE)
0
FONT 7 BUFFER
6 PAPER
SET DEFAULT MARGINS
(001 & 132 for 10 cpi)
SET RIGHT MARGIN
SET LEFT MARGIN
INCREMENT COLUMN
COUNT (to right)
1 DECREMENT COLUMN
COUNT (to left)
EXIT OFF LINE
MARGIN SETUP
6 PAPER
4
2
0
5
FUNCTION MODE
FORMS ADJUSTMENT
CPI
LPI
9 ENTER
Figure B–2: Function Mode Options
PARAMETER SELECTION B–3
Appendix C
LG31 COUNTRY KITS
Final Country Kit Options
LGK31-AA
U.S., Canada and Mexico/English, Power Cord, 17-00083-09
LGK31-AD
Denmark/English, Power Cord, 17-00310-10
LGK31-AE
U. K. and Ireland/English, Power Cord, 17-00209-00
LGK31-AG
Germany and Austria/German, 17-00199-00
LGK31-AI
Italy/English, Power Cord, 17-00364-01
LGK31-AJ
Japan/English, Power Cord, 17-00083-25
LGK31-AK
Switzerland/German, French, Power Cord, 17-00210-00
LGK31-AT
Israel/English, Power Cord, 17-00457-01
LGK31-AZ
Australia and New Zealand/English, Power Cord, 17-00198-00
LGK31-BJ
India/English, Power Cord, 17-00456-01
LGK31-CA
Country Kit General European, Power Cord, 17-00199-00
(Belgium/Finland/France/Netherlands/Norway/Portugal/Spain/Sweden)
LG31 COUNTRY KITS C–1
All country kits include the following.
Kernel Documentation Kit EK-OLG31-DK
EK-LG31E-UG
EK-LG31E-IN
LG31 User Guide (English)
LG31 Installation/Operator’s Manual (English)
Binder and slipcase
C–2 LG31 COUNTRY KITS
Index
A
adjusting form position, 4–36, 4–37
aligning paper, 6–9
alignment tests, 5–6
audio alarm, 1–2, 3–10
B
CPI, 1–2, 4–14, 4–17, 4–32, 4–36,
4–38, 4–39
D
diagnostic fault codes, 5–4, 5–6
display, 3–10
display LEDs, 3–10
backing up the paper, 4–40
baud rate, 4–8, 4–9
bottom margin, 4–22, 4–23
buffer clear, 4–41, 6–10
E
C
F
character sets, 1–6
characters per inch (CPI), 1–2
clearing the printer buffer, 4–41
communications interface, 4–8
configuration menu, 2–14, 3–8, 4–5,
4–6, B–1
connecting host, 2–19
control panel readouts, A–1 to A–5
control panels, 1–2, 3–3
inner, 3–7
outer, 3–3 to 3–5
controls and indicators, 3–1 to
3–17
country kits, 2–2, C–1
cover interlock, 3–5
fault codes, 5–4, 5–6
features, 1–5
font, 4–14
character set, 4–18
country, 4–14, 4–18
CPI, 4–17
horizontal expansion, 4–15, 4–20
mode, 4–19
style, 4–14, 4–16, 4–17
vertical expansion, 4–15, 4–21
forms control, 4–22, 4–24
form set-up, 4–31, 4–31 to 4–34
bottom, 4–31 to 4–34
margin, 4–31 to 4–34
print adjustment, 4–35 to 4–36
top, 4–31 to 4–34
electrical problems, 7–4
errors, 5–4, 5–6
Index–1
function mode, 4–28
form set-up
buffer clear, 4–41
forms adjustment, 4–36
margin set-up, 4–38
procedure, 4–32
reverse form feed, 4–40
top-of-form, 4–33
initialization procedure, 4–28
lockup integration procedure,
4–31
printer initialization, 4–28 to
4–31
function mode operation, B–3
H
HEX DUMP, 6–13
horizontal tab stops, 4–25, 4–26
I
initialization
printer, 4–28 to 4–31
installing/replacing ribbon, 6–5 to
6–7
installing the printer, 2–11
interface connector, 4–2
interface straps, A, 4–8
interface straps, B, 4–8
L
LED display, 3–10
lines per inch (LPI), 1–2
loading paper, 6–1, 6–2
low paper printing, 6–10 to 6–13
LPI, 1–2
M
maintenance, 7–1
margin example, 4–34, 4–39
margins, 4–38
margin settings, 4–24
left, 4–24
Index–2
margin settings (cont’d.)
right, 4–25
mechanical problems, 7–2
O
operator troubleshooting, 7–2
P
paper motion, 6–8
form feed, 6–8
line feed, 6–9
microstepping, 6–9
forward, 6–9
reverse, 6–9
reverse form feed, 6–9
paper tension lever, 3–16
parity, 4–8
power switch, 3–1
power-up, 2–14
self-test, 2–14
printed circuit board (PCB), 1–4
printed circuit boards (PCB), 1–4
printer control straps, 4–26 to
4–27
printer initialization, 4–28 to 4–31
printer parameters, 7–5
factory settings, 7–6, 7–9
power-up parameter settings,
7–6, 7–7
power-up parameters retained,
7–7
reset state, 7–8
print gap control, 3–17
printing the hex file, 6–14
print parameter categories, 4–1
communications, 4–8 to 4–14
forms, 4–22 to 4–24
horizontal tab stops, 4–25, 4–26
LPI, 4–22
margin settings, 4–24
print characteristics, 4–14 to
4–22
print parameter categories (cont’d.)
printer control straps, 4–26 to
4–27
vertical tab stops, 4–26
print patterns, 4–35
print speed, 1–2
Print speed, 1–9
print test pattern, 5–3
R
re-inking ribbon, 6–7
Resident Fonts, 1–8
reverse form feed, 4–40
RS-232-C signals, 4–2
RS_232-C serial interface, 1–4
power-up, 5–1, 5–3
printing, 5–2
serial interface, 1–4, 4–2
serial strapping options, 4–13 to
4–14
specifications, 1–6
speed (baud rate), 4–8
T
top margin, 4–22, 4–23
U
unpacking, 2–2
procedure, 2–3
S
V
self-tests, 5–1
operational, 5–2
vertical tab stops, 4–26
Index–3