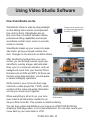
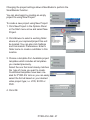
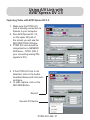
1
PYRO A/V Link
High Quality Analog to DV Video Converter
PYRO A/V Link
User's Guide
: First Edition
www.adstech.com
Technical Support: 562.926.4338
Technical Support Hours: M-F
8am-5pm, PST
Table of Content
Product Overview ........................................................................................................... 3
The missing link in DV Video .............................................................................. 3
Capture, Edit, Export .......................................................................................... 3
Features ............................................................................................................. 4
What’s Included ........................................................................................................ 4
Connection Configurations ............................................................................................ 5
Analog Video Capture connected to PC or Mac ....................................................... 5
Export DV from computer to Analog monitor or video tape recorder ........................ 5
Capture from a DV Camcorder ................................................................................. 6
Export DV to your Digital Camcorder ....................................................................... 6
Dub video from an Analog device to a Digital recorder or from a Digital
deck or camcorder to an Analog video tape machine .......................................... 6
PYRO A/V Link Hardware Description ........................................................................... 7
Front Panel ............................................................................................................... 7
Rear Panel ................................................................................................................ 8
4 Position Dip Switch ......................................................................................... 9
6 Pin 1394 / FireWire Connection ......................................................................10
Right and Left RCA Audio Outputs .................................................................... 10
Video Out (RCA) ................................................................................................10
S-VHS Out (Y/C 4 Pin Din) ................................................................................ 10
Component Video .............................................................................................. 10
On / Off .............................................................................................................. 10
Power Jack - 5VDC Input .................................................................................. 10
Getting Started - WIndows ............................................................................................ 11
Hardware Installation ................................................................................................12
Windows - Quick Start .............................................................................................. 12
Windows Software ............................................................................................. 12
Getting Started - Mac .....................................................................................................14
Hardware Installation 2 .............................................................................................15
MAC - Quick Start .....................................................................................................15
Software .............................................................................................................15
Computer Connected Configurations ............................................................................ 16
Ready to Capture Video ........................................................................................... 16
Connecting an Analog Video Source ........................................................................16
Capturing Video with your Video Capture / Edit Software ........................................ 18
PYRO A/V LINK 1
Connecting an External TV for Simultaneous Video Preview ...................................... 19
Connecting for Analog Record and Preview at the same time .....................................20
Connecting for Capture from DV Camcorder ...............................................................21
Exporting Video from a Video Editor to an Analog Device ........................................... 22
Exporting to a Digital Camcorder ................................................................................. 23
Non-Computer Configurations .......................................................................................... 24
Connecting to Analog Video through Digital Conversion ............................................. 24
Add a Preview Monitor to this Configuration ......................................................... 25
Connecting for Digital to Analog Conversion ............................................................... 25
Add a Preview Monitor to this Configuration ......................................................... 26
Capturing and Editing Video ............................................................................................. 27
Video Capture and Editing Program fro Mac Users .......................................................... 27
iMovie 3.0 .................................................................................................................... 27
Final Cut Express .........................................................................................................28
Final Cut 3.0 ................................................................................................................ 28
Video Capture and Editing Program for Windows Users .................................................. 29
Movie Maker 2 ............................................................................................................. 29
Adobe Premiere 6.5 ..................................................................................................... 30
Avid Xpress DV v. 3.5 ...................................................................................................30
VideoStudio from Ulead ............................................................................................... 31
Using Video Studio Software ............................................................................................ 33
Hardware check-up before using VideoStudio ........................................................... 35
Installing and running VideoStudio .............................................................................. 36
Configuring VideoStudio .............................................................................................. 37
Getting around VideoStudio ......................................................................................... 41
Library .......................................................................................................................... 42
Steps to Create your Movie ......................................................................................... 44
Start ............................................................................................................................. 47
Selecting a Template ................................................................................................... 48
Capture ........................................................................................................................ 50
Direct Capturing Mpeg Video ...................................................................................... 51
Capturing still Images .................................................................................................. 52
Video Studio Manual and other Help sources ...................................................................53
Adobe Premiere ........................................................................................................... 54
AVID Xpress DV 3.5 ..................................................................................................... 56
Final Cut Pro ................................................................................................................ 57
Detailed Product Specifications ........................................................................................ 58
Trouble Shooting ...............................................................................................................59
Warranty Information .........................................................................................................60
Contacting Technical Support ........................................................................................... 61
Notes .................................................................................................................................62
PYRO A/V LINK 2
Product Overview
PYRO A/V Link
High Quality Analog to DV Video Converter
The ultimate tool for capturing and converting video into professional
quality DV format and an extraordinary tool for exporting edited DV
content to analog video tape recorders..
The missing link in DV Video
Capturing DV from a Digital camcorder is fantastic, but what about all of the
video content you have in other formats (8mm, beta, VHS, DVD), how do you
get that content into the DV format? PYRO A/V link solves the problem by
converting any analog video source into DV.
DV video looks great but when you want to send it to tape your options are
limited. You can export back to your miniDV camcorder, but it’s hard to share
a miniDV tape with Grandma. PYRO A/V link bridges the gap by allowing you
to export DV video to any analog video recorder. Capture and edit your video,
then output to VHS and share tapes that anyone can watch!
Capture, Edit, Export
With PYRO A/V link you can capture from any video source, including DV
camcorders. Mix and match your video content to create a truly unique video
production. Capture the video with Video Studio 6 DVD, then add video filters,
transition effects, video overlays, narration, background music and more. When
your video production is a wrap, export to any VCR or VTR, save as MPEG-2
and burn a DVD (Windows only) or publish to the Internet.
PYRO A/V LINK 3
Features:
-
External FireWire/1394 device
Converts analog (RCA, S-VHS or Component Video) to DV video format
Export DV Video to analog video tape recorders (RCA, S-VHS)
Convert between devices (from DV to Analog or Analog to DV) without
using a computer
Capture from DV camcorder with full device control
Compatible with a wide range of video DV editing software
Capture as MPEG-2 video and Create VCD, SVCD, DVD disks (Windows
only using Video Studio)
What’s Included:
1.) PYRO A/V Link device
2.) 5 VDC Power Supply
3.) 6 ft. RCA to RCA cable ( Yellow, Red, White - Yellow, Red, White)
4.) 6 ft. S-VHS Cable
5.) 6 ft. 6 pin to 6 pin 1394 cable
6.) 6 ft. 4 pin to 4 pin 1394 cable
7.) User Guide
8.) Quick Guide
9.) Software CD (Windows users)
PYRO A/V LINK 4
Connection Configurations:
PYRO A/V Link can be used in several ways depending upon your video
conversion needs.
Analog Video Capture connected to PC or Mac
* Capture any Analog Video source to PC or Mac via the A/V link and a
FireWire connection.
Export DV from computer to Analog monitor or video tape
recorder
Publish to Tape: Export your video production from the video editors timeline
out to a TV or Video Tape recorder.
PYRO A/V LINK 5
Capture from a DV Camcorder
Easy desktop connection for your Digital camcorder. Complete device control,
just as if you were directly connected to your 1394/FireWire host card.
Export DV to your Digital Camcorder
Publish to your Digital camcorder. Use A/V Link as an easy way to send edited
video back to your DV camcorder.
Dub video from an analog device to a Digital recorder or from a
Digital deck or camcorder to an analog video tape machine
Use A/V Link without a computer to convert video content from digital to
analog. A/V link can operate as a stand alone media converter. No computer
required!
PYRO A/V LINK 6
PYRO A/V Link Hardware Description
PYRO A/V Link
Front Image
Front Panel:
The front of the PYRO A/V Link is for all of the audio and video INPUT
Connectors, LED displays and Mode Switch.
Mode Button – Switches from DV capture or Analog Output.
The Blue LED will be on whenever video is being captured as DV whether the
source is an analog video tape or your DV camcorder. The RED Analog LED will
turn on when you are exporting DV to a VCR or other analog device.
LED:
Green:
Blue:
Red:
Power
DV Capture
Analog Export
Connectors:
S-VHS
Composite(RCA)
Right and Left Audio(RCA)
4 Pin DV
Input
Input
Input
Input
PYRO A/V LINK 7
Rear Panel:
The back of the PYRO A/V Link is for all of the audio and Video Outputs with the
exception of the Component Video inputs.
4 Position Dip Switch
POSITION
1
2
3
4
UP
48 KHz/16 bit Audio
Win 2000
DV
PAL
DOWN
32 KHz/12 bit Audio
Win ME/XP
PC/Mac
NTSC
PYRO A/V LINK 8
Switch 1 - Audio Sampling Rate:
When recording from an analog source:
Set the audio switch to match the properties of your video editing project or
desired audio format. This setting is used for encode/recording only.
When recording from a Digital Camcorder:
Set the audio sampling rate to match the setting of your camcorder. Most
digital camcorders allow the audio to be recorded at 12 bit or 16 bit audio.
You may also need to select the proper audio setting in your video editing
software. This setting is used for encode/recording only.
Switch 2 - Windows Version:
This switch sets the device to be most compatible with the Windows operating
system that you are using. There are differences in the 1394 software and timing
between versions of the Windows operating system. This switch allows you to set
the A/V Link to match the timing that the Operating system you are using expects.
For the Mac, platform please leave it in the default position.
Switch 3 – DV or PC/Mac:
Set to DV if you are connecting a Digital Camcorder to the front 4 Pin connector.
This lets the camcorder set the 1394 bus connection timing.
Switch 4 – TV Format:
Set this switch to match the television/video format for your country. Generally
North America, Japan and Taiwan are set to NTSC. Europe, Africa and Australia
are set to PAL. See the back of this user guide for a complete listing of every
country.
PYRO A/V LINK 9
6 Pin 1394/FireWire connection
Use the supplied 6 pin to 6 pin cable to connect the A/V Link to your PC or Mac.
In a non-computer – analog to DV conversion setting, use the 6 pin cable to
connect to another device.
Right and Left RCA Audio Outputs
Use the supplied A/V cables to connect audio outputs to your TV or video tape
recording device.
Video Out (RCA)
Use the supplied A/V cables to connect the RCA Video output to your TV or video
tape recording device.
S-VHS Out (Y/C 4 Pin Din)
Use the supplied S-VHS cable to connect the video output to your TV or video
tape recording device.
More about Video Outputs
You may have both RCA and S-VHS connected and outputting video
simultaneously. You can also use the outputs to preview video on a TV monitor
during DV editing or during analog video capture.
Component Video
The Red, Green and Blue component video jacks allow for input of video from a
component source. You can also connect a composite synch cable to the RCA
Video input to allow for composite synch.
On/Off
Power On/Off switch
Power Jack - 5VDC input
This is a self powered device, meaning the unit will function only when power is
applied. Use only the power supply included with PYRO A/V Link to power this
device.
PYRO A/V LINK 10
Getting Started - Windows
Minimum System Requirements:
Processor: Plll 500 MHz or faster
OS: Windows 98SE, WinME, WinXP or Win2000
RAM: 128 MB or greater
Hard Disk: Ultra DMA 5400 RPM or faster with DMA enabled ( 4 GB for every 18
minutes of video captured).
Monitor/Graphics: Resolution of 1024 x 768, 32 bit color, DirectX 8.1 or later
Sound: Standard sound card
1394 Port: OHCI-compliant 1394 card or built in port functioning properly. Texas
Instruments or Agere based 1394 host controllers are recommended.
Note: Most 1394 add-in cards are OHCI compliant including, the ADS
PYRO 1394 cards.
CD-ROM: For software installation
CD Burner: For burning Video CD’s (VCD) or Super VCD (SVCD) disks
DVD Burner: For burning DVD disks
Windows CD: The Windows CD may be needed to load 1394 drivers if you are
using Win98SE or WinMe.
Optimize your system for DV capture and editing:
It is highly recommended that you complete the following procedures to ensure
smooth video capture.
1.) Make sure all of your drives are defragmented. This is done in Windows
under Accessories/System tools. (Not required on the Mac)
2.) Make sure your drive had DMA enabled. This is done in Device Manager
under Disk Drives. This procedure may require you to reboot after you
have enabled DMA on your hard drive. (Not required on the Mac)
3.) If possible use a separate drive, even an external FireWire drive for saving
captured video .
4.) Close all unnecessary programs and background tasks when recording or
exporting video.
PYRO A/V LINK 11
Hardware Installation:
WINDOWS – Quick Start
1.) Connect A/C Power adapter
2.) Connect the 6 Pin 1394 cable between the PYRO A/V Link and computer.
Connect directly to the 1394 Host port. Connecting through a 1394 Hub/
Repeater is not recommended.
3.) WinXP and Win2000 will automatically recognize the device and install
drivers. WinME and Win98SE may ask for drivers from the Windows CD.
4.) Once the device drivers are installed the PYRO A/V Link will appear under
Windows Device manager as an Imaging Device.
5.) Connect Audio/Video cables between your video devices and
PYRO A/V Link
6.) Start your Video Editor application and you are ready to capture video
7.) Press Play on your video device.
8.) Press the Play button on your video editor’s preview window to begin
previewing video. Press Record, or Capture button to begin recording to
your computer hard drive.
Windows Software:
The drivers necessary for the PYRO A/V Link to operate with a Windows based
PC are built into the operating system. Once you plug in the device, Windows will
recognize it and the device will appear as an imaging device in Device Manager.
If you already own video editing software such as Adobe Premiere, you are ready
to connect your video devices and start capturing video.
For Windows Users who don’t have any video editing software, we provide a CD
that includes Ulead’s Video Studio software. This software allows you to capture,
edit, export video, save as MPEG-1, MPEG-2, streaming video or even burn a
VCD, SVCD or DVD disk.
PYRO A/V LINK 12
Other Video Editing software:
The PYRO A/V Link can be used with any video editing software that is
compatible with DV. We have tested with Adobe Premiere, Avid DV Express,
Ulead DVD Workshop, Ulead Media Studio Pro 6.5, Vegas Video, ArcSoft
ShowBiz, Magix Video Deluxe 2.0 and we continue to test with other video editors
on the market.
PYRO A/V LINK 13
Getting Started - Mac
Minimum System Requirements:
Processor: 400 MHz or faster
OS: Mac OS 9.0.4, OSX (Not in Classic Mode), OSX 10.02 (Jaguar)
RAM: 128 MB or greater
Monitor/Graphics: Resolution of 1024 x 768, 32 bit color
Sound: Standard Macintosh sound system
1394 Port: Standard built-in 1394 port or OHCI-compliant 1394 add-in card
Note: Most 1394 add-in cards are OHCI compliant including, the ADS
PYRO 1394 cards.
CD Burner: For burning Video CD’s (VCD) or Super VCD (SVCD) disks
DVD Burner: For burning DVD disks (iDVD, DVD Studio Pro or Instant DVD for
Mac required).
Note: Apple iMovie is included with systems which include built-in FireWire ports.
Optimize your system for DV capture and editing:
It is highly recommended that you complete the following procedures to ensure
smooth video capture.
1.) If possible use a separate drive, even an external FireWire drive for
capturing video.
2.) Close all unnecessary programs or disable extensions not required for
recording or exporting video.
PYRO A/V LINK 14
Hardware Installation 2:
MAC – Quick Start
1.) Connect Power
2.) Connect the 6 Pin 1394 cable between the PYRO A/V Link and computer.
Connect directly to the 1394 Host port. Connecting through a 1394 Hub/
Repeater is not recommended.
3.) Your Mac will automatically recognize the device.
4.) Once the device has been detected PYRO A/V Link will appear under the
Profiler as shown on this page.
5.) Connect Audio/Video cables between your video devices and
PYRO A/V Link
6.) Start your Video Editor application and you are ready to capture video
7.) Press Play on your video device.
8.) Press the Play button on your video editor’s preview window to begin
previewing video. For iMovie, press Import to begin recording.
Software:
No software is included with PYRO A/V Link
for the Mac platform. No device drivers are
required for proper operation and all Mac
computers that have shipped with built-in
FireWire ports include iMovie for capturing,
editing and exporting video from a 1394
device, such as PYRO A/V Link. PYRO
A/V Link is also compatible with other video
editing software such as Final Cut Pro, Avid
Express DV and Adobe Premiere
PYRO A/V LINK 15
Computer
Connected Configurations
Ready to Capture Video
DV Video is great because it offers superior quality and is easily edited. The only
problem is how can you get all of your non-DV content converted into the DV
format through your FireWire connection. PYRO A/V Link lets you do that quickly
and easily. You can connect many different video devices to the PYRO A/V
Link such as your old 8mm camcorder, your VCR, DVD Player, a TV to preview
captured video or even a digital camcorder. Over the next few pages we will
demonstrate several possible configurations.
Connecting an analog Video source
We have supplied you with most of the audio/video cables you will need for
capturing from a variety of video sources. In some cases you may need to use
the custom cable supplied by your camcorder manufacturer or you may need to
purchase extra cables depending upon your desired A/V configuration.
1.) Use the supplied RCA to RCA cable to connect between your analog
source and the PYRO A/V Link. This cable has 3 RCA connectors at each
end.
Yellow = Video
Red = Right Audio
White = Left Audio
Yellow = Video
Red = Right Audio
White = Left Audio
Note: If your camcorder does not have three separate RCA Jacks, use the
custom cable supplied with the camcorder.
PYRO A/V LINK 16
1.) If your camcorder, VCR or other video device includes an S-VHS
connector, use the supplied S-VHS cable to connect between your video
device and PYRO A/V Link for improved quality.
2.) If your Video tape machine, DVD player or other video device provides
Component video outputs, use a component video cable (not supplied)
to connect between your video device and PYRO A/V Link. Component
video will provide the best quality video.
* Component cables not included.
* If you have BNC Connectors as component out, you can convert them
with component to RCA Connectors.
PYRO A/V LINK 17
Capturing Video with your
Video Capture/Edit Software
When powered up the PYRO A/V Link is ready to convert an analog video source
into DV so you can capture video to your computer via your capture/edit software.
Video Source:
PYRO A/V Link will auto detect which video input connections have a video
source and automatically use that source. Use the best video input source you
have available, Component being best, S-VHS second best and RCA (Composite)
the lowest quality video source.
Previewing Video in Video Editing Software:
With most video editing software, the interface includes a video preview window.
In some cases you must select the Movie Capture Window (Adobe Premiere).
1.) Start your Video Editing software application.
2.) Locate the video Preview Window or Movie Capture Window.
3.) Once you have the video preview or capture window open, press PLAY on
your video playback device.
4.) Click PLAY on the video editing software preview window. Now you will
see and most likely hear (depending on the software) your video playing on
the computer.
5.) Click the RECORD button on the video editing software and you will begin
to record DV to your computer hard drive.
PYRO A/V LINK 18
Connecting an external TV for
Simulation Video Preview
PYRO A/V Link allows you to preview video while being captured and edited so
you can see your results full screen on the TV.
1.) Connect a video cable from the RCA or S-VHS OUT jacks on the back of
the PYRO A/V Link and into an external video input (RCA or S-VHS) on
your TV.
2.) Connect an audio cable to the Left and Right RCA audio OUT jacks on the
back of the PYRO A/V Link to the external audio inputs (RCA) on your TV.
3.) Apply Power to the TV and switch the TV to accept the external video
source. (Check your TV manual if you are not sure how to do this.)
PYRO A/V LINK 19
Connecting for Analog Record and
Preview at the same time
You can preview and record video to a VCR at the same time as long as the VCR
allows for audio and video to be passed through it. Check and test your VCR
to ensure that has audio and video inputs and outputs and that it allows pass
through of audio and video while recording.
1.) Connect a video cable from the RCA or S-VHS OUT jacks on the back of
the PYRO A/V Link and into the Video In on your VCR.
2.) Connect an RCA or S-VHS cable to the Video Out on your VCR to an
external video input (RCA or S-VHS) on your TV.
3.) Connect an audio cable to the Left and Right RCA audio OUT jacks on the
back of the PYRO A/V Link to the audio inputs (RCA) on your VCR.
4.) Connect an audio cable between the Left and Right RCA OUT on your
VCR to the Audio INPUTS on your TV.
5.) Apply Power to the VCR – You may have to change the TV/VCR switch on
the VCR to allow pass through.
6.) Apply Power to the TV and switch the TV to accept the external video
source. (Check your TV manual if you are not sure how to do this.)
PYRO A/V LINK 20
Connecting for Capture from DV Camcorder
If you are using a Digital Camcorder to capture and or export video you can do
this by simply connecting the Digital camcorder directly to the 1394 port on your
computer.
For your convenience the PYRO A/V Link provides a 4 pin DV In/Out connection,
thus acting as a 1394 desktop Hub and allowing easier connection to your
computer.
1.) Connect a 4 pin to 4 pin DV cable between the DV In/Out connection on
your digital camcorder to the 4 Pin DV IN port on the front of the
PYRO A/V Link.
2.) Turn your Camcorder on to VCR/VTR mode.
3.) The Digital Camcorder will be recognized by the computer and
Windows(WinXP) will show all compatible software that can be used with
the digital camcorder (see Box). Select the video capture or
editing application you want to use.
4.) If this selection box does not appear, Start your Video Editing software the
old fashion way.
PYRO A/V LINK 21
Previewing Video in the Video Editing Software:
With most video editing software, the interface includes a video preview window.
In some cases you must select the Movie Capture Window (Adobe Premiere).
1.) Locate the software video Preview Window or Movie Capture Window.
2.) Once you have the video preview or capture window open click PLAY on
the video editing software preview window. This will send a signal to your
digital camcorder to enter PLAY mode and you will see and most likely
hear (depending on the software) your video playing on the computer.
3.) Click the RECORD button on the video editing software and you will begin
to record DV to your computer hard drive.
Device Control Note: Depending upon the video editing software,
there may be extra steps to select your camcorder as the 1394 device
to be used for capture. Once your camcorder is selected as the 1394
device, you can use software device control just as if you were directly
connected to the computers 1394 port (See video editing notes in
appendix).
Exporting Video from a
Video Editor to an Analog Device
Now that you have captured and edited your video you might want to export it out
of your computer and on to tape so you can easily publish or share your video
production with friends, family or even paying customers!
1.) Connect a video cable from the RCA or S-VHS OUT jacks on the back of
the PYRO A/V Link and into an external video input (RCA or S-VHS) on
your VCR
Note: S-VHS provides higher quality video recording than an RCA
cable. S-VHS is recommended if your camcorder or VCR offers this
connection.
PYRO A/V LINK 22
2.) Connect an audio cable to the Left and Right RCA audio OUT jacks on
the back of the PYRO A/V Link to the external audio inputs (RCA)
on your VCR.
Note: If you are recording back to a camcorder, you may need to use
the cables provide by the camcorder manufacturer.
3.) Apply Power to the VCR and press RECORD just before you begin
exporting video from your computers video editing software.
Note: Each video editing software program will offer a slightly different method for
exporting video. Some software will allow export from timeline without rendering
the video and others will require that you “Save” your video and then “Print to
Tape”. Please check the user guide for your video editing software to learn how
to export video.
Exporting to a Digital Camcorder
If you want to export from your video editor to a digital camcorder, you can
accomplish this by connecting the camcorder directly to the 1394 port. However,
you can also use the PYRO A/V Link as your 1394 connection and export DV
through the A/V Link and into your digital camcorder.
The setup is the same as if you used A/V Link as your Digital camcorder
capture connection.
1.) Connect a 4 pin to 4 pin DV cable between the DV In/Out connection on
your digital camcorder to the 4 Pin DV In/Out port on the PYRO A/V Link.
2.) Turn your Camcorder on to VCR/VTR mode.
3.) The Digital Camcorder will be recognized by the computer.
4.) Start your Video Editing software, Use the export or Print to Tape function
in the software to export video from your computer and record in the
digital camcorder.
PYRO A/V LINK 23
Non-Computer Configurations
PYRO A/V Link can operate as a stand a lone conversion device between analog
and digital recording devices. This means you can convert analog content into
DV content via a direct conversion to a DV deck or a Digital camcorder without
connecting either device to a computer
Connecting for Analog Video to
Digital Conversion
1.) Apply Power to the PYRO A/V Link device.
2.) Connect the RCA audio and video cables between your analog video
device and the RCA audio and video inputs on the front of the PYRO A/V
Link unit.
3.) Use the S-VHS or Component video inputs if your analog video device has
these connections for the best possible video quality.
4.) Use a 6 Pin to 4 Pin 1394 cable to connect from the A/V Link to your digital
camcorder or DV deck. Connect the 6 pin end of the cable to the 6 pin
1394 connector on the rear of the PYRO A/V unit and connect the 4 pin
end to your digital camcorder or DV Deck.
5.) Use the MODE SELECTOR SWITCH on the front of the PYRO A/V Link
device to switch to ANALOG MODE. In this mode, the RED LED should
be lit.
6.) Press the RECORD button on your digital camcorder or DV deck just
before pressing the PLAY button on your analog video device (VCR or
Camcorder).
PYRO A/V LINK 24
Add a Preview Monitor to this Configuration
You can easily connect a TV to the audio video output jacks on the PYRO A/V
Link to monitor your video dubbing process.
1.) Connect an RCA or S-VHS video cable between the PYRO A/V Link and
your TV RCA or S-VHS Video input jacks.
2.) Connect Right and Left audio cable between the PYRO A/V Link Right and
Left audio jacks and your TV audio inputs.
3.) Switch the TV to accept an external video input.
Connecting for Digital to
Analog Conversion
If you have a digital camcorder you can use the PYRO A/V Link to convert the
digital content into an analog video signal so it can be recorded on your VCR.
1.) Connect your digital camcorder or DV deck to the 4 pin DV In jack on the
front of the PYRO A/V Link.
2.) Connect a video cable from the RCA or S-VHS OUT jacks on the back of
the PYRO A/V Link and into an external video input (RCA or S-VHS) on
your VCR
Note: S-VHS provides a higher quality video recording than an RCA
cable. S-VHS is recommended if your camcorder or VCR offers this
connection.
3.) Connect an audio cable to the Left and Right RCA audio OUT jacks on
the back of the PYRO A/V Link to the external audio inputs (RCA) on your
VCR.
Note: If you are recording back to a camcorder, you may need to use
the cables provide by the camcorder manufacturer.
PYRO A/V LINK 25
4.) Use the MODE SELECTOR SWITCH on the front of the PYRO A/V Link
device to switch to DIGITAL MODE. In this mode, the BLUE LED should
be lit.
5.) Apply Power to the VCR and press RECORD just before you press PLAY
on your digital camcorder.
Add a Preview Monitor to this Configuration
You can preview and record video to a VCR at the same time as long as the VCR
allows for audio and video to be passed through it. Check and test your VCR to
ensure that it has audio and video inputs and outputs and they allow pass through
of audio and video while recording.
1.) Connect a video cable from the RCA or S-VHS OUT jacks on the back of
the PYRO A/V Link and into the Video In on your VCR.
2.) Connect an RCA or S-VHS cable to the Video Out on your VCR to an
external video input (RCA or S-VHS) on your TV.
3.) Connect an audio cable to the Left and Right RCA audio OUT jacks on the
back of the PYRO A/V Link to the audio inputs (RCA) on your VCR.
4.) Connect an audio cable between the Left and Right RCA OUT on your
VCR to the Audio INPUTS on your TV.
5.) Apply Power to the VCR – You may have to change the TV/VCR switch on
the VCR to allow pass through.
6.) Apply Power to the TV and switch the TV to accept the external video
source. (Check your TV manual if you are not sure how to do this.)
PYRO A/V LINK 26
Capturing and Editing Video
The PYRO A/V Link is compatible with most any video capture and editing
program for Windows or the Mac that is capable of capturing video in the DV
format. This makes PYRO A/V Link a very useful and versatile product.
The following is an overview of popular video editing products that are
compatible with PYRO A/V Link.
Video Capture and Editing program for Mac users:
iMovie 3.0:
If you bought your Mac
anytime after 1998 and it
includes a FireWire port,
you probably already have
a version of iMovie. At the
time of this printing Apple is
offering iMovie 3.0 as part of
the iLife package and also as
a separate download.
iMovie is a digital video editing application that Apple says is so easy to use,
you don’t need a manual to get started making your own movies. And if you’re
wondering what you’ll make movies about, the answer is just about anything.
PYRO A/V Link lets you capture any analog video content in the DV format and
allows you to export back to tape when your movie is ready for an audience.
PYRO A/V LINK 27
Final Cut Express:
Featuring the same interface as the Emmy
Award-winning Final Cut Pro, Final Cut Express
is a robust editing solution for digital video
enthusiasts. It provides professional-level
editing, compositing and real-time effects for
full-featured DV editing. Final Cut Express is an
innovative combination of power, ease of use and
affordability.
Capture video:
Simply connect your PYRO A/V Link to your Mac and capture video directly to the
Browser window. Then organize and manage your clips with ease.
Nonlinear editing tools:
Edit your video using professional tools like razor blade, slip, slide, ripple, roll,
extend and split.
Final Cut Pro 3.0
Final Cut Pro is the choice of professional level video editors on the Mac. PYRO
A/V link is a perfect companion for Final Cut, allowing you to capture analog video
as DV content. Final Cut Pro ‘s award-winning design features lightening-fast
workflow between trimming, editing and effects — no separate modes to slow you
down. Built-in compositing and effects, integrated offline resolution and project
and file-level media management allow fast creativity and project flexibility for
nearly any project. And with Final Cut Pro’s G4 real-time effects, you‘ll experience
real-time effects playback on DV without PCI hardware — even on a PowerBook.
*See using PYRO A/V Link
with Final Cut Pro for tips
PYRO A/V LINK 28
Video Capture and Editing Programs
for Windoows users:
Movie Maker 2:
Windows Movie Maker 2 makes home
movies amazingly fun. With Movie
Maker 2, you can create, edit, and
share your home movies right on your
computer. Build your movie with a few
simple drag-and-drops. Delete bad
shots and include only the best scenes.
For Windows XP users (Home or Professional version), you can download the
latest video editing software from the Microsoft website for Free. Just go to the
Windows XP Movie Maker download page:
http://www.microsoft.com/windowsxp/moviemaker/downloads/moviemaker2.asp
Movie Maker 2 is also available from Windows Update.
Then share your movie via the Web, e-mail, or CD. You can also save your
movie back to the video tape in your camera to play back on a TV or on
the camera itself. The Movie Maker 2 web site gives you information on
recommended system requirements, getting started guides and step by step
instructions for video editing, adding transition effects and more.
Lots of Video Editing software choices
For the windows user there are many software vendors offering video editing
software. PYRO A/V Link is compatible with all of the applications that support
the DV format. Some of these applications are listed below:
ShowBiz by Arcsoft
MovieShop by Broderbund
Video Deluxe 2.0 by Magix
VideoWave 5 by Roxio
Studio 8 by Pinnacle Systems
PYRO A/V LINK 29
Adobe Premiere 6.5
Use the PYRO A/V Link with
Adobe Premiere 6.5 to get all
of your analog content or use it
as an easy way to get your DV
productions out to tape. Adobe
Premiere has been the industry
standard for video professionals
Adobe Premiere delivers
everything you need to create
professional video productions.
Take advantage of Real-time
Preview to instantly view effects, transitions, titles, motion, and transparency.
Use storyboarding to visualize your entire program. Create sophisticated title
sequences with the Adobe Title Designer. And use professional audio-editing tools
to make a dramatic impact with high-quality audio.
*See using PYRO A/V Link with Adobe Premiere for tips
Avid Xpress DV v3.5
Want to use the software the TV and film
industry use to edit most major productions,
but you need a way to get you analog tape
content on the time line? Use PYRO A/V Links
Component video inputs to capture video from
your beta SP deck…Now your making talkies!
Avide XPress DV 3.5 is built on a revolutionary
real-time architecture that delivers more
than 100 customizable real-time effects,
professional-level color correction with waveform and vectorscope analysis, and
multiple simultaneous real-time streams - all in software. You can preview a title,
apply a dissolve, perform color correction, and animate a picture-in-picture effect
simultaneously - all without rendering. And only Avid Xpress DV v3.5 allows you
to customize every parameter of every real-time effect and see it all right away.
Avid gives you the creative freedom you want and the image quality you need to
deliver professional-grade video on a desktop, laptop, or mountaintop - anywhere
your imagination takes you.
PYRO A/V LINK 30
Video Studio 6 from
Ulead
People with little or no
experience in video editing
will appreciate how easy
it is to use VideoStudio.
Trim video, add your
own soundtrack, create
compelling titles and drop
in stunning effects using an
easy-to-learn interface that
makes editing videos fun.
•
Use with PYRO A/V Link to Capture video from DV, D8, Hi8 camcorders,
VCR’s or any analog or DV video source.
•
Grab DVD-ready video with MPEG-Direct™ capture
•
Share movies on CD, DVD, tape, or the Web
Windows Software Bundle – Video Studio 6
Mac users have the benefit of getting iMovie included as part of the
operating system.
Many windows users have not upgraded to Windows XP and therefore do not
have the benefit of using Microsoft’s Movie Maker 2. We wouldn’t want you get
home with your new PYRO A/V Link and not have a complete video capture and
editing application to use, so we have included Video Studio 6 with your
PYRO A/V Link.
The next section goes over the basic steps to get started capturing and editing
video in Video Studio 6. Complete documentation is on the PYRO A/V Link CD
in .pdf format. There is also help at any time by pressing the F1 key on your
keyboard. More on that later.
PYRO A/V LINK 31
Installing the Bundled Software CD
1.) Insert the PYRO A/V Link CD
into your CD-ROM drive.
2.) The Auto-run screen displayed
here will appear on your
screen.
3.) This Auto-Run requires Apples
Quick Time player to run. If
you do not have Quick Time
installed, it will automatically
begin installing Quick Time on
your system.
4.) There are 4 Selections:
a. Install Driver
b. Video Studio 6
c. Teveo Live
d. Media Share 3.0
a.) Install Drivers – Driver installation is required ONLY if you are running
Win98SE. This driver is actually a patch to the Microsoft 1394 software in
Windows 98SE. If you have Windows ME, WinXP or Win2000 – skip this Step.
b.) Video Studio - Click the Video Studio button and the Video Studio installer will
open. See the section below for full Video Studio 6 installation instructions.
c.) Teveo Live – it’s a fun software application that turns your PC into a Live Web
Cam. What ever video you run through the PYRO A/V Link will be displayed to
anyone (private or public) on the Teveo web site.
D.) Media Share - is a subscription service with a Free trial offer. Media Share
lets you post images and video on a server so you can share your image and
video collection with friends and family.
PYRO A/V LINK 32
Using Video Studio Software
How VideoStudio works
VideoStudio follows a step-by-step paradigm
so that editing tasks remain uncomplicated
from start to finish. VideoStudio also offers more than a hundred transition effects,
professional titling capabilities and simple
soundtrack creation tools. Learn in seconds,
create in minutes.
Footage can be captured from
your camcorder and digitized
for editing in your PC
VideoStudio breaks up your movie into separate tracks, giving you broad creative freedom. Changes to one track do not affect others.
After transferring footage from your camcorder, you can arrange scenes, apply special effects, overlay images, add animated
titles, sync in a voiceover narration, and use
background music from your favorite CDs in
formats such as WAV and MP3. All these can
be done using drag-and-drop, cut-and-paste,
or select-and-apply operations.
All the tracks in your movie are then organized into a video project file (*.VSP), which
contains all the video and audio information
on how your movie is put together.
The VideoStudio workspace
Components of a finished project as displayed in
When everything is all set to go, your comTimeline Mode
puter collects all information needed to create your final movie file. This process is called rendering.
You can then output and distribute your movie as a DVD/VCD/SVCD title,
streaming Web page video, or an e-mail attachment. You can also record your
movie back to your camcorder or VCR.
PYRO A/V LINK 33
Hardware checkup before using VideoStudio
To ensure that your video production runs smoothly and trouble-free, click
Control Panel: Systems - Device Manager and check if your devices are
working properly in accordance with your Operating System (O/S).
DV IEEE 1394 capture card
The following Windows operating systems support the IEEE 1394 capture
card. Always remember to turn on your PYRO A/V Link/DV camcorder
connected to the IEEE 1394 interface so that it can be detected as image
device or sound, video and game controller.
Windows 98
Windows 98 supports the Texas Instruments DV driver only but does not
provide it. Search the drivers (if bundled) that come with the IEEE 1394
card. Check that the following devices are working properly:
•
1394 Bus Controller
•
Sound, video and game controllers: 1394 camcorder
Windows 98 Second Edition / Windows 2000
Windows 98 Second Edition and Windows 2000
include the Microsoft DV driver and still support
the Texas Instruments DV driver. Check that the
following devices are working properly:
•
•
•
*
*
1394 Bus Controller
Image Device: Microsoft DV Camera and VCR (For
Microsoft DV driver only.)
Sound, video and game controllers: 1394 camcorder
(For Texas Instruments DV driver only.)
It is strongly recommended to use the Microsoft driver in Win
ME and Win 2000.
PYRO A/V Link will be listed as AVC Compliant DV Tape
Recorder/Player
PYRO A/V LINK 34
Windows Millennium Edition (Me)
Windows Me fully supports the IEEE 1394 card. Check that the following devices
are working properly:
•
•
•
•
1394 Bus Controller
61883 Device Class
AVC Device Class
(Brand name) DV Camcorder: The brand name depends on the DV camcorder connected to the IEEE interface card.
Windows XP
Windows XP fully supports IEEE 1394.
* PYRO A/V Link will be listed as AVC Compliant DV Tape Recorder/Player under
the Device Manager.
To run VideoStudio under Windows XP, check that the following devices are
working properly:
•
•
•
•
1394 Bus Controller
61883 Device Class
AVC Device Class
(Brand name) DV Camcorder: The brand
name depends on the DV camcorder connected to the IEEE interface card.
For Windows 98 and Windows Me, select the
DMA option in Device Manager: Disk drive
Settings Tab. In Windows 2000, the DMA
option is hidden but it is always enabled. DMA
avoids possible drop frame problems later
when you are capturing video.
Settings Tab after clicking Properties
when a hard drive is selected from Control
Panel: System - Device Manager
Note:In addition to commonly used Texas Instruments and Microsoft DV drivers, there are other drivers available. Consult your
camcorder’s manual for suitable drivers.
PYRO A/V LINK 35
Installing and running VideoStudio
To install VideoStudio:
1. Place the Instant DVD CD into your CDROM drive. Click on the Video Studio icon
to load the Video Studio Installation screen.
2. When the Setup screen appears, follow the
instructions to install VideoStudio onto your
computer.
Note: If the Setup screen does not appear after
loading the CD, then you can manually start it by
double-clicking the My Computer icon on your
desktop, then double-clicking the icon for the CDROM drive. When the CD-ROM window opens,
double-click the Setup icon.
VideoStudio installation screen
Please install also the following applications, because they are very important
in making digital video work well on your computer. The installation program
will walk you through installing:
•
•
•
•
QuickTime
Windows Media Format
RealPlayer
Acrobat Reader
Note: Skip this step if you already have newer
versions of the above supporting applications
installed in your PC.
To run VideoStudio:
• Double-click the VideoStudio icon on
your Windows desktop.
Running VideoStudio from Windows Start menu
OR
• Select the VideoStudio icon from the VideoStudio program group on the
Windows Start menu.
PYRO A/V LINK 36
Configuring VideoStudio
PYRO A/V Link allows you to capture video from camcorders, VCRs, and
VCD/DVD Players into the high quality DV format. To ensure a smooth
installation and setup with Video Studio 6, please follow the steps outlined
below.
1.) Turn on your PYRO A/V Link and be
certain that it has been properly detected
by the Windows Device manager as
outlined on the previous pages.
2.) Connect your video source to the audio
and video jacks on A/V Link.
3.) Check your video source to ensure it is
powered on and that you have a tape of
disk playing video.
4.) Click the Capture Step at the top of the
Video Studio software. You should see
“PYRO A/V Link” listed in the Driver field
in the Capture Settings panel.
5.) DV should be the vided capture format. If
you wish to capture as MPEG video, read
the section on “Direct Capture of MPEG”
later in this manual.
6.) Click on the Tools icon to open the
“Settings and Commands” menu.
7.) Click “Change Capture Plug-in – Be sure
that Ulead Direct Show Capture Plug-in
is selected
8.) Click PLAY on the Preview Window and
you will see your video previewing.
Check that your device is listed under Driver
Note: PYRO A/V Link supports many video input sources. PYRO A/V Link has the ability to
automatically sense and select the active video input whether it be Composite (RCA), SVideo
(S-VHS) or Component video inputs. Video will be captured from what ever video source is
connected with a live video signal.
PYRO A/V LINK 37
Using DV Pass Through for Digital Camcorders
If you wish to connect your Digital Camcorder to the 4 Pin 1394 port on the front
of the PYRO A/V Link, you will need to make some additional settings to ensure
that you can control your camcorder via the Video Studio software. Device
control will include Start, Stop and Record functions on your digital camcorder.
Follow the steps below to properly
setup your Digital Camcorder for
1394 pass-through with PYRO A/V
Link.
1.) Click the tool icon to bring up the
“Settings and Commands” menu.
2.) Click – Select Device Control
3.) Select the camcorder driver;
Microsoft 1394 Device Control.
4.) Then select “options”
5.) Select your Digital Camcorder as
the active device.
6.) Click “OK” to close the dialog
boxes.
You now should now see your digital
camcorder listed in the Driver window
on the capture settings panel.
7.) Be sure your camcorder is turned
on an set to VCR/VTR mode.
8.) Press “Play” below the Preview
Window and your camcorder should
begin playing and video will begin
playing in the preview Window.
PYRO A/V LINK 38
Getting around VideoStudio
The VideoStudio interface has been designed to make the sometimes complicated task of editing movies on your PC intuitive and enjoyable. The illustration on this page shows an overview of the entire program, while the next
few pages detail more specific features.
Track buttons
Each activates a track to edit.
Click a button to change the
Preview Window and available
options accordingly.
Options Panel
Contains controls,
buttons, and other
information.
Preview Window
Shows the current clip,
video filter, effect, or
title.
Folder button
Click to switch between
various library folders.
Load media button
Click to add video
or audio files to the
Library.
Library
Stores and organizes
all of your media clips.
Trim Bar
Used for trimming, editing, and cropping video
clips.
Timeline
Represents the period
of time that a clip appears in your movie.
The Options Panel
The Options Panel changes depending
on the program’s mode and the step or
track you are working on. The Options
Panel may contain one or two tabs.
Information in each tab vary depending
on the selected clip.
PYRO A/V LINK 39
Options Panel in Storyboard Step
Zoom controls
Increase or decrease the
number of frames displayed in the Timeline.
Selected range
These color bars represent the
trimmed or selected part of a clip
or project.
Preview Bar
Click and drag these
controls to scroll
through a clip. The
position is shown in
the Preview Window’s
content.
Trim handle
Click and drag to trim
a clip.
Time units
Represents the timing of clips in hours :
minutes, seconds, and
milliseconds
Storyboard and Timeline
Click tabs to switch between
Storyboard Mode and Timeline Mode.
Insert media files
Displays a menu allowing you
to place video, audio or image
clips directly on the project.
Project scroll controls
Use the left and right
buttons or grab the
Scroll Bar to move
around your project.
ToolTips
Place the mouse over a button or object to display a
balloon which identifies the item.
PYRO A/V LINK 40
Navigator buttons
These can be used to move around a
project or a selected clip. See page 22.
Save Project
Displays the Save As
dialog box to save the
VSP file in a folder of
your choice.
Trash Can
Drag and drop clips
here to delete them
from the project. You
can also select a clip
and press the Delete
key on your keyboard.
Context Sensitive Help
This button activates the Context
sensitive help feature. After you
click on it, your cursor changes to a
question mark. Move over an object
in the program and click again.
Settings and Commands
This button pops up a menu that
contains many useful tools such
as online Help and Preferences.
You can also setup Device control
and Capture plug-in from here.
Undo and Redo
Any changes you make that you
don’t like can be instantly fixed or
undone by clicking the left button.
And if you change your mind, simply
click Redo.
Settings and Commands pop-up menu
PYRO A/V LINK 41
Next
Moves to the point right after the
present point of a project, clip, or
selected area.
Previous
Moves to the preceding point of
a project, clip, or selected area.
Home
Returns to the starting point of a
project, clip, or selected area.
End
Moves to the ending point
of a project, clip, or selected
area.
Repeat
Plays a project, clip, or selected area continually.
Mark in / out
Use these buttons to mark the point
where you want a clip to start and end.
Play Project
Provides options to select between Instant
Preview or High Quality Preview. Choose
Instant Preview for a quick preview without
rendering. To render your project, choose
High Quality Preview.
Play Clip
Click to play a video or audio clip. Hold down
the [Shift] to play only the selected duration
(between Mark in and Mark out) on the Trim
Bar. During playback, click the button again to
stop.
PYRO A/V LINK 42
System Volume
Click and drag the slider to
adjust the volume of a clip’s
audio output or music. This
adjusts the volume of your
speakers at the same time.
The Library
The Library is a storage depot for everything you need to create a movie:
video clips, video filters, audio clips, still images, transition effects, music
files, titles and color clips. These are collectively known as media clips.
To add media clips to the Library:
1. Click Load media to open a dialog box
for locating the media clip to insert in
the Library.
2. Select the desired file.
3. Click Open when you are finished.
Load media allows
you to locate the clip
you want to add to
the Library.
Note:
You can also drag and drop files from Windows
Explorer straight to the Library.
The type of clip you can insert depends
on which step you are working on (such
as Title or Audio). Use your mouse to
drag and drop single or multiple clips
from the Library to its destination.
In the Storyboard Step, you can drag and
drop clips simultaneously from the Library
to the Timeline whether you are in Timeline Mode or Storyboard Mode.
Right-click a clip in the
Library to view the clip’s
properties as well as copy,
delete, or split by scene.
Hold [Ctrl] or [Shift] to
select multiple clips.
Video Studio allows you to save your project in many video file formats. Please keep in mind
that if you wish to send video out through PYRO A/V Link to view your movie on a TV or record
to video tape, only DV files can be exported out through PYRO A/V Link.
PYRO A/V LINK 43
Steps to create your movie
VideoStudio is laid out in a step-by-step format, following the items on the
Menu Bar at the top of the program, from left to right. Click a step on the Menu
Bar to move directly to it. The step you are currently in is highlighted in yellow.
It is not necessary to work through every step every time, but these steps can
serve as a guide to creating a complete movie. These steps do not necessarily
need to be followed in the order that they are presented.
Your work is saved in a small project file (*.VSP) that organizes all of your media files together. A project file is NOT the same as a movie and changes made
to it do not affect your media clips. It is possible to have a number of different
projects using the same clips.
The Start Step is for creating a new project file or opening an existing
one. This is the very first and required step whenever you want to work
in VideoStudio.
Once a project is opened in VideoStudio, video can be recorded
directly to your computer’s hard disk in the Capture Step. Footage
from a videotape can be captured as a single file or automatically
divided into multiple files. This step allows you to record video files and
still images.
The Storyboard Step and the Timeline are the heart of VideoStudio.
This is where you arrange, edit, and trim your video clips. Video filters
can also be applied to your video clips in this step.
Transition effects between scenes are fun and easy. Thumbnail animations and drag-and-drop operations put dozens of cool effects at
your fingertips.
PYRO A/V LINK 44
This feature allows you to superimpose one clip over another as an
added effect to your movie. On top of what you can do using Effects,
you can use Overlay feature to add a professional touch to your
work.
No movie would be complete without opening and closing titles. You
can design and animate your text title in any Windows True Type
font, color and size, or choose from various presets in the Library.
Background music sets the mood of your movie. VideoStudio lets
you select and record music files from one or several CD-ROM
drives attached to your computer. You can also dub over your video
in this step.
The final cuts have been made and the music has been synchronized with care. Now it’s time to put it all together and make a master copy of your newest movie.
Note:
• When moving between steps, VideoStudio Guide - a real-time online Help - is displayed
to give you quick reference and tips. You can enable or disable it in the Preferences
dialog box which you can access by clicking Settings and Commands: Preferences or by
pressing [F6].
• Since video rendering usually requires large hard disk space, use the Preview Tab in
the Preferences dialog box to assign proper space and folders in your hard disk(s). This
should be done before opening a project in VideoStudio to ensure enough there is space
for rendering and previewing.
PYRO A/V LINK 45
Start
The Start Step is where you create a new project file (*.VSP), or open an existing project. A project file is a small file used by VideoStudio to store all of
the information about your movie such as clips used, trimming information,
duration of movie, size of frames, and type of movie to make. A project file
is not the finished movie and can only be opened in VideoStudio. The actual
process of creating a movie from a project file is
performed in the Finish Step.
Creating a new project
When you run VideoStudio, it automatically opens
a new project and lets you start composing your
video production. If this is your first time to use
VideoStudio, the new project uses VideoStudio’s
initial default settings. Otherwise, the new project
reuses the project settings which you have last
used. To check what these settings are, click Settings and Commands and select Project Properties.
Project settings determine how your video project is rendered when you preview the project.
Rendering is the process by which VideoStudio
converts raw video, titles, sounds, and effects into
a continuous stream of data which can be played
back in your computer. You can modify the project settings in the Project Properties dialog box.
When you capture or insert your first video clip
into the project, VideoStudio automatically checks
the properties of the clip and your project. If properties such as file format, frame size, etc. are not
identical, VideoStudio displays a message and
gives you the option to have the project settings
automatically adjusted to match the clip’s properties.
PYRO A/V LINK 46
Changing the project settings allows VideoStudio to perform the
SmartRender function.
You can also begin by creating an empty
project file using New Project.
To create a new project using New Project:
1. Click New Project in the Options Panel
or the Start menu arrow and select New
Project.
2. Click Browse to select a working folder
where all your captured/project files will
be located. You can also click Settings
and Commands: Preferences. Enter a
folder name to create a subfolder in this
location.
3. Choose a template from Available project
templates which includes all templates
you created previously.
Select the one that most closely matches
the type of movie you want to create.
Customized templates have been created for PYRO A/V Link so you can easily
select the format based on your desired
video project type; i.e. VCD, SVCD or
DVD.
4. Click OK.
PYRO A/V LINK 47
To open an existing project:
1. Click Open Project or the Start menu arrow and select Open Project.
2. Select the project file (*.VSP) you want to open. If you are not sure where
the file is, use Browse and then click Scan. This finds all *.VSP files under
your assigned folder or drive.
3. Click Open.
Note:A faster way to open an existing project is to click it in the Recent file list. VideoStudio, however, cannot open a
project that has been moved or removed.
PYRO A/V LINK 48
Selecting a template
Templates provide settings that can get you started as quickly as possible.
When choosing a template, first know the attributes of the sources you are
going to use in the project. Video sources can be already existing video
files in your hard drive or still to be captured scenes from your capturing
device. Templates displayed have been customized to work with PYRO A/V
Link. Choose the DV, VCD, SVCD or DVD template that matches your video
project goal.
To get the best quality and rendering time,
choose a project template for your project,
capture and edit your video and then in the
finish step, select the same video format so
you will only render the changes you made
to the video; i.e. titles, transistion effect and
video filters you have added..
Video is displayed on NTSC or PAL devices,
the most common of which is the television.
Although many devices now work with both,
it is helpful to select the standard that suits
your specific need.
•
•
Select from Available project templates depending on the settings required by your project
NTSC is predominant in North America and
many Asian countries.
PAL is the standard in Europe and South Pacific.
If you select your country when installing
VideoStudio, the appropriate TV standard is
selected by default.
The output video file format determines the
media type by which your project can be
distributed.
•
•
•
•
•
Select a video file as a template dialog box
is displayed upon selecting Template from an
existing video file
DV lets you cut into DV.
MPEG-1 lets you output in VCD.
MPEG-2 lets you output in SVCD or DVD.
The widely-used Microsoft AVI is ideal for videos intended for viewing on most PCs.
Streaming formats such as MOV, RM, and WMV are used in creating video for sharing
over the Internet.
PYRO A/V LINK 49
Capture
The process of transferring video from your camcorder or other video sources
to your computer is called capturing. When everything is ready to go, the video
feed from your source device should be visible in the Preview Window. If your
card supports a television monitor, you should also be able to watch your video
on it.
Checklist for successful video capture
Capturing video is one of the most demanding tasks you will ever ask of your
computer. It involves high data rates and requires huge amounts of disk space.
Here are a few things you can do to ensure success:
•
Shut down ALL other programs that are running except Windows Explorer and
VideoStudio. Disable the Screen Saver to avoid possible interruption.
•
Best results can be achieved by using a dedicated video hard disk, preferably with the
capabilities of at least Ultra-DMA/66, 7200 rpm and more than 30 GB space. Check to
be sure you have DMA enabled on the hard drive for smooth video capture
Scene Detection
Automatically separates captured
video into several files based on
changes in recording date and
time. (Not available when using
Instant DVD).
Capture Video
Transfers video from your source
to your hard disk.
Capture Image
Captures a single frame as a still
image from your source to your
hard disk.
Capture duration
Sets the length of time for the
capture.
Options
Displays a menu allowing you
to modify your capture settings.
Captured frames
The total number of captured
video frames.
Format
Allows you to easily select a file
format to use for saving captured
videos. (MPEG only when using
with Instant DVD)
Driver
Displays the detected capture
device and lists other capture
device drivers installed in your
computer.
Dropped frames
The total number of lost video
frames while capturing.
Switch to playback mode
Click to work in Playback Mode
for instant previews.
PYRO A/V LINK 50
Switch to capture mode
Click to work in Capture Mode
and perform capturing tasks.
Capturing DV video
To capture DV video:
1. Connect your camcorder to the IEEE 1394
capture card. Turn it on and set it to Play
(or VTR / VCR) mode. Check your device
manual for specific instructions.
2. Open a new project.
3. In the Capture Step, click Play in Navigator.
4. When you get to the part of the video you
want to record, click Capture Video on the
Capture Settings Tab in the Options Panel.
5. Click Capture Video again or press [Esc] to
stop capturing.
PYRO A/V LINK 51
Direct Capture of MPEG Video with
PYRO A/V Link
As you hopefully have found out
by now, PYRO A/V Link does an
exceptional job of capturing any analog
source as DV and even supports your
digital camcorder. However, there
may be some projects that you want
to capture in MPEG-1 or MPEG-2
format. Generally converting from DV
to MPEG-2 involves a long conversion
process called “Transcoding”. Video
Studio includes a power “Real
Time” transcoding technology called
MPEGNow™. MPEGNow has the
capability of converting DV video on
the fly into MPEG-1 or MPEG-2*. This
allows you to quickly edit, and author
VCD, SVCD or DVD disks.
(*Continuous MPEG-2 conversion required P4
1.8 GHZ system).
To capture in MPEG format:
1.)
2.)
3.)
4.)
Connect your video source to PYRO A/V Link.
Be sure you’re A/V Link is connected to the PC and turned on.
In the Capture Step, select MPEG from the Format List.
Ulead DSW MPEG Capture Plug-in will be detected automatically.
Use this capture plug-in when capturing MPEG from a DV source
such as PYRO A/V Link or directly from a digital camcorder.
5.) Click Options and select MPEG Settings. Choose the type of
MPEG you would like to capture and set the other attributes.
6.) Click Play and then Capture Video to start capturing
7.) Click Capture Video again or press [Esc} button to stop capturing.
PYRO A/V LINK 52
Capturing still images
In addition to video, VideoStudio also allows you to capture still images. The
image format can be BMP or JPEG, and the size spends on its source video.
To choose your image format, click Settings and Commands: Preferences. In
the Preferences dialog box click the Capture Tab and set the format.
With Instant DVD, the Capture Still images button on the Interface is greyed
out, but you can still grab a snapshot from any video frame that has been
captured. These snapshots can be easily imported into DVD Picture Show to
create a DVD or VCD slideshow you can play on a DVD player.
To capture still images:
1. Connect your camcorder or VCR to Instant DVD. Switch it on
and set it to Play (or VTR / VCR) mode. Check your device
manual for specific instructions.
2. Open a new project.
3. In the Capture Step, click Capture to record a video clip. When you finish
capture the clip will be placed in the timeline below the preview window.
4. Switch from Storyboard mode to Timelime mode. This will allow you to view
each individual video frame. Double Click on the video clip to make it the
active clip in the timeline.
5. Play through the video clip to find the frame you want to capture as a still image. You can use the single frame advance and rewind buttons on the video
navigator.
6. Click the Save Still Image button to save the video frame as still image. The
image will be saved at the resolution of the video capture. For example, if
you captured as VCD the image resolution will be 352 x 240. If you captured the file in DV format the image will have a resolution of 720 x 480.
PYRO A/V LINK 53
Video Studio Manual and other Help Resources
We hope that the information
provided you are up and running
with PYRO A/V Link and Video
Studio. This Getting Started with
Video Studio is a very abridged
version of the Video Studio manual.
Video Studio has many feature and
capabilities, not yet covered. To
learn more step by step procedures
you can read the full on-line manual
that is in Acrobat reader format.
Help and Instructions (F1)
At any time you can press the F1 key on your keyboard and Video Studio
help will pop up. You can read tips and techniques or read step by step
procedures.
Video Studio Guide
You can enable the Video Studio Guide by
clicking the “Tools” icon which brings up the
settings and commands menu. From this menu,
select Preferences.On the Preferences menu,
click “Enable Video Studio Guide” When the
guide is enabled, a user guide will pop up on the
screen every time you move from one stage of
video capturing or editing to the next.
Full Manual
The Full manual is located on the PYRO A/V Link
CD:
1.) Insert CD and when the Auto-run menu pops up, Click on Video Studio icon.
2.) On the Video Studio Auto-run screen, Click Browse CD.
3.) An file explorer window will open, double click on the “Document” folder and then
double click on the Manual folder.
4.) If you do not have Adobe Acrobat installed, click on the Acrobat folder and install the
Acrobat Reader.
PYRO A/V LINK 54
Using A/V Link with
Adobe Premiere
Adobe Premiere – Notes
1.) Use Generic DV device control for the PYRO A/V Link
2.) Select, File, Capture, Movie Capture – the video capture Window will appear.
3.) Click the PLAY button on the video capture window and video will appear.
4.) Click red record button to begin capturing video.
5.) If you wish to scrub video on an external monitor, have only the analog video
output connections connected to your TV or monitor. Video played from
timeline will be displayed on the TV.
6.) If you wish to scrub video and view on your digital camcorder LCD, connect
only the digital camcorder to A/V Link. Video played from timeline will be
displayed on the LCD display.
7.) When scrubbing video, only rendered portions will be displayed on the TV or
digital camcorders LCD display.
8.) While video is being sent to an external display, preview on the computer will
be slower than normal. Turn off A/V Link to resume full playback on the
computer screen.
Premiere 6.5 Video playback control reminders:
Playback Start/Stop - Press Space Bar on keyboard or Click PLAY icon in
monitor window.
Playback with REALTIME Previews – Press ENTER key on keyboard (this will
playback video in software Monitor Window only – preview on external device.
PYRO A/V LINK 55
Capturing Video with Adobe Premiere 6.5
1. Make sure the PYRO A/V Link is already
connected via firewire to your computer.
2. Run Adobe Premiere and select your
PROJECT SETTINGS.
3. Click FILE / CAPTURE / MOVIE CAPTURE
4. The PYRO A/V Link should be
recognized at this point as a
GENERIC Device, press PLAY to
preview or the RED Record Button
to start recording.
PYRO A/V LINK 56
Using A/V Link with
AVID Xpress DV 3.5
Capturing Video with AVID Xpress DV 3.5
1. Make sure the PYRO A/V
Link is already connected via
firewire to your computer.
2. Run AVID Xpress DV 3.5,
on the upper left part of
the screen you will see the
RECORD TOOL Window.
3. PYRO A/V Link should be
recognized as a GENERIC
DVDevice – NTSC (PAL if
your converting analog PAL
signals to DV)
4. If the PYRO A/V Link is not
detected, click on the button
illustrated below and click autoconfigure.
5. To start capture, click on the
RECORD Button
Record
Generic DV Device
PYRO A/V LINK 57
Using A/V Link with
Final Cut Pro
Capturing Video with Final Cut Pro
1. Make sure the PYRO A/V Link is
already connected via firewire to
your computer.
2. Click on FINAL CUT PRO / Audio/
Video Settings
3. Select the DEVICE CONTROL PRESETS TAB, Hilite Non-Controllable
Device Click OK.
4. To capture video, click on FILE / LOG AND CAPTURE, Select your
CAPTURE Settings and start capturing video like you would capture a
DV Camcorder
PYRO A/V LINK 58
Detailed Product Specifications
-
-
Capture Resolution:
o NTSC: 720 x 480 @ 30 frames per second
o PAL: 720 x 576 @ 25 frame per second
Capture in DV video format
Audio capture in 48KHz (16 Bit) or 32 kHz (12 bit)
Power On/Off button
Mode Selector switch – Analog or Digital switch
Inputs:
o Video
§ RCA, S-VHS, Component Video
§ 4 Pin 1394 connector
o Audio
§ Right and Left RCA
Outputs:
o Video
§ RCA, S-VHS
§ 6 Pin 1394 Connector
o Audio
§ Right and Left RCA
Product Name:
Part Number:
PYRO A/V Link
API-550
PYRO A/V LINK 59
Trouble Shooting
Video will not Preview in Video Studio 6 or other video editing software
Check and Make sure that the PYRO A/V Link is connected properly to your
computer. To check if PYRO A/V Link is recognized please go to page ____ of
this manual.
Video Studio 6 will not transcode DV to MPEG2 properly, dropped frames etc.
This problem is mostly related to lack of SYSTEM RESOURCES. Your
computer might not be fast enough, your hard drive might not be optimized
(defragged), your video card might not be AGP Etc. Real Time DV to MPEG2
transcoding requires a lot of horsepower. ADS Technologies guarantees
continuous DV to MPEG2 Transcode for up to 2.5 Hours on a P4, 1.8GHZ
Machine.
Video Studio 6 or my Video Capture Application hangs for awhile after I stop
capturing
This might happen in really long captures. This is normal. Remember that you
are capturing and manipulating files in the Gigabytes range. Stop the capture
and wait several seconds, your capture software or Video Studio 6 should go
back to normal.
Selecting PAL as your template results in a video captured as NTSC
Restart Video Studio 6 or your video capture application. Select PAL again.
This should fix the problem.
PYRO A/V LINK 60
Service & Warranty Information
Service:
If you require assistance with the installation, operation, or application of your ADS Technologies, Inc. product
there are several options available to you as described in the technical support section of this manual. The
ADS Technologies technical support and customer service staff can aid in solving many problems. Our
technical support department is available to repair any ADS Technologies product. You
or your dealer must return products to our factory for repair or warranty replacement.
Return/Replacement:
Each individual computer store or dealer sets product returns policies for their customers.
ADS Technologies, Inc. cannot be responsible for the actions or policies set by our dealers. If you desire to
return the product for a refund, you must get the refund from the dealer or store you purchased the product
from. If you purchased the product directly from ADS please see the
“Terms and Conditions of Sale” on the reverse side of your sales invoice.
Returns to ADS Technologies, Inc. are for repair or warranty replacement only. If you need to return product
to ADS Technologies, Inc. for repair or replacement you must follow these steps:
1. Call our Technical Support department at (562) 926-4338 to obtain a Return Merchandise
Authorization (RMA) number.
2. The RMA number is valid for 30 days.
3. Ship the product to the ADS factory with the RMA number marked on the inside and outside of
the package. If there is no RMA number on the package or the RMA number has expired, the
shipment will be refused. ADS will not be liable for lost or mis-shipped products.
4. Replacement product cannot be shipped to you until the defective product has been
received by ADS.
5. Once the product is received at the factory it will be tested and then repaired or replaced.
6. Turn around time is approximately one week. A repaired or replacement product will be shipped
back to you.
Warranty:
This ADS Technologies, Inc. product comes with a One (1) year hardware warranty. ADS Technologies, Inc.
(ADS) warrants this product against defects in material and workmanship for a period of One (1) year from
the date of original purchase from ADS or an authorized ADS dealer. This warranty applies only to the original
purchase of the product and is not transferable. This warranty does not cover any incompatibilities due to the
user’s computer, hardware, software or other related system configuration in which the product interfaces.
Proof of purchase will be required before any warranty consideration by ADS occurs.
This warranty does not cover any damage caused by negligence, non-authorized modifications, or parts
installed without prior written permission from ADS.
This warranty does not apply if the product has been damaged by accident, abuse, or misapplication, nor as a
result of service to the product by anyone other than ADS.
If your ADS product is not in working order, your only recourse is repair or warranty replacement, as
described above. UNDER NO CIRCUMSTANCES will ADS Technologies, Inc. be liable for consequential
damages, including but not limited to any lost savings, lost profits, or any other damages, caused by the use of
any ADS Technologies, Inc. product or inability to use the product, even if the dealer or ADS Technologies, Inc.
has been advised of such liability or other claims. This includes damage to property and, to the extent
permitted by law, damages for personal injury. This warranty is in lieu of all other warranties including implied
warranties of merchantability and fitness for a particular purpose.
PYRO A/V LINK 61
FCC Information
Federal communications Commission Radio Frequency Interference Statement
Note: This equipment has been tested and found to comply with the limits for a class B digital device, pursuant
to Part 15 of the FCC Rules. These limits are designed to provide reasonable protection against harmful
interference when the equipment is operated in a residential installation. This equipment generates, uses and
can radiate radio frequency energy and if not installed and used in accordance with the instruction manual
may cause harmful interference to radio communications. However, there is no guarantee that interference
will not occur in a particular installation. If this equipment does cause harmful interference to radio or television
reception, which can be determined by turning the equipment off and on, the user is encouraged to try to
correct the interference by one or more of the following measures:
* Reorient or relocate the receiving antenna.
* Increase the separation between the equipment and receiver.
* Connect the equipment into an outlet on a circuit different from that to which the receiver is connected.
* Consult the dealer or an experienced radio TV technician for help.
Notice:
(1) The changes or modifications not expressly approved by the party responsible for compliance could void
the user’s authority to operate the equipment.
(2) Shielded interface cables and AC power cord, if any, must be used in order comply with the emission limits.
Contacting Technical Support
ADS Technologies
North America Office
12627 Hidden Creek Way
Cerritos, CA, 90703
Phone:
Technical Support:
Technical Support Hours:
Fax:
562.926.1928
562.926.4338
M-F 8am-5pm PST
562.926.0518
European Office
Shannon Industrial Estate
Shannon Co. Clare, Ireland
Phone:
+353.61.702042
PYRO A/V LINK 62
Notes
PYRO A/V LINK 63
North America Office
12627 Hidden Creek Way
Cerritos, CA, 90703
Phone: 562.926.1928
Technical Support: 562.926.4338
Technical Support Hours: M-F 8am-5pm PST
Fax: 562.926.0518
European Office
Shannon Industrial Estate
Shannon Co. Clare, Ireland
Phone: +353.61.702042
Part No. 550-551
www.adstech.com
PYRO A/V Link
ADS Technologies