1
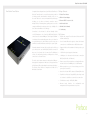
User Guide
Etisalat Travel Router USER GUIDE
1 –PREFACE.. .......... . . . . . . . . . . . . . . . . . . . . . . . . . . . . . . . . . . . . . . . . . . . . . . . . . . . . . . . . . . . . . . 3
2 –PLACEMENT.. ..... . . . . . . . . . . . . . . . . . . . . . . . . . . . . . . . . . . . . . . . . . . . . . . . . . . . .. . . . . . . . . . 4
2.1 ROUTER P L A C E M E N T.. . . . . . . . . . . . . . . . . . . . . . . . . . . . . . . . . . . . . . . . . . . . . 5
2.2 AVOID OB S TA C L E S A N D I N T E R F E R E N C E.. . . . . . . . . . . . . . . . 5
2.3 CORDLESS P H O N E S.. . . . . . . . . . . . . . . . . . . . . . . . . . . . . . . . . . . . . . . . . . . . . . . 6
2.4 CHOOSE T H E “ Q U I E T E S T ” C H A N N E L F O R YO U R
WIRELES S N E T WO R K. . . . . . . . . . . . . . . . . . . . . . . . . . . . . . . . .. . . . . . . . . . 6
3 –GETTING STARTE D.. . . . . . . . . . . . . . . . . . . . . . . . . . . . . . . . . . . . . . . . . . . . . . . . . . . . . . . . . . 7
3.1 CONNECTI N G YO U R D E V I C E TO T H E R O U T E R.. . . . . . . . 9
3.2 DEFAULT S E T T I N G S.. . . . . . . . . . . . . . . . . . . . . . . . . . . . . . . . . . . . .. . . . . . . . . . 9
3.3 CONFIGUR I N G YO U R R O U T E R A N D S E T T I N G U P
YOUR CO M P U T E R.. . . . . . . . . . . . . . . . . . . . . . . . . . . . . . . . . . . . .. . . . . . . . . 10
4 –ADVANCED........ . . . . . . . . . . . . . . . . . . . . . . . . . . . . . . . . . . . . . . . . . . . . . . . . . . . . . . . . . . . . 1 2
5 –WIRELESS.......... . . . . . . . . . . . . . . . . . . . . . . . . . . . . . . . . . . . . . . . . . . . . . . . . . . . .. . . . . . . . 18
5.1 BASIC.. ..... . . . . . . . . . . . . . . . . . . . . . . . . . . . . . . . . . . . . . . . . . . . . . . . . . . . . . . . . . . . . 1 9
5.2 ADVANCED.. . . . . . . . . . . . . . . . . . . . . . . . . . . . . . . . . . . . . . . . . . . . . . . . . .. . . . . . . . 1 9
5.3 SECURITY.. . . . . . . . . . . . . . . . . . . . . . . . . . . . . . . . . . . . . . . . . . . . . . . . . . . . . . . . . . . . 2 0
5.4 WPS......... . . . . . . . . . . . . . . . . . . . . . . . . . . . . . . . . . . . . . . . . . . . . . . . . . . . .. . . . . . . . 2 2
6 –FIREWALL.......... . . . . . . . . . . . . . . . . . . . . . . . . . . . . . . . . . . . . . . . . . . . . . . . . . . . .. . . . . . . . 23
7 –ADMINISTRATIO N.. . . . . . . . . . . . . . . . . . . . . . . . . . . . . . . . . . . . . . . . . . . . . . . . . . . . . . . . . 27
8 –TROUBLE SHOOT I N G.. . . . . . . . . . . . . . . . . . . . . . . . . . . . . . . . . . . . . . . . . . . . .. . . . . . . . . 31
9 –ESTABLISHING YO U R W I R E L E S S C O N N E C T I O N.. . . . . . . . . . . . . 34
Table of Contents
2
Etisalat Travel Router USER GUIDE
Your Etisalat Travel Router
Congratulations on the purchase of your Etisalat Travel Router.
E t i s a l a t ’s Tra v e l R o u t e r i s a v e rs a t i l e a n d p o r t a b l e s olution
f o r w i re l e s s m o b i l e b ro a d b a n d f o r t h e h o m e , o f f i c e or on
t h e ro a d . T h i s d e v i c e c re a t e s a n i n s t a n t W i re l e s s N hotspot
a l l o w i n g y o u t o s h a re a n I n t e r n e t c o n n e c t i o n across
m u l t i p l e d e v i c e s l i k e s m a r t p h o n e s , g a m i n g c o n s o l e s o r other
c o m p u t e rs . W i t h w i re l e s s d a t a s p e e d s o f u p t o 1 5 0 M bps it is
3 0 0 % f a s t e r t h a n W i re l e s s G t e c h n o l o g y.
C o n n e c t i o n t o t h e I n t e r n e t i s a c h i e v e d t h ro u g h either
a 3 G U S B m o d e m o r v i a a f i x e d l i n e ( D S L / C a b l e / S atellite)
c o n n e c t i o n t o t h e ro u t e rs WA N p o r t . T h e i n t e g ra t e d L i thiumI o n b a t t e r y d e l i v e rs n e t w o r k i n g p o w e r f o r u p t o 5 h ours in
o n e p o w e r - c h a rg e - c y c l e , w h i c h m e a n s y o u c a n s e t up your
o w n W i re l e s s n e t w o r k w i t h o u t s e a rc h i n g f o r a p o w e r point.
F e a t u r i n g a u t o m a t i c I n t e r n e t f a i l o v e r, t h i s d e v i c e w i ll keep
y o u c o n n e c t e d . I n c a s e t h e D S L / C a b l e / S a t e l l i t e c o n nection
d ro p s o u t , i t a c t i v a t e s t h e 3 G c o n n e c t i o n . T h e WA N port
c a n a l s o b e c o n f i g u re d o p t i o n a l l y a s a L A N p o r t f o r a wired
connection to a network client.
T h e d e v i c e a l s o f e a t u re s a d v a n c e d s e c u r i t y s u c h a s V P N passt h ro u g h , a f u l l c o m p l e m e n t o f w i re l e s s s e c u r i t y o p t i o ns and a
built in firewall. The setup is simple via a web browser interface.
T h e E t i s a l a t Tra v e l R o u t e r i s c o m p a t i b l e w i t h M a c OS X,
Windows OS and Linux.
Package Contents
1. Etisalat Travel Router
2. 5VDC~2A Power Adapter
3. Ethernet CAT5E Crossover Cable
4. Quick Install Guide
5. CD-ROM (User’s Manual)
6. Li-lon Battery
Key Features
• Stylish and compact Travel Router with internal Wi-Fi
antenna and battery
• Creates instant Wireless hotspots to share the Internet
connection of a 3G USB modem or DSL/Cable modem
• Supports Wireless N standard with data speeds up to
150Mbps
• 1 USB 2.0 host port supports 3G modems
• 1 WAN port for alternate wired Internet connection
(DSL/Cable/Satellite via Ethernet)
• Ensures connectivity and business continuity with autoInternet-failover from WAN port to 3G USB modem
• Mains-operated or up to 5 hours battery power if no
power point is available
• Hassle-free internal Wi-Fi antenna (1Transmit/1Receive)
• Easy Wireless Protected Setup (WPS) by the single touch
of a button to establish a secure wireless connection
• Full Wireless security - WEP, WPA, WPA2
• Browser based interface for configuration
management: OS independent and easy to use
and
Preface
3
Placement
Etisalat Travel Router USER GUIDE
PLACEMENT
Just like your mob i l e p h o n e , a 3 G U S B M o d e m ’s l o c a t i o n w i l l a f f e c t i t s s i g n a l s t re n g t h t o
the 3G Mobile Bas e S t a t i o n ( C e l l To w e r ) . T h e d a t a s p e e d a c h i e v a b l e f ro m a 3 G U S B m o d e m
is relative to this s i g n a l s t re n g t h , w h i c h i s a f f e c t e d b y m a n y e n v i ro n m e n t a l f a c t o rs . P l e a s e
keep in mind that t h e 3 G U S B M o d e m w i l l n e e d a d eq u a t e s i g n a l s t re n g t h i n o rd e r t o p ro v i d e
Internet connectiv i t y w h i l s t c h o o s i n g a l o c a t i o n t o p l a c e y o u r Tra v e l R o u t e r.
Si milarly to the 3 G U S B M o d e m , t h e w i re l e s s c on n e c t i o n b e t w e e n t h e R o u t e r a n d y o u r
W i-Fi devices will b e s t ro n g e r t h e c l o s e r y o u r c o n n e c t e d d e v i c e s a re t o y o u r R o u t e r. Yo u r
wireless connectio n a n d p e r f o r m a n c e w i l l d e g ra de a s t h e d i s t a n c e b e t w e e n y o u r R o u t e r
and connected dev i c e s i n c re a s e s . T h i s m a y o r m a y n o t b e d i re c t l y n o t i c e a b l e , a n d i s g re a t l y
af fected by the in d i v i d u a l i n s t a l l a t i o n e n v i ro n m e nt .
If you have concer n s a b o u t y o u r n e t w o r k ’s p e r f o r m a n c e t h a t m i g h t b e re l a t e d t o ra n g e o r
obstruction factors , t r y m o v i n g t h e c o m p u t e r t o a p o s i t i o n b e t w e e n t h re e t o f i v e m e t e rs
from the Router in o rd e r t o s e e i f d i s t a n c e i s t h e p ro b l e m . I f d i f f i c u l t i e s p e rs i s t e v e n a t
close range, please c o n t a c t E t i s a l a t Te c h n i c a l S u p p o r t .
N ote: While some of the items listed can affect network perform a n c e , t h e y w i l l n o t p ro h i b i t y o u r w i re l e s s n e t w o r k
from functioning; if you are concerned that your network i s n o t o p e ra t i n g a t i t s m a x i m u m e f f e c t i v e n e s s ,
please contact Etisalat Technical Support.
R o u t e r P l acement
P l a c e y o u r R o u t e r as close as possible to the centre of your wireless network
d e v i c e s . To a c h i e v e the best wireless network coverage for your “wireless clients”
( i . e . , c o m p u t e rs w i t h built-in or USB Wireless Adapters, Laptops with built-in Wireless,
W i re l e s s P D A / i P h o n e, etc):
• I n m u l t i - s t o re y h omes, place the Router on a floor that is as close to the centre of the
h o m e a s p o s s i b l e . This may mean placing the Router on an upper floor.
• A v o i d p l a c i n g t h e Router near a cordless telephone that operates at the same radio
f re q u e n c y ( 2 . 4 G H z).
A v o i d o b s tacles and interference
A v o i d p l a c i n g y o u r R outer near devices that may emit radio “noise,” such as microwave
o v e n s . D e n s e o b j e c t s that can inhibit wireless communication include:
• R e f r i g e ra t o rs
• Wa s h e rs a n d / o r d ryers
• Metal cabinets
• L a rg e a q u a r i u m s
• M e t a l l i c - b a s e d , U V-tinted windows
I f y o u r w i re l e s s s i g n a l seems weak in some spots, make sure that objects such as these are
n o t b l o c k i n g t h e s i g n al’s path (between your devices and the Router).
Placement
5
Etisalat Travel Router USER GUIDE
Cordless P h o n e s
If the performance o f y o u r w i re l e s s n e t w o r k i s i m p a i re d a f t e r c o n s i d e r i n g t h e a b o v e i s s u e s ,
and you have a cord l e s s p h o n e :
• Try moving cord l e s s p h o n e s a w a y f ro m y o u r Tra v e l R o u t e r a n d y o u r w i re l e s s - e n a b l e d
computers.
• Unplug and rem o v e t h e b a t t e r y f ro m a n y c o rd l e s s p h o n e t h a t o p e ra t e s o n t h e 2 . 4 G H z
band (check ma n u f a c t u re r ’s i n f o r m a t i o n ) . I f t h i s f i x e s t h e p ro b l e m , y o u r p h o n e m a y b e
interfering wit h t h e W i - F i R o u t e r.
• If your phone s u p p o r t s c h a n n e l s e l e c t i o n , c h a n g e t h e c h a n n e l o n t h e p h o n e t o t h e
farthest chann e l f ro m y o u r w i re l e s s n e t w o r k . F o r e x a m p l e , c h a n g e t h e p h o n e t o c h a n n e l
1 and move you r Tra v e l R o u t e r t o c h a n n e l 11 . S e e y o u r p h o n e s u s e r m a n u a l f o r d e t a i l e d
instructions.
C h o o s e t he “Quietest” Channel for your
W i re l e s s Network
I n l o c a t i o n s w h e re h omes or offices are close together, such as apartment buildings or
o f f i c e c o m p l e x e s , t h ere may be wireless networks nearby that can conflict with your
w i re l e s s n e t w o r k .
U s e t h e S i t e S u r v e y capabilities found in the Wireless Utility of your wireless adapter to
l o c a t e a n y o t h e r w i reless networks that are available (see your wireless adapter’s user
m a n u a l ) , a n d s w i t c h your Router and computers to a channel as far away from other
networks as possible.
• E x p e r i m e n t w i t h more than one of the available channels, in order to find the clearest
c o n n e c t i o n a n d a void interference from neighbouring cordless phones or other wireless
devices.
• If necessary, co n s i d e r s w i t c h i n g t o a 9 0 0 M H z o r 5 G H z c o rd l e s s p h o n e .
Placement
6
Getting Started
Etisalat Travel Router USER GUIDE
GETTING
STARTED
The LED Indicators of the 3G Travel Router
The Travel Router has been designed to be placed on a desktop.
The LED indicators are easily visible on the top of the Router
to provide you with information about network activity and
status. See below for an explanation of each of the features.
The Power LED - Displaying Power and Battery Status
When Router is switched on and battery inside
Network and System Requirements
Before continuing with the installation of your Travel Router,
please confirm that you comply with the minimum system
requirements below.
Green:
power adapter is plugged in and battery is fully charged
Green in flashing:
power is provided by battery
Amber:
power adapter is plugged in and charging the battery
• Compatible 3G USB Modem with an Active SIM/Data
Service if you want to use 3G Broadband service.
RED:
Battery power is low
Note:
When device is on without battery inside
Amber:
Power adapter is plugged in
When device is off and with battery inside
Amber:
power adapter is plugged in and charging the battery
The Connectors and Buttons of the 3G Travel Router
S u b j e c t t o t e r m s a n d c o n d i t i o n s f ro m y o u r 3 G M o b i l e B ro a d b a n d
S e r v i c e P ro v i d e r.
• Computer with Windows, Macintosh, or Linux-based
operating systems with a working Ethernet network
adapter with TCP/IP Protocol installed.
• A web browser such as Internet Explorer, Netscape
Navigator, Mozilla Firefox, Opera, Safari etc.
Wireless Computer System Requirements
• Computer with a working IEEE 802.11b, 802.11g or
802.11n wireless adapter.
Modem Requirements
LED
Icon
Description
Power
Lights up when powered ON.
Side Ports
3G
Lights up when the router is connected via 3G.
Reset
Press once to initiate LAN port function. Hold this button
down for 10 seconds to reset to factory defaults.
Wireless
Lights up when WLAN is enabled. Blinks on traffic.
WPS Button
Press once to initiate Wireless Protected Setup
WAN /
LAN
Light up when specific Ethernet connection is
established, Blinks on WAN / LAN traffic and Blinks on
Temporarily overridden to LAN mode.
3G USB Modem
USB port for connecting a compatible 3G USB Modem
WAN / LAN
RJ45 WAN Ethernet port for a Fixed Line (ADSL/Cable/
Satellite) network connection (factory default) or LAN
port for wired Ethernet clients (computers, laptops etc.)
Power
Power connector, connects to DC 5V 2A Power Adapter
In order to use the WAN Ethernet port for Internet
connectivity your fixed line service (Cable/xDSL/Satellite)
modem must be equipped with an RJ45 Ethernet port. Many
modems have both an RJ45 Ethernet port and a USB port.
If you have a modem with both Ethernet and USB, and are
using the USB port at this time, you will be instructed to use
the RJ45 Ethernet port during the installation procedure. If
your modem only has a USB port, you can request a different
type of modem from your Internet Service Provider, or you
can purchase a modem that has an RJ45 Ethernet port on it.
Getting Started
8
Etisalat Travel Router USER GUIDE
Connect i n g y o u r d e v i c e t o
t he Rout e r
Follow the next steps to create a Wireless Local Area Network
(WLAN) to provide Internet access to 802.11b, 802.11g and
802.11n wireless-equipped computers or smartphones.
Step 1 – Connect the 3G USB Modem.
Charging your battery
Step 3b – Connect a computer via Ethernet
If you use the Travel Router until the battery has completely
drained, it will power off. If this occurs, let the unit charge
overnight.
Press the Reset button on the Router and connect one end
N o t e : T h e b a t t e r y m u s t b e f u l l y c h a rg e d b e f o re u s i n g y o u r Tra v e l R o u t e r
f o r t h e f i rs t t i m e .
To charge your battery please complete the following steps:
1.
Pl ug the Etisalat su p p l i e d 3 G U S B m o d e m i n t o t h e U S B p o r t .
2.
of the Ethernet cable to the WAN/LAN Port on the back
panel of the Travel Router, and the other end to the RJ45
Ethernet port of the laptop or desktop PC you would like
to use.
W
ith the battery inserted into your Travel Router connect
the supplied power adapter to the wall power outlet and
to the micro USB socket on the Travel Router.
Leave it to charge until the power LED lights up solid Green.
Step 2 – Plug in the power
C o n n e c t t h e p o w e r a d a p t e r t o t h e p o r t o n t h e b a c k panel
o f y o u r Tra v e l R o u t e r. T h e n p l u g t h e o t h e r e n d o f t h e power
adapter into a wall outlet or power strip.
Default Settings
LAN (Management)
Static IP Address: 192.168.20.1
Subnet Mask: 255.255.255.0
Default Gateway: 192.168.20.1
WAN (Internet)
WAN mode: DHCP
Wireless
SSID: Etisalat Travel Router
Step 3a – Connect a computer or smartphone via Wireless
U s i n g y o u r w i re l e s s d e v i c e , s c a n t h e w i re l e s s n e t w orks in
y o u r a re a a n d s e l e c t t h e n e t w o r k c a l l e d E t i s a l a t Travel
R o u t e r, t h e n c l i c k c o n n e c t . W h e n t h e s e c u r i t y k e y p rompt is
displayed enter the security key 3GT1WNE0
Channel: 11
Security: WPA-PSK
TKIP Key: 3GT1WNE0
Modem Access
Username: admin
Password: admin
Getting Started
9
Etisalat Travel Router USER GUIDE
Configuring your Router and setting up your
computer
Having physically c o n n e c t e d y o u r R o u t e r, t h e n e x t s t e p i s t o
configure the Rou t e r t o e s t a b l i s h a b ro a d b a n d c o n n e c t i o n .
Depending on your c o m p u t e rs c u r re n t s e t t i n g s y o u m a y f i rs t
need to reconfigure t h e TC P / I P ( N e t w o r k S e t t i n g s ) t o a c c e s s
your Router. Follo w t h e i n s t r u c t i o n s f o r y o u r o p e ra t i n g
system.
Windows Vista computers
1. In the Window s t a s k b a r, c l i c k o n S t a r t a n d th e n c l i c k
Control Panel.
2. Click on Netwo r k a n d S h a r i n g C e n t e r. ( C l a s s i c vi e w o n l y )
3. Click on Manag e N e t w o r k C o n n e c t i o n s o n t h e l e f t m e n u .
4. Right click on L o c a l A re a C o n n e c t i o n a n d c l i c k o n
Properties
5. The Local Area Connection dialog box will display a list of
currently installed network items. Ensure that the check
box to the left of the item labelled Internet Protocol
Version 4 (TCP/IPv4) is checked. Select Internet Protocol
Version 4 (TCP/IPv4) and click on Properties.
Windows® XP computers
Mac OSX 10.4
1 . I n t h e W i n d o w s t a s k b a r, c l i c k t h e S t a r t b u t t o n , a nd then
1. Click the Apple icon and choose System Preferences.
c l i c k C o n t ro l Pa n e l .
2 . C l i c k o n N e t w o r k & I n t e r n e t C o n n e c t i o n s i c o n . ( C ategory
mode only).
3. Click the Network Connections icon.
4 . I n t h e L A N o r H i g h - S p e e d I n t e r n e t w i n d o w, r i g ht-click
o n t h e i c o n c o r re s p o n d i n g t o y o u r n e t w o r k i n terface
c a rd ( N I C ) a n d s e l e c t P ro p e r t i e s . ( O f t e n , t h i s icon is
l a b e l e d L o c a l A re a C o n n e c t i o n ) .
5 . T h e L o c a l A re a C o n n e c t i o n d i a l o g b o x d i s p l a y s with a
l i s t o f c u r re n t l y i n s t a l l e d n e t w o r k i t e m s . E n s u re that
t h e c h e c k b o x t o t h e l e f t o f t h e i t e m l a b e l l e d I nternet
P ro t o c o l ( TC P / I P ) i s c h e c k e d . S e l e c t I n t e r n e t P rotocol
TC P / I P a n d c l i c k o n P ro p e r t i e s .
6 . I n t h e I n t e r n e t P ro t o c o l ( TC P / I P ) P ro p e r t i e s d i a l og box,
c l i c k t h e ra d i o b u t t o n l a b e l l e d O b t a i n a n I P address
a u t o m a t i c a l l y. A l s o c l i c k t h e ra d i o b u t t o n l abelled
O b t a i n D N S s e r v e r a d d re s s a u t o m a t i c a l l y.
2. Click on the Network icon.
3. Set Location to Automatic and Show to Built In Ethernet.
4. Click on the TCP/IP tab.
5. In the Configure option, choose Use DHCP with automatic
address.
6. Click on Apply Now.
Setting up your Travel Router
The next step is to establish the broadband connection to
the Internet. Please follow the steps below to configure
your router via the user interface.
1. Open your web browser (e.g. Internet Explorer/Firefox/
Safari) on your computer or smartphone and navigate to
http://192.168.20.1/
2. Click Login and type “admin” (without quotes) in the
Username and Password fields. Then click on Submit.
7 . C l i c k O K t w i c e t o c o n f i r m y o u r c h a n g e s , a n d c l ose the
C o n t ro l Pa n e l .
6. In the Internet P ro t o c o l Ve rs i o n 4 ( TC P / I P v 4 ) p ro p e r t i e s
dialog box, cli c k t h e ra d i o b u t t o n l a b e l l e d O b t a i n a n
IP address aut o m a t i c a l l y. A l s o c l i c k t h e ra d i o b u t t o n
labelled Obtain D N S s e r v e r a d d re s s a u t o m a t i c a l l y.
7. Click OK twice t o c o n f i r m y o u r c h a n g e s a n d c l o s e t h e
Control Panel.
Note: A d m i n i s t h e d e f a u l t u s e r n a m e a n d p a s s w o rd f o r t h e u n i t .
3. Set up your WAN connection as follows:
Getting Started
10
Etisalat Travel Router USER GUIDE
Using the Router with the Etisalat 3G Mobile Broadband
Internet Service
Using the Travel Router with a fixed line Broadband
Internet Service (DSL/Cable)
N ote: Note: Before proceeding with this step, ensure that your 3G USB D o n g l e
has been plugged into the USB port of your Travel Router
B e f o re p ro c e e d i n g w i t h t h i s s t e p , e n s u re t h a t y o u r WA N c o n n e c t i o n
h a s b e e n p l u g g e d i n t o t h e WA N p o r t o f y o u r Tra v e l R o u t e r
To configure a 3G WA N c o n n e c t i o n , p l e a s e f o l l o w t h e s e
steps:
To configure a non WAN connection (Static, DHCP, PPPoE,
PPTP), please follow these steps:
• Mouseover Inte r n e t S e t t i n gs a n d c l i c k o n W W A N
• Mouseover Internet Settings and click on WAN
• The appropriate Etisalat profile and APN are selected by default
• Select your WAN Connection type from the dropbox
(Static, DHCP, PPPoE, PPTP)
• I f y o u w i s h t o e nter a different APN to use, click on the “Profile
• Enter the relevant information on this screen as supplied
by your Broadband ISP
N a m e ” p u l l d o w n menu and select an unused profile
• Click in the “A P N ” s e c t i o n a n d
(or your provid e d A P N i f n e c e s s a r y )
enter:
etisalat.ae
Otherwise if:
• Your SIM card re q u i re s a P I N c o d e
• Your 3G broad b a n d s e r v i c e p ro v i d e r re q u i re s y o u t o
input the usern a m e / p a s s w o rd f o r y o u r 3 G c o n n e c t i o n .
• Click Apply to save the settings
• Click Apply to save the settings
• I f e v e r y t h i n g i s c o n f i g u re d p ro p e r l y, t h e S t a t u s p age will
s h o w t h a t y o u r 3 G s e r v i c e i s o n l i n e a n d t h e WAN IP
a d d re s s t h a t h a s b e e n a s s i g n e d .
• If everything is configured properly, the Status page
will show that your WAN service is online and the WAN
IP address that has been assigned. Non-3G connection
status page example:
• You wish to us e o t h e r a l t e r n a t e 3 G c o n n e c t i o n d e t a i l s
(such as a spec i a l A P N )
Pl ease enter any o t h e r re l e v a n t i n f o r m a t i o n o n t h i s s c re e n
as provided by Etis a l a t
Getting Started
11
Advanced
Etisalat Travel Router USER GUIDE
ADVANCED
FEATURES
3G Internet Settings
This page allows you to setup your WWAN (Wireless Wide
Area Network) connection. Enter the relevant settings as
provided by Etisalat.
This section explai n s o t h e r f e a t u re s t h a t y o u m a y w a n t t o
enable depending o n y o u r a p p l i c a t i o n . S o m e f e a t u re s c a n
add extra stability a n d e r ro r re c o v e r y. O t h e r f e at u re s a re
available to assist w i t h i n t e g ra t i n g t h e Tra v e l R o u t e r w i t h
your application.
Login Procedure
1. Open your web b ro w s e r ( e . g . I n t e r n e t E x p l o re r / F i re f o x /
Safari) and nav i g a t e t o h t t p : / / 1 9 2 . 1 6 8 . 2 0 . 1 /
Ethernet Port Status
T h e d e f a u l t s e t t i n g f o r t h e R o u t e r ’s E t h e r n e t p o r t is set
t o o p e ra t e a s a WA N p o r t . B u t t h e Tra v e l R o u t e r allows
t h e E t h e r n e t p o r t t o b e c h a n g e d f ro m WA N t o L A N or LAN
t o WA N .
2. Click Login an d t y p e “a d m i n ” ( w i t h o u t q u o t es ) i n t h e
Username and Pa s s w o rd f i e l d s . T h e n c l i c k o n S u b m i t .
N ote: admin is the default username and password for the unit.
Status
The status page pro v i d e s s y s t e m re l a t e d i n f o r m a t i o n . I t i s
shown on login to t h e R o u t e r, a n d c a n a l s o b e a c c e s s e d b y
selecting Status fro m t h e t o p m e n u .
By default, the st a t u s p a g e w i l l s h o w S y s t e m I n f o , L o c a l
Network, WWAN, C o n n e c t i o n S t a t u s a n d E t h e r n e t S t a t u s . To
view either WAN, P P Po E o r P P T P i n d i v i d u a l l y, c l i c k o n t h e i r
re levant buttons. To v i e w t h e m a l l , c l i c k o n t h e A l l S t a t u s
button
Ethernet Port status
Description
Current
Current port status, either WAN or LAN
LAN
Change the current port status to LAN
WAN
Change the current port status to WAN
N o t e : T h e 3 G c o n n e c t i o n f i e l d s m a y n o t b e n e c e s s a r y f o r y o u r c o n n e c t i o n
The information on this page will only be used when your service
p ro v i d e r re q u i re s y o u t o e n t e r a U s e r N a m e a n d Pa s s w o rd t o c o n n e c t
to the 3G network.
Name
Description
APN:
Enter the APN as supplied by Etisalat
User Name:
Enter your 3G username
Password:
Enter your 3G password
3G NAT:
Enables network address translation on your 3G connection
WAN NAT:
Enables network address translation on your WAN connection
Operation Mode; There are 3 options:
‘Always On’
Keeps the Internet connection alive, does not disconnect.
‘OFF’
Does not connect to the Internet.
‘Automatic
3G Backup’
The Automatic 3G Backup feature of the Travel Router is
designed to provide a backup 3G Internet connection in case
your primary connection should fail. To use this feature, you
will need both an Ethernet WAN connection (from an xDSL
modem/ISDN/Satellite etc) and a 3G WAN connection.
PIN:
Enter the Pin Code for your SIM card
Advanced
13
Etisalat Travel Router USER GUIDE
WAN
Select the WAN co n n e c t i o n t y p e s u i t a b l e f o r y o u r e n v i ro n m e n t a n d c o n f i g u re p a ra m e t e rs
according to the se l e c t e d c o n n e c t i o n t y p e .
STATIC (FIXED IP)
If your WAN conne c t i o n u s e s a s t a t i c I P a d d re s s , p l e a s e s e l e c t S t a t i c I P A d d re s s a n d f i l l i n
the required inform a t i o n i n t h e f i e l d s p ro v i d e d .
Name
Description
IP Address:
Type in the IP address assigned by your Internet Service Provider
Subnet Mask:
Type in the Subnet mask assigned by your Internet Service Provider
Default Gateway:
Type in the WAN Gateway assigned by your Internet Service Provider
Primary/ Secondary DNS:
Type in the DNS address assigned by your Internet Service Provider
MAC Clone:
lease input the MAC address of your computer here if your service provider only permits
P
computers with a certain MAC address to access the Internet. If you are using the computer
which used to connect to the Internet via a cable modem, you can simply press the ‘Default’
button to fill the MAC address field with the MAC address of your computer.
NAT Configuration
Allows you to enable or disable network address translation (NAT) for this WAN connection type
D H C P ( A U TO C O N F I G )
T h i s c o n n e c t i o n w i l l get the IP address from the Internet service provider. Choose this
c o n n e c t i o n i f y o u a re connecting the router to a Cable Modem service. Leave everything as
d e f a u l t u n l e s s i n s t r u cted by your Internet Service Provider.
Name
Description
Hostname
lease input the host name of your computer. This is optional, and only required if your service
P
provider asks you to do so.
MAC Clone
lease input the MAC address of your computer here if your service provider only permits computers
P
with a certain MAC address to access the Internet. If you are using the computer which used to
connect to Internet via a cable modem, you can simply press the ‘Default’ button to fill the MAC
address field with the MAC address of your computer.
NAT Configuration
Allows you to enable or disable network address translation (NAT) for this WAN connection type
C l i c k A p p l y t o s a v e t he settings.
Click Apply to save t h e s e t t i n g s .
Advanced
14
Etisalat Travel Router USER GUIDE
PPPOE (ADSL)
Most ADSL services u s e t h e P P P o v e r E t h e r n e t p ro t o c o l . U s e
this if you connec t y o u r Tra v e l R o u t e r t o a b r i d g e d A D S L
modem.
PPTP
P P T P ( Po i n t t o Po i n t Tu n n e l i n g P ro t o c o l ) a l l o w s f o r a secure
c o n n e c t i o n o v e r t h e I n t e r n e t b y s i m p l y d i a l i n g i n a local
p o i n t p ro v i d e d b y y o u r I S P. T h e f o l l o w i n g s c re e n allows
c l i e n t P C s t o e s t a b l i s h a n o r m a l P P T P s e s s i o n a n d p rovides
h a s s l e - f re e c o n f i g u ra t i o n o f t h e P P T P c l i e n t o n e a c h client
PC.
Name
Description
Server IP address:
Type in the server IP address assigned by your PPTP
Provider.
PPTP Account/
Password:
Type in the username and password assigned by your
PPTP provider.
Address Mode:
Select Dynamic if your service uses a DHCP server, or
select Static and type in the IP address, Subnet Mask
and Default Gateway assigned by your Internet Service
Provider.
Operation Mode; There are 3 options:
Name
Description
Username/Password
Type in your PPPoE account username and password.
‘Keep Alive’ -
Keeps the Internet connection alive, does not disconnect.
‘On Demand’ -
Only connects to the Internet when there’s a connect
attempt
‘Manual’ -
Only connects to the Internet when the ‘Connect’ button
on this page is pressed, and disconnects when the
‘Disconnect button is pressed.
MAC Clone:
Please input the MAC address of your computer here,
if your service provider only permits computers with a
certain MAC address to access Internet. If you’re using
the computer which used to connect to Internet via cable
modem, you can simply press ‘Fill My MAC’ button to
fill the MAC address field with the MAC address of your
computer.
NAT Configuration
Allows you to enable or disable network address
translation (NAT) for this WAN connection type
Operation Mode; There are 3 options:
‘Keep Alive’
Keeps the Internet connection alive, does not
disconnect.
‘On Demand’
Only connects to the Internet when there’s a connect
attempt
‘Manual’
nly connects to the Internet when the ‘Connect’
O
button on this page is pressed, and disconnects when
the ‘Disconnect’ button is pressed.
MAC Clone
lease input the MAC address of your computer here
P
if your service provider only permits computers with
a certain MAC address to access the Internet. If you
are using the computer which used to connect to the
Internet via cable modem, you can simply press the
‘Default’ button to fill the MAC address field with the
MAC address of your computer.
NAT Configuration
Allows you to enable or disable network address
translation (NAT) for this WAN connection type
Click Apply to save the settings.
Click Apply to save t h e s e t t i n g s .
Advanced
15
Etisalat Travel Router USER GUIDE
WAN FAILOVER BAC K U P
The WAN Failover B a c k u p f e a t u re o f t h e Tra v e l R o u t e r i s
designed to provid e a b a c k u p 3 G I n t e r n e t c o n n e c t i o n i n c a s e
your primary conn e c t i o n s h o u l d f a i l . To u s e t h i s f e a t u re , y o u
will need both an E t h e r n e t WA N c o n n e c t i o n ( f ro m a n x D S L
modem/ISDN/Satel l i t e e t c ) a n d a 3 G WA N c o n n e c t i o n .
To set up WAN fa i l o v e r o n y o u r Tra v e l R o u t e r, f i rs t t i c k
“Enable automatic 3 G b a c k u p ” , t h e n f i l l i n t h e f ie l d s t h a t
appear.
LAN
T h i s Pa g e a l l o w s y o u t o c h a n g e t h e L A N ( L o c a l A re a N etwork)
s e t t i n g s o f y o u r Tra v e l R o u t e r.
Name
Description
IP Address:
The local IP address of this device.
Subnet Mask:
The subnet mask of the local IP address
LAN 2:
Used to configure a secondary LAN IP Address
MAC Address:
The LAN MAC address of your Travel Router
DHCP Type:
Please leave this set to ‘Enable’ unless you have another DHCP
server on the same network.
Primary DNS/
Secondary
DNS:
(Optional) This feature allows you to manually assign DNS
Servers
Lease Time:
DHCP lease times of the DHCP clients of your Travel Router.
Click Apply to save the settings.
Name
Description
Internet Host:
Enter an Internet address here to check the Internet connection
APN:
Enter the APN for your 3G service
User Name:
Enter your 3G username
Password:
Enter your 3G password
Click Apply to save t h e s e t t i n g s .
Advanced
16
Etisalat Travel Router USER GUIDE
Advanced Routing
ADVANCED ROUTING – DYNAMIC
This page allows y o u t o c o n f i g u re s t a t i c a n d d y n a m i c ro u t i n g r u l e s f o r y o u r Tra v e l R o u t e r.
D y n a m i c R o u t i n g u s e s the RIP protocol to allow the Travel Router to adapt to changes in
t h e n e t w o r k . R I P e n a bles the device to determine the best route for each packet based on
t h e “ h o p c o u n t ” o r n umber of hops between Source and Destination. To enable Dynamic
R o u t i n g , s e l e c t E n a b l e from the dropbox and click Apply.
DHCP Client
T h i s p a g e a l l o w s y o u to view the current DHCP clients connected to your Travel Router.
ADVANCED ROUTING – STATIC
Static Routing allo w s c o m p u t e rs t h a t a re c o n n e c t e d t o y o u r Tra v e l R o u t e r t o c o m m u n i c a t e
with computers on a n o t h e r L A N s e g m e n t w h i c h a re c o n n e c t e d t o i t v i a a n o t h e r ro u t e r. To
set a rule, you nee d t o s p e c i f y t h e f o l l o w i n g :
• Destination
• Netmask (if ap p l i c a b l e - s e l e c t t h e “ N e t ” ra n g e a s t h e ro u t e t y p e )
• Gateway
• Interface
Advanced
17
Wireless
Etisalat Travel Router USER GUIDE
Basic
Advanced
This page allows y o u t o d e f i n e t h e b a s i c w i re l e s s s e t t i n g s f o r t h i s d e v i c e s u c h a s t h e S S I D
and channel.
T h i s p a g e a l l o w s y o u to modify the advanced wireless settings for your Travel Router. These
s e t t i n g s s h o u l d n o t b e changed unless you are aware of what effect they will have.
Name
Description
Radio On/Off:
On by default. Changing this option to Off will turn off the wireless feature on the
unit and you will not be able to connect to your Travel Router wirelessly.
Network Mode: You can select which wireless standards are able to connect to your wireless network:
11b/g mixed mode:
Both 802.11b and 802.11g wireless devices are in your network.
11b only:
Select this if all of your wireless clients are 802.11b.
11g only:
Select this if all of your wireless clients are 802.11g.
11n only:
Select this if all of your wireless clients are 802.11n.
11/b/g/n mixed mode:
Select this if 802.11b and 802.11g and 802.11n wireless devices are in your network.
Network Name (SSID):
The SSID (Service Set Identifier) is the name of your wireless network. Use a unique
name to identify your wireless network so that you can easily connect from your
wireless clients. This field is case sensitive and can be up to 32 characters. You
should change the default SSID for added security.
Frequency (Channel):
This setting configures the frequency that the Wireless Radio uses for wireless
connectivity. Select one channel that you wish to use from the drop down list.
WDS Mode
Wireless Distribution System (WDS) enables you to connect multiple Wireless Access
Points together to extend the range of your wireless network. You can enable this
if needed
Click Apply to save t h e s e t t i n g s .
Wireless
19
Etisalat Travel Router USER GUIDE
Name
Description
Beacon Interval:
Interval of time the wireless router broadcasts a beacon, used to synchronize
the wireless network.
Data Beacon Rate (DTIM):
Enter a value between 1 and 255 for the Delivery Traffic Indication Message
(DTIM). A DTIM is a countdown informing clients of the next window for
listening to broadcast and multicast messages
Fragment Threshold:
This specifies the maximum size of a packet during the fragmentation of
data to be transmitted. If you set this value too low, it will result in bad
performance.
RTS Threshold:
When the packet size is smaller than the RTS threshold, the wireless router will
not use the RTS/CTS mechanism to send this packet.
AP Isolation:
This feature allows you to isolate clients on your wireless network. To enable
communication between the wireless clients connected to your Travel Router,
select Disabled. To prevent the communication between the wireless clients,
please choose Enabled.
TX Power:
This determines the output power of the antenna
WMM Capable:
WMM (Wi-Fi Multimedia) if enabled supports QoS (Quality of Service) for
experiencing better audio, video and voice in applications
WMM Parameters:
Click on the WMM Configuration button to configure the WMM parameters
Broadcast Network Name (SSID):
Select ‘Disabled’ to hide the SSID of your Travel Router. If disabled, other
people will not be able scan and detect this product’s SSID.
Click Apply to save a n y c h a n g e s m a d e t o t h e s e t t i n g s .
Security
T h i s p a g e a l l o w s y o u to configure the wireless security for your Travel Router. Setting up
s u f f i c i e n t w i re l e s s s e curity can prevent unauthorised access to your wireless network.
Name
Description
SSID Choice:
Select the SSID on which to configure the security settings
Security Mode:
Select the security mode for the wireless network. See below for more information
Access Policy:
This feature allows MAC Address Control, which prevents unauthorized clients from accessing
your wireless network. Select whether to allow/block users on the policy list, and add their
MAC addresses to the list on the format XX:XX:XX:XX:XX:XX
C l i c k A p p l y t o s a v e t he settings.
Wireless
20
Etisalat Travel Router USER GUIDE
Security Mode
You may choose fro m t h e f o l l o w i n g w i re l e s s s e c u r i t y o p t i o n s : D i s a b l e d , O p e n , S h a re d , W E P
AUTO, WPA, WPA-P S K , W PA 2 , W PA 2 - P S K , W PA - P S K- W PA 2 - P S K , W PA 1 - W PA 2 o r 8 02 . 1 x .
Name
Description
WEP:
WEP (Wired Equivalent Privacy) helps prevent against unwanted wireless users accessing your
Travel Router. It has been superseded by WPA-PSK
Name
Description
WPA/WPA2:
WPA (Wi-Fi Protected Access) authentication is suitable for enterprises. It must be used in
conjunction with an authentication server such as RADIUS to provide centralized access control
and management. It can provide stronger encryption and authentication solution than non WPA
modes.
Name
Description
WPA-PSK/WPA2-PSK:
WPA-PSK is enabled by default. WPA-PSK (TKIP) and WPA2-PSK (AES) are a newer type of
security. This type of security gives a more secure network connection when compared to
WEP. Use TKIP Encryption Type for WPA-PSK and AES for WPA2-PSK. After that, please enter
the key in the Passphrase field. The key needs to be more than 8 characters and less than
63 characters and it can be any combination of letters and numbers. Please note that the
configuration for WPA-PSK and WPA2-PSK is identical.
Name
Description
802.1x:
In order to use 802.1X security, you need to have a RADIUS server on your network that will act as the
authentication server. Please type in the details for your RADIUS server in the fields required.
N o t e : A f t e r c o n f i g u r i n g w i re l e s s s e c u r i t y, y o u a l s o n e e d t o c o n f i g u re y o u r w i re l e s s a d a p t e r t o u s e t h e s a m e s e c u r i t y
s e t t i n g s b e f o re y o u c a n c o n n e c t w i re l e s s l y. N o t a l l w i re l e s s a d a p t e rs s u p p o r t W PA - P S K / W PA 2 - P S K / W PA / W PA 2
s e c u r i t y ; p l e a s e re f e r t o y o u r w i re l e s s a d a p t e r u s e r g u i d e f o r m o re d e t a i l s . I t i s s t ro n g l y re c o m m e n d e d t o s e t
u p a s i m p l e w i re l e s s s e c u r i t y s u c h a s W E P 6 4 b i t o r W PA ( w h e n t h e w i re l e s s c l i e n t s u p p o r t s W PA ) i n o rd e r t o
s e c u re y o u r n e t w o r k .
Wireless
21
Etisalat Travel Router USER GUIDE
WPS
W PS is the simples t w a y t o e s t a b l i s h a c o n n e c t i o n b e t w e e n w i re l e s s c l i e n t s a n d y o u r Tra v e l
Router. This metho d re m o v e s t h e n e e d t o m a n u a l l y s e l e c t t h e e n c r y p t i o n m o d e a n d f i l l i n
the passphrase. Yo u o n l y n e e d t o p re s s a b u t t o n o n b o t h w i re l e s s c l i e n t a n d w i re l e s s ro u t e r,
and WPS will do th e re s t f o r y o u . T h e w i re l e s s ro u t e r s u p p o r t s t w o t y p e s o f W P S :
Name
Description
WPS via Push Button
You have to push a specific button on the wireless client or in your wireless client utility to
start the WPS mode, and switch the wireless router to WPS mode. You can simply push the
WPS button of the wireless router, or click the ‘Start Process’ button in the web configuration
interface
WPS via PIN code
WPS SSID:
This is the network broadcast name (SSID) of the router.
WPS Auth Mode:
It shows the active authentication mode for the wireless connection.
WPS PIN:
This is the WPS PIN code of the wireless router. You may need this information when connecting
to other WPS-enabled wireless devices.
WPS Mode:
Select either PIN or PBC.
Station List
T h e S t a t i o n L i s t s h o w s the wireless clients currently associated with your Travel Router.
You have to know the PIN code of the wireless client and switch it to WPS mode, then input the
wireless client PIN to the wireless router web interface.
Name
Description
WPS:
Use the dropbox to either enable or disable the WPS function.
WPS Current Status:
If the wireless security (encryption) function of this wireless router is properly set, you will see a
‘Success’ message here. Otherwise, you will see ‘Idle’.
Wireless
22
Firewall
Etisalat Travel Router USER GUIDE
FIREWALL
MAC/IP/Port Filtering
This page allows yo u t o s e t u p M A C , I P a n d p o r t f i l t e r i n g r u l e s t o p ro t e c t y o u r n e t w o r k f ro m
malicious activity. T h e f i l t e r i n g r u l e s c a n b e u s e d t o e i t h e r a l l o w o r b l o c k c e r t a i n u s e rs a n d /
or ports from acce s s i n g t h e I n t e r n e t .
Basic Settings
Name
Description
MAC/IP/Port Filtering:
Select Enable to enable MAC/IP/Port Filtering
Default Policy:
Select whether packets that do not match any rules are accepted or dropped
MAC/IP/Port Filtering Settings
Name
Description
MAC Address:
MAC address of a local computer
Dest IP Address:
Destination IP Address for the filter rule
Source IP Address:
Source IP Address for the filter rule
Protocol:
Select the port number protocol type (TCP, UDP or both). If you are
unsure, then leave it to the default “TCP&UDP” setting
Dest Port Range:
Destination Port Range of the filter rule
Source Port Range:
Source Port Range of the filter rule
Action:
Either accept or drop the packet that matches the rule
Comment:
Add a comment to identify the rule (optional)
C l i c k A p p l y t o s a v e t he settings.
Firewall
24
Etisalat Travel Router USER GUIDE
Port Forwarding
DMZ
This page allows y o u t o c o n f i g u re p o r t f o r w a rd i ng r u l e s t o a l l o w re m o t e u s e rs t o a c c e s s
services such as We b o r F T P o n y o u r l o c a l c o m p u t e rs . T h i s a l l o w s y o u t o re d i re c t a p a r t i c u l a r
port number (from t h e I n t e r n e t / WA N p o r t ) t o a p a r t i c u l a r L A N I P a d d re s s .
I f y o u h a v e a c l i e n t PC that cannot run an Internet application (e.g. Games) properly from
b e h i n d t h e N AT f i re w all, then you can open up the firewall restrictions to allow unrestricted
t w o - w a y I n t e r n e t a c c ess by defining a DMZ Host.
T h e D M Z f u n c t i o n a l l ows you to re-direct all packets going to your WAN port IP address,
t o a p a r t i c u l a r I P a d dress in your LAN. The difference between the virtual server and the
D M Z f u n c t i o n i s t h a t the virtual server re-directs a particular service/Internet application
( e . g . F T P, w e b s i t e s ) t o a particular LAN client/server, whereas DMZ re-directs all packets
( re g a rd l e s s o f s e r v i c e s) going to your WAN IP address to a particular LAN client/server.
Name
Description
Name
Description
DMZ Settings:
Enable/disable DMZ.
Virtual Server Settings:
Enable/Disable port forwarding
DMZ IP Address:
IP Address:
The LAN IP address that the public port number packet will be sent to
Fill-in the IP address of a particular host in your LAN Network that will
receive all the packets originally going to the WAN port/Public IP address of
your Travel Router.
Port Range:
The public port numbers to be sent to the specific LAN IP address
Protocol:
Select the port number protocol type (TCP, UDP or both). If you are unsure, then leave it
as the default “TCP&UDP” setting
Comment:
Add a comment to identify the rule (optional)
Click Apply to save t h e s e t t i n g s .
Firewall
25
Etisalat Travel Router USER GUIDE
System Security
Content Filtering
This page allows y o u t o i m p ro v e t h e s e c u r i t y o f y o u r Tra v e l
Router through th e S P I f i re w a l l a n d re m o t e a c c e s s s e t t i n g s .
T h i s p a g e a l l o w s y o u t o c o n f i g u re c o n t e n t , U R L a nd host
f i l t e rs t o re s t r i c t i m p ro p e r c o n t e n t a c c e s s f ro m LAN
c o m p u t e rs
Name
Description
Remote
Management (via
WAN):
Enable/Disable remote management on the WAN
interface.
Deny ping from
WAN interface:
Select Enable to deny ICMP packets received on the
WAN interface. Otherwise, select Disable to allow
ICMP packets received on the WAN interface.
SPI Firewall:
Enable/Disable the SPI (Stateful Packet Inspection)
firewall to improve the security of your Travel Router.
Name
Description
Web Content Filter:
Tick the boxes to enable Proxy, Java or ActiveX
content filtering
URL Filter:
Block access to a website by entering its full URL
address.
Host Filter:
Block access to block access to certain websites by
entering a keyword
Click Apply to save t h e s e t t i n g s .
Click Apply to save the settings.
Firewall
26
Administration
Etisalat Travel Router USER GUIDE
Managem e n t
System Monitor
This page allows yo u t o c o n f i g u re a d m i n i s t ra t o r s y s t e m s e t t i n g s i n c l u d i n g t h e a d m i n i s t ra t o r
username and pass w o rd , N T P s e t t i n g s , a n d D D N S s e t t i n g s .
Periodic Ping Settings
The Periodic Ping Reset Monitor configures the Travel Router to transmit controlled ping packets
to 1 or 2 user specified IP addresses. Should the router not receive responses to the pings the
router will reboot.
This works as follows:
A. After every “Periodic Ping Timer” configured interval, the router sends 3 consecutive pings to
the “Destination Address”.
Name
Description
B. If all 3 pings fail the router sends 3 consecutive pings to the “Second Address”.
Select Language:
Select a language for the web interface. English and Arabic are available
C. The router then sends 3 consecutive pings to the “Destination Address” and 3 consecutive
Administrator Settings
(account/password):
Configure a new administrator username and password.
pings to the “Second Address” every
NTP Settings:
The NTP (Network Time Protocol) settings allow your router to synchronise its internal
clock with the global Internet Time. These settings will affect functions such as System Log
entries and Firewall settings.
DDNS:
DDNS (Dynamic Domain Name Service) allows you to map the static domain name to a
dynamic IP address. To use this feature, you must sign up for an account from a DDNS
service provider. This router supports DynDNS, TZO and other common DDNS service
providers.
“Periodic Ping Accelerated Timer” configured interval.
D. If all accelerated pings in step C above fail the number of times configured in “Fail Count”,
the router reboots.
E.
If any ping succeeds the router returns to step A and does not reboot.
Note: T h e “ Pe r i o d i c P i n g T i m e r ” s h o u l d n e v e r b e s e t t o a v a l u e l e s s t h a n 3 0 0 s e c o n d s ; t h i s i s t o a l l o w t h e ro u t e r t i m e
t o re c o n n e c t t o t h e c e l l u l a r n e t w o r k f o l l o w i n g a re b o o t .
Periodic Ping Disabled
Click Apply to save t h e s e t t i n g s .
To disable the Periodic Ping Reset Monitor simply leave the fields blank
Administration
28
Etisalat Travel Router USER GUIDE
N B: The traffic generated by the periodic ping feature is coun t e d a s
chargeable usage. Please keep this in mind when selecting h o w o f t e n
to ping
How to Configure a Periodic Reset Timer
Setting Manager
T h e ro u t e r c a n
after a periodic
i s n o t n e c e s s a r y,
installations, it
o c c u rs .
This page allows you to import/export the system settings,
reset your Travel Router to factory defaults, or reboot your
Travel Router.
b e c o n f i g u re d t o a u t o m a t i c a l l y reboot
i n t e r v a l s p e c i f i e d i n m i n u t e s . W h ile this
i t d o e s e n s u re t h a t i n t h e c a s e o f remote
w i l l re b o o t t h e ro u t e r i f s o m e a nomaly
T h e d e f a u l t v a l u e i s 0 w h i c h d i s a b l e s t h e Pe r i o d i c Reset
T i m e r. T h e m a x i m u m v a l u e i s 6 5 5 3 5 m i n u t e s .
Upload Firmware
This page allows you to upgrade the Router’s firmware. To
upgrade the firmware of your Travel Router, you need to
download the firmware file to your local hard disk, and then
click the Browse button to locate the firmware file you just
downloaded.
The export settings feature enables you to store a backup
copy of the configuration currently being used the Travel
Router. This can then be easily restored to the Travel Router
at a later time if necessary.
The configuration file contains the settings and account
information used by the Travel Router. As such, it is
recommended to use a password to encrypt this information
and prevent any unauthorised use.
You will be prompted to enter the appropriate password
when restoring the configuration.
O n c e y o u h a v e s e l e c t e d t h e n e w f i r m w a re f i l e , c l i c k A pply to
s t a r t t h e u p g ra d e p ro c e s s .
Administration
29
Etisalat Travel Router USER GUIDE
Statistics
System Log
This page allows y o u t o v i e w t h e L A N , WA N a n d w i re l e s s s t a t i s t i c s o f y o u r Tra v e l R o u t e r.
A l l s y s t e m e v e n t s a re logged. You can use this function to check the event log of your
Tra v e l R o u t e r.
T h e S y s t e m L o g f e a t ure also offers the ability to send your system log information to a
re m o t e s y s l o g c o m p u ter. This means the system log information will be available even if the
Tra v e l R o u t e r i s re b o oted or the System Log page is cleared.
To u s e t h i s f e a t u re , enter the appropriate IP address and port for the computer or device
r u n n i n g t h e s y s l o g s e rver application.
Administration
30
Trouble Shooting
Etisalat Travel Router USER GUIDE
TROUBLE
SHOOTING
This section provi d e s a n o v e r v i e w o f c o m m o n i s s u e s , a n d
possible solutions f o r t h e i n s t a l l a t i o n a n d o p e ra t i o n o f y o u r
Travel Router.
1. Why your wireless client CAN NOT access the Internet?
W hen the Travel R o u t e r i s c o n f i g u re d t o u s e W i re l e s s
encryption (WEP, W PA / W PA 2 e t c ) , y o u n e e d t o e n s u re y o u r
wireless adapter s e t t i n g s m a t c h y o u r 3 G R o u t e rs s e t t i n g s .
Pl ease refer to y o u r w i re l e s s a d a p t e r m a n u a l f o r m o re
information. Ensure t h a t t h e w i re l e s s c l i e n t i s as s o c i a t e d
with your Travel R o u t e r.
follow the steps below:
• Click on Start > Run
• Ty p e i n C M D a n d p re s s E n t e r.
• Ty p e i n “ i p c o n f i g / a l l ” a n d p re s s E n t e r
• Ty p e i n “ p i n g 1 9 2 . 1 6 8 . 2 0 . 1 ” t o c h e c k i f y o u c a n access
t h e Tra v e l R o u t e r
N o t e : I f y o u h a v e c h a n g e d t h e d e f a u l t I P A d d re s s , e n s u re y o u p i n g t h e c o r re c t
I P A d d re s s a s s i g n e d t o t h e Tra v e l R o u t e r.
2. Why does your wireless connection keep dropping?
P l e a s e t r y t h e f o l l o w i n g s t e p s t o i m p ro v e t h e w i re l e s s signal
q u a l i t y. E n s u re t h e b a t t e r y o f y o u r Tra v e l R o u t e r is fully
c h a rg e d .
• Tr y t o k e e p t h e Tra v e l R o u t e r a t l e a s t 6 i n c h e s a w ay from
the wall or other objects.
•
To check this conn e c t i o n ( W i n d o w s X P ) , f o l l o w t h e s e s t e p s :
• Click on Start > C o n t ro l Pa n e l > N e t w o r k C o n n e c t i o n
• Right Click on W i re l e s s N e t w o r k c o n n e c t i o n
• Select View Available Wireless Networks. The “Connect
to Wireless Network” screen appears. Ensure you have
selected the correct wireless network.
Ensure the IP Add re s s a s s i g n e d t o t h e w i re l e s s a d a p t e r i s
within the same s u b n e t a s y o u r Tra v e l R o u t e r. T h e Tra v e l
Router has a defa u l t I P A d d re s s o f 1 9 2 . 1 6 8 . 2 0 . 1 . W i re l e s s
adapters must hav e a n I P A d d re s s i n t h e s a m e ra n g e ( e . g . ,
192.168.20.x). Alth o u g h t h e s u b n e t m a s k m u s t b e t h e s a m e
for all the comput e rs o n t h e n e t w o r k , n o t w o d e v i c e s m a y
have the same IP A d d re s s . T h e re f o re , e a c h d e v i c e m u s t h a v e
a unique IP Addres s .
•
Try changing the channel on the Router to a different channel to avoid
interference. Please refer to the Basic Wireless settings section of this
manual
Keep your product away (at least 3-6 feet) from electrical devices that
generate RF noise, like microwaves, monitors, electric motors, etc.
3. Cannot establish a wireless connection?
• Try to disable all security settings such as WEP, and MAC
Address Control.
• Turn off the Travel Router and the client. Then turn the
Travel Router back on again, and then turn on the client.
• Ensure that all devices are set to Infrastructure mode.
• Ensure that the LED indicators are indicating normal
activity. If not, ensure that the AC power adapter is
firmly connected or the battery of the Travel Router is
charged.
• Ensure that the IP Address, subnet mask, gateway and
DNS settings are correctly entered on the computer.
• If you are using 2.4GHz cordless phones, X-10 equipment,
or other home security systems, ceiling fans, or lights,
your wireless connection may degrade dramatically, or
drop altogether.
• To avoid interference, you can change the wireless
Channel on your Travel Router.
• Keep your product at least 3-6 feet away from electrical
devices that generate RF noise. Examples include:
microwaves, monitors, electric motors, and so forth.
N o t e : A n E t h e r n e t c o n n e c t i o n i s re q u i re d t o t ro u b l e s h o o t t h e Tra v e l R o u t e r.
When the Travel Router is configured to use Wireless encryption
(WEP, WPA/WPA2 or any encryption), you need to ensure that
your wireless adapter settings match. Please refer to your
wireless adapter manual for additional information.
• M o v e t h e Tra v e l R o u t e r a n d t h e w i re l e s s c l i e n t i nto the
s a m e ro o m , a n d t h e n t e s t t h e w i re l e s s c o n n e c t i o n.
To check the IP A d d re s s a s s i g n e d t o t h e w i re l e s s a d a p t e r,
Trouble Shooting
32
Etisalat Travel Router USER GUIDE
4. Can not remember your encryption key. What should
you do?
If you forgot your e n c r y p t i o n k e y, t h e W i re l e s s d e v i c e w i l l
not be able to esta b l i s h a c o n n e c t i o n t o y o u r Tra v e l R o u t e r.
To reset the encry p t i o n k e y ( s ) , l o g i n t o t h e Tra v e l R o u t e r
web configuration u s i n g a n E t h e r n e t c o n n e c t i o n .
5. How do you reset your Travel Router to its factory
default settings?
To factory reset t h e Tra v e l R o u t e r t o i t s f a c t o r y d e f a u l t
settings, follow th e s t e p s l i s t e d b e l o w :
• Ensure that th e ro u t e r i s p o w e re d o n ( f o r a t l e a s t 1
minute).
• Press the reset button for at least ten seconds and release.
At this point, the reset is in progress. Do not power off
the unit at this point.
• After your Trav e l R o u t e r re b o o t s , t h e d e f a u l t s e t t i n g s a re
now restored. T h i s e n t i re p ro c e s s t a k e s s e v e ra l m i n u t e s
to complete.
• E n s u re t h a t t h e re i s a s o l i d c a b l e c o n n e c t i o n b etween
t h e E t h e r n e t p o r t o n t h e Tra v e l R o u t e r, a n d y our NIC
( N e t w o r k I n t e r f a c e C a rd ) .
• C h e c k t h a t t h e s e t t i n g s o n y o u r n e t w o r k a d a p ter are
“ E n a b l e d , ” a n d s e t t o a c c e p t a n I P a d d re s s f ro m t h e DHCP
( P l e a s e re f e r t o t h e C o m p u t e r H a rd w a re C o n f i g uration
s e c t i o n i n t h i s m a n u a l f o r a d d i t i o n a l i n f o r m a t i o n).
• I f a l l s e t t i n g s a p p e a r t o b e c o r re c t , e n s u re t h at you
a re n o t u s i n g a c ro s s o v e r E t h e r n e t c a b l e . A l t h o ugh the
Tra v e l R o u t e r i s M D I / M D I X c o m p a t i b l e , n o t a l l NIC are.
T h e re f o re , i t i s re c o m m e n d e d t h a t y o u u s e a s traight
t h ro u g h E t h e r n e t c a b l e w h e n p o s s i b l e .
7. What you can do when your Travel Router has no
power
• P l u g i n t h e p o w e r a d a p t e r p ro v i d e d t o re c h a rg e your
battery
N o t e : Yo u c a n s t i l l u s e t h e Tra v e l R o u t e r w i t h n o b a t t e r y p o w e r, a s l o n g a s t h e
power adapter is plugged in.
• Once you have re s e t t h e ro u t e r t o i t s d e f a u l t s e t t i n g s
you will be able t o a c c e s s t h e d e v i c e ’s w e b c o n f i g u ra t i o n
using http://19 2 . 1 6 8 . 2 0 . 1 w i t h u s e r n a m e / p a s s w o rd o f
“admin”.
6. What you can do if the Ethernet cable does not work
properly
• The Travel Rou t e r ’s E t h e r n e t p o r t i s a WA N p o r t b y
default, simply p re s s t h e re s e t b u t t o n d o w n f o r o n e
second for the WA N p o r t t o s w i t c h t o b e c o m e a L A N
port.
Trouble Shooting
33
Establishing Your
Wireless Connection
Etisalat Travel Router USER GUIDE
ESTA B L I S H I N G
YOUR
WIRE L E S S
CONN E C T I O N
2 . R i g h t - c l i c k o n y o u r W i re l e s s N e t w o r k C o n n e c t i on and
s e l e c t V i e w A v a i l a b l e W i re l e s s N e t w o r k s :
5. The connection will show Connected.
The following examples use “Etisalat Travel Router” as
the SSID and WPA-PSK with “3GT1WNE0” as the encryption key.
Windows XP
Follow these steps :
1. Open Network C o n n e c t i o n s ( S t a r t - > C o n t ro l Pa n e l - >
Network Conne c t i o n s ) :
4. Enter the network key (“3GT1WNE0”) and click Connect:
3 . S e l e c t t h e w i re l e s s n e t w o r k y o u w a n t t o c o n nect to
( “ E t i s a l a t Tra v e l R o u t e r ” ) a n d c l i c k C o n n e c t :
Estabishing Your Wireless Connection
35
Etisalat Travel Router USER GUIDE
Mac OSX 10.6
Follow these steps :
1. Click on the Ai r p o r t i c o n o n t h e t o p r i g h t m e n u .
3 . O n t h e n e w w i n d o w, t i c k o n S h o w Pa s s w o rd a n d type in
t h e n e t w o r k k e y i n t h e Pa s s w o rd f i e l d . T h i s e x a m ple uses
“ 3 G T 1 W N E 0 ” a s t h e k e y. A f t e r t h a t , c l i c k o n O K .
Windows Vista
Follow these steps:
1. Open Network and Sharing Center (Start > Control Panel
(Classic View) > Network and Sharing Center).
4 . To c h e c k t h e c o n n e c t i o n , c l i c k o n t h e A i r p o r t i c on and
t h e re s h o u l d b e a t i c k n e x t t o t h e w i re l e s s n a m e .
2. Click on the n e t w o r k n a m e t h a t y o u w a n t t o c o n n e c t .
This example us e s “ E t i s a l a t Tra v e l R o u t e r ” a s t h e n e t w o r k
name.
2. Click on “Connect to a network”.
Estabishing Your Wireless Connection
36
Etisalat Travel Router USER GUIDE
3. Choose “Etisala t Tra v e l R o u t e r ”.
5 . T i c k o n b o t h “ S a v e t h i s n e t w o r k ” a n d “ S t a rt this
c o n n e c t i o n a u t o m a t i c a l l y ” a n d c l i c k o n “ C l o s e ”.
4. Tick “Display C h a ra c t e rs ” a n d t y p e i n t h e n e t w o r k
security
key.
This
example
uses
“ 3 GT 1 W N E 0 ”.
Then click “Con n e c t ”.
Estabishing Your Wireless Connection
37
Introduction