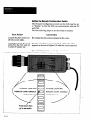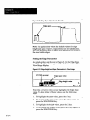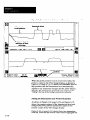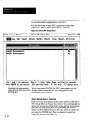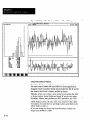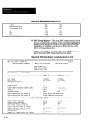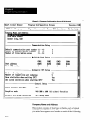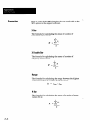
1
Important User
Information
Solid state equipment has operational characteristics
differing from those of electromechanical equipment.
“Application Considerations for Solid State Controls”
(Publication SGI-1.1) describes some important differences
between solid state equipment and hard-wired
electromechanical devices. Because of this difference, and
also because of the wide variety of uses for solid state
equipment, all persons responsible for applying this
equipment must satisfy themselves that each intended
application of this equipment is acceptable.
?
In no event will the Allen-Bradley Company be responsible
or liable for indirect or consequential damages resulting
from the use or application of this equipm.ent.
The examples and diagrams in this manual are included
solely for illustrative purposes. Because of the many
variables and requirements associated with any particular
installation, the Allen-Bradley Company cannot assume
responsibility or liability for actual use based on the
examples and diagrams.
No patent liability is assumed by Allen-Bradley Company
with respect to use of information, circuits, equipment, or
software described in this manual.
Reproduction of the contents of this manual, in whole or in
part, without written permission of the Allen-Bradley
Company is prohibited.
hGcroVAX. VAX, VAXstation. VAXcluster. VhiS. DECnet, DECwindows, VAXsemr,
VAX FM.% VAX DATATRIEVE, VAX GKS. VAX DEC/CMS. VAX V-IX. and VAX
Rinume~
am trademarks of DlGffAL Equipmnt Cmpmtion
-I
-
Introduction
Chapter I
l-l
l-l
l-2
l-2
1-3
UserExperience
.................................
Related Publications ..............................
Overview: Installation ............................
......................
Compatibility Considerations
Overview: Support Software .......................
Installation
Chapter 2
Software Package: Items Included ...................
..........................
Hardware Requirements
ConnectingtheSLStothePC
....................
Setting the Remote Configuration
Switch
...........
Software Installation .............................
Software Removal ...............................
2-l
2-l
2-2
2-4
2-5
2-6
-
Getting Started
Chapter 3
Staging the SLS and Initializing the CSS .............
....................
Preparing an SLS Configuration
Using the View Image Option ......................
Using the Monitor Option .........................
Using the SPC Option ............................
Summary of CSS Procedures. ......................
User Interface:
Getting Around
Chapter 4
Keyboard Usage .................................
Key Assignments
..............................
Using the Keyboard ............................
MouseUsage
Configure Option
3-l
3-4
3-Q
3-12
3-14
3-16
...................................
4-l
4-l
4-3
4-10
Chapter 5
Configuration
Configuration
Configuration
Record
_. . . . . . . . . . . . . . . . . . . .
Record Preparation
........ ... .
Menu Options . . . . . . . . . . . . . .
5-1
5-1
5-2
i
Considerations When Using the Send Option ..........
Configuration Screen Fields .......................
Description ...................................
S-4
55
5-6
Use Hardware Switch Settings?
5-7
...................
Switch Settings and Function Selection .............
Setpoint Settings ...............................
5-7
5-8
5-9
Edge Span and Edge Height Settings
Lighting Compensation
Binarization
...............
(Series B SLS Only) ........
S-10
Function Parameters (Series B SLS Only)
S-1 1
Set Point Method (Series B SLS Only)
5-11
.............
Invert Discrete Output B? (Series B SLS Only) .......
Use Burst Mode? (Series B SLS Only)
ExposureT’uneFactors
.............
$13
5-16
........................
Burst Mode Cycle Tme Factors
View Image
Option
5-13
S-17
.................
Chapter 6
View Image Display: Features and Symbols . . . . . . . . . . .
Line Image .................
:. ................
ViewPort
....................................
6-l
6-l
6-4
View Image Symbols
6-5
Keyboard Trigger
6-7
6-7
6-8
...........................
View Image Trigger Mode Selection .................
Automatic Trigger. .............................
..............................
External Trigger
...............................
Keyboard/External Trigger .......................
Using the View Image Display .....................
Aiming, Positioning, and Focusing the SLS ..........
Edge Height and Edge Span Parameters
............
6-9
6-9
6-10
6-10
6-11
Edge Height .................................
EdgeSpan
..................................
6-12
Setting the Edge Parameters
6-14
....................
Binarization Parameters and Graphic Indicators
(Series B SLS Only) .........................
BinarizationLevel ............................
BackgroundProbe..
..........................
Setting the Binarization
Configuring
and Probe Parameters ......
the SLS For Binary Analysis Functions
Disable Automatic Lighting Compensation
(Series B SLS Only) .........................
6-13
6-16
6-17
6-17
6-18
. 6-20
6-22
_
-
Monitor Option
Chapter 7
Monitor Menu: Function Selection ..................
Monitor Display: Features and Symbols ..............
Analog Bar Graphs .............................
LEDIndicators
7-2
7-3
7-3
................................
7-4
...............................
7-4
SwitchSettings
................................
7-5
Miscellaneous
Data .............................
7-S
Results Statistics
Monitor Functions ...............................
PC Processing Speed Considerations
7-6
7-6
...............
.......................
Monitor with NO Logging
7-7
Monitor with Logging ...........................
Monitor & Log, NO Statistics ....................
Log Results ONLY .............................
7-8
LogFiieReport
7-8
................................
SaveLogFunctions
Text File/Lotus
............................
123.PRN Format
MetriStat Lab Format
dBASE.DBF
Format
Delete Monitor Log
7-9
................
7-9
.........................
DataMyte TurboSPC.PRN
Statistical Process
Control Option
7-7
7-8
Format
7-10
...............
7-12
..........................
7-12
............................
7-13
Chapter 8
......
......
......
......
......
8-2
8-3
8-5
8-9
8-9
Chart Selection and Setup Menu: Options . , . . ......
8-12
......
8-13
......
......
8-14
8-14
......
8-15
......
......
8-17
8-17
PC Hardware vs SPC Performance
...........
Staging the SLS For SPC Data Displays .......
SPC Chart Display: Typical Features .........
Automatic SPC Setup Method ...............
Using the Automatic SPC Setup Method .....
F3 Calibrate Function
....................
Run-Only SPC Setup Method ...............
Using the Run-Only SPC Setup Method
.....
Run--Only Setup Menu: Options and Features
Short SPC Setup Method ...................
Using the Short SPC Setup Method
.........
......
8-18
......
S-20
..........................
......
S-20
Sample Size ..........................
......
8-21
...
Short Setup Menu: Options
Short Setup Screen:
Description
...............
Fields ................
ill
Specification
Limits (USL and LSL)
Result Description:
. . . . . . . . . . . . . 8-21
Chart A and Chart B . . . . . . . . . . 8-21
Chart Selection:
Chart A and Chart B . . . . . . . . . . _ _ 8-22
SaveStatistics?
. . . . . . . . . . . . . . . . . . . . . . . . . . . . . . 8-24
-
Long SPC Setup Method . . . . . . . . . . . . . . . . . . . . . . . . . . 8-25
Using the Long SPC Setup Method . . . . . . . , . . . . . . . . 8-25
Long Setup Menu: Options . . _ . . . . . . . . . . . . . . . . . . . 8-26
Long Setup Screen:
Description
Fields . . . . . . . . . . . . . . . . . . . . . . . 8-28
. . . . . . . . . . . . . . . . . . . . . . . . . . . . . . . . . 8-29
Chart Scale Values . . . . . . . . . . . . . . . . . . . . . . . . . . . . 8-30
Sample Size . . . . . . . . . . . . . . . . . . . . . . . . . . . . . . . . . 8-30
Specification
Limits (USL and LSL)
. . . . . . . . . . . . . 8-30
Target......................................
8-31
Display Chart? . . . . . . . . . . . . . . . . . . . . . . . . . . . . . . . 8-3 1
ChartSelection:
ChartAandChartB
.._.........
8-31
Chart Boundary Values
. . . . . . . . . . . . . . . . . . . . . . . . 8-32
Display Control Limits?
. . . . . . . . . . . . . . . . . . . . . . . 8-33
Use Fixed Control Limits?
. . _ . , . . . . . . . . . . . . . . . . 8-35
Fixed Control Limits Values . . . . . . . . . . . . . _ . . . . 8-35
Use Fixed Center Line? . . . . . . . . . . . . . . . . . . . . . . . 8-35
Fiied Center Line Value . . . . . . . . . . . . . . . . . . . . , . 8-35
Number of Sigma Units for Control Limits
Chart Attributes Method:
Number of Cells
Stabilization
. . . . . . . . 8-35
Chart A and Chart B . . _ . . 8-36
. . . . . . . . . . . . . . . . . . . _ . . . . . . . . . 8-38
Value . . . . . . . . . . . . . . . . . _ . . . _ . . . . . 8-38
Number of Triggers Before Limit Change
. . . . . . . . . 8-38
Chart Formulas: Chart A and Chart B . . . . . . . . , . . . 8-39
SLS Scale Values . . . . . . . . . . . . . . . . . . . . . . . . . 841
LogResults?
. . . . . . . . . . . . . . . . . . . . . . . . . . .._...
Use Estimated Sigma? . . . . . . . . . . . . _
Control Chart Panning Percentage
Result Description:
....
841
. . . . _ . . . . 841
. . . . . . . 842
Chart A and Chart B . . . . . . . . . . 843
Cpk Calculation Method:
Chart A and Chart B . . .
8-44
SaveStatistics?
. . . . . . . . . . . . . . . . . . . . . . . . . . . . . . 845
Calibration, Chart Scaling, and SLS Scaling
. . . . . . 846
Single SLS Calibration
Multiple SLS Calibration
LoggingFunctions
..._
..
_. . . . . . .
...... . ..... .
. 847
. . 849
. . . . . . . . . . . . . . . . . . . . . . . . . . . . . 8-52
Automatic and Run-Only
Setup Methods
_ . . . . . 8-52
Short and Long Setup Methods
. ...
.. .
Conversion Functions . . . . _ . . . . . . . . .
8-52
8-54
-
Text File/Lotus
123.PRN Format
................
8-55
.........................
MetriStat Lab Format
8-57
DataMyte ‘kboSPC.PRN
Format ...............
dBASE.DBF Format ..........................
ReportFunctions
Program
Configuration
Option
Program Configuration Screen
Company Name and Address
Setup
840
.....................
.....................
9-l
9-2
. . . 9-3
......................
...
9-3
Number of Tries Before Error ...............
...
9-3
Number of Seconds Before Tieout
...
9-3
9-3
Default Communication
Port Number
........
..........
Multiple Port Setup .........................
Port Address
...
............................
Port IRQ Number
...
...
........................
...
Automatic SPC Setup .......................
Number of Subgroups
.....................
Number of Inspections
per Subgroup
.........
Save Statistics When Exiting SPC? ...........
Use Saved Statistics When Starting SPC? ......
GeneralSetup
.............................
Color Monitor (Yes/No)
Graphics Mode
...................
..........................
Default SPC Setup Selection
RS-232 Cable
Connections
8-59
...............................
Chapter 9
Communication
Online Help
Messages
8-59
................
9-4
. *.
9-5
...
9-5
..
9-S
...
9-5
..,
9-5
...
...
9-5
...
9-8
9-5
Chapter 10
Help Option: General Help Message .................
Fl Key: Specific Help Messages ...................
Fl Key: Searching Help Messages ..................
Printing Help Messages ...........................
10-l
10-l
10-2
10-2
Appendix A
Cable Connectors . . . . . . . . . . _ _ . . . . . . . . . . . . . . . . . A-l
Cable Adapter
. . . . . . . . . . . . . . . . . . . . . . . . . . . . . . . A-l
”
Glossary
Appendix 6
SPC Formulas
Appendix C
C- 1
C-2
G2
Formula Variables ...............................
Formulas ......................................
XBax ........................................
Range
RBar
C-2
.......................................
C-2
........................................
Standard Deviation
sBar
C-2
.................................
XDoubleBar
C-3
.............................
C-3
........................................
EstimatedSigma:
C-3
..............
XBarandRChart
C-3
Estimated Sigma: X Bar and s Chart ...............
Non-Conforming
C-4
......................
C-4
Process Capability (Cp) and Inverse (Cr) ............
C-4
CpkIndex
C-S
...............
Control Limits:
X Bar and R Charts
Control Limits:
X Bar and s Charts ................
C-5
Control Limits:
Individuals Charts ................
p Charts ........................
C-6
Formula Constants
_-
C-5
....................................
ControlLimits:
Send
Configuration
Utility
Units (p)
pBar ........................................
C-6
C-7
...............................
Appendix II
Directory Requirements
Usage Information . . .
. ... .
Error Messages
Example Batch File . .
.......
........
........
... .. ...
,....
,....
.....
.....
....
....
....
....
...
...
...
...
.....
.....
.....
.....
...
...
...
...
D-l
D-l
D-3
I%4
Figures
1.1 MainMenu
l-3
...................................
2.1 Connecting the Cable to 53 .......................
2.2 Setting the Remote Configuration
Switch
2-3
...........
2-4
-
3.1 Aiig
3-2
Target Orientation Relative to the SLS .......
3.2 MainMenu..
3-3
.................................
3.3 Cm&ration
Menu ............................
3-4
3.4 Ccnfiguration
Screen
3-5
...........................
3.5 “Use hardware switch settings?” Selection
3.6 Parameter Switches
3-6
..........
3-6
............................
3.7 Parameter Switch Configuration
..................
3.8 SLS Analysis Function Selection
..................
3.9 ‘Locate Edges” Record in the Configuration
3-7
3-7
Menu
...
3-8
3-9
3.10 view Image Trigger Menu .......................
3.11 View Image Display of the Aiming Target ...........
3-10
3.12Inverted Line Image Display of the Aiming Target ....
3-11
3.13 Monitor Menu .................................
3-12
3.14 Monitoring Smart Sensor Screen ..................
3-13
3.15 SPC Setup Menu ...............................
3-14
3.16 Chart Selection and Setup Menu
3.17 SPC Data Display:
3-15
..................
X Bar and R and Histogram
4.1 Main Menu: Keys Functions
4-3
.....................
4.2 Monitor Menu: Key Functions
4-4
...................
4.3 Fl Key: Displaying the Main Menu Help Message
4.4 Fl Key: String Search Function
4.5 Configuration
3-16
......
...
4-7
Menu ............................
4.6 Configuration Screen
4-7
...........................
4-8
....................
4.7 SLS Function Selection Menu
4.8 Menu After Pressing the TAB Key
4-s
4-6
..................
4-8
................
4.9 Menu After Pressing the Down Arrow Key Twice
....
4.10 Menu After Pressing the ENTER Key ..............
4-9
4-9
4.11 Mouser Cursor: Initial Position in the Main Menu ....
4-10
4.12 Using the Down Arrow in the “Elevator Shaft” .......
4-12
4.13 Using the Up Arrow in the “Elevator Shaft”
4-13
.........
4.14 Using the Mouse Cursor in the “Elevator Shaft” ......
4.15 Fl Key: String Search Function
5.1 Configuration Menu Options
5.2 Initial Configuration
.....................
Screen (part 1 of 2) ............
5.3 SLS Function Selection Menu
5.4 Initial Configuration
..................
....................
Screen (Part 2 of 2) ............
5.5 Using Both Set Points on One Inspection Result . . , . . _
4-13
4-14
5-2
5-6
5-8
5-10
5-12
vii
5.6 Set Point Method Menu
.........................
5.7 Burst Image Acquisition
Using 1Oms Spacing.
5-12
5.8 Burst Image Acquisition Mode Cycle Tie
5.-15
.......
.
Example
6-2
6.2 FOV, Inspection Direction, and Line Image ..........
6-3
6.3 ViewPotiAPortionoftheLineImage..
6-4
...........
6.5 SLS Improperly Aimed,Positioned,
G-8
............
6-10
.....
and Focused
6.6 Object Properly Aimed ..........................
6-10
6.7 Object Properly Aimed and Positioned
6-11
.............
6.8 Object Properly Aimed, Positioned, and Focused
.....
6-11
6.9 Line Image Amplitude: Black and Gray Objects ......
6-12
6.10 Unwanted Fist Edge Detection on a “Clutter” Object
6.11Edge Height Adjustment:
6.12 Edge Span Adjustment:
Results
.
6-14
..................
6.13 Edge Height and Span Parameters in View Image .....
6-14
6.14 Binarization Symbols and Parameters
616
6.16 Binarization
..............
6-19
6-19
................
6.18 Object Image With “Normal” Background Luminance
.
6.19 Object Image With Saturated Background Luminance
.
6-23
6-24
6.20 Object With the Bright Area Not Covered ...........
6-25
6.21 Object With the Bright Area Covered
6-25
6.22 Object With Lighting Compensation
..............
6-25
.......
Disabled.
6.23 Light Object With the Bright Area Not Covered
6-26
......
6.24 Light Object With the Bright Area Covered
.........
6.25 Light Object With Lighting Compensation
Disabled
6-26
..
7.2 Monitor Smart Sensor Display: Basic Features
7.3 Monitor Menu Functions
......
7-8
7.5 Sample of Converted Text File from a Monitor Log ...
7.6 MetriStat Import Setup Screen ....................
7-9
7-10
8.1 Histograms Displaying “Normal” Statistical Distribution
8.2 SPC Chart Display: X Bar and R and Histogram
7-3
7-6
........................
............................
8.3 SPC Setup Menu ...............................
6-26
7-2
7.1 Monitor Menu .................................
7.4 Monitor Log Report
-
6-18
and Probe Parameters in View Image ....
6.17 Dashed Binarization Level Symbol
...
6-12
6-13
.................
Results
6.15 Binarization Level Indicator and Parameter ..........
Vlll
s-17
6.1 View Image Display of the Aiming Target ...........
6.4 Trigger Icon on the View Image Display
-
.....
8-4
8-5
8-10
_
-
8.4 Chart Selection and Setup Menu ..................
8.5 Run-Only Short SPC Setup Menu .................
8.6 Short SPC Setup Menu ..........................
8.7 Short SPC Setup Screen .........................
8.8 Chart Selection Menu ...........................
8.9 Long SPC Setup Menu ..........................
8.10 Description Field: Long SPC Setup Menu ...........
8.11 Chart Scales Fields: Long SPC Setup Menu .........
8.12 LongSPCSetupScreen(Part1of4)
...............
8.13 Single-Chart Display of X Bar and R and Histogram . .
8.14 LongSPCSetupScreen(Part2of4).
..............
8.15 p Chart Attributes Method Menu ..................
..............
8.16 LongSPCSetupScreen(Part3of4).
8.17 LongSPCSetupScreen(Part4of4).
..............
8.18 Panning Operation With Percentage Set to 80% ......
8.19 Cpk Calculation Method Menu ...................
8.20 Log File Menu and Logging Options Menu ..........
8.21 SPC Log Conversion Menu ......................
8.22 Sample of Converted Text File from an SPC Log .....
8.23 MehiStat Import Setup Screen (Composite) .........
8.24 Basic SPC Log Report: Automatic and Run-Only ....
8.25 Basic SPC Log Report: Short and Long ............
8.26 SPC Log Report Showing Scaled SLS Logging ......
8.27 SPC Statistics Report (1 of 2) .....................
8.28 SPC Statistics Report (2 of 2) .....................
8.29 SPC Setup Report: Long Setup Screen (1 of 2) ......
8.30 SPC Setup Report: Long Setup Screen (2 of 2) ......
8.31 Histogram Report (1 of 2) .......................
8.32 Histogram Report (2 of 2) .......................
9.1 Program Configuration
Screen (Full Screen) .........
9.2 Graphics Mode Selection Menu ...................
8-11
8-15
8-18
8-20
8-22
8-26
8-28
8-28
8-29
8-32
8-34
8-37
8-39
841
8-43
8-44
8-53
8-55
8-55
8-57
8-60
8-61
8-62
8-63
8-64
8-64
8-65
8-67
8-68
9-2
9-6
9.3 Default SPC Setup Menu ........................
9.4 SPC Setup Menu ...............................
9-8
A.1 Pinout Diagram: Connectors on Cable 2804-CSCl
...
A.2 Pinout Diagram: 9-m-25 Pin Adapter .............
A.3 Schematic Diagram for Modifying 25-pin Connector . .
A-l
9-9
A-2
A-3
Tables
6.1 Altering Binarization Level . . . . . . . . . . . . . . . . . . . . . .
6.2 Altering Background Probe Position . . . . . . . . . . . . . . .
6-19
6-20
ix
-
-
Introduction
The SLS Configuration Support Software (CSS) is a
user-friendly, menu-driven software package intended both
for configuring the SLS and for monitoring its inspection
functions. The CSS provides several additional functions,
including statistical process control (SPC), that are not
available when using the SLS alone.
The CSS is easy to install and operate on your IBM (or
compatible) personal computer (PC). Its easy-to-use “user
interface” provides several menus and data entry screens
for configuring the SLS, and several graphic displays for
monitoring inspection results while the SLS is in operation.
The menus and screens simplify SLS configuration and
operation. To access them, you can use either the keyboard
or a mouse, if your PC has one installed.
User-selectable language translations of the menus,
screens, and displays are included with the CSS.
User Experience
Before using the CSS, you should be familiar with the SLS
itself and the procedures described in the SIS User’s
Manual, Catalog No. 280~NDOOl. To install the CSS in
your PC, you need only know how to insert the diskettes in
the appropriate disk drive. You do not need to be an
experienced PC user.
If you intend to use the SPC functions, you need no prior
knowledge or experience to use the simplest functions;
however, to use the full range of SPC functions included in
this software, you must be familiar with most SPC concepts
and parameters.
Related Publications
For information about the SLS, and the SPC and database
application programs, refer to the following publications:
l
Smart Linear Sensor User’s Manual, Catalog No.
2804-NDOOl.
l
SLS instruction sheet.
l
DataMyte Handbook.
l
DataMyte TurboSPC User’s Manual
l
MetriStat User’s Manual
l dBASE User’s Manual
l Lotus l-2-3
User’s Manual
The DataMyte Handbook and MetriStat User’s Manual are
useful if you intend to use statistical process control in your
application and/or want to convert data to the format
required by either of those SPC programs.
The dBASE and Lotus manuals are useful if you intend to
convert data to the format required by either of those
Programs.
Overview:
Installation
Hereisas ummary of the procedure for installing the CSS
on your PC. (The complete installation procedure is located
in Chapter 2, Installation.)
The CSS is supplied on two 5.2~inch diskettes and on a
single 3.5~inch diskette, and it includes an “install”
program to simplify installation in your PC.
If your PC has a 5.2~inch floppy drive, you simply insert
the first diskette in a drive, type “A:lNSTALL” or
“B:INSTALL,” and press the ENTER key. The “install”
program creates an “SLY directory on the destination disk
and loads several files into it. (Note that the destination disk
can be either a hard disk or ajloppy diskette of sufficient
capacity.) At the appropriate point, the CSS asks for the
second diskette, then loads the remaining files onto the
destination disk.
If your PC has a 3.~inch floppy drive, you insert the single
diskette in the drive, type “A:INSTALL” or “B:INSTALL,”
and press the ENTER key. The installation program creates
an “SLS” directory on the destination disk and loads all
files onto it.
After installing the CSS, you can initialize it by simply
typing “SLS” and pressing the ENTER key.
Compatibility
Considerations
CSS “Version 2.0” is compatible with both the Series A and
the Series B SLS; however, you cannot implement the
Series B functions in Version 2.0 unless you are using a
Series B SLS.
CSS “Version 1.0” is not compatible with the Series B SLS;
you cannot implement the new functions in the Series B
SLS unless you are using Version 2.0.
1-2
-
Configuration records developed while using Version 1.0
are not compatible with Version 2.0. Thus, if you have
Version 1.O configuration records that you want to save,
you should relocate all files in the current Version 1.0
directory before installing Version 2.0, since the new CSS
overwrites the old CSS during installation.
The Main Menu of the CSS appears on the display as
shown in Figure 1.1:
Figure Id MainMenu
Snart Linear Sensor
Select
an option
Hain tlenu
using 1 and t then press
Version 2.00
ENTER. Fl for help.
FZ change port.
_-
Statistical
Process Control
Program Conf igurat ion
Help
Quit
hart
Linear Sensor
-
Series
B, Revision
CI
Note the “Series B, Revision A” designation beneath the
Main Menu. The CSS automatically interrogates the SLS to
determine the status of its firmware and displays it a~
shown in the jgure.
The Main Menu contains the options that enable you to
configure and stage the SLS and monitor its inspection and
SPC operations. In addition, a help option provides basic
information about the software, and a quit option enables
l-3
you to exit to the disk operating system (DOS). Here is a
brief description of each option in the Main Menu:
Configure -This option enables you to create and store
numerous SLS configuration records. Each record
contains the specific analysis function, operation
parameters, and set point settings for one SLS inspection
application. Selecting these values in a configuration
record is equivalent to setting the DIP switches and set
point pots on the SLS itself. (Some analysis functions
and parameters, however, are accessible only through
the CSS.)
View Image - This option enables you to see what the
SLS “sees” within its field of view (FOV) and thereby
simplify the SLS staging process. The image from the
SLS appears in a graphic display called the “Line
Image,” and a magnified portion of the Line Image,
called the “View Port,” appears below it. Appearing with
these images are inspection results data and exposure
and cycle times.
Monitor-This
option enables you to monitor SLS
inspection results and discrete outputs, compile results
statistics, log results data, convert logged data to other
formats such as MetriStat Lab, and generate log reports
for a printer or DOS file.
-
Statistical Process Control - This option enables you
to perform statistical process control operations, during
which you can monitor statistical data displays using a
variety of control charts. In addition, you can compile
results statistics, log result data and statistics, and, as
with the Monitor option, convert logged data to other
formats and generate log reports.
Program ConfQuration -This option enables you to
select various “global” parameters, such as
communications ports, header data for log and other
reports, and type of graphics adapter.
Help - This option enables you to access the basic help
message, which contains general information pertaining
to the CSS. (Additional help messages are available
throughout the CSS. You can access these messages by
pressing the F 1 key.)
Quit - This option enables you to exit the CSS and
return your PC to its disk operating system. When you
select Quit, the Main Menu disappears from the display,
and the DOS prompt reappears.
1-4
-
Installation
Installing the SLS Configuration Support Software (CSS)
includes two main tasks: connecting the SLS to a suitably
equipped personal computer (PC), and installing the CSS in
the PC.
Software Package:
Items Included
In addition to this manual, you should find the following
items in the CSS package:
l The SLS Configuration
Support Software is supplied on
two 5.2~inch diskettes and one 3%inch diskette. L.ook
for these diskettes in the plastic holders at the back of
this manual.
l One 12-foot (3.7m) RS-232 communication
cable,
Catalog No. 2804-CSC1, which connects the SLS to a
serial communication port on your PC. (If you intend to
connect more than one SLS to your PC, you need one
cable for each additional SLS.)
l One package of connector
pins, which you can use to
modify the 2804-CSCl cable for use with an
Allen-Bradley 1784-T45 Industrial Terminal.
l One 9-t+25
pin adapter, which connects the 2spin
connector on the 28O&CSCl cable to a 9-pin se&l port
on an IBM-AT or comuatible PC. U’his adaoter is not
required for an IBM-&,
IBM-XT; or compatible, PC.)
Verify that these items are included in your package.
Hardware
Requirements
You can install and operate the SLS Configuration
Support
Software in any IBM-PCTM or compatible personal
computer with the following minimum equipment:
l DOS:
l RAM:
Version 2.1 or higher.
64OK bytes, with 520K bytes free.
l Disk drives:
Two 1.2M-byte, 5.2~inch
one 1.44M-byte, 3.S-iich disk drive.
l Serial communication
disk drives, or
ports: One port for each SL.S
connected to the PC.
l Communication
cables: One RS-232 cable for each
SLS attached to the PC, and one cable for a printer, if
used.
l Display adapter:
A graphics display adapter and
monitor (to support the View Image and Statistical
Process Control options). The CSS supports hercules,
CGA, EGA, and VGA adapters, and the Paradise and
Video 7 super VGA adapters.
Note that one RS-232 communication cable, Catalog No.
28044X1,
and one g-to-25 pin adapter are supplied with
the CSS.
The following hardware is recommended:
l Computer:
An IBM ATTMor compatible computer
with an 80286,80386, or 80486 microprocessor operates
faster than an 808&based computer.
l Math coprocessor:
A math coprocessor enables your
computer to perform mathematical calculations faster
than the same computer without a coprocessor. This is
especially useful for SPC operations.
l Color monitor:
A color monitor enhances the
differences between the graphic elements in the data
displays and the various menus.
-
l Disk drives:
A hard disk drive provides faster operation
of the CSS, and it enahles you to maintain all of the CSS
files on one disk.
l Printer:
A parallel or serial printer enables you to
acquire hard copies of the various reports that are
available in the CSS.
Connecting the SLS to the PC
Befonz proceeding with the RS-232 cable connections,
connect the SLS to its power supply as described in the
SLS User’s Manual. Be sure to remove power from the
SLS and set the PC power switch to OFF. This reduces the
probability of accidently damaging the equipment.
Use the following steps to connect the RS-232 cable
between the SLS and PC.
Your Action
2-2
Comments
Remove the capfrom
connector J3 on the SLS
Save the cap for possible future use. A cap should always
he in place on an unused SLS connector.
Locate the SL.%to-PC
communication cable.
This is the RS-232 communication cable. It has a round
4-pin connector on one end and a 2%pin D-type connector
on the other end.
-
Note the two alignment
keys on the 4-pin
connector
Refer to Appendix A, RS-232 Cable Connections, for
pinout information.
Carefully align the 4-pin
connector with J3 on the
SLS.
Refer to Figure 2.1, below.
Figure 2.1 Connecting the Cable to 53
_-
Attach the connector to 53,
and tighten the locking
ring.
This completes the cable connection
If your PC has a g-pin
serial connector, attach the
g-to-25 pin adapter to the
communication cable.
This step applies only to IBM-AT or compatible
Attach the connector to the
appropriate serial port on
the PC.
This completes the cable connection
to J3.
PC’s
to the PC.
2-3
-
Setting the Remote Configuration Switch
The Remote Configuration switch on the SLS must be set
to “Enable” so that the SLS can communicate with the PC
and CSS.
Use the following steps to set the switch to Enable.
Your Action
Comments
Loosen thefour screws on
the SLS cover plate.
Be certain that the screws remain in the cover.
Carefilly remove the cover
plate from the SLS, ami set
it aside for future use.
Use the screwdriver supplied with the 3.X The SLS
appears as shown in Figure 2.2 with the cover removed.
Fgure 29 Settingthe RemoteConfigurationSwitch
1
+I
NORMAL LIGHTING -0
STROBE LIGHTING
REMOTE CONF. ENABLE
REMOTE CONF. DISABLE 1
OUTPUTS N.C.
Press down here
(0) to set switch
2-4
I
I
1
Note the column of 12
“DIP” switches.
These 12 “rocker” switches select the SLS analysis
function and operating parameters, including the Remote
Configuration switch.
Press down on the rocker
switch as shown in
Figure 2.2 (page 2-t).
This completes the Remote Configuration
Software Installation
switch setting.
The SLS Configuration Support Software is supplied on
two 5.2~inch diskettes and one 3.5inch diskette. Use
whichever diskettes are appropriate for your PC.
Note: Before you install the software, you should make a
copy of the software and use the copy for installation. Refer
to your DOS manual for instructions.
Installing the CSS in your PC is simple and
straightforward. The following steps show you how.
If you are using a 5.2%inch drive, use all of the steps to
install the CSS.
If you are using a 3.5inch drive, the steps are the sa.me,
except that aUfile.s are on one diskette; thus, the
installation continues to completion after you type the
“install” command and press the ENTER key.
Your Action
Comments
Insert the diskette labeled
“#I” in the disk drive.
Type A:INSTALL or
B:INSTALL at the DOS
prompt, then press the
ENTER key.
This activates the installation program, which creates an
“SLS” directory, then begins loading files into it. When it
finishes installing from diskette #l, a screen prompt asks
you to insert diskette #2. (You can type the “install”
command using uppercase or lowercase.)
Note: The “A:lNSTALL” and “B:lNSTALL” commands
install the CSS in English. To install the CSS in a different
language, such as French, type “A:INSTALL -LF’. Use the
initial letter of the language after the “L” (uppercase or
lowercase).
Remove diskette #I when
the screen prompt appears.
Insert the #2 diskette, then
follow the screen prompts.
The “install” software loads in the remaining files. When it
finishes, a screen message appears.
Remove diskette #2.
This completes the CSS installation.
2-5
Software Removal
In the event that you need to remove the CSS along with al!
logs and saved statistics, you can use the following steps:
1.
If you generated log files while using the short or long
setup menu, delete the SPC setup records that contain
these log files (this deletes the log files).
2.
Return to the SLS Main Menu.
3.
Highlight “Quit,” then press the ENTER key. This
causes the DOS prompt to appear, typically, as follows:
c:\sIs.
4.
Type “DEL*.*” to remove all files from the SLS
directory.
5.
If you deleted log files in step 1, type “RD SLS.LOG’
to remove the SLS .LoG directory.
6.
Type “CIA” to change to the root directory.
7.
Type “RD SLS’ to remove the SLS directory.
Thii completes
2-6
the CSS removal.
-
Getting Started
This chapter provides a quick, hands-on introduction to the
main features of the SLS Configuration Support Software
(CSS). Included is a set of “Getting Started” procedures for
preparing an example SLS configuration record, sending it
to the SLS, and looking at the View Image, Monitor, and
WC display options while the SLS operates using the
example configuration.
.
Staging the SLS and
Initializing the CSS
Your Action
Before proceeding with this chapter, perform the hardware
connection and powerup check procedures if you have not
already done so. These are described in Chapter 3 of the
SLS User’s Manual, Catalog No. 2804-NDOOl. Then,
perform the SLS setup procedures described in the Staging
SLS and Focusing and Aiming SLS sections in Chapter 4 of
that manual.
Use the following procedures to stage the SLS and initialize
the CSS.
Comments
Find the bar pattern
labeled “Aiming Target” in
the back of this manual.
-
Orient the bar pattern so
that ‘Aiming TaTget” is
positioned as shown in
Figure 3.1.
Refer to Figure 3.1 on page 3-2.
Use the targeting light to
align the target as shown in
the figure.
The targeting light should lie across the bar pattern as
shown in Figure 3.1. (The targeting light coincides with the
SLS field of view.)
Verify that the Remote
Configuration switch on the
SLS is set b “Enable.”
If necessary, refer to Chapter 2 in this manual, Setting
Remote Configuration Switch.
Power up the PC, then type
“CD\sLs” to change to the
SLS directory.
Figure 3.1 Aiming Target Orlentatton Relative to the SLS
Inspection direction
Type in “SLS,” then press
the ENTER key.
This initializes the CSS. After a few seconds, the powerup
banner appears on the display, as follows:
ALLEN-BRADLEY
COMPANY OPERATOR
INTERFACE
AND LOGIC DIVISION
CONFIGURATION
SUPPORT SOFTWARE
- SERIES B, REVISION
A
4
I
This support software was created by the Allen-Bradley
Company,
Operator
Interface
and Logic Division.
It is intended
for use
with the Allen-Bradley
Smart Linear Sensor (Series A and B).
I
:
4
t
t
I
4
Copyright
Interface
(C) 1990,
and Logic
1991, Allen-Bradley
Division,
Milwaukee,
Company
- Operator
Wisconsin
- U.S.A.
Note: The terms “SERIES B, REVISION A” and “(Series
A and B)” in the banner message refer to the status of the
firmware in the SLS. The term “Version 2.0” at the top of
the display refers to the status of the Configuration Support
Somare.
Press any ky.
32
The Main Menu appears on the screen, as shown
Figure 3.2 on page 3-3.
in
Figure32 MainMenu
thin tlenu
nart Linear Sensor
Select an option using J and t then press ENTER. Fl for help.
stical
Smart Linear Sensor
Uersion 2.88
F2 change port.
Process Control
-
Series B, Revision FI
3-3
Preparing an SLS
Configuration
Use the following procedure to prepare an example
configuration and send it to the SLS. At this point, your
SLS should be staged as indicated above, powered up, and
connected to the PC.
Comments
Your Action
Verify that the reverse video The Configure option enables you to create SLS
is highlighting the
configuration records.
“Configure” option in the
Main Menu.
CUTSOT
Press the ENTER key to
When you press the ENTER key, the Configuration Menu
select the Configure option. appears on the screen, as shown in Figure 3.3.
Figure3.3 Configuration
Menu
Smart Linear Sensor
m
Insert
Delete
Configuration
flodify
Overwrite
Henu
Send
Report
Uersion 2.88
View Image Utilities
Use + and + for options.
Use 1, t, PgUp, PgDn, Howe, and End for records.
Press EWfERto run option.
ESC Main knu.
Fl for help.
F2 change port.
Verify that the CUTSOT is
highlighting the ‘Add”
option in the Configuration
Menu.
3-4
The Add option enables you to add a new configuration
record to the Configuration Menu.
When you press the ENTER key, the Configuration
appears on the screen, as shown in Figure 3.4.
Press the ENTER key to
select the Add option.
Screen
Fgure 3.4 ConfigurationScreen
Configuration
Smart Linear Sensor
Fill
in the configuration
Use hardmare witch
-(Off)
settings?
Pitch
screen.
Version Z.BB
Screen
Press ESC uhen done.
Fl for help.
Yes
Settings-
Targeting Light Off
Off x-Off x--
Targeting Light On
Setup 1 Teach Mode
Output Normally Open
Off <--
Output Normally Closed
-
1-D Spatial
Neasurement
Send Setpoint values to the Smart Linear Sensor? Yes
Set Point A (B - 188) 188.88
Set Point B (B - lBB1 lBB.BB
Type “Locate Edges” in the
highlighted Description
field, then press the ENTER
key.
“Locate Edges” is the name or description
configuration record in this example.
of the new
When you press the ENTER key, the cursor advances to the
“Use hardware switch setting?” field, as shown in
Figure 3.5 on page 3-6.
3-5
Figure 36 We hardwm switch settings? Sakclion
art Linear Sensor
I
Fill
Description
Version 2.4
Configurat ion Screen
in the configuration
screen.
Press
ESCuhen done.
Fl
for help.
I
Locate Edges
P
Use harduare switch settings?
--IOff
I muitch
Ifyou
see “Yes” under the
cursor,
press the space bar
to select ‘No,” then press
the ENTER h
Otherwire,
just press the ENTER key.
a
ml) 1
Settings
I
This field determines the source of the DIP switch settings
for this configuration
record. “Yes” selects the ha&vare
switch settings on the SLS, while “No” selects the software
switch settings in this configuration record. (The “Locate
Edges” example configuration record uses the “software”
switch settings shown in the following steps.)
When you press the ENTER key, the cursor advances to the
first parameter switch selection, as shown in Figure 3.6.
Fgura 3.6 ParameterSwitches
I --(Off I C)“vitch
Settings-
‘targeting Light Off
Run Mode
!iF
-
Dark Object
Level Triggered
Normal Lighting
Output Normally Open
High Resolution
On
-->
On
-->
On
-->
Off (-On
->
mll) 1
Targeting Light On
Setup / Teach Mode
Light Object
Edge Triggered
Strobe Lighting
Output Mornally Closed
High Speed
(The “On/Off” pattern of the parameter switch settings
shown in Figure 3.6 may not be the same as the settings
appearing on your screen.)
Ifyou see “On” under the
cursor, press the space bar
to select “Ofi” then Press
the ENTER key. Otherwise,
justpress the ENTER key.
This configures
the targeting light to Off.
When you press the ENTER key, the cursor advances to the
next parameter switch selection.
-
-
Use the space bar and
ENTER key to conjigure the
remaining switches as
shown in Figure 3.7.
Note that the Remote Configuration switch is not included
in this group. That switch can be set only on the SLS itself.
Figure 3.7 shows how the parameter switches are set for the
“Locate Edges” example configuration record. “Off’
selects the parameter in the left column, while “On” selects
the parameter in the right column.
Figure 3.7 ParameterSwitchConfiguration
II
-(Off I Mitch
Targeting
SettingsOff <--
Light Off
Run tlode
on
-->
Dark Object
Level Iriggered
Normal Lighting
Output Norrrally Open
High Resolution
Off
Off
Off
Off
m
<-(-<-<--
Ion) 1
Targeting Light On
Setup 1 Teach tlode
Light Object
Edge Ir iggered
Strobe Lighting
Output Normally Closed
High Speed
When you press the ENTER key after setting the last
switch, the cursor advances to the “SLS Function” field and
the SLS Function Selection Menu appears on the screen, as
shown in Figure 3.8.
Figure38 SLSAnalysisFunctionSeietion
tings-
.-
1-D Spatial lleasurenent
Object Width Neasurenent
Object Void Heasurenent
Largest Object Width
1-D Object JIecognit ion
Included Obj. lexture Recognition
Full Field Texture Recognition
>
ml)
1
Targeting Light On
Setup / Teach Mode
Light Object
Edge Triggered
Strobe Lighting
Output Normally
Closed
High Speed
SLS Function
The function selection menu contains all of the SLS
analysis functions (they do not all appear at the same time
3-7
because of space limitations). The SLS Function field
shows the current selected function.
Ifyou see “1-D Spaliul
Measurement” in the
function field, press the
ENTER key and && the
next step.
Press the back space key
(or the space bar)
repeatedly until “I-D
Sjatial tieasurement”
appears in ~hefunc~ion
j&U, then press Ihe ENTER
Note that “Object Void Measurement” appears in the SLS
Function field in Figure 3.8 (page 3-7.)
I-D Spatial Measurement is the SLS analysis function to
be used in the “Locate Edges” example.
This completes the “Locate Edges” example configuration
record. (Chapter 5, Configure Option, describes the full
Configuration Screen in detail.)
Press the ESC key.
This causes three menu options to appear near the top of the
Configuration Screen, as follows:
Verify that the cursor is
highlighting “Save,” then
press the ENTER key.
When you press the ENTER key, the “Locate Edges”
example configuration record is saved, and the
Configuration Menu returns. The new record now appears
under “Description,” as shown in Figure 3.9.
Save
Cancel
Modify
Fgure 3.9 “Locate Edges” Record in Configuration
hart Linear
-m
Insert
Delete
Hodify
I-
ImmimIi
II
1m-1
Configuration Henu
Sensor
Overwrite
-
Menu
Version 2.81
Send Report View Image Utilities
1
-
Press the “S” key to select
the “Send” option.
The Send option sends or “downloads” the highlighted
configuration record (“Locate Edges”) to the SLS.
Press the ENTER key.
This sends the “Locate Edges” configuration
SLS.
record to the
Press the ESC key.
This causes the CSS to exit the Configuration
return to the Main Menu.
Menu and
This completes the “Getting Started” procedure for
preparing an SLS configuration.
Continue with Using the View Image Option, next.
3-8
-
-
Using the View
Image Option
The following procedure shows you how to select and use
the View Image option.
The View Image option displays images from the SLS
while the SLS operates using its current configuration. (In
this case, it is the “Locate Edges” example configuration
record, which you downloaded earlier using the Send
option).
Following an inspection cycle, the SLS sends image and
results data to the PC, and the CSS then displays these data
on the screen.
Comments
Your Action
Press the “V” key to
highlight the View Image
option in the Main Menu.
Press the ENTER key.
-
This causes the View Image Trigger Menu to appear, as
shown in Figure 3.10.
Figure 3.10 Vii
I Uin
Han
Image Trigger Menu
I
I
I
m
Keyboard Trigger
Pro Externa 1 Trigger
He1 Keyboard 1 External Trigger
I hi I
Sta
_-
Verify that the cursor is
highlighting “Automatic
Trigger,” then press the
ENTER key.
When you press the ENTER key, the SLS begins acquiring
images and sending image and results data to the PC. When
the Aiming Target is properly positioned (as shown in
Figure 3.1, page 3-2). the View Image display appears as
shown in Figure 3.11 on page 3-10.
3-9
Figure3.11 View Image Display of the Aiming Target
t
piixiq
Black bar
/
white
c
1) First edge:
2) Last edge:
I
Black-gray-black
28.5~
75.3x
\
White
1-D Spatial ?kcasuraent
KS = first edge il last edge
The View Image contains two graphic displays:
Image, and the View Port.
the Line
The Line Image represents the full image field of the SLS.
Since the SLS acquires an image from the bottom up
(Figure 3.1, page 3-Z), it “sees” the solid black bar first,
then the black-gray-black
bar. Note that the black portions
of the Line Image are highest, the white portions lowest,
and the gray portion in between.
The View Port is, in effect, a magnified part of the Line
Image. The magnification is adjustable both vertically and
horizontally.
Note that if the “Locate Edges” example configuration
record had specified Light Object instead of Dark Object
(see switch settings in Figure 3.7, page 3-7), the images
would be inverted, as shown in Figure 3.12 on page 3-11.
3-10
Figure3.12 lnwted Line Image Diilay of the Aiming Tqet
-t
ET
wbitc
-
wllib?
White
7
I
L
J
Black bar
Black-gray-black
Chapter 6, View Image, provides full details of the View
Image display.
Press the ESC key twice.
This causes the CSS to exit the View Image option and
return to the Main Menu.
This completes the “Getting Started” procedunz for using
the View Image option.
Continue with Using the Monitor Option, next.
3-11
Using the Monitor
Option
The following procedure shows you how to select and use
the Monitor option.
The Monitor option displays results data from the SLS
while the SLS operates using its current configuration. (In
this case, it is the “Locate Edges” example configuration
record, which you downloaded earlier using the Send
option).
Following each inspection cycle, the SC3 sends results data
to the PC, and the CSS then displays these data on the
screen.
Comments
Your Action
Press fhe “AI” key to
highlight the Monitor
option in the Main Menu.
Press the ENTER key.
This causes the Monitor Menu to appear, as shown in
Figure 3.13.
-
Figure3.13 MonitorMenu
CO-
t
St 3
Pr
HAni& with Logging
He Honitor I Log, NO Statistics
@I Log Results ONLY
Log File Report
Save Log to Text File / Lotus 123 .PRN
Save Log to MetriStat Lab Format
Save Log to DataNyte TurboSPC .PRN Format
Save Log to dBfXE .DBF Format
Delete knitor
Log
Verify that the cursor is
highlighting “Monitor with
NO Logging,” then press
the ENTER key.
3--12
When you press the ENTER key, the CSS begins displaying
results data from the SLS on the Monitoring Smart Sensor
screen, as shown in Figure 3.14 on page 3-13.
Fgure 3.14 Monitoring Smart Sensor Screen
Smart Linear Sensor
Version
Bonitoring Smart Sensor
Press Fi for help.
2.86
Press ESCwhen done.
Start Time: 15:51:29
Start Date: WlW1991
Result FI- First edge
lean: 28.81
Standard Deuiation: 0.87
Max: 28.23
Min: 27.58
Range: 8.73
Max: 82.69
Nin: 82.68
Range: 8.61
Result B - Last edge
Hean: 82.37
Standard Deuiation: 8.97
Switch Settings:
Using remote configuration
Lighting compensation is On
Exposure
Time (~1: 12.2
Cycle Time Cns): 48
Triggers Processed: 921 of 921
Function: 1-D Spatial Measurement
Targeting Light Off
Setup 1 Teach Hode
Dark Object
Level Triggered
Nomal
Lighting
Remote Configuration Enabled
Output Normally Open
High Resolution
The inspection results data appear as horizontal bars, and
statistics based on this data appear under each bar. Listed
below these displays are the selected analysis function, the
switch settings (operating parameters), and other data
related to the inspection operation.
Chapter 7, Monitor, provides full details of the Monitoring
Smart Sensor screen.
Press the ESC ky hvice.
This causes the CSS to exit the Monitor option and return
to the Main Menu.
This completes the “Getting Started” procedure for using
the Monitor option.
Continue with Using the SPC Option, next.
3-13
Using the SPC
Option
The following procedure shows you how to select and use
the Statistical Process Control (SPC) option.
-
The SPC option displays statistics based on results data
accumulated from the SLS while the SLS operates using its
current configuration. (In this case, it is the “Locate Edges”
example configuration record, which you downloaded
earlier using the Send option).
Following each inspection cycle, the SLS sends results data
to the PC. During SPC operations, the CSS performs
statistical calculations on the results data and displays the
results of these calculations on the SPC screen.
Your Action
Comments
Press the ‘27’ key to
highlight fhe Statistical
Process Control option in
the Main Menu.
Press the ENTER key.
This causes the SPC Setup Menu to appear, as shown in
Figure 3.15.
-
Fgure 3.15 SPC Setup Menu
Verify rhot the CUTSOT is
When you press the ENTER key, the Chart Selection and
highlighting “Chart
Setup Menu appears on the screen, as shown in Figure 3.16
Selection and Setup Menu,” on page 3-15.
then press the ENTER key.
3-14
-
Figure3.W ChmtSeMionandSeiupMenu
K Bar and Histogram X and Histogram
X and Sideways Histogram
Turn Logging On
Log File Cowersion
SPC Log Report
Delete SPC Log
Saue SPC Setup Configuration
Results
Verify that the cursor is
highlighting “‘XBar and R
and Histogram,” then press
the ENTER key.
logging
is Off.
When you press the ENTER key, the software begins
initializing the SPC display screen, then begins displaying
the SPC data as shown in Figure 3.17 on page 3-16.
The SPC data display in this example includes a histogram
and graphic display of results data averages (X Bar), and a
graphic display of range data (R). Basic statistical data
appear under each histogram. This is one of several chart
displays that am available for SPC operations.
Chapter 8, Statistical Process Control, provides full details
of the SPC menus, screens, and data displays.
This completes the “Getting Started’ procedure for using
the SPC option.
Continue with Summary of CSS Procedures, next.
3-15
Figure 3.17 WC Data Display: X Bar and Rand Histogram
Summary of CSS
Procedures
3-16
When using the CSS, keep in mind the following main
procedures and the order in which you perform them:
l
Prepare a configuration
l
Send the configuration
l
Use the View Image option to display line images and
results data The View Image option can be useful for
“fine tuning” the SLS staging (lighting, aiming, and
focusing) and for adjusting certain operating parameters.
l
Use the Monitor option to monitor, log, and/or report the
results data horn SLS inspections under actual or test
operating conditions.
l
Use the SPC option to perform a variety of statistical
process control calculations on the results data from SLS
inspections, display SPC data, log SPC data, and report
SPC data.
record.
to the SLS.
User Interface: Getting Around
The “user interface” is the point at which you interact with
the CSS. More specifically, it refers to the s~ucture of
menus, data entry screens, symbols, and various other
elements that the CSS displays on the PC monitor.
“Getting Around” the user interface requires using
specified keys on the keyboard, or using a mouse, if one is
installed on your PC.
This chapter provides easy-to-follow
procedures that show
you how to use the keyboard (or a mouse) to enter and exit
menus and screens, select menu options, and so on. The
procedures “walk” you through various menus and screens
in order to demonstrate the keyboard and mouse functions.
The remaining chapters of this manual show you the defuifs
for using all of the menus and screens.
Keyboard Usage
This section describes the functions of keys and illustrates
using the keyboard to interact with the CSS.
Key Assignments
Several of the keys have been assigned a specific function
within the CSS. Some of these keys have more than one
assignments, the specific assignment varying according to
the selected task.
Here is a list of the keys, along with a brief statement of
their functions within the CSS:
l
Fl: Function key #1 selects “help” messages throughout
the menus and screens.
l
IQ: Function key #2 enables you to change the serial
communication port number from menus (but not from
data entry screens).
l
F3: Function key #3 enables you to calibrate the chart
scales when setting up statistical process control (SPC)
operations.
l
F4: Function key #4 displays the serial communication
port to which the SLS is connected. It also shows the
series and revision level of the firmware in the SLS.
l F5:
Function key #5 clears all data from a data entry
field, regardless of the position of the data entry cursor.
l
F6: Function key #6 clears all data to the right of the
data entry cursor.
l
F7: Function key #7 operates as an “undo” key. It
restores the previously saved data to the field.
l
ESC (escape): The escape key, in general, returns the
previous menu or screen to the display.
l SPACE BAR:
The space bar key moves the reverse
video cursor to the next menu option, deletes characters
to the right in data entry fields, and toggles Yes/No
selections.
l BACKSPACE:
The backspace key moves the reverse
video cursor to the previous menu option, deletes
characters to the left in data entry fields, and toggles
Yes/No selections.
l
l
ENTER: The enter (or “Return”) key selects
highlighted menu options and data in the data entry
fields.
Arrow keys (up, down, left, right): Generally, these
keys enable you to move cursors within the menus and
screens. They also perform specific functions in the
display screens.
l PgUp
and PgDn (Page Up and Page Down): These
keys enable you to “page” rapidly through data entry
screens, help message screens, and vertical menus.
l Home and End:
These keys enable you to move rapidly
to the beginning or end of help message screens and
vertical menus. (The Control-Home and Control-End
key combinations perform the these functions in data
entry screen.)
l
TAB: The Tab key moves the reverse video cursor into
menus that appear within data entry screens. In addition,
it performs selection functions in the View Image and
SPC displays.
l Initial letters:
By pressing the initial letter of all menu
options, you can select an option quickly without using
the arrow keys.
4-2
-
Using the Keyboard
This section contains a procedure that illustrates the
functions of the keys listed previously. It doesn’t cover
every possible situation, of course, but after stepping
through the procedure, you should be able to navigate
efficiently throughout the CSS.
The Main Menu, shown in Figure 4.1, is the starting point
of the procedure. It illustrates the “prompt” he, which, in
this case, is near the top of the screen (in some cases, it
appears at the bottom of the screen). It “prompts” the use of
tlk up and down arrow keys, the ENTEri key, and the Fl
and F2 keys. In all cases, the prompt line shows the
commands that apply to the current screen.
Figure4.1 MainMenu:KeyFunctions
hart Linear Sensor
Uersion 2 -88
Hain Ilelenu
Select an option using 1 and t then press ENTER. Fi for help.
F2 change port.
Reverse video cursors
It highlights the Main
Menu option to be selected.
/
/
The “prompt” line:
It shows the keys
that apply to the
Main Menu.
Uiew Image
noni tor
Statistical
Process Control
Program Configuration
Help
Quit
,Smart Linear Sensor
-
Series B, Reuision A
4-3
Use the following procedure to familiarize yourself with
the commands or keys listed above:
Comments
Your Action
Press the down arrow key.
The reverse video cursor in the Main Menu moves down to
the View Image option.
Press the letter “S” key,
The cursor moves down to the Statistical Process Control
option.
Press the up arrow key.
The cursor moves up to the Monitor option.
Press the ENTER key.
This selects the Monitor option. The Monitor Menu appears
on the screen, as shown in Figure 4.2. Note that the prompt
line now includes the ESC key.
Figure 4.2 Monitor Menu: Key Functions
Snart
Linear
Sensor
I Use 1 and t then press
Monitor tlenu
ENTER. ESC previous
Version 2.N
nenu.
Fl help.
F2 change port.
cu
Vi
ll0
St
Pr
He
Press the ESC key.
This returns to the Main Menu (Figure 4.1 on page 4-3.)
Press the letter “C” key.
The cursor moves back up to the Configure option.
Press the Fl key.
This selects a help message that describes the Main Menu
options. Refer to Figure 4.3 on page 4-5. Note that the
prompt line non’ containT a new set of key prompts.
Press the PgDn key.
The help message scrolls down to the next “page.” (A page
is 17 lines, the size of the help message box.)
Press the PgDn key again.
When you press PgDn again, the next page appears (or the
last page, in some cases).
Press the PgUp key.
The help message scrolls back up to the previous page.
Press the End key.
The help message scrolls down to the last page in the help
message.
-
Figure 4.3 Fl Key: Displaying the Main Menu Help Message
Version 2.00
Help
iDMrt Linear Sensor
Use PgUp, PgDn, Hone, End, 1, and t to uiew.
The tlain Iienu lists
Software.
the main options
Fl to search.
in the SLS Configuration
ESC uhen done.
I
Support
To highlight an option in the renu, use the Up Armu t and Dow clrrou 1
keys (or the option’s initial
letter) to lwue the reverse video bar
Use the ENTERkey to select the
(“cursor”) over the desired option.
high1 ighted option.
To print
Screen
the contents
of the current
key or the Ctrl and P keys,
These are the kin
menu or help message, press the Print
Menu options:
Conf igure
The tern “Configure” meanssetting up the SLS for a specific
application.
It includes selecting and storing inspection function
parameters, setpoints,
and data accumulated while operating in the
‘rem the Home key.
The help message scrolls back up to the first page.
Press and release the &
arrow key.
The help message scrolls down one line. (If you press and
hold the down key, the page scrolls continuously.)
Press and release the Q
arrow key.
The help message scrolls up one line.
Press the FI key again.
A message appears asking you to “Enter a string to look up
(ESC to cancel):” Below the message is the word
“Configure,” which is the default “string,” in this case.
Press the ENTER key.
This causes the CSS to search for the fmt occurrence of the
string “Configure.” When found, Configure appears on the
top line in the message box, as shown in Figure 4.4 on page
4-6.
-
4-5
-
Figure4.4 Fi Key:String!3earchFunction
hart
I
Linear Sensor
Version 2.88
klP
Use PgUp, PgDn, Hone, End, 1, and t to uiw.
Fl to search.
ESCuhen done.
I
Ccmfigure
Ihe tern “Configure” means setting up the SLS for a specific
application.
It includes selecting and storing inspection function
parameters, setpaints, and data accumulatedwhile operating in the
“setup&ach” mode,
If you had typed “monitor,” the software would search for
the first occurrence of that string.
Note: The case of the string has no effect on the search.
Thus, MONITOR, Monitor, and monitor are all the same to
the search function.
Press the ESC key.
This returns to the Main Menu (Figure 4.1, page 4-3).
Press the F2 key.
When you press F2, a message appears asking you to
“Enter a new port number (ESC to cancel):” Below the
message is the current default COM port number.
-
If you enter 2 (then press ENTER), and COM 2 is not
installed in your PC, this message appears: “The specified
communication port number does not exist. The hardware
does not show the presence of COM2.”
Press the F4 key
When you press F4, this informative message appears:
SLS
is
connected
to
B, Revision
Press
any
key.
Series
COMl.
A.
This message shows you quickly the default COM port
number and the series and revision levels of the firmware in
the SIS connected to that port.
Verify that the Configure
option i.~highlighted in the
Main Menu, then Press the
ENTER key.
4-6
This selects the Configuration Menu, the upper part of
which appears in Figure 4.5 on page 4-7. Note that the
prompt line has moved to the bottom of the screen, and the
former prompt line now conkns the Con&u&on
Menu
options.
-
Figure4.5 ConfigurationMenu
. Insert
IrIm
Delete
Uersion 2.EU
Configuration tlenu
&art Linear Sensor
Hodify Ouerwite
Press the ENTER key.
Send Report View lnage
This selects the Configuration
which appears in Figure 4.6.
Utilities
Screen, the upper part of
Fgure 4.6 ConfigurationScreen
Smart Linear Sensor
Fill
Version Z.BEl
Configurat ion Screen
in the configuration
screen.
Press ESCuhen done.
Fl for help.
I
Description
Pll
Type “‘New Configuration”
in the Description field.
Press ESC, then ENTER, to
bake the description.
The Configuration Menu reappears, with “New
Configuration” now under “Description.”
Press the “M” key, then
ENTER, to restore the
Cor$guration Screen.
The Configuration Screen reappears, with “New
Configuration” still in the Description field.
Press the right arrow key to
move the data entry cursor
under “c” in the word
“Configuration.”
Press the F6 key.
This clears “Configuration”
from the field.
Press the F7 key.
This restores “Configuration” to the field, since you saved
“New Configuration” in a previous step.
Press the F5 key
This clears “New Configuration”
Press the down arronp key
repeatedly, until the SLS
Function Selection Menu
appears.
Refer to Figure 4.7 on page 4-8. Note that the TAB
prompt appears in the prompt line.
from the field.
Note also that “1-D Spatial Measurement” appears in the
SLS Function field, indicating that this is the current SLS
function selection.
4-7
Figure 4.7 SLS Function S&don
r Snart
Linear Sensor
SLS Function
Selection
Menu
Version
Ienu
2.80
ss TABto moue to the nenu or SPfICEBARto advance or BACKSPfiCE
to go back.
Targeting
Light On
Object Void Reasurement
Strobe
Lighting
Output Normally Closed
Press the TAB key.
This causes the reverse video cursor to highlight the “1-D
Spatial Measurement” function as shown in Figure 4.8.
Figure 48 Menu After Pressing the TAB Key
Targeting
Light On
Ilode
Setup / Teach
Output
Press the down arrow key
twice.
4-8
Normally Closed
The cursor highlights the “Object Void Measurement”
function in the menu, as shown in Figure 4.9 on page 4-9.
Figure4.9 MenuAfter Pressingthe DownArrow Key Twice
Targeting Light On
Setup / Teach Node
Strobe Lighting
Output Normally Closed
Press the ENTER key.
-
This selects the “Object Void Measurement” function, and
it now appears in the SLS Function field, as shown in
Figure 4.10.
Figure 4.10 Menu After Pressing the ENTER Key
1-D Spat ia 1 Measurement
Object Width Heasurment
Object Uoid Neasuxment
Largest Object Width
I-D Object Recognition
Targeting Light On
Setup / Teach Mode
Strobe Lighting
Output Normally Closed
Press the ESC tiy, then
press the ENTER key.
This returns to the Main Menu (Figure 4.1, page 4-3) and
saves the “Object Void Measurement” function
This completes the keyboard familiarization
procedure.
You have seen how all of the keys work, except for the F3
key and right arrow key. The F3 key selects a calibration
function that is active only when you configure specific
SPC parameters. Chapter 8, Stafistical Process Control
Option, demonstrates using the F3 key to select the
calibration function. The left and right arrow keys are also
demonstrated there.
4-9
Mouse Usage
This section contains a procedure that illustrates the
functions of the mouse. Not every possible situation is
covered, of course, but after stepping through the
procedure, you should be able to navigate the mouse
efficiently throughout the CSS. As you will see, the mouse
performs most of the functions of the keys, but in a
different manner.
(When using a VGA graphics adapter with 800 x 600
resolution, the mouse cursor will not appear on the graphic
displays, such as View Image, unless the mouse driver
supports the cursor.)
The Main Menu, shown in Figure 4.11, is the starting point
of the procedure. It shows the initial position of the mouse
cursor after you initialize the CSS.
Fqure 4.11 MouserCursor: Initial Position in the Main Menu
View hage
Honitor
Statistical
Process Control
Progrm Configuration
Help
quit
,Mouse
cursor
Generally, to highlight any object (such as a menu option or
data entry field) with the mouse, move the mouse cursor
over the desired object, then “click” (press and release) the
mouse button.
Alternatively, you can “pull” the reverse video cursor over
the desired object by pressing and holding the mouse button
to highlight the object nearest the mouse cursor. While still
holding the mouse button, you can then move the mouse
and “pull” (or “drag”) the reverse video cursor until it
highlights the desired object.
Note that the “pulling” technique can perform additional
functions, some of which are demonstrated in the following
procedure.
4-10
-
Use the following procedure to familiarize yourself with
the mouse functions. This procedure follows approximately
the same path as the procedure described in the Using the
Keyboard section.
Your Action
Comments
Move the mouse cursor
over the down arrow
prompt in the prompt line.
The prompt line is near the top of the screen.
Click the mouse button.
Notice that nothing happens. The mouse cursor does not
work with the arrow prompts.
Move the mouse cursor
somewhere near the bottom
of the Main Menu.
Press and )&i
button,
-
.-
the mouse
This causes the reverse video cursor to highlight one of the
menu options.
While holding the button,
p& the reverse video
cursor up until it highlights
the Monitor option.
Release the mouse button.
The Monitor option remains highlighted.
“Double click” the mouse
button (press and release
twice, quickly).
This selects the Monitor option. The Monitor Menu appears
on the display (see Figure 4.2 on page 4-4).
Move the mouse cursor
over the ESCprompt., then
click the mouse button.
This returns to the Main Menu (Figure 4.1, page 4-3).
Move the mouse cursor
onto the Configure line in
the Main Menu, then click
the mouse button.
This highlights the Configure option.
Move the mouse cursor
over the FI prompt, and
click the mouse button.
This selects a help message (Figure 4.12, page 4-12) that
describes the Main Menu options.
Move the mouse cursor
over the PgDn prompt, then
click the mouse button.
This causes the help message to scroll to the next “page.”
Move the mouse cursor
over the PgUp key, then
click the mouse button.
The help message scrolls to the previous page.
4-11
Move the moue cursor
over the Endprompt, then
click the mouse button.
The help message scrolls to the last page.
Move the mouse cursor
The help message scrolls back to the first page.
over the Home prompt, then
click the mouse button.
Move the mouse cursor
over the down arrow in the
“elevator shaft.”
Refer to Figure 4.12.
Figure4.12 UsingtheDown Arro~inthe~ElevatorShaW
Smart Linear
Sensor
Version 2,b
klP
Use PgUp, PgDn, Home, End, J, and t to uiew.
Fi to search.
ESC when done.
To highlight
an option in the menu, use the Up Arrou t and Down Arrow 1
keys, (or the option’s initial
letter) to move the reverse video bar
I”cursor”) over the desired option,
Use the ENTER key to select the
highlighted option.
To print
the contents
Screen key
of the current
or the Ctrl and P keys.
These are the Main Menu
menu
or help message, press the Print
options:
Configure
The term “Configure” means setting up the SLS for a specific
It includes seIecting and storing inspection function
application,
Click the mouse button.
The help message scrolls “down” one line. (If you press
and hold the mouse button, the page scrolls continuously.)
Move the cursor over the
up arrow in the “elevator
shaft. ”
Figure 4.13 on page 4-13 shows the upper right corner of
the Main Menu Help screen shown in Figure 4.12.
4-12
Fgure 4.13 Usingthe Up Arrow in the Wevator Shaft”
Version 2 .BE
IP
to uiew .
Fl to search.
ESCwhen done.
I
A
I
1 the SLS ConFiguration Support/
II
1
Ciick the mouse button.
The help message scrolls “up” one line.
Move the cursor to the
halfivaypoint in the
“elevator shafl.”
Here is another method of scrolling through the help
message. Figure 4.14 shows the center right side of the
Main Menu Help screen shown in Figure 4.12).
Figure4.14 Usingthe Mouse Cursor in the “ElevatorShaft”
or help message, press the Print
-
Click the mouse button.
The help message scrolls to about the halfway point of the
message.
Press and !&i
button.
This confines the mouse cursor to the “elevator shaft.”
the mouse
pull the cursor to the top of
the “elevator shaft,” just
beneath the up arrow.
Release the mouse bunon.
The help message scrolls back to the fust page.
Move the mouse cursor out
of the “elevator shaj? to
the bottom boundary of the
help message box.
Press and m
the mouse
bunon fora few seconds.
The help message scrolls “down” as long as you hold the
button, until it eventually reaches the end of the message.
4-13
Move the mouse cursor to
the @ bowlda?yof the
help message box.
Press and && the mouse
button until the help
message stops scrolling.
When the help message stops scrolling, it has returned to
the first page.
A message appears asking you to “Enter a string to look up
Move the mouse cursor
(EX to cancel):” Below the message is the word
over the FI prompt again,
then click the mouse button. “Config~,” which is the d&&t “sting.”
Note: At this point, the mouse is inactive. To proceed, you
must use the keyboard, as follows:
Press the ENTER key.
This causes the CSS to search for the fmt occurrence of the
string “Configure.” When found, Configure appears on the
top line in the message box, as shown in Figure 4.15.
Fgun?4.15 Fl Key:StringSearchFunction
Smart Linear Sensor
Version 2.W
Help
ltse PgUp, PgDn, Home, End, 4, and t to uiew.
Fl to search.
_
ESCwhen done.
,,#I
Cd igure
The term “Configure” means setting up the SLS for a specific
application.
It includes selecting
and storing
inspection
function
parameters, setpoints, and data accumulated while operating in the
“setuP/teach” mode.
If you had typed “monitor,” the software would search for
the fust occurrence of that string.
Note 1: The case of the string has no effect on the search.
Thus, MON!XOR, Monitor, and monitor are all the same to
the search function.
Note 2: The mouse is active again at this point.
Move the mouse cursor
over the ESC prompt, then
click the mouse button.
This returns to the Main Menu (Figure 4.1, page 4-3).
Move the mouse cursor
over the F2 prompt, then
click the mouse button.
When you click F2, a message appears asking you to “Enter
a new port number (EX to cancel):” Below the message is
the current default COM port number (usually “1”).
4-14
-
Note: At this point, the mouse is inactive. To proceed, you
must use the keyboard, as follows:
Type in “2,” then press the
ENTER key.
If COM 2 is not installed in your PC, this message appears:
“The specified communication port number does not exist.
The hardware does not show the presence of COMZ.”
Move the mouse cursor
onto the Configure line in
the Main Menu, then
“double click” the mouse
button.
This selects the Configuration
in Figure 4.5 on page 4-7.
Move the mouse cursor
over the Add option, then
“double click” the mouse
button.
This selects the Configuration Screen, part of which
appears in Figure 4.6 on page 4-7
Move the mouse cursor
over the SLS Functionjield,
then click the mouse button.
This causes the SLS Function Selection Menu to appear, as
shown in Figure 4.8 on page 4-8.
Move the mouse cursor
anywhere inside the
function selection menu,
then click the mouse button.
This causes the reverse video cursor to highlight the
selected function (in this example, it is the “1-D Spatial
Measurement” function).
Move the mouse cursor
onto the “I-D Object
Recognition” line, then
double click the mouse
button.
This selects the “1-D Object Recognition”
now appears in the SLS Function field.
Menu, part of which appears
function, and it
Altemativelv, move the
mouse cursor over the
ENTER prompt, then click
the mouse button.
Move the mouse cursor
outside the menu (but mt
over the SLS Function
line), then click the mouse
button.
This removes the function selection menu and causes the
E!SC prompt to appear.
Move the mouse cursor
over the ESC prompt, then
click the mouse button.
This causes @e “Save Cancel Modify” options to appear,
with the “Save” option highlighted.
Move the mouse cursor
over the Cancel option,
then double click the mouse
button.
This causes the Configuration
Menu to appear.
4-15
Move he mouse cursor
over the ESCprompt, then
click the mouse button.
Note that the prompt line is now at the bottom of the
screen. When you click the button, the Main Menu returns
(Figure 4.1, page 4-3).
This completes the mouse familiarizafion procedure.
You have seen how the mouse functions work, except for
the F3 key. The F3 key selects a calibration function that is
active only when you configure specific SPC parameters.
Chapter 8, StatisGcal Process Control Option, demonstrates
using the F.3 key to select the calibration function.
As noted earlier, the arrow keys in the prompt lines do not
function with the mouse, since it uses other means to
perform arrow key functions. Also, the mouse has no way
of selecting the F4, FS, F6, and F7 functions. To perform
those functions, you must press the corresponding keys on
the keyboard (see Using the Keyboard for details).
4-16
Configure Option
When you performed the procedures in Chapters 3 and 4,
you had a preview of the Configure Option and the
Configuration Menu and Configuration Screen. (If you
have not yet performed those procedures, it is
recommended that you do so before continuing with this
chapter and the remaining chapters.)
Thii chapter describes the configuration and support
options in the Configuration Menu and the data entry and
parameter fields in the Configuration Screen, and provides
the details for using these two “screens” to perform all of
the SLS configuration and support functions.
Configuration
_ Record
A configuration record contains all of the configuration
data that the SLS requires to perform a specified inspection
application. The CSS can store the conjiguration record in
memory under a descriptive name, and then download the
record to the SLS when required for the application.
(Note that
Appendix
download
application
Configuration
Record Preparation
the Send Configuration utility, described in
D, Send Configuration Utility, enables you to
configuration records to the SLS using
software other than the CSS.)
Here is an outline of the main steps used to prepare any
record:
new conliguration
l
Highlight and select the Configure Option in the Main
Menu.
l
Highlight and select the Add or Insert option in the
Configuration Menu.
l
Access each field in the Configuration
Screen.
l
Enter the appropriate data in each data entry field.
l
Select the appropriate options in the other fields.
l
Slop all fields that do not need to be changed.
l
Save the completed configuration
record.
You can use a similar set of steps to modify an existing
configuration record. The main difference is that you select
the Modify (or Overwrite) option instead of Add or Insert.
COnfiCJU~tiOn &?nU
Options
When you select the Configure Option in the Main menu,
the Configuration Menu appears, the top half of which is
shown in Figure 5.1. Note that the Configuration Menu
options are displayed across the upper part of the screen.
You can highlight a menu option by typing its initial letter,
by pressing the right (or left) arrow key, or by pressing the
SPACE BAR (or BACKSPACE) key. You can select an
option by pressing the ENTER key. You can deselect a
selected option by pressing the ESC key.
Figure 5.1 Configuration Menu Options
Smart Linear
m
Insert
Delete
Version
Configuration Henu
Sensor
Hodify
2.M
Overwrite Send Report View Image Utilities
Sibley
Initially, the area under “Description” is empty; however, in
the example shown in Figure 5.1, the Description area lists
the names (“descriptions”) of three configuration records
that are used in the explanations of the menu option
functions below. Each configuration record shows the time
and date that it was last saved.
Here are the functions of the configuration
1. Add - Select this option to
record. If you save the new
added below the last record
(in Figure 5.1, it would be
of Holes” record).
2.
3.
menu options:
create a new configuration
record, its description is
listed under “Description”
after the “Check Total Size
Insert - Select this option to create a new configuration
record. If you save the new record, its description is
inserted above the highlighted record under
“Description” (above the “Locate Left Edge of Part”
record in the example in Figure 5.1).
Delete - Select this option to delete the highlighted
configuration record. When you press the ENTER key
to delete the record, a message asks whether you am
sure that you want to delete the record. If not, select
5-2
-
“‘No”; otherwise, select “Yes.” When you delete a
record, it disappears from the list, and the records
below the deleted record all move up one line.
4.
Modify - Select this option to modify the highlighted
configuration record, or just review the current contents
of that record.
5. Overwrite - Select this option to upload the
configuration in the SLS and use it to overwrite the
configuration data in the highlighted configuration
record. When you press the ENTER key, the
Configuration Screen displays configuration data from
the SLS, not from the highlighted record. (If you
change your mind after selecting Overwrite, you can
press the ESC key and select “Cancel.“)
6.
Send - Select this option to send or “download” to the
SLS the configuration data in the highlighted
configuration record. You must do this before the SLS
can begin inspection operations using any new or
modified configuration record, since the SLS retains a
configuration until you overwrite it by sending another
configuration. (For more information about the Send
option and downloading configuration data, refer to
Considerations When Using the Send Option, on page
5-4.)
7.
Report - Select this
on the configuration
configuration record.
report to the display
send it to a DOS file
8.
View Image - Select this option to display what the
SLS “sees” when it inspects an object in its field of
view. This option operates in the same manner as the
View Image option in the Main Menu, except that it
gives you access to certain parameters that you cannot
access by any other means. (For a complete description
of View Image functions, refer to Chapter 6, View
Image, in this manual.)
9.
Utilities - Select this option to perform these utility
functions: “Export” configuration records to a different
DOS fde; “Import” configuration records from a
different DOS file, change to a different DOS file, or
copy the highlighted record within the current file.
option to generate a report based
data in the highlighted
You have three choices: Send the
for review, send it to a printer, or
on disk.
5-3
Considerations
When Using the
Send Option
After preparing a new configuration record, or modifying
an existing one, you can use the Send option to download
the data in the new or modified configuration record to the
SLS.
When you select the Send option and press the ENTER key,
the CSS uploads a set of “variables” from the SLS (such as
lighting compensation parameters) that the SLS “learned”
from initial image acquisitions. The CSS compares these
“taught variables” to the variables contained in the
configuration record data to be downloaded (none of these
variables appear on the display).
If the two sets of variables do not match, the CSS displays
the following message:
The taught
variables
match the variables
Do you want to save
in the SLS don’t
in this
record
the SLS variables?
I
(Note that the Yes and No prompts appear in the prompt
line near the top of the display. Initially, Yes is highlighted.)
-
This “taught variables” message asks whether you want the
highlighted configuration record to acquire a set of “taught
variables” from the SLS, or retain those that are currently
stored in the configuration record.
If you select Yes and press the ENTER key, the CSS first
overwrites the stored variables in the configuration record
with the “taught variables” from the SLS, then downloads
the altered configuration data to the SLS. The SLS is then
ready to operate using the new set of variables instead of
the variables originally stored in the configuration record.
If you select No and press the ENTER key, the CSS
downloads the unaltered configuration data to the SLS. The
SLS is then ready to operate using the variables originally
stored in the configuration record instead of the new set of
variables.
Select Yes, typically, during initial setup operations, when
the SLS has heen operating using the “Setup/Teach Mode”
long enough to acquire stable lighting compensation and
other parameters, and is ready to be switched to “Run
Mode” operation.
At that point, you could modify the current configuration
record by changing “Setup/Teach Mode” to “Run Mode”
(or create a new configuration record), save the mcord, then
download it to the SLS. When the “taught variables”
5-4
-
message appears, select the Yes prompt to ensure that the
SLS operates using the newest variables, not the ones
stored in the configuration record.
Select No, typically, whenever the SLS must be
m-configured for an inspection application that requires a
different set of variables. In this case, highlight the
appropriate configuration record and download it to the
SLS. When the “taught variables” message appears, select
the No prompt to ensure that the SLS operates using the
stored variables, not the ones currently in the SLS.
Configuration Screen
Fields
The Configuration Screen appears whenever you select the
Add, Insert, Modify, or Overwrite option in the
Configuration Menu.
When you select either the Add or the Insert option, the
CSS uploads configuration data from the SLS and displays
that data in the Configuration Screen.
When you select the Modify option, the CSS does not
upload configuration data from the SLS and display it on
the Configuration Screen. Instead, it displays the contents
of the configuration record that is currently highlighted in
the Configuration Menu.
When you select the Overwrite option, the CSS uploads
configuration data from the SLS and displays that data in
the Configuration Screen instead of the of the contents of
the currently highlighted configuration record.
Figure 5.2, on page 5-6, is typical of the initial
Configuration Screen that appears when you select the Add
or Insert option.
Note that Figure 5.2 shows only the first part or “page” of
the Configuration Screen. The remainder is shown in
Figure 5.4 on page 5-10. It appears when you press the
PgDn key (or the down arrow key repeatedly).
S-5
Figure59 lnttial ConfigurationScreen(PartI of 2)
hart Linear Sensor
Fill
in the configuration
Use hardware switch settings?
-(Off 1 Mitch
Version 2.88
Configuration Screen
screen.
Press
ESC when done.
Fi for help.
Yes
Set.tingsTargeting Light On
Setup 1 Teach tlode
1-D Spatial Heasurenrent
Send Setpoint values to the Smart Linear Sensor? Yes
Set Point A (Ei - 1W 198.88
Set Point B (9 - 1M) 188.M
Once the Configuration Screen appears on the display, you
can change any of the data and parameter fields to whatever
is appropriate, regardless of whether you selected the Add,
Insert, Modify, or Overwrite option.
Here is a description of each data entry and option field in
the Configuration Screen.
Description
Use this field to identify the configuration record with a
unique name or description, preferably one that identifies
its function in your application. You can enter any series of
up to 50 printable characters. The minimum is one
5-6
-
Use Hardware Switch Settings?
This field asks whether you
settings of the DIP switches
“switch settings” (including
select in the Switch Settings
Screen.
want the SLS to use the
on its access panel, or the
the analysis function) that you
section of the Configuration
Use the SPACE BAR to select Yes or No.
If you select Yes, the SLS uses the DIP switch settings to
determine its analysis function and operating parameters. If
you select No, the SLS uses the “switch settings” and the
analysis function that you select in the Switch Settings
section of the Contiguration Screen.
Note: This question applies only to the functions and
parameters that the DIP switches can select, not to the
setpoint or other settings, which have their own Yes/No
options.
Switch Settings and Function Selection
Note: If you answered Yes to the preceding question, you
can bypass this section of the Configuration Screen.
This section enables you to select the SLS analysis function
and operating parameters for the current configuration
record. (For a complete description of these settings, refer
to Chapters 2 and 5 of the SLS User’s Manual, Catalog No.
280~NDool.)
Use the SPACE BAR to toggle each switch setting field to
either Off or On. “Off’ selects the parameter in the left
column, while “On” selects the parameter in the right
column. Note that the arrow points left for “Off’ and right
for “On.”
Set these “switches” according to the requirements
application.
of your
The SLS Function field selects the SLS analysis function.
When you highlight this field, the SLS Function Selection
Menu appears on the screen, as shown in Figure 5.3 on
page 5-8.
5-7
Figure 5.3 SLSFunctionSelectionMenu
-
II
1-D Spatial Measurement
Object Width Measurement
Object Void Measurement
Largest Object Width
1-D Object Recognition
Included Obj a Texture Recognition
Full Field Texture Recognition
Note that the menu does not show the entire list of analysis
functions at one time; however, you can select any function
using e&r of the following methods:
l
Use the SPACE BAR to scroll down through the list of
functions in the menu, or use the BACKSPACE key to
scroll up. In either case, the currently selected function
appears in the SLS Function field. Stop scrolling when
you see the correct function in the function field.
l
Press the TAB key. When you do this, the current
function (the one in the function field) is highlighted in
the menu. Use the down (or up) arrow key to highlight
the correct function, then press the ENTER key to select
that function.
-
Note: After pressing the TAB key to enter the menu,
you can access the help messages for the analysis
functions by pressing the Fl key.
Setpoint Settings
This field asks whether you want the SLS to use the
settings of the setpoint potentiometers on its access panel,
or the setpoint values that you select in the Configuration
Screen. (For a complete description of the setpoint settings,
refer to Chapter 2 of the SLS User’s Manual, Catalog No.
2804-NLIOOI .)
Use the SPACE BAR to select Yes or No.
S-8
-
If you answer “No” to the setpoint setting question, ignore
the next two data entry fields. In this case, the SLS uses the
settings of the two setpoint “pots” on its access panel.
If you answered “Yes,” enter the appropriate values (0 to
100 percent) for “Set Point A” and “Set Point B” in the next
two data entry fields (you can enter decimal values having
up to two digits to the right of the decimal). The SLS uses
these values instead of the setpoint pot settings.
Note: The SLS converts the setpoint values that you enter
to the nearest storable value, which is always within 0.013
of the value that you entered.
At this point, press the PgDn key to displuy the second part
of the Configuration Screen, as shown in Figure 5.4 on
page 5-l 0.
Edge Span and Edge Height Settings
This field asks whether you want SLS to use the edge span
and edge height values that you enter in the next two data
entry fields. (Normally, you use the View Image option to
determine the appropriate span and height values, then
enter them in the two fields. For a complete description of
edge span and edge height parameters, refer to Chapter 6,
View Image Option, in this manual.)
Use the SPACE BAR to select Yes or No.
If you select Yes, the CSS sends these two values when you
download the configuration to the SLS. If you select No,
the CSS does not download these values. Instead, the SLS
uses the default values (span = 4, height = 3).
If you answered “No” to the edge span/edge height
question, ignore the two data entry fields. If you answered
“Yes,” enter the appropriate values (1 to 10) for “Edge
Span” and “Edge Height.”
5-9
Figure5.4 InitialConfiguration
Screen(Part2 of2)
hart Linear Sensor
Fill
Version 2.08
Configurat ion Screen
screen.
in the configuration
Press ESC when done.
Fl for help.
Series B - ONLY
&x Lighting Corrpensation? No
Binarization Function Paraaeters
(B - 255) 48
Binarization Level
Background Probe Position (fl - 99.6) 23.5
Set Point tlethud Both set points for Result A
Invert Discrete Output B? No
Use Burst We? No
Use TiRed Burst Me
Burst Hode Spacing
fbquisition?
Lighting Compensation (Series 6 SLS Only)
This field asks whether you want to enable or disable the
automatic lighting compensation function in the SLS when
you download this configuration.
Use the SPACE BAR to select Yes or No.
If you select Yes, lighting compensation in the SLS remains
enabled (the default condition). If you select No, lighting
compensation in the SLS is disabled.
Refer to Disable Automatic Lighting Compensation on page
6-22 for a discussion of lighting compensation, and for
procedures showing how to use the “disable” feature in
special situations.
5-10
Binarization Function Parameters (Series B SLS Only)
Ignore this field unless you selected one of the two
binarization analysis functions for this configuration and
you want to include the threshold level and probe position
parameters in this configuration. (For a complete
description of the binarization parameters, refer to Chapter
6, View Imuge, in this manual.)
Briefly, the binarization level is the luminance threshold at
which the SLS differentiates between the inspected object
and its background. It can be set to values from 0 to 255.
The lower the value, the closer the binarization level is to
the background luminance level; the higher the value, the
closer the binarization level is the the inspected object’s
luminance level.
The background (or “light”) probe’s position can be
adjusted to measure luminance anywhere in the SLS field
of view (FOV). The position is stated as a percentage of the
FOV ranging from 0% to 99.6%.
If appropriate, enter the values for these two parameters
their respective fields.
in
Set Point Method (Series B SLS Only)
The Set Point Method field selects the “method” by which
the set points affect the discrete outputs on the SLS. You
can use this field to configure the SLS so that both set
points (A and B) operate on the same inspection result; that
is, either result A or result B. The effect is equivalent to
setting two range limits for one inspection result, such as
first edge or object width.
As an example, assume that result A represents an object’s
width, and you have selected “Both set points for Result
A.” Assume also that the nominal or “target” width is
represented by 4O%, the lower range limit by 38%. and the
upper range limit by 42%.
With set point A set to 388, set point B set to 42%, the
“Outputs N.O./Outputs N.C.” switch set to “N.C.,” and
output B inverted, both discrete outputs are open only when
result A is between 38% and 42%. Thus, when inspection
result A is above 42%, output B is closed, when the result
is below 38%, output A is closed.
These relationships
arc shown in Figure 5.5 on page 5-12.
5-11
Figure5.5 Using Both Set Points on OneInspectionResult
Discrete outputs = N.C. 1
Set point A
= 38% olFOV
1 Dkcreteoutput A
= closed
Dkcrete output B
= closed
Output B (inverted)
q open
A
I
I
I
1
I
I
Set point B
=42% ofFOV
-
:
I
1
I
I
I
I
I
I
I-
: Both discrete outputs :
+
areopen +
0when result is between 1
I
38% and428
’
Dkcrete output A
= open
)
Discrete outpot B
= open
)
Output B (inverted)
= closed
l
You can select one of the following set point methods:
1. Single set points - This is the default setting, and it
causes each set point to operate on its corresponding
inspection result. Thus, Set Point A operates on result
A, and Set Point B operates on result B.
2.
Both set points for Result A - This setting causes both
set points to operate on inspection result A.
3.
Both set points for Result B -This setting causes both
set points to operate on inspection result B.
When you highlight the Set Point Method field, the Set
Point Method Menu appears on the screen, as shown in
Figure 5.6.
Figure 5.6 Set Point MethodMenu
Single set points
Both set points for Result A
Both set points for Result B
5-12
You can select any menu option using either of the
following methods:
Use the SPACE BAR to scroll down through the list of
options in the menu, or use the BACKSPACE key to
scroll up. In either case, the currently selected option
appears in the Set Point Method field. Stop scrolling
when you see the correct option in the option field.
Press the TAB key. When you do this, the cUrrent option
(the one in the option field) is highlighted in the menu.
Use the down (or up) arrow key to highlight the correct
option, then press the ENTER key to select that option.
Note: After pressing the TAB key to enter the menu,
you can access the help messages for the set point
methods by pressing the Fl key.
Invert Discrete Output B? (Series B SLS Only)
Thii field asks whether or not you want to invert discrete
output B; that is, change a “normally open” output to a
“normally closed” output, or vice versa. Thus, when
discrete output B would normally be open (because of the
setting of the Outputs N.O.lOutputs N.C. switch), inverting
the output causes it to be closed.
An application of the output inversion function is described
under Set Point Method. and is shown in Figure 5.5 (page
5-12).
Use the SPACE BAR to select Yes or No.
If you select No, discrete output B reflects the setting of the
“Outputs NC/Outputs
N.O.” switch. If you select Yes,
discrete output B reflects the opposite of that switch setting.
Use Burst Mode? (Series B SLS Only)
This field asks whether or not you want to use the burst
mode to acquire images of the inspected object.
The burst acquisition mode enables the SLS to acquire and
store a rapid succession or “burst” of images before
processing any of them. Using this mode, the SLS can
acquire f?om 2 to 9 images at intervals ranging from 6ms to
25ms. This capability can be useful when a series of images
must be acquired more rapidly than the normal cycle time
for the specified analysis function allows.
5-13
For example, if an SLS inspection application requires a
moving object to be measured at four places along its
length, but the object crosses the FOV in 5Oms, the SLS
would be able to acquire and process only two images
during that time, assuming an Object Width cycle time of
25ms.
However, by selecting the burst mode and specifying four
image acquisitions with 1Oms spacing, you can enable the
SLS to acquire four object width measurements, as shown
in Figure 5.7 on page 5-15.
After acquiring the fourth image, the SLS processes all four
images and sends the results data to its RS-232 port. The
CSS can store the results data on disk and/or use it for
monitoring or SPC operations.
Alternatively, other computer equipment can be connected
to the SLS and, when using the appropriate communication
software, can receive the results data and use it for process
control.
-
Note: Because of the indeterminate timing of the analog
and discrete outputs when the burst acquisition mode is in
use, only the RS-232 results should be used.
The burst acquisition mode can be configured
the following methods:
using one of
1. Using one trigger to acquire a specified number of
images (2 to 9) having a specified interval (6ms to
25ms) between them, or
2.
Using multiple triggers to acquire a specified number of
images (2 to 9), but without a specified interval.
In the second method, the SLS evaluates the time interval
between the first and second triggers and uses that as the
baseline for the measuring the intervals between the
remaining trigger pairs (#2 and #3, #3 and #4, and so on).
For example, if the SLS expects seven triggers, but the
interval between trigger #3 and trigger #4 exceeds twice the
interval between triggers #1 and #2, the SLS assumes that a
missed trigger has occurred. It then “times out,” processes
the images already acquired (#l, #2, and #3), sends them to
the PC, and then resets the burst count.
5-14
-
Fgure 5.7 Burst Image Aqulsltion Using 10111sSpacing
Inspected
object
FOV
I
Use the SPACE BAR to select Yes or No.
If you select No, the image acquisition is “normal”; that is,
the SLS acquires andprocesses one image per trigger. If
you select Yes, the SLS can acquire either a “burst” of
images from one trigger or from a “burst” of triggers. In
5-15
this case, the SLS acquires all images before it processes
any of them.
The “Use Tied Burst Mode Acquisition?” field asks
whether or not you want to use a single trigger for the burst
acquisition or one trigger for each acquisition.
Again, use the SPACE BAR to select Yes or No.
If you answer No, the SLS requires a trigger for each of the
image acquisitions that you specify in the “Burst Mode
Acquisition” field. If you answer Yes, the SLS acquires the
specified number of images from a single trigger.
If you select No, ignore the next three fields. If you select
Yes, answer the next question and enter values in the two
data entry fields.
The “Use Tied Burst Mode Acquisition?” field asks
whether or not you want to use a single trigger for the burst
acquisition or one trigger for each acquisition.
-
Again, use the SPACE BAR to select Yes or No.
If you answer No, the SLS requires a trigger for each of the
image acquisitions that you specify in the “Burst Mode
Acquisition” field. If you answer Yes, the SLS acquires the
specified number of images from a single trigger.
Exposure Time Factors
To implement the burst acquisition mode properly, you
must ensure that the SLS exposure time is short enough to
accommodate the intended burst spacing (the interval
between image acquisitions). If the exposure time is not
short enough, the resulting image may lack sufficient
contrast for the SLS to perform reliable edge detection.
As a rule of thumb, the exposure time must not exceed the
spacing time, minus 5ms. For example, if the spacing were
15ms, the exposure time must not exceed 10ms.
Thus, you should use the View Image or Monitor option to
determine the exposure time and, if necessary, adjust the
lighting to achieve an exposure time that is at least 5ms less
than the designated burst spacing.
5-16
_-
Burst Mode Cycle Time Factors
The burst mode cycle time includes the time required to
acquire the designated number of images, using the
designated spacing, plus the time required to process the
designated number of images. These considerations can be
summarized by the example shown by the following
formula, and by Figure 5.8, below.
Burst
(Burst
+ ((hdysis
cycle
time -
spacing * No.
of images)
jimction cycle time - ks) *No. of images)
Figure 5.8 Burst Acquisition Mode Cycle Time Example
-
5-17
-
View Image Option
The SLS Configuration Support Software (CSS) provides
two versions of the View Image Option: One version is in
the Main Menu, while the other version is in the
Configuration Menu. Since the Configuration Menu version
has the most functions, the information and procedures in
this chapter cover its functions, and they include notes to
indicate which functions do not apply the Main Menu
version.
The main purpose of the View Image display is to enable
you to see the image of the inspected object that the SLS
“sees” within its field of view (FOV). Using this display,
you can stage, aim, and focus the SLS more quickly and
accumtely. In addition, the View Image display enables you
to use a number of functions that cannot be used with a
stand-alone SLS.
Note: Before you continue with this chapter, perform the
procedure in Chapter 3, Getting Started, up to the point
where you have the View Image display shown in
Figure 3.12 (page 3-l 1) and in Figure 6.1 on page 6-2.
When you have that image on your PC’s display screen,
return to this chapter.
View Image Display:
Features and
Symbols
The View Image display (Figure 6.1) consists of two main
features: the Line Image, and the View Port. Briefly stated,
the Line Image is a graphic display of the light-and-dark
output from the linear sensor in the SLS. Below the Line
Image is the View Port, which is a user-adjustable,
“magnified” portion of the Line Image.
The following sections detail the features and symbols
within the View Image display.
Line Image
As stated above, the Line Image comes from the linear
sensor in the SLS. The inspection direction along the linear
sensor is from the bottom (mounting side) to the top of the
SLS, as shown in Figure 6.2 on page 6-3. In the Lie
Image, this corresponds to left-to-right.
Thus, the SLS
--” the solid black bar first and the black-grayblack
bar second. Figure 6.2 shows the relation between the FOV,
the inspection direction, and the Line Image.
-
Figure 8.1 View Image Ufsplay of the Almlng Target
QD
(LineImage
Black-gray-black
Black bar
White
White
White
-
Em
t) First
edge:
!I1 Lastedge:
-
22.52
w
1-D Spatial
Xs = first
i!!!Q
tkasurement
edge & last
edge
Look closely at the lower right comer of Figure 6.1, above.
The SLS analysis function is I-D Spatial Measurement,
which locates the fist edge of the frst object in the FOV
and the last edge of the last object in the FOV. A small “x”
identifies the location of each edge.
The Line Image extends across 100% of the FOV. The
starting point of the inspection is the 0% of FOV, and the
ending point is 100% of the FOV. All locations and
measurements are thus stated as percentages of the FOV.
Look closely at the lower left comer of Figure 6.1. The
locations of the first and last edges are stated as percentages
of the FOV. In this case, the first edge location is 22.5%
from the starting point of the inspection (0% of FOV), and
the fart edge location is 68.0% from the starting point.
6-2
-
Figure 62
FDV, Inspection Direction, and Line Image
\
Inspection direction
.
\
.
\
.
\
\
\
\
\
\
,
,
I
,
,
63
View Port
As stated earlier, the View Port is an adjustable,
“magnified” portion of the Line Image. It enables you to
“zoom in” on a selected portion of the Line Image for a
closer look. Figure 6.3 shows this relationship.
Figure 6.3 View Port A Portion of the Line Image
-I.-
I First edge:
22.52
1 last edge: m
---m-D--
I
Xs
q
---w---
-
1-D Spatial kasurenenl
first
edge & last edge
You can adjust the image in the View Port using the icons
and symbols described in the following section.
View Image Symbols
The View Image display contains a number of icons and
other symbols, most of which pertain to the View Port
adjustments. These are numbered in Figure 6.3 (page
+I), and they represent the following functions:
1. Horizontal View Port Marker - This symbol
indicates the specific horizontal segment of the Lime
Image that appears in the View Port. The vertical dotted
lines in Figure 6.3 (page 6A) show this segment in
the Line Image. The shorter the horizontal marker, the
smaller the segment appearing in the View Port, and the
higher the horizontal ‘magnification.”
2.
Panning Arrows -These arrow icons prompt you to
press the left or right arrow key (or “click” the icon
directly with the mouse cursor) to move the horizontal
view port marker left or right. The marker does not
change its length-just its position. (You can use
Control/Arrow to move the marker in larger
increments; and, you can use the Home and End key to
move the marker fully left and right, respectively.) The
effect is to select a different segment of the Line Image.
3.
Microscope/Minus - This icon prompts you to press
the minus (-) key, (or “click” the icon directly with the
mouse cursor) to extend the horizontal marker from the
right end (the left end always remains fixed, unless the
right end is at its rightmost position). The effect is to
“zoom out” from the View Port image.
4.
Microscope/Plus
- This icon prompts you to press the
(-), or minus, key (or “click” the icon directly with the
mouse cursor) to contract the horizontal marker from
the right end (the left end remains fared). The effect is
to “zoom in” on the View Port image.
5.
Vertical View Port Marker-This
symbol indicates
the specific vertical segment of the Line Image that
appears in the View Port. The horizontal dotted lines in
Figure 6.3 (page 6-4) show this segment in the Line
Image. The shorter the vertical marker, the smaller the
Lie Image segment appearing in the View Port (and
the higher the vertical “magnification”).
6.
Limit Selector Arrow - This arrow symbol points to
the upper or lower end of the vertical view port marker,
whichever you designate to move up or down when you
use the up (8) and down (9) arrow keys.
6-5
7.
Arrow Position Select - This icon prompts you to
press the TAB key (or “click” the icon directly with the
mouse cursor) to position the limit selector arrow at
either the upper or the lower end of the vertical marker.
You can toggle between the upper and lower positions
by pressing the TAB key repeatedly.
8.
Up Arrow-This
icon prompts you to press the up
arrow key to move the designated moveable end of the
vertical marker upward. (You can use the PgUp and
PgDn keys to move the end in larger increments.)
9.
Down Arrow - This icon prompts you to press the
down arrow key to move the designated moveable end
of the vertical marker downward. (You can use the
PgUp and PgDn keys to move the end in larger
increments.)
10. Cycle Time -The cycle time value displayed here is
the actual time that the SLS required to process the
current image. The time varies with the selected
analysis function and the exposure time. (For more
information about cycle tune, refer to Appendix B of
the SLS User’s Manual, Catalog No. 2804-NDOOl.)
-
11. Exposure Time - The exposure time value displayed
here is the actual time that the SLS required to capture
the current image. The time varies with the amount of
light in the FOV. (For more information about exposure
tune, refer to Appendix B of the SLS User’s Manual,
Catalog No. 280~NDOOl.)
12. *Edge Span and Edge Height - The values listed next
to “1)” and “2)” are the current Edge Span and Edge
Height parameters, respectively. Their purpose is to
enable you to mom precisely define the edges in order
to make them as stable as possible. In most cases, the
edges are sufficiently well defined for the default
values (4 for Edge Span and 3 for Edge Height) to
ensure stable edges. In a few cases, however, you may
need to adjust these parameters to accommodate less
well-defined edges, or to filter out unwanted “noise.”
(Refer to Edge Height and Edge Span Parameters on
page 6-11 for information about selecting and adjusting
these parameters.)
Note: This location is used to indicate the binary
threshold and light probe location values when the SLS
is configured with either the Binary Object Size or the
‘Not available in Main Menu View Image option.
c-4
-
Binary Object Count analysis function. In these cases,
edge span and edge height are not available.
13. Send Parameters - This symbol prompts you to press
the ENTER key to activate any changes that you make
to the Edge Span and/or Edge Height parameters. After
you press BNIXR. the effects of the parameter changes
appear in the Line Image and View Port displays.
14. *Lighting Compensation
(Series B SLS only) -This
icon prompts you to press the “L” key (or “click” the
icon directly with the mouse cursor) to toggle the
lighting compensation function to the opposite of its
current state (On or Off).
1.5. Escape -This icon prompts you to press the ESC key
(or “click” the icon directly with the mouse cursor) to
exit the View Image and return to the previous menu.
View Image Trigger
Mode Selection
The CSS provides four methods of triggering the SLS to
acquire an image for the View Image display: Automatic,
Keyboard, External, and Keyboard/external. The following
section describes these triggering methods.
Automatic Trigger
When you select Automatic Trigger, the CSS forces the
SLS “offline” and assumes triggering control of the SLS.
This causes the SLS to suspend operations using the trigger
input mode designated in its configuration (that is, an
external trigger signal or its own internal trigger signal) and
rely exclusively on the CSS for triggering commands.
When the CSS issues a trigger command to the SLS, the
SLS acquires an image and sends it to the PC. The CSS
displays the image, and when it is ready for another image,
it sends another trigger command to the SLS. The software
updates the display with each new image that it acquires.
This process continues as long as the Automatic Trigger
mode is in effect; that is, until you press the ESC key.
Note: The rate at which the CSS updates the display
depends on the speed of your PC and graphics adapter, and
whether or not a math coprocessor is installed. The display
update frequency does not correspond to the maximum rate
at which the SLS can operate “online” using its internal
‘Not available in Main Menu View Image option.
6-7
trigger. The main function of the Viiw Image display is to
assist you during the setup and configuration process, not
monitor real time operations.
Keyboard Trigger
When you select Keyboard Trigger, the CSS forces the SLS
“offline” and assumes triggering control, as it does with
Automatic Trigger. However, instead of automatically
issuing a trigger command to the SLS, it waits for you to
press the 7”’ key before issuing a trigger command. When
the SLS sends the image to the PC, the CSS displays the
image, then waits for you to press the “T” key again before
issuing another trigger command to the SLS.
This process continues as long as Keyboard Trigger is in
effect that is until you press the ESC key.
Note: The View Image display includes a “Trigger” icon
when you select Keyboard Trigger (or Keyboard/External
Trigger). This prompts you to press the “T” key (or “click”
the icon directly with the mouse cursor) to send another
trigger command to the SLS. As Figure 6.4 shows, the icon
appears on the left side of the View Image display.
-
Fgure 6.4 Trigger kon on the View Image Display
-
External Trigger
When you select External Trigger, the CSS forces the SLS
“offline.” Instead of assuming triggering control, however,
it issues an enubling or arming command to the SLS, then
waits for an “external” trigger to the SLS to cause the SLS
to acquire an image.
The trigger input mode designated in the current SLS
configuration determines the source of the “external”
trigger signal. Thus, the source is either an o&al external
trigger signal from the J2 input (Edge Triggered mode), or
an internal trigger signal from the SLS itself (Level
Triggered mode, with the J2 input low).
When the trigger input mode is “Edge Triggered,” the 5X-S
acquires an image at the leading edge of a trigger signal and
sends it to the PC. After displaying the image, the CSS
issues another arming command to the SLS. (Note that if
the SLS receives another trigger signal before receiving
another arming command, the SIS ignores the trigger.)
When the trigger input mode is “Level Triggered,” and the
trigger input level is high, the SLS cannot acquire images at
all. However, when the trigger input level is low, the SLS
can acquire an image using its internal trigger signal
provided the CSS has issued an arming command to the
SLS. After displaying the image, the CSS issues another
arming command. With the next internal trigger, the SLS
acquires another image and sends it to the PC.
Keyboard/External Trigger
When you select Keyboard/External Trigger, operation is
identical to External Trigger operation, except that the CSS
waits for you to press the 7” key before issuing an
enabling or arming command to the SLS (see Keyboard
Trigger, page 6-8, and External Trigger, above).
6-9
Using the View
Image Display
This section shows you how to use the View Image display
to help you aim, position, and focus the SLS, and to “fine
tune” the edge location function when the FOV has
unavoidable visual “noise.”
-
Aiming, Positioning, and Focusing the SLS
You can use the View Image display to aim and position the
SLS for optimum use of the FOV, and focus the SLS.
Figure 6.5 shows an image of the “target” shown in
Figure 6.2 (page 6-3). This is how the image appears
when the SLS is improperly aimed, positioned, and
focused.
Figure 6.5 SLS Improperly Aimed, Positioned, and Focused
The object image is too far to the right in the FOV and too
small (the SLS is not close enough), and the object edges
have considerable slope (the SLS is out of focus).
The SLS is properly aimed when object image is centered
in the FOV. The SLS is properly posifioned when the object
image occupies the largest practicable percentage of the
FOV. The SLS is properly focused when the edges of the
object image are as nearly vertical as possible.
Figure 6.6 shows the same image with the SLS properly
aimed (image is centered), but still improperly positioned
(image is too small) and out of focus.
Figure 6.6 Object Properly Aimed
-
Figure 6.7 shows the same image with the SLS properly
aimed and positioned (larger size), but still out of focus.
Fgure 6.7 Object Property Aimed and Positioned
Figure 6.8 shows the image with the SLS properly aimed,
positioned, and focused (the object’s edges are nearly
vertical).
Figure IS Obieci Properly Aimed, Positioned, and Focused
*Edge Height and Edge Span Parameters
Most of the SLS analysis functions must locate the edges of
the inspected object in order to perform their inspection
function. (Exception: Full field texture recognition.) This
requires stable edge detection. Thus, when setting up your
application, in order to ensure that the SLS can detect the
inspected object’s edges reliably, you should always use the
1-D Spatial Measurement function fmt, to verify edge
stability (or establish it, if necessary), before switching to
another function.
The edge height and edge span parameters control when the
SLS detects an edge within the FOV. Generally, the SLS
detects an edge whenever it sees a specified change in
image contrast within a specified distance along the FOV.
As Figure 6.2 (page 6-3) shows, contrast changes appear
as changes in the amplitude of the Line Image. When the
contrast between the inspected object and its background is
high (a black object against a white background), the Line
‘Not available in Main Menu View Image option.
6-11
Image amplitude is also high where the object appears in
the FOV. Figure 6.9 shows the Line Image amplitude
changes between a white background and black and
medium gray objects.
Fgure 6.9 Line Image Ampliide: Black and Gray Obiects
Black Object
Black-gray-black
amolitude
Edge Height
The edge height parameter specifies the minimum contrast
that must exist between an inspected object and its
background before the SLS can detect its edges. Edge
height values range from 1 to 10. The larger the edge height
value specified, the higher the minimum required contrast.
The utility of the edge height parameter lies in its ability to
mask out low-contrast visual “clutter” objects that appear
in the Line Image as low amplitude “noise.” If the contrast
of the clutter is relatively low, you can try raising the edge
height value to the point where the SLS does not detect an
edge on any of the clutter objects.
The Line Image in Figure 6.10 is an example of how this
might appear with one clutter object and one inspected
object. In this example, the edge height value is set to 3.
Note that the small “x” (identifying the fmt edge) is
located on the clutter object.
Figure 6.10 Unwanted First Edge Detection on a Wutter”
6-12
Object
By raising the edge height value to 6, the SLS no longer
detects an edge on the clutter object, since its contrast
(amplitude) is too low for the higher edge height value.
Figure 6.11 shows the result. Note that the small “x” is now
located on the first edge of the inspected object.
Fgure 8.11 Edge tieigM Adjustment: Aesutts
First edge now detected
on inspected object \
i----l
Edge Span
The edge span parameter specifies the span or distance
along the FOV within which the specified change in image
contrast (amplitude) must take place. Edge span values
range from 1 to 10. The larger the edge span value, the
greater the distance along the FOV that the SLS must
evaluate in order to detect the specified change in contrast.
Thus, if a visual “noise spike” appeared in the FOV, the
contrast changes from white to black, and black to white
again, within a very short distance. When the edge span
value is set high enough, however, the SLS ignores the
spike, since the net contrast change, from the beginning to
the end of the specified span, is zero (or nearly zero).
Figure 6.12 on page 6-14 shows part of the View Port for
the objects shown in Figure 6.11, above In this example, the
edge height value is 3 (as in Figure 6.10, page 6-12), but
the edge span value is 10, the maximum. Note that the SLS
did not detect an edge on the “clutter” object, since the
object’s “span” was smaller than the distance that the SLS
evaluated with an edge span value of 10. The SLS did
detect an edge on the inspected object, however, since it
met the specified contrast change (edge height) over the
specified distance (edge span).
6-13
Figure 0 12 EdgeSpan
Adjustment
Results
:
I
Note: In applications where the default values for edge
height and span (4 and 3, respectively) are not satisfactory,
you will probably need to adjust both parameters to achieve
the most stable edges.
Setting the Edge Parameters
-
As noted earlier, and shown in Figure 6.13. the Edge Span
and Edge Height values appear in the bottom-center of the
View Image display.
Figure 6.13 Edge Height and Span Parameters in View Image
ENTER prompt
Edge span value
Note that a reverse video cursor highlights the Edge Span
value. To alter either of these values, use the following
keys:
1. To highlight the span value, press the 1 key.
2.
To increment the span value, press the 1 key again, or
press the SPACEBAR key.
3. To highlight the height value, press the 2 key.
4.
To increment the height value, press the 2 key again, or
press the SPACEBAR key.
-
To decrement the highlighted
BACKSPACE key.
value, press the
To send the altered values to the SLS, press the ENTER
key. In a moment, the efict of the altered values
appears in the View Image display.
Repeat steps 1 through 6, as necessary, until the small
“x’s” are correctly positioned on the first and last edges
of the inspected objects.
Once you have determined the optimum values for the edge
span and edge height parameters, using the View Image
display, you must enter them in the appropriate
configuration record (use the Overwrite option) and send
(or m-send) that configuration to the SJS. At that point, the
SLS becomes operational using these values.
lBinarization Parameters and Graphic Indicators
(Series B SLS Only)
When you select either the Binary Object S,ize or the Binary
Object Count analysis function, the View Image display
replaces the edge span and edge height values with the
binarization level and background probe position values. In
addition, it provides two graphic indicators of these values:
a horizontal line that indicates the binarization level, and a
vertical line that indicates the position of the background
probe. Figure 6.14 shows the Rew Image display with the
binarization parameters and graphic indicators.
Figure 6.14 BinarizationSymbols and Parameters
I
Binarization
level indicator
II
-
-~
-‘-‘l
ml
B&kground
probe indicator
I
Exposure Time hs):+-----I
11.6
Binarization level
lm
.:I Object
3 Object
size:
center:
z?.!xz
m
Background probe
position
qYz!v-
i!!Q
Object Size
X = object center
Binary
‘Not available in Main Menu View Image option
6-16
Binarization Level
Briefly, the binurizution level controls the luminance
threshold at which the SLS differentiates the inspected
object from its background. Its value ranges from 0 to 255.
The lower the value, the closer the binarization level is to
the background luminance level; the higher the value, the
closer the binarization level is to the inspected object’s
luminance level.
In effect, the SLS ignores everything in the Line Image that
falls below the binarization level. It looks for the inspected
object at or above that level only.
In the View Image display, increasing the value of the
binarization level moves the binarization level indicator
upward. Figure 6.14 (page 6-16) shows the position of the
indicator when the binarization value is set to 56. This
value is relative to the position of the background probe.,
which is located at 23.9% of the FOV. The binarization
level “rides” the background probe as the probe detects
variations in the background luminance. Thus, the value of
the binarization level always remains 56 units (in this case)
above the background luminance.
In Figure 6.15, page 6-18, the binarization level indicator is
in approximately the same vertical position as it is in
Figure 6.14 (page 6-16), but its value is 138. This is true
because the background probe is set to 0% of the FOV,
which disables the probe. Thus, the binarization level has
an absolute value of 138 [where 0 is at the base of the Line
Image, and 255 is at the top), and it does not vary with
changes in the background luminance level.
Background Probe
The background probe (or “light” probe) can measure the
luminance anywhere within the FOV, and its position is
indicated as a percentage of the FOV. Normally, it should
be set to a point on the FOV that is appropriate for
monitoring the background luminance level.
When the probe position value is set to O%, it is flush with
the left edge of the Line Image. In this position, the probe is
disabled, and the binarization level isfixed. This is shown
in Figure 6.15 (page 618).
617
Figure0.15 BinarkationLevelindicatorand Parameter
1-h-C
El
bject
Blnarization
Levelindicator
-BackgFound prohe
indicator is fiush
with edge
II!
q
Exposure Time hsl:
I
Cycle Time hsl:3Q
11.0
1
q
•.u
f
/
Bin&&ion
22.92
1) Object size:
!I Object center: m
level
Background probe
position
q-/
2) ea..
lm
Binary Object Siu
X = object center
When the probe position is set to a non-zero value, the
probe is visible in the View Image display, as shown in
Figure 6.14 (page 6-16). It detects the luminance level at
that position, and the binarization level automatically
adjusts to any luminance changes that the probe detects.
Visually, the binarization level indicator appears to be
“riding” the top of the background probe indicator.
Setting the Binarization
and Probe Parameters
As shown in Figure 6.14 (page 6-16) and Figure 6.15,
above, the current settings of the binarization level and
background probe position parameters appear in the
bottom-center of the View Image display.
Figure 6.16, on page 619, shows these two parameters
close up. Note that the reverse video cursor highlights the
6-18
binarization level, which indicates that it is currently
selected and can be changed.
Fgure 6.16 Binarlzdion
and Probe Parameters in View image
I
Biuarization
level
Background probe
Note:
As soon as you change either parameter, the
binarization level symbol (horizontal line) changes to a
dashed line, as shown in Figure 6.17, below. This is a
reminder to press the ENTER key to validate the parameter
changes bv sending them to the SLS. When -you .press
&R,
the solid iine
reappears.
Figure 0.17 Dashed Binariration
Level Symbol
Bharization level indicator after
changing either parameter.
To alter the binarization
shown in Table 6.1:
level parameter, use the keys
Table 6.1
Altering Binarization Level
-
Desired Result
Your Action
Hiahliqht binarization level parameter. 1 Press the 1 kev.
Increment binarization level by I.
Press the 1 key or space bar.
Increment binarization level by IO.
1 Press the asterisk (‘) key.
Decrement binarizatlon level by 1.
1 Press the backspace kev.
Decrement binarization level by 10.
1 Press the ampersand (8) key.
6-19
To alter the background probe position parameter, use the
keys shown in Table 6.2:
Table02
Altering BackgroundProbe Position
Desired
Result
Hiqhliaht probe position parameter.
I
Your Action
1 Press the 2 key.
Increment probe position by 0.4%.
Press the 2 key or space bar.
Increment probe position by 4.0%.
Press the asterisk (7 key.
Decrement probe position by 0.4%.
Decrement probe position by 4.0%.
Press the backspace key.
1 Press the ampersand (&) key.
Repeat the above steps as necessary, until the binarization
level and probe are positioned correctly for your
application. Then, press the ENTER key to send the new
parameter values to the SLS. When you do, the dashed
binarization level indicator becomes a solid line again.
Once you have determined the optimum positions for the
binarization level and background probe, you must enter
the corresponding values in the appropriate configuration
record (use the Overwrite option), then send that
configuration to the SLS. At that poinf the SLS becomes
operational using these values.
Configuring
the SLS For Binary Analysis Functions
In order to set the relative background level correctly for
binary analysis functions, you should configure the SLS
according to the following procedure:
Your Action
Comments
Select the Conjiguration
option in the Main Menu.
Select the Add option to
create a new configuration
record on the Configuration
Screen.
Enter an appropriate name
or description in the
Description field
6-20
When you select the Add option, the Configuration
appears on fie display.
Screen
Under “Switch Settings,”
set the operation mode to
“Set-uplTeach Mode.”
Set the other “switches” as
required for your
application.
-
Select the appropriate
binary analysbfinction.
In the SLS Function field, you can select either Binary
Object Size or Binary Object Count.
Select “Yes” in the “Use
Lighting Compensation?”
field.
This enables the lighting compensation
Enter “0” (zero) in the
Background Probe Position
field.
This selects the absolute threshold function.
Press the ESC key, then
press the ENTER key to
save the new configuration
record.
When you press the RSC key, the “Save” menu option is
highlighted.
Select the Send option to
send the new configuration
to the SLS.
When you press the ENTER key, the “taught variables
don’t match” message appears. Note that the “Yes” prompt
is highlighted.
Press the ENTER key
This downloads the new configuration to the SLS, but saves
the “taught variables” currently in the SLS.
Select the View Image
option to display the image.
If appropriate, use “Automatic Trigger.”
Adjust the probe position
and binarization level as
required for your
application.
Refer to the steps listed under Setting Binarization and
Probe Parameters.
function.
Press the ESC key &
to
return to the Configuration
Menu.
Use the Overwrite option to
read the configuration
parameters into the
configuration record.
This overwrites the previous parameter values in the Binary
Function Parameters section of the Configuration Menu.
Under “Switch Settings,”
set the operation mode to
“Run Mode.”
f5-21
Press the ESC key, then
press the ENTER key to
save the configuration
record.
When you press the ESC key, the “Save” menu option is
highlighted.
Select the Send option to
send the new configuration
to the SM.
When you press the ENTER key, the “taught variables
don’t match” message appears.
Select “Yes,” then press the This downloads the new configuration
ENTER key.
new taught variables.
to the SLS with the
This completes the configuration procedure for the binary
analysisfunctions.
Disable Automatic Lighting Compensation
(Series B SLS Only)
You can selectively enable or disable the automatic lighting
compensation function in the SLS in order to achieve more
control in special lighting situations. Generally, you would
first enable the lighting compensation long enough to
permit it to adjust to the “normal” luminance level, then
disable it to prevent further automatic adjustments from
occurring when intended (or unintended) changes occur in
the background luminance level.
-
Here are some lighting situations in which the capability of
disabling lighting compensation could be used effectively:
Bright backlighting - In compensating for changes in
background light levels, automatic lighting compensation
always attempts to prevent the background luminance in the
image from reaching saturation. This, however, may
prevent the SLS from maximizing the difference between
the background luminance and the inspected object’s
luminance and, as a consequence, achieving the maximum
edge detection capability.
Furthermore, if the brightness level of the background light
source exceeds the capability of the lighting compensation
function, the result may be instability in the processed
image. This could be a problem for applications using a
bright background lighting source.
When lighting compensation is disabled, however, the
background luminance can reach saturation and ensure the
‘Not available in Main Menu View Image option.
6-22
-
maximum luminance differentiation
and inspected object.
between background
Briefly, the SLS staging and setup procedure when using
bright backlighting involves these main steps:
1. Place one or two sheets of white paper over the
background light source, and place the inspected object
on top of the paper.
2.
Select an appropriate configuration record from the
Configuration Menu and download the configuration
the SLS using the Send option.
to
3.
Select the View Image option in the Configuration
Menu.
4.
Set the lighting compensation
5.
Turn on the light source, then position the object and
focus the SL.S to obtain the best image, such as the one
in Figure 6.18.
-
Figure 6.18 Ob@t Image Wi
to “On.”
“Normal” Background luminance
Inspected object \L
“Normal” background
hUiUaIlcp
6.
After a few moments, set the lighting compensation
“Off.” The image should remain as shown in
Figure 6.18 (except “On” changes to “Off.“).
7.
Remove the paper from under the inspected object.
When you do, the background luminance should
saturate, as shown in Figure 6.19 on page 624.
8.
To save the configuration, return to the Configuration
Menu. Use the Add or Insert option to create a new
configuration record, or use the Overwrite option to
update an existing configuration record.
to
Note that the inspected object in Figure 6.19 on page 6-24
has a higher “amplitude” than in Figure 6.18, above. This
enhances edge detection.
F@ure 6.19 Object image With Saturated Background Luminance
Inspected object 1
r’
Saturated background
luminance
Saturated background
luuduance
3ff
q
.
I
I
Specular reflections; bright areas on object - Lighting
compensation always bases its adjustments on the
difference between the background part of the image and
the peak “amplitude” of the object. Thus, when using a
dark object on a light background, if any part of the object
image is brighter than the background luminance (because
of a white spot or reflection), lighting compensation uses
the brighter area as the basis for its adjustments.
-
When using a light object on a dark background, if any part
of the object image is brighter than the object, (because of a
white spot or reflection), lighting compensation uses the
brighter area as the basis for its adjustments.
In either case, the reflection or bright area may prevent the
SLS from maximizing the difference between the
background luminance and the inspected object, and, as a
consequence, achieving the maximum edge detection
capability.
Briefly, the SLS staging and setup procedure for managing
this situation involves these main steps:
1. Select an appropriate configuration record (set to
“Teach Mode”) from the Configuration Menu and
download the configuration to the SLS using the Send
option.
6-24
2.
Select the View Image option in the Configuration
Menu.
3.
Set the lighting compensation to “On.” At this point,
the image may appear as shown in Figure 6.20 on page
6-25.
4.
Place a mask, or non-reflective material, over the
bright area on the inspected object. The image should
now appear as shown in Figure 6.21 on page 6-25.
-
5.
After a few moments, set the lighting compensation
“Off.” The image should not change.
to
6.
Remove the mask fmm the inspected object. When you
do, the image should appear as shown in Figure 6.22.
7.
To save the configuration, return to the Configuration
Menu. Use the Add or Insert option to create a new
configuration record, or use the Overwrite option to
update an existing configuration record.
Fgure 620 Dark object Wiih the Bight Area Not Covered
Ir~spected object
-~
t
“Normal” background
lominance
In
t
“Normal” background
luminance
Reflection or bright
area on object
Figure 6.21 Dark Object Wiihthe Bdght Area Covered
Figure 8.22 Dark Object Wiih Lighting Compensation
Disabled
Inspected object
“Normal” backgrormd
luminance
“Normal” background
lumtuauce
/
Retlection or bright
area is ignored
6-25
The same steps can be applied to an application using a
light object on a dark background, as shown in Figure 6.23,
Figure 6.24, and Figure 6.25.
Figure 623
Light Object With the Brlght Area Not Covered
Reflection or bright
Inqected
on
q
object
t
“Normal” background
luminance
“Normal” background
lmninance
Figure 694
On
Light Object Wii
“NormaP background
luminance
Figure 695 Liglht Object Wti
“N~rmal’~ background
luminance
6-26
the Bright Area Covered
Lighting Compensation
Disabled
“Normal” background
luminance
Monitor Option
The main function of the Monitor option is to monitor SLS
inspection operations and provide a rapidly updated graphic
display of inspection results from the SLS.
More specifically, the Monitor option provides these
functions:
l
Displays analog results in horizontal bar graphs.
l
Displays discrete outputs in simulated JXDs.
l
Displays statistics based on analog results.
l
Logs analog results in a monitor log file on disk.
l
Creates monitor log reports, which can be reviewed on
screen, printed, or saved in a file on disk.
l
Converts monitor logs to formats required by
spreadsheet, database, and statistical process control
applications.
The following sections provide details about the Monitor
functions and the features and symbols within the Monitor
display.
Note: Before you continue with this chapter, perform the
procedure in Chapter 3, Getting Started, Up to the point
where you have the View Image display shown in
Figure 3.12 (page 3-l 1). When you have that image on
your PC’s display screen, return to this chapter.
Monitor Menu:
Function Selection
When you select the Monitor option in the Main Menu, the
Monitor Menu appears on the screen, as shown in
Figure 7.1. This menu contains all of the Monitor functions.
-
Figure7.1MonitorMenu
nart Linear Sensor
Version 2.8
llonitor Henu
Use 4 and t then press MITER. ESCprevious menu.
Fl
help.
FZ change port,
I
co
Vi
flu
St
ii
Qu
Save Log to Text File / Lotus 123 .PRN
te TurboSPC .PRN Format
The Monitor Menu enables you to select the appropriate
monitor display function, logging function, or log
conversion function. Note that +he reverse video cursor
highlights the “Monitor with NO Logging” function. This is
the default condition whenever you select the Monitor
option. (For the time being, this function will serve to
illustrate the Monitor display features and symbols. The
remaining functions are discussed later in this chapter.)
When you press the ENTER key to select the Monitor with
NO Logging function, the “Monitor Smart Sensor” display
appears on the screen after a brief period of initialization, as
shown in Figure 7.2 on page 7-3.
7-2
-
Figure 72 MonitorSmartSensorDisplay: BasicFeatures
Snart Linear Sensor
Nonitoring Snart Sensor
Press Fl for help.
Version Z.E#
Press ESCuhen done.
Start Time: i2:B8:3f
Result B - Last edge
Hean: 74.85
/
Standard Deviation:
5
0
Using remote configuration
Nax: 74.87
Switch Settings:
Lighting compensation is On
Exposure Time HIS): 18.4
Cycle Tine (ml: 25
Triggers Processed : 569 of 569
Function: 1-D Spatial tkasurement
Monitor Display:
Features and Symbols
ii.B8
Nin: 74.82
I
Range: B.65
Targeting Light Off
Setup 1 reach Hode
Dark Object
Leve 1 Ir iggered
Normal Lighting
Remote Configuration Enabled
Output Normally Open
High Resolution
The features and symbols in the Monitoring Smart Sensor
display are identified in Figure 7.2, above, by the circled
callouts and are described in the following sections.
Analog Bar Graphs
@
The two analog bar graphs are visual indicators of the
inspection results at the A and B analog outputs. The length
of each bar indicates the percentage value of the current
inspection result. Thus, the bar under “Result A - Fist
Edge” indicates a result of about 28% (jrst edge location
on the FOV), while the bar under “Result B - Last Edge”
indicates a result of about 75% (last edge location on the
FOV).
7-3
The analog bars am updated rapidly, as quickly as the PC
can update the screen.
LED Indicators @
These simulated LED indicators correspond
following LEDs on the SLS:
to the
l a - discrete output A.
l b-discrete
output B.
l e - fault/error
l c-contrast
When an LED appears on the screen, it is “on,” and when
an LED does not appear, it is “off.”
Note in Figure 7.2 (page 7-3) that the a and b LEDs are
“on,” but the e and c LEDs are “off .”
-
Results Statistics 0
These two lines each contain several elements of statistical
data that are based on the analog A and B inspection
results, as follows:
l Mean -This
is the current average of all results values,
and it is calculated using the following formula:
.
x =ci=,
xi
n
n
l Standard
Deviation - This is the current standard
deviation of all result values, and it is calculated using
the following formula:
t$m($Xi)2/n
s =
i=l
i=l
J
(n-1)
7-I
-
l
Max-This
l
Min - This is the current minimum result value.
l
Range - This is the difirence between the current
maximum and minimum result values.
is the current maximum result value.
Switch Settings @
These “switch settings” are the operating parameters in the
current SLS configuration. They reflect the parameters
designated by either the DIP switch settings on the SLS or
the “switch settings” contained in a downloaded
configuration.
Miscellaneous Data @
These six lines include information about the current SLS
configuration and performance data about each inspection
operation, as follows:
l
Configuration - This indicates whether the SLS is
currently operating using a “remote configuration,” or is
using the “hardware switches.” The difference is this:
When using a “remote configuration,” the SLS uses the
operating parameters and analysis function defined in a
configuration record. When using the “hardware
switches,” the SLS uses the operating parameters and
analysis function defined by the settings of the DIP
switches on the SLS.
l
Lighting Compensation - This indicates whether the
lighting compensation is currently enabled (On) or
disabled (Off). (Refer to Chapter 6, View Image Option,
for detailsabout the lighting compensation function.)
l
Exposure Time - This indicates the amount of time that
the SLS required to expose the linear sensor adequately
for the current image. The exposure time varies with
changes in FOV luminance levels.
l
Cycle Time - This indicates the total time that the SLS
required to expose, acquire, and process the current
image. The cycle time is the minimum acceptable time
interval between triggers.
l
Triggers Processed - This line indicates the number of
triggers that the SLS processed vs the number of triggers
that it received.
-
7-5
l Function-This line indicates the analysis function in
the current SLS configuration. It reflects the analysis
function designated by either the DIP switch settings on
the SLS or the “SL.S Function” contained in a
downloaded configuration.
Monitor Functions
As mentioned earlier, the Monitor Menu enables you to
select the appropriate Monitor function. Figure 7.3 shows
the Monitor Menu and its functions. Note that the top four
functions in the menu perform inspection monitoring and/or
logging operations. The remaining Monitor functions
perform log conversions, generate log reports, and delete
the log tile.
Figure7.3 MonttorhknuFunctions
Nonitor 8 Log, ii0 Statistics
Lag Besll1ts ONLY
Log File Report
Saw Log to Text File / Lotus 123 .PJIN
Saue Log to MetriStat Lab Format
Save Log to Dataflyte TurboSPC .PBN Ford
Save Log to dBASE .DBF Format
Delete Monitor Log
PC Processing Speed Considerations
The speed with which your PC can process inspection
results data from the SLS may be a factor in determining
which of the three bgging functions to select. Since these
functions vary in complexity according to the type and
amount of data appearing on the display, they vary also in
the amount of PC processing time that they require.
7-6
-
Listed in order from slowest to fastest, the logging
functions are:
l Monitor with Logging
l Monitor & Log, NO Statistics
l Log Results ONLY
Some PC’s, such as those operating at 4.77MHz. may be
unable to process results data rapidly enough to “keep up”
with the SLS under some circumstances.
For example, if you select the “Monitor with Logging”
function and the following message appears . . .
can't
keep
up with
the
SLS,
some
data
is being
ignored.
. . . it means that your PC cannot perform that functionjhsr
enough to log all of the inspection results data from the
SLS. In this case, you should try using the next fastest
function. If the message appears again, use the fastest
function (“Log Results ONLY”).
Keep in mind that the log file always stores the same vpe
of information, regardless of which logging function you
select.
Here am the Monitor functions:
Monitor with NO Logging
This function selects the full “Monitoring Smart Sensor”
display, but does not store results data in a log file on disk.
It is intended for visual monitoring only.
Monitor with Logging
-
This function selects the full “Monitoring Smart Sensor”
display and stores results data in a log file on disk. You can
generate a report from the log file, or convert it to another
format (spreadsheet, database, SPC).
Note: Whenever you begin a “logging” operation, the new
results data overrc’rife all previously logged results data.
7-7
-
Monitor & Log, NO Statistics
This function selects the “Monitoring Smart Sensor”
display without the statistics under each analog bar. It stores
results data in a log file on disk.
Log Results ONLY
This function selects the “Monitoring Smart Sensor”
display without the analog bars, statistics, switch settings,
and configuration information. It stores results data in a log
file on disk.
Log File Report
This function generates a statistical report from the results
data stored in the log file. You can review the report on the
display, send it to a printer, or save it in a file on any
available disk. Figure 7.4 is an example of the Monitor
Report.
Figure 7.4 Monitor Log Report
SLS on cow1
__________________._____
Result A
Ree"lt B
__________-_______-_____________________-~-.----------~26.61
wean
Standard
Deviation
Wax
nin
26.69
80.22
26.25
80.15
Discrete
Output
Count
Triggers
16782
Triggers
Processed
16782
Triggers
Failed
of
Cycle
Time
25
0.0
0.07
16782
Time
11.6
0.00
0.44
Range
Number
80.17
0.10
Exposure
0
11.6
25
11.6
25
0.0
0
___
0
_-
0
The log report contains the same kind of statistical data that
appears under the analog bars on the Monitoring Smart
Sensor display. In addition, it contains statistical data
pertaining to exposure times and cycle times.
7-8
-
-
Note: Since the CSS generates the log report ikom the
accumulated results data in the monitor log, it requires an
amount of time that varies with the size of the monitor log.
Thus, a large log may require several minutes of processing
Save Log Functions
You can use the ‘Save Log” functions to save the monitor
log to any of four formats that you can then use the logged
data with other application software, namely:
1. Save Log to Text File/Lotus
123.PRN
2.
Save Log to Me&tat
3.
Save Log to DataMyte TurboSPCPRN
4.
Save Log to dBASE.DBF Format
Here is a description
Text FileLotus
Lab Format
Format
of each “save” function.
123,PRN Format
When you select this Save Log function, the CSS converts
the monitor log to a text fide, each line of which contains
results data and other data from one SLS inspection cycle.
Figure 7.5 shows a few lines of a text file.
F@ure 7.5 Sample of Converted Text File from Monitor Log
1, “04/09/1991”,
“10:52:35.06”,12.2,25,0,0,1,26.69,0,80.20
1,“04/09/1991”,“10:52:35.06”,12.2,25,0,0,0,1,26.67,0,80.20
1, “04/09/1991fl,
1, “04/09/1991”,
“10:52:35.12”,12.2,25,0,0,1,26.69,0,80.20
1, “04/09/1991”,
“10:52:35.17”,12.2,25,0,0,1,26.67,0,80.17
“10:52:35.12”,12.2,25,0,0,1,26.67,0,80.20
1,“04/09/1991”,“10:52:35.17~,12.2,25,0,0,1,26.67,0,80.20
-
1, “04/09/1991N,
“10:52:35.23”,12.2,25,0,0,1,26.67,0,80.20
Each line contains eleven fields, separated by commas. The
information in each field is as fohows:
Field 1 contains the COM port number to which the SLS is
connected. In this case, it is COMl.
7-9
Fields 2 and 3 contain the date and time of the trigger that
started the inspection cycle.
-
Field 4 contains the exposure time (12.2m.9).
Field S contains the inspection cycle time (25ms).
Field 6 contains the error LED status (0 = Off).
Field 7 contains the contrast LED status (0 = Off).
Field 8 contains the discrete output A LED status (1 = On).
Field 9 contains the analog output A result (26.69).
Field 10 contains the discrete output B LED status (0 =
OfQ
Field 11 contains the analog output B result (80.20).
When the conversion is completed, a message appears with
instructions for importing the file into the Lotus 123
Program.
Consult your Lotus 123 manual, if necessary, for more
information about file importation.
MetriStat Lab Format
When you select this Save Log function, the CSS displays
the MetriStat Import Setup Screen, as shown in Figure 7.6.
Figure 7.6 MeWtat import Setup Screen
iIII
-I
Inport File Name
Ike Autenatic Date / Time? Yes
- SLS on COIN
Part ID
Characteristic ID
Sarrple Size (OPS)
Machine
Operator
Your Key
Base
HaItiplier
7-10
Result fi
Result B
I
1
e.mme
i.mem
Et.88888
1 .&Mm
-
This screen contains several data entry fields, which are
described as follows:
Import File Name - The default file name,
\MSXXSJMPTXT,
appears the fust time you use this
function. You can use this file name, or enter a file name of
your choice. This is a requited entry.
Use Automatic Datdime?
- Select Yes if you want the
MetriStat program to enter the date and time for each
subgroup, or select No if you want the ach& dates and
times to be used.
The message “SLS on COMl,” which follows the data/time
field, indicates the communication port to which the SLS is
connected.
Part ID - A part identification must contain at least one
character, but not more than 12 characters. This is a
required entry.
Characteristic ID - A characteristic identification is a
name that describes the inspection results at each of the
analog outputs. The name must contain at least one, but not
more than 10 characters. One characteristic ID is required;
however, if you omit the other ID, the correspondiig results
information will not be imported into the MetriStat Lab
system.
Sample Size (OPS) - The sample size is the number of
observations per subgroup (OPS). It is the number of
individual inspection results, from 1 to 99, that you want in
each subgroup. The default value is 1. This is a required
entry for result A and result B, whether or not you intend to
import them both.
Machine, Operator, Your Key - You can use these fields
to further identify the source of the samples; however, they
am not required entries.
Base, Multiplier - You can use these two fields to convert
inspection results frompercen&zge values (0 to 100%) to
measurement values (inches, centimeters, and so on). The
conversion calculation uses the Base and Multiplier values
in this formula: ((Result * Multiplier) + Base).
When you complete the data entry fields, press the ESC key
to exit the setup screen. To save the entries and start the
conversion, verify that the “Save” option is highlighted,
then press the ENTER key.
7-11
When the conversion is completed, a message appears with
instructions for importing the file into the MetriStat Lab
program.
DataMyte ‘IhrboSPC.PRN Format
When you select this Save Log function, the CSS converts
the monitor log into a file that you can import into the
DataMyte TurboSPC program. The converted file contains
basic inspection results data.
When the conversion is completed, a message appears with
instructions for importing the file into the DataMyte
TurboSPC program.
dBASE.DBF Format
When you select this Save Log function, the CSS converts
the monitor log to a dBASE.DBF file, each record of which
contains results data and other data from one SLS
inspection cycle.
Each line contains eleven fields. as follows:
Field 1 contains the COM port number to which the SLS is
connected.
Fields 2 and 3 contain the date and time of the trigger that
started the inspection cycle.
Field 4 contains the exposure time.
Field 5 contains the inspection cycle time.
Field 6 contains the error LED status (“F’ = Off; ‘IT” =
On).
Field 7 contains the contrast LED status (“F’ = Off; “I”’ =
On).
Field 8 contains the discrete output A LED status (“F’ =
OR, “T’ = On).
Field 9 contains the analog output A result.
7-12
Field 10 contains the discrete output B LED status (“F” =
OW, “T’ = On).
Field 11 contains the analog output B result.
When the conversion is completed, a message appears
stating that a “DBF’ file has been created that the dBASE
program can use directly.
Consult your dBASE manual, if necessary, for more
information about dBASE files.
Delete Monitor Log
You can use this function to delete the monitor log file from
the system disk. When you select Delete Monitor Log, you
are prompted to answer “Are you sure you want to delete
the monitor log?” If so, highlight Yes and press the ENTER
key. If not, just press the ENTER key (No is the default
option).
Note: Whenever you select a monitor logging option, the
CSS ovenvrites any previous monitor log with the newly
logged data. Thus, you need not delete the old monitor log
before starting a new one.
7-13
-
-
Statistical Process Control Option
The Statistical Process Control (SPC) option provides
simultaneous displays of a variety of SPC data using
histognuns, control charts, and tables of cumulative
statistics. You can select from among several data display
options, such as X Bar and Histogram, X Bar and R and
Histogram, and so on.
In addition, the SPC option can log results data and
statistics to disk files for later use in reports or, when
converted, in other application programs.
You can select one of the following SPC setup and
operation methods, according to your experience and
application requirements. Each has a different level of
complexity, as follows:
1.
Automatic SPC setup: This is the easiest and
quickest method of SPC setup and operation. It
automatically calculates the upper and lower chart
boundaries during an initialization phase, then displays
SPC data. Use this method if you have little knowledge
of SPC.
2.
Run-only short SPC setup: This setup method
enables you to perform SPC operations by using
existing SPC setup records. Use this method to inhibit
unauthorized personnel from changing SPC setup
records.
3.
Short SPC setup: This setup method enables you to
prepare an SPC setup record in which you can specify
a few SPC parameters, then perform SPC operations
using that record. Use this method if you have a
working knowledge of SPC and want to modify some
basic chart parameters.
4.
Long SPC setup: This setup method enables you to
prepare a detailed SPC setup record in which you can
specify all of the SPC parameters that are available
with this SPC option and perform SPC operations
using that record Use this method only if you have a
thorough knowledge of SPC concepts and parameters.
These SPC setup methods are described in detail in this
chapter.
PC Hardware
Performance
vs
SPC
During SPC operations, the css must perform a large
number of statistical and other calculations from the
moment it acquires inspection results data from the SLS
until it updates the graphic and numeric data on the PC
display. These calculations require time; thus, in some
circumstances the SLS can deliver results data faster than
the CSS can process that data and display the results on the
PC monitor.
When that happens, the CSS instructs the SLS to suspend
data transmissions until it “catches up” with thf processing
load; and, at the same time, it displays a “W” (Warning)
icon on the display to alert you to the fact. When it fiiishes
its current work load, the CSS instructs the SLS to resume
sending results data.
In the meantime, however, the SLS may have already
acquired and processed another image, and issued
inspection results to the SLS outputs. In that case, the CSS
will have missed one results “data point,” and will perform
all subsequent calculations without that data point.
-
To avoid this situation, you need to consider the factors that
determine whether the CSS can “keep up” with the SLS (or
SLs’s):
8-2
1.
The type of microprocessor in the PC. (An 80286 is
more powerful than an 8088, and an 80386 is more
powerful than an 80286, and so on.)
2.
The clock rate of the microprocessor
faster than 6Mhz, and so on.)
3.
The presence (or absence) of a math coprocessor in the
PC. (A math coprocessor increases the PC’s calculation
sped.)
4.
The type of graphics adapter in the PC.
5.
The rate at which the SLS acquires images (generally,
the trigger repetition rate).
6.
The base cycle time of the selected SLS analysis
function. (1-D Object Recognition has a longer base
cycle time than 1-D Spatial Measurement, for
example.)
7.
The exposure time. (Lower light levels increase the
overall cycle time.)
8.
The number of SLS’s connected to the PC.
in Mhz. (8Mhz is
-
Here are some performance
guidelines:
l An IBM AT or compatible
PC, operating at 8Mhz, with
a math coprocessor, can service four SLS’s delivering a
total of 30 SLS inspection results “data points” per
second.
l An IBM XT or compatible
PC, operating at 4.77Mhz.
without a math coprocessor, can service five SLS
inspection results “data points” per second.
The remainiig sections of this manual provide details about
using each of the SPC setup and operation methods
outlined above.
Note: Before continuing with this chapter, you should
become familiar with the SLS staging and configuration
procedures described in the other chapters of this manual.
-
ing the SLS For
Data Displays
For the purpose of the procedures in this chapter, it is
assumed that you have staged and configured the SLS to
inspect real objecfs. Your SLS and PC should be set up
either in a testing area in which the SLS inspects a large
representative sample of objects repeatedly, or in an actual
workplace se&g in which the SLS inspects a stream of
different objects.
The point to remember is thatyou must always conjgure
and properly stage the SLS before you atfempt to perform
SPC operations.
During SPC operations, when the variation in the position
(or dimension) of the objects has a “normal” statistical
variation, as reflected in the inspection results, the SPC data
displays typically have a statistically “normal” appearance
This is particularly true of a histogram, which tends toward
a bell-shaped pattern when displaying a normal statistical
distribution.
Figure 8.1 on page 8-4 shows the bell-shaped appearance
of vertical and horizontal (“sideways”) histograms when
displaying normal statistical distributions.
8-3
Figure 8.1 Histograms
Displaying “Normal”Statistical Distribution
Sideways
Histogram
SPC Chart Display:
Typical Features
Figure 8.2 shows how the SPC display might appear when
your SLS is set up as described under Staging SLS For SPC
Data Displays, and you have started an SPC operation. It is
intended to give you a general idea of how a typical SPC
chart display looks.
Figure 82 SPC Chart Display: X Bar and R and Histogram
The graphic data “pans” across the display from left to
right; that is, the data display begins at the left chart
boundary and moves toward the right boundary. When the
data display reaches the right boundary, the display is
cleared, and the data display begins again at the left
boundary. This process continues as long as the SLS is in
operation and the SPC operation remains selected.
8-5
Figure 8.2 (page 8-5) also identifies the main features of a
typical chart display. They are identified by the circled
numbers. and are described briefly as follows:
1.
Chart A - This two-part chart reflects the inspection
results from analog output A on the SLS, except when
a formula is defined for chart A. In that case, chart A
reflects the results from the formula
These charts display the data points, the average of the
data points, and the upper and lower control limits
applicable to the results data from the data points.
2.
Chart B -This two-part chart reflects the inspection
results from analog output B on the SLS, except when
a formula is defined for chart B. In that case, chart B
reflects the results from the formula.
This chart operates the same as chart A, however, in
the short and long SPC setup methods, you can
designate different chart options for charts A and B.
8-6
3.
Data Points - Each point along this line represents one
data point. The line makes the data points more visible.
(The meaning of the data points depends on the chart
selection. Since this is an “X Bar and R and
Histogram” chart, each data point represents the
average value, or X Bar, of every sample or subgroup
inspected.)
4.
Data Point Average -This line represents the current
average of all of the data points displayed along the
line (4). (Since this is an “X Bar and R and Histogram”
chatt, the data points are themselves averages, or X Bar
(F). Thus, the grand average of the averages is called X
Double Bar.)
5.
Upper
current
process
process
Control Limit @JCL) - This line represents the
value of the upper control limit. When the
results (data points) are below this limit, the
is considered to be in control.
6.
Lower
current
process
process
Control Limit (LCL) - This line represents the
value of the lower control limit. When the
results (data points) are above this limit, the
is considered to be in control.
-
7.
Histogram: Chart A - This histogram reflects the
inspection results (or formula results) that am
displayed on chart A.
The bars or “cells” in a verticufhistogram indicate
relativeaccumulations of data point values that fall
within both an overall range (max. - min.) and several
subordinate ranges that are determined by the number
of cells in the histogram (see Long SPC Setup
Method).
Both the “max. -min.” range and the cells are updated
continually as the data points accumulate; thus, the
range withineach cell is always a function of the max.
- min. range divided by the number of cells specified
for the histogram.
The cells in a horizontalhistogram indicate the actual
accumulations of data point values that fall within the
subordinate ranges determined by the upper and lower
chart boundaries and the number of cells specified for
the histogram.
8.
Histogram: Chart B -This histogram reflects the
inspection results (or formula results) that are
displayed on chart B.
9.
Statistics: Chart A -This table of accumulated
statistics is based on the inspection results (or formula
results) displayed on chart A and the chart option
designated for chart A. Its specific contents vary to
some degree with the graphics adapter installed in your
PC and with the graphics mode selected in the Progrsm
Configuration Screen.
10. Statistics: Chart B -This table of accumulated
statistics is based on the inspection results (or formula
results) displayed on chart B and the chart option
designated for chart B. Its specific contents vary to
some degree with the graphics adapter installed in your
PC and with the graphics mode selected in the Program
Configuration Screen.
11. A-B Icon - This icon signifies that when you press the
“A” or “B” (or “click” the icon with the mouse), the
online help screen appears. The messages in this screen
explain briefly the function of the other icons.
(Alternatively,
help screen.)
you can press the Fl key to display the
12. Plus Icon-This
icon signifies that when you press the
“+” key (or “click” the icon with the mouse), the
apparent panning speed of the chart increases. The
visual effect is to “stretch” the data display
horizontally.
-
13. Minus Icon -This icon signifies that when you press
the “-” key (or “click” the icon with the mouse), the
apparent panning speed of the chart decreases. The
visual effect is to “shrink” the data display horizontally.
14. Tab Icon - This icon signifies that you can display
upper and lower control limit data for either chart A or
chart B by pressing the TAB key (or “clicking” the
icon with the mouse).
When you press TAB thefirst time, UCL and LCL data
for chart A appear at the bottom of the display, and the
“Histogram” label for chart A is highlighted in reverse
video. When you press TAB the second time, the same
result occurs for chart B . When you press TAB the
third time, the UCL and LCL data are removed. (By
using the SHIFT and TAB keys, you can reverse this
movement.)
When the “Histogram” label is highlighted, the Plus,
Minus, Stop, and Freeze icons apply only to the
corresponding chart (A or B).
When only one chart is displayed, the UCL and LCL
data appear automatically, and the TAB key has no
effect.
15. Stop Icon - This icon signifies that when you press the
“S” key (or “click” the icon with the mouse), the data
display stops. Data accumulation continues, however.
When you press the “S” key again, the data display
resumes, reflecting the updated condition of the data
and statistics that accumulated from the time that the
data display stopped.
(Alternatively, you can press the F3 key to stop the data
display and start it again.)
16. Freeze Icon -This icon signifies that when you press
the “F’ key (or “click” the icon with the mouse), the
data display freezes when it reaches the right chart
boundmy. Data accumulation continues, however.
When you press the “F’ key again, the data display
resumes, reflecting the updated condition of the data
8-8
-
and statistics that accumulated from the time that the
data display stopped.
(Alternatively, you can press the F2 key to freeze the
data display and start it again.)
17. F,se - This icon signifies that when you press the ESC
(escape) key (or “click” the icon with the mouse), the
SPC operation and data display stop, and the display
returns to the previous setup menu.
Automatic SPC
Setup Method
The automatic SPC setup and operation method enables
you to perform SPC operations even if you have little or no
experience with statistical process control. It is easy to use,
since all you need to do is select one of the chart options to
start the automatic SPC setup.
You may also rind this method useful when you are
investigating various chart display options and want an
automatic SPC setup to save tune.
Using the Automatic SPC Setup Method
Here is the procedure for using the automatic method of
SPC setup and operation:
Your Action
Comments
Return to the Main Menu, if
you have not already done
SO.
Press the “.I?’ key to
highlight the Statistical
Process Control option,
then press the ENTER key.
When you press ENTER, the SPC Setup Menu shouti
appear on the display, as shown in Figure 8.3 on page 8-10.
8-9
Figure6.3
spcsetupMenu
I I
Iion I
He1 Short SPC Setup llenu
Qui I Long SPC Setup Menu
(If the SPC Setup Menu does not appear, it was not selected
as the default setup menu in the Program Configuration
Screen. If this is the case, refer to Chapter 9, Progrum
Configuration Option, for information about selecting the
SPC Setup Menu as the default setup menu.)
Note that the Chart Selection and Setup Menu option is
always highlighted when the SPC Setup Menu tirst appears
on the display. (You can highlight any of the other menu
options by using the up and down arrow keys, or by
pressing the key for the initial letter of the option, such as
“L” for Long SPC Setup Menu.)
Press the ENTER key.
When you press ENTER, the Chart Selection and Setup
Menu appears on the display, as shown in Figure 8.4 on
page 8-11.
Note that the X Bar and R and Histogram option is always
highlighted when the menu first appears in the display.
The options in the Chart Selection and Setup Menu are
described in the Chart Selection and Setup Menu Options,
the next section of this manual.
Press the ENTER key
again.
When you press ENTER, the following message appears on
the display:
I
8-10
Initializing
Processed
XXX
SF-2 screen.
of YYY
Calculating
stabilization
chart
triggers.
boundaries.
I
-
Figure 8.4 Chart 8ektion
and setup Menu
I
Ii1
Log File
Results
Conversion
logging is Off.
(The number YYY is derived from the numbers entered in
the Program Configuration Screen under the Automatic
SPC Setup section. The CSS multiplies the “Number of
subgroups” by the “Number of inspections per subgroup”
to get YYY. The number XXX is updated until it equals
YYY.)
This is the “automatic” part of the Charts method. The CSS
performs YYY inspections during initialization in order to
accumulate results data, which it then uses to calculate the
upper and lower chart boundaries during initialization.
After completing initialization, the CSS displays the
selected SPC charts and begins displaying graphic and
statistical data in those charts, as shown in Figure 8.2 (page
8-5).
Because of the chart boundary calculations performed
automatically during initialization, the graphic data should
appear properly distributed (verficully) within the upper and
lower chart boundaries. (If the chart boundaries were not
appropriately set, the data may appear in a very narrow
band, or, the data may be “off the chart,” and you would
probably see only a flat line along the top or bottom of the
chart.)
8-11
Chart Selection and Setup Menu: Options
Here are the options in the Chart Selection and Setup
Menu. Note that when you select one of the chart options, it
applies to both chart A and chart B.
To select any menu option, first highlight the option, then
press the ENTER key.
1.
2.
X Bar and R and Histogram - This option plots
graphic data as follows:
a.
Subgroup average data (X bar).
b.
A running average of X bar data (X double bar).
c.
A histogram based on X data.
d.
Range data points (R).
e.
A running average of range data (R bar).
f.
Upper and lower control liits
for X bar and R.
X Bar and s and Histogram - This option plots
graphic data as follows:
a.
Subgroup average data (X bar).
b.
A running average of X bar data (X double bar).
c.
A histogram based on X data.
d.
Standard deviation data points (s).
e.
A running average of standard deviation data (s
bar).
f.
3.
4.
Upper and lower control limits for X bar and s.
X Bar and Histogram - This option plots graphic data
as follows:
a.
Subgroup average data (X bar).
b.
A running average of X bar data (X double bar).
c.
A histogram based on X data.
d.
Upper and lower control limits for X bar
X and Histogram
follows:
option plots graphic data as
a.
Individual results data points (X).
b.
A running average of individual data points (X
bar).
8-12
-This
-
5.
c.
Upper and lower control limits for X.
d.
A histogram based on X data.
X and Sideways Histogram-This
graphic data as follows:
option plots
a
Individual data points (X).
b.
A running average of individual data points (X
bar).
c.
Upper and lower control limits for X.
d.
A sideways histogram based on X data.
6.
‘lkn Logging On (Off) -Select this option to enable
(if OJ) or disable (if On) the logging function.
(Logging operations are described in Logging
Functions on page 8-52.)
7.
Log File Conversion - Select this option to convert
the data accumulated in the log file to a format that is
compatible with one of a number of other application
programs, such as Lotus 123 and MetiStat Lab. (Log
file conversions are described in Conversion Functions
on page 8-54.)
8.
SPC Log Report - Select this option to generate a
report that is based on the data accumulated in the log
file. You can elect to review the report on the display,
print the report, or save the report to a DOS file.
(These reports are described in Report Functions on
pai+ 8-W
9.
Delete SPC Log - Select this option to delete the SPC
log fiie.
10. Save SPC Setup Configuration - When you end an
automatic SPC operation, you can select this option to
save the SPC setup record that was created
automatically by the SPC operation that you just ended.
(You can access the saved setup record by selecting
one of the other three SPC setup menus: run-only,
short, or long.)
F3 Calibrate Function
When you selected the Chart Selection and Setup Menu, the
prompt line added the “F3 calibrate” function, which
enables you to convert SLS inspection results ranging from
0% to 100% into “real world” units, such as inches or
8-13
centimeters. For more information about the F3 calibrate
function, refer to Calibration, Chart Scaling, and SLS
Scaling on page 8-46.
F$J4llly
SPC setup The run-only
SPC setup and operation method enables you
to perform SPC operations by selecting an existing SPC
setup record. Thus, you need little or no experience with
statistical process control to use this setup option.
Using the Run-Only SPC Setup Method
Here is the procedure for using the run-only
SPC setup and operation:
Your Action
method of
Comments
Return to the Main Menu, if
you have not already doneSO.
Press the ‘3” key to
highlight the Statistical
Process Control option,
then press the ENTER key.
When you press ENTER, the SPC Setup Menu should
appear on the display, as shown in Figure 8.3 (page 8-10).
(If the SPC Setup Menu does not appear, it was not selected
as the defaull setup menu in the Program Configuration
Screen. If this is the case, refer to Chapter 9, Program
Configuration Option, for information about selecting the
SPC Setup Menu as the default setup menu.)
Press the ‘3” key again to
highlight the Short SPC
Menu (RUN Only) option,
then press the ENTER key.
When you press ENTER, the run-only version of the Short
SPC Setup Menu appears on the display (along with three
example setup records). Refer to Figure 8.5 on page 8-15.
Note that the SPC option is always highlighted when the
Short SPC Setup Menu first appears on the display.
Note also that the first example setup record, “Width
Measurements,” is highlighted. (All three of these setup
records were prepared earlier by someone using either the
short or long SPC setup menu.)
You can highlight any of the other setup records by using
the up and down arrow keys, the PgDn and PgUp keys, and
the Home and End keys.
Note: The setup record that you select must correspond to
the configuration currently operating in the SLS. Ifyou
need to change the SLS configuration, go to the
8-14
-
Conj&ration
Menu (described in Chapter 5). highlight the
-appropriate configuration record, and use the Se& option
to download that conjigumtion to the SLS.
FigureM Run-Only Short WC setup Menu
lhart Linear Sensor
m
Short SPC Setup tlenu
Uersion 2-B
Clear Report Toggle Logging Log Report Convert Log Delete Log
Results logging is Off.
Use + and l for options.
Use 1, t, PgUp, PgDn, Hone, and End for records.
Press ENTER
to run option. ESCprevious menu. Fl for help.
FZ change port.
Highlight the appropriate
setup record, then press the
ENTER key.
When you press ENTER, the SPC charts appear on the
display (these charts are the ones designated in the
highlighted setup record).
Run-Only
Setup Menu: Options and Features
Here is a brief description of the menu options and main
features in the run-only version of the Short SPC Setup
Menu in Figure 8.5, above. You can highlight an option by
typing the initial letter of the option, by pressing the right
(or left) arrow key, or by pressing the SPACE BAR (or
BACKSPACE) key. You can select an option by pressing
the ENTER key. You can deselect a selected option by
pressing the ESC key.
8-15
SPC - Select this option to begin SPC operations using
the highlighted setup record.
Clear - Select this option to clear statistics from a
highlighted setup record that has “Yes” in the “Saved
Stats” column.
Report - Select this option if you want to generate a
report based on saved statistics, histograms, or the
setup record. (These reports are described in Report
Functions on page 8-60.)
Toggle Logging - The logging function accumulates a
log file of basic inspection results data for later use in
reports or for conversion to other formats.
Select this option to turn the logging function on if it is
off, or turn it ofSif it is on. Note that the current on-off
state of the logging function is indicated by the
message near the bottom of the menu.
8-16
5.
Log Report - Select this option to generate a report
that is based on the data accumulated in the log fide.
You can elect to review the report on the display, print
the report, or save the report to a DOS file. (These
reports are described in Repot? Functions on page
8-60.)
6.
Convert Log - Select this option to convert the data
accumulated in the log file to a format that is
compatible with one of a number of other application
programs, such as Lotus 123 and MetriStat Lab. (These
log file conversions are described in Conversion
Functions on page g-54.)
7.
Delete Log - Select this option to delete the log file.
8.
Saved Stats-This
column indicates whether saved
statistics exist for each setup record in the setup menu.
The “No” changes to “Yes” whenever you exit an SPC
operation using a setup record that has “save stats”
specified. The “Yes” changes to “No” whenever you
select the Clear option described above for the
highlighted setup record.
9.
Results logging is On/Off-This
message indicates
the current status of the logging function. You can
toggle the function on and off by selecting the Toggle
Logging option.
-
~hort~Pc
setup
The short SPC setup and operation method enables you to
specify a few SPC parameters in a short setup record, then
run SPC operations using that record. You need little or no
experience with statistical process control to use this setup
option.
Using the Short SPC Setup Method
Here is the procedure for using the short method of SPC
setup and operation:
Your Action
Comments
Return to the Main Menu, if
you have not already done
so.
-
Press the “Y key to
highlight the Statistical
Process Control option,
then press the ENTER key.
When you press ENTER, the SPC Setup Menu should
appear on the display, as shown in Figure 8.3 (page 8-10).
(If the SPC Setup Menu does not appear, it was not selected
as the default setup menu in the Program Configuration
Screen. If this is the case, refer to Chapter 9, Program
Configuration Option, for information about selecting the
SPC Setup Menu as the default setup menu.)
Press the “s” key twice to
highlight the Short SPC
Setup Menu option, then
press the ENTER key.
When you press ENTER, the Short SPC Setup Menu
appears on the display, as shown in Figure 8.6 on page
S-18.
Note that the SPC option is highlighted when the Short SPC
Setup Menu appears on the display with existing setup
records. Otherwise, the Add option is highlighted.
Note also that the setup menu contains three setup records,
and that the first setup record, “Width Measurements,” is
highlighted. All three of these setup records were prepared
earlier by someone using either the short or long SPC setup
menu.
At this point, you can highlight an existing setup record and
perform SPC operations.
Note: The setup record that you select must correspond to
the configuration currently operating in the SLS. If you
need to change the SLS configuration, go to the
Conjguration Menu (described in Chapter S), highlight the
8-17
appropriate configuration record, and use the Send option
to dbwnkmd thut configuration to the SLS.
Use the next step to start SPC operations at this time.
Otherwise, skip to Short Setup Menu: Options.
Flgure 8.6 Short SPC setup Menu
hart Linear Sensor
m
Log Add Insert
Short SPC Setup tlenu
Delete
Modify
Charts
Version2.88
Clear
Report
Utilities
tleasuremnts
tleasuremnts
Use f and + for options.
Press MTER to run option.
Use 4, t, PgUp, PgDn, Hone, and End for records.
ESC previous mmu. Fl for help.
F2 change port.
Highlight the appropriate
When you press ENTER, the SPC charts appear on the
setup record, then press the display (these charts are the ones designated in the
ENTER key.
highlighted setup record).
Short Setup Menu: Options
Here is a brief description of the menu options in the Short
SPC Setup Menu in Figure 8.6, above. You can highlight an
option by typing the initial letter of the option, by pressing
the right (or left) arrow key, or by pressing the SPACE
BAR (or BACKSPACE) key. You can select an option by
pressing the ENTER key. You can deselect a selected
option by pressing the ESC key.
8-18
1.
SPC - Select this option to begin SPC operations using
the highlighted setup record.
2.
Log - Select this option to set up multiple log files in
the Log File Menu and perform SPC operations using
any of specified log files to log SPC data. (Logging
operations are described in Logging Functions on page
8-52.)
3.
Add - Select this option to create a new SPC setup
record in the Short SPC Setup Screen. The new setup
record is added to the end of the list of setup records in
the setup menu.
4.
Insert - Select this option to create a new WC setup
record in the Short WC Setup Screen. The new setup
record is inserted above the highlighted setup reccrd in
the setup menu.
5.
Delete - Select this option to delete the highlighted
setup record in the setup menu.
6.
Modify - Select this option to modify the highlighted
setup record in the setup menu. When you select the
Modify option, the highlighted setup record appears in
the Short SPC Setup Screen.
7.
Charts - Select this option to perform an automatic
SPC operation. For details, refer to the Automatic SPC
Setup Method section of this manual. The procedure is
basically the same.
8.
Clear - Select this option to clear statistics from a
highlighted setup record that has “Yes” in the “Saved
Stats” column.
9.
Report - Select this option if you want to generate a
report based on saved statistics, histograms, or the
setup record. (These reports are described in Report
Functions on page g-60.)
10. Utilities - Select this option to perform the following
utility functions:
a. “Export” an SPC setup record to a different DOS file,
either a new file or an existing file.
b. 7mport” an setup record from a DOS file in which
you have previously stored setup records.
c. Change to a different DOS file, either a new file or an
existing file.
d. Copy the highlighted
file.
setup record within the current
g-19
-
Short Setup Screen: Fields
When you select the Add, Insert, or Modify option, the
Short SPC Setup Screen appears in the display. Figure 8.7
is typical of an initial Short SPC Setup Screen.
Figure8.7
snartLinearsensor
I
ShortSPCSetupScreen
Short SPC Setup Screen
Enter the On-Line SPCoptions.
Press ESCuhen done.
Version 2.88
Fl for help.
I
I
I I
Sample size
Lower Specification
Upper Specification
Result description
Result description
Chart selection
Chart selection
chart A
Chart B -
1
1
I
III
Limit (EL)
Limit (USLI
for Chart A
for Chart B
for Chart A
for Chart B
First edge
Last edge
X and Sideways Histogram
X and Sideways Histogram
Save stats after running SPC?
Use sawed stats hen running SPC?
No
No
Here is a description of each data entry and option field in
the Short SPC Setup Screen.
Descciption
Use this field to identify the SPC setup record with a
unique name or description, preferably one that identifies
its SPCfinction. You can enter any series of up to 60
printable characters. The minimum is one character.
a-20
I
Sample Size
Use this field to enter the sample size, which is the number
of data points (inspection results) to be used in each
subgroup. The sample size to enter depends partly on the
chart options that you intend to use for charts A and B, as
follows:
l
For the “x” chart options, which display individual
inspection results, the sample size must always be 1.
l
For the ‘%” chart options, which display inspection
results averages, the sample sire must be 2 or greater
(up to 99).
l
For the “p” chart options, the sample size can be 1 to
9999. The number selected depends on the actual
“sample” of items whose percentage of defective items
the p chart displays.
Specification
Limits (USL and LSL)
Use these fields to enter the upper and lower specification
limits for the items being inspected (if you enter &her
limit, you must enter the other limit also). When you use
the X or x chart options, and enter the specification limits,
the CSS calculates and displays Cp, Cpk, and Cr, the
process capability indices.
Note: When you use the p chart options, you must enter
both specification liits if you select “Result out of spec”
in the p Chart Attributes Method Menu, since the CSS
calculates the percentage of defective items (p) as the
number of items whose inspection result is outside eirher
specification limit divided by the number of items in the
sample.
(For more information about chart attributes, refer to Chart
Attributes Method: Chart A and Chart B on page g-36.)
Result Description:
Chart A and Chart B
Use these fields to enter a descriptive name for the results
that are displayed in each chart. These names appear above
the corresponding charts in the display, and also appear in
the setup and statistics reports.
Initially, the result descriptions are taken from the analysis
function currently operating in the SLS. Thus, when the
1-D Spatial Measurement function is in operation, the
g-21
results description for chart A is First Edge, and the
description for chart B is Last Edge. These reflect the
results frcm the analog A and B outputs.
You can use these fields to enter any name or description,
up to 33 characters long, that is better suited to your
application.
Chart Selection:
Chart A and Chart B
Use the chart selection fields to select a chart option for
chart A and chart B. You can select the same chart option or
different chart options for each chart, according to the
requirements of your application.
When you highlight either field, the Chart Selection Menu
appears on the display, as shown in Figure 8.8.
Figure 88 Chart Selection Menu
-
X Ear and R and Histogram
X Bar and s and Histogram
X Bar and Histogram
X and Histogram
X and Sideways Histogram
p Chart and Sideways Histogram
p Chart and Histogram
You can select a chart option using either of the following
methods:
8-22
l
Use the SPACE BAR to scroll donvr through the list of
chart options in the menu, or use the BACKSPACE key
to scroll up. In either case, the currently selected chart
option appears in the chart selection field. Stop scrolling
when you see the correct chart option in the field.
l
Press the TAB key. When you do this, the current chart
option (the one in the chart selection field) is highlighted
in the menu. Use the down (or up) arrow key to
highlight the correct chart option, then press the ENTER
key to select that option.
Here are the chart options in the Chart Selection Menu.
(Note that the first five options are the same as those in the
Chart Selection and Setup Menu shown in Figure 8.8 on
page 8-22.)
1.
X Bar and R and Histogram - This option plots
graphic data as follows:
a.
Subgroup average data (X bar).
b. A running average of X bar data (X double bar).
c.
A histogram based on X data.
d. Range data points (R).
2.
e.
A running average of range data (R bar).
f.
Upper and lower control limits for X bar and R.
X Bar and s and Histogram - This option plots
graphic data as follows:
a.
Subgroup average data (X bar).
b. A muting
3.
average of X bar data (X double bar).
c.
A histogram based on X data.
d.
Standard deviation data points (s).
e.
A running average of standard deviation data (s
bar).
f.
Upper and lower control limits for X bar and s.
X Bar and Histogram - This option plots graphic data
as follows:
a
Subgroup average data (X bar).
b. A running average of X bar data (X double bar).
c.
A histogram based on X data.
d. Upper and lower control limits for X bar.
4.
X and Histogram -This
follows:
a
option plots graphic data as
Individual results data points (X).
b. A running average of individual data points (X
bar).
c.
Upper and lower control limits for X.
d.
A histogram based on X data.
S-23
5.
X and Sideways Histogram - This option plots
graphic data as follows:
a.
Individual data points (X).
b. A running average of individual data points (X
bar).
6.
7.
c.
Upper and lower control limits for X.
d.
A sideways histogram based on X data.
p Chart and Sideways Histogram-This
graphic data as follows:
option plots
a.
Individual data points (p).
b.
A running average of individual data points 6).
c.
Upper and lower control limits for p.
d.
A sideways histogram based on p data.
p Chart and Histogram - This option plots graphic
data as follows:
a.
Individual data points @).
b.
A running average of individual data points 6).
c.
Upper and lower control limits for p.
d.
A histogram based on X data.
Save Statistics?
Use these two fields to indicate whether you want the CSS
to save and/or use saved statistics, as follows:
l
In the&? field, select “Yes” if you want the CSS to
save the accumulated statistics when you press the RSC
key to discontinue an SPC operation. Otherwise, select
“No.”
You can use saved statistics for the “Saved Statistics
Report” and/or as the statistical starting basis for the
next SPC operation.
l
8-24
In the second field, select “Yes” if you want the CSS to
begin an SPC operation using statistics saved from
previous SPC operations. Otherwise, select “No.”
_
-
Long SPC Setup
Method
The long SPC setup and operation method enables you to
specify all of the SPC parameters that are available in the
CSS. then run SPC operations using that record. Before
using this option, you should have a full knowledge of SPC
concepts and parameters.
Using the Long SPC Setup Method
Here is the procedure for using the long method of SPC
setup and operation:
Comments
Your Action
Return to the Main Menu, if
you have notalready done
SO.
-
Press the “s” key to
highlight the Statistical
Process Control option,
then press the ENTER key.
When you press ENTER, the SPC Setup Menu should
appear on the display, as shown in Figure 8.3 (page 8-10).
(If the SPC Setup Menu does not appear, it was not selected
as the default setup menu in the Program Configuration
Screen. If this is the case, refer to Chapter 9. Program
Conjiguration Option, for information about selecting the
SPC Setup Menu as the default setup menu.)
Press the “L” key m
highlight the Long SPC
Setup Menu option, then
press the ENTER key.
When you press ENTER, the Long SPC Setup Menu
appears on the display, as shown in Figure 8.9 on page
8-26.
Note that the Add option is highlighted when the Long SPC
Setup Menu appears on the display without existing setup
records. Otherwise, the SPC option is highlighted.
At this point, you must create a new setup record before
you can perform SPC operations. The setup record that you
create should correspond to the configuration currently
operating in the SLS.
-Select the Add option.
When you press the ENTER key, the cursor moves to the
Description field in the setup menu.
Enter a descriptive name
Enter 1 to 50 characters.
for the SPC setup record.
8-25
Figurew LongWC setup Menu
hart
Linear Sensor
SPC Log m
Insert
Version 2.8
Long SPC Setup tlenu
Delete
Hodify Rescale
Charts Clear
Report Utils
chartA
Lou Value
HighValue
Precision
Chart B
Lou Value
High Value
Precision
Saved Stats?
I
Use * and + for options.
Press ENlEBto run option.
Use 1, t, PgUp, PgDn, How, and End for retards.
ESCprevious menu. Fl for help. F2 change port.
Long Setup Menu: Options
Here is a brief description of the menu options in the Long
SPC Setup Menu in Figure 8.9, above. You can highlight an
option by typing the initial letter of the option, by pressing
the right (or left) arrow key, or by pressing the SPACE
BAR (or BACKSPACE) key. You can .seIect an option by
pressing the ENTER key. You can deselect a selected
option by pressing the ESC key.
8-26
1.
SPC - Select this option to begin SPC operations using
the highlighted setup record.
2.
Log - Select this option to set up multiple log files in
the Log File Menu and perform SPC operations using
any of specified log files to log SPC data (Logging
operations are described in Logging Functions on page
8-52.)
-
3.
Add - Select this option to create a new SPC setup
record in the Long SPC Setup Screen. The new setup
record is added to the end of the list of setup records in
the setup menu.
4.
Insert - Select this option to create a new SPC setup
record in the Long SPC Setup Screen. The new setup
record is inserted above the highlighted setup record in
the setup menu.
5.
Delete - Select this option to delete the highlighted
setup record in the setup menu.
6.
Modify - Select this option to modify the highlighted
setup record in the setup menu. When you select the
Modify option, the highlighted setup record appears in
the Long SPC Setup Screen.
7.
Rescale - Select this option to calibrate your
inspection results to “real world” measurements, such
as inches or centimeters. (For detailed information
about the Rescale option, refer to Calibration, Chart
Scaling, and SLS Scaling on page 84.)
In addition, you can change the precision of the results
by selecting 0 to 7 places to the right of the decimal
(the default precision is 2 places to the right of the
decimal).
8.
Charts - Select this option to perform an automatic
SPC operation. For details, refer to the Automatic SPC
Setup Method on page 8-9. Th.e procedure is basically
the same.
9.
Clear - Select this option to clear statistics from a
highlighted setup record that has “Yes” in the “Saved
Stats” column.
10. Report - Select this option if you want to generate a
report based on saved statistics, histograms, or the
setup record. (These reports are described in Repoti
Functions section on page 8-60.)
11. Utilities - Select this option to perform these four
utility functions:
a.
“Export” an SPC setup record to a different DOS
file, either a new file or an existing file.
b.
“Import” an setup record from a DOS file in which
you have previously stored setup records.
8-27
c.
Change to a different DOS file, either a new file or
an existing file.
d.
Copy the highlighted
current file.
^
setup record within the
Long Setup Screen: Fields
When you select the Add option, the cursor moves to the
Description field in the Long SPC Setup Menu, as shown in
Figure 8.10.
Figure 8.10 Description Field: Long SPCSetup
rt Limar .smsm
Rtcr
tk
Menu
lLmgsFcsetuplkw
setup descrlptlol.
hwa
BC to cmcd.
uonlml2.d
H for klp.
-
When you enter a descriptive name for the setup record and
press the ENTER key, the cursor moves to the first field of
the Chart Scales screen, as shown in Figure 8.11.
Fgure 8.11 Chart Scales Fields: Long SPC setup Menu
SPC tip
Entm tk
ruling
idomatim.
pnrr
nm
Bsc wkn he.
Pi klp.
F3 calibrate.
Note also that the F3 prompt has appeared in the prompt
line in the upper display. This function key selects the
calibration function, which can convert SLS inspection
results to “real world” units, such as inches or centimeters.
Since the calibration and scaling functions and procedures
arc described in the Calibration, Chart Scaling, and SLS
Scaling on page 8-46, they are not included here. Thus, for
the purposes of the following setup screen descriptions, the
chart scales are assumed to be set to their default values.
8-28
-
To continue on to the Long SPC Setup Screen, press the
EW key, then press the ENTER key to “save” the Chart
Scales screen and display the fiit group of data entry and
option fields in the setup screen, as shown in Figure 8.12.
(The remainder of the long setup Screen is shown in
Figure 8.14, page 8-34; Figure 8.16, page 8-39; and
Figure 8.17, page 8-41.)
Figure8.12 Long!WCSetupScreen(Part1 of 4)
Enter the On-Line SPC options.
Press ESCuhen done.
Lou Ualue
High Value
Sample size
Lower Specification
Upper Specification
Iarget
Display chart?
Chart selection for
Chart selection for
Version 2
Long SPC Setup Screen
Smart Linear Sensor
Fl help.
F3 calibrat
chart A
ChartB-
e.BmEl
ma IfiBeBB
B.BBBEm
ieB.eElBae
1
I
Limit (LSL)
Limit (USL)
Yes
Yes
X and Sideways Histogram
X and Sideuays Histogram
Chart A
Chart B
X or X Bar Chart Setup
Lower Chart Boundary
Upper Chart Boundary
Display control linits?
Refer to Figure 8.12, above, for the following descriptions
of the data entry and option fields in the Long SPC Setup
Screen.
Description
Use this field to identify the SPC setup record with a
unique name or description, preferably one that identifies
its SPCfinction.
You can enter any series of up to 60
printable characters. The minimum is one character.
8-29
Note: Initially, the description field contains the name that
you just entered if you used the Add or Insert option.
Otherwise, the existing name appears if you used the
Modii option.
Chart Scale Values
These fields indicate the current low and high values tiom
the Chart Scales screen. They appear in the setup screen for
informational purposes only. You cannot change them in
the setup screen.
Sample Size
Use this field to enter the sample size, which is the number
of data points (inspection results) to be used in each
subgroup. The sample size to enter depends partly on the
chart options that you intend to use for charts A and B, as
follows:
l
For the “X” chart options, which display individual
inspection results, the sample size must always be 1.
l
For the I%” chart options, which display inspection
results averages,
the sample sire must be 2 or greater
(up to 99).
l
For the “p” chart options, the sample size can be 1 to
9999. The number selected depends on the actual
“sample” of items whose percentage of defective items
the p chart displays.
Specification
Limits (USL and LSL)
Use these fields to enter the upper and lower specification
limits for the items being inspected (if you enter either
limit, you must enter the other limit also). When you use
the X or x chart options, and enter the specification limits,
the CSS calculates and displays Cp, Cpk, and Cr (the
process capability indices) in the table alongside the
associated chart.
Note: When you use the p chart options, you must enter
both specification limits if you select “Result out of spec”
in the p Chart Attributes Method Menu, since the CSS
calculates the percentage of defective items (p) as the
number of items whose inspkction result is outside either
8-30
-
specification limit divided by the number of items in the
sample.
(For more information about chart attributes, refer to Chuti
Attributes Method: Chart A and Churt B on page g-36.)
Use these fields to enter values that you deem to represent
the ideal outcome for all inspection results in each chart
While the CSS does not use these values in any of the SPC
calculations, it does include them in the statistics report.
You may also want to enter the “target” value in the
“Center line” field in this setup screen.
Display Chart?
Use these fields to disable the display of either chart (at
least one chart must be enabled). Figure 8.13 on page 8-32
shows a typical single-chart display using the X Bar and R
and Histogram chart option.
When just one chart is enabled, it occupies the entire
display. Thus, since the available space is greater, the
associated table can contain all of the statistical data,
including the control limits. (Note that the TAB icon is
missing, since it is not needed in a single-chart display.)
Chart Selection: Chart A and Chart B
Refer to Chart Selection: Chart A and Chart 3 on page
8-22 for information about chart selection.
g-31
Figure 8.13 8hgk-Chart
Display of X Bar and R and Histogram
-
Chart Boundary Values
Use these fields to specify the upper and lower boundaries
for each control chart that you select for your application.
Separate chart boundary fields are provided for the X and X
bar charts, the R and s charts, and the p charts.
Initially, when you create a new setup record using the Add
or Insert option, these fields are blank. If you do not enter
boundary values, and perform an SPC operation, the CSS
uses, by default, the low and high values indicated in the
Chart Scales screen. (In any case, you cannot set the chart
boundaries beyond the low and high values specified in the
Chart Scales screen.)
If you are using a p chart, the chart boundary values can
range from 0.000 to 1.000.
8-32
-
Note: When you perform an automatic SPC setup using
the Charts menu option, the CSS calculates the chart
boundaries during the initialization phase. If you then save
the resulting setup record (by selecting Save SPC Setup
Configuration and naming the setup record), the CSS
inserts the calculated chart boundaries into the appropriate
fields. You can see the calculated boundary values by
highlighting the new setup record and selecting the Modify
option; or, by viewing or printing the SPC Setup Report
(see Figure 8.29, page 8-64).
Display Control
Limits?
Use these fields to indicate whether or not you want the
control limits to appear in the corresponding chart display.
Separate “Display control limits?” fields arc provided for
the X and X bar charts, the R and s charts, and the p charts.
If you select “No,” the control limits will not be displayed
either graphically or in the data tables.
The next group of data entry and option fields appear in
Figure 8.14 on page 8-34. (Note that this figure is a
composite - it shows more than you will see on your
display at one time.)
8-33
-
Rgure 8.14 Long WC setup Screen[part2 of 4)
Smart Linear Sensor
Long SPC Setup Screen
the On-Line SPC options.
Press ESCuhen done.
Use fixed control limits?
Lower Control Limit X (LCLX)
Upper Control Linit X (UCLX)
Use fixed center line?
Center Line
Numberof sigma units for limits
Uersion 2.88
Fl help.
Ia
No
ND
No
3
3
R or s Chart Setup
her Chart Boundary
Upper Chart Roundary
Display control link?
Use fixed control limits?
Louer Control Limit MIJI or LCLsl
Upper Control Limit (UCLRor LlCLsI
Use fixed center 1 ine?
Center Line
Yes
ND
No
No
No
Yes
p Chart Setup
Low3 Chart Boundary
Upper Chart Boundary
Display control limits?
Use fixed control limits?
Lower Control Limit p (LCLp)
Upper Control Limit p (UCLpI
Use fixed center line?
Center Line
Chart A Attributes Nethod
Chart B Bttributes Method
Yes
No
Yes
No
No
No
Result out of spec
Result out of spec
Histogran Setup
Numberof cells
Stabilization
value
Numberof triggers before limit change
8-34
15
15
75
58
P3 calibrate.
1
Use Fixed Control Limits?
Use these fields
control limits to
display. Separate
provided for the
the p charts.
to indicate whether or not you want fiied
appear in the chart A and/or chart B
“Use fixed control limits?” fields are
X and X bar charts, the R and s charts, and
If you select “Yes” for chart A or chart B, you must enter
the upper and lower control limit values for that chart in the
following fields.
Fixed Control Limits Values
If you selected “Yes” in the “Use fixed control limits?”
field, use these fields to specify the upper and lower limits
that you want displayed. Separate upper and lower control
limit fields are provided for the X and X bar charts, the R
and s charts, and the p charts.
Use Fixed Center Line?
Use these fields to indicate whether or not you want a fmed
center line to appear in the chart A and/or chart B display.
Separate “Use fixed control liits?”
fields are provided for
the X and X bar charts, the R and s charts, and the p charts.
If you select “Yes” for chart A or chart B, you must enter a
fixed center line value for that chart in the following field.
Fixed Center Line Value
If you selected “Yes” in the “Use fixed center line?” field,
use this field to specify the fixed center line that you want
displayed. Separate upper and lower center line fields are
provided for the X and X bar charts, the R and s charts, and
the p charts.
Number of Sigma Units for Control Limits
Note: These fields apply only to X “individuals”
charts.
Use these fields to indicate whether or not you want to
change the number of sigma units used to calculate the
control limits. The default value is 3. Numbers 1 to 5 are
valid.
The formula for calculating UCLx is: mean + (sigma x
sigma units).
The formula for calculating LCLx is: mean - (sigma x
sigma units).
Chart Attributes Method:
Chart A and Chart B
Note: These fields apply only when you have selected a p
chart option for chart A and/or chart B.
Use these fields to select the “attribute” that determines
whether an inspected item is defective. You can select the
same “attribute method” or different methods for each p
chart, according to the requirements of your application.
Here. are some requirements
the attribute method:
1.
to keep in mind when selecting
When you select “Result out of spec,” you must enter
both specification limits, since the CSS calculates the
percentage of defective items @) as the number of
items whose inspection result is outside either
specification limit divided by the number of items in
the sample.
2.
When you select “Result above USL” you must enter
the upper specification limits; when you select “Result
below LSL,” you must enter the lower specification
limit.
3.
When you select either “Discrete output closed” or
“Discrete output open,” you do not need to enter
specification limits.
When you highlight either chart attributes field, the p Chart
Attributes Method Menu appears on the display, as shown
in Figure 8.15 on page 8-37.
8-36
-
Flgure8.15 pChaiAtlribubzsMethodMenu
It
Result out of spec
Result above USL
Result below LSL
Discrete output closed
You can select a menu option using either of the following
methods:
l Use the SPACE BAR to scroll down through the list of
options in the menu, or use the BACKSPACE key to
scroll up. In either case, the currently selected option
appears in the chart attributes field. Stop scrolling when
you see the correct option in the field.
l Press the TAB key. When you do this, the current option
(the one in the chart attributes field) is highlighted in the
menu. Use the down (or up) arrow key to highlight the
correct chart option, then press the ENTER key to select
that option.
Here are the options in the p Chart Attributes Method
Menu.
1.
Result out of spec - Use this option if the inspected
item is defective when the inspection result is outside
the upper or lower specification limit.
2.
Result above USL - Use this option if the inspected
item is defective when the inspection result is outside
the upper specification limit only.
3.
Result below LSL - Use this option if the inspected
item is defective when the inspection result is outside
the lower specification Limit only.
4.
Discrete output closed - Use this option if the
inspected item is defective when the discrete output is
closed.
5.
Discrete output open - Use this option if the inspected
item is defective when the discrete output is open.
8-37
Number of Cells
Use these fields to specify the number of cells in the
histogram for chart A and/or chart B. You can select the
same number of cells, or a different number, for each chart,
according to the requirements of your application. The
default number is 15 in a new setup record. The valid
numbers range from 5 to 30.
Stabilization
Value
Use these tields to specify the number of individual
inspection results (data points) that the CSS uses to
“stabilize” the initial histogram boundaries. The boundary
settings are based on the minimum and maximum results
values received during the stabilization period.
The stabilization value should be large enough to include
the largest and smallest results values that am likely to
occur in your application. The valid numbers range kom 1
to 9999.
Number of Triggers Before Limit Change
Use these fields to specify the number of individual
inspection results (data points or “triggers”) that the CSS
must receive before it can change the histogram
boundaries. After receiving the specified number of
“triggers,” the CSS changes the boundary settings
whenever it receives a lower minimum value (or a higher
maximum value) since the last boundary change.
The valid numbers range ti-om 1 to 99.
The next group of data entry and option fields appear in
Figure 8.16 on page 8-39.
8-38
Figure8.16LongSPCSetupScreen(Part3.of4)
Smart Linear Sensor
Long SPC Setup Screen
Enter the On-Line SPC options.
Version 2
Press ESCuhen done.
llultiple
Fl help.
I’3 calibrat
SLS Setup
Chart fI Fomula
Chart B Pm-da
SLS Scaling
Lou Value
High Value
Log Results?
-
UOU) and Logging
SLS 1
SLS 2
SLS 3
SLS 4
No
No
No
No
NOTE: The high value rimts the lw
value is the SLS’s “Field Of View”
Chart Formulas:
Chart A and Chart B
Use these fields to specify formulas that combine and/or
perform mathematical operations on the inspection results
from two or more SLS’s, or perform mathematical
operations on the results from one SLS.
The altered results data from the formula appear in the
corresponding chart instead ofthe normal results data from
a single analog output.
For example, if the Chart A Formula field specifies
combining the analog A result from SLS 1 (connected to
COMl) with the analog B result from SLS 2 (connected to
COM2), the altered result appears in chart A instead of a
single result from either SLS.
All formulas must observe the following requirements.
1.
A formula must contain one or more of these
mathematical operators:
a.
Addition:
+
b.
Subtraction:
c.
Multiplication:
x or *
8-39
2.
d.
Division:
e.
Exponentiation:
-
/
h or$
A formula must specify the analog result from at least
one SLS, as follows:
a.
SLS 1: laand
lb
b.
SLS2:
c.
SLS 3: 3a and 3b
d.
SLS4:
2aand2b
4aand4b
Thus, la is the analog A output from SLS 1, and 4b is the
analog B output from SLS 4.
In both of the following examples, assume that the SLS is
configured with the 1-D Spatial Measurement function.
Example 1: (2b - la)
This formula causes the difference between the analog B
output (last edge) from SLS 2 and the analog A output (first
edge) from SLS 1 to appear in the designated chart.
If each SLS were each positioned to locate one end of a
long item, and the result values from each SLS were
calibrated to the same “real world” units, this formula
would indicate the actual length of the item.
Example 2: ((lb - la)“2 + (2b - 2a)*2)“0.5
This formula uses the Pythagorean theorem to calculate the
diagonal measurement across a rectangle. It causes the
square root of the sums of the squares of the differences
between the two sets of edges to appear in the designated
chart. Each “difference” represents a distance between a
first edge and a last edge within the same field of view.
Thus, (lb - la) is the distance between the fmt and last
edges within the FOV of SLS 1.
If the two SLS’s were positioned to measure the length and
width of the same rectangular item, and the results values
from each SLS were calibrated to the same “real world”
values, this formula would indicate the diagonal distance
across the rectangle.
8-40
SLS Scale Values
Use these fields, along with the “FC3calibrate” function, to
enter calibrated scale values for any SLS connected to
COMl, COM2, COM3, and/or COM4. The calibration and
scaling functions and procedures are described in the
Calibration, Chart Scaling, and SLS Scaling on page 8-46.
Log Results?
Use these fields to enable (if OJn or disable (if On) the
logging function for each SL.S used in your application.
(Logging operations are described in Logging Functions on
page 8-52.)
Note: The On/Off status of the “Log Results?” fields has
no effect on the operation of formulas that use the SLS
results.
The last group of data entry and option fields appear in
Figure 8.17.
Figure8.17 LongSF+C
setupScreen[Part4 of 4)
General Setup
Use e&hated
sigma for Cp and Cpk?
Control chart panning percentage
No
lee.88
Result description
Result description
Object width
Object center
Cpk calculation
Cpk calculation
for Chart A
for Chart B
method for Chart A
nethod for Chart B
No
lee&l
Nin of WL-Nean) or Mean-LSLI
Nin of IUSL-Clean)or Mean-LSL)
Save stats after running SPC?
Use saued stats uhen running SPC?
Use Estimated Sigma?
Use these fields to indicate whether or not you want
estimated sigma to be used to calculate the process
capability indices Cp and Cpk, when you have selected
either an X Bar and R or an X Bar and s chart.
Note: Your process must be both normally distributed and
in control in order to use the estimated value of sigma.
Refer to Appendix C. SPC Formulas, for an explanation of
the formulas used to calculate Cp, Cpk, and estimated
sigma.
Control Chart Panning Percentage
Use these fields to enter the percentage of the control charts
to be cleared at the end of the “panning” cycle, when the
charts are full. The valid percentage numbers range from
25% to 100%.
If the percentage is set to lOO%, the control charts are
cleared entirely, and the next panning cycle begins at the
left boundary of each chart. If the percentage is set to 80%,
the last 20% of the previous cycle is redisplayed on the left
side of each chart, and the next panning cycle begins at the
20% point. Figure 8.18, page 8-43, shows how this works.
Note: The smaller the panning percentage, the longer the
redisplay time. If you select 2.5%, the CSS must redisplay
75% of the previous panning cycle; thus, you may see the
“W” (warning) symbol if the redisplay time has reached the
point where your PC cannot keep pace with the SLS.
8-42
-
Flgure 8.18 Panning Operatton With Percentage Set to 80%
Firsteds
mdiuidusls
New display cycle begins here
Result Description:
Chart A and Chart B
Use these fields to enter a descriptive name for the results
that are displayed in each chart. These names appear above
the corresponding charts in the display, and also appear in
the setup and statistics reports. Thus, in Figure 8.17, page
8-41, the names are Object Width for chart A, and Object
Center for chart B.
Initially, the result descriptions are taken from the analysis
function currently operating in the SLS. Thus, when the
8-43
1-D Spatial Measurement function is in operation, the
results description for chart A is Fit Edge, and the
description for chart B is Last Edge. These reflect the
results from the analog A and B outputs.
You can use these fields to enter any name or description,
up to 33 characters long, that is better suited to your
application.
Cpk Calculation Method:
Chart A and Chart B
Use the Cpk calculation method fields to select a Cpk
calculation method for chart A and chart B, ifyou have
entered specification limits for either or both char&. You
can select the same method or different methods for each
chart, according to the requirements of your application.
When you highlight either Cpk calculation field in the setup
screen, the Cpk Calculation Method Menu appears in the
display, as shown in Figure 8.19.
-
Figure 8.19 Cpk Calculation Method Menu
These menu options enable you to select a method for
calculating Cpk when the specification midpoint (“target”)
is farther from one specification limit that the other.
You can select a menu option using either of the following
methods:
8-44
l
Use the SPACE BAR to scroll down through the list of
options in the menu, or use the BACKSPACE key to
scroll up. In either case, the currently selected option
appears in the appropriate Cpk calculation method field.
Stop scrolling when you see the correct chart option in
the field.
l
Press the TAB key. When you do this, the current chart
option (the one in the chart selection field) is highlighted
in the menu. Use the down (or up) arrow key to
-
highlight the correct chart option, then press the ENTER
key to select that option.
Hem are the options in the Cpk Calculation Method Menu:
1.
Min of (USL - Mean) or (Mean - LSL) - This is the
standard method for calculating Cpk, which is the
lesser result of these two calculations:
cpk = UJSL -Mean)
3a
or
(Mean - LSL)
CM=
3a
2.
USL - Mean -Use this method for calculating Cpk
when the specification midpoint is closer to the USL.
3.
Mean - LSL -Use this method for calculating Cpk
when the specification midpoint is closer to the LSL.
Save Statistics?
Use the last two fields to indicate whether you want the
CSS to save and/or use saved statistics, as follows:
l ln thefinf
field, select “Yes” if you want the CSS to
save the accumulated statistics when you press the ESC
key to discontinue an SPC operation. Otherwise, select
“No.”
l In the second field, select “Yes” if you want the CSS to
begin an SPC operation using statistics saved from
previous SPC operations. Otherwise, select “No.”
8-45
Calibration, Chart Scaling, and SLS Scaling
CuZibration enables you to convert or “rescale” inspection
results data from an SLS, which you normally see as
percentages from 0% to 100% in the Monitor and View
Image displays, to “real world” units of your choice, such
as inches, centimeters. and so on. The effect is that when
you perform SPC operations, the statistical data is based on
actual measurement values.
The simplest calibration procedure can measure an “ideal’
object of known size and automatically calibrate the chart
scale values accordingly. This procedure is available from
the Chart Selection and Setup Menu in the SPC Setup
Menu, and also from the Charts option of the short and long
setup menus.
A mom complex calibration procedure can measure a
different “ideal” object of known size for each SZS, when
more than one SLS is used, and combine their calibrated
values in formulas. You then manually change the chart
scale values to reflect the lowest and highest combined
measurement. This procedure is available only in the Long
SPC Setup Screen.
Chart scaling involves altering the low and high values in
the Chart Scales screen (next to the Long SPC Setup Menu)
in order to rescale the results data from the SL.S. Thus, if
the results data ranges from 20 to 30 when the Chart Scales
values are 0 (low) and 100 (high), the same data will range
from 10 to 15 if you alter the Chart Scales values to 0 (low)
and 50 (high).
You can specify any negative or positive number that fits in
the ten-character field. The only requirement is that the low
value must be lower (or more negative) than the high value.
SLS scaling involves entering low and high scaling values
for individual SLS’s. (The associated data entry fields are
in the SLS Scaling section of the long setup menu.
One function of SLS scaling is to enable you to set each
SLS to a different scale, where each can serve its own
purpose insofar as the accumulation of SPC data is
concerned. Another function of SLS scaling is to enable
you to calibrate multiple SLS’s so that their results reflect
the same basic measurement units in formulas.
The practical effect of SLS scaling is to alter the
relationship between the SLS field of view (FOV) scales
and the chart scales. Thus, if the SLS scaling values were
the same as the Chart Scale values (for example, 0 and
8-46
-
lOO), the results data from the SLS could appear anywhere
within the entire chart scale range of 0 to 100. If, however,
the SLS scales were reset to 0 and 10, the results data could
only appear within the 0 to 10 portion of the chart scale
range.
You can specify any negative or positive number that fits in
the ten-character field. The only requirement is that the low
value must be lower (or more negative) than the high value.
Single SLS Calibration
Here is an example procedure for performing
calibration, where only one SLS is used.
simple
For the purposes of this procedure, assume that the WC
Setup Menu is on the display and the Chart Selection and
Setup Menu option highlighted, as shown in Figure 8.3
(page 8-10).
Note: The SLS must be configured using an
function that returns edge locations or object
the 1-D Spatial Measurement function or the
function. In addition, the SIS must be staged
“ideal” object of known size.
Your Action
analysis
size, such as
Object Width
using an
Comments
Press the ENTER key to
select the Chart Selection
and Setup Menu.
When the menu appears on the display, note that the “F3
calibrate” prompt appears in the prompt line.
Press the F3 key
When you press F3, an explanatory message appears on the
display. Read the message, then continue.
Verifi that “Yes” is
highlighted, then press the
ENTER key.
When you press ENTER, a data entry box appears asking
you to enter the size of the object in the FOV.
Enter the object size in the
“real world” units ofyour
choice.
You must enter only the numbers, not the unit name. For
example, if the object size is 3.25 inches, enter 3.25.
Press the ENTER key.
When you press ENTER, the View Image display appears.
Note that the “image count” (0) and the “enter” icon appear
at the bottom center of the display. The image count shows
the number of images acquired during the calibration
process.
g-47
To start the calibration
process, press the ENTER
key again.
When you press ENTER, the CSS begins acquiring results
data (object width or edge location), and the image count
begins to increment.
When the countfigure
reaches 30 to 50. Dress the
ESC key to stop ihe View
Image and return to the
Chart Selection and Setup
Menu.
The CSS calculates the average of the accumulated results,
and uses that as the basis of the calibration.
Press the ENTER key to
select the highlighted chart
option and begin SPC
operations.
Note that the X Bar and R and Histogram chart option is
highlighted. This chart option is used in the next steps.
When you press ENTER, the CSS enters the initialization
phase, then starts the SPC operation using the calibrated
chart scales.
Note that the data tables alongside the charts reflect the
“real world” value that you entered. The X bar value should
be close to that value. Thus, if you entered 3.5, X bar
should be 3.5 (plus or minus a small amount) if you are
measuring the same object repeatedly.
After a minute or so, press
the ESC key to stop the
SPC operation.
When you press ESC, the Chart Selection and Setup Menu
appears again on the display.
Highlight the “Save SPC
Setup Conjiguration”
option, then press the
ENTER key.
When you press ENTER, the data entry box for the record
name appears on the display.
Type in TEST, then press
the ENTER key.
When you press ENTER, the setup record is saved.
Use the next steps to review the TEST setup record in the
long setup screen.
Press the ESC key to return
to the SPC Setup Menu.
Highlight the “Long SPC
Setup Menu” option, then
press the ENTER key.
8-48
When you press ENTER, the long setup menu appears on
the display.
Highlight the “TEST’ setup
record,
Note that the Chart Scales screen shows the calibrated low
and high values. They sre the same for both charts.
The calibrated low value is always zero. The calibrated
high value reflects the “real world” value entered and the
percentage of the SLS FOV that it occupies.
As an example, if you enter 4.0 as width of anobject, and it
occupies exactly 50% of the FOV, the CSS will calculate
the high value as 8.0. It will then base all subsequent width
measurements on a 0-to-8.0 scale.
Highlight the Modi&
option, then press th-e
ENTER key.
When you press ENTER, the long setup screen appears on
the display.
Note that the CSS has inserted the calibrated chart scales
values into the Low Value and High Value fields of the
setup screen.
Note that the CSS has also calculated the appropriate X bar
and R chart boundaries for charts A and B and inserted
them into the corresponding fields of the setup screen.
This completes the single SLS calibration procedure.
Multiple SLS Calibration
Here is an example procedure in which the results from two
SLS’s are calibrated for use in a formula. Then, the chart
scales are altered manually to accommodate the maximum
real world values that are likely to result from the formula.
For the purposes of this procedure, assume that the SPC
Setup Menu is on the display and the Chart Selection and
Setup Menu option highlighted, as shown in Figure 8.3 on
page 8-10.
Note: Each SLS must be configured using either the I-D
Spatial Measurement function or the Object Width
function. In addition, each SLS must be staged using an
“ideal” object of known size, as appropriate for the
application.
Your Action
Highlight the Long SPC
Setup Menu, then press the
ENTER key to select that
menu.
Comments
When the menu appears on the display, note that the “F3
calibrate” prompt appears in the prompt line.
849
Highlight the Add option,
then press the ENTER key.
This creates a new setup record.
Type in TEST, then press
the ENTER key.
This names the setup record “TELST,” and moves the cursor
to the Chart Scales screen (which you will not change at
this time).
Press the ESC key, then the
ENTER key.
This exits and “saves” the Chart Scales screen, then
displays the Long SPC Setup Screen.
Using the PgDn and down
arrow keys, highlight the
Law Valuefield under SLS
1 in the SLS Scaling
section.
Press the F3 key
When you press F3, an explanatory message appears on the
display. Read the message, then continue.
VerijS that “Yes” is
highlighted, then press the
ENTER key.
When you press ENTER, a data entry box appears asking
you to enter the size of the object in the FOV.
Enter the object size in the
real world units Of yUT
choice.
You must enter only the numbers, not the unit name. For
example, if the object size is 3.25 inches, enter 3.25.
Press the ENTER key.
When you press ENTER, the View Image display appears.
-
Note that the count figure (0) and “enter” icon appear at the
bottom center of the display. The count figure shows the
number of results data acquisitions during the calibration
process.
To start the calibration
process, press the ENTER
key again.
When you press ENTER, the CSS begins acquiring results
data (object width or edge location), and the count figure
begins to increment.
When the count figure
reaches 30 to 56, press the
ESC kev to stow the View
Image &d ret;m to the
long setup scxen.
The CSS calculates the average of the accumulated results,
and uses that as the basis of the calibration.
Note that the calibrated values appear in the low and high
value fields.
Press the Control and right
arrow keys to highlight the
Law Value key under SLS 2.
At this point, the inspection results from SLS 1 and SLS 2
Press the F3 key, then
repeat the previous steps to can be combined in a chart formula, as described in Chart
enter the ~clme real world
Form&s:
Chart A and Chart B on page 8-39.
size of the object in the
FOV of SLS 2.
8-50
Press the ESC key, then
press the ENTER key, to
exit and save the long setup
screen.
When you press ENTER, the long setup menu reappears on
the display, with the Add option highlighted.
Press the “‘R”key to
highlight the Rescale
option.
The Rescale option is used to rescale the low and high
values in the Chart Scales screen.
Press the ENTER key to
select the Rescaie option.
When you press ENTER, the cursor highlights the Chart A
Low Value field in the Chart Scales screen.
Enter the w
value that
you can expectfiom the
Chart A results.
Press the ENTER key to
save the Low Value and
move the cursor to the High
Valuefield.
Enter the &g&k value that
you can expectfrom the
Chart A results.
Press the ENTER key to
save the High Value.
Ifappropriate, repeat the
previous steps to alter the
Chart B law and high
values.
Press the ESC key, then the
ENTER key
This exits and “saves” the Chart Scales screen, then
redisplays the Long SPC Setup Menu.
This completes the multiple SLS calibration and resealing
procedure.
8-51
-
Logging Functions
The CSS can perform logging operations using any of the
four setup methods. The automatic and run-only setup
methods share a common logging function (logging on or
logging off) and default log file. The short and long setup
methods also share a common logging function, and they
can share the same log files or use different ones.
Automatic and Run-Only Setup Methods
These two setup methods use a menu option that turns
logging on or off, as required. When logging is enabled and
SPC operations arc in progress, results data is saved in a
log file whose default name is SLS-SPC.LOG. Note that
the results data from oil automatic and run-only SPC
operations are saved in this file, regardless of which chart is
selected in the case of automatic operations, or which SPC
record is highlighted in the case of run-only operations.
As indicated earlier in this chapter, you can use the logged
data to generate reports and/or convert the data for use in
other application programs.
Short and Long Setup Methods
These two setup methods use a single menu option that
selects all logging operations, including creating log files,
performing SPC operations using one of the log files, and
reporting and converting log tiles after completing SPC
operations.
When you select either the short or long setup menu, and
then select the Log option from the setup menu, the Log
File Menu and logging options menu appear on the display.
Figure 8.20, on page 8-53, shows the Log File Menu and
menu options as they appear with the short setup menu. The
same Log File Menu and menu option appear with the long
setup menu.
Here is a brief description of the logging menu options. You
can highlighr an option by typing the initial letter of the
option, by pressing the right (or left) arrow key, or by
pressing the SPACE BAR (or BACKSPACE) key. You can
select an option by pressing the ENTER key. You can
deselect a selected option by pressing the ESC key.
1.
8--52
SPC - Select this option to begin SPC operations with
logging using the setup record that was highlighted in
-
the setup menu when you selected the Log option, and
logging to the Ne that is currently highlighted in the
Log File Menu.
Figure820 LogFileMenuandLoggingOptionsMenu
Slmart Linear Sensor
SPC m
Delete
Lag File tlenu
Renaae Clear
Use + and + for options.
Press ENTER
to run option.
Version 2.88
Report Convert Clear Stats
Use 4, t, PgUp, PgDn, Hone, and End for logs.
ESCsetup menu. Fl for help.
FZ change port.
2.
Add - Select this option to create a new log fiie in the
Log File Menu. The new log file is added to the end of
the list of log files, if any, in the menu.
3.
Delete - Select this option to delete the highlighted
file in the menu.
4.
Rename - Select this option to rename the highlighted
log file in the menu. Use any name that meets the
requirements for DOS filenames.
5.
Clear - Select this option to clear data from the
highlighted log file in the menu.
6.
Report - Select this option to generate a report that is
based on the data accumulated in the highlighted log
file. You can elect to review the report on the display,
log
8-53
print the report, or save the report to a DOS file.
(These reports are described in Report Functions on
page 8-60.)
7.
Convert - Select this option to convert the data
accumulated in the highlighted log Ne to a format that
is compatible with one of a number of other application
programs, such as Lotus 123 and MetriStat Lab. These
am described in Conversion Functions on page 8-54.
8.
Clear Stats - Select this option to clear the statistics
from the setup record that was highlighted when you
selected the Log option.
Note that the Log Fine Menu has four columns or fields:
File Name, Size, Date, and Tie. The@ name can be any
DOS-compatible
filename that is appropriate for your
application. The size of a file, which is stated as the number
of records, is updated whenever SPC operations that are
logging to the file are discontinued. The date and time
fields record the last update to a log file.
-
-
Conversion Functions
You can use the SPC log file conversion functions to
convert any of the log files that arise from SPC operations,
regardless of which SPC setup and operation method
generated the fdes, to a form that you can then use with
other application software, namely:
1.
Text File/Lotus
123 .PRN Format
2.
Met&&t
3.
DataMyte TurboSPC .PRN Format
4.
dBASE .DBF Format
Lab Format
These conversion functions operate in the same manner as
the Save Log functions in the Monitor option (see Save Log
Functions on page 7-9 in Chapter 7, Monitor Option, in
this manual). In each case, vou select a conversion format
from the SPC Log ConversIon Menu, shown in Figure 8.21
on page 8-55, and perform the corresponding conversion.
8-54
-
Figure 821
SFC Log Conversion Menu
Dataflyte TurboSPC . PRN
dIMSE JBF
Here is a description
of each SPC conversion
Text File/Lotus lW.PRN
-
function:
Format
When you select this Save Log function, the CSS converts
the SPC log to a text file, each line of which contains
results data and other data from one SLS inspection cycle.
Figure 8.22 is a sample of a few lines of converted text file.
Fgure 822
2, “06/03/1991”,
“15:28:11.15”,14.1,25,0,0,0,20.07,0,83.5~
2,“06/03/1991”,“15:28:11.15”
2, “06/03/1991”,
Sample of Converted Text File from an SPC Log
,14.1,25,0,0,0,20.27,0,83.4~
“15:28:11.15”,14.1,25,0,0,0,20.12,0,83.35
5,“06/03/1991”,“15:28:03.41”,20.44
5,“06/03/1991”,“15:28:03.46”,20.29
5,“06/03/1991”,‘15:28:03.46”,20.22
In thefirst group of three lines, each line contains eleven
fields, separated by commas. This format appears only
when you select “yes” in the appropriate ‘Log Results?”
jieldr in the SLS Scaling section of the long SPC setup
screen.
The information
in each field is as follows:
Field 1 contains the COM port number to which the SLS is
connected. In this case, it is COM2.
Fields 2 and 3 contain the date and time of the trigger that
started the inspection cycle.
8-55
Field 4 contains the exposure time.
Field 5 contains the inspection cycle time.
Field 6 contains the error LED status (1 = On; 0 = Off).
Field 7 contains the contrast LED status (1 = On; 0 = Off).
Field 8 contains the discrete output A LED status (1 = On;
O-Off).
Field 9 contains the analog output A result.
Field 10 contains the discrete output B LED status (1 = On;
o-off).
Field 11 contains the analog output B result.
In the second group of three lines, each line contains four
fields, separated by commas. The information in each field
is as follows:
Field 1 identifies the chart to which the results data applies.
A “5” indicates Chart A; a “6” indicates Chart B.
Fields 2 and 3 identify the date and time of the trigger that
started the inspection cycle.
Field 4 contains the results data for the specified chart.
When the conversion is completed, a message appears with
instructions for importing the file into the Lotus 123
Program.
Consult your Lotus 123 manual, if necessary, for more
information about fiie importation.
8-56
-
MetriStat Lab Format
When you select this conversion function, the CSS displays
the MetriStat Import Setup Screen. Figure 8.23 shows how
the screen would appear if you selected “Yes” in the SLS 1
and SLS 2 “Log Results?” fields of the long setup menu
(see Figure. 8.16 on page 8-39). Note that Figure 8.23 is a
composite - it shows more than you will see on your
display at one time.
Figure823 MetriStatlmportSetupScteen(Composk)
Inport File Nsns
Use Autanatic Data / lima? Yaa
- SLS on COtI1
Part ID
Result A
Characteristic
ID
1
Sample Size COPS)
Hachine.
Operator
Your Key
e.mme
Base
l.mfme
Hultiplier
I II
Desalt B
1
-e.mmB
l.emm
SLS on cow2
Part ID
Characteristic
ID
Sanple Size. (OPS)
lllachina
Operator
Ywr Key
IIBase
Hultiplier
hsults
Part ID
Result A
Desalt B
1
1
B.mme
l.mme
frorr SPC
e.mmB
l.emm
Chart A
chart B
58
5
a.mme
B.88mB
Characteristic
ID
8aaple Size (OPS)
Hachine
Operator
Yaw Key
Base
I(hltiplier
(I
This setup screen contains several data entry fields, each
group of which is repeated for SLS 1 results data, SLS 2
results data, and SPC chart data. The lines containing “SLS
on COMl,” “SLS on COM2,” and “Results From SPC”
identify the beginning of each group.
8-57
Here are the data entry fields in each group:
Import File Name - The default file name,
\MSXXSJMF?TXT,
appears the first time you use this
function. You can use this file name, or enter a file name of
your choice. This is a required entry.
Use Automatic Datdl’ime? - Select Yes if you want the
MetriStat program to enter the date and time for each
subgroup, or select No if you want the actual dates and
times to be used.
Fart ID - A part identification must contain at least one
character, but not more than 12 characters. This is a
required entry.
Characteristic ID - A characteristic identification is a
name that describes the inspection results at each of the
analog outputs. The name must contain at least one, but not
more than 10 characters. One characteristic ID is required;
however, if you omit the other ID, the corresponding results
information will not be imported into the MetriStat Lab
system.
Sample Size (OPS) -The sample sire is the number of
observations per subgroup (OPS). It is the number of
individual inspection results, from 1 to 99, that you want in
each subgroup. The default value is 1. This is a required
entry for result A and result B, whether or not you intend to
import them both.
Machine, Operator, Your Key - You can use these fields
to further identify the source of the samples; however, they
are not required entries.
Base, Multiplier - You can use these two fields to convert
inspection results from percentage values (0 to 100%) to
measurement values (inches, centimeters, and so on). The
conversion calculation uses the Base and Multiplier values
in this formula: ((Result * Multiplier) + Base).
When you complete the data entry fields, press the ESC key
to exit the setup screen. To save the entries and start the
conversion, verify that the “Save” option is highlighted,
then press the ENIER key.
When the conversion is completed, a message appears with
instructions for importing the file into the Met&tat Lab
program.
8-58
-
DataMyte ‘hrboSPC.PRN
Format
When you select this Save Log function, the CSS converts
the SPC log into a file that you can import into the
DataMyte TurboSPC program. The converted file contains
basic inspection results data.
When the conversion is completed, a message appears with
instructions for importing the file into the DataMyte
TurboSPC program.
dBASE.DBF
Format
When you select this Save Log function, the CSS converts
the SPC log to a dBASE.DBF file, each record of which
contains results data and other data from one SLS
inspection cycle.
Each record contains eleven fields, as follows:
Field 1 contains the COM port number to which the SLS is
connected, or a number representing the chart to which the
data applies (chart A = 5; chart B = 6).
Fields 2 and 3 contain the date and time of the trigger that
started the inspection cycle.
Field 4 contains the exposure time.
Field 5 contains the inspection cycle tune.
Field 6 contains the error LED status (‘IF’ = Off; 7”
On).
=
Field 7 contains the contrast LED status (T’ = Off; “T’ =
On).
Field 8 contains the discrete output A LED status (“F’ =
Off; “T’ = on).
Field 9 contains the analog output A result.
Field 10 contains the discrete output B LED status (“F” =
Off, “T’ = On).
Field 11 contains the analog output B result.
8-59
When the conversion is completed, a message appears
stating that a “DBF’ fne has been created that the dBASE
program can use directly.
Consult your dBASE manual, if necessary, for mom
information about dBASE files.
Report Functions
SPC operations can generate a number of reports, each of
which you can view on the display, send to a printer, or
save in a DOS file. These are the reports and the sources of
the data for each report:
l SPC Log Report (auto and run-only)
- This SPC log
report is from automatic and/or run-only SPC
operations, and is shown in Figure 8.24. The report
contains statistics that are based on the results data saved
in the SLS-SPCLOG
file, which is generated (or
updated) when you enable logging during automatic or
run-only SPC operations.
-
Figure 6.24 Basic SPC Log Report: Automatic and Run-Only
-----------__-----------------------------------------~--*----------=----------nay
13,
1991
Page
- 15:45:37
Allen-Bradley
Company
_-
Smart
Linear
Ajax
Widget
1234
nain
Sensor
--
SK
kg
1
Rep*
Co.
street
Center City, us*
--------_--_=-------------------------------------------=-------------------=---
SPC Charts
Chart B
Chart A
--------~---__------------~------------~---~-~~~~~~~~---~~-~~~.~~~~~~~~~~~~~~~~~
66.72
&a"
49.34
0.58
8.77
War
68.99
68.94
nin
65.79
44.25
3.20
1082
24.69
1087
Standard
Range
Number
Deviation
of Points
l SPC Log Report (short and long) -This
SPC log
report is from SPC operations based on the short or long
setup screens, and is shown in Figure 8.25 on page g-61.
The report contains statistics that are based on
whichever log file is highlighted in the Log Fide Menu.
Note that this report is similar to the previous log report,
except for the addition of the setup record description
and the log tile name.
8-60
-
Fgure 8.25 Basic SPC Log Report: Short and Long
Hay
13,
1991
Page
- 16:07:38
Allen-Bradley
ccmpany
--
smart
Linear
A)ax
Widget
123.
nain
sensor
--
spc
1
Log Report
Co.
street
CenteI city, us.4
_-_________-____________________________---*-----------------------------------: Part
DWCriptiOll
Width
lag File
: TEST.LcG
---_____________________________________----------------------------------~----Chart A
Chart B
SPC Charts
____________________~---~-----~.--~.-------------------------------------------66.77
Mea"
‘4.92
0.59
0.30
nax
69.16
45.84
ain
65.84
44.27
3.32
1.56
332
332
Standard
Deviation
Range
Number
Of mints
l SPC Log Report (SLS scaling) - This SPC log report is
-
from SPC operations based on the long setup screen
only, in which logging is enabled for one or more SLS in
the SLS Scaling and Logging section of the long setup
screen. Figure 8.26, page 8-62, shows the added section
of statistics (SLS on COMl) that appears in the report
when logging is enabled for SLS 1.
Additional sections of data appear in the report for each
SLS attached to the PC and enabled for logging under
the SLS Scaling and Logging section.
8-61
Flgure 8X
8PC Log Report Showing Wed
SLS Logging
___-___--__-___-________________________---------------------------------------wa*
14,
1991
-
10:08:05
Allen-Bradley
Page
Conlpany
--
Smart
Linear
Ajax
Widget
1234
nain
: Part
--
SPC
Log
1
Report
Co.
street
center
city,
__-__-__-__-____-_______________________-----*---------------------------------Demcrlption
sensor
USA
Width
lag File
: TEST.ICG
________________________________________---------------------------------------SLS on con1
Result A
Result B
Rpm"re
The
Cycle
________________________________________----------------------------------------
Time
60.64
60.14
12.2
0.34
0.16
0.0
0
Wax
69.74
60.63
12.2
30
win
67.84
59.73
12.2
25
nean
Standard
=wle
Discrete
Number
of
Deviation
output
count
Triggers
Triggers
Pmessed
Triggers
Failed
1.90
0.90
484
0
0.0
---
25
5
-_
484
484
0
________________________________________---------------------------------------WC
Charts
Chart A
Chart B
_---_---__-___-_____-----------------------------------------------------------68.64
Hean
60.14
0.34
0.16
Nax
69.74
60.63
nin
67.84
59.73
1.90
0.90
Standard
Deviation
Range
Number
464
of Points
l
484
Statistics Report -This report is based on inspection
results that were saved during SPC operations using the
currently highlighted setup record. The report can
originate from run-only SPC operations, or from SPC
operations based on the short or long setup screen.
The report (Figure 8.27, page 8-63, and Figure 8.28,
page 8-64) contains a series of fields that account for alI
of the SPC statistics and parameter values used in the
CSS; however, not all of them are applicable in every
case. Non-applicable
fields are marked “N/A.”
8-62
Figure 8.27 spc sfatktics
Report (1 of 2)
----------___--------------------*------------------------------------*---------
Nay
08:44:29
14, 1991
Allen-Bradley
Ccppany
--
Smart
Linear
Ajax
Widget
1234
Main
Sensor
--
Statistics
Re,x,rt
Co.
Street
Center City, USA
-------__-___---------------------------------------------------*--------------DeSCriptlOn
: Part
Width
Result
description
for Chart
A:
Result
description
for Chart
B: Object
Object
vidth
center
Chart
Selection
for Chart
A:
X Bar
and
chart
Belection
for chart
B:
X and
Sideways
R and
Sistcqram
Eistcqram
--------___________-----------------------
Chart
sample
5
1
size
Lover
A _________
Chart
B _______
specification
Limit
(LSL)
67.69
WA
upper Specification
La? Value
Limit
(IISL)
69.69
0.00000
WA
0.00000
100.00000
100.00000
Eigh
Value
Total
Number
1002
1002
of Subgroups
200
1002
Number
Below
LSL
2
WA
N"mher
Above
USL
0
WA
N”mher
O"t
of Spec
2
WA
Number
of Points
Percent
Below
LSL
0.20
N/A
Percent
Above
l3.c.L
0.00
WA
Percent
CJut Of spec
0.20
WA
Maximum
69.60
60.63
ninimum
67.50
59.58
Range
2.10
1.05
0.35
0.18
0.12
0.03
Standard
variance
Deviation
x Bar
68.52
60.12
Target
68.50
N/A
WA
68.51
WA
60.12
P-r
x Double
Bar
Calculated
LCLX
68.04
59.59
Calculated
UCLX
69.00
60.66
R Bar
0.83
WA
Calculated
Ix2LR
0.00
WA
Calculated
UCLA
1.76
WA
8-63
Figure 8.2s SKi statlsnes Report (2 of 2)
B Bar
Calculated
LCLs
Calculated
UCLs
CP
0.95
WA
CPk
Cr
0.79
N/A
1.05
WA
0.18
Estimated
0.36
sigma
l SPC Setup Report-This
is an SPC setup record, and it
always contains the contents of the currently highlighted
setup record, using the Long SPC Setup Screen format,
regardless of whether you access it from the run-only,
short, or long setup menu.
Figure 8.29 (page 864) and Figure 8.30 (page 8-65)
show the entire SPC setup report in two parts.
Figure W9
SPCSetup
Repott
Long Setup Screen (I of 2)
----------______________________________--------*------------------------------my
14,
1991
- 08:45:45
Allen-Bradley
Page
Company
--
Smart
Ajax
Widget
1234
Main
Center
DeLiCriptiOn
: Part
Linear
Sensor
--
WC
setup
Report
Co.
Street
USA
City,
Width
________________________________________--
Chart
Low
0.00000
0.00000
100.00000
100.00000
2
2
5
1
Value
BFqh
Yallie
Decimal
Sample
Precision
size
Lover
Specification
Limit
(LSL)
Upper
Specification
Limit
(EL)
CJ,afl B _______
67.69
69.69
Target
Display
I\ _________
68.50
chart?
Ye8
Chart
selection
for Chart
A
Chart
selection
for Chart
B
__________________________
X Bar
Yes
and R and Histogram
X and Sideways
x Of x Bar
chart
setup
Histogram
------------._---__-..-
Lower
chart
Boundary
67.91
Upper
Chart
Boundary
69.06
60.71
Yes
Ye8
NO
NO
NO
NO
3
3
Display
Use
control
fired
limits?
control
limits?
Lover
Control
Limit
X
(LCLX)
Upper
Control
Limit
X
(CCL*)
Use
fixed
center
Center
Line
Number
of
sigma
line?
units
for limits
59.56
1
Figure 8.30 Spc setup Report
Iover
Chart
Boundary
Dpper
Chart
Boundary
Display
Use
control
fixed
limits?
control
limits?
Lover
Control
Limit
(LCLR or I.cLB,
cpper
CO"tlol
Limit
(UCLR
Dse
fixed
center
center
or UCLS,
line?
Line
______________________________
Lover
Chart
Boundary
Dpper
Chart
Boundary
Display
Use
control
fixed
limits?
Limit
p
(LCLP,
upper
Control
Limit
p
(DCLp,
fixed
center
line?
----_-_-_-_--_--__-------------
Yes
Yea
NO
NO
NO
NO
Line
Chart
A Attributes
Method
Result
""t Of
spec
Chart
B Attributes
Wethod
Result
O"t
spec
____________________--------Number
Histogram
mmber
value
Of triggers
Chart
A Forrmula
Chart
B Formula
NOTE :
The
high
before
value
limit
minus
estimated
Co"tro1
chart
sigma
change
the
______________________________
"se
setup
Of cells
Stabilization
-
setup
limital
contml
control
Center
-
p Chart
Lower
Use
Long Setup Screen (2 of 2)
low value
General
for Cp
paMing
and Cpk?
percentage
Of
_______-____--____-_----------
15
15
75
75
50
50
is the
setup
SLS'B
'Field
Of View"
_______________________________
NO
NO
100.00
100.00
Result
description
for Chart
A
Object
width
Result
description
for Chart
B
object
center
Cpk
calculation
method
for Chart
A
nin
of
(USL-Wan)
or
(Mean-LSL)
Cpk
calculation
method
for Chart
B
nin
of
(USL-Mean)
or
(man-LSL)
8-65
l Histogram
Report - This report, like the Statistics
Report, is based on inspection results that were saved
during SPC operations using the currently highlighted
setup record. The report can originate from run-only
SPC operations, or from SPC operations based on the
short or long setup screen.
The histogram report (Figure 8.31, page 8-67, and
Figure 8.32, page8-68) contains two pages. Each page
contains a horizontal “histogram” consistine of “*”
(asterisk) characters, and a Able showing &ll contents.
Chart A data appear on “Page 1” of the report; chart B
data appear on “Page 2.”
The “*” histograms provide a visual indication of the
relative distribution of data point entries in each cell.
The tables show the range of values within each cell and
the number of entries in each cell.
8-66
Figure 8.31 Histogram Report (I of 2)
____-__-____________*-----------------------------------------------------------
way
14,
1991
- 08:45:11
Allen-Bradley
Description
Chart
Low
Bigh
: Part
Description:
Wlue
--
smart
Idnear
Ajax
Widget
1234
Hain
Sensor
--
Histogram
1
Report
Co.
street
center
city,
Minimum:
67.50
USA
Width
Object
width
: 0.00000
Value
: 100.00000
ISI,: 67.69
wan:
page
Company
USIA: 69.69
68.52
Histogram
Standard
Deviation:
waximum:
69.60
0.35
Cells :
Cells
Low
High
Number in Cell
__-----.____---_________________________--------------------1
67.50
67.59
2
67.62
67.74
3
3
67.77
67.89
22
4
67.91
68.06
68.03
48
68.18
112
5
1
6
68.21
68.30
114
7
68.33
68.45
169
8
68.47
68.60
139
9
68.62
68.74
144
10
68.77
68.89
95
11
68.91
69.01
64
12
69.04
69.16
52
13
69.18
69.30
25
14
69.33
69.45
10
15
69.47
69.60
4
8-67
Figure 8.32 Histogram Report p of 2)
___-__-_--_-_-__--______________________---------------------------------------nay 14, 1991 - 08:15:16
Allen-Bradley
Company
--
Smart
Linear
Ajax
Widget
1234
Main
Sensor
Page
--
Eistcqram
Report
Co.
Street
Center City, OSA
________________________________________---------------------------------------DeSCriptiOU
Chart
Low
: Part
Description:
value
Eigh
wean:
: 100.00000
59.58
60.12
Histogram
center
: 0.00000
Value
rrhimum:
Width
Object
l4aximum:
Standard
60.63
Deviation:
0.18
Cells:
Cell"
Low
High
Number in Cell
________________________________________---------------------
8-68
1
59.58
59.61
2
2
59.63
59.68
4
3
59.71
59.76
9
4
59.78
59.83
30
5
59.85
59.90
70
6
59.93
59.98
111
7
60.00
60.05
154
8
60.07
60.12
174
9
60.15
60.20
133
10
60.22
60.27
11
60.29
60.34
118
92
12
60.37
60.42
54
13
60.44
60.49
32
14
60.51
60.56
13
15
60.59
60.63
6
2
Program Configuration Option
The function of the Program Configuration option is to
configure the CSS according to your hardware setup and
other application requirements.
More specifically, you can use the Program Configuration
option to define the following hardware, communication,
and SPC application parameters:
l
Enter a name and address header for the configuration,
monitor, and SPC reports.
l
Define the default communication
communication error procedure.
port and the
port setup.
l
Defoe a multiple communication
l
Select parameters for automatic SPC setup operations.
l
Select graphic display modes.
This chapter provides the details for using the Program
Configuration Screen, which contains the data entry fields
for the setup functions listed above.
Program
Configuration Screen
To select the Program Configuration Screen, return to the
Main Menu, then highlight and select the Program
Configuration option. When you do, the Program
Configuration Screen appears on the display. Figure 9.1, on
page 9-2, shows the entire screen; however, you will see
only the top two-thirds initially. (To see the remainder,
press the PgDn key.)
Note that the Program Configuration Screen contains
several sections. The remainder of this chapter describes
each of these sections.
FigureQ.1ProgramConfigurationScreen(FullScreen)
hart
Fill
Linear Sensor
Program Configuration Screen
in the progran configuration
Center
record.
Version
Press ESC uhen done.
2.88
Fi for help.
City, USA
Cobnunication
Setup
Default comunication
port number (1 - 41
Number of seconds before timeout (1 - 51
Yumber of tries before error
(I - 51
Kltiple
1
1
1
Port Setup
Port address
Port IRQ nunber
Automatic SPC Setup
lumber of subgroups
lumber of inspections per subgroup
saue statistics
uhen exiting SPC?
Jse saved statistics
when starting
SPC’?
50
5
Yes
Yes
Iolor monitor (Yes&)
Yes
Graph its mode
WI 888 x 688 (16 colors)
Paradise
Company Name and Address
This sectionconsistsof four lines or fields, each of which
can hold up to 72 characters. The name and address that
you enter here appears as a header on each of the following
9-2
reports: the Configuration
the four SPC reports.
Report, the Monitor Report, and
Communication Setup
This section consists of three fields that specify certain
communication parameters, as follows:
Default Communication
Port Number
This field specifies the port to which an SL.S must be
connected in order to use all of the CSS options. If the
current default setting is incorrect for your application,
enter a different port number (1 through 4 are valid).
Number of Tries Before Error
This field specifies the maximum number of
communication tries that the CSS performs before
reporting a communication error of a “no response”
condition. (Numbers 1 through 5 are valid.)
Number of Seconds Before Timeout
This field specifies the number of seconds that you want
the CSS to wait before retrying a communication with the
SJLS after the SLS failed to respond to the previous
communication attempt. (Numbers 1 through 5 are valid.)
Multiple Port Setup
If your application uses more than one SLS, and/or requires
port address/port interrupt (IRQ) numbers other than the
default numbem appearing on the screen, make the
appropriate entries in this section.
Refer to your communication adapter reference manual to
determine the appropriate port addresses and/or port IRQ
numbers.
9-3
Port Address
-
This field shows the address for each of the four
communication ports: COMl, 03F8; COM2,02F8; COM3,
03E8; and COM4, CY2E8.Refer to your communication
adapter reference manual for information about port
addresses.
Port IRQ Number
This field shows the default IRQ number for each of the
four communication ports: COMl and COM3, IRQ$
COM2 and COM4, IRQ3.
Note: The CSS supports IRQ3, IRQ4, IRQS, and IRQ7
only. Refer to your communication adapter reference
manual for information about port IRQ numbers.
Automatic SPC Setup
-
The “Automatic SPC Setup” section applies only to the
Statistical Process Control (SPC) option, which is described
in Chapter 8 of this manual. If you are not using SPC in
your application, you can ignore this section.
An “automatic SPC Setup” is one in which you specify
only the type of chart to be used in the SPC operation. It is
the simplest SPC operation, since it requires little or no
SPC knowledge or experience to set up.
When it performs an automatic SPC setup, the CSS
acquires data initially from a number of sample inspections,
organized in subgroups, in order to calculate stable chart
boundaries before displaying charts and data.
To perform this calculation, the software uses the number
of data subgroups that you specify in the “Number of
subgroups” field.
Each subgroup contains the number of individual
inspections (data points) that you specify in the “Number of
inspections per subgroup” field. The CSS uses this number
for both the initial chart boundary calculation and the
subsequent data displays.
The short and long SPC setup screens both have two
questions about saving and/or using SPC statistics. The two
fields in this section enable you to set the default answers to
these questions for both screens. The default answers
-
appear whenever you select a “new” setup screen using the
“Add” or ‘Tnsert” option.
Number of Subgroups
Enter into this field the number of subgroups that you want
the CSS to use as the basis for the chart boundary
calculation.
Number of Inspections per Subgroup
Enter into this field the number of inspections
that you want in each subgroup.
(data points)
Save Statistics When Exiting SPC?
In this field, select Yes if you want the CSS to save the SPC
statistics accumulated during the current SPC operation.
Otherwise, select No.
Use Saved Statistics When Starting SPC?
In this field, select Yes if you want the CSS to use statistics
saved from previous SPC operations as the statistical basis
when starting a new SPC operation. Otherwise, select No.
General Setup
The “General Setup” section contains three fields that apply
to all SLS operations.
Color Monitor (Yes/No)
In this field, select Yes if you are using a color monitor, or
No if you arc using a monochrome monitor.
Graphics Mode
When you highlight this field, the Graphics Mode Selection
Menu appears as shown in Figure 9.2 on page 9-6.
9-5
Figure 92 Graphics ModeSelection
Menu
Automatic
CGA648 x 288 (2 colors1
EGA64B x 288 (16 colors1
EGA648 x 356 (2 colorsl
EGA648 x 3% 116 colors1
VGA6448x 488 (16 colors)
VGA8BB x 688 (16 colors) Paradise
UGA868 x 6BB (16 colors) Uideo-7
Hercules 728 x 348 (2 colors)
This menu enables you to select the resolution/color
combination that optimizes your graphics adapter for
displaying View Image and SPC data.
Here are the menu options:
Automatic: This option automatically selects the highest
resolution that is available from the graphics adapter in
your PC, as follows:
l
CGA Adapter:
640x 200
l
EGA Adapter:
640 x 350
l
VGA Adapter:
640 x 480
l
Hercules Adapter:
720 x 348
CGA 640 x 200 (2 colors): This option provides the
highest resolution that is available from CGA adapters.
View Image and SPC data displays appear in two colors
(black and white), while text-only displays appear in color.
EGA 640 x 200 (16 colors): This option provides the same
resolution and color text displays as the CGA option. In
addition, it provides 16 colors for View Image and SPC
data displays.
Note: Select this option if you want the data displays to
appear in color, but your EGA adapter has only 64K-bytes
of memory; or, if you want to increase the “panning speed”
of the SPC data displays and possibly prevent the
appearance of the “w” (warning) symbol.
9-6
-
EGA 640 x 350 (2 colors): This option provides the
highest resolution that is available from EGA adapters.
View Image and SPC displays appear in two colors (black
and white), while text-only displays appear in color.
Note: If you selected “Automatic” or “EGA 640 x 350 (16
colors)” and are using a color monitor, but the View Image
and SPC data displays do not appear in color, your EGA
adapter probably has only 64K-bytes of memory. If so, you
can select this option to provide the highest resolution for
the data displays, but without color. If you want the data
displays to appear in color, you can select the CGA option;
however, the resolution is lower.
EGA 640 x 350 (16 colors): This option provides the
highest resolution that is available from EGA adapters,
along with 16 colors for View Image and SPC displays
(provided the adapter has 256K-bytes of memory).
Text-only displays also appear in color.
Note: If you selected “Automatic” for this option and are
using a color monitor, but the View Image and SPC data
displays do not appear in color, your EGA adapter probably
has only 64K-bytes of memory. If so, you can selec‘t the
“EGA 640 x 350 (2 colors)” option to provide the highest
resolution for the data displays, but without color. If you
want the data displays in color, you can select the “EGA
640 x 200 (16 colors)” option; however, the resolution is
lower.
VGA 640 x 480 (16 colors): This option provides the
highest resolution that is available from standard VGA
adapters, along with 16 colors for View Image and SPC
data displays. Text-only displays also appear in color.
Note: If you are using a monochrome monitor with a VGA
adapter, select this option, then select No in the “Color
monitor (Yes/No)” field, above.
VGA 800 x 600 (16 colors) Paradise; Video-7: These
two options provide the high resolution that is available
from super VGA adapters, along with 16 colors for View
Image and SPC data displays. Text-only displays also
appear in color.
Note: Select one of these options only if you are certain
that the corresponding adapter is installed in your PC.
Hercules 720 x 348 (2 color): Select this option (or
“Automatic”) if a Hercules-type graphic adapter is installed
in your PC.
9-7
Default SPC
SetupSelection
-.
When you highlight the “Default SPC setup selection”
field, the Default SPC Setup Menu appears, as shown in
Figure 9.3.
Fgure 9.3 Defautt SPC Setup Menu
SPC Setup Menu
Chart Selection and Setup Menu
Short SPC Menu MN Only)
Short SPC Setup Menu
Long SPC Setup Menu
This menu enables you to select a default setup menu to
appear on the display whenever you select the Statistical
Process control (SPC) option in the Main Menu. Your
choice of default setup menu should be the one that you
expect to use most often for SPC operations. (Refer to
Chapter 8, Statistical Process Control Option, for complete
details about SPC operations.)
Here are the default setup menu options:
SPC Setup Menu: If you select this default option, the
SPC Setup menu, shown in Figure 9.4, page 9-9, appears
on the display when you select the SPC option. You must
select one of the four setup menus from the SPC Setup
Menu.
Chart Selection and Setup Menu: If you select this
option, the Chart Selection and Setup Menu appears on the
display when you select the SPC option.
The chart menu enables you to select SPC operations
directly, without having to make entries on a setup screen
first.
9-8
-
Figure 9.4 SFC Setup Menu
Short SPC Menu (RUN Only): If you select this option,
the Short SPC Setup menu (the “run only” version) appears
on the display when you select the SPC option.
The “run only” menu enables you to select SPC operations
directly, using any existing SPC setup record (stored in
either the short or the long setup menu). You cannot create
new setup records, however, or modify existing records.
Short SPC Setup Menu: If you select this option, the
Short SPC Setup Menu appears on the display when you
select the SPC option.
The short setup menu enables you to select SPC operations
directly, using any SPC setup record already in the setup
menu; or, you can create a new setup record or modify an
existing setup record on the Short SPC Setup Screen and
use that record for SPC operations.
Long SPC Setup Menu: If you select this option, the
Long SPC Setup Menu appears on the display when you
select the SPC option.
-
The long setup menu enables you to select SPC operations
directly, using any SPC setup record already in the setup
menu; or, you can create a new setup record or modify an
existing setup record on the Long SPC Setup Screen and
use that record for SPC operations. (You should have a
thorough understanding of SPC concepts and parameters
before attempting to use the long setup option.)
9-9
-
-
Online Help Messages
The SLS Configuration Support Software (CSS) provides
both a general help message and numerous
“context-specific”
help messages to assist you in
performing the various setup, configuration, and
operational tasks within the software.
Chapter 4, User Interface: Getting Around, introduced you
to the online help message concept. Here are the two
methods of accessing help messages:
l Selecting
the Help option in the Main Menu to access a
help message that pertains generally to the hardware and
to CSS procedures.
l Pressing the Fl key anywhere
withii the CSS to access a
“context-specific”
help message; that is, one that
pertains specifically to the current menu, screen, or data
entry field.
In addition, once a help message appears on the screen, you
can use the Fl key to search for a particular character string
within the help message.
The following sections describe these help messages.
Help Option: General
Help Message
When you select the Help option in the Main Menu, a
lengthy help message appears that provides general
information about the required hardware configuration and
the basic procedures for using the keyboard keys, the
mouse, the help messages themselves, and about
configuring and operating the CSS.
You should acquaint yourself with the contents of this help
message if you have questions about any of the subjects
mentioned above.
--
Fl Key: Specific
Help Messages
When you press the Fl key, a message appears on the
screen that pertains to the specific menu, menu option,
screen, or data entry field currently highlighted by the
reverse video “cursor.”
Fl Key: Searching
Help Messages
You can enter the help message search function by pressing
the Fl key again after displaying any help message on the
screen. When you press Fl, a message asks you to “Enter a
string to look up (ESC to cancel):“.
Beneath this message is a default string, which reflects the
name of the menu option or data entry field that the reverse
video cursor highlighted when you pressed Fl to access the
help message. For example, if the cursor highlights
“Monitor” in the Main Menu when you press Fl, the
default string will also be “Monitor.”
The search function can be especially useful with the longer
help messages, some of which are several “pages” in
length. If you do not want to search for the default string,
enter a string of your choice. You can enter a string of up to
65 characters.
Note that you must enter a string exactly as you expect to
find it in the help message text; however, the case is not
important. Thus, if you are searching for a string such as
this. . .
-
a DOS ffie
. . enter u’ny of these strings to search for it::
a DOS file
A DOS FILE
a dos
After entering a search string (or using the default string, if
appropriate), press the ENTER key to start the search. If the
software finds a string matching the search string, it scrolls
the help message so that the matching string appears on the
top line of the help message.
Note: You may need to repeat the Fl/ENTER sequence in
order to find the specific instance of the suing that you are
looking for.
Printing Help
Messages
1G-2
You can print the entire contents of the currently displayed
help message by pressing the Print Screen key or the Ctrl
and P keys.
-
RS-232 Cable Connections
Cable Connectors
The RS-232 communication cable is included with the SLS
Configuration Support Software (CSS), Catalog No.
2804sWl.
This cable has a small 4-pin connector on one
end and a 25-pin &type connector on the other end. Both
connectors are shown in Figure A. 1.
Note: You can order the cable separately as Catalog No.
2804-CSCl.
Figure A.1 Pinout Diagram: Connectors
4-Pin
To: SLS 53 Port
TXD
on Cable 2804-CSCi
RXD
N.C.
GRD
2
TXD
Open
GRD
(Female)
1
v
3
RXD
To: PC COM Port
00000@0~000
000000000
25-Pin
Cable Adapter
(Female)
If your PC is an IBM-AT or compatible, you may need the
9-t+25 pin cable adapter (included with the CSS) in order
to connect the RS-232 communication cable to the PC.
Figure A.2 on page A-2 shows the connections between
the pins on each end of the o-to-25 pin adapter.
If your PC is an IBM-PC, XT or compatible,
need the o-to-25 pin adapter.
Fgure A.2 Pinout Diagram: 9-b-25
you may not
Pin Adapter
O-Pin (Female)
(pG-&)
N.C.
1
8
N.C.
RXD
2
TXD
3
N.C.
4
GRD
5
II I
3
RXD
2
TXD
Ifit.
GkD
25-Pin
N.C.
6
N.C.
7
NC.
8
N.C.
9
-
N’C.
(Female)
N:C.
N%.
i:.
N.C. = No Connection
If you are using an Allen-Bradley industrial terminal,
Catalog No. 1784T45, you must modify the 280~CSCl
cable supplied with the CSS, using the following materials:
l
Five connector pins (supplied with the CSS).
l
22-gage insulated wire (not supplied).
Use the following steps to modify the 2804-CSCl
A-2
cable:
1.
Disassemble
connector.
the housing assembly of the 25-pin
2.
Using five of the supplied pins and a short length of
22-gage wire, modify the connector by adding the
connections as shown in Figure A.3 on page A-3.
Figure A.3 Schematic Diagram for Modifying 2!i-pin Connector
3.
Reassemble
the 25-pin connector.
Note: Using a modified cable with other IBM-compatible
PC’s may result in unsatisfactory performance. Use the
unmodified cable with those PCs.
.-
--
A-3
-
-
Glossary
Here is a list of terms used in this manual and/or in
statistical process control.
Assignable cause - A non-random cause of variation in a
process resulting from an identifiable, and therefore
correctable, source (see Common cause). Also called
special cause.
Cell - For a sample based on a continuous variable, a cell is
an interval into which individual data points are grouped.
The full range of the variable is usually broken into
intervals of equal size, and the number of points in each
cell totalled. These intervals (cells) make up a frequency
distribution called a histogram. This greatly reduces the
amount of information that must be dealt with, as opposed
to treating each element (data point) individually.
Centerline - For control charts, the centerline is the
horizontal lie marking the center of the chart, usually
indicating the grand average of the quantity being charted.
Common cause - A random cause of variation in a process
resulting from an unidentifiable source (see Assignable
cause). Also called chance, normal, and system
cause.
Control limits - Two calculated values, appearing as upper
and lower control limit lines on a control chart, that indicate
the extent of the variation to be expected from a process on
the basis of “common” causes of variation. The process is
“in control” so long as the values lie between the two
control limits.
Control chart - A statistical tool that can be used to
monitor the stability of a process and indicate whether the
process is “in control.” A control chart plots statistical data
based on measurements of the process, and it includes a
center line and an upper and lower control limit line.
Statistical data displayed in a control chart can identify the
presence of “assignable” causes (compared to “common”
or chance causes) of variations in a process, and can thus
identify whether the process is “out of control” and in need
of adjustment.
CSS -The
SLS Configuration
Support Software.
Histogram - A frequency distribution diagram that uses
several bars or “cells” to indicate equal intervals within an
overall range of vahres. The length or height of each cell
indicates the number of entries within its interval. Together,
the cells provide a visual representation
process (see Cell).
Individuals - Individual observations
of the variation in : or results (X).
LCL - The lower control limit (see Control limits).
LSL - The lower specification
limit (see Specification).
Mean - The arithmetic average of a series of values (X
bar).
Non-conforming units - Units that do not conform to a
specification or other inspection standard. Sometimes
called defective or discrepant units.
p - The fraction of non-conforming
produced by a process.
(or defective) units
Population - All of the units produced by a process (see
Sample).
Process - The combination of machines, materials,
procedures, people, and environment that result in a given
product or service.
-
Process capability - A measure of the uniformity of
product that a process is capable of producing. It is
expressed numerically by Cp, Cr, and Cpk. Using these
measures requires the process to be in control (within
control limits) and the process distribution to be normal
(bell-shaped). A process is “capable” when the dispersion
of the process distribution is less than the total specification
tolerance, and lies within both specification limits.
R bar-The
mean range of the subgroups.
R - The range, or difference, between the maximum and
minimum values in a subgroup.
Sample - Part of the population of units produced by a
process (see Population). A subgroup.
SLS - The Allen-Bradley
Smart Linear Sensor.
SPC - Means “Statistical Process Control,” and refers to
the use of statistical techniques, such as control charts, to
analyze the results of a process in order to control the
process and ensure that its results are acceptable. The
objective of SPC is to achieve process results that are
always within the specification limits.
Specification - The engineering requirement used to
evaluate the acceptability of each item produced by a
process. A specification defines a nominal or “target” value
B-2
-
and upper and lower limit values. To be acceptable, an item
must lie within the upper and lower specification limits.
Standard deviation - A measure of the variation or
dispersion in a process, usually based on the evaluation of a
sample (instead of the entire “population”) of units
produced by the process.
Subgroup - A sample of individual observations or results
of a specified size, upon which statistical operations are
performed. These include mean, range, and standard
deviation.
Target - The nominal or desired value of each item
produced by a process.
Tolerance - The acceptable variation in value from the
nominal or target value as designated by the upper and
lower specification limits.
UCL - The upper control limit (see Control limits).
USL - The upper specification
X double bar -The
limit (see Specification).
mean of the subgroup means.
X bar - The mean of the individual values (X) in a
subgroup. Ideally, the value of X bar should coincide with
the target value of the specification.
R-3
-
SPC Formulas
Statistical process control makes use of numerous formulas,
and those that pertain to the SPC option of the support
software are included in this appendix, along with the
definitions of the variables used in these formulas.
Formula Variables
Here is a list of the variables used in the SPC formulas.
1. x = an individual observation
or inspection
result.
2.
x (x bar) = the average of a series of individual
observations.
3.
F (x double bar) = the average of the < values.
4.
n = the number of observations
5.
k = the number of subgroups.
6.
R = the difference between the maximum and
minimum x values in a subgroup.
in a subgroup.
7. i? (R bar) = the average of the R (Range) values of the
subgroups.
8.
0 = the standard deviation of a population.
9.
s = the standard deviation of a sample.
10. s (s bar) = the average of the s values of the subgroups.
11. p = the fraction of non-conforming
units in a subgroup.
12. i (p bar) = the average fraction of non-conforming
UUitS.
Formulas
Here is a list of the SPC formulas that are applicable to the
SPC option in the support software.
-
X Bar
The formula for calculating the mean of a series of
individual values (x) is:
n
X Double Bar
The formula for calculating the mean of a series of
subgroup means (T) is:
-
k
x=
x;
c
i=,
=
k
Range
The formula for calculating the range between the highest
and lowest values in a series of values (x) is:
R
= x,--x,,
R Bar
The formula for calculating the mean of a series of range
values (R) is:
k
if
=
Ri
c
&,
k
c-2
-
-
Standard Deviation
The formula for calculating the standard deviation of a
subgroup (sample) is:
A$-
s =
(g&)*/n
i=l
i=l
J
(n-
1)
s Bar
The formula for calculating the mean of a series of standard
deviation values (s) is:
k
c
si
s = izl
-
k
Estimated Sigma: X Bar and R Chart
The formula for calculating estimated sigma (a) for the X
Bar and R chart is:
estimated
a
CJ = d
2
Estimated Sigma: X Bar and s Chart
The formula for calculating estimated sigma (CT)for the X
Bar and s chart is:
estimated
u
= L
c4
c-3
-
Non-Conforming Units (p)
The formula for calculating the fraction of non-conforming
(defective) units @) in a sample is:
P=
number of non-conforming unirs
n
p Bar
The formula for calculating the mean of a series of “p”
values is:
k
c
p
=
h
‘-’
X Pi)
k
ni
c
i=l
Process Capability (Cp) and Inverse (Cr)
The formulas for calculating the capability of a process
(Cp), and its inverse (Cr), are:
60
cr
C-4
= (USL-LSL)
-
Cpk Index
The formulas for calculating the Cpk index are:
C = minimum of (USL -x)
pk
30
or (x- LSL)
or, use these formulas to determiue unilateral tolerances:
or
-
Control Limits: X Bar and R Charts
The formulas for calculating the control limits for an X Bar
and R chart are:
UCL, = DJT
Control Limits: X Bar and s Charts
The formulas for calculating the control limits for an X Bar
and s chart are:
UCL, = BJ
c-s
Control Limits: Individuals Charts
-
The formulas for calculating the control limits for
individuals charts are:
UCL, = x+ ya
LCL, = x-y7
Note: y defaults to 3, but you can change it to
any value from 1 to 5.
Control Limits: p Charts
The formulas for calculating the control limits for p charts
WC
UCL, = p + 3
-Pu -P-l
n
J
LCL, = p - 3
-PI1 -PI
n
J
C-6
-
-
Formula Constants
Divisors
for est.
ofstd
XBar R
Consts
Sample
Size
n
The following twwpart table contains the constants that the
CSS uses to calculate control limits:
1
A2
d2
D3
I
-
D4
I
=43
I
c4
I
1.880
1.023
0.729
0.577
1.128
1.693
2.059
2.326
0.000
0.000
0.000
3.267
2.574
2.282
2.114
2.659
1.954
1.628
1.427
0.7979
0.8862
0.9213
0.94cO
6
7
8
9
10
0.483
0.419
0.373
0.337
0.308
2.534
2.704
2.847
2.970
3.078
0.000
0.076
0.136
0.184
0.223
2.004
1.924
1.864
1.816
1.777
1.287
1.182
1.099
1.032
0.975
0.95 15
0.9594
0.9650
0.9693
0.9727
0.030
0.118
0.185
0.239
0.284
1.970
1.882
1.815
1.761
1.716
11
12
13
14
15
0.285
0.266
0.249
0.235
0.223
3.173
3.258
3.336
3.407
3.472
0.256
0.283
0.307
0.328
0.347
1.744
1.717
1.693
1.672
1.653
0.927
0.886
0.850
0.817
0.789
0.9754
0.9776
0.9794
0.98 10
0.9823
0.321
0.354
0.382
0.406
0.428
1.679
1.646
1.618
1.594
1.572
16
17
18
19
20
0.212
0.203
0.194
0.187
0.180
3.532
3.588
3.640
3.689
3.735
0.363
0.378
0.39 1
0.403
0.415
1.637
1.622
1.608
1.597
1.585
0.763
0.739
0.718
0.698
0.680
0.9835
0.9845
0.9854
0.9862
0.9869
21
22
23
24
25
0.173
0.167
0.162
0.157
0.153
3.778
3.819
3.858
3.895
3.931
0.425
0.434
0.443
0.45 1
0.459
1.575
1.566
1.557
1.548
1.541
0.663
0.647
0.633
0.619
0.606
0.9876
0.9882
0.9887
0.9892
0.9896
c-7
Sample
Size
XB%R
COflStS
Divisor
for est
of std
n
A2
4
30
35
40
45
50
55
60
65
70
75
80
85
90
95
100
Note:
C-8
see
note
RChsrt
RCitti
LOWeI
upper
CtlL.h
CtlLh
D3
Se43
See
note
note
D4
see
note
xBar
COIlStS
XBar s
A3
0.548
0.507
0.474
0.447
0.424
Divisors
forest.
of std
c4
See
note
0.405
see
note
See
note
See
See
note
note
see
note
SCX
note
See
note
see
note
Use the values given for a sample size of 25.
0.387
0.372
0.358
0.346
0.335
0.325
0.316
0.308
0.300
see
note
see
note
sChart
LA3Wef
CtlLim
B3
s&art
LOWa
CtlLim
B4
0.600
0.630
0.660
0.680
0.700
1.400
1.370
1.340
1.320
1.3M)
0.710
0.720
0.730
0.740
0.750
1.290
1.280
1.270
1.260
1.250
0.760
0.770
0.770
0.780
0.790
1.240
1.230
1.230
1.220
1.210
-
Send Configuration Utility
The Send Configuration utility, SENDCONEEXE,
provides a method for the knowledgeable DOS user or
programmer to download specified SJ.S configuration
records to the SL.S while running application software other
than the SLS Configuration Support Software (CSS).
Directory
Requirements
For most applications, the SENDCONEEXE file should be
located in the same directory as the CSS files. usually the
SLS directory. If you locate the SENDCONEEXE file in a
different directory, however, you must have with it at least
the following CSS file:
SLSPCF
Without the SLSPCF file, the error message, “cannot open
the program configuration fne” appears.
-
Usage Information
When you type “SENDCONF <Enter>,” the following
usage data appear on the display:
Smart Linear Sensor Send Configuration Software
Copyright (C) 1990,199 1, Allen-Bradley Company
usage:
sendconf -v -f-d
-p -q -s
%le. fid
-d“conf description”
-PPo*
-Q
-ASIs
displays program version
file name for configuration file
configuration record description
RS-232 port number as specified
in Program Configuration
run in quiet mode (no messages displayed)
(default is to display messages)
directory where SIS is installed
Except as noted below, you can use any or all of the
options, as appropriate for your requirements. When you
select two or more options, you can position them in any
sequence, not just in the sequence shown in the “usage”
line above. Use uppercase or lowercase.
The options have the following functions;
1. -v Use this option to display the current version
number of the Send Configuration utility. Note that you
should use this option alone. If you include other
options, they are ignored - only the version number is
displayed.
2.
-ffie.fid Use this option when the required
configuration record is in a different .CFG file than the
SLS.CFG file. The filename, “fie.fid,” must include
the path when the .CFG file is not in the same directory
as the SFNDCONEEXE
file.
3. +l‘conf description” Use this option to specify the
name of the configuration record to be downloaded to
the SLS. The description between the quotation marks
must be spelled exactly as it is spelled in the
Description block of the Configuration Menu (case is
not important).
4. -pport Use this option to specify the RS-232 port to
which the SLS is attached. The communication port
number, “port,” must be a number from 1 to 4.
5.
-9 Use this option to inhibit message displays. This is
useful if you intend to use your own error messages,
and want to suppress the default error messages (see
Example Batch File).
6.
-sULS Use this option to specify the directory where
the CSS files are located, if the current directory does
nor contain these files. Usually, the CSS files are in the
“SLY directory.
Here are some examples that demonstrate
various options:
-
the use of the
Example 1: Type sendconf -v <Enter>
Response:
Version 2.00
Example 2: Type sendconf -fc:ken&lsZ.cfg
Width” (Enter>
-d“Object
This causes the utility to look for the “Object Width”
configuration record in the SLS2.CFG fne, which is in the
SEND subdirectory.
If the download is successful,
appears:
Response:
the following message
“Object Width” successfully sent.
If the download is not successful,
message appears.
D-2
an appropriate error
-
Example 3: Type sendconf -p2
-d“Object
Length”
<Enter>
This causes the utility to download the “Object Width”
configuration record to the SLS attached to the COM2 port.
Example 4: Type sendconf
<Enter>
-ASLS -d“Object
Length”
-pl
This causes the utility to download the “Object Width”
configuration record to the SLS attached to the COMI poh
Error Messages
One of the following error messages may appear if the send
operation is unsuccessfuul:
invalid
l error:
rf
l error:
directory
error
record
l error.
was not found
l
error while sending
error:
l
error:
cannot initialize communications
l
error:
cannot open the program configuration
0 error
specified file name is too large
* error:
no file name specified
0 error:
description
0 error:
missing description
l
error:
file
is too large
path name is too large
0 error:
missing directory
@error:
invalid port number, 1 - 4 are valid
l errormissing
description,
use -11
Other Messages
l
“configname”
successfully
sent.
D-3
Example Batch File
-
One method of using the Send Configuration utility is to
include it in a DOS batch fde. Here is an example that
causes the PC to execute the “sendconf’ command to send
the specified configuration record to the SLS, and to check
for each of the possible error conditions:
@echo off
ClS
sendconf -d“tesW
-q
if
if
if
if
if
if
if
if
if
if
if
if
if
if
errorlevel 14 got0 err14
errorlevel 13 goto err13
errorlevel 12 goto err12
errorlevel 11 got0 err1 1
errorlevel 10 got0 err10
errorlevel 9 got0 err9
errorlevel 8 goto err8
errorlevel 7 got0 err7
errorlevel 6 goto err6
errorlevel 5 got0 err5
errorlevel 4 got0 err4
errorlevel 3 got0 err3
errorlevel 2 got0 err2
errorlevel 1 got0 err1
echo Download was successful.
goto done
:errl4
echo Error while sending the configuration record.
goto done
:en-13
echo Record not found.
goto done
:errl2
echo Record filing error.
goto done
:errll
echo Error opening the program configuration file.
goto done
:errlO
echo Error opening communications.
goto done
:en9
echo Invalid directory.
goto done
:err8
D-l
-
-
-
echo
goto
:err7
echo
goto
:err6
echo
goto
:err5
echo
goto
:exr4
echo
goto
:err3
echo
goto
:enZ
echo
goto
:errl
echo
goto
:done
Invalid port.
done
Missing path name.
done
Path name is too large.
done
Missing description.
done
Description
done
is too large.
Missing configuration
done
file name.
File name is too large.
done
Missing description.
done
D-s
-
-
-
A
Aiming target
Inverted Line Image
display, 3-11
using ii sti staging, 3-1,
3-2
View Image display, 3-l 0
Analysis function, Selecting,
3-7.3-8.5-7
B
Background probe
General, 6-17
Setting, 6-18
Banner, Powerup, 3-2
Binarization level
General, 6-17
Setting, 6-18
Binary analysis functions,
Configuring SLS, 6-20
Burst acquisition mode
Cycle time factors, 5-17
Exposure time factors, 5-16
C
Cable connection,
2-2
RS-232,
Chart Selection and Setup
Menu, 3-15
Menu options, S-12
Communication cable
Cable adapter, A-l
Connectors, A-l
Compatibility,
l-2
CSS and SLS.
Configuration
Menu, 3-4
Screen, 3-5
Description field, 3-5
Preparation, 3-t. 5-l
Saving, 3-8
Sending to SLS, 3-8
Switch settings, 3-6
Configuration Screen fields
Analysis function selection,
5-7
Binarization function
parameters, 5-11
Description, 5-6
Edge span and height
settings, 5-9
Invert discrete output B?,
5-13
Lighting compensation,
5-10
Setpoint method, 5-l 1
Setpoint settings, 5-8
Switch settings, 5-7
Use burst mode?, 5-13
Use hardware switch
settings?, 5-7
Configure option, Summary,
14
CSS procedures, Summary,
3-16
D
Default COM port, Current,
4-6
Down arrow key, Using, 4-4
E
Edge Height, Description
use, 6-12
and
Edge Height and Edge Span,
General, 6- 11
Edge Span, Description
use, 6-13
Configuration Menu options,
summary, 5-2
End key, Using, 4-4
Configuration record
Description, 5- 1
PSC key, Using, 4-4
ENTER key, Using, 4-5
and
Experience,
User, l-l
F
Fl - F7 keys, Summary, 4-l
I?2 key, Using, 4-6
Line Image, Description,
3-10,&l
F4 key, Using, 4-6
FS key, Using, 4-7
F6 key, Using, 4-7
F7 key, Using, 4-7
H
2-2
Help message
Example, 4-5
String search example, 4-6
Help Option
General help message, 10-l
Printing help message, 10-2
Searching help messages,
10-2
Specific help messages,
10-l
Help option, Summary, l-4
Home key, Using, 4-S
I
Initialization,
General, 1-2
Initialization
3-2
procedure, CSS,
Overview, l-2
Installation procedure, CSS,
2-5
Items, CSS package, 2-1
I-2
Summary
Light compensation disable
For bright backlighting,
6-22
For reflections, 6-24
F3 key
Use of, 4-9
using, 8-47
Installation,
Key assignments,
4-l
L
Fl key, Using, 4-4
Hardware
Mirlimlml, 2-l
Recommended,
-
K
Log conversions
Monitor
DataMyte format, 7-12
dBASE format, 7-12
MetriStat Lab format,
7-10
Text file/lotus 123
format, 7-9
SPC
DataMyte format, 8-59
dBASE format, 8-59
MetriStat Lab format,
8-57
Text file/Lotus 123
format, 8-55
-
Logging options, SPC
Automatic setup method,
8-52
Long setup method, 8-52
Run-only setup method,
8-52
Short setup method, 8-52
Long setup screen fields
Chart attributes method,
8-36
Chart boundary values,
8-32
Chart formulas, 8-39
Chart scale values, 8-30
Chart selection, 8-3 1
Control chart panning
percentage, 8-42
-
Cpk calculation method,
Description, 8-29
Display chart?, 8-31
Display control limits?,
8-33
Fixed center line value,
8-35
Fixed control limits values,
8-35
Log nXults?, 8-41
Number of cells, 8-38
Number of sigma units,
8-35
Number of triggers before
limit change, 8-38
Result description, 843
Sample size, 8-30
Save statistics?, 84.5
SLS scales values. 8-41
Specification limits, 8-30
Stabilization value, 8-38
Target, 8-3 1
Use estimated sigma?, 841
Use fixed center line?, 8-35
Use fixed control limits?,
8-35
Monitor Menu, 3-12
Monitor Option
Basic functions, 7-l
Selecting functions, 7-2
Monitor option, Summary, l-4
Monitoring Smart Sensor
screen, 3-13
Mouse cursor
“clicking”, 4-10
“pulling”, 4-10,411,4-13
Mouse driver support of,
4-10
Using in “elevator shaft”,
4-12.4-13
P
Parameter switch settings,
3-6,3-7
PgDn key, Using, 4-4
PgUp key, Using, 4-4
Program Configuration
Option, Basic functions.
9-l
hl
Program Configuration
summary, 1-l
Main Menu, 3-3
Program configuration screen
fields
Automatic SPC setup
Number of inspections per
subgroup, 9-5
Number of subgroups,
9-5
Save statistics when
exiting SPC?, 95
Use saved statistics when
starting SPC?, 9-5
Communication setup, 9-3
Company name and
address, 9-2
Default communication port
number, 9-3
General setup
Color monitor?, 9-5
Monitor display
Analog bar graphs, 7-3
LED indicators, 7-4
Miscellaneous data, 7-5
Results statistics, 7-4
Switch settings, 7-5
Monitor functions
Delete log file, 7-13
Generate log file report, 7-8
Logging only, 7-8
Monitor and logging, no
statistics, 7-8
Monitor with logging, 7-7
Monitor with no logging,
7-7
Save and convert log files,
7-9
Speed considerations, 7-6
option,
I-3
Default SPC setup
selection, 9-8
Graphics mode, 9-5
Multiple port setup
Port address, 9-4
Port IRQ number, 9-4
Number of seconds before
timeout, 9-3
Number of tries before
error, 9-3
Prompt line, Definition, 4-3
Quit option, Summary, l-4
R
Reference publications,
l-l
Removal procedure, CSS, 2-6
Reports
Histogram, 8-66
Monitor log, 7-8
SPC log
Auto and run-only, 8-60
Short and long setup,
8-60
SLS scaling, 8-61
SPC setup, 8-64
statistics, &62
S
Send Configuration Utility
Directory requirements,
D-l
Error messages, D-3
Example batch file, D-4
Usage information, D-l
I-4
SLS calibration
Multiple SLS, 8-49
Single SLS, 8-47
SPC chart features,
Descriptions, 8-5
SPC data display, 3-16
Q
Send option
Description,
using, 54
Chart selection, 8-22
Description, 8-20
Result description, 8-21
Sample size. 8-2 1
Specification limits, 8-21
5-3
SPC formulas
Formula constants, C-6
Formulas, C-2
Variables, C-l
SPC Setup Menu, 3-14
SPC setup menus
Long setup options, 8-26
Run-only options, 8-15
Short setup options, 8-18
-
SPC setup methods
Automatic setup procedure,
8-9
Long setup procedure, 8-25
Run-only setup procedure,
8-14
Short setup procedure, 8-17
staging SLS, 3-1
Statistical Process Control
Option
Basic setup methods, 8-1
Performance
considerations, 8-2
SLS staging and setup
considerations, 8-3
Statistical Process Control
option, Summary, l-4
String search, Example, 4-6
Series and Revision, Current
SLS.4-6
Switch settings,
Configuration,
Short setup screen, Save
statistics fields, 8-24
T
Short setup screen fields
TAB key, Using, 4-8
2-4
-
View Image Trigger Menu,
3-9
Up arrow key, Using, 44
V
view Image display, SLS
preparation, 6-9
View Image option, Summary,
14
View Image symbols,
Description, 65,645,
6-7
View Image trigger mode
Automatic trigger, 6-7
External trigger, 6-g
Keyboard trigger, 6-g
Keyboard/External trigger,
6-9
View Port, Description, 3-10,
64
I-5
-
-
Aiming
Target
-
-
-
_-
-
-
-
-
c ALLEN-BRADLEY
m
w
A ROCKWELL
INTERNATIONAL
COMPANY
Industrial Control Group
Milwaukee, Wisconsin 53204
Catalog
No. 2804-ND002
Series B
40062-210-01
(B)
@