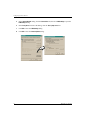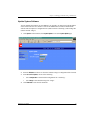
1
Megabit Modem
MM701G User Manual
Version 1.x
Copyright
March 2002
Copyright © 2002 ADC DSL Systems, Inc. All Rights Reserved.
Information contained in this document is company private to ADC DSL Systems, Inc., and shall not be modified, used,
copied, reproduced or disclosed in whole or in part without the written consent of ADC.
Trademark Information
ADC is a registered trademark of ADC Telecommunications, Inc.
Avidia and Megabit Modem are registered trademarks and StarGazer, SwitchWare, and Skyrocket are trademarks of
ADC DSL Systems, Inc. No right, license, or interest to such trademarks is granted hereunder, and you agree that no
such right, license, or interest shall be asserted by you with respect to such trademark.
Other product names mentioned in this practice are used for identification purposes only and may be trademarks or
registered trademarks of their respective companies.
Disclaimer of Liability
Contents herein are current as of the date of publication. ADC reserves the right to change the contents without prior
notice. In no event shall ADC be liable for any damages resulting from loss of data, loss of use, or loss of profits, and
ADC further disclaims any and all liability for indirect, incidental, special, consequential or other similar damages. This
disclaimer of liability applies to all products, publications and services during and after the warranty period.
Specific Disclaimer for High-risk Activities
This product is not designed or intended for use in high-risk activities including, without restricting the generality of
the foregoing, on-line control of aircraft, air traffic, aircraft navigation or aircraft communications; or in the design,
construction, operation or maintenance of any nuclear facility. ADC (including its affiliates) and its suppliers
specifically disclaim any express or implied warranty of fitness for such purposes or any other purposes.
ii
MM701G User Manual
About This User Manual
ABOUT THIS USER MANUAL
Use this manual to setup the MM701G modem. It provides instruction on:
•
installing the modem
•
configuring the modem
•
monitoring the modem
•
maintaining the modem
DOCUMENT CONVENTIONS
Notes contain information about special circumstances.
Cautions indicate the possibility of equipment damage or personal injury.
MM701G User Manual
iii
Product Certifications
PRODUCT CERTIFICATIONS
FCC Class B Compliance
This equipment has been tested and found to comply with the limits for a Class B digital device,
pursuant to part 15 of the FCC Rules. These limits are designed to provide reasonable protection
against harmful interference in a residential installation. This equipment generates, uses and can
radiate radio frequency energy and, if not installed and used in accordance with the instructions,
may cause harmful interference to radio communications. However, there is no guarantee that
interference will not occur in a particular installation.
If this equipment does cause harmful interference to radio or television reception, which can be
determined by turning the equipment off and on, the user is encouraged to try to correct the
interference by one or more of the following measures:
•
Reorient or relocate the receiving antenna.
•
Increase the separation between the equipment and receiver.
•
Connect the equipment into an outlet on a circuit different from that to which the receiver
is connected.
•
Consult the dealer or an experienced radio/TV technician for help.
UL
This product meets all safety requirements per UL-1950 standard.
CE
This product meets all EMC and safety requirements per EN 300 386-2 and IEC 950
(EN60950).
iv
MM701G User Manual
Table of Contents
TABLE OF CONTENTS
Chapter 1: Overview ...............................................................................................................1
Verify Shipping Package Contents...................................................................................... 2
System Requirements ..........................................................................................................2
What To Do Next ................................................................................................................2
Chapter 2: Installing the Modem ........................................................................................... 3
Setting the MDI/MDI-X Switch ..........................................................................................4
Connecting the Cables .........................................................................................................5
Checking LED Indications ..................................................................................................6
What To Do Next ................................................................................................................7
Chapter 3: Managing the Modem Using a Web Browser.................................................... 9
Setting Up the PC ..............................................................................................................10
Configuring the Web Browser...........................................................................................12
Accessing the Modem Web Pages.....................................................................................15
Managing the System ........................................................................................................16
Configuring the WAN .......................................................................................................23
Configuring the LAN ........................................................................................................27
Managing DSL ..................................................................................................................30
Saving Changes .................................................................................................................38
Rebooting the Modem .......................................................................................................39
MM701G User Manual
v
Table of Contents
Chapter 4: Managing the Modem Using the Console Port & Telnet................................41
Connecting to the Console Port .........................................................................................42
Setting Up a Telnet Session ...............................................................................................44
Setting Up the WAN..........................................................................................................45
Managing DSL...................................................................................................................51
Restoring Factory Defaults ................................................................................................59
Saving the Current Configuration......................................................................................60
Updating System Software ................................................................................................61
Viewing System Information.............................................................................................62
Rebooting the Modem .......................................................................................................63
Chapter 5: Implementing Point-to-Point LAN Extension..................................................65
Quick Installation...............................................................................................................66
Configuring the CPE Modem ............................................................................................68
Configuring the CO Modem ..............................................................................................72
Verifying Connectivity ......................................................................................................76
Appendix A: Specifications ....................................................................................................77
Overview............................................................................................................................78
Data Specifications ............................................................................................................79
Hardware Specifications ....................................................................................................83
Rate vs. Reach....................................................................................................................87
Appendix B: Technical Assistance and Returns ..................................................................89
World Wide Web ...............................................................................................................89
Knowledge Base ................................................................................................................89
Technical Support ..............................................................................................................90
Returns ...............................................................................................................................90
Appendix C: Glossary.............................................................................................................91
vi
MM701G User Manual
1
OVERVIEW
The MM701G is a versatile, high-speed
modem that extends your Ethernet LAN in a
back-to-back implementation or connects your
LAN to one or more service providers. It
employs G.shdsl technology for fixed-rate or
Status LEDs
rate-adaptive, symmetric rates up to 2.3 Mbps
over single-pair wiring and allows for multiple
management options, including an easy to use Web-based interface. In addition, the MM701G
supports 32 simultaneous Bridge/Router or PPP sessions to the same or different service
providers over its G.shdsl WAN interface. For sizeable deployment, the MM701G provides the
ability to download pre-defined configuration files to the flash memory instead of manually
defining each and every value for all modems.
LAN
LINK
TX
RX
PWR
COL
DSL
SYNC
TX
RX
MAR
The MM701G also includes several useful protocols and services. If you require IP addresses
to be served dynamically on your LAN, use the built-in DHCP server. If you need to update your
modem software, use the built-in TFTP client. If you require private IP addresses and need to
translate them into public IP addresses, use the built-in NAT function. If you need to exchange
IP routing information with another device, configure and implement RIP. For a complete list
of features, see Appendix A.
Use this guide to install and configure your MM701G. Before installation, be sure to verify your
shipping package contents and system requirements as described in the sections listed below.
Section
MM701G User Manual
Page
Verify Shipping Package Contents
2
System Requirements
2
What To Do Next
2
1
Verify Shipping Package Contents
VERIFY SHIPPING PACKAGE CONTENTS
As you unpack the modem, inspect the contents for damage. If the equipment was damaged in
transit, report it to the shipping company and to your sales representative.
Check the contents of the package for the following:
•
MM701G modem unit
•
6 Vdc power supply
•
Ethernet cable
•
phone cord with RJ-11 connectors
•
console cable and DB-9 console port adapter
SYSTEM REQUIREMENTS
You need the following hardware and software to complete the installation and configuration of
the MM701G:
•
PC with an Ethernet NIC Card (10 Mbps Full Duplex) and serial port
•
TCP/IP protocol stack installed (see your operating system documentation)
•
Web browser installed such as Internet Explorer® Version 4.0 or higher
•
Ethernet hub/switch (optional)
•
Terminal emulation program (such as HyperTerminal)
WHAT TO DO NEXT
After you have verified the shipping package contents and system requirements, you are now
ready to install the modem as explained in Chapter 2 on page 3.
2
MM701G User Manual
INSTALLING THE MODEM
2
Perform the following installation procedures to install the modem:
Section
Setting the MDI/MDI-X Switch
MM701G User Manual
Page
4
Connecting the Cables
5
Checking LED Indications
6
What To Do Next
7
3
Setting the MDI/MDI-X Switch
SETTING THE MDI/MDI-X SWITCH
The MDI/MDI-X switch located on modem rear
panel allows you to connect a network device
(such as a PC, hub, switch, or router) to the
modem 10Base-T port.
Set the MDI/MDI-X switch for the 10Base-T
port to:
4
•
MDI-X when connecting to a network
device such as a PC with an Ethernet NIC
card with a MDI port
•
MDI when connecting to a device such as a
hub, switch, or router with a MDI-X port
For connection to
devices such as
a PC
MDI-X
MDI
For connection to
devices such as
a Hub
MM701G User Manual
Chapter 2: Installing the Modem
CONNECTING THE CABLES
After you’ve verified the shipping package contents, follow this procedure to physically set up
your modem:
1
Turn off your computer.
2
Connect the cables to the modem rear panel as shown below.
•
grey phone cable for the DSL line port
•
black cable for the 10Base-T port
•
power cable for the modem Power connector
See “Connecting to the Console Port” on page 42 for connecting the console cabling.
DSL line
port
Wall jack with
SHDSL service
DS
LL
INE
CO
NS
OL
E
10
10BASE-T
port
BA
SE
-T
MD
I
MD
I-X
PO
WE
R
PC, hub or other
network device
Power
connector
MM701G User Manual
5
Checking LED Indications
CHECKING LED INDICATIONS
Your service provider sets up the G.shdsl parameters for your service. The MM701G must have
the DSL SYNC LED lit before you can connect sessions with your service provider. Verify
SYNC in the following table.
The table below describes LED indications for all operational modes. LEDs on the MM701G
front panel provide continual status at-a-glance for network and voice connections.
LED
State
Description
POWER
On green
MM701G has power.
Off
MM701G does not have power.
Ethernet
LINK
Tx
Rx
Coll
On green
A PC, hub, or other network device is connected to the MM701G
10Base-T interface.
Off
No device is connected to the MM701G 10Base-T interface.
Flashing green
MM701G is transmitting data to devices on the LAN.
Off
MM701G is not transmitting data to the LAN.
Flashing green
MM701G is receiving data from devices on the LAN.
Off
MM701G is not receiving data from the LAN.
Flashing green
Ethernet packet collisions are occurring on the LAN.
Off
No Ethernet packet collisions are occurring.
DSL
Sync
Tx
Rx
Margin
6
On green
DSL transceiver is synchronized (connected) and in normal operation
mode.
Flashing green
Slow flashing green indicates that the DSL transceiver is in a start-up
or handshaking sequence. Fast flashing green indicates that the DSL
transceiver is in training sequence.
Off
DSL transceiver is not detecting a transceiver at the far end and is not
connected.
Flashing green
MM701G is transmitting data over the DSL connection.
Off
MM701G is not transmitting data over the DSL connection.
Flashing green
MM701G is receiving data over the DSL connection.
Off
MM701G is not receiving data over the DSL connection.
On green
DSL margin is above the preset margin value.
Off
DSL margin is at or below the preset margin value.
MM701G User Manual
Chapter 2: Installing the Modem
WHAT TO DO NEXT
After you have installed the modem, determine which method to use to manage the modem:
•
For point-to-point applications, refer to Chapter 5 on page 65.
•
To manage the modem through the Web interface using your Web browser
(recommended), refer to Chapter 3 “Managing the Modem Using a Web Browser” on
page 9.
•
To manage the modem through the command-line interface using the modem console port
or by a telnet session, refer to Chapter 4 “Managing the Modem Using the Console Port &
Telnet” on page 41.
MM701G User Manual
7
What To Do Next
8
MM701G User Manual
MANAGING THE MODEM USING A
WEB BROWSER
3
You can manage the MM701G using a Web browser, console port, or a telnet session.
All of the MM701G features and functionality are accessible through the Web interface. In
contrast, there are some features not supported through the console port. For example, you can
enable or disable spanning tree through the Web interface, but not through the console port or
telnet. The same principle applies for deleting a WAN session and selecting ATM VBR as a
quality of service.
To prevent losing your configuration changes, be sure to save them as described in “Saving
Changes” on page 38.
Refer to the following sections to take advantage of the Web interface.
Section
MM701G User Manual
Page
Setting Up the PC
10
Configuring the Web Browser
12
Accessing the Modem Web Pages
15
Managing the System
16
Configuring the WAN
23
Configuring the LAN
27
Managing DSL
30
Saving Changes
38
Rebooting the Modem
39
9
Setting Up the PC
SETTING UP THE PC
To access the modem Web interface, set up your PC on the same LAN IP subnet as the
MM701G. The default LAN IP subnet for the modem is 10.0.0.0 with a subnet mask of
255.255.255.0.
However, if you have an existing subnet to accommodate the modem, change the IP address of
the modem from the command-line interface as described in“Setting Up the LAN” on page 48.
If your PC cannot connect to the modem, set your PC Ethernet NIC card for 10 Mbps
half-duplex transmission (not auto-detect).
The following is an example of how to set up a PC running Microsoft Windows 98.
10
1
From the Windows desktop, click Start, Settings, Control Panel to open
the Control Panel dialog.
2
From the Control Panel dialog, double-click the Network icon.
3
From the Configuration tab, double-click TCP/IP.
MM701G User Manual
Chapter 3: Managing the Modem Using a Web Browser
4
Do one of the following:
•
If DHCP has not been enabled on the modem (default), select Specify an IP address.
•
If DHCP has been enabled on the modem, select Obtain an IP address automatically and
skip to step 6.
5
Enter IP Address and Subnet Mask. The default modem LAN IP address is 10.0.0.1 with a
subnet mask of 255.255.255.0. Use an IP address for your PC from the following range:
10.0.0.2 to 10.0.0.254.
6
Click OK to close the TCP/IP Properties dialog.
7
Click OK to close the Network dialog.
8
Click OK to restart the computer.
MM701G User Manual
11
Configuring the Web Browser
CONFIGURING THE WEB BROWSER
To view the modem Web pages properly, your Web browser must have the proxies disabled and
cache settings enabled to compare the cached document against the network document every
time it is accessed.
The following is an example of how to make the configuration changes using Netscape
Navigator 4.0.
12
1
Open your Web browser.
2
Click Edit, Preferences to open the Preferences dialog.
3
From Category, select Advanced, click Cache, then select Every time for Document in cache is
compared to document on network.
4
From Category, select Advanced, click Proxies, then select Direct connection to the Internet.
5
Click OK to close the Preferences dialog.
MM701G User Manual
Chapter 3: Managing the Modem Using a Web Browser
The following is an example of how to make the configuration changes using
Internet Explorer 5.5:
1
Open your Web browser.
2
Click Tools, Internet Options to open the Internet Options dialog.
3
In the Temporary Internet Files section of the dialog, click Settings.
4
Select Every visit to the page, then click OK.
MM701G User Manual
13
Configuring the Web Browser
14
5
In the Internet Options dialog, click the Connections tab, then click LAN Settings to open the
LAN Settings dialog.
6
In the Proxy Server section of the dialog, clear the Use a proxy server box.
7
Click OK to close the LAN Settings dialog.
8
Click OK to close the Internet Options dialog.
MM701G User Manual
Chapter 3: Managing the Modem Using a Web Browser
ACCESSING THE MODEM WEB PAGES
Type http://10.0.0.1 in the Location Bar field of the Web browser (as shown below), then press
ENTER to display the MM701G Web pages.
http://10.0.0.1
Location Bar
The following login screen displays.
This login is for the system administrator responsible for configuring and managing the
MM701G. Enter the default username (admin) and password (password), then click Login. Or, if
you have changed the login username and password, enter the new login username and
password.
MM701G User Manual
15
Managing the System
MANAGING THE SYSTEM
The System pages are designed so that you can manage, update, and troubleshoot the modem as
a whole. From these pages you can:
16
•
view the overall configuration of the modem
•
enable or disable spanning tree
•
change the login name and password
•
update the modem software and configuration files
•
revert back to the default factory values
MM701G User Manual
Chapter 3: Managing the Modem Using a Web Browser
View Modem Status
The System Status page is a read-only summary of the current modem configuration. It includes
information about the modem software, DSL configuration values, WAN session settings, and
LAN parameters. Use it as an overview of the modem status.
You cannot change the Device Name.
To configure the DSL fields, see “DSL Advanced Configuration” on page 31.
MM701G User Manual
17
Managing the System
Refer to the following table for a description of the fields:
Parameter
Description
Device Name
Descriptive role of the modem. This is not configurable.
Model
Megabit Modem model number.
DSP Version
Version of the Digital Signal Processor of the modem.
Firmware Revision
Version number of the image downloaded to the modem.
DSL Status Fields
Configuration values specific to G.shdsl.
Modulation
Annex standard (A or B) in the current configuration.
State
Status of the DSL link.
Data Rate TX
Rate at which the modem is configured to receive data.
Data Rate RX
Rate at which the modem is configured to send data.
SNR Margin (DB)
Used to control the front panel LED. See “DSL Advanced Configuration” on page 31
for more information.
For WAN Session and LAN field descriptions, refer to
18
•
“Configuring the WAN” on page 23 for WAN Session fields.
•
“Configuring the LAN” on page 27 for LAN fields.
MM701G User Manual
Chapter 3: Managing the Modem Using a Web Browser
Set Spanning Tree
Spanning Tree eliminates loops in a LAN topology, ensuring that there is only one path (or link)
between any two nodes on a network. Use Spanning Tree protocol only when you have already
selected a Bridge session (as described in “Set Up WAN Sessions” on page 23) and when you
have more than one device (a PC only) on your LAN and when those devices have more than
one physical path connecting them.
1
Select System on the menu bar, then click Configuration to access the System Configuration
page.
2
Select Enable to activate the Spanning Tree protocol for all bridging sessions.
MM701G User Manual
19
Managing the System
Set Login Name and Password
You can change the login parameters for the system administrator. The default login name is
admin and the default password is password.
1
Select System on the menu bar then click Password to access the System Configuration page.
2
Enter the Current Login name, then enter the Current Password.
3
Enter the New Login Name, then enter the New Password.
4
Enter the new password again to Confirm New Password.
5
Click Submit.
Use the new Login Name and Password the next time you login to the MM701G.
20
MM701G User Manual
Chapter 3: Managing the Modem Using a Web Browser
Update System Software
You can upgrade the software on your MM701G. To upgrade, you must specify the IP address
of the server where the new software is stored. The MM701G uses TFTP to download the
software which comprises a configuration file (must be named “celsiancfg”) and an image file
(must be named “image”).
1
Click System on the menu bar, then System Update to access the System Update page.
2
Enter the IP Address of the server where the firmware image or configuration file is located.
3
From Select file to update, do one of the following:
4
•
select Configuration to download the configuration file “celsiancfg”
•
select Image to download the image file “image”
Click Download to start the file download.
MM701G User Manual
21
Managing the System
Set to Factory Defaults
When you configure the MM701G, you change the factory default settings to new values. You
can return these parameters to their default values to provide a known starting point if you are
troubleshooting or you simply want to configure new parameters. For session default values, see
“Default Session Parameter Values” on page 82.
Active links are lost when you reset to factory default values.
22
1
Click System on the menu bar, then Factory Defaults to access the System Factory Defaults
page.
2
Click Proceed if you want to return all values to their original factory values.
3
Click Cancel if you do not want to return all values to their original factory values.
MM701G User Manual
Chapter 3: Managing the Modem Using a Web Browser
CONFIGURING THE WAN
This configuration sets up the communication between the MM701G and the service provider
for each session you set up. You can set up 32 separate sessions as RFC 1483 Bridge, RFC 1483
Router, or PPP protocol. Use the following sections to complete the WAN configuration.
Set Up WAN Sessions
1
Select WAN on the menu bar to access the Session configuration page.
2
Select a session from the [Sessions] list. The configuration options for that session appear
in the Session X table (where X equals the Session number).
MM701G User Manual
23
Configuring the WAN
3
Configure the following parameters for each session you set up as shown in the following
table:
Parameter
Description
Session Name
Enter a unique, descriptive identifier for the session. This name can have a maximum
of 15 characters with no spaces.
Protocol
Select the message format to be used between the MM701G and the service
provider. You can configure each session with any of the three protocols listed
below.
• Select RFC 1483-Bridge if the MM701G forwards packets based on MAC
addresses. You can enable Spanning Tree when you select Bridge sessions. See
“Set Spanning Tree” on page 19.
• Select RFC 1483-Router if the MM701G routes packets based on IP addresses.
• Select PPPoA if the MM701G establishes PPP sessions with the service provider.
If you select RFC 1483 Bridge or RFC 1483 Router protocol, you only need to set up
one session.
You can, however, configure a combination of RFC 1483 Router/Bridge and PPP
protocols for a multiple session configuration.
State
Select Enable to activate this session. Select Disable to deactivate this session. You
can set the state for each session. You can also change the state for a session at any
time using this parameter.
IP Address
Determine how an IP address is assigned to a session:
• If you selected PPPoA protocol, Dynamic is automatically selected. The service
provider automatically assigns an IP address to this session. The IP address
displays in the box.
• If you selected RFC 1483-Router protocol, you enter the IP address supplied by
the service provider in the box. Do not select Dynamic.
• If you selected RFC 1483-Bridge protocol, you do not enter an IP address and
you do not select Dynamic.
Subnet Mask
Determine how the subnet mask is assigned to a session:
• If you selected PPPoA protocol, the service provider automatically assigns a
Subnet Mask. The Subnet Mask displays in the box.
• If you selected RFC 1483-Router protocol, you enter the Subnet Mask supplied
by the service provider in the box.
• If you selected RFC 1483-Bridge protocol, you do not enter a Subnet Mask.
NAT
24
Enable or Disable the use of Network Address Translation (NAT) protocol to
translate private IP addresses (addresses on your LAN) to public IP addresses
assigned to each session (see IP Address above in this table for session IP
addresses).
MM701G User Manual
Chapter 3: Managing the Modem Using a Web Browser
Parameter
Description
RIP Send
Routing Information Protocol (RIP) dynamically routes packets sent from the
MM701G to the service provider. Select the same RIP version that is used by the
service provider:
• Select Disable if you selected RFC1483 - Bridge protocol.
• Select RIP1 to send broadcast packets from the MM701G.
• Select RIP2 to send multicast packets from the MM701G.
• Select RIP1&RIP2 to send both broadcast and multicast packets from the
MM701G.
RIP Accept
To dynamically route packets sent from the service provider to the MM701G, select
the same RIP version that is used by the service provider:
• Select Disable if you chose RFC 1483 Bridge protocol.
• Select RIP1 to receive broadcast packets.
• Select RIP2 to receive multicast packets.
• Select RIP1&RIP2 to receive both broadcast and multicast packets.
Virtual Path ID (VPI)
Enter the value (from 0 to 4,095) provided by the service provider. The number
identifies the virtual path that transports ATM cells between the MM701G and the
service provider. This value must match the virtual path identification (VPI) the
service provider uses for this connection.
Virtual Channel ID (VCI) Enter the value (from 32 to 65,535) provided by the service provider. The number
identifies the virtual channel for this session that transports ATM cells between the
MM701G and the service provider. This value must match the virtual channel ID
(VCI) that the service provider uses for this connection.
ATM QoS
Select the ATM Quality of Service supplied by your service provider. The options are:
• UBR (unspecified bit rate)
• VBR-nrt (variable bit rate non-real-time)
• CBR (constant bit rate)
QoS Peak Cell Rate
Enter the QoS Peak Cell Rate (PCR) value supplied by your service provider A PCR
value is required for CBR QoS, but is not used for UBR QoS. PCR is the maximum
rate at which data is transferred on the line, measured in cells per second
QoS Sustainable Cell
Rate
Enter the QoS Sustainable Cell Rate (SCR) value supplied by your service provider
Use only for VBR-nrt QoS. SCR is the average rate at which ATM cells are
transferred, measure in cells per second.
QoS Maximum Burst
Size
Enter the QoS Maximum Burst Rate (MBR) value supplied by your service provider
Use only for VBR-nrt QoS. MBR is the maximum number of cells that can be
transmitted at the peak cell rate.
MM701G User Manual
25
Configuring the WAN
Parameter
Description
Encapsulation
Select the encapsulation type that is supplied by the service provider. The options
are:
• VC-MUX—Virtual Channel Multiplexer-based encapsulation, which allows one
protocol to be run over the session.
• LLC—Logical Link Control, which allows multiple protocols to be run over the
session.
Login Name
A PPP session requires the Login Name supplied by the service provider.
Login Password
A PPP session requires the Login Password supplied by the service provider.
Authentication
Select the authentication protocol provided by your service provider for PPP
sessions. The authentication protocol type must match at the MM701G and the
service provider. The options are:
• PAP—The modem sends authentication requests to the service provider and
authentication occurs only once during the life of the link.
• CHAP—The service provider returns an authentication challenge to the modem
during the authentication.
4
26
Do one of the following:
•
Click Apply, then save changes as described in “Saving Changes” on page 38.
•
Click Reset to restart the session.
•
Click Delete to remove the session, then save changes as described in “Saving
Changes” on page 38.
•
Click Save Changes to save changes made to the configuration.
MM701G User Manual
Chapter 3: Managing the Modem Using a Web Browser
CONFIGURING THE LAN
This configuration sets up the communication between your LAN and the MM701G.
1
Select LAN on the menu bar to access the LAN Settings page.
MM701G User Manual
27
Configuring the LAN
2
Configure the following parameters:
Parameter
Description
LAN Protocol
Select the message format to be used for your LAN.
• Select Bridge if the LAN forwards packets based on MAC addresses. If you
selected RFC 1483 Bridge protocol for the WAN sessions (page 23), select Bridge
for the LAN traffic.
• Select Router if the LAN routes packets based on IP addresses. If you selected
RFC 1483 Router or PPP protocol for the WAN sessions (page 23), select Router
for the LAN traffic.
IP Address
See your LAN administrator for LAN IP addresses.
However, if you want to change the IP address through the Web interface, enter an
IP address for the LAN (10Base-T) port provided by the LAN administrator. Or, you
can use the default IP address for the LAN port which is 10.0.0.1. If you choose to
use the default IP address, ensure that the devices on your LAN are on the same
subnet as the MM701G LAN port.
If you select Client for the DHCP configuration (below in this table), a DHCP server
on your LAN automatically provides the IP address.
Subnet Mask
Enter the subnet mask for the LAN (10Base-T) port provided by the LAN
administrator. Or, you can use the default subnet mask for the LAN port which is
255.255.255.0. If you choose to use the default subnet mask, ensure that it allows
devices on your LAN to access the MM701G LAN port.
Default Gateway
Enter the default IP address for a default gateway that is supplied by the service
provider.
DHCP
See your LAN administrator for the DHCP selection. You selected whether or not you
wanted to enable DHCP in “Determining IP Addresses” on page 14.
However, if you want to change that DHCP selection through the Web interface,
select one of the following:
• None—DHCP is not enabled.
• Client—The MM701G is a DHCP client and can be served an IP address for the
LAN port by a DHCP server on your LAN.
• Server—The MM701G is a DHCP server and can serve IP addresses to devices
on your LAN. See DHCP Range Low and High for the ranges of IP addresses that
the MM701G can serve.
DHCP Range Low
Enter the IP address supplied by your LAN administrator. This is the lowest IP
address value that the MM701G can serve when configured as a DHCP server.
DHCP Range High
Enter the IP address supplied by your LAN administrator. This is the highest IP
address value that the MM701G can serve when configured as a DHCP server.
28
MM701G User Manual
Chapter 3: Managing the Modem Using a Web Browser
Parameter
Description
DHCP Gateway
Enter the IP address of the default gateway that is provided by the LAN administrator
for devices on the LAN. The MM701G must be configured as a DHCP server and
provides this gateway IP address to requesting DHCP clients (such as PCs) on the
LAN.
DNS Server
Enter the IP address of the Domain Name System (DNS) server that is provided by
either the service provider or the LAN administrator. The MM701G must be
configured as a DHCP server and provides this DNS IP address to requesting DHCP
clients (such as PCs) on the LAN.
The DNS server maps human-readable addresses to IP addresses. A
human-readable address is one such as:
maggie.copro.company.com.
The DNS resolver on the server translates this to a numeric value. This numeric value
is the IP address assigned to a WAN session (see page 23).
3
4
Do one of the following:
•
Click Apply, then save changes as described in “Saving Changes” on page 38.
•
Click Reset to restart the session.
If you enabled DHCP, reboot the system as described in “Rebooting the Modem” on
page 39 to activate the DHCP parameters.
MM701G User Manual
29
Managing DSL
MANAGING DSL
Select either the DSL quick configuration or the advanced configuration as directed by your
service provider.
DSL Quick Configuration
You can configure the MM701G to comply with different standards for DSL transmission. For
the quick configuration, you only select the transmission type.
1
Select DSL on the menu bar then select DSL Quick Config under [DSL Options].
2
Select one of the following options as directed by your service provider:
3
30
•
Annex A
•
Annex B
Click Apply.
MM701G User Manual
Chapter 3: Managing the Modem Using a Web Browser
DSL Advanced Configuration
You can configure the MM701G to comply with different standards for SHDSL transmission
as well as parameters.
1
Select DSL on the menu bar, then select DSL Advanced Config under [DSL Options].
To view basic statistics for the DSL configuration, see “View Modem Status” on page 17.
MM701G User Manual
31
Managing DSL
2
Configure the following parameters as supplied by your service provider:
Parameter
Description
Exec Mode
Select CPE or CO. For point-to-point connections, one modem must
be configured for CPE and the other for CO. For all other applications,
select CPE.
Standard
Select Annex A or Annex B (Default: Annex A). Annex A and Annex B
are both transmission standards. Annex A is most often used in North
America. Annex B is most often used in Europe.
Startup Margin
Select a value from 2 DB to 15 DB. Applies only to Rate-Adaptive mode
(Default: 2 DB).
Power Backoff
Select Enable or Disable (Default: Enable).
Clock Offset
Do not change from factory-ship configuration.
Upstream Frame Sync Word
Do not change from factory-ship configuration.
Upstream Stuffbits
Do not change from factory-ship configuration.
Downstream Frame Sync Word
Do not change from factory-ship configuration.
Downstream Stuffbits
Do not change from factory-ship configuration.
Encoder Coefficient A
Do not change from factory-ship configuration.
Encoder Coefficient B
Do not change from factory-ship configuration.
Minimum Base Rate
Enter a value from 1 to 36 to select the minimum acceptable data rate
in Rate-Adaptive mode. Rate is equal to N*64kbps, where N is the
selected value (Default: 1).
Maximum Base Rate
Enter a value from 1 to 36 to select the maximum acceptable data rate
in Rate-Adaptive mode. Rate is equal to N*64kbps, where N is the
selected value (Default: 36).
Minimum Sub Rate
Enter 0 or 1 (Default: 0).
Maximum Sub Rate
Enter 0 or 1 (Default: 1).
Wire Pair Mode
Select Single or Two (Default: Single).
Asymmetric PSD
Select Disabled, 1544 kb, or 784 kb (Default: Disabled).
Bit Rate Mode
Select Adaptive Rate or Fixed Rate (Default: Adaptive Rate).
Test Bit Rate
Select a value from 72K to 2368K (Default: 2320K).
SNR Margin Limit
Enter a value from -64 to 63. Used to control the front panel LED.
(Default: 4).
3
32
Click Apply, then save changes using “Saving Changes” on page 38.
MM701G User Manual
Chapter 3: Managing the Modem Using a Web Browser
Test DSL
The MM701G has embedded diagnostics used for detecting line problems or as an aid in
troubleshooting line related technical problems. These diagnostic programs have significance
only to technical support personnel and is not discussed further in this manual.
1
Select DSL on the menu bar, then select Diagnostics to access the DSL Diagnostics page.
2
Select a test from the menu.
3
Do one of the following:
•
Click Start to begin the test.
•
Click Stop to terminate the test.
MM701G User Manual
33
Managing DSL
View ATM Statistics
Use the ATM statistics on the DSL ATM Statistics page for troubleshooting and monitoring ATM
traffic.
34
1
Select DSL on the menu bar, then select ATM Statistics to access the DSL ATM Statistics page.
2
View the statistics.
Parameter
Description
RX Cell
The number of ATM cells received in the DSL interface.
TX Cell
The number of ATM cells transmitted from the DSL interface.
Cell Drop
The number of ATM cells dropped.
Cell Delineation
The real-time indicator of ATM cell delineation error (where 0
indicates no delineation errors and 1 for delineation errors).
RX HEC Errors
The number of ATM cells received with an error in the ATM cell
header.
MM701G User Manual
Chapter 3: Managing the Modem Using a Web Browser
View Link Statistics
Use the ATM statistics on the DSL Link Statistics page for troubleshooting and monitoring ATM
traffic.
1
Select DSL on the menu bar, then select Link Statistics to access the DSL Link Statistics page.
MM701G User Manual
35
Managing DSL
2
View the statistics.
Parameter
Description
Operational State
Valid entries are:
• Handshaking is when the modem is making an attempt to
connect to a device on the other side of the G.shdsl line.
• Training is when the modem is learning the connection
parameters.
• Show Time is the actual connection time.
36
Data Rate
Bit rate after the ATM headers have been removed.
DSP Version
The modem DSP code can be upgraded—this is the current
version that is running on your system.
Last Failed
Displays the last state reached before start-up failed. This is used
for troubleshooting by technicians.
Remote Coefficient A
Displays the remote coefficient for channel A.
Remote Coefficient B
Displays the remote coefficient for channel B.
Transmission Power
Displays the local transmission power in dB.
Receiver Gain
Displays the amplifying factor for incoming signal in dB.
Local SNR Margin
Actual value of the current Signal to Noise (SNA) ratio.
Framer Sync
Displays the link status.
MM701G User Manual
Chapter 3: Managing the Modem Using a Web Browser
View Error Counters
Use the ATM statistics on the DSL Error Counters page for troubleshooting and monitoring ATM
traffic.
1
Select DSL on the menu bar then select Error Counters to access the DSL Error Counters page.
2
View the statistics.
Parameter
Description
CRC Errors
The number of cyclic redundancy check (CRC) errors. CRC is an
error checking technique to ensure the integrity of data during
transmission.
LOSW Errors
The number of errors due to a loss of signal.
FEBE Errors
The number of errors in forward and backward transmission.
MM701G User Manual
37
Saving Changes
SAVING CHANGES
Use the Save Changes page for saving your current configuration to flash memory. By saving
your configuration changes, your changes will not be lost by resetting the modem.
38
1
Select Save Changes on the menu bar to access the Save Changes page.
2
Do one of the following:
•
Click Save to write the configuration to flash memory.
•
Click Cancel to exit the current page without saving your configuration.
MM701G User Manual
Chapter 3: Managing the Modem Using a Web Browser
REBOOTING THE MODEM
Before you reboot the modem, make sure you have saved any configuration changes as
described in “Saving Changes” on page 38.
1
Select Reboot on the menu bar to access the Reboot page.
2
Do one of the following:
•
Click Yes to reboot the modem.
•
Click No to cancel the rebooting process.
It is unlikely that the modem will lock up (no response to any of your requests through the Web
interface and command-line interface). However, in this rare occurrence, power off the modem
by disconnecting the power plug, wait 30 seconds, then reconnect the power. This process
allows the modem to properly reset the power and eliminate the possibility of false values in
memory. However, please note that the preferred method of rebooting is to access the Reboot
page as described in the above procedure.
MM701G User Manual
39
Rebooting the Modem
40
MM701G User Manual
MANAGING THE MODEM USING
THE CONSOLE PORT & TELNET
4
You can manage the MM701G using a Web browser, console port, and telnet session.
In comparison, you can manage more of the modem’s functionality using a Web browser rather
than using the modem console port and telnet access. For example, you can enable or disable
spanning tree through the modem Web interface, but not through the console port or telnet. The
same applies for deleting a WAN session and selecting ATM’s VBR as a quality of service.
However, there are scenarios in which using the command-line interface is preferred over the
Web interface. For example, if you cannot connect to the modem through the DSL line and
10Base-T port, you can still manage the modem through the console port.
To prevent losing your configuration changes, be sure to save them as described in “Saving
the Current Configuration” on page 60.
The following sections describe how to use the command-line interface:
Section
MM701G User Manual
Page
Connecting to the Console Port
42
Setting Up a Telnet Session
44
Setting Up the WAN
45
Setting Up the LAN
48
Managing DSL
51
Restoring Factory Defaults
59
Saving the Current Configuration
60
Updating System Software
61
Viewing System Information
62
Rebooting the Modem
63
41
Connecting to the Console Port
CONNECTING TO THE CONSOLE PORT
1
Install the supplied grey console cable between the modem Console port and your PC as
shown below.
PC
9-pin COM
port
Adapter
DS
LL
INE
CO
NS
OL
E
10
BA
SE
-T
MDI
MDI
Grey cable
2
42
-X
PO
WE
R
Console port
Using a terminal emulation program, verify the communication settings as follows:
•
9600 baud
•
no parity
•
8 data bits
•
no stop bit
•
flow control off
MM701G User Manual
Chapter 4: Managing the Modem Using the Console Port & Telnet
Currently, Windows includes a terminal emulation program called HyperTerminal. In Windows
98, access HyperTerminal from the Windows desktop by clicking Start, Programs, Accessories,
HyperTerminal.
Once you have established communication, the Main Menu page displays.
MM701G User Manual
43
Setting Up a Telnet Session
SETTING UP A TELNET SESSION
Use a telnet client to set up a telnet session to the modem. To set up a telnet session, specify the
LAN IP address of the modem to establish communication. The default LAN IP address is
10.0.0.1. If this IP address has changed, contact your service provider.
Below is an example using Microsoft Windows 98:
44
1
Click Start, Run to access the Run dialog.
2
Enter the LAN IP address as a parameter to the telnet command, then click OK to start the
Windows telnet client and access the password prompt.
3
Enter the telnet password to access the Main Menu page. The default telnet password for the
MM701G is password.
MM701G User Manual
Chapter 4: Managing the Modem Using the Console Port & Telnet
SETTING UP THE WAN
For Bridge or Router mode you need to set the WAN VPI/VCI as supplied by your service
provider.
1
From the Main Menu, select WAN Setup. The WAN Session screen displays.
Session group 1 - 16
1.
2.
3.
4.
5.
6.
7.
8.
9.
10.
11.
12.
13.
14.
15.
16.
17.
Session 1
Session 2
Session 3
Session 4
Session 5
Session 6
Session 7
Session 8
Session 9
Session 10
Session 11
Session 12
Session 13
Session 14
Session 15
Session 16
Get next group
Bridge
IPoA-Router
PPP-Router
UNDEFINED
UNDEFINED
UNDEFINED
UNDEFINED
UNDEFINED
UNDEFINED
UNDEFINED
UNDEFINED
UNDEFINED
UNDEFINED
UNDEFINED
UNDEFINED
UNDEFINED
RFC1483 Bridge
RFC1483 Router
PPPoA
(Enabled)
(Enabled)
(Enabled)
Select session for editing (Return to exit) ->
The WAN Session screen presents data related to each session defined for your Bridge/Router.
The following table provides a description of the four fields displayed on the WAN Session
screen.
Column
Description
1
The session number—sessions 1-16 are displayed on the first page of the
screen and sessions 17-31 are displayed on a the second page of the WAN
session screen.
Example: 2. Session 2
2
Session name—up to 15 characters may be entered for a descriptive name
for a session. No spaces are allowed. Use this field to help identify each of
your sessions.
Example: IPoA-Router
3
Session protocol—configured for this session.
Example: RFCF1483 Router
4
Session status indicator—enabled or disabled.
MM701G User Manual
45
Setting Up the WAN
2
Select a session by typing the session number at the Select session for editing prompt to
display the WAN Session Options screen.
Session Parameters
1.
2.
3.
4.
5.
6.
7.
8.
9.
Session Name
WAN Protocol
State
IP Addressing
IP Address
IP Net Mask
NAT
RIP Send
RIP Accept
Bridge
RFC1483 Bridge
Enabled
N/A
N/A
N/A
N/A
N/A
N/A
10.
11.
12.
13.
14.
15.
16.
17.
18.
VPI
0
VCI
35
QOS
UBR
QOS Peak Cell Rate
Encapsulation
LLC
Login Name
N/A
Login Password
N/A
Authentication
N/A
Apply
Select parameter to edit (Return to exit) ->
46
3
Type 10 to select the VPI parameter, then enter the values supplied by your service
provider.
4
Type 11 to select the VCI parameters, then enter the values supplied by your service
provider.
5
If you are operating in Router mode, you also need to enter the WAN ADSL Port ID
address and the associated WAN IP subnet mask. Both of these values are provided by your
service provider.
6
Select Apply to activate your changes. Apply immediately activates the changes that you have
made for this session.
7
Select Save New System configuration from the Main Menu as described in “Saving the
Current Configuration” on page 60 or the changes will be lost upon reboot or power cycle.
MM701G User Manual
Chapter 4: Managing the Modem Using the Console Port & Telnet
Valid values for the parameters shown on the Sessions Options screen are defined in the
following table. Unless there is a special circumstance, the default values for the remaining
parameters should not be changed.
Session Parameter
Valid parameter Values
Session Name
The name assigned to the session by your service
provider—up to 15 characters.
WAN Protocol
RFC1483-Router, RFC1483-Bridge, PPPoA.
State
Enable or Disable.
IP Addressing
Static or Dynamic.
IP Address
WAN IP address supplied by your service provider.
IP Net Mask
WAN IP subnet mask supplied by your service provider.
NAT
Enable or Disable.
RIP Send
Disable, RIP1, RIP2, Rip1&Rip2.
RIP Accept
Disable, RIP1, RIP2, Rip1&Rip2.
VPI
VPI supplied by your service provider.
VCI
VCI supplied by your service provider.
QoS
Supplied by your service provider.
QoS Peak Cell Rate
Supplied by your service provider.
Encapsulation
VC-MUX, LLC.
Login Name
PPP authentication name supplied by your service
provider.
Login Password
PPP authentication password supplied by your service
provider.
Authentication
PAP, CHAP.
Apply
Apply Settings.
MM701G User Manual
47
Setting Up the WAN
SETTING UP THE LAN
If you are operating in Router mode and in a LAN environment, then you also need to set your
LAN protocol, Ethernet Port IP address, and subnet mask.
If you prefer, you may use the default values of 10.0.0.1 for the Ethernet Port IP Address, and
255.255.255.0 for the subnet mask.
1
From the Main Menu, select LAN Setup. The LAN setup screen displays.
LAN
1.
2.
3.
4.
5.
6.
7.
8.
9.
10.
LAN Protocol
IP address
IP Net Mask
Default Gateway
DHCP
DHCP Range Low Address
DHCP Range High Address
DHCP Gateway Address
DHCP DNS
Apply
Bridge
10.0.0.1
255.255.255.0
None
N/A
N/A
N/A
N/A
Select Parameter to edit (Return to exit) ->
48
2
Select LAN Protocol by typing 1 from the LAN Setup menu.
3
Do one of the following from the LAN Mode menu:
•
Select Router by typing 1.
•
Select Bridge by typing 2. You must configure an IP address for the LAN port to use a
Browser or Telnet to manage the MM701G.
4
Select IP Address and IP Net Mask by typing 2 and 3 (respectively), then enter the values
supplied by your LAN administrator or use the default values.
5
Select Default Gateway by typing 4 from LAN Setup menu, then enter the Default Gateway IP
address supplied by your access provider.
6
Select Apply by typing 10 to activate your settings. Apply immediately activates the changes
that you have made for this session.
7
From the Main Menu select Save New System Configuration to save these settings.
MM701G User Manual
Chapter 4: Managing the Modem Using the Console Port & Telnet
Valid values for the parameters shown on the LAN Setup screen are defined in the following
table.
LAN Parameter
Valid parameter Values
LAN Protocol
Router or Bridge.
IP address
IP address assigned by your LAN administrator, or DHCP
server (Default 10.0.0.1).
IP Net Mask
IP address assigned by your LAN administrator, or DHCP
server (Default 255.255.255.0).
Default Gateway
Default Gateway provided by your access provider.
DHCP
Client, Server, or None.
DHCP Range Low Address
DHCP low range IP address supplied by your LAN
administrator.
DHCP Range High Address
DHCP high range IP address supplied by your LAN
administrator.
DHCP Gateway Address
In DHCP Server Mode, this is the gateway address that is
automatically assigned to the requesting DHCP client.
DHCP DNS
In DHCP Server Mode, this is the DNS address that is
automatically assigned to the requesting DHCP client.
Apply
Apply Settings.
Setting Up DHCP
This procedure is optional. Follow this procedure to enable or disable DHCP on the modem.
From the Main Menu, select LAN Setup screen and enter values for the following DHCP
parameters:
1
To enable DHCP, select DHCP and choose either Client or Server by typing 2 or 3 on the LAN
Setup menu. If DHCP Client is selected, you do not need to configure an IP address. None
disables DHCP.
2
Enter the low range of the DHCP IP addresses as supplied by your LAN administrator.
3
Enter the high range of the DHCP IP addresses as supplied by your LAN administrator.
4
Enter the default gateway address that is provided to the requesting DHCP client—only if
you are operating in server mode. This IP Address is also available from your LAN
administrator.
5
Enter the DNS address that is provided to the requesting DHCP client—only if you are
operating in server mode. This IP Address is also available from your LAN administrator.
MM701G User Manual
49
Setting Up the WAN
6
Select Apply to immediately activate the changes that you have made for this session.
7
From the Main Menu select Save New System Configuration to save these settings or the
changes will be lost upon reboot or power cycle.
8
If you have enabled DHCP, select Reboot from main menu to reboot the router.
Setting Up NAT
This procedure is optional. Follow this procedure to enable or disable NAT for a WAN session.
From the Main Menu, select WAN Setup to access the WAN sessions page.
1
Select the session for which you wish to enable NAT. The WAN Sessions Options screen
displays.
2
From the WAN Sessions Options screen, select the NAT option and enter either enable or
disable to change the NAT status for this session.
Session State
1. Disable
2. Enable
Select session NAT (Return to exit) ->
50
3
Select Apply to activate your changes. Apply immediately activates the changes that you have
made for this session.
4
From the Main Menu, select Save New System Configuration to save these settings or the
changes will be lost upon reboot or power cycle.
•
If DHCP Client is selected, you do not need to configure an IP address.
•
In Bridge mode, you need an IP address for the LAN port to use a Browser or Telnet
to manage the MM701G.
MM701G User Manual
Chapter 4: Managing the Modem Using the Console Port & Telnet
MANAGING DSL
Use the G.SHDSL menu to manage the DSL line. This menu allows you to:
•
view the DSL configuration
•
configure the DSL line
•
monitor the DSL statistics
•
test the DSL line
G.SHDSL Menu
1.
2.
3.
4.
5.
G.SHDSL Current Settings
Quick Configuration Setting
Advance Configuration Setting
G.SHDSL Statistics
Hardware/Line Diagnostics
Enter Selection (Return to exit) ->
Viewing the DSL Configuration
1
From the Main Menu, select DSL by typing 3 to access the G.SHDSL Menu.
2
From the G.SHDSL Menu, select G.SHDSL Current Settings by typing 1 to access the G.SHDSL
Current Setting page.
3
View the DSL configuration as described by the table shown in “Advanced Configuration”
on page 52.
Configuring the DSL Line
1
From the Main Menu, select DSL by typing 3 to access the G.SHDSL Menu.
2
From the G.SHDSL Menu, do one of the following:
•
To configure Annex A or Annex B as the standard, select Quick Configuration Setting and
proceed to “Quick Configuration” on page 52.
•
To configure the advanced features of the modem, select Advance Configuration Setting
and proceed to “Advanced Configuration” on page 52.
MM701G User Manual
51
Managing DSL
Quick Configuration
From the SHDSL Standard page, do one of the following:
•
Select G.SHDSL - Annex A
•
Select G.SHDSL - Annex B
Save your changes by selecting Save Current Configuration from the Main Menu as described in
“Saving the Current Configuration” on page 60.
Advanced Configuration
From the G.SHDSL Advance Configuration Setting page, type the number of the G.shdsl field to
configure, then reference the table below for assistance in changing and selecting the parameter
value.
G.shdsl Advance Configuration Setting
1.
2.
3.
4.
5.
6.
7.
8.
9.
10.
11.
ExecMode
Standard
StartupMargin
ClockOffset (ppm)
PowerBackoff
UpFrameSync
UpStuffBits
DownFrameSync
DownStuffBits
EncoderCoeffA
EncoderCoeffB
CPE
G.shdsl-AnnexB
2dB
0
Enable
13727
15
13727
15
366
817
12.
13.
14.
15.
16.
17.
18.
19.
20.
21.
MinBaseRate
1
MaxBaseRate
36
MinSubRate
0
MaxSubRate
1
WirePairMode
SinglePair
AsymmetricPSD
SymmetricPSD
BitRateMode
AdaptiveRate
TestBitRate
2320K
SNRMarginLimit (dB) 4
Apply
Enter Parameter to edit (Return to exit) ->
52
SHDSL Parameter
Description
Values
ExecMode
Operational mode of the modem. If you are implementing
a back-to-back configuration, configure one modem in
CO mode and the other in CPE mode. Otherwise, select
CPE.
CPE, CO
Standard
Select Annex A or Annex B (Default: Annex A).
Annex A, Annex B
StartupMargin
Currently only 0 dB is supported.
2 to 15
ClockOffset
Used for a low frequency wander and jitter between
network and DSL system clock. Only set on the CO side.
(Default: 0)
-100 to 100 ppm
PowerBackoff
Select Enable to activate Power Backoff or Disable to
deactivate Power Backoff. (Default: Enable)
Enable, Disable
MM701G User Manual
Chapter 4: Managing the Modem Using the Console Port & Telnet
SHDSL Parameter
Description
Values
UpFrameSync
The Upstream Frame Sync Word parameter.
(Default: 13727)
0 to 65535
UpStuffBits
The Upstream Stuffbits parameter. (Default: 15)
0 to 16
DownFrameSync
The Downstream Frame Sync Word parameter.
(Default: 13727)
0 to 65535
DownStuffBits
The Downstream Stuffbits parameter. (Default: 15)
0 to 16
Encoder CoeffA
The encoder coefficient for the A channel. (Default: 366)
0 to 1048577
Encoder CoeffB
The encoder coefficient for the B channel. (Default: 817)
0 to 1048577
MinBaseRate
Used with the MinSubRate to define the minimum line
rate. (Default: 1)
MaxBaseRate
Used with the MaxSubRate to define the maximum line
rate. (Default: 36)
1 to 36
MinSubRate
Used with the MinBaseRate to define the minimum line
rate. (Default: 0)
0,1
MaxSubRate
Used with the MaxBaseRate to define the maximum line
rate. (Default: 1)
0,1
WirePairMode
Currently only SinglePair is supported.
SinglePair, TwoPair
AsymmetricPSD
Select between the three options: Symmetric PSD,
AsymPSDHighRate, AsymPSDLowRate.
(Default: SymmetricPSD)
SymmetricPSD,
AsymPSDHighRate,
AsymPSDLowRate
BitRateMode
The method in which the modem establishes a bit rate
with the device on the other side of the DSL line (such as
the DSLAM or another MM701G). Fixed Rate attempts to
establish a connection only at the rate that is specified
while Adaptive Rate dynamically negotiates its bit rate.
(Default: Adaptive Rate)
Fixed Rate, Adaptive
Rate
TestBitRate
Select a value from 72K to 2320K. (Default: 2320)
72K to 2320K
SNRMarginLimit
The signal-to-noise ratio limit. This can be set between
-64 to +63. The Margin LED on the front panel indicates
when the actual SNR is greater than the configured value.
(Default: 4)
-64 to 63
MM701G User Manual
53
Managing DSL
Monitoring the DSL Statistics
Use the G.SHDSL Statistics page to monitor the following types of DSL statistics:
•
General Statistics
•
Error Counters
•
ATM Counters
Viewing General Statistics
1
From the Main Menu, select DSL by typing 3 to access the G.SHDSL Menu.
2
Select G.SHDSL Statistics by typing 4 to access the G.SHDSL Statistics page.
3
Select G.SHDSL General Statistics by typing 1 to access the G.SHDSL General Statistics page.
G.SHDSL General Statistics
1.
2.
3.
4.
5.
6.
7.
8.
9.
10.
11.
OperationalState
DataRate (Kbps)
DSPVersion
LastFailed
RemoteEncoderCoeffA
RemoteEncoderCoeffB
TransmissionPower
ReceiverGain
LocalSNRMargin
LoopAttenuation
FramerSync
Handshaking
2320
R1.2 -5
0x0000
0
0
0
0
43
0
N/A
Press any key (Return to exit) ->
54
MM701G User Manual
Chapter 4: Managing the Modem Using the Console Port & Telnet
4
View the statistics.
Parameter
Description
OperationalState
Valid entries are:
• Handshaking is when the modem is making an attempt to
connect to a device on the other side of the G.shdsl line.
• Training is when the modem is learning the connection
parameters.
• Show Time is the actual connection time.
DataRate
Bit rate after the ATM headers have been removed.
DSPVersion
The modem DSP code can be upgraded—this is the current
version that is running on your system.
LastFailed
Displays the last state reached before start-up failed. This is used
for troubleshooting by technicians.
RemoteEncoderCoeffA
Displays the remote coefficient for channel A.
RemoteEncoderCoeffB
Displays the remote coefficient for channel B.
TransmissionPower
Displays the local transmission power in dB.
ReceiverGain
Displays the amplifying factor for incoming signal in dB.
Local SNRMargin
Actual value of the current Signal to Noise (SNA) ratio.
FramerSync
Displays the link status.
MM701G User Manual
55
Managing DSL
Viewing Error Counters
1
From the Main Menu, select DSL to access the G.SHDSL Menu.
2
Select G.SHDSL Statistics to access the G.SHDSL Statistics page.
3
Select G.SHDSL Error Counters to access the G.SHDSL Error Counters page.
G.SHDSL Error Counters
1. CRCErrors
2. LOSWErrors
3. FEBEErrors
0
0
0
Press any key (Return to exit) ->
4
View the counters.
Parameter
Description
CRCErrors
The number of cyclic redundancy check (CRC) errors. CRC is an
error checking technique to ensure the integrity of data during
transmission.
LOSWErrors
The number of errors due to a loss of signal.
FEBEErrors
The number of errors in forward and backward transmission.
Viewing ATM Counters
1
From the Main Menu, select DSL to access the G.SHDSL Menu.
2
Select G.SHDSL Statistics to access the G.SHDSL Statistics page.
3
Select G.SHDSL ATM Counters to access the G.SHDSL ATM Counters page.
ATM Counters
1.
2.
3.
4.
5.
RxCell
TxCell
CellDrop
CellDelineation
RxHECErrors
0
0
0
0
0
Press any key (Return to exit) ->
56
MM701G User Manual
Chapter 4: Managing the Modem Using the Console Port & Telnet
4
View the statistics.
Parameter
Description
RXCell
The number of ATM cells received in the DSL interface.
TXCell
The number of ATM cells transmitted out the DSL interface.
CellDrop
The number of ATM cells dropped.
CellDelineation
The bit indicating the presence of cell delineation errors.
• 0 for delineation errors
• 1 for no delineation errors.
RxHECErrors
MM701G User Manual
The number of ATM cells received in error.
57
Managing DSL
Testing the DSL Line
The MM701G has embedded diagnostics used for detecting line problems or as an aid in
troubleshooting line related technical problems. These programs are used by technical support
personnel to diagnose problems and determine the appropriate solutions.
58
1
From the Main Menu, select DSL to access the G.SHDSL Menu.
2
Select Hardware/Line Diagnostics to access the G.SHDSL Hardware/Line Diagnostics page.
3
Select a diagnostic. These diagnostic programs have significance only to technical support
personnel and are not discussed further in this manual.
MM701G User Manual
Chapter 4: Managing the Modem Using the Console Port & Telnet
RESTORING FACTORY DEFAULTS
When you configure the MM701G, you change the factory default settings to new values. You
can return these parameters to their default values to provide a known starting point if you are
troubleshooting or you simply want to configure new parameters.
Active links may be lost when you reset to factory default values.
1
From the Main Menu, select Restore Factory Configuration to access the Restore Factory
Configuration page.
WARNING - This will delete configuration and return to default
1. Continue
2. Cancel
Select (Return to exit) ->
2
Do one of the following:
•
Select Continue if you want to return all values to their original factory values.
•
Select Cancel if you do not want to return all values to their original factory values.
If you restore the factory defaults, save the changes by selecting Save Current Configuration from
the Main Menu as described in “Saving the Current Configuration” on page 60.
MM701G User Manual
59
Saving the Current Configuration
SAVING THE CURRENT CONFIGURATION
Use the Save Current Configuration page for saving your current configuration to flash memory.
By saving your configuration changes, your changes will not be lost by resetting the modem.
1
From the Main Menu, select Save Current Configuration to access the Save Current Configuration
page.
WARNING - This will overwrite configuration
1. Continue
2. Cancel
Select (Return to exit) ->
2
60
Do one of the following:
•
Select Continue to write the configuration to flash memory.
•
Select Cancel to exit the current page without saving your configuration.
MM701G User Manual
Chapter 4: Managing the Modem Using the Console Port & Telnet
UPDATING SYSTEM SOFTWARE
You can upgrade the firmware on your MM701G. To upgrade, you must specify the IP address
of the server where the new firmware is stored.
1
Configure a TFTP server to download the system software. The MM701G uses TFTP to
download the firmware which comprises a configuration file (must be named “celsiancfg”)
and an image file (must be named “image”) located on the TFTP server.
2
From the Main Menu, select System Update to access the System Update page.
System Update
1. IP Address
2. File to update
3. Update
10.0.0.2
CONFIGURATION
Select (Return to exit) ->
3
Select IP Address to configure the IP address of the TFTP server to download the system
software.
4
Select File to update to determine the type of file to download.
5
At the Update File menu, select one of the following:
6
•
Configuration to download the configuration file “celsiancfg”
•
Image to download the image file “image”
Select Update to begin updating the software.
MM701G User Manual
61
Viewing System Information
VIEWING SYSTEM INFORMATION
The System Information page is a read-only summary of the current modem configuration. It
includes information about the firmware release, model, release date, MAC address, and DSP
version. This information is often used by technical support when troubleshooting.
1
From the Main Menu, select System Information to access the System Information page.
System Information
1.
2.
3.
4.
5.
Firmware Release
Model
Release date
MAC address
DSP version
1.4.1
MM701G
May 24 2001
00:20:A7:A2:01:C0
R1.2 -5
Press any key (Return to exit) ->
2
62
View the information.
MM701G User Manual
Chapter 4: Managing the Modem Using the Console Port & Telnet
REBOOTING THE MODEM
Before you reboot the modem, save configuration changes as described in “Saving the Current
Configuration” on page 60.
1
From the Main Menu, select Reboot to access the Reboot page.
WARNING - This will reboot without saving configuration
1. Continue
2. Cancel
Select (Return to exit) ->
2
Do one of the following:
•
Select Continue to reboot the modem.
•
Select Cancel to cancel the rebooting process.
It is unlikely that the modem will lock up (no response to any of your requests through the Web
interface and command-line interface). In this rare occurrence, power off the modem by
disconnecting the power plug, wait 30 seconds, then reconnect the power. This process allows
the modem to properly reset the power and eliminate the possibility of false values in memory.
However, please note that the preferred method of rebooting is to access the Reboot page as
described in the above procedure.
MM701G User Manual
63
Rebooting the Modem
64
MM701G User Manual
IMPLEMENTING POINT-TO-POINT
LAN EXTENSION
5
With a pair of MM701Gs, you can connect remote LANs by placing them “back-to-back.” One
MM701G is set for Customer Premise Equipment (CPE) mode and the other MM701G is set
for Central Office (CO) mode. By bridging traffic between these two modems you essentially
create one extended LAN that allows the use of a single IP subnet.
Straight out of its shipping box, the CPE modem is already configured for implementing
point-to-point LAN extension. There are no changes necessary for this modem. Furthermore,
there are only two configuration changes necessary for the CO modem:
•
set it up for CO mode
•
change the LAN IP address
These changes are described in “Quick Installation” on page 66.
However, if you already have a custom configuration (not using factory defaults) on your
modems, refer to “Configuring the CPE Modem” on page 68 to configure the CPE modem and
“Configuring the CO Modem” on page 72 to configure the CO modem.
Section
MM701G User Manual
Page
Quick Installation
66
Configuring the CPE Modem
68
Configuring the CO Modem
72
Verifying Connectivity
76
65
Quick Installation
QUICK INSTALLATION
The MM701G is shipped with factory defaults as a CPE and does not require
any additional configuration to fill the role of the CPE modem. Only the CO
modem requires configuration.
To set up the CO modem, follow these instructions:
Configure for CO Mode
66
1
Select DSL on the menu bar, then select DSL Advanced Config under [DSL Options].
2
In the Exec Mode box, select CO to dedicate the MM701G as the CO modem.
3
Click Apply.
MM701G User Manual
Chapter 5: Implementing Point-to-Point LAN Extension
Change the LAN IP Address
Any device (such as a PC) connecting to the modem LAN interface loses its connection when
the modem LAN IP address is changed. After the IP address is changed, you need to specify this
new address to reconnect a device.
1
Select LAN on the menu bar to access the LAN Settings page.
2
In the IP address box, enter 10.0.0.2.
3
Click Apply to activate the changes. The connection to the Web interface will be lost
because the modem now has a new LAN IP address. Specify http://10.0.0.2 as the URL on
your Web browser to reconnect.
4
Click Save Changes from the menu bar to prevent losing the configuration after resetting the
modem.
You are now finished with the Quick Installation. To verify connectivity, refer to “Verifying
Connectivity” on page 76
MM701G User Manual
67
Configuring the CPE Modem
CONFIGURING THE CPE MODEM
68
1
Select DSL on the menu bar then select DSL Advanced Config under [DSL Options].
2
In the Exec Mode box, select CPE to configure the MM701G as the CPE modem.
3
Click Apply.
MM701G User Manual
Chapter 5: Implementing Point-to-Point LAN Extension
4
Select LAN on the menu bar to access the LAN Settings page.
5
In the LAN Protocol box, select Bridge.
6
In the IP Address box, enter an available IP address on your subnet.
7
Click Apply.
MM701G User Manual
69
Configuring the CPE Modem
70
8
Select WAN on the menu bar then select Bridge under [Sessions].
9
In the Protocol box, select RFC 1483 - Bridge.
10
In the Virtual Path ID box, enter the Virtual Path ID. This must match the Virtual Path ID of
the CO modem.
11
In the Virtual Channel ID box, enter the Virtual Channel ID. This must match the Virtual
Channel ID of the CO modem.
12
Click Apply.
MM701G User Manual
Chapter 5: Implementing Point-to-Point LAN Extension
13
Select Save Changes on the menu bar to access the Save Changes page.
14
Click Save to save the configuration to flash memory.
MM701G User Manual
71
Configuring the CO Modem
CONFIGURING THE CO MODEM
72
1
Select DSL on the menu bar then select DSL Advanced Config under [DSL Options].
2
In the Exec Mode box, select CO to dedicate the MM701G as the CO modem.
3
Click Apply.
MM701G User Manual
Chapter 5: Implementing Point-to-Point LAN Extension
4
Select LAN on the menu bar to access the LAN Settings page.
5
In the LAN Protocol box, select Bridge.
6
In the IP Address box, enter an available IP address on your subnet.
7
Click Apply.
MM701G User Manual
73
Configuring the CO Modem
74
8
Select WAN on the menu bar then select Bridge under [Sessions].
9
In the Protocol box, select RFC 1483 - Bridge.
10
In the Virtual Path ID box, enter the Virtual Path ID. This must match the Virtual Path ID of
the CPE modem.
11
In the Virtual Channel ID box, enter the Virtual Channel ID. This must match the Virtual
Channel ID of the CPE modem.
12
Click Apply.
MM701G User Manual
Chapter 5: Implementing Point-to-Point LAN Extension
13
Select Save Changes on the menu bar to access the Save Changes page.
14
Click Save to save the configuration to flash memory.
MM701G User Manual
75
Verifying Connectivity
VERIFYING CONNECTIVITY
After you have performed each of the previous configuration changes, verify back-to-back
communication by passing traffic over the WAN session. For example, set up a PC on the
LAN-side of the CPE modem and another PC on the LAN-side of the CO modem. Then,
transfer a file or ping between the two PCs. This generates traffic and tests connectivity.
View the SYNC LED
On the front panel of one of the MM701Gs, check the status of the SYNC LED. If it is blinking,
it is attempting to establish communication with the other modem. If it is on solid green, it has
already synchronized its connection with the other modem. See “Checking LED Indications”
on page 6 for LED descriptions.
View the ATM Statistics
76
1
Select DSL on the menu bar then select ATM Statistics under [ATM Statistics].
2
View the statistics. If the RX Cell and TX Cell values increment, the two modems have
established communication and are passing traffic. If they do not, refresh the page by
clicking the Refresh button on your Web browser. If the counters still do not increment,
verify each modem for the correct configuration parameters.
MM701G User Manual
SPECIFICATIONS
A
The MM701G is a DSL modem that takes advantage of G.shdsl technology by offering
rate-adaptive communication at equal rates going both upstream and downstream. In addition,
the MM701G also provides:
•
sessions for precise control of security, performance and management of users and
resources per session. Allowing Service providers to offer additional services and class of
service for Internet access, private ATM networks or connections to application servers like
video servers or voice gateways.
•
self-installation for non-technical users
For further information, reference the following:
MM701G User Manual
Section
Page
Overview
78
Data Specifications
79
Hardware Specifications
83
Rate vs. Reach
87
77
Overview
OVERVIEW
The MM701G provides:
78
•
fixed-rate or rate-adaptive, symmetric G.shdsl transmission up to 2.3 Mbps
•
multiple session types:
–
PPP over ATM (RFC 2364)
–
RFC 1483 bridging over ATM AAL5
–
RFC 1483 routing over ATM AAL5 (IPoA)
•
32 simultaneous sessions of the same or different types
•
support for point-to-point LAN extension
•
DHCP (client and server) for sending and receiving dynamic IP addresses
•
NAT (including NAPT) for IP address and port translation
•
TFTP for modem software updates
•
RIP versions 1 and 2 for dynamic IP routing information exchange
•
multiple management options:
–
serial interface
–
telnet
–
Web interface
–
SNMP agent
•
10Base-T LAN interface with MDI/MDI-X switch
•
front panel LEDs for troubleshooting and monitoring LAN and DSL connections
•
PAP and CHAP for PPP login name and password authentication
•
ATM Quality of Service selection
•
statistics for monitoring network traffic
•
diagnostic tests to assist technical support personnel
MM701G User Manual
Appendix A: Specifications
DATA SPECIFICATIONS
DSL Standards
•
Annex A (991.2)
•
Annex B (991.2)
ATM standards
•
ATM Forum UNI Version 3.1 and UNI Version 4.0
•
ITU-T Q.2931, Q.2971 signaling
•
ITU I.363.5 ATM Adaptation Layer 5
•
ITU I.432 Cell Delineation and HEC
•
ITU I.361 ATM Cell Format
•
Classes of Service: CBR, UBR, VBR-nrt
•
Virtual Circuits: 32 for data
Internetworking Features
•
PPP: 1332, 1661, 1638, 1570
•
NAT and NAPT: 1631
•
DHCP Server & Client: 2131, 2132
•
Dynamic IP routing, ARP: 826, RIP: 1058, 1723
•
TCP/IP: 1112, 1122, 950, 894, 793, 791, 1812
•
BOOTP: 951, 1542
•
TFTP: 1350
•
IP over ATM: 1577, 1755
MM701G User Manual
79
Data Specifications
WAN Protocols
•
IETF RFC 2364 PPP over AAL5 (VC multiplexing and LLC encapsulation)
•
IETF RFC 1483 Multiprotocol encapsulation over AAL5
•
IETF RFC 1577 Classical IP over ATM
Security
•
PPP authentication - PAP/CHAP: 1334, 1994
•
Web and Telnet password
Management
•
Embedded SNMP agent, Terminal, Telnet with Web based configuration and management
tool
•
Auto provisioning extensions
•
ILMI, OAM F4 and F5 support
•
Concise MIB: 1212, MIB-II: 1213, Traps: 1215, Bridge MIB: 1493
•
SNMP MIB: 1471, 1472, 1473, 1474
•
SNMP: 1157
•
Open DSL
•
DSL Forum Auto-Configuration
•
Remote Configuration
Software Upgrade
80
•
TFTP download into built-in flash memory
•
Remote download (DSLAM support required)
MM701G User Manual
Appendix A: Specifications
Encapsulation
When you activate RFC 1483 system mode, you can select WAN encapsulation as VC
multiplexing for some sessions and LLC encapsulation for other sessions.
PPP
Authentication
(PAP/CHAP)
Provides authentication of PPP sessions for security through Password and
Challenge-Handshake Authentication Protocols (RFC 1994).
Network Address
Translation
Network Address Translation (NAT) maps LAN side private IP address to the
public IP address assigned to the 32 virtual channels (RFC 1631). You can map
to two private addresses to each of the 32 sessions for a total of 64 addresses.
Routing
Routing Protocol
Supports RFC 1724 Routing Information Protocol (RIP and RIP Version 2).
Encapsulation
Supports Logical Link Control (LLC) or VC-based multiplexing (RFC 1483).
Static Routes
Supports up to 32 static routes.
Address Resolution
Supports Address Resolution Protocol (ARP) over the LAN port (RFC 826).
Bridging
Bridging and Address
Learning
Implements a transparent learning bridge with a bridging table of 1024 entries.
Encapsulation
Supports Logical Link Control (LLC) or VC-based multiplexing (RFC 1483).
Spanning Tree
Provides Spanning Tree support per IEEE 802.1d.
RFCs
•
RFC 1483 Multiprotocol Encapsulation over ATM (Bridging/Routing)
•
RFC 2364 PPP Encapsulation over ATM
•
RFC 1994 for PAP/CHAP Authentication
•
RFC 1631 IP Network Address Translator (for NAPT)
•
RFC 1350 for TFTP client
•
RFC 2131 and RFC 2132 for DHCP server and relay protocols (supported only in RFC
1483 Bridging mode) and extensions, respectively
MM701G User Manual
81
Data Specifications
MIBs
•
Bridge MIB - 1493
•
SNMP MIBs - 1471, 1472, 1473, 1474
•
MIB 1213 - MIB II
•
MIB 1215 - Trap
Default Session Parameter Values
Session Parameter
Bridge
IPoA Router
PPP-Router
Protocol
RFC1483 - Bridge
RFC1483 - Router
PPPoA
State
Enable
Enable
Enable
IP Address
N/A
10.0.0.1
N/A (Dynamic)
Subnet Mask
N/A
255.255.255.0
N/A (Dynamic)
NAT
Enable
Disable
Disable
RIP Send
None
RIP I & II
RIP I & II
RIP Accept
None
RIP I & II
RIP I & II
Virtual Path ID (VPI: 0 - 4095)
0
0
0
Virtual Channel ID (VCI: 32 - 65536)
105
106
110
ATM QoS
UBR
UBR
UBR
QoS Peak Cell Rate (PCR)
N/A
N/A
N/A
QoS Sustainable Cell Rate (SCR)
N/A
N/A
N/A
QoS Maximum Burst Size (MBS)
N/A
N/A
N/A
Encapsulation
LLC
LLC
LLC
Login Name
N/A
N/A
admin
Login Password
***
***
password
Authentication
PAP
PAP
CHAP
82
MM701G User Manual
Appendix A: Specifications
HARDWARE SPECIFICATIONS
LED
•
Power
•
Ethernet: Link, Tx, Rx, Collision
•
DSL: Sync, Tx, Rx, Margin
Connectors
•
DSL Interface: RJ-11
•
10Base-T: RJ-45
•
Console Port: RJ-45 (serial connection to RS-232 for local configuration)
LAN Interface
•
10Base-T (IEEE 802.3i)
•
Connector: RJ-45 with MDI/MDI-X switch
MM701G User Manual
83
Hardware Specifications
WAN Interface
SHDSL (Symmetrical High-Speed Digital Subscriber Line)
Maximum transmission rate:
Downstream
2320 kbps
2320kbps
Upstream
Minimum transmission rate to sync
192 kbps
Connector
RJ-11
ATM (Asynchronous Transfer Mode)
84
ATM Adaptation Layer
AAL5 (ITU I.363.5)—Supports encapsulation and
de-encapsulation of AAL5 Protocol Data Units (PDUs) for
convergence. Segmentation and Reassembly (SAR) layer
segments and reassembles AAL5 PDUs into ATM cells that are
48 byte SAR-PDUs.
ATM Layer
Attaches or strips the 5-byte header to the 48-byte SAR-PDU.
Performance is a maximum line rate of 17,812 cells per second
downstream and 2,189 cells per second upstream.
Cell Format
Format complies with ITU I.361 ATM cell format. Cell delineation
complies with ITU I.432 Cell Delineation and HEC. Cells are fixed
length (53 bytes), including 5 bytes of header and 48 bytes of
payload. Included in the header are the VPI and VCI number.
Virtual Circuit type
Permanent Virtual Circuit (PVC) per ATM forum UNI Version 3.1.
Maximum Virtual Circuits
32 virtual circuits that can simultaneously connect to service
providers for sessions encapsulated either as PPP or RFC 1483
Bridging/Routing.
MM701G User Manual
Appendix A: Specifications
Connector Pinouts
The following sections provide the pinout information for the various modem connectors.
DSL Port (RJ-11)
The following table shows the signal on each pin of the DSL port. The connector for this
interface is an RJ-11. See “Connecting the Cables” on page 5 for the location of this port.
Pin
Signal
1
Not used
2
No connection
3
Ring
4
Tip
5
No connection
6
Not used
10Base-T Port (RJ-45)
The following table shows the signal on each pin of the 10Base-T port connector when the
switch is in either the MDI or the MDI-X position. The connector for this interface is an RJ-45.
See “Connecting the Cables” on page 5 for the location of this port.
MM701G User Manual
MDI
MDI-X
Signal
Description
1
3
TX+
Transmit Data (+)
2
6
TX-
Transmit Data (-)
3
1
RD+
Receive Data (+)
4
4
Not used
Not used
5
5
Not used
Not used
6
2
RD-
Receive Data (-)
7
7
Not used
Not used
8
8
Not used
Not used
85
Hardware Specifications
Console Port (RJ-45)
The following table gives the signal designations and pin numbers for each end of the RJ-45 to
RS-232 cable that is used between the modem Console port (RJ-45) and the PC Serial port
(DB-9).
PC RS-232 Serial Port
(DB-9)
Signal
Description
1
RTS
Ground
2
DTR
Ground
3
TxD
Transmit Data
4
GND
Ground
5
5
GND
Ground
2
6
RxD
Receive Data
7
DSR
Ground
8
CTS
Ground
3
86
Modem
Console
(RJ-45)
MM701G User Manual
Appendix A: Specifications
RATE VS. REACH
MM701G User Manual
87
Rate vs. Reach
88
MM701G User Manual
TECHNICAL ASSISTANCE
AND RETURNS
B
This chapter describes how to contact ADC for technical support.
WORLD WIDE WEB
Avidia product information can be found at http://www. adc.com using any Web browser.
KNOWLEDGE BASE
The ADC Knowledge Base can help you locate answers to frequently asked questions on a
variety of topics, including:
•
troubleshooting
•
installation
•
configuration
•
upgrades
The Knowledge Base can be found at: http://www.adc.com/Knowledge_Base/index.jsp using
any Web browser.
MM701G User Manual
89
Technical Support
TECHNICAL SUPPORT
Technical support is available 24 hours a day, 7 days a week by contacting the ADC Technical
Assistance Center (TAC).
•
Telephone: 800.638.0031
714.730.3222
•
Fax:
714.730.2400
•
Email
[email protected]
A Customer Service Engineer answers technical assistance calls Monday through Friday
between 7:30 AM and 5:30 PM, Pacific Time, excluding holidays. At all other times, an on-duty
Customer Service Engineer returns technical assistance calls within 30 minutes.
Refer to the ADC web site (see above) for specific warranty information.
RETURNS
To return equipment to ADC:
1
Locate the purchase order number under which the equipment was purchased. You will
need to provide this number to ADC Customer Service to obtain a return authorization.
2
Call ADC Customer Service to ask for a Return Material Authorization (RMA) number and
instructions before returning products. Use the telephone number, fax number, or email
address listed below:
•
Telephone: 800.366.3891 ext. 63748 or 952.946.3748
The 800 line is toll-free in the U.S. and Canada.
3
90
•
Fax: 952.946.3237
•
Email Address: repair&[email protected]
Be prepared to provide the following information:
•
Company name, address, telephone number, and the name of a person Customer
Service can contact regarding this equipment.
•
A description of the equipment as well as the number of units that you are returning.
Be sure to include the model and part number of each unit.
•
The shipping address to which Customer Service should return the repaired equipment.
•
The reason for the return.
MM701G User Manual
GLOSSARY
C
10Base-T
The Institute of Electrical and Electronic Engineers (IEEE) 802.3 specification for
Ethernet over thin coaxial cable.
AAL2
ATM Adaptation Layer 2. Used for compressed voice and video that is intolerant of
delay. This layer is used by G.shdsl xDSL technology.
AAL5
ATM Adaptation Layer 5. AAL5 has been adopted by the ATM Forum from a Class of
Service called High Speed Data transfer. It typically supports all types of data traffic.
Originally designed to support TCP/IP.
ATM
Asynchronous Transfer Mode is a high bandwidth, low delay, connection-oriented,
packet-like switching and multiplexing technique that uses 53-byte fixed-size cells to
transmit voice, video and data over a network. ATM layers define how cells are
formatted and provides the transport of the fixed length cells between the modem
and the service provider (or endpoints of the virtual connection).
attenuation
The dissipation of the power of a transmitted signal as it travels over copper wire,
measured in decibels (dB).
authentication
Security feature offered through PAP and CHAP with PPP sessions.
BER
Bit Error Rate is a measure of transmission quality. The ratio of error bits to the total
number of bits transmitted.
bps
bit-per-second is the number of bits transferred during each second of data
transmission.
CBR
Constant Bit Rate is a Service Class for the modem. It provides constant bit rate data
with a timing relationship between the source and the destination. Also, a traffic class
that carries a guaranteed constant bandwidth. Best suited for applications that require
fixed bandwidth, such as uncompressed voice, video and circuit emulation. CBR is a
Quality of Service class defined by the ATM Forum for ATM networks.
cell
A fixed-length packet. Also, the unit of data transmission used in ATM. Each ATM cell
contains a fixed-size frame (53 bytes) consisting of a five-byte header and a 48-byte
payload.
MM701G User Manual
91
92
community
string
A text string required for an SNMP trap to be received by a trap receiver(s). Also, a
text string that identifies an SNMP community and is associated with specific access
rights (read-only or read/write).
CRC
Cyclic Redundancy Check is a method used to verify the accuracy of data
transmission.
downstream
traffic
Communications from a service provider to a user.
encapsulation
The inclusion of data in a protocol header prior to transmission, which enables
successful data transmission between different protocol networks.
ES
Errored Seconds is the seconds during which errors occur that prevent the payload
from being corrected.
Ethernet
A protocol used for LAN traffic, which has a transfer rate of 10 or 100 Mbps.
flash memory
Non-volatile memory that can be erased and reprogrammed.
gateway
A device (generally a router) that provides translation services to allow
communication between two dissimilar networks.
IP
Internet Protocol is a TCP/IP protocol that controls packet transmission.
IP address
A 32-bit address used in IP routing. The address consists of four octets separated by
decimals. The octets comprise a network section, a subnet section (optional) and a
host section.
LAN
Local Area Network is a physically connected group of devices between which data
transmission occurs at high speeds over relatively short distances.
LLC
Logical Link Control is an encapsulation protocol for data that you transmit from the
modem over the WAN in 1483 Bridging/Routing mode.
LOF
Loss Of Frame is an error indicating that the receiving equipment has lost a frame.
LOS
Loss Of Signal is an error indicating that the receiving equipment has lost the signal.
MAC
Media Access Control is a physical address associated with a device such as a NIC.
For modem configuration, the MAC is used to map inbound traffic (from a remote IP
address) to an internal (LAN) IP address. Used with 1483 Bridging/Routing Mode.
margin
The noise margin in decibels that the modem must achieve with a BER of 10 -7 or
better to successfully complete initialization.
MM701G User Manual
Appendix C: Glossary
MIB
Management Information Base is a set of variables that define the configuration and
status parameters for network management. Network management stations can
retrieve information from and write information to an MIB. The Internet Engineering
Task Force (IETF) specifies standard MIBS for certain types of devices, ensuring any
NMS can manage the devices. Vendors can specify proprietary MIBs for their devices
to fit specific needs.
NAPT
Network Address and Port Translation provides the means to map private IP
addresses and TCP/UDP ports to the public IP addresses (proxy addresses) and
TCP/UDP ports that are set up for the PPP sessions. Used with PPP Mode.
NVRAM
Non-Volatile Random Access Memory is a medium for storing system configuration
information, so the information is not lost when the system is reset.
octet
A TCP/IP term indicating eight bits.
PAP/CHAP
Password Authentication Protocol and Challenge Handshake Authentication Protocol
are two ways to authenticate PPP sessions. With PAP, the modem sends
authentication requests to the service provider and authentication occurs only once
during the life of the link.
In CHAP, the service provider returns an authentication challenge to the modem
during authentication. CHAP can be renegotiated during the life of the link. Also, both
the modem and the service provider must support clear text versions of the
password. The CHAP host field must be the same on both ends of the session.
PDU
Protocol Data Unit is data as it appears at the interface between a particular sublayer
and the sublayer immediately below.
POTS
Plain Old Telephone Service.
PPP
Point-to-Point Protocol exists between the hardware layer and the network-layer
interface protocols. It is a widely used protocol for establishing connections on the
Internet. PPP provides the set up and release of connections for each session.
PAP/CHAP provide the authentication for the PPP sessions.
proxy IP address
The proxy IP address is the WAN IP address for one of the 32 sessions. The proxy
IP address is used to enter static NAT entries. See IP address.
PVC
Permanent Virtual Circuit is a logical connection comprised of a predefined static
route across a packet-switched network that is always in place and always available.
QoS
Quality of Service is the configured traffic parameters that are assigned to a virtual
circuit, which specifies how quickly and how accurately data is transferred from the
sender to the receiver.
RFC
Request For Comment is a series of notes that contain surveys, measurements, ideas,
techniques, and observations, as well as proposed and accepted TCP/IP protocol
standards. RFCs are available on the Internet.
MM701G User Manual
93
94
RIP
Routing Information Protocol allows routers to update the routing tables
automatically (for example with information such as how many hops between
destinations). The version of RIP you select for the session must match the version
supported by the service provider. Versions RIP1 and RIP-1 compatible are used for
broadcast. Version RIP 2 is used for multicast.
SEF
Severely Errored Frames is the incoming signal has at least four consecutive errored
framing patterns.
SES
Severely Errored Seconds is the seconds during which more than 2,500 bipolar errors
are detected on the line.
session
The time during which two computers maintain a communication connection. An
example is a connection configured between the MM550 Integrated Access Device
and the service provider.
SNMP
Simple Network Management Protocol is a protocol that specifies how to send
information between a NMS and managed devices on a network. The managed
devices run a program called an agent. The agent interprets SNMP request and
responds to them. SNMP is used to set device configurations, read device
configurations or read the device status.
Spanning Tree
A bridging protocol that detects and prevents loops from occurring in a system
containing multiple bridges.
subnet mask
A type of IP address that allows a site to use a single IP address for multiple physical
networks.
TCP
Transmission Control Protocol is a transport protocol used to map inbound traffic
(from a remote IP address) to an internal (LAN) IP address. Establishes connection
with remote user before data transmission.
TCP/IP
Transmission Control Protocol/Internet Protocol is a protocol used for
communications between computers over networks and the internet.
TFTP
Trivial File Transfer Protocol is a protocol used to download card images or other files
from an external TFTP server to the NVRAM of any installed cards, or to upload files
from an installed card to an external TFTP server.
trap receivers
PCs configured to receive SNMP traps (messages).
traps
Autonomous, interrupt-driven, SNMP messages sent from a managed node to a
network management station to indicate that an event has occurred.
UAS
UnAvailable Seconds is the number of seconds during which the line is unavailable.
UBR
Unspecified Bit Rate is an ATM traffic type used for LAN traffic. When network
congestion occurs, the data is stored in a buffer until it can be sent.
MM701G User Manual
Appendix C: Glossary
UDP
User Datagram Protocol is a transport protocol used to map inbound traffic (from a
remote IP address) to an internal (LAN) IP address. Uses a protocol port number for
the destination at the remote location.
upstream traffic
Communications from a user to a service provider.
VCI
Virtual Channel Identifier is a 16-bit field addressing identifier in the header of an ATM
cell used to route cell traffic. It identifies a particular VC link for a given VP.
VCMUX
Virtual Channel Multiplexer-based encapsulation used for networks with large
numbers of virtual channels making it practical to carry a single protocol per virtual
channel.
VC
A Virtual Channel is a logical connection in the ATM network over which ATM cells are
transmitted.
VPI
Virtual Path Identifier is an 8-bit field addressing identifier in the header of an ATM
cell that is used to route cell traffic. It identifies a particular VP link.
VP
A Virtual Path is a group of VCs carried between two points. The VP provides a means
of bundling traffic traveling in the same direction. VPs are defined by a unique VPI
value.
WAN
Wide Area Network is a network consisting of nodes located across a large
geographical area. Also, the connection between a service provider and MM701G
Modem.
MM701G User Manual
95
96
MM701G User Manual
Index
INDEX
Numerics
configuring
CO modem 72
10/100BASE-T
connector pinouts 85
CPE modem 68
description 91
LAN 27
A
accessing modem web pages 15
NAT,CLI 50
WAN 23
web browser 12
adaptation layer 84
advanced configuration 52
connecting
cables 4
ATM
console port 42
adaptation layer 84
connectivity, verifying back-to-back 76
cell format 84
connector pinouts 85
description 91
console port 86
max VCs 84
connecting to 42
specifications 84
managing modem 41
statistics 34
viewing counters 56
counters
ATM 56
B
back-to-back
errors 56
CPE modem, configuring 68
implementing 65
verifying connectivity 76
bridging specifications 81
C
cables, connecting 4
cell formats 84
changes, saving 38
CO modem, configuring 72
configuration file 21, 61
configuration, saving 38, 60
MM701G User Manual
97
Index
D
I
Data Specifications 79
image file 21, 61
Default Session Parameter Values 82
implementing, back-to-back 65
defaults
installing, modem 3, 65
factory 59
L
settings 22
LAN
DHCP 49
configuring 27
downstream 92
extending 65
DSL
setting up 48
connector pinouts 85
line testing 58
troubleshooting 10, 66
login
managing 30, 51
name 20
monitoring statistics 54
quick configuration 30
testing 33
password 20
setting name 20
setting password 20
E
Encapsulation 81
M
MAC, description 92
error counters 37, 56
managing
F
DSL 30, 51
modem 9, 41
factory defaults
restoring 59
system 16
setting 22
modem
installing 3, 65
file
configuration 21, 61
image 21, 61
rebooting 39, 63
modem status, viewing 17
full duplex 10, 66
monitoring, DSL statistics 54
G
general statistics 54
98
MM701G User Manual
Index
N
setting
factory defaults 22
NAT
configuring, CLI 50
login name 20
description 93
password 20
setting up 50
spanning tree 19
network interface card (NIC) 10, 66
P
package contents 2
setting up
LAN 48
NAT 50
telnet 44
password 20
Physical Specifications 83
WAN 45
WAN sessions 23
pinouts 85
point-to-point, LAN extension 65
SHDSL, specifications 84
shipping package contents 2
PPP, specifications 81
software, updating 21, 61
Q
quick configuration 52
spanning tree, setting 19
specifications 77
R
ATM 84
rebooting, modem 39, 63
bridging 81
requirements 2
PPP 81
restoring, factory defaults 59
routing 81
Returns 90
SHDSL 84
RFCs 81
WAN interface 84
routing, specifications 81
S
saving
changes 38
configuration 38
current configuration 60
MM701G User Manual
statistics
DSL 54
general 54
link 35
subnet mask description 94
support 89
99
Index
system
V
managing 16
verifying back-to-back connectivity 76
requirements 2
viewing
updating software 21, 61
ATM counters 56
viewing information 62
ATM statistics 34
T
technical specifications 77
error counters 37, 56
general statistcs 54
link statistics 35
technical support 89
modem status 17
telnet
managing modem 41
system information 62
W
setting up 44
testing
WAN
DSL 33
configuring 23
DSL line 58
interface specifications 84
TFTP
setting up 45
description 94
setting up sessions 23
updating system software 61
troubleshooting
warranty 89
web browser, configuring 12
Ethernet NIC 10, 66
web interface
LAN connection 10, 66
accessing 15
no response (lockup) 39, 63
managing modem 9
U
updating system software 21, 61
upstream description 95
100
MM701G User Manual
Index
MM701G User Manual
101
ADC DSL Systems, Inc.
14402 Franklin Avenue
Tustin, CA 92780
Tel: 714.832.9922
Fax: 714.832.9924
For Technical Assistance:
800.638.0031
714.730.3222
1187627
1187627 Rev A