1
ROWA
DVD-3610
DVDNCDICDIMP3
PLAYER
INSTRUCTION
MANUAL
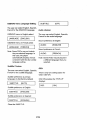
Warning
TO PREVENT ELECTRIC SHOCK DO NOT
TO PREVENT FIRE OR SHOCK HAZARD,
USE THIS PLUG WITH AN EXTENSION
DO NOT EXPOSE THIS APPLIANCE TO
CORD, RECEPTACLE OR OTHER OUTLET
RAIN OR MOSITURE.
UNLESS THE BLADES CAN BE FULLY
INSERTED TO PREVENT BLADE EXPOSURE
CAUTION
The lightning flash with
arrowhead symbol,with and
equilateral triangle, is
to alert the user of the
presence of uninsulated
"dangerous voltage" within the
Product's enclosure that may
Be of sufficient magnitude to
constitute a risk of electric
shock to people.
CAUTION: TO REDUCE THE
RISK OF ELECTRIC SHOCK, DO
NOT REMOVE COVER (OR
BACK), NO USER SERVICABLE
PARTS INSIDE. REFER
SERVICING TO QUALIFIED
SERVICING PERSONNEL.
The exclamation point within
an equilateral triangle is
intended to alert the user of the
)resence of important operatin
and maintenance (servicing)
instructions in the literature
accompanying the appliance.
"FSI" This product has been evaluated for double protection to prevent electric shock hazard.
IMPORTANT
SAFETY
NOTES: Read these instructions.
Do not loose the safety instruction. Keep in a safe place where you can
easily access them. Refer to these safety notes.
1) Keep these instructions.
2) Heed all warnings.
3) Following all instructions.
4) Do not use this apparatus
near water.
5) Clean only with dry cloth.
6) Do not block any ventilation
instructions.
openings,
Install in accordance
with the manufacturer's
7) Do not install near any heat sources such as radiators, heat registers, stoves, or other
apparatus (including amplifiers) that produce heat.
8) Do not defeat the safety purpose of the polarized or grounding-type plug. A polarized
plug has two blades with one wider than the other. A grounding type plug has two blades
and a third grounding prong. The wide blade or the third prong are provided for your safety.
If the provided plug does not fit into your outlet, consult an electrician for replacement of
the obsolete outlet.
1/36
9) Protect the power cord from being walked on or pinched particularly at plugs,
convenience receptacles, and the point where they exit from the apparatus.
10) Only use attachments/accessories
specified by the manufacturer.
11 ) Use only with the cart,stand,tripod,bracket,or
sold with the apparatus.
combination
table specified by the manufacturer,
or
When a cart is used,use caution when moving the cart/apparatus
to avoid injury from tip-over.
12) Unplug this apparatus during lightning storms or when unused for long periods of
time.
13)Refer all servicing to qualified servicing personnel. Servicing is required when the
apparatus
has been damaged in any way, such as power-supply
damaged,liquid
cord or plug is
has been spilled or objects have fallen into the apparatus,the
has been exposed to rain or moisture,does
14) This appliance
not operate normally,or
apparatus
has been dropped.
shall not be exposed to dropping or splashing water and that no object
filled with liquids such as vases shall be placed on this apparatus.
2/36
TABLE OF CONTENTS
FEATURES .......................................................................................
5/36,6/36
PRECAUTIONS
.................................................................................
7/36
BEFORE USING ................................................................................
8/36
NAMES AND FUNCTIONS ............................................................
9/36
Front Panel .................................................................................
9/36
Front Panel Display----LCD
10/36
Backlight
Display .....................................
Rear panel .................................................................................
11/36
Remote control ............................................................................
12/36
BASIC CONNECTION
........................................................................
13/36
Optional audio connection .............................................................
14/36,15/36
BASIC PLAYBACK .............................................................................
Powering
on the player,inserting
16/36
a disc ,and playing ..........................
16/36
Pausing playback .........................................................................
16/36
Stopping
playback
16/36
playback (show the DVD Logo screen ) and resuming
after stopping .................................................................
Fast forward/backward
..............................................................
16/36
Slow forward/backward
..............................................................
16/36
Skipping to the back/next
chapter/track
...........................................
Using SEARCH to jump to a specific time or track/title/chapter
ADVANCED
.............
17/36
17/36
PLAYBACK
Enable TITLE function ...................................................................
18/36
Enable MENU function .................................................................
18/36
Using repeat A-B to repeat a specific segment
(DVD,VIDEO CD and audio CD) .....................................................
18/36
Using BOOKMARK to set bookmarks and have playback
jump to the bookmarks ..................................................................
19/36
Repeat play .................................................................................
19/36
3/36
Play mode selection .......................................................................
19/36,20/36
Enable Programmed
20/36
Playback Mode ..................................................
3D sound effect ..............................................................................
21/36
Selecting subtitles (DVD only) ............................................................
21/36
Using display to view time and play status .............................................
21/36,22/36
Viewing from a desired angle ............................................................
22/36
Using Audio to change the Audio language ..........................................
22/36
Using L/R to change the sound channel ................................................
22/36,23/36
Using Zoom to change the size of picture .............................................
23/36
Mute function ..................................................................................
23/36
About MP3 disc ...............................................................................
24/36,25/36
PLAYER CONFIGURATION
VIA SETUP MENU .......................................
26/36
How to choose setting options ............................................................
26/36
OSD/DVD menu language
27/36
...............................................................
Subtitle choice .................................................................................
27/36
Audio choices .................................................................................
27/36
Enable/disable
27/36
OSD ..........................................................................
Default choices ................................................................................
27/36
TV Type Choices ..............................................................................
28/36
TV System Choices ...........................................................................
28/36
Audio Output Choices ........................................................................
28/36,29/36
Password .......................................................................................
30/36
Rating Choices .................................................................................
30/36,31/36
DISC HANDLING
DEFINITION
AND MAINTENANCE
...................................................
AND TERMS .....................................................................
SPECIFICATIONS
..............................................................................
REGION MANAGEMENT
INFORMATION
.................................................
4/36
31/36,32/36
33/36,34/36
35/36
36/36
Congratulations
on your purchase of DVD3610. We strongly recommend that
you carefully study the Operating Instructions before attempting to operate the
player and that you note the listed precautions.
Features
• High sound quality
• This player enables 96 KHZ/24 bit linear PCM signals ,which constitute the
specifications towards the highest in DVD standards.The sound in all of its
various modes is reproduced faithfully and SNR performance can reach up to
99dB.
• The user can select Dolby digital/linear PCM,DTS digital output based on their
own AV components.
• 15 kinds of digital sound effect simulation.
• High picture quality
• 10 bit video D/A converter
With
its 10 bit capability,this
and the resolution
•
Versatile
can reach
reproduces
fine images faithfully
up to 500-line
DVD features
• Multi-audio
function
The audio soundtrack
audio
D/A converter
languages
• Multi-angle
can be heard
also depends
up to 8 languages.
on the disc being
(The number
function
Scenes may be displayed
in one of a maximum
of different angles.
to the DVD disc being recorded with multiple camera angles.)
• Multi-subtitle
Subtitles
(subject
function
may be displayed
in up to 32 languages.(DVD
recorded
multi-subtitles)
• Parental
of
played.)
lock function
This can prevent
playing
of DVD discs
unsuitable
5136
for children.
with
• Bookmark
function
This player can store a maximum of 3 positions
recalled when you like.
in its memory which can be
• Compatible with PAL and NTSC DVDNideo CD
This player can play discs recorded in either PAL or NTSC format. However,
the player must be connected to a Multi-system TV to play both PAL DVD
/Video CD and NTSC DVD/Video CD .The use of a Multi-system TV is
recommended.
•
Discs
which
DVD
SVCD,
VCD
can be played
CVD,
with this player
DVCD
CD, CD-R,CD-RW,MP3
• Do not try to play any Discs whose format can not be supported
player, otherwise,
data on the disc may be damaged.
6/36
by this DVD
Precautions
No fingers
We greatly recommend
read these precautions
operating this player.
that you
before
• Touching internal parts of this
player is dangerous and may cause
serious damage to the player.Do not
attempt to disassemble the player.
• Do not put any foreign object on the
disc tray.
Radiation
DVD/VCD/CD/MP3
player is a Class 1
laser product. However this
DVDNCDICD/MP3
player uses a visible
laser beam which could cause hazardous
radiation exposure if directed. Be sure to
operate the DVD/VCD/CD/MP3
player
correctly as instructed.
LASER PRODUCT
l CLASS
1
or other objects inside
Condensation
Moisture
may form on the lens under
the following
conditions.
• immediately
turned on.
after a heater
• in a steamy
or very humid
• when the player
cold environment
}
has been
room.
is moved from a
to a warm one.
If moisture forms inside this player,
it may not operate properly.
In this
case,turn
on the power and wait
about one hour for the moisture to
be evaporated.
If there
TV while
received
(BACK
OF PLAYER)
Depending
is noise
interference
a broadcast
is being
with DVD player on
on the reception
of the TV, interference
CAUTION
on the
condition
may appear
on
the TV screen while you are watching
a TV broadcast
and the player is on.
-LASER RADIATION WHEN
OPEN. DO NOT STARE
INTO BEAM.
This is not a malfunction
of the player
or the TV. To watch a TV broadcast,
set the player
7/36
to the standby
mode.
Before Using
Checking
Accessories
Please confirm that the following
were received with the player.
1 .Audio cord
2.Video
cord
3.Remote
control
unit
4.Operating instructions
(this brochure)
Preparing
Insert
2 x 1.5 volt
into battery
infrared
transmitter
Position
replace
3 volts for
power
compartment.
than these
is
the batteries.
and negative
of the batteries properly
to the indication
inside
malfunction
of the unit.
Note:
as the
requires
the positive
polarities
according
size batteries
If the transmission
insufficient,
battery
"AAA"
compartment
operation.
other
the Remote Control
Using
specified
or inoperative
the
batteries
may cause
operation
To maintain accuracy
and
longer life-time of the transmitter,
do not simultaneously
or more buttons.
press two
8/36
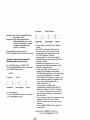
Names and functions
Front panel
1
4
2
5
15
6 7 8 9
3
10
16
111213
t4
1 .POWER switch
Press to switch the player on/off
2.STAND-BY indicator
10.OPENICLOSE
Press to open/close the disc tray
11.SETUP
Green means working status while red
means stand-by
3.Display window
Displays the disc information and play
status
4.PHONES
Press the button to display setup
menu
12.MENU
DVD:Select the root menu.
VCD:Select PBC function
13.REPEAT
To connect to earphone
5.VOLUME
To open/close REPEAT menu
14.ARROW AND ENTER BUTTON
Use to adjust the sound
6.BACK
Move around the options on the
screen for selection.
15.DISC TRAY
Press BACK (_)
track/chapter
7.NEXT
Press NEXT(_
8.STOP
to previous
When loading a disc,place disc
in the disc tray with the label side
facing up.
16.REMOTE SENSOR
) to next track/chapter
Press to stop playback and return to logo
screen
9.PLAY/PAUSE
To play,pause play and resume play
9136
To receive
control
the signal from remote
Front Panel Display .... LCD Backlight
The following
Display
is one display example
1
3
4
4.Time indicator
03:16
Indicate the elapsed time of the
current chapter/track in sequence
of mm:ss
1.Media type :
"DVD" for DVD disc
"VCD" for VCD 1.1/2.0
"CD" for audio CD
"MP3" for MP3 disc
2.TITLE/CHAPTER/TRACK
T1C8
for DVD,means
Track
indicator
title 1 chapter 8
03
is for Video
disc.
CD/Audio
3. Operational
status
Indicate the current
status such as
CD and MP3
indicator
operational
play,stop,open,loading
""" : stop status
etc.
"_'" : play status
"OPEN":Tray
is open
"LOADING":Disc
is loading
10/36
Rear Panel
9
3
°
_
J ,:_'_
_,_,Ik_:,:
7
1. Antenna
Connect
o
I 4qL
CAUTIOM
/I=
I
_
654
in jack
to the external
_
_'_:'_--
2
6.Coaxial
antenna
2. RF out jack
To connect the RF signal to the
antenna terminal of a TV unit.
3. Channel select switch
To select between 3 or 4 channels
for a better video and audio quality.
4. Optical output jack
Use to deliver the digital audio
signal recorded on discs to an AV
amplifier or receiver.
5. Audio OUT jacks
Use to connect two-channel audio
audio ( analog ) to the audio stereo
input on a TV or stereo amplifier.
if the unit is connected to a receiver
that has both digital and analog
input jacks for DVD player
connection,
it may be beneficial
make both connections.
to
output jack
Use to connect the digital audio
signal recorded on discs to an AV
amplifier or receiver.
7.S-VIDEO out jack
If your TV or monitor has an S-video
input, better picture reproduction is
possible by connecting the player to
your TV or monitor via the S-Video
jack.
8. Y,U(Ob),V(Cr)
If your TV or monitor has an
Y,U(Cb), V(Cr) inputs,higher quality
picture reproduction
is possible by
connecting the player to your TV or
monitor via the Y,U,V inputs.
9.VIDEO out jack
Connect to the Video input on a TV
or monitor or AV amplifier or
receiver with video input capability.
Note: [] Means double-layer
11/36
insulation
Remote
Control
oo0o
0 0 '0 <B.
_
Ii
rt EpL_y
0 0 0 "_0
6 -", d
Button
Descdption
POWER
Switch between
stand-by and working
status
CLEAR
Clear a numeric
DISPLAY
.
Display
entry/bookmark
time and disc play status
AUDIO
Select audio languages
ZOOM
Zoom the picture in different
for your preference
modes
(lx,2x,3x,off)
SUBTITLE
Select the subtitle languages
for your
preference
0 0 D O
'
{
j
(
) _
i
DIGIT,0-9
Enter the track or chapter/title
REPEAT
Repeat
or time
the whole disc or tigetchapter
or
track of the disc based on your choice
REPEAT
QDE_
©, ,:_ ,Q
0,0
'0 0:0:
,
x
i
A-B
Select specific
segment
for repeat
MODE
Select play
ANGLE
Multi-angle
TITLE
multi-title
SET UP
Select
ENTER
Input / switch
RETURN
Return to root menu state
PROGRAM
Program
BACK/NEXT
Skip to back/next
STOP
Stop playing
PLAY/PAUSE
To play,pause
SLOW
Slow forward/backward
FAST
Fast forward/backward
BOOKMARK
Bookmark
L/R
Select
left/right
3D
Select
3D stereo enhancement
VOLUME
SEARCH
+/-
or repeat mode
DVD only :select angle of scen_
DVD only:Show
tracks or chapters/tiges
and resume play
setting
play
play
(up to 3 locations)
audio channel
Ihe sound level
specific time or tracldtitle/chapter
play
ROWA
MENU
Select
root menu or PBC function
MUTE
Select
mute on/off
i;!
i,
i
12/36
to play
track / chapter
Increase/decrease
Search
the title of disc
SETUP menu
te
Basic
connection
• Ensure that this player and any other equipments to be connected are all set to standby
mode or off position and disconnect the AC cord before commencing connection.
• Do not block ventilation holes of any of the equipments and arrange them so that air can
circulate freely.
• Read through the instructions before connecting other equipments.
• Ensure that you observe the color coding when connecting audio and video cables,
• Refer to the following tables for details on what equipments can be connected to this
player,and what cables are required.
Video equipment you own
Standard
(Direct
Conven{ional
Wide -screen
(16:9) etc
view
TV)
TV set t4:3)
TV set
CRT
Cinema-size
by projeelion
on to a large
Projector
LCD Projector
images
can be en oyed
from three ligh_ sources
screen
A
Cinema -size
image can be enjo)yed
b_ projecting
from an LCD panel 1o
a/arg_
screen
Projection
TV
Powerful
images
impossible
with
CRTV can be enjoyed by projectin_
on 10 a large film
/A, x
Video
÷®
S Vide°
inp#t
c;a_
/
R
0
®
t/"
C_
$
0
I
t
OUTDOORS
A_
NNA
$00
AC PLUG
o
=.-_-.F-.=._.--2
=--
-t
13/36
O
P@
• Optional
audio connection
Audio equipment (Analog connection)
Audio equipment
Back of the player
Connector types
cable
(optional)
- Audio
Optical
cable
digital
--
audio_
(optional)
Coaxial audio
cable (optional)
I
Olg t_l @ud Q npu
Audio
equipment
lDigital
;/
connection)
eonnec
ors
Connectortypes
D
Dolby
Digital
14/36
decoder
and AV amplifier
(if applicable)
Optional
audio connections
Considering the audio output from the
player's optical/coaxial digital audio
output connector.The type of audio
output from the connector can be
selected by "Digital output choice "in
"PLAYER CONFIGURATION
VIA
SETUP MENU"
Enjoying digital audio output from the
digital audio output connector
Note when connecting the optical
digital audio cable (optional)
• Remove the dust protection cap
from the optical digital audio output
and connect the cable firmly so that
the configurations of both the cable
and the connector match.
The following list out the format of
Digital output for different types of
disc.
• Keep the dust protection cap to
protect against dust,always reattach
the cap when not using the connector.
• Sound from the microphone will
not be output from the digital audio
output connector.
Disc
Sound recording
Optical/coaxial digital
audio output connector
Dolby Digital
5.1 channel
Dolby Digital bitstream
(1-5.1ch) or PCM(2ch)
(48KHZ/16 bit)
Linear PCM
(48 !96KHZ
16/20/24bit)
Linear PCM(2ch)
(48KHZ sampling/16bit
only) or no output
MPEG 1
PCM
DVD
Video
CD
CD
(44.1 KHZ sampling)
Linear PCM
Linear PCM
(44.1 KHz sampling)
15/36
• Press PLAY/PAUSE button again to
resume normal playback.
BASIC PLAYBACK
The basic playback function are the
minimum functions used to play a
disc. All are accessed directly
through the front panel or the
remote control.
Powering on the player, inserting
a disc and playing it
• Insert the AC plug into the mains
AC outlet.
• Press POWER button on the front
panel.
* If there's a disc in the tray,the unit
will begin to read the disc.
• Press OPEN/CLOSE button on
the front panel or remote control,
the DISC TRAY will pop out.
• Insert a disc.
• Press OPEN/CLOSE button on the
front panel or remote control to
close the disc tray. The unit will
begin to play the disc.For the first
several seconds, the LCD will
display "LOADING" which is
flickering until disc has been
recognized. And MP3 disc will
spend more time for being
recognized
*If the unit enter "stand-by"mode,
press one of 5 buttons(OPEN/
CLOSE,BACK,N EXT,STOP,PLAY
/PAUSE) on the front panel to
make the unit be in working status.
Stopping playback (showing of the
DVD Logo screen ) and resuming
playback after stopping.
• Press STOP button to stop playback
and this will show the logo screen.
The unit will memorizes the location
where playback is stopped.
• Press PLAY/PAUSE button to
resume playback from the location
where playback is stopped
Fast forward/backward
(remote control only)
•Press FAST FORWARD/BACKWARD
button to fast forward / backward
through the disc.
• Each time the FAST FORWARD/
BACKWARD button is pressed,the
fast motion speed
changes in
sequence of 2X,4X,8X,20X of the
normal speed correspondingly.
• Press PLAY/PAUSE button to
resume normal playback.
Slow forward/backward
(remote control only)
• Press
to play a disc in slow motion.
• Each time the SLOW
FORWARD/
BACKWARD
slow
Pausing
playback
• Press PLAY / PAUSE
to pause
muted
playback.
during
PAUSE
button
motion
button
speed
is pressed,
changes
the
in
sequence
of 1/2, 1/4,1/6,1/7
of the
normal speed
correspondingly.
• Press PLAY/PAUSE
button to
once
The sound
SLOW FORWARD/BACKWARD
is
resume
mode.
16/36
normal
playback.
Skipping to the bacldnext
chapterltrack
• Press BACK/NEXT button to skip
to the beginning of the back/next
chapter (DVD) or track
(VCD,audio CD,MP3).
Note: Playback resumes in normal
speed after skipping to the
beginning of a track or chapter.
Using SEARCH to jump to a
specific time or Track/Title/Chapter
(example)
To play a spot at 1:23:45
Press 1,2,3,4,5 button, ENTER;
(OSD)
TIME:
1 : 23 : 45
• To jump to the beginning of a specific
track,select TRACK and enter the
TRACK number ,press ENTER button
• To jump to the beginning of a specific
Title/Chapter, select Title/Chapter or
both and enter the Title / Chapter
number as followings:
1.For VCD and audio CD
(OSD)
Disc Search
Time
00:00:00
Track
(example)
To play TITLE 2 CHAPTER 4
Press "2" button,ENTER;Press
ARROW button '11,,"to move
the cursor to the next "---",then
press "4"button,ENTER
2.For DVD
(OSD)
(OSD)
Time
Title/Chapter
00:00:00
/
• Press ARROW button to select the
type of search, either a time search
or Title/Chapter/Track
search.
• To jump to a spot in time on the
disc, select Time and enter the time
in sequence of hh:mm:ss ( hours,
minutes,seconds)
as followings:
17/36
TITLE/CHAPTER
2/4
ADVANCED
PLAYBACK
Enable TITLE function
(for multi-title disc only)
(remote control only)
Use REPEAT A-B to repeat a
specific segment
( DVD,VIDEO CD and audio CD)
(remote control only)
Press REPEAT A-B once at the
beginning of the segment ( point A)
you want to play repeatedly.The OSD
will display:
For DVD only
• Press TITLE to show the title of disc
• Press ARROW buttons to highlight
selected Title Menu entry.
• Press ENTER to select highlighted
entry. The unit will begin to play
the selected unit
(OSD)
H_ A-
Press A-B again at the end of the
segment(point B). The OSD will
display:
Enable MENU function
For DVD
(OSD)
• Press MENU button to display the
root menu
Note:The player automatically return
to point A and starts repeat
playback of the selected
segment (A-B).
• Press ARROW buttons to highlight
selected menu entry.
• Press ENTER to select highlighted
entry.The unit will begin to play after
selection.
H_ B-
Press A-B a third time to cancel
For VCD
• Select PBC function
REPEAT
A-B playback
playback
to continue
The OSD will display:
(OSD)
18/36
_H OFF
and allow
in normal
fashion.
Use BOOKMARK Function
(remote control only)
Three Repeat modes for VCD,Audio
CD,MP3 disc:OFF,ALL,SINGLE
• Press BOOKMARK to enable the
BOOKMARK Menu. The OSD will
OFF=REPEAT
display the following:
(OSD)
BOOKMARK
BOOKMARK
BOOKMARK
1
2
3
:
:
:
:
:
:
(OSD)
(OSD)
• Press MODE
R]/[-FRACK]
button
to select
MODE
menu.
button
(OSD
to display
the mode
in circular
Three Repeat modes for DVD:
OFF,Chapter,Title
ex.)
Play mode
Mode
current repeat mode.
• Successive
presses of "ENTER"
button change
fashion.
RE PEAT:[CHAPTE
PLAY MODE SELECTION
(remote control only)
PLAY
REPEAT
REPEAT:[TITLE]//ALL]
CHAPTER/SINGLE
=Repeat current
chapter/track. When playback
reaches the end of the current
chapter/track,playback
will resume
from the beginning of the
chapter/track.
• To clear a bookmark entry, select a
bookmark with a time value and
press CLEAR button.
• Press BOOKMARK again to close
the BOOKMARK menu.
• Press
REPEAT:[OFF]
TITLE/ALL=Repeat
entire title / all
disc. When playback reaches the
end of the title or disc,playback will
resume at the beginning of the
title/disc.
• Press the UP/DOWN buttons to
select which bookmark to set.
• Once the desired point during
playback is reached, press ENTER
to set the selected bookmark to the
current time.
• To jump to a particular bookmark,
select a bookmark with a time value
and press ENTER, playback will
jump to that spot on the disc within
5 seconds for DVDs and VIDEO
CDs and audio CDs
REPEAT
mode disabled.
OK
off
Cancel
Press ENTER button briefly and
repeatedly to cycle all the modes:
shuffle/program/off.
Once get your
desired mode, move the cursor to
"OK" then press ENTER.
19136
Program
Shuffle=
play all the chapters/tracks
in random order.
Program=Play
the programmed
title/chapter/tracks
in your
desired order(see "enable
programmed
playback
mode" for detail)
Press MODE
PLAY/PAUSE
button again or
button to exit the menu
Enable programmed
playback
Mode(remote
control only)
For VIDEO CD and AUDIO CD
• Press PROGRAM button to enable
the PROGRAM menu.
1
2
3
1
2
3
._
CLEAR ALL
7
8
9
__
Play Program
For DVD MODE
• Press PROGRAM
the PROGRAM
• Press the arrow buttons
to select
entry.
• For VCD and Audio CD,enter a
number from the remote control
referencing the designated
For DVD enter a number
track.
respectively for title and chapter,
referencing the designated title and
chapter to play.
• Repeat this process until your
desired tracks/tRies/chapters
have
all been programmed
• Then move the arrow button to
select Play Program and press
ENTER.Meanwhile
the unit will begin
to play title/chapter#1
or track#1.
Once that title/chapter
or track has
been finished playing, playback will
jump to the title/chapter #2 or
track #2 and so on.
• If you want to change the
programming,press
the ARROW
button to select the Title / Chapter
or Track to change,then enter your
desired ones again by overwriting
the old ones.
button to enable
menu.
10
11
12
Cancel
10
11
12 ......
Cancel
7
8
9
Play Program
Track
4
5___
6
4
5
6
CLEAR ALL
< OSD>
Program
Title/Chapter
• If you want to clear the programming,
select CLEAR ALL and Press
ENTER button,all the input will be
cleared.
• Press PROGRAM
close OSD.
Note:Press
STOP first before
pressing
20/36
button again to
Program
button
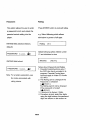
3D sound effect(remote
control only)
(OSD ex.1) _
• 3D audio post-process can produce a
virtual multi-channel audio effect using
only two speakers where applicable.
• Press 3D button and OSD will show the
current 3D status.
(OSD) 3D on
1 Eng (1 st press)
• Successive presses of SUBTITLE
button will choose other subtitles in
circular fashion.
(OSD)
_}
2 Spa
(2 ndpress)
(OSD)
_
3 Fre
(3 _d press)
(OSD)
_
(1 st press)
• Successive presses of 3D will switch
3D sound effect between 3D on and
3D off.
off
Note:
(OSD) 3D off
(2 nd press)
(OSD) 3D on
(3 rd press)
When you turn on the player
or replace a disc.The player
returns to the default setting.
Note: for DVD only
Using
Note: You may hear a difference in
volume between normal and 3D
enhanced sound.
Note: 3D enhancement cannot be
activated if the AUDIO OUT
(remote
3 kinds of subtitle
off mode.
and
only)
(OSD ex.) 00:00:06
will show
unit
choice
control
• Press DISPLAY once and
display the amount of time
and the remaining time to
on the disc. For example,
will display:
Selecting subtitles (DVD only)
(remote control only)
support
subtitle
to view time
play status
setting in the Setup Menu is
BITSTREAM.
Note: 3D enhancement may not
function depending on the
recording system(Dolby digital,
MPEG,PCM).
• Press SUBTITLE
button,OSD
the current subtitle choice.This
DISPLAY
and
21/36
OSD will
played
be played
the OSD
02:14:18
• Press Display again for OSD to
additionally display the current
track and the total number of the
tracks (for audio CD and VCD);
the current title ,chapter and angle,
audio ,subtitle mode and the total
number of titles,chapters,angle
(for DVD only).
(OSD ex.)
DVD
00:00:06
Title 1/5 Chapter 2/12
Audio
1_
Subtitle
1 Eng
_
i_
iillil
Using Audio to change the audio
language (remote control only)
(for multi-language
DVD only)
02:14:18
Angle 1/1
5.1 Ch
• Press AUDIO to display the
current audio language option
the unit can support 3 kinds of
audio language
off
• Press DISPLAY a third time to
close OSD.
(OSD)
Note: For some discs,they will display
the spectrum
plot for the third
[_
1 Eng
lilli]
5.1ch
• Successive presses of "Audio"
will select other options in circular
fashion
press.
Viewing
from a desired angle
(For DVD with multi-angle
only)
(OSD)[_
2 Spa
iill_
5.1ch
(OSD)I_
3 Fre
lillil
5.1ch
Using L/R to change the sound
Channel
(remote control only)
• You can select a camera angle when
(for VCD and audio CD only)
(remote control only)
viewing DVDs
• Press ANGLE will display the current
L/R
currently
angles
(OSD)
• Press
i_
1/2
selected
button
presses
will choose
of
"ANGLE"
other
angle
settings
(OSD)
_(_
to display
sound
(OSD)
L/R MODE
• Successive
button
2/2
22/36
Mix
the
channel.
• Successive presses of" L/R" button
will chose other three settings.
(OSD)
L/R MODE
(remote control only)
(OSD) I_
Left
• Press MUTE again to recover the
sound.
(OSD)
L/R MODE
Right
L/R to close
OSD
Using ZOOM to change the size of
Picture(remote
control only)
You can use ZOOM to change
Picture size in four modes:Ix,
the
2x,3x,off
If your units is in normal
Press ZOOM,the
Zoomed
lx
(OSD)
function
• Press MUTE button to enable MUTE
function.
Stereo
(OSD)
L/R MODE
Press
MUTE
picture
picture
size,
will be
? 1(1 st press)
Successive presses will change the
Picture to the other size:
(OSD) £
2
(2 nd
press)
(OSD)/O
3
(3 rd
press)
23/36
About MP3 disc
(F) CD-ROM
driver
Create your MP3 disc:
• use .mp3 as the extension
save audio
_
to
files onto CD-R(W)
or CD
'
ROM,e.g.Michael08.mp3.Do
not use
any other extensions
e.g..doc
,.txt,.
pdf,etc.,when
MP3.
making
audio
Song0] .mp3
Song02.mp3
_
Girl04.mp3
_
i _
•
and MP3 tracks
CD-ROM,as
to playback
from mixed
within
03
i k________jazz08
CD audio
a CD-R(W)
Girl05.mp3
Gid06.mp3
jazz07
rap3
may result in serious malfunction
of
the set and harmful noise interference.
to combine
Song03.mp3
files into
• Do not use the .mp3 extension
for
text or other non-audio
data files.This
• Do not attempt
02
rap3
o4
or
the set will only be able
your CD audio tracks
CD formats.
Clsssic09.mp3
Classicl0.mp3
Classic11 .mp3
--
The following chart is a example of a
PC display for a MP3 disc with albums.
an album is shown as an Folder in
Windows Explorer.
Classic12.mp3
Abba01.wav
skipped
._
Abba02.wav
Note:
.......
I_
Arrow
sequence
track
pathway
show
of MP3 album
the
and
playback.
01-04 means this disc has a total
number of 4 MP3 albums
SongOl-Class12
means the disc has
a total number of 12 tracks.
24/36
Skipped Denotes an album which
contains non-audio files only.e.g..jpg,
.wav,.doc.These
cannot be detected
or played on the MP3-CD player and
are hence "skipped".Where
an album
contains mixed format files,the
non-MP3 files will be skipped.
Select a track
During MP3 playback,OSD
the following information:
(OSD
ex.)
MP3
1 YNJ
01aa
02bb
8
9
08hh
09ii
3
4
5
6
03cc
04dd
05ee
06ff
10
11
12
13
10jj
11kk
1211
13ram
7
07gg
14 14nn
will display
00:00:32
2.Press _
or _
button briefly and
repeatedly on the front panel or remote
control to reach your desired track.
Press ENTER button to play it.
r--A
MP3 1 YNJ
TRACK 1/88 00:01:49
1
2
01aa
02bb
8
9
3
4
5
6
03cc
04dd
05ee
06ff
10 l_j
11 11kk
121211
13 13mm
7
07gg
14 14nn
IL
TRACK48/88
1
2
(OSD ex.)
C
48
3.Look through all the albums in your disc,
then choose your preferred track.
08hh
09ii
• Using arrow button to highlight
album number and name.
• Press
all the
album
• Press
B
the
ENTER button repeatedly to cycle
albums and change the current
choice.
_or
I_ button on the front
panel or remote control to highlight
your desired track in the album
• Press ENTER button to play it.
A: Album number and name
B:Track name
C:Track number
There are 3 choices for you to
select a track:
1 .Enter one or two digit directly from the
remote control indicating the track
number.Then press ENTER button to
play it.
e.g. Press digital buttons"4" and "8"
then press Enter.The unit will play
track 48.The time icon will indicate the
elapsed time of current track.
25/36
PLAYER CONFIGURATION
SETUP MENU
VIA
How to choose setting options
The Setup Menu lets the user set a
category from Language, Video,
Audio,Rating.
• Press SETUP
SETUP Menu
button will toggle the
between On and Off.
OSD Menu
English
Subtitle
English
French
Audio
English
Spanish
DVD Menu
English
OSD
on
Note: Setup key cannot be activated
(OSD)
during
ing
press
disc playing.
STOP
pressing
Note:
• Use the arrow
select
menu
buttons
• Using
appear
(_II liD') to
the arrow
below
buttons
to select
the setting
change.
As the setting
(A/V)
options,then
it.
ENTER
button
to choose
settings
the
all the
you may meet
Language
Video
Audio
Rating
OSD Menu
Subtitle
Audio
DVD Menu
OSD
Default
TV Shape
TV System
Dolby D Password
DTS
rating
MP3
Others
you want to
to select
press
in audio and
setting options.
Note: The below will display
the menu
is toggled
with ENTER button, the options
available for each setting appear
the right.
• Use (A/r)
Press
continuously
the menu you want. As each
is selected with ENTER button,
the settings
heading.
SETUP.
For the settings
rating,
In this case,
first before
to
setting
ENTER
to toggle
26136
OSD/DVD
menu Language
Setting:
The user can select English, Spanish,
French for the OSD/DVD language.
OSD/DVD
menu in English,select
LANGUAGE:
OSD/DVD
[ENGLISH]
SUBTITLE:
Audio
J
choices:
The user can select English, Spanish,
French for the audio language.
I
Sound preference
is English
menu in French,select
[AUDIO:
[ LANGUAGE:
[FRENCH]
[ENGLISH]
I
1
Note: Some DVDs may not include
the pre-selected language. In
this case, the player
automatically displays menus
consistent with the disc's initial
language setting.
Subtitle
[OFF]
Sound preference
is French
l AUDIO:
[FRENCH]
1
Note: Some DVDs may be played in
a different language than you
selected.
Choices:
OSD:
The user can select
French
English,
for the subtitle
Spanish,
There's only one setting option for
OSD: OSD ON.
language.
Subtitle preference is primary
language on disc(factory default)
OSD ON enables the "POP-UP"
displays:
I
SUBTITLE:
[AUTO]
I
I OSD:
Subtitle preference
[SUBTITLE:
[ENGLISH]
Subtitle preference
l SUBTITLE:
is English
J
is Spanish:
[SPANISH]
]
Close the SUBTITLE:
27/36
[ ON ]
J
Default:
TV system choices:
Default ON can enter factory default
setting automatically.
For TV system setting,here we
strongly recommend AUTO
and NTSC options for the USA
user.
I
Default:
[ ON ]
[
Default Off will disable this function.
I Default:
[OFF]
Audio output choices:
I
TV Type Choices:
These option inform the user to
select the settings based on one's
equipment
• Analog output choices:
The user who owns 2 RCA appliances
with inputs can select:
This option allows the user to select
the aspect ratio of their TV
TV type is normally a 4:3 size(factory
default).This should be selected when
a 4:3 TV is connected.Displays
for a
16:9 size can also be selected.
Analog out:
• Digital
I TVTYPE:
There
[4:3LB
will cause
difference
some
choosing
i_]
visual
between
4:3 LB
When
[4:3PS
[]]
which
is connected
has a built-in
decoder,
to
select
Dolby
Digital
the following
option.
Dolby
[16:9
the player
an AV component
(with an optical/
coaxial digital input connector)
TV type is 16:9 size and shows a
widescreen anamorphic; please
select the following options.
TVTYPE:
choices:
The player is capable of outputting
the Dolby Digital audio signal,also
can convert the Dolby Digital signal
to a digital Linear PCM signal.
effects
you best
I
output
• Dolby Digital Out
I
and 4:3 PS type. You can try both
options and select the ones that fit
TVTYPE:
[2 channel]
_i_]
Digital
When
Out:
the player
AV component
coaxial
does
digital
28/36
is connected
to an
with an optical
input connector
not contain
decoder,be
[Raw]
the Dolby
sure to select
/
which
Digital
output without decoding
selected,the
I
Dolby Digital Out:
output
is
is a digital
noise that could potentially
[PCM]
cause damage to your
speakers.
Select the following option while turn
Off Dolby Digital out.
Dolby Digital out:
• DTS
[Off]
I
I
output
This player is capable of outputting
DTS digital audio ( bitstream )
signal for DVDs recorded in DTS
• MP3 Digit out
This player is capable of outputting
PCM digital audio signal for discs
recorded in MP3 format. Usually
select the following option when the
player is connected to an AV
component with an optical/coaxial
digital input connector
format. When the player is
connected
to an AV component
an optical/coaxial
connector
with
digital input
that has a built-in DTS
MP3 Digital
out:
[PCM]
Select the following
option while turn
Off MP3 digital out.
decoder,select
DTS
Digital
the following
out:
option:
MP3 Digital
[Raw]
out:
[Off]
Note: For some other digital out
Select
the following
the DTS Digital
while
Turn
off
formats, select RAW when
out
connected
DTS Digital
out:
to a receiver that
accepts Dolby DigitaI,MPEG
[Off]
or
DTS encoded audio signal.
If the receiver with an
Note:If you have made digital audio
connections
equipped
to component
optical/coaxial
not
to decode the DTS
digital bitstream,
connector
be sure to
decoding
select "off ". If a DTS signal
digital input
do not have any
function,
select PCM
If you want to turn off the digital
out, select
29/36
Off.
Password:
Rating:
This option allows the user to enter
Press ENTER button to cycle all rating,
a password to lock and unlock the
parental control setting into the
e.g. Select following
player.
admission
RATING field unlocked (factory
which allows
to person of all ages.
Rating:
[G]
default):
Select
PASSWORD:
[ ****
I PASSWORD:
**
the notes associated
children
under
to view
I RATING:
[NC-17]
Notes about Password and Rating
1. Parental Control functions only if
the DVD disc has it encoded in its
il ]
Note: For a better explanation,
rating choice.
when
17 are forbidden
I_]
RATING field locked:
[ **
following
program. Parental Control does
not work apply to Video CD/Audio
CD/MP3.
see
with
2. The Rating can be changed if the
Password is 'unlocked'
( _ shown ).
The Rating cannot
if the password
,
( I_ shown).
A password
4. Procedure
not be changed
is 'locked'
is always
4 digits.
to lock: enter
four digits
using the digit buttons; the password
digits are shown on the screen as
30/36
'****' ; The four password digits
are saved in memory after the
ENTER button is pressed; the
' locked ' icon [ _11] appears.
5. Procedure
Additional information
Disc handling and maintenance
handling precautions
• Hold the disc by the edges so the
surface will not be soiled with
to unlock: enter four
digits using the digit buttons; the
password
fingerprints. (_1)
Fingerprints,dirt and scratches can
cause skipping and distortion.
• Do not write on the label side with
digits are shown on the
screen as '****' ; the four password
digits are erased from the memory
a ball-point pen or other writing
utensils.
• Do not use cleaning sprays,benzine,
thinner,static electricity prevention
liquids or any other solvent.
• Be careful not to drop or bend the
disc.
• Do not install more than 1disc on
after the ENTER button is pressed;
the'
unlock'
icon [ I_ ] appears.
6. Do not forget your password.
As
there is no way to override the
password.
the disc tray.
• Do not try to close the disc tray
when the disc is not installed
properly.( [] )
• Be sure to store the disc in its case
when not in use.
If the surface is soiledrd
W_pe gently with a soft,damp (water
only ) cloth.
When wiping discs, always move the
cloth from the center hole toward the
outer edge.
( Wipe the disc using a circular
motion circular scratches are likely
to occur,which will cause noise and
possible disc failure.)
31/36
If the disc is brought from a cold
to a warm environment,moisture
may form on the disc
Wipe this moisture off with a soft,
lint-free cloth before using the disc.
Improper disc storage
You can damage discs if you store
them in the following places:
• Areas exposed to direct sunlight
• Humid or dusty areas
• Areas directly exposed to a heat
outlet or heating appliance
Maintenance
• Be sure to set the unit to the
stand-by mode and disconnect the
AC cord before maintaining the
player.
• Wipe this player with a dry, soft
cloth. If the surfaces are extremely
dirty,wipe clean with a cloth which
has been dipped in a weak soapand-water solution and wrung out
thoroughly, and then wipe again
with a dry cloth.
• Never use alcohol,benzine,thinner
cleaning fluid or other chemicals,
and do not use compressed air to
remove dust.
[]
: ,.-".y
0
32/36
Definition
of terms
DVD
Angle
Recorded onto some DVD disc are
scenes which have been
simultaneously shot from a number
of different angles (the same scene is
shot from the front,the right side,etc).
With such discs, the ANGLE button
can be used to view the scene from
different angles.
Chapter
number
These number are recorded on DVD
DISC.A title is subdivided into many
sections,each of which is numbered,
and specific parts of video
presentation can be searched quickly
using these numbers.
This refers to a high-density optical
disc on which high-quality pictures
and sound have been recorded by
mean of digital signals.Incorporating
a new video compression technology
(MPEG II) and high-density recording
technology, DVD enable a
aesthetically pleasing full-motion
movies can be recorded, a DVD disc
has a greater capacity than a single
1.2 mm thick disc.Since the two thin
discs are adhered to each other,it may
be possible to achieve double-sided
play for even longer duration play.
Subtitle
This is the appearance
of the dialogue
at the bottom of the screen which are
prerecorded
Digital
audio
output
discs.
Time number
The digital
audio
output
) converts
into optical
signals
to the amplifier.
connecter
electrical
signals
and transfers
Consequently,it
them
has a
number of features including immunity
from electrical
interference
from
external
DVD
connector
(optical)
( optical
on some
sources
and its ability
This indicates the play time which
has elapsed from the start of a disc
/title/track.It can be used to find a
specific scene quickly. ( It may not
work with some discs.)
to
prevent the generation
of noise and
Its effect on the external environment.
33/36
Title
number
These numbers are recorded on DVD
Discs.When a disc contains two or
more movies ,these movies are
numbered as title 1,title 2,etc.
Track
number
These numbers
are assigned
to the
track which are recorded on Video
CD/MP3.They
to be located
Video
enable
specific
tracks
quickly.
CD
This contains recording of pictures
and sound whose quality is similar to
that of video tape.
34136
Others:
Specifications
Pickup:
Power
requirement:AC ~100-240V,50/60HZ
Power
Consumption:20W
Specification are subject to change
without notice.Weight and dimensions
are approximate.
Signal system:NTSC/PAL
Weight:2.85 kg
Dimensions:360 (W) X 266 (D) X 62 (H) mm
(excluding protrusions)
Operating temperatures:+5 to +35°c
Operating humidity range:5 to 90%
(no condensation)
Disc played:
(1) DVD-VIDEO disc
12cm single-sided,single-layer
12cm single-sided,dual-layer
12cm double-sided,single-layer
12cm double-sided,dual-layer
8cm single-sided,single-layer
8cm single-sided,dual-layer
8cm double-sided,single-layer
8cm double-sided,dual-layer
(2) Compact disc (Video CD,SVCD,CVD,DVCD,VCD-R,CD-RW,MP3)
12cm disc
8cm disc
Audio section characteristics:
(1) OUTPUT LEVEL(10k _ ):2.0+0.2/-1V
(2) CHANNEL UNBALANCE:0.5dB
Max.
(3) AUDIO SNR:95dB Min.
(4) CROSS TALK:80dB Min.
(5) FREQUENCY RESPONSE:20Hz-20KHz
± 3dB
(6) FREQUENCY ERROR: _+0.02%
(7) LEVEL NON-LINEARITY:0dB~60dB
_+0.5dB
Video section characteristics :
(1) OUTPUT LEVEL:1.0 ±0.2V
(2) HORIZONTAL RESOLUTION:
Wave length:665mm
Laser power:Class 1
450LINE Min.
35136
Region Management
Information
Region Management Information:This player is designed and manufactured to respond
to the Region management information that is recorded on a DVD disc. If the Region
number described on the DVD disc does not correspond to the region number of this
player,this player cannot play this disc.
EXAMPLE:
The Region number for the player is 1.
This product incorporates copyright protection technology that is protected by
method claims of certain U.S. patents and other intellectual property rights owned
by Macrovision Corporation and other rights owners.Use of this copyright
protection technology must be authorized by Macrovision Corporation,and is
intended for home and other limited viewing uses only unless otherwise authorized
by Macrovision Corporation. Reverse engineering or disassembly is prohibited.
Manufactured under license from Dolby Laboratories.
"Dolby" and the double-D symbols are trademarks of Dolby Laboratories.
Free customer
service number is: 1-866-ROWA-USA
36/36