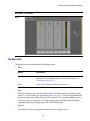
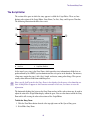
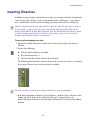
1
®
Interplay Central
User’s Guide
Legal Notices
Product specifications are subject to change without notice and do not represent a commitment on the part of Avid Technology, Inc.
This product is subject to the terms and conditions of a software license agreement provided with the software. The product may
only be used in accordance with the license agreement.
Avid products or portions thereof are protected by one or more of the following United States Patents: 5,309,528; 5,355,450;
5,396,594; 5,440,348; 5,467,288; 5,513,375; 5,528,310; 5,557,423; 5,577,190; 5,584,006; 5,640,601; 5,644,364; 5,654,737;
5,724,605; 5,726,717; 5,745,637; 5,752,029; 5,754,851; 5,799,150; 5,812,216; 5,828,678; 5,842,014; 5,852,435; 5,959,610,
5,986,584; 5,999,406; 6,038,573; 6,057,829, 6,069,668; 6,141,007; 6,211,869; 6,336,093, 6,532,043; 6,546,190;
6,596,031;6,728,682, 6,747,705; 6,763,523; 6,766,357; 6,847,373; 7,081,900; 7,403,561; 7,433,519; 7,441,193, 7,671,871;
7,684,096; 7,836,389 and 7,916,363; 7,930,624; 8,023,568; 8,082,226; D352,278; D372,478; D373,778; D392,267; D392,268;
D392,269; D395,291; D396,853; D398,912. Other patents are pending.
Avid products or portions thereof are protected by one or more of the following European Patents: 0506870; 0635188; 0674414;
0752174; 0811290; 0811292; 0811293; 1050048; 1111910; 1629675, and 0972256. Other patents are pending.
Avid products or portions thereof are protected by one or more of the following United States Patents: 5,309,528; 5,355,450;
5,396,594; 5,440,348; 5,467,288; 5,513,375; 5,528,310; 5,557,423; 5,577,190; 5,584,006; 5,640,601; 5,644,364; 5,654,737;
5,724,605; 5,726,717; 5,745,637; 5,752,029; 5,754,851; 5,799,150; 5,812,216; 5,828,678; 5,842,014; 5,852,435; 5,986,584;
5,999,406; 6,038,573; 6,141,007; 6,211,869; 6,532,043; 6,546,190; 6,596,031; 6,747,705; 6,763,523; 6,766,357; 6,847,373;
7,081,900; 7,403,561; 7,433,519; 7,555,557; 7,562,099; D352,278; D372,478; D373,778; D392,267; D392,268; D392,269;
D395,291; D396,853; D398,912. Other patents are pending.
Avid products or portions thereof are protected by one or more of the following European Patents: 0506870; 0635188; 0674414;
0752174; 1111910; 1629675. Other patents are pending.
This document is protected under copyright law. An authorized licensee of Interplay Central may reproduce this publication for the
licensee’s own use in learning how to use the software. This document may not be reproduced or distributed, in whole or in part, for
commercial purposes, such as selling copies of this document or providing support or educational services to others. This document
is supplied as a guide for Interplay Central. Reasonable care has been taken in preparing the information it contains. However, this
document may contain omissions, technical inaccuracies, or typographical errors. Avid Technology, Inc. does not accept
responsibility of any kind for customers’ losses due to the use of this document. Product specifications are subject to change without
notice.
Copyright © 2012 Avid Technology, Inc. and its licensors. All rights reserved.
The following disclaimer is required by Apple Computer, Inc.:
APPLE COMPUTER, INC. MAKES NO WARRANTIES WHATSOEVER, EITHER EXPRESS OR IMPLIED, REGARDING THIS
PRODUCT, INCLUDING WARRANTIES WITH RESPECT TO ITS MERCHANTABILITY OR ITS FITNESS FOR ANY PARTICULAR
PURPOSE. THE EXCLUSION OF IMPLIED WARRANTIES IS NOT PERMITTED BY SOME STATES. THE ABOVE EXCLUSION
MAY NOT APPLY TO YOU. THIS WARRANTY PROVIDES YOU WITH SPECIFIC LEGAL RIGHTS. THERE MAY BE OTHER
RIGHTS THAT YOU MAY HAVE WHICH VARY FROM STATE TO STATE.
The following disclaimer is required by Sam Leffler and Silicon Graphics, Inc. for the use of their TIFF library:
Copyright © 1988–1997 Sam Leffler
Copyright © 1991–1997 Silicon Graphics, Inc.
Permission to use, copy, modify, distribute, and sell this software [i.e., the TIFF library] and its documentation for any purpose is
hereby granted without fee, provided that (i) the above copyright notices and this permission notice appear in all copies of the
software and related documentation, and (ii) the names of Sam Leffler and Silicon Graphics may not be used in any advertising or
publicity relating to the software without the specific, prior written permission of Sam Leffler and Silicon Graphics.
THE SOFTWARE IS PROVIDED “AS-IS” AND WITHOUT WARRANTY OF ANY KIND, EXPRESS, IMPLIED OR OTHERWISE,
INCLUDING WITHOUT LIMITATION, ANY WARRANTY OF MERCHANTABILITY OR FITNESS FOR A PARTICULAR PURPOSE.
IN NO EVENT SHALL SAM LEFFLER OR SILICON GRAPHICS BE LIABLE FOR ANY SPECIAL, INCIDENTAL, INDIRECT OR
CONSEQUENTIAL DAMAGES OF ANY KIND, OR ANY DAMAGES WHATSOEVER RESULTING FROM LOSS OF USE, DATA OR
PROFITS, WHETHER OR NOT ADVISED OF THE POSSIBILITY OF DAMAGE, AND ON ANY THEORY OF LIABILITY, ARISING
OUT OF OR IN CONNECTION WITH THE USE OR PERFORMANCE OF THIS SOFTWARE.
The following disclaimer is required by the Independent JPEG Group:
This software is based in part on the work of the Independent JPEG Group.
2
This Software may contain components licensed under the following conditions:
Copyright (c) 1989 The Regents of the University of California. All rights reserved.
Redistribution and use in source and binary forms are permitted provided that the above copyright notice and this paragraph are
duplicated in all such forms and that any documentation, advertising materials, and other materials related to such distribution and
use acknowledge that the software was developed by the University of California, Berkeley. The name of the University may not be
used to endorse or promote products derived from this software without specific prior written permission. THIS SOFTWARE IS
PROVIDED ``AS IS'' AND WITHOUT ANY EXPRESS OR IMPLIED WARRANTIES, INCLUDING, WITHOUT LIMITATION, THE
IMPLIED WARRANTIES OF MERCHANTABILITY AND FITNESS FOR A PARTICULAR PURPOSE.
Copyright (C) 1989, 1991 by Jef Poskanzer.
Permission to use, copy, modify, and distribute this software and its documentation for any purpose and without fee is hereby
granted, provided that the above copyright notice appear in all copies and that both that copyright notice and this permission notice
appear in supporting documentation. This software is provided "as is" without express or implied warranty.
Copyright 1995, Trinity College Computing Center. Written by David Chappell.
Permission to use, copy, modify, and distribute this software and its documentation for any purpose and without fee is hereby
granted, provided that the above copyright notice appear in all copies and that both that copyright notice and this permission notice
appear in supporting documentation. This software is provided "as is" without express or implied warranty.
Copyright 1996 Daniel Dardailler.
Permission to use, copy, modify, distribute, and sell this software for any purpose is hereby granted without fee, provided that the
above copyright notice appear in all copies and that both that copyright notice and this permission notice appear in supporting
documentation, and that the name of Daniel Dardailler not be used in advertising or publicity pertaining to distribution of the software
without specific, written prior permission. Daniel Dardailler makes no representations about the suitability of this software for any
purpose. It is provided "as is" without express or implied warranty.
Modifications Copyright 1999 Matt Koss, under the same license as above.
Copyright (c) 1991 by AT&T.
Permission to use, copy, modify, and distribute this software for any purpose without fee is hereby granted, provided that this entire
notice is included in all copies of any software which is or includes a copy or modification of this software and in all copies of the
supporting documentation for such software.
THIS SOFTWARE IS BEING PROVIDED "AS IS", WITHOUT ANY EXPRESS OR IMPLIED WARRANTY. IN PARTICULAR,
NEITHER THE AUTHOR NOR AT&T MAKES ANY REPRESENTATION OR WARRANTY OF ANY KIND CONCERNING THE
MERCHANTABILITY OF THIS SOFTWARE OR ITS FITNESS FOR ANY PARTICULAR PURPOSE.
This product includes software developed by the University of California, Berkeley and its contributors.
The following disclaimer is required by Paradigm Matrix:
Portions of this software licensed from Paradigm Matrix.
The following disclaimer is required by Ray Sauers Associates, Inc.:
“Install-It” is licensed from Ray Sauers Associates, Inc. End-User is prohibited from taking any action to derive a source code
equivalent of “Install-It,” including by reverse assembly or reverse compilation, Ray Sauers Associates, Inc. shall in no event be liable
for any damages resulting from reseller’s failure to perform reseller’s obligation; or any damages arising from use or operation of
reseller’s products or the software; or any other damages, including but not limited to, incidental, direct, indirect, special or
consequential Damages including lost profits, or damages resulting from loss of use or inability to use reseller’s products or the
software for any reason including copyright or patent infringement, or lost data, even if Ray Sauers Associates has been advised,
knew or should have known of the possibility of such damages.
The following disclaimer is required by Videomedia, Inc.:
“Videomedia, Inc. makes no warranties whatsoever, either express or implied, regarding this product, including warranties with
respect to its merchantability or its fitness for any particular purpose.”
“This software contains V-LAN ver. 3.0 Command Protocols which communicate with V-LAN ver. 3.0 products developed by
Videomedia, Inc. and V-LAN ver. 3.0 compatible products developed by third parties under license from Videomedia, Inc. Use of this
software will allow “frame accurate” editing control of applicable videotape recorder decks, videodisc recorders/players and the like.”
The following disclaimer is required by Altura Software, Inc. for the use of its Mac2Win software and Sample Source
Code:
©1993–1998 Altura Software, Inc.
3
The following disclaimer is required by 3Prong.com Inc.:
Certain waveform and vector monitoring capabilities are provided under a license from 3Prong.com Inc.
The following disclaimer is required by Interplay Entertainment Corp.:
The “Interplay” name is used with the permission of Interplay Entertainment Corp., which bears no responsibility for Avid products.
This product includes portions of the Alloy Look & Feel software from Incors GmbH.
This product includes software developed by the Apache Software Foundation (http://www.apache.org/).
© DevelopMentor
This product may include the JCifs library, for which the following notice applies:
JCifs © Copyright 2004, The JCIFS Project, is licensed under LGPL (http://jcifs.samba.org/). See the LGPL.txt file in the Third Party
Software directory on the installation CD.
Avid Interplay contains components licensed from LavanTech. These components may only be used as part of and in connection
with Avid Interplay.
This product includes FFmpeg, which is covered by the GNU Lesser General Public License.
This product includes software that is based in part of the work of the FreeType Team.
This software is based in part on the work of the Independent JPEG Group.
This product includes libjpeg-turbo, which is covered by the wxWindows Library License, Version 3.1.
Portions copyright 1994, 1995, 1996, 1997, 1998, 1999, 2000, 2001, 2002 by Cold Spring Harbor Laboratory. Funded under Grant
P41-RR02188 by the National Institutes of Health.
Portions copyright 1996, 1997, 1998, 1999, 2000, 2001, 2002 by Boutell.Com, Inc.
Portions relating to GD2 format copyright 1999, 2000, 2001, 2002 Philip Warner.
Portions relating to PNG copyright 1999, 2000, 2001, 2002 Greg Roelofs.
Portions relating to gdttf.c copyright 1999, 2000, 2001, 2002 John Ellson ([email protected]).
Portions relating to gdft.c copyright 2001, 2002 John Ellson ([email protected]).
Portions relating to JPEG and to color quantization copyright 2000, 2001, 2002, Doug Becker and copyright (C) 1994, 1995, 1996,
1997, 1998, 1999, 2000, 2001, 2002, Thomas G. Lane. This software is based in part on the work of the Independent JPEG Group.
See the file README-JPEG.TXT for more information. Portions relating to WBMP copyright 2000, 2001, 2002 Maurice Szmurlo and
Johan Van den Brande.
Permission has been granted to copy, distribute and modify gd in any context without fee, including a commercial application,
provided that this notice is present in user-accessible supporting documentation.
This does not affect your ownership of the derived work itself, and the intent is to assure proper credit for the authors of gd, not to
interfere with your productive use of gd. If you have questions, ask. "Derived works" includes all programs that utilize the library.
Credit must be given in user-accessible documentation.
This software is provided "AS IS." The copyright holders disclaim all warranties, either express or implied, including but not limited to
implied warranties of merchantability and fitness for a particular purpose, with respect to this code and accompanying
documentation.
Although their code does not appear in gd, the authors wish to thank David Koblas, David Rowley, and Hutchison Avenue Software
Corporation for their prior contributions.
Attn. Government User(s). Restricted Rights Legend
U.S. GOVERNMENT RESTRICTED RIGHTS. This Software and its documentation are “commercial computer software” or
“commercial computer software documentation.” In the event that such Software or documentation is acquired by or on behalf of a
unit or agency of the U.S. Government, all rights with respect to this Software and documentation are subject to the terms of the
License Agreement, pursuant to FAR §12.212(a) and/or DFARS §227.7202-1(a), as applicable.
4
Trademarks
003, 192 Digital I/O, 192 I/O, 96 I/O, 96i I/O, Adrenaline, AirSpeed, ALEX, Alienbrain, AME, AniMatte, Archive, Archive II, Assistant
Station, AudioPages, AudioStation, AutoLoop, AutoSync, Avid, Avid Active, Avid Advanced Response, Avid DNA, Avid DNxcel, Avid
DNxHD, Avid DS Assist Station, Avid Liquid, Avid Media Engine, Avid Media Processor, Avid MEDIArray, Avid Mojo, Avid Remote
Response, Avid Unity, Avid Unity ISIS, Avid VideoRAID, AvidRAID, AvidShare, AVIDstripe, AVX, Axiom, Beat Detective, Beauty
Without The Bandwidth, Beyond Reality, BF Essentials, Bomb Factory, Boom, Bruno, C|24, CaptureManager, ChromaCurve,
ChromaWheel, Cineractive Engine, Cineractive Player, Cineractive Viewer, Color Conductor, Command|24, Command|8, Conectiv,
Control|24, Cosmonaut Voice, CountDown, d2, d3, DAE, Dazzle, Dazzle Digital Video Creator, D-Command, D-Control, Deko,
DekoCast, D-Fi, D-fx, Digi 003, DigiBase, DigiDelivery, Digidesign, Digidesign Audio Engine, Digidesign Development Partners,
Digidesign Intelligent Noise Reduction, Digidesign TDM Bus, DigiLink, DigiMeter, DigiPanner, DigiProNet, DigiRack, DigiSerial,
DigiSnake, DigiSystem, Digital Choreography, Digital Nonlinear Accelerator, DigiTest, DigiTranslator, DigiWear, DINR, DNxchange,
DPP-1, D-Show, DSP Manager, DS-StorageCalc, DV Toolkit, DVD Complete, D-Verb, Eleven, EM, Euphonix, EUCON, EveryPhase,
Expander, ExpertRender, Fader Pack, Fairchild, FastBreak, Fast Track, Film Cutter, FilmScribe, Flexevent, FluidMotion, Frame
Chase, FXDeko, HD Core, HD Process, HDPack, Home-to-Hollywood, HYBRID, HyperControl, HyperSPACE, HyperSPACE
HDCAM, iKnowledge, Image Independence, Impact, Improv, iNEWS, iNEWS Assign, iNEWS ControlAir, Instantwrite, Instinct,
Intelligent Content Management, Intelligent Digital Actor Technology, IntelliRender, Intelli-Sat, Intelli-sat Broadcasting Recording
Manager, InterFX, Interplay, inTONE, Intraframe, iS Expander, ISIS, IsoSync, iS9, iS18, iS23, iS36, ISIS, IsoSync, KeyRig,
KeyStudio, LaunchPad, LeaderPlus, LFX, Lightning, Link & Sync, ListSync, LKT-200, Lo-Fi, Luna, MachineControl, Magic Mask,
Make Anything Hollywood, make manage move | media, Marquee, MassivePack, Massive Pack Pro, M-Audio, M-Audio Micro,
Maxim, Mbox, Media Composer, MediaFlow, MediaLog, MediaMatch, MediaMix, Media Reader, Media Recorder, MEDIArray,
MediaServer, MediaShare, MetaFuze, MetaSync, MicroTrack, MIDI I/O, Midiman, Mix Rack, MixLab, Moviebox, Moviestar,
MultiShell, NaturalMatch, NewsCutter, NewsView, Nitris, NL3D, NLP, Nova, NRV-10 interFX, NSDOS, NSWIN, Octane, OMF, OMF
Interchange, OMM, OnDVD, Open Media Framework, Open Media Management, Ozone, Ozonic, Painterly Effects, Palladium,
Personal Q, PET, Pinnacle, Pinnacle DistanTV, Pinnacle GenieBox, Pinnacle HomeMusic, Pinnacle MediaSuite, Pinnacle Mobile
Media, Pinnacle Scorefitter, Pinnacle Studio, Pinnacle Studio MovieBoard, Pinnacle Systems, Pinnacle VideoSpin, Podcast Factory,
PowerSwap, PRE, ProControl, ProEncode, Profiler, Pro Tools LE, Pro Tools M-Powered, Pro Transfer, Pro Tools, QuickPunch,
QuietDrive, Realtime Motion Synthesis, Recti-Fi, Reel Tape Delay, Reel Tape Flanger, Reel Tape Saturation, Reprise, Res Rocket
Surfer, Reso, RetroLoop, Reverb One, ReVibe, Revolution, rS9, rS18, RTAS, Salesview, Sci-Fi, Scorch, Scorefitter, ScriptSync,
SecureProductionEnvironment, Serv|LT, Serv|GT, Session, Shape-to-Shape, ShuttleCase, Sibelius, SIDON, SimulPlay,
SimulRecord, Slightly Rude Compressor, Smack!, Soft SampleCell, Soft-Clip Limiter, Solaris, SoundReplacer, SPACE, SPACEShift,
SpectraGraph, SpectraMatte, SteadyGlide, Streamfactory, Streamgenie, StreamRAID, Strike, Structure, Studiophile, SubCap,
Sundance Digital, Sundance, SurroundScope, Symphony, SYNC HD, Synchronic, SynchroScope, SYNC I/O, Syntax, TDM
FlexCable, TechFlix, Tel-Ray, Thunder, Titansync, Titan, TL Aggro, TL AutoPan, TL Drum Rehab, TL Everyphase, TL Fauxlder, TL In
Tune, TL MasterMeter, TL Metro, TL Space, TL Utilities, tools for storytellers, Torq, Torq Xponent, Transfuser, Transit, TransJammer,
Trigger Finger, Trillium Lane Labs, TruTouch, UnityRAID, Vari-Fi, Velvet, Video the Web Way, VideoRAID, VideoSPACE, VideoSpin,
VTEM, Work-N-Play, Xdeck, X-Form, Xmon, XPAND!, Xponent, X-Session, and X-Session Pro are either registered trademarks or
trademarks of Avid Technology, Inc. in the United States and/or other countries.
Avid Interplay Central v1.2 User’s Guide • 9329-65178-00 Rev A • April 2012 • This document is distributed by Avid
in online (electronic) form only, and is not available for purchase in printed form.
5
Contents
Using This Guide. . . . . . . . . . . . . . . . . . . . . . . . . . . . . . . . . . . . . . . . . . . . . . . 11
Symbols and Conventions . . . . . . . . . . . . . . . . . . . . . . . . . . . . . . . . . . . . . . . . . . . . . . . 11
If You Need Help. . . . . . . . . . . . . . . . . . . . . . . . . . . . . . . . . . . . . . . . . . . . . . . . . . . . . . . 12
Avid Training Services . . . . . . . . . . . . . . . . . . . . . . . . . . . . . . . . . . . . . . . . . . . . . . . . . . 12
Chapter 1
Getting Started . . . . . . . . . . . . . . . . . . . . . . . . . . . . . . . . . . . . . . . . . . . . . . . . 14
The Newsroom Environment. . . . . . . . . . . . . . . . . . . . . . . . . . . . . . . . . . . . . . . . . . . . . . 15
Signing In to Interplay Central. . . . . . . . . . . . . . . . . . . . . . . . . . . . . . . . . . . . . . . . . . . . . 16
Understanding the Application Layout . . . . . . . . . . . . . . . . . . . . . . . . . . . . . . . . . . . . . . 17
Working with Layouts . . . . . . . . . . . . . . . . . . . . . . . . . . . . . . . . . . . . . . . . . . . . . . . . 18
Working with Panes and Areas . . . . . . . . . . . . . . . . . . . . . . . . . . . . . . . . . . . . . . . . 20
The Menu Bar. . . . . . . . . . . . . . . . . . . . . . . . . . . . . . . . . . . . . . . . . . . . . . . . . . . . . . 23
The Launch Pane . . . . . . . . . . . . . . . . . . . . . . . . . . . . . . . . . . . . . . . . . . . . . . . . . . . 24
Plug-ins and MOS Integration . . . . . . . . . . . . . . . . . . . . . . . . . . . . . . . . . . . . . . . . . . . . . 25
Viewing Interplay Central Help . . . . . . . . . . . . . . . . . . . . . . . . . . . . . . . . . . . . . . . . . . . . 25
Chapter 2
Working with Assets . . . . . . . . . . . . . . . . . . . . . . . . . . . . . . . . . . . . . . . . . . . . 27
The Assets Pane. . . . . . . . . . . . . . . . . . . . . . . . . . . . . . . . . . . . . . . . . . . . . . . . . . . . . . . 28
Navigating in the Assets Pane . . . . . . . . . . . . . . . . . . . . . . . . . . . . . . . . . . . . . . . . . 29
Working with News Assets . . . . . . . . . . . . . . . . . . . . . . . . . . . . . . . . . . . . . . . . . . . . . . . 30
Identifying iNEWS Directories, Queues, Projects, and Facets. . . . . . . . . . . . . . . . . 30
Navigating the iNEWS Database . . . . . . . . . . . . . . . . . . . . . . . . . . . . . . . . . . . . . . . 31
Working with Media Assets . . . . . . . . . . . . . . . . . . . . . . . . . . . . . . . . . . . . . . . . . . . . . . . 32
Identifying Interplay Production Systems and Media Assets . . . . . . . . . . . . . . . . . . 32
Navigating the Interplay Production Database . . . . . . . . . . . . . . . . . . . . . . . . . . . . . 33
Adding or Removing Property Columns . . . . . . . . . . . . . . . . . . . . . . . . . . . . . . . . . . 34
Resizing Columns . . . . . . . . . . . . . . . . . . . . . . . . . . . . . . . . . . . . . . . . . . . . . . . . . . 34
Moving Columns. . . . . . . . . . . . . . . . . . . . . . . . . . . . . . . . . . . . . . . . . . . . . . . . . . . . 35
Moving or Copying Assets . . . . . . . . . . . . . . . . . . . . . . . . . . . . . . . . . . . . . . . . . . . . 35
6
Chapter 3
Working with Projects. . . . . . . . . . . . . . . . . . . . . . . . . . . . . . . . . . . . . . . . . . . 36
Opening Projects or Facets. . . . . . . . . . . . . . . . . . . . . . . . . . . . . . . . . . . . . . . . . . . . . . . 37
The Project/Story Pane . . . . . . . . . . . . . . . . . . . . . . . . . . . . . . . . . . . . . . . . . . . . . . . . . . 37
Associating Stories with Projects or Facets . . . . . . . . . . . . . . . . . . . . . . . . . . . . . . . . . . 39
Chapter 4
Script Building Basics . . . . . . . . . . . . . . . . . . . . . . . . . . . . . . . . . . . . . . . . . . 40
The Queue/Story Pane . . . . . . . . . . . . . . . . . . . . . . . . . . . . . . . . . . . . . . . . . . . . . . . . . . 41
The Script Editor. . . . . . . . . . . . . . . . . . . . . . . . . . . . . . . . . . . . . . . . . . . . . . . . . . . . 43
Creating a Story . . . . . . . . . . . . . . . . . . . . . . . . . . . . . . . . . . . . . . . . . . . . . . . . . . . . . . . 45
Segmenting Stories. . . . . . . . . . . . . . . . . . . . . . . . . . . . . . . . . . . . . . . . . . . . . . . . . . . . . 46
Taking Dictation . . . . . . . . . . . . . . . . . . . . . . . . . . . . . . . . . . . . . . . . . . . . . . . . . . . . . . . 48
Editing a Story. . . . . . . . . . . . . . . . . . . . . . . . . . . . . . . . . . . . . . . . . . . . . . . . . . . . . . . . . 49
Formatting a Script . . . . . . . . . . . . . . . . . . . . . . . . . . . . . . . . . . . . . . . . . . . . . . . . . . 50
Adding Production Cues. . . . . . . . . . . . . . . . . . . . . . . . . . . . . . . . . . . . . . . . . . . . . . 51
Adding Machine Control Instructions . . . . . . . . . . . . . . . . . . . . . . . . . . . . . . . . . . . . 52
Timing the Text . . . . . . . . . . . . . . . . . . . . . . . . . . . . . . . . . . . . . . . . . . . . . . . . . . . . . . . . 53
Deleting or Recovering a Deleted Story . . . . . . . . . . . . . . . . . . . . . . . . . . . . . . . . . . . . . 53
Locking and Unlocking a Story . . . . . . . . . . . . . . . . . . . . . . . . . . . . . . . . . . . . . . . . . . . . 54
Adding Media to a Script . . . . . . . . . . . . . . . . . . . . . . . . . . . . . . . . . . . . . . . . . . . . . . . . . 55
Moving or Deleting Clips in the Sequence Timeline . . . . . . . . . . . . . . . . . . . . . . . . . . . . 57
Trimming Clips in the Sequence Timeline. . . . . . . . . . . . . . . . . . . . . . . . . . . . . . . . . . . . 58
Using L-Cuts in the Sequence Timeline . . . . . . . . . . . . . . . . . . . . . . . . . . . . . . . . . . . . . 60
Inserting Dissolves . . . . . . . . . . . . . . . . . . . . . . . . . . . . . . . . . . . . . . . . . . . . . . . . . . . . . 62
Inserting Script Templates . . . . . . . . . . . . . . . . . . . . . . . . . . . . . . . . . . . . . . . . . . . . . . . 63
Chapter 5
Working with Video Media . . . . . . . . . . . . . . . . . . . . . . . . . . . . . . . . . . . . . . . 65
The Media Pane . . . . . . . . . . . . . . . . . . . . . . . . . . . . . . . . . . . . . . . . . . . . . . . . . . . . . . . 66
Media Pane: Asset Mode . . . . . . . . . . . . . . . . . . . . . . . . . . . . . . . . . . . . . . . . . . . . . 66
Media Pane: Output Mode . . . . . . . . . . . . . . . . . . . . . . . . . . . . . . . . . . . . . . . . . . . . 69
Playing Assets and Script Sequences . . . . . . . . . . . . . . . . . . . . . . . . . . . . . . . . . . . . . . 72
Using the J-K-L Keys for Playback. . . . . . . . . . . . . . . . . . . . . . . . . . . . . . . . . . . . . . 73
Stepping Through Assets or Script Sequences . . . . . . . . . . . . . . . . . . . . . . . . . . . . 74
Playing Recently Viewed Assets . . . . . . . . . . . . . . . . . . . . . . . . . . . . . . . . . . . . . . . 75
Selecting the Aspect Ratio . . . . . . . . . . . . . . . . . . . . . . . . . . . . . . . . . . . . . . . . . . . . 75
Updating the Media Status . . . . . . . . . . . . . . . . . . . . . . . . . . . . . . . . . . . . . . . . . . . . 75
7
Playing Simple and Complex Sequences . . . . . . . . . . . . . . . . . . . . . . . . . . . . . . . . 76
Selecting the Playback Quality. . . . . . . . . . . . . . . . . . . . . . . . . . . . . . . . . . . . . . . . . 77
Marking In and Out Points. . . . . . . . . . . . . . . . . . . . . . . . . . . . . . . . . . . . . . . . . . . . . . . . 77
Working with Markers . . . . . . . . . . . . . . . . . . . . . . . . . . . . . . . . . . . . . . . . . . . . . . . . . . . 79
Using the Timecode Displays . . . . . . . . . . . . . . . . . . . . . . . . . . . . . . . . . . . . . . . . . . . . . 80
Entering Timecode to Cue a Frame . . . . . . . . . . . . . . . . . . . . . . . . . . . . . . . . . . . . . . . . 80
Working in the Media Timeline . . . . . . . . . . . . . . . . . . . . . . . . . . . . . . . . . . . . . . . . . . . . 82
Using the Zoom Bar . . . . . . . . . . . . . . . . . . . . . . . . . . . . . . . . . . . . . . . . . . . . . . . . . . . . 83
Reviewing for Playback. . . . . . . . . . . . . . . . . . . . . . . . . . . . . . . . . . . . . . . . . . . . . . . . . . 84
Using Match Frame. . . . . . . . . . . . . . . . . . . . . . . . . . . . . . . . . . . . . . . . . . . . . . . . . . . . . 85
Opening an Enclosing Folder . . . . . . . . . . . . . . . . . . . . . . . . . . . . . . . . . . . . . . . . . . . . . 85
Mixing Down Sequences. . . . . . . . . . . . . . . . . . . . . . . . . . . . . . . . . . . . . . . . . . . . . . . . . 87
Viewing and Editing a Clip During Ingest . . . . . . . . . . . . . . . . . . . . . . . . . . . . . . . . . . . . 89
Saving a Frame as an Image . . . . . . . . . . . . . . . . . . . . . . . . . . . . . . . . . . . . . . . . . . . . . 90
Chapter 6
Using Audio . . . . . . . . . . . . . . . . . . . . . . . . . . . . . . . . . . . . . . . . . . . . . . . . . . . 91
Working with Audio Tracks . . . . . . . . . . . . . . . . . . . . . . . . . . . . . . . . . . . . . . . . . . . . . . . 92
The Audio Pane . . . . . . . . . . . . . . . . . . . . . . . . . . . . . . . . . . . . . . . . . . . . . . . . . . . . 93
Adjusting Audio Levels for a Script Sequence . . . . . . . . . . . . . . . . . . . . . . . . . . . . . 95
Setting the Audio Mix . . . . . . . . . . . . . . . . . . . . . . . . . . . . . . . . . . . . . . . . . . . . . . . . 96
Setting Audio Monitoring Preferences for Assets. . . . . . . . . . . . . . . . . . . . . . . . . . . 97
Overriding the Default Audio Tracks . . . . . . . . . . . . . . . . . . . . . . . . . . . . . . . . . . . . 98
Recording a Voice-over. . . . . . . . . . . . . . . . . . . . . . . . . . . . . . . . . . . . . . . . . . . . . . . . . . 98
Chapter 7
Search . . . . . . . . . . . . . . . . . . . . . . . . . . . . . . . . . . . . . . . . . . . . . . . . . . . . . . 100
The Search Bar . . . . . . . . . . . . . . . . . . . . . . . . . . . . . . . . . . . . . . . . . . . . . . . . . . . . . . . 101
The Search Pane . . . . . . . . . . . . . . . . . . . . . . . . . . . . . . . . . . . . . . . . . . . . . . . . . . . . . 102
Conducting a Search. . . . . . . . . . . . . . . . . . . . . . . . . . . . . . . . . . . . . . . . . . . . . . . . . . . 103
Chapter 8
Logging and Creating Subclips . . . . . . . . . . . . . . . . . . . . . . . . . . . . . . . . . . 105
Workflows for Logging. . . . . . . . . . . . . . . . . . . . . . . . . . . . . . . . . . . . . . . . . . . . . . . . . . 106
Understanding Markers and Restrictions . . . . . . . . . . . . . . . . . . . . . . . . . . . . . . . . . . . 107
The Logging Layout . . . . . . . . . . . . . . . . . . . . . . . . . . . . . . . . . . . . . . . . . . . . . . . . . . . 109
The Markers Pane. . . . . . . . . . . . . . . . . . . . . . . . . . . . . . . . . . . . . . . . . . . . . . . . . . . . . 110
Adding, Saving, and Deleting Markers . . . . . . . . . . . . . . . . . . . . . . . . . . . . . . . . . . . . . 113
Cutting, Copying, and Pasting Text. . . . . . . . . . . . . . . . . . . . . . . . . . . . . . . . . . . . . . . . 115
8
Navigating by Markers in the Logging Layout . . . . . . . . . . . . . . . . . . . . . . . . . . . . . . . . 115
Exporting Markers . . . . . . . . . . . . . . . . . . . . . . . . . . . . . . . . . . . . . . . . . . . . . . . . . . . . . 116
Unicode Support for Marker Text . . . . . . . . . . . . . . . . . . . . . . . . . . . . . . . . . . . . . . . . . 117
Creating Subclips . . . . . . . . . . . . . . . . . . . . . . . . . . . . . . . . . . . . . . . . . . . . . . . . . . . . . 118
Chapter 9
Messaging . . . . . . . . . . . . . . . . . . . . . . . . . . . . . . . . . . . . . . . . . . . . . . . . . . . 119
Sending Messages . . . . . . . . . . . . . . . . . . . . . . . . . . . . . . . . . . . . . . . . . . . . . . . . . . . . 120
Viewing and Replying to Received Messages . . . . . . . . . . . . . . . . . . . . . . . . . . . . . . . 121
Chapter 10
Sending to Playback . . . . . . . . . . . . . . . . . . . . . . . . . . . . . . . . . . . . . . . . . . . 122
Specifying Send to Playback Settings. . . . . . . . . . . . . . . . . . . . . . . . . . . . . . . . . . . . . . 123
Sending a Script Sequence to a Playback Device . . . . . . . . . . . . . . . . . . . . . . . . . . . . 125
Sending a Stored Sequence to a Playback Device. . . . . . . . . . . . . . . . . . . . . . . . . . . . 127
Sending a Mixed-Resolution Long GOP Sequence to a Playback Device . . . . . . . . . . 128
The Progress Pane . . . . . . . . . . . . . . . . . . . . . . . . . . . . . . . . . . . . . . . . . . . . . . . . . . . . 129
Chapter 11
User Settings . . . . . . . . . . . . . . . . . . . . . . . . . . . . . . . . . . . . . . . . . . . . . . . . . 131
General Settings . . . . . . . . . . . . . . . . . . . . . . . . . . . . . . . . . . . . . . . . . . . . . . . . . . . . . . 132
iNEWS Settings. . . . . . . . . . . . . . . . . . . . . . . . . . . . . . . . . . . . . . . . . . . . . . . . . . . . . . . 133
Interplay Production Settings . . . . . . . . . . . . . . . . . . . . . . . . . . . . . . . . . . . . . . . . . . . . 134
MOS Settings . . . . . . . . . . . . . . . . . . . . . . . . . . . . . . . . . . . . . . . . . . . . . . . . . . . . . . . . 136
Chapter 12
Interplay Central Tablet Application . . . . . . . . . . . . . . . . . . . . . . . . . . . . . . 138
Connection Basics . . . . . . . . . . . . . . . . . . . . . . . . . . . . . . . . . . . . . . . . . . . . . . . . . . . . 139
The iPad . . . . . . . . . . . . . . . . . . . . . . . . . . . . . . . . . . . . . . . . . . . . . . . . . . . . . . . . . 139
Gestures for the Tablet Application . . . . . . . . . . . . . . . . . . . . . . . . . . . . . . . . . . . . 140
Starting Interplay Central on the Tablet . . . . . . . . . . . . . . . . . . . . . . . . . . . . . . . . . . . . 141
The Sidebar. . . . . . . . . . . . . . . . . . . . . . . . . . . . . . . . . . . . . . . . . . . . . . . . . . . . . . . . . . 142
Buttons of the User Interface . . . . . . . . . . . . . . . . . . . . . . . . . . . . . . . . . . . . . . . . . . . . 144
Customizing Interplay Central Settings . . . . . . . . . . . . . . . . . . . . . . . . . . . . . . . . . . . . . 144
Accessing the iNEWS Database. . . . . . . . . . . . . . . . . . . . . . . . . . . . . . . . . . . . . . . . . . 145
Working with Links in Stories . . . . . . . . . . . . . . . . . . . . . . . . . . . . . . . . . . . . . . . . . 151
Viewing Video Associated with a Script . . . . . . . . . . . . . . . . . . . . . . . . . . . . . . . . . 151
Entering Presenter Mode . . . . . . . . . . . . . . . . . . . . . . . . . . . . . . . . . . . . . . . . . . . . . . . 154
Working with Favorites . . . . . . . . . . . . . . . . . . . . . . . . . . . . . . . . . . . . . . . . . . . . . . . . . 155
Chapter 13
Interplay Central Mobile Application . . . . . . . . . . . . . . . . . . . . . . . . . . . . . . 157
Connection Basics . . . . . . . . . . . . . . . . . . . . . . . . . . . . . . . . . . . . . . . . . . . . . . . . . . . . 158
9
The BlackBerry Smart Phone. . . . . . . . . . . . . . . . . . . . . . . . . . . . . . . . . . . . . . . . . 158
Starting the Interplay Central mobile application. . . . . . . . . . . . . . . . . . . . . . . . . . . . . . 160
Accessing the iNEWS Database. . . . . . . . . . . . . . . . . . . . . . . . . . . . . . . . . . . . . . . . . . 162
Creating a Story . . . . . . . . . . . . . . . . . . . . . . . . . . . . . . . . . . . . . . . . . . . . . . . . . . . . . . 165
Editing a Story. . . . . . . . . . . . . . . . . . . . . . . . . . . . . . . . . . . . . . . . . . . . . . . . . . . . . . . . 167
Formatting a Script . . . . . . . . . . . . . . . . . . . . . . . . . . . . . . . . . . . . . . . . . . . . . . . . . 168
Adding Production Cues. . . . . . . . . . . . . . . . . . . . . . . . . . . . . . . . . . . . . . . . . . . . . 169
Adding Machine Control Instructions . . . . . . . . . . . . . . . . . . . . . . . . . . . . . . . . . . . 170
Working Offline on Local Stories. . . . . . . . . . . . . . . . . . . . . . . . . . . . . . . . . . . . . . . . . . 171
Working with Links in Stories . . . . . . . . . . . . . . . . . . . . . . . . . . . . . . . . . . . . . . . . . . . . 173
Appendix A
Keyboard Shortcuts . . . . . . . . . . . . . . . . . . . . . . . . . . . . . . . . . . . . . . . . . . . 175
Queue/Story Pane Shortcuts . . . . . . . . . . . . . . . . . . . . . . . . . . . . . . . . . . . . . . . . . . . . 176
Assets Pane Shortcuts . . . . . . . . . . . . . . . . . . . . . . . . . . . . . . . . . . . . . . . . . . . . . . . . . 177
Media Pane Shortcuts. . . . . . . . . . . . . . . . . . . . . . . . . . . . . . . . . . . . . . . . . . . . . . . . . . 177
Markers Pane Shortcuts . . . . . . . . . . . . . . . . . . . . . . . . . . . . . . . . . . . . . . . . . . . . . . . . 179
Appendix B
Icons . . . . . . . . . . . . . . . . . . . . . . . . . . . . . . . . . . . . . . . . . . . . . . . . . . . . . . . . 183
Pane Type Icons . . . . . . . . . . . . . . . . . . . . . . . . . . . . . . . . . . . . . . . . . . . . . . . . . . . . . . 184
Launch Pane Icons . . . . . . . . . . . . . . . . . . . . . . . . . . . . . . . . . . . . . . . . . . . . . . . . . . . . 184
Assets Pane Icons . . . . . . . . . . . . . . . . . . . . . . . . . . . . . . . . . . . . . . . . . . . . . . . . . . . . 185
Media Pane Icons . . . . . . . . . . . . . . . . . . . . . . . . . . . . . . . . . . . . . . . . . . . . . . . . . . . . . 186
Markers Pane Icons . . . . . . . . . . . . . . . . . . . . . . . . . . . . . . . . . . . . . . . . . . . . . . . . . . . 187
Progress Pane Icons. . . . . . . . . . . . . . . . . . . . . . . . . . . . . . . . . . . . . . . . . . . . . . . . . . . 188
Index . . . . . . . . . . . . . . . . . . . . . . . . . . . . . . . . . . . . . . . . . . . . . . . . . . . . . . . . 200
10
Using This Guide
This guide is intended for all users of an Avid Interplay Central system. This guide describes
product features and basic user procedures, such as Interplay Central user settings and story or
asset creation.
For initial installation and configuration, see the Avid Interplay Central Installation and
Configuration Guide. For administrative information, see the Avid Interplay Central
Administration Guide.
Symbols and Conventions
Avid documentation uses the following symbols and conventions:
Symbol or Convention Meaning or Action
n
A note provides important related information, reminders,
recommendations, and strong suggestions.
c
A caution means that a specific action you take could cause harm to
your computer or cause you to lose data.
w
>
A warning describes an action that could cause you physical harm.
Follow the guidelines in this document or on the unit itself when
handling electrical equipment.
This symbol indicates menu commands (and subcommands) in the
order you select them. For example, File > Import means to open the
File menu and then select the Import command.
This symbol indicates a single-step procedure. Multiple arrows in a list
indicate that you perform one of the actions listed.
(Windows), (Windows
only), (Macintosh), or
(Macintosh only)
This text indicates that the information applies only to the specified
operating system, either Windows or Macintosh OS X.
Bold font
Bold font is primarily used in task instructions to identify user interface
items and keyboard sequences.
If You Need Help
Symbol or Convention Meaning or Action
Italic font
Italic font is used to emphasize certain words and to indicate variables.
Courier Bold font
Courier Bold font identifies text that you type.
Ctrl+key or mouse action
Press and hold the first key while you press the last key or perform the
mouse action. For example, Command+Option+C or Ctrl+drag.
If You Need Help
If you are having trouble using your Avid product:
1. Retry the action, carefully following the instructions given for that task in this guide. It is
especially important to check each step of your workflow.
2. Check the latest information that might have become available after the documentation was
published:
-
If the latest information for your Avid product is provided as printed release notes, they
are shipped with your application and are also available online.
-
If the latest information for your Avid product is provided as a ReadMe file, it is
supplied on your Avid installation media as a PDF document (README_product.pdf)
and is also available online.
You should always check online for the most up-to-date release notes or ReadMe
because the online version is updated whenever new information becomes available. To
view these online versions, select ReadMe from the Help menu, or visit the Knowledge Base
at www.avid.com/readme.
3. Check the documentation that came with your Avid application or your hardware for
maintenance or hardware-related issues.
4. Visit the online Knowledge Base at www.avid.com/onlinesupport. Online services are
available 24 hours per day, 7 days per week. Search this online Knowledge Base to find
answers, to view error messages, to access troubleshooting tips, to download updates, and to
read or join online message-board discussions.
Avid Training Services
Avid makes lifelong learning, career advancement, and personal development easy and
convenient. Avid understands that the knowledge you need to differentiate yourself is always
changing, and Avid continually updates course content and offers new training delivery methods
that accommodate your pressured and competitive work environment.
12
Avid Training Services
For information on courses/schedules, training centers, certifications, courseware, and books,
please visit www.avid.com/support and follow the Training links, or call Avid Sales at
800-949-AVID (800-949-2843).
13
1 Getting Started
The following main topics describe basic user tasks as well as various concepts and features you
might encounter when working with Interplay Central.
•
The Newsroom Environment
•
Signing In to Interplay Central
•
Understanding the Application Layout
•
Plug-ins and MOS Integration
•
Viewing Interplay Central Help
The Newsroom Environment
The Newsroom Environment
This topic describes the basic systems in the newsroom environment:
•
Avid iNEWS newsroom computer system
•
Avid Interplay Production
•
Avid Interplay Central
Avid iNEWS
The Avid iNEWS newsroom computer system provides journalists, producers, directors, and
various technical personnel in the newsroom with an array of tools to make their job easier. It is
primarily made up of iNEWS Workstations, linked together via a local or wide area network, and
the iNEWS Server, which manages all the day-to-day activities of the newsroom.
n
Although referred to as a singular unit, the iNEWS Server typically consists of two or more
computers running the iNEWS Server software. Each one acts as a backup for the other to
protect the overall stability of the network. For redundancy, the iNEWS system mirrors its
database across these servers for redundancy.
Interplay Production
The Avid Interplay Production system combines an asset database with workflow management
software, both of which are integrated with Avid shared storage and Avid archive solutions.
Interplay Production provides tools that let journalists and producers add rich media to stories
and send the assembled video sequence to a playout server.
Interplay Central
Interplay Central extends access to your assets to journalists working inside and outside the
newsroom, whether they are using standard desktop workstations, laptops, or even smart phones.
Scripts, video, and graphics can be viewed and edited through the web-based application running
in a standard browser, while iNEWS content can be viewed and edited using supported phones.
Journalists can create, modify, and review all their story content more quickly than ever before,
without switching between multiple tools.
15
Signing In to Interplay Central
Signing In to Interplay Central
Use a supported browser, such as Google Chrome, to connect to and sign in to your Interplay
Central server.
When you first sign in to Interplay Central, you are asked to confirm or supply the user name and
password of an Avid iNEWS account and an Interplay Production account. These credentials
provide you with the appropriate access and rights to the iNEWS and Interplay Production
databases, enabling you to supply only the Interplay Central user name and password at future
sign-ins.
To sign in to the application:
1. Open a supported browser and type the URL of your Interplay Central server.
The URL is the computer name of the Interplay Central middleware server.
2. At the sign-in screen, type your user name and password.
3. Click Sign In, or press Enter (Windows) or Return (Macintosh).
After a few moments, the Interplay Central application opens and displays the last layout
that you used.
n
When you sign in to Interplay Central, you are automatically signed in to your iNEWS newsroom
computer system and Interplay Production system. If, however, the security settings for one of
these integrated systems is inaccurate, you might see a warning similar to this:
If you get a message like this, click the link provided and verify your security settings.
4. (Optional) If the layout you want is not displayed, select the one you want from the Layouts
menu.
n
Each Interplay Central user is assigned one or more roles by the Interplay Central
Administrator. Each role is associated with one or more layouts. For more information about
available layouts, see “Working with Layouts” on page 18. For more information about roles,
see the Interplay Central Administrator’s Guide.
To sign out of the application:
t
Click Sign Out in the application menu.
16
Understanding the Application Layout
Understanding the Application Layout
A layout is a set of panes and other controls that is installed as part of the Interplay Central
web-based application. The size and location of the panes are set by default in each layout. Not
all available panes are displayed in each layout, but users can customize which panes are
displayed, their sizes, and where they are located in the window.
The following table describes the main panes.
Icon Pane
Description
Refer to...
Assets
A pane that displays assets. These assets can
result from a search or from browsing. Assets
are displayed in a folder hierarchy, if
applicable to the assets displayed.
“The Assets Pane” on page 28
Queue/Story
A pane that displays the contents of a queue
“The Queue/Story Pane” on
with the contents of a selected story in the
page 41
queue, including the story form, any
production cues, and sequences. It can only be
opened from the Assets pane, and is therefore
not listed as part of the Panes menu.
Project/Story
A pane that displays the contents of a project,
its facets, and any associated stories. It can
only be opened from the Assets pane, and is
therefore not listed as part of the Panes menu.
“The Project/Story Pane” on
page 37
Audio
A pane that displays the controls for adjusting
the audio settings for media assets.
“Working with Audio Tracks”
on page 92
Help
A pane that displays the help system.
“Viewing Interplay Central
Help” on page 25
Launch
A pane from which you navigate to various
“The Launch Pane” on page 24
locations. This pane displays remote file
systems, local file systems, and other locations
for assets.
Markers
A pane in which you can view and create
markers. This pane is available in the Video
layout and the Logging layout.
“The Markers Pane” on
page 110
Media
A pane in which you can view and edit media
assets. The controls that are displayed depend
on the selected asset.
“The Media Pane” on page 66
17
Understanding the Application Layout
Icon Pane
Description
Refer to...
Progress
A pane in which you can monitor the progress “The Progress Pane” on
of background processes, such as send to
page 129
playback, deletions, and sequence mixdowns.
Search
A pane from which you can conduct a search. “The Search Pane” on page 102
This pane functions the same as the Search bar.
In addition to the panes, the application layouts also feature bars that offer additional
information, options, and functionality.
q
w
e
The following table describes these bars.
Bar
Description
Refer to...
1
Menu
A section of the application that provides
numerous menu options.
“The Menu Bar” on page 23
2
Message
A section of the application in which you can
send and receive messages.
“Messaging” on page 119
3
Search
A section of the application from which you can
conduct a search. The results of a search can be
dragged from the bar and placed in an area as a
pane for better viewing.
“The Search Bar” on page 101
Working with Layouts
The Interplay Central rich web-based application is installed with five layouts. Not all available
panes are visible in each layout, but you can open additional panes if necessary.
You select a layout from the Layout drop-down menu, located near the upper right corner of the
window. The menu shows the name of the layout that is currently displayed. If you click the
menu, it shows the name of the role or roles for the signed-in user, along with the layouts that are
available for that role. You can select any layout that is displayed.
18
Understanding the Application Layout
The following illustration shows the default layouts available to the Journalist role.
The following table lists the five predefined layouts and which users have access to them.
Layout
Description
Available To
Basic
Journalists use this layout to edit and create stories. You All users, based on
can view media in this layout but you cannot add video or license type
audio to the story.
Logging
Media loggers use this layout to add markers to clips and All users, based on
to create subclips. For more information, see “Logging
license type
and Creating Subclips” on page 105.
System Settings
Administrators use this layout to specify various
configuration settings. For more information, see
“Configuring System Settings” in the Interplay Central
Administration Guide.
Administrators only
Users
Administrators use this layout to import, create, and
manage Interplay Central users.
Administrators only
For more information, see “Interplay Central User
Management” in the Interplay Central Administration
Guide.
Video
Journalists use this layout to edit and create stories that
include video and audio.
All users, based on
license type
This layout is displayed the first time a user signs in. You
can switch to another layout at any time by selecting it
from the Layout menu.
To change to a different predefined layout:
t
n
Choose the layout from the Layout drop-down menu.
Changes that you make to a predefined layout are saved when you change to a different layout or
when you sign out.
19
Understanding the Application Layout
To close a pane:
t
Click the X on the pane’s tab.
To open additional panes:
1. Select the Panes menu.
2. Select the menu option corresponding to the pane you want to open.
The pane you select opens in the active area. For more information, see “Working with
Panes and Areas” on page 20.
To reset a layout to its original configuration:
t
Select Reset Layout from the Layout drop-down menu.
To reset all layouts to their original default configurations:
t
Select Reset All Layouts from the Layout drop-down menu.
Working with Panes and Areas
The Interplay Central user interface is very customizable because of the multiple areas in which
panes may be moved. Any single area can contain one or more panes, and when multiple panes
are positioned into a single area, the panes appear in a tabular format with one pane on top of the
others.
If the number of tabbed panes within an area exceeds the area’s space within the browser
window, Right and Left Arrow buttons appear next to the Pane Menu button, enabling you to
navigate through all of the panes.
You can move panes around to save screen space and reconfigure panes in a way that best suits
your needs. The application saves the last arrangement and displays it the next time you sign in
to the application.
You move panes into what are called drop zones within an area. Each area has five drop zones:
center, top, bottom, left, and right.
To move a pane:
t
n
Click the pane’s tab and drag it to your preferred drop zone.
Do not click the X in the pane’s tab, as that will close the pane.
The drop zone is highlighted in orange to help you identify where the pane will be
positioned within the window when you release the mouse button.
The following illustrations demonstrate the process of dragging the Media pane to each drop
zone.
20
Understanding the Application Layout
In the illustrations, the Audio pane is already located in the area to which the Media pane is
being moved. So if a user drags the Media pane into the center drop zone, the two panes
would appear as tabbed panes, with only one on top and therefore visible at a time. Dragging
to the other drop zones in an area splits the area into two, either horizontally or vertically.
Drop Zone
Illustration
Center
Top
21
Understanding the Application Layout
Drop Zone
Illustration
Bottom
Left
22
Understanding the Application Layout
Drop Zone
Illustration
Right
The Menu Bar
The application’s menu bar includes the following menus:
•
•
Home
Option
Description
User Settings
Opens the Settings dialog box with configuration options available for
modification to non-administrative users. For more information, see
“User Settings” on page 131.
About
Opens a screen with information about the product
Panes
This menu lists the panes that you can open in the selected layout. For a list of these main
panes, see “Understanding the Application Layout” on page 17. You are only permitted one
instance of some panes within the user interface; however, you can open multiple instances
of an Assets pane or Search pane. If a single-instance pane is already opened, the option
representing that pane will appear grayed out in the Panes menu.
•
Sign Out
Select Sign Out to leave the application and return to the sign-in screen.
23
Understanding the Application Layout
The Launch Pane
The Launch pane lists the iNEWS system and Interplay Production system that are available on
the Interplay Central system. The Launch pane also includes any iNEWS projects.
Systems and projects are easily identified by the following icons.
Icon
Description
Connected Interplay Production system
Disconnected Interplay Production system
Connected iNEWS system
Disconnected iNEWS system
Project in the iNEWS database
iNEWS Project (not started)
iNEWS Project (expired)
Opening a system, such as an iNEWS newsroom computer system or Interplay Production
system, lets you view the contents of that system’s database in the Assets pane. Opening an
iNEWS project from the Launch pane lets you view each project’s contents in the Assets pane.
To open a system or project from the Launch pane, do one of the following:
t
Double-click the item you want to open.
24
Plug-ins and MOS Integration
t
Right-click the item and select “Open in New Assets Tab.”
For more information about assets and projects, see “Working with Assets” on page 27 and
“Working with Projects” on page 36.
Plug-ins and MOS Integration
Interplay Central provides support for Active-X plug-ins. For example, Deko Select is a plug-in
for a newsroom computer system’s interface that allows a user, such as a reporter, to drag and
drop graphic templates directly into the story, as well as alter replaceable text or graphics in the
selected template. You can also use the Avid Deko Select plug-in to add graphics to the video for
a story sequence. Other plug-ins are available through third-party manufacturers, such as the
Assignment List by Aurora.
For procedures on how to install plug-ins, see the documentation for the plug-in. For more
information on configuring Interplay Central to work with plug-ins, see “MOS Settings” on
page 136. After installation and configuration, plug-ins are listed at the bottom of the Pane menu.
For more information about using a plug-in, see the documentation for the plug-in, such as the
Avid Deko Select Installation and User’s Guide.
Viewing Interplay Central Help
The Help system for Interplay Central combines the contents of the following documents:
•
Interplay Central User’s Guide
•
Interplay Central Administration Guide
Help information is provided in two ways, depending on whether you want to review information
specific to a certain feature of Interplay Central, or view the entire help system.
For instance, if you want to know more about the Media pane and the controls available within
the pane, you can view that information by opening that portion of the Help system through the
Pane Menu button.
To access a Help topic related to a certain pane:
1. Click the Pane Menu button.
2. Select Help.
The help topic will open as a tabbed pane within the Web-based application.
25
Viewing Interplay Central Help
To open the entire help system:
t
n
Select Pane > Help.
You can open the full Help system in a separate browser tab by clicking the “Search in New
Browser Tab” button.
26
2 Working with Assets
Assets are items that are stored in a database, such as stories, scripts, video clips, and audio clips.
From a pane called the Assets pane, you can view assets for items that are contained in the
Launch pane. For example, if you double-click the name of an iNEWS system in the Launch
pane, the Assets pane displays the contents of the iNEWS database.
The following main topics describe the Assets pane and how you can work with various assets in
Interplay Central.
•
The Assets Pane
•
Working with News Assets
•
Working with Media Assets
The Assets Pane
The Assets Pane
After you sign in to Interplay Central, an empty pane labeled Assets is displayed in one of the
application areas. You use the Assets pane to view the contents of an item that you open from the
Launch pane, such as an iNEWS system or project, or an Interplay Production system. After you
open a system or project, the label of the Asset pane changes to reflect your selection, and you
can browse the database or work with the assets that are displayed. You can also open multiple
Assets panes, which appear as multiple tabbed panes within an application area.
The options you have for working with assets depends on the type of asset you select.
The following topics describe working with different types of assets:
•
“Working with News Assets” on page 30
•
“Working with Media Assets” on page 32
To display assets in an Assets pane:
t
Double click an item in the Launch pane.
The following illustration shows the Interplay Production database selected in the Launch
pane and its contents opened in the Assets pane below. The name of the highlighted system
appears in the tab at the top of the Assets pane.
To open an additional Assets pane, do one of the following:
t
Select Panes > Assets.
t
Right-click an item in the Launch pane and select “Open in New Assets Tab.”
The new pane is displayed next to another Asset pane that has the focus.
28
The Assets Pane
n
To ensure the Asset pane has the focus, click an item in that pane, not just somewhere in the area.
If you closed the last open Asset pane, the aforementioned command displays a new pane in
an existing area.
To close an Assets pane:
t
Click the Close button.
Navigating in the Assets Pane
As you browse through a database, the history of your navigation is retained in views, and you
can go backward and forward to display those views. The name that appears in the Assets pane’s
tab also changes to reflect your location within the database you are viewing.
The following table lists the navigation buttons in the Assets pane.
Button
Description
Back button toggles the current view to the previous view in the pane.
Forward button toggles the current view to the next view in the pane.
Refresh button refreshes the current view in the pane.
Close button closes the pane.
Pane Menu button opens a context menu providing various options, including
opening the help content related to the pane.
To navigate the Assets pane:
t
n
Click a turn-down arrow to the left of a folder. This will expand the directory within the
current view.
Clicking the arrow next to an open directory closes that directory within the current view.
t
Double-click on a folder to open the directory in a new full-pane view within the Assets
pane.
To display a view you already displayed:
t
Click the Forward button or the Back button.
29
Working with News Assets
Working with News Assets
The following topics describe the iNEWS database as it is displayed in the Assets pane:
•
Identifying iNEWS Directories, Queues, Projects, and Facets
•
Navigating the iNEWS Database
Identifying iNEWS Directories, Queues, Projects, and Facets
The iNEWS database is a file structure that is organized by directories that contain subfolders or
queues, which in turn contain stories. Directories contained within other directories are known as
subfolders or subdirectories.
Projects are a way of categorizing stories by topic so that news teams working on a particular
topic can find everything related to it in a single place, without moving or copying original
source information within the database. Facets are sub-topics of projects that provide additional
granularity. Any stories associated to a facet are automatically associated to that facet’s parent
project.
You can view the contents of an iNEWS database by choosing the iNEWS system in the Launch
pane. Likewise, Projects can also be opened from the Launch pane. Projects and iNEWS systems
are easily identified by the following icons.
Icon
Description
Connected iNEWS system
Disconnected iNEWS system
Project in the iNEWS database
iNEWS Project (not started)
iNEWS Project (expired)
After you double click on a chosen system in the Launch pane, the database file structure with its
directories and queues are displayed in the Assets pane. If you double click on a project, any
facets of the chosen project are displayed in the Assets pane.
Different icons are used to identify queues, directories and facets in the Assets pane.
30
Working with News Assets
Icon
Description
Directory or subfolder in the iNEWS database
Indexed directory or subfolder
Queue
Indexed Queue
Locked Queue
Indexed and Locked Queue
Facet
Facet (not started)
Facet (expired)
In addition to facets, each project also contains the following queues in the Assets pane:
Icon
Description
ALL queue - shows all stories associated with the project and its facets.
QUERY Search Queue - shows results of a search conducted with criteria
pre-defined for the project in iNEWS. Each project can have only one search
queue.
Navigating the iNEWS Database
This topic provides procedures for viewing the database file structure by opening directories and
queues. For information about projects, and facets, see “Working with Projects” on page 36.
The contents of directories are displayed in the Assets pane. The contents of queues are viewed
in the Queue/Story pane. For more information, see “The Queue/Story Pane” on page 41.
31
Working with Media Assets
To open a directory:
t
Double click the directory in the Assets pane.
This opens the directory’s contents in the same pane. To return to the previous view of the
database file structure, click the Back button.
t
Click on the small, turn-down arrow to the left of the directory in the Assets pane.
This expands the directory to show its contents while still retaining a view of the rest of the
database file structure. To close the directory, click the small arrow again.
To open a queue:
t
Double click the queue in the Assets pane.
The queue’s contents open in the Queue/Story pane.
Working with Media Assets
An Interplay Production database holds media assets such as clips, subclips, sequences, and
graphics. You can browse the database in the Assets pane and display a media asset in the Media
pane.
The following topics describe working with media assets:
•
“Identifying Interplay Production Systems and Media Assets” on page 32
•
“Navigating the Interplay Production Database” on page 33
•
“Adding or Removing Property Columns” on page 34
•
“Resizing Columns” on page 34
•
“Moving Columns” on page 35
•
“Moving or Copying Assets” on page 35
Identifying Interplay Production Systems and Media Assets
Different icons are used to identify Interplay Production assets and indicate status in the Assets
pane.
Icon
Description
Column
Audio asset
Name
Video asset: a master clip.
Name
32
Working with Media Assets
Icon
Description
Column
Video asset: a subclip
Name
Video asset: a sequence
Name
Video asset: an in-progress clip (Edit While Capture)
Name
Supported
State
Reservation
State
Restriction
State
Navigating the Interplay Production Database
This topic provides procedures for viewing the Interplay Product database file structure by
opening Interplay folders.
The contents of folders in an Interplay Production system are displayed in the Assets pane. You
can double-click an asset to open it in the Media pane.
To open an Interplay Production folder:
t
Double-click the folder in the Assets pane.
This opens the folders’s contents in the same pane. To return to the previous view of the
database file structure, click the Back button.
t
Click the turn-down arrow to the left of the folder in the Assets pane.
This action expands the directory to show its contents while still retaining a view of the rest
of the database file structure. To close the folder, click the turn-down arrow again.
To open a video asset, do one of the following:
t
Double-click an asset.
t
Select an asset and press the Enter key.
The asset opens in the Media pane. For more information, see “Working with Video Media”
on page 65.
To open a video asset and the Logging layout from an Assets tab, do one of the following:
t
Select a clip and select “Open in Logging Layout” from the Assets pane tab.
t
Right-click a clip and select “Open in Logging Layout.”
33
Working with Media Assets
Adding or Removing Property Columns
A set of property columns are shown when viewing media assets in the Assets pane. These
columns display metadata that is associated with assets in the Interplay Production database. You
can select other property columns to display. The columns that are available depend on the
columns that are available in a particular Interplay Production database.
To add or remove property columns:
1. Click the Pane menu button in the top right corner of the Assets pane.
2. Select the Add or Remove Columns option.
The Add Or Remove Columns window opens. The list is divided in System properties, User
(custom) properties, and Resolutions.
3. Select the columns you want to add or deselect the columns you want to remove.
You can use the search box to find a particular column.
4. Click the Close box or click anywhere outside the window to save your settings.
Resizing Columns
You can adjust the column width of any column displayed in the Assets pane.
To resize a column:
1. Position your mouse pointer over the dividing line between two columns.
The pointer changes to a bi-directional arrow when it hovers over the right location.
2. Click and drag it right or left to adjust column width.
34
Working with Media Assets
Moving Columns
You can rearrange the order of columns displayed in the Assets pane.
To move a column:
1. Click the header of the column you want to move.
2. Drag it right or left and release the mouse button when it is repositioned where you want it.
An orange line appears as a guide during the drag-and-drop process.
Moving or Copying Assets
You can move or copy assets in the Interplay Production database by using the Cut, Copy, and
Paste commands.
To move an asset to another folder:
1. Select one or more assets.
2. Right-click and select Cut.
3. Select the folder into which you want to move the asset, right-click, and select Paste.
To copy an asset to another folder:
1. Select one or more assets.
2. Right-click and select Copy.
3. Select the folder into which you want to move the asset, right-click, and select Paste.
35
3 Working with Projects
Projects is a feature of the iNEWS newsroom computer system that provides a way of
categorizing stories by topic so that news teams working on a particular topic can find everything
related to it in a single place, without moving or copying the original source information from its
current location in the iNEWS database. Facets are sub-topics, providing additional granularity
to projects.
The following main topics describe panes and how to use projects and facets in news production:
•
Opening Projects or Facets
•
The Project/Story Pane
•
Associating Stories with Projects or Facets
Opening Projects or Facets
Opening Projects or Facets
In Interplay Central, projects appear listed in the Launch pane. Opening an iNEWS project from
the Launch pane lets you view each project’s contents in the Assets pane. Facets and the project’s
queues are opened from the Assets pane.
To open a project:
t
Double click on the project in the Launch pane.
The project’s contents open in the Assets pane.
To open a facet:
t
Double click on the facet in the Assets pane.
The facet’s contents open in the Project/Story pane.
The Project/Story Pane
The contents of a project include an ALL queue, a QUERY queue, and any sub-topics, known as
facets. For instance, the following illustration shows the Hurricane Earl project has facets for
topics like Damage and Evacuation.
37
The Project/Story Pane
Every project has an ALL queue that displays in the Queue panel all stories associated with the
project and its facets. Any indexed story can be associated with a project or facet.
Stories associated with a project retain their original source permissions; therefore, a user
without read access to a story’s source queue will not be able to see that story in a project to
which its associated even if the user has read access to the project.
Every project has a QUERY queue—identified by the magnifying glass icon—which is the
search queue that runs the project’s query. For more information on the icons used to identify
projects and facets, see “Identifying iNEWS Directories, Queues, Projects, and Facets” on
page 30.
The Project/Story pane functions similar to the Queue/Story pane. It can display either a
project’s facet, or a news story associated with that project’s facet. It can also display both at the
same time, as shown in the following illustration:
n
The title that appears on the pane’s tab changes based on what is selected in the Project/Story
pane.
Two buttons, Project and Story, are located at the top of the pane and may be used to toggle on or
off the display of the project or a story. When toggled on the buttons appear orange.
38
Associating Stories with Projects or Facets
For instance, while viewing a project’s contents, clicking the Story button splits the pane’s
display space to show the project’s contents on the top half and the selected story associated with
that project or facet on the bottom half of the pane. Clicking the Story button again hides the
story and displays only the project’s facet or queue once more.
n
A user cannot have both the Project and Story buttons simultaneously toggled off. When only one
is on and the user clicks that button, the system will automatically toggle it off and the other one
on.
The name on the tab of a Project/Story pane changes based on the story you have selected in the
pane. You can mouse over the tab to view the entire path name.
When only the facet or one of the project’s queues (ALL or QUERY) is displayed, this is known
as the grid view. Likewise, when only the story is shown in the pane, the display is known as the
story view. And when both are visible, the display is called a split view.
The horizontal dividing line between the grid and story sections of the pane may be used to
adjust the ratio of the split view display within the pane. When you position your mouse pointer
over it, the pointer changes to a double arrow, letting you click and drag it up or down to adjust
the space allocated to each section of the pane. However, it is not recommended that this
technique be used to try and hide one section of the pane or the other.
The ratio you set is retained when you sign out.
Associating Stories with Projects or Facets
Any indexed story can be associated with a project or facet.
To associate an indexed story with a project or facet.
1. Navigate to and open the indexed queue in which the story resides.
2. Right-click on the story in the Queue/Story pane and select Associate story with a project.
3. In the dialog box, select the project(s) or facet(s) to which you want the story associated.
4. Click Apply.
39
4 Script Building Basics
When you create new stories or edit existing ones, you can save them to the iNEWS Server for
future review by you or others. The basics of editing stories includes: creating a story, opening
existing stories, navigating through stories, editing and formatting scripts, and adding media. In
Interplay Central, stories are created and edited in the Queue/Story pane.
The following main topics describe the Queue/Story pane and basic techniques of script
building.
•
The Queue/Story Pane
•
Creating a Story
•
Segmenting Stories
•
Taking Dictation
•
Editing a Story
•
Timing the Text
•
Deleting or Recovering a Deleted Story
•
Locking and Unlocking a Story
•
Adding Media to a Script
•
Moving or Deleting Clips in the Sequence Timeline
•
Trimming Clips in the Sequence Timeline
•
Using L-Cuts in the Sequence Timeline
•
Inserting Dissolves
•
Inserting Script Templates
The Queue/Story Pane
The Queue/Story Pane
The Queue/Story pane can display either an iNEWS queue, such as a show’s rundown or a wire
feed, or a news story in that queue. It can also display both a queue and one of its news stories at
the same time, as shown in the following illustration:
q
w
1
The Queue section
2
The Story section, also called the Script Editor
41
The Queue/Story Pane
The name on the tab of a Queue/Story pane changes based on the story you have selected in the
pane. You can mouse over the tab to view the entire path name.
When only the queue is displayed in the pane, this is known as the grid view. Likewise, when
only the story is shown in the pane, the display is known as the story view. And when both are
visible, the display is called a split view.
The horizontal dividing line between the queue and story sections of the pane may be used to
adjust the ratio of the split view display within the pane. When you position your mouse pointer
over it, the pointer changes to a double arrow, letting you click and drag it up or down to adjust
the space allocated to each section of the pane. However, it is not recommended that this
technique be used to try and hide one section of the pane or the other.
The ratio you set is retained when you sign out.
The Queue/Story Toolbar
The Queue/Story pane offers a unique toolbar that has buttons that toggle the display within the
pane as well as provide key story editing functionality.
Two buttons, Queue and Story, on the toolbar may be used to toggle on or off the display of the
queue or a story. When toggled on the buttons appear orange.
For instance, while viewing a rundown, clicking the Story button splits the pane’s display space
to show the queue on the top half and the selected story in that queue on the bottom half of the
pane. Clicking the Story button again hides the story and displays only the queue once more.
n
A user cannot have both the Queue and Story buttons simultaneously toggled off. When only one
is on and the user clicks that button, the system will automatically toggle it off and the other one
on.
The toolbar also provides a Refresh button, which can be used to refresh the queue view.
The Annotation button—the one with the microphone icon on it—is described in “Taking
Dictation” on page 48.
Although the toolbar appears at the top of the pane all of the time, even when only the queue is
shown in the grid view, most of the buttons are used for editing stories and therefore, are not used
to modify the queue. The buttons associated with editing are explained further in “Editing a
Story” on page 49.
42
The Queue/Story Pane
The Script Editor
The section of the pane in which the story appears is called the Script Editor. There are four
distinct sub-sections of the Script Editor: Story Form, Cue List, Story, and Sequence Timeline.
The following illustration identifies these areas.
q
w
r
e
1
Story Form
3
Story (text area)
2
Cue List
4
Sequence Timeline
At the top of every story is the Story Form, which provides story information in fields that are
predetermined by the iNEWS system administrator for each queue in the database. For instance,
a form may contain the story’s title (slug), length, and status, among other things. Wire queues
usually show different fields than rundown queues.
n
If any specific field located in the Story Form is also displayed in the queue, then data that you
enter in that field will appear in both locations no matter which one you choose to enter the
information.
The horizontal dividing line between the Story Form and rest of the sub-sections may be used to
adjust the ratio of the Script Editor display within the pane. You can also choose to hide the Story
Form while still viewing the other sub-sections of the Script Editor.
To hide the Story Form:
1. Click the Pane Menu button located at the top right corner of the Queue/Story pane.
2. Select Hide Story Form.
43
The Queue/Story Pane
To show the Story Form:
1. Click the Pane Menu button located at the top right corner of the Queue/Story pane.
2. Select Show Story Form.
The Story is the sub-section of the Script Editor in which you write your story or view the text of
an existing story. As you type, your text automatically wraps to the next line when you reach the
end of the current line. A scroll bar at the right side of this area appears when text extends
beyond the bounds of the text area.
The Cue List is the sub-section of the Script Editor in which you add or edit production cues and
machine control events, such as those for a character generator (CG). Each cue is numbered
within a story, beginning with one (1). If cues are rearranged in the story, the system renumbers
the cues automatically. The following illustration shows an example of a cue containing a CG
event.
The Sequence Timeline is the sub-section of the Script Editor in which you add, rearrange, or
remove video and audio clips associated with the story. The columns in the timeline represent
seconds, video, natural sound (NAT), sound on tape (SOT), and voice over audio (VO). Colors
are also used to show the various types of media in the Sequence Timeline:
•
Green for video with natural sound
•
Blue for video with sound on tape
•
Purple for voice over audio
When selected, however, the color of the media in the Sequence Timeline changes to orange.
44
Creating a Story
The horizontal orange bar is called the sightline and acts as a position indicator when playing a
script sequence in the Media pane.
Creating a Story
You can create a story by writing it from scratch or by utilizing information from other resources,
such as wire stories. For more information on how to edit existing stories, see “Editing a Story”
on page 49. While working with stories, you can view them in split mode with the queue shown
on top and the story shown in the bottom half of the Queue/Story pane or you can view them in
full view mode, so that the story fills the entire pane, in which case the queue is not displayed.
To view an existing story:
t
Select the story in the queue you want to view and click the Story button to display the story
in the bottom half of the Queue/Story pane.
To open an existing story to full view:
t
Double click on a story in the queue.
t
Select the story in the queue and click the Queue button.
This toggles off the display of the queue in the Queue/Story pane and displays the story
within the entire pane’s space.
To create a new story:
1. Navigate to the row in which you want the new story to be inserted in the queue.
2. Click the Pane Menu button located at the top right corner of the Queue/Story pane.
3. Select Create Story.
45
Segmenting Stories
The existing row is pushed down, and a new row is inserted in the queue at that location.
So long as you are in split view, you can now begin writing your story; otherwise, open the
new blank story by double-clicking on the new row.
4. Enter the name of your story in the Title (a.k.a. Slug) field of the Story Form.
5. Enter the text of your story in the first available segment.
6. Click the Pane Menu button located at the top right corner of the Queue/Story pane.
7. Select Save Story to save your changes.
n
Navigating away from a story in the queue will also result in any changes made to the story
being saved regardless of whether you manually saved the story.
Segmenting Stories
You can write a story in a single segment or divide it into multiple segments. The following
illustration shows a story in a single segment.
You can use segments to time the text and integrate it with video, audio, and production cues.
Multiple timed segments are combined to form the overall story. The following illustration
shows the same story as the one in the previous example, but written as a segmented story.
46
Segmenting Stories
In Interplay Central, timing taglines appear in the Sequence Timeline to mark the length of each
segment in the story, such as 00:10 seconds and 00:28 seconds in the previous illustration. For
more information, see “Timing the Text” on page 53.
You can add or delete segments, split a segment in two, and rearrange segments within a story.
To add a segment to a story:
t
Click in the segment marked NEW located at the bottom of the story and begin typing. See
the previous illustration for an example.
To split a segment in two:
1. Position the cursor in the story where you want to split the text into two segments.
2. Click the Pane Menu button located at the top right corner of the Queue/Story pane.
3. Select Split Segment.
To rearrange segments in a story:
t
n
Click the header bar of the segment you want to move and drag it up or down into its new
location.
Whenever you rearrange segments, any production cues or machine control events in those
segments are moved as well, and renumbered accordingly.
47
Taking Dictation
To delete a segment:
1. Select the segment.
2. Click the Pane Menu button located at the top right corner of the Queue/Story pane.
3. Select Delete Segment.
Taking Dictation
The Interplay Central Annotation feature allows users to dictate their stories, using the Chrome
browser's Speech-to-Text technology.
n
This feature does require a connection to the Internet, and it is only available on Windows-based
computers with Google Chrome, not Apple computers with the Safari browser.
To use the Annotation feature to write stories:
1. Open a blank story and place your cursor in a segment.
2. Click the Annotate button.
A speech bubble will appear below the button, instructing you to begin speaking. It also
displays an audio level bar for your information and a Cancel button should you want to stop
dictation.
3. Speak clearly.
If you want sentence punctuation in your text, you can type it in later, or you can say what
punctuation is needed where as you speak. For instance, if you want the text to be Hello,
I’m Jane Doe., then you would need to say, “Hello comma I’m Jane Doe period.” The
system punctuates contractions for you.
For best results, conduct your dictation in a location free from too much background noise.
When you finish talking, the system transfers your speech into text starting at your cursor
position.
n
A pause in your speech can stop the annotation. To continue, click to position your cursor once
more and then click the Annotate button again.
48
Editing a Story
4. After your text appears in the Script Editor, you can correct any capitalization or punctuation
issues in the story as needed.
Editing a Story
When modifying a news story, changes made in Interplay Central are automatically updated in
the iNEWS newsroom computer system. The reverse is also true, so if changes are made to a
story at an iNEWS workstation, those changes will appear if the story is opened in Interplay
Central.
The standard editing features found in Interplay Central are the same as those for most word
processing software applications. You can cut, copy, or paste text as you work on a story. When
cutting or copying text, the system stores the text in a temporary storage spot known as a
clipboard; only one block of text can be stored at a time, so whenever you cut or copy something
new, it replaces whatever was previously stored on the clipboard.
You can use cut, copy, and paste to move text within a single story or from one story to another.
You can also change text to a bold or italicized font, and underline selected text within a story,
using keystroke combinations or the toolbar buttons highlighted in red in the following
illustration.
To cut text:
t
Select the text and press Ctrl+X.
t
(Macintosh) Select the text and press Cmd+X.
To copy text:
t
Select the text and press Ctrl+C.
t
(Macintosh) Select the text and press Cmd+C.
To paste text:
t
n
Select the text and press Ctrl+V.
To immediately undo the previous editing change, press Ctrl+Z. On a Macintosh, press Cmd+Z.
t
(Macintosh) Select the text and press Cmd+V.
To redo the previous edit:
t
Select the text and press Ctrl+Y.
49
Editing a Story
t
(Macintosh) Select the text and press Cmd+Y.
To set text to bold, do one of the following:
t
Select the text and click the B button.
t
Select the text and press Ctrl+B.
t
(Macintosh) Select the text and press Cmd+B.
To italicize text, do one of the following:
t
Select the text and click the I button.
t
Select the text and press Ctrl+I.
t
(Macintosh) Select the text and press Cmd+I.
To underline text, do one of the following:
n
t
Select the text and click the U button.
t
Select the text and press Ctrl+U.
t
(Macintosh) Select the text and press Cmd+U.
To immediately undo the last change in the font, or a previous editing change, press Ctrl+Z. On
a Macintosh, press Cmd+Z.
Formatting a Script
When you write a story, the text appears in the default normal text style. However, when
formatting a story as a script for a news broadcast, it is often necessary to distinguish certain text
from others using various styles of text, such as instructions for presenters or closed captioning.
Presenter instructions are most often used as brief, special instructions to news presenters (also
called news anchors). The text for presenter instructions appears red in the script, in reverse
video on the teleprompter, and is not included in the text used by the system to calculate the read
time.
Closed captioning is most often used for sound-bite verbatims. The text for closed captioning
appears green in the script and is sent to a closed caption encoder if your station uses such a
device to broadcast scripts for the hearing-impaired. Closed captioning text does not appear in
the teleprompter, nor is it included in the calculations of a script’s read time.
n
The default normal text style is sent to both the teleprompter and to any closed caption encoder
used at the station.
The following procedures use the toolbar buttons highlighted in red in the following illustration.
50
Editing a Story
To mark text as a presenter instruction:
t
Select the text and click the P button.
To mark text as a closed captioning text:
t
Select the text and click the CC button.
To mark text as a normal text:
t
n
Select the text and click the N button.
You can click the N, P, or CC buttons before typing your text as well. Any new text you type will
appear in the format you selected. To change the format of the text you type at any time, select
another format.
Adding Production Cues
When you format a story as a script for a news broadcast, you might need to add production cues
that provide important information to technical staff as well as machine control commands for
devices, such as character generators.
Production cues are added to scripts from the Story area and edited in the Cue List area of the
Script Editor. When added to a script, each production cue is given a numerical value. That
number in a black box appears as a production cue marker in the script, which corresponds to the
insertion location of that production cue’s text box in the Cue List.
51
Editing a Story
When selected, the production cue marker appears orange, and the information in the production
cue is visible in the Cue List.
To insert a production cue in a script:
1. Position your cursor in the story where you want to insert the production cue marker.
2. (Windows) Press Alt+Insert. (Macintosh) Press Option+Insert.
3. Enter the production cue information, such as Take VO, On Camera, Take SOT, or Take
Live. The information is automatically saved when you click elsewhere within the story.
To move a production cue in a script:
t
n
Click on the production cue’s marker and drag it to another location within the script.
When production cues are rearranged in a script, the system automatically renumbers them,
beginning with one (1). The same renumbering occurs if new production cues are added or
existing ones are deleted.
To delete a production cue from a script:
t
Select the production cue and press the Delete key.
Adding Machine Control Instructions
If your station integrates with a broadcast control system, such as iNEWS Command, the
production cues might include machine control instructions.
These instructions must be preceded by an asterisk (*) and written in a special format, beginning
with a command for the type of device the instruction is for, such as CG for a character
generator. After the command the format specifies a particular item or template, such as 2line for
a template that contains two lines for fulfillment data. If additional comments or information is
required it would follow on succeeding lines in the same production cue text box.
In the following procedure, a machine control instruction for a 2-line character generator graphic
is used as an example.
To add machine control instructions for a CG event:
1. Insert a production cue in the script.
2. In the production cue text box (in the Cue List), type *CG 2line and press Enter.
3. Type the first line of text that should appear on the 2-line CG graphic, such as Mayor Joe
Smith. Press Enter.
4. Type the second line of text that should appear on the 2-line CG graphic, such as
Pleasantville.
52
Timing the Text
Your CG machine control instruction will appear in blue font.
Timing the Text
With Interplay Central, segments are used to help estimate the timing of the text in scripts. Pale
yellow, horizontal lines with little flags, called timing taglines, are displayed in the Sequence
Timeline to show the estimated time for each segment in the script. For example, the following
story has two segments; the first is 10 seconds long, and the second is 28 seconds long.
n
When Run times are added into production cues, these times are added to the overall time of the
script as well as the time shown for the segment in which the production cue resides.
Deleting or Recovering a Deleted Story
When an iNEWS story is deleted, it is sent to a folder called the Dead queue, from which it may
be retrieved for limited amount of time. That time frame is pre-determined based on a purge
interval set for that queue by each site’s system administrator.
53
Locking and Unlocking a Story
To delete a story:
1. Select the story.
2. Click the Pane Menu button located at the top right corner of the Queue/Story pane.
3. Select Delete Story.
To retrieve a deleted story from the Dead queue:
1. Navigate to the Dead queue in the iNEWS database and locate the story.
2. Copy the story.
3. Navigate to the queue in which you want to put the story and paste it there.
Locking and Unlocking a Story
The iNEWS newsroom computer system has multiple types of locks, such as edit locks,
segmented edit locks, easy locks and key locks. Locking a story makes it impossible for another
unauthorized person to change a story while you are working in it. If a story is edit locked by
another user, you can still navigate to that story and view it, but a warning message appears if
you attempt to edit the story. The warning message states: Unable to obtain edit lock.
Story is currently locked by another user.
Segmented edit locking allows for one user to change Story Form data while another user has a
lock on the story’s text and cue list. This is beneficial for producers who might need to make
modifications in the Story Form sub-section of the Script Editor while a reporter is still working
on the body of the story itself.
Easy locks and key locks may only be applied to a story from an iNEWS workstation, but the
security measures are honored within Interplay Central. With easy lock, an iNEWS user locks
the story to his or her user name, so that only that user or an iNEWS system administrator can
access it. If any other user attempts to open an easy-locked story from Interplay Central, they
will be denied viewing or editing access to the story. Likewise, an iNEWS user key locks a story
by applying a password so that only those who know the password can view or edit the story. If
an Interplay Central user attempts to open a key-locked story, the system will prompt that user
for the password.
c
None of locking features apply to iNEWS system administrators. They can access any story
in the iNEWS database at any time regardless of the type of lock applied to a story.
To lock a story, do one of the following:
t
Begin typing in the body of the story. An edit lock is automatically applied to the story body.
t
Click the Lock/Unlock button. An edit lock is manually applied to the story body.
When you have a story locked, the Lock/Unlock button appears orange.
54
Adding Media to a Script
To lock the Story Form, do the following:
t
Begin typing in any field in the Story Form of a story. The segmented edit lock is
automatically applied.
To unlock a story, do one of the following:
n
t
Navigate to another story in the queue. The story you edited is automatically saved and
unlocked.
t
Click the Lock/Unlock button.
If you click the Unlock button, a confirmation dialog box appears stating the following:
Story may have been modified. Would you like to save it?
Choose Yes to save it and then unlock the story, No to unlock the story without saving
modifications, or Cancel to return to the story with the edit lock still in place.
Navigating between the Story Form sub-section of the Script Editor to the Story or Cue List
sub-sections releases any segmented edit lock you have on the Story Form. The reverse does
the same for any easy lock you might have on the story body. All changes you made while
having either lock are saved by the system before the locks are released.
Adding Media to a Script
The Sequence Timeline is the area of the Script Editor in which you add, rearrange, or remove
media assets associated with the story. The columns in the timeline represent from left to right:
seconds, video, natural sound (NAT), sound on tape (SOT), and voice over audio (V).
55
Adding Media to a Script
Different colors are used for each type of media asset in the timeline: green for video with NAT
sound, blue for video with SOT sound, and purple for VO sound.
n
The horizontal orange bar is called the sightline and acts as a position indicator when playing a
script’s sequence in the Media pane. Whenever a user trims a clip, the sightline automatically
moves to that position in the sequence, and the frame to which the clip was trimmed is displayed
in the viewer of the Media pane.
You can easily drag and drop a media asset from the Media pane into the Sequence Timeline, but
when doing so, it is important to consider the position of your mouse pointer, type of asset, and
where you want to put the asset. For instance, keep in mind the following:
•
When inserting video with natural sound (NAT), position your mouse pointer over the N or
video columns before releasing the mouse button.
•
When inserting audio only for a voice over (VO), position your mouse pointer over the V
column before releasing the mouse button.
•
When inserting video with sound on tape (SOT), position your mouse pointer over the S
column before releasing the mouse button.
The system displays highlights in each column during a drag and drop process to help guide you.
The sequence of video and audio that you create is called the script sequence. The the video
format is determined by the first clip that you add to the sequence. Any additional clips must
match the initial video format.
To insert a video asset with a NAT audio track into the script:
1. Click on a video clip with natural sound in the Media pane.
2. Drag it to the Sequence Timeline in the Script Editor until your pointer is over the N or
Video column, as shown in the following illustration.
56
Moving or Deleting Clips in the Sequence Timeline
As you drag the clip to where you want it, the Video and N columns appear highlighted to
show you where the asset will be inserted when you release the mouse button.
To insert a video asset with a SOT audio track into the script:
1. Click on a video clip with sound on tape in the Media pane.
2. Drag it to the Sequence Timeline in the Script Editor until your pointer is over the S column,
as shown in the following illustration.
As you drag the clip to where you want it, the Video and S columns appear highlighted to
show you where the asset will be inserted when you release the mouse button.
To insert an audio asset such as a VO track into the script:
1. Select the VO track from the Media pane.
2. Drag it to the Sequence Timeline in the Script Editor until the V column is highlighted, as
shown:
As you drag the asset to where you want it, the V column appears highlighted to show you
where the asset will be inserted when you release the mouse button.
Moving or Deleting Clips in the Sequence Timeline
After assets are added to a script sequence, they can be rearranged in the timeline.
57
Trimming Clips in the Sequence Timeline
After you have added a clip to the timeline, it cannot be switched to a different column. For
instance, if you drag and drop a clip into the timeline as a SOT, you cannot then select that clip in
the timeline and drag it to the other audio columns. If the clip has audio on a channel that is not
mapped to the audio column in which you insert it, you will not hear the audio when the
sequence is played.
n
If an insertion is made to the wrong column, you can use the Match Frame option (in the Media
player’s Pane menu) to reload the clip into the player, then delete the clip from the Sequence
Timeline, and redo the insertion by dragging it from the player to the timeline again.
To move a clip in a sequence:
1. Click on the clip you want to move.
2. Drag it up or down in the Sequence Timeline to reposition it.
As you drag the clip, other assets in the sequence will adjust accordingly.
To delete a clip from a sequence:
1. Right-click on the clip you want to delete.
2. Select Delete Clip.
Deleting a clip from the Sequence Timeline does not remove the original source media from
the server.
Trimming Clips in the Sequence Timeline
After a media clip is added to a script sequence, you can trim the clip from either end,
lengthening or shortening the clip frame-by-frame as needed.
To trim a clip, both audio and video together, using your mouse:
1. Select the video clip you want to trim, positioning your mouse pointer near the end you want
to adjust.
A trim indicator will appear in the clip’s video column and any corresponding audio column,
as shown in the following illustration.
58
Trimming Clips in the Sequence Timeline
2. Click and drag the trim indicator in the video column to adjust the clip.
n
You can only lengthen a clip to the maximum length of its original source media.
Whenever you trim a clip, the sightline automatically moves to the new position in the
sequence and the frame at that position is displayed in the viewer of the Media pane so the
user can see the exact frame to which the clip was trimmed.
To trim a clip, using your keyboard:
1. With your mouse, click the video clip you want to trim.
2. Do one of the following:
t
To trim from the start of the clip, select that end by pressing the Left Arrow key.
t
To trim from the end of the clip, select that end by pressing the Right Arrow key.
3. Do one of the following:
t
Press the M key to trim the clip’s chosen end10 frames earlier.
t
Press the comma (,) key to trim the clip’s chosen end one frame earlier.
t
Press the period (.) key to trim the clip’s chosen end one frame later.
t
Press the slash (/) key to trim the clip’s chosen end 10 frames later.
The sightline will automatically move to the trim location.
59
Using L-Cuts in the Sequence Timeline
Using L-Cuts in the Sequence Timeline
An L-cut is a split edit between two clips in which the video transition does not occur
simultaneously with the audio transition. In some cases, the audio transition happens before the
video, while in other cases the reverse is true.
The following illustration shows two examples of L-cuts near the forty second mark in the
timeline. One L-cut is the NAT clip (green) in which the video ends before the natural sound.
The other L-cut is the second SOT clip in the sequence (blue) in which the sound on tape is
introduced slightly before the corresponding video.
In Interplay Central, you can create, modify, or remove L-cuts in the Sequence Timeline of the
Script Editor.
60
Using L-Cuts in the Sequence Timeline
To create an L-cut:
1. Select the video clip you want to edit, positioning your mouse pointer near the end you want
to adjust.
A trim indicator will appear in the clip’s video column and/or any corresponding audio
column.
2. Do one of the following:
t
Hold the Ctrl key down, click the video trim indicator, and drag it to a different position.
t
Click the audio trim indicator and drag it to a different position.
This separates the video transition from the audio transition, letting you modify one without
altering the other. You can click either indicator to modify each one independently.
To remove an L-cut:
t
Click and drag the trim indicator for audio back into alignment with the video, or vice versa.
You do not have to be exact; close is near enough for the system to realign the video and
audio transitions.
n
Moving a clip with an L-cut to a new location in the sequence will also remove the L-cut and
realign the video and audio transitions.
n
When audio segments overlap, Interplay Central automatically adjusts the audio levels. See
“Working with Audio Tracks” on page 92.
61
Inserting Dissolves
Inserting Dissolves
In addition to using straight or split edits between clips, you can insert a dissolve to transition on
center between clips. Dissolves can be set to transition from 2 to 300 frames—even numbers
only—with half of the frames used in the leading clip and the other half in the trailing clip.
n
Dissolves cannot be placed at the start of the first clip or the end of the last clip in a sequence.
For any dissolve, you must ensure the source material has sufficient media to allow for the
dissolve before Mark In or after Mark Out points. Also, the trailing half of one dissolve cannot
overlap the leading portion of the next dissolve. In all of these cases, the system will issue
messages indicating that a dissolve is not possible.
To insert a dissolve between two clips:
1. Position the sightline within two seconds of the cut between two clips in the Sequence
Timeline.
2. Do one of the following:
t
Click the Dissolve button in the toolbar.
t
Press the Backslash key (\).
t
Click the Pane Menu button and select Insert Dissolve.
The following illustration shows a dissolve between the two clips of a sequence as indicated
by the square Dissolve icon located just below the sightline.
n
The icon is a static size and does not change with dissolves of varying durations.
3. By default the duration of dissolves is set to 20 frames—divided evenly at 10 frames in the
leading clip and 10 frames in the trailing clip. This can be changed, however, by
double-clicking on the Dissolve icon or by right-clicking on the icon and selecting Modify
Duration.
62
Inserting Script Templates
If altered, any new dissolve added to the sequence afterwards will have the altered setting for
its duration.
n
The default duration can be modified by changing the Dissolve Duration for Effects in User
Settings. See “iNEWS Settings” on page 133 for more information.
4. You can view the dissolve by positioning the sightline in the Sequence Timeline at any point
in the leading clip and then playing the output in the viewer of the Media pane.
Dissolves are associated with the leading clip, so if the leading clip is moved to the end of
the sequence, the associated dissolve is automatically deleted.
To delete a dissolve:
t
Right-click on the Dissolve icon and select Delete Dissolve.
Inserting Script Templates
Script templates are templates created by an administrator for you to use to quickly insert
predefined text and segments into stories. For instance, if a daily weather story in a show has a
standard set of production cues and presenter instructions that are always the same, an
administrator can create a script template that contains this information. The template can then
be made available to Interplay Central users to insert within new stories they write for
subsequent shows.
63
Inserting Script Templates
Script templates are inserted at the current cursor position of an opened story.
To insert a script template:
1. Open or create a new story and position your cursor in the story body where you want to
insert the template information.
2. Do one of the following:
t
Click the Template button in the toolbar.
t
Right-click and select Insert Script Template.
3. Select the template you want to use from the list by double-clicking on it.
n
If you already know the name of the template you want, you can also type it in the Search field
and press Enter.
64
5 Working with Video Media
The following main topics describe how to work with the Media pane to view and edit your
video assets:
•
The Media Pane
•
Playing Assets and Script Sequences
•
Marking In and Out Points
•
Working with Markers
•
Using the Timecode Displays
•
Working in the Media Timeline
•
Using the Zoom Bar
•
Reviewing for Playback
•
Opening an Enclosing Folder
•
Using Match Frame
•
Mixing Down Sequences
•
Viewing and Editing a Clip During Ingest
•
Saving a Frame as an Image
The Media Pane
The Media Pane
The Media pane provides you with the controls you need to play, cue, and mark video clips as
you build your story. You can set the Media pane to one of two modes:
•
Click the Asset button to work in Asset mode.
Use Asset mode to view master clips, subclips, and sequences, and to edit media into your
script sequence. You can also send a sequence from an Interplay Production database to a
playback device. For a description of the controls in Asset mode, see “Media Pane: Asset
Mode” on page 66.
•
Click the Output button to work in Output mode.
Use Output mode to view your script sequence, add a voice over, and send the sequence to a
playback device. For a description of the controls in Output mode, see “Media Pane: Output
Mode” on page 69.
The view in the Media pane automatically switches to Asset mode when you open an asset in the
Asset pane by double-clicking the asset or by dragging the asset from the Asset list and dropping
it on the Media pane. The view automatically switches to Output mode when you open a story
that includes a script sequence or when you move the sightline in the Sequence Timeline of a
script sequence.
Media Pane: Asset Mode
The following illustration shows the Media pane in Asset mode. Displays and controls are
described in the accompanying table.
66
The Media Pane
q
w
e
u
i
r
o
t
y
Display or Control
Description
1
Title
Displays the name of an asset loaded from the Interplay Production database.
2
Asset and Output buttons
Lets you switch views between an asset loaded from the Interplay Production
database (Asset mode) and the script sequence for the story loaded in the Script
Editor (Output mode).
67
The Media Pane
3
4
Display or Control
Description
Video format display
Displays the tracks associated with the asset. If the display is red, the asset does
not have online media that matches the target resolution of the selected Send to
Playback profile. If you move the mouse pointer over the display, you see what
video and audio formats are associated with the asset, in addition to the tracks.
STP button
Click this button to send a playable sequence loaded from an Interplay database
to a playback device. In Asset mode, this button is active only if you load a
sequence. For more information, see “Sending a Stored Sequence to a Playback
Device” on page 127.
Media viewer
Displays video for a loaded asset, including master clips, sequences, and
subclips.
Text for a marker that you select in the Media Timeline is displayed as a
overlay at the bottom of the Media viewer. Error messages concerning media
appear at the top of the Media viewer. The speed display for J-K-L play is
shown in the upper right. For more information, see “Using the J-K-L Keys for
Playback” on page 73.
5
6
Media Timeline and zoom bar
Media controls
•
The Media Timeline is a graphical representation of the length and time
span of an asset or script sequence. The Media Timeline includes timing
marks, a position indicator, and other controls. For more information, see
“Working in the Media Timeline” on page 82.
•
The zoom bar lets you enlarge a section of the Media Timeline. For more
information, see “Using the Zoom Bar” on page 83.
Let you play, pause, step through, and mark in and out points. For more
information, see “Playing Assets and Script Sequences” on page 72 and
“Marking In and Out Points” on page 77.
68
The Media Pane
7
Display or Control
Description
Pane Menu button
Provides options for controlling the display and sending to playback. For more
information, see the appropriate topic:
•
Recently Viewed Assets. See “Playing Recently Viewed Assets” on
page 75.
•
Update Media Status. See “Updating the Media Status” on page 75.
•
Aspect Ratio. See “Selecting the Aspect Ratio” on page 75.
•
Playback Quality. See “Selecting the Playback Quality” on page 77.
•
Playback Statistics. Provides performance information about the media
playback.
•
Send to Playback (profile name). See “Sending to Playback” on page 122.
•
Send to Playback Settings. See “Specifying Send to Playback Settings” on
page 123.
•
Sequence Mixdown. See “Mixing Down Sequences” on page 87.
•
Help. Displays information about the audio pane. Use the Help control
buttons to access other Help topics.
8 Timecode displays
Provides timecode information for the loaded asset or script sequence. For
more information, see “Using the Timecode Displays” on page 80.
9 Marker overlay
Displays the contents of a marker, if the position indicator is parked on the
marker. For more information, see “Working with Markers” on page 79.
Media Pane: Output Mode
The following illustration shows the Media pane in Output mode. Displays and controls are
described in the accompanying table.
69
The Media Pane
u
i
q
w
e
r
t
y
o
1)
Display or Control
Description
1
Title
Displays the name of the story loaded in the script editor.
2
Asset and Output buttons
Lets you switch views between an asset loaded from the Interplay Production
database (Asset mode) and the script sequence for the story loaded in the Script
Editor (Output mode).
3
Video format display
Displays the target resolution of the selected Send to Playback profile. Move
your mouse pointer over the display to see the complete label for the target
resolution.
STP button
Click this button to send the loaded script sequence to a playback device. For
more information, see “Sending a Script Sequence to a Playback Device” on
page 125.
Media viewer
Displays and plays media for the script sequence loaded in the script editor.
4
Error messages concerning media appear at the top of the Media viewer. The
speed display for J-K-L play is shown in the upper right. For more information,
see “Using the J-K-L Keys for Playback” on page 73.
70
The Media Pane
5
Display or Control
Description
Media Timeline and zoom bar
•
The Media Timeline is a graphical representation of the length and time
span of an asset or script sequence. The Media Timeline includes timing
marks, a position indicator, and other controls. For more information, see
“Working in the Media Timeline” on page 82.
•
The zoom bar lets you enlarge a section of the Media Timeline. For more
information, see “Using the Zoom Bar” on page 83.
6
Media controls
Let you play, pause, and step through the sequence. For more information, see
“Playing Assets and Script Sequences” on page 72. Controls for working with
In points and Out points are disabled in Output mode.
7
Pane Menu button
Provides options for controlling the display and sending to playback. For more
information, see the appropriate topic:
•
Match Frame. See “Using Match Frame” on page 85.
•
Update Media Status. See “Updating the Media Status” on page 75.
•
Aspect Ratio. See “Selecting the Aspect Ratio” on page 75.
•
Playback Quality. See “Selecting the Playback Quality” on page 77.
•
Playback Statistics. Provides performance information about the media
playback.
•
Send to Playback (profile name). See “Specifying Send to Playback
Settings” on page 123.
•
Send to Playback Settings. See “Specifying Send to Playback Settings” on
page 123.
•
Input Source. With the voice-over controls active, specifies the audio device
for recording. See “Recording a Voice-over” on page 98.
•
Help. Displays information about the Media pane. Use the Help control
buttons to access other Help topics.
8
Timecode displays
Provides timecode information for the loaded script sequence. For more
information, see “Using the Timecode Displays” on page 80.
9
Voice-over button
Displays the controls for creating a voice over. For more information, see
“Recording a Voice-over” on page 98.
10 Review for Playback button
Enables play of media in the send-to-playback target resolution. For more
information, see “Reviewing for Playback” on page 84.
71
Playing Assets and Script Sequences
Playing Assets and Script Sequences
You can play a video asset or audio asset in the Media pane.
The following illustration shows the play buttons in the Media pane.
q
e
w
1
Play In to Out
2
Play/Pause
3
Review Out
You can also use keyboard controls, including the J, K, and L keys. For more information, see
“Using the J-K-L Keys for Playback” on page 73. For information about stepping through media,
see “Stepping Through Assets or Script Sequences” on page 74.
For information about playing sequences in Interplay Central, see “Playing Simple and Complex
Sequences” on page 76.
To view or play a video asset:
1. Do one of the following:
t
In the Assets pane, double-click the asset you want to view or play.
t
Drag an asset from the Assets pane and drop it on the Media viewer.
If the Media pane is in Output mode, it automatically switches to Asset mode.
2. To play video or audio, do one of the following:
t
In the Media pane, click the Play/Pause button. While video or audio is playing, the
Pause icon is displayed. To pause play, click the Play/Pause button again.
t
On your keyboard, press the L key or the space bar. To pause play, press the K key or
press the space bar again.
To play a script sequence:
1. Open a story that includes a script sequence.
If the Media pane is in Asset mode, it automatically switches to Output mode.
2. To play video or audio, do one of the following:
t
In the Media pane, click the Play/Pause button. While video or audio is playing, the
Pause icon is displayed. To pause play, click the Play/Pause button again.
72
Playing Assets and Script Sequences
t
On your keyboard, press the L key or the space bar. To pause play, press the K key or
press the space bar again.
To play from an In point to an Out point, do one of the following:
t
In the Media pane, click the Play In to Out button.
To play to an Out point:
t
In the Media pane, click the Review Out button.
The position indicator moves to three seconds before the Out point and plays to the Out
point.
Using the J-K-L Keys for Playback
The J-K-L keys on the keyboard allow you to play and shuttle through media at varying speeds.
This feature, also referred to as three-button play or variable-speed play, allows you to use three
fingers to manipulate the speed of playback for greater control.
The playback speed is displayed in the upper right corner of the monitor. For backward play, the
display includes a left-pointing arrow. For forward play, the display includes a right-pointing
arrow.
To play or shuttle through the media using the J-K-L keys on the keyboard:
t
Press the L key to move forward through the footage at normal speed.
t
Press the L key multiple times to move forward through the footage at faster speeds, as
described in the following table:
Press the L Key
To Play Media At
2 times
2x normal speed
3 times
3x normal speed
4 times
4x normal speed
t
Press the J key to move backward at the same shuttle speed increments.
t
Press the K key to stop playback.
t
Press the K and L keys together for slow forward at ¼ times normal speed.
t
Press the K and J keys together for slow backward at ¼ times normal speed.
73
Playing Assets and Script Sequences
t
Press and hold the K key and tap the L key or the J key to step through footage one frame at
a time.
To slow or change play direction one speed at a time:
t
Press Alt (Windows) or Option (Macintosh) while you tap the J or L key.
Play slows or changes direction one speed at a time from the speed at which you are
currently playing.
-4x
-3x
-2x
-1x
0
1x
2x
3x
4x
For example, you are shuttling backward with the J key at 2x normal speed. Press and hold
Alt and tap the L key once. Play slows to backward at normal speed (1x speed). Hold Alt and
tap L once again. Play stops. Continue to hold Alt and tap L once again. Play goes forward at
normal speed.
Stepping Through Assets or Script Sequences
You can use various controls to step through an asset or script sequence. The following
illustration shows the buttons in the Media pane that you use to step forward or back.
q w e
r t y
1
10 Seconds Back
4
1 Frame Forward
2
1 Second Back
5
1 Second Forward
3
1 Frame Back
6
10 Seconds Forward
You can also step through by In and Out points, markers, or timecode. See “Marking In and Out
Points” on page 77, “Working with Markers” on page 79, and “Entering Timecode to Cue a
Frame” on page 80.
To step through an asset or script sequence, do one of the following:
t
Click the 10 Seconds Back button.
t
Click the 1 Second Back button.
t
Click the 1 Frame Back button or press the left arrow key.
74
Playing Assets and Script Sequences
t
Click the 1 Frame Forward button or press the right arrow key.
t
Click the 1 Second Forward button.
t
Click the 10 Seconds Forward button.
t
Press the Home key to move to the beginning of a clip.
t
Press the End key to move to the end of a clip.
Playing Recently Viewed Assets
Interplay Central keeps a history of the last 10 assets that you loaded in the Media pane. You
select any of these assets to play, rather than selecting them from the Interplay Production
database tree.
To play one of the last 10 assets loaded in the Media pane.
1. Click the Pane Menu button.
2. Click Recently Viewed Assets > asset_name.
Selecting the Aspect Ratio
Interplay Central automatically sizes the Media viewer for the asset you select to play. If
necessary, you can change the aspect ratio.
To select the aspect ratio of the Media viewer:
1. Click the Pane Menu button.
2. Click Aspect Ratio > 4x3 or Aspect Ratio > 16x9.
Updating the Media Status
At times you might load an asset or sequence and see a message “Media Offline.” This situation
could occur for several reasons, for example, if a shared-storage workspace is not currently
available. If the workspace becomes available, and the media comes back online, the media
might not be automatically loaded. You can use a menu option to force the media player to
search for the media again and load it if it is available.
To update the media status:
1. Click the Pane Menu button.
2. Click Update Media Status.
75
Playing Assets and Script Sequences
Playing Simple and Complex Sequences
You can play sequences that are stored in an Interplay Production database, but some sequences
require additional preparation to be completely playable. Sequences that include non-real-time
effects created in an Avid editing system need to be rendered in the editing system before you
can play them correctly in Interplay Central. Sequences that are fully supported for playback in
Interplay Central are marked by a green triangle in the State column in the Assets tab. These
sequences play as the editor intended, with all effects rendered.
n
The State column is not displayed by default. For information about how to display it, see
“Adding or Removing Property Columns” on page 34.
Simple Sequences and Complex Sequences
Interplay Central can play simple sequences that are checked into the Interplay Production
database. Simple sequences are defined as:
•
Shotlists created in Avid editing applications (NewsCutter, Media Composer, and
Symphony) and Interplay Assist that consist of cuts only, with no effects.
•
Sequences created in Avid Instinct and Interplay Central that consist of cuts, L-cuts, audio
pan/volume effects, audio dissolve effects, video dissolve effects, and no more than one
video track.
Interplay Central can also play complex sequences. Complex sequences are sequences created in
Avid editing applications that have multiple video tracks and various kinds of effects. If you load
a complex sequence in Interplay Central, the Interplay Central playback server attempts to play
the sequence. If the sequence has unrendered effects or is very complex, it might play without
effects or it might not play at all. To assure correct playback, a sequence must have all effects
rendered.
An editor working in a multi-resolution workgroup can take the following approach to prepare a
complex sequence for review in Interplay Central:
1. Make a copy of the sequence.
2. Change the Dynamic Relink settings as desired.
3. Render the copy of the sequence.
4. Check the copy in to an Interplay folder.
76
Marking In and Out Points
5. Restore the Dynamic Relink working resolution settings.
6. Continue working on the original sequence.
Mixing Down Complex Sequences
If a sequence is too complex to play in the Media viewer, and you do not want to render it, you
can use the Interplay Central Mixdown feature to create a playable master clip. See “Mixing
Down Sequences” on page 87.
Selecting the Playback Quality
When you play media in Interplay Central, you are viewing media that is compressed for
optimum viewing over a network. Instead of viewing source media in its native format, the media
server compresses it on demand for network-based playback.
You have the option of playing media using one of three quality options: good, better, best. Your
choice is usually based on the network connection between you and the server. If your computer
is connected to the Interplay Central playback server on a local network, you can choose best
quality. If your computer is connected to the Interplay Central playback server over a WAN
connection, you might need to choose good quality. Good quality consumes less bandwidth at
the expense of image quality.
To select the playback quality of the compressed media:
t
Click the Pane Menu button, select Playback Quality, and select the level you want.
The numbers associated with each level indicate the amount of JPEG compression. An
administrator can adjust these levels. See the Interplay Central Installation and
Configuration Guide.
Marking In and Out Points
If you want to use only a portion of a clip, you can set an In and Out point in the clip, and then
add the edited clip to the sequence that accompanies your story. By default, In and Out points are
set at the first frame and last frame of a clip. You can mark In and Out points only in Asset mode.
The following illustration shows the buttons in the Media pane that you use with In and Out
points
q w e
r t y
77
Marking In and Out Points
1
Play In to Out
4
Mark Out
2
Go to In
5
Go to Out
3
Mark In
6
Review Out
To mark an In point:
1. Load a clip in the Media pane and navigate to the frame where you want to set the In point.
2. Do one of the following:
t
Click the Mark In button.
t
Press I on the keyboard.
The In point is moved to the frame you marked. If the clip is playing, marking an In point
does not stop playback.
You can change an In point’s location by dragging it along the Media Timeline.
To mark an Out point:
1. Load a clip in the Media pane and navigate to the location where you want to set the Out
point.
2. Do one of the following:
t
Click the Mark Out button.
t
Press O on the keyboard.
The Out point is moved to the location you marked. If the clip is playing, marking an Out
point does not stop playback.
You can change the Out point’s location by dragging it along the Media Timeline.
To navigate to an In or Out point:
t
Click the Go to In or Go to Out button.
To play from an In point to an Out point:
t
Click the Play In to Out button.
To play to an Out point from any previous frame:
t
Click the Review Out button.
The position indicator moves to three seconds before the Out point and plays to the Out
point.
78
Working with Markers
Working with Markers
Markers are frame-specific markers that a user can add when logging media with Interplay
Central, Interplay Assist, or Interplay Access. An Interplay Central user can add markers in the
Logging layout or in the Video layout. For more information about adding markers, see
“Logging and Creating Subclips” on page 105.
n
In Media Composer v6.0, Avid Symphony v6.0, and NewsCutter v10.0, the term “locators” was
changed to “markers” in both the user interface and the documentation.
Marker icons are displayed in the Media timeline. If you park the position indicator on a marker
that includes text, the text is displayed as an overlay in the Media viewer. You can click a marker
to jump to it and display its text.
w
q
1
Marker indicators in the Media Timeline
2
Marker indicator and marker text
You can use keyboard shortcuts to step to the next marker or to the previous marker.
n
If you are creating a script sequence in the Video layout and add a clip that includes markers to
a script sequence, the markers are not added to the script sequence.
To step to the next marker:
t
Press Shift+right-arrow key.
To step to the previous marker:
t
Press Shift+left-arrow key.
79
Using the Timecode Displays
Using the Timecode Displays
There are four timecode displays in the top-right corner of the Media pane. The information
displayed depends on whether you are in Asset mode or Output mode, and the options you
select.
q
e
1
w
r
t
Display
Description
Master, Absolute, or Remain
Master: In Asset mode, displays timecode for the selected frame that
corresponds to the original timecode for the asset. In Output mode, displays
timecode for the selected frame that corresponds to the timecode of the script
sequence.
Absolute: Displays timecode for the selected frame that is offset from the first
frame of the asset or script sequence (time elapsed).
Remain: Displays timecode for the selected frame that is offset from the last
frame of the asset or script sequence (time remaining).
2
Timecode display menu button
Displays the options for displaying master, absolute, or remain timecode.
3 In point
(Asset mode only) Displays timecode for the In point. The timecode displayed
depends on your selection: Master, Absolute, or Remain.
4 Out point
(Asset mode only) Displays timecode for the Out point. The timecode
displayed depends on your selection: master, absolute, or remain.
5 Duration
In Asset mode, shows timecode for the duration from In point to Out point.
In Output mode, shows timecode for the duration of the script sequence.
Entering Timecode to Cue a Frame
You can cue a loaded, playable clip or sequence to a specific frame by typing a timecode value,
referred to as direct-entry mode. You can also cue backward or forward from the current location
by a specified number of hours, minutes, seconds, or frames by using positive or negative
frame-offset values. This is referred to as offset mode.
80
Entering Timecode to Cue a Frame
To cue to a frame based on a known timecode:
1. Do one of the following:
t
Click the main timecode display.
t
With focus in the Media pane, press Enter (Windows) or Return (Macintosh).
The timecode is displayed with a green background.
2. Using the standard number keys or the numeric keypad, type the timecode for the frame you
want to display, then press Enter (Windows) or Return (Macintosh). If you are using a
numeric keypad, make sure the Num Lock key is on. You can use the period key (.) as a
shortcut for entering 00.
To find a timecode that starts at the same hour, minute, or second as the current timecode,
type only the last digits. For example, if the current timecode is 11:56:24:00 and you type
3000, the system finds the frame at 11:56:30:00.
To clear the overlay without cueing, press the Esc key.
If you type a timecode that is earlier than the beginning of a clip or sequence, the first frame
of the clip or sequence is displayed. If you type a timecode that is later than the end of the
clip or sequence, the last frame of the clip or sequence is displayed.
While you are entering timecode, you can type a plus sign (+) or a minus sign (-) to switch to
offset mode. Any numbers you type are preserved.
To cue to a frame based on a frame-offset value:
1. Using the standard number keys or the numeric keypad, type a plus sign (+) to move forward
or a minus sign (-) to move backward. If you are using a numeric keypad, make sure the
Num Lock key is on. You can use the period key (.) as a shortcut for entering 00.
A plus sign or minus sign is displayed with an empty green field.
2. Type the number of hours, minutes, seconds, or frames you want the position indicator to
move. Use the following formats:
-
Type 1 through 99 to specify a number of frames forward or backward. Then press Enter
(Windows) or Return (Macintosh). For example, type –47 to move backward 47 frames.
81
Working in the Media Timeline
-
Type 100 or greater to move forward or backward a specified number of hours, minutes,
seconds, and frames. Then press Enter (Windows) or Return (Macintosh). For example,
type +500 to move forward five seconds.
To clear the overlay without cueing, press the Esc key.
If you type a number that is beyond the limit of the clip or sequence, the first or last frame of
the clip or sequence is displayed.
While you are entering a forward value, you can type a plus sign (+) again to switch to
direct-entry mode. While you are entering a backward value, you can type a minus sign (-) to
switch to direct-entry mode. Any numbers you type are preserved.
Working in the Media Timeline
The Media Timeline is a graphical representation of the length and time spans of an asset or
script sequence. The Media Timeline includes timing marks, a position indicator, and other
controls. The following illustration shows the Media Timeline and controls in Asset mode.
q w
e r
t
1
Position indicator
4
Marker indicators
2
In mark
5
Zoom bar
3
Out mark
In Output mode, the Media Timeline does not include In and Out markers or markers.
The position indicator functions as a playhead: media for the frame marked by the position
indicator is displayed in the Media viewer. You can drag the position indicator to scrub through a
clip or sequence. You can click on a location in the Media Timeline to move the position
indicator and display a specific frame. In Output mode, movement of the position indicator
matches movement of the sightline in the Sequence Timeline.
82
Using the Zoom Bar
Marks in the Media Timeline indicate various time spans. The time spans indicated depend on
the length of the asset or script sequence and the settings in the zoom bar. Timing marks indicate
the following:
•
1 second
•
10 seconds
•
1 minute (60 seconds)
•
5 minutes (300 seconds)
•
1 hour (3600 seconds)
These timing marks are intended for general navigation, not navigation to a specific timecode.
For information about working with timecode, see “Using the Timecode Displays” on page 80.
Using the Zoom Bar
The zoom bar is located below the Media Timeline. You can use the zoom bar to enlarge a
section of the Media Timeline so that you can work more easily with long clips. By default, the
zoom bar is set to display the entire clip in the Media Timeline.
The zoom bar includes a position indicator that matches the position indicator in the Media
Timeline and is always visible, which is useful when you are zoomed in to a section of the
timeline that does not include the timeline position indicator.
The following illustration shows the zoom bar set for an entire 10-minute clip.
The following illustration shows the zoom bar set so that the timeline shows two minutes. This is
referred to as the zoom region. Notice that the position indicator is displayed in the zoom bar, but
is not visible in the timeline.
You can drag the zoom bar through the clip to select any two-minute region.
You can click the position indicator in the zoom bar and jump to the position indicator in the
timeline. The zoom region moves to include both position indicators and to enlarge the section of
the timeline that includes the position indicator.
83
Reviewing for Playback
If you drag the position indicator in the timeline, or if you play the loaded clip or sequence, the
zoom bar and its position indicator match the movement in the timeline.
To zoom in to or out from a section of the Media Timeline, do one of the following:
t
Drag a zoom bar handle in to zoom in or out to zoom out.
t
Press the down arrow key to zoom in by 50 percent or press the up arrow key to zoom out by
50 percent.
The following illustration shows the timeline for a twenty minute clip, with the zoom bar set
to display the entire clip. In and Out points mark a one-minute segment.
The next illustration shows the timeline zoomed in to show the one-minute segment. Timing
marks are displayed at one-second intervals.
Reviewing for Playback
When you play media in Interplay Central in a multi-resolution environment, the media server
plays the most compressed available media. For a send-to-playback operation, the
send-to-playback profile specifies a high-resolution target resolution. You can select an option to
play the media in the target resolution.
Reviewing media for playback is a way of testing if all media is available for the script sequence,
checking for black frames, and checking if edits are frame-accurate. It is not a way to check the
quality of the resolution. This relink is made only to the specific target resolution and if the
resolution is not available the Media Offline display will be shown.
Reviewing media for playback is a temporary setting and applies only to the currently loaded
script sequence.
84
Using Match Frame
To review a script sequence in the send-to-playback target resolution:
1. In Output mode, click the Review for Playback button.
The button turns orange. A tool tip shows the target resolution.
2. Play the script sequence.
Using Match Frame
The Match Frame feature lets you load a master clip that contains a specific frame of a script
sequence. This clip is called the source clip. You can use Match Frame to quickly load a clip
from your sequence for additional editing.
Match Frame is available only in Output mode. You cannot use it in Asset mode for sequences
loaded from an Interplay Production database.
To load a source clip for a specific frame of a script sequence:
1. Click the Output button to display the current script sequence.
2. Navigate to the frame for which you want to load the master clip.
3. Click Pane Menu button and select Match Frame.
The master clip that contains the frame is loaded in the Media pane, with the matching frame
displayed. In and Out marks are set to match the clip segment in the script.
Opening an Enclosing Folder
You can use the “Open Enclosing Folder” command to open an Assets pane for a folder that
contains a selected asset. For example, you might want to locate a folder that holds master clips
captured at the same time as the clip currently loaded in the Media pane. You can use this
command for an asset loaded in the Media pane, for an asset you select in an Assets pane, or for
an asset selected in a Search pane.
To open the enclosing folder for an asset loaded in the Media pane:
t
Click the Pane Menu button and select Open Enclosing Folder.
85
Opening an Enclosing Folder
If the asset is stored in only one folder, the folder opens in a new Assets pane, with the
selected asset highlighted.
If the asset is stored in more than one folder, the Open Enclosing Folder window opens and
displays a list of folders that contain the asset. Double-click one of the listed folders and the
folder opens in a new Assets pane, with the selected asset highlighted. You can use the Up
Arrow and Down Arrow keys to navigate through the list, and the Enter key to open the
enclosing folder for a selected clip. Use the Esc key to cancel and close the window.
To open the enclosing folder for an asset selected in an Assets pane:
t
Click the Pane Menu button and select Open Enclosing Folder, or right-click and select
Open Enclosing Folder.
The results are the same as when you select the command for an asset loaded in the Media
pane.
To open the enclosing folder for an asset selected in a Search pane:
t
Click the Pane Menu button and select Open Enclosing Folder, or right-click and select
Open Enclosing Folder.
The folder for the selected asset, as shown in the Path column, directly opens in a new
Assets pane, with the selected asset highlighted.
If the setting “Show only one representation for each asset found” is enabled in the Interplay
Production User Settings, the results are the same as when you select the command for an
asset loaded in the Media pane.
n
If the asset is contained in a folder that contains more objects than can be displayed in an Assets
tab, and the asset is not displayed in the first group, it is not highlighted.
86
Mixing Down Sequences
Mixing Down Sequences
You can use the Interplay Central Mixdown feature for two purposes:
•
n
Creating a master clip that is playable in the Media viewer. If a sequence created in an Avid
editing system is too complex to play correctly in the Media pane, you can use the Mixdown
feature to create a new master clip. All master clips are playable. After mixing down the
sequence, you can load the new master clip, mark In and Out points, and add the segment to
your script sequence.
For information about playing sequences, see “Playing Simple and Complex Sequences” on
page 76.
•
Creating a script sequence that matches the send-to-playback resolution. If you want to send
a script sequence to a playback device, the resolution of the sequence must match the
resolution specified for the playback device. Interplay Central warns you if the sequence
does not match the send-to-playback resolution, and you can use the Mixdown feature to
create a script sequence with the required resolution.
Interplay Central Mixdown uses the Interplay Production system’s Media Services Transcode
service to perform the mixdown. An Interplay Production administrator needs to create a
Transcode profile that uses Mixdown mode. An Interplay Central user selects the profile in the
Settings dialog box.
Because Interplay Central displays all available Transcode profiles, the Interplay Production
administrator should name the profile in a meaningful way. For example, include the word
“mixdown” and the resolution in the name of the profile. For more information, see the Interplay
Media Services documentation.
To select a Transcode profile for mixing down a sequence:
1. Select Home > Settings.
2. In the Name section, select Interplay Production.
3. In the Sequence Mixdown Settings section, select a profile from the Profile list.
87
Mixing Down Sequences
4. Click Apply and close the Settings dialog box.
To mix down a sequence, do one of the following:
t
In the Asset pane or a Search pane, select an Interplay Production sequence, right-click, and
select Sequence Mixdown.
t
In the Asset pane, select an Interplay Production sequence and select Sequence Mixdown
from the Assets Pane menu.
t
With a sequence loaded in the Media pane, click the Pane Menu button and select Sequence
Mixdown.
t
With a story loaded in the Queue/Story pane, select Sequence Mixdown from the
Queue/Story Pane menu.
The Sequence Mixdown process uses the selected Transcode profile and begins the
mixdown. You can view the progress in the Progress pane.
To cancel the process, click the x icon. If the process was successful, the Progress pane
displays the name of the new master clip. Click the Monitor icon to play the clip in the
Media pane.
88
Viewing and Editing a Clip During Ingest
The new master clip is created in the same Interplay Production folder as the original
sequence. Click the blue link to open the folder in the Asset pane.
Media for the new master clip is stored in the workspace specified in the Transcode profile.
Viewing and Editing a Clip During Ingest
Interplay Central lets you view and edit a master clip while it is still being captured through an
ingest device. These clips are called in-progress clips, and the process of working with them is
called Frame Chase editing or edit while capture (EWC). You can add an in-progress clip to a
script sequence and send the sequence to playback before the capture is complete. For more
information about Frame Chase editing, see the Avid Interplay Transfer documentation.
In-progress clips are indicated by the following icons in the Interplay Production database tree:
In-progress master clip
In-progress audio clip
If you view an in-progress clip in the Media pane, the ends of the Media Timeline pulse with a
purple glow while the capture is in progress.
During the capture, the visible region of the Media Timeline (the zoom region) remains constant
to make the viewing and editing easier. The zoom bar shrinks as the duration of the clip grows.
You can use the zoom bar to change the zoom region during the capture.
You can reduce the zoom region and view new material as it becomes available. For example, if
you zoom in to view the last 5 minutes of a clip and play near the end, the visible region of the
timeline displays the last 5 minutes of the available media during the entire capture operation.
89
Saving a Frame as an Image
Saving a Frame as an Image
From the Media pane, you can select a frame of video and save it as an image in either the PNG
or JPG format. If a clip is associated with multiple resolutions, the image is saved in the highest
resolution.
To save a frame as an image:
1. Double-click the video asset to open it in the Media pane.
2. Navigate to the frame of video you want to save.
3. Click the Pane Menu button and select Save As Image.
4. When the dialog box appears, select the image format: PNG or JPG.
5. (Optional) Click in the Filename text field to change default name of the image.
6. Click Download.
The image is saved to the default download folder on your computer, as specified by your
browser. For instance, in Google Chrome, you can view or change the download location of
this folder by clicking the Wrench icon, selecting Options, selecting Under the Hood, and
reviewing the setting called Downloads.
90
6 Using Audio
The following main topics describe how to add audio to the Sequence Timeline and adjust audio
levels to produce your final story:
•
Working with Audio Tracks
•
Recording a Voice-over
Working with Audio Tracks
Working with Audio Tracks
The Sequence Timeline in the Script Editor includes three different types of audio tracks:
•
Natural sound (NAT): Audio recorded at the same time as the video clip by the microphone
built-in to the video camera. Interplay Central supports single-channel or dual-channel NAT
tracks.
•
Sound-on-Tape (SOT): Audio recorded at the same time as the video clip, usually with a
microphone separate from the one built in to the video camera, which records the natural
sound. Interplay Central supports single-channel or dual-channel SOT tracks.
•
Voice: Audio recorded through an audio device connected to your system or an audio-only
media file opened from the Interplay Production database. Interplay Central supports
single-channel Voice tracks.
Each audio track is identified in the Sequence Timeline:
•
N indicates the NAT track. Media in the NAT track and its associated video track is colored
green.
•
S indicates the SOT track. Media in the SOT track and its associated video track is colored
blue.
•
V indicates Voice track. Media in the Voice track is colored purple.
An Interplay Production administrator can change the labels that identify each track by changing
the settings in the Interplay Production Application Database Settings. For more information, see
the Interplay Central Administration Guide.
92
Working with Audio Tracks
Automatic Adjustment of Audio Gain Levels
The application automatically sets audio gain levels to ensure the clearest sound for the master
audio track of your story. This provides default volume levels for separate tracks so that you do
not need to manually adjust audio gain levels. Audio gain levels are set according to the
following parameters:
•
If a Voice track is present, the application lowers (or “ducks”) the audio level on any other
tracks (NAT track, SOT track, or both) running at the same point in the Sequence Timeline.
•
If no Voice track is present, and a SOT track is present, the application ducks the audio level
on the NAT track running at the same point in the Sequence Timeline.
•
If no Voice or SOT tracks are present, NAT sound remains at full volume.
An Interplay Production administrator can change the amount of ducking by changing the setting
in the Interplay Administrator Application Database Settings. For more information, see the Avid
Interplay Engine and Avid Interplay Archive Engine Administration Guide. The default level is
12 dB.
Automatic Creation of Audio Dissolves
By default, Interplay Central creates an audio dissolve between each clip in your sequence.
Because the dissolve requires at least one frame to fade out or fade in, you should not mark your
In point at the first frame of your clip or your Out point at the last frame of your clip. Instead, use
the Video monitor controls to step in a few frames from the beginning or end of your clip before
marking your In and Out points.
An Interplay Production administrator can change the number of frames used for the dissolve by
changing the setting in the Interplay Administrator Application Database Settings. For more
information, see the Avid Interplay Engine and Avid Interplay Archive Engine Administration
Guide.The default number of frames is 2.
The Audio Pane
The Audio pane provides you with the controls you need to adjust audio levels for the script
sequence and monitor output.
In the Video layout, the Audio pane is positioned directly below the Media pane. You can drag
the Audio pane to a different area if you prefer. If the Audio pane is not displayed, select Panes >
Audio to open it.
The following illustration identifies controls in the Audio pane when the Media pane is in Output
mode. In Asset mode, only the Audio meters are active. You can monitor the audio level of an
asset, but you cannot change it.
93
Working with Audio Tracks
The border color of each set of controls matches the colors of the tracks in the script sequence:
green for NAT, blue for SOT, and purple for Voice. For more information, see “Working with
Audio Tracks” on page 92.
y
q
w
u
e
r
t
1
i
Control
Description
Balance knob
Controls the balance for stereo tracks. Click the green tip of the indicator and
drag it left or right so that the indicator points to the desired level of mixing.
Dragging the indicator all the way to the L or the R selects only the content of
the left or right channels. Double-click a balance knob to center it.
The balance knobs are active only if there are two tracks for NAT or SOT audio.
2
Solo and Mute buttons
Click the S (Solo) button to monitor only the selected mono or stereo track. All
other tracks are muted. Click the M (mute) button to mute only the selected
mono or stereo track.
3
Volume slider
Click and drag the slider to adjust the volume level for an audio clip. The level
applies only to the segment of a clip, not to the entire clip or the entire track.
4
Volume level display
Displays the level selected by the volume slider.
5
Track identifier
Identifies the track associated with the audio controls. Tracks are identified as
mono or stereo. For example, NAT 1, 2 indicates a stereo NAT track, using
tracks 1 and 2.
An Interplay Central administrator can change the labels that identify each
track by changing the settings in the Interplay Production Application Database
Settings. For more information, see the Interplay Central Administration
Guide.
94
Working with Audio Tracks
6
Control
Description
Pane Menu button
Provides options for controlling audio editing:
•
Mix Mode: Select Stereo or Mono to specify the audio output. See “Setting
the Audio Mix” on page 96.
•
Help: Displays information about the audio pane. Use the Help control
buttons to access other Help topics.
7 Audio meters
Displays the audio level for the asset, the selected tracks of the script sequence,
or the overall mix of the script sequence. There are two meters. For stereo
output, each meter displays a separate level. For mono output, both meters
display the same level. All tracks are mapped to stereo or mono. See “Setting
the Audio Mix” on page 96.
8 Audio monitoring preferences
(Asset mode only) Selects the audio output for the asset. By default, output is
stereo or mono. You can create a custom setting. See “Setting Audio
Monitoring Preferences for Assets” on page 97.
The NAT, SOT, and Voice controls are enabled or disabled depending on the position of the
sightline. In the following illustration, the sightline is positioned across both NAT and Voice
clips., and the NAT and Voice controls are activated.
Adjusting Audio Levels for a Script Sequence
To adjust audio levels for a script sequence:
1. If the Audio pane is not open, select Panes > Audio.
The Audio pane opens and displays the audio controls.
2. Drag the audio slider for the track you want to adjust.
95
Working with Audio Tracks
The change in audio level is shown in the audio meter. The following illustration shows
adjustment of the level for a NAT track.
For more information about audio controls, see “The Audio Pane” on page 93.
Setting the Audio Mix
You can set the audio mix for an asset or for a script sequence. For an asset, up to 16 tracks are
monitored. You can select which tracks to monitor. For more information, see “Setting Audio
Monitoring Preferences for Assets” on page 97.
To set the audio mix, do one of the following:
t
Select Mix Mode > Mono from the Audio Pane menu.
Interplay Central maps all audio tracks to a center pan, which creates a mono mixdown of all
tracks. It outputs the resulting track to two identical channels.
t
Select Mix Mode > Stereo
In Asset mode, Interplay Central maps all audio tracks to a left/right alternating pan, with
odd tracks on one channel and even tracks on the other channel, which creates a stereo
mixdown of all tracks. It outputs the resulting two tracks to two channels.
In Output mode, this setting applies only to dual-channel tracks. You can use the balance
knob to adjust the mix for NAT1 and NAT2, and SOT1 and SOT2. An administrator
specifies how tracks are mapped in the Editor Database Settings view in the Interplay
Administrator. For more information, see the Interplay Central Administration Guide.
96
Working with Audio Tracks
Setting Audio Monitoring Preferences for Assets
In Asset mode, by default, all audio tracks in an asset are monitored, up to 16 tracks. You can
create a custom setting for which tracks to monitor. Source clips and sequences can include up to
24 tracks of audio but you can play only 16 at a time.
To set custom audio monitoring:
1. In the Audio pane, click the Custom button.
The Audio Monitoring Preferences window is displayed.
2. Select or deselect the tracks you want to monitor. You can click the Disable All and Enable
First 16 Tracks buttons to make selection easier.
3. Click the Close button or click anywhere outside the window.
4. In the Audio pane, click the speaker button next to the Custom button.
The speaker button turns green, and the track identifier shows which tracks are selected.
97
Recording a Voice-over
Overriding the Default Audio Tracks
An Interplay administrator sets the default tracks for NAT, SOT, and Voice audio. By default,
track A1 is mapped to NAT audio, A2 is mapped to SOT audio, and A3 is mapped to Voice. (If
dual-channel support is enabled, A1 and A4 are mapped to NAT audio, and A2 and A5 are
mapped to SOT audio).
n
For information about setting the default tracks, see the Avid Interplay Central Administration
Guide.
You might need to change these mappings. For example, the NAT audio and the SOT audio
might become reversed if a reporter’s microphone is recorded on the wrong track. When this
happens, the NAT sound takes the place of the SOT track, and if you disable the NAT track the
SOT is disabled instead. You can change (or swap) the NAT and SOT tracks to compensate for
this problem.
When you override the default NAT or SOT tracks in a clip, only the active clip in the Sequence
Timeline is modified. Other clips that you added to the Sequence Timeline from the same source
clip remain unchanged.
To override the default audio tracks:
1. Do one of the following:
t
Right-click the audio portion of a clip in the Sequence Timeline and select Audio
Mapping.
t
Select the audio portion of a clip in the Sequence Timeline and select Audio Mapping
from the Queue/Story Pane menu or the Project/Story Pane menu.
2. Select the track you want to use for the selected audio.
Recording a Voice-over
You can use special audio controls in the Media pane to record a voice-over for your story. You
can record the voice-over while the video is playing.
To record a voice-over:
1. Click the Output button to load the script sequence into the Media pane.
With the Output button selected, the Voice-over button is displayed in the lower right of the
Media pane.
98
Recording a Voice-over
2. Click the Voice-over button.
The first time you click the voice-over controls during a session, you might see a message
from the Adobe Flash Player asking for permission to let the Interplay Central server access
your camera and microphone. Click Allow.
The voice-over controls are displayed.
3. Click the Media Pane Menu button, select Input Source, and select the device you want to
use for recording.
4. Turn the power on the recording device, if necessary, and use the volume slider to set the
desired volume level.
5. Set the start point for the recording by doing one of the following:
t
Drag the position indicator in the timeline.
t
Drag the sightline in the script editor.
t
Clicking the Play/Pause, 1 Frame Back, or 1 Frame Forward buttons in the voice-over
controls.
6. When you are ready to record, press the Record button.
A three-second countdown is displayed in the viewer, audio pops mark each second, and the
Record button flashes red. At the end of the countdown, the Record button remains red and
you can begin recording.
You can monitor the recording level in the audio meter and adjust it as needed while
recording.
Click Cancel to stop recording without saving the file.
7. When you are finished the recording, press the Record button again.
The voice-over is added to the script sequence, in the V column. You can review the
recording by playing the script sequence.
8. To exit the voice-over controls, click the Voice-over button.
99
7
Search
Interplay Central offers search capability through a Search bar or Search pane, which let you
search for text and media assets in the integrated systems listed in the Launch pane. You can have
multiple Search panes open at the same time.
This chapter contains the following main topics:
•
The Search Bar
•
The Search Pane
•
Conducting a Search
The Search Bar
The Search Bar
The Search bar has a drop-down list used to select the type of asset, a text field in which you can
enter search criteria, and a Search button you click on to conduct the search.
When a search is conducted from the Search bar, the results appear as a drop-down list under the
text field. The size of the Search bar and its results can be adjusted by clicking and dragging the
edges or corners.
1
Search Detach icon
2
Search button
3
Pane Menu button
The Search bar is part of the Search pane. When a search is conducted from the Search pane, the
results are provided as a list in the pane below the bar.
101
The Search Pane
The Search Pane
There are a few ways you can open a Search pane; the method you take depends on whether you
have already conducted a search.
To open a Search pane:
t
Select Panes > Search.
This opens a blank Search pane in which you can conduct your search, using the Search bar
at the top of the pane.
t
If you have already conducted a search in the Search bar and want to display the results in a
pane, click the Search Detach icon and drag the bar into any application area on screen. For
more information, see “The Search Bar” on page 101.
t
If you have already conducted a search and want to keep your results in the pane while
opening a duplicate Search pane to perhaps further filter your search, use the Pane Menu
button and select Detach Search.
102
Conducting a Search
Conducting a Search
If you want to locate an asset, but do not want to manually navigate through database file
structures, you can conduct a search using the Search bar or Search pane. Regardless of which
one you use, the procedure is the similar; however, you can define more criteria for filtering your
search results when conducting a search from the Search pane.
To conduct a search:
1. Select the type of asset from the drop-down list. Options include:
-
All Assets - conducts a search of both iNEWS and Interplay Production systems for
stories and media that match the search criteria.
-
Media - conducts a search of Interplay Production for media assets that match the search
criteria.
-
Stories - conducts a search of the iNEWS newsroom computer system for stories that
match the search criteria.
2. If conducting a search from a Search pane, select Folder from the Add Criteria drop-down
list and then click Browse to limit your search to a specified directory.
n
The Add Criteria feature is not available from the Search bar.
To select multiple locations for your search, you can hold the Control key (Windows) or
Command key (Macintosh) down while clicking on the locations in which you want to
conduct your search. After making multiple selections, you can mouse over the Browse field
to view the full list of selections as a tooltip.
n
When searching an iNEWS database, you can simultaneously search multiple indexed queues;
however, you can only choose one non-indexed queue path at a time. Attempts to choose more
than one will result in an invalid selection error message.
Should you change your mind and want to remove the added criteria, click the Minus button,
which appears at the far right of the pane above the Search button.
3. Type a key word or words in the Search bar’s text field.
When two or more words are entered, separated by spaces, the system conducts a search for
anything that matches all words entered. For instance, if you type White House, the system
will search for items containing both White and House, but the results will not feature items
with only White or House.
103
Conducting a Search
Additionally, the search for a word, such as plane, will respond with items that contain plane
as well as items that contain airplane.
n
The search is not case-sensitive; however, Avid recommends only alpha-numeric characters be
used.
Use of punctuation or symbols could have mixed results. For example, an iNEWS system
treats an asterisk or question mark as a wild card character. This means, when searching
stories in the iNEWS database, typing the letters Sm*th will locate stories with words such
as: Smith, Smyth, and smooth. However, the Interplay Production does not support wild card
characters, so the same search for Sm*th would only return media assets containing those
exact characters (Sm*th) and not anything else.
4. Click the Search button.
Assets that match the criteria are returned in the search results list. If the asset exists in
multiple locations of Interplay Production, all instances could be listed as determined by an
Interplay Production setting.
n
The Interplay Production settings include two settings that can help improve search
performance: Show only one representation for each asset found and Select a time range for
your search results. For more information, see “Interplay Production Settings” on page 134.
The following illustration shows an example of a search conducted in the Search pane for
which the user specified a search of Stories in the Wires directory for the keyword Flood.
The search returned 62 matches in the results list.
104
8 Logging and Creating Subclips
In Interplay Central, logging refers to the process of adding information to clips, subclips, and
sequences. This information includes markers, restrictions, and text, which you can use for
reference during story creation and media editing. The following main topics describe features
you use when logging your material.
•
Workflows for Logging
•
Understanding Markers and Restrictions
•
The Logging Layout
•
The Markers Pane
•
Adding, Saving, and Deleting Markers
•
Exporting Markers
•
Unicode Support for Marker Text
•
Creating Subclips
The following topic lists the keyboard shortcuts used for logging:
•
n
“Markers Pane Shortcuts” on page 179
In Media Composer v6.0, Avid Symphony v6.0, and NewsCutter v10.0, the term “locators” was
changed to “markers” in both the user interface and the documentation.
Workflows for Logging
Workflows for Logging
Interplay Central is designed to enable fast, flexible logging. There is a special layout for
logging, called the Logging layout. There is a pane for viewing and editing markers, called the
Markers pane, which is available in both the Logging layout and the Video layout. Keyboard
shortcuts provide a quick way to work with markers while controlling media playback.
Example Workflows
Following are two typical logging workflows.
•
Logging a video feed: A media logger logs content at the same time that the media is being
ingested.The media logger can add markers to specify particular video or audio frames and
add comments to the markers as required. A journalist can then open a specific clip or clips
in the Interplay Central Video layout, view the markers and comments, and copy text if
necessary, even while the recording is in progress.
Working with content while it is being ingested is sometimes referred to as “edit while
capture.” For more information, see “Viewing and Editing a Clip During Ingest” on page 89.
•
Logging recorded video: A media logger browses for recorded clips and logs the content by
adding markers and comments. For example, marker comments can include a transcription
of an interview. A journalist can then use the transcription as a starting point for a story.
Multiple Loggers Working on the Same Clip
Two or more media loggers can add markers to the same clip, while it is still being recorded or
after it has already been recorded. Each media logger can refresh the Markers pane to display all
saved markers, including those created by other loggers.
c
There is no locking mechanism if two loggers are editing the same marker text. If two
loggers are editing the same marker text, either one can save the marker, and the clip in the
Interplay database is updated with the last saved version. To display the latest saved
version, click the Refresh button or press F5 (see “The Markers Pane” on page 110).
Keyboard Shortcuts
Most functions for logging and controlling playback can be accomplished by keyboard shortcuts.
For example, a logger working on a live video feed can do the following:
1. Press Ctrl+M to add a marker at an approximate point.
2. Type text for the marker.
3. Press Ctrl+Enter to exit and save the marker.
4. Press Ctrl+M to add another marker.
106
Understanding Markers and Restrictions
If you want to create a marker with a icon with a specific color, press Ctrl plus the appropriate
key on the numeric keypad instead of Ctrl+M. For example, press Ctrl+3 to create a marker with
a red icon.
A logger who is transcribing an interview can use Ctrl+J (back), Ctrl+K (stop), and Ctrl+L
(forward) to precisely control playback of a clip while typing the transcription in a marker or in a
series of markers.
For more information, see “Markers Pane Shortcuts” on page 179.
Understanding Markers and Restrictions
In Interplay Central, adding markers is the primary way to log material. A marker is an indicator
that you add to a selected frame to mark a particular location in a clip, subclip, or sequence.
Markers can have icons of different colors and can be associated with user-defined comments.
Markers and Avid Applications
Users can add, view, and edit markers in several different Avid applications:
•
Avid NewsCutter, Avid Media Composer, Avid Symphony
•
Interplay Assist
•
Interplay Access
•
Interplay Central
Markers added in any of these products can be viewed and edited by any of the other products in
an Interplay environment. The following illustration shows the same clip and markers in
Interplay Central and in Avid NewsCutter.
107
Understanding Markers and Restrictions
n
In Media Composer v6.0, Avid Symphony v6.0, and NewsCutter v10.0, the term “locators” was
changed to “markers” in both the user interface and the documentation.
Restrictions
A restriction is a set of two markers that indicate clips whose use is limited in some way, such as
through intellectual property rights management or content compliance. Users can add and edit
restrictions only in Interplay Assist, but can view them in the following Avid products:
•
Avid NewsCutter, Avid Media Composer, Avid Symphony
•
Interplay Instinct
•
Interplay Central
Markers and Sequences
In Interplay Central, you can add markers to clips, subclips, and sequences that are stored in the
Interplay Production database. Markers that you add to a sequence are associated only with the
sequence. They are not automatically associated with the corresponding master clips used in the
sequence. Similarly, a marker added to a subclip is not added to the associated master clip.
108
The Logging Layout
n
When you add a marker to a sequence, there might be a delay of a few seconds before you can
create a new marker. In this case, the Insert Marker button is disabled (grayed out). When the
button is enabled again, you can create a new marker.
If you are creating a script sequence in the Video layout, you can open the Markers pane, but it is
active only when you are working with clips in Asset mode. You can open a clip, view its
markers, add markers, and copy marker text to a story in the Script Editor. However, if you add a
clip that includes markers to a script sequence, the markers are not added to the script sequence.
If you switch the Media pane to Output mode, the Markers pane is disabled.
Number of Characters in Marker Text
In Interplay Central, marker text is limited to 32,000 characters for each marker. If marker text
exceeds 32,000 characters, a warning message tells you that the text exceeds the maximum
number of characters and that you cannot save the text until the reduce the number of characters.
The Save status message shows you the character count until it is reduced to 32,000, at which
point the message changes to “Unsaved changes” and you can save the text.
The Logging Layout
The Logging layout provides you with an arrangement of panes defined for use in logging. By
default the layout includes four panes: Launch, Media, Assets, and Markers. The following
illustration shows the Media pane and the Markers pane. The Markers pane tab displays the
name of the loaded clip or sequence.
q
w
e
109
r
The Markers Pane
1
Launch pane
3
Assets pane
2
Media pane
4
Markers pane
You can adjust the location and size of the panes as you can do in other layouts. For example,
you can drag the Assets pane beneath the Media pane.For more information, see “Working with
Panes and Areas” on page 20.
n
The Output button and the STP button in the Media pane are disabled in the Logging layout.
To open the Logging layout:
t
Select Logging from the Layout drop-down menu.
To reset the Logging layout:
t
Select Reset Layout from the Layout drop-down menu.
To open the Logging layout from an Assets pane, do one of the following:
t
Select a clip and select “Open in Logging Layout” from the Pane menu.
t
Right-click a clip and select “Open in Logging Layout.”
The Markers Pane
The Markers pane is the pane in which you create and view markers and marker text. You can
also view restrictions, if the clip or sequence contains them, but you cannot currently create
restrictions in Interplay Central.
The Markers pane is available in both the Logging layout and the Video layout. The Logging
layout is designed specifically for logging. The Video layout is designed specifically for
journalists, and the inclusion of the Markers pane allows journalists the option of viewing and
creating markers.
n
If you are creating a script sequence in the Video layout and add a clip that includes markers to
a script sequence, the markers are not added to the script sequence.
The following illustration shows a series of markers in the Markers pane. Displays and controls
are described in the accompanying table.
110
The Markers Pane
qw e rr
t
y
r
r
u
i
r6
o
r
1)
r
Display or Control
Description
1
Insert Marker button and Marker
Color menu
Creates a new marker at the timecode selected in the Media
pane. You can select the color for the marker, as described
in “Adding, Saving, and Deleting Markers” on page 113.
You can also create a new marker by pressing Ctrl+M
(Windows and Macintosh) or Command + M (Macintosh),
or using Ctrl plus a key on the numeric keypad. See
“Markers Pane Shortcuts” on page 179.
2
Refresh button
Updates the display of markers saved for the selected clip or
sequence. This control is especially useful when multiple
loggers are adding markers to the same clip or sequence, or
when a journalist wants to see the latest information added
by the loggers.
If the focus is in the Markers pane, you can also press F5 to
update the display.
3
Export button
Displays options for exporting marker text to other
applications. See “Exporting Markers” on page 116.
4
Save button
Saves all markers without exiting edit mode.
n
5
Save status message
Edit mode refers to the state in which the cursor is
displayed in the Notes field and you can enter text.
Displays whether or not markers for the clip or sequence
are saved. The messages are “Unsaved changes,” “Saving,”
or “All changes saved.”
111
The Markers Pane
6
7
Display or Control
Description
Pane Menu button
The Pane Menu for the Markers pane contains the following
options:
Columns
•
Save. Functions the same as Ctrl+S.
•
Delete. Functions the same as the Delete key
(Windows), Backspace (Macintosh), or fn+Backspace
(MacBook).
•
Export. Functions the same as the Export button.
•
Keyboard Shortcuts. Displays a Help topic that lists
keyboard shortcuts used for logging tasks.
•
Help. Displays a Help topic describing controls in the
Markers panel. From this topic you can access the entire
Interplay Central Help system.
The Markers pane has four columns:
•
(no label): Displays orange for the selected marker or
markers.
•
TC: Displays the timecode in the clip or sequence that
corresponds to the location of the marker.
•
Marker icon: Displays the icon associated with the
marker.
•
Notes: Displays the text associated with the marker.
You can cut, copy, and paste this text. See “Cutting,
Copying, and Pasting Text” on page 115.
8
Unselected marker
Gray indicates a marker that is not selected,
9
Restriction
A restriction is displayed in several parts:
10
Selected marker in edit mode
•
The entire marker entry at the start of a restriction is
colored red.
•
The marker entry at the end of the restriction is also
colored red. This marker’s text includes a link (marked
in blue) to the marker at the start of the restriction.
•
Any markers within the restricted span are colored with
red cross-hatching.
When you are actively editing text for a marker, the marker
is selected in orange, and the Notes field is white.
112
Adding, Saving, and Deleting Markers
The Markers pane is available in both the Logging layout and the Video layout. In the Logging
layout, the Markers pane is open by default. In the Video layout, you need to open it from the
Panes menu.
To close the Markers pane:
t
Click the X in the pane’s tab.
To open the Markers pane:
t
Select Panes > Markers.
You can adjust the location and size of the panes as you can do in other layouts. For more
information, see “Working with Panes and Areas” on page 20.
Adding, Saving, and Deleting Markers
How you add markers depends on your workflow. You can add a marker to a clip, subclip, or
sequence. You can add markers while video is playing or you can scrub through the video and
add markers at appropriate locations. You can control the video, add markers, and delete markers
by using the mouse or the keyboard. For example, while in the Logging layout, you can use
Ctrl+J, Ctrl+K, or Ctrl+L keys to control video while you are still typing marker text. For a list of
keyboard shortcuts, see “Markers Pane Shortcuts” on page 179.
Adding text in the Notes column is optional. You can add marker text immediately, or you can
add a marker without text and then add text later.
When you add a marker without text, the marker is saved automatically. When you add a marker
with text, the marker is saved automatically and the text is saved if you save the marker manually
or if you step out of a marker (exit edit mode) by using Ctrl+Enter.
n
Edit mode refers to the state in which the cursor is displayed in the Notes field and you can enter
text.
You can select which color you want to use for the marker icon. This can be useful if you want to
establish particular meanings for particular colors (red for restrictions, blue for audio, and so on).
The Add Marker button indicates the currently selected color for the marker icon. To change the
color, click the down arrow on the marker button and select a different color.
113
Adding, Saving, and Deleting Markers
To add a marker, do one of the following:
t
Click the Add Marker button.
t
Press Ctrl+M.
t
Press Ctrl plus a key on the numeric keypad that is associated with the color you want to use
for the marker icon. For example, press Ctrl+3 to create a marker with a red icon. See
“Markers Pane Shortcuts” on page 179.
The cursor is displayed in the Notes field and you can begin typing.
You can add another marker while you are in edit mode. After you create a new marker, the
old marker is automatically saved and the cursor is displayed in the Notes field of the new
marker.
To enter edit mode and edit marker text, do one of the following:
t
Double-click a marker.
t
Select a marker and press Enter.
To save marker text, do one of the following:
t
Click the Save button.
t
Press Ctrl+S.
t
Press Ctrl+Enter to exit edit mode.
t
Use the mouse to select a different marker.
t
Add a new marker.
To delete a marker, select one or more markers and do one of the following:
t
Press the Delete key (Windows), Backspace (Macintosh), or fn+Backspace (MacBook).
t
Right-click and select Delete.
t
Select Delete from the Pane menu.
To change the color of one or more marker icons, select the marker or markers and do one
of the following:
t
Position the mouse pointer on the icon and click the left or right mouse button, then select a
color.
t
Select a color from the Marker Color drop-down menu. This action also changes the color
for the next marker you add.
114
Cutting, Copying, and Pasting Text
Cutting, Copying, and Pasting Text
You can use standard keyboard shortcuts to cut text or copy text to the system clipboard, or paste
text from the system clipboard. This includes the ability to copy text from external sources such
as documents or web pages and to paste the text as marker notes. The text is pasted without
formatting.
You can also do the reverse: copy marker text and paste it into an external source, such as
Notepad. If you are working on a story in the Interplay Central Video layout, you can copy and
paste text into the Script Editor. You can also copy and paste entire markers (timecode and text).
When you paste an entire marker into a document, the clip name and framerate are included in
the pasted text.
To cut text:
t
Select the text and press Ctrl+X.
To copy text:
t
Select the text and press Ctrl+C.
To copy markers:
t
Select one or more markers and press Ctrl+C. Use Shift+click to select contiguous markers,
and Ctrl+click to select non-contiguous markers.
To paste text:
t
Press Ctrl+V.
For a complete list of keyboard shortcuts, see “Markers Pane Shortcuts” on page 179.
Navigating by Markers in the Logging Layout
You can use the mouse or keyboard to navigate by marker through a clip or sequence. The
marker that is selected in the timeline is also selected in the Markers pane. When you select a
marker in the Markers pane, the same marker is selected in the timeline and the corresponding
frame is displayed in the Media viewer.
To navigate to the previous marker, do one of the following:
t
With the focus in the Markers pane, press the Up Arrow key.
t
With the focus outside of the Markers pane, press Ctrl+Shift+Left Arrow.
To navigate to the next marker, do one of the following:
t
With the focus in the Markers pane, press the Down Arrow key.
115
Exporting Markers
t
n
With the focus outside of the markers pane, press Ctrl+Shift+Right Arrow.
In the Video layout, use Shift+Left Arrow and Shift+Right Arrow to navigate by markers.
Exporting Markers
You can export a list of markers in one of the following formats:
•
Plain text file (.txt) that lists the timecode and text for each marker.
•
A tab-delimited text file (.txt) that you can import into Media Composer or another Avid
editing application. For more information, see the documentation for the Avid editing
application.
•
CSV (comma-separated value) file that you can open as a Microsoft Excel spreadsheet.
•
XML file for use in other applications.
You can copy complete markers (timecode and text) to the system clipboard and paste them into
another application. You can also copy and paste marker text.
To export markers as a file:
1. Load a clip or sequence that includes markers in the Monitor.
2. Do one of the following:
t
Click the Export button.
t
Select Export from the Pane menu.
The Export Logs dialog box is displayed.
3. Select the type of file you want to export: Plain Text, Media Composer Text, CSV, or XML.
4. Type a file name. You do not need to add an extension.
116
Unicode Support for Marker Text
5. Click Download.
The file is saved to your default download folder.
The dialog box remembers the format you selected. This format is automatically selected the
next time you open the dialog box.
To copy one or more markers as text to the clipboard:
t
Select one or more markers and press Ctrl+C.
You can use the mouse or keyboard to select multiple markers:
-
Select a marker, then press Shift+Up Arrow or Shift+Down Arrow to select a range.
-
Select a marker, then press Shift+click to select a range or Ctrl+click to select individual
files.
You can then use Ctrl+V to paste the timecode and text to another document or application.
To copy marker text to the clipboard:
1. Double-click the Notes field for the marker whose text you want to copy.
2. Select the text you want to copy.
You can then use Ctrl+V to paste the text to another document or application.
Unicode Support for Marker Text
Interplay Central v1.2 and later supports input and display of Unicode characters when you
create marker text. As a result, any characters that you use for marker text in Interplay Central
are displayed correctly in the following products:
•
Interplay Central
•
Interplay Assist
•
Avid Instinct
•
Interplay Access
Unicode characters are displayed in Media Composer, Symphony, or NewsCutter only if the
operating system is set to the same locale in which the text was created.
Interplay Central correctly displays any characters used for marker text created in other products.
n
In an Interplay workgroup, all clients and applications except Interplay Central must use the
same locale, either English or one other locale.
117
Creating Subclips
Creating Subclips
If you are working in the Logging layout, you can create a subclip from a clip that you load in the
Media pane and store it in an existing folder in the Interplay Production database.
n
Creation of subclips from sequences is not currently supported.
To create a subclip:
1. Set an In point and an Out point for a clip that is loaded in the Media pane.
2. In the Assets pane, display the folder in which you want to store the subclip.
3. Click anywhere in the Media viewer and drag the thumbnail from the Media pane to the
folder, or to the line in the Assets pane that holds the folder.
Use the mouse pointer to precisely indicate the target location. If you hover over a folder, the
folder opens. If a folder is already open in the Assets pane, drag the thumbnail anywhere in
the Assets pane (except to a subfolder) to add it to the folder. A green plus sign indicates a
valid location for the subclip.
The subclip is added to the database, with the extension .Sub.01 added to the clip name. Any
other subclips you create from the same master clip include an incremented extension, for
example, .Sub.02.
n
Creation of subclips is currently limited to the Logging layout.
118
9 Messaging
Interplay Central provides you with a messaging feature for communicating with other users
working on the system.
n
Access to an iNEWS system is required for the messaging feature to work.
A message is a single line notation (70 spaces) that can be sent to only one other person.
The following main topics describe how to use the messaging feature.
•
Sending Messages
•
Viewing and Replying to Received Messages
Sending Messages
Sending Messages
Use the Message bar in Interplay Central to send messages, reply to messages, or view messages
received during your current session.
To send a message:
1. Click in the To: field of the Message bar, and from the list that appears, select the user to
whom you want to send a message.
All iNEWS user accounts are shown in the list. Colored dots appear next to names in the list
to indicate which users are available to receive messages via Interplay Central. A green dot
indicates a signed-in user, while a red dot appears next to users that are not signed in.
2. Click in the Enter Message Text field to type your message.
3. Click Send.
After the message is sent, the bar turns a pale shade of blue.
120
Viewing and Replying to Received Messages
Viewing and Replying to Received Messages
When messages are received, the Message bar turns a pale shade of green, and a numerical value
appears near the right end of the bar to show you how many unread messages you have, such as
10 in the following illustration.
To view received messages:
t
Use the Arrow buttons located near the right end of the Message bar to scroll through any
received messages.
To reply to a received message:
t
Click in the bar where the received message is located, type your message, and click Send.
121
10 Sending to Playback
The following topics provide information about sending a sequence to a playback device:
•
Specifying Send to Playback Settings
•
Sending a Script Sequence to a Playback Device
•
Sending a Stored Sequence to a Playback Device
•
The Progress Pane
Specifying Send to Playback Settings
Specifying Send to Playback Settings
The video and audio sequence that you create in the script editor is called the script sequence.
When you are finished editing a script sequence, you can transfer it to a playback device or
playout server for broadcast. This process is called send to playback, or STP.
You can also send sequences created in other Avid applications to a playback device if they are
playable in Interplay Central. For more information, see “Playing Simple and Complex
Sequences” on page 76.
When you send to playback, you use a profile that is created by an Interplay Central
administrator. For more information, see the “Configuring for Send to Playback” in the Interplay
Central Administration Guide.
You select a profile and other options in the Send to Playback Settings dialog box.
When you want to send a sequence to playback, if the sequence’s resolution matches the profile
and the sequence includes a video ID, you can send the sequence simply by clicking the STP
button. For more information, see “Sending a Script Sequence to a Playback Device” on
page 125 and “Sending a Stored Sequence to a Playback Device” on page 127.
n
If you select a Long GOP resolution as a target resolution, you can mix media of different
resolutions if the frame rates match. See “Sending a Mixed-Resolution Long GOP Sequence to a
Playback Device” on page 128.
To specify send-to-playback settings:
1. From the Media pane menu, select Send to Playback Settings.
2. Supply the following information:
123
Specifying Send to Playback Settings
Setting
Description
Name
Automatically supplied when you select a sequence for send to playback.
Video ID
Automatically supplied when you select a script sequence if the video ID is
already assigned to the story. The video ID is equivalent to the tape ID in Avid
editing systems.
If the Settings dialog box opens after you begin a send-to-playback operation, and
there is no Video ID assigned for a script sequence, a blue link is displayed in the
Video ID field. Click this link to display and enable the Video ID field within the
story form of the corresponding story. Then enter the correct Video ID.
Profile
Select the profile that you want to use for the send-to-playback operation. Profiles
are created by an Interplay Central administrator. Settings for the selected profile
are displayed in the section below the profile name. These settings are described
in “Configuring for Send to Playback” in the Interplay Central Administration
Guide.
Overwrite
(Optional) Select Overwrite if you want to automatically overwrite any sequence
with the same Tape ID already sent to the playback device.
n
High Priority
n
If you try to send a sequence with the same Tape ID as one already sent to
the playback device, you receive an error message. Select the Overwrite
option only if you are sure you want to overwrite any sequences with the
same Tape ID.
(Optional) Select High Priority if you want the sequence to be transferred as
quickly as possible and to play on the playback device before the transfer is
finished (also known as “play while transfer”).
If the Send to Playback Settings dialog opens after you send a sequence to playback, either the
resolution of the sequence does not match the selected profile or the video ID is missing, or both.
If you supply the correct settings, you can click the Send button to start the send to playback
process.
3. Click the Close button at the top right of the dialog box or click in another area of the
application.
If a script sequence is loaded in Output mode, the resolution for the selected profile is
displayed in the Video Format display. Move the mouse pointer over the display, and the
complete resolution is shown in an overlay.
124
Sending a Script Sequence to a Playback Device
Move the mouse pointer over the STP button, and a summary of the selected profile is shown
in an overlay.
The selected profile is also displayed in the Send to Playback option in the Media Pane
menu.
Sending a Script Sequence to a Playback Device
If you have selected an STP profile, your story includes a video ID, and the media format
matches the resolutions specified in the profile, you can send a sequence to playback by clicking
the STP button. You can also send to playback by selecting the Send to Playback option from the
Media pane menu or by clicking the Send button in the Send to Playback Settings dialog box.
125
Sending a Script Sequence to a Playback Device
If the media format of the script sequence does not match the media format specified in the
profile, the Video Format display is red. To send the sequence to playback, select a different
profile or replace the media in the sequence. For more information, see “Specifying Send to
Playback Settings” on page 123.
You can preview a sequence before sending it to playback. For more information, see
“Reviewing for Playback” on page 84.
n
If you select a Long GOP resolution as a target resolution, you can mix media of different
resolutions if the frame rates match. See “Sending a Mixed-Resolution Long GOP Sequence to a
Playback Device” on page 128.
To send a sequence to a playback device:
1. Open a story in the Queue/Story pane or the Project/Story pane and click the Output button
in the Media pane.
The script sequence is loaded in the Media viewer. The resolution for the currently selected
STP profile is displayed in the Video Format display.
2. Do one of the following:
t
Click the STP button.
t
From the Media pane menu, select Send to Playback (profile-name).
If the script sequence includes a video ID, and the media formats match the requirements of
the profile, the sequence is sent to the Interplay Transfer service, from which it is sent to the
selected playback device. You can continue working while the transfer is taking place.
If the sequence does not have a video ID, the Send to Playback Settings dialog box opens.
Supply the correct settings and click Send.
If there is no Video ID assigned for a script sequence, a blue link is displayed in the Video
ID field. Click this link to display and enable the Video ID field within the story form of the
corresponding story. Then enter the correct Video ID and start the send-to-playback
operation again.
126
Sending a Stored Sequence to a Playback Device
For information on monitoring the send-to-playback operation, see “The Progress Pane” on
page 129.
Sending a Stored Sequence to a Playback Device
You can send a sequence stored in an Interplay Production database to a playback device.
If the media format of the sequence does not match the media format specified in the profile, the
Video Format display is red. To send the sequence to playback, select a different profile.
You can preview a sequence before sending it to playback. For more information, see
“Reviewing for Playback” on page 84.
n
If you select a Long GOP resolution as a target resolution, you can mix media of different
resolutions if the frame rates match. See “Sending a Mixed-Resolution Long GOP Sequence to a
Playback Device” on page 128.
To send a sequence to a playback device:
1. Load a sequence in the Media pane.
The resolution for the currently selected STP profile is displayed in the Video Format
display.
2. Do one of the following:
t
Click the STP button.
t
From the Media pane menu, select Send to Playback (profile-name).
If the sequence includes a video ID, and the media formats match the requirements of the
profile, the sequence is sent to the Interplay Transfer service, from which it is sent to the
selected playback device. You can continue working while the transfer is taking place.
If the sequence does not have a video ID set, the Send to Playback Settings dialog box
opens. Type a video ID, then click Send.
For information on monitoring the send-to-playback operation, see The Progress Pane.
127
Sending a Mixed-Resolution Long GOP Sequence to a Playback Device
Sending a Mixed-Resolution Long GOP Sequence to
a Playback Device
There are limitations on the types of media you can add to a sequence for a successful
send-to-playback operation. In most cases, all media used in the sequence must be available in
the target resolution to start an STP operation.
However, when you select a Long GOP resolution as a target resolution, you can mix media of
different resolutions if the frame rates match. For example, if the target resolution is
XDCAM-HD 1080i, you can include both XDCAM 1080i clips and DV25 411 NTSC clips in
the same sequence. Both use an actual frame rate of 29.97 fps.
The DV25 clips do not need to be transcoded to XDCAM 1080i before the STP operation begins.
For Long GOP sequences, any necessary transcoding takes place during the STP operation.
n
You can determine the frame rate of a clip in the Interplay Central Assets pane. Open the
Interplay Production database and check the FPS column. If the column is not displayed, click
the Assets Pane menu and select Add or Remove Columns. For more information, see “Adding or
Removing Property Columns” in the Interplay Central User’s Guide.
Note the following:
•
Video Format display: In the Media panel, the Video Format display shows the STP target
resolution. If the media format of any clip in the script sequence does not match the media
format specified in the profile, the Video Format display is red.
For a mixed-resolution Long GOP sequence, this display is red. However, you can send the
sequence to playback so long as all clips in the sequence use the same frame rate.
•
Aspect ratio: There is no aspect ratio conversion. 4:3 clips are stretched to 16:9.
•
Review for Playback: In the Media panel Output mode, when you click the Review for
Playback button, all objects of the sequence that are available in the target resolution are
played in the target resolution. Objects that are not available in the target resolution are
replaced by the message “Media Offline.” To see all parts of the sequence in review mode,
clips not in the target resolution need to be transcoded to the target resolution, for example,
by using the Interplay Transcode feature in an Avid editing system.
128
The Progress Pane
c
For target resolutions other than Long GOP, all objects in the sequence must be available
in the target resolution before an STP operation can begin.
The Progress Pane
The Progress pane is used to monitor sequence mixdowns and send to playback processes as they
happen. If necessary, you can also cancel a process that is underway or restart a job directly from
the pane. The following illustration shows several examples of what you might encounter when
monitoring processes with the Progress pane.
n
Clicking the link for succesfully finished Sequence Mixdown jobs opens the folder containing the
newly created clip in the Assets pane.
Processes are grouped according to the type of job, such as Sequence Mixdown or Send to
Playback. Single job groups can be collapsed to get a better overview by selectively displaying
only one section. You can display all job groups again manually or from the Pane menu. For
instance, select Show Job Groups to open all sections.
In the case a problem occurs, the Details link displays the error message that is reported from the
Interplay Central system. In case of Sequence Mixdown, this is the same error message
displayed for the failed transcode job in the Interplay Media Services and Transfer Status tool.
For send to playback (STP) this is the error message that is passed by the Interplay Central
Distribution service. For more information, see “Monitoring and Troubleshooting” in the Avid
Interplay Central User’s Guide.
129
The Progress Pane
To open the Progress pane:
t
Select Panes > Progress.
To cancel a process underway:
t
Click the Cancel button located to the right of the active process.
To retry a failed process:
t
Click the Resend button located to the right of the process.
To open the new master clip after a mixdown process:
t
Click the Monitor button located to the right of the process. For more information, see
“Mixing Down Sequences” on page 87.
To remove a job from the list in the Progress pane:
t
Right-click on the finished process and select Clear Job.
To remove all non-running processes from the list in the Progress pane:
1. Click the Pane Menu button.
2. Select Clear Inactive Jobs.
130
11 User Settings
Interplay Central users can access and modify some key user settings in the User Settings dialog
box. Some are general settings, such as language or password. Other settings are specifically
related to the systems integrated with Interplay Central, such as an iNEWS newsroom computer
system or Interplay Production system.
The following main sections describe these user settings in Interplay Central.
•
General Settings
•
iNEWS Settings
•
Interplay Production Settings
•
MOS Settings
General Settings
General Settings
General settings include setting the language used in the application and changing the user’s
password.
To modify the language used in Interplay Central:
1. Select Home > User Settings.
The User Settings dialog box appears with the General settings displayed.
2. Select the language you want used from the drop-down menu. Options include: English,
French, German, Spanish, Simplified Chinese, and Japanese.
3. Click Apply.
To change your Interplay Central password:
1. Select Home > Settings.
The Settings dialog box appears with the General settings displayed.
2. In the Password section, enter your old password. Then your new password twice.
3. Click Apply.
132
iNEWS Settings
The new credentials are not in effect until you sign out and sign in again.
iNEWS Settings
When a user signs in to Interplay Central, the system automatically signs that user into an
iNEWS newsroom computer system, if configured to do so.
For this integration between Interplay Central and an iNEWS newsroom computer system to
work properly, you must provide the proper credentials for the account used to connect to the
Avid iNEWS server. By default, your iNEWS credentials are not the same as your Interplay
Central credentials. The first time you sign in to Interplay Central, you have an option to change
your iNEWS credentials.
To modify the iNEWS settings:
1. Select Home > Settings.
The Settings dialog box appears with the General settings displayed by default.
2. Select iNEWS.
133
Interplay Production Settings
3. If necessary, uncheck “Use my Interplay Central credentials.” Then enter the iNEWS user
name and password.
4. (Optional) Specify the default duration for dissolves, used to transition between clips in
sequences. By default, the duration is set to 20 frames. Users can override the default on a
case-by-case basis from within the Sequence Timeline.
5. Click Apply.
The new credentials are not in effect until you sign out and sign in again.
Interplay Production Settings
When a user signs in to Interplay Central, the system will automatically sign that user into an
Interplay Production system, if configured to do so.
For this integration between Interplay Central and an Interplay Production system to work
properly, you must provide the proper credentials for the account used to connect to the Avid
Interplay Production server. By default, your Interplay Production credentials are the same as
your Interplay Central credentials. The first time you sign in to Interplay Central, you have an
option to change your Interplay Production credentials.
You should also ensure proper configuration of the mixdown settings and search criteria.
To modify the Interplay Production settings:
1. Select Home > Settings.
The Settings dialog box appears with the General settings displayed by default.
2. Select Interplay Production.
134
Interplay Production Settings
3. If necessary, uncheck “Use my Interplay Central credentials.” Then enter the user name and
password.
4. Select a profile from the drop-down list in the Sequence Mixdown Settings section.
The following illustration shows a couple of sample profile options—in this case, a list of
transcode profiles as defined in the Interplay Media services in Interplay Production.
n
The Profile setting is only available if you are signed in with valid Interplay Production
credentials. If this option appears grayed out, click Apply to save your Interplay Production
credentials, sign out and sign back in, and then reopen the Settings dialog box.
5. In the Search Filter section, select the check box only if you want the system to limit the
display of search results to one representation for each asset found.
135
MOS Settings
6. Set the time range for searches. Options include varying ranges from as short as the last 10
minutes to as long as last year. The default setting is to search for content over the last 14
days.
7. Click Apply.
The new credentials are not in effect until you sign out and sign in again.
n
If there is no valid Interplay Production username/password combination active, you cannot
select a Mixdown profile.
MOS Settings
A site can use plug-ins to further expand the capabilities of Interplay Central through MOS
integration, such as the Avid Deko Select plug-in; however, to gain access to plug-ins, the
plug-ins must be installed and MOS enabled.
To enable access to plug-ins:
1. Select Home > Settings.
The Settings dialog box appears with the General settings displayed by default.
136
MOS Settings
2. Select MOS.
3. Ensure the “MOS enabled” check box is selected.
4. Click Apply.
For more information on plug-ins, see “Plug-ins and MOS Integration” on page 25 and the
documentation for your plug-in.
137
12 Interplay Central Tablet Application
The Interplay Central tablet application is a native user interface designed to run on your iPad®
touch-screen tablet device and enable direct, secure access to your station’s iNEWS newsroom
computer system.
The following main topics describe basic user information about the device and tablet
application.
•
Connection Basics
-
The iPad
-
Gestures for the Tablet Application
•
Starting Interplay Central on the Tablet
•
The Sidebar
•
Buttons of the User Interface
•
Customizing Interplay Central Settings
•
Accessing the iNEWS Database
-
Working with Links in Stories
-
Viewing Video Associated with a Script
•
Entering Presenter Mode
•
Working with Favorites
Connection Basics
Connection Basics
You can use the Interplay Central tablet application to view and approve news stories, navigate
the news directory, play video sequences associated with scripts and view a show’s scripts in
presenter mode while signed in to your station’s iNEWS newsroom computer system.
There are various connection options available when using the Interplay Central tablet
application:
n
•
WiFi
•
Carrier specific cellular service (such as 3G)
The application is designed to automatically select the first available connection from the list of
options according to the priority shown in the list.
The iPad
Before using the Interplay Central tablet application, familiarize yourself with key features of the
touch-screen tablet on which the application is run.
There are very few exterior buttons on the iPad. Most navigation is accomplished with touch
gestures on the screen, such as tapping an icon to start an application. Swiping your fingertip
across the screen can navigate you to other pages of additional application icons or do something
entirely different within an application.
Button
Description
The Home button wakes the tablet when it is sleeping and exits applications, returning you
to the home screen.
n
Remember, the more applications that you have running, the more memory and battery power
your tablet uses. To optimize the performance of your tablet, try to close applications when you
are finished with them.
139
Connection Basics
Gestures for the Tablet Application
Applications for touch-screen tablets let users accomplish certain tasks utilizing various gestures
like fingertip swipes or taps. What these gestures do can be different in each application. The
following table describes what certain gestures do depending on where a user is within the
Interplay Central tablet application.
Location
Gesture
Description
Sidebar (on left side of
screen when displayed)
Two Finger Swipe to the Right or Displays or hides the sidebar
Left
Sidebar
Tap the Back button
Navigates to the location named on the Back button
itself
Sidebar
Touch and hold the Back button
Navigates back to the Launch pane regardless of how
far down the file structure you’ve gone
Sidebar
Tap stars (while in edit mode)
Selects or deselects items as Favorites
Sidebar
Tap name of a Favorite item
(while in edit mode)
Lets you modify the item’s name as it appears in the
Favorites list
Script Editor (right side
of screen if sidebar is
displayed)
One Finger Swipe to the Right or Navigates backward or forward to previous or next
Left
story in a rundown
Script Editor (Cue List
sub-section)
Tap a production cue or machine
control instruction
Auto-scrolls the story text so that the associated
production cue marker comes into view
Script Editor (Story
sub-section)
Tap a production cue marker
Auto-scrolls the cue list so that the production cue or
machine control instruction associated with that
marker comes into view
Media Viewer
Touch and drag the Playhead
button
Moves to new position in viewer’s video playback
timeline
Media Viewer
Pinch out on viewer embedded in Expands the viewer to full screen
the Script Editor above the Cue
List sub-section
Media Viewer
Pinch in on full screen viewer
Presenter Mode
Swipe left or tap on right edge of Navigates to next page
screen
Presenter Mode
Swipe right or tap on left edge of Navigates to previous page
screen
140
Minimizes viewer back to original size and position
within the Script Editor
Starting Interplay Central on the Tablet
Location
Gesture
Description
Presenter Mode
Pinch in on full screen
Exits full screen presenter mode
Starting Interplay Central on the Tablet
When the Interplay Central tablet application is installed on your touch-screen tablet, an icon
representing the application is also installed on the home screen. It can be moved elsewhere like
icons for other applications.
To sign in:
1. Start the Interplay Central tablet application by selecting the Interplay Central icon.
The Sign-In screen appears.
2. Enter the hostname for the Interplay Central middleware (Web application) server in the
following format:
<hostname>
You should only have to do this the first time you sign in. If you do not know this
information, contact your system administrator.
3. Type in your Interplay Central user name and password.
4. (Optional) If you want the application to keep you signed in, slide the round ON/OFF button
from off to on.
5. Tap the Sign In button.
After you sign in, the Interplay Central tablet application connects to the iNEWS newsroom
computer system.
141
The Sidebar
n
If your iNEWS credentials are incorrect or missing in your Interplay Central account, you will
receive a message stating the following: “Your iNEWS user name and/or password are incorrect.
Click OK to update your iNEWS credentials.” When you click OK, a dialog will appear with
some additional fields you can use to supply valid credentials.
To view the help system:
1. Tap the Actions button.
2. Select Help.
To sign out:
1. Tap the Actions button.
2. Select Sign Out.
To exit the application:
1. Press the Home button.
2. Select Close.
The Sidebar
After you sign in to the Interplay Central tablet application, you can view the sidebar, located
along the left side of the screen when displayed, and use it to navigate to various systems that are
integrated with Interplay Central, such as an iNEWS newsroom computer system.
The top level you can view from the sidebar is the Launch pane. The following illustration shows
the Launch pane with an available iNEWS newsroom computer system, as well as a couple of
user-defined Favorites.
142
The Sidebar
From the Launch pane, you can navigate through a system’s file structure and open assets to the
right of the sidebar. The sidebar can be hidden at any time to increase the screen real estate on the
tablet for viewing assets. Use the Show/Hide button to toggle the display of the sidebar.
n
The look of this button changes depending on the display status of the sidebar.
Button
Description
Tap this button to display the sidebar.
Tap this button to hide the sidebar.
143
Buttons of the User Interface
Buttons of the User Interface
The Interplay Central tablet application provides a small toolbar of buttons in the top right corner
area of the user interface that you can use to do various things within the application. The
following table shows these buttons and describes their uses.
Button
Description
The Filmstrip button expands the viewer to full screen.
The Presenter Mode button opens a show’s rundown of stories in presenter mode.
The Actions button opens a menu of options that include: Reload, Send Logs, Help, and
Sign Out.
Customizing Interplay Central Settings
Like other tablet applications, Interplay Central has some settings you can modify.
To modify Interplay Central table application settings on the iPad:
1. Start Interplay Central.
2. Tap the Settings icon.
3. Select Interplay Central in the list of applications.
The settings are grouped into categories, such as General and Presenter Mode.
The following table provides information about the various general settings.
General Settings
Description
Version
For display purposes only, this value shows the currently installed version of the
tablet application.
Logging
If set to On, Interplay Central will keep logs on session activities, which might be
helpful in troubleshooting any issues. Also, a Send Logs option appears (when
you tap the Actions button) to let you email the logs to Avid. If set to Off, logging
and the Send Logs option is disabled.
Request Timeout
Options are intervals of: 10, 20, or 30 seconds, 1 minute, or 2 minutes.
144
Accessing the iNEWS Database
General Settings
Description
Story Font Size
Story font size options are: 18, 22, 26, 32, and 38.
The following table provides information about the various settings for presenter mode.
Presenter Mode Settings
Description
Font Size
Options for presenter mode are: 18, 22, 26, 32, and 38.
Normal Text
Normal text is the text of the story itself. Options are: Black on White or White on
Black.
Presenter Text
Presenter text is most often used for special instructions to presenters in scripts.
Options are: White on Black, Black on White, or Red on White.
Closed Captioning Text
Closed captioning is text sent to a closed caption encoder if your station uses such
a device to broadcast text for the hearing-impaired. Options are: White on Black,
Black on White, or Green on White.
Skip Blank Stories
If set to On, presenter mode will skip any stories that have no text or production
cues.
Accessing the iNEWS Database
The iNEWS database is the backbone of your iNEWS system. The data you and others in your
newsroom create—stories, scripts, and rundowns—is saved in the database on the iNEWS
Server. Stories are contained in queues, which are stored in directories (also known as folders).
When viewed with the tablet application, available iNEWS systems, along with any of their
directories and queues, are displayed in the sidebar.
The application uses different icons to distinguish between directories, queues, and stories.
Icon
Description
Directories are storage spaces that can hold queues or other subdirectories. Unlike queues,
directories do not contain stories. The Wires folder is one example of a directory that
contains queues with incoming wire stories.
Queues let you organize stories in detailed categories. A show’s rundown is one example of
a queue.
145
Accessing the iNEWS Database
Icon
Description
Stories contain text, such as contact information or a description of a news event. A wire
story is one example. Any story can become a script for a show. Scripts contain additional
data beyond text, such as production cues, machine control instructions, presenter
instructions, and even have video script sequences associated with them.
Destinations in the iNEWS system directory that are chosen for the Favorites list have a gold star
on their icons.
The following illustration shows an example of an iNEWS system directory with two directories
marked as favorite destinations.
n
While viewing the top level of an iNEWS system directory in the sidebar, the Back button displays
the word Launch, which means you can tap it to return to the previous view of the Launch pane.
The button’s name changes, however, the further you navigate down the system directory.
146
Accessing the iNEWS Database
You can open directories, queues, and stories from the Interplay Central tablet application.
Directories and queues open within the sidebar. Stories open to the right of the sidebar in what is
called the Script Editor.
To open a directory:
1. Navigate to the directory.
2. Tap the chosen folder on screen to open it.
n
As you navigate down into the system’s directory structure, your path or location within the
database is displayed at the top of the screen.
The following illustration is an example of the Wires directory opened to view numerous
queues containing incoming wire stories.
To back out of a directory or queue:
t
Tap the Back button.
147
Accessing the iNEWS Database
n
The Back button does not display the word “Back” on it, but rather the name on the button
changes as a user navigates further into the directory. In the previous illustration, the Back
button displayed the system name NRCS as an example.
To open a queue:
1. Navigate to the queue inside a directory.
2. Tap the chosen queue to open it.
The following illustration shows an example of a rundown queue.
148
Accessing the iNEWS Database
To open a story:
1. Navigate to the story in a queue.
n
When a story icon appears with a check mark, the story has been “approved”. This can be done
only from an iNEWS workstation and not from the Interplay Central tablet application.
2. Tap the chosen story to open it.
149
Accessing the iNEWS Database
The story opens to the right of the sidebar in what is called the Script Editor. The Script
Editor is split into two sub-sections:
-
The Cue List, located on the left side, which contains any production cues or machine
control instructions.
-
The Story, located on the right side, which contains the text of the story, any presenter
instructions, and production cue markers.
You can hide the sidebar to expand the view and show only the Script Editor.
The following illustration shows the Script Editor with a story containing production cues
markers identified numerically. These markers within the story align with production cues
and machine control instructions that are displayed in the Cue List to the left of the story
itself. Those appearing in blue text are machine control instructions. Those in black text are
production cues. Presenter instructions appear as red text in the body of the story.
To navigate to the next or previous story in the queue:
t
Swipe your fingertip across the screen from left to right or right to left.
150
Accessing the iNEWS Database
To reload a story:
1. Tap the Actions button.
2. Tap Reload.
Working with Links in Stories
A story could contain much more than simple text. It could contain a URL to a Web page on the
Internet or even an e-mail address to a contact you might need. When URLs or e-mail addresses
are included in stories, they become dynamic links, meaning you can use them to open your
tablet’s browser or an e-mail window.
To e-mail a contact from a story:
1. Tap the e-mail address in the story.
The tablet will open an e-mail window, using your tablet’s default e-mail application.
2. Write your e-mail.
3. Tap Send.
To open a URL (http) link from a story:
t
Tap the link in the story.
The tablet’s Web browser will open and navigate automatically to the URL.
Viewing Video Associated with a Script
Sequences of video might be associated with some scripts in a show. When that is the case, those
that are created in Interplay Central Web application can be previewed from the tablet
application in a media viewer.
In landscape mode, a small media viewer appears above the Cue List sub-section of the Script
Editor, but the viewer can also be expanded to full screen. In portrait mode, the Filmstrip button
must be used to open the viewer full screen and preview sequences.
n
The viewer appears (in landscape mode), and the Filmstrip button is enabled (in either mode),
only when there is a video script sequence associated with the open story.
Button
Description
The Play button plays the sequence so you can preview the video associated with the story.
This button changes to a Pause button while the sequence is playing.
151
Accessing the iNEWS Database
Button
Description
The Playhead is used to navigate to a new position in the viewer’s video playback timeline.
The Maximize button expands the viewer to full screen. This button changes to the
Minimize button if the viewer is expanded to full screen.
The Filmstrip button expands the viewer to full screen.
You can view video sequences if:
n
•
the sequence was created and modified in Interplay Central.
•
the sequence was created in Interplay Central and modified in NewsCutter or Media
Composer; however, some effects might not be visible from the media viewer.
•
the sequence was created in Instinct and modified in Interplay Central.
You cannot view video sequences that were created in NewsCutter or Media Composer, nor play
back shotlists created in Interplay Assist or Interplay Access.
152
Accessing the iNEWS Database
To view video sequences associated with a script:
1. Do one of the following:
t
Tap the Play button in the viewer located above the Cue List sub-section of the Script
Editor. (This option applies to landscape mode only, not portrait mode.)
t
Tap the Filmstrip button—or the Maximize button in the viewer—to open the viewer
full screen. Then tap the Play button.
2. (Optional) After viewing, if you expanded the viewer, tap the Minimize button to restore the
viewer to its original size and location within the Script Editor.
153
Entering Presenter Mode
To regenerate the sequence video proxy for playback:
1. Tap the Actions button.
2. Tap Reload.
Entering Presenter Mode
The Interplay Central tablet application lets users view a show’s scripts in page-by-page layout,
similar to printed scripts used by news presenters. This method of viewing stories from a
rundown is known as presenter mode. When in presenter mode, Interplay Central automatically
updates stories and story positions in a rundown, with the exception being the currently viewed
story. Updates are ignored for the current story. Also, while in presenter mode, stories are cached
locally on the tablet for offline use in case the user takes the tablet out of WiFi range or the server
becomes unresponsive. Updates do not occur if tablet-to-server connection is lost.
n
Stories are not cached or automatically updated when viewing stories in regular mode, even if
online.
To enter presenter mode:
1. Open a show’s rundown.
2. Tap the Presenter Mode button.
Presenter mode opens on the first story of a rundown.
To navigate through scripts in presenter mode:
t
Swipe left or tap right edge of the touch screen to go to the next page.
t
Swipe right or tap the left edge of the touch screen to go to the previous page.
To exit presenter mode:
t
Pinch in on the screen.
You can customize the appearance of text in presenter mode by modifying some Interplay
Central tablet application settings. Additionally, you can opt to skip blank stories while in
presenter mode. For more information, see “Customizing Interplay Central Settings” on
page 144.
154
Working with Favorites
Working with Favorites
To make navigation even easier, you can designate certain locations in the newsroom system as
Favorites, which will appear in a list on the Launch pane.
From the tablet application, you can use your Favorites list to navigate quickly to your most
often used directories, queues, or stories. You can edit your Favorites list by creating new ones,
editing their names, or deleting existing ones from the list.
To create a Favorite:
1. Tap the Edit button.
2. Tap the gray star next to the directory, queue, or story you want to designate as a favorite
destination. Gold stars indicate chosen destinations; gray stars are not chosen. You can select
more than one at a time.
3. Tap the Done button.
All selections you made will be added to your Favorites list in the Launch pane. And a small
gold star will appear over each icon of favored destinations in the system directory.
To edit a Favorite:
1. Tap the Edit button.
2. Tap the one in the list you want to edit.
3. When cursor appears, you can change the name.
155
Working with Favorites
For instance, if you plan to have multiple rundown queues in your Favorites list, they may all
share the same queue name, but you can edit each one in the list to distinguish which
rundown is for the morning show, midday show, and evening newscast.
4. Tap the Done button.
To delete a Favorite:
1. Tap the Edit button.
2. Tap the gold star next to the directory, queue, or story you want to remove as a favorite
destination. Gold stars indicate chosen destinations; gray stars are not chosen. You can
deselect more than one at a time; any you deselect will be deleted from your Favorites list.
3. Tap the Done button.
156
13 Interplay Central Mobile Application
The Interplay Central mobile application is a native user interface designed to run on your
BlackBerry® smart phone and enable direct, secure access to your station’s iNEWS newsroom
computer system.
The following main topics describe basic user information about the mobile device and
application.
•
Connection Basics
-
The BlackBerry Smart Phone
•
Starting the Interplay Central mobile application
•
Accessing the iNEWS Database
•
Creating a Story
•
Editing a Story
-
Formatting a Script
-
Adding Production Cues
-
Adding Machine Control Instructions
•
Working Offline on Local Stories
•
Working with Links in Stories
Connection Basics
Connection Basics
You can use the Interplay Central mobile application to view, write and edit news stories while
signed in to your station’s iNEWS newsroom computer system, or you can work on stories
offline.
There are various connection options available when using the Interplay Central mobile
application:
n
•
WiFi
•
Direct TCP (Carrier specific APN)
•
MDS or BlackBerry Enterprise Server (BES)
•
BlackBerry Internet Services (BIS)
•
WAP 2.0
The application is designed to automatically select the first available connection from the list of
options according to the priority shown in the list.
The BlackBerry Smart Phone
Before using the Interplay Central mobile application, familiarize yourself with key features of
the phone on which the application is run. The following illustration is one example of a
BlackBerry smart phone that features a QWERTY keyboard.
158
Connection Basics
Three primary buttons on the BlackBerry are used to navigate through the Interplay Central
mobile application.
Button
Description
The Menu button provides access to all of your BlackBerry applications beyond those
shown on your main screen. In applications, it is used to access various menu options.
The trackpad is used to move the cursor similar to a touchpad on a laptop.
The Escape button is used to return to previous screens.
n
Remember, the more applications that you have running, the more memory and battery power
your phone uses. To optimize the performance of your phone, try to close applications when you
are finished with them.
159
Starting the Interplay Central mobile application
Starting the Interplay Central mobile application
When the Interplay Central mobile application is installed on your smart phone, an icon
representing the application is also installed. It usually resides in the Download folder but can be
moved elsewhere like icons for other BlackBerry applications.
n
The first time you start the application, you will be prompted with the following message:
“Would you like to grant Interplay Central trusted application status?” Select Yes.
To sign in:
1. Start the Interplay Central mobile application by selecting the Interplay Central mobile
application icon.
The Sign-In screen appears.
2. Enter the hostname for the Interplay Central middleware (Web application) server in the
following format:
<hostname>
You should only have to do this the first time you sign in. If you do not know this
information, contact your system administrator.
3. Type in your user name and password.
4. Use the phone’s trackpad to select and press the Sign In button.
160
Starting the Interplay Central mobile application
After you sign in, the Interplay Central mobile application connects to the iNEWS
newsroom computer system.
n
If your iNEWS credentials are incorrect, you will receive a message stating the following: “Your
iNEWS user name and/or password are incorrect. Click OK to update your iNEWS credentials.”
When you click OK, the Sign-In screen will reappear with some additional fields you can use to
supply valid credentials.
To sign out:
1. Press the Menu button.
2. Select Sign Out.
To exit the application:
1. Press the Menu button.
2. Select Close.
161
Accessing the iNEWS Database
n
If you selected the Keep me signed in check box when you signed in, exiting the application only
closes the program, but it does not log you out. Clicking the application’s icon will reopen
Interplay Central mobile application to where you were when you closed the program.
Accessing the iNEWS Database
The iNEWS database is the backbone of your iNEWS system. The data you and others in your
newsroom create—stories, scripts, and rundowns—is saved in the database on the iNEWS
Server. Stories are contained in queues, which are stored in directories (also known as folders).
The application uses different icons to distinguish between queues and directories.
Icon
Description
Queues let you organize stories in detailed categories. A show’s rundown is one example of
a queue.
Directories are storage spaces that can hold queues or other subdirectories. Unlike queues,
directories do not contain stories.
You can open directories, queues, and stories from Interplay Central mobile application.
162
Accessing the iNEWS Database
To open a directory:
1. Use the trackpad to navigate to the directory.
2. Press the trackpad to open the chosen folder.
n
As you navigate down into the directory structure, your path or location within the database is
displayed at the top of the screen.
The following illustration is an example of the Wires directory opened to view numerous
queues containing incoming wire stories.
To back out of a directory:
t
Do one of the following:
-
Press the Escape button.
-
Select Back to Parent Folder.
To open a queue:
1. Use the trackpad to navigate to the queue inside a directory.
2. Press the trackpad to open the chosen queue.
The following illustration shows an example of a rundown queue.
163
Accessing the iNEWS Database
To open a story:
1. Use the trackpad to navigate to the story in a queue.
2. Press the trackpad to open the chosen story.
To navigate to next or previous story:
1. Press the Menu button.
2. Do one of the following:
n
t
Select Next Story.
t
Select Previous Story.
If attempting to navigate away from a story you are editing, the system will prompt you to save or
disregard your changes before leaving the story, or allowing you to cancel your navigation
request.
To return to the queue from a story:
t
Do one of the following:
-
Press the Escape button.
-
Press the Menu button and select Return to Parent.
164
Creating a Story
Creating a Story
Journalists can create a story by writing it from scratch or by utilizing information from other
resources, such as wire stories, all of which can be done from the Interplay Central mobile
application.
To open an existing news or wire story:
1. Open the rundown or wires queue in which the story resides.
The following illustration shows an example of the Weather queue, located in the Wires
directory.
2. Slide your finger over the trackpad to navigate to the story in the queue.
3. Do one of the following:
t
With the story selected, press the Enter key.
t
Press the Menu button and select Open Story.
The story will open in read-only mode, so the background will appear grayish.
165
Creating a Story
To create a new story:
1. Slide your finger over the trackpad to navigate to the row in the queue where you want to
create a new story.
2. Press the Menu button.
3. Select Create New Story. A row will be added to the queue and the blank story will open.
n
New stories become available to other iNEWS users only after the story is saved to the server.
4. Enter the text of your story.
5. Press the Menu button.
6. Do one of the following:
n
t
Select Save to save the changes while keeping the story opened for more edits.
t
Select Save and Close Story.
If you attempt to navigate away from the story that is being edited, such as pressing the Escape
button, the system will prompt you to either save or discard your changes.
166
Editing a Story
Editing a Story
When editing a story, the system obtains an edit lock, which prevents other users from being able
to alter a story while you are working in it. The edit lock is released when you either save and
close the story or discard your changes.
The standard editing features found in the Interplay Central mobile application are the same for
most word processing software applications on the market, such as cut, copy, and paste.
You can use cut, copy, and paste to move text around within a single story or from one story to
another. When cutting or copying text, the system actually stores the text in a temporary storage
spot known as a clipboard; only one block of text can be stored at a time, so whenever you cut or
copy something new, it replaces whatever was previously stored on the clipboard.
To edit an existing story:
1. Navigate to the existing story in the queue.
2. Press the Menu button.
3. Select Edit Story.
The gray background will appear white once the edit lock is obtained and you are able to
begin editing the story.
167
Editing a Story
To select text:
1. Position cursor at beginning or end of text you want to select.
2. Do one of the following:
t
Press and hold the Alt key down while you swipe your fingertip across the trackpad to
highlight your selection.
t
Press the Menu button and click the Select option. Then use the trackpad to highlight
your selection.
To cut text:
1. Select the text.
2. Press the Menu button.
3. Select Cut.
To copy text:
1. Select the text.
2. Press the Menu button.
3. Select Copy.
To paste text:
1. Select the text.
2. Press the Menu button.
3. Select Paste.
Formatting a Script
When writing a story, the text will appear in the default normal text style. However, when
formatting a story as a script for a news broadcast, it is often necessary to distinguish certain text
from others using various styles of text, such as instructions for presenters or closed captioning.
Presenter instructions are most often used as brief, special instructions to news presenters (also
known as news anchors). The text for presenter instructions appear red in color, in reverse video
on the teleprompter, and is not included in the text used by the system to calculate the read time.
Closed captioning is most often used for sound-bite verbatims. The text for closed captioning
appears green in color and is sent to a closed caption encoder if your station uses such a device to
broadcast scripts for the hearing-impaired. Closed captioning text does not appear in the
teleprompter, nor is it included in the calculations of a script’s read time.
n
The default normal text style is sent to both the teleprompter and to any closed caption encoder
used at the station.
168
Editing a Story
To mart text as a presenter instruction:
1. Select the text.
2. Press the Menu button.
3. Select Presenter.
To mart text as a closed captioning text:
1. Select the text.
2. Press the Menu button.
3. Select Closed Captioned.
To mart text as a normal text:
1. Select the text.
2. Press the Menu button.
3. Select Normal.
n
You can choose the format before typing your text as well. Any new text you type will appear in
the format you selected. To change the format of the text you type at any time, select another
format.
Adding Production Cues
When formatting a story as a script for a news broadcast, production cues are often added to
provide valuable information to technical staff as well as machine control commands for devices,
such as character generators.
Production cues are added to scripts from the Story area and edited by opening them on screen.
When added to a script, each production cue is given a small, box-like marker within the script,
which can be selected and moved or removed if necessary. If moved or deleted, the text
associated with the marker is also moved or deleted.
To open an existing production cue:
1. Position cursor on a production cue marker in the script.
2. Do one of the following:
t
Press the Enter key.
t
Press the Menu button and select Open Production Cue.
To insert a production cue to a script:
1. Position your cursor in the story where you want to insert the production cue marker.
2. Press the Menu button.
169
Editing a Story
3. Select Add Production Cue.
4. Enter the production cue information, such as: Take VO, On Camera, Take SOT, Take Live,
and so forth.
5. Press the Menu button and select Back to Story to navigate back to the story.
n
Other navigational options, such as Next Production Cue or Previous Production Cue, are also
available. The information in the newly inserted production cue is automatically saved when you
navigate elsewhere within the application. If you attempt to sign out or close the application, a
message appears prompting you to either save or discard your changes.
To move a production cue in a script:
t
Select the production cue’s marker and use the cut and paste features to move it to another
location within the script.
To delete a production cue from a script:
t
Position cursor to the right of the production cue marker and press the Delete key.
t
Select the production cue marker and press the Delete key.
To move to the next or previous production cue:
1. While viewing or editing a production cue, press the Menu button.
2. Do one of the following:
n
t
Select Next Production Cue if you want to see the next production cue in the script.
t
Select Previous Production Cue if you want to see the previous production cue in the
script.
The menu options will only appear if there are other production cues in the script, before or after
the one viewed at present.
Adding Machine Control Instructions
If your station integrates with a broadcast control system, such as iNEWS Command, the
production cues might include machine control instructions.
These instructions should be preceded by an asterisk (*) and written in a special format,
beginning with a command for the type of device the instruction is for, such as CG for a
character generator. After the command the format specifies a particular item or template, such
as 2line for a template that contains two lines for fulfillment data. If additional comments or
information is required it would follow on succeeding lines in the same production cue text box.
170
Working Offline on Local Stories
In the following procedure, a machine control instruction for a 2-line character generator graphic
is used as an example. The first line calls up the correct template and the subsequent lines of text
provide the fulfillment data that should appear in the graphic.
To add machine control instructions for a CG event:
1. Add or open a production cue in the script.
2. (Optional) Press the Menu button and select Machine Control.
n
Typing an asterisk (*), as shown in the next step, will automatically switch the text you type to
Machine Control format, which appears as blue font.
3. Type your machine control command, such as *CG 2line and press Enter.
4. Type the first line of text that should appear on the 2-line CG graphic, such as: John Smith.
Press Enter.
5. Type the second line of text that should appear on the 2-line CG graphic, such as:
Pleasantville, USA.
Your CG machine control instruction will appear in blue font.
Working Offline on Local Stories
You can run the Interplay Central mobile application at anytime without being connected to your
station’s iNEWS newsroom computer system and work offline on stories saved locally to your
phone. Also, Interplay Central mobile application enables a user to continue working on an
iNEWS story even if connection to the iNEWS system is lost. When that happens, the user can
save the work as a local story on the phone. Local stories can then be saved to the iNEWS
database later once connection is restored.
To view any existing local stories:
1. Start the Interplay Central mobile application.
2. At the Sign In screen, press the Menu button.
3. Select Local Stories.
Your list of any locally saved stories will appear.
171
Working Offline on Local Stories
n
You do not have to sign in to your iNEWS system to view stories stored locally on your phone, but
if you are signed in, you can view your local stories anytime by selecting the View Local Stories
menu option.
To create a local story:
1. From the Local Stories view, press the Menu button.
2. Select Create New Story.
3. Enter your story’s information.
4. Press the Menu button.
5. Do one of the following:
n
t
Select Save to save your changes and keep the story open.
t
Select Save and Close to save your changes and return to the Local Stories view.
A third option is available called Save to Server. This selection enables you to save a story
created offline to the iNEWS database once you are able to sign in to your iNEWS newsroom
computer system. After a local story is saved to the database, it is no longer a locally stored
story, and is therefore removed from the Local Stories view.
172
Working with Links in Stories
Working with Links in Stories
A story could contain much more than text or production cues. It could contain a URL to a Web
page on the Internet or even a phone number to a contact you might need. When URLs or phone
numbers are included in stories, they become dynamic links, meaning you can use them to open
your phone’s browser or place a phone call.
To call a phone number from a story:
1. Position your cursor on the phone number.
2. Press the Menu button.
3. Select Call <phone number>.
The phone will dial the number automatically.
173
Working with Links in Stories
To open a URL (http) link from a story:
1. Position your cursor on the link.
2. Press the Menu button.
3. Select Open Link.
The phone’s Web browser will open and navigate automatically to the URL.
174
A Keyboard Shortcuts
The following topics provide information about keyboard shortcuts:
n
n
•
Queue/Story Pane Shortcuts
•
Assets Pane Shortcuts
•
Media Pane Shortcuts
•
Markers Pane Shortcuts
These keyboard shortcuts can be used on Windows systems or Macintosh systems, unless
otherwise noted. The Macintosh generally uses the Command key in place of the CTRL key,
however, you can still use the CTRL key shortcut. For example, on a Macintosh, you can save a
story by pressing either CTRL+S or Command+S.
Safari on the Macintosh currently has a known issue with Command (CMD) keyboard shortcuts.
In some cases complex key combinations with more that one additional key (CMD+J+K) fail to
register correctly when one of the additional keys is held for a longer time. This should not occur
if all keys are pressed approximately at the same time and released immediately.
Using the Tab Key in a Browser Window
By default, the Tab key works differently in Chrome and Safari:
•
In both browsers, you can use the Tab key to move from one text field to the next text field.
•
In Chrome, you can also use the Tab key to move from one screen object to the next, such as
tabbing from a text field to a button. To match this behavior in Safari, do one of the
following:
-
Use Option+Tab
-
In the Preferences > Advanced settings panel, select the following setting: “Press Tab to
highlight each item on a webpage.”
The behavior described for Chrome also applies to Chrome Frame in Internet Explorer.
Queue/Story Pane Shortcuts
Queue/Story Pane Shortcuts
Keyboard shortcuts available when working in the Queue/Story pane are listed in the following
table. Some keystroke combinations only work when the cursor is located in a certain section of
the pane; the Focus column in the table specifies the section of the pane when that is the case.
For more information on the pane and its sections, see “The Queue/Story Pane” on page 41.
Shortcut
Description
Focus
Ctrl+S
Save story
Queue/Story pane
Ctrl+E
Toggle the story’s edit lock on and off
Queue/Story pane
Shift+Left Arrow
Select text one character at a time moving backward
Story
Shift+Right Arrow
Select text one character at a time moving forward
Story
Ctrl+Shift+Left Arrow
Select text one word at a time moving backward
Story
Ctrl+Shift+Right Arrow Select text one word at a time moving forward
Story
Shift+Up Arrow
Select text one line at a time moving upward
Story
Shift+Down Arrow
Select text one line at a time moving downward
Story
Ctrl+X
Cut selection
Story
Ctrl+C
Copy selection
Queue/Story pane
Ctrl+V
Paste selection
Story
Ctrl+Z
Undo previous change
Queue/Story pane
Ctrl+Y
Redo previous change
Queue/Story pane
Ctrl+B
Set selected text to bold
Story
Ctrl+I
Italicize selected text
Story
Ctrl+U
Underline selected text
Story
Ctrl+Alt+P
Turn on Presenter Instruction mode or mark selected
text as presenter instructions
Story
Alt+Insert
Insert production cue
Story
Ctrl+Alt+M
Mark selected text as machine control instructions
Cue List
Ctrl+Alt+C
Turn on Closed Captioning mode or mark selected text Story
as closed captioning text
176
Assets Pane Shortcuts
Shortcut
Description
Focus
Ctrl+Alt+N
Turn on Normal text mode or change selected text to
normal font
Story
Tab
Move to next form field
Story Form
Shift+Tab
Move to previous form field
Story Form
Assets Pane Shortcuts
Keyboard shortcuts available when working with the Assets pane are listed in the following
table. For more information on the pane and its sections, see “Working with Assets” on page 27.
Shortcut
Description
Focus
Up Arrow
Move up and select clip
Assets pane
Down Arrow
Move down and select clip
Assets pane
Enter (Windows)
Return (Macintosh)
•
If a folder is selected, opens the folder.
Assets pane
•
If an asset is selected, loads it into the Media pane.
Media Pane Shortcuts
Keyboard shortcuts available when working with the Media pane are listed in the following
tables:
•
Shortcuts with Focus in the Media Pane
•
Shortcuts with Focus Outside the Media Pane
For more information on the pane and its sections, see “The Media Pane” on page 66.
Shortcuts with Focus in the Media Pane
The following table lists shortcuts you can use when the focus is in the Media pane.
Shortcut
Description
Focus
Space bar
Play or pause play.
Media pane
Home
fn+Left Arrow (MacBook)
Move to the beginning of a clip or sequence.
Media pane
177
Media Pane Shortcuts
Shortcut
Description
Focus
End
Move to the end of a clip or sequence.
fn+ Right Arrow (MacBook)
Media pane
I
Insert an In point.
Media pane
O
Insert an Out point.
Media pane
Left Arrow
Move 1 frame back
Media pane
Right Arrow
Move 1 frame forward
Media pane
Down Arrow
Zoom in to a section of the timeline.
Media pane
Up Arrow
Zoom out from a section of the timeline.
Media pane
J, K, L
See “Using the J-K-L Keys for Playback” on page 73. Media pane
Shift+Left Arrow
Go to the previous marker.
Media pane
Shift+Right Arrow
Go to the next marker.
Media pane
Alt+Left Arrow
Move 10 seconds back
Media pane
Alt+Right Arrow
Move 10 seconds forward
Media pane
Enter (Windows)
Return (Macintosh)
Selects the timecode display to enable keyboard
entries.
Media pane
Shortcuts with Focus Outside the Media Pane
The following table shows keyboard shortcuts you can use to control playback when focus is not
in the Media pane, for example, when you are logging in the Markers pane.
n
Some keyboard shortcuts work differently when you are working in the Markers pane in edit
mode. See “Markers Pane Shortcuts” on page 179.
Shortcut
Description
Focus
Ctrl +space bar
Play or pause play.
Global
Ctrl+Home
fn+Left Arrow (MacBook)
Move to the beginning of a clip or sequence.
Global
Ctrl+End
fn+Right Arrow (MacBook)
Move to the end of a clip or sequence.
Global
Ctrl+I
Insert an In point.
Global
178
Markers Pane Shortcuts
Shortcut
Description
Focus
Ctrl+O
Insert an Out point.
Global
Ctrl+Left Arrow
Move 1 frame back
Global
n
On Macintosh systems, to use Ctrl+Left Arrow
or Ctrl+Right Arrow to move 1 frame, you need
to deselect the Mission Control option in
System Settings > Keyboard. By default, Ctrl+
arrow key will switch you one space in the
direction of the arrow key selected.
Ctrl+Right Arrow
Move 1 frame forward
Global
Ctrl+Down Arrow
Zoom in to a section of the timeline by 50 percent.
Global
Ctrl+Up Arrow
Zoom out from a section of the timeline by 50 percent. Global
Ctrl+J, Ctrl+K, Ctrl+L
See “Using the J-K-L Keys for Playback” on page 73. Global
Ctrl+Shift+Left Arrow
Go to the previous marker.
Global
Ctrl+Shift+Right Arrow
Go to the next marker.
Global
Ctrl+Alt+Left Arrow
Move 10 seconds back
Global
Ctrl+Alt+Right Arrow
Move 10 seconds forward
Global
Markers Pane Shortcuts
Keyboard shortcuts available when working in the Markers pane are listed in the following
tables:
•
Shortcuts for Working with Markers
•
Shortcuts for Working with Marker Text
For shortcuts that you can use to control playback while logging, see “Media Pane Shortcuts” on
page 177.
Shortcuts for Working with Markers
Some of the following keystroke combinations work when the cursor is anywhere in the
application and others work only when the cursor is located in the Markers pane. The Focus
column in the table describes the focus required for each keystroke combination.
179
Markers Pane Shortcuts
Shortcut
Description
Focus
Ctrl+M (Windows and Macintosh)
Command+M (Macintosh)
Create a new marker
Global
Numeric keypad
Create marker and set icon color as follows:
Global
•
Ctrl+0: Last color picked. If no previous color
was selected in a session, the color is white.
•
Ctrl+1: White
•
Ctrl+2: Black
•
Ctrl+3: Red
•
Ctrl+4: Green
•
Ctrl+5: Blue
•
Ctrl+6: Cyan
•
Ctrl+7: Magenta
•
Ctrl+8: Yellow
The Num Lock state must be enabled to use these
commands.
Ctrl+Shift+Left Arrow
Move to and select previous marker
Global
Ctrl+Shift+Right Arrow
Move to and select next marker
Global
Delete key (Windows)
Backspace key (Macintosh)
fn+Backspace key (MacBook)
Delete the selected marker or markers
Markers pane
Up Arrow
Move to and select previous marker
Markers pane
Down Arrow
Move to and select next marker
Markers pane
Enter
Enter edit mode
Markers pane
Ctrl+Enter (Windows and Macintosh)
Command+Enter (Macintosh)
Exit edit mode and save
Markers pane
Esc
Exit edit mode without saving
Markers pane
Ctrl+S (Windows and Macintosh)
Command+S (Macintosh)
Save markers and text without exiting edit mode
Markers pane
F5
Reloads the content of the Markers pane
Markers pane
180
Markers Pane Shortcuts
Shortcuts for Working with Marker Text
The following table lists keyboard shortcuts that you use while working with marker text in edit
mode.
n
“Edit mode” refers to the mode in which the Notes column is selected and the insert bar is
displayed.
Shortcut
Description
Focus
Enter, Alt+Enter
Create a line break
Markers pane
Ctrl+Left Arrow (Windows)
Alt+Left Arrow (Macintosh)
Go to previous word
Markers pane
Ctrl+Right Arrow (Windows)
Alt+Right Arrow (Macintosh)
Go to next word
Markers pane
Up Arrow
Go to previous line
Markers pane
Down Arrow
Go to next line
Markers pane
Ctrl+Shift+Up Arrow (Windows)
Alt+Shift+Up Arrow (Macintosh)
Select previous paragraph
Markers pane
Ctrl+Shift+Down Arrow (Windows)
Alt+Shift+Down Arrow (Macintosh)
Select next paragraph
Markers pane
Ctrl+Shift+Home (Windows)
Ctrl+Shift+Pos1 (Windows)
Command+Shift+Up Arrow (Macintosh)
Select text from the beginning to the current position Markers pane
Ctrl+Shift+End (Windows)
Command+Shift+Down Arrow
(Macintosh)
Select text from the current position to the end
Markers pane
Shift+Left Arrow
Select text one character at a time moving backward
Markers pane
Shift+Right Arrow
Select text one character at a time moving forward
Markers pane
Ctrl+Shift+Left Arrow (Windows)
Alt+Shift+Left Arrow (Macintosh)
Select text one word at a time moving backward
Markers pane
Ctrl+Shift+Right Arrow (Windows)
Alt+Shift+Right Arrow (Macintosh)
Select text one word at a time moving forward
Markers pane
Shift+Up Arrow
Select text one line at a time moving upward
Markers pane
Shift+Down Arrow
Select text one line at a time moving downward
Markers pane
181
Markers Pane Shortcuts
Shortcut
Description
Focus
Ctrl+A (Windows)
Command+A (Macintosh)
Select all text
Markers pane
Delete key
Delete one letter or space forward
Markers pane
Backspace key
Delete one letter or space backward
Markers pane
Ctrl+X
Cut selection
Markers pane
Ctrl+C
Copy selection
Markers pane
Ctrl+V
Paste selection
Markers pane
For more information on the Markers pane and its sections, see “The Markers Pane” on
page 110.
182
B Icons
This topic provides a quick reference guide to icons or buttons you might encounter when using
Interplay Central. They are grouped according to the following:
•
Pane Type Icons
•
Launch Pane Icons
•
Assets Pane Icons
•
Media Pane Icons
•
Markers Pane Icons
•
Progress Pane Icons
Pane Type Icons
Pane Type Icons
The follow icons are used to identify the various types of panes you might have open in the
Interplay Central user interface. For more information about these panes, see “Understanding the
Application Layout” on page 17.
Icon
Description
Assets pane
•
Queue/Story pane
•
Project/Story pane
Audio pane
Help pane
Launch pane
Markers pane
Media pane
Progress pane
Search pane
Launch Pane Icons
The following icons are used in the Launch pane.
Icon
Description
Connected Interplay Production system
Disconnected Interplay Production system
Connected iNEWS system
184
Assets Pane Icons
Icon
Description
Disconnected iNEWS system
Project in the iNEWS database
iNEWS Project (not started)
iNEWS Project (expired)
Assets Pane Icons
Various icons are used distinguish between the different types of assets accessible via Interplay
Central. Other icons are used to show the state of an asset. These type and status icons show up
in the Assets pane in either the Name or State columns.
Icon
Description
Column
Audio asset
Name
Video asset: a master clip.
Name
Video asset: a subclip
Name
Video asset: a sequence
Name
Video asset: Edit While Capture in progress
Name
Supported
State
Reservation
State
Restriction
State
185
Media Pane Icons
Assets Pane Icons related to an iNEWS newsroom computer system
All iNEWS related icons in the Assets pane appear in the Name column.
Icon
Description
Directory or subfolder in the iNEWS database
Indexed Directory
Queue in the iNEWS database
Indexed Queue
Locked Queue
Indexed and Locked Queue
Facet in the iNEWS database
Facet (not started)
Facet (expired)
QUERY Search Queue
Media Pane Icons
The following icons are used in the Media pane.
Buttons
Description
The Asset and Output buttons let you switch between a loaded asset and the script
sequence.
Plays the asset or the story sequence. The Play button changes to a Pause button while
the asset or story sequence is being played.
Plays from an In point to an Out point.
186
Markers Pane Icons
Buttons
Description
Moves the position indicator to the In point.
Marks an In point.
Marks an Out point
Moves the position indicator to the Out point.
Plays the last three seconds before the Out point.
Steps back 10 seconds.
Steps back 1 second
Steps back 1 frame
Steps forward 1 frame
Steps forward 1 second
Steps forward 10 seconds
Markers Pane Icons
The following icons are used in the Markers pane.
Icon
Description
Insert Marker and Select Marker Color
Cancel
Refresh
187
Progress Pane Icons
Progress Pane Icons
The following icons are used in the Progress pane.
Icon
Description
Open in Media pane
Cancel
Resend/Retry
188
Interplay Central Glossary
A
Administrators group
A default group used for Interplay Central user management that contains users with
administrative privileges.
asset
An object that you can use to create stories and sequences. There are different types of assets,
such as video media, audio media, graphics, images, and text. Asset usually refers to objects or
also lists of objects, such as rundowns, that are stored in an asset management database.
Asset mode
If you click the Asset button in the Media pane, you can view media for the currently loaded
asset and use controls that apply specifically to assets, such as controls for setting In and Out
points. Compare with the definition of Output mode.
Assets pane
A pane in the client application that displays assets. These assets can result from a search or from
browsing. Assets are displayed in a folder hierarchy, if applicable to the assets displayed.
authentication provider
A server that checks the credentials (user name and password) of a user and allows access. An
Interplay Central administrator designates an authentication provider for imported users, such as
a Windows Domain server.
B
Basic layout
A layout that a journalist uses to edit and create stories. You can view media in this layout but
you cannot add video or audio to the story.
C
Contacts list
In the Message bar, a list of iNEWS users from which you can select a recipient of a message.
Cue List
The area in the Script Editor in which the journalist adds or edits production cues and machine
control events, such as those for a character generator (CG).
D
Details pane
A pane in the Users layout and the System Settings layout that displays information and settings
for a selected item.
drop zone
The part of an area into which you can move a pane. Each area has five drop zones: center, top,
bottom, left, and right.
E
edit while capture (EWC)
See Frame Chase editing.
190
F
Frame Chase editing
A feature that lets you view and edit media while it is being captured from a line feed or ingest
device. Also known as edit while capture (EWC).
I
Imported group
A default group used for Interplay Central user management that contains users imported from a
Windows domain.
in-progress clip
A clip that is in the process of being captured. You can use in-progress clips in Frame Chase
editing.
Interplay Central middleware server
A Web-application server used to manage communications between Interplay Central
workstations and back-end systems.
Interplay Central Distribution service
A service used to coordinate jobs with Avid Media Services for sequence mixdowns and send to
playback.
Interplay Central User Management service
A service that provides the ability to create and manage users and groups and authenticate users
across multiple systems.
Interplay Common Playback Server (ICPS)
A Linux® based server that runs the Interplay Common Playback service. It concurrently reads
multiple media assets and sequences residing on an ISIS, and compresses that media for
playback on Internet-connected clients.
191
J
J-K-L play
The J-K-L keys on the keyboard allow you to play and shuttle through media at varying speeds.
This feature is also referred to as three-button play or variable-speed play.
L
Launch pane
A pane in the client application from which you navigate to various locations. This pane displays
remote file systems, local files systems, and other locations for assets.
Layout
A collection of panes designed for a specific purpose, such as a layout for journalists or a layout
for administrators.
Layout selector
A list from which you select the layout that you want to work in.
L-cut
A split edit between two clips in which the video transition and the audio transition do not occur
simultaneously. The audio transition can occur before the video transition or the video transition
can occur before the audio transition.
locator
See marker.
logging
Adding information to clips, subclips, and sequences. This information includes markers,
restrictions, and text, which can be used for reference during story creation and media editing.
192
M
marker
An indicator added to a selected frame to mark a particular location in a clip, subclip, or
sequence. Markers can be different colors and can be associated with user-defined text. Locators
are displayed in the Media Timeline and locator text is displayed as an overlay in the Media
viewer. Formerly called locator.
Markers layout
A layout that a media logger or journalist uses to view and create markers.
master clip
A media object that contains pointers to media files in which the actual digital video and audio
data is stored.
Match Frame
A feature that lets you load a source clip, a portion of which is contained in a sequence.
Media controls
In the Media pane, controls that let you play and move through an asset and edit an asset for use
in creating a sequence. Which controls are displayed depends on the selected asset.
Media pane
A pane in the client application in which you can view and edit media assets, using the Media
controls.
Media viewer
The section of the Media pane used to view an asset.
Media Timeline
In the Media pane, a graphical representation of the length and time spans of an asset or
sequence.
Message bar
A section of the client application in which you can send and receive messages. The Message bar
consists of the To field, the Message field, and the Send button.
193
Menu bar
A section of the client application from which you can select various menu options.
Message History
In the Message bar, arrow buttons are provided to let you read recent messages. A numerical
indicator appears when multiple unread messages exist.
metadata
Data that describes an asset. Metadata includes properties, reservations, restrictions, and other
information.
mixdown
A process in which multiple video tracks, multiple audio tracks, and effects are combined into a
new master clip with one video track and a reduced number of audio tracks.
N
NAT (natural sound)
Audio recorded at the same time as the video, often by a microphone built in to a camera.
Compare with the definition of SOT (sound on tape).
O
Output mode
If you click the Output button in the Media pane, you can view media for the currently loaded
script sequence and use controls that apply specifically to script sequences, such as voice-over
controls. Compare with the definition of Asset mode.
P
pagination
A system setting the specifies the maximum number of items listed in the Queue/Story pane or
the Project/Story pane.
194
pane
An area can contain one or more panes. Multiple panes are layered within an area with the names
of each pane appearing on tabs that the user can select to view.
position indicator
A vertical bar in the Media Timeline that indicates the location of the frame displayed in the
Media viewer. You can drag the position indicator to scrub through a clip or sequence.
Progress pane
A pane in the client application that displays the progress and status of Interplay Central
processes such as sequence mixdown and send to playback.
Project/Story pane
A pane in the client application that displays the contents of a project, its facets, and any
associated stories.
Q
Queue/Story pane
A pane in the client application that displays the contents of a queue with the contents of the
story, including the story form.
R
restriction
A set of two markers that indicate clips whose use is limited in some way, such as through
intellectual property rights management or content compliance.
role
A set of features, privileges, and layouts that are assigned to a user by an Interplay Central
administrator. An administrator can create Interplay Central roles based on roles within an
organization.
rundown
A lineup or timed list of scripts indicating the order in which they will be aired during a news
program.
195
S
Script Editor
A section of the Queue/Story pane in which a journalist creates and organizes the elements of a
script. There are four sub-sections of the Script Editor: Story Form, Cue List, Story, and
Sequence Timeline.
script
A compilation of elements that include the story that is sent to the teleprompter and read on the
air, any video and audio that is broadcast with the story, as well as production cues and machine
control instructions associated with the story.
script sequence
A series of video, audio, and images that you compose in the Script Editor and play in the Media
pane. Script sequences are saved in the Interplay Production database and can be sent to a
playback device.
Search bar
A section of the client application in which you can conduct a search for assets that match
specific criteria.
Search pane
1. A pane in the Basic or Video layout that lets a user search for information and assets.
2. A pane in the Users layout that lets an administrator search for Interplay Central groups and
users.
Send button
In the Message bar, the button you click to send a message.
segment
1. In a rundown, a portion of the show aired between commercial breaks.
2. A portion of the story body/text. A journalist uses segments to time the text and integrate it
with video, audio, and production cues. Multiple timed segments are combined to form the
overall story.
send to playback (STP)
The process of transferring a sequence to a playback device or playout server for broadcast.
196
sequence
Video, images and audio clips, or any combination, arranged in a series.
Sequence Timeline
The area of the Script Editor in which a journalist adds, rearranges, or removes video and audio
clips associated with the story.
Settings pane
A pane in the System Settings layout from which you can select a group of settings to view or
edit.
shuttle
To view media at speeds slower or faster than real time. In Interplay Central you can use the J, K,
and L keys to shuttle through a clip or sequence.
sightline
The yellow bar in the Sequence Timeline that acts as a position indicator when playing a script
sequence in the Media pane.
SOT (sound on tape)
Audio recorded at the same time as the video, often by a microphone separate from the one built
in to a camera. Compare with the definition of NAT (natural sound).
source clip
A video clip or audio clip that is used as part of a sequence.
story
The text that is read on air. Also, the Story section is part of the Script Editor in which a
journalist writes a story or views the text of an existing story.
Story Form
A section of the Script Editor that provides story information in fields that are predetermined by
the iNEWS system administrator for each queue in the database.
STP (send to playback)
The process of transferring a sequence to a playback device or playout server for broadcast.
197
subclip
A clip created by marking IN and OUT points in a master clip and saving the frames between the
points. The subclip does not contain pointers to media files. The subclip references the master
clip, which contains pointers to the media files.
System Settings layout
A layout that an Interplay Central administrator uses to specify various configuration settings.
T
Timecode displays
In the Media pane, displays that provide timecode information for the loaded asset or sequence.
Timing taglines
Horizontal lines with pale yellow tags that appear in the Sequence Timeline to display estimated
read times for story segments.
trim indicator
In the Sequence Timeline, a mark that appears at the beginning or end of a clip in the video
column or audio column when hovering over that area with the mouse pointer. You can trim
video and audio together, or you can trim them separately to create an L-cut.
U
Unassigned group
A default group used for Interplay Central user management that includes users that were
removed from a group but are not members of any other groups.
User Management service
A service that provides administrators with the ability to create and manage users and groups,
and authenticate users across multiple products with a single user name and password.
User Tree pane
A pane in the Users layout that displays groups and users in a hierarchical layout.
198
Users layout
A layout for Interplay Central user management that an Interplay Central administrator uses to
import, create, and manage users and group.
V
Video layout
A layout that a journalist uses to edit and create stories that include video and audio.
Voice-over controls
Controls that let you record a voice over and adjust its volume.
W
window
The primary user interface element of the application.
Z
zoom bar
In the Media pane, a control located below the Media Timeline that lets you enlarge a section of
the Media Timeline so you can work more easily with long clips.
199
ABCDEFGHIJKLMNOPQRSTUVWXYZ
Index
A
About menu option 23
Active-X plug-ins 25
Annotation
speech-to-text 48
Areas 20
Aspect ratio 75
Asset mode
described 66
displays and controls 66
Assets
aspect ratio 75
described 27
playing 72
recently viewed 75
stepping through 74
working with media 32
working with news 30
Assets pane
described 28
list of icons 185
navigating 29
Audio
ducking audio 92
overriding default NAT and SOT tracks 98
swapping NAT and SOT tracks 98
types of audio tracks 92
Audio dissolves
automatic creation 92
Audio gain
adjusting 92
adjusting for script sequence 95
automatic adjustment 92
Audio levels
setting 92
Audio mix 96
Audio monitoring
setting preferences 97
Audio pane
described 93
Audio tracks
in script editor 91
Avid
online support 12
training services 12
Avid iNEWS
described 15
B
Basic layout 18
BlackBerry smart phone 158
C
Clips
moving and deleting 57
Complex sequence
defined 76
Cue List
described 43
D
Dead queue 53
Dictation
speech-to-text 48
Dissolves 62
audio 92
Drop zones
described 20
Ducking
for audio tracks 92
Index
ABCDEFGHIJKLMNOPQRSTUVWXYZ
E
Easy locks 54
Edit locks 54
Edit while capture (EWC)
in-progress clips 89
Exporting
markers 116
F
Facet
associating story with 39
described 30
opening 37
Favorites 155
Folder
opening for an asset 85
G
General settings 132
H
Help
viewing 25
I
Icons
Assets pane 185
Launch pane 184
Markers pane 187
Media pane 186
pane types 184
Progress pane 188
Image
creating from a video frame 90
In point
marking 77
iNEWS
and Interplay Central Mobile 162
and Interplay Central on a tablet 145
database 30
described 15
navigating database 31
201
project 36
script templates 63
user settings 133
In-progress clips 89
Interplay Central
community idea web page 23
described 15
tablet application 138
accessing iNEWS 145
buttons 144
connection basics 139
custom settings 144
favorites 155
presenter mode 154
starting 141
the sidebar 142
view video sequences 151
working with links 151
Interplay Central Mobile
accessing iNEWS 162
adding machine control instructions 170
adding production cues 169
connection basics 158
creating a story 165
editing a story 167
formatting a script 168
starting 160
working offline 171
working with links 173
Interplay Production
asset types 32
described 15
moving and copying assets 35
navigating database 33
property columns 34
user settings 134
iPad 139
custom settings 144
gestures 140
Interplay Central tablet application 138
J
J-K-L playback 73
JPG file
creating from a video frame 90
ABCDEFGHIJKLMNOPQRSTUVWXYZ
K
Key locks 54
Keyboard shortcuts
Logging 179
Media pane Pane 177
Queue/Story pane 176
L
Launch pane 24
list of icons 184
Layouts
access to 18
Basic 18
list of 18
Logging 109
resetting 18
Video 18
L-cut 60
Links
in Interplay Central Mobile 173
in Interplay Central tablet application 151
Locators 79
Locking
story 54
Locks, types of 54
Logging
keyboard shortcuts 179
workflows 106
Logging layout
described 109
Index
Markers pane
described 110
keyboard shortcuts 179
list of icons 187
Match Frame 85
Media
adding to a script 55
playback quality 77
updating status 75
viewing in tablet application 151
Media pane
keyboard shortcuts 177
list of icons 186
Media timeline
described 82
Menu bar
described 23
Messages
sending 120
viewing and replying to 121
Mix Mode 96
Mixdown 87
MOS integration 25
MOS settings 136
N
NAT column 55
NAT tracks
changing the default 98
described 92
swapping with SOT tracks 98
M
O
Machine control instructions
adding 52
adding in Interplay Central Mobile 170
Markers
adding 113
cutting, copying, pasting text 115
deleting 113
described 107
exporting 116
navigating by 115
saving 113
Unicode support 117
Online support 12
Out point
marking 77
Output mode
described 66
displays and controls 69
P
Panes
Asset 28
Audio 93
202
Index
ABCDEFGHIJKLMNOPQRSTUVWXYZ
Launch 24
list of 17
list of icons 184
Media 66
Project/Story 37
Queue/Story 41
Search 102
working with 20
Playback quality 77
Plug-ins
working with 25
PNG file
creating from a video frame 90
presenter mode 154
custom settings 144
Procedures
access help topic for a pane 25
add a marker 114
add a segment to a story 47
add CG machine control instructions 52
add or remove columns in Assets pane 34
associate indexed story to project or facet 39
cancel process underway 130
change layout 19
change marker color 114
change user password 132
close a pane 20
close an Assets pane 29
conduct a search 103
copy an asset 35
create a new story 45
create a new story from mobile app 166
create a story through voice annotation 48
create an L-cut 61
cue to frame based on off-set value 81
cue to frame based on timecode 81
cut, copy, paste marker text 115
delete a clip from a sequence 58
delete a dissolve 63
delete a production cue 52
delete a segment 48
delete a story 54
delete marker 114
display assets in Asset pane 28
display previous view in Assets pane 29
edit a story
copy text 49
203
cut text 49
from mobile app 167
italicize text 50
mark closed captioning 51
mark normal text 51
mark presenter text 51
paste text 49
redo edit 49
set text to bold 50
underline text 50
edit marker text 114
enable plug-ins 136
export markers 116
hide story form 43
insert a NAT video asset 56
insert a SOT video asset 57
insert an audio voice over 57
insert dissolves 62
insert production cue 52
insert script templates 64
load source clip for frame of script sequence 85
lock a story 54
lock the story form 55
mark an Out point 78
mix down a sequence 88
mobile application
add CG machine control instructions 171
call number from link in story 173
copy text 168
create a new story 166
create local story (work offline) 172
cut text 168
delete production cue 170
edit a story 167
exit application 161
insert production cue 169
mark closed captioning 169
mark normal text 169
mark presenter text 169
move production cue 170
navigate stories 164
navigate the directory 163
navigate to production cues 170
navigate to queue from story 164
open a queue 163
open a story 164
open directory 163
ABCDEFGHIJKLMNOPQRSTUVWXYZ
open production cue 169
open story 165
open URL link from story 174
paste text 168
select text 168
sign in 141, 160
sign out 161
view local stories (work offline) 171
modify iNEWS credentials 133
modify Interplay Production settings 134
modify language in Interplay Central 132
move a clip in a sequence 58
move a column in Assets pane 35
move a pane 20
move a production cue 52
move an asset 35
navigate by markers 115
navigate the Assets pane 29
navigate to an In or Out point 78
open a facet 37
open a system or project from Launch pane 24
open a video asset 33
open an enclosing folder 85
open an iNEWS directory 32
open an iNEWS project 37
open an iNEWS queue 32
open an Interplay Production folder 33
open iNEWS directory from mobile app 163
open iNEWS directory from tablet app 147
open iNEWS queue from mobile app 163
open iNEWS queue from tablet app 148
open Interplay Central help system 26
open more panes 20
open multiple Assets panes 28
open new master clip after mixdown 130
open Progress pane 130
open Search pane 102
open story from mobile app 164, 165
open story from tablet app 149
open story to full view 45
override default audio tracks 98
play a script sequence 72
play from an In or Out point 78
play from In to Out point 73
play media with J-K-L keys 73
play one of last 10 assets in Media pane 75
play to an Out point 73
Index
play to Out point from previous frame 78
rearrange story segments 47
record a voice-over 98
remove all non-running jobs 130
remove an L-cut 61
remove job from Progress pane 130
reply to a message 121
reset all layouts 20
reset layout 20
resize columns in Assets pane 34
retrieve deleted story from Dead queue 54
retry failed process 130
review script sequence in STP target resolution 85
save a frame as an image 90
save marker text 114
select aspect ratio for Media viewer 75
select Transcode profile for mixdown 87
send a message 120
send sequence to playback device 127
set audio mix 96
set custom audio monitoring 97
show story form 44
sign in 16
sign out 16
split a segment 47
step through an asset or sequence 74
step to next locator 79
step to previous locator 79
tablet application
create a favorite 155
delete a favorite 156
edit a favorite 155
email from link in story 151
enter presenter mode 154
exit application 142
exit presenter mode 154
navigate stories 150
navigate the directory 147
navigating in presenter mode 154
open a queue 148
open a story 149
open directory 147
open URL link from story 151
regenerate sequence video proxy 154
reload a story 151
sign out 142
view help system 142
204
Index
ABCDEFGHIJKLMNOPQRSTUVWXYZ
view video associated with script 153
trim a clip 58
trim a clip with keyboard 59
unlock a story 55
update media status 75
view existing story 45
view messages 121
view or play a video asset 72
zoom in or out of Media Timeline 84
Production cue
adding 51
Production cues
adding in Interplay Central Mobile 169
Progress pane
described 129
list of icons 188
Project
associating story with 39
described 30, 36
opening 37
Property columns
adding and removing 34
moving 35
resizing 34
Provide Feedback menu option 23
Q
Queue/Story pane
described 41
keyboard shortcuts 176
Queues
in Assets pane 30
R
Restrictions
described 107
Reviewing
for playback 84
S
Script
adding media 55
formatting 50
Script Editor
205
described 43
Script sequence
editing 57
playing 72
stepping through 74
trimming clips 58
Script templates 63
Search bar 101
Search pane 102
Searching
for assets 103
Segmented edit locks 54
Segments
described 46
Send to playback
selecting a profile 123
sending a script sequence 125
Sequence Timeline
described 43
Sequences
inserting dissolves 62
mixing down 87
simple and complex 76
viewing in tablet application 151
Settings menu option 23
Sidebar, described 142
Sightline
described 43
Signing in 16
Signing out 16
Simple sequence
defined 76
SOT column 55
SOT tracks
changing the default 98
described 92
swapping with NAT tracks 98
Speech-to-Text 48
Split edit 60
Story
adding media 55
creating 45
creating in Interplay Central Mobile 165
deleting 53
described 43
editing 49
editing in Interplay Central Mobile 167
ABCDEFGHIJKLMNOPQRSTUVWXYZ
inserting script templates 63
locking and unlocking 54
recovering 53
segments 46
timing 53
Story Form
described 43
Index
setting 92
Z
Zoom bar
described 83
with in-process clips 89
T
Tab key
in browser window 175
Templates, for scripts 63
Timecode
using to cue a frame 80
Timecode displays 80
Timing taglines 53
Training services 12
Transitions, dissolves 62
Trimming 58
Troubleshooting 12
U
Unicode
support for marker text 117
Unlocking
story 54
Update Media Status command 75
User settings
General 132
iNEWS 133
Interplay Production 134
MOS 136
V
V column 55
Video dissolves 62
Video layout 18
Video sequences
view from tablet application 151
Voice tracks
described 92
Voice-over
recording 98
Volume
206
Index
207
ABCDEFGHIJKLMNOPQRSTUVWXYZ