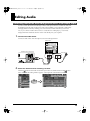
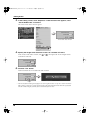
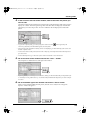
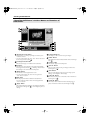
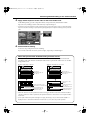
1
DV-7DLPRO-SE_e.book 1 ページ 2005年9月1日 木曜日 午後2時43分
Features Added with
the DV-7DL PRO Studio Edition
● Upgrading to the DV-7DL PRO Studio Edition
For the upgrade procedure, refer to “Upgrading to the DV-7DL PRO
Studio Edition,” which is packaged with the product.
Refer to this manual after you have finished upgrading to the DV-7DL
PRO Studio Edition.
● Description of Basic Operation
This manual describes the new features added with the DV-7DL PRO
Studio Edition. For the basic operation of the DV-7DL-G or DV-7DL
PRO, refer to the “Owner’s Manual” included with the unit.
● How to Read This Manual
The explanations in this manual assume basic knowledge of how to use
the mouse (which are included with the unit) as well as the DV-7DLC
remote controller and the DL-CR1 card reader.
For more information on how to use these, refer to the corresponding
owner’s manuals, listed below.
• Using the Mouse ............DV-7DL-G/PRO Ver. 2.0 Owner’s Manual, p. 33, or
DV-7DL PRO Owner’s Manual, p. 32
• Using the DV-7DLC ......DV-7DLC Owner’s Manual
• Using the DL-CR1..........DL-CR1 Owner’s Manual
Copyright © 2005 ROLAND CORPORATION
All rights reserved. No part of this publication may be reproduced in any form without
the written permission of ROLAND CORPORATION.
DV-7DLPRO-SE_e.book 2 ページ 2005年9月1日 木曜日 午後2時43分
Features Added with the DV-7DL PRO
Studio Edition
The features described below have been added to the DV-7DL PRO Studio Edition (which we’ll call
the “Studio Edition” for short).
Timeline Palette
Infinity Roll Editing (Editing of three or more pieces of video material) (p. 54)
A feature that replaces the video on the Main Video track with the results of A/B roll editing has
been added. This enables you to perform editing that combines even more video shot from other
angles (infinity roll editing).
Features for Batch Editing of Transition Effects
• Feature for Batch Arrangement of Transition Effects (p. 29)
You can now arrange transition effects on the Timeline Palette in groups. This feature is useful at
times such as when you’re applying the same transition effect repeatedly.
• Feature for Creating Bridges for Transition Effects in Specified Passages (p. 31)
Now you can create groups of bridges for transition effects in specified passages.
Added Features for Audio Editing
• Feature for Recording Narration Directly from Audio Input (p. 13)
Now you can choose the audio input to use for the Narration feature. This lets you perform the
narration process using other connected audio equipment, not just microphones.
• Automatic Audio Fade Feature (p. 15)
A feature that lets you automatically create fades for audio material has been added. You can easily
create fade-ins and fade-outs.
Material Editing
• Fixed-length Cut Editing Mode (p. 61)
A button has been added to keep In point and Out point spacing unchanging in the Detail View
window for video or audio material. This is convenient when you’re fine tuning video and audio
material.
Capturing and Importing Video
Feature for Making Notes of the Date and Time of Tape Recordings (p. 6)
When you capture video material via a DV connector, you can now keep a record of information
about the date and time it was recorded by the DV device in the “Notes” for the video material.
Added Features for One-frame Record (p. 7)
The features “Onion Skin,” “Interval Capture,” and “Multiframe Save” have been added to the
One-frame Record feature. This lets you use One-frame Record to create animations efficiently.
Capturing and Importing Audio
Added Features for Importing Audio Material from Audio CDs (p. 11)
• Shuttling Slider
It’s now possible to know the playback location on an audio CD. You can also rewind and fast
forward to the desired location in a song by dragging the shuttling slider.
• “Play Mode” Field
You can now specify a starting position for playback.
• Material-name Field
It’s now possible to specify a name for audio material when you capture it.
2
DV-7DLPRO-SE_e.book 3 ページ 2005年9月1日 木曜日 午後2時43分
Titles
Added Title-in/Title-out Effects (p. 19)
Title-in and title-out effects have been added. These let you achieve sophisticated title-ins and -outs
with rendering.
Feature for Fine-tuning the Settings for Title-in/Title-out Movement (p. 20)
Now you can create title-in and title-out movement the way you want it. You can freely make and
combine the settings for where Slide is positioned and how it moves, and how fades occur.
Effects
Ten Types of Effects Added
• Six Types of Transition Effects Added (p. 32)
RT Slide
RT Stretch
RT Push Out
Zoom Fade
Moving Split
Out Focus
• One Type of Filter Effect Added (p. 33)
Partial Magnifier
• Three Types of Composition Effects Added (p. 34)
Twin Screen
RT Crop
Centerimage
Creation of Video Material
Added Feature for Zoom/Pan Still Picture (p. 36)
“Preset” has been added to the “Zoom/Pan Still Picture” on the DV-7DL PRO. You can easily make
still pictures move, simply by selecting preset types of movement.
Vari-speed Feature (p. 50)
A Vari-speed feature has been added for creating video material with Motion effects applied.
Video Output
Changing the Aspect Ratio for DV Output (p. 62)
Now you can output digital video at a ratio of 16:9. Using this when editing video material shot at
a 16:9 wide aspect ratio lets you perform DV output simultaneously for the discrimination signal
that monitors use to change to 16:9 display automatically (the ID-1 signal).
Waveform Monitor and Vectorscope Added
Waveform Monitor (p. 66) and Vectorscope (p. 68)
You can now display a waveform monitor and a vectorscope. These make it possible for you to
evaluate video signals objectively. You can use these as a guide for checking the picture.
3
DV-7DLPRO-SE_e.book 4 ページ 2005年9月1日 木曜日 午後2時43分
Table of Contents
Capturing Video ......................................................................................6
Keeping a Record of the Date and Time of the Tape Recording............................................ 6
Using the One-frame Record Feature ....................................................................................... 7
Capturing While Viewing the Previous Frame (Onion Skin) ............................................... 7
Capturing at Fixed Intervals (Interval Capture)................................................................... 8
Capturing a Number of Frames Simultaneously (Multiframe Save) ................................. 10
Capturing Audio....................................................................................11
Capturing Audio from a CD ..................................................................................................... 11
Listening To Just the End of a Song................................................................................. 11
Capturing Audio Material After Naming It ......................................................................... 12
Editing Audio.........................................................................................13
Recording Narration and Background Music from Audio Input .......................................... 13
Getting the Volume to Fade In/Out Automatically ................................................................. 15
Creating a Fade In Automatically ..................................................................................... 15
Creating a Fade Out Automatically................................................................................... 16
Batch Fade In/Fade Out for a Specified Passage ............................................................ 17
Creating Titles .......................................................................................19
Making Settings for How Titles Appear and Disappear ........................................................ 19
Added Title-in/Title-out Effects ......................................................................................... 19
Making Detailed Settings for Title-In Motion (Expanded Settings) ................................... 20
Making Detailed Settings for Title-Out Motion (Expanded Settings) ................................ 22
Displaying Other Timeline Video in the Titler’s Preview Window........................................ 23
Managing Material Needed to Create Titles (Titler Utility) ................................................... 24
Adding a Still Picture ........................................................................................................ 24
Deleting a Still Picture ...................................................................................................... 27
Using Effects .........................................................................................29
Placing a Group of Transition Effects (Transition FX) in a Specified Passage .................. 29
Automatically Creating Bridges for Transition Effects (Transition FX)............................... 30
Creating Bridges for Transition Effects (Transition FX) in a Specified Passage ............... 31
List of Added Effects................................................................................................................ 32
Transition Effects (Transition FX) ..................................................................................... 32
Filter Effects (Filter FX)..................................................................................................... 33
Composition Effects (Composition FX)............................................................................. 34
4
DV-7DLPRO-SE_e.book 5 ページ 2005年9月1日 木曜日 午後2時43分
Creating Video Material ........................................................................36
Creating “Dynamic” Video Material from a Still Picture (Zoom/Pan Still Picture).............. 36
Capturing Still Pictures ..................................................................................................... 36
“Zoom/Pan Still Picture” window: Names and Functions of Added Items ........................ 38
Choosing a Zoom/Pan Image from the List ...................................................................... 39
Saving an Edited Zoom/Pan Image to the List ................................................................. 40
Deleting a Zoom/Pan Image............................................................................................. 41
Using a Wide Variety of Motion (Presets)......................................................................... 42
Registering Often-used Movement as Presets................................................................. 45
Rotating a Still Picture ...................................................................................................... 47
Creating Multiple Pieces of Video Material at One Time .................................................. 48
Displaying the Zoom/Pan Window from Title Material...................................................... 49
Creating Video Material with Motion Effects (Vari-speed) .................................................... 50
Displaying the Screen for Applying Motion Effects........................................................... 50
Performing Detailed Editing on the Timeline Palette ........................53
Temporarily Ignoring the Results of A/B Roll Editing During Sequence Playback............ 53
Infinity Roll Editing (Editing 3 or More Pieces of Video Material) ........................................ 54
Managing Material in the Material Window.........................................58
Importing Material from Another Project (Import Utility) ...................................................... 58
Enlarging the View of Title Material (Title Big Thumbnail) ................................................... 60
Making the Length of Material Unchanging (Fixed Cutlength Editing Mode) ..................... 61
Recording the Sequence......................................................................62
Changing the Aspect Ratio for DV Output ............................................................................. 62
Outputting Video Recorded at 16:9 from the DV Jack at 16:9.......................................... 63
Outputting Video Recorded at 4:3 from the DV Jack at 16:9............................................ 64
Other Features ......................................................................................66
Viewing the Waveform Monitor ............................................................................................... 66
Viewing the Vectorscope ......................................................................................................... 68
Glossary.................................................................................................70
Index.......................................................................................................71
5
DV-7DLPRO-SE_e.book 6 ページ 2005年9月1日 木曜日 午後2時43分
Capturing Video
Keeping a Record of the Date and Time of the Tape Recording
When you capture video material via DV input, you can retain a record of the date and time that
the material was recorded by the digital video camera or deck. You can view the information on
the date and time of taping in “MEMO” in the Detail View window and in the Video Palette’s List
Mode window.
Detail View window
The information on the date and time is automatically
entered into the “MEMO.”
* To use this feature, the setting for the date and time must be made on the digital video camera or deck. For
more information, refer to the documentation for your digital video camera or deck.
1.
At the “Capture” screen, click the “Settings” button.
The menu appears.
2.
Click “Write Record Date Time to Memo” to select it.
The menu disappears.
3.
Click the “Settings” button a second time and make sure a check mark is
displayed next to “Write Record Date Time to Memo.”
After you verify that the check mark is present, click the “Settings” button to close the menu.
From now on, whenever you capture video material, information on the date and time the material
was shot is inserted automatically into “MEMO” in the Detail View window.
* If no check mark is present, go back to step 2 and carry out the operation again.
6
DV-7DLPRO-SE_e.book 7 ページ 2005年9月1日 木曜日 午後2時43分
Capturing Video
Using the One-frame Record Feature
The One-frame Record feature has been augmented with three features that improve ease of use:
“Onion Skin,” “Interval Capture,” and “Multiframe Save.” These enable you to accomplish
animation camerawork more efficiently.
Capturing While Viewing the Previous Frame (Onion Skin)
You can view captured frames superimposed translucently over the input video picture. Because
the captured frames are displayed, checking the motion is easy.
With Onionskin, you can display up to three superimposed frames of just-captured video.
* You can also use Onionskin in combination with the “Interval Capture” and “Multiframe Save” features of
One-frame Record.
1.
At the “Capture” screen, click the “Settings” button to display the menu.
2.
Line up the pointer with “Onion Skin (Frame Capture),” and when the menu
appears, click to select the number of superimposed video frames to
display.
From now on, when you perform One-frame Record taping, one to three frames of the video just
captured are displayed superimposed translucently over the input video.
* When you’re not using Onion Skin, select “OFF.”
7
DV-7DLPRO-SE_e.book 8 ページ 2005年9月1日 木曜日 午後2時43分
Capturing Video
Capturing at Fixed Intervals (Interval Capture)
You can perform One-frame Record taping automatically at every iteration of a fixed-length
interval of time.
When you want to take video of, for example, a blooming flower and use it to create speeded-up
video material, manual One-frame Record operations take a lot of time. In cases like this, the
Interval Capture feature is useful for capturing video automatically.
* You can use Interval Capture in combination with the “Onion Skin” and “Multiframe Save” features of
One-frame Record.
1.
At the “Capture” screen, click the “Settings” button to display the menu.
2.
Line up the pointer with “Time Interval Frame Capture” and click.
A window for making the settings for Interval Capture (One-frame Record) appears.
The window for making the settings for Interval Capture
3.
Click the “Time Interval Frame Capture” button.
The button lights in red, and you can now set the time interval for capturing video.
4.
Set the capture-time interval.
The time is displayed in terms of “hours: minutes: seconds.” Click to select the unit of time you
want to set, then click
or
to change the value.
After making the setting, click the “OK” button.
8
DV-7DLPRO-SE_e.book 9 ページ 2005年9月1日 木曜日 午後2時43分
Capturing Video
5.
Click the “Frame Capture Start” button.
Interval Capture starts.
Thereafter, the “Frame Capture Start” button is automatically activated at every iteration of the
interval you set in step 4.
“Frame Capture Start” button
6.
Click the “Capture Stop” button to quit capturing.
Interval Capture ends and the video material is created.
* The capture-time interval you set in step 4 is automatically entered into the “MEMO” for the created video
material.
“Capture Stop” button
9
DV-7DLPRO-SE_e.book 10 ページ 2005年9月1日 木曜日 午後2時43分
Capturing Video
Capturing a Number of Frames Simultaneously (Multiframe Save)
You can capture two or more frames at one time.
When creating animation-like video material, you may sometimes find that the camerawork for
capturing video one frame at a time takes too long, or you are unable to create video material of the
length you intended. Using “Multiframe Save” lets you record a number of frames at one time,
enabling you to create video material rapidly.
* You can use Multiframe Save in combination with the “Onion Skin” and “Interval Capture” features of
One-frame Record.
1.
At the “Capture” screen, click the “Settings” button to display the menu.
2.
Line up the pointer with “Multiple Frame Saving while Frame Capture,” and
when the menu appears, click to select the number of frames to record at
one time.
From now on, when you perform One-frame Record taping, the number of frames you selected are
recorded each time.
10
DV-7DLPRO-SE_e.book 11 ページ 2005年9月1日 木曜日 午後2時43分
Capturing Audio
Capturing Audio from a CD
You can play back and listen to just the end of a song. This is useful at times such as when you’re
choosing a song to use as an ending. The addition of a shuttling slider also lets you quickly move
to and hear the location of the song you want to listen to.
Listening To Just the End of a Song
You can specify the length to play back and listen to just the end of a song.
1.
Click
to the right of the “Play Mode” field, and when the menu appears,
click “Ending 10sec” to select it.
“Ending 10sec” is displayed in the “Play Mode” field.
You can specify the number of seconds from the end of the song to play back by selecting “Ending
10sec” or other item from the menu. Choose the setting you want.
2.
Select and listen to a song.
Click a track number and select the song, then click the “Play” button. The end of the song is played
back for the time you selected in step 1, allowing you to listen to it.
* If you want to play back a song from the beginning in the usual manner, then in step 1, select “From Top.”
Listening to a Song Partway Through
When you want to listen to a song from the middle, drag the shuttling slider to move the playback
position.
Shuttling slider
Drag
11
DV-7DLPRO-SE_e.book 12 ページ 2005年9月1日 木曜日 午後2時43分
Capturing Audio
Capturing Audio Material After Naming It
You can give a name ahead of time to audio material that you capture from an audio CD.
1.
Click the “NAME” field.
The “NAME” field changes as shown in the figure, enabling you to type in text.
A cursor appears.
2.
Give the material a name.
Using the keyboard, type in a name for the audio material.
3.
Carry out the capture operation.
* Follow the instructions in “Capturing Audio from CD” in the following owner’s manual to capture the audio
material from an audio CD.
• DV-7DL-G/PRO Ver. 2.0 Owner’s Manual, p. 105, or
• DV-7DL PRO Owner’s Manual, p. 106
12
DV-7DLPRO-SE_e.book 13 ページ 2005年9月1日 木曜日 午後2時43分
Editing Audio
Recording Narration and Background Music from Audio Input
You can record to the Audio tracks directly from the audio input connectors on the back of the unit.
By inputting audio through an audio mixer (such as the M-100FX) you can adjust the sound quality
and apply effects in advance, enabling you to insert narration in line with what you envision.
Also, if you connect an audio device such as a cassette deck or an MD player, you can insert
background music matched to the flow of the video directly into your sequence.
1.
Connect the audio device.
Connect an audio mixer and a microphone as shown in the figure below.
Audio mixer
DV-7DL series rear panel
Microphone
Audio output
L
Mic input
R
Audio cable
2.
Select the Audio track for recording narration.
Click the
button for the Audio track where you want to record the narration. The
turns red and the Recording window appears on the right side of the Timeline Palette.
button
Narration window
13
DV-7DLPRO-SE_e.book 14 ページ 2005年9月1日 木曜日 午後2時43分
Editing Audio
3.
At the bottom of the Recording window, click
appears, click “AUDIO” to select it.
, and at the menu that
This enables you to record audio from audio input.
* To record audio from the Mic input on the front panel of the unit, select “MIC.”
Thereafter, go to “Inserting Narration” in one of the following owner’s manuals, and carry out
recording according to steps 3 through 5.
• DV-7DL-G/PRO Ver. 2.0 Owner’s Manual, p. 128, or
• DV-7DL PRO Owner’s Manual, p. 125
Recording Playback Audio in Sync with External Equipment
You can synchronize this unit with a Roland VS series multitrack recorder (such as the VS-2000CD)
and record the audio from the VS series device.
UM-1X
MIDI
DV-7DL series
USB connector
AUDIO input connectors
VS-2000CD
Audio
* For information on synchronization, refer to “Feature for Synchronizing with an External Device” in one of
the following owner’s manuals.
• DV-7DL-G/PRO Ver. 2.0 Owner’s Manual, p. 360, or
• DV-7DL PRO Owner’s Manual, p. 348
14
DV-7DLPRO-SE_e.book 15 ページ 2005年9月1日 木曜日 午後2時43分
Editing Audio
Getting the Volume to Fade In/Out Automatically
You can automatically create a fade-in or fade-out in audio material arranged on the Timeline
Palette.
* You can also make batch settings for fade-in or fade-out for multiple pieces of audio material in a specified
passage. For more information, refer to "Batch Fade In/Fade Out for a Specified Passage" (p. 17)
Creating a Fade In Automatically
1.
Move the pointer to a location near the left edge of the audio material, then
right-click.
Move the pointer to a location near the left edge of the audio material where you want to create the
fade-in, and when the shape of the pointer has changed to
, right-click. The menu appears.
Right-click
2.
From the menu, click “Create Audio Fade-In” to select it.
At the menu, you can specify the length of the fade to create, such as “Create Audio Fade-In (1
frames).” Choose the setting you want. The fade-in is created automatically.
15
DV-7DLPRO-SE_e.book 16 ページ 2005年9月1日 木曜日 午後2時43分
Editing Audio
Creating a Fade Out Automatically
1.
Move the pointer to a location near the right edge of the audio material, then
right-click.
Move the pointer to a location near the right edge of the audio material where you want to create
the fade-out, and when the shape of the pointer has changed to
, right-click. The menu appears.
Right-click
2.
From the menu, click “Create Audio Fade-Out” to select it.
Using the menu, you can specify the length of the fade to create, such as “Create Audio Fade-Out
(1 frames).” Choose the setting you want. The fade-out is created automatically.
16
DV-7DLPRO-SE_e.book 17 ページ 2005年9月1日 木曜日 午後2時43分
Editing Audio
Batch Fade In/Fade Out for a Specified Passage
You can create fade-ins or fade-outs in a batch for pieces of audio material in a specified passage
on the Timeline Palette.
* A fade-in or fade-out is created for audio material when the material’s left or right edge is located within the
specified passage.
In point
Out point
Specified passage
When only the right edge is inside:
A fade-out is created.
1.
When only the left edge is inside:
A fade-in is created.
Specify the passage.
Set an In point and an Out point in the sequence.
* For more information, refer to “Setting In Points and Out Points in a Sequence” in one of the following
owner’s manuals.
• DV-7DL-G/PRO Ver. 2.0 Owner’s Manual, p. 287, or
• DV-7DL PRO Owner’s Manual, p. 282
2.
Click the Track Selector for the Audio track.
Click the Track Selector for the Audio track containing the audio material for which you want to
apply the fade. The specified passage on the selected Audio track turns red.
17
DV-7DLPRO-SE_e.book 18 ページ 2005年9月1日 木曜日 午後2時43分
Editing Audio
3.
In the editing screen, click “Sequence.” From the menu that appears, click
“Create Audio Fade” to select it.
The “Create Audio Fade” window appears.
“Create Audio Fade” window
4.
Specify the length of the fade time in terms of a number of frames.
In the “Create Audio Fade” window, click
set the time for the fade.
5.
or
to the right of the “Frame Length” field to
Click the “OK” button.
Fade-ins and fade-outs are created in the audio material.
* Fade-ins and fade-outs having the length you set with “Length in Frames” in step 4 are created. This means
that no fade-in or fade-out is created when the length of the audio material is shorter than the specified fade
time (the combined length of both the fade-in time and the fade-out time).
18
DV-7DLPRO-SE_e.book 19 ページ 2005年9月1日 木曜日 午後2時43分
Creating Titles
Making Settings for How Titles Appear and Disappear
Added Title-in/Title-out Effects
The types of effects described below have been added to the Title-in and Title-out effects available
with the Titler.
Effect type
Rendering
“Title In” effect
*
A Title-out effect produces an effect that is the opposite of the corresponding
Title-in effect.
Zoom
Magnifies (zooms in).
Required
Horizontal Stretch
Stretches horizontally.
Required
Vertical Stretch
Stretches vertically.
Required
Blur
Focuses gradually.
Required
Blur Zoom
Focuses while zooming out.
Required
H. Stretch Blur
Focuses while zooming out horizontally.
Required
B. Stretch Blur
Focuses while zooming out vertically.
Required
Rotation Zoom (2 rotations)
Zooms in while rotating twice.
Required
Rotation Zoom (3 rotations)
Zooms in while rotating three times.
Required
Rotation Zoom (4 rotations)
Zooms in while rotating four times.
Required
Zoom Bound
Zooms in, then bounces.
Expand setting
For more information, refer to “Making Detailed Settings for Title-In
Motion (Expanded Settings)” (p. 20).
Required
Not required
* If your sequence uses a title with Title-in or Title-out effect settings that require rendering, then please note
the following important points.
• The length of a title placed on the Timeline Palette cannot be adjusted by dragging. Use the Titler to adjust the length
of the title.
• Rendering is necessary to apply the Title-in or Title-out effect in the sequence.
The Point Where the Title-in Effect Appears
When you select Zoom, Rotation Zoom (any type), or Zoom Bounce as the type of Title-in effect,
you can set the point where the title appears. When you do this, “
” appears in the Titler’s
Preview window, as shown in the figure below.
The title appears at the location of this “
,” then gradually expands to fill the screen. You can
move this “
” to any location you want by dragging it.
The Point Where the Title-out Effect Disappears
When you select Zoom, Rotation Zoom (any type), or Zoom Bounce as the type of Title-out effect,
you can set the point where the title disappears. When you do this, “
” appears in the Titler’s
Preview window, as shown in the figure below.
The title disappears completely at the location of this “
location you want by dragging it.
.” You can move this “
”to any
19
DV-7DLPRO-SE_e.book 20 ページ 2005年9月1日 木曜日 午後2時43分
Creating Titles
Making Detailed Settings for Title-In Motion (Expanded Settings)
You can create real-time titles by freely making and combining the settings for where Slide is
positioned and how it moves, and how fades occur.
* For more information on basic Title-in settings, refer to “Making Settings for How Titles Appear and
Disappear” in one of the owner’s manuals described below.
• DV-7DL-G/PRO Ver. 2.0 Owner’s Manual, p. 219, or
• DV-7DL PRO Owner’s Manual, p. 215
1.
For the Title-in type, select “Expand setting.”
Click the right side of the Title-In Type field, then click “Expand setting” to select it. The Title-in
type changes to “Expand setting,” and the “Expanded setup of Title In” window appears.
“Extended setup of Title in” window
2.
Make the settings for the items in the “Expanded setup of Title In” window.
Make the settings for the items to create the motion you want. You can make the settings for the
items described below.
20
Setting item
Description
Setting value
Mode
Type of Title-in motion
Wipe: Motion like a wipe change
Slide: Motion like a slide change
Wipe
slide
None
* When “None” has been selected, only the settings for
“Alpha change” and “Alpha offset” can be made.
Horizontal motion
Direction of horizontal movement
Left to Right
Right to Left
None
Horizontal Change
Change in horizontal movement
Linear: Unchanging speed
Bounce:Bouncing sensation
Linear, Slowdown, Accelerate, Smooth,
Bound (Soft), Bound, Bound2, Bound3
Vertical motion
Direction of vertical movement
Top to Bottom
Bottom to Top
None
Vertical change
Change in vertical movement
Wipe: Motion like a wipe change
Slide: Motion like a slide change
Linear, Slowdown, Accelerate, Smooth,
Bound (Soft), Bound, Bound2, Bound3
Alpha change
Change in the title’s degree of transparency
Linear, Slowdown, Accelerate, Smooth, None (100%)
* When “None (100%)” has been selected, the setting for
“Alhpa offset” cannot be selected.
Alpha offset
Location where the title’s degree of
transparency begins to change
* For more information, refer to “About Alpha
offset” on the following page.
0%, 25%, 50%, 75%
DV-7DLPRO-SE_e.book 21 ページ 2005年9月1日 木曜日 午後2時43分
Creating Titles
3.
Verify the movement.
The movement of the title you created in step 2 is displayed in the Preview window.
* A title displayed in the Preview window is only for previewing its operation. Its operation is not accurate.
This means that frame drop-out may be visible. To verify the operation accurately, insert the title into a
sequence and play it back.
For information on how to insert a title into a sequence, refer to “Inserting Titles into a Sequence” in one of
the following owner’s manuals.
• DV-7DL-G/PRO Ver. 2.0 Owner’s Manual, p. 222, or
• DV-7DL PRO Owner’s Manual, p. 218
4.
Click the “OK” button.
When you have finished making the settings, click the “OK” button. The “Title-In Extended
Settings” window disappears.
About “Alpha offset”
The “Alpha offset” setting for a Title-in effect specifies the location where the title’s degree of
transparency begins to change.
For instance, when “Alpha offset” is set to “75%,” the degree of transparency of the title starts to
change at a location of 75%, in terms of length, from the beginning of the Title-in effect. (See the
figure below for a conceptual view.)
Level
100%
Title-in length
Wipe/Slide location
0%
25%
50%
75%
Alpha offset
The “Alpha offset” setting for a Title-out effect specifies the location where the title’s degree of
transparency stops changing.
For instance, when “Alpha offset” is set to “75%,” the title becomes transparent at a location of 75%,
in terms of length, from the end of the Title-out effect. (See the figure below for a conceptual view.)
Title-out length
Level
100%
Wipe/Slide location
75%
50%
25%
0% Alpha offset
21
DV-7DLPRO-SE_e.book 22 ページ 2005年9月1日 木曜日 午後2時43分
Creating Titles
An Example of How to Use “Extended Settings”
As an example, this section covers the settings for creating a Title-in effect in which text bounces as
it falls from the upper left.
Settings for text that bounces as it falls from the upper left
Setting item
Setting value
Mode
Horizontal
motion
Horizontal
change
Vertical motion
Vertical change
Alpha change
Slide
Left to Right
Slowdown
Top to Bottom
Bound1
None (100%)
When the settings just described are combined as described below, they ultimately produce
operation in which text bounces as it falls from the upper left.
Vertical movement
Horizontal movement
+
Setting “Horizontal motion” to
“Left to Right” and “Horizontal
change” to “Slowdown”
produces decelerating movement
from left to right.
Final movement
=
Setting “Vertical motion” to “Top
to Bottom” and “Vertical change”
to “Bound1” produces up-anddown bouncing.
Combining the decelerating
movement from left to right with
the up-and-down bounding
produces bounding movement
from upper left to lower right.
You can create a wide variety of operations using these and the other settings. Try experimenting
with various combinations of settings as you view the results in the Preview window.
Making Detailed Settings for Title-Out Motion (Expanded Settings)
Just as with Title-in effects, you can create the kind of Title-out operation that you want. For
information on the basic procedures, refer to “Making Detailed Settings for Title-In Motion
(Expanded Settings)” (p. 20).
* For more information on basic Title-out settings, refer to “Making Settings for How Titles Appear and
Disappear” in one of the owner’s manuals described below.
• DV-7DL-G/PRO Ver. 2.0 Owner’s Manual, p. 219, or
• DV-7DL PRO Owner’s Manual, p. 215
22
DV-7DLPRO-SE_e.book 23 ページ 2005年9月1日 木曜日 午後2時43分
Creating Titles
Displaying Other Timeline Video in the Titler’s Preview Window
The Titler’s Preview window displays the video at the location of the position bar. This means that
the video you want may sometimes not be displayed in the Titler’s Preview window, such as when
you display the Titler without first checking the location of the position bar.
If this happens, you can use the DV-7DLC and the “Reload timeline image” feature place the video
you want in the Preview window without having to close the Titler.
1.
Operate the DV-7DLC to move the playback position.
While watching the video displayed on the television monitor, operate the DV-7DLC to move the
playback position to the video you want to display in the Titler’s Preview window.
TV monitor
2.
DV-7DLC
TV monitor
On the screen, click the “Reload timeline image” button.
The Preview window is updated with the Timeline video at the selected destination.
“Reload timeline image” button
23
DV-7DLPRO-SE_e.book 24 ページ 2005年9月1日 木曜日 午後2時43分
Creating Titles
Managing Material Needed to Create Titles (Titler Utility)
You can add and delete the still pictures (Pictures, Textures, Frames, Backgrounds, and Center
Images) displayed on the Titler’s internal list.
Adding the still pictures that you want to use to the internal list can be useful, because it makes it
unnecessary to import the still pictures from a CD-ROM or memory card every time you need
them.
Adding a Still Picture
This adds still pictures saved on a CD-ROM or memory card to the Titler’s internal list.
* Depending on the file format or image size of the still picture, addition to the internal list may not be possible.
For more information, refer to “Formats for Saving Still Pictures” (p. 26).
1.
Load the media.
* Importing from a memory card requires the DL-CR1 card reader.
2.
At the Preview window, click “Settings.” Then from the menu that appears,
click “Titler Utility” to select it.
The “Image File Explorer” window appears.
“Image File Explorer ” window
3.
Select the type of title material for which you want to add the still picture.
In the window, click the tab for Pictures, Textures, Backgrounds, or Center Images to select the type
of title material for which you want to add the still picture.
Tab
24
DV-7DLPRO-SE_e.book 25 ページ 2005年9月1日 木曜日 午後2時43分
Creating Titles
4.
In the list on the left side of the window, click to select the still picture you
want to add.
The media loaded is displayed in the list on the left side. Double-clicking the media after it appears
displays its contents. From among the image files and folders that are displayed, select the still
picture that you want to import. The “Preview” field below the list displays the selected still
picture
* To go back to a parent folder, go to the top left of the window and click
“Directory” field, then from the list that appears, select the folder.
at the right side of the
* If the contents of the CD-ROM or memory card are not displayed, go to the bottom left of the window and
click the “Update” button.
* To select more than one still picture, hold down the “Shift” key on the keyboard and click the still pictures
you want to add.
* To select all still pictures, go to the center of the window and click the “Select All” button.
5.
Go to the center of the window and click the “Add →” button.
The still picture is added to the list at the right of the window.
* Depending on the format the still picture was saved in, adding it to the internal list may not be possible. Refer
to “Formats for Saving Still Pictures” (p. 26) and check the format that the still picture you want to import
is saved in.
6.
Go to the bottom right of the window and click the “Close” button.
When you have finished adding the still picture, click the “Close” button. The “Image File
Explorer” window disappears.
25
DV-7DLPRO-SE_e.book 26 ページ 2005年9月1日 木曜日 午後2時43分
Creating Titles
Formats for Saving Still Pictures
You can add still pictures that meet the conditions described below to the Titler’s internal list.
File format
Image size
•
•
•
*
JPEG format
JBMP format (* Uncompressed file)
TGA format
Alpha channel: Only alpha channels saved in TGA format are
supported.
Picture:
Maximum 640 x 480 pixels
Other material: Maximum 1,440 x 1,080 pixels
When saving still pictures on a CD-R or memory card, give attention to the following important
points.
Saving on CD-R
File and folder names
Writing with a Macintosh
When writing, use the “Joliet Mode 1” format, upwardly compatible
with ISO 9660 for both Windows and Macintosh, and write in the
“Disc at Once” mode. Multisession CD-R media written using packetwriting software cannot be used.
For file names and folder names, use only single-byte alphanumeric
characters (letters and numbers). The maximum number of characters
is limited to eight.
If you’re using a Macintosh, save with Macintosh extensions for ISO
9660 disabled.
*This unit cannot read CD-ROMs saved using the multisession or Mix-mode CD format.
*This operation requires additional computer-related knowledge. For information on computer operation,
refer to the documentation for your computer or to a technical guide.
26
DV-7DLPRO-SE_e.book 27 ページ 2005年9月1日 木曜日 午後2時43分
Creating Titles
Deleting a Still Picture
This deletes a still picture displayed on the Titler’s internal list.
Important!
Performing the operation described in this section completely deletes the still-picture data
from the unit. A still picture that has been deleted cannot be recovered, so use care when
performing this procedure.
1.
At the Preview window, click “Settings.” Then from the menu that appears,
click “Titler Utility” to select it.
The “Image File Explorer” window appears.
2.
Select the type of title material for the still picture you want to delete.
In the window, click the tab for Pictures, Textures, Backgrounds, or Center Images to select the type
of title material for the still picture you want to delete.
Tab
3.
In the list on the right side of the window, click to select the still picture you
want to delete.
The “Preview” field below the list displays the selected still picture. Check again carefully to make
sure you want to delete the still picture.
* To select more than one still picture, hold down the “Shift” key on the keyboard and click the still pictures
you want to delete.
* To select all still pictures, go to the right side of the window and click the “Select All” button.
27
DV-7DLPRO-SE_e.book 28 ページ 2005年9月1日 木曜日 午後2時43分
Creating Titles
4.
Go to the right side of the window and click the “Delete” button.
A window prompting you to confirm the deletion of the still picture is displayed.
Window prompting you to confirm deletion
5.
Hold down the “Shift” key on the keyboard and click the “Delete” button.
The still picture you selected in step 3 is deleted.
Hold down the “Shift” key...
6.
Go to the bottom right of the window and click the “Close” button.
When you have finished deleting the still picture, click the “Close” button. The “Image File
Explorer” window disappears.
28
DV-7DLPRO-SE_e.book 29 ページ 2005年9月1日 木曜日 午後2時43分
Using Effects
Placing a Group of Transition Effects (Transition FX) in a
Specified Passage
You can specify a passage on the Timeline Palette and place a group of transition effects in the
passage. This is useful at times such as when you want to apply the same transition effect
repeatedly.
1.
Specify the passage.
Set an In point and an Out point in the sequence.
* For more information, refer to “Setting In Points and Out Points in a Sequence” in one of the following
owner’s manuals.
• DV-7DL-G/PRO Ver. 2.0 Owner’s Manual, p. 287, or
• DV-7DL PRO Owner’s Manual, p. 282
2.
Click the Track Selector for the Main Video track.
The specified passage on the Main Video track turns red.
In point
3.
Out point
Hold down the “Ctrl” key on the keyboard and drag the Transition FX icon
to the Control track.
Drag the Transition FX icon to any cut point (seam between two pieces of material) in the specified
passage. The Transition FX icon is placed at all the cut points in the specified passage.
Specified passage
Drag
Hold down the “Ctrl” key...
* You can create a bridge automatically simply by placing the Transition FX icon. For more information, refer
to “Automatically Creating Bridges for Transition Effects (Transition FX)” (p. 30).
You can also create bridges in a group for transition effects in a specified passage after you place the
Transition FX icons. For more information, refer to “Creating Bridges for Transition Effects (Transition FX)
in a Specified Passage” (p. 31).
29
DV-7DLPRO-SE_e.book 30 ページ 2005年9月1日 木曜日 午後2時43分
Using Effects
Automatically Creating Bridges for Transition Effects
(Transition FX)
You can create a bridge automatically, simply by placing a Transition FX icon.
The bridge required to apply transition effects accurately is created automatically, preventing
problems with being unable to apply an effect properly because the bridge is insufficient. This is
also convenient because it eliminates the trouble of having to create a bridge later.
* If the bridge for a placed transition effect is insufficient, the In point and Out point in the video before and
after the transition effect are automatically shifted to create the bridge that the transition effect requires. This
means that the video material on the Timeline Palette is shortened by an amount corresponding to the bridge
that is created.
1.
At the editing screen, click “Settings.” Then from the menu that appears,
click “Auto Making Margin for Transition Effect” to select it.
2.
Click the “Settings” in the editing screen a second time, and make sure a
check mark appears next to “Auto Making Margin for Transition Effect” on
the menu that appears.
After you verify that the check mark is present, click the “Settings” to close the menu. Thereafter,
placing a Transition FX icon automatically creates a bridge.
* If no check mark is present, go back to step 1 and carry out the operation again.
30
DV-7DLPRO-SE_e.book 31 ページ 2005年9月1日 木曜日 午後2時43分
Using Effects
Creating Bridges for Transition Effects (Transition FX) in a
Specified Passage
You can create bridges in a group for transition effects in a specified passage on the Timeline
Palette.
* If the bridge for a placed transition effect is insufficient, the In point and Out point in the video before and
after the transition effect are automatically shifted to create the bridge that the transition effect requires. This
means that the video material on the Timeline Palette is shortened by an amount corresponding to the bridge
that is created.
1.
Specify the passage.
Set an In point and an Out point in the sequence.
* For more information, refer to “Setting In Points and Out Points in a Sequence” in one of the following
owner’s manuals.
• DV-7DL-G/PRO Ver. 2.0 Owner’s Manual, p. 287, or
• DV-7DL PRO Owner’s Manual, p. 282
2.
lick the Track Selector for the Main Video track.
The specified passage on the Main Video track turns red.
In point
Out point
The transition effect to edit
3.
In the editing screen, click “Sequence.” From the menu that appears, click
“Make Margin for Transition Effect” to select it.
Bridges are created for transition effects that have none. The video material on the Timeline Palette
is shortened by an amount corresponding to the bridges that are created.
31
DV-7DLPRO-SE_e.book 32 ページ 2005年9月1日 木曜日 午後2時43分
Using Effects
List of Added Effects
Transition Effects (Transition FX)
* For information on how to use transition effects, refer to “Applying Transition Effects (Transition FX)” in
one of the following owner’s manuals.
• DV-7DL-G/PRO Ver. 2.0 Owner’s Manual, p. 230, or
• DV-7DL PRO Owner’s Manual, p. 226
RT Slide
Real-time effect
Level
Adjustment
This makes the picture change by sliding the next
picture in over the original picture.
RT Slide does not require rendering.
Mode
RT Stretch
Mode
RT Push Out
Normal
Reverse
Normal
Reverse
Real-time effect
Refer to page 235 of the DV-7DL-G/PRO Ver.
2.0 Owner’s Manual or page 231 of the DV-7DL
PRO Owner’s Manual.
This sets the direction from which the next
picture slides in.
This sets the width and color of the margin for
the picture.
Level
Adjustment
Refer to page 235 of the DV-7DL-G/PRO Ver.
2.0 Owner’s Manual or page 231 of the DV-7DL
PRO Owner’s Manual.
This sets the size of the zoomed picture at
which the fade-in occurs, as a ratio (%) of the
full screen.
This sets the width of the margin for the
zoomed picture.
This sets the direction for effect movement.
Zoom Fade
Real-time effect
Fade (%)
32
Refer to page 235 of the DV-7DL-G/PRO Ver.
2.0 Owner’s Manual or page 231 of the DV-7DL
PRO Owner’s Manual.
This selects the direction in which the next
picture is stretched.
This sets the width of the margin for the
stretched picture.
This sets the direction for effect movement.
Level
Adjustment
This makes the next picture slide in, pushing out
the original picture.
RT Push does not require rendering.
This zooms the picture to full screen from a
location you specify. Clicking the location you
want in the Preview window makes the picture
expand from that location to the entire screen as
fade occurs.
Zoom Fade does not require rendering.
This sets the width of the margin for the sliding
picture.
This sets the direction for effect movement.
Real-time effect
Level
Adjustment
This makes the picture change by stretching the
next picture over the original picture.
RT Stretch does not require rendering.
Refer to page 235 of the DV-7DL-G/PRO Ver.
2.0 Owner’s Manual or page 231 of the DV-7DL
PRO Owner’s Manual.
This selects the direction of the slide.
Mode
0–100
Normal
Reverse
DV-7DLPRO-SE_e.book 33 ページ 2005年9月1日 木曜日 午後2時43分
Using Effects
Moving Split
Rendering effect
Level
Adjustment
This moves a picture split at a border line,
revealing the next picture underneath.
Mode
Refer to page 235 of the DV-7DL-G/PRO Ver.
2.0 Owner’s Manual or page 231 of the DV-7DL
PRO Owner’s Manual.
This sets the splitting method.
This sets the width of the margin for the split
picture.
This sets the direction for effect movement.
Out Focus
Normal
Reverse
Rendering effect
Level
Adjustment
Mode
Refer to page 235 of the DV-7DL-G/PRO Ver.
2.0 Owner’s Manual or page 231 of the DV-7DL
PRO Owner’s Manual.
This sets the direction for effect movement.
Normal
Reverse
The picture becomes unfocused and changes to
the next picture.
Filter Effects (Filter FX)
* For information on how to use filter effects, refer to “Applying Filter Effects (Filter FX)” in one of the
following owner’s manuals.
• DV-7DL-G/PRO Ver. 2.0 Owner’s Manual, p. 236, or
• DV-7DL PRO Owner’s Manual, p. 232
Partial Magnifier
Rendering effect
Background
color
This sets the color of the background.
This displays the “Make Background Color”
window, where you can make the setting for
the background color.
* For information on operation, refer to page 161 of
the DV-7DL-G/PRO Ver. 2.0 Owner’s Manual or
page 158 of the DV-7DL PRO Owner’s Manual.
This expands (zooms) a portion of the picture.
You can move the zoomed range using key
frames.
Output picture
(screen center)
Factor
(screen center)
Keyframe
Clicking this button then clicking on a color in
the Preview window allows you to set the
selected color as the background color.
This previews the picture that is expanded.
This displays the zoom factor used when the
picture expands.
* Note that a factor greater than 200% causes the
picture to blur. A factor exceeding 200% is
displayed in red to serve as a guide when editing.
For information on operation, refer to page 250
of the DV-7DL-G/PRO Ver. 2.0 Owner’s
Manual or page 246 of the DV-7DL PRO
Owner’s Manual.
33
DV-7DLPRO-SE_e.book 34 ページ 2005年9月1日 木曜日 午後2時43分
Using Effects
Composition Effects (Composition FX)
* For information on how to use composition effects, refer to “Applying Composition Effects (Composition
FX)” in one of the following owner’s manuals.
• DV-7DL-G/PRO Ver. 2.0 Owner’s Manual, p. 238, or
• DV-7DL PRO Owner’s Manual, p. 234
Twin Screen
This displays the picture on the Insert
Video track and the picture on the Main
Video track in two small screens in the
full screen.
Twin Screen does not require rendering.
Real-time effect
Main
Insert
Picture In
This selects the picture on the Main Video track.
This selects the picture on the Insert Video track.
This sets the movement when the screens appear.
Length
(frame)
This sets, in terms of a number of frames, the length
of time for which Picture In is applied to the effectapplied picture.
This sets the movement when the screens
disappear.
Picture Out
Length
(frame)
Picture
Coverage
Fade
Border
Border
Color
Background
color
This sets, in terms of a number of frames, the length
of time for which Picture Out is applied to the
effect-applied picture.
This sets the ratio of the pictures displayed on
screen.
This lets you apply a fade during Picture In or
Picture Out.
* This setting can be made only for the Insert Video
track.
This displays an edge (border) around the screen.
This sets the thickness of the border.
This sets the color of the border.
This displays the “Make Border Color” window,
where you can make the setting for the border color.
* For information on operation, refer to page 161 of the
DV-7DL-G/PRO Ver. 2.0 Owner’s Manual or page
158 of the DV-7DL PRO Owner’s Manual.
Clicking this button then clicking on a color in the
Preview window allows you to set the selected
color as the border color.
This sets the color of the background.
This displays the “Make Background Color”
window, where you can make the setting for the
background color.
* For information on operation, refer to page 161 of the
DV-7DL-G/PRO Ver. 2.0 Owner’s Manual or page
158 of the DV-7DL PRO Owner’s Manual.
Clicking this button then clicking on a color in the
Preview window allows you to set the selected
color as the background color.
34
None
Zoom
Vertical Zoom
Horizontal Zoom
Zoom from general
Stretch from top
Stretch from right
Stretch from bottom
Stretch from left
Zoom from left
Zoom from center
0–120
None
Zoom
Vertical Zoom
Horizontal Zoom
Zoom to general
Stretch to top
Stretch to right
Stretch to bottom
Stretch to left
Zoom to left
Zoom to center
0–120
50–100
2–15
DV-7DLPRO-SE_e.book 35 ページ 2005年9月1日 木曜日 午後2時43分
Using Effects
RT Crop
Real-time effect
Fade In
(frame)
Fade Out
(frames)
This sets, in terms of a number of frames, the length
of time for which Fade In is applied to the effectapplied picture.
This sets, in terms of a number of frames, the length
of time for which Fade Out is applied to the effectapplied picture.
Keyframe
For information on operation, refer to page 250 of
the DV-7DL-G/PRO Ver. 2.0 Owner’s Manual or
page 246 of the DV-7DL PRO Owner’s Manual.
Fade In
(frame)
This sets, in terms of a number of frames, the length
of time for which Fade In is applied to the effectapplied picture.
This sets, in terms of a number of frames, the length
of time for which Fade Out is applied to the effectapplied picture.
This makes the setting for the picture placed at the
center.
0–120
0–120
This crops a portion of the picture
arranged on the video on the Insert
Video track, and composites the
remaining portion with the picture on
the Main Video track.
RT Crop does not require rendering.
Centerimage
Real-time effect
Fade Out
(frames)
Arrangement
This performs a soft cut-out around the
picture on the Insert Video track and
composites it on the picture on the Main
Video track. You can also use it to cut
out the center of the picture on the Insert
Video track.
Centerimage does not require rendering.
Size
This sets the size of the range for cutting out the
picture.
Soft Edge
This sets the degree of blur for the edges of the
centerimage.
0–120
0–120
Center: Main
Center: Insert
small
Middle
Large
Extra-large
OFF
Faint
Weak
Middle
Strong
35
DV-7DLPRO-SE_e.book 36 ページ 2005年9月1日 木曜日 午後2時43分
Creating Video Material
Creating “Dynamic” Video Material from a Still Picture
(Zoom/Pan Still Picture)
A dynamic “Preset” has been added to the Zoom/Pan Still Picture feature. You can add movement
to still pictures simply by choosing rotation, zoom, or other available forms of motion.
Also, the method of capturing still pictures has changed a little with the Studio Edition. You can
manage captured still pictures as “zoom/pan images” for which zooming or panning movement
settings have been made.
Capturing Still Pictures
The method of capturing still pictures has changed slightly in the Studio Edition. To capture a still
picture, use the method described below.
* The basic sequence of steps for creating video material from still images has not changed.
(1)”Capture the still picture” ➔ (2) “Edit (Zoom/Pan Still Picture)” ➔ (3) “Create video material”
1.
Load the CD-ROM or memory card containing the image.
2.
At the editing screen, click “Material.” When the menu appears, click
“Create Zooming/Panning Material” to select it.
The “Zoom/Pan Still Picture” window appears.
“Zoom/Pan Still Picture” window
3.
Go to the upper right of the window and click the “Import Picture” button.
The “Import” window appears.
“Import Picture” button
36
DV-7DLPRO-SE_e.book 37 ページ 2005年9月1日 木曜日 午後2時43分
Creating Video Material
4.
Click the still picture you want to capture.
The selected still picture is displayed at the upper right of the window.
5.
Go to the lower right of the “Import” window and click the “Import” button.
Capture of the still picture you selected in step 4 starts. When the still-picture capture is all finished,
the “Import” window disappears.
The imported still picture is saved with its settings for zooming or panning motion in the “Zoom/
Pan Image List” below the “Zoom/Pan Still Picture” window.
Zoom/Pan Image List
Selecting More Than One Still Picture
When you select the still picture in step 4, you can use the keyboard to select more than one.
• You can select the still pictures you want by holding down the “Shift” key on the keyboard and clicking.
Hold down the “Shift” Key...
• You can select successively up and down by holding down the “Windows” key on the keyboard and
clicking.
Successively
selected
Hold down the “Windows” Key...
37
DV-7DLPRO-SE_e.book 38 ページ 2005年9月1日 木曜日 午後2時43分
Creating Video Material
“Zoom/Pan Still Picture” window: Names and Functions of
Added Items
1
2
3
4
9
5
10
6
7
8
1 “Register As Preset” Button
7 Zoom/Pan Image List
This displays a list of saved zoom/pan images.
This registers a zooming or panning movement you’ve
created as a Preset.
* You can use this button only when “User” has been selected in
the Preset type-selection field ( 2 ).
8 “Delete” Button
This deletes the material selected in the Zoom/Pan Image
List ( 7 ).
2 Preset Type-selection Field
9 “Rotation” Field
This selects the type of available motions (Presets).
3 Preset List
This displays a list of Presets of the type selected in the
Preset type-selection field ( 2 ). Selecting a Preset makes
the settings for movement for the still picture.
This sets the angle for the still picture.
10 “Save As” Button
This saves the created zoom/pan image on the Zoom/
Pan Image List ( 7 ).
“Save” Button
This saves the settings for the zoom/pan image you’re
editing, overwriting the older settings
4 “Delete” Button
This deletes a Preset registered as “User.”
* You can use this button only when a Preset registered as
“User” has been selected.
5 Memo Field
This displays information about the selected Preset.
You can enter information when a Preset registered as
“User” is selected.
6 “Apply” Button
This applies the Preset settings to the material selected in
the Zoom/Pan Image List ( 7 ), overwriting the previous
settings.
38
.
“Select All” Button
This selects all the pieces of material saved on the Zoom/
Pan Image List ( 7 ).
“Create All” Button
This creates video material from the selected group of
pieces of material on the Zoom/Pan Image List ( 7 ).
DV-7DLPRO-SE_e.book 39 ページ 2005年9月1日 木曜日 午後2時43分
Creating Video Material
Choosing a Zoom/Pan Image from the List
The imported still picture is saved with its settings for zooming or panning motion in the “Zoom/
Pan Image List” below the “Zoom/Pan Still Picture” window.
You can use saved zoom/pan images in other projects
Zoom/Pan image
Still picture
Movement
Zoom/Pan Image List
1.
At the Zoom/Pan Image List at the bottom of the window, click the image
you want to read in.
The read-in image appears in the editing window at the center of the screen, and the zoom/pan
settings are updated.
Read-in image
* Up to eight zoom/pan images are displayed in the Zoom/Pan Image List. When nine or more zoom/pan
images have been saved, you can view all zoom/pan images by dragging the slider below the Zoom/Pan Image
List to the left or right, or by clicking
or
.
Drag
Slider
* While you’re editing a zoom/pan image, if you read in a different zoom/pan image, a window prompting you
to save the settings you’re editing is displayed. To save the settings, click the “Do Save” button. The zoom/
pan image you’re editing is overwritten.
39
DV-7DLPRO-SE_e.book 40 ページ 2005年9月1日 木曜日 午後2時43分
Creating Video Material
Saving an Edited Zoom/Pan Image to the List
1.
Go to the lower right of the window and click the “Save as” button.
The zoom/pan image you created is saved as a new image.
“Save As” button
Saving an Edited Zoom/Pan Image by Overwriting
When you change and save a zoom/pan image read in from the Zoom/Pan Image List, the zoom/
pan image is saved by overwriting.
1. Go to the lower right of the window and click the “Save” button.
“Save” button
40
DV-7DLPRO-SE_e.book 41 ページ 2005年9月1日 木曜日 午後2時43分
Creating Video Material
Deleting a Zoom/Pan Image
1.
On the list at the bottom of the window, click the zoom/pan image you want
to delete.
The name of the zoom/pan image you selected turns red.
* You can delete a group of zoom/pan images at one time. For information on how to select multiple zoom/pan
images, go to “Creating Multiple Pieces of Video Material at One Time” (p. 48) and refer to step 1.
2.
Go to the lower left of the window and click the “Delete” button.
A window prompting you to confirm deletion of the selected zoom/pan image is displayed.
Window prompting you to confirm deletion
3.
Click “Yes” button.
The selected zoom/pan image is deleted.
41
DV-7DLPRO-SE_e.book 42 ページ 2005年9月1日 木曜日 午後2時43分
Creating Video Material
Using a Wide Variety of Motion (Presets)
You can add movement to still pictures simply by choosing rotation, zoom, or other available
forms of motion (Presets).
1.
At the Zoom/Pan Image List at the bottom of the window, click the zoom/pan
image you want to read in.
The read-in image appears in the editing window at the center of the screen, and the zoom/pan
settings are updated.
Read-in image
2.
Go to the upper left of the window and click
appears, click the type of Preset to select it.
. From the menu that
A list of Presets of the selected type is displayed.
Types of Presets
• Zoom. . . . . . . . . . . . . . Presets for zooming (in or out)
• Pan. . . . . . . . . . . . . . . . Presets for moving the screen to the left or right
• Combined Action . . . Presets whose movement changes at least once
• Rotation . . . . . . . . . . . Presets for rotating
• User . . . . . . . . . . . . . . . Presets you register yourself. (Refer to page 45.)
42
DV-7DLPRO-SE_e.book 43 ページ 2005年9月1日 木曜日 午後2時43分
Creating Video Material
3.
Select a Preset.
On the Preset List, find the Preset you want, then click it. The Preset settings are applied to the
image you’re editing. You can verify the movement of the Preset by clicking the “Play” button.
“Play” button
4.
Go to the lower right of the window and click the “Save As” button.
The zoom/pan image you created is saved as a new image.
* Clicking the “Save” button to the right of the “Save As” button overwrites the zoom/pan image you’re
editing.
“Save As” button
43
DV-7DLPRO-SE_e.book 44 ページ 2005年9月1日 木曜日 午後2時43分
Creating Video Material
Making Preset Settings for a Group of Zoom/Pan Images
You can make the settings for the same Preset at one time for a group of zoom/pan images saved
on the Zoom/Pan Image List.
1. Hold down the “Shift” key on the keyboard and click the zoom/pan images you want to
make the Preset settings for.
You can select more than one zoom/pan image. The name of the zoom/pan image you selected
turns red.
Hold down the “Shift” key...
2. Select the Preset you want.
Go to “Using a Wide Variety of Motion (Presets)” (p. 42) and follow steps 2 and 3 to select the
Preset.
3. Go to the bottom left of the window and click the “Apply” button.
A window prompting you to confirm overwriting the settings for the zoom/pan images is
displayed.
Window prompting you to confirm overwriting
4. Click “Yes” button.
The Preset you chose in step 2 is applied to the selected zoom/pan images.
44
DV-7DLPRO-SE_e.book 45 ページ 2005年9月1日 木曜日 午後2時43分
Creating Video Material
Registering Often-used Movement as Presets
You can register motions you use often as Presets, making them available for easy use.
1.
Make the still-picture settings for movement.
* For more information on how to make the settings for motion, refer to “Making ‘Motion’ Settings” in one of
the following owner’s manuals.
• DV-7DL-G/PRO Ver. 2.0 Owner’s Manual, p. 273, or
• DV-7DL PRO Owner’s Manual, p. 267
2.
Go to the upper left of the window and click
appears, click “User.”
. From the menu that
A list of User Presets is displayed.
3.
Click the “Add to Preset” button.
The motion is registered as a User Preset.
“Add to Preset” button
45
DV-7DLPRO-SE_e.book 46 ページ 2005年9月1日 木曜日 午後2時43分
Creating Video Material
Changing the Name of a Created Preset
You can change the name of a Preset you have created.
Position the pointer over the name of a Preset registered as “User” and click to highlight the name,
then type in a new name using the keyboard.
Changing the Icon for a Created Preset
You can change the icon for a Preset you have created to a graphic of your choosing.
Locate mouse pointer over the icon you want to change. Hold down right button of mouse.
Selection menu will appear. Select menu of icon you like to show on screen and release right
button.
Hold down right button
of mouse
46
DV-7DLPRO-SE_e.book 47 ページ 2005年9月1日 木曜日 午後2時43分
Creating Video Material
Rotating a Still Picture
You can apply the settings for rotary motion to a still picture.
1.
Go to the bottom right of the window and type in a value in the “Rotate”
field.
Click
or
to change the value in the “Rotation” field. For example, entering 1 in the “Rotate”
field makes the still picture rotate clockwise one turn. The setting range is from -1,080 to 1,080
(degrees).
2.
Move the shuttling slider to the location where you want to rotate the still
picture and add a key frame.
* For information on how to add key frames, refer to “Adding Key Frames to Create Complex Movement” in
one of the following owner’s manuals.
• DV-7DL-G/PRO Ver. 2.0 Owner’s Manual, p. 274, or
• DV-7DL PRO Owner’s Manual, p. 268
47
DV-7DLPRO-SE_e.book 48 ページ 2005年9月1日 木曜日 午後2時43分
Creating Video Material
Creating Multiple Pieces of Video Material at One Time
You can make video material out of a group of zoom/pan images at one time.
1.
Hold down the “Shift” key on the keyboard and click the zoom/pan images
on the Zoom/Pan Image List that you want to use to create video material.
You can select more than one zoom/pan image. The name of the zoom/pan image you selected
turns red.
Hold down the “Shift” key...
* You can select zoom/pan images successively at the right or left by holding down the “Windows ( )” key
on the keyboard and clicking the zoom/pan images. Also, when you want to select all saved zoom/pan images,
click the “Select All” button to the right of the Zoom/Pan Image List.
2.
Go to the bottom right of the window and click the “Create All” button.
Rendering is performed to create the video material. The created video material is registered on the
Material palette.
48
DV-7DLPRO-SE_e.book 49 ページ 2005年9月1日 木曜日 午後2時43分
Creating Video Material
Displaying the Zoom/Pan Window from Title Material
You can import title material into the “Zoom/Pan Still Picture” window and use it to create video
material with zoom, rotation, or other motion, in the same way as with a still picture.
* For information on basic Zoom/Pan Still Picture operations, refer to “Creating ‘Dynamic’ Video Material
from Still Image” in one of the following owner’s manuals. Also refer to “Creating “Dynamic” Video
Material from a Still Picture (Zoom/Pan Still Picture)” in this manual (p. 36–48).
DV-7DL-G/PRO Ver.2.0 Owner’s Manual, p. 271, or DV-7DL PRO Owner’s Manual, p. 266
1.
Display the Title Palette.
2.
Right-click the title. From the menu that appears, select and click “Open
Zoom/Pan.”
The “Zoom/Pan Still Picture” window appears, enabling you to apply settings for zooming or
panning to the title.
Right-click
“Zoom/Pan Still Picture” window
3.
Go to the lower right of the window and click the “Save As” button to save
the zoom/pan image you created from the title.
The zoom/pan image you created is saved as a new image. A title is not saved on the Zoom/Pan
Image List simply by importing it into the “Zoom/Pan Still Picture” window. When you want to
edit a title as a zoom/pan image later, first save it on the Zoom/Pan Image List.
“Save As” button
4.
Click the “Create” button.
Rendering is performed to create the video material. The created video material is registered on the
Material palette in the Preview window.
5.
Click the “Close” button.
The “Zoom/Pan Still Picture” window disappears.
49
DV-7DLPRO-SE_e.book 50 ページ 2005年9月1日 木曜日 午後2時43分
Creating Video Material
Creating Video Material with Motion Effects (Vari-speed)
You can create video material with continuously variable liveliness, from slow motion to fast
motion. This is useful for times such as when you want to add vigor to memorable sports scenes,
or when you want to create animated material with a changing sense of speed.
* What’s “Vari-speed”? ➔ Refer to “Glossary” (p. 70).
Displaying the Screen for Applying Motion Effects
1.
Right-click a piece of video material on the Material palette. From the menu
that appears, select “Vari-speed” and click it.
The Vari-speed window appears.
1
4
Position bar (red line)
5
2
6
3
7
9
8
10
“Vari-speed” Window: Names and Functions
1 Preview Monitor
Here you can preview the video material you have
created.
2 Shuttling Slider
This moves the playback location of the video material
being created.
3 Playback Panel
This lets you play back and check the results of the
settings for items 4 through 9 .
4 “Direction” Field
Regular .......... This performs playback from the In point
in the video material.
Reverse .......... This performs playback in reverse, from the
Out point in the video material.
5 Speed Transition Graph
You use this to adjust the playback speed at the In point,
Out point, and points registered at key frames.
When you have clicked a point to make it turn red, you
can adjust the value of the “Speed” field by clicking
or
. The original speed is 100 (%).
You can also adjust the value of the “Speed” field ( 8 ) by
dragging the points directly.
50
6 “Frame” Field
This adjusts the location of the point selected with the
speed transition graph. The location of the In point or Out
point cannot be changed.
7 Key Frame
Registering a key frame adds a point for adjusting the
playback speed at the location of the position bar.
8 “Speed” Field
This adjusts the playback speed at the point selected with
the speed transition graph ( 5 ).
9 “Input Length” Field
This displays the length from the In point to the Out point
in the original video material.
10 “Create” Button
This creates video material with the settings of items
through 8 applied.
4
“Output Length” Field
This displays the length of the video material created by
the results of the settings for items 4 through 8 .
“Close” Button
This closes the Vari-speed window.
DV-7DLPRO-SE_e.book 51 ページ 2005年9月1日 木曜日 午後2時43分
Creating Video Material
Creating Video Material That Starts Slowly and Stops Slowly
1.
At the speed transition graph, click the In point to make it turn red, then
lower the value in the “Speed” field.
Clicking
lowers the value in the “Speed” field.
In point (This turns red when selected.)
2.
Move the shuttling slider to the location where you want to make the
playback speed change, then register a key frame.
Drag the shuttling slider, then click the “Add Key Frame” button. The new point is registered on
the speed transition graph.
* You can adjust the location of the newly registered point later by entering values in the “Frame” field.
The new point is registered.
“Add key frame” button
3.
Click the newly registered point on the speed transition graph to make it
turn red, then raise the value in the “Speed” field.
Clicking
raises the value in the “Speed” field.
Newly registered point (This turns red when selected.)
51
DV-7DLPRO-SE_e.book 52 ページ 2005年9月1日 木曜日 午後2時43分
Creating Video Material
4.
At the speed transition graph, click the Out point to make it turn red, then
lower the value in the “Speed” field.
Clicking
lowers the value in the “Speed” field.
Out point
(This turns red when selected.)
5.
Click the “Play” button to check the action.
The Preview window displays the video with the settings you made in steps 1 through 4 applied.
If you find a problem, make adjustments in steps 1 through 4.
“Play” button
6.
Click the “Create” button.
Creation of the video material starts. The created video material is registered on the Material
palette.
7.
Go to the bottom right of the window and click the “Close” button.
The “Vari Speed” window disappears.
You can create a wide variety of operations using these and the other settings. Try experimenting
with combinations of speed-changing movements as you view the results in the Preview window.
52
DV-7DLPRO-SE_e.book 53 ページ 2005年9月1日 木曜日 午後2時43分
Performing Detailed Editing on the
Timeline Palette
Temporarily Ignoring the Results of A/B Roll Editing During
Sequence Playback
When you play back a sequence that you have worked on with A/B roll editing, the T-bar on the
A/B Roll palette now moves in correspondence with the results of A/B roll editing. Holding down
the “Alt” key on the keyboard during this time causes the recorded results of A/B roll editing to
be ignored temporarily. Holding down the “Alt” key as you operate the T-bar lets you switch the
video on the Main Video track and the video on the Insert Video track in real time.
This is useful when you want to experiment with changing the main video and the insert video at
a timing different from the recorded results of A/B roll editing.
To resume playback of the results of A/B roll editing, release the “Alt” key.
or
DV-7DLC
Hold down the “Alt” key...
* You can also switch the video on the Main Video track and the video on the Insert Video track when operating
the T-bar without pressing the “Alt” key. In this case, the recorded results of A/B roll editing are played back
one second after you stop operating the T-bar.
53
DV-7DLPRO-SE_e.book 54 ページ 2005年9月1日 木曜日 午後2時43分
Performing Detailed Editing on the Timeline Palette
Infinity Roll Editing (Editing 3 or More Pieces of Video Material)
Infinity roll editing is the process of editing three or more pieces of video material all shot
simultaneously.
With the Studio Edition, a feature for replacing the video on the Main Video track with the results
of A/B roll editing has been added. By combining insert video that has undergone A/B roll editing
on the Main Video track, you can carry out A/B roll editing that places new video material on the
Insert Video track.
By repeating this process of performing A/B roll editing and then combining the results of editing
together on the Main Video track, you can edit three or more pieces of simultaneously shot video
material.
INSERT
A
MAIN
Perform A/B roll editing.
B
INSERT
MAIN
The Results of A/B Roll Editing (A and B)
Combine the results of A/B roll editing together on
the Main Video track. This leaves the Insert Video track
empty.
INSERT
C
MAIN
The Results of A/B Roll Editing (A and B)
INSERT
MAIN
The Results of A/B Roll Editing (A, B, and C)
1.
Arrange new video material on the Insert Video track
and perform A/B roll editing.
Combine the results of A/B roll editing together on
the Main Video track. This leaves the Insert Video track
empty
Perform A/B roll editing.
Carry out A/B roll editing, following the procedures in “A/B Roll Editing” in one of the following
owner’s manuals.
• DV-7DL-G/PRO Ver. 2.0 Owner’s Manual, p. 301, or
• DV-7DL PRO Owner’s Manual, p. 296
2.
Combine the insert video on the Main Video track.
Right-click the video material on the Insert Video track that you have worked with using A/B roll
editing, and from the menu that appears, select and click “Main Track Bouncing.” A window for
bouncing the insert video on the Main Video track appears.
The window for bouncing the insert video
on the Main Video track
Right-click
54
DV-7DLPRO-SE_e.book 55 ページ 2005年9月1日 木曜日 午後2時43分
Performing Detailed Editing on the Timeline Palette
Replacing with a Dissolve Effect
In the window for combining the insert video on the Main Video track, selecting the “Use Dissolve
Effect” check box (making a check mark appear in it) causes the transition portion of the video
manipulated with A/B roll editing to be replaced with a “Dissolve” transition effect.
INSERT
A
MAIN
B
INSERT
MAIN
B
A
B
Dissolve effects
Conditions for Replacement with a Dissolve
To replace the transition portion of the video edited using A/B roll techniques, the following
conditions must be met.
• The control points before and after the video transition are at the maximum or minimum value.
• The video transition takes two or more frames, but no longer than four seconds.
* If the passage edited using A/B roll techniques has no video-transition portion that meets the conditions just
described, no “Use Dissolve Effect” check box is displayed in the window for combining the insert video on
the Main Video track.
* Even when the control points appear to be successfully set at the maximum or minimum value, in actual
application a slight discrepancy may cause the transition portion of the video edited using A/B roll editing
not to be replaced by a dissolve effect. To prevent this, it’s a good idea to use the A/B Roll Tool’s “Snap Points
to MAX or MIN value” button to dependably change the control points to the maximum or minimum value.
1. Select the material.
Click to select the material whose control points you want to adjust to the maximum or minimum
value. The selected material turns red.
2. Click the “Snap Points to MAX or MIN value” button.
Clicking the A/B Roll Tool’s “Snap Points to MAX or MIN” button lets you smooth the results of
A/B roll editing as shown in the figure below.
“Snap Points to MAX or MIN value” button
55
DV-7DLPRO-SE_e.book 56 ページ 2005年9月1日 木曜日 午後2時43分
Performing Detailed Editing on the Timeline Palette
3.
Click the “Start” button.
The processing for combining the insert video edited using A/B roll techniques on the Main Video
track starts.
When the processing finishes, the video on the Main Video track is replaced with the video
material that includes the results of A/B roll editing. Also, the video on the Insert Video track
disappears, enabling you to arrange other video material.
A/B Roll Markers
When you combine insert video that you’ve worked with using editing onto the Main Video track,
the video on the Main Video track is replaced with video material to which the results of A/B roll
editing have been applied. At this time, a yellow indicator like the one shown in the figure below
is applied to the A/B roll editing results that have become a single piece of video material.
* In the same way as for video material created using the “Scenemaking” feature, a yellow indicator is applied
to the portion of insert and main video mixed by A/B roll editing.
INSERT
A
MAIN
B
INSERT
Yellow indicator
MAIN
B
A
The Results of A/B Roll Editing
Dissolve effect
4.
B
Dissolve effect
Drag the three pieces of video to the Insert Video track.
Drag
56
A
DV-7DLPRO-SE_e.book 57 ページ 2005年9月1日 木曜日 午後2時43分
Performing Detailed Editing on the Timeline Palette
5.
Apply double exposure to the video on the Insert Video track.
At the Effect palette, go to the composition effects (Composition FX) and select the Double
Exposure icon, and drag it to the video material you placed in step 4.
* If a dissolve effect is already placed on the transition portion of the main picture when you place the Double
Exposure icon, then rendering is required for the effect-applied portion. Perform rendering to incorporate the
effect.
Drag
6.
Perform A/B roll editing.
Go back to step 1 and perform A/B roll editing.
If you want to add video shot from yet more angles, repeat steps 2 and through 5.
About the Synchronized Audio Recording on Audio Track 1
When you use the “Combine Insert Video on the Main track” feature, the synchronized audio
recording for the video material on the Main Video track is copied from Audio Track 1 to another
empty Audio track.
● When replaced by a dissolve
INSERT
● Cases other than the one at left
INSERT
Main video A
Mmain video A
Synchronized audio for
main video A
Synchronized audio for
main video A
Single piece of video
material
Synchronized audio for the
replaced video on the Main track
Automatically reduced to minimum level
Synchronized audio for
copied main video A
Synchronized audio for
main video A
Automatically reduced to minimum level
Synchronized audio for
copied main video A
* When the volume level of the synchronized audio recording for the Main Video track is minimized (that is,
when the volume line is at the very bottom), the synchronized audio on Audio Track 1 is not copied to another
Audio track.
* If none of the Audio tracks from 2 through 4 are empty, the message “No free Audio tracks available” is
displayed. Move or delete audio material on Audio Track 2, 3, or 4, then carry out the operation.
57
DV-7DLPRO-SE_e.book 58 ページ 2005年9月1日 木曜日 午後2時43分
Managing Material in the Material Window
Importing Material from Another Project (Import Utility)
Video, audio, and title material from other projects can be imported into the project you currently
have open.
* The data itself for the material is copied to the project you’re importing into. This means the imported
material takes up hard-disk space.
1.
At the editing screen, click “Material.” When the menu appears, select and
click “Import Utility.”
The “Import Utility” window appears.
“Import Utility” window
2.
Click the hard disk where the project containing the material to import is
located.
Go to the list of disk drives on the left side of the window and select the hard disk. A list of the
projects saved on the selected hard disk appears in the center of the window.
Project list
3.
58
Go to the upper right of the window and click
type of material you want to import.
then click to select the
DV-7DLPRO-SE_e.book 59 ページ 2005年9月1日 木曜日 午後2時43分
Managing Material in the Material Window
4.
Click the source project for importing the material.
Go to the project list at the center of the window and click the project containing the material you
want to import. A list of material of the type you selected in step 3 is displayed in the center of the
window.
Project list
5.
Material list
Click the material to import.
Go to the material list at the center of the window and click the material you want to import.
Material list
Details of the
selected material
are displayed.
6.
Click the “Import” button.
Importing of the material starts.
7.
Click the “Close” button.
The “Import Material from Another Project” window disappears. The imported material appears
in the Material window of the project you currently have open.
59
DV-7DLPRO-SE_e.book 60 ページ 2005年9月1日 木曜日 午後2時43分
Managing Material in the Material Window
Enlarging the View of Title Material (Title Big Thumbnail)
You can enlarge the view of the title-material thumbnails on the Title Palette.
Using the enlarged view of thumbnails can be useful when the text or shapes in the thumbnails are
too small to make out.
1.
In the Material window, click the Title tab to display the Title Palette.
2.
Right-click the title whose view you want to enlarge, then from the menu
that appears, click “Open Title Big Thumbnail Window” to select it.
The “Title Big Thumbnail” window appears and displays an enlarged view of the title you selected.
* Going to the bottom left of the window and clicking
the order of the material.
or
displays the titles on the Title Palette in
* You can drag the “Enlarged Title Thumbnail” window to any location you want. Note, however, that if you
move the “Enlarged Title Thumbnail” window to the Sequence Monitor, the enlarged image may be
corrupted.
Right-click
“Title Big Thumbnail” window
3.
Click the “CLOSE” button.
The “Title Big Thumbnail” window disappears.
Placing Titles from the “Title Big Thumbnail” Window
You can arrange titles by dragging them from the “Title Big Thumbnail” window to the Title track.
Drag
60
DV-7DLPRO-SE_e.book 61 ページ 2005年9月1日 木曜日 午後2時43分
Managing Material in the Material Window
Making the Length of Material Unchanging
(Fixed Cutlength Editing Mode)
You can make the interval between the In point and Out point set in video or audio material
unchanging.
Once you have made the setting enabling “Fixed Cutlength Editing Mode,” if you change the
setting for an In point, the setting for the Out point is also automatically changed. In the same way,
changing the setting for an Out point causes the setting for the In point to change automatically.
This is useful when you want to modify the setting for an In point or Out point in placed video or
audio material without changing the overall length of the Timeline Palette.
* The Fixed-length Cut Editing mode is enabled only when you are editing In points or Out points in the Detail
View window. When you are performing editing on the Timeline Palette, the interval between the In point
and Out point does not remain unchanged.
1.
In the Detail View window, click the “Fixed Cutlength Editing Mode” button.
The Fixed Cutlength Editing mode is enabled, and the interval between an In point and Out point
remains unchanged. When the Fixed-length Cut Editing mode is enabled, the button’s lock symbol
changes from
to
.
Green line
Red line
“Fixed Cutlength Edit Mode” button
2.
Move the position bar, then click the “Set In Point” button.
When you set an In point, an Out point is also automatically set.
This interval is made unchanging.
In point
Out point
Moving the position bar and
changing the setting for the In point...
In point
Out point
...makes the setting for the Out point
change automatically.
* When you set an Out point, an In point is set automatically.
* The interval between the In point and the Out point remains unchanged while you perform editing in the
Fixed-length Cut Editing mode. This means that you can set the In point or Out point within a range in
which the interval between them does not change.
Ending the Fixed Cutlength Editing Mode
Clicking the “Fixed Cutlength Editing Mode” button (
Cut Editing mode.
) a second time ends the Fixed-length
61
DV-7DLPRO-SE_e.book 62 ページ 2005年9月1日 木曜日 午後2時43分
Recording the Sequence
Changing the Aspect Ratio for DV Output
You can output an edited sequence from the unit’s DV jack at an aspect ratio of 16:9.
● To take video material recorded on a DV device at 16:9 and save it on a DV device at 16:9
Refer to “Outputting Video Recorded at 16:9 from the DV Jack at 16:9” (p. 63).
● To take video material recorded on a DV device at 4:3 and save it on a DV device at 16:9
Refer to “Outputting Video Recorded at 4:3 from the DV Jack at 16:9” (p. 64).
* Output at 16:9 to a television monitor from the unit’s composite-video or S-Video jack is not possible. When
you want to check 16:9 output on a television monitor, refer to “How to Verify the Picture and Sound of DV
16:9 Output” (p. 65).
* Output at 16:9 is supported only by DV devices compatible with the ID-1 signal.
* This feature is not compatible with high-definition television (HDTV or Hi-Vision) output.
“Full Size (Squeezed)” and “Letter Box”
Two methods are available for recording video on a DV device at an aspect ratio of 16:9: “Full Size”
and “Letter Box.”
4
16
3
4
9
“Full Size”
This method compresses 16:9 video
horizontally and records the video at a
size of 4:3.
"Letter Box"
This method reduces 16:9 video and
records it at the horizontal width of a
4:3 screen.
3
Whether recorded as “Full Size” or as “Letter Box,” the video is saved at 4:3 size, and when played
back on a DV device it is displayed stretched to fit a 16:9 screen.
* The terms used for “full size” and “Letter Box” differ from one digital video camera manufacturer to another.
About the ID-1 Signal
A video signal compressed to 4:3 full size (squeezed) or Letter Box is also recorded with a
discrimination signal indicating that it is 16:9 video recorded as full size or Letter Box. This is called
an “ID-1 signal.” A DV device that receives a video signal in which an ID-1 signal is embedded
automatically stretches the displayed video to 16:9.
● When a 16:9 video signal is sent from the unit’s DV jack to a DV device compatible with ID-1
DV-7DL series
DV device
Video displayed on the DV device
● When a 16:9 video signal is sent from the unit’s DV jack to a DV device not compatible with ID-1
DV-7DL series
62
DV device
Video displayed on the DV device
DV-7DLPRO-SE_e.book 63 ページ 2005年9月1日 木曜日 午後2時43分
Recording the Sequence
Outputting Video Recorded at 16:9 from the DV Jack at 16:9
1.
Check the picture displayed in the editing screen’s Sequence Monitor.
To take video recorded on a DV device at 16:9 and output it in 16:9 widescreen format, first check
how the captured video is displayed in the editing screen’s Sequence Monitor.
Its appearance is like one or the other of the figures below.
Full-size picture (vertically stretched)
2.
Letter Box picture (trimmed at top and bottom)
At the editing screen, click “Settings.” Then, in the menu that appears, line
up the pointer with “DV Out Screen Size.”
A list of available aspect ratios for digital-video output is displayed.
Aspect ratio list
3.
Click to select a suitable aspect ratio for outputting the video material.
If the video is recorded at full size, select “16:9 (Full Size).”
If the video is recorded in Letter Box format, select “16:9 (Letter Box).”
The aspect ratio for digital-video output changes. The aspect ratio changes for the DV device
connected to the unit.
* On some DV devices, the aspect ratio may remain unchanged.
63
DV-7DLPRO-SE_e.book 64 ページ 2005年9月1日 木曜日 午後2時43分
Recording the Sequence
Outputting Video Recorded at 4:3 from the DV Jack at 16:9
When you are taking video recorded at 4:3 on a DV device and outputting it in 16:9 widescreen
format, you can output it in 16:9 widescreen format by outputting it in “Letter Box” format. The
top and bottom of the picture for video at 4:3 are trimmed.
* The picture in the trimmed areas at the top and bottom is not displayed. Give attention to this point when
you’re creating titles.
Video recorded at 4:3
1.
Video output in 16:9 widescreen format
At the editing screen, click “Settings.” Then, in the menu that appears, line
up the pointer with “DV Out Screen Size.”
A list of available aspect ratios for digital-video output is displayed.
Aspect ratio list
2.
Click “16:9 (Letter Box)” to select it.
The aspect ratio for digital-video output changes to 16:9 (Letter Box). The aspect ratio changes for
the DV device connected to the unit.
* On some DV devices, the aspect ratio may remain unchanged.
64
DV-7DLPRO-SE_e.book 65 ページ 2005年9月1日 木曜日 午後2時43分
Recording the Sequence
How to Verify the Picture and Sound of DV 16:9 Output
Checking the audio and video output from the DV jack at 16:9 requires making connections from
the DV device connected to the DV jack to the S-Video jack and audio jacks on a television monitor.
Make the connections as shown in the figure below.
DV-7DL series front panel
DV2 connector
DV connector
DV cable
DV
S-Video output connector
S
Audio output connectors
Output
L
R
DV1 connector
DV-7DL series rear panel
S-Video
cable
DV device
Audio cable
Input
L
R
S
S-Video input connector
Audio input connectors
TV monitor (S1/S2 compatible)
* Use an S-Video cable to connect the DV device and the television monitor.
* Use a television monitor that supports S1 or S2 signals. A television monitor compatible only with S1 signals
will not automatically detect “16:9 (Letter Box)” output.
65
DV-7DLPRO-SE_e.book 66 ページ 2005年9月1日 木曜日 午後2時43分
Other Features
Viewing the Waveform Monitor
This makes it easy to view the level of brightness and the like for the picture displayed on the
Sequence Monitor or in the Detail View window.
1.
On the Sequence Monitor, display the picture you want to check using the
waveform monitor.
2.
At the editing screen, click “Settings.” Then, from the menu that appears,
click “Open Waveform Monitor” to select it.
The waveform monitor appears.
* When you want to color-correct video material as you view the waveform monitor, double-click the video
material in the Material window or on the Timeline to display the Detail View window. The waveform of the
video displayed in the Detail View window appears on the waveform monitor.
Waveform Monitor
What’s a Waveform Monitor?
In television stations and other such sites where footage is shot and edited, to ensure that the
programs produced are broadcast at appropriate levels of quality, a variety of measurement
equipment is used to evaluate the picture and perform quality control.
A waveform monitor is a instrument for measuring the “brightness component” of the picture. You
can use this to verify whether the brightness of the picture is appropriate (that is, free of washedout whites or “crushed” blacks).
As a general-use measuring device, in addition to the video signals (brightness and color)
displayed on the television monitor, a waveform monitor also displays the waveforms of the color
synchronization signals and the like, which are required to display a stable picture.
* If you want to learn more about waveform monitors in detail, refer to a technical guide.
Important! About the Unit’s Waveform Monitor
* The unit’s built-in waveform monitor differs from general stand-alone waveform monitors in the
ways described below.
• Only the picture data (digital video) displayed on the Sequence Monitor or in the Detail View
window is displayed as if on a simple stand-alone waveform monitor.
• Burst (color synchronization) and sync (vertical synchronization) signals are not displayed.
* The unit’s waveform monitor is a simple system. Use it for reference only. When you want to
accomplish exact verification of video signals, use a stand-alone waveform monitor.
* The picture quality of a finished sequence may vary according to the equipment on which it is
ultimately recorded.
66
DV-7DLPRO-SE_e.book 67 ページ 2005年9月1日 木曜日 午後2時43分
Other Features
“Waveform Monitor”: Names and Functions
4 “Composite” Button
2
1
3
4
5
6
7
Switching on this button displays the waveform of the
composite signal on the waveform monitor.
5 “All lines” Button
Switching on this button displays all the waveforms for
the selected signal on the waveform monitor.
6 “Line select” Button
Switching on this button lets you display only the signal
for the line specified with the “Line Select” field ( 7 ) on
the waveform monitor.
7 “Line select” Field
8
9
10
1 Waveform Monitor
This displays the waveforms of the picture (horizontal
lines) displayed on the Sequence Monitor or in the Detail
View window.
2 “Luminance” Button
Switching on this button displays the waveform of the
luminance signal on the waveform monitor.
3 “Chroma” Button
Switching on this button displays the waveform of the
chroma signal on the waveform monitor.
When the “Line Select” button ( 6 ) is switched on, only
the signal for the line specified here is displayed on the
waveform monitor.
8 Waveform Density Slider
This slider adjusts the density of the displayed line.
Sliding it to the right makes the displayed waveforms
more dense.
9 Scale Density Slider
This slider adjusts the density of the display scale. Sliding
it to the right make the scale display more dense.
10 “Close” Button
This closes the waveform monitor, making it disappear.
Correcting the Brightness of Video Material While Viewing the Waveform Monitor
On the waveform monitor, you can check the respective levels of the luminance signal, chroma
signal, and composite signal of the picture displayed on the Sequence Monitor or in the Detail View
window.
To correct the brightness of video material, you check the level of the luminance signal on the
waveform monitor.
* What are the “luminance signal,” “chroma signal,” and “composite signal”? ➔ Refer to “Glossary” (p. 70).
1. Display the Detail View window.
While you’re viewing the waveform monitor, display the Detail View window for the video
material whose brightness you want to adjust.
2. At the waveform monitor, click the “Luminance Signal” button.
The button lights in green, and the waveform for the luminance signal appears on the waveform
monitor.
3. Adjust the brightness of the video material.
Adjusting “Brightness” or “Contrast” in the Detail View window makes the waveform on the
waveform monitor move up or down.
When the luminance-signal level on the waveform monitor exceeds “+100,” white and bright areas
of the picture on the television monitor are more likely to suffer washout. While watching the
picture on the television monitor, adjust the level of the luminance signal on the waveform monitor
so that it does not exceed “+100.”
67
DV-7DLPRO-SE_e.book 68 ページ 2005年9月1日 木曜日 午後2時43分
Other Features
Viewing the Vectorscope
This provides a simple display of the hues and color intensity for the picture displayed on the
Sequence Monitor or in the Detail View window.
1.
On the Sequence Monitor, display the video you want to check using the
vectorscope.
2.
At the editing screen, click “Settings.” Then, from the menu that appears,
click “Open VectorScope” to select it.
The vectorscope appears.
* When you want to perform color correction for video material while viewing the vectorscope, double-click the
video material in the vectorscope or on the Timeline to display the Detail View window. The color-signal
component of the picture displayed in the Detail View window appears on the vectorscope.
Vectorscope
What’s a Vectorscope?
In television stations and other such sites where footage is shot and edited, to ensure that the
programs produced are broadcast at appropriate levels of quality, a variety of measurement
equipment is used to evaluate the picture and perform quality control.
A vectorscope is a device for measuring the hue and color intensity of a video picture. You can use
it to check whether the balance and strength of the picture’s color are appropriate.
* If you want to learn more about vectorscopes in detail, refer to a technical guide.
Important! About the Unit’s Vectorscope
* The unit’s built-in vectorscope differs from general stand-alone vectorscopes in the ways described
below.
• Only the picture data (digital video) displayed on the Sequence Monitor or in the Detail View
window is displayed as if on a simple stand-alone vectorscope.
• Burst (color synchronization) signals are not displayed.
* The unit’s built-in vectorscope is a simple system. Use it for reference only.
* When you want to accomplish exact verification of video signals, use a stand-alone vectorscope.
* The picture quality of a finished sequence can vary depending on the equipment on which it is
ultimately recorded
68
DV-7DLPRO-SE_e.book 69 ページ 2005年9月1日 木曜日 午後2時43分
Other Features
“Vectorscope”: Names and Functions
4 “All lines” Button
Switching on this button displays the color-signal
components of all signals on the vectorscope.
2
1
3
5 “Line select” Button
Switching on this button lets you display only the signal
for the line specified with the “Line Select” field ( 6 ) on
the vectorscope.
4
5
6
6 “Line select” Field
When the “Line Select” button ( 5 ) is switched on, only
the signal for the line specified here is displayed on the
vectorscope.
7
8
9
7 Color-signal Component Density Slider
This slider adjusts the density of the displayed line.
Sliding it to the right makes the displayed color-signal
components more dense.
1 Vectorscope
This displays the color-signal components of the picture
(horizontal lines) displayed on the Sequence Monitor or
in the Detail View window.
8 Scale Density Slider
This slider adjusts the density of the display scale. Sliding
it to the right make the scale display more dense.
2 “Point” Button
Switching on this button displays the color-signal
components as green points.
9 “Close” Button
This closes the vectorscope, making it disappear.
3 “Color” Button
Switching on this button displays the color-signal
component points with color added.
Correcting Hue and Color Strength While Viewing the Vectorscope
With the vectorscope, you can check the components of the hue and color strength (saturation) for
the picture displayed on the Sequence Monitor or in the Detail View window. Hue is displayed
along the circumference, and color strength is displayed along the radius.
Deep
R
MG
YL
Light
A color-signal component
B
G
CY
Deep
1. Display the Detail View window.
While you’re viewing the vectorscope, display the Detail View window for the video material
whose hue or color strength you want to adjust.
2. Correct the hue and color strength of the video material.
Adjusting “Saturation” or “Red,” “Green,” or “Blue” in the Detail View window shifts the colorsignal components on the vectorscope, allowing you to verify the hue and color strength after color
correction.
* When you composite video using the Chroma Key effect, using the vectorscope lets you see the distribution
of hues in the video material, making it easier to determine the blanked-out color (key color).
69
DV-7DLPRO-SE_e.book 70 ページ 2005年9月1日 木曜日 午後2時43分
Glossary
Chroma Signal
This refers to a signal that contains information about the saturation, hue, and other such qualities
of the picture.
Composite Signal
This refers to a signal in which the luminance signal and chroma signal are combined (composited).
Luminance Signal
This refers to a signal that contains information about brightness.
Luminance contains no color information at all—only the signal for brightness when appearing in
monochrome.
Vari-speed
This is a feature for continuously varying the playback speed of video material.
For instance, using Vari-speed on video material of a car cutting across the screen lets you show
the car in slow motion for just the moment it is at the center of the screen.
70
DV-7DLPRO-SE_eIX.fm 71 ページ 2005年9月21日 水曜日 午後1時21分
Index
A
A/B roll markers ..............................................................
Alpha offset ......................................................................
Aspect ratio ......................................................................
Audio input ......................................................................
Auto Making Margin for Transition Effect .......................
P
56
21
62
13
30
C
Centerimage ..................................................................... 35
Chroma signal ............................................................ 67, 70
Composite signal ........................................................ 67, 70
Composition effects (Composition FX) ............................. 34
Create Audio Fade (specified Passage) ............................. 17
Create Audio Fade-In ....................................................... 15
Create Audio Fade-Out .................................................... 16
Create Zooming/Panning Material .................................. 36
Creating bridges
automatically .............................................................. 30
specified passage ........................................................ 31
D
Dissolve effects ................................................................. 55
DV Out Screen Size .................................................... 63–64
E
Expanded Settings ............................................................ 20
F
Fade In
creating automatically ................................................
creating in a specified passage ....................................
Fade Out
creating automatically ................................................
creating in a specified passage ....................................
Filter effects (Filter FX) .....................................................
Fixed cutlength editing mode ...........................................
Formats for saving still pictures .......................................
15
17
16
17
33
61
26
I
ID-1 signal ........................................................................ 62
Ignoring the results of A/B roll editing ............................ 53
Image files
adding ......................................................................... 24
deleting ....................................................................... 27
Import Utility ................................................................... 58
Infinity roll editing ........................................................... 54
Interval Capture ................................................................. 8
L
Listening to a song ........................................................... 11
Luminance signal ....................................................... 67, 70
M
Main Track Bouncing .......................................................
Make Margin for Transition Effect ...................................
Motion effects ...................................................................
Moving Split .....................................................................
Multiframe Save ...............................................................
54
31
50
33
10
Partial Magnifier ............................................................... 33
Play Mode ......................................................................... 11
Presets ............................................................................... 42
R
Recording
audio input .................................................................
RT Crop ............................................................................
RT Push Out .....................................................................
RT Slide ............................................................................
RT Stretch .........................................................................
13
35
32
32
32
S
Still pictures
adding ......................................................................... 24
deleting ....................................................................... 27
T
Title Big Thumbnail ..........................................................
Title material
creating video material ...............................................
enlargining the view ...................................................
Title-in effects
additional list ..............................................................
appearance point ........................................................
expanded settings .......................................................
Title-out effects
additional list ..............................................................
disappearance point ....................................................
expanded settings .......................................................
Titler Utility ......................................................................
Transition effects (Transition FX) .....................................
creating bridges automatically ....................................
creating bridges in a specified passage .......................
placing a group ...........................................................
Twin Screen ......................................................................
60
49
60
19
19
20
19
19
22
24
32
30
31
29
34
U
Use Dissolve Effect ........................................................... 55
User presets ...................................................................... 45
V
Vari-speed .................................................................. 50, 70
Vectorscope ...................................................................... 68
W
Waveform monitor ........................................................... 66
Write Record Date Time to Memo ...................................... 6
Z
Zoom Fade ........................................................................
Zoom/Pan images
capturing .....................................................................
choosing ......................................................................
deleting .......................................................................
rotating .......................................................................
saving ..........................................................................
32
36
39
41
47
40
O
Onion Skin .......................................................................... 7
Out Focus ......................................................................... 33
71
DV-7DLPRO-SE_e.book 72 ページ 2005年9月1日 木曜日 午後2時43分
Information
When you need repair service, call your nearest EDIROL/Roland Service Center or authorized EDIROL/Roland distributor
in your country as shown below.
U. S. A. / CANADA
EUROPE
EDIROL (Europe) Ltd.
Studio 3.4 114 Power Road
London W4 5PY
U. K.
TEL: +44 (0)20 8747 5949
FAX:+44 (0)20 8747 5948
http://www.edirol.com/europe
ASIA
Deutschland
TEL: 0700 33 47 65 20
France
TEL: 0810 000 371
Italia
TEL: 02 93778329
AUSTRALIA
TAIWAN
AUSTRALIA
ROLAND TAIWAN
ENTERPRISE CO., LTD.
Roland Corporation
Australia Pty., Ltd.
Room 5, 9fl. No. 112 Chung Shan
N.Road Sec.2, Taipei, TAIWAN,
R.O.C.
TEL: (02) 2561 3339
38 Campbell Avenue
Dee Why West. NSW 2099
AUSTRALIA
TEL: (02) 9982 8266
CHINA
Roland Shanghai Electronics Co.,Ltd.
5F. No.1500 Pingliang Road
Shanghai 200090, CHINA
TEL: (021) 5580-0800
CENTRAL/LATIN
AMERICA
Roland Shanghai Electronics Co.,Ltd.
(BEIJING OFFICE)
10F. No.18 3 Section Anhuaxili
Chaoyang District Beijing
100011 CHINA
TEL: (010) 6426-5050
BRAZIL
Roland Shanghai Electronics Co.,Ltd.
(GUANGZHOU OFFICE)
2/F., No.30 Si You Nan Er Jie Yi
Xiang, Wu Yang Xin Cheng,
Guangzhou 510600, CHINA
TEL: (020) 8736-0428
OTHERS incl. MEXICO
MALAYSIA
Roland Asia Pacific Sdn. Bhd.
45-1, Block C2, Jalan PJU 1/39,
Dataran Prima, 47301 Petaling
Jaya, Selangor, MALAYSIA
TEL: 60-3-7805-3263
Roland Brasil Ltda.
Rua San Jose, 780 Sala B
Parque Industrial San Jose
Cotia - Sao Paulo - SP, BRAZIL
TEL: (011) 4615 5666
Roland Audio Development
Corp.
14830 Desman Rd.
La Mirada, CA 90638
U.S.A.
Tel: 1-714-521-8000
email : [email protected]
EUROPE
EDIROL Corporation
North America
425 Sequoia Drive, Suite 114
Bellingham, WA 98226
U. S. A.
TEL: (360) 594-4273
FAX: (360) 594-4271
http://www.edirol.com/
BELGIUM/FRANCE/
HOLLAND/
LUXEMBOURG
Roland Central Europe N.V.
Houtstraat 3, B-2260, Oevel
(Westerlo) BELGIUM
TEL: (014) 575811
CZECH REP.
K-AUDIO
Kardasovska 626.
CZ-198 00 Praha 9,
CZECH REP.
TEL: (2) 666 10529
DENMARK
Roland Scandinavia A/S
Nordhavnsvej 7, Postbox 880,
DK-2100 Copenhagen
DENMARK
TEL: 3916 6200
FINLAND
Roland Scandinavia As,
Filial Finland
RUSSIA
Roland East Europe Ltd.
Warehouse Area ‘DEPO’ Pf.83
H-2046 Torokbalint, HUNGARY
TEL: (23) 511011
MuTek
Dorozhnaya ul.3,korp.6
117 545 Moscow, RUSSIA
TEL: (095) 981-4967
IRELAND
SPAIN
Roland Ireland
Roland Iberia, S.L.
G2 Calmount Park, Calmount
Avenue, Dublin 12
Republic of IRELAND
TEL: (01) 4294444
Paseo García Faria, 33-35
08005 Barcelona SPAIN
TEL: 93 493 91 00
SWEDEN
ITALY
Roland Italy S. p. A.
Viale delle Industrie 8,
20020 Arese, Milano, ITALY
TEL: (02) 937-78300
NORWAY
Roland Scandinavia Avd.
Kontor Norge
Lilleakerveien 2 Postboks 95
Lilleaker N-0216 Oslo
NORWAY
TEL: 2273 0074
Roland Scandinavia A/S
SWEDISH SALES OFFICE
Danvik Center 28, 2 tr.
S-131 30 Nacka SWEDEN
TEL: (0)8 702 00 20
SWITZERLAND
Roland (Switzerland) AG
Landstrasse 5, Postfach,
CH-4452 Itingen,
SWITZERLAND
TEL: (061) 927-8383
Elannontie 5
FIN-01510 Vantaa, FINLAND
TEL: (0)9 68 24 020
POLAND
GERMANY
UL. Gibraltarska 4.
PL-03664 Warszawa POLAND
TEL: (022) 679 44 19
Mira Str. 19/108
P.O. Box 180
295400 Munkachevo, UKRAINE
TEL: (03131) 414-40
PORTUGAL
UNITED KINGDOM
Roland Iberia, S.L.
Portugal Office
Roland (U.K.) Ltd.
Roland Elektronische
Musikinstrumente HmbH.
Oststrasse 96, 22844 Norderstedt,
GERMANY
TEL: (040) 52 60090
AUSTRIA
GREECE
Roland Elektronische
Musikinstrumente HmbH.
Austrian Office
STOLLAS S.A.
Music Sound Light
Eduard-Bodem-Gasse 8,
A-6020 Innsbruck, AUSTRIA
TEL: (0512) 26 44 260
HUNGARY
155, New National Road
Patras 26442, GREECE
TEL: 2610 435400
UKRAINE
MX MUSIC SP.Z.O.O.
Cais das Pedras, 8/9-1 Dto
4050-465, Porto, PORTUGAL
TEL: 22 608 00 60
TIC-TAC
Atlantic Close, Swansea
Enterprise Park, SWANSEA
SA7 9FJ,
UNITED KINGDOM
TEL: (01792) 702701
ROMANIA
FBS LINES
Piata Libertatii 1,
535500 Gheorgheni, ROMANIA
TEL: (266) 364 609
As of August 1, 2005 (EDIROL-2)
204
* Microsoft and Windows are registered trademarks of Microsoft Corporation.
206j
* Windows® is known officially as: “Microsoft® Windows® operating system.”
207
* Apple and Macintosh are registered trademarks of Apple Computer, Inc.
209
* Mac OS is a trademark of Apple Computer, Inc.
04015867
’05-9-1KS