1
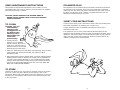
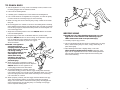
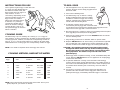
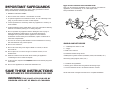
ONE-YEAR LIMITED WARRANTY
This Salton, Inc. product warranty extends to the original consumer purchaser of the product.
Warranty Duration: This product is warranted to the original consumer purchaser for a
period of one (1) year from the original purchase date.
Warranty Coverage: This product is warranted against defective materials or
workmanship. This warranty is void if the product has been damaged by accident, in
shipment, unreasonable use, misuse, neglect, improper service, commercial use,
repairs by unauthorized personnel or other causes not arising out of defects in
materials or workmanship. This warranty is effective only if the product is purchased
and operated in the USA, and does not extend to any units which have been used in
violation of written instructions furnished by Salton, Inc., or to units which have been
altered or modified or to damage to products or parts thereof which have had the serial
number removed, altered, defaced or rendered illegible.
Warranty Disclaimers: This warranty is in lieu of all warranties expressed or implied
and no representative or person is authorized to assume for Salton, Inc. any other
liability in connection with the sale of our products. There shall be no claims for defects
or failure of performance or product failure under any theory of tort, contract or
commercial law including, but not limited to, negligence, gross negligence, strict liability,
breach of warranty and breach of contract.
Warranty Performance: During the above one-year warranty period, a product with a
defect will be either repaired or replaced with a reconditioned comparable model (at
Salton, Inc.’s option) when the product is returned to the Salton, Inc. facility. The
repaired or replacement product will be in warranty for the balance of the one-year
warranty period and an additional one-month period. No charge will be made for such
repair or replacement.
TM
Foghorn
Leghorn
Egg Cooker
USE & CARE GUIDE
Service and Repair
If service is required, you should first call toll-free 1-800-233-9054 between the hours of
8:00 am and 5:00 pm Central Standard Time and ask for CONSUMER SERVICE stating that
you are a consumer with a problem. Please refer to Model EG2LT when you call.
In-Warranty Service (USA) for an appliance covered under the warranty period, no
charge is made for service or postage. Call for pre-paid return mailing label. (U.S.
Customers Only)
Out-of- Warranty Service: A flat rate charge by model is made for out-of-warranty
service. Include $6.00 (U.S.) for return shipping and handling.
Salton, Inc. cannot assume responsibility for loss or damage during incoming shipment.
For your protection, carefully package the product for shipment and insure it with the
carrier. Be sure to enclose the following items with your appliance: any accessories
related to your problem; your full return address and daytime phone number; a note
describing the problem you experienced; a copy of your sales receipt or other proof of
purchase to determine warranty status. C.O.D. shipments cannot be accepted.
Return the appliance to:
ATTN: Repair Department, Salton, Inc.
550 Business Center Drive, Mt. Prospect, Illinois 60056
For more information on Salton, Inc. products, visit our website:
http://www.salton-maxim.com, or you can
email us at: [email protected]
LOONEY TUNES, characters, names and all related indicia
are trademarks of Warner Bros. © 2000.
Printed in China
©2000 Salton, Inc.
P/N 60426
MODEL EG2LT
IMPORTANT SAFEGUARDS
When using electrical appliances, basic safety precautions should
always be followed, including the following:
Eggs are one of nature’s most versatile foods.
They can be served for breakfast, lunch or dinner. Use them for
appetizers, for entertaining, or as a late night snack.
The possibilities are endless.
1. READ ALL INSTRUCTIONS.
2. Do not touch hot surfaces. Use handles or knobs.
3. To protect against risk of electrical shock, do not submerge cord,
plug, or product base in water or other liquids.
4. Close supervision is necessary when any appliance is used by or
near children.
5. Unplug appliance from outlet when not in use and before cleaning.
Allow to cool before putting on or taking off parts.
6. Do not operate any appliance with a damaged cord or plug or
after the appliance malfunctions or has been dropped or
damaged in any manner. Return appliance to the nearest
authorized service facility for examination, repair or electrical or
mechanical adjustment.
7. The use of accessory attachments not recommended or sold by
the manufacturer may cause injuries.
8. Do not use outdoors.
9. Do not let cord hang over edge of table or counter, or touch
hot surfaces.
SIMPLE OMELET RECIPE
1 - 2 tablespoons water or milk
1 - 2 eggs
10. Do not place on or near a hot gas or electric burner, or in a
heated oven.
1 small onion minced
11. Extreme caution must be used when moving an appliance
containing hot oil or other hot liquids.
3 tablespoons grated cheese (Cheddar, Swiss, Mozzarella, etc.)
12. To disconnect, depress the ON/OFF Button and remove plug from
wall outlet.
13. Do not use appliance for other than intended use.
1/2 medium tomato finely diced
Seasoning (salt, pepper, herbs, etc.)
1. Combine all ingredients.
2. Evenly pour mixture into the greased Poaching Trays.
3. Cook as directed in the “TO POACH EGGS” section.
SAVE THESE INSTRUCTIONS
THIS APPLIANCE IS FOR HOUSEHOLD USE ONLY
Serve with toast or bagels and fruit for a complete breakfast.
WARNING:
THIS IS NOT A TOY FOR USE BY
CHILDREN. KEEP OUT OF REACH OF CHILDREN.
1
10
USER MAINTENANCE INSTRUCTIONS
POLARIZED PLUG
This appliance requires little maintenance and contains no user
serviceable parts. Do not try to repair it yourself. Refer it to qualified
personnel if servicing is needed.
This appliance has a polarized plug (one blade is wider than the other).
To reduce the risk of electric shock, this plug will fit into a polarized
outlet only one way. If the plug does not fit fully into the outlet, reverse
the plug. If it still does not fit, contact a qualified electrician. Do not
attempt to modify the plug in any way.
CAUTION: NEVER IMMERSE THE HEATING BOWL IN
WATER OR ANY OTHER LIQUID. THIS COULD DAMAGE
THE EGG COOKER.
SHORT CORD INSTRUCTIONS
A short power-supply cord is provided to reduce the risk resulting from
becoming entangled in or tripping over a longer cord.
TO CLEAN
CAUTION: Use care
when handling
Measuring Cup.
The Egg Piercer on
the bottom of the
Measuring Cup is
VERY SHARP and
could cause
personal injury.
Longer extension cords are available and may be used if care is
exercised in their use.
If an extension cord is used, (1) the marked electrical rating of the
extension cord should be at least as great as the electrical rating of the
appliance, and (2) the longer cord should be arranged so that it will not
drape over the counter top or table top where it can be pulled on by
children or tripped over unintentionally.
1. Unplug unit and
allow to cool completely
before cleaning. Do not use
steel wool, scouring pads or
abrasive cleaners, as this will
damage the non-stick finish.
2. Wash Lid, Measuring Cup, Egg Rack, and Poaching Trays in warm,
soapy water. Dry all parts thoroughly. This product is NOT
dishwasher safe!
3. Wipe Heating Bowl with a slightly damp, soft cloth. Never immerse
Heating Bowl in water. If desired, rub a light coat of vegetable oil
over the center Heating Element, or use a small amount of white
vinegar, mixed with water, to help remove mineral deposits which
may form on the Heating Element from the use of tap water. DO
NOT USE A DESCALING AGENT!
TO STORE
Unplug unit, allow to cool, and clean as directed. Store in its original
box or in a clean, dry place. Never store it while it is hot or still
plugged in. Never wrap cord tightly around the appliance. Do not put
any stress on cord where it enters unit, as this could cause the cord
to fray and break.
9
2
OPERATING INSTRUCTIONS
PRODUCT MAY VARY SLIGHTLY FROM ILLUSTRATIONS
Steam Vent
Lid
Poaching
Trays (2)
Egg Rack
Heating
Element
HELPFUL HINTS
ON/OFF
Button
Indicator
Light
• Avoid purchasing cracked or broken eggs. Always check freshness
date on egg packaging.
• To test eggs for freshness, place an egg in a bowl of cool water. If it
sinks, it is fresh; if it floats, discard the egg.
• Chill hard boiled eggs in cold water IMMEDIATELY after cooking to
prevent the blue discoloration around the egg yolk.
• Store eggs in the refrigerator. Boiled eggs will keep for up to one
week in the refrigerator. Poached eggs can be plunged into cold
water immediately after cooking and be covered and refrigerated for
up to two days.
Heating
Bowl
• To reheat refrigerated poached eggs, allow egg to reach room
temperature or set poached egg in hot water for about one minute.
Measuring
Cup
• When a recipe calls for eggs to be at “room temperature,” remove
eggs from refrigerator 30 minutes prior to use.
HARD
Egg
Piercer
1
3
7
MED
1
3
7
SOFT
1
3
7
Assembled Unit
3
8
TO POACH EGGS
1. Set the appliance on a dry, clean countertop surface, where it can
be easily plugged into an electrical outlet.
2. Lift Lid off of Heating Bowl.
3. Carefully pour 2 tablespoons COLD water into Heating Bowl.
4. Use a small amount of vegetable oil, margarine, or butter to lightly
coat the inside of Poaching Tray(s) to avoid sticking.
5. Break one egg into each Poaching Tray, being careful not to break
the yolk.
6. Be sure Egg Rack is seated on inner rim of Heating Bowl. Carefully
place filled Poaching Tray(s) onto Egg Rack. Be sure feet on bottom
of Poaching Tray(s) is (are) locked into position in the triangular cutouts of the Egg Rack.
7. Align hole in handle portion of Lid over ON/OFF Button and lower
Lid onto Heating Bowl.
8. Plug the Egg Cooker into a standard 120V AC power outlet.
9. Depress ON/OFF Button to start cooking. A red Indicator Light will
turn on while the unit is heating and cooking. The
amount of time needed to poach 1-2 eggs is
about 5 minutes.
CAUTION: This appliance
generates heat and
escaping steam through the
Steam Vent in the top of the
Lid during cooking.
Do not place hands or any
other objects over the
Steam Vent during
operation. The steam is
very hot and could cause
personal injury.
BEFORE USING
CAUTION: Use care when handling Measuring Cup. The
Egg Piercer on the bottom of the Measuring Cup is
VERY SHARP and could cause personal injury.
1. Carefully unpack Egg Cooker.
2. Lift Lid off Heating Bowl and wash Lid, Measuring Cup, Egg
Rack, and Poaching Trays in warm, soapy water. Dry all
parts thoroughly.
3. Wipe Heating Bowl with a slightly damp, soft cloth.
Never immerse Heating Bowl in water! If desired, rub a
light coat of vegetable oil over the center Heating Element.
This will help prevent mineral deposits from forming and
ease future cleaning.
10. When eggs have completed cooking, a
loud, intermittent beep will sound. Depress
ON/OFF Button to turn appliance off.
Unplug Egg Cooker from wall outlet.
11. To prevent additional “cooking” from the
heat inside the Egg Cooker, remove eggs shortly after the beep.
Use handle portion of Lid to lift Lid off of Heating Bowl. Use care to
avoid escaping heat and steam when removing Lid. If necessary,
use oven mitts or a towel.
12. When properly cooked, poached eggs will have filmed-over egg
yolks and the whites will be set and firm inside the Poaching
Tray(s). Use oven mitts to remove Poaching Trays from Egg Rack.
Serve poached eggs in Poaching Trays or carefully scoop eggs
onto a separate serving dish.
7
4
INSTRUCTIONS FOR USE
TO BOIL EGGS
Your Foghorn Leghorn Egg Cooker will cook
1-7 eggs at a time. Depending on
the amount of water used, the
Egg Cooker will cook eggs to a
soft, medium, or hard
consistency. Depending on the
size and number of eggs, the
Egg Cooker can create a
deliciously soft boiled egg in
5 minutes, or 7 perfectly
cooked hard boiled eggs in
about 15 minutes. The Egg
Cooker will also cook up to
two poached eggs at a time in
about 5 minutes!
1. Set the appliance on a dry, clean countertop
surface, where it can be easily plugged into an
electrical outlet.
2. Lift Lid off of Heating Bowl.
3. Use Measuring Cup or refer to Cooking
Guide to determine the amount of water
needed for number of eggs and cooking
method. Carefully pour desired amount of
COLD water into Heating Bowl.
4. To prevent cracking during cooking, we
recommend piercing eggs with a small air hole.
Locate larger end of egg(s) and carefully push Egg Piercer into
larger end of each egg until a small hole forms.
5. Be sure Egg Rack is seated on inner rim of Heating Bowl and place
each egg (larger end down) into the Egg Rack.
COOKING GUIDE
The Measuring Cup has markings for cooking 1, 3, or 7 eggs at
soft, medium, or hard consistencies. Fill water to the desired line for
cooking type (soft, medium, or hard) and corresponding number of
eggs (1, 3, or 7). Use the chart below as a guide for all other water
measurements for cooking type and corresponding number of eggs.
NOTE: Less water is required when more eggs are cooked.
COOKING METHOD /AMOUNT OF WATER
No. of
Eggs
B
O
I
L
E
D
Poached
Soft
Medium
Hard
1
2-1/2 Tbl.
5 Tbl.
9 Tbl.
2 Tbl.
2
2 Tbl.
4-1/2 Tbl.
8-1/2 Tbl.
2 Tbl.
3
2 Tbl.
4 Tbl.
7-1/2 Tbl.
N/A
4
2 Tbl.
3-1/2 Tbl.
7 Tbl.
N/A
5
1-1/2 Tbl.
3 Tbl.
6 Tbl.
N/A
6
1 Tbl.
2-1/2 Tbl.
5-1/2 Tbl.
N/A
7
1 Tbl.
2-1/2 Tbl.
5 Tbl.
N/A
6. Align hole in handle portion of Lid over ON/OFF Button and lower
Lid onto Heating Bowl.
7. Plug the Egg Cooker into a standard 120V AC power outlet.
8. Depress ON/OFF Button to start cooking. A red Indicator Light will
turn on while the unit is heating and cooking. Depending on the
amount of water and number of eggs, the cooking time will vary.
CAUTION: This appliance generates heat and escaping steam
through the Steam Vent in the top of the Lid during cooking.
Do not place hands or any other objects over the Steam Vent
during operation. The steam is very hot and could cause
personal injury.
9. When eggs have completed cooking, a loud, intermittent beep will
sound. Depress ON/OFF Button to turn appliance off. Unplug Egg
Cooker from wall outlet.
10. To prevent additional “cooking” from the heat inside the Egg
Cooker, remove eggs shortly after the beep. Use handle portion of
Lid to lift Lid off of Heating Bowl. Use care to avoid escaping heat
and steam when removing Lid. If necessary, use oven mitts or
a towel.
11. Use tongs or a towel to remove hot eggs from Egg Rack. To
prevent a blue discoloration around egg yolks and to ease in
peeling boiled eggs, immediately chill boiled eggs in cold water.
NOTE: Eggs will become more firm with more water. This is just a
guide; adjust to your tastes as desired.
5
6
TO POACH EGGS
1. Set the appliance on a dry, clean countertop surface, where it can
be easily plugged into an electrical outlet.
2. Lift Lid off of Heating Bowl.
3. Carefully pour 2 tablespoons COLD water into Heating Bowl.
4. Use a small amount of vegetable oil, margarine, or butter to lightly
coat the inside of Poaching Tray(s) to avoid sticking.
5. Break one egg into each Poaching Tray, being careful not to break
the yolk.
6. Be sure Egg Rack is seated on inner rim of Heating Bowl. Carefully
place filled Poaching Tray(s) onto Egg Rack. Be sure feet on bottom
of Poaching Tray(s) is (are) locked into position in the triangular cutouts of the Egg Rack.
7. Align hole in handle portion of Lid over ON/OFF Button and lower
Lid onto Heating Bowl.
8. Plug the Egg Cooker into a standard 120V AC power outlet.
9. Depress ON/OFF Button to start cooking. A red Indicator Light will
turn on while the unit is heating and cooking. The
amount of time needed to poach 1-2 eggs is
about 5 minutes.
CAUTION: This appliance
generates heat and
escaping steam through the
Steam Vent in the top of the
Lid during cooking.
Do not place hands or any
other objects over the
Steam Vent during
operation. The steam is
very hot and could cause
personal injury.
BEFORE USING
CAUTION: Use care when handling Measuring Cup. The
Egg Piercer on the bottom of the Measuring Cup is
VERY SHARP and could cause personal injury.
1. Carefully unpack Egg Cooker.
2. Lift Lid off Heating Bowl and wash Lid, Measuring Cup, Egg
Rack, and Poaching Trays in warm, soapy water. Dry all
parts thoroughly.
3. Wipe Heating Bowl with a slightly damp, soft cloth.
Never immerse Heating Bowl in water! If desired, rub a
light coat of vegetable oil over the center Heating Element.
This will help prevent mineral deposits from forming and
ease future cleaning.
10. When eggs have completed cooking, a
loud, intermittent beep will sound. Depress
ON/OFF Button to turn appliance off.
Unplug Egg Cooker from wall outlet.
11. To prevent additional “cooking” from the
heat inside the Egg Cooker, remove eggs shortly after the beep.
Use handle portion of Lid to lift Lid off of Heating Bowl. Use care to
avoid escaping heat and steam when removing Lid. If necessary,
use oven mitts or a towel.
12. When properly cooked, poached eggs will have filmed-over egg
yolks and the whites will be set and firm inside the Poaching
Tray(s). Use oven mitts to remove Poaching Trays from Egg Rack.
Serve poached eggs in Poaching Trays or carefully scoop eggs
onto a separate serving dish.
7
4
OPERATING INSTRUCTIONS
PRODUCT MAY VARY SLIGHTLY FROM ILLUSTRATIONS
Steam Vent
Lid
Poaching
Trays (2)
Egg Rack
Heating
Element
HELPFUL HINTS
ON/OFF
Button
Indicator
Light
• Avoid purchasing cracked or broken eggs. Always check freshness
date on egg packaging.
• To test eggs for freshness, place an egg in a bowl of cool water. If it
sinks, it is fresh; if it floats, discard the egg.
• Chill hard boiled eggs in cold water IMMEDIATELY after cooking to
prevent the blue discoloration around the egg yolk.
• Store eggs in the refrigerator. Boiled eggs will keep for up to one
week in the refrigerator. Poached eggs can be plunged into cold
water immediately after cooking and be covered and refrigerated for
up to two days.
Heating
Bowl
• To reheat refrigerated poached eggs, allow egg to reach room
temperature or set poached egg in hot water for about one minute.
Measuring
Cup
• When a recipe calls for eggs to be at “room temperature,” remove
eggs from refrigerator 30 minutes prior to use.
HARD
Egg
Piercer
1
3
7
MED
1
3
7
SOFT
1
3
7
Assembled Unit
3
8
USER MAINTENANCE INSTRUCTIONS
POLARIZED PLUG
This appliance requires little maintenance and contains no user
serviceable parts. Do not try to repair it yourself. Refer it to qualified
personnel if servicing is needed.
This appliance has a polarized plug (one blade is wider than the other).
To reduce the risk of electric shock, this plug will fit into a polarized
outlet only one way. If the plug does not fit fully into the outlet, reverse
the plug. If it still does not fit, contact a qualified electrician. Do not
attempt to modify the plug in any way.
CAUTION: NEVER IMMERSE THE HEATING BOWL IN
WATER OR ANY OTHER LIQUID. THIS COULD DAMAGE
THE EGG COOKER.
SHORT CORD INSTRUCTIONS
A short power-supply cord is provided to reduce the risk resulting from
becoming entangled in or tripping over a longer cord.
TO CLEAN
CAUTION: Use care
when handling
Measuring Cup.
The Egg Piercer on
the bottom of the
Measuring Cup is
VERY SHARP and
could cause
personal injury.
Longer extension cords are available and may be used if care is
exercised in their use.
If an extension cord is used, (1) the marked electrical rating of the
extension cord should be at least as great as the electrical rating of the
appliance, and (2) the longer cord should be arranged so that it will not
drape over the counter top or table top where it can be pulled on by
children or tripped over unintentionally.
1. Unplug unit and
allow to cool completely
before cleaning. Do not use
steel wool, scouring pads or
abrasive cleaners, as this will
damage the non-stick finish.
2. Wash Lid, Measuring Cup, Egg Rack, and Poaching Trays in warm,
soapy water. Dry all parts thoroughly. This product is NOT
dishwasher safe!
3. Wipe Heating Bowl with a slightly damp, soft cloth. Never immerse
Heating Bowl in water. If desired, rub a light coat of vegetable oil
over the center Heating Element, or use a small amount of white
vinegar, mixed with water, to help remove mineral deposits which
may form on the Heating Element from the use of tap water. DO
NOT USE A DESCALING AGENT!
TO STORE
Unplug unit, allow to cool, and clean as directed. Store in its original
box or in a clean, dry place. Never store it while it is hot or still
plugged in. Never wrap cord tightly around the appliance. Do not put
any stress on cord where it enters unit, as this could cause the cord
to fray and break.
9
2
IMPORTANT SAFEGUARDS
When using electrical appliances, basic safety precautions should
always be followed, including the following:
Eggs are one of nature’s most versatile foods.
They can be served for breakfast, lunch or dinner. Use them for
appetizers, for entertaining, or as a late night snack.
The possibilities are endless.
1. READ ALL INSTRUCTIONS.
2. Do not touch hot surfaces. Use handles or knobs.
3. To protect against risk of electrical shock, do not submerge cord,
plug, or product base in water or other liquids.
4. Close supervision is necessary when any appliance is used by or
near children.
5. Unplug appliance from outlet when not in use and before cleaning.
Allow to cool before putting on or taking off parts.
6. Do not operate any appliance with a damaged cord or plug or
after the appliance malfunctions or has been dropped or
damaged in any manner. Return appliance to the nearest
authorized service facility for examination, repair or electrical or
mechanical adjustment.
7. The use of accessory attachments not recommended or sold by
the manufacturer may cause injuries.
8. Do not use outdoors.
9. Do not let cord hang over edge of table or counter, or touch
hot surfaces.
SIMPLE OMELET RECIPE
1 - 2 tablespoons water or milk
1 - 2 eggs
10. Do not place on or near a hot gas or electric burner, or in a
heated oven.
1 small onion minced
11. Extreme caution must be used when moving an appliance
containing hot oil or other hot liquids.
3 tablespoons grated cheese (Cheddar, Swiss, Mozzarella, etc.)
12. To disconnect, depress the ON/OFF Button and remove plug from
wall outlet.
13. Do not use appliance for other than intended use.
1/2 medium tomato finely diced
Seasoning (salt, pepper, herbs, etc.)
1. Combine all ingredients.
2. Evenly pour mixture into the greased Poaching Trays.
3. Cook as directed in the “TO POACH EGGS” section.
SAVE THESE INSTRUCTIONS
THIS APPLIANCE IS FOR HOUSEHOLD USE ONLY
Serve with toast or bagels and fruit for a complete breakfast.
WARNING:
THIS IS NOT A TOY FOR USE BY
CHILDREN. KEEP OUT OF REACH OF CHILDREN.
1
10
ONE-YEAR LIMITED WARRANTY
This Salton, Inc. product warranty extends to the original consumer purchaser of the product.
Warranty Duration: This product is warranted to the original consumer purchaser for a
period of one (1) year from the original purchase date.
Warranty Coverage: This product is warranted against defective materials or
workmanship. This warranty is void if the product has been damaged by accident, in
shipment, unreasonable use, misuse, neglect, improper service, commercial use,
repairs by unauthorized personnel or other causes not arising out of defects in
materials or workmanship. This warranty is effective only if the product is purchased
and operated in the USA, and does not extend to any units which have been used in
violation of written instructions furnished by Salton, Inc., or to units which have been
altered or modified or to damage to products or parts thereof which have had the serial
number removed, altered, defaced or rendered illegible.
Warranty Disclaimers: This warranty is in lieu of all warranties expressed or implied
and no representative or person is authorized to assume for Salton, Inc. any other
liability in connection with the sale of our products. There shall be no claims for defects
or failure of performance or product failure under any theory of tort, contract or
commercial law including, but not limited to, negligence, gross negligence, strict liability,
breach of warranty and breach of contract.
Warranty Performance: During the above one-year warranty period, a product with a
defect will be either repaired or replaced with a reconditioned comparable model (at
Salton, Inc.’s option) when the product is returned to the Salton, Inc. facility. The
repaired or replacement product will be in warranty for the balance of the one-year
warranty period and an additional one-month period. No charge will be made for such
repair or replacement.
TM
Foghorn
Leghorn
Egg Cooker
USE & CARE GUIDE
Service and Repair
If service is required, you should first call toll-free 1-800-233-9054 between the hours of
8:00 am and 5:00 pm Central Standard Time and ask for CONSUMER SERVICE stating that
you are a consumer with a problem. Please refer to Model EG2LT when you call.
In-Warranty Service (USA) for an appliance covered under the warranty period, no
charge is made for service or postage. Call for pre-paid return mailing label. (U.S.
Customers Only)
Out-of- Warranty Service: A flat rate charge by model is made for out-of-warranty
service. Include $6.00 (U.S.) for return shipping and handling.
Salton, Inc. cannot assume responsibility for loss or damage during incoming shipment.
For your protection, carefully package the product for shipment and insure it with the
carrier. Be sure to enclose the following items with your appliance: any accessories
related to your problem; your full return address and daytime phone number; a note
describing the problem you experienced; a copy of your sales receipt or other proof of
purchase to determine warranty status. C.O.D. shipments cannot be accepted.
Return the appliance to:
ATTN: Repair Department, Salton, Inc.
708 South Missouri St., Macon 63552
For more information on Salton, Inc. products, visit our website:
http://www.eSalton.com, or you can
email us at: [email protected]
LOONEY TUNES, characters, names and all related indicia
are trademarks of Warner Bros. © 2000.
Printed in China
©2000 Salton, Inc.
P/N 60426
MODEL EG2LT